# Advanced Administration
# Advanced Administration Handbook
Welcome to the **WordPress Advanced Administration Handbook**! Here you will find WordPress advanced documentation. Use the “Contents” menu on the left to navigate topics.
## Why Advanced Administration?
Not all users who use WordPress have to know about technology, and therefore in its documentation should not appear either, and developers do not have to know certain advanced system configurations.
With this in mind, all the more technically complex documentation has been included in this documentation so that it can be used by more or less technical people.
## Where can I be involved?
The Documentation Team meets in the WordPress Slack, in the [\#docs](https://wordpress.slack.com/archives/docs/) channel. The conversations are in English. Check out the [WordPress Meeting calendar](https://make.wordpress.org/meetings#docs) for the current schedule.
## Advanced Administration Handbook managers
This documentation is managed by [@javiercasares](https://profiles.wordpress.org/javiercasares/), [@lucp](https://profiles.wordpress.org/lucp/), and [@milana_cap](https://profiles.wordpress.org/milana_cap/). Also, the [Documentation Team](https://make.wordpress.org/docs/) and [Hosting Team](https://make.wordpress.org/hosting/) are involved in this.
If you’re interested in improving this handbook, check the [Github Handbook repo](https://github.com/WordPress/WordPress-Advanced-administration-handbook), the [Documentation Issue tracked](https://github.com/WordPress/Documentation-Issue-Tracker/labels/advanced%20administration), or leave a message in the [\#hosting-community channel](https://wordpress.slack.com/archives/hosting-community/) at [WordPress Slack](https://make.wordpress.org/chat/).
# Before You Install
Before installing WordPress, you need to check that your web hosting provider fulfills the necessary software and conditions. Also, you must have access to the server and some tools.
If these terms are new to you: your **host** (or **hosting provider**) is the company you pay to put your site online, and the **server** is the computer where WordPress runs.
## Requirements on the server side
- PHP 7.4 or greater
- MySQL 5.7 or MariaDB 10.3 or greater
- HTTPS support
For a list of detail requirements on your web host, refer the [official requirement page](https://wordpress.org/about/requirements/) and the [Server Environment page](https://make.wordpress.org/hosting/handbook/server-environment/).
## Requirements on local
- Login Account (user id and password) to the server via FTP or shell
- Text Editor
- FTP
- Your web browser of choice
You will need to know how to use a text editor to edit the main configuration file. If you are a Windows user, Notepad will do. If you’re an OS X user you can use TextEdit. Later, you will likely want to edit your Template Files (see [Templates](https://codex.wordpress.org/Templates) for some references). You can do this through the WordPress [Administration Screens](https://wordpress.org/documentation/article/administration-screens/), but using a good text editor is highly recommended. For more information on this, see [Editing files](https://developer.wordpress.org/advanced-administration/wordpress/edit-files/).
You will need to be able to use an FTP program to [upload](https://developer.wordpress.org/advanced-administration/upgrade/ftp/filezilla/) files and [set file permissions](https://developer.wordpress.org/advanced-administration/server/file-permissions/) (optional). You could choose [FileZilla](https://developer.wordpress.org/advanced-administration/upgrade/ftp/filezilla/) for this task.
Now you are all set to go on to [Installation](https://developer.wordpress.org/advanced-administration/before-install/howto-install/).
# Server configuration
Server configuration covers the hosting environment that runs WordPress. This includes the web server, file and directory permissions, database tools, email delivery, domain routing, and hosting control panels.
Use this section when you need to prepare a server for WordPress, adjust an existing server, or understand which server-level setting affects a WordPress feature. These pages are most useful for site administrators, hosting providers, and users who have access to server or hosting control panel settings.
Some server changes can make a site unavailable if they are applied incorrectly. Review the relevant page before making changes and create a current backup when working with files or the database.
## Choose a server topic
- Use [Web servers](https://developer.wordpress.org/advanced-administration/server/web-server/) when you need to understand how WordPress works with server software such as Apache HTTPD or Nginx.
- Use [Changing File Permissions](https://developer.wordpress.org/advanced-administration/server/file-permissions/) when WordPress cannot write files, updates fail, uploads fail, or you need to review ownership and permissions.
- Use [Mail](https://developer.wordpress.org/advanced-administration/server/mail/) when WordPress email is not being sent or delivered reliably.
- Use [Finding Server Info](https://developer.wordpress.org/advanced-administration/server/server-info/) when you need PHP, database, operating system, or server software details for installation or troubleshooting.
- Use [Control Panels](https://developer.wordpress.org/advanced-administration/server/control-panel/) when your host provides tools such as WP Toolkit, cPanel, WHM, or Plesk.
## Web server configuration
The [Web servers](https://developer.wordpress.org/advanced-administration/server/web-server/) page explains the role of the web server and links to configuration guidance for Apache HTTPD and Nginx.
- [Apache HTTPD / .htaccess](https://developer.wordpress.org/advanced-administration/server/web-server/httpd/) covers WordPress rewrite rules, `.htaccess` examples, and related Apache configuration.
- [Nginx](https://developer.wordpress.org/advanced-administration/server/web-server/nginx/) covers standalone Nginx configuration for WordPress, including single site and multisite examples.
## Files, directories, and database tasks
- [Changing File Permissions](https://developer.wordpress.org/advanced-administration/server/file-permissions/) explains how file and directory permissions work and how they affect WordPress updates, uploads, plugins, themes, and configuration files.
- [Emptying a Database Table](https://developer.wordpress.org/advanced-administration/server/empty-database/) explains how to empty a table with phpMyAdmin. This should only be done after confirming the correct table and creating a backup.
- [Finding Server Info](https://developer.wordpress.org/advanced-administration/server/server-info/) explains how to collect server details such as PHP version, server software, and database version for installation or troubleshooting.
## Domains, subdomains, and directory layout
- [Giving WordPress Its Own Directory](https://developer.wordpress.org/advanced-administration/server/wordpress-in-directory/) explains how to keep WordPress core files in a subdirectory while serving the site from the domain root.
- [Configuring Wildcard Subdomains](https://developer.wordpress.org/advanced-administration/server/subdomains-wildcard/) explains wildcard subdomain setup for domain-based multisite networks.
## Mail and hosting tools
- [Mail](https://developer.wordpress.org/advanced-administration/server/mail/) explains how WordPress sends email through the server environment and what administrators should consider for SMTP, relays, and deliverability.
- [Control Panels](https://developer.wordpress.org/advanced-administration/server/control-panel/) covers common hosting control panel tools such as WP Toolkit for cPanel, WHM, and Plesk.
## Before changing server settings
If you are using managed hosting, check your host’s documentation or support channels before changing server configuration. Hosts often manage web server rules, PHP settings, mail delivery, backups, and control panel features for you.
For self-managed servers, test changes in a staging environment when possible. Keep a record of the original configuration so you can restore it if a change does not work as expected.
# WordPress Multisite / Network
WordPress Multisite is a feature of WordPress that enables you to create several instances of WordPress managed within one installation. You need to have rewrites enabled to use multisite. Check the [server requirements](https://developer.wordpress.org/advanced-administration/multisite/prepare-network/#server-requirements) for details.
One can use a multisite for a variety of purposes. Multisite is, for example, used by business sites that share some resources, such as the theme or plugins, and have different content for their regions.
The content in a Multisite has its own unique tables in the database, only the user table is shared between the instances.
You can create a multisite that works with subdirectories (“path-based”) or use domains or subdomains (“domain-based”). For how to map the domains, see [WordPress Multisite Domain Mapping](https://developer.wordpress.org/advanced-administration/multisite/domain-mapping/)
# Themes
The Theme refers to the underlying technologies and components that come together to deliver the visual design and functionality of a WordPress website. It encompasses the server-side components that power WordPress, as well as the architecture and files specific to WordPress themes.
Understanding the technology behind WordPress themes on the server is fundamental to building and maintaining successful WordPress websites. Whether you’re a developer, designer, or administrator, this knowledge empowers you to create and manage themes effectively, ensuring a secure, high-performing, and visually appealing web presence.
## Technology of Themes
### Web Servers
Web servers (e.g., Apache, Nginx) handle incoming HTTP requests and serve web pages. They play a critical role in delivering WordPress themes to users.
### PHP
PHP is the server-side scripting language that WordPress is built upon. It processes requests, connects to the database, and generates dynamic content based on theme files and user input.
### Databases
WordPress relies on databases, typically MySQL, to store content, settings, and theme data. It retrieves information from the database to dynamically generate web pages.
### File Systems
File systems are used to store theme files, images, JavaScript, and CSS. Understanding the structure and organization of theme files is essential for theme development.
## Theme Architecture
WordPress themes consist of PHP template files, CSS stylesheets, JavaScript files, and other assets. Themes are organized within the `wp-content/themes` directory on the server.
Template files determine the layout and structure of web pages. Key templates include `header.php`, `footer.php`, and various content-specific templates like `single.php` and `page.php`.
### Style Sheets (CSS)
CSS files control the visual presentation of the theme. Styles are defined in CSS files and determine elements like colors, fonts, and layout.
### JavaScript
JavaScript files enhance website interactivity and functionality. These files can be included in themes for tasks like form validation, animations, and AJAX functionality.
### Functions.php
The `functions.php` file contains PHP functions and code for theme-specific features and customizations. It’s where you can add actions, filters, and custom functions to modify how the theme behaves.
## Workflow on your Webserver
### User Requests
When a user visits a WordPress site, the web server processes their request and forwards it to WordPress.
### WordPress Core
WordPress core, which includes PHP scripts and database queries, interprets the user’s request and retrieves content and settings.
### Theme Integration
The selected theme’s template files and styles are integrated into the content, and the final HTML, CSS, and JavaScript are generated and sent to the user’s browser.
## Customization and Optimization
### Child Themes
Child themes are used to extend and customize existing themes without modifying the original theme files. This allows you to make changes without losing updates or risking theme conflicts.
### Performance
Optimizing themes for performance includes minimizing server requests, reducing image sizes, and optimizing CSS and JavaScript. Caching techniques can also enhance loading speed.
### Security Considerations
Proper security practices include keeping themes and WordPress core up-to-date, securing database access, and sanitizing user input to prevent vulnerabilities.
# Security
The goal of the page is to inform users who manage a WordPress site about general security best practices both in terms of environment level items, such as file permissions, as well as application-level items, such as setting up proper user roles, so they have a better foundation for security than setting up WordPress somewhere with no additional configuration.
**The most important thing to do for WordPress security is to keep WordPress itself and all installed plugins and themes up to date. It is also encouraged for users to choose themes and plugins that are actively receiving updates.**
WordPress is committed to providing a secure experience for users. Information about WordPress’s official stance on security and a general discussion about WordPress’s overall aims for security can be found on [WordPress.org’s Security page](https://wordpress.org/about/security/).
This guide borrows heavily from the WordPress Codex’s guide on [Hardening WordPress](https://wordpress.org/support/article/hardening-wordpress/). Since it’s publicly editable, advice in the codex should be viewed with caution.
Keeping any system, not just WordPress, secure is continuous work. Good security requires careful planning, monitoring, and periodic maintenance.
Security largely consists of reducing risk and planning for recovery. Most security plans focus on minimizing the risk of unauthorized access only, but risk can never be successfully reduced to zero. As long as there is some risk, you must plan for recovery so that if something were to happen, user sites are not completely lost and can be quickly restored to normal operation.
Security is also about more than WordPress. It is also about making sure your hosting environment is secure and your personal online practices and behaviors keep you safe. Good security depends on the technology in use and the people using the technology. Obsolete or out-of-date technology can have bugs or vulnerabilities that can put your WordPress website at risk. People’s bad online practices can also put your WordPress website as risk. It is important to make sure that not only do you keep the technology you use up-to-date and maintained but also that employees are using security best practices when using the Internet and when interacting with your hosting platform or customer WordPress sites.
# Debugging WordPress
Debugging is an essential part of website development and a crucial step in ensuring a smooth and reliable experience for users. Debugging refers to the process of finding and fixing errors or issues within a website’s code.
In this part of the Advanced Administration Handbook, we will address various aspects of debugging a WordPress website, including general WordPress debugging, JavaScript debugging, WordPress network debugging, and test-driving.
## General WordPress Debugging
When it comes to [debugging a WordPress site](https://developer.wordpress.org/advanced-administration/debug/debug-wordpress/), there are various methods and techniques to use, including turning on debugging in the WordPress configuration file, using error logs and the use of debugging plugins. These techniques can help identify and resolve various types of errors, such as PHP errors and database errors.
## Testing and Step Debugging
Automated tests and step debugging are useful when you need to investigate problems in code instead of only reading log output. [PHPUnit](https://make.wordpress.org/core/handbook/testing/automated-testing/phpunit/) is used for automated PHP tests in WordPress development, and [WP-CLI can scaffold plugin test files](https://developer.wordpress.org/cli/commands/scaffold/plugin-tests/) for plugin projects.
[Xdebug](https://xdebug.org/docs/step_debug) can be used with a compatible editor or IDE to step through PHP code, inspect variables, and follow the call stack while a request is running.
## JavaScript Debugging
[JavaScript debugging](https://developer.wordpress.org/advanced-administration/debug/debug-javascript/) is essential for ensuring that the site’s front-end interactions and user experience are functioning correctly. Using browser dev tools to inspect the source code and diagnose issues with JavaScript along with a few more tips are provided in this section.
## WordPress Network Debugging
[WordPress network debugging](https://developer.wordpress.org/advanced-administration/debug/debug-network/) is a required when maintaining a network of WordPress sites; referring to the process of debugging multiple sites that are connected through a single installation of WordPress. This type of setup is often used by organizations that have multiple websites that share a common set of plugins, themes, and users.
## Test-driving
[Test-driving](https://developer.wordpress.org/advanced-administration/debug/test-driving/) refers to the process of testing a website before making it live. This process allows developers to identify and resolve any issues or bugs before the site is made available to the public. Test-driving is typically performed in a sandbox environment. Creating a sandbox environment is covered in this section.
# Resources for Building on WordPress
As you design your WordPress theme or build a plugin, you will be using a combination of HTML, CSS, PHP, and JavaScript (JS).
There are *plenty* (probably too many) resources online for you to get started with these web languages. It can be overwhelming!
With this resource page, we hope to focus on resources and guides that will help you the most to provide clear guidance and instruction on using HTML, CSS, PHP, and JS. This is nowhere near an exhaustive list, only meant to help you get started.
We recommend that you save or bookmark this page as a reference for learning while you’re working on your WordPress theme or plugin. See also:\
– [Theme Developer Handbook](https://developer.wordpress.org/themes/)\
– [Plugin Developer Handbook](https://developer.wordpress.org/plugins/)\
– [Block Editor Handbook](https://developer.wordpress.org/block-editor/).
## General Web Development Education
WordPress.org has released [Learn WordPress](https://learn.wordpress.org/) which will guide you through several topics around developing for WordPress.
[freeCodeCamp](https://freecodecamp.org/) is a free and open source education platform and is not WordPress-specific. They offer instruction, demo projects, and their own certification that have helped millions learn HTML, CSS and JavaScript.
They will teach you the basics of HTML and CSS in their [Responsive Web Design](https://www.freecodecamp.org/learn/2022/responsive-web-design/) course.
If you’d like to dive deeper with JavaScript, you can do so in their [Front End Development Libraries](https://www.freecodecamp.org/learn/front-end-development-libraries/#bootstrap) course, which will get you started with JavaScript and even React, which will be helpful for you to developer themes, plugins, and especially blocks.
Unfortunately, there’s currently no PHP course.
Also, since you’ll be writing code, it would be good to familiarize yourself with the [WordPress Coding Standards](https://developer.wordpress.org/coding-standards/) and [Inline Documentation Standards](https://developer.wordpress.org/coding-standards/inline-documentation-standards/).
Beyond that, these are some resources you might find helpful for each of the languages.
## HTML
- [W3Schools HTML](https://www.w3schools.com/tags/default.asp)
- [Learn How to Make Websites](https://developer.mozilla.org/en-US/learn)
## CSS
If this is your first time using CSS with WordPress, [this document](https://developer.wordpress.org/advanced-administration/wordpress/css/) provides a fantastic overview
Other than that, these are some solid resources for you to review:
- [W3 Schools](https://www.w3schools.com/cssref/default.asp)
- [MDN](https://developer.mozilla.org/en-US/docs/CSS)
- [CSS Tricks](https://css-tricks.com/)
- [CSS Zen Garden – the art of the possible in CSS](https://www.csszengarden.com/)
- [CSS on A List Apart](https://alistapart.com/blog/topic/css/)
- [Flexbox Guide](https://duckduckgo.com/?q=css+tricks+flexbox&ia=web)
- [CSS Grid Guide](https://duckduckgo.com/?q=css+tricks+grid&ia=web)
- [CSS Grid by Example](https://gridbyexample.com/)
## JavaScript
- [W3Schools JS](https://www.w3schools.com/js/default.asp)
- [MDN](https://developer.mozilla.org/en-US/docs/Web/javascript)
- [JSDoc](https://jsdoc.app/about-getting-started.html) for documenting your code
- [ReactJS](https://reactjs.org/)
## PHP
- [PHP Language Reference](https://www.php.net/manual/en/langref.php)
- [PHP Function Reference](https://www.php.net/manual/en/funcref.php)
- [W3Schools PHP](https://www.w3schools.com/php/default.asp)
- [PHP The Right Way](https://phptherightway.com/) is a high level review of modern PHP
- [PHPDoc](https://www.phpdoc.org/docs/latest/index.html) for documenting your code
- [SitePoint’s PHP resources](https://www.sitepoint.com/php/)
### Books
- The good folks at WebDev Studios have put out several books on WordPress theming, plugin development, and also how to use WordPress. You can find a list of their books [here](https://webdevstudios.com/books/)
- [You Don’t Know JS](https://github.com/getify/You-Dont-Know-JS) is a book series on modern JS development. This the Github repo for the books, or you can purchase physical copies.
- [Eloquent JavaScript](https://eloquentjavascript.net/)
- [JavaScript: The Definitive Guide](https://www.oreilly.com/library/view/javascript-the-definitive/9781491952016/)
- [PHP Cookbook](https://www.oreilly.com/library/view/php-cookbook/9781098121310/)
- [Programming PHP](https://www.oreilly.com/library/view/programming-php-4th/9781492054122/)
# Creating Database for WordPress
If you are installing WordPress on your own web server, follow one of the below instructions to create your WordPress database and user account.
## Using phpMyAdmin
If your web server has [phpMyAdmin](https://wordpress.org/documentation/article/wordpress-glossary/#phpMyAdmin) installed, you may follow these instructions to create your WordPress username and database. If you work on your own computer, on most Linux distributions you can install PhpMyAdmin automatically.
***Note:** These instructions are written for phpMyAdmin 4.4; the phpMyAdmin user interface can vary slightly between versions.*
If a database relating to WordPress does not already exist in the **Database** dropdown on the left, create one:
Choose a name for your WordPress database: ‘wordpress’ or ‘blog’ are good, but most hosting services (especially shared hosting) will require a name beginning with your username and an underscore, so, even if you work on your own computer, we advise that you check your hosting service requirements so that you can follow them on your own server and be able to transfer your database without modification. Enter the chosen database name in the **Create database** field and choose the best collation for your language and encoding. In most cases it’s better to choose in the “utf8\_” series and, if you don’t find your language, to choose “utf8mb4_general_ci” (Reference: [\[1\]](https://make.wordpress.org/core/2015/04/02/the-utf8mb4-upgrade/)).
[](https://i1.wp.com/wordpress.org/support/files/2018/11/phpMyAdmin_create_database_4.4.jpg?fit=688%2C411&ssl=1)
phpMyAdmin language encoding drop down
Click the **phpMyAdmin** icon in the upper left to return to the main page, then click the **Users** tab. If a user relating to WordPress does not already exist in the list of users, create one:
[](https://i0.wp.com/wordpress.org/documentation/files/2018/11/users-768x500.jpg?ssl=1)
phpMyAdmin Users Tab
1. Click **Add user**.
2. Choose a username for WordPress (‘wordpress’ is good) and enter it in the **User name** field. (Be sure **Use text field:** is selected from the dropdown.)
3. Choose a secure password (ideally containing a combination of upper- and lower-case letters, numbers, and symbols), and enter it in the **Password** field. (Be sure **Use text field:** is selected from the dropdown.) Re-enter the password in the **Re-type** field.
4. Write down the username and password you chose.
5. Leave all options under **Global privileges** at their defaults.
6. Click **Go**.
7. Return to the **Users** screen and click the **Edit privileges** icon on the user you’ve just created for WordPress.
8. In the **Database-specific privileges** section, select the database you’ve just created for WordPress under the **Add privileges to the following database** dropdown, and click **Go**.
9. The page will refresh with privileges for that database. Click **Check All** to select all privileges, and click **Go**.
10. On the resulting page, make note of the host name listed after **Server:** at the top of the page. (This will usually be **localhost**.)
[](https://i1.wp.com/wordpress.org/support/files/2018/11/phpMyAdmin_server_info_4.4.jpg?fit=682%2C107&ssl=1)
## Using the MySQL Client
You can create MySQL users and databases quickly and easily by running mysql from the shell. The syntax is shown below and the dollar sign is the command prompt:
$ mysql -u adminusername -p
Enter password:
Welcome to the MySQL monitor. Commands end with ; or \\g.
Your MySQL connection id is 5340 to server version: 3.23.54
Type 'help;' or '\\h' for help. Type '\\c' to clear the buffer.
mysql> CREATE DATABASE databasename;
Query OK, 1 row affected (0.00 sec)
mysql> CREATE USER "wordpressusername"@"hostname" IDENTIFIED BY "password";
mysql> GRANT ALL PRIVILEGES ON databasename.* TO "wordpressusername"@"hostname";
Query OK, 0 rows affected (0.00 sec)
mysql> FLUSH PRIVILEGES;
Query OK, 0 rows affected (0.01 sec)
mysql> EXIT
Bye
The example shows:
- That root is also the *adminusername*. It is a safer practice to choose a so-called “mortal” account as your mysql admin, so that you are not entering the command “mysql” as the root user on your system. (Any time you can avoid doing work as root you decrease your chance of being exploited.) The name you use depends on the name you assigned as the database administrator using mysqladmin.
- wordpress or blog are good values for *databasename*.
- wordpress is a good value for *wordpressusername* but you should realize that, since it is used here, the entire world will know it, too.
- *hostname* will usually be localhost. If you don’t know what this value should be, check with your system administrator if you are not the admin for your WordPress host. If you are the system admin, consider using a non-root account to administer your database.
- *password* should be a difficult-to-guess password, ideally containing a combination of upper- and lower-case letters, numbers, and symbols. One good way of avoiding the use of a word found in a dictionary is to use the first letter of each word in a phrase that you find easy to remember.
If you need to write these values somewhere, avoid writing them in the system that contains the things protected by them. You need to remember the value used for *databasename*, *wordpressusername*, *hostname*, and *password*. Of course, since they are already (or will be shortly) in your wp-config.php file, there is no need to put them somewhere else, too.
## Using Plesk
If your hosting provider supplies the [Plesk](https://www.plesk.com/) hosting control panel and you want to install WordPress manually, follow the instructions below to create a database:
1. Log in to Plesk.
2. Click **Databases** in the Custom Website area of your website on the Websites & Domains page:
[](https://i0.wp.com/wordpress.org/documentation/files/2018/11/plesk-db-768x558.png?ssl=1)
Plesk custom website databases
1. Click **Add New Database**, change database name if you want, create database user by providing credentials and click **OK**. You’re done!
## Using cPanel
If your hosting provider supplies the [cPanel](https://wordpress.org/documentation/article/wordpress-glossary/#cPanel) hosting control panel, you may follow these simple instructions to create your WordPress username and database. A more complete set of instructions for using cPanel to create the database and user can be found in [Using cPanel](https://wordpress.org/documentation/article/using-cpanel/).
1. Log in to your [cPanel](https://wordpress.org/documentation/article/wordpress-glossary/#cPanel).
2. Click **MySQL Database Wizard** icon under the Databases section.
3. In **Step 1. Create a Database** enter the database name and click Next Step.
4. In **Step 2. Create Database Users** enter the database user name and the password. Make sure to use a strong password. Click Create User.
5. In **Step 3. Add User to Database** click the All Privileges checkbox and click Next Step.
6. In **Step 4. Complete the task** note the database name and user. Write down the values of *hostname*, *username*, *databasename*, and the password you chose. (Note that *hostname* will usually be **localhost**.)
## Using DirectAdmin
If you’re a regular User of a single-site webhosting account, you can log in normally. Then click **MySQL Management**. (If this is not readily visible, perhaps your host needs to modify your “package” to activate MySQL.) Then follow part “c” below.
Reseller accounts Admin accounts may need to click **User Level**. They must first log in as Reseller if the relevant domain is a Reseller’s primary domain… or log in as a User if the domain is not a Reseller’s primary domain. If it’s the Reseller’s primary domain, then when logged in as Reseller, simply click **User Level**. However if the relevant domain is not the Reseller’s primary domain, then you must log in as a User. Then click **MySQL Management**. (If not readily visible, perhaps you need to return to the Reseller or Admin level, and modify the “Manage user package” or “Manage Reseller package” to enable MySQL.)
In MySQL Management, click on the small words: **Create new database**. Here you are asked to submit two suffixes for the database and its username. For maximum security, use two different sets of 4-6 random characters. Then the password field has a Random button that generates an 8-character password. You may also add more characters to the password for maximum security. Click **Create**. The next screen will summarize the database, username, password and hostname. Be sure to copy and paste these into a text file for future reference.
# How to install WordPress
WordPress is well-known for its ease of installation. Under most circumstances, installing WordPress is a very simple process and takes less than five minutes to complete. [Many web hosts](https://wordpress.org/hosting/) now offer [tools (e.g. Fantastico) to automatically install WordPress](https://wordpress.org/documentation/article/automated-installation/) for you. However, if you wish to install WordPress yourself, the following guide will help.
## Things to Know Before Installing WordPress
Before you begin the install, there are a few things you need to have and do. Refer the article [Before You Install](https://developer.wordpress.org/advanced-administration/before-install/). It’s also good to verify that e-mail delivery is working properly on your host. Refer to [Mail](https://developer.wordpress.org/advanced-administration/server/mail/) for more information.\
If you need multiple WordPress instances, refer [Installing Multiple WordPress Instances.](https://developer.wordpress.org/advanced-administration/before-install/multiple-instances/).
## Basic Instructions
Here’s the quick version of the instructions for those who are already comfortable with performing such installations. More [detailed instructions](#detailed-instructions) follow.
1. Download and unzip the WordPress package if you haven’t already.
2. Create a database for WordPress on your web server, as well as a [MySQL](https://wordpress.org/documentation/article/glossary/#mysql) (or MariaDB) user who has all privileges for accessing and modifying it.
3. (Optional) Find and rename `wp-config-sample.php` to `wp-config.php`, then edit the file [(see Editing wp-config.php)](https://developer.wordpress.org/advanced-administration/wordpress/wp-config/) and add your database information.\
**Note:** If you are not comfortable with renaming files, step 3 is optional and you can skip it as the install program will create the `wp-config.php` file for you.
4. Upload the WordPress files to the desired location on your web server:
- If you want to integrate WordPress into the root of your domain (e.g. https://example.com/), move or upload all contents of the unzipped WordPress directory (excluding the WordPress directory itself) into the root directory of your web server.
- If you want to have your WordPress installation in its own subdirectory on your website (e.g. https://example.com/blog/), create the blog directory on your server and upload the contents of the unzipped WordPress package to the directory via FTP.
- **Note:** If your FTP client has an option to convert file names to lower case, make sure it’s disabled.
5. Run the WordPress installation script by accessing the URL in a web browser. This should be the URL where you uploaded the WordPress files.
– If you installed WordPress in the root directory, you should visit: https://example.com/\
– If you installed WordPress in its own subdirectory called blog, for example, you should visit: https://example.com/blog/\
That’s it! WordPress should now be installed.
## Detailed instructions
### Step 1: Download and Extract
Download and unzip the WordPress package from [wordpress.org/download/](https://wordpress.org/download/).
- If you will be uploading WordPress to a remote web server, download the WordPress package to your computer with a web browser and unzip the package.
- If you will be using FTP, skip to the next step – uploading files is covered later.
- If you have [shell](https://wordpress.org/documentation/article/glossary/#shell) access to your web server, and are comfortable using console-based tools, you may wish to download WordPress directly to your [web server](https://wordpress.org/documentation/article/glossary/#web-server) using wget (or lynx or another console-based web browser) if you want to avoid [FTPing](https://wordpress.org/documentation/article/glossary/#ftp):
- wget https://wordpress.org/latest.tar.gz
- Then extract the package using:
- tar -xzvf latest.tar.gz
The WordPress package will extract into a folder called wordpress in the same directory that you downloaded latest.tar.gz.
### Step 2: Create a database for WordPress
If you are using a [hosting provider](https://wordpress.org/documentation/article/glossary/#hosting-provider), you may already have a WordPress database set up for you, or there may be an automated setup solution to do so. Check your hosting provider’s support pages or your control panel for clues about whether or not you’ll need to create one manually.
If you determine that you’ll need to create one manually, follow the instructions for Using phpMyAdmin below to create your WordPress username and database. For other tools such as Plesk, cPanel and Using the MySQL Client, refer the article [Creating Database for WordPress.](https://developer.wordpress.org/advanced-administration/before-install/creating-database/)
If you have only one database and it is already in use, you can install WordPress in it – just make sure to have a distinctive prefix for your tables to avoid over-writing any existing database tables.
#### Using phpMyAdmin
If your web server has [phpMyAdmin](https://wordpress.org/documentation/article/glossary/#phpmyadmin) installed, you may follow these instructions to create your WordPress username and database. If you work on your own computer, on most Linux distributions you can install PhpMyAdmin automatically.
***Note:** These instructions are written for phpMyAdmin 4.4; the phpMyAdmin user interface can vary slightly between versions.*
1. If a database relating to WordPress does not already exist in the **Database** dropdown on the left, create one:
1. Choose a name for your WordPress database: ‘`wordpress`‘ or ‘`blog`‘ are good, but most hosting services (especially shared hosting) will require a name beginning with your username and an underscore, so, even if you work on your own computer, we advise that you check your hosting service requirements so that you can follow them on your own server and be able to transfer your database without modification. Enter the chosen database name in the **Create database** field and choose the best collation for your language and encoding. In most cases it’s better to choose in the “utf8\_” series and, if you don’t find your language, to choose “utf8mb4_general_ci” [(Refer this article about upgrading to utf8mb4)](https://make.wordpress.org/core/2015/04/02/the-utf8mb4-upgrade/).\
2. Click the **phpMyAdmin** icon in the upper left to return to the main page, then click the **Users** tab. If a user relating to WordPress does not already exist in the list of users, create one:\
1. Click **Add user**.
2. Choose a username for WordPress (‘`wordpress`‘ is good) and enter it in the **User name** field. (Be sure **Use text field**: is selected from the dropdown.)
3. Choose a secure password (ideally containing a combination of upper- and lower-case letters, numbers, and symbols), and enter it in the **Password** field. (Be sure **Use text field**: is selected from the dropdown.) Re-enter the password in the **Re-type** field.
4. Write down the username and password you chose.
5. Leave all options under **Global privileges** at their defaults.
6. Click **Go**.
7. Return to the Users screen and click the **Edit privileges** icon on the user you’ve just created for WordPress.
8. In the **Database-specific privileges** section, select the database you’ve just created for WordPress under the **Add privileges to the following database** dropdown, and click Go.
9. The page will refresh with privileges for that database. Click **Check All** to select all privileges, and click **Go**.
10. On the resulting page, make note of the host name listed after **Server**: at the top of the page. (This will usually be **localhost**.)
### Step 3: Set up wp-config.php
You can either create and edit the wp-config.php file yourself, or you can skip this step and let WordPress try to do this itself when you run the installation script (step 5). (you’ll still need to tell WordPress your database information).
(For more extensive details, and step by step instructions for creating the configuration file and your secret key for password security, please see [Editing wp-config.php](https://developer.wordpress.org/advanced-administration/wordpress/wp-config/)).
Return to where you extracted the WordPress package in Step 1, rename the file wp-config-sample.php to wp-config.php, and open it in a text editor.
[Enter your database information](https://developer.wordpress.org/advanced-administration/wordpress/wp-config/#configure-database-settings) under the section labeled
// ** MySQL settings - You can get this info from your web host ** //
**DB_NAME**\
The name of the database you created for WordPress in Step 2.\
**DB_USER**\
The username you created for WordPress in Step 2.\
**DB_PASSWORD**\
The password you chose for the WordPress username in Step 2.\
**DB_HOST**\
The hostname you determined in Step 2 (usually localhost, but not always; see [some possible DB_HOST values](https://developer.wordpress.org/advanced-administration/wordpress/wp-config/#set-database-host)). If a port, socket, or pipe is necessary, append a colon (:) and then the relevant information to the hostname.\
**DB_CHARSET**\
The database character set, normally should not be changed (see [Editing wp-config.php](https://developer.wordpress.org/advanced-administration/wordpress/wp-config/)).\
**DB_COLLATE**\
The database collation should normally be left blank (see [Editing wp-config.php](https://developer.wordpress.org/advanced-administration/wordpress/wp-config/)).
[Enter your secret key values](https://developer.wordpress.org/advanced-administration/wordpress/wp-config/) under the section labeled
/* Authentication Unique Keys and Salts. */
Save the `wp-config.php` file.
### Step 4: Upload the files
Now you will need to decide where on your domain you’d like your WordPress-powered site to appear:\
– In the root directory of your website. (For example, https://example.com/)\
– In a subdirectory of your website. (For example, https://example.com/blog/)
***Note:** The location of your root web directory in the filesystem on your [web server](https://wordpress.org/documentation/article/glossary/#web-server) will vary across [hosting providers](https://wordpress.org/documentation/article/glossary/#hosting-provider) and operating systems. Check with your hosting provider or system administrator if you do not know where this is.*
#### In the Root Directory
- If you need to upload your files to your web server, use an [FTP](https://wordpress.org/documentation/article/glossary/#ftp) client to upload all the contents of the wordpress directory (but not the directory itself) into the root directory of your website.\
If your files are already on your web server, and you are using [shell](https://wordpress.org/documentation/article/glossary/#shell) access to install WordPress, move all of the contents of the wordpress directory (but not the directory itself) into the root directory of your website.
#### In a Subdirectory
- If you need to upload your files to your web server, rename the wordpress directory to your desired name, then use an [FTP](https://wordpress.org/documentation/article/glossary/#ftp) client to upload the directory to your desired location within the root directory of your website.
- If your files are already on your web server, and you are using [shell](https://wordpress.org/documentation/article/glossary/#shell) access to install WordPress, move the wordpress directory to your desired location within the root directory of your website, and rename the directory to your desired name.
### Step 5: Run the Install Script
Point a web browser to start the installation script.
- If you placed the WordPress files in the root directory, you should visit: https://example.com/wp-admin/install.php
- If you placed the WordPress files in a subdirectory called blog, for example, you should visit: https://example.com/blog/wp-admin/install.php
#### Setup configuration file
If WordPress can’t find the wp-config.php file, it will tell you and offer to try to create and edit the file itself. (You can also do this directly by loading `wp-admin/setup-config.php` in your web browser.) WordPress will ask you the database details and write them to a new wp-config.php file. If this works, you can go ahead with the installation; otherwise, go back and [create, edit, and upload the wp-config.php file yourself (step 3).](https://developer.wordpress.org/advanced-administration/before-install/howto-install/#step-3-set-up-wp-config-php)
#### Finishing installation
The following screenshots show how the installation progresses. Notice that in entering the details screen, you enter your site title, your desired user name, your choice of a password (twice), and your e-mail address. Also displayed is a check-box asking if you would like your blog to appear in search engines like Google and DuckDuckGo. Leave the box unchecked if you would like your blog to be visible to everyone, including search engines, and check the box if you want to block search engines, but allow normal visitors. Note all this information can be changed later in your [Administration Screen](https://wordpress.org/documentation/article/administration-screens/).
If you successfully install the WordPress, login prompt will be displayed.
Install script troubleshooting\
– If you get an error about the database when you run the install script:\
– Go back to [Step 2](#detailed-step-2) and [Step 3](#detailed-step-3), and make sure you entered all the correct database information into wp-config.php.\
– Make sure you granted your WordPress user permission to access your WordPress database in **Step 3.**\
– Make sure the database server is running.
## Installing WordPress at popular Hosting Companies
### installing WordPress at Atlantic.net
[Install WordPress On A Ubuntu 14.04 LTS](https://www.atlantic.net/vps-hosting/how-to-install-wordpress-ubuntu-14/)\
You can also install WordPress on Ubuntu with [one click WordPress Hosting](https://www.atlantic.net/vps-hosting/wordpress-vps-hosting/) on Atlantic.Net.
### Installing WordPress at AWS
- [Installatron WordPress](https://aws.amazon.com/marketplace/pp/prodview-duuvqpjnl65oe) Installatron WordPress is a pre-configured and ready-to-launch image that contains a WordPress website and Installatron’s WordPress management tools.
- [Architecting a Highly Scalable WordPress Site in AWS](https://www.slideshare.net/harishganesan/scaling-wordpress-in-aws-amazon-ec2) A guide for building a more expensive, highly scalable AWS implementation using Amazon’s Relational Data Store (RDS) et al.
### Installing WordPress at DigitalOcean
- [How to install WordPress on Ubuntu 14.04](https://www.digitalocean.com/community/tutorials/how-to-install-wordpress-on-ubuntu-14-04)
### Installing WordPress at Linode
- [Manage Web Content with WordPress](https://www.linode.com/docs/websites/cms/manage-web-content-with-wordpress) Install WordPress on a Debian Server with a LAMP Stack
You can also install WordPress on Ubuntu with one click using this [StackScript](https://www.linode.com/stackscripts/view/12) on Linode.
### Installing WordPress at iPage Hosting
- [This is a great step by step tutorial by IStartBlogging](https://istartblogging.com/#express-blog-install) on how to setup your blog the smart way with iPage Hosting.
In less than 5 minutes from now, you will have your blog ready on your domain. You will install WordPress on your own domain as an Automated Process with ONE Click WordPress Installation feature from iPage hosting.
### Installing WordPress at Microsoft Azure
- [Installing WordPress on Microsoft Azure](https://azure.microsoft.com/en-us/marketplace/partners/wordpress/wordpress/) is as simple as a few clicks. A hosting space and MySQL database will be created and configured, so you’re ready to start creating within a matter of seconds.
- Running into some issues and need to troubleshoot your WordPress site on Azure? Follow this handy [Troubleshooting guide for WordPress on Azure](https://azure.microsoft.com/en-us/blog/wordpress-troubleshooting-techniques-on-azure-websites/)
- There is a full listing of resources on how to [learn more about WordPress on Microsoft Azure!](https://azure.microsoft.com/en-us/documentation/articles/develop-wordpress-on-app-service-web-apps/)
## Common installation problems
The following are some of the most common installation problems. For more information and troubleshooting for problems with your WordPress installation, check out [FAQ Installation](https://wordpress.org/documentation/article/faq-installation/) and [FAQ Troubleshooting](https://wordpress.org/documentation/article/faq-troubleshooting/).
**I see a directory listing rather than a web page.**
The web server needs to be told to view index.php by default. In Apache, use the DirectoryIndex index.php directive. The simplest option is to create a file named .htaccess in the installed directory and place the directive there. Another option is to add the directive to the web server’s configuration files.
**I see lots of `Headers already sent` errors. How do I fix this?**
You probably introduced a syntax error in editing wp-config.php.
1. Download wp-config.php (if you don’t have [shell](https://wordpress.org/documentation/article/glossary/#shell) access).
2. Open it in a [text editor](https://wordpress.org/documentation/article/glossary/#text-editor).
3. Check that the first line contains nothing but , and that there is no text after it (not even whitespace).
4. If your text editor saves as Unicode, make sure it adds **no byte order mark (BOM)**. Most Unicode-enabled text editors do not inform the user whether or not it adds a BOM to files; if so, try using a different text editor.
5. Save the file, upload it again if necessary, and reload the page in your browser.
**My page comes out gibberish. When I look at the source I see a lot of “``” tags.**
If the `` tags are being sent to the browser, it means your [PHP](https://wordpress.org/documentation/article/glossary/#php) is not working properly. All PHP code is supposed to be executed before the server sends the resulting [HTML](https://wordpress.org/documentation/article/glossary/#html) to your web browser. (That’s why it’s called a preprocessor.) Make sure your web server meets the requirements to run WordPress, that PHP is installed and configured properly, or contact your hosting provider or system administrator for assistance.
**I keep getting an `Error connecting to database` message but I’m sure my configuration is correct.**
Try resetting your MySQL password manually. If you have access to MySQL via shell, try issuing:
SET PASSWORD FOR 'wordpressusername'@'hostname' = OLD_PASSWORD('password');
If you do not have shell access, you should be able to simply enter the above into an SQL query in phpMyAdmin. Failing that, you may need to use your host’s control panel to reset the password for your database user.
**I keep getting an `Your PHP installation appears to be missing the MySQL extension which is required by WordPress` message but I’m sure my configuration is correct.**
Check to make sure that your configuration of your web-server is correct and that the MySQL plugin is getting loaded correctly by your web-server program. Sometimes this issue requires everything in the path all the way from the web-server down to the MySQL installation to be checked and verified to be fully operational. Incorrect configuration files or settings are often the cause of this issue.
**My image/MP3 uploads aren’t working.**
If you use the Rich Text Editor on a blog that’s installed in a subdirectory, and drag a newly uploaded image into the editor field, the image may vanish a couple seconds later. This is due to a problem with TinyMCE (the rich text editor) not getting enough information during the drag operation to construct the path to the image or other file correctly. The solution is to NOT drag uploaded images into the editor. Instead, click and hold on the image and select **Send to Editor.**
# Running a Development Copy of WordPress
Having a development instance of WordPress is a good way to update, develop, and modify a website without interrupting the live version of WordPress. There are many ways to set up a development copy of WordPress, but this article will cover the basics, best practices, tips, and some tools to make running a development copy of WordPress much easier.
## Installing WordPress on your computer
Use these instructions to set up a local server environment for testing and development.
Installing WordPress locally is usually meant for development. Those interested in development can follow the instructions below to download and install WordPress locally.\
– [wp-env](https://developer.wordpress.org/block-editor/reference-guides/packages/packages-env/) – a free, open-source development environment maintained by the WordPress core developer community.\
– [VVV or Varying Vagrant Vagrants](https://varyingvagrantvagrants.org/) – free, open-source local development environment maintained by members of the WordPress community.\
– [XAMPP](https://www.apachefriends.org/) – free and open-source local development environment maintained by Apache Friends\
– [MAMP](https://www.mamp.info/en/mac/) – free local development environment that has everything you need to install WordPress locally.\
– [DDEV](https://ddev.readthedocs.io/en/stable/users/quickstart/#wordpress) – free, open-source, development environment. Seamlessly share local sites over public domains, includes a database editor, Xdebug, and other performance profiling tools.\
– [Lando](https://lando.dev/) – free, open-source development environment that offers a [plugin to install WordPress locally](https://docs.lando.dev/plugins/wordpress/).\
– [AMPPS](https://ampps.com/downloads/) – free WAMP/MAMP/LAMP stack with Softaculous Installer built in. It can 1-click install and upgrade WordPress and others as well.\
– [Bitnami package for WordPress](https://bitnami.com/stack/wordpress) and [Bitnami package for WordPress Multisite](https://bitnami.com/stack/wordpress-multisite) – Bitnami packages for WordPress that provide a one-click install solution for WordPress or WordPress Multisite on your local computer or in the cloud.\
– [Instant WordPress](https://instantwp.com/) – free, standalone, portable WordPress development environment for Windows that will run from a USB key.\
– [WordPress Studio](https://developer.wordpress.com/studio/) – free, open-source app to install and manage multiple WordPress sites locally.
### Software Appliance – Ready-to-use
You may find that using a pre-integrated [software appliance](https://en.wikipedia.org/wiki/Software_appliance) is a great way to get up and running with WordPress, especially in combination with virtual machine software (e.g., VMWare, VirtualBox, Xen HVM, KVM).
Parallels is another software that can be used. Unlike virtual machine software, it requires payment. It allows you to run both Mac and Windows on your machine.
A software appliance allows users to skip the manual installation of WordPress and its dependencies and instead deploy a self-contained system that requires little to no setup in just a couple of minutes.
- [TurnKey WordPress Appliance](https://www.turnkeylinux.org/wordpress): a free Debian-based appliance that just works. It bundles a collection of popular WordPress plugins and features a small footprint, automatic security updates, SSL support, and a Web administration interface. Available as ISO, virtual machine images, or launch in the cloud.
### Unattended/automated installation of WordPress on Ubuntu Server 16.04 LTS
## Two WordPress Installations with One Database
**Note:** This method is NOT recommended if you plan on doing database development.
A popular approach to running a local copy of your live site is using the same local and live database. Using the same database will allow you to work on your local copy and push changes from local to your production with no break in uptime.
**Setup of the local copy**
Once you have your local files set up, you must modify wp-config.php in the root of your local install.
define('WP_HOME', "https://{$_SERVER['HTTP_HOST']}");
define('WP_SITEURL', "https://{$_SERVER['HTTP_HOST']}");
ob_start( 'ob_replace_home_url' );
function ob_replace_home_url( $content ) {
$home_urls = array(
'https://site.testing.example.com',
'https://site.example.com',
'https://site.authoring.testing.example.com',
'https://site.authoring.example.com',
);
$content = str_replace( $home_urls, WP_HOME, $content );
return $content;
}
### Using a Drop-In
What if we don’t want to hack core code? Avoiding changes to core code is a good practice for easy upgrading and code-sharing. There is even a filter for this (`pre_option_siteurl` and `pre_option_home`) but there’s a problem: within **wp-settings.php**,
- the filter can’t be defined until after line 65 when `functions.php` is included
- WordPress makes calls to `get_option` on line 155 of (via `wp_plugin_directory_constants()`)
- plugins aren’t defined until later down around line 194.
However, between lines 65 and 155, there is something we can use, namely the loading of the drop-in `db.php`; the filter can be safely defined there. (However, this is perhaps only halfway towards “not core” code.) Check if you already have an existing wp-content/db.php before trying this technique. Plugins like W3 Total Cache use it for similar reasons.
General \> Site Language** and select from the list of available languages. For Multisite Super Admins, you can set the default language using the Network Administration **Settings** panel.
## Manually installing language files
Here are the steps you will need to follow to install an international version of WordPress.
**Note:** If you make an error in the steps or you do not specify the correct language, WordPress will default back to English. For more help Installing WordPress, see [Installing WordPress](https://developer.wordpress.org/advanced-administration/before-install/howto-install/) and [FAQ Installation](https://wordpress.org/documentation/article/faq-installation/).
- Download the `.mo` language file for your language. The naming convention of the `.mo` files is based on the ISO-639 language code (e.g. *pt* for Portuguese) followed by the ISO-3166 country code (e.g. *PT* for Portugal or *BR* for Brazil). So, the Brazilian Portuguese file would be called `pt_BR.mo`, and a non-specific Portuges file would be called `pt.mo`. Complete lists of codes can be found at [(country codes)](https://www.gnu.org/savannah-checkouts/gnu/gettext/manual/gettext.html#Country-Codes) and [(language codes)](https://www.gnu.org/savannah-checkouts/gnu/gettext/manual/gettext.html#Language-Codes).
## Setting the language for your site
### Single-site installations
#### WordPress 4.0 and above
- Change the language in the admin settings screen. `Settings > General > Site Language`.
#### WordPress 3.9.2 and below
- Open your `wp-config.php` file in a [text editor](https://wordpress.org/documentation/article/wordpress-glossary/#Text_editor) and search for:
define( 'WPLANG', '' );
- Edit this line according to the `.mo` file you’ve just downloaded, e.g. for the Portuguese spoken in Brazil you must add:
define ( 'WPLANG', 'pt_BR' );
- Note that if the .mo and .po files don’t exist for a language code called for in wp-config.php then there is no error message, but the code is still used in language_attributes() . This is useful for those of us whose language is similar enough to en_US not to require translation, but who don’t want en-US as the language tag in the blog, instead wanting some other variant of English. For example:
define ( 'WPLANG', 'en_GB' );
- Once you’ve added your language code, save the file.
### Multisite installations
If you have a [site network](https://developer.wordpress.org/advanced-administration/multisite/create-network/) (WordPress multisite), the language is set on a per-blog basis through the “Site language” option in the `Settings > General` subpanel.
You can set the default language for the entire network under the `Network Admin > Settings` screen (“Default Language”).
### Adding translation
If you want to add translations for terms that are still displaying in English after installation, visit [translate.wordpress.org](https://translate.wordpress.org) and select your language. To get started, refer [this page](https://make.wordpress.org/polyglots/handbook/tools/glotpress-translate-wordpress-org/) in the [Translator’s Handbook](https://make.wordpress.org/polyglots/handbook/).
# Installing Multiple WordPress Instances
If you need multiple WordPress instances, there are three types of installations based on system architecture, or a combination of WordPress instances and databases:
1. WordPress Multisite Network: a single WordPress instance (with multiple sites created within the same WP instance) sharing a single database instance.
2. Single Database: multiple WordPress instances sharing a single database instance.
3. Multiple Databases: multiple WordPress instances with each instance using its own database instance.
Let’s first look at the third type, multiple WordPress instances with multiple databases, because it has the same installation process as a single WordPress instance.
## Multiple WordPress Instances with Multiple Databases
You’ll need a separate [MySQL database](https://wordpress.org/documentation/article/wordpress-glossary/#mysql) for each instance you plan to install. If you have not yet created these, [basic instructions are found here](https://developer.wordpress.org/advanced-administration/before-install/howto-install/#step-2-create-the-database-and-a-user).
To make sure each WordPress instance connects to the right database you need to add that information to the [wp-config.php](https://developer.wordpress.org/advanced-administration/wordpress/wp-config/) file. The lines to change are the following:
define('DB_NAME', 'wordpress'); // The name of the database
define('DB_USER', 'username'); // Your MySQL username
define('DB_PASSWORD', 'password'); // The user's password
define('DB_HOST', 'localhost' ); // The host of the database
`DB_NAME` is the name of the individual database created for that blog hosted on the `DB_HOST` MySQL server. If you are using different user logins for each database, edit `DB_USER` and `DB_PASSWORD` to reflect this as well.
Upload each [wp-config.php](https://developer.wordpress.org/advanced-administration/wordpress/wp-config/) file to its specific root/installation directory, and run the installation. See [Installing WordPress](https://developer.wordpress.org/advanced-administration/before-install/howto-install/) for more information.
## The Multisite Feature
If you want multiple sites to use WordPress, you can use the multisite feature to create what is referred to as a *network* of sites. The multisite feature involves installing a single WordPress instance and a single database.
The multisite feature appears to be simpler than other types of multiple WordPress installations, but there are some considerations and restrictions. Refer to the following documents for more detailed information:
- [Before You Create A Network](https://developer.wordpress.org/advanced-administration/multisite/prepare-network/)
- [Create A Network](https://developer.wordpress.org/advanced-administration/multisite/create-network/)
- [Multisite Network Administration](https://developer.wordpress.org/advanced-administration/multisite/administration/)
## Multiple WordPress Instances with a Single Database
As with the multiple-database solution described above, the [wp-config.php](https://developer.wordpress.org/advanced-administration/wordpress/wp-config/) file will vary for each installation. In this case, however, only a single line is unique to each blog:
$table_prefix = 'wp_'; // example: 'wp_' or 'b2' or 'mylogin_'
By default, WordPress assigns the table prefix `wp_` to its [MySQL database](https://wordpress.org/documentation/article/wordpress-glossary/#mysql) tables, but this prefix can be anything you choose. This allows you to create unique identifiers for each blog in your database. For example, let’s say you have three blogs to set up, with the names *Main*, *Projects*, and *Test*. You should substitute the prefix `wp_` in each blog’s\
[wp-config.php](https://developer.wordpress.org/advanced-administration/wordpress/wp-config/):
**Main blog:**
$table_prefix = 'main_';
**Projects blog:**
$table_prefix = 'projects_';
**Test blog:**
$table_prefix = 'test_';
As noted, you may use a prefix of your own making. Those provided here are for example only.
Upload each [wp-config.php](https://developer.wordpress.org/advanced-administration/wordpress/wp-config/) file to its specific root/installation directory, and run the installation. See [Installing WordPress](https://developer.wordpress.org/advanced-administration/before-install/howto-install/) for more information.
For enhanced security you can also add multiple users to the same database and give each WordPress Instance their own MySQL user.
## Multiple Databases, Same Users
You can use the same userbase for all your blogs on the same domain by defining the `CUSTOM_USER_TABLE` and optionally the `CUSTOM_USER_META_TABLE` constants to point to the same `wp_your_blog_users` and `wp_your_blog_usermeta` tables.\
See [Editing wp-config.php/Custom User and Usermeta Tables](https://developer.wordpress.org/advanced-administration/wordpress/wp-config/#custom-user-and-usermeta-tables).
# Install WordPress at popular providers
## Installing WordPress at Atlantic.Net
- [How to Install WordPress on a Ubuntu 14.04 LTS Cloud Server](https://www.atlantic.net/community/howto/install-wordpress-ubuntu-14/)
You can also install WordPress on Ubuntu with one click [WordPress Hosting](https://www.atlantic.net/vps-hosting/wordpress-vps-hosting/).
## Installing WordPress at AWS
- [WordPress Certified by Bitnami and Automattic](https://aws.amazon.com/marketplace/pp/prodview-bzstv3wbn5wkq). WordPress is the world’s most popular content management platform. It includes the new Gutenberg editor and over 45,000 themes and plugins. This image is certified by Bitnami as secure, up-to-date, and packaged using industry best practices, and approved by Automattic, the experts behind WordPress.
- [WordPress with NGINX and SSL Certified by Bitnami and Automattic](https://aws.amazon.com/marketplace/pp/prodview-s6cuqgfczpuwm). WordPress with NGINX and SSL enhances WordPress with SSL auto-configuration and the high-performance NGINX web server. This image is certified by Bitnami as secure, up-to-date, and packaged using industry best practices, and approved by Automattic, the experts behind WordPress.
- [WordPress with LiteSpeed Cache (Powered OpenLiteSpeed).](https://aws.amazon.com/marketplace/pp/prodview-w7ee7rs5uhlem) This OLS + WordPress image is 200+ times faster than a regular WordPress image.
- [WordPress Multisite Certified by Bitnami and Automattic.](https://aws.amazon.com/marketplace/pp/prodview-rcmdzzu2x3ntm) WordPress Multisite makes it simple to manage multiple WordPress websites from the same server and interface. This image is certified by Bitnami as secure, up-to-date, and packaged using industry best practices, and approved by Automattic, the experts behind WordPress.
- [Architecting a Highly Scalable WordPress Site in AWS](https://www.slideshare.net/harishganesan/scaling-wordpress-in-aws-amazon-ec2) A guide for building a more expensive, highly scalable AWS implementation using Amazon’s Relational Data Store (RDS).
## Installing WordPress at DigitalOcean
- [How To Install WordPress on Ubuntu 12.04](https://www.digitalocean.com/community/tutorials/how-to-install-wordpress-on-ubuntu-12-04)
- [How To Install WordPress on Ubuntu 14.04](https://www.digitalocean.com/community/tutorials/how-to-install-wordpress-on-ubuntu-14-04)
- [How To Install WordPress with LAMP on Ubuntu 16.04](https://www.digitalocean.com/community/tutorials/how-to-install-wordpress-with-lamp-on-ubuntu-16-04)
- [How To Install WordPress with LAMP on Ubuntu 18.04](https://www.digitalocean.com/community/tutorials/how-to-install-wordpress-with-lamp-on-ubuntu-18-04)
- [How To Install WordPress on Ubuntu 20.04 with a LAMP Stack](https://www.digitalocean.com/community/tutorials/how-to-install-wordpress-on-ubuntu-20-04-with-a-lamp-stack)
- [How To Install WordPress on Ubuntu 22.04 with a LAMP Stack](https://www.digitalocean.com/community/tutorials/how-to-install-wordpress-on-ubuntu-22-04-with-a-lamp-stack)
- [How To Use Ansible to Install and Set Up WordPress with LAMP on Ubuntu 18.04](https://www.digitalocean.com/community/tutorials/how-to-use-ansible-to-install-and-set-up-wordpress-with-lamp-on-ubuntu-18-04)
- [How To Install WordPress with LAMP on Debian 9](https://www.digitalocean.com/community/tutorials/how-to-install-wordpress-with-lamp-on-debian-9)
- [How to Install WordPress with LAMP on Debian 10](https://www.digitalocean.com/community/tutorials/how-to-install-wordpress-with-lamp-on-debian-10)
## Installing WordPress at Linode
- [Install WordPress on Ubuntu 16.04](https://www.linode.com/docs/guides/install-wordpress-on-ubuntu-16-04/)
- [Install WordPress on Ubuntu 18.04](https://www.linode.com/docs/guides/install-wordpress-ubuntu-18-04/)
- [Install WordPress on Ubuntu 20.04](https://www.linode.com/docs/guides/how-to-install-wordpress-ubuntu-2004/)
- [Install WordPress on Ubuntu 22.04](https://www.linode.com/docs/guides/how-to-install-wordpress-ubuntu-22-04/)
- [Install WordPress on Debian 10](https://www.linode.com/docs/guides/how-to-install-wordpress-debian-10/)
- [Install WordPress on AlmaLinux 8](https://www.linode.com/docs/guides/how-to-install-wordpress-almalinux-8/)
## Installing WordPress at Microsoft Azure
- [Installing WordPress on Microsoft Azure](https://learn.microsoft.com/azure/app-service/quickstart-wordpress) is as simple as a few clicks. A hosting space and MySQL database will be created and configured, so you’re ready to start creating within a matter of seconds.
- Running into some issues and need to troubleshoot your WordPress site on Azure? Follow this handy [Troubleshooting guide for WordPress on Azure](https://learn.microsoft.com/troubleshoot/azure/app-service/web-apps-open-source-technologies-faqs).
- For other WordPress related content or specific WordPress related questions, you may perform a [search with WordPress related terms on Microsoft Learn](https://learn.microsoft.com/en-us/search/?terms=wordpress).
# Changing File Permissions
On computer file systems, different files and directories have **permissions** that specify who and what can read, write, modify and access them. This is important because WordPress may need access to write to files in your `wp-content` directory to enable certain functions.
## Short explanation
Linux [file permissions](https://en.wikipedia.org/wiki/File_system_permissions) consist primarily of three components — the permissions the owner of the file or folder has, the permissions members of the group that owns the file or folder have, and the permissions that anyone else has for accessing or modifying the file and folder. The three permission components are usually represented using three numbers in order of the owner’s permission level, the group’s permission level, and everyone’s permission level. *There is technically a fourth component, but that is beyond what we need to know to secure WordPress. It will not be discussed here.*
There are three kinds of access each for the user, the group, and everyone else. They are read access, write access, and execute access. Read access lets you read the contents of the file or the directory. Write access lets you modify the file or the directory. And execute access lets you run the file like a program or a script.
## Permission Modes
7 5 5
user group world
r+w+x r+x r+x
4+2+1 4+0+1 4+0+1 = 755
The permission mode is computed by adding up the following values for the user, the file group, and for everyone else. The diagram shows how.
- **R**ead 4 – Allowed to read files
- **W**rite 2 – Allowed to write/modify files
- e**X**ecute1 – Read/write/delete/modify/directory
7 4 4
user group world
r+w+x r r
4+2+1 4+0+0 4+0+0 = 744
### Example Permission Modes
| Mode | Str Perms | Explanation |
|----|----|----|
| **0677** | -rw-rwxrwx | owner has rw only(6), other and group has rwx (7) |
| **0670** | -rw-rwx— | owner has rw only, group has rwx, others have no permission |
| **0666** | -rw-rw-rw- | all have rw only (6) |
| **0607** | -rw—-rwx | owner has rw only, group has no permission and others have rwx |
| **0600** | -rw——- | owner has rw only, group and others have no permission |
| **0477** | -r–rwxrwx | owner has read only (4), other and group has rwx (7) |
| **0470** | -r–rwx— | owner has read only, group has rwx, others have no permission |
| **0407** | -r—–rwx | owner has read only, other has rwx, group has no permission |
| **0444** | -r–r–r– | all have read only (4) |
| **0400** | -r——– | owner has read only(4), group and others have no permission(0) |
## Permission Scheme for WordPress
Permissions will be different from host to host, so this guide only details general principles. It cannot cover all cases. This guide applies to servers running a standard setup (note, for shared hosting using “suexec” methods, see below).
Typically, all files should be owned by your user (ftp) account on your web server, and should be writable by that account. On shared hosts, files should never be owned by the webserver process itself (sometimes this is **www**, or **apache**, or **nobody** user).
Any file that needs write access from WordPress should be owned or group-owned by the user account used by WordPress (which may be different than the server account). For example, you may have a user account that lets you FTP files back and forth to your server, but your server itself may run using a separate user, in a separate usergroup, such as **dhapache** or **nobody**. If WordPress is running as the FTP account, that account needs to have write access, i.e., be the owner of the files, or belong to a group that has write access. In the latter case, that would mean permissions are set more permissively than default (for example, 775 rather than 755 for folders, and 664 instead of 644).
The file and folder permissions of WordPress should be the same for most users, depending on the type of installation you performed and the umask settings of your system environment at the time of install.
**NOTE:** If an experienced user installed WordPress for you, you likely do not need to modify file permissions. Unless you are experiencing problems with permission errors, or you *want to*, you probably should not mess with this.
**NOTE:** If you installed WordPress yourself, you likely DO need to modify file permissions. Some files and directories should be “hardened” with stricter permissions, specifically, the wp-config.php file. This file is initially created with 644 permissions, and it’s a hazard to leave it like that. See Security and Hardening.
Typically, all core WordPress files should be writable only by your user account (or the httpd account, if different). (Sometimes though, multiple ftp accounts are used to manage an install, and if all ftp users are known and trusted, i.e., not a shared host, then assigning group writable may be appropriate. Ask your server admin for more info.) However, if you utilize mod_rewrite Permalinks or other `.htaccess` features you should make sure that WordPress can also write to your `/.htaccess` file.
If you want to use the built-in theme editor, all files need to be group writable. Try using it before modifying file permissions, it should work. (This may be true if different users uploaded the WordPress package and the Plugin or Theme. This wouldn’t be a problem for Plugin and Themes installed via the admin. When uploading files with different ftp users group writable is needed. On shared hosting, make sure the group is exclusive to users you trust… the apache user shouldn’t be in the group and shouldn’t own files.)
Some plugins require the `/wp-content/` folder be made writeable, but in such cases they will let you know during installation. In some cases, this may require assigning 755 permissions. The same is true for `/wp-content/cache/` and maybe `/wp-content/uploads/` (if you’re using [MultiSite](https://developer.wordpress.org/advanced-administration/multisite/create-network/) you may also need to do this for `/wp-content/blogs.dir/`)
Additional directories under /wp-content/ should be documented by whatever plugin / theme requires them. Permissions will vary.
|
|- index.php
|- wp-admin
| |- wp-admin.css
|- wp-blog-header.php
|- wp-comments-post.php
|- wp-commentsrss2.php
|- wp-config.php
|- wp-content
| |- cache
| |- plugins
| |- themes
| |- uploads
|- wp-cron.php
|- wp-includes
|- xmlrpc.php
### Shared Hosting with suexec
The above may not apply to shared hosting systems that use the “suexec” approach for running PHP binaries. This is a popular approach used by many web hosts. For these systems, the php process runs as the owner of the php files themselves, allowing for a simpler configuration and a more secure environment for the specific case of shared hosting.
Note: suexec methods should NEVER be used on a single-site server configuration, they are more secure **only** for the specific case of shared hosting.
In such an suexec configuration, the correct permissions scheme is simple to understand.
- All files should be owned by the actual user’s account, not the user account used for the httpd process.
- Group ownership is irrelevant, unless there’s specific group requirements for the web-server process permissions checking. This is not usually the case.
- All directories should be 755 or 750.
- All files should be 644 or 640. Exception: wp-config.php should be 440 or 400 to prevent other users on the server from reading it.
- No directories should ever be given 777, even upload directories. Since the php process is running as the owner of the files, it gets the owners permissions and can write to even a 755 directory.
In this specific type setup, WordPress will detect that it can directly create files with the proper ownership, and so it will not ask for FTP credentials when upgrading or installing plugins.
Popular methods used by sysadmins for this setup are:
- [suPHP](https://smarsching.github.io/suphp/Home.html), runs through php-cgi, currently unmaintained since 2013.
- [mod_ruid2](https://github.com/mind04/mod-ruid2), apache module, currently unmaintained since 2013.
- [mpm-itk](http://mpm-itk.sesse.net/), apache module.
- [mod_fcgid](https://httpd.apache.org/mod_fcgid/), an Apache module and FastCGI server with more extensive configuration.
- [PHP-FPM](https://php-fpm.org/), an alternative FastCGI server with shared OPCode, for use with Apache and Nginx.
## Using an FTP Client
[FTP programs](https://developer.wordpress.org/advanced-administration/upgrade/ftp/) (“clients”) allow you to set permissions for files and directories on your remote host. This function is often called `chmod` or `set permissions` in the program menu.
In [WordPress install](https://developer.wordpress.org/advanced-administration/before-install/howto-install/), two files that you will probably want to alter are the index page, and the css which controls the layout. Here’s how you change index.php – *the process is the same for any file*.
In the screenshot below, look at the last column – that shows the permissions. It looks a bit confusing, but for now just note the sequence of letters.
[](https://i0.wp.com/wordpress.org/documentation/files/2019/02/podz_filezilla_12.gif?ssl=1)\
Initial permissions
Right-click ‘index.php’ and select ‘File Permissions’\
A popup screen will appear.
[](https://i0.wp.com/wordpress.org/documentation/files/2019/02/podz_filezilla_13.gif?ssl=1)\
Altering file permissions
Don’t worry about the check boxes. Just delete the ‘Numeric value:’ and enter the number you need – in this case it’s 666. Then click OK.
[](https://i0.wp.com/wordpress.org/documentation/files/2019/02/podz_filezilla_14.gif?ssl=1)\
Permissions have been altered.
You can now see that the file permissions have been changed.
### Unhide the hidden files
By default, most [FTP Clients](https://developer.wordpress.org/advanced-administration/upgrade/ftp/), including [FileZilla](https://sourceforge.net/projects/filezilla/), keep hidden files, those files beginning with a period (.), from being displayed. But, at some point, you may need to see your hidden files so that you can change the permissions on that file. For example, you may need to make your [.htaccess](https://wordpress.org/documentation/article/glossary#htaccess) file, the file that controls [permalinks](https://wordpress.org/documentation/article/using-permalinks/), writeable.
To display hidden files in FileZilla, in it is necessary to select ‘View’ from the top menu, then select ‘Show hidden files’. The screen display of files will refresh and any previously hidden file should come into view.
To get FileZilla to always show hidden files – under Edit, Settings, Remote File List, check the Always show hidden files box.
In the latest version of Filezilla, the ‘Show hidden files’ option was moved to the ‘Server’ tab. Select ‘Force show hidden files.’
## Using the Command Line
If you have shell/SSH access to your hosting account, you can use `chmod` to change file permissions, which is the preferred method for experienced users. Before you start using `chmod` it would be recommended to read some tutorials to make sure you understand what you can achieve with it. Setting incorrect permissions can take your site offline, so please take your time.
- [Unix Permissions](https://web.archive.org/web/20190715230319/http://www.washington.edu/computing/unix/permissions.html)
You can make **all** the files in your `wp-content` directory writable in two steps, but before making every single file and folder writable you should first try safer alternatives like modifying just the directory. Try each of these commands first and if they don’t work then go recursive, which will make even your themes image files writable. Replace **DIR** with the folder you want to write in
chmod -v 746 DIR
chmod -v 747 DIR
chmod -v 756 DIR
chmod -v 757 DIR
chmod -v 764 DIR
chmod -v 765 DIR
chmod -v 766 DIR
chmod -v 767 DIR
If those fail to allow you to write, try them all again in order, except this time replace -v with -R, which will recursively change each file located in the folder. If after that you still can’t write, you may now try 777.
### [About Chmod](#about-chmod)
`chmod` is a unix command that means “**ch**ange **mod**e” on a file. The `-R` flag means to apply the change to every file and directory inside of `wp-content`. 766 is the mode we are changing the directory to, it means that the directory is readable and writable by WordPress and any and all other users on your system. Finally, we have the name of the directory we are going to modify, `wp-content`. If 766 doesn’t work, you can try 777, which makes all files and folders readable, writable, and executable by all users, groups, and processes.
If you use [Permalinks](https://wordpress.org/documentation/article/using-permalinks/) you should also change permissions of .htaccess to make sure that WordPress can update it when you change settings such as adding a new page, redirect, category, etc.. which requires updating the .htaccess file when mod_rewrite Permalinks are being used.
1. Go to the main directory of WordPress
2. Enter `chmod -v 666 .htaccess`
**NOTE:** From a security standpoint, even a small amount of protection is preferable to a world-writeable directory. Start with low permissive settings like 744, working your way up until it works. Only use 777 if necessary, and hopefully only for a temporary amount of time.
## The dangers of 777
The crux of this permission issue is how your server is configured. The username you use to FTP or SSH into your server is most likely not the username used by the server application itself to serve pages.
7 7 7
user group world
r+w+x r+w+x r+w+x
4+2+1 4+2+1 4+2+1 = 777
Often the Apache server is ‘owned’ by the **www-data**, **dhapache** or **nobody** user accounts. These accounts have a limited amount of access to files on the server, for a very good reason. By setting your personal files and folders owned by your user account to be World-Writable, you are literally making them World Writable. Now the www-data, dhapache and nobody users that run your server, serving pages, executing php interpreters, etc. will have full access to your user account files.
This provides an avenue for someone to gain access to your files by hijacking basically any process on your server, this also includes any other users on your machine. So you should think carefully about modifying permissions on your machine. I’ve never come across anything that needed more than 767, so when you see 777 ask why it’s necessary.
### The Worst Outcome
The worst that can happen as a result of using 777 permissions on a folder or even a file, is that if a malicious cracker or entity is able to upload a devious file or modify a current file to execute code, they will have complete control over your blog, including having your database information and password.
### Find a Workaround
It is usually pretty easy to have the enhanced features provided by the impressive WordPress plugins available, without having to put yourself at risk. Contact the Plugin author or your server support and request a workaround.
## Finding Secure File Permissions
The .htaccess file is one of the files that is accessed by the owner of the process running the server. So if you set the permissions too low, then your server won’t be able to access the file and will cause an error. Therein lies the method to find the most secure settings. Start too restrictive and increase the permissions until it works.
### Example Permission Settings
The following example has a *custom compiled php-cgi binary* and a *custom php.ini* file located in the cgi-bin directory for executing php scripts. To prevent the interpreter and `php.ini` file from being accessed directly in a web browser they are protected with a .htaccess file.
Default Permissions (umask 022)
644 -rw-r--r-- /home/user/wp-config.php
644 -rw-r--r-- /home/user/cgi-bin/.htaccess
644 -rw-r--r-- /home/user/cgi-bin/php.ini
755 -rwxr-xr-x /home/user/cgi-bin/php.cgi
755 -rwxr-xr-x /home/user/cgi-bin/php5.cgi
Secured Permissions
600 -rw------- /home/user/wp-config.php
6**0**4 -rw----r-- /home/user/cgi-bin/.htaccess
6**00** -rw------- /home/user/cgi-bin/php.ini
7**11** -rwx--x--x /home/user/cgi-bin/php.cgi
**100** ---x------ /home/user/cgi-bin/php5.cgi
#### .htaccess permissions
**644 \> 604** – The bit allowing the group owner of the .htaccess file read permission was removed. 644 is normally required and recommended for .htaccess files.
#### php.ini permissions
**644 \> 600** – Previously all groups and all users with access to the server could access the php.ini, even by just requesting it from the site. The tricky thing is that because the php.ini file is only used by the php.cgi, we only needed to make sure the php.cgi process had access. The php.cgi runs as the same user that owns both files, so that single user is now the only user able to access this file.
#### php.cgi permissions
**755 \> 711** This file is a compiled php-cgi binary used instead of mod_php or the default vanilla php provided by the hosting company. The default permissions for this file are 755.
#### php5.cgi permissions
**755 \> 100** – Because of the setup where the user account is the owner of the process running the php cgi, no other user or group needs access, so we disable all access except execution access. This is interesting because it really works. You can try reading the file, writing to the file, etc. but the only access you have to this file is to run php scripts. And as the owner of the file you can always change the permission modes back again.
$ cat: php5.cgi: Permission denied
./php5.cgi: Welcome
## SELinux
[Security Enhanced linux](https://en.wikipedia.org/wiki/Security-Enhanced_Linux) is a kernel security module that provides mechanisms by which processes can be sandboxed into particular contexts. This is of particular use to limit the actions that web pages can perform on other parts of the operating system. Actions that are denied by the security policy are often hard to distinguish from regular file permission errors.
selinux is typically installed on Redhat family distributions (e.g., CentOS, Fedora, Scientific, Amazon and others).
### How to determine if selinux is the problem?
If you are on a debian based distribution, you are probably fine.
Run the following command (on rpm based systems);
$ rpm -qa | grep selinux
selinux-policy-targeted-3.13.1-166.el7_4.7.noarch
selinux-policy-3.13.1-166.el7_4.7.noarch
libselinux-2.5-11.el7.x86_64
libselinux-python-2.5-11.el7.x86_64
libselinux-utils-2.5-11.el7.x86_64
and to check whether it is the cause of denials of permissions:
$ getenforce
Enforcing
One issue that selinux causes is blocking the wp-admin tools from writing out the \`.htaccess\` file that is required for url rewriting. There are several commands for inspecting this behaviour
$ audit2allow -w -a
type=AVC msg=audit(1517275570.388:55362): avc: denied { write } for pid=11831 comm="httpd" path="/var/www/example.org/.htaccess" dev="vda1" ino=67137959 scontext=system_u:system_r:httpd_t:s0 tcontext=system_u:object_r:httpd_sys_content_t:s0 tclass=file
Was caused by:
The boolean httpd_unified was set incorrectly.
Description:
Allow httpd to unified
Allow access by executing:
# setsebool -P httpd_unified 1
and
$ ausearch -m avc -c httpd
----
time->Tue Jan 30 01:30:31 2018
type=PROCTITLE msg=audit(1517275831.762:55364): proctitle=2F7573722F7362696E2F6874747064002D44464F524547524F554E44
type=SYSCALL msg=audit(1517275831.762:55364): arch=c000003e syscall=21 success=no exit=-13 a0=55b9c795d268 a1=2 a2=0 a3=1 items=0 ppid=11826 pid=11829 auid=4294967295 uid=48 gid=48 euid=48 suid=48 fsuid=48 egid=48 sgid=48 fsgid=48 tty=(none) ses=4294967295 comm="httpd" exe="/usr/sbin/httpd" subj=system_u:system_r:httpd_t:s0 key=(null)
type=AVC msg=audit(1517275831.762:55364): avc: denied { write } for pid=11829 comm="httpd" name="bioactivator.org" dev="vda1" ino=67137958 scontext=system_u:system_r:httpd_t:s0 tcontext=unconfined_u:object_r:httpd_sys_content_t:s0 tclass=dir
----
You can temporarily disable selinux to determine if it is the cause of the problems;
$ setenforce
usage: setenforce \[ Enforcing | Permissive | 1 | 0 \]
# Finding Server Info
What version of [PHP](https://wordpress.org/documentation/article/glossary#php) are you using? What server software is your site host using? What version of [MySQL](https://wordpress.org/documentation/article/glossary#mysql) do you have? What operating system does your site host use?
ALT= Top of PHP Info test file results
These are questions often asked by WordPress users as they prepare to [install WordPress](https://developer.wordpress.org/advanced-administration/before-install/howto-install/). Other times, these questions are asked while troubleshooting a problem with a WordPress installation. But don’t spend at lot of time searching your site, or your host’s site, for the answers—there’s a very easy way to get that information.
The easiest way to collect the information is to make use of a PHP function called phpinfo(). The phpinfo() function will query your (or your host’s) server and generate a report with a long list of data. Note: Remember to bookmark this page, because, in the future, a volunteer in the [WordPress Support Forum](https://www.wordpress.org/support/forums/) may ask you to use this method to get information to assist them in troubleshooting a question you asked on the Support Forum.
**Warning:** This file will contain some moderately sensitive information about your server that could help an attacker gain access to it. Make sure that you give the file an obscure filename and delete it as soon as you’re done.
In a text editor, copy and paste the following command:
Make sure there are no spaces before or after the command, just the command, and save the file as something obscure like sffdsajk234.php. It’s important to make the file difficult for hackers to file, because it will contain information that could help them compromise your server.
Upload the file to the root directory of your site. Then type in the address to the file in your browser:
https://example.com/sffdsajk234.php
The result will be several pages long and it will contain a ton of information. Though your data may be in a different order, for the most part, you just need the summary items that lists things like this:
| | |
|----|----|
| PHP | Version 7.3.0 |
| System | Windows NT DESKTOP-LK01DAN 10.0 build 17763 (Windows 10) i586 |
| Build Date | Dec 6 2018 01:51:18 |
| Server API | Apache 2.0 Handler |
| Apache Version | Apache/2.4.37 (Win32) OpenSSL/1.1.1a PHP/7.3.0 |
That’s it. Make sure you remember to delete the file once you’re done with it, because leaving it there could help hackers compromise your server.
## Information and Resources
- [PHP.net’s phpinfo Manual](https://www.php.net/phpinfo)
- [Zend’s PHP Manual on phpinfo](https://www.zend.com/manual/function.phpinfo.php)
- [WordPress Environment PHP library](https://github.com/abelcallejo/wordpress-environment)
# Giving WordPress Its Own Directory
Many people want WordPress to power their website’s root (e.g. https://example.com) but they don’t want all of the WordPress files cluttering up their root directory. WordPress allows you to install it into a subdirectory, but have your website served from the website root.
**Note:** This guide covers configuration for Apache (`.htaccess`), nginx (server blocks), and IIS (`web.config`).
As of [Version 3.5](https://wordpress.org/documentation/wordpress-version/version-3-5/), Multisite users may use all of the functionality listed below. If you are running a version of WordPress older than 3.5, please update before installing a Multisite WordPress install on a subdirectory.
**Note to theme/plugin developers:** this will not separate your code from WordPress. Themes and plugins will still reside under `wp-content` folder.
## Moving a Root install to its own directory
Let’s say you’ve installed WordPress at `example.com`. Now you have two different methods to move WordPress installations into a subdirectory:
1. Without change of SITE-URL (remains `example.com`)
2. With change in SITE-URL (it will redirect to `example.com/subdirectory`)
## Method I (Without URL change)
1. After Installing WordPress in the root folder, move EVERYTHING from the root folder into a subdirectory.
### Apache (.htaccess)
1. Create a `.htaccess` file in the root folder, and put this content inside (just change `example.com` and `my_subdir`):
RewriteEngine on
RewriteCond %{HTTP_HOST} ^(www.)?example.com$
RewriteCond %{REQUEST_URI} !^/my_subdir/
RewriteCond %{REQUEST_FILENAME} !-f
RewriteCond %{REQUEST_FILENAME} !-d
RewriteRule ^(.*)$ /my_subdir/$1
RewriteCond %{HTTP_HOST} ^(www.)?example.com$
RewriteRule ^(/)?$ my_subdir/index.php [L]
### nginx (server block)
1. Add this to your nginx server block:
``` nginx
location /my_subdir/ {
try_files $uri $uri/ /my_subdir/index.php?$args;
}
location ~ \.php$ {
fastcgi_split_path_info ^(.+\.php)(/.*)$;
fastcgi_pass unix:/var/run/php/php8.3-fpm.sock;
fastcgi_param SCRIPT_FILENAME $document_root$fastcgi_script_name;
include fastcgi_params;
}
```
That’s all 🙂
## Method II (With URL change)
### Moving process
*(p.s. If you’ve already installed WP in subdirectory, some steps might be already done automatically).*
1. Create the new location for the core WordPress files to be stored—we will use `/wordpress` in our examples. On Linux, use `mkdir wordpress` from your `www` directory. You’ll probably want to use `chown apache:apache` on the `wordpress` directory you created.
2. Go to the [General](https://wordpress.org/documentation/article/administration-screens/#settings-configuration-settings) screen.
3. In **WordPress address (URL):** set the address of your main WordPress core files. Example: \`https://example.com/wordpress\`.
4. In **Site address (URL):** set root directory’s URL. Example: \`https://example.com\`.
5. Click **Save Changes**. Do not worry about the errors that happen now! Continue reading.
6. Now move your WordPress core files (from root directory) to the subdirectory.
7. Copy (NOT MOVE!) the `index.php` and `.htaccess` files from the WordPress directory into the root directory of your site (Blog address). The `.htaccess` file is invisible, so you may have to set your FTP client to [show hidden files](https://developer.wordpress.org/advanced-administration/server/file-permissions/#Unhide_the_hidden_files). If you are not using [pretty permalinks](https://wordpress.org/documentation/article/using-permalinks/#using-pretty-permalinks), then you may not have a .`htaccess` file. ***If you are running WordPress on a Windows (IIS) server** and are using pretty permalinks, you’ll have a `web.config` rather than a `.htaccess` file in your WordPress directory. For the `index.php` file the instructions remain the same, copy (don’t move) the index.php file to your root directory. The `web.config` file must be treated differently than the `.htaccess` file so you must MOVE (DON’T COPY) the `web.config` file to your root directory.*
8. Open your root directory’s `index.php` file in a [text editor](https://wordpress.org/documentation/article/glossary#text-editor).
9. Change the following and save the file. Change the line that says:`require dirname( __FILE__ ) . '/wp-blog-header.php';`to the following, using your directory name for the WordPress core files: `require dirname( __FILE__ ) . '/wordpress/wp-blog-header.php';`.
10. Login to the new location. It might now be \`https://example.com/wordpress/wp-admin/\`.
11. If you have set up [Permalinks](https://wordpress.org/documentation/article/using-permalinks/), go to the [Permalinks Screen](https://wordpress.org/documentation/article/administration-screens/#permalinks) and update your Permalink structure. WordPress will automatically update your `.htaccess` file if it has the appropriate file permissions. If WordPress can’t write to your `.htaccess` file, it will display the new rewrite rules to you, which you should manually copy into your `.htaccess` file (in the same directory as the main `index.php` file).
### .htaccess modification
In some cases, some people like to install separate versions in a subdirectory (such as `/2010`, `/2011`, `/latest` and etc..), and want that website (by default) used the latest version, then Install WordPress in a subdirectory, such as `/my_subdir` and in your root folder’s .htaccess file add the following (just change the words as you need):
**Apache (.htaccess):**
RewriteEngine On
RewriteCond %{HTTP_HOST} ^(www.)?example.com$
RewriteRule ^(/)?$ my_subdir\[L\]
**nginx (server block):**
``` nginx
location = / {
return 301 /my_subdir/;
}
location /my_subdir/ {
try_files $uri $uri/ /my_subdir/index.php?$args;
}
location ~ \.php$ {
fastcgi_split_path_info ^(.+\.php)(/.*)$;
fastcgi_pass unix:/var/run/php/php8.3-fpm.sock;
fastcgi_param SCRIPT_FILENAME $document_root$fastcgi_script_name;
include fastcgi_params;
}
```
Now when users go to your root domain (`example.com`), it will automatically redirect to the subdirectory you specified.
Note: This code comes from Site 5’s post here: [How to Redirect Your Domain to a Subfolder Using .htaccess](https://qa.site5.com/advanced/how-to-redirect-your-domain-to-a-subfolder-using-htaccess/).
## Moving Specific WordPress Folders
The following links explain how to change specific directories within WordPress:
- [Moving wp-content folder](https://wordpress.org/documentation/article/editing-wp-config-php/#moving-wp-content-folder)
- [Moving Plugin Folder](https://wordpress.org/documentation/article/editing-wp-config-php/#moving-plugin-folder)
- [Moving Themes Folder](https://wordpress.org/documentation/article/editing-wp-config-php/#moving-themes-folder)
- [Moving Uploads Folder](https://wordpress.org/documentation/article/editing-wp-config-php/#moving-uploads-folder)
## See also
- [Using Caddy to give WordPress its own directory](https://caddy.community/t/using-caddy-to-give-wordpress-its-own-directory/13185)
# Configuring Wildcard Subdomains
Wildcard subdomains are useful to allow end users of a domain-based WordPress [multisite](https://wordpress.org/documentation/article/wordpress-glossary/#multisite) network to create new sites on demand. In this type of network each new site has its own subdomain, and the wildcard configuration means that those subdomains do not have to be configured individually. For information on how to create a multisite network, see: [Create A Network](https://developer.wordpress.org/advanced-administration/multisite/create-network/).
This page contains some examples of how to configure wildcard subdomains in different circumstances. If you cannot determine how to set up wildcard subdomains on your particular web server, *contact your webhost* for directions.
## Apache
In the `httpd.conf` file, or in the include file containing the `VirtualHost` section for your web account, add a line like this (if it is not already present):
ServerAlias *.example.com
Also create a wildcard DNS record like:
*.example.com A 192.0.2.1
## CPanel
Make a sub-domain named “\*” (wildcard) at your CPanel (`*.example.com`). Make sure to point this at the same folder location where your `wp-config.php` file is located.
## Plesk
There are several steps that differ when setting up the server for wildcard subdomains on a server using Plesk Panel compared to a server using cPanel (or no control panel). This article [Configuring Wildcard Subdomains for multi site under Plesk Control Panel](https://codex.wordpress.org/Configuring_Wildcard_Subdomains_for_multi_site_under_Plesk_Control_Panel) details all the steps involved.
## DirectAdmin
Click “User Panel” -\> DNS Management -\> add the following three entries using the three columns:
* A 192.0.2.1
Click “Admin Panel” (If you have no “admin panel” ask your host to do this) -\> Custom Httpd -\> yourdomain.com -\> In the text input area, just paste and “save” precisely the following:
ServerAlias *.|DOMAIN|
*If you ever need to un-do a custom Httpd: return here, delete text from input area, save.*
- DirectAdmin.com: [Apache Wildcard Documentation](https://help.directadmin.com/item.php?id=127). DirectAdmin.com forum: [WordPress wildcard subdomains](https://forum.directadmin.com/threads/wildcard-subdomains-yea-i-know-its-a-common-one.29074/#post-195033).
## Amazon Web Services
AWS instances are not assigned a permanent IP address by default. This means that a “server’s” IP address may change when it is rebooted. To resolve this issue, assign an Elastic IP Address to your server instance and use that IP address when configuring the A record with your registrar.
AWS Elastic Load Balancers cannot be assigned an elastic IP, therefore you must use a CName to give them a friendly URL. You cannot have a CName to a root URL. Therefore you must point the domain root (example.com) at a specific server instance with an Elastic IP address and create a wildcard CName (\*.example.com) and point that at your Elastic Load Balancer. In your .htaccess, then just redirect all domain root traffic (example.com) to a specific sub-domain (www.example.com).
**Notes:**
- Some registrars do not currently support wildcard CNames.
- Amazon’s Route53 Domain Name Service eliminates the CName issue, but at an additional cost.
# Emptying a Database Table
Plugins which generate site statistics for you can rapidly create large amounts of data — every visitor causes something to be written to the database. Ordinarily, this is not a problem, but if your database size is limited by your host it could be. Also, if you are moving the database for whatever reason, its size will impact the export and import time. This page will show you how to empty a table, thus resetting its contents and size to zero. This does not stop the statistics plugins from working or otherwise damage your database.
[phpMyAdmin](https://developer.wordpress.org/advanced-administration/upgrade/phpmyadmin/) is the name of the program used to manipulate your database. A good hosting package will have this included. [Accessing phpMyAdmin](https://developer.wordpress.org/advanced-administration/security/backup/#accessing-phpmyadmin) offers information on accessing phpMyAdmin under various server control panels.
The procedure outlined in this article has been tried and tested using phpMyAdmin versions 2.5.3 and 2.5.7 pl1 running on Unix.
**Note:** When making significant changes like this to your database, you should always create a BACKUP!
See [WordPress Backups](https://developer.wordpress.org/advanced-administration/security/backup/) and [Backing Up Your Database](https://developer.wordpress.org/advanced-administration/security/backup/database/) for details.
## The Process
1. Login to phpMyAdmin on your server.
2. From the left side bar, select your WordPress database.
1. All the tables in the WordPress database will appear.
1. Click “Erase” button of the table you wish to empty. For this example, we will be emptying the “wp_dstats2” table.
**Note:** Your table may well have a different name, check the plugin’s documentation to find out what it is. DO NOT empty a table that is used by the WordPress core. (Please see the list under [Database_Description](https://codex.wordpress.org/Database_Description) for those specific table names.)
1. You will now get a confirmation screen.
**This is your last chance to check that you have the right table and database selected** — phpMyAdmin has no UNDO function, so once changes are committed, you are stuck with them. Unless, of course, you made that suggested back up.
1. Click “OK” and you will be returned to viewing all the tables in your database with the specified table’s contents emptied.
# Web servers
The web server is a piece of software that accepts user web requests and serves them the appropriate result. Many different web servers run on other operation systems. Generally, if your web server supports and executes PHP files, it should be able to work with WordPress.
## Apache HTTPD
See [Apache HTTPD / .htaccess](https://developer.wordpress.org/advanced-administration/server/web-server/httpd/)
## nginx
See [Nginx](https://developer.wordpress.org/advanced-administration/server/web-server/nginx/).
# Control Panels
## WP Toolkit for cPanel & WHM and Plesk
WP Toolkit is a single management interface that allows you to install, configure, and manage WordPress® easily. WP Toolkit can install, configure, and manage WordPress versions 4.9 or later.
cPanel & WHM versions 102 and above install WP Toolkit by default. WP Toolkit is available in Plesk if the server administrator has installed the WP Toolkit extension.
## cPanel & WHM
This tutorial describes how to install WordPress in the cPanel & WHM control panel using WP Toolkit. For other options to install WordPress in cPanel & WHM, read cPanel’s [How to Install WordPress with cPanel](https://docs.cpanel.net/knowledge-base/third-party/how-to-install-wordpress-with-cpanel/) documentation.
To install WordPress via WP Toolkit, perform the following actions:
1. Log in to the cPanel interface with the information provided by your hosting company.
2. Select *WP Toolkit* from the lefthand menu bar. The *WP Toolkit* interface will appear.
3. Click *Install WordPress* to create a new WordPress installation.
### Install WordPress
In the *Install WordPress* interface, click *Install* to use the default settings. Or provide the following optional information to customize your installation, then click *Install*:
- The installation directory. By default, the installation uses the account’s `public_html` directory.
- The title for the website.
- The plugin or theme set.
- The language of the website.
- The version of WordPress to install. By default, the installation uses the current WordPress version.
- The WordPress Administrator username and password.
- The database name, table prefix, username and password.
- The automatic update settings for the WordPress software, plugins, and themes.
Click *Install Plugins* if you want to install plugins and themes, or click *No, thanks* to optionally install them later.
## Plesk
This tutorial provides step-by-step examples of installing Plesk WP Toolkit using the Plesk Web Installer.
### Using Web Installer
Install Plesk using Web Installer please open your browser and go to [get.plesk.com](https://get.plesk.com/). For Plesk installation, it is required a fresh Linux server with access to the Internet. You can install Plesk on any supported Linux-based OS.
Provide your server’s IP address or hostname, enter your root password, or just add a private key.
- Accept the terms of End-User License Agreement and click Install button.
- Relax and wait for some time to let the installation be finalized.
- Click on the Login link. No worries about “secure connection warnings”, just make an exception.
### Installing WordPress
- For an express installation, click Install (Quick). The latest version of WordPress will be installed, and the default settings will be used. The new instance will be available via HTTPS if SSL/TLS support is enabled for the domain.
- If you want to change the default installation settings, click Install (Custom). This enables you to set up the administrator user, select the desired WordPress version, specify the database name, select auto-update settings, and more.
### Managing WordPress Instances
Go to WordPress to see all your WordPress instances. WP Toolkit groups information about each instance in blocks we call cards.
A card shows a screenshot of your website and features several controls that give you easy access to frequently used tools. The screenshot changes in real time to reflect the changes you make to your website. For example, if you switch the maintenance mode on or change the WordPress theme, the screenshot of the website will change immediately.
### Tools
In the “Tools” section, click to access the following WP Toolkit features:
- “Sync” to synchronize the content of your website with another one.
- “Clone” to make a full copy of your website.
- “Manage Files” to manage the website’s files in File Manager.
- “Back Up/Restore” to create a backup of your website and restore it if necessary.
The controls below give you easy access to the following settings and tools:
- “Search engine indexing” shows your website in search results of search engines.
- “Caching (nginx)” speeds up the website load time and reduces server load.
- “Debugging” helps you debug a website that is not ready for viewing and being tested or developed.
- “Maintenance mode” hides your website’s content from visitors.
- “Password Protection” specifies the password you will use to log in to WordPress from Plesk.
# Mail
This page details the philosphy, operations, and the recommended practices for setting up the local mailing environment for WordPress.
## Prerequisites
Before starting, you’ll need to have a basic understanding of the [SMTP protocol](https://en.wikipedia.org/wiki/Simple_Mail_Transfer_Protocol) and the roles of each of the three mailing agents ([MUA](https://en.wikipedia.org/wiki/Mail_user_agent), [MTA](https://en.wikipedia.org/wiki/Message_transfer_agent), and [MDA](https://en.wikipedia.org/wiki/Message_delivery_agent)).
## WordPress’s Philosophy on Mailing
WordPress has never provided either a MUA or an MTA by default. It only provides a wrapper for a language API library that handles the submission of a message to an MTA which can interact either with PHP `mail()` function or the `SMTP` extension.
This means, that its the server administrator’s responsibility to configure the MTA and the related mailing environment properly to interact with the chosen language API. Historically, [PHPMailer](https://github.com/PHPMailer/PHPMailer) has been this library of choice. WordPress is not involved in the process of sending emails but only in the process of formatting the message to submit it to this mailing API.
## How WordPress’s Mailing operates out-of-the-box
Currently, WordPress uses the `wp_mail()` wrapping function. By default configuration, this wrapper informs the PHPMailer library to use the PHP’s internal `mail()` function that requires the presence of a sendmail-compatible binary acting as the MTA. Hence, in order for WordPress to work out-of-the-box, one needs to have the related mailing local environment properly configured.
This is generally not a problem if you are using a managed hosting service, but if you are running your own server and do not have a SMTP server (MTA) set up and/or the related mailing environment properly configured, the outgoing mail won’t be sent, unless you configure WordPress’ wrapper to use a remote SMTP server.
## Recommended Actions
Besides the technical aspects, it’s worthwhile to outline the recommended solutions given the different scenarios so the admins do not end up choosing solutions that don’t fit them.
If your WordPress site is on managed hosting, there is typically nothing extra that needs to be done to send emails, but some additional actions to ensure deliverability as explained below may be required. Mail originating from your WordPress install should work out-of-the-box. All mailing related questions should be directed to your webhost, and you may want to check if the host provides the option to configure a SMTP relay through their admin panel.
If you’re on a self-managed hosting platform (i.e. running your own server), there are typically three ways you can setup your mail service:
- **Setup a local MTA or a dedicated mail server that can send mail directly**. With this method, you as the admin are responsible for everything. Please keep in mind that even if you’ve configured all of the related software correctly, you may still run into issues, as mail deliverability extends into factors outside of your control, such as IP reputation. Due to the amount of overhead and ongoing maintenance required, this method is typically reserved for server administrators with experience in this field, because of the potential to run into serious deliverability troubles.
- **Setup a local MTA and have it relay mail to a third party mailing service**. This is the recommended method for most self-hosted setups because it is easier to implement than the previous one, and still retains compatibility with WordPress’ philosophy. If you don’t want to deal with the complexity of mail deliverability issues in running your full MTA, this is way to go. In fact, some smaller web hosts utilize this method (they would hold a business account with the third party mailing services and relay all the mails to the mailing service). If you host and manage your own site and you are sending a sizable number of emails through WordPress, this method is also ideal, as you delegate the responsibility to the third party mailing service. Like the first method, be aware that this option is not exempt of risks, as explained in the next section. Setting up your MTA always requires some level of server management expertise, even if you are relying on a third party mailing service.
- **Configure a SMTP relay via code to utilize a third party mailing service**. This is the recommended method if you are not going to handle a high volume of emails or you don’t want to deal with the complexity of mail deliverability issues in running a self-hosted MTA. Be aware that this method [will cause a performance degradation](https://konstantin.blog/2021/wp_mail-is-not-broken/) for many reasons.
## Setting up your own MTA
If you choose to set up your MTA, either for local or third party relay, this section briefly explains the basics of setting up an MTA in both \*NIX and Windows environments. Before we go into the details, be aware that there are some risks in this approach. Port 25 has to be open, which can be problematic if you are not careful, as it is one of the most common attack vectors. If you don’t protect the SMTP relay authentication properly, you might end up with a security issue or having your server being used for spamming.
### \*NIX Server Basics
If you are running your own \*NIX server, you should have either `postfix` `exim`, `qmail` or `sendmail` as the most popular MTA, on your machine and just need to set them up (you may search on the web for how-tos). If you wish to use a third party mailing service, the recommended practice is to setup your local MTA to relay mail to the remote SMTP server as this will prevent the page load time from suffering.
### Windows Host Server Specific
Check your “Relay” settings on the SMTP Virtual Server. Grant access to `127.0.0.1` . Then in your `php.ini` file, set the `SMTP` setting to the same IP address. Also set `smtp_port` to `25`.
On a Windows machine, try a sendmail emulator like [Fake sendmail for Windows with TLS v1.2 support](https://github.com/sendmail-tls1-2/main).
### Alternative Solutions to MTA Setup
If you do not want to manually setup a complete MTA in your box, there are some other options:
- Use a relay MTA in place of a local full-featured MTA: for example, [msmtp-mta](https://wiki.debian.org/msmtp) is a simplified MTA that can be used to relay emails using a remote SMTP server (i.e. a remote MTA). The package provides a `/usr/sbin/sendmail` symlink to `msmtp` and has sendmail compatible interface that other software can use directly.
- Use SMTP plugins: You can install [SMTP plugins](https://wordpress.org/plugins/search/smtp/) from the WP.org plugin directory. These type of plugins override `wp_mail()` default settings to use PHPMailer or any other mailing library of their choice, which utlize remote third party mailing services to send mail on your behalf of your domain.
### Ensuring Deliverability
Once we have our system sending mails, we need to ensure that they are actually delivered to the recipients. There are a few things we need to check:
#### Ensure Proper Return Address is Used
By default, the WordPress wrapper fills in the `From:` field with `wordpress@example.com` and the `From:` name as *WordPress*. This is fine if this is a valid e-mail address. For example, if your domain is `example.com`, your host will pass `wordpress@example.com` on for delivery. It will probably send your mail as long as `example.com` is setup to send and receive mail, even if `wordpress` is not a valid mailbox. Some old mail delivery agents will check if the `From:` address is valid and can receive mail. This check is becoming less common nowadays, but we recommend to make sure to use a valid email address and the mailbox exists in your receiving mail server. If you are using the default `From:` address, simply verify that you can receive mail in the `wordpress@example.com` mailbox. Remember that `example.com` is the domain of your WordPress installation.
If you don’t want to send the emails from the same domain as the one exhibited in your installation, then you must introduce some code changes in your WordPress. For example, if your WP domain is `example.org` but you want to send emails from `mail.example.org`, the mail may not send because the DNS records of `example.org` may not authorize emails to be handled by your mail server, as the default `From:` address will be `wordpress@wordpress.org`. To change the default `From:` address, your WordPress can [use the `wp_mail_from` filter](https://developer.wordpress.org/reference/hooks/wp_mail_from/). For the name, you can use [the `wp_mail_from_name` filter](https://developer.wordpress.org/reference/hooks/wp_mail_from_name/).
It may be possible to force the `From:` address configuration in your configured MTA server. Refer to the related documentation for your MTA.
#### The Reply-To Address
The WordPress wrapper ignores the `Reply-To:`, so it will be coincidental with the `From:` address, following the example above, `wordpress@example.com` by default. If you want your users to be able to reply to sent emails, make sure that this mailbox exists on your receiving mail server. The default `Reply-To:` is always going to be the same as the `From:` address, unless you explicitly set it to a different address in the mail headers.
There is only one scenario where the `Reply-To:` address is set automatically: when we are sending an email to a user that commented on a post. In this case, the `Reply-To:` address will be set to the email address that the commenter explicitely specified.
### Troubleshooting Spam Deliverability Issues
Your email message may have been routed to a spam folder or even worse, simply discarded as malicious. There are a couple measures you can use to convince recipient’s mail servers that your message is legitimate and should be delivered as addressed. Setting up SPF, DKIM and DMARC records is a critical step to ensure deliverability. There are multiple guides online that will help you set up these records. Below is an explanation as to why these records are beneficial.
#### SPF (Sender Policy Framework)
This is the most common anti-spam measure used. The MDA checks the SPF record of the sender’s domain to see if it is authorized to send mail for that domain. The SPF is a TXT DNS record that you need to add, or check if your host has added it for you, that lists the IP addresses or hostnames authorized to send mail for that domain. This ensures that the mail is not coming from an unauthorized source. So, for example, if an unknown server IP address sends an email with your domain name in the `From:` field, thanks to the SPF DNS record, the MDA will reject the mail as spam. But if you don’t configure this properly in your DNS records, your emails may also be rejected as spam.
Just remember, if you are sending emails through different servers, including your WordPress installation, you need to add all the addresses to the SPF record.
#### DKIM (Domain Key Identified Mail)
This anti-spam integrity authentication check has gained a lot of traction in the last few years, and has been implemented by most major email providers. You can use both SPF and DKIM in the same message. Again, just as with SPF, you can check if your receiving mailserver verified your host’s domain key by examining the mail header. As with SPF, if you can edit your TXT DNS records, you can set up DKIM credentials yourself. If you are in a managed hosting environment, check with your hosting provider if they have set this up for you, as it is common practice.
If you have to manage this by yourself, there are multiple methods to send the right DKIM signature in your emails:
- Configure your MTA to sign the email with the DKIM signature.
- Some SMTP plugins have a DKIM signature option.
- Use `PHPMailer` library to set the DKIM signature. For this, you may need to [hook to the `phpmailer_init` action](https://developer.wordpress.org/reference/hooks/phpmailer_init/) and follow the PHPMailer library’s documentation (this is not officially documented, check [this post for more details](https://stackoverflow.com/a/24464694/4442122).
Also make sure to generate your DKIM keys with the correct domain information and publish the DNS record accordingly. When you add the DKIM public key to your DNS records, the MDA will check for your email header DKIM-Signature and verify the signature. If the signature is invalid, the MDA will reject the mail as spam. This is meant to avoid emails being spoofed and sent from an unauthorized source. DKIM and SPF are used together to ensure the email is legitimate and should be delivered as addressed.
#### DMARC (Domain-based Message Authentication, Reporting & Conformance)
The DMARC record is another TXT DNS record that you need to add or check if your hosting has added it for you, that lists the actions to take when the email has not passed the SPF or DKIM checks. DMARC is becoming almost mandatory, so to ensure deliverability, we recommend setting it up. You can read more about it [here](https://dmarc.org/).
# Nginx
While the LAMP stack (Linux + Apache + MySQL + PHP) is very popular for powering WordPress, it is also possible to use Nginx. WordPress supports Nginx, and some large WordPress sites, such as WordPress.com, are powered by Nginx.
When talking about Nginx, it is important to know that there are multiple ways to implement Nginx. It can be setup as a reverse-proxy in front of Apache, which is a very powerful setup that allows you to use all of the features and power of Apache, while benefiting from the speed of Nginx. Most websites that report using Nginx as the server (based on stats gathered from HTTP response headers), are actually Apache running with Nginx as the reverse proxy. (The HTTP response headers showing “Nginx” are being reported by the reverse-proxy, not the server itself.)
**This guide is referring to a standalone Nginx setup, where it is used as the primary server instead of Apache.** It should be noted that Nginx is not a completely interchangeable substitute for Apache. There are a few key differences affecting WordPress implementation that you need to be aware of before you proceed:
- With Nginx there is no directory-level configuration file like Apache’s .htaccess or IIS’s web.config files. All configuration has to be done at the server level by an administrator, and WordPress cannot modify the configuration, like it can with Apache or IIS.
- Pretty Permalinks functionality is slightly different when running Nginx.
- Since Nginx does not have .htaccess-type capability and WordPress cannot automatically modify the server configuration for you, it cannot generate the rewrite rules for you.
- Without modifications to your install, “index.php” will be added to your Permalinks. (There are ways to mitigate this with plugins (see below) and/or adding custom code to your child theme’s functions.php.)
- However, if you do want to have some (limited) .htaccess capability, it is technically possible to do add by installing the [htscanner PECL extension for PHP](https://www.php.net/manual/en/book.htscanner.php). (However, this is not a perfect solution so be sure to test and debug thoroughly before using on a live site.)
This guide is not going to cover how to install and configure Nginx, so this assumes that you have already installed Nginx and have a basic understanding of how to work with and debug it.
## Generic and Multi-Site Support
To make WordPress work with Nginx you have to configure the backend php-cgi. The options available are `fastcgi` or `php-fpm`. Here, php-fpm is being used because it is included with PHP 5.3+, so installing it is straight forward.
The Nginx configuration has been broken up into five distinct files and is heavily commented to make each option easier to understand. The [author](https://wordpress.org/support/users/bigsite/) also made a best-effort attempting to follow “best practices” for nginx configurations.
### Main (generic) startup file
This is equivalent to /etc/nginx/nginx.conf (or /etc/nginx/conf/nginx.conf if you’re using Arch Linux).
# Generic startup file.
user {user} {group};
#usually equal to number of CPUs you have. run command "grep processor /proc/cpuinfo | wc -l" to find it
worker_processes auto;
worker_cpu_affinity auto;
error_log /var/log/nginx/error.log;
pid /var/run/nginx.pid;
# Keeps the logs free of messages about not being able to bind().
#daemon off;
events {
worker_connections 1024;
}
http {
#rewrite_log on;
include mime.types;
default_type application/octet-stream;
access_log /var/log/nginx/access.log;
sendfile on;
#tcp_nopush on;
keepalive_timeout 3;
#tcp_nodelay on;
#gzip on;
#php max upload limit cannot be larger than this
client_max_body_size 13m;
index index.php index.html index.htm;
# Upstream to abstract backend connection(s) for PHP.
upstream php {
#this should match value of "listen" directive in php-fpm pool
server unix:/tmp/php-fpm.sock;
# server 127.0.0.1:9000;
}
include sites-enabled/*;
}
### Per Site configuration
# Redirect everything to the main site. We use a separate server statement and NOT an if statement - see https://www.nginx.com/resources/wiki/start/topics/depth/ifisevil/
server {
server_name _;
return 302 $scheme://example.com$request_uri;
}
server {
server_name example.com;
root /var/www/example.com;
index index.php;
include global/restrictions.conf;
# Additional rules go here.
# Only include one of the files below.
include global/wordpress.conf;
# include global/wordpress-ms-subdir.conf;
# include global/wordpress-ms-subdomain.conf;
}
Splitting sections of the configuration into multiple files allows the same logic to be reused over and over. A ‘global’ subdirectory is used to add extra rules for general purpose use (either /etc/nginx/conf/global/ or /etc/nginx/global/ depending on how your nginx install is set up).
### Global restrictions file
# Global restrictions configuration file.
# Designed to be included in any server {} block.
location = /favicon.ico {
log_not_found off;
access_log off;
}
location = /robots.txt {
allow all;
log_not_found off;
access_log off;
}
# Deny all attempts to access hidden files such as .htaccess, .htpasswd, .DS_Store (Mac).
# Keep logging the requests to parse later (or to pass to firewall utilities such as fail2ban)
location ~ /\. {
deny all;
}
# Deny access to any files with a .php extension in the uploads directory
# Works in sub-directory installs and also in multisite network
# Keep logging the requests to parse later (or to pass to firewall utilities such as fail2ban)
location ~* /(?:uploads|files)/.*\.php$ {
deny all;
}
### General WordPress rules
For single site installations, here is the `global/wordpress.conf` file:
# WordPress single site rules.
# Designed to be included in any server {} block.
# Upstream to abstract backend connection(s) for php
upstream php {
server unix:/tmp/php-cgi.socket;
server 127.0.0.1:9000;
}
server {
## Your website name goes here.
server_name domain.tld;
## Your only path reference.
root /var/www/wordpress;
## This should be in your http block and if it is, it's not needed here.
index index.php;
location = /favicon.ico {
log_not_found off;
access_log off;
}
location = /robots.txt {
allow all;
log_not_found off;
access_log off;
}
location / {
# This is cool because no php is touched for static content.
# include the "?$args" part so non-default permalinks doesn't break when using query string
try_files $uri $uri/ /index.php?$args;
}
location ~ \.php$ {
#NOTE: You should have "cgi.fix_pathinfo = 0;" in php.ini
include fastcgi.conf;
fastcgi_intercept_errors on;
fastcgi_pass php;
}
location ~* \.(js|css|png|jpg|jpeg|gif|ico)$ {
expires max;
log_not_found off;
}
}
This is more up-to-date example for Nginx: https://www.nginx.com/resources/wiki/start/topics/recipes/wordpress/
### WordPress Multisite
For multisite installations, use one of the below sections for the `global/wordpress.conf` file, depending on the version of WordPress that was in use when multisite was *activated*, as well as the domain/subdirectory configuration.
#### WordPress 3.5 and up
If you activated Multisite on WordPress 3.5 or later, use one of these.
##### WordPress 3.5 and up Subdirectory Examples
# WordPress multisite subdirectory config file for WP 3.5 and up.
server {
server_name example.com ;
root /var/www/example.com/htdocs;
index index.php;
if (!-e $request_filename) {
rewrite /wp-admin$ $scheme://$host$request_uri/ permanent;
rewrite ^(/[^/]+)?(/wp-.*) $2 last;
rewrite ^(/[^/]+)?(/.*\.php) $2 last;
}
location / {
try_files $uri $uri/ /index.php?$args ;
}
location ~ \.php$ {
try_files $uri =404;
include fastcgi_params;
fastcgi_pass php;
}
#add some rules for static content expiry-headers here
}
##### WordPress 3.5 and up Subdomains Examples
# WordPress multisite subdomain config file for WP 3.5 and up.
server {
server_name example.com *.example.com ;
root /var/www/example.com/htdocs;
index index.php;
location / {
try_files $uri $uri/ /index.php?$args ;
}
location ~ \.php$ {
try_files $uri =404;
include fastcgi_params;
fastcgi_pass php;
}
#add some rules for static content expiry-headers here
}
#### WordPress 3.4 and below
If you originally activated Multisite with WordPress with 3.4 or older, you need to use one of these:
##### WordPress \<=3.4 Subdirectory Examples
# WordPress multisite subdirectory config file for WP 3.4 and below.
map $uri $blogname{
~^(?P/[^/]+/)files/(.*) $blogpath ;
}
map $blogname $blogid{
default -999;
#Ref: https://wordpress.org/extend/plugins/nginx-helper/
#include /var/www/wordpress/wp-content/plugins/nginx-helper/map.conf ;
}
server {
server_name example.com ;
root /var/www/example.com/htdocs;
index index.php;
location ~ ^(/[^/]+/)?files/(.+) {
try_files /wp-content/blogs.dir/$blogid/files/$2 /wp-includes/ms-files.php?file=$2 ;
access_log off; log_not_found off; expires max;
}
#avoid php readfile()
location ^~ /blogs.dir {
internal;
alias /var/www/example.com/htdocs/wp-content/blogs.dir ;
access_log off; log_not_found off; expires max;
}
if (!-e $request_filename) {
rewrite /wp-admin$ $scheme://$host$request_uri/ permanent;
rewrite ^(/[^/]+)?(/wp-.*) $2 last;
rewrite ^(/[^/]+)?(/.*\.php) $2 last;
}
location / {
try_files $uri $uri/ /index.php?$args ;
}
location ~ \.php$ {
try_files $uri =404;
include fastcgi_params;
fastcgi_pass php;
}
#add some rules for static content expiry-headers here
}
NGINX provides 2 special directive: X-Accel-Redirect and map. Using these 2 directives, one can eliminate performance hit for static-file serving on WordPress multisite network.
##### WordPress \<=3.4 Subdomains Examples
# WordPress multisite subdomain config file for WP 3.4 and below.
map $http_host $blogid {
default -999;
#Ref: https://wordpress.org/extend/plugins/nginx-helper/
#include /var/www/wordpress/wp-content/plugins/nginx-helper/map.conf ;
}
server {
server_name example.com *.example.com ;
root /var/www/example.com/htdocs;
index index.php;
location / {
try_files $uri $uri/ /index.php?$args ;
}
location ~ \.php$ {
try_files $uri =404;
include fastcgi_params;
fastcgi_pass php;
}
#WPMU Files
location ~ ^/files/(.*)$ {
try_files /wp-content/blogs.dir/$blogid/$uri /wp-includes/ms-files.php?file=$1 ;
access_log off; log_not_found off; expires max;
}
#WPMU x-sendfile to avoid php readfile()
location ^~ /blogs.dir {
internal;
alias /var/www/example.com/htdocs/wp-content/blogs.dir;
access_log off; log_not_found off; expires max;
}
#add some rules for static content expiry-headers here
}
Ref: https://www.nginx.com/resources/wiki/start/topics/recipes/wordpress/
### HTTPS in Nginx
Enabling HTTPS in Nginx is relatively simple.
server {
# listens both on IPv4 and IPv6 on 443 and enables HTTPS and HTTP/2 support.
# HTTP/2 is available in nginx 1.9.5 and above.
listen *:443 ssl;
listen [::]:443 ssl;
http2 on;
# indicate locations of SSL key files.
ssl_certificate /srv/www/ssl/ssl.crt;
ssl_certificate_key /srv/www/ssl/ssl.key;
ssl_dhparam /srv/www/master/ssl/dhparam.pem;
# indicate the server name
server_name example.com *.example.com;
# Enable HSTS. This forces SSL on clients that respect it, most modern browsers. The includeSubDomains flag is optional.
add_header Strict-Transport-Security "max-age=31536000; includeSubDomains";
# Set caches, protocols, and accepted ciphers. This config will merit an A+ SSL Labs score as of Sept 2015.
ssl_session_cache shared:SSL:20m;
ssl_session_timeout 10m;
ssl_protocols TLSv1 TLSv1.1 TLSv1.2;
ssl_prefer_server_ciphers on;
ssl_ciphers 'ECDH+AESGCM:ECDH+AES256:ECDH+AES128:DH+3DES:!ADH:!AECDH:!MD5';
}
Mozilla offers an [excellent SSL config generation tool](https://mozilla.github.io/server-side-tls/ssl-config-generator/) as well.
### WP Super Cache Rules
# WP Super Cache rules.
# Designed to be included from a 'wordpress-ms-...' configuration file.
set $cache_uri $request_uri;
# POST requests and urls with a query string should always go to PHP
if ($request_method = POST) {
set $cache_uri 'null cache';
}
if ($query_string != "") {
set $cache_uri 'null cache';
}
# Don't cache uris containing the following segments
if ($request_uri ~* "(/wp-admin/|/xmlrpc.php|/wp-(app|cron|login|register|mail).php|wp-.*.php|/feed/|index.php|wp-comments-popup.php|wp-links-opml.php|wp-locations.php|sitemap(_index)?.xml|[a-z0-9_-]+-sitemap([0-9]+)?.xml)") {
set $cache_uri 'null cache';
}
# Don't use the cache for logged in users or recent commenters
if ($http_cookie ~* "comment_author|wordpress_[a-f0-9]+|wp-postpass|wordpress_logged_in") {
set $cache_uri 'null cache';
}
# START MOBILE
# Mobile browsers section to server them non-cached version. COMMENTED by default as most modern wordpress themes including twenty-eleven are responsive. Uncomment config lines in this section if you want to use a plugin like WP-Touch
# if ($http_x_wap_profile) {
# set $cache_uri 'null cache';
#}
#if ($http_profile) {
# set $cache_uri 'null cache';
#}
#if ($http_user_agent ~* (2.0\ MMP|240x320|400X240|AvantGo|BlackBerry|Blazer|Cellphone|Danger|DoCoMo|Elaine/3.0|EudoraWeb|Googlebot-Mobile|hiptop|IEMobile|KYOCERA/WX310K|LG/U990|MIDP-2.|MMEF20|MOT-V|NetFront|Newt|Nintendo\ Wii|Nitro|Nokia|Opera\ Mini|Palm|PlayStation\ Portable|portalmmm|Proxinet|ProxiNet|SHARP-TQ-GX10|SHG-i900|Small|SonyEricsson|Symbian\ OS|SymbianOS|TS21i-10|UP.Browser|UP.Link|webOS|Windows\ CE|WinWAP|YahooSeeker/M1A1-R2D2|iPhone|iPod|Android|BlackBerry9530|LG-TU915\ Obigo|LGE\ VX|webOS|Nokia5800)) {
# set $cache_uri 'null cache';
#}
#if ($http_user_agent ~* (w3c\ |w3c-|acs-|alav|alca|amoi|audi|avan|benq|bird|blac|blaz|brew|cell|cldc|cmd-|dang|doco|eric|hipt|htc_|inno|ipaq|ipod|jigs|kddi|keji|leno|lg-c|lg-d|lg-g|lge-|lg/u|maui|maxo|midp|mits|mmef|mobi|mot-|moto|mwbp|nec-|newt|noki|palm|pana|pant|phil|play|port|prox|qwap|sage|sams|sany|sch-|sec-|send|seri|sgh-|shar|sie-|siem|smal|smar|sony|sph-|symb|t-mo|teli|tim-|tosh|tsm-|upg1|upsi|vk-v|voda|wap-|wapa|wapi|wapp|wapr|webc|winw|winw|xda\ |xda-)) {
# set $cache_uri 'null cache';
#}
#END MOBILE
# Use cached or actual file if they exists, otherwise pass request to WordPress
location / {
try_files /wp-content/cache/supercache/$http_host/$cache_uri/index.html $uri $uri/ /index.php?$args ;
}
**Experimental modifications:**
If you are using HTTPS, the latest development version of WP Super Cache may use a different directory structure to differentiate between HTTP and HTTPS. try_files line may look like below:
location / {
try_files /wp-content/cache/supercache/$http_host/$cache_uri/index-https.html $uri $uri/ /index.php?$args ;
}
### W3 Total Cache Rules
W3 Total Cache uses different directory structure for disk-based cache storage depending on WordPress configuration.
Cache validation checks will remain common as shown below:
#W3 TOTAL CACHE CHECK
set $cache_uri $request_uri;
# POST requests and urls with a query string should always go to PHP
if ($request_method = POST) {
set $cache_uri 'null cache';
}
if ($query_string != "") {
set $cache_uri 'null cache';
}
# Don't cache uris containing the following segments
if ($request_uri ~* "(/wp-admin/|/xmlrpc.php|/wp-(app|cron|login|register|mail).php|wp-.*.php|/feed/|index.php|wp-comments-popup.php|wp-links-opml.php|wp-locations.php|sitemap(_index)?.xml|[a-z0-9_-]+-sitemap([0-9]+)?.xml)") {
set $cache_uri 'null cache';
}
# Don't use the cache for logged in users or recent commenters
if ($http_cookie ~* "comment_author|wordpress_[a-f0-9]+|wp-postpass|wordpress_logged_in") {
set $cache_uri 'null cache';
}
#ADD mobile rules from WP SUPER CACHE section above
#APPEND A CODE BLOCK FROM BELOW...
**FOR Normal WordPress (without Multisite)**
Use following:
# Use cached or actual file if they exists, otherwise pass request to WordPress
location / {
try_files /wp-content/w3tc/pgcache/$cache_uri/_index.html $uri $uri/ /index.php?$args ;
}
**FOR Multisite with subdirectories**\
Use the following:
if ( $request_uri ~* "^/([_0-9a-zA-Z-]+)/.*" ){
set $blog $1;
}
set $blog "${blog}.";
if ( $blog = "blog." ){
set $blog "";
}
# Use cached or actual file if they exists, otherwise pass request to WordPress
location / {
try_files /wp-content/w3tc-$blog$host/pgcache$cache_uri/_index.html $uri $uri/ /index.php?$args ;
}
**FOR Multisite with Subdomains/Domain-mapping**\
Use following:
location / {
try_files /wp-content/w3tc-$host/pgcache/$cache_uri/_index.html $uri $uri/ /index.php?$args;
}
Notes
- Nginx can handle gzip & browser cache automatically so better leave that part to nginx.
- W3 Total Cache Minify rules will work with above config without any issues.
## Nginx fastcgi_cache
Nginx can perform caching on its own end to reduce load on your server. When you want to use Nginx’s built-in fastcgi_cache, you better compile nginx with [fastcgi_cache_purge](https://github.com/FRiCKLE/ngx_cache_purge) module. It will help nginx purge cache for a page when it gets edited. On the WordPress side, you need to install a plugin like [Nginx Helper](https://wordpress.org/plugins/nginx-helper/) to utilize fastcgi_cache_purge feature.
Config will look like below:
**Define a Nginx cache zone in http{…} block, outside server{…} block**
#move next 3 lines to /etc/nginx/nginx.conf if you want to use fastcgi_cache across many sites
fastcgi_cache_path /var/run/nginx-cache levels=1:2 keys_zone=WORDPRESS:500m inactive=60m;
fastcgi_cache_key "$scheme$request_method$host$request_uri";
fastcgi_cache_use_stale error timeout invalid_header http_500;
**For WordPress site config, in server{..} block add a cache check block as follow**
#fastcgi_cache start
set $no_cache 0;
# POST requests and urls with a query string should always go to PHP
if ($request_method = POST) {
set $no_cache 1;
}
if ($query_string != "") {
set $no_cache 1;
}
# Don't cache uris containing the following segments
if ($request_uri ~* "(/wp-admin/|/xmlrpc.php|/wp-(app|cron|login|register|mail).php|wp-.*.php|/feed/|index.php|wp-comments-popup.php|wp-links-opml.php|wp-locations.php|sitemap(_index)?.xml|[a-z0-9_-]+-sitemap([0-9]+)?.xml)") {
set $no_cache 1;
}
# Don't use the cache for logged in users or recent commenters
if ($http_cookie ~* "comment_author|wordpress_[a-f0-9]+|wp-postpass|wordpress_no_cache|wordpress_logged_in") {
set $no_cache 1;
}
**Then make changes to PHP handling block**
Just add this to the following php block. Note the line fastcgi_cache_valid 200 60m; which tells nginx only to cache 200 responses(normal pages), which means that redirects are not cached. This is important for multilanguage sites where, if not implemented, nginx would cache the main url in one language instead of redirecting users to their respective content according to their language.
fastcgi_cache_bypass $no_cache;
fastcgi_no_cache $no_cache;
fastcgi_cache WORDPRESS;
fastcgi_cache_valid 200 60m;
Such that it becomes something like this
location ~ [^/]\.php(/|$) {
fastcgi_split_path_info ^(.+?\.php)(/.*)$;
if (!-f $document_root$fastcgi_script_name) {
return 404;
}
# This is a robust solution for path info security issue and works with "cgi.fix_pathinfo = 1" in /etc/php.ini (default)
include fastcgi.conf;
fastcgi_index index.php;
# fastcgi_intercept_errors on;
fastcgi_pass php;
fastcgi_cache_bypass $no_cache;
fastcgi_no_cache $no_cache;
fastcgi_cache WORDPRESS;
fastcgi_cache_valid 200 60m;
}
**Finally add a location for conditional purge**
location ~ /purge(/.*) {
# Uncomment the following two lines to allow purge only from the webserver
# allow 127.0.0.1;
# deny all;
fastcgi_cache_purge WORDPRESS "$scheme$request_method$host$1";
}
If you get an ‘unknown directive “fastcgi_cache_purge”‘ error check that your Nginx installation has fastcgi_cache_purge module.
## Better Performance for Static Files in Multisite (WP \<= 3.4)
By default, on multisite networks activated prior to 3.5, a static file request brings php into picture i.e. `ms-files.php` file. You can get much better performance using Nginx `Map{..}` directive.
In Nginx config for your site, above `server{..}` block, add a section as follows:
map $http_host $blogid {
default 0;
example.com 1;
site1.example.com 2;
site1.com 2;
}
It is just a list of site-names and blog-ids. You can use [Nginx helper](https://wordpress.org/extend/plugins/nginx-helper) to get such a list of site-name/blog-id pairs. This plugin will also generate a `map.conf` file which you can directly include in the `map{}` section like this:
map $http_host $blogid {
default 0;
include /path/to/map.conf ;
}
After creating a `map{..}` section, you just need to make one more change in your Nginx config so requests for /files/ will be first processed using nginx `map{..}`:
location ~ ^/files/(.*)$ {
try_files /wp-content/blogs.dir/$blogid/$uri /wp-includes/ms-files.php?file=$1 ;
access_log off; log_not_found off; expires max;
}
Notes
- Whenever a new site is created, deleted or an extra domain is mapped to an existing site, Nginx helper will update map.conf file automatically but you will still need to reload Nginx config manually. You can do that anytime later. Till then, only files for new sites will be served using php-fpm.
- This method does not generate any symbolic links. So, there will be no issues with accidental deletes or backup scripts that follow symbolic links.
- For large networks, this will scale-up nicely as there will be a single map.conf file.
A couple of final but important notes: This whole setup assumes that the root of the site is the blog and that all files that will be referenced reside on the host. If you put the blog in a subdirectory such as /blog, then the rules will have to be modified. Perhaps someone can take these rules and make it possible to, for instance, use a:
set $wp_subdir "/blog";
directive in the main ‘server’ block and have it automagically apply to the generic WP rules.
## Warning
A typo in [Global restrictions file](https://developer.wordpress.org/advanced-administration/server/web-server/nginx/#global-restrictions-file) can create loopholes. To test if your “uploads” directory is really protected, create a PHP file with some content (example: ), upload it to “uploads” directory (or one of its sub-directories), then try to access (execute) it from your browser.
## Resources
### Reference
- [nginx + php-fpm + PHP APC + WordPress multisite (subdirectory) + WP Super Cache](https://wordpress.org/support/topic/nginx-php-fpm-php-apc-wordpress-multisite-subdirectory-wp-super-cache/).
### External Links
- [Nginx WordPress wiki page](https://www.nginx.com/resources/wiki/start/topics/recipes/wordpress/)
- [LEMP guides on Linode’s Library](https://www.linode.com/docs/guides/web-servers/lemp/)
- [Various guides about Nginx on Linode’s Library](https://www.linode.com/docs/guides/web-servers/nginx/)
- [Lightning fast WordPress with Php-fpm and Nginx](https://www.sitepoint.com/lightning-fast-wordpress-with-php-fpm-and-nginx/)
- [Virtual Hosts Examples](https://wiki.nginx.org/VirtualHostExample)
- [List of 20+ WordPress-Nginx Tutorials for common situations](https://rtcamp.com/wordpress-nginx/tutorials/)
- [An introduction to Nginx configuration](https://blog.martinfjordvald.com/nginx-primer/)
- [A comprehensive blog series on hosting WordPress yourself using Nginx](https://deliciousbrains.com/hosting-wordpress-setup-secure-virtual-server/)
- [WordPress Installation CentminMod](https://centminmod.com/nginx_configure_wordpress.html)
- [Nginx WordPress Installation Guide](https://thecustomizewindows.com/2015/12/nginx-wordpress-installation-guide-steps/)
### Scripts & Tools
For WordPress Nginx scripted installation [CentminMod](https://centminmod.com/nginx_configure_wordpress.html) can be used for CentOS.
### Securing Nginx
- [Securing Nginx and PHP](http://kbeezie.com/securing-nginx-php/)
- [Setting up PHP-FastCGI and nginx? Don’t trust the tutorials: check your configuration!](https://nealpoole.com/blog/2011/04/setting-up-php-fastcgi-and-nginx-dont-trust-the-tutorials-check-your-configuration/)
# Apache HTTPD / .htaccess
## .htaccess
The `.htaccess` is a distributed configuration file, and is how Apache handles configuration changes on a per-directory basis.
WordPress uses this file to manipulate how Apache serves files from its root directory, and subdirectories thereof. Most notably, WP modifies this file to be able to handle pretty permalinks.
This page may be used to restore a corrupted `.htaccess` file (e.g. a misbehaving plugin).
### Basic WP
# BEGIN WordPress
RewriteEngine On
RewriteRule .* - [E=HTTP_AUTHORIZATION:%{HTTP:Authorization}]
RewriteBase /
RewriteRule ^index\.php$ - [L]
RewriteCond %{REQUEST_FILENAME} !-f
RewriteCond %{REQUEST_FILENAME} !-d
RewriteRule . /index.php [L]
# END WordPress
### Multisite
#### WordPress 3.5 and up
If you activated Multisite on WordPress 3.5 or later, use one of these.
##### WordPress \>=3.5 Subfolder Example
# BEGIN WordPress Multisite
# Using subfolder network type: https://wordpress.org/documentation/article/htaccess/#multisite
RewriteEngine On
RewriteRule .* - [E=HTTP_AUTHORIZATION:%{HTTP:Authorization}]
RewriteBase /
RewriteRule ^index\.php$ - [L]
# add a trailing slash to /wp-admin
RewriteRule ^([_0-9a-zA-Z-]+/)?wp-admin$ $1wp-admin/ [R=301,L]
RewriteCond %{REQUEST_FILENAME} -f [OR]
RewriteCond %{REQUEST_FILENAME} -d
RewriteRule ^ - [L]
RewriteRule ^([_0-9a-zA-Z-]+/)?(wp-(content|admin|includes).*) $2 [L]
RewriteRule ^([_0-9a-zA-Z-]+/)?(.*\.php)$ $2 [L]
RewriteRule . index.php [L]
# END WordPress Multisite
##### WordPress \>=3.5 SubDomain Example
# BEGIN WordPress Multisite
# Using subdomain network type: https://wordpress.org/documentation/article/htaccess/#multisite
RewriteEngine On
RewriteRule .* - [E=HTTP_AUTHORIZATION:%{HTTP:Authorization}]
RewriteBase /
RewriteRule ^index\.php$ - [L]
# add a trailing slash to /wp-admin
RewriteRule ^wp-admin$ wp-admin/ [R=301,L]
RewriteCond %{REQUEST_FILENAME} -f [OR]
RewriteCond %{REQUEST_FILENAME} -d
RewriteRule ^ - [L]
RewriteRule ^(wp-(content|admin|includes).*) $1 [L]
RewriteRule ^(.*\.php)$ $1 [L]
RewriteRule . index.php [L]
# END WordPress Multisite
#### WordPress 3.4 and below
If you originally installed WordPress with 3.4 or older and activated Multisite then, you need to use one of these:
##### WordPress \<=3.4 SubFolder Example
WordPress 3.0 through 3.4.2
# BEGIN WordPress Multisite
# Using subfolder network type: https://wordpress.org/documentation/article/htaccess/#multisite
RewriteEngine On
RewriteBase /
RewriteRule ^index\.php$ - [L]
# uploaded files
RewriteRule ^([_0-9a-zA-Z-]+/)?files/(.+) wp-includes/ms-files.php?file=$2 [L]
# add a trailing slash to /wp-admin
RewriteRule ^([_0-9a-zA-Z-]+/)?wp-admin$ $1wp-admin/ [R=301,L]
RewriteCond %{REQUEST_FILENAME} -f [OR]
RewriteCond %{REQUEST_FILENAME} -d
RewriteRule ^ - [L]
RewriteRule ^[_0-9a-zA-Z-]+/(wp-(content|admin|includes).*) $1 [L]
RewriteRule ^[_0-9a-zA-Z-]+/(.*\.php)$ $1 [L]
RewriteRule . index.php [L]
# END WordPress Multisite
##### WordPress \<=3.4 SubDomain Example
# BEGIN WordPress Multisite
# Using subdomain network type: https://wordpress.org/documentation/article/htaccess/#multisite
RewriteEngine On
RewriteBase /
RewriteRule ^index\.php$ - [L]
# uploaded files
RewriteRule ^files/(.+) wp-includes/ms-files.php?file=$1 [L]
RewriteCond %{REQUEST_FILENAME} -f [OR]
RewriteCond %{REQUEST_FILENAME} -d
RewriteRule ^ - [L]
RewriteRule . index.php [L]
# END WordPress Multisite
### General Examples
#### Options
Any options preceded by a **+** are added to the options currently in force, and any options preceded by a **–** are removed from the options currently in force.
Possible values for the [Options directive](https://httpd.apache.org/docs/trunk/mod/core.html#options) are any combination of:
**None**
All options are turned off.
**All**
All options except for MultiViews. This is the default setting.
**ExecCGI**
Execution of CGI scripts using mod_cgi is permitted.
**FollowSymLinks**
The server will follow symbolic links in this directory.
**Includes**
Server-side includes provided by mod_include are permitted.
**IncludesNOEXEC**
Server-side includes are permitted, but the \#exec cmd and \#exec cgi are disabled.
**Indexes**
URL maps to a directory, and no DirectoryIndex, a formatted listing of the directory.
**MultiViews**
Content negotiated “MultiViews” are allowed using mod_negotiation.
**SymLinksIfOwnerMatch**
Only follow symbolic links where target is owned by the same user id as the link.
This will disable all options, and then only enable FollowSymLinks, which is necessary for mod_rewrite.
Options None
Options FollowSymLinks
#### DirectoryIndex
[DirectoryIndex Directive](https://httpd.apache.org/docs/trunk/mod/mod_dir.html#directoryindex) sets the file that Apache will serve if a directory is requested.
Several URLs may be given, in which case the server will return the first one that it finds.
DirectoryIndex index.php index.html /index.php
#### DefaultLanguage
[DefaultLanguage Directive](https://httpd.apache.org/docs/trunk/mod/mod_mime.html#defaultlanguage) will cause all files that do not already have a specific language tag associated with it will use this.
DefaultLanguage en
#### Default Charset
Set the default character encoding sent in the HTTP header. See [Setting charset information in .htaccess](https://www.w3.org/International/questions/qa-htaccess-charset)
AddDefaultCharset UTF-8
**Set Charset for Specific Files**
AddType 'text/html; charset=UTF-8' .html
**Set for specific files**
AddCharset UTF-8 .html
#### ServerSignature
The [ServerSignature Directive](https://httpd.apache.org/docs/trunk/mod/core.html#serversignature) allows the configuration of a trailing footer line under server-generated documents. Optionally add a line containing the server version and virtual host name to server-generated pages (internal error documents, FTP directory listings, mod_status and mod_info output etc., but not CGI generated documents or custom error documents).
**On**
adds a line with the server version number and ServerName of the serving virtual host
**Off**
suppresses the footer line
**Email**
creates a “mailto:” reference to the ServerAdmin of the referenced document
SetEnv SERVER_ADMIN admin@site.com
ServerSignature Email
#### Force Files to be Downloaded
The below will cause any requests for files ending in the specified extensions to not be displayed in the browser but instead force a “Save As” dialog so the client can download.
AddType application/octet-stream .avi .mpg .mov .pdf .xls .mp4
#### HTTP Compression
The [AddOutputFilter Directive](https://httpd.apache.org/docs/trunk/mod/mod_mime.html#addoutputfilter) maps the filename extension extension to the filters which will process responses from the server before they are sent to the client. This is in addition to any filters defined elsewhere, including `SetOutputFilter` and `AddOutputFilterByType`. This mapping is merged over any already in force, overriding any mappings that already exist for the same extension.
See also [Enable Compression](https://developers.google.com/speed/docs/insights/EnableCompression)
AddOutputFilterByType DEFLATE text/html text/plain text/xml application/xml application/xhtml+xml text/javascript text/css application/x-javascript
BrowserMatch ^Mozilla/4 gzip-only-text/html
BrowserMatch ^Mozilla/4\.0[678] no-gzip
BrowserMatch \bMSIE !no-gzip !gzip-only-text/html
**Force Compression for certain files**
SetOutputFilter DEFLATE
#### Send Custom HTTP Headers
The [Header Directive](https://httpd.apache.org/docs/trunk/mod/mod_headers.html#header) lets you send HTTP headers for every request, or just specific files. You can view a sites HTTP Headers using [Firebug](https://getfirebug.com/), [Chrome Dev Tools](https://developer.chrome.com/docs/devtools/), [Wireshark](https://www.wireshark.org/) or [Advanced HTTP Request / Response Headers](https://www.askapache.com/online-tools/http-headers-tool/).
Header set X-Pingback "https://example.com/xmlrpc.php"
Header set Content-Language "en-US"
#### Unset HTTP Headers
This will unset HTTP headers, using **always** will try extra hard to remove them.
Header unset Pragma
Header always unset WP-Super-Cache
Header always unset X-Pingback
#### Password Protect Login
This is very useful for protecting the `wp-login.php` file. You can use this [Advanced Htpasswd/Htdigest file creator](https://www.askapache.com/online-tools/htpasswd-generator/).
**Basic Authentication**
AuthType Basic
AuthName "Password Protected"
AuthUserFile /full/absolute/path/to/.htpasswd
Require valid-user
Satisfy All
**Digest Authentication**
AuthType Digest
AuthName "Password Protected"
AuthDigestDomain /wp-login.php https://example.com/wp-login.php
AuthUserFile /full/absolute/path/to/.htpasswd
Require valid-user
Satisfy All
#### Require Specific IP
This is a way to only allow access for IP addresses listed. Note usage of RequireAny instead of RequireAll.
Require ip 192.0.2.123
Require ip 2001:0DB8:1111:2222:3333:4444:5555:6666
#### Protect Sensitive Files
This denies all web access to your wp-config file, htaccess/htpasswd and WordPress debug.log. On installed site, consider adding install.php as well.
Require all denied
#### Require SSL
This will force SSL, and require the exact hostname or else it will redirect to the SSL version. Useful in a `/wp-admin/.htaccess` file.
SSLOptions +StrictRequire
SSLRequireSSL
SSLRequire %{HTTP_HOST} eq "www.example.com"
ErrorDocument 403 https://www.example.com
### External Resources
- [Official Apache HTTP Server Tutorial: .htaccess files](https://httpd.apache.org/docs/trunk/howto/htaccess.html)
- [Official Htaccess Directive Quick Reference](https://httpd.apache.org/docs/trunk/mod/quickreference.html)
- [Htaccess Tutorial](https://www.askapache.com/htaccess/)
- [Google PageSpeed for Developers](https://developers.google.com/speed/docs/insights/rules)
- [Stupid Htaccess Tricks](https://perishablepress.com/stupid-htaccess-tricks/)
- [Advanced Mod_Rewrite](https://www.askapache.com/htaccess/crazy-advanced-mod_rewrite-tutorial/)
### See also
- [htaccess for subdirectories](https://codex.wordpress.org/htaccess%20for%20subdirectories)
- [Using Permalinks](https://wordpress.org/documentation/article/customize-permalinks/)
- [Changing File Permissions](https://wordpress.org/documentation/article/changing-file-permissions/)
- [UNIX Shell Skills](https://codex.wordpress.org/UNIX%20Shell%20Skills)
- [Rewrite API](https://codex.wordpress.org/Rewrite%20API)
# Editing wp-config.php
One of the most important files in your WordPress installation is the `wp-config.php` file. This file is located in the root of your WordPress file directory and contains your website’s base configuration details, such as database connection information.
When you first download WordPress, the `wp-config.php` file isn’t included. The WordPress setup process will create a `wp-config.php` file for you based on the information you provide in the [installation](https://developer.wordpress.org/advanced-administration/before-install/howto-install/) process.
It is unlikely that a non-developer would have to edit the wp-config.php file, in the case you are acting on trouble shooting steps provided by a technical person or by your webhost, this [page](https://developer.wordpress.org/advanced-administration/wordpress/wp-config/) should help.
# wp-config.php
TEMPORALLY NOTE: this may link for the simple part, to:\
\* https://developer.wordpress.org/advanced-administration/wordpress/wp-config/\
\* https://developer.wordpress.org/advanced-administration/debug/debug-wordpress/
## Advanced Options
The following sections may contain advanced information and some changes might result in unforeseen issues. Please make sure you practice [regular backups](https://developer.wordpress.org/advanced-administration/security/backup/) and know how to restore them before modifying these settings.
### table_prefix
The **\$table_prefix** is the value placed in the front of your database tables. Change the value if you want to use something other than **wp\_** for your database prefix. Typically this is changed if you are [installing multiple WordPress blogs](https://developer.wordpress.org/advanced-administration/before-install/multiple-instances/) in the same database, as is done with the multisite feature.
It is possible to have multiple installations in one database if you give each a unique prefix. Keep security in mind if you choose to do this.
$table_prefix = 'example123_'; // Only numbers, letters, and underscores please!
### WP_SITEURL
WP_SITEURL allows the WordPress address (URL) to be defined. The value defined is the address where your WordPress core files reside. It should include the https:// part too. Do not put a slash “**/**” at the end. Setting this value in `wp-config.php` overrides the [wp_options table](https://codex.wordpress.org/Database_Description#Table:_wp_options) value for **siteurl**. Defining these constants hard-codes your site’s URL configuration, which improves portability and helps prevent issues caused by typos or misconfiguration in the dashboard. **Note:** This will **not** change the database stored value. The URL will revert to the old database value if this line is ever removed from `wp-config`. [Use the **RELOCATE** constant](https://developer.wordpress.org/advanced-administration/upgrade/migrating/) to change the **siteurl** value in the database.
If WordPress is installed into a directory called “wordpress” for the [domain](https://en.wikipedia.org/wiki/Domain_name_system) example.com, define `WP_SITEURL` like this:
define( 'WP_SITEURL', 'https://example.com/wordpress' );
Dynamically set WP_SITEURL based on \$\_SERVER\[‘HTTP_HOST’\]
define( 'WP_SITEURL', 'https://' . $_SERVER['HTTP_HOST'] . '/path/to/wordpress' );
**Note:** HTTP_HOST is created dynamically by PHP based on the value of the HTTP HOST Header in the request, thus possibly allowing for [file inclusion vulnerabilities](https://en.wikipedia.org/wiki/File_inclusion_vulnerability). SERVER_NAME may also be created dynamically. However, when Apache is configured as UseCanonicalName “on”, SERVER_NAME is set by the server configuration, instead of dynamically. In that case, it is safer to user SERVER_NAME than HTTP_HOST.
Dynamically set `WP_SITEURL` based on `$_SERVER['SERVER_NAME']`
define( 'WP_SITEURL', 'https://' . $_SERVER['SERVER_NAME'] . '/path/to/wordpress' );
### Blog address (URL)
Similar to WP_SITEURL, WP_HOME *overrides the [wp_options table](https://codex.wordpress.org/Database_Description#Table:_wp_options) value for* home *but does not change it in the database.* **home** is the address you want people to type in their browser to reach your WordPress blog. It should include the https:// part and should not have a slash “**/**” at the end. Defining these constants hard-codes your site’s URL configuration, which improves portability and helps prevent issues caused by typos or misconfiguration in the dashboard.
define( 'WP_HOME', 'https://example.com/wordpress' );
If you are using the technique described in [Giving WordPress Its Own Directory](https://developer.wordpress.org/advanced-administration/server/wordpress-in-directory/) then follow the example below. Remember, you will also be placing an `index.php` in your web-root directory if you use a setting like this.
define( 'WP_HOME', 'https://example.com' );
Dynamically set `WP_HOME` based on `$_SERVER['HTTP_HOST']`
define( 'WP_HOME', 'https://' . $_SERVER['HTTP_HOST'] . '/path/to/wordpress' );
### Moving wp-content folder
You can move the `wp-content` directory, which holds your themes, plugins, and uploads, outside of the WordPress application directory.
Set WP_CONTENT_DIR to the full **local path** of this directory (no trailing slash), e.g.
define( 'WP_CONTENT_DIR', dirname(__FILE__) . '/blog/wp-content' );
Set WP_CONTENT_URL to the full **URL** of this directory (no trailing slash), e.g.
define( 'WP_CONTENT_URL', 'https://example/blog/wp-content' );
### Moving plugin folder
Set WP_PLUGIN_DIR to the full **local path** of this directory (no trailing slash), e.g.
define( 'WP_PLUGIN_DIR', dirname(__FILE__) . '/blog/wp-content/plugins' );
Set WP_PLUGIN_URL to the full **URI** of this directory (no trailing slash), e.g.
define( 'WP_PLUGIN_URL', 'https://example/blog/wp-content/plugins' );
If you have compatibility issues with plugins Set PLUGINDIR to the full **local path** of this directory (no trailing slash), e.g.
define( 'PLUGINDIR', dirname(__FILE__) . '/blog/wp-content/plugins' );
### Moving themes folder
You cannot move the themes folder because its path is hardcoded relative to the `wp-content` folder:
$theme_root = WP_CONTENT_DIR . '/themes';
However, you can register additional theme directories using [register_theme_directory](https://developer.wordpress.org/reference/functions/register_theme_directory/).
See how to [move the wp-content](https://developer.wordpress.org/advanced-administration/wordpress/wp-config/) folder. For more details how the themes folder is determined, see `wp-includes/theme.php`.
### Moving uploads folder
Set UPLOADS to:
define( 'UPLOADS', 'blog/wp-content/uploads' );
This path can not be absolute. It is always relative to ABSPATH, therefore does not require a leading slash.
### Modify AutoSave Interval
When editing a post, WordPress uses Ajax to auto-save revisions to the post as you edit. You may want to increase this setting for longer delays in between auto-saves, or decrease the setting to make sure you never lose changes. The default is 60 seconds.
define( 'AUTOSAVE_INTERVAL', 180 ); // Seconds
### Post Revisions
WordPress, by default, will save copies of each edit made to a post or page, allowing the possibility of reverting to a previous version of that post or page. The saving of revisions can be disabled, or a maximum number of revisions per post or page can be specified.
#### Disable Post Revisions
If you do **not** set this value, WordPress defaults WP_POST_REVISIONS to *true* (enable post revisions). If you want to disable the awesome revisions feature, use this setting:
define( 'WP_POST_REVISIONS', false );
Note: Some users could not get this to function until moving the command to the first line under the initial block comment in `wp-config.php`.
#### Specify the Number of Post Revisions
If you want to specify a maximum number of revisions that WordPress stores, change *false* to an integer/number (*e.g.*, 3 or 12).
define( 'WP_POST_REVISIONS', 3 );
Note: Some users could not get this to function until moving the command to the first line under the initial block comment in `wp-config.php`.
### Set Cookie Domain
The domain set in the cookies for WordPress can be specified for those with unusual domain setups. For example, if subdomains are used to serve static content, you can set the cookie domain to only your non-static domain to prevent WordPress cookies from being sent with each request to static content on your subdomain .
define( 'COOKIE_DOMAIN', 'www.example.com' );
### Enable Multisite / Network Ability
WP_ALLOW_MULTISITE is a feature enable multisite functionality. If this setting is absent from `wp-config.php` it defaults to false.
define( 'WP_ALLOW_MULTISITE', true );
### Redirect Nonexistent Blogs
NOBLOGREDIRECT can be used to redirect the browser if the visitor tries to access a nonexistent subdomain or a subfolder.
define( 'NOBLOGREDIRECT', 'https://example.com' );
### Fatal Error Handler
WordPress 5.2 introduced [Recovery Mode](https://make.wordpress.org/core/2019/04/16/fatal-error-recovery-mode-in-5-2/) which displays error message instead of white screen when plugins causes fatal error.
*The site is experiencing technical difficulties. Please check your site admin email inbox for instructions.*
White screens and PHP error messages are not displayed to users any more. But in a development environment, if you want to enable WP_DEBUG_DISPLAY, you have to disable recovery mode by set true to WP_DISABLE_FATAL_ERROR_HANDLER.
define( 'WP_DISABLE_FATAL_ERROR_HANDLER', true ); // 5.2 and later
define( 'WP_DEBUG', true );
define( 'WP_DEBUG_DISPLAY', true );
### WP_DEBUG
The [WP_DEBUG](https://developer.wordpress.org/advanced-administration/debug/debug-wordpress/) option controls the reporting of some errors and warnings and enables use of the WP_DEBUG_DISPLAY and WP_DEBUG_LOG settings. The default boolean value is false.
define( 'WP_DISABLE_FATAL_ERROR_HANDLER', true ); // 5.2 and later
define( 'WP_DEBUG', true );
[Database errors are printed only if WP_DEBUG is set to true](https://trac.wordpress.org/ticket/5473). Database errors are handled by the [wpdb](https://developer.wordpress.org/reference/classes/wpdb/) class and are not affected by [PHP’s error settings](https://www.php.net/errorfunc).
Setting WP_DEBUG to true also raises the [error reporting level](https://www.php.net/manual/en/errorfunc.configuration.php#ini.error-reporting) to E_ALL and activates warnings when deprecated functions or files are used; otherwise, WordPress sets the error reporting level to E_ALL ^ E_NOTICE ^ E_USER_NOTICE.
### WP_ENVIRONMENT_TYPE
The WP_ENVIRONMENT_TYPE option controls the environment type for a site: `local`, `development`, `staging`, and `production`.
The values of environment types are processed in the following order with each sequential method overriding any previous values: the WP_ENVIRONMENT_TYPE [PHP environment variable](https://www.php.net/manual/en/reserved.variables.environment.php) and the WP_ENVIRONMENT_TYPE constant.
For both methods, if the value of an environment type provided is not in the list of allowed environment types, the default `production` value will be returned.
The simplest way to set the value is probably through defining the constant:
define( 'WP_ENVIRONMENT_TYPE', 'staging' );
Note: When `development` is returned by [wp_get_environment_type()](https://developer.wordpress.org/reference/functions/wp_get_environment_type/), WP_DEBUG will be set to `true` if it is not defined in the `wp-config.php` file of the site.
### SCRIPT_DEBUG
[SCRIPT_DEBUG](https://developer.wordpress.org/advanced-administration/debug/debug-wordpress/) is a related constant that will force WordPress to use the “dev” versions of scripts and stylesheets in `wp-includes/js`, `wp-includes/css`, `wp-admin/js`, and `wp-admin/css` will be loaded instead of the `.min.css` and `.min.js` versions. If you are planning on modifying some of WordPress’ built-in JavaScript or Cascading Style Sheets, you should add the following code to your config file:
define( 'SCRIPT_DEBUG', true );
### Disable Javascript Concatenation
To result in faster administration screens, all JavaScript files are [concatenated](https://en.wikipedia.org/wiki/Concatenation) into one URL. If JavaScript is failing to work in an administration screen, you can try disabling this feature:
define( 'CONCATENATE_SCRIPTS', false );
### Configure Error Logging
Configuring error logging can be a bit tricky. First of all, default PHP error log and display settings are set in the php.ini file, which you may or may not have access to. If you do, they should be set to the desired settings for live PHP pages served to the public. It’s strongly recommended that no error messages are displayed to the public and instead routed to an error log. Further more, error logs should not be located in the publicly accessible portion of your server. Sample recommended php.ini error settings:
error_reporting = 4339
display_errors = Off
display_startup_errors = Off
log_errors = On
error_log = /home/example.com/logs/php_error.log
log_errors_max_len = 1024
ignore_repeated_errors = On
ignore_repeated_source = Off
html_errors = Off
**About Error Reporting 4339** This is a custom value that only logs issues that affect the functioning of your site, and ignores things like notices that may not even be errors. See [PHP Error Constants](https://www.php.net/manual/en/errorfunc.constants.php) for the meaning of each binary position for 1000011110011, which is the binary number equal to 4339. The far left 1 means report any E_RECOVERABLE_ERROR. The next 0 means do not report E_STRICT, (which is thrown when sloppy but functional coding is used) and so on. Feel free to determine your own custom error reporting number to use in place of 4339.
Obviously, you will want different settings for your development environment. If your staging copy is on the same server, or you don’t have access to `php.ini`, you will need to override the default settings at run time. It’s a matter of personal preference whether you prefer errors to go to a log file, or you prefer to be notified immediately of any error, or perhaps both. Here’s an example that reports all errors immediately that you could insert into your `wp-config.php` file:
@ini_set( 'log_errors', 'Off' );
@ini_set( 'display_errors', 'On' );
define( 'WP_DISABLE_FATAL_ERROR_HANDLER', true ); // 5.2 and later
define( 'WP_DEBUG', true );
define( 'WP_DEBUG_LOG', false );
define( 'WP_DEBUG_DISPLAY', true );
Because `wp-config.php` is loaded for every page view not loaded from a cache file, it is an excellent location to set `php.ini` settings that control your PHP installation. This is useful if you don’t have access to a `php.ini` file, or if you just want to change some settings on the fly. One exception is ‘error_reporting’. When WP_DEBUG is defined as true, ‘error_reporting’ will be set to E_ALL by WordPress regardless of anything you try to set in wp-config.php. If you really have a need to set ‘error_reporting’ to something else, it must be done after `wp-settings.php` is loaded, such as in a plugin file.
If you turn on error logging, remember to delete the file afterwards, as it will often be in a publicly accessible location, where anyone could gain access to your log.
Here is an example that turns PHP error_logging on and logs them to a specific file. If WP_DEBUG is defined to true, the errors will also be saved to this file. Just place this above any *require_once* or *include* commands.
@ini_set( 'log_errors', 'On' );
@ini_set( 'display_errors', 'Off' );
@ini_set( 'error_log', '/home/example.com/logs/php_error.log' );
/* That's all, stop editing! Happy blogging. */
Another example of logging errors, as suggested by Mike Little on the [wp-hackers email list](https://lists.automattic.com/pipermail/wp-hackers/2010-September/034830.html):
/**
* This will log all errors notices and warnings to a file called debug.log in
* wp-content (if Apache does not have write permission, you may need to create
* the file first and set the appropriate permissions (i.e. use 666) )
*/
define( 'WP_DEBUG', true );
define( 'WP_DEBUG_LOG', true );
define( 'WP_DEBUG_DISPLAY', false );
@ini_set( 'display_errors', 0 );
A refined version from Mike Little on the [Manchester WordPress User Group](https://groups.google.com/g/manchester-wordpress-user-group/c/tHJxMGhcnZs/m/dn-8yjYIq9wJ):
/**
* This will log all errors notices and warnings to a file called debug.log in
* wp-content only when WP_DEBUG is true. if Apache does not have write permission,
* you may need to create the file first and set the appropriate permissions (i.e. use 666).
*/
define( 'WP_DEBUG', true ); // Or false
if ( WP_DEBUG ) {
define( 'WP_DEBUG_LOG', true );
define( 'WP_DEBUG_DISPLAY', false );
@ini_set( 'display_errors', 0 );
}
Confusing the issue is that WordPress has three (3) constants that look like they could do the same thing. First off, remember that if WP_DEBUG is false, it and the other two WordPress DEBUG constants do not do anything. The PHP directives, whatever they are, will prevail. Except for ‘error_reporting’, WordPress will set this to 4983 if WP_DEBUG is defined as false. Second, even if WP_DEBUG is true, the other constants only do something if they too are set to true. If they are set to false, the PHP directives remain unchanged. For example, if your `php.ini` file has the directive (‘display_errors’ = ‘On’); but you have the statement define( ‘WP_DEBUG_DISPLAY’, false ); in your `wp-config.php` file, errors will still be displayed on screen even though you tried to prevent it by setting WP_DEBUG_DISPLAY to false because that is the PHP configured behavior. This is why it’s very important to set the PHP directives to what you need in case any of the related WP constants are set to false. To be safe, explicitly set/define both types. More detailed descriptions of the WP constants is available at [Debugging in WordPress](https://developer.wordpress.org/advanced-administration/debug/debug-wordpress/).
For your public, production WordPress installation, you might consider placing the following in your `wp-config.php` file, even though it may be partly redundant:
@ini_set( 'log_errors', 'On' );
@ini_set( 'display_errors', 'Off' );
define( 'WP_DISABLE_FATAL_ERROR_HANDLER', false ); // 5.2 and later
define( 'WP_DEBUG', false );
define( 'WP_DEBUG_LOG', false );
define( 'WP_DEBUG_DISPLAY', false );
The default debug log file is `/wp-content/debug.log`. Placing error logs in publicly accessible locations is a security risk. Ideally, your log files should be placed above you site’s public root directory. If you can’t do this, at the very least, set the log file permissions to 600 and add this entry to the `.htaccess` file in the root directory of your WordPress installation:
Order allow,deny
Deny from all
This prevents anyone from accessing the file via HTTP. You can always view the log file by retrieving it from your server via FTP.
### Increasing memory allocated to PHP
**WP_MEMORY_LIMIT** option allows you to specify the maximum amount of memory that can be consumed by PHP. This setting may be necessary in the event you receive a message such as “Allowed memory size of xxxxxx bytes exhausted”.
This setting increases PHP Memory only for WordPress, not other applications. By default, WordPress will attempt to increase memory allocated to PHP to 40MB (code is at the beginning of `/wp-includes/default-constants.php`) for single site and 64MB for multisite, so the setting in `wp-config.php` should reflect something higher than 40MB or 64MB depending on your setup.
WordPress will automatically check if PHP has been allocated less memory than the entered value before utilizing this function. For example, if PHP has been allocated 64MB, there is no need to set this value to 64M as WordPress will automatically use all 64MB if need be.
Note: Some hosts do not allow for increasing the PHP memory limit automatically. In that event, contact your host to increase the PHP memory limit. Also, many hosts set the PHP limit at 8MB.
Adjusting the WordPress memory limit potentially creates problems as well. You might end up hiding the root of the issue for it to happen later down the line as you add in more plugins or functionalities.
If you are facing Out of Memory issues even with an elevated memory limit, you should properly debug your installation. Chances are you have too many memory intensive functions tied to a specific action and should move these functions to a cronjob.
Increase PHP Memory to 64MB
define( 'WP_MEMORY_LIMIT', '64M' );
Increase PHP Memory to 96MB
define( 'WP_MEMORY_LIMIT', '96M' );
Administration tasks require may require memory than usual operation. When in the administration area, the memory can be increased or decreased from the WP_MEMORY_LIMIT by defining WP_MAX_MEMORY_LIMIT.
define( 'WP_MAX_MEMORY_LIMIT', '128M' );
Note: this has to be put before wp-settings.php inclusion.
### Cache
WordPress supports several different caching mechanisms. These systems are independent and are not all controlled by the same constant or subsystem.
#### `WP_CACHE`
``` php
define( 'WP_CACHE', true );
```
`WP_CACHE` does not enable caching by itself.
When set to `true`, WordPress attempts to load the `wp-content/advanced-cache.php` drop-in early during bootstrap. This is commonly used by page caching plugins and some hosting platforms.
If no `advanced-cache.php` file exists, defining `WP_CACHE` has little or no effect.
Many caching plugins automatically add or manage this constant.
#### Persistent object cache
Persistent object caching uses an `object-cache.php` drop-in and is separate from `advanced-cache.php`.
Examples include Redis and Memcached integrations.
Persistent object caching may function even when `WP_CACHE` is not defined.
#### Transients and persistent object caching
The Transients API stores temporary data with an expiration time, but where that data is stored depends on the site’s cache configuration.
When a persistent object cache drop-in such as Redis or Memcached is active, transients can be stored in the external object cache. Without a persistent object cache, WordPress stores transient values in the database, typically in the `wp_options` table.
This means transients should not be assumed to be memory-backed on all sites. Heavy transient usage on a site without persistent object caching can increase database reads and writes and contribute to options table growth.
Transients set with an expiration time are not autoloaded by default; transients set without an expiration are autoloaded. This means heavy use of expiring transients adds rows to `wp_options` without adding to the autoload footprint loaded on every request.
#### Cache layers
Different cache layers serve different purposes:
| Cache type | Typical implementation | Purpose |
|----|----|----|
| Page cache | `advanced-cache.php` | Serve complete rendered pages |
| Object cache | `object-cache.php` | Cache database/query/application objects |
| Opcode cache | PHP OPcache | Cache compiled PHP bytecode |
| Browser cache | HTTP headers/CDN | Cache assets in browsers |
#### Common misconceptions
- `WP_CACHE` does not automatically enable Redis or Memcached.
- `WP_CACHE` does not enable browser caching.
- `WP_CACHE` alone does not improve performance unless a caching drop-in is installed.
- Persistent object cache and page cache are separate systems.
- Transients are not always stored in memory; without persistent object caching, they are stored in the database.
- Transient option rows in `wp_options` are not necessarily autoloaded; only transients set without an expiration are autoloaded.
#### Related
For implementation details, see:
- `advanced-cache.php`
- `object-cache.php`
- `wp_start_object_cache()`
- Drop-ins
#### Legacy and specialized performance constants
The following constants control specialized script and style loading, concatenation, and compression behavior:
- `CONCATENATE_SCRIPTS`
- `COMPRESS_SCRIPTS`
- `COMPRESS_CSS`
- `ENFORCE_GZIP`
Most sites should not define these manually unless specifically troubleshooting performance or asset loading issues.
### Custom User and Usermeta Tables
**CUSTOM_USER_TABLE** and **CUSTOM_USER_META_TABLE** are used to designate that the user and usermeta tables normally utilized by WordPress are not used, instead these values/tables are used to store your user information.
define( 'CUSTOM_USER_TABLE', $table_prefix.'my_users' );
define( 'CUSTOM_USER_META_TABLE', $table_prefix.'my_usermeta' );
Note: Even if ‘CUSTOM_USER_META_TABLE’ is manually set, a usermeta table is still created for each database with the corresponding permissions for each instance. By default, the WordPress installer will add permissions for the first user (ID \#1). You also need to manage permissions to each of the site via a plugin or custom function. If this isn’t setup you will experience permission errors and log-in issues.
CUSTOM_USER_TABLE is easiest to adopt during initial Setup your first instance of WordPress. The define statements of the `wp-config.php` on the first instance point to where `wp_users` data will be stored by default. After the first site setup, copying the working `wp-config.php` to your next instance will only require a change the `$table_prefix` variable. Do not use an e-mail address that is already in use by your original install. Once you have finished the setup process log in with the auto generated admin account and password. Next, promote your normal account to the administrator level and Log out of admin. Log back in as yourself, delete the admin account and promote the other user accounts as is needed.
### Language and Language Directory
WordPress [Version 4.0](https://wordpress.org/documentation/wordpress-version/version-4-0/) allows you to change the language in your WordPress [Administration Screens](https://wordpress.org/documentation/article/administration-screens/). To change the language in the admin settings screen. Go to [Settings](https://wordpress.org/documentation/article/administration-screens/#settings-configuration-settings) \> [General](https://wordpress.org/documentation/article/settings-general-screen/) and select Site Language.
#### WordPress v3.9.6 and below
**WPLANG** defines the name of the language translation (.mo) file. **WP_LANG_DIR** defines what directory the WPLANG .mo file resides. If WP_LANG_DIR is not defined WordPress looks first to wp-content/languages and then `wp-includes/languages` for the .mo defined by WPLANG file.
define( 'WPLANG', 'de_DE' );
define( 'WP_LANG_DIR', dirname(__FILE__) . 'wordpress/languages' );
To find out the WPLANG language code, please [refer here](https://make.wordpress.org/polyglots/teams/). The code in WP Local column is what you need.
### Save queries for analysis
The **SAVEQUERIES** definition saves the database queries to an array and that array can be displayed to help analyze those queries. The information saves each query, what function called it, and how long that query took to execute. **Note:** This will have a performance impact on your site, so make sure to turn this off when you aren’t debugging.
First, add this to the `wp-config.php` file:
define( 'SAVEQUERIES', true );
Then in the footer of your theme put this:
if ( current_user_can( 'administrator' ) ) {
global $wpdb;
echo "
";
      print_r( $wpdb->queries );
      echo "
";
}
Alternatively, consider using [Query Monitor](https://wordpress.org/plugins/query-monitor/)
### Override of default file permissions
The **FS_CHMOD_DIR** and **FS_CHMOD_FILE** define statements allow override of default file permissions. These two variables were developed in response to the problem of the core update function failing with hosts running under [suexec](https://en.wikipedia.org/wiki/SuEXEC). If a host uses restrictive file permissions (e.g. 400) for all user files, and refuses to access files which have group or world permissions set, these definitions could solve the problem.
define( 'FS_CHMOD_DIR', ( 0755 & ~ umask() ) );
define( 'FS_CHMOD_FILE', ( 0644 & ~ umask() ) );
Example to provide setgid:
define( 'FS_CHMOD_DIR', ( 02755 & ~umask() ) );
Note: ‘**0755′** and ‘**02755**‘ are octal values. Octal values must be prefixed with a 0 and are not delineated with single quotes (‘). See Also: [Changing File Permissions](https://developer.wordpress.org/advanced-administration/server/file-permissions/)
### WordPress Upgrade Constants
**Note: Define as few of the below constants as needed to correct your update issues.**
The most common causes of needing to define these are:
Host running with a special installation setup involving symlinks. You may need to define the path-related constants (FTP_BASE, FTP_CONTENT_DIR, and FTP_PLUGIN_DIR). Often defining simply the base will be enough.
Certain PHP installations shipped with a PHP FTP extension which is incompatible with certain FTP servers. Under these rare situations, you may need to define FS_METHOD to “ftpsockets”.
The following are valid constants for WordPress updates:
- **FS_METHOD** forces the filesystem method. It should only be “direct”, “ssh2”, “ftpext”, or “ftpsockets”. Generally, you should only change this if you are experiencing update problems. If you change it and it doesn’t help, **change it back/remove it**. Under most circumstances, setting it to ‘ftpsockets’ will work if the automatically chosen method does not.
- **(Primary Preference) “direct”** forces it to use Direct File I/O requests from within PHP, this is fraught with opening up security issues on poorly configured hosts, This is chosen automatically when appropriate.
- **(Secondary Preference) “ssh2”** is to force the usage of the SSH PHP Extension if installed
- **(3rd Preference) “ftpext”** is to force the usage of the FTP PHP Extension for FTP Access, and finally
- **(4th Preference) “ftpsockets”** utilises the PHP Sockets Class for FTP Access.
- **FTP_BASE** is the full path to the “base”(ABSPATH) folder of the WordPress installation.
- **FTP_CONTENT_DIR** is the full path to the wp-content folder of the WordPress installation.
- **FTP_PLUGIN_DIR** is the full path to the plugins folder of the WordPress installation.
- **FTP_PUBKEY** is the full path to your SSH public key.
- **FTP_PRIKEY** is the full path to your SSH private key.
- **FTP_USER** is either user FTP or SSH username. Most likely these are the same, but use the appropriate one for the type of update you wish to do.
- **FTP_PASS** is the password for the username entered for **FTP_USER**. If you are using SSH public key authentication this can be omitted.
- **FTP_HOST** is the hostname:port combination for your SSH/FTP server. The default FTP port is 21 and the default SSH port is 22. These do not need to be mentioned.
- **FTP_SSL** TRUE for SSL-connection *if supported by the underlying transport* (not available on all servers). This is for “Secure FTP” not for SSH SFTP.
define( 'FS_METHOD', 'ftpext' );
define( 'FTP_BASE', '/path/to/wordpress/' );
define( 'FTP_CONTENT_DIR', '/path/to/wordpress/wp-content/' );
define( 'FTP_PLUGIN_DIR ', '/path/to/wordpress/wp-content/plugins/' );
define( 'FTP_PUBKEY', '/home/username/.ssh/id_rsa.pub' );
define( 'FTP_PRIKEY', '/home/username/.ssh/id_rsa' );
define( 'FTP_USER', 'username' );
define( 'FTP_PASS', 'password' );
define( 'FTP_HOST', 'ftp.example.org' );
define( 'FTP_SSL', false );
Some configurations should set FTP_HOST to localhost to avoid 503 problems when trying to update plugins or WP itself.
#### Enabling SSH Upgrade Access
There are two ways to upgrade using SSH2.
The first is to use the [SSH SFTP Updater Support plugin](https://wordpress.org/plugins/ssh-sftp-updater-support/). The second is to use the built-in SSH2 upgrader, which requires the pecl SSH2 extension be installed.
To install the pecl SSH2 extension you will need to issue a command similar to the following or talk to your web hosting provider to get this installed:
pecl install ssh2
After installing the pecl ssh2 extension you will need to modify your PHP configuration to automatically load this extension.
pecl is provided by the pear package in most linux distributions. To install pecl in Redhat/Fedora/CentOS:
yum -y install php-pear
To install pecl in Debian/Ubuntu:
apt-get install php-pear
It is recommended to use a private key that is not pass-phrase protected. There have been numerous reports that pass phrase protected private keys do not work properly. If you decide to try a pass phrase protected private key you will need to enter the pass phrase for the private key as FTP_PASS, or entering it in the “Password” field in the presented credential field when installing updates.
### Alternative Cron
There might be reason to use an alternative Cron with WP. Most commonly this is done if scheduled posts are not getting published as predicted. This alternative method uses a redirection approach. The users’ browser get a redirect when the cron needs to run, so that they come back to the site immediately while cron continues to run in the connection they just dropped. This method has certain risks, since it depends on a non-native WordPress service.
define( 'ALTERNATE_WP_CRON', true );
### Disable Cron and Cron Timeout
Disable cron entirely by setting DISABLE_WP_CRON to true.
define( 'DISABLE_WP_CRON', true );
Make sure a cron process cannot run more than once every WP_CRON_LOCK_TIMEOUT seconds.
define( 'WP_CRON_LOCK_TIMEOUT', 60 );
### Additional Defined Constants
Here are additional constants that can be defined. These probably shouldn’t be set unless other methodologies have been attempted first. The Cookie definitions can be particularly useful if you have an unusual domain setup.
define( 'COOKIEPATH', preg_replace( '|https?://[^/]+|i', '', get_option( 'home' ) . '/' ) );
define( 'SITECOOKIEPATH', preg_replace( '|https?://[^/]+|i', '', get_option( 'siteurl' ) . '/' ) );
define( 'ADMIN_COOKIE_PATH', SITECOOKIEPATH . 'wp-admin' );
define( 'PLUGINS_COOKIE_PATH', preg_replace( '|https?://[^/]+|i', '', WP_PLUGIN_URL ) );
define( 'TEMPLATEPATH', get_template_directory() );
define( 'STYLESHEETPATH', get_stylesheet_directory() );
### Empty Trash
This constant controls the number of days before WordPress permanently deletes posts, pages, attachments, and comments, from the trash bin. The default is 30 days:
define( 'EMPTY_TRASH_DAYS', 30 ); // 30 days
To disable trash set the number of days to zero.
define( 'EMPTY_TRASH_DAYS', 0 ); // Zero days
**Note:** WordPress will not ask for confirmation when someone clicks on “Delete Permanently” using this setting.
### Automatic Database Optimizing
There is automatic database repair support, which you can enable by adding the following define to your `wp-config.php` file.
Note: This should only be enabled if needed and disabled once the issue is solved. When enabled, a user does not need to be logged in to access the functionality, since its main intent is to repair a corrupted database and users can often not login when the database is corrupt.
define( 'WP_ALLOW_REPAIR', true );
The script can be found at `{$your_site}/wp-admin/maint/repair.php`.
### DO_NOT_UPGRADE_GLOBAL_TABLES
A **DO_NOT_UPGRADE_GLOBAL_TABLES** define prevents [dbDelta()](https://developer.wordpress.org/reference/functions/dbdelta/) and the upgrade functions from doing expensive queries against global tables.
Sites that have large global tables (particularly users and usermeta), as well as sites that share user tables with bbPress and other WordPress installs, can prevent the upgrade from changing those tables during upgrade by defining **DO_NOT_UPGRADE_GLOBAL_TABLES** to true. Since an ALTER, or an unbounded DELETE or UPDATE, can take a long time to complete, large sites usually want to avoid these being run as part of the upgrade so they can handle it themselves. Further, if installations are sharing user tables between multiple bbPress and WordPress installs you may to want one site to be the upgrade master.
define( 'DO_NOT_UPGRADE_GLOBAL_TABLES', true );
### View All Defined Constants
PHP has a function that returns an array of all the currently defined constants with their values.
print_r( @get_defined_constants() );
### Disable the Plugin and Theme File Editor
Occasionally you may wish to disable the plugin or theme file editor to prevent overzealous users from being able to edit sensitive files and potentially crash the site. Disabling these also provides an additional layer of security if a hacker gains access to a well-privileged user account.
define( 'DISALLOW_FILE_EDIT', true );
**Note**: The functionality of some plugins may be affected by the use of `current_user_can('edit_plugins')` in their code. Plugin authors should avoid checking for this capability, or at least check if this constant is set and display an appropriate error message. Be aware that if a plugin is not working this may be the cause.
### Disable Plugin and Theme Update and Installation
This will block users being able to use the plugin and theme installation/update functionality from the WordPress admin area. Setting this constant also disables the Plugin and Theme File editor (i.e. you don’t need to set DISALLOW_FILE_MODS and DISALLOW_FILE_EDIT, as on its own DISALLOW_FILE_MODS will have the same effect).
define( 'DISALLOW_FILE_MODS', true );
### Require SSL for Admin and Logins
**Note:** WordPress [Version 4.0](https://wordpress.org/documentation/wordpress-version/version-4-0/) deprecated FORCE_SSL_LOGIN. Please use FORCE_SSL_ADMIN.
FORCE_SSL_ADMIN is for when you want to secure logins and the admin area so that both passwords and cookies are never sent in the clear. See also [HTTPS](https://developer.wordpress.org/advanced-administration/security/https/) for more details.
define( 'FORCE_SSL_ADMIN', true );
### Block External URL Requests
Block external URL requests by defining WP_HTTP_BLOCK_EXTERNAL as true and this will only allow localhost and your blog to make requests. The constant WP_ACCESSIBLE_HOSTS will allow additional hosts to go through for requests. The format of the WP_ACCESSIBLE_HOSTS constant is a comma separated list of hostnames to allow, wildcard domains are supported, eg `*.wordpress.org` will allow for all subdomains of wordpress.org to be contacted.
define( 'WP_HTTP_BLOCK_EXTERNAL', true );
define( 'WP_ACCESSIBLE_HOSTS', 'api.wordpress.org,*.github.com' );
### Disable WordPress Auto Updates
There might be reason for a site to not auto-update, such as customizations or host supplied updates. It can also be done before a major release to allow time for testing on a development or staging environment before allowing the update on a production site.
define( 'AUTOMATIC_UPDATER_DISABLED', true );
### Disable WordPress Core Updates
The easiest way to manipulate core updates is with the WP_AUTO_UPDATE_CORE constant:
**Disable all core updates:**
define( 'WP_AUTO_UPDATE_CORE', false );
**Enable all core updates, including minor and major:**
define( 'WP_AUTO_UPDATE_CORE', true );
**Enable core updates for minor releases (default):**
define( 'WP_AUTO_UPDATE_CORE', 'minor' );
Reference: [Disabling Auto Updates in WordPress 3.7](https://make.wordpress.org/core/2013/10/25/the-definitive-guide-to-disabling-auto-updates-in-wordpress-3-7/)
### Cleanup Image Edits
By default, WordPress creates a new set of images every time you edit an image and when you restore the original, it leaves all the edits on the server. Defining IMAGE_EDIT_OVERWRITE as true changes this behavior. Only one set of image edits are ever created and when you restore the original, the edits are removed from the server.
define( 'IMAGE_EDIT_OVERWRITE', true );
## Double Check Before Saving
***Be sure to check for leading and/or trailing spaces around any of the above values you entered, and DON’T delete the single quotes!***
Before you save the file, be sure to **double-check** that you have not accidentally deleted any of the single quotes around the parameter values. Be sure there is nothing after the closing PHP tag in the file. The last thing in the file should be **?\>** and nothing else. No spaces.
To save the file, choose **File \> Save As \> wp-config.php** and save the file in the root of your WordPress install. Upload the file to your web server and you’re ready to install WordPress!
# Site Architecture (v1.5)
The following is a description of the general site architecture for WordPress 1.5. WordPress theme developers are encouraged but not required to maintain much of the core site architecture of XHTML tags and CSS selectors. Therefore, you can just consider this to be a general outline, because your theme may be different.
## Template Driven Pages
Before we get to the [core structure](#Core_Structure) of the WordPress page architecture, you need to understand that WordPress uses [template files](https://codex.wordpress.org/Templates) to generate the final page “look” and content. For example, when viewing the front page of your WordPress site, you are actually viewing several template files:
- index.php
- header.php
- sidebar.php
- footer.php
When you view a single post page, you might be viewing the following template files:
- single.php
- header.php
- sidebar.php
- footer.php
- comments.php
On a multi-post page like categories, archives, and search, you might be viewing any combination of the following template files:
- index.php
- category.php
- 404.php
- search.php
- header.php
- sidebar.php
- footer.php
As much as possible in the following architecture specifications, we’ve specified which CSS selectors belong in which template files.
## Core Structure
The core structure of a WordPress site represents the main containers that hold the page’s content. The core structure of a WordPress site features, at a minimum:
- Header
- Sidebar/Menu
- Content
- Footer
These are the main containers in which the most important parts of the page are “contained.” Remember, the core structure is like a set of building blocks, where each unit is dependent upon the other units. If you change one, you have to change the others.
**Classic Theme**
**Default Theme**
Please note that, while both themes make use of a sidebar, the first theme refers to it as a menu, while the other theme refers to it as a sidebar.
Perhaps the main difference between the core structures of these two themes is the use of the header and footer. For the Classic Theme, the header is in an h1 tag, and the footer is enclosed in a paragraph tag. Meanwhile in the Default Theme, the header has been placed in a div called header, while the footer has been placed in a footer div.
Both themes feature a container that encompasses or “wraps” itself around the entire page. This container (often used in combination with the body HTML tag) allows for more definitive control of the entire structure. Depending on the WordPress theme being used, this container can also be referred to as:
- page
- wrap
- rap
Some themes may add a second, third, or even fourth sidebar, creating a column effect. They may also include additional wrappers around the entire page or around specific containers. However, in all cases, the basic core structure essentially remains the same.
### The Modular Template Files
Based on the premise of building blocks, WordPress themes divide the core structure into individual blocks called [template files](https://codex.wordpress.org/Templates). These are the template files:
- Header – header.php
- Sidebar/Menu – sidebar.php
- Content – index.php, single.php, page.php, category.php, author.php, search.php, etc.
- Footer – footer.php
In each of these template files, it is possible to use the body div as an all-encompassing container for content.
When viewing a web page that uses a particular WordPress theme, the specific template files generated are dependent upon the user’s request. If a user clicks on a category tag, the category template will be used. If the user views a [page](https://wordpress.org/documentation/article/create-pages/), the page template will be used.
When these core template files are loaded in combination with the [WordPress Loop](https://codex.wordpress.org/The_Loop) and queries, a variety of templates can be generated. This allows web page developers to create individual and unique styles for each specific template.
## Interior Structures
Within these core structural containers are smaller building blocks which hold the specific content within the parent container. WordPress themes can feature a variety of these, but we are going to concentrate on the two themes that come with WordPress. (Most WordPress theme templates are based on these two themes.)
### Header
The header is the structure that traditionally sits at the top of a web page. It contains the title of the website. It may also be referred to as a masthead, head, title, or banner. In all WordPress themes, the header is found within the header.php template file.
The Classic Theme features the simplest header code:
The Default Theme has a more complex header code:
While the styles for the Classic Theme are found within the theme’s style.css file, styles for the Default Theme are found both within the style.css file and the of the header.php [template file](https://codex.wordpress.org/Templates). Working with these styles is extensively covered in the article [Designing Headers](https://codex.wordpress.org/Designing_Headers).
### Content
The content container in WordPress plays a critical role, because it holds the [WordPress Loop](https://codex.wordpress.org/The_Loop). The WordPress Loop processes each post that will be displayed on the current page. These posts are then formatted according to how they match specific criteria within the Loop tags.
The Classic Theme has the simplest content structure:
Date
Post Title
Post Meta Data
Welcome to WordPress.
Comments (2)
The Classic Theme hosts containers for the Date, Title, Post Meta Data, Post Content, and Feedback (number of comments). It also showcases a powerful feature: the ability to individually style a single post’s look.
The post CSS class selector applies the post styles to this container. It is important to note that the post class selector also has an ID which is generated automatically by WordPress. Here is an example of the code that can be used to display a class selector’s ID:
The use of the template tag [the_ID()](https://developer.wordpress.org/reference/functions/the_ID/) displays the ID number for the post. This unique identifier can be used for internal page links as well as for styles. For instance, an individual post could have a style for post-1, as well as for post-2. While it is a bit excessive to feature a style for every post, there may be a post or two that you need to have look a little different. Some plugins may use this identifier to automatically change the look of different posts, too.
The content container for the Default Theme features a **multi-post view** (e.g. for the front page, categories, archives, and searches) as well as a **single post view** for single posts. The multi-post view looks like this:
Post Title
Date
Post Content.
Post Meta Data Section
Previous Post
Next Post
There is a lot going on here. Let’s break it down.
### Breakdown of Content Example
The **multi-post view** features a content container with a class called narrowcolumn, while the **single post view** features a class called widecolumn. The sidebar for the single post view is not generated on that page, allowing the post to be viewed across the width of the entire content area.
Like the Classic Theme, this division sets up the style for post and the identifier for post-X, with X representing the post’s unique ID number. This allows the user to customize the specific post’s look.
Post Title
This encompasses the post’s title code, styled by the `
` tag.
Date
The date code is surrounded and styled by the small tag.
The post content is styled with a combination of the styles within the entry CSS selectors, and the paragraph tag.
Post Meta Data Section
The [Post Meta Data Section](https://codex.wordpress.org/Post_Meta_Data_Section) contains data details about the post, such as the date, time, and categories the post belongs to.
The [Next and Previous Links](https://codex.wordpress.org/Next_and_Previous_Links) are styled in the navigation div. They also include classes for alignleft (for the Previous Post) and alignright (for the Next Post in chronological order).
These elements are shifted around in the **single post view** content structure:
Post Title
Post content.
Post Meta Data
In the absence of the sidebar, the widecolumn class has been formatted to stretch content across the page. The navigation div has been moved up to the top. And the Post Meta Data is now incorporated into the entrytext parent container, and has been styled differently, with an alt class selector added.
These two examples from the Default Theme give you just a glimpse into the myriad ways your WordPress site can be customized.
#### Comments
Comments may be featured in the single post view (using the comments.php template file) or in a popup window (using the comments-popup.php template file). The overall styles for these two types of comments are basically the same.
##### Classic Theme Comments
While individual sections of the comments feature styling reference, the Classic Theme has no general comment division or group style reference, one could be easily added.
**\#comments h2**
Styles the title at the top of the comments list which says “Comments 4 Leave a Comment”, with the latter part of the sentence in a link that jumps to `
Leave a comment
`.
**\#comment-n**
Comments are given a unique ID number, signified here by the letter n. This allows them to be styled individually.
**\#comments ol**
This begins the **ordered list** of the comments, counting down from one, and sets the overall style of the comments list.
**\#comments li**
Style reference for each comment on the list.
**\#comments p**
This paragraph tag styles the actual comments on the comment list.
**\#comment cite**
This use of the cite controls the look of the commenter’s name. It usually states “Name says:” in the comments list.
**\#comments h2** or **\#postcomment**
The h2 heading can be styled two ways, as \#comments h2 or \#postcomment. The latter is used by the “Leave a Comment” link from the top of the comments section, too.
**\#commentform**
Style reference for the overall “form” for inputting comments. Each input area has it’s own ID.
**\#author**
ID reference for the comment author’s input area.
**\#comments small**
The `` tag is used in several places in the Classic Theme. This usage surrounds the text in the **comment submit form** and the text for the **list of tags** that can be used in the comment.
**\#email**
ID reference for the comment author’s email.
**\#url**
ID reference for the comment author’s URL.
**\#comment**
ID reference for the comment input textarea. It does not style the final generated comment, just the input box.
**\#comment \#submit**
There are two submit buttons in the Classic Theme, for search and comment submissions. This is the submit comment button.
##### Default Theme Comments
The Default Theme comments feature a loop query within the comments.php and comments-popup.php which changes some of the information depending upon if comments are open, closed, and any present. If the comments are open or closed and no comments have been made, this information will be displayed within the `
While individual sections of the comments feature styling reference, the Default Theme has no general comment division or group style reference, though one could be easily added.
**h3 \#comments**
Styles the `
` tag for the “number of responses to the post” heading.
**\#commentlist ol**
Styles the “ordered list” of the comments list.
**.alt li** and **\#comment-n**
The comment list items have two style references. The first one is the class alt and the second is the comment ID number signified here by the letter n. This allows them to be styled individually.
**cite**
The tag cite frames the “Name says:” and link to the comment author’s URL.
**.commentmetadata small**
The `` tag has a class of commentmetadata which allows the date and time of the post to be styled.
**ol \#commentlist p**
Styles the paragraph within the ordered list of comments.
**\#respond h3**
Styles the heading for “Leave a Reply”.
**\#commentform**
Style reference for the overall “form” for inputting comments. Each input area has it’s own ID.
**\#author**
ID reference for the comment author’s input area.
**\#comments small**
The `` tag is used in several places in the Classic Theme. This usage surrounds the text in the **comment submit form *and the text for the*** *list of tags’* that can be used in the comment.
**\#email**
ID reference for the comment author’s email.
**\#url**
ID reference for the comment author’s URL.
**\#comment**
ID reference for the comment input textarea. It does not style the final generated comment, just the input box.
**\#comment \#submit**
There are two submit buttons in the Classic Theme, for search and comment submissions. This is the submit comment button.
##### Popup Comments
The Classic and Default Themes’ `comments-popup.php` template file is essentially the same. They use the layout for the [Classic Theme comment structure](#Default_Theme_Comments). While the Classic Theme uses `
` headings and the Default Theme uses `
` headings for the title headings in their comments, in the comments-popup.php template file, they both use the `
` heading tag.
Comments
....Classic Theme comment section.....
...Classic Theme footer....
The body tag sets the style for the overall page with `#commentspopup`. The `
` heading begins the comments section.
If you make modifications to the structure of the tags within the header and footer of the overall Theme, ensure those structural changes are applied to the comments popup template, especially if you will be [releasing the Theme to the public](https://codex.wordpress.org/Designing_Themes_for_Public_Release).
### Sidebar
As you saw with the Default Theme, the sidebar can be visible or not, depending upon the template file in use. The sidebar, in general, can be simple or complex. WordPress Themes often feature information within the sidebar in **nested lists**. There is a step-by-step guide for the sidebar at [Customizing Your Sidebar](https://codex.wordpress.org/Customizing_Your_Sidebar) and more information on [Styling Lists with CSS](https://codex.wordpress.org/Styling_Lists_with_CSS), too.
In general, the WordPress sidebar features titles of the various sections within a list, with the section items in a nested list below the title.
The Classic Theme sidebar looks like this, with the links removed for simplification:
Pages
Contact
About
Blogroll
Blogroll Link 1
Blogroll Link 1
Blogroll Link 1
Categories:
Category Link 1
Category Link 2
Archives:
Archives Month Link 1
Archives Month Link 2
Meta:
RSS Feed Link
RSS Comments Feed Link
XHTML Validator
XFN Link
WordPress Link
Most of these are self-explanatory. Each set of links has its own CSS selector: [Pages](https://wordpress.org/documentation/article/create-pages/), categories, archives, search, and meta.
#### Pages and Link Categories
The [Pages](https://wordpress.org/documentation/article/create-pages/) and [Links](https://codex.wordpress.org/Links_Manager) category, labeled “Blogroll”, uses the [](https://developer.wordpress.org/reference/functions/get_links_list/) and [](https://developer.wordpress.org/reference/functions/wp_list_pages/) template tags which automatically generate a heading.
For the **Links** category, it generates an h2 heading for that set of links. This means you can style the menu h2 heading to look differently from the rest of the headings, or, if you want them to all look the same, make sure that the menu h2 style *matches* the rest of the category styles which are not automatically generated.
The **Pages** template tag generates pagenav as the heading and then identifies the pages in a new way. As a general list viewed on multi-post and single post views, the Page list items feature a class=”page_item” to style those links. When viewing an individual Page, that Page’s link will change to class=”current_page_item”, which can then be styled to look differently from the rest of the Page links.
#### Categories, Archives, and Meta
The other sidebar section titles, *categories*, *archives*, *meta*, and others, do not use template tags which generate their own titles. These are set inside of PHP statements which “print” the text on the page. While these could be put inside of [heading tags](https://codex.wordpress.org/Designing_Headings), WordPress uses the `_e()` function to display or `echo` the text titles while also marking the text as a possible target for language translation. If you will be [developing your theme](https://codex.wordpress.org/Theme_Development) for [public release](https://codex.wordpress.org/Designing_Themes_for_Public_Release), using the echo functions is highly recommended.
You can style these individually or all the same. Some Themes, like the Default Theme, put all these in `
` headings so the list headings will all look the same. Therefore, they may or may not use style references for each section. You may add them if you need them to change the look of each section of links.
#### Search Form
The search form is found within the searchform.php. It may be found in different locations within the sidebar. To style the overall search form, use the search ID. Here is a list of the individual areas of the search form which may be styled by default. You may add style classes to gain more control over the look of your search form.
**\#search**
The overall style for the search form.
**\#search label**
Used to style the label tag, if necessary.
**\#searchform**
Used to style the form itself.
**\#search div**
This unlabeled div is a child container of the parent container search and maybe styled from within that selector.
**\#searchform input**
To style the input area for the search, this selector combination will work.
**\#searchsubmit**
*Used by the Default Theme*, this selector may be used to style the **search** or **submit** button.
The search form area, input, and button can be styled in many ways, or left with the default input and “button” look.
#### Meta Feed Links
The Meta links may be shown as text or icons representing the various links. The XHTML and CSS validation links may use the W3 icons. The various Feeds can also be represented as icons. Or left as text. It’s up to you. Use of the feeds within your sidebar with text or icons is covered by the article [WordPress Feeds](https://wordpress.org/documentation/article/wordpress-feeds/).
### Footer
The footer is found within the footer.php template file. In both the Default and Classic Themes, the footer contains little information.
**Classic Theme**
The footer’s content is styled with the credit class and the paragraph and cite tags.
The tag displays the number of mysql queries used on the page and the time it took for the page to load, in HTML commented code. It is there for the administrator’s convenience and use. It is only visible within the page’s source code. If you would like to display this visible on the page, remove the [comments](https://codex.wordpress.org/Commenting_Code). It’s look will be influenced by the credit class style of the paragraph tag. On the template file, it looks like this:
**Default Theme**
The Default Theme’s footer is styled by the footer ID and the paragraph tag. While the footer area itself maybe styled by the footer, the paragraph tag controls the text within it. To style the paragraph tag differently within the footer than the rest of your page:
**\#footer p {styles}**
## Resources
- [CSS](https://developer.wordpress.org/advanced-administration/wordpress/css/)
- [Finding Your CSS Styles](https://codex.wordpress.org/Finding_Your_CSS_Styles)
- [CSS Troubleshooting](https://codex.wordpress.org/CSS_Troubleshooting)
- [Using Themes](https://wordpress.org/documentation/article/worik-with-themes/)
- [Theme Development](https://codex.wordpress.org/Theme_Development)
- [Designing Themes for Public Release](https://codex.wordpress.org/Designing_Themes_for_Public_Release)
- [WordPress Lessons](https://learn.wordpress.org/)
- [Blog Design and Layout](https://codex.wordpress.org/Blog_Design_and_Layout)
- [Stepping Into Template Tags](https://codex.wordpress.org/Stepping_Into_Template_Tags)
# Cookies
WordPress uses cookies, or tiny pieces of information stored on your computer, to verify who you are. There are cookies for logged in users and for commenters.
## Enable Cookies in Your Browser
WordPress uses cookies for authentication. That means that in order to log in to your WordPress site, you must have cookies enabled in your browser.
You can find information on how to manage those for the most popular browsers here:\
– [Google Chrome](https://support.google.com/chrome/answer/95647)\
– [Mozilla Firefox](https://support.mozilla.org/en-US/kb/enable-and-disable-cookies-website-preferences)\
– [Microsoft Edge](https://privacy.microsoft.com/en-us/windows-10-microsoft-edge-and-privacy)\
– [Safari](https://support.apple.com/guide/safari/manage-cookies-and-website-data-sfri11471/mac)\
– [Opera](https://help.opera.com/en/latest/web-preferences/#cookies)\
– [Brave](https://brave.com/privacy/browser/)
## User’s Cookie
Users are those people who have registered an account with the WordPress site.
On login, WordPress uses the `wordpress_[hash]` cookie to store your authentication details. Its use is limited to the Administration Screen area, `/wp-admin/`.
After login, WordPress sets the `wordpress_logged_in_[hash]` cookie, which indicates when you’re logged in, and who you are, for most interface use.
WordPress also sets a few `wp-settings-{time}-[UID]` cookies. The number on the end is your individual user ID from the users database table. This is used to customize your view of admin interface, and possibly also the main site interface.
The cookies lifetime can be adjusted with the `auth_cookie_expiration` hook. An example of this can be found at [what’s the easiest way to stop wp from ever logging me out](https://wordpress.stackexchange.com/questions/515/whats-the-easiest-way-to-stop-wp-from-ever-logging-me-out).
### Non-Version-Specific Data
The actual cookies contain your username, the expiration time and *hashed* data that ensures you have a valid session. A *hash* is the result of a specific mathematical formula applied to some data. In case of these cookies, only 4 characters of your hashed password are stored in a hash in your cookie. This ensures that it is impossible to retrieve your password from the cookie. It also ensures that any cookie will invalidated whenever your password is changed.
WordPress uses the two cookies to bypass the password entry portion of `wp-login.php`. If WordPress recognizes that you have valid, non-expired cookies, you go directly to the [WordPress Administration Screen](https://wordpress.org/documentation/article/administration-screens). If you don’t have the cookies, or they’re expired, or in some other way invalid (like you edited them manually for some reason), WordPress will require you to log in again, in order to obtain new cookies.
## Commenter’s Cookie
When visitors comment on your blog, they get cookies stored on their computers too. This is purely a convenience, so that the visitor won’t need to re-type all their information again when they want to leave another comment. Three cookies are set for commenters:
- `comment_author_{HASH}`
- `comment_author_email_{HASH}`
- `comment_author_url_{HASH}`
The commenter cookies are set to expire a little under one year from the time they’re set.
## WordPress Test Cookie
WordPress will set a temporary cookie named `wordpress_test_cookie` which is to probe the ability of WordPress to set cookies. If writing this cookie fails, you will get the following error message “Cookies are blocked or not supported by your browser.”
In case you get this after moving your website, always try to delete your cookies and if you are using a caching plugin, the server cache. This will solve temporary issues.
## Language Cookie
WordPress allows you to alter the language of all translatable strings on login. For this measure WordPress will set a cookie named `wp_lang` which is a session cookie and will store the language key of the selected language.
## References
- [Wikipedia: Cookies](https://en.wikipedia.org/wiki/HTTP_cookie)
- [RFC2965](http://www.faqs.org/rfcs/rfc2965.html)
- [PHP cookie documentation](https://www.php.net/manual/en/features.cookies.php)
# Update Services
Update Services are tools you can use to let other people know you’ve updated your blog. WordPress automatically notifies popular Update Services that you’ve updated your blog by sending a [XML-RPC](https://xmlrpc.com/) [ping](https://wordpress.org/documentation/article/glossary/#pingback) each time you create or update a post. In turn, Update Services process the ping and updates their proprietary indices with *your* update.
## Common Usage
Most people use [Ping-o-Matic](https://pingomatic.com/) which, with just one “ping” from you, will let many other services know that you’ve updated. As for why, Ping-O-Matic puts it best:
> Ping-O-Matic is a service to update different search engines that your blog has updated.\
> We regularly check downstream services to make sure that they’re legit and still work. So while it may appear like we have fewer services, they’re the most important ones.
If you do not want the update services to be pinged, remove all the update service URIs listed under “Update Services” on the [Settings](https://wordpress.org/documentation/article/administration-screens/#settings-configuration-settings)-\>[Writing](https://wordpress.org/documentation/article/settings-writing-screen/) administration screen of your WordPress installation.
Certain web hosts – particularly free ones – disable the PHP functions used to alert update services. If your web host prevents pings, you should stop WordPress from attempting to ping.
## XML-RPC Ping Services
https://rpc.pingomatic.com/
https://rpc.twingly.com/
http://ping.blo.gs/
## Alternatives
An alternative is [Feed Shark](https://feedshark.brainbliss.com/), which pings over 60 services for free.
## WordPress Multisite Network
By default, editing the Ping Services field is disabled for individual sites in a WordPress Multisite network. To restore this option, you can add a small custom plugin or must-use plugin with the following code:
add_action( 'init', function() {
if ( is_multisite() ) {
// Allow the Update Services configuration screen to appear.
add_filter( 'enable_update_services_configuration', '__return_true', 11 );
// Whitelist the 'ping_sites' option so changes can be saved to the database.
add_filter( 'whitelist_options', function( $options ) {
$options['writing'][] = 'ping_sites';
return $options;
}, 11 );
}
} );
# Editing Files
There are times when you will need to edit WordPress files, especially if you want to change your [WordPress Theme](https://wordpress.org/documentation/article/worik-with-themes/). WordPress features a [built-in editor](https://developer.wordpress.org/advanced-administration/wordpress/edit-files/#using-the-theme-file-editor-and-plugin-file-editor) that allows you to edit files online, using any internet browser. You can also edit files copied or stored on your computer, and then upload them to your site using an [FTP client](https://developer.wordpress.org/advanced-administration/upgrade/ftp/). Before editing any of your WordPress files, be sure to do the following:
- Work from copies of backup files when possible, and make sure that you [back up your information](https://developer.wordpress.org/advanced-administration/security/backup/) frequently–while you work, and whenever you make changes. Remember to keep your backups in a safe place!
- When working online, you need to set the appropriate [file permissions](https://developer.wordpress.org/advanced-administration/server/file-permissions/) so that you can modify and save files. If you see a note at the bottom of the WordPress editor panel that says *If this file was writable, you could edit it…* this means that you need to change the file permissions before you can make any changes.
- When modifying files outside the built-in plugin and theme editors, use a [text editor](https://wordpress.org/documentation/article/wordpress-glossary/#text-editor). **It is strongly advisable not to use a word-processing program**. Word processors change quote marks to characters, they sometimes convert specific characters, and they can also add in unwanted code. These changes can cause files to break. For similar reasons, it is also inadvisable to use certain HTML generator programs.
## Using the Theme File Editor and Plugin File Editor
WordPress contains two built-in editors that allow you to edit theme files directly from your browser. They are called the **theme file editor** and the **plugin file editor**. Please note that, depending on the level of user privileges that you have, you may or may not be able to access these features in the administrative panel of your blog. Please contact your blog or website administrator, to have your privileges adjusted.
### Where can I find these editors?
You can find these editors in the following places, depending on your theme:
- If you are using a [Block theme](https://wordpress.org/documentation/article/block-themes/), both the Theme and Plugin File Editor will be listed under Tools.
- If you are using a Classic theme, the Theme File Editor will be listed under Appearance and the Plugin File Editor will be listed under Plugins.
You can view a file in either of these editors by accessing it from the right-hand sidebar navigation. More information on editing themes is available at [Theme Developer Handbook](https://developer.wordpress.org/themes/). Be aware that if the theme you edit is updated, your changes will be overwritten. To better organize your changes and protect them from updates, consider creating a [Child Theme](https://developer.wordpress.org/themes/advanced-topics/child-themes/) in which to keep all your changes.
### What Files Can Be Edited?
The following file types (if [writable](https://developer.wordpress.org/advanced-administration/server/file-permissions/)) can be edited in the plugin editor that is built into the WordPress administrative panel:
- [HTML](https://wordpress.org/documentation/article/glossary#html)
- [PHP](https://wordpress.org/documentation/article/glossary#php)
- [CSS](https://wordpress.org/documentation/article/glossary#css)
- TXT (and related text-like files such as RTF)
In the theme editor, only writable PHP and CSS files can be edited.
### Things You Need to Know
#### Instant Changes
The changes you make to files using the WordPress editors are instant. The changes happen online, in real-time. You and any visitors to your site will see the changes, immediately. Because of the immediate nature of the changes, it’s usually safer to edit copies of your files offline, test the file copies, and then upload your changes when they are verified. Always make sure you have a current backup before editing files.
#### Editor Features
The built-in WordPress plugin and theme file editors are very basic, allowing you to easily view and edit plugin and theme files on your website. Please note that there are no advanced editor features such as search and replace, line numbers, syntax highlighting, or code completion. Hint: Use your browser’s internal search bar to help find code within the visual editors.
#### File Permissions
To edit a file using the built-in WordPress plugin and theme editors, the permissions for that file must be set to writable (at least 604). You can [change the permissions](https://developer.wordpress.org/advanced-administration/server/file-permissions/) on files by using an [FTP client program](https://developer.wordpress.org/advanced-administration/upgrade/ftp/), a web-based file manager provided by your host, or from the [command-line](https://wordpress.org/documentation/article/glossary#shell) using SSH (secure shell). Your options depend on the type of access your host offers.
#### Make a Mistake? Use Backup Files
Back up all files before editing. If you make a mistake that causes errors, causes a site crash, creates a blank screen, or blocks access to your WordPress Dashboard, delete the changed file and replace it with a good copy from your backup. No backup? Download a fresh copy of the file you edited from the original source, replace it, and start over. BACK UP FIRST.
#### Security Warning
By default, any user that logs in with administrative permissions can access the WordPress plugin and theme editors, and change any theme or plugin file on your site in real-time. To combat accidents, errors, or even hacking, you may wish to disable the ability to edit files within the WordPress theme by adding the [DISALLOW_FILE_EDIT](https://wordpress.org/documentation/article/editing-wp-config-php/#disable-the-plugin-and-theme-editor) function to your `wp-config.php` file.
## Editing Files Offline
To edit files offline, you can use any of the [recommended text editors](https://developer.wordpress.org/advanced-administration/wordpress/edit-files/#text-editors) to create and edit files, and an [FTP client](https://developer.wordpress.org/advanced-administration/upgrade/ftp/) to upload them. Make sure to view the results in your browser, to see if the desired changes have taken effect. **Note**: It is not recommended to change WordPress core files other than [wp-config.php](https://wordpress.org/documentation/article/editing-wp-config-php/). If you must change anything else, take notes about your changes, and store a copy of these notes in a text file in your WordPress root directory. You should also make a backup copy of your WordPress core files, for future reference and upgrades.
## Using Text Editors
### Editors to Avoid
Editors to avoid include any do-it-yourself instant web page software (like Adobe Dreamweaver), or text processor (like Google Docs or Microsoft Word). **Note:** If you use an external editor such as a word-processor to create and edit files, this can corrupt the file you are editing. See [text editor](https://wordpress.org/documentation/article/wordpress-glossary/#text-editor) in the glossary for a short explanation as to why you should avoid these editors.
### Text Editors
The following [text editors](https://wordpress.org/documentation/article/wordpress-glossary/#text-editor) are acceptable for file editing:
- [BBEdit](https://www.barebones.com/products/bbedit/) (Mac, Free)
- [Crimson Editor](http://www.crimsoneditor.com/) (Windows, Free)
- [CodeLobster](https://codelobster.com/) (Mac, Linux, Windows, Free)
- [EditPad](https://www.editpadpro.com/) (Windows)
- [EditPlus](https://www.editplus.com/) (Windows)
- [emacs](https://www.gnu.org/software/emacs/emacs.html) (Mac, Linux, Windows) Open-Source, Free
- [JEdit](https://jedit.org/) (Mac, Linux, Windows)
- [Notepad++](https://notepad-plus-plus.org/) (Windows) Open-Source, Free
- [PSPad](https://www.pspad.com/) (Windows) Free
- [Smultron](https://www.peterborgapps.com/smultron/) (Mac) \$
- [SubEthaEdit](https://apps.apple.com/us/app/subethaedit/id728530824) (Mac) Open-Source, Free
- [Sublime Text](https://www.sublimetext.com/) (Mac, Linux, Windows) \$
- [TextMate](https://macromates.com/) (Mac) \$
- [TextPad](https://www.textpad.com/home) (Windows)
- [UltraEdit-32](https://www.ultraedit.com/) (Mac, Linux, Windows) \$
- [vim](https://www.vim.org/) (Mac, Linux, Windows) Open-Source, Free
- [Visual Studio Code](https://code.visualstudio.com/) (Mac, Linux, Windows)
- [NetBeans](https://netbeans.apache.org/) (Mac, Linux, Windows)
# CSS
As of WordPress 6.2, you can add custom CSS in the Styles area of the Site Editor. Learn more about the [site-wide and per-block custom CSS editors](https://wordpress.org/documentation/article/styles-overview/#applying-custom-css).
WordPress relies heavily on the presentation styles within CSS. With the use of [Themes](https://wordpress.org/documentation/article/using-themes/), you have an almost infinite choice of layout options. WordPress Themes make it easy to change your website’s appearance, and open up the field to help you [create your own Theme](https://codex.wordpress.org/Theme_Development) and page layout.
[CSS](https://wordpress.org/documentation/article/glossary/#css) stands for **Cascading Style Sheets**. It allows you to store style presentation information (like colors and layout) separate from your HTML structure. This allows precision control of your website layout and makes your pages faster and easier to update.
This article briefly describes the use of CSS in WordPress, and lists some references for further information. For information on CSS itself, see [Resources for Building on WordPress: CSS](https://developer.wordpress.org/advanced-administration/resources/#css).
## [WordPress and CSS](#wordpress-and-css)
WordPress Themes use a combination of [template files](https://codex.wordpress.org/Templates), [template tags](https://codex.wordpress.org/Template_Tags), and CSS files to generate your WordPress site’s look.
### [Template Files](#template-files)
[Template files](https://codex.wordpress.org/Stepping_Into_Templates) are the building blocks which come together to create your site. In the [WordPress Theme structure](https://developer.wordpress.org/advanced-administration/wordpress/site-architecture/), the header, sidebar, content, and footer are all contained within individual files. They join together to create your page. This allows you to customize the building blocks. For example, in the default WordPress Theme, the multi-post view found on the front page, category, [archives](https://codex.wordpress.org/Creating_an_Archive_Index), and [search](https://codex.wordpress.org/Creating_a_Search_Page) web pages on your site, the sidebar is present. Click on any post, you will be taken to the single post view and the sidebar will now be gone. You can [choose which parts and pieces appear](https://codex.wordpress.org/The_Loop_in_Action) on your page, and customize them individually, allowing for a different header or sidebar to appear on all pages within a specific category. And more. For a more extensive introduction to Templates, see [Stepping Into Templates](https://codex.wordpress.org/Stepping_Into_Templates).
### [Template Tags](#template-tags)
Template tags are the bits of code which provide instructions and requests for information stored within the WordPress database. Some of these are highly configurable, allowing you to customize the date, time, lists, and other elements displayed on your website. You can learn more about template tags in [Stepping Into Template Tags](https://codex.wordpress.org/Stepping_Into_Template_Tags).
### [Stylesheet](#stylesheet)
The CSS file is where it all comes together. On every template file within your site there are HTML elements wrapped around your template tags and content. In the stylesheet within each Theme are rules to control the design and layout of each HTML element. Without these instructions, your page would simply look like a long typed page. With these instructions, you can move the building block structures around, making your header very long and filled with graphics or photographs, or simple and narrow. Your site can “float” in the middle of the viewer’s screen with space on the left and right, or stretch across the screen, filling the whole page. Your sidebar can be on the right or left, or even start midway down the page. How you style your page is up to you. But the instructions for styling are found in the `style.css` file within each Theme folder.
## [Custom CSS in WordPress](#custom-css-in-wordpress)
Starting with WordPress 4.7, you can now add custom CSS to your own theme from the [Appearance Customize Screen](https://wordpress.org/documentation/article/appearance-customize-screen/), without the need for additional plugins or directly editing themes and child themes. Just choose the **Additional CSS** tab when customizing your current theme to get started!
Any CSS changes you make will appear in the preview, just like other changes made in the customizer, this means you have time to tweak and perfect the look of your site, without actually changing anything until you are happy with it all!
Keep in mind that the CSS changes are tied in with your theme. This means that if you change to a new theme, your custom CSS styles will no longer be active (of course, if you change back to your previous theme, they will once again be there).
### [Why use Custom CSS?](#why-use-custom-css)
There are a few reasons why:
- If you modify a theme directly and it is updated, then your modifications may be lost. By using Custom CSS you will ensure that your modifications are preserved.
- Using Custom CSS can speed up development time.
- Custom CSS is loaded after the theme’s original CSS and thus allows overriding specific CSS statements, without having to write an entire CSS set from scratch.
## [WordPress Generated Classes](#wordpress-generated-classes)
Several classes for aligning images and block elements (`div`, `p`, `table` etc.) were introduced in WordPress 2.5: `aligncenter`, `alignleft` and `alignright`. In addition the class `alignnone` is added to images that are not aligned, so they can be styled differently if needed.
The same classes are used to align images that have a caption (as of WordPress 2.6). Three additional CSS classes are needed for the captions, and one more for accessibility. Together, the classes are:
/* WordPress Core
-------------------------------------------------------------- */
.alignnone {
margin: 5px 20px 20px 0;
}
.aligncenter,
div.aligncenter {
display: block;
margin: 5px auto 5px auto;
}
.alignright {
float:right;
margin: 5px 0 20px 20px;
}
.alignleft {
float: left;
margin: 5px 20px 20px 0;
}
a img.alignright {
float: right;
margin: 5px 0 20px 20px;
}
a img.alignnone {
margin: 5px 20px 20px 0;
}
a img.alignleft {
float: left;
margin: 5px 20px 20px 0;
}
a img.aligncenter {
display: block;
margin-left: auto;
margin-right: auto;
}
.wp-caption {
background: #fff;
border: 1px solid #f0f0f0;
max-width: 96%; /* Image does not overflow the content area */
padding: 5px 3px 10px;
text-align: center;
}
.wp-caption.alignnone {
margin: 5px 20px 20px 0;
}
.wp-caption.alignleft {
margin: 5px 20px 20px 0;
}
.wp-caption.alignright {
margin: 5px 0 20px 20px;
}
.wp-caption img {
border: 0 none;
height: auto;
margin: 0;
max-width: 98.5%;
padding: 0;
width: auto;
}
.wp-caption p.wp-caption-text {
font-size: 11px;
line-height: 17px;
margin: 0;
padding: 0 4px 5px;
}
/* Text meant only for screen readers. */
.screen-reader-text {
border: 0;
clip: rect(1px, 1px, 1px, 1px);
clip-path: inset(50%);
height: 1px;
margin: -1px;
overflow: hidden;
padding: 0;
position: absolute !important;
width: 1px;
word-wrap: normal !important; /* Many screen reader and browser combinations announce broken words as they would appear visually. */
}
.screen-reader-text:focus {
background-color: #eee;
clip: auto !important;
clip-path: none;
color: #444;
display: block;
font-size: 1em;
height: auto;
left: 5px;
line-height: normal;
padding: 15px 23px 14px;
text-decoration: none;
top: 5px;
width: auto;
z-index: 100000;
/* Above WP toolbar. */
}
Each Theme should have these or similar styles in its `style.css` file to be able to display images and captions properly. The exact HTML elements and class and ID values will depend on the structure of the Theme you are using.
## [Templates and CSS](#templates-and-css)
To help you understand more about how CSS works in relationship to your web page, you may wish to read some of the articles cited in these lists:
- [Using Themes](https://wordpress.org/documentation/article/using-themes/) – There are also many advanced articles in this list.
- [Templates](https://codex.wordpress.org/Templates) – Comprehensive list of WordPress Theme and Template articles.
- [Theme Development](https://codex.wordpress.org/Theme_Development) – WordPress Theme Development guide and code standards.
## [WordPress Layout Help](#wordpress-layout-help)
If you are having some problems or questions about your WordPress Theme or layout, begin by checking the website of the Theme author to see if there is an upgrade or whether there are answers to your questions. Here are some other resources:
- [Site Design and Layout](https://codex.wordpress.org/Site_Design_and_Layout) – Comprehensive list of resources related to site design in WordPress.
- [FAQ Layout and Design](https://codex.wordpress.org/FAQ_Layout_and_Design)
## [CSS Resources](#css-resources)
- [Finding Your CSS Styles](https://codex.wordpress.org/Finding_Your_CSS_Styles)
- [CSS Troubleshooting](https://codex.wordpress.org/CSS_Troubleshooting)
- [CSS Fixing Browser Bugs](https://codex.wordpress.org/CSS_Fixing_Browser_Bugs)
- [CSS Coding Standards](https://developer.wordpress.org/coding-standards/wordpress-coding-standards/css/)
- [CSS Shorthand](https://codex.wordpress.org/CSS_Shorthand)
- [Resources for Building on WordPress: CSS](https://developer.wordpress.org/advanced-administration/resources/#css)
- [Conditional Comment CSS](https://codex.wordpress.org/Conditional_Comment_CSS)
- [Validating a Website](https://codex.wordpress.org/Validating_a_Website)
# WordPress Feeds
## WordPress Built-in Feeds
By default, WordPress comes with various feeds. They are generated by template tag for [bloginfo()](https://developer.wordpress.org/reference/functions/bloginfo/) for each type of feed and are typically listed in the sidebar and/or footer of most WordPress Themes. They look like this:
URL for [RDF/RSS 1.0 feed](https://web.resource.org/rss/1.0/)
URL for [RSS 0.92 feed](https://www.rssboard.org/rss-0-9-2)
URL for [RSS 2.0 feed](https://www.rssboard.org/rss-specification)
URL for [Atom feed](http://www.atomenabled.org/)
URL for comments RSS 2.0 feed
The first four feeds display recent updates and changes to your site’s content for the different feedreaders. Of these, the RSS feeds are the most well known. The last feed example is used by RSS 2.0 feedreaders and does not show your site’s content. It only shows the comments made on your site.
To track the comments on a specific post, the [post_comments_feed_link()](https://developer.wordpress.org/reference/functions/post_comments_feed_link/) template tag is used on single post pages like this:
There are ways to modify these feeds, and these are covered in the article on [Customizing Feeds](https://codex.wordpress.org/Customizing_Feeds).
## Adding Feeds
Not all WordPress Themes feature all of the RSS Feed types that are available through WordPress. To add a feed to your site, find the location of where the other feeds are, typically in your sidebar.php or footer.php template files of your Theme. Then add one of the tags listed above to the list, like this example:
### Adding Graphics to Feed Links
Many people like to have a graphic representing the feed instead of words. There are now [standards](http://www.feedicons.com/) for these graphics or “buttons”, but you can [make your own](https://kalsey.com/tools/buttonmaker/) to match the look and colors on your site.
To add a graphic to your feed link, simply wrap the link around the graphic such as:
### Changing Addresses
If you are currently using other webblog software and are changing to WordPress, or are moving your weblog to a new location, you can “forward” RSS readers to your new RSS feeds using file rewrites and redirects in your .htaccess file.
Edit the `.htaccess` file in your root folder; if no file exists, create one.
Here is an example for a b2 feed:
RewriteRule ^b2rss2.php(.*)? /wordpress/?feed=rss2 [QSA]
Here is an example for MovableType Users:
RewriteRule ^index.xml(.*)? /wordpress/?feed=rss2 [QSA]
# Multilingual WordPress
WordPress currently does not support a bilingual or multilingual blog out-of-the-box. However, plugins developed by the WordPress community make it easy to create a multilingual blog. The fourth and final phase of the WordPress Gutenberg project will add core implementation for multilingual sites as listed in the [WordPress roadmap](https://wordpress.org/about/roadmap/).
Creating a multilingual blog is basically installing WordPress in more than one language and letting the Plugin switch between them. This includes installing .mo languages files which most Plugins will require you to do manually. For more details, see [Installing WordPress in Your Language](https://developer.wordpress.org/advanced-administration/before-install/in-your-language/).
## Different types of multilingual plugins
There are a few basic types of multilingual Plugins:
1. Manage multilingual posts in one post per language. Translations are then linked together, indicating that one post is the translation of another.
2. Store all languages alternatives for each post in the same post.
3. Manage translations on the generated page instead of using a post context.
4. Link together separate WordPress sites in a network (multisite) installations for each language by pinging back and forth.
### One language per post
Multilingual plugins that assign a single language per post will let the user select the post’s language and add translations as new posts (same for pages, tag and categories).
Then, different versions of the same content are linked together to form translation groups. This grouping allows users to switch the display language.
Pros:
1. The database contents for posts remain unmodified (easy install and uninstall).
2. Everything gets translated by default. If a post includes custom fields, they’re attached to that post, so they are already associated with the language.
3. Some plugins use – for theme’s displayed terms – the language files (.mo) delivered with localizable themes. In WordPress, localization is based in [GNU gettext](https://make.wordpress.org/polyglots/handbook/#Localization_Technology) technology. So when a single post is in french, plugin switch all the terms of the theme in the same language (here french). The files can be completed with the specific terms of the site (categories titles, widget, links…). No need to re-translate all, just add specific terms and translations in target languages.
4. Other plugins that analyze contents (like related posts) keep working correctly.
Cons:
1. More complex architecture. The plugin needs to hook to many WordPress functions and filter them so that only contents that matches the language is returned.
2. Additional tables are required by some plugins – normally, to hold the translation grouping. Newer plugins likely use a custom taxonomy or post meta fields instead.
3. May cause excessive database grow and slow performance as a result. A WooCommerce-based site having a 100,000 products will have 500,000 records after translating to 5 languages. All product metas (could be tens of those per product, and also transients will be duplicated, too, so the database might become huge).
### All languages in a single post
Multilingual plugins that hold all the language contents in the same post use language meta tags to distinguish between contents in different languages. When the post is displayed, it’s first processed and only the active language content remains.
Pros:
1. Side by side editing is easily implemented.
2. Less things to break. There are no additional tables and much fewer things to modify in WordPress.
3. The search will find the same post, regardless on which language you used for the keyword.
4. Number of records in the database stays the same.
Cons:
1. Uninstall can be complicated, as the database needs to be cleaned from multilingual contents.
2. Post permalinks may not be translatable.
### Manage translations on the generated page
Multilingual plugins that use the content pages generated by WordPress and perform translation on those pages. When any page is displayed on WordPress the plugin (either offline or online) attempts to create a translated version of the page using machine translation. Later on that translation can be manually changed or modified.
Pros:
1. Installation is simple and translation for any content on the page is provided.
2. Editing the translation can be done with ease.
Cons:
1. Automatic translation is not good enough and pages on the site might be badly translated.
2. There’s a strong coupling between content and translation, and changes in the original content might break the translation.
### Plugins that direct you to external translation services
Those Multilingual plugins are normally used to create a widget that creates a shortcut for using online translation services (such as Google Translate). The content is auto translated on demand by the third party engine.
Pros:
1. Installation is simple and translation for any content on the page is provided.
2. It is quite clear that the translation process is automated, so the users expectations are lowered.
Cons:
1. Automatic translation is not good enough and pages on the site might be badly translated.
2. Without the ability to change the translation those plugins limit the ability of the content publisher to provide quality translated content.
### Each language in its own WordPress installation
A separate site is created for each language you want to translate into (e.g. in a [WordPress Multisite](https://developer.wordpress.org/advanced-administration/multisite/create-network/) installation). All the sites need to run the same theme and plugin. When a translation is saved source posts get pinged by translation posts and the system keeps a separate table with the translation relationships.
Pros:
1. Each language site is a regular WordPress install with regular posts (postmeta and external db is used for translation data)
2. If you turn off the plugin the content continues to work fine, albeit without knowledge of its sources/translations.
Cons:
1. Separate sites create more management needs which might be undesirable.
## Language negotiation
Language negotiation means how to determine the language in which users see the site.
Regardless of the solution for storing multilingual contents, multilingual plugins also need to be able to choose which language to display in.
Normally, the URL indicates the display language. Different URL strategies for encoding language information are:
- Add the language name as a parameter: example.com/?lang=en or example.com/?lang=es
- Add virtual ‘directories’ as language names: example.com/en/ or example.com/es/
- Use different domains for different languages: www.example.com or es.example.com
## How to choose the right multilingual solution
Choosing the most suitable multilingual Plugin for your needs will take some time. See the [WordPress Plugin Directory](https://wordpress.org/plugins/search/multilingual) for a list of multilingual Plugins.
There is not only one way but a way adapted to the content strategy, the data-model, the number of posts and pages, and the behavior/experience expected by visitors. And for WordPress Network (multisite), a good knowledge of server administration is required.
In any case, installing a multilingual plugin is a big change for any site. It would be a good idea to first create a test site and verify that everything works correctly between all the required plugins and the theme and only then install.
Since many multilingual plugins change the database significantly, doing a [database backup](https://developer.wordpress.org/advanced-administration/security/backup/database/) is required before experimenting.
## Related
- [WordPress in Your Language](https://developer.wordpress.org/advanced-administration/before-install/in-your-language/)
# oEmbed
The easy embedding feature is mostly powered by oEmbed, a protocol for consumers (such as your blog) to ask providers (such as YouTube) for the HTML needed to embed content from the provider.
oEmbed is designed to avoid the need to copy and paste HTML from the site hosting the media you wish to embed. It supports different kind of content like videos, images, text, and more.
## Does This Work With Any URL?
No, not by default. The WordPress Core has an [internal whitelist](https://developer.wordpress.org/reference/hooks/oembed_providers/) that will only allow certain URLs to be embeddable for security reasons. The good news is that the whitelist can be modified, and new sites and URLs can be added by registering their handle.
## How Can I Add or Change Support For Websites?
Adding support for an additional website depends on whether the site supports oEmbed. [oEmbed.com](https://oembed.com/) provides a list of hundreds of [supported provides](https://oembed.com/providers.json).
### Adding Support For An oEmbed-Enabled Site
If a site supports oEmbed, you’ll want to call [`wp_oembed_add_provider()`](https://developer.wordpress.org/reference/functions/wp_oembed_add_provider/) to add the site and URL format to the internal whitelist.
### Adding Support For A Non-oEmbed Site
You’ll need to register a handler using [`wp_embed_register_handler()`](https://developer.wordpress.org/reference/functions/wp_embed_register_handler/) and provide a callback function that generates the HTML.
### Removing Support for An oEmbed-Enabled Site
If you wish to remove an oEmbed-enabled provider, you’ll want to call [`wp_oembed_remove_provider`](https://developer.wordpress.org/reference/functions/wp_oembed_remove_provider/).
## What About oEmbed Discovery?
As of version 4.4, WordPress supports oEmbed discovery, but has severe limitations on what type of content can be embedded via non-whitelisted sites.
Specifically, the HTML and Video content is filtered to only allow links, blockquotes, and iframes, and these are additionally filtered to prevent insertion of malicious content. The HTML is then modified to be sandboxed and to have additional security restrictions placed on them as well.
However, if you feel you are knowledgeable enough to not require this level of safety, you can give `unfiltered_html` users (Administrators and Editors) the ability to embed from websites that have oEmbed discovery tags in their ``.
The oEmbed discovery content for “link” and “photo” types is not quite so heavily filtered in this manner; however, it is properly escaped for security and to prevent any malicious content from being displayed on the site
# Loopbacks
A loopback request is when WordPress tries to connect back to its own site.
WordPress uses loopback requests to start WP-Cron, which runs scheduled posts and other scheduled events that plugins or themes may add.
Loopback requests are also used by the built-in plugin and theme file editors. When you make a change, WordPress connects back to the site to check that the change does not break the site.
## Troubleshooting loopback issues
If scheduled posts or other timed events are not running, or if Site Health reports that loopback requests are failing, you may need to troubleshoot the site.
The most common cause of loopback failures is a plugin or theme conflict. Start with the normal troubleshooting steps:
## Common troubleshooting steps
- Deactivate **all plugins** to see whether this resolves the problem. If it does, reactivate the plugins one by one until you find the plugin causing the issue. If you cannot access your admin dashboard, try resetting the plugins folder by [SFTP/FTP](https://developer.wordpress.org/advanced-administration/upgrade/ftp/) or [phpMyAdmin](https://developer.wordpress.org/advanced-administration/upgrade/phpmyadmin/). For more help, read [How to deactivate all plugins when you can’t log in to wp-admin](https://wordpress.org/documentation/article/faq-troubleshooting/). Sometimes, an apparently inactive plugin can still cause problems. Also remember to deactivate any plugins in the `mu-plugins` folder. The easiest way is to temporarily rename that folder to `mu-plugins-old`.
- Switch to a bundled default WordPress theme to rule out theme-specific problems. If you cannot log in to change themes, you can temporarily move or rename the active theme folder by [SFTP/FTP](https://developer.wordpress.org/advanced-administration/upgrade/ftp/) so WordPress can fall back to an installed default theme.
- If the problem continues after disabling plugins and switching themes, contact your hosting provider. Ask whether server-side security rules, firewall rules, DNS configuration, SSL configuration, or HTTP authentication are blocking the site from requesting its own URL.
# Common WordPress errors
If you are encountering a WordPress error message or white screen, don’t panic. Someone has likely encountered the same message before and it can easily be solved.
This page lists the most common WordPress errors experienced by WordPress users, and provides a starting point for fixing them. At [WordPress Support](https://wordpress.org/documentation/), you will also find links to more detailed pages or forums where a volunteer will be there to help.
## The White Screen of Death
Both PHP errors and database errors can manifest as a white screen, a blank screen with no information, commonly known in the WordPress community as the *WordPress White Screen of Death* (WSOD).
Before resorting to desperate measures, there are a number of reasons for the WordPress white screen of death:
- **A Plugin is causing compatibility issues**. If you can access the [Administration Screens](https://wordpress.org/documentation/article/administration-screens/) try deactivating all of your Plugins and then reactivating them one by one. If you are unable to access your Screens, log in to your website via [FTP](https://developer.wordpress.org/advanced-administration/upgrade/ftp/). Locate the folder `wp-content/plugins` and rename the Plugin folder `plugins_old`. This will deactivate all of your Plugins. You can read more about manually deactivating your plugins in the [Troubleshooting FAQ](https://wordpress.org/documentation/article/faq-troubleshooting/#how-to-deactivate-all-plugins-when-not-able-to-access-the-administrative-menus).
- **Your Theme may be causing the problem**. This is especially likely if you are experiencing the white screen of death after you have just activated a new Theme, or created a New Site in a WordPress Network. Log in to the WordPress Administration Screens and activate a default WordPress Theme (e.g. Twenty Twenty-One). If you are using WordPress 5.8 and below, please switch to Twenty Twenty-One theme since the Twenty Twenty-Two theme requires 5.9 and above. If you can’t access your Administration Screens, access your website via FTP and navigate to the `/wp-content/themes/` folder. Rename the folder for the active Theme.
The [WP_DEBUG feature](https://developer.wordpress.org/advanced-administration/debug/debug-wordpress/#wp_debug) often provides additional information.
## Internal Server Error
[](https://i0.wp.com/wordpress.org/documentation/files/2018/11/internalservererror2.jpg?ssl=1)\
Internal Server Error message
There can be a number of reasons for an Internal Server Error. Here are some thing you can do to solve it:
- The most likely issue is a corrupted `.htaccess` file. Log in to your site root using FTP and rename your `.htaccess` file to `.htaccess_old`. Try loading your site to see if this has solved your problem. If it works, make sure to visit [Settings](https://wordpress.org/documentation/article/administration-screens/#settings-configuration-settings) \> [Permalinks](https://wordpress.org/documentation/article/administration-screens/#permalinks) and reset your [permalinks](https://wordpress.org/documentation/article/using-permalinks/). This will generate a new `.htaccess` file for you.
- Try deactivating all of your Plugins to see if it is a Plugin issue. If you are unable to access your WordPress Administration Screens, deactivate your Plugins via FTP by following [these instructions](https://wordpress.org/documentation/article/faq-troubleshooting/#how-to-deactivate-all-plugins-when-not-able-to-access-the-administrative-menus).
- Switch the Theme to a WordPress default Theme (e.g. Twenty Twenty-One) to eliminate any Theme-related problems. If you are using WordPress 5.8 and below, please switch to Twenty Twenty-One theme since the Twenty Twenty-Two theme requires 5.9 and above.
- Increase the [PHP Memory limit](https://wordpress.org/documentation/article/editing-wp-config-php/#increasing-memory-allocated-to-php)
- Try re-uploading the `wp-admin` and `wp-includes` folders from a [fresh install of WordPress](https://wordpress.org/download/).
## Error Establishing Database Connection
If you get a page featuring the message “Error Establishing Database Connection”, this means that there is a problem with the connection to your database and there could be a number of reasons for this. The following are possible reasons and solutions.
### Incorrect wp-config.php Information
“Error establishing a database connection” is usually caused by an error in your [wp-config.php](https://wordpress.org/documentation/article/editing-wp-config-php/) file. Access your site in your FTP client. Open up `wp-config.php` and ensure that the following are correct:
- Database name
- Database username
- Database password
- Database host
Learn more about [editing wp-config.php](https://wordpress.org/documentation/article/editing-wp-config-php/).
If you are sure your configuration is correct you could [try resetting your MySQL password manually](https://developer.wordpress.org/advanced-administration/before-install/howto-install/#common-installation-problems).
### Problems with Your Web Host
The next step is to contact your web host. The following hosting issues may be causing the problem:
- Your database has met its quota and has been shut down.
- The server is down.
Contact your hosting provider to see if either of these issues is causing your problem.
### Compromised Website
If you have checked `wp-config.php` for errors, and confirmed with your host for hosting issues, it is possible that your site has been hacked.
Scan your site with [Sucuri SiteCheck](https://sitecheck.sucuri.net/) to ensure that it hasn’t been compromised. If it has you should check out [My Site was Hacked](https://wordpress.org/documentation/article/faq-my-site-was-hacked/).
## Failed Auto-Upgrade
There will be situations when the WordPress auto-update feature fails. Symptoms include:
- A blank white screen and no information.
- A warning that the update failed.
- A PHP error message.
The WordPress automatic upgrade feature may fail due to a glitch in the connection with the main WordPress files, a problem with your Internet connection during upgrade, or incorrect [File Permissions](https://developer.wordpress.org/advanced-administration/server/file-permissions/).
To update your WordPress site manually, see the [Manual Update article](https://wordpress.org/documentation/article/updating-wordpress/#manual-update).
## Connection Timed Out
The connection timed out error appears when your website is trying to do more than your server can manage. It is particularly common on shared hosting where your memory limit is restricted. Here are some things you can try:
- **Deactivate all Plugins.** If deactivating all the WordPress Plugins on your site resolves the issue, reactivate them one-by-one to see which plugin is causing the problem. If you are unable to access your Administration Screens, [read about how to manually deactivate your plugins](https://wordpress.org/documentation/article/faq-troubleshooting/#how-to-deactivate-all-plugins-when-not-able-to-access-the-administrative-menus).
- **Switch to a default WordPress Theme.** If you are using WordPress 5.8 and below, please switch to Twenty Twenty-One theme since the Twenty Twenty-Two theme requires 5.9 and above. This should rule out any Theme-related problems.
- **Increase your [memory limit in wp-config.php](https://wordpress.org/documentation/article/editing-wp-config-php/#increasing-memory-allocated-to-php)**. If you are on shared hosting you may have to ask your hosting provider to increase your memory limit for you.
- **Increase the maximum execution time in your [php.ini](https://php.net/manual/en/ini.core.php) file.** This is not a WordPress core file so if you are not sure how to edit it, contact your hosting provider to ask them to increase your maximum execution time. See below instructions for increasing maximum execution time.
## Maintenance Mode Following Upgrade
[](https://i0.wp.com/wordpress.org/documentation/files/2018/11/maintenancemode1.jpg?ssl=1)
When WordPress updates, it automatically installs a `.maintenance` file. Following upgrade, you may receive a message that says “Briefly unavailable for scheduled maintenance. Please check back in a minute.” The maintenance file may not have been removed properly.
To remove this message do the following:
1. Log in to your website using your FTP program
2. Delete the `.maintenance` file, which will be found in your site root.
Read more about the [maintenance mode issue](https://wordpress.org/documentation/article/faq-troubleshooting/#how-to-clear-the-briefly-unavailable-for-scheduled-maintenance-message-after-doing-automatic-upgrade).
## You Make Changes and Nothing Happens
If you are making changes to your website and you do not see the changes in your browser, you may need to clear your [browser cache](https://wordpress.org/support/topic/i-make-changes-and-nothing-happens/). Your browser stores information about the websites that you visit. This makes it faster to load websites when you visit them because the browser just has to reload information already stored on your computer, rather than downloading it again.
If you make a change to a website and the browser does not think it is significant, it will simply load the data from your cache, and you won’t see your changes. To fix the problem, simply [empty your browser cache](https://wordpress.org/support/topic/i-make-changes-and-nothing-happens/) or close the tab and reopen the link.
## Pretty Permalinks 404 and Images not Working
If you are experiencing 404 errors with pretty [permalinks](https://wordpress.org/documentation/article/using-permalinks/) and a white screen when you upload images, [mod_rewrite](https://wordpress.org/documentation/article/glossary#mod_rewrite) may not be enabled in Apache by default. Mod_rewrite is an extension module of the [Apache web server](https://wordpress.org/documentation/article/glossary#apache) software which allows for “rewriting” of [URLs](https://en.wikipedia.org/wiki/Url) on-the-fly. It’s what you need to make pretty permalinks work.
[WordPress Multisite](https://wordpress.org/documentation/article/glossary#multisite) networks usually experience this but it can also occur on shared hosting providers or after a [site migration or server move](https://wordpress.org/documentation/article/moving-wordpress/).
Reset your permalinks through **Settings \> Permalinks.** If this does not work, you may have to edit the `.htaccess` file manually.
# BEGIN WordPress
RewriteEngine On
RewriteBase /
RewriteRule ^index\.php$ - [L]
RewriteCond %{REQUEST_FILENAME} !-f
RewriteCond %{REQUEST_FILENAME} !-d
RewriteRule . /index.php [L]
# END WordPress
If you are not familiar with editing your `.htaccess` file, contact your hosting provider to ask them to turn on mod_rewrite rules. There is more information on [pretty permalinks in the WordPress Codex](https://wordpress.org/documentation/article/using-permalinks/#using-pretty-permalinks).
## Custom Post Type 404 Errors
You may experience problems with 404 errors and [custom post types](https://wordpress.org/documentation/article/post-types/#custom-types). Try the following steps:
1. Make sure that none of your Custom Post Types and single pages have the same name. If they do, rename the single page, including the [slug](https://wordpress.org/documentation/article/glossary/#post-slug).
2. Log in to your WordPress Administration Screens, navigate to **Settings \> Permalinks**. Select the default permalinks. Save. Then reselect your preferred permalinks. This will flush the rewrite rules and should solve your problem.
## Critical Error Message
If you come across the message “There has been a critical error on this website. Please check your site admin email inbox for instructions.”, this indicates that something in your site has caused a critical error that prevents WordPress from running as expected.
First, check your email to see if WordPress has sent you any details about the error. Next, enable debug mode in your [wp-config.php](https://developer.wordpress.org/advanced-administration/debug/debug-wordpress/#example-wp-config-php-for-debugging) file.
After enabling this, review the error logs located in wp-content/debug.log to find out what specifically went wrong.
Some of the most common causes you might uncover include conflicts between plugins, compatibility issues with your theme, running an incompatible PHP version, hitting the memory limit, or having corrupted WordPress files.
## Specific Error Messages
There are a number of different errors that will appear in your error logs. To access your error logs you will need to turn on [debugging](https://wordpress.org/documentation/article/editing-wp-config-php/#wp_debug) and then locate your error log via FTP. The following information will help you to decipher some of the common error messages.
### PHP Errors
Below are some common PHP error messages.
#### Fatal Errors and Warnings
##### Cannot modify header information – headers already sent
If you receive a warning that WordPress cannot modify header information and headers are already sent, it usually means that you have spaces or characters before the opening tags or after the closing tags. Read how to [fix the headers already sent error](https://wordpress.org/documentation/article/faq-troubleshooting/#how-do-i-solve-the-headers-already-sent-warning-problem).
If you are experiencing this problem when you have just installed WordPress you may have introduced a syntax error into `wp-config.php`. [These instructions will help you to fix the error](https://developer.wordpress.org/advanced-administration/before-install/howto-install/#common-installation-problems).
##### Call to undefined function
An error reading call to undefined function could mean that a WordPress Plugin is trying to find a file or data which isn’t present or accessible in the code. Reasons for this include:
- An error when trying to auto-install or auto-upgrade a Plugin. Try [installing or upgrading the Plugin manually](https://wordpress.org/documentation/article/managing-plugins/#manual-plugin-installation).
- An error when trying to auto-install or auto-upgrade a Theme. Try [installing or upgrading the Theme manually](https://wordpress.org/documentation/article/using-themes/#adding-new-themes).
- You may be using an [incompatible WordPress Plugin](https://wordpress.org/documentation/article/managing-plugins/#plugin-compatibility) or incompatible Theme. This could happen with older versions of WordPress and a new WordPress Plugin, or if you are trying to use a WordPress Multisite Plugin on a single site installation. Upgrade WordPress to resolve this issue.
- You may be trying to call a function that doesn’t exist. Check `functions.php` for misspellings.
Try deactivating the WordPress Plugin or changing the WordPress Theme that caused the error to appear. If you are unable to do this from within the Administration Screens, you may have to do this [manually via FTP](https://wordpress.org/documentation/article/faq-troubleshooting/#how-to-deactivate-all-plugins-when-not-able-to-access-the-administrative-menus).
##### Allowed memory size exhausted
An Allowed Memory Size Exhausted error means that your WordPress installation doesn’t have enough memory to achieve what you want. You can try out the following steps:
- Increase your [memory limit in wp-config.php](https://wordpress.org/documentation/article/editing-wp-config-php/#increasing-memory-allocated-to-php)
- Increase your memory limit by editing `php.ini`. This is not a file that comes with WordPress so if you are unfamiliar with it you should contact your web host about increasing your memory limit.
##### Maximum execution time exceeded
You may receive a message such as “Maximum execution time of 30 seconds exceeded” or “Maximum execution time of 60 seconds exceeded”. This means that it is taking to longer for a process to complete and it is timing out. There are a number of ways to fix this error.
**Editing `.htaccess`**
**Make sure you back up `.htaccess` before you edit it.**
Add the following line to `.htaccess`:
php_value max_execution_time 60
**Editing `php.ini`**
Add the following to `php.ini`
max_execution_time = 60
If you are unsure of how to make these changes, or if you are on shared hosting that prevents you from making them yourself, you should contact your hosting provider and ask them to increase your maximum execution time.
#### Parse errors
##### Syntax Error
A syntax error means that you have made a mistake while creating your PHP structure. You could, for example, be:
- Missing a `;` at the end of an individual line.
- Using curly quotation marks.
- Missing a curly bracket.
When this error appears it will tell you which file the error appears in (`functions.php` for example) and approximately which line (it may not always be the exact line so be sure to check just before and just after) in the code.
##### Unexpected
If you are receiving an error which says ‘parse error: unexpected’ this usually means that you have forgotten to include a character. The most common are:
- **Unexpected ‘=’** : you have forgotten to include the \$ when referencing a variable
- **Unexpected ‘)’** : you have forgotten to include the opening bracket (
- **Unexpected ‘(‘** : you have forgotten to include the closing bracket )
- **Unexpected T_STRING**: you have forgotten a quotation mark or a semi-colon at the end of the previous line
- **Unexpected T_ELSE**: you have an else statement with no opening if statement
#### Use of an undefined constant
As with parse errors, “use of an undefined constant” means that you are missing a character. It could be one of the following:
- Missing a \$ when referencing a variable
- Missing quotation marks around array keys
### Database Errors
The following errors may appear in relation to your WordPress database.
#### Error 13 – Cannot Create/Write to File
There are a number of reasons why you may be experiencing this error.
**MySQL cannot create a temporary file.**
The MySQL variable `tmpdir` is set to a directory that cannot be written to when using PHP to access MySQL. To verify this, enter MySQL at the command line and type `show variables`. You’ll get a long list and one of them will read: **tmpdir = /somedir/** (whatever your setting is.)
To solve this, alter the **tmpdir** variable to point to a writable directory.
1. Find the **my.cnf** file. On \*nix systems this is usually in **/etc/**. On Windows system, Find the **my.ini**.
2. Once found, open this in a simple text editor and find the **\[mysqld\]** section.
3. Under this section, find the **tmpdir** line. If this line is commented (has a **\#** at the start), delete the **\#** and edit the line so that it reads: **tmpdir = /writable/dir** where **/writable/dir** is a directory to which you can write. Some use **/tmp**, or you might also try **/var/tmp** or **/usr/tmp**. On Windows, use **C:/Windows/tmp**.
4. Save the file.
5. Shutdown MySQL by typing `mysqlshutdown -u -p shutdown`.
6. Start MySQL by going to the MySQL directory and typing `./bin/safe_mysqld &`. Usually the MySQL directory is in **/usr/local** or sometimes in **/usr/** on Linux systems.
**The** [**file permissions**](https://developer.wordpress.org/advanced-administration/server/file-permissions/) **are incorrect**
Correct the [File Permissions](https://developer.wordpress.org/advanced-administration/server/file-permissions/).
If none of this make sense and you have someone to administrate your system for you, show the above to them and they should be able to figure it out.
#### CREATE Command Denied to User
This error occurs when the user assigned to the database does not have adequate permissions to perform the action to create columns and tables in the database. You will need to log in to [CPanel](https://wordpress.org/documentation/article/using-cpanel/) or [Plesk](https://www.plesk.com/) to give your database user adequate permissions.
Alternatively you can [create a new user to assign to your database](https://wordpress.org/documentation/article/using-cpanel/#step-3-add-user-to-database). If you do create a new user you will need to ensure that it is [updated in](https://wordpress.org/documentation/article/using-cpanel/#editing-the-wordpress-config-file) `[wp-config.php](https://wordpress.org/documentation/article/using-cpanel/#editing-the-wordpress-config-file)`.
#### Error
It could be because:
- you are out of space on /tmp (wherever tmpdir is), or,
- you have too many files in /tmp (even if there is lots of free space), or,
- Your cache on your server is full
This is a MySQL error and has nothing to do with WordPress directly; you should contact your host about it. Some users have reported that running a “repair table” command in [phpMyAdmin](https://developer.wordpress.org/advanced-administration/upgrade/phpmyadmin/) fixed the problem.
#### Error 145
This indicates that a table in your database is damaged or corrupted. If you are comfortable using [phpMyAdmin](https://developer.wordpress.org/advanced-administration/upgrade/phpmyadmin/) you can use [these instructions on repairing your MySQL database tables](https://wordpress.org/documentation/article/faq-troubleshooting-2/#how-do-you-repair-a-mysql-database-table).
**Always [backup your database](https://wordpress.org/documentation/article/backing-up-your-database/) before performing any actions on it.**
If you have not used phpMyAdmin before, or are uncomfortable doing so, contact your web host and ask them to run CHECK/REPAIR on your database.
#### Unknown Column
An unknown column error can be caused by a missing column in the database. If you have just upgraded WordPress then try manually upgrading again. To update your WordPress site manually, see the [Update article](https://wordpress.org/documentation/article/updating-wordpress/#manual-update).
If you are running a database query when you encounter the error then you may by using incorrect quotation marks for the identifier quote character. This [question on Stack Overflow provides more details](https://stackoverflow.com/questions/1346209/unknown-column-in-field-list-error-on-mysql-update-query). Also see the [MySQL documentation](https://dev.mysql.com/doc/refman/8.2/en/identifiers.html).
## Resources
- [MySQL Error Codes and Messages](https://dev.mysql.com/doc/refman/en/error-messages-server.html)
# Post Formats
## Intro
**Post Formats** is a [theme feature](https://codex.wordpress.org/Theme_Features) introduced with [Version 3.1](https://wordpress.org/documentation/wordpress-version/version-3-1/). A Post Format is a piece of meta information that can be used by a theme to customize its presentation of a post. The Post Formats feature provides a standardized list of formats that are available to all themes that support the feature. Themes are not required to support every format on the list. New formats cannot be introduced by themes or even plugins. The standardization of this list provides both compatibility between numerous themes and an avenue for external blogging tools to access this feature in a consistent fashion.
In short, with a theme that supports Post Formats, a blogger can change how each post looks by choosing a Post Format from a radio-button list.
Using **Asides** as an example, in the past, a category called Asides was created, and posts were assigned that category, and then displayed differently based on styling rules from [post_class()](https://developer.wordpress.org/reference/functions/post_class/) or from [in_category(‘asides’)](https://developer.wordpress.org/reference/functions/in_category/). With **Post Formats**, the new approach allows a theme to add support for a Post Format (e.g. [add_theme_support(‘post-formats’, array(‘aside’))](https://developer.wordpress.org/reference/functions/add_theme_support/)), and then the post format can be selected in the Publish meta box when saving the post. A function call of [get_post_format(\$post-\>ID)](https://developer.wordpress.org/reference/functions/get_post_format/) can be used to determine the format, and [post_class()](https://developer.wordpress.org/reference/functions/post_class/) will also create the “format-asides” class, for pure-css styling.
## Supported Formats
The following Post Formats are available for users to choose from, if the theme enables support for them.
Note that while the actual post content entry won’t change, the theme can use this user choice to display the post differently based on the format chosen. For example, a theme could leave off the display of the title for a “Status” post. How things are displayed is entirely up to the theme, but here are some general guidelines.
- **aside**: Typically styled without a title. Similar to a Facebook note update.
- **gallery**: A gallery of images. Post will likely contain a gallery shortcode and will have image attachments.
- **link**: A link to another site. Themes may wish to use the first `` tag in the post content as the external link for that post. An alternative approach could be if the post consists only of a URL, then that will be the URL and the title (`post_title`) will be the name attached to the anchor for it.
- **image**: A single image. The first `` tag in the post could be considered the image. Alternatively, if the post consists only of a URL, that will be the image URL and the title of the post (`post_title`) will be the title attribute for the image.
- **quote**: A quotation. Probably will contain a blockquote holding the quote content. Alternatively, the quote may be just the content, with the source/author being the title.
- **status**: A short status update, similar to a Twitter status update.
- **video**: A single video or video playlist. The first `
 ](https://i1.wp.com/wordpress.org/support/files/2018/11/phpMyAdmin_create_database_4.4.jpg?fit=688%2C411&ssl=1)
phpMyAdmin language encoding drop down
Click the **phpMyAdmin** icon in the upper left to return to the main page, then click the **Users** tab. If a user relating to WordPress does not already exist in the list of users, create one:
[
 ](https://i0.wp.com/wordpress.org/documentation/files/2018/11/users-768x500.jpg?ssl=1)
phpMyAdmin Users Tab
1. Click **Add user**.
2. Choose a username for WordPress (‘wordpress’ is good) and enter it in the **User name** field. (Be sure **Use text field:** is selected from the dropdown.)
3. Choose a secure password (ideally containing a combination of upper- and lower-case letters, numbers, and symbols), and enter it in the **Password** field. (Be sure **Use text field:** is selected from the dropdown.) Re-enter the password in the **Re-type** field.
4. Write down the username and password you chose.
5. Leave all options under **Global privileges** at their defaults.
6. Click **Go**.
7. Return to the **Users** screen and click the **Edit privileges** icon on the user you’ve just created for WordPress.
8. In the **Database-specific privileges** section, select the database you’ve just created for WordPress under the **Add privileges to the following database** dropdown, and click **Go**.
9. The page will refresh with privileges for that database. Click **Check All** to select all privileges, and click **Go**.
10. On the resulting page, make note of the host name listed after **Server:** at the top of the page. (This will usually be **localhost**.)
[
 ](https://i1.wp.com/wordpress.org/support/files/2018/11/phpMyAdmin_server_info_4.4.jpg?fit=682%2C107&ssl=1)
## Using the MySQL Client
You can create MySQL users and databases quickly and easily by running mysql from the shell. The syntax is shown below and the dollar sign is the command prompt:
$ mysql -u adminusername -p
Enter password:
Welcome to the MySQL monitor. Commands end with ; or \\g.
Your MySQL connection id is 5340 to server version: 3.23.54
Type 'help;' or '\\h' for help. Type '\\c' to clear the buffer.
mysql> CREATE DATABASE databasename;
Query OK, 1 row affected (0.00 sec)
mysql> CREATE USER "wordpressusername"@"hostname" IDENTIFIED BY "password";
mysql> GRANT ALL PRIVILEGES ON databasename.* TO "wordpressusername"@"hostname";
Query OK, 0 rows affected (0.00 sec)
mysql> FLUSH PRIVILEGES;
Query OK, 0 rows affected (0.01 sec)
mysql> EXIT
Bye
The example shows:
- That root is also the *adminusername*. It is a safer practice to choose a so-called “mortal” account as your mysql admin, so that you are not entering the command “mysql” as the root user on your system. (Any time you can avoid doing work as root you decrease your chance of being exploited.) The name you use depends on the name you assigned as the database administrator using mysqladmin.
- wordpress or blog are good values for *databasename*.
- wordpress is a good value for *wordpressusername* but you should realize that, since it is used here, the entire world will know it, too.
- *hostname* will usually be localhost. If you don’t know what this value should be, check with your system administrator if you are not the admin for your WordPress host. If you are the system admin, consider using a non-root account to administer your database.
- *password* should be a difficult-to-guess password, ideally containing a combination of upper- and lower-case letters, numbers, and symbols. One good way of avoiding the use of a word found in a dictionary is to use the first letter of each word in a phrase that you find easy to remember.
If you need to write these values somewhere, avoid writing them in the system that contains the things protected by them. You need to remember the value used for *databasename*, *wordpressusername*, *hostname*, and *password*. Of course, since they are already (or will be shortly) in your wp-config.php file, there is no need to put them somewhere else, too.
## Using Plesk
If your hosting provider supplies the [Plesk](https://www.plesk.com/) hosting control panel and you want to install WordPress manually, follow the instructions below to create a database:
1. Log in to Plesk.
2. Click **Databases** in the Custom Website area of your website on the Websites & Domains page:
[
 ](https://i0.wp.com/wordpress.org/documentation/files/2018/11/plesk-db-768x558.png?ssl=1)
Plesk custom website databases
1. Click **Add New Database**, change database name if you want, create database user by providing credentials and click **OK**. You’re done!
## Using cPanel
If your hosting provider supplies the [cPanel](https://wordpress.org/documentation/article/wordpress-glossary/#cPanel) hosting control panel, you may follow these simple instructions to create your WordPress username and database. A more complete set of instructions for using cPanel to create the database and user can be found in [Using cPanel](https://wordpress.org/documentation/article/using-cpanel/).
1. Log in to your [cPanel](https://wordpress.org/documentation/article/wordpress-glossary/#cPanel).
2. Click **MySQL Database Wizard** icon under the Databases section.
3. In **Step 1. Create a Database** enter the database name and click Next Step.
4. In **Step 2. Create Database Users** enter the database user name and the password. Make sure to use a strong password. Click Create User.
5. In **Step 3. Add User to Database** click the All Privileges checkbox and click Next Step.
6. In **Step 4. Complete the task** note the database name and user. Write down the values of *hostname*, *username*, *databasename*, and the password you chose. (Note that *hostname* will usually be **localhost**.)
## Using DirectAdmin
If you’re a regular User of a single-site webhosting account, you can log in normally. Then click **MySQL Management**. (If this is not readily visible, perhaps your host needs to modify your “package” to activate MySQL.) Then follow part “c” below.
Reseller accounts Admin accounts may need to click **User Level**. They must first log in as Reseller if the relevant domain is a Reseller’s primary domain… or log in as a User if the domain is not a Reseller’s primary domain. If it’s the Reseller’s primary domain, then when logged in as Reseller, simply click **User Level**. However if the relevant domain is not the Reseller’s primary domain, then you must log in as a User. Then click **MySQL Management**. (If not readily visible, perhaps you need to return to the Reseller or Admin level, and modify the “Manage user package” or “Manage Reseller package” to enable MySQL.)
In MySQL Management, click on the small words: **Create new database**. Here you are asked to submit two suffixes for the database and its username. For maximum security, use two different sets of 4-6 random characters. Then the password field has a Random button that generates an 8-character password. You may also add more characters to the password for maximum security. Click **Create**. The next screen will summarize the database, username, password and hostname. Be sure to copy and paste these into a text file for future reference.
# How to install WordPress
WordPress is well-known for its ease of installation. Under most circumstances, installing WordPress is a very simple process and takes less than five minutes to complete. [Many web hosts](https://wordpress.org/hosting/) now offer [tools (e.g. Fantastico) to automatically install WordPress](https://wordpress.org/documentation/article/automated-installation/) for you. However, if you wish to install WordPress yourself, the following guide will help.
## Things to Know Before Installing WordPress
Before you begin the install, there are a few things you need to have and do. Refer the article [Before You Install](https://developer.wordpress.org/advanced-administration/before-install/). It’s also good to verify that e-mail delivery is working properly on your host. Refer to [Mail](https://developer.wordpress.org/advanced-administration/server/mail/) for more information.\
If you need multiple WordPress instances, refer [Installing Multiple WordPress Instances.](https://developer.wordpress.org/advanced-administration/before-install/multiple-instances/).
## Basic Instructions
Here’s the quick version of the instructions for those who are already comfortable with performing such installations. More [detailed instructions](#detailed-instructions) follow.
1. Download and unzip the WordPress package if you haven’t already.
2. Create a database for WordPress on your web server, as well as a [MySQL](https://wordpress.org/documentation/article/glossary/#mysql) (or MariaDB) user who has all privileges for accessing and modifying it.
3. (Optional) Find and rename `wp-config-sample.php` to `wp-config.php`, then edit the file [(see Editing wp-config.php)](https://developer.wordpress.org/advanced-administration/wordpress/wp-config/) and add your database information.\
**Note:** If you are not comfortable with renaming files, step 3 is optional and you can skip it as the install program will create the `wp-config.php` file for you.
4. Upload the WordPress files to the desired location on your web server:
- If you want to integrate WordPress into the root of your domain (e.g. https://example.com/), move or upload all contents of the unzipped WordPress directory (excluding the WordPress directory itself) into the root directory of your web server.
- If you want to have your WordPress installation in its own subdirectory on your website (e.g. https://example.com/blog/), create the blog directory on your server and upload the contents of the unzipped WordPress package to the directory via FTP.
- **Note:** If your FTP client has an option to convert file names to lower case, make sure it’s disabled.
5. Run the WordPress installation script by accessing the URL in a web browser. This should be the URL where you uploaded the WordPress files.
– If you installed WordPress in the root directory, you should visit: https://example.com/\
– If you installed WordPress in its own subdirectory called blog, for example, you should visit: https://example.com/blog/\
That’s it! WordPress should now be installed.
## Detailed instructions
### Step 1: Download and Extract
Download and unzip the WordPress package from [wordpress.org/download/](https://wordpress.org/download/).
- If you will be uploading WordPress to a remote web server, download the WordPress package to your computer with a web browser and unzip the package.
- If you will be using FTP, skip to the next step – uploading files is covered later.
- If you have [shell](https://wordpress.org/documentation/article/glossary/#shell) access to your web server, and are comfortable using console-based tools, you may wish to download WordPress directly to your [web server](https://wordpress.org/documentation/article/glossary/#web-server) using wget (or lynx or another console-based web browser) if you want to avoid [FTPing](https://wordpress.org/documentation/article/glossary/#ftp):
- wget https://wordpress.org/latest.tar.gz
- Then extract the package using:
- tar -xzvf latest.tar.gz
The WordPress package will extract into a folder called wordpress in the same directory that you downloaded latest.tar.gz.
### Step 2: Create a database for WordPress
If you are using a [hosting provider](https://wordpress.org/documentation/article/glossary/#hosting-provider), you may already have a WordPress database set up for you, or there may be an automated setup solution to do so. Check your hosting provider’s support pages or your control panel for clues about whether or not you’ll need to create one manually.
If you determine that you’ll need to create one manually, follow the instructions for Using phpMyAdmin below to create your WordPress username and database. For other tools such as Plesk, cPanel and Using the MySQL Client, refer the article [Creating Database for WordPress.](https://developer.wordpress.org/advanced-administration/before-install/creating-database/)
If you have only one database and it is already in use, you can install WordPress in it – just make sure to have a distinctive prefix for your tables to avoid over-writing any existing database tables.
#### Using phpMyAdmin
If your web server has [phpMyAdmin](https://wordpress.org/documentation/article/glossary/#phpmyadmin) installed, you may follow these instructions to create your WordPress username and database. If you work on your own computer, on most Linux distributions you can install PhpMyAdmin automatically.
***Note:** These instructions are written for phpMyAdmin 4.4; the phpMyAdmin user interface can vary slightly between versions.*
1. If a database relating to WordPress does not already exist in the **Database** dropdown on the left, create one:
1. Choose a name for your WordPress database: ‘`wordpress`‘ or ‘`blog`‘ are good, but most hosting services (especially shared hosting) will require a name beginning with your username and an underscore, so, even if you work on your own computer, we advise that you check your hosting service requirements so that you can follow them on your own server and be able to transfer your database without modification. Enter the chosen database name in the **Create database** field and choose the best collation for your language and encoding. In most cases it’s better to choose in the “utf8\_” series and, if you don’t find your language, to choose “utf8mb4_general_ci” [(Refer this article about upgrading to utf8mb4)](https://make.wordpress.org/core/2015/04/02/the-utf8mb4-upgrade/).\
 2. Click the **phpMyAdmin** icon in the upper left to return to the main page, then click the **Users** tab. If a user relating to WordPress does not already exist in the list of users, create one:\
 1. Click **Add user**.
2. Choose a username for WordPress (‘`wordpress`‘ is good) and enter it in the **User name** field. (Be sure **Use text field**: is selected from the dropdown.)
3. Choose a secure password (ideally containing a combination of upper- and lower-case letters, numbers, and symbols), and enter it in the **Password** field. (Be sure **Use text field**: is selected from the dropdown.) Re-enter the password in the **Re-type** field.
4. Write down the username and password you chose.
5. Leave all options under **Global privileges** at their defaults.
6. Click **Go**.
7. Return to the Users screen and click the **Edit privileges** icon on the user you’ve just created for WordPress.
8. In the **Database-specific privileges** section, select the database you’ve just created for WordPress under the **Add privileges to the following database** dropdown, and click Go.
9. The page will refresh with privileges for that database. Click **Check All** to select all privileges, and click **Go**.
10. On the resulting page, make note of the host name listed after **Server**: at the top of the page. (This will usually be **localhost**.)
 ### Step 3: Set up wp-config.php
You can either create and edit the wp-config.php file yourself, or you can skip this step and let WordPress try to do this itself when you run the installation script (step 5). (you’ll still need to tell WordPress your database information).
(For more extensive details, and step by step instructions for creating the configuration file and your secret key for password security, please see [Editing wp-config.php](https://developer.wordpress.org/advanced-administration/wordpress/wp-config/)).
Return to where you extracted the WordPress package in Step 1, rename the file wp-config-sample.php to wp-config.php, and open it in a text editor.
[Enter your database information](https://developer.wordpress.org/advanced-administration/wordpress/wp-config/#configure-database-settings) under the section labeled
// ** MySQL settings - You can get this info from your web host ** //
**DB_NAME**\
The name of the database you created for WordPress in Step 2.\
**DB_USER**\
The username you created for WordPress in Step 2.\
**DB_PASSWORD**\
The password you chose for the WordPress username in Step 2.\
**DB_HOST**\
The hostname you determined in Step 2 (usually localhost, but not always; see [some possible DB_HOST values](https://developer.wordpress.org/advanced-administration/wordpress/wp-config/#set-database-host)). If a port, socket, or pipe is necessary, append a colon (:) and then the relevant information to the hostname.\
**DB_CHARSET**\
The database character set, normally should not be changed (see [Editing wp-config.php](https://developer.wordpress.org/advanced-administration/wordpress/wp-config/)).\
**DB_COLLATE**\
The database collation should normally be left blank (see [Editing wp-config.php](https://developer.wordpress.org/advanced-administration/wordpress/wp-config/)).
[Enter your secret key values](https://developer.wordpress.org/advanced-administration/wordpress/wp-config/) under the section labeled
/* Authentication Unique Keys and Salts. */
Save the `wp-config.php` file.
### Step 4: Upload the files
Now you will need to decide where on your domain you’d like your WordPress-powered site to appear:\
– In the root directory of your website. (For example, https://example.com/)\
– In a subdirectory of your website. (For example, https://example.com/blog/)
***Note:** The location of your root web directory in the filesystem on your [web server](https://wordpress.org/documentation/article/glossary/#web-server) will vary across [hosting providers](https://wordpress.org/documentation/article/glossary/#hosting-provider) and operating systems. Check with your hosting provider or system administrator if you do not know where this is.*
#### In the Root Directory
- If you need to upload your files to your web server, use an [FTP](https://wordpress.org/documentation/article/glossary/#ftp) client to upload all the contents of the wordpress directory (but not the directory itself) into the root directory of your website.\
If your files are already on your web server, and you are using [shell](https://wordpress.org/documentation/article/glossary/#shell) access to install WordPress, move all of the contents of the wordpress directory (but not the directory itself) into the root directory of your website.
#### In a Subdirectory
- If you need to upload your files to your web server, rename the wordpress directory to your desired name, then use an [FTP](https://wordpress.org/documentation/article/glossary/#ftp) client to upload the directory to your desired location within the root directory of your website.
- If your files are already on your web server, and you are using [shell](https://wordpress.org/documentation/article/glossary/#shell) access to install WordPress, move the wordpress directory to your desired location within the root directory of your website, and rename the directory to your desired name.
### Step 5: Run the Install Script
Point a web browser to start the installation script.
- If you placed the WordPress files in the root directory, you should visit: https://example.com/wp-admin/install.php
- If you placed the WordPress files in a subdirectory called blog, for example, you should visit: https://example.com/blog/wp-admin/install.php
#### Setup configuration file
If WordPress can’t find the wp-config.php file, it will tell you and offer to try to create and edit the file itself. (You can also do this directly by loading `wp-admin/setup-config.php` in your web browser.) WordPress will ask you the database details and write them to a new wp-config.php file. If this works, you can go ahead with the installation; otherwise, go back and [create, edit, and upload the wp-config.php file yourself (step 3).](https://developer.wordpress.org/advanced-administration/before-install/howto-install/#step-3-set-up-wp-config-php)
 #### Finishing installation
The following screenshots show how the installation progresses. Notice that in entering the details screen, you enter your site title, your desired user name, your choice of a password (twice), and your e-mail address. Also displayed is a check-box asking if you would like your blog to appear in search engines like Google and DuckDuckGo. Leave the box unchecked if you would like your blog to be visible to everyone, including search engines, and check the box if you want to block search engines, but allow normal visitors. Note all this information can be changed later in your [Administration Screen](https://wordpress.org/documentation/article/administration-screens/).
 If you successfully install the WordPress, login prompt will be displayed.
Install script troubleshooting\
– If you get an error about the database when you run the install script:\
– Go back to [Step 2](#detailed-step-2) and [Step 3](#detailed-step-3), and make sure you entered all the correct database information into wp-config.php.\
– Make sure you granted your WordPress user permission to access your WordPress database in **Step 3.**\
– Make sure the database server is running.
## Installing WordPress at popular Hosting Companies
### installing WordPress at Atlantic.net
[Install WordPress On A Ubuntu 14.04 LTS](https://www.atlantic.net/vps-hosting/how-to-install-wordpress-ubuntu-14/)\
You can also install WordPress on Ubuntu with [one click WordPress Hosting](https://www.atlantic.net/vps-hosting/wordpress-vps-hosting/) on Atlantic.Net.
### Installing WordPress at AWS
- [Installatron WordPress](https://aws.amazon.com/marketplace/pp/prodview-duuvqpjnl65oe) Installatron WordPress is a pre-configured and ready-to-launch image that contains a WordPress website and Installatron’s WordPress management tools.
- [Architecting a Highly Scalable WordPress Site in AWS](https://www.slideshare.net/harishganesan/scaling-wordpress-in-aws-amazon-ec2) A guide for building a more expensive, highly scalable AWS implementation using Amazon’s Relational Data Store (RDS) et al.
### Installing WordPress at DigitalOcean
- [How to install WordPress on Ubuntu 14.04](https://www.digitalocean.com/community/tutorials/how-to-install-wordpress-on-ubuntu-14-04)
### Installing WordPress at Linode
- [Manage Web Content with WordPress](https://www.linode.com/docs/websites/cms/manage-web-content-with-wordpress) Install WordPress on a Debian Server with a LAMP Stack
You can also install WordPress on Ubuntu with one click using this [StackScript](https://www.linode.com/stackscripts/view/12) on Linode.
### Installing WordPress at iPage Hosting
- [This is a great step by step tutorial by IStartBlogging](https://istartblogging.com/#express-blog-install) on how to setup your blog the smart way with iPage Hosting.
In less than 5 minutes from now, you will have your blog ready on your domain. You will install WordPress on your own domain as an Automated Process with ONE Click WordPress Installation feature from iPage hosting.
### Installing WordPress at Microsoft Azure
- [Installing WordPress on Microsoft Azure](https://azure.microsoft.com/en-us/marketplace/partners/wordpress/wordpress/) is as simple as a few clicks. A hosting space and MySQL database will be created and configured, so you’re ready to start creating within a matter of seconds.
- Running into some issues and need to troubleshoot your WordPress site on Azure? Follow this handy [Troubleshooting guide for WordPress on Azure](https://azure.microsoft.com/en-us/blog/wordpress-troubleshooting-techniques-on-azure-websites/)
- There is a full listing of resources on how to [learn more about WordPress on Microsoft Azure!](https://azure.microsoft.com/en-us/documentation/articles/develop-wordpress-on-app-service-web-apps/)
## Common installation problems
The following are some of the most common installation problems. For more information and troubleshooting for problems with your WordPress installation, check out [FAQ Installation](https://wordpress.org/documentation/article/faq-installation/) and [FAQ Troubleshooting](https://wordpress.org/documentation/article/faq-troubleshooting/).
**I see a directory listing rather than a web page.**
The web server needs to be told to view index.php by default. In Apache, use the DirectoryIndex index.php directive. The simplest option is to create a file named .htaccess in the installed directory and place the directive there. Another option is to add the directive to the web server’s configuration files.
**I see lots of `Headers already sent` errors. How do I fix this?**
You probably introduced a syntax error in editing wp-config.php.
1. Download wp-config.php (if you don’t have [shell](https://wordpress.org/documentation/article/glossary/#shell) access).
2. Open it in a [text editor](https://wordpress.org/documentation/article/glossary/#text-editor).
3. Check that the first line contains nothing but , and that there is no text after it (not even whitespace).
4. If your text editor saves as Unicode, make sure it adds **no byte order mark (BOM)**. Most Unicode-enabled text editors do not inform the user whether or not it adds a BOM to files; if so, try using a different text editor.
5. Save the file, upload it again if necessary, and reload the page in your browser.
**My page comes out gibberish. When I look at the source I see a lot of “``” tags.**
If the `` tags are being sent to the browser, it means your [PHP](https://wordpress.org/documentation/article/glossary/#php) is not working properly. All PHP code is supposed to be executed before the server sends the resulting [HTML](https://wordpress.org/documentation/article/glossary/#html) to your web browser. (That’s why it’s called a preprocessor.) Make sure your web server meets the requirements to run WordPress, that PHP is installed and configured properly, or contact your hosting provider or system administrator for assistance.
**I keep getting an `Error connecting to database` message but I’m sure my configuration is correct.**
Try resetting your MySQL password manually. If you have access to MySQL via shell, try issuing:
SET PASSWORD FOR 'wordpressusername'@'hostname' = OLD_PASSWORD('password');
If you do not have shell access, you should be able to simply enter the above into an SQL query in phpMyAdmin. Failing that, you may need to use your host’s control panel to reset the password for your database user.
**I keep getting an `Your PHP installation appears to be missing the MySQL extension which is required by WordPress` message but I’m sure my configuration is correct.**
Check to make sure that your configuration of your web-server is correct and that the MySQL plugin is getting loaded correctly by your web-server program. Sometimes this issue requires everything in the path all the way from the web-server down to the MySQL installation to be checked and verified to be fully operational. Incorrect configuration files or settings are often the cause of this issue.
**My image/MP3 uploads aren’t working.**
If you use the Rich Text Editor on a blog that’s installed in a subdirectory, and drag a newly uploaded image into the editor field, the image may vanish a couple seconds later. This is due to a problem with TinyMCE (the rich text editor) not getting enough information during the drag operation to construct the path to the image or other file correctly. The solution is to NOT drag uploaded images into the editor. Instead, click and hold on the image and select **Send to Editor.**
# Running a Development Copy of WordPress
Having a development instance of WordPress is a good way to update, develop, and modify a website without interrupting the live version of WordPress. There are many ways to set up a development copy of WordPress, but this article will cover the basics, best practices, tips, and some tools to make running a development copy of WordPress much easier.
## Installing WordPress on your computer
Use these instructions to set up a local server environment for testing and development.
Installing WordPress locally is usually meant for development. Those interested in development can follow the instructions below to download and install WordPress locally.\
– [wp-env](https://developer.wordpress.org/block-editor/reference-guides/packages/packages-env/) – a free, open-source development environment maintained by the WordPress core developer community.\
– [VVV or Varying Vagrant Vagrants](https://varyingvagrantvagrants.org/) – free, open-source local development environment maintained by members of the WordPress community.\
– [XAMPP](https://www.apachefriends.org/) – free and open-source local development environment maintained by Apache Friends\
– [MAMP](https://www.mamp.info/en/mac/) – free local development environment that has everything you need to install WordPress locally.\
– [DDEV](https://ddev.readthedocs.io/en/stable/users/quickstart/#wordpress) – free, open-source, development environment. Seamlessly share local sites over public domains, includes a database editor, Xdebug, and other performance profiling tools.\
– [Lando](https://lando.dev/) – free, open-source development environment that offers a [plugin to install WordPress locally](https://docs.lando.dev/plugins/wordpress/).\
– [AMPPS](https://ampps.com/downloads/) – free WAMP/MAMP/LAMP stack with Softaculous Installer built in. It can 1-click install and upgrade WordPress and others as well.\
– [Bitnami package for WordPress](https://bitnami.com/stack/wordpress) and [Bitnami package for WordPress Multisite](https://bitnami.com/stack/wordpress-multisite) – Bitnami packages for WordPress that provide a one-click install solution for WordPress or WordPress Multisite on your local computer or in the cloud.\
– [Instant WordPress](https://instantwp.com/) – free, standalone, portable WordPress development environment for Windows that will run from a USB key.\
– [WordPress Studio](https://developer.wordpress.com/studio/) – free, open-source app to install and manage multiple WordPress sites locally.
### Software Appliance – Ready-to-use
You may find that using a pre-integrated [software appliance](https://en.wikipedia.org/wiki/Software_appliance) is a great way to get up and running with WordPress, especially in combination with virtual machine software (e.g., VMWare, VirtualBox, Xen HVM, KVM).
Parallels is another software that can be used. Unlike virtual machine software, it requires payment. It allows you to run both Mac and Windows on your machine.
A software appliance allows users to skip the manual installation of WordPress and its dependencies and instead deploy a self-contained system that requires little to no setup in just a couple of minutes.
- [TurnKey WordPress Appliance](https://www.turnkeylinux.org/wordpress): a free Debian-based appliance that just works. It bundles a collection of popular WordPress plugins and features a small footprint, automatic security updates, SSL support, and a Web administration interface. Available as ISO, virtual machine images, or launch in the cloud.
### Unattended/automated installation of WordPress on Ubuntu Server 16.04 LTS
## Two WordPress Installations with One Database
**Note:** This method is NOT recommended if you plan on doing database development.
A popular approach to running a local copy of your live site is using the same local and live database. Using the same database will allow you to work on your local copy and push changes from local to your production with no break in uptime.
**Setup of the local copy**
Once you have your local files set up, you must modify wp-config.php in the root of your local install.
define('WP_HOME', "https://{$_SERVER['HTTP_HOST']}");
define('WP_SITEURL', "https://{$_SERVER['HTTP_HOST']}");
ob_start( 'ob_replace_home_url' );
function ob_replace_home_url( $content ) {
$home_urls = array(
'https://site.testing.example.com',
'https://site.example.com',
'https://site.authoring.testing.example.com',
'https://site.authoring.example.com',
);
$content = str_replace( $home_urls, WP_HOME, $content );
return $content;
}
### Using a Drop-In
What if we don’t want to hack core code? Avoiding changes to core code is a good practice for easy upgrading and code-sharing. There is even a filter for this (`pre_option_siteurl` and `pre_option_home`) but there’s a problem: within **wp-settings.php**,
- the filter can’t be defined until after line 65 when `functions.php` is included
- WordPress makes calls to `get_option` on line 155 of (via `wp_plugin_directory_constants()`)
- plugins aren’t defined until later down around line 194.
However, between lines 65 and 155, there is something we can use, namely the loading of the drop-in `db.php`; the filter can be safely defined there. (However, this is perhaps only halfway towards “not core” code.) Check if you already have an existing wp-content/db.php before trying this technique. Plugins like W3 Total Cache use it for similar reasons.
General \> Site Language** and select from the list of available languages. For Multisite Super Admins, you can set the default language using the Network Administration **Settings** panel.
## Manually installing language files
Here are the steps you will need to follow to install an international version of WordPress.
**Note:** If you make an error in the steps or you do not specify the correct language, WordPress will default back to English. For more help Installing WordPress, see [Installing WordPress](https://developer.wordpress.org/advanced-administration/before-install/howto-install/) and [FAQ Installation](https://wordpress.org/documentation/article/faq-installation/).
- Download the `.mo` language file for your language. The naming convention of the `.mo` files is based on the ISO-639 language code (e.g. *pt* for Portuguese) followed by the ISO-3166 country code (e.g. *PT* for Portugal or *BR* for Brazil). So, the Brazilian Portuguese file would be called `pt_BR.mo`, and a non-specific Portuges file would be called `pt.mo`. Complete lists of codes can be found at [(country codes)](https://www.gnu.org/savannah-checkouts/gnu/gettext/manual/gettext.html#Country-Codes) and [(language codes)](https://www.gnu.org/savannah-checkouts/gnu/gettext/manual/gettext.html#Language-Codes).
## Setting the language for your site
### Single-site installations
#### WordPress 4.0 and above
- Change the language in the admin settings screen. `Settings > General > Site Language`.
#### WordPress 3.9.2 and below
- Open your `wp-config.php` file in a [text editor](https://wordpress.org/documentation/article/wordpress-glossary/#Text_editor) and search for:
define( 'WPLANG', '' );
- Edit this line according to the `.mo` file you’ve just downloaded, e.g. for the Portuguese spoken in Brazil you must add:
define ( 'WPLANG', 'pt_BR' );
- Note that if the .mo and .po files don’t exist for a language code called for in wp-config.php then there is no error message, but the code is still used in language_attributes() . This is useful for those of us whose language is similar enough to en_US not to require translation, but who don’t want en-US as the language tag in the blog, instead wanting some other variant of English. For example:
define ( 'WPLANG', 'en_GB' );
- Once you’ve added your language code, save the file.
### Multisite installations
If you have a [site network](https://developer.wordpress.org/advanced-administration/multisite/create-network/) (WordPress multisite), the language is set on a per-blog basis through the “Site language” option in the `Settings > General` subpanel.
You can set the default language for the entire network under the `Network Admin > Settings` screen (“Default Language”).
### Adding translation
If you want to add translations for terms that are still displaying in English after installation, visit [translate.wordpress.org](https://translate.wordpress.org) and select your language. To get started, refer [this page](https://make.wordpress.org/polyglots/handbook/tools/glotpress-translate-wordpress-org/) in the [Translator’s Handbook](https://make.wordpress.org/polyglots/handbook/).
# Installing Multiple WordPress Instances
If you need multiple WordPress instances, there are three types of installations based on system architecture, or a combination of WordPress instances and databases:
1. WordPress Multisite Network: a single WordPress instance (with multiple sites created within the same WP instance) sharing a single database instance.
2. Single Database: multiple WordPress instances sharing a single database instance.
3. Multiple Databases: multiple WordPress instances with each instance using its own database instance.
 Let’s first look at the third type, multiple WordPress instances with multiple databases, because it has the same installation process as a single WordPress instance.
## Multiple WordPress Instances with Multiple Databases
You’ll need a separate [MySQL database](https://wordpress.org/documentation/article/wordpress-glossary/#mysql) for each instance you plan to install. If you have not yet created these, [basic instructions are found here](https://developer.wordpress.org/advanced-administration/before-install/howto-install/#step-2-create-the-database-and-a-user).
To make sure each WordPress instance connects to the right database you need to add that information to the [wp-config.php](https://developer.wordpress.org/advanced-administration/wordpress/wp-config/) file. The lines to change are the following:
define('DB_NAME', 'wordpress'); // The name of the database
define('DB_USER', 'username'); // Your MySQL username
define('DB_PASSWORD', 'password'); // The user's password
define('DB_HOST', 'localhost' ); // The host of the database
`DB_NAME` is the name of the individual database created for that blog hosted on the `DB_HOST` MySQL server. If you are using different user logins for each database, edit `DB_USER` and `DB_PASSWORD` to reflect this as well.
Upload each [wp-config.php](https://developer.wordpress.org/advanced-administration/wordpress/wp-config/) file to its specific root/installation directory, and run the installation. See [Installing WordPress](https://developer.wordpress.org/advanced-administration/before-install/howto-install/) for more information.
## The Multisite Feature
If you want multiple sites to use WordPress, you can use the multisite feature to create what is referred to as a *network* of sites. The multisite feature involves installing a single WordPress instance and a single database.
The multisite feature appears to be simpler than other types of multiple WordPress installations, but there are some considerations and restrictions. Refer to the following documents for more detailed information:
- [Before You Create A Network](https://developer.wordpress.org/advanced-administration/multisite/prepare-network/)
- [Create A Network](https://developer.wordpress.org/advanced-administration/multisite/create-network/)
- [Multisite Network Administration](https://developer.wordpress.org/advanced-administration/multisite/administration/)
## Multiple WordPress Instances with a Single Database
As with the multiple-database solution described above, the [wp-config.php](https://developer.wordpress.org/advanced-administration/wordpress/wp-config/) file will vary for each installation. In this case, however, only a single line is unique to each blog:
$table_prefix = 'wp_'; // example: 'wp_' or 'b2' or 'mylogin_'
By default, WordPress assigns the table prefix `wp_` to its [MySQL database](https://wordpress.org/documentation/article/wordpress-glossary/#mysql) tables, but this prefix can be anything you choose. This allows you to create unique identifiers for each blog in your database. For example, let’s say you have three blogs to set up, with the names *Main*, *Projects*, and *Test*. You should substitute the prefix `wp_` in each blog’s\
[wp-config.php](https://developer.wordpress.org/advanced-administration/wordpress/wp-config/):
**Main blog:**
$table_prefix = 'main_';
**Projects blog:**
$table_prefix = 'projects_';
**Test blog:**
$table_prefix = 'test_';
As noted, you may use a prefix of your own making. Those provided here are for example only.
Upload each [wp-config.php](https://developer.wordpress.org/advanced-administration/wordpress/wp-config/) file to its specific root/installation directory, and run the installation. See [Installing WordPress](https://developer.wordpress.org/advanced-administration/before-install/howto-install/) for more information.
For enhanced security you can also add multiple users to the same database and give each WordPress Instance their own MySQL user.
## Multiple Databases, Same Users
You can use the same userbase for all your blogs on the same domain by defining the `CUSTOM_USER_TABLE` and optionally the `CUSTOM_USER_META_TABLE` constants to point to the same `wp_your_blog_users` and `wp_your_blog_usermeta` tables.\
See [Editing wp-config.php/Custom User and Usermeta Tables](https://developer.wordpress.org/advanced-administration/wordpress/wp-config/#custom-user-and-usermeta-tables).
# Install WordPress at popular providers
## Installing WordPress at Atlantic.Net
- [How to Install WordPress on a Ubuntu 14.04 LTS Cloud Server](https://www.atlantic.net/community/howto/install-wordpress-ubuntu-14/)
You can also install WordPress on Ubuntu with one click [WordPress Hosting](https://www.atlantic.net/vps-hosting/wordpress-vps-hosting/).
## Installing WordPress at AWS
- [WordPress Certified by Bitnami and Automattic](https://aws.amazon.com/marketplace/pp/prodview-bzstv3wbn5wkq). WordPress is the world’s most popular content management platform. It includes the new Gutenberg editor and over 45,000 themes and plugins. This image is certified by Bitnami as secure, up-to-date, and packaged using industry best practices, and approved by Automattic, the experts behind WordPress.
- [WordPress with NGINX and SSL Certified by Bitnami and Automattic](https://aws.amazon.com/marketplace/pp/prodview-s6cuqgfczpuwm). WordPress with NGINX and SSL enhances WordPress with SSL auto-configuration and the high-performance NGINX web server. This image is certified by Bitnami as secure, up-to-date, and packaged using industry best practices, and approved by Automattic, the experts behind WordPress.
- [WordPress with LiteSpeed Cache (Powered OpenLiteSpeed).](https://aws.amazon.com/marketplace/pp/prodview-w7ee7rs5uhlem) This OLS + WordPress image is 200+ times faster than a regular WordPress image.
- [WordPress Multisite Certified by Bitnami and Automattic.](https://aws.amazon.com/marketplace/pp/prodview-rcmdzzu2x3ntm) WordPress Multisite makes it simple to manage multiple WordPress websites from the same server and interface. This image is certified by Bitnami as secure, up-to-date, and packaged using industry best practices, and approved by Automattic, the experts behind WordPress.
- [Architecting a Highly Scalable WordPress Site in AWS](https://www.slideshare.net/harishganesan/scaling-wordpress-in-aws-amazon-ec2) A guide for building a more expensive, highly scalable AWS implementation using Amazon’s Relational Data Store (RDS).
## Installing WordPress at DigitalOcean
- [How To Install WordPress on Ubuntu 12.04](https://www.digitalocean.com/community/tutorials/how-to-install-wordpress-on-ubuntu-12-04)
- [How To Install WordPress on Ubuntu 14.04](https://www.digitalocean.com/community/tutorials/how-to-install-wordpress-on-ubuntu-14-04)
- [How To Install WordPress with LAMP on Ubuntu 16.04](https://www.digitalocean.com/community/tutorials/how-to-install-wordpress-with-lamp-on-ubuntu-16-04)
- [How To Install WordPress with LAMP on Ubuntu 18.04](https://www.digitalocean.com/community/tutorials/how-to-install-wordpress-with-lamp-on-ubuntu-18-04)
- [How To Install WordPress on Ubuntu 20.04 with a LAMP Stack](https://www.digitalocean.com/community/tutorials/how-to-install-wordpress-on-ubuntu-20-04-with-a-lamp-stack)
- [How To Install WordPress on Ubuntu 22.04 with a LAMP Stack](https://www.digitalocean.com/community/tutorials/how-to-install-wordpress-on-ubuntu-22-04-with-a-lamp-stack)
- [How To Use Ansible to Install and Set Up WordPress with LAMP on Ubuntu 18.04](https://www.digitalocean.com/community/tutorials/how-to-use-ansible-to-install-and-set-up-wordpress-with-lamp-on-ubuntu-18-04)
- [How To Install WordPress with LAMP on Debian 9](https://www.digitalocean.com/community/tutorials/how-to-install-wordpress-with-lamp-on-debian-9)
- [How to Install WordPress with LAMP on Debian 10](https://www.digitalocean.com/community/tutorials/how-to-install-wordpress-with-lamp-on-debian-10)
## Installing WordPress at Linode
- [Install WordPress on Ubuntu 16.04](https://www.linode.com/docs/guides/install-wordpress-on-ubuntu-16-04/)
- [Install WordPress on Ubuntu 18.04](https://www.linode.com/docs/guides/install-wordpress-ubuntu-18-04/)
- [Install WordPress on Ubuntu 20.04](https://www.linode.com/docs/guides/how-to-install-wordpress-ubuntu-2004/)
- [Install WordPress on Ubuntu 22.04](https://www.linode.com/docs/guides/how-to-install-wordpress-ubuntu-22-04/)
- [Install WordPress on Debian 10](https://www.linode.com/docs/guides/how-to-install-wordpress-debian-10/)
- [Install WordPress on AlmaLinux 8](https://www.linode.com/docs/guides/how-to-install-wordpress-almalinux-8/)
## Installing WordPress at Microsoft Azure
- [Installing WordPress on Microsoft Azure](https://learn.microsoft.com/azure/app-service/quickstart-wordpress) is as simple as a few clicks. A hosting space and MySQL database will be created and configured, so you’re ready to start creating within a matter of seconds.
- Running into some issues and need to troubleshoot your WordPress site on Azure? Follow this handy [Troubleshooting guide for WordPress on Azure](https://learn.microsoft.com/troubleshoot/azure/app-service/web-apps-open-source-technologies-faqs).
- For other WordPress related content or specific WordPress related questions, you may perform a [search with WordPress related terms on Microsoft Learn](https://learn.microsoft.com/en-us/search/?terms=wordpress).
# Changing File Permissions
On computer file systems, different files and directories have **permissions** that specify who and what can read, write, modify and access them. This is important because WordPress may need access to write to files in your `wp-content` directory to enable certain functions.
## Short explanation
Linux [file permissions](https://en.wikipedia.org/wiki/File_system_permissions) consist primarily of three components — the permissions the owner of the file or folder has, the permissions members of the group that owns the file or folder have, and the permissions that anyone else has for accessing or modifying the file and folder. The three permission components are usually represented using three numbers in order of the owner’s permission level, the group’s permission level, and everyone’s permission level. *There is technically a fourth component, but that is beyond what we need to know to secure WordPress. It will not be discussed here.*
There are three kinds of access each for the user, the group, and everyone else. They are read access, write access, and execute access. Read access lets you read the contents of the file or the directory. Write access lets you modify the file or the directory. And execute access lets you run the file like a program or a script.
## Permission Modes
7 5 5
user group world
r+w+x r+x r+x
4+2+1 4+0+1 4+0+1 = 755
The permission mode is computed by adding up the following values for the user, the file group, and for everyone else. The diagram shows how.
- **R**ead 4 – Allowed to read files
- **W**rite 2 – Allowed to write/modify files
- e**X**ecute1 – Read/write/delete/modify/directory
7 4 4
user group world
r+w+x r r
4+2+1 4+0+0 4+0+0 = 744
### Example Permission Modes
| Mode | Str Perms | Explanation |
|----|----|----|
| **0677** | -rw-rwxrwx | owner has rw only(6), other and group has rwx (7) |
| **0670** | -rw-rwx— | owner has rw only, group has rwx, others have no permission |
| **0666** | -rw-rw-rw- | all have rw only (6) |
| **0607** | -rw—-rwx | owner has rw only, group has no permission and others have rwx |
| **0600** | -rw——- | owner has rw only, group and others have no permission |
| **0477** | -r–rwxrwx | owner has read only (4), other and group has rwx (7) |
| **0470** | -r–rwx— | owner has read only, group has rwx, others have no permission |
| **0407** | -r—–rwx | owner has read only, other has rwx, group has no permission |
| **0444** | -r–r–r– | all have read only (4) |
| **0400** | -r——– | owner has read only(4), group and others have no permission(0) |
## Permission Scheme for WordPress
Permissions will be different from host to host, so this guide only details general principles. It cannot cover all cases. This guide applies to servers running a standard setup (note, for shared hosting using “suexec” methods, see below).
Typically, all files should be owned by your user (ftp) account on your web server, and should be writable by that account. On shared hosts, files should never be owned by the webserver process itself (sometimes this is **www**, or **apache**, or **nobody** user).
Any file that needs write access from WordPress should be owned or group-owned by the user account used by WordPress (which may be different than the server account). For example, you may have a user account that lets you FTP files back and forth to your server, but your server itself may run using a separate user, in a separate usergroup, such as **dhapache** or **nobody**. If WordPress is running as the FTP account, that account needs to have write access, i.e., be the owner of the files, or belong to a group that has write access. In the latter case, that would mean permissions are set more permissively than default (for example, 775 rather than 755 for folders, and 664 instead of 644).
The file and folder permissions of WordPress should be the same for most users, depending on the type of installation you performed and the umask settings of your system environment at the time of install.
**NOTE:** If an experienced user installed WordPress for you, you likely do not need to modify file permissions. Unless you are experiencing problems with permission errors, or you *want to*, you probably should not mess with this.
**NOTE:** If you installed WordPress yourself, you likely DO need to modify file permissions. Some files and directories should be “hardened” with stricter permissions, specifically, the wp-config.php file. This file is initially created with 644 permissions, and it’s a hazard to leave it like that. See Security and Hardening.
Typically, all core WordPress files should be writable only by your user account (or the httpd account, if different). (Sometimes though, multiple ftp accounts are used to manage an install, and if all ftp users are known and trusted, i.e., not a shared host, then assigning group writable may be appropriate. Ask your server admin for more info.) However, if you utilize mod_rewrite Permalinks or other `.htaccess` features you should make sure that WordPress can also write to your `/.htaccess` file.
If you want to use the built-in theme editor, all files need to be group writable. Try using it before modifying file permissions, it should work. (This may be true if different users uploaded the WordPress package and the Plugin or Theme. This wouldn’t be a problem for Plugin and Themes installed via the admin. When uploading files with different ftp users group writable is needed. On shared hosting, make sure the group is exclusive to users you trust… the apache user shouldn’t be in the group and shouldn’t own files.)
Some plugins require the `/wp-content/` folder be made writeable, but in such cases they will let you know during installation. In some cases, this may require assigning 755 permissions. The same is true for `/wp-content/cache/` and maybe `/wp-content/uploads/` (if you’re using [MultiSite](https://developer.wordpress.org/advanced-administration/multisite/create-network/) you may also need to do this for `/wp-content/blogs.dir/`)
Additional directories under /wp-content/ should be documented by whatever plugin / theme requires them. Permissions will vary.
|
|- index.php
|- wp-admin
| |- wp-admin.css
|- wp-blog-header.php
|- wp-comments-post.php
|- wp-commentsrss2.php
|- wp-config.php
|- wp-content
| |- cache
| |- plugins
| |- themes
| |- uploads
|- wp-cron.php
|- wp-includes
|- xmlrpc.php
### Shared Hosting with suexec
The above may not apply to shared hosting systems that use the “suexec” approach for running PHP binaries. This is a popular approach used by many web hosts. For these systems, the php process runs as the owner of the php files themselves, allowing for a simpler configuration and a more secure environment for the specific case of shared hosting.
Note: suexec methods should NEVER be used on a single-site server configuration, they are more secure **only** for the specific case of shared hosting.
In such an suexec configuration, the correct permissions scheme is simple to understand.
- All files should be owned by the actual user’s account, not the user account used for the httpd process.
- Group ownership is irrelevant, unless there’s specific group requirements for the web-server process permissions checking. This is not usually the case.
- All directories should be 755 or 750.
- All files should be 644 or 640. Exception: wp-config.php should be 440 or 400 to prevent other users on the server from reading it.
- No directories should ever be given 777, even upload directories. Since the php process is running as the owner of the files, it gets the owners permissions and can write to even a 755 directory.
In this specific type setup, WordPress will detect that it can directly create files with the proper ownership, and so it will not ask for FTP credentials when upgrading or installing plugins.
Popular methods used by sysadmins for this setup are:
- [suPHP](https://smarsching.github.io/suphp/Home.html), runs through php-cgi, currently unmaintained since 2013.
- [mod_ruid2](https://github.com/mind04/mod-ruid2), apache module, currently unmaintained since 2013.
- [mpm-itk](http://mpm-itk.sesse.net/), apache module.
- [mod_fcgid](https://httpd.apache.org/mod_fcgid/), an Apache module and FastCGI server with more extensive configuration.
- [PHP-FPM](https://php-fpm.org/), an alternative FastCGI server with shared OPCode, for use with Apache and Nginx.
## Using an FTP Client
[FTP programs](https://developer.wordpress.org/advanced-administration/upgrade/ftp/) (“clients”) allow you to set permissions for files and directories on your remote host. This function is often called `chmod` or `set permissions` in the program menu.
In [WordPress install](https://developer.wordpress.org/advanced-administration/before-install/howto-install/), two files that you will probably want to alter are the index page, and the css which controls the layout. Here’s how you change index.php – *the process is the same for any file*.
In the screenshot below, look at the last column – that shows the permissions. It looks a bit confusing, but for now just note the sequence of letters.
[
 ](https://i0.wp.com/wordpress.org/documentation/files/2019/02/podz_filezilla_12.gif?ssl=1)\
Initial permissions
Right-click ‘index.php’ and select ‘File Permissions’\
A popup screen will appear.
[
 ](https://i0.wp.com/wordpress.org/documentation/files/2019/02/podz_filezilla_13.gif?ssl=1)\
Altering file permissions
Don’t worry about the check boxes. Just delete the ‘Numeric value:’ and enter the number you need – in this case it’s 666. Then click OK.
[
 ](https://i0.wp.com/wordpress.org/documentation/files/2019/02/podz_filezilla_14.gif?ssl=1)\
Permissions have been altered.
You can now see that the file permissions have been changed.
### Unhide the hidden files
By default, most [FTP Clients](https://developer.wordpress.org/advanced-administration/upgrade/ftp/), including [FileZilla](https://sourceforge.net/projects/filezilla/), keep hidden files, those files beginning with a period (.), from being displayed. But, at some point, you may need to see your hidden files so that you can change the permissions on that file. For example, you may need to make your [.htaccess](https://wordpress.org/documentation/article/glossary#htaccess) file, the file that controls [permalinks](https://wordpress.org/documentation/article/using-permalinks/), writeable.
To display hidden files in FileZilla, in it is necessary to select ‘View’ from the top menu, then select ‘Show hidden files’. The screen display of files will refresh and any previously hidden file should come into view.
To get FileZilla to always show hidden files – under Edit, Settings, Remote File List, check the Always show hidden files box.
In the latest version of Filezilla, the ‘Show hidden files’ option was moved to the ‘Server’ tab. Select ‘Force show hidden files.’
## Using the Command Line
If you have shell/SSH access to your hosting account, you can use `chmod` to change file permissions, which is the preferred method for experienced users. Before you start using `chmod` it would be recommended to read some tutorials to make sure you understand what you can achieve with it. Setting incorrect permissions can take your site offline, so please take your time.
- [Unix Permissions](https://web.archive.org/web/20190715230319/http://www.washington.edu/computing/unix/permissions.html)
You can make **all** the files in your `wp-content` directory writable in two steps, but before making every single file and folder writable you should first try safer alternatives like modifying just the directory. Try each of these commands first and if they don’t work then go recursive, which will make even your themes image files writable. Replace **DIR** with the folder you want to write in
chmod -v 746 DIR
chmod -v 747 DIR
chmod -v 756 DIR
chmod -v 757 DIR
chmod -v 764 DIR
chmod -v 765 DIR
chmod -v 766 DIR
chmod -v 767 DIR
If those fail to allow you to write, try them all again in order, except this time replace -v with -R, which will recursively change each file located in the folder. If after that you still can’t write, you may now try 777.
### [About Chmod](#about-chmod)
`chmod` is a unix command that means “**ch**ange **mod**e” on a file. The `-R` flag means to apply the change to every file and directory inside of `wp-content`. 766 is the mode we are changing the directory to, it means that the directory is readable and writable by WordPress and any and all other users on your system. Finally, we have the name of the directory we are going to modify, `wp-content`. If 766 doesn’t work, you can try 777, which makes all files and folders readable, writable, and executable by all users, groups, and processes.
If you use [Permalinks](https://wordpress.org/documentation/article/using-permalinks/) you should also change permissions of .htaccess to make sure that WordPress can update it when you change settings such as adding a new page, redirect, category, etc.. which requires updating the .htaccess file when mod_rewrite Permalinks are being used.
1. Go to the main directory of WordPress
2. Enter `chmod -v 666 .htaccess`
**NOTE:** From a security standpoint, even a small amount of protection is preferable to a world-writeable directory. Start with low permissive settings like 744, working your way up until it works. Only use 777 if necessary, and hopefully only for a temporary amount of time.
## The dangers of 777
The crux of this permission issue is how your server is configured. The username you use to FTP or SSH into your server is most likely not the username used by the server application itself to serve pages.
7 7 7
user group world
r+w+x r+w+x r+w+x
4+2+1 4+2+1 4+2+1 = 777
Often the Apache server is ‘owned’ by the **www-data**, **dhapache** or **nobody** user accounts. These accounts have a limited amount of access to files on the server, for a very good reason. By setting your personal files and folders owned by your user account to be World-Writable, you are literally making them World Writable. Now the www-data, dhapache and nobody users that run your server, serving pages, executing php interpreters, etc. will have full access to your user account files.
This provides an avenue for someone to gain access to your files by hijacking basically any process on your server, this also includes any other users on your machine. So you should think carefully about modifying permissions on your machine. I’ve never come across anything that needed more than 767, so when you see 777 ask why it’s necessary.
### The Worst Outcome
The worst that can happen as a result of using 777 permissions on a folder or even a file, is that if a malicious cracker or entity is able to upload a devious file or modify a current file to execute code, they will have complete control over your blog, including having your database information and password.
### Find a Workaround
It is usually pretty easy to have the enhanced features provided by the impressive WordPress plugins available, without having to put yourself at risk. Contact the Plugin author or your server support and request a workaround.
## Finding Secure File Permissions
The .htaccess file is one of the files that is accessed by the owner of the process running the server. So if you set the permissions too low, then your server won’t be able to access the file and will cause an error. Therein lies the method to find the most secure settings. Start too restrictive and increase the permissions until it works.
### Example Permission Settings
The following example has a *custom compiled php-cgi binary* and a *custom php.ini* file located in the cgi-bin directory for executing php scripts. To prevent the interpreter and `php.ini` file from being accessed directly in a web browser they are protected with a .htaccess file.
Default Permissions (umask 022)
644 -rw-r--r-- /home/user/wp-config.php
644 -rw-r--r-- /home/user/cgi-bin/.htaccess
644 -rw-r--r-- /home/user/cgi-bin/php.ini
755 -rwxr-xr-x /home/user/cgi-bin/php.cgi
755 -rwxr-xr-x /home/user/cgi-bin/php5.cgi
Secured Permissions
600 -rw------- /home/user/wp-config.php
6**0**4 -rw----r-- /home/user/cgi-bin/.htaccess
6**00** -rw------- /home/user/cgi-bin/php.ini
7**11** -rwx--x--x /home/user/cgi-bin/php.cgi
**100** ---x------ /home/user/cgi-bin/php5.cgi
#### .htaccess permissions
**644 \> 604** – The bit allowing the group owner of the .htaccess file read permission was removed. 644 is normally required and recommended for .htaccess files.
#### php.ini permissions
**644 \> 600** – Previously all groups and all users with access to the server could access the php.ini, even by just requesting it from the site. The tricky thing is that because the php.ini file is only used by the php.cgi, we only needed to make sure the php.cgi process had access. The php.cgi runs as the same user that owns both files, so that single user is now the only user able to access this file.
#### php.cgi permissions
**755 \> 711** This file is a compiled php-cgi binary used instead of mod_php or the default vanilla php provided by the hosting company. The default permissions for this file are 755.
#### php5.cgi permissions
**755 \> 100** – Because of the setup where the user account is the owner of the process running the php cgi, no other user or group needs access, so we disable all access except execution access. This is interesting because it really works. You can try reading the file, writing to the file, etc. but the only access you have to this file is to run php scripts. And as the owner of the file you can always change the permission modes back again.
$ cat: php5.cgi: Permission denied
./php5.cgi: Welcome
## SELinux
[Security Enhanced linux](https://en.wikipedia.org/wiki/Security-Enhanced_Linux) is a kernel security module that provides mechanisms by which processes can be sandboxed into particular contexts. This is of particular use to limit the actions that web pages can perform on other parts of the operating system. Actions that are denied by the security policy are often hard to distinguish from regular file permission errors.
selinux is typically installed on Redhat family distributions (e.g., CentOS, Fedora, Scientific, Amazon and others).
### How to determine if selinux is the problem?
If you are on a debian based distribution, you are probably fine.
Run the following command (on rpm based systems);
$ rpm -qa | grep selinux
selinux-policy-targeted-3.13.1-166.el7_4.7.noarch
selinux-policy-3.13.1-166.el7_4.7.noarch
libselinux-2.5-11.el7.x86_64
libselinux-python-2.5-11.el7.x86_64
libselinux-utils-2.5-11.el7.x86_64
and to check whether it is the cause of denials of permissions:
$ getenforce
Enforcing
One issue that selinux causes is blocking the wp-admin tools from writing out the \`.htaccess\` file that is required for url rewriting. There are several commands for inspecting this behaviour
$ audit2allow -w -a
type=AVC msg=audit(1517275570.388:55362): avc: denied { write } for pid=11831 comm="httpd" path="/var/www/example.org/.htaccess" dev="vda1" ino=67137959 scontext=system_u:system_r:httpd_t:s0 tcontext=system_u:object_r:httpd_sys_content_t:s0 tclass=file
Was caused by:
The boolean httpd_unified was set incorrectly.
Description:
Allow httpd to unified
Allow access by executing:
# setsebool -P httpd_unified 1
and
$ ausearch -m avc -c httpd
----
time->Tue Jan 30 01:30:31 2018
type=PROCTITLE msg=audit(1517275831.762:55364): proctitle=2F7573722F7362696E2F6874747064002D44464F524547524F554E44
type=SYSCALL msg=audit(1517275831.762:55364): arch=c000003e syscall=21 success=no exit=-13 a0=55b9c795d268 a1=2 a2=0 a3=1 items=0 ppid=11826 pid=11829 auid=4294967295 uid=48 gid=48 euid=48 suid=48 fsuid=48 egid=48 sgid=48 fsgid=48 tty=(none) ses=4294967295 comm="httpd" exe="/usr/sbin/httpd" subj=system_u:system_r:httpd_t:s0 key=(null)
type=AVC msg=audit(1517275831.762:55364): avc: denied { write } for pid=11829 comm="httpd" name="bioactivator.org" dev="vda1" ino=67137958 scontext=system_u:system_r:httpd_t:s0 tcontext=unconfined_u:object_r:httpd_sys_content_t:s0 tclass=dir
----
You can temporarily disable selinux to determine if it is the cause of the problems;
$ setenforce
usage: setenforce \[ Enforcing | Permissive | 1 | 0 \]
# Finding Server Info
What version of [PHP](https://wordpress.org/documentation/article/glossary#php) are you using? What server software is your site host using? What version of [MySQL](https://wordpress.org/documentation/article/glossary#mysql) do you have? What operating system does your site host use?
 ALT= Top of PHP Info test file results
These are questions often asked by WordPress users as they prepare to [install WordPress](https://developer.wordpress.org/advanced-administration/before-install/howto-install/). Other times, these questions are asked while troubleshooting a problem with a WordPress installation. But don’t spend at lot of time searching your site, or your host’s site, for the answers—there’s a very easy way to get that information.
The easiest way to collect the information is to make use of a PHP function called phpinfo(). The phpinfo() function will query your (or your host’s) server and generate a report with a long list of data. Note: Remember to bookmark this page, because, in the future, a volunteer in the [WordPress Support Forum](https://www.wordpress.org/support/forums/) may ask you to use this method to get information to assist them in troubleshooting a question you asked on the Support Forum.
**Warning:** This file will contain some moderately sensitive information about your server that could help an attacker gain access to it. Make sure that you give the file an obscure filename and delete it as soon as you’re done.
In a text editor, copy and paste the following command:
Make sure there are no spaces before or after the command, just the command, and save the file as something obscure like sffdsajk234.php. It’s important to make the file difficult for hackers to file, because it will contain information that could help them compromise your server.
Upload the file to the root directory of your site. Then type in the address to the file in your browser:
https://example.com/sffdsajk234.php
The result will be several pages long and it will contain a ton of information. Though your data may be in a different order, for the most part, you just need the summary items that lists things like this:
| | |
|----|----|
| PHP | Version 7.3.0 |
| System | Windows NT DESKTOP-LK01DAN 10.0 build 17763 (Windows 10) i586 |
| Build Date | Dec 6 2018 01:51:18 |
| Server API | Apache 2.0 Handler |
| Apache Version | Apache/2.4.37 (Win32) OpenSSL/1.1.1a PHP/7.3.0 |
That’s it. Make sure you remember to delete the file once you’re done with it, because leaving it there could help hackers compromise your server.
## Information and Resources
- [PHP.net’s phpinfo Manual](https://www.php.net/phpinfo)
- [Zend’s PHP Manual on phpinfo](https://www.zend.com/manual/function.phpinfo.php)
- [WordPress Environment PHP library](https://github.com/abelcallejo/wordpress-environment)
# Giving WordPress Its Own Directory
Many people want WordPress to power their website’s root (e.g. https://example.com) but they don’t want all of the WordPress files cluttering up their root directory. WordPress allows you to install it into a subdirectory, but have your website served from the website root.
**Note:** This guide covers configuration for Apache (`.htaccess`), nginx (server blocks), and IIS (`web.config`).
As of [Version 3.5](https://wordpress.org/documentation/wordpress-version/version-3-5/), Multisite users may use all of the functionality listed below. If you are running a version of WordPress older than 3.5, please update before installing a Multisite WordPress install on a subdirectory.
**Note to theme/plugin developers:** this will not separate your code from WordPress. Themes and plugins will still reside under `wp-content` folder.
## Moving a Root install to its own directory
Let’s say you’ve installed WordPress at `example.com`. Now you have two different methods to move WordPress installations into a subdirectory:
1. Without change of SITE-URL (remains `example.com`)
2. With change in SITE-URL (it will redirect to `example.com/subdirectory`)
## Method I (Without URL change)
1. After Installing WordPress in the root folder, move EVERYTHING from the root folder into a subdirectory.
### Apache (.htaccess)
1. Create a `.htaccess` file in the root folder, and put this content inside (just change `example.com` and `my_subdir`):
 1. All the tables in the WordPress database will appear.
 1. Click “Erase” button of the table you wish to empty. For this example, we will be emptying the “wp_dstats2” table.
**Note:** Your table may well have a different name, check the plugin’s documentation to find out what it is. DO NOT empty a table that is used by the WordPress core. (Please see the list under [Database_Description](https://codex.wordpress.org/Database_Description) for those specific table names.)
 1. You will now get a confirmation screen.
 **This is your last chance to check that you have the right table and database selected** — phpMyAdmin has no UNDO function, so once changes are committed, you are stuck with them. Unless, of course, you made that suggested back up.
1. Click “OK” and you will be returned to viewing all the tables in your database with the specified table’s contents emptied.
# Web servers
The web server is a piece of software that accepts user web requests and serves them the appropriate result. Many different web servers run on other operation systems. Generally, if your web server supports and executes PHP files, it should be able to work with WordPress.
## Apache HTTPD
See [Apache HTTPD / .htaccess](https://developer.wordpress.org/advanced-administration/server/web-server/httpd/)
## nginx
See [Nginx](https://developer.wordpress.org/advanced-administration/server/web-server/nginx/).
# Control Panels
## WP Toolkit for cPanel & WHM and Plesk
WP Toolkit is a single management interface that allows you to install, configure, and manage WordPress® easily. WP Toolkit can install, configure, and manage WordPress versions 4.9 or later.
cPanel & WHM versions 102 and above install WP Toolkit by default. WP Toolkit is available in Plesk if the server administrator has installed the WP Toolkit extension.
## cPanel & WHM
This tutorial describes how to install WordPress in the cPanel & WHM control panel using WP Toolkit. For other options to install WordPress in cPanel & WHM, read cPanel’s [How to Install WordPress with cPanel](https://docs.cpanel.net/knowledge-base/third-party/how-to-install-wordpress-with-cpanel/) documentation.
To install WordPress via WP Toolkit, perform the following actions:
1. Log in to the cPanel interface with the information provided by your hosting company.
2. Select *WP Toolkit* from the lefthand menu bar. The *WP Toolkit* interface will appear.
3. Click *Install WordPress* to create a new WordPress installation.
### Install WordPress
In the *Install WordPress* interface, click *Install* to use the default settings. Or provide the following optional information to customize your installation, then click *Install*:
- The installation directory. By default, the installation uses the account’s `public_html` directory.
- The title for the website.
- The plugin or theme set.
- The language of the website.
- The version of WordPress to install. By default, the installation uses the current WordPress version.
- The WordPress Administrator username and password.
- The database name, table prefix, username and password.
- The automatic update settings for the WordPress software, plugins, and themes.
Click *Install Plugins* if you want to install plugins and themes, or click *No, thanks* to optionally install them later.
## Plesk
This tutorial provides step-by-step examples of installing Plesk WP Toolkit using the Plesk Web Installer.
### Using Web Installer
Install Plesk using Web Installer please open your browser and go to [get.plesk.com](https://get.plesk.com/). For Plesk installation, it is required a fresh Linux server with access to the Internet. You can install Plesk on any supported Linux-based OS.
 Provide your server’s IP address or hostname, enter your root password, or just add a private key.
- Accept the terms of End-User License Agreement and click Install button.
- Relax and wait for some time to let the installation be finalized.
- Click on the Login link. No worries about “secure connection warnings”, just make an exception.
### Installing WordPress
 - For an express installation, click Install (Quick). The latest version of WordPress will be installed, and the default settings will be used. The new instance will be available via HTTPS if SSL/TLS support is enabled for the domain.
- If you want to change the default installation settings, click Install (Custom). This enables you to set up the administrator user, select the desired WordPress version, specify the database name, select auto-update settings, and more.
### Managing WordPress Instances
Go to WordPress to see all your WordPress instances. WP Toolkit groups information about each instance in blocks we call cards.
 A card shows a screenshot of your website and features several controls that give you easy access to frequently used tools. The screenshot changes in real time to reflect the changes you make to your website. For example, if you switch the maintenance mode on or change the WordPress theme, the screenshot of the website will change immediately.
### Tools
In the “Tools” section, click to access the following WP Toolkit features:
 - “Sync” to synchronize the content of your website with another one.
- “Clone” to make a full copy of your website.
- “Manage Files” to manage the website’s files in File Manager.
- “Back Up/Restore” to create a backup of your website and restore it if necessary.
The controls below give you easy access to the following settings and tools:
- “Search engine indexing” shows your website in search results of search engines.
- “Caching (nginx)” speeds up the website load time and reduces server load.
- “Debugging” helps you debug a website that is not ready for viewing and being tested or developed.
- “Maintenance mode” hides your website’s content from visitors.
- “Password Protection” specifies the password you will use to log in to WordPress from Plesk.
# Mail
This page details the philosphy, operations, and the recommended practices for setting up the local mailing environment for WordPress.
## Prerequisites
Before starting, you’ll need to have a basic understanding of the [SMTP protocol](https://en.wikipedia.org/wiki/Simple_Mail_Transfer_Protocol) and the roles of each of the three mailing agents ([MUA](https://en.wikipedia.org/wiki/Mail_user_agent), [MTA](https://en.wikipedia.org/wiki/Message_transfer_agent), and [MDA](https://en.wikipedia.org/wiki/Message_delivery_agent)).
## WordPress’s Philosophy on Mailing
WordPress has never provided either a MUA or an MTA by default. It only provides a wrapper for a language API library that handles the submission of a message to an MTA which can interact either with PHP `mail()` function or the `SMTP` extension.
This means, that its the server administrator’s responsibility to configure the MTA and the related mailing environment properly to interact with the chosen language API. Historically, [PHPMailer](https://github.com/PHPMailer/PHPMailer) has been this library of choice. WordPress is not involved in the process of sending emails but only in the process of formatting the message to submit it to this mailing API.
## How WordPress’s Mailing operates out-of-the-box
Currently, WordPress uses the `wp_mail()` wrapping function. By default configuration, this wrapper informs the PHPMailer library to use the PHP’s internal `mail()` function that requires the presence of a sendmail-compatible binary acting as the MTA. Hence, in order for WordPress to work out-of-the-box, one needs to have the related mailing local environment properly configured.
This is generally not a problem if you are using a managed hosting service, but if you are running your own server and do not have a SMTP server (MTA) set up and/or the related mailing environment properly configured, the outgoing mail won’t be sent, unless you configure WordPress’ wrapper to use a remote SMTP server.
## Recommended Actions
Besides the technical aspects, it’s worthwhile to outline the recommended solutions given the different scenarios so the admins do not end up choosing solutions that don’t fit them.
If your WordPress site is on managed hosting, there is typically nothing extra that needs to be done to send emails, but some additional actions to ensure deliverability as explained below may be required. Mail originating from your WordPress install should work out-of-the-box. All mailing related questions should be directed to your webhost, and you may want to check if the host provides the option to configure a SMTP relay through their admin panel.
If you’re on a self-managed hosting platform (i.e. running your own server), there are typically three ways you can setup your mail service:
- **Setup a local MTA or a dedicated mail server that can send mail directly**. With this method, you as the admin are responsible for everything. Please keep in mind that even if you’ve configured all of the related software correctly, you may still run into issues, as mail deliverability extends into factors outside of your control, such as IP reputation. Due to the amount of overhead and ongoing maintenance required, this method is typically reserved for server administrators with experience in this field, because of the potential to run into serious deliverability troubles.
- **Setup a local MTA and have it relay mail to a third party mailing service**. This is the recommended method for most self-hosted setups because it is easier to implement than the previous one, and still retains compatibility with WordPress’ philosophy. If you don’t want to deal with the complexity of mail deliverability issues in running your full MTA, this is way to go. In fact, some smaller web hosts utilize this method (they would hold a business account with the third party mailing services and relay all the mails to the mailing service). If you host and manage your own site and you are sending a sizable number of emails through WordPress, this method is also ideal, as you delegate the responsibility to the third party mailing service. Like the first method, be aware that this option is not exempt of risks, as explained in the next section. Setting up your MTA always requires some level of server management expertise, even if you are relying on a third party mailing service.
- **Configure a SMTP relay via code to utilize a third party mailing service**. This is the recommended method if you are not going to handle a high volume of emails or you don’t want to deal with the complexity of mail deliverability issues in running a self-hosted MTA. Be aware that this method [will cause a performance degradation](https://konstantin.blog/2021/wp_mail-is-not-broken/) for many reasons.
## Setting up your own MTA
If you choose to set up your MTA, either for local or third party relay, this section briefly explains the basics of setting up an MTA in both \*NIX and Windows environments. Before we go into the details, be aware that there are some risks in this approach. Port 25 has to be open, which can be problematic if you are not careful, as it is one of the most common attack vectors. If you don’t protect the SMTP relay authentication properly, you might end up with a security issue or having your server being used for spamming.
### \*NIX Server Basics
If you are running your own \*NIX server, you should have either `postfix` `exim`, `qmail` or `sendmail` as the most popular MTA, on your machine and just need to set them up (you may search on the web for how-tos). If you wish to use a third party mailing service, the recommended practice is to setup your local MTA to relay mail to the remote SMTP server as this will prevent the page load time from suffering.
### Windows Host Server Specific
Check your “Relay” settings on the SMTP Virtual Server. Grant access to `127.0.0.1` . Then in your `php.ini` file, set the `SMTP` setting to the same IP address. Also set `smtp_port` to `25`.
On a Windows machine, try a sendmail emulator like [Fake sendmail for Windows with TLS v1.2 support](https://github.com/sendmail-tls1-2/main).
### Alternative Solutions to MTA Setup
If you do not want to manually setup a complete MTA in your box, there are some other options:
- Use a relay MTA in place of a local full-featured MTA: for example, [msmtp-mta](https://wiki.debian.org/msmtp) is a simplified MTA that can be used to relay emails using a remote SMTP server (i.e. a remote MTA). The package provides a `/usr/sbin/sendmail` symlink to `msmtp` and has sendmail compatible interface that other software can use directly.
- Use SMTP plugins: You can install [SMTP plugins](https://wordpress.org/plugins/search/smtp/) from the WP.org plugin directory. These type of plugins override `wp_mail()` default settings to use PHPMailer or any other mailing library of their choice, which utlize remote third party mailing services to send mail on your behalf of your domain.
### Ensuring Deliverability
Once we have our system sending mails, we need to ensure that they are actually delivered to the recipients. There are a few things we need to check:
#### Ensure Proper Return Address is Used
By default, the WordPress wrapper fills in the `From:` field with `wordpress@example.com` and the `From:` name as *WordPress*. This is fine if this is a valid e-mail address. For example, if your domain is `example.com`, your host will pass `wordpress@example.com` on for delivery. It will probably send your mail as long as `example.com` is setup to send and receive mail, even if `wordpress` is not a valid mailbox. Some old mail delivery agents will check if the `From:` address is valid and can receive mail. This check is becoming less common nowadays, but we recommend to make sure to use a valid email address and the mailbox exists in your receiving mail server. If you are using the default `From:` address, simply verify that you can receive mail in the `wordpress@example.com` mailbox. Remember that `example.com` is the domain of your WordPress installation.
If you don’t want to send the emails from the same domain as the one exhibited in your installation, then you must introduce some code changes in your WordPress. For example, if your WP domain is `example.org` but you want to send emails from `mail.example.org`, the mail may not send because the DNS records of `example.org` may not authorize emails to be handled by your mail server, as the default `From:` address will be `wordpress@wordpress.org`. To change the default `From:` address, your WordPress can [use the `wp_mail_from` filter](https://developer.wordpress.org/reference/hooks/wp_mail_from/). For the name, you can use [the `wp_mail_from_name` filter](https://developer.wordpress.org/reference/hooks/wp_mail_from_name/).
It may be possible to force the `From:` address configuration in your configured MTA server. Refer to the related documentation for your MTA.
#### The Reply-To Address
The WordPress wrapper ignores the `Reply-To:`, so it will be coincidental with the `From:` address, following the example above, `wordpress@example.com` by default. If you want your users to be able to reply to sent emails, make sure that this mailbox exists on your receiving mail server. The default `Reply-To:` is always going to be the same as the `From:` address, unless you explicitly set it to a different address in the mail headers.
There is only one scenario where the `Reply-To:` address is set automatically: when we are sending an email to a user that commented on a post. In this case, the `Reply-To:` address will be set to the email address that the commenter explicitely specified.
### Troubleshooting Spam Deliverability Issues
Your email message may have been routed to a spam folder or even worse, simply discarded as malicious. There are a couple measures you can use to convince recipient’s mail servers that your message is legitimate and should be delivered as addressed. Setting up SPF, DKIM and DMARC records is a critical step to ensure deliverability. There are multiple guides online that will help you set up these records. Below is an explanation as to why these records are beneficial.
#### SPF (Sender Policy Framework)
This is the most common anti-spam measure used. The MDA checks the SPF record of the sender’s domain to see if it is authorized to send mail for that domain. The SPF is a TXT DNS record that you need to add, or check if your host has added it for you, that lists the IP addresses or hostnames authorized to send mail for that domain. This ensures that the mail is not coming from an unauthorized source. So, for example, if an unknown server IP address sends an email with your domain name in the `From:` field, thanks to the SPF DNS record, the MDA will reject the mail as spam. But if you don’t configure this properly in your DNS records, your emails may also be rejected as spam.
Just remember, if you are sending emails through different servers, including your WordPress installation, you need to add all the addresses to the SPF record.
#### DKIM (Domain Key Identified Mail)
This anti-spam integrity authentication check has gained a lot of traction in the last few years, and has been implemented by most major email providers. You can use both SPF and DKIM in the same message. Again, just as with SPF, you can check if your receiving mailserver verified your host’s domain key by examining the mail header. As with SPF, if you can edit your TXT DNS records, you can set up DKIM credentials yourself. If you are in a managed hosting environment, check with your hosting provider if they have set this up for you, as it is common practice.
If you have to manage this by yourself, there are multiple methods to send the right DKIM signature in your emails:
- Configure your MTA to sign the email with the DKIM signature.
- Some SMTP plugins have a DKIM signature option.
- Use `PHPMailer` library to set the DKIM signature. For this, you may need to [hook to the `phpmailer_init` action](https://developer.wordpress.org/reference/hooks/phpmailer_init/) and follow the PHPMailer library’s documentation (this is not officially documented, check [this post for more details](https://stackoverflow.com/a/24464694/4442122).
Also make sure to generate your DKIM keys with the correct domain information and publish the DNS record accordingly. When you add the DKIM public key to your DNS records, the MDA will check for your email header DKIM-Signature and verify the signature. If the signature is invalid, the MDA will reject the mail as spam. This is meant to avoid emails being spoofed and sent from an unauthorized source. DKIM and SPF are used together to ensure the email is legitimate and should be delivered as addressed.
#### DMARC (Domain-based Message Authentication, Reporting & Conformance)
The DMARC record is another TXT DNS record that you need to add or check if your hosting has added it for you, that lists the actions to take when the email has not passed the SPF or DKIM checks. DMARC is becoming almost mandatory, so to ensure deliverability, we recommend setting it up. You can read more about it [here](https://dmarc.org/).
# Nginx
While the LAMP stack (Linux + Apache + MySQL + PHP) is very popular for powering WordPress, it is also possible to use Nginx. WordPress supports Nginx, and some large WordPress sites, such as WordPress.com, are powered by Nginx.
When talking about Nginx, it is important to know that there are multiple ways to implement Nginx. It can be setup as a reverse-proxy in front of Apache, which is a very powerful setup that allows you to use all of the features and power of Apache, while benefiting from the speed of Nginx. Most websites that report using Nginx as the server (based on stats gathered from HTTP response headers), are actually Apache running with Nginx as the reverse proxy. (The HTTP response headers showing “Nginx” are being reported by the reverse-proxy, not the server itself.)
**This guide is referring to a standalone Nginx setup, where it is used as the primary server instead of Apache.** It should be noted that Nginx is not a completely interchangeable substitute for Apache. There are a few key differences affecting WordPress implementation that you need to be aware of before you proceed:
- With Nginx there is no directory-level configuration file like Apache’s .htaccess or IIS’s web.config files. All configuration has to be done at the server level by an administrator, and WordPress cannot modify the configuration, like it can with Apache or IIS.
- Pretty Permalinks functionality is slightly different when running Nginx.
- Since Nginx does not have .htaccess-type capability and WordPress cannot automatically modify the server configuration for you, it cannot generate the rewrite rules for you.
- Without modifications to your install, “index.php” will be added to your Permalinks. (There are ways to mitigate this with plugins (see below) and/or adding custom code to your child theme’s functions.php.)
- However, if you do want to have some (limited) .htaccess capability, it is technically possible to do add by installing the [htscanner PECL extension for PHP](https://www.php.net/manual/en/book.htscanner.php). (However, this is not a perfect solution so be sure to test and debug thoroughly before using on a live site.)
This guide is not going to cover how to install and configure Nginx, so this assumes that you have already installed Nginx and have a basic understanding of how to work with and debug it.
## Generic and Multi-Site Support
To make WordPress work with Nginx you have to configure the backend php-cgi. The options available are `fastcgi` or `php-fpm`. Here, php-fpm is being used because it is included with PHP 5.3+, so installing it is straight forward.
The Nginx configuration has been broken up into five distinct files and is heavily commented to make each option easier to understand. The [author](https://wordpress.org/support/users/bigsite/) also made a best-effort attempting to follow “best practices” for nginx configurations.
### Main (generic) startup file
This is equivalent to /etc/nginx/nginx.conf (or /etc/nginx/conf/nginx.conf if you’re using Arch Linux).
# Generic startup file.
user {user} {group};
#usually equal to number of CPUs you have. run command "grep processor /proc/cpuinfo | wc -l" to find it
worker_processes auto;
worker_cpu_affinity auto;
error_log /var/log/nginx/error.log;
pid /var/run/nginx.pid;
# Keeps the logs free of messages about not being able to bind().
#daemon off;
events {
worker_connections 1024;
}
http {
#rewrite_log on;
include mime.types;
default_type application/octet-stream;
access_log /var/log/nginx/access.log;
sendfile on;
#tcp_nopush on;
keepalive_timeout 3;
#tcp_nodelay on;
#gzip on;
#php max upload limit cannot be larger than this
client_max_body_size 13m;
index index.php index.html index.htm;
# Upstream to abstract backend connection(s) for PHP.
upstream php {
#this should match value of "listen" directive in php-fpm pool
server unix:/tmp/php-fpm.sock;
# server 127.0.0.1:9000;
}
include sites-enabled/*;
}
### Per Site configuration
# Redirect everything to the main site. We use a separate server statement and NOT an if statement - see https://www.nginx.com/resources/wiki/start/topics/depth/ifisevil/
server {
server_name _;
return 302 $scheme://example.com$request_uri;
}
server {
server_name example.com;
root /var/www/example.com;
index index.php;
include global/restrictions.conf;
# Additional rules go here.
# Only include one of the files below.
include global/wordpress.conf;
# include global/wordpress-ms-subdir.conf;
# include global/wordpress-ms-subdomain.conf;
}
Splitting sections of the configuration into multiple files allows the same logic to be reused over and over. A ‘global’ subdirectory is used to add extra rules for general purpose use (either /etc/nginx/conf/global/ or /etc/nginx/global/ depending on how your nginx install is set up).
### Global restrictions file
# Global restrictions configuration file.
# Designed to be included in any server {} block.
location = /favicon.ico {
log_not_found off;
access_log off;
}
location = /robots.txt {
allow all;
log_not_found off;
access_log off;
}
# Deny all attempts to access hidden files such as .htaccess, .htpasswd, .DS_Store (Mac).
# Keep logging the requests to parse later (or to pass to firewall utilities such as fail2ban)
location ~ /\. {
deny all;
}
# Deny access to any files with a .php extension in the uploads directory
# Works in sub-directory installs and also in multisite network
# Keep logging the requests to parse later (or to pass to firewall utilities such as fail2ban)
location ~* /(?:uploads|files)/.*\.php$ {
deny all;
}
### General WordPress rules
For single site installations, here is the `global/wordpress.conf` file:
# WordPress single site rules.
# Designed to be included in any server {} block.
# Upstream to abstract backend connection(s) for php
upstream php {
server unix:/tmp/php-cgi.socket;
server 127.0.0.1:9000;
}
server {
## Your website name goes here.
server_name domain.tld;
## Your only path reference.
root /var/www/wordpress;
## This should be in your http block and if it is, it's not needed here.
index index.php;
location = /favicon.ico {
log_not_found off;
access_log off;
}
location = /robots.txt {
allow all;
log_not_found off;
access_log off;
}
location / {
# This is cool because no php is touched for static content.
# include the "?$args" part so non-default permalinks doesn't break when using query string
try_files $uri $uri/ /index.php?$args;
}
location ~ \.php$ {
#NOTE: You should have "cgi.fix_pathinfo = 0;" in php.ini
include fastcgi.conf;
fastcgi_intercept_errors on;
fastcgi_pass php;
}
location ~* \.(js|css|png|jpg|jpeg|gif|ico)$ {
expires max;
log_not_found off;
}
}
This is more up-to-date example for Nginx: https://www.nginx.com/resources/wiki/start/topics/recipes/wordpress/
### WordPress Multisite
For multisite installations, use one of the below sections for the `global/wordpress.conf` file, depending on the version of WordPress that was in use when multisite was *activated*, as well as the domain/subdirectory configuration.
#### WordPress 3.5 and up
If you activated Multisite on WordPress 3.5 or later, use one of these.
##### WordPress 3.5 and up Subdirectory Examples
# WordPress multisite subdirectory config file for WP 3.5 and up.
server {
server_name example.com ;
root /var/www/example.com/htdocs;
index index.php;
if (!-e $request_filename) {
rewrite /wp-admin$ $scheme://$host$request_uri/ permanent;
rewrite ^(/[^/]+)?(/wp-.*) $2 last;
rewrite ^(/[^/]+)?(/.*\.php) $2 last;
}
location / {
try_files $uri $uri/ /index.php?$args ;
}
location ~ \.php$ {
try_files $uri =404;
include fastcgi_params;
fastcgi_pass php;
}
#add some rules for static content expiry-headers here
}
##### WordPress 3.5 and up Subdomains Examples
# WordPress multisite subdomain config file for WP 3.5 and up.
server {
server_name example.com *.example.com ;
root /var/www/example.com/htdocs;
index index.php;
location / {
try_files $uri $uri/ /index.php?$args ;
}
location ~ \.php$ {
try_files $uri =404;
include fastcgi_params;
fastcgi_pass php;
}
#add some rules for static content expiry-headers here
}
#### WordPress 3.4 and below
If you originally activated Multisite with WordPress with 3.4 or older, you need to use one of these:
##### WordPress \<=3.4 Subdirectory Examples
# WordPress multisite subdirectory config file for WP 3.4 and below.
map $uri $blogname{
~^(?P
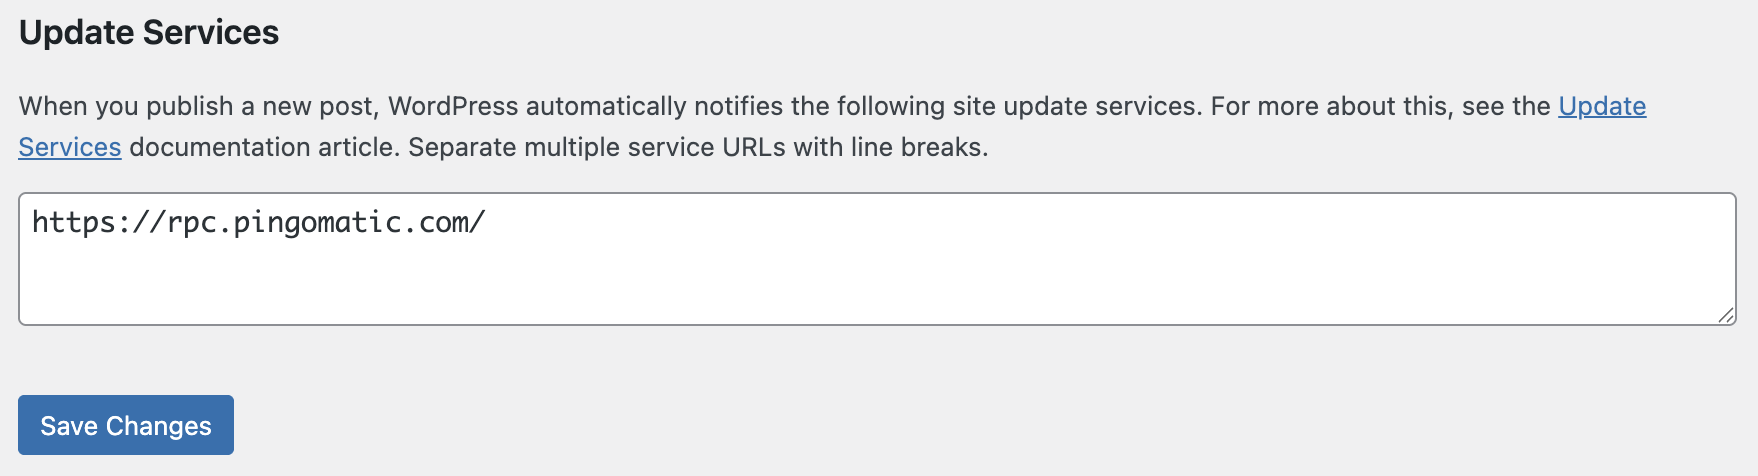 Certain web hosts – particularly free ones – disable the PHP functions used to alert update services. If your web host prevents pings, you should stop WordPress from attempting to ping.
## XML-RPC Ping Services
https://rpc.pingomatic.com/
https://rpc.twingly.com/
http://ping.blo.gs/
## Alternatives
An alternative is [Feed Shark](https://feedshark.brainbliss.com/), which pings over 60 services for free.
## WordPress Multisite Network
By default, editing the Ping Services field is disabled for individual sites in a WordPress Multisite network. To restore this option, you can add a small custom plugin or must-use plugin with the following code:
add_action( 'init', function() {
if ( is_multisite() ) {
// Allow the Update Services configuration screen to appear.
add_filter( 'enable_update_services_configuration', '__return_true', 11 );
// Whitelist the 'ping_sites' option so changes can be saved to the database.
add_filter( 'whitelist_options', function( $options ) {
$options['writing'][] = 'ping_sites';
return $options;
}, 11 );
}
} );
# Editing Files
There are times when you will need to edit WordPress files, especially if you want to change your [WordPress Theme](https://wordpress.org/documentation/article/worik-with-themes/). WordPress features a [built-in editor](https://developer.wordpress.org/advanced-administration/wordpress/edit-files/#using-the-theme-file-editor-and-plugin-file-editor) that allows you to edit files online, using any internet browser. You can also edit files copied or stored on your computer, and then upload them to your site using an [FTP client](https://developer.wordpress.org/advanced-administration/upgrade/ftp/). Before editing any of your WordPress files, be sure to do the following:
- Work from copies of backup files when possible, and make sure that you [back up your information](https://developer.wordpress.org/advanced-administration/security/backup/) frequently–while you work, and whenever you make changes. Remember to keep your backups in a safe place!
- When working online, you need to set the appropriate [file permissions](https://developer.wordpress.org/advanced-administration/server/file-permissions/) so that you can modify and save files. If you see a note at the bottom of the WordPress editor panel that says *If this file was writable, you could edit it…* this means that you need to change the file permissions before you can make any changes.
- When modifying files outside the built-in plugin and theme editors, use a [text editor](https://wordpress.org/documentation/article/wordpress-glossary/#text-editor). **It is strongly advisable not to use a word-processing program**. Word processors change quote marks to characters, they sometimes convert specific characters, and they can also add in unwanted code. These changes can cause files to break. For similar reasons, it is also inadvisable to use certain HTML generator programs.
## Using the Theme File Editor and Plugin File Editor
WordPress contains two built-in editors that allow you to edit theme files directly from your browser. They are called the **theme file editor** and the **plugin file editor**. Please note that, depending on the level of user privileges that you have, you may or may not be able to access these features in the administrative panel of your blog. Please contact your blog or website administrator, to have your privileges adjusted.
### Where can I find these editors?
You can find these editors in the following places, depending on your theme:
- If you are using a [Block theme](https://wordpress.org/documentation/article/block-themes/), both the Theme and Plugin File Editor will be listed under Tools.
- If you are using a Classic theme, the Theme File Editor will be listed under Appearance and the Plugin File Editor will be listed under Plugins.
You can view a file in either of these editors by accessing it from the right-hand sidebar navigation. More information on editing themes is available at [Theme Developer Handbook](https://developer.wordpress.org/themes/). Be aware that if the theme you edit is updated, your changes will be overwritten. To better organize your changes and protect them from updates, consider creating a [Child Theme](https://developer.wordpress.org/themes/advanced-topics/child-themes/) in which to keep all your changes.
### What Files Can Be Edited?
The following file types (if [writable](https://developer.wordpress.org/advanced-administration/server/file-permissions/)) can be edited in the plugin editor that is built into the WordPress administrative panel:
- [HTML](https://wordpress.org/documentation/article/glossary#html)
- [PHP](https://wordpress.org/documentation/article/glossary#php)
- [CSS](https://wordpress.org/documentation/article/glossary#css)
- TXT (and related text-like files such as RTF)
In the theme editor, only writable PHP and CSS files can be edited.
### Things You Need to Know
#### Instant Changes
The changes you make to files using the WordPress editors are instant. The changes happen online, in real-time. You and any visitors to your site will see the changes, immediately. Because of the immediate nature of the changes, it’s usually safer to edit copies of your files offline, test the file copies, and then upload your changes when they are verified. Always make sure you have a current backup before editing files.
#### Editor Features
The built-in WordPress plugin and theme file editors are very basic, allowing you to easily view and edit plugin and theme files on your website. Please note that there are no advanced editor features such as search and replace, line numbers, syntax highlighting, or code completion. Hint: Use your browser’s internal search bar to help find code within the visual editors.
#### File Permissions
To edit a file using the built-in WordPress plugin and theme editors, the permissions for that file must be set to writable (at least 604). You can [change the permissions](https://developer.wordpress.org/advanced-administration/server/file-permissions/) on files by using an [FTP client program](https://developer.wordpress.org/advanced-administration/upgrade/ftp/), a web-based file manager provided by your host, or from the [command-line](https://wordpress.org/documentation/article/glossary#shell) using SSH (secure shell). Your options depend on the type of access your host offers.
#### Make a Mistake? Use Backup Files
Back up all files before editing. If you make a mistake that causes errors, causes a site crash, creates a blank screen, or blocks access to your WordPress Dashboard, delete the changed file and replace it with a good copy from your backup. No backup? Download a fresh copy of the file you edited from the original source, replace it, and start over. BACK UP FIRST.
#### Security Warning
By default, any user that logs in with administrative permissions can access the WordPress plugin and theme editors, and change any theme or plugin file on your site in real-time. To combat accidents, errors, or even hacking, you may wish to disable the ability to edit files within the WordPress theme by adding the [DISALLOW_FILE_EDIT](https://wordpress.org/documentation/article/editing-wp-config-php/#disable-the-plugin-and-theme-editor) function to your `wp-config.php` file.
## Editing Files Offline
To edit files offline, you can use any of the [recommended text editors](https://developer.wordpress.org/advanced-administration/wordpress/edit-files/#text-editors) to create and edit files, and an [FTP client](https://developer.wordpress.org/advanced-administration/upgrade/ftp/) to upload them. Make sure to view the results in your browser, to see if the desired changes have taken effect. **Note**: It is not recommended to change WordPress core files other than [wp-config.php](https://wordpress.org/documentation/article/editing-wp-config-php/). If you must change anything else, take notes about your changes, and store a copy of these notes in a text file in your WordPress root directory. You should also make a backup copy of your WordPress core files, for future reference and upgrades.
## Using Text Editors
### Editors to Avoid
Editors to avoid include any do-it-yourself instant web page software (like Adobe Dreamweaver), or text processor (like Google Docs or Microsoft Word). **Note:** If you use an external editor such as a word-processor to create and edit files, this can corrupt the file you are editing. See [text editor](https://wordpress.org/documentation/article/wordpress-glossary/#text-editor) in the glossary for a short explanation as to why you should avoid these editors.
### Text Editors
The following [text editors](https://wordpress.org/documentation/article/wordpress-glossary/#text-editor) are acceptable for file editing:
- [BBEdit](https://www.barebones.com/products/bbedit/) (Mac, Free)
- [Crimson Editor](http://www.crimsoneditor.com/) (Windows, Free)
- [CodeLobster](https://codelobster.com/) (Mac, Linux, Windows, Free)
- [EditPad](https://www.editpadpro.com/) (Windows)
- [EditPlus](https://www.editplus.com/) (Windows)
- [emacs](https://www.gnu.org/software/emacs/emacs.html) (Mac, Linux, Windows) Open-Source, Free
- [JEdit](https://jedit.org/) (Mac, Linux, Windows)
- [Notepad++](https://notepad-plus-plus.org/) (Windows) Open-Source, Free
- [PSPad](https://www.pspad.com/) (Windows) Free
- [Smultron](https://www.peterborgapps.com/smultron/) (Mac) \$
- [SubEthaEdit](https://apps.apple.com/us/app/subethaedit/id728530824) (Mac) Open-Source, Free
- [Sublime Text](https://www.sublimetext.com/) (Mac, Linux, Windows) \$
- [TextMate](https://macromates.com/) (Mac) \$
- [TextPad](https://www.textpad.com/home) (Windows)
- [UltraEdit-32](https://www.ultraedit.com/) (Mac, Linux, Windows) \$
- [vim](https://www.vim.org/) (Mac, Linux, Windows) Open-Source, Free
- [Visual Studio Code](https://code.visualstudio.com/) (Mac, Linux, Windows)
- [NetBeans](https://netbeans.apache.org/) (Mac, Linux, Windows)
# CSS
 To add a graphic to your feed link, simply wrap the link around the graphic such as:
 ### Changing Addresses
If you are currently using other webblog software and are changing to WordPress, or are moving your weblog to a new location, you can “forward” RSS readers to your new RSS feeds using file rewrites and redirects in your .htaccess file.
Edit the `.htaccess` file in your root folder; if no file exists, create one.
Here is an example for a b2 feed:
RewriteRule ^b2rss2.php(.*)? /wordpress/?feed=rss2 [QSA]
Here is an example for MovableType Users:
RewriteRule ^index.xml(.*)? /wordpress/?feed=rss2 [QSA]
# Multilingual WordPress
WordPress currently does not support a bilingual or multilingual blog out-of-the-box. However, plugins developed by the WordPress community make it easy to create a multilingual blog. The fourth and final phase of the WordPress Gutenberg project will add core implementation for multilingual sites as listed in the [WordPress roadmap](https://wordpress.org/about/roadmap/).
Creating a multilingual blog is basically installing WordPress in more than one language and letting the Plugin switch between them. This includes installing .mo languages files which most Plugins will require you to do manually. For more details, see [Installing WordPress in Your Language](https://developer.wordpress.org/advanced-administration/before-install/in-your-language/).
## Different types of multilingual plugins
There are a few basic types of multilingual Plugins:
1. Manage multilingual posts in one post per language. Translations are then linked together, indicating that one post is the translation of another.
2. Store all languages alternatives for each post in the same post.
3. Manage translations on the generated page instead of using a post context.
4. Link together separate WordPress sites in a network (multisite) installations for each language by pinging back and forth.
### One language per post
Multilingual plugins that assign a single language per post will let the user select the post’s language and add translations as new posts (same for pages, tag and categories).
Then, different versions of the same content are linked together to form translation groups. This grouping allows users to switch the display language.
Pros:
1. The database contents for posts remain unmodified (easy install and uninstall).
2. Everything gets translated by default. If a post includes custom fields, they’re attached to that post, so they are already associated with the language.
3. Some plugins use – for theme’s displayed terms – the language files (.mo) delivered with localizable themes. In WordPress, localization is based in [GNU gettext](https://make.wordpress.org/polyglots/handbook/#Localization_Technology) technology. So when a single post is in french, plugin switch all the terms of the theme in the same language (here french). The files can be completed with the specific terms of the site (categories titles, widget, links…). No need to re-translate all, just add specific terms and translations in target languages.
4. Other plugins that analyze contents (like related posts) keep working correctly.
Cons:
1. More complex architecture. The plugin needs to hook to many WordPress functions and filter them so that only contents that matches the language is returned.
2. Additional tables are required by some plugins – normally, to hold the translation grouping. Newer plugins likely use a custom taxonomy or post meta fields instead.
3. May cause excessive database grow and slow performance as a result. A WooCommerce-based site having a 100,000 products will have 500,000 records after translating to 5 languages. All product metas (could be tens of those per product, and also transients will be duplicated, too, so the database might become huge).
### All languages in a single post
Multilingual plugins that hold all the language contents in the same post use language meta tags to distinguish between contents in different languages. When the post is displayed, it’s first processed and only the active language content remains.
Pros:
1. Side by side editing is easily implemented.
2. Less things to break. There are no additional tables and much fewer things to modify in WordPress.
3. The search will find the same post, regardless on which language you used for the keyword.
4. Number of records in the database stays the same.
Cons:
1. Uninstall can be complicated, as the database needs to be cleaned from multilingual contents.
2. Post permalinks may not be translatable.
### Manage translations on the generated page
Multilingual plugins that use the content pages generated by WordPress and perform translation on those pages. When any page is displayed on WordPress the plugin (either offline or online) attempts to create a translated version of the page using machine translation. Later on that translation can be manually changed or modified.
Pros:
1. Installation is simple and translation for any content on the page is provided.
2. Editing the translation can be done with ease.
Cons:
1. Automatic translation is not good enough and pages on the site might be badly translated.
2. There’s a strong coupling between content and translation, and changes in the original content might break the translation.
### Plugins that direct you to external translation services
Those Multilingual plugins are normally used to create a widget that creates a shortcut for using online translation services (such as Google Translate). The content is auto translated on demand by the third party engine.
Pros:
1. Installation is simple and translation for any content on the page is provided.
2. It is quite clear that the translation process is automated, so the users expectations are lowered.
Cons:
1. Automatic translation is not good enough and pages on the site might be badly translated.
2. Without the ability to change the translation those plugins limit the ability of the content publisher to provide quality translated content.
### Each language in its own WordPress installation
A separate site is created for each language you want to translate into (e.g. in a [WordPress Multisite](https://developer.wordpress.org/advanced-administration/multisite/create-network/) installation). All the sites need to run the same theme and plugin. When a translation is saved source posts get pinged by translation posts and the system keeps a separate table with the translation relationships.
Pros:
1. Each language site is a regular WordPress install with regular posts (postmeta and external db is used for translation data)
2. If you turn off the plugin the content continues to work fine, albeit without knowledge of its sources/translations.
Cons:
1. Separate sites create more management needs which might be undesirable.
## Language negotiation
Language negotiation means how to determine the language in which users see the site.
Regardless of the solution for storing multilingual contents, multilingual plugins also need to be able to choose which language to display in.
Normally, the URL indicates the display language. Different URL strategies for encoding language information are:
- Add the language name as a parameter: example.com/?lang=en or example.com/?lang=es
- Add virtual ‘directories’ as language names: example.com/en/ or example.com/es/
- Use different domains for different languages: www.example.com or es.example.com
## How to choose the right multilingual solution
Choosing the most suitable multilingual Plugin for your needs will take some time. See the [WordPress Plugin Directory](https://wordpress.org/plugins/search/multilingual) for a list of multilingual Plugins.
There is not only one way but a way adapted to the content strategy, the data-model, the number of posts and pages, and the behavior/experience expected by visitors. And for WordPress Network (multisite), a good knowledge of server administration is required.
In any case, installing a multilingual plugin is a big change for any site. It would be a good idea to first create a test site and verify that everything works correctly between all the required plugins and the theme and only then install.
Since many multilingual plugins change the database significantly, doing a [database backup](https://developer.wordpress.org/advanced-administration/security/backup/database/) is required before experimenting.
## Related
- [WordPress in Your Language](https://developer.wordpress.org/advanced-administration/before-install/in-your-language/)
# oEmbed
The easy embedding feature is mostly powered by oEmbed, a protocol for consumers (such as your blog) to ask providers (such as YouTube) for the HTML needed to embed content from the provider.
oEmbed is designed to avoid the need to copy and paste HTML from the site hosting the media you wish to embed. It supports different kind of content like videos, images, text, and more.
## Does This Work With Any URL?
No, not by default. The WordPress Core has an [internal whitelist](https://developer.wordpress.org/reference/hooks/oembed_providers/) that will only allow certain URLs to be embeddable for security reasons. The good news is that the whitelist can be modified, and new sites and URLs can be added by registering their handle.
## How Can I Add or Change Support For Websites?
Adding support for an additional website depends on whether the site supports oEmbed. [oEmbed.com](https://oembed.com/) provides a list of hundreds of [supported provides](https://oembed.com/providers.json).
### Adding Support For An oEmbed-Enabled Site
If a site supports oEmbed, you’ll want to call [`wp_oembed_add_provider()`](https://developer.wordpress.org/reference/functions/wp_oembed_add_provider/) to add the site and URL format to the internal whitelist.
### Adding Support For A Non-oEmbed Site
You’ll need to register a handler using [`wp_embed_register_handler()`](https://developer.wordpress.org/reference/functions/wp_embed_register_handler/) and provide a callback function that generates the HTML.
### Removing Support for An oEmbed-Enabled Site
If you wish to remove an oEmbed-enabled provider, you’ll want to call [`wp_oembed_remove_provider`](https://developer.wordpress.org/reference/functions/wp_oembed_remove_provider/).
## What About oEmbed Discovery?
As of version 4.4, WordPress supports oEmbed discovery, but has severe limitations on what type of content can be embedded via non-whitelisted sites.
Specifically, the HTML and Video content is filtered to only allow links, blockquotes, and iframes, and these are additionally filtered to prevent insertion of malicious content. The HTML is then modified to be sandboxed and to have additional security restrictions placed on them as well.
However, if you feel you are knowledgeable enough to not require this level of safety, you can give `unfiltered_html` users (Administrators and Editors) the ability to embed from websites that have oEmbed discovery tags in their ``.
The oEmbed discovery content for “link” and “photo” types is not quite so heavily filtered in this manner; however, it is properly escaped for security and to prevent any malicious content from being displayed on the site
# Loopbacks
A loopback request is when WordPress tries to connect back to its own site.
WordPress uses loopback requests to start WP-Cron, which runs scheduled posts and other scheduled events that plugins or themes may add.
Loopback requests are also used by the built-in plugin and theme file editors. When you make a change, WordPress connects back to the site to check that the change does not break the site.
## Troubleshooting loopback issues
If scheduled posts or other timed events are not running, or if Site Health reports that loopback requests are failing, you may need to troubleshoot the site.
The most common cause of loopback failures is a plugin or theme conflict. Start with the normal troubleshooting steps:
## Common troubleshooting steps
- Deactivate **all plugins** to see whether this resolves the problem. If it does, reactivate the plugins one by one until you find the plugin causing the issue. If you cannot access your admin dashboard, try resetting the plugins folder by [SFTP/FTP](https://developer.wordpress.org/advanced-administration/upgrade/ftp/) or [phpMyAdmin](https://developer.wordpress.org/advanced-administration/upgrade/phpmyadmin/). For more help, read [How to deactivate all plugins when you can’t log in to wp-admin](https://wordpress.org/documentation/article/faq-troubleshooting/). Sometimes, an apparently inactive plugin can still cause problems. Also remember to deactivate any plugins in the `mu-plugins` folder. The easiest way is to temporarily rename that folder to `mu-plugins-old`.
- Switch to a bundled default WordPress theme to rule out theme-specific problems. If you cannot log in to change themes, you can temporarily move or rename the active theme folder by [SFTP/FTP](https://developer.wordpress.org/advanced-administration/upgrade/ftp/) so WordPress can fall back to an installed default theme.
- If the problem continues after disabling plugins and switching themes, contact your hosting provider. Ask whether server-side security rules, firewall rules, DNS configuration, SSL configuration, or HTTP authentication are blocking the site from requesting its own URL.
# Common WordPress errors
If you are encountering a WordPress error message or white screen, don’t panic. Someone has likely encountered the same message before and it can easily be solved.
This page lists the most common WordPress errors experienced by WordPress users, and provides a starting point for fixing them. At [WordPress Support](https://wordpress.org/documentation/), you will also find links to more detailed pages or forums where a volunteer will be there to help.
## The White Screen of Death
Both PHP errors and database errors can manifest as a white screen, a blank screen with no information, commonly known in the WordPress community as the *WordPress White Screen of Death* (WSOD).
Before resorting to desperate measures, there are a number of reasons for the WordPress white screen of death:
- **A Plugin is causing compatibility issues**. If you can access the [Administration Screens](https://wordpress.org/documentation/article/administration-screens/) try deactivating all of your Plugins and then reactivating them one by one. If you are unable to access your Screens, log in to your website via [FTP](https://developer.wordpress.org/advanced-administration/upgrade/ftp/). Locate the folder `wp-content/plugins` and rename the Plugin folder `plugins_old`. This will deactivate all of your Plugins. You can read more about manually deactivating your plugins in the [Troubleshooting FAQ](https://wordpress.org/documentation/article/faq-troubleshooting/#how-to-deactivate-all-plugins-when-not-able-to-access-the-administrative-menus).
- **Your Theme may be causing the problem**. This is especially likely if you are experiencing the white screen of death after you have just activated a new Theme, or created a New Site in a WordPress Network. Log in to the WordPress Administration Screens and activate a default WordPress Theme (e.g. Twenty Twenty-One). If you are using WordPress 5.8 and below, please switch to Twenty Twenty-One theme since the Twenty Twenty-Two theme requires 5.9 and above. If you can’t access your Administration Screens, access your website via FTP and navigate to the `/wp-content/themes/` folder. Rename the folder for the active Theme.
The [WP_DEBUG feature](https://developer.wordpress.org/advanced-administration/debug/debug-wordpress/#wp_debug) often provides additional information.
## Internal Server Error
[
 ](https://i0.wp.com/wordpress.org/documentation/files/2018/11/internalservererror2.jpg?ssl=1)\
Internal Server Error message
There can be a number of reasons for an Internal Server Error. Here are some thing you can do to solve it:
- The most likely issue is a corrupted `.htaccess` file. Log in to your site root using FTP and rename your `.htaccess` file to `.htaccess_old`. Try loading your site to see if this has solved your problem. If it works, make sure to visit [Settings](https://wordpress.org/documentation/article/administration-screens/#settings-configuration-settings) \> [Permalinks](https://wordpress.org/documentation/article/administration-screens/#permalinks) and reset your [permalinks](https://wordpress.org/documentation/article/using-permalinks/). This will generate a new `.htaccess` file for you.
- Try deactivating all of your Plugins to see if it is a Plugin issue. If you are unable to access your WordPress Administration Screens, deactivate your Plugins via FTP by following [these instructions](https://wordpress.org/documentation/article/faq-troubleshooting/#how-to-deactivate-all-plugins-when-not-able-to-access-the-administrative-menus).
- Switch the Theme to a WordPress default Theme (e.g. Twenty Twenty-One) to eliminate any Theme-related problems. If you are using WordPress 5.8 and below, please switch to Twenty Twenty-One theme since the Twenty Twenty-Two theme requires 5.9 and above.
- Increase the [PHP Memory limit](https://wordpress.org/documentation/article/editing-wp-config-php/#increasing-memory-allocated-to-php)
- Try re-uploading the `wp-admin` and `wp-includes` folders from a [fresh install of WordPress](https://wordpress.org/download/).
## Error Establishing Database Connection
If you get a page featuring the message “Error Establishing Database Connection”, this means that there is a problem with the connection to your database and there could be a number of reasons for this. The following are possible reasons and solutions.
### Incorrect wp-config.php Information
“Error establishing a database connection” is usually caused by an error in your [wp-config.php](https://wordpress.org/documentation/article/editing-wp-config-php/) file. Access your site in your FTP client. Open up `wp-config.php` and ensure that the following are correct:
- Database name
- Database username
- Database password
- Database host
Learn more about [editing wp-config.php](https://wordpress.org/documentation/article/editing-wp-config-php/).
If you are sure your configuration is correct you could [try resetting your MySQL password manually](https://developer.wordpress.org/advanced-administration/before-install/howto-install/#common-installation-problems).
### Problems with Your Web Host
The next step is to contact your web host. The following hosting issues may be causing the problem:
- Your database has met its quota and has been shut down.
- The server is down.
Contact your hosting provider to see if either of these issues is causing your problem.
### Compromised Website
If you have checked `wp-config.php` for errors, and confirmed with your host for hosting issues, it is possible that your site has been hacked.
Scan your site with [Sucuri SiteCheck](https://sitecheck.sucuri.net/) to ensure that it hasn’t been compromised. If it has you should check out [My Site was Hacked](https://wordpress.org/documentation/article/faq-my-site-was-hacked/).
## Failed Auto-Upgrade
There will be situations when the WordPress auto-update feature fails. Symptoms include:
- A blank white screen and no information.
- A warning that the update failed.
- A PHP error message.
The WordPress automatic upgrade feature may fail due to a glitch in the connection with the main WordPress files, a problem with your Internet connection during upgrade, or incorrect [File Permissions](https://developer.wordpress.org/advanced-administration/server/file-permissions/).
To update your WordPress site manually, see the [Manual Update article](https://wordpress.org/documentation/article/updating-wordpress/#manual-update).
## Connection Timed Out
The connection timed out error appears when your website is trying to do more than your server can manage. It is particularly common on shared hosting where your memory limit is restricted. Here are some things you can try:
- **Deactivate all Plugins.** If deactivating all the WordPress Plugins on your site resolves the issue, reactivate them one-by-one to see which plugin is causing the problem. If you are unable to access your Administration Screens, [read about how to manually deactivate your plugins](https://wordpress.org/documentation/article/faq-troubleshooting/#how-to-deactivate-all-plugins-when-not-able-to-access-the-administrative-menus).
- **Switch to a default WordPress Theme.** If you are using WordPress 5.8 and below, please switch to Twenty Twenty-One theme since the Twenty Twenty-Two theme requires 5.9 and above. This should rule out any Theme-related problems.
- **Increase your [memory limit in wp-config.php](https://wordpress.org/documentation/article/editing-wp-config-php/#increasing-memory-allocated-to-php)**. If you are on shared hosting you may have to ask your hosting provider to increase your memory limit for you.
- **Increase the maximum execution time in your [php.ini](https://php.net/manual/en/ini.core.php) file.** This is not a WordPress core file so if you are not sure how to edit it, contact your hosting provider to ask them to increase your maximum execution time. See below instructions for increasing maximum execution time.
## Maintenance Mode Following Upgrade
[
 ](https://i0.wp.com/wordpress.org/documentation/files/2018/11/maintenancemode1.jpg?ssl=1)
When WordPress updates, it automatically installs a `.maintenance` file. Following upgrade, you may receive a message that says “Briefly unavailable for scheduled maintenance. Please check back in a minute.” The maintenance file may not have been removed properly.
To remove this message do the following:
1. Log in to your website using your FTP program
2. Delete the `.maintenance` file, which will be found in your site root.
Read more about the [maintenance mode issue](https://wordpress.org/documentation/article/faq-troubleshooting/#how-to-clear-the-briefly-unavailable-for-scheduled-maintenance-message-after-doing-automatic-upgrade).
## You Make Changes and Nothing Happens
If you are making changes to your website and you do not see the changes in your browser, you may need to clear your [browser cache](https://wordpress.org/support/topic/i-make-changes-and-nothing-happens/). Your browser stores information about the websites that you visit. This makes it faster to load websites when you visit them because the browser just has to reload information already stored on your computer, rather than downloading it again.
If you make a change to a website and the browser does not think it is significant, it will simply load the data from your cache, and you won’t see your changes. To fix the problem, simply [empty your browser cache](https://wordpress.org/support/topic/i-make-changes-and-nothing-happens/) or close the tab and reopen the link.
## Pretty Permalinks 404 and Images not Working
If you are experiencing 404 errors with pretty [permalinks](https://wordpress.org/documentation/article/using-permalinks/) and a white screen when you upload images, [mod_rewrite](https://wordpress.org/documentation/article/glossary#mod_rewrite) may not be enabled in Apache by default. Mod_rewrite is an extension module of the [Apache web server](https://wordpress.org/documentation/article/glossary#apache) software which allows for “rewriting” of [URLs](https://en.wikipedia.org/wiki/Url) on-the-fly. It’s what you need to make pretty permalinks work.
[WordPress Multisite](https://wordpress.org/documentation/article/glossary#multisite) networks usually experience this but it can also occur on shared hosting providers or after a [site migration or server move](https://wordpress.org/documentation/article/moving-wordpress/).
Reset your permalinks through **Settings \> Permalinks.** If this does not work, you may have to edit the `.htaccess` file manually.
# BEGIN WordPress
Hi, this is a comment.
Comment by Person