Integrations
- ChatGPT Desktop
- Claude Code
- Claude Desktop
- Cline CLI
- Cline
- Codex CLI
- Copilot CLI
- DeepSeek Harness
- Droid
- Goose
- Hermes Desktop
- Hermes Agent
- Overview
- JetBrains
- marimo
- n8n
- NemoClaw
- Oh My Pi
- Onyx
- OpenClaw
- OpenCode
- Pi
- Pool
- Roo Code
- VS Code
- Xcode
- Zed
ChatGPT Desktop
ChatGPT Desktop includes Codex, OpenAI's desktop coding agent. Ollama adds compatible local and cloud models to Codex's model picker alongside ChatGPT's native models.
Prerequisites
- Ollama v0.34.0 or newer
If ChatGPT is not installed, Ollama offers to download it during setup.
Connect ChatGPT
- Open the Ollama desktop app and select Apps.
- Toggle ChatGPT (Desktop) to On.
- Follow the setup prompts. If ChatGPT is already open, Ollama asks to restart it before the new models appear.
- Open the ChatGPT desktop app and use Codex mode.
Choose models
Open Ollama Settings, select Apps, then select ChatGPT. Choose up to five compatible local or cloud models and save your changes. Ollama asks to restart ChatGPT when a model change needs one.
Disconnect ChatGPT
Open Ollama Apps and turn ChatGPT off. Ollama restores ChatGPT's connection settings and usual profile. If ChatGPT is open, Ollama asks to restart it so the change takes effect.
Codex behavior and limits
- Only requests made with an Ollama model go to Ollama. ChatGPT's native models keep using their usual provider.
- Ollama models are for Codex mode. Regular Chat and voice keep using their usual ChatGPT connection.
- Codex manages sessions. Ollama routes model requests and compaction when Codex asks for it, but does not store ChatGPT sessions.
- Web search uses Ollama's web-search service when you use an Ollama model. It requires Ollama sign-in and is limited to three calls per response.
Related integrations
- Use Codex from a terminal with Codex CLI.
- Connect other desktop apps from Claude Desktop.
Claude Code
Claude Code reads your codebase, edits files, and runs commands.
Ollama connects Claude Code to local and cloud models through its Anthropic-compatible API.
Get started
Launch Claude Code with Ollama:
ollama launch claude
Capabilities
<div className="capability-list-item">
  <div className="capability-list-icon"><Icon icon="terminal" /></div>
  <div>
    <div className="capability-list-heading">Command line</div>
    <div className="capability-list-copy">Run commands with Claude Code's permission flow</div>
  </div>
</div>

<div className="capability-list-item">
  <div className="capability-list-icon"><Icon icon="code" /></div>
  <div>
    <div className="capability-list-heading">Tool calling</div>
    <div className="capability-list-copy">Use tools with compatible models</div>
  </div>
</div>

<div className="capability-list-item">
  <div className="capability-list-icon"><Icon icon="file-pen" /></div>
  <div>
    <div className="capability-list-heading">File edits</div>
    <div className="capability-list-copy">Read and edit files in your project</div>
  </div>
</div>

<div className="capability-list-item">
  <div className="capability-list-icon"><Icon icon="users" /></div>
  <div>
    <div className="capability-list-heading">Subagents</div>
    <div className="capability-list-copy">Split work across tasks</div>
  </div>
</div>

<div className="capability-list-item">
  <div className="capability-list-icon"><Icon icon="globe" /></div>
  <div>
    <div className="capability-list-heading">Web search</div>
    <div className="capability-list-copy">Search the web through Ollama</div>
  </div>
</div>

<div className="capability-list-item">
  <div className="capability-list-icon"><Icon icon="file-text" /></div>
  <div>
    <div className="capability-list-heading">Web fetch</div>
    <div className="capability-list-copy">Fetch and summarize web pages</div>
  </div>
</div>

<div className="capability-list-item">
  <div className="capability-list-icon"><Icon icon="image" /></div>
  <div>
    <div className="capability-list-heading">Vision</div>
    <div className="capability-list-copy">Send images and screenshots</div>
  </div>
</div>

<div className="capability-list-item">
  <div className="capability-list-icon"><Icon icon="brain" /></div>
  <div>
    <div className="capability-list-heading">Thinking</div>
    <div className="capability-list-copy">Use thinking controls with compatible models</div>
  </div>
</div>
Models
Choose a model with enough context for your repository.
Use larger models without downloading them. Choose a model and set a 64k+ context window.For larger repositories, set the context length to 64k or higher.
More features
Run without interaction
Use --yes for scripts, Docker, or CI:
ollama launch claude --model gemma4:cloud --yes -- -p "how does this repository work?"
The --yes flag skips selectors, pulls the model when needed, and requires --model. Arguments after -- are passed directly to Claude Code.
Web search
Use Ollama's web search API from Claude Code.
See Web search for setup and usage.
Scheduled tasks with /loop
Use /loop inside Claude Code to run a prompt or slash command on a schedule:
/loop <interval> <prompt or /command>
Examples:
/loop 30m Check my open PRs and summarize their status
/loop 1h Research the latest AI news and summarize key developments
/loop 15m Check for new GitHub issues and triage by priority
Telegram
Connect a Telegram bot to your Claude Code session. Install the Telegram plugin, create a bot with @BotFather, then launch Claude Code:
ollama launch claude -- --channels plugin:telegram@claude-plugins-official
Claude Code prompts for permission on most actions. To allow the bot to work autonomously, configure permission rules or pass --dangerously-skip-permissions in an isolated environment.
See the plugin README for setup instructions.
Connect directly to Ollama's cloud
Install Claude Code, then set your API key in OLLAMA_API_KEY. No Ollama installation required.
In Bash or Zsh, run:
ANTHROPIC_BASE_URL=https://ollama.com \
ANTHROPIC_AUTH_TOKEN="$OLLAMA_API_KEY" \
ANTHROPIC_API_KEY="" \
claude --model glm-5.3-flash
Use ANTHROPIC_AUTH_TOKEN for bearer authentication. Claude settings can override shell variables. Update any base URL or credentials in those settings, then run /status to check the connection.
Choose a cloud model that supports tools. Basic chat and file edits work with compatible models. Hosted WebSearch and advanced tool controls are not fully supported. See Anthropic compatibility.
Manual setup
1. Install Claude Code
curl -fsSL https://claude.ai/install.sh | bash
irm https://claude.ai/install.ps1 | iex
2. Set the environment variables
export ANTHROPIC_AUTH_TOKEN=ollama
export ANTHROPIC_API_KEY=""
export ANTHROPIC_BASE_URL=http://localhost:11434
3. Run Claude Code
claude --model qwen3.5
Or run with environment variables inline:
ANTHROPIC_AUTH_TOKEN=ollama ANTHROPIC_BASE_URL=http://localhost:11434 ANTHROPIC_API_KEY="" claude --model kimi-k2.7-code:cloud
Claude Desktop
- Ollama. Windows support coming soon.
- To use a local model, download it before setup.
- To use a cloud model, sign in to Ollama and enable cloud models. Some models require a paid plan.
If Claude is not installed, Ollama offers to download it during setup.
Set up Claude
- Open Ollama and select Apps.
- Connect Claude.
- Follow the setup prompts to install Claude if needed and restart it when prompted.
Switch models
Open Ollama Settings → Apps. Choose your models, then select Restart Claude. You can use the same model for more than one option.
Supported features
- Subagents - Split larger tasks across agents
- Web search - Supported by default through Ollama's web search
- Cowork - Complete difficult tasks with Claude Cowork
- Auto mode - Let the agent decide when to ask before making changes
Disconnect Claude
Open Ollama Apps and disconnect Claude. Ollama restores Claude's previous settings. Restart Claude when prompted.
You can also restore Claude from the terminal:
ollama launch claude-desktop --restore
Quitting Ollama while Claude is connected also restores Claude's usual configuration.
Cline CLI
Cline CLI is an autonomous coding agent for interactive terminal sessions.
<img src="/images/cline-cli.png" alt="Cline CLI launched with Ollama selected as the provider" style={{ borderRadius: "12px" }} />
Install
Install the Cline CLI. For the IDE extension, see Cline.
npm install -g cline
If Cline CLI is not installed and npm is available, ollama launch cline will prompt to install cline@latest.
Usage with Ollama
Quick setup
ollama launch cline
When launched through ollama launch cline, Ollama sets Cline's provider to Ollama, points it at the local Ollama endpoint, and selects the model you choose.
To configure without launching:
ollama launch cline --config
Run directly with a model
ollama launch cline --model qwen3.5
To use a cloud model:
ollama launch cline --model kimi-k2.6:cloud
Pass a prompt to Cline
Arguments after -- are passed directly to Cline:
ollama launch cline -- "summarize this repository"
To open Cline's Kanban board:
ollama launch cline -- kanban
<img src="/images/cline-kanban.png" alt="Cline Kanban board opened from the CLI" style={{ borderRadius: "12px" }} />
Manual setup
To configure Cline CLI manually, first make sure Ollama is running and the model you want to use is available:
ollama pull qwen3.5
Then run Cline's interactive auth flow:
cline auth
Select Ollama as the provider, use http://localhost:11434 as the base URL if prompted, and choose a model such as qwen3.5 or kimi-k2.6:cloud.
To check the current Cline configuration:
cline config
To start an interactive session:
cline
Cline
Install Cline in your IDE.
Usage with Ollama
- Open Cline settings >
API Configurationand setAPI ProvidertoOllama - Select a model under
Modelor type one (e.g.qwen3) - Update the context window to at least 32K tokens under
Context Window
Use a context window of at least 32K tokens for coding.

Connecting to ollama.com
- Create an API key from ollama.com
- Click on
Use custom base URLand set it tohttps://ollama.com - Enter your Ollama API Key
- Select a model from the list
Models
Choose a cloud model that supports tool calling.
Codex CLI
Install the Codex CLI. For the ChatGPT desktop app, see ChatGPT Desktop.
npm install -g @openai/codex
Usage with Ollama
Use a context window of at least 64k tokens for Codex.
Quick setup
ollama launch codex
When launched through ollama launch codex, Ollama refreshes the model catalog
and uses a dedicated Codex profile for that session.
Type /model inside Codex to switch between your installed, tool-capable Ollama
models without restarting. The starting model remains selected, and each model
keeps its own context window, vision, and thinking settings. Pull additional
models with ollama pull <model> before launching to include them in the picker.
To configure without launching:
ollama launch codex --config
To remove the Ollama launch profile and generated model catalog:
ollama launch codex --restore
Manual setup
To use codex with Ollama, use the --oss flag:
codex --oss
To use a specific model, pass the -m flag:
codex --oss -m gpt-oss:120b
To use a cloud model:
codex --oss -m gpt-oss:120b-cloud
Profile-based setup
For a persistent Codex CLI configuration, create ~/.codex/ollama-launch.config.toml:
model = "gpt-oss:120b"
model_provider = "ollama-launch"
model_catalog_json = "/Users/you/.codex/model.json"

[model_providers.ollama-launch]
name = "Ollama"
base_url = "http://localhost:11434/v1/"
wire_api = "responses"
Then run:
codex --profile ollama-launch
Web search through local Ollama
Codex web-search requests sent through the Ollama profile are executed by
Ollama for both local and cloud models. Sign in with ollama signin to use the
web-search service.
To disable web search for a Codex session:
codex --profile ollama-launch -c 'web_search="disabled"'
Copilot CLI
GitHub Copilot CLI is GitHub's AI coding agent for the terminal. It can understand your codebase, make edits, run commands, and help you build software faster.
Open models can be used with Copilot CLI through Ollama, enabling you to use models such as qwen3.5, glm-5.3:cloud, kimi-k3:cloud See all supported models here.
Install
Install Copilot CLI:
brew install copilot-cli
npm install -g @github/copilot
curl -fsSL https://gh.io/copilot-install | bash
winget install GitHub.Copilot
Usage with Ollama
Quick setup
ollama launch copilot
Run directly with a model
ollama launch copilot --model kimi-k2.5:cloud
Non-interactive (headless) mode
Run Copilot CLI without interaction for use in Docker, CI/CD, or scripts:
ollama launch copilot --model kimi-k2.5:cloud --yes -- -p "how does this repository work?"
The --yes flag auto-pulls the model, skips selectors, and requires --model to be specified. Arguments after -- are passed directly to Copilot CLI.
Manual setup
Copilot CLI connects to Ollama using the OpenAI-compatible API via environment variables.
- Set the environment variables:
export COPILOT_PROVIDER_BASE_URL=http://localhost:11434/v1
export COPILOT_PROVIDER_API_KEY=
export COPILOT_PROVIDER_WIRE_API=responses
export COPILOT_MODEL=qwen3.5
- Run Copilot CLI:
copilot
Or run with environment variables inline:
COPILOT_PROVIDER_BASE_URL=http://localhost:11434/v1 COPILOT_PROVIDER_API_KEY= COPILOT_PROVIDER_WIRE_API=responses COPILOT_MODEL=glm-5:cloud copilot
Note: Copilot requires a large context window. We recommend at least 64k tokens. See the context length documentation for how to adjust context length in Ollama.
DeepSeek Harness
DeepSeek Harness is an open-source coding agent.
DeepSeek Harness is currently a developer preview. Its upstream configuration may change between releases.
Setup
ollama launch dsh
Ollama installs @deepseek-ai/dsh if needed. To choose a model:
ollama launch dsh --model qwen3.8
ollama launch dsh --model deepseek-v4-flash:cloud
To configure without starting:
ollama launch dsh --config
Web search
Web search is enabled automatically. It requires access to Ollama's cloud and a model that supports tools. Run ollama signin if needed.
Configuration
Ollama stores its settings in ~/.ollama/launch/dsh/settings.yaml. These settings load last and set the model, provider, and web search connection. Repeated launches preserve other settings in this file. Ollama does not change ~/.dsh/settings.yaml, profiles, sessions, or credentials.
Launch rejects additional --patch arguments. Pass other Harness arguments after --:
ollama launch dsh -- --port 3081
Manual install
DeepSeek Harness requires Node.js. To install it manually:
npm install -g @deepseek-ai/dsh@latest
Then run ollama launch dsh. On Windows, install Node.js for Windows.
Droid
Install the Droid CLI:
curl -fsSL https://app.factory.ai/cli | sh
Droid requires a larger context window. It is recommended to use a context window of at least 64k tokens. See Context length for more information.
Usage with Ollama
Quick setup
ollama launch droid
To configure without launching:
ollama launch droid --config
Manual setup
Add a local configuration block to ~/.factory/config.json:
{
  "custom_models": [
    {
      "model_display_name": "qwen3-coder [Ollama]",
      "model": "qwen3-coder",
      "base_url": "http://localhost:11434/v1/",
      "api_key": "not-needed",
      "provider": "generic-chat-completion-api",
      "max_tokens": 32000
    }
  ]
}
Cloud Models
The following example configures qwen3-coder for use with Droid.
Add the cloud configuration block to ~/.factory/config.json:
{
  "custom_models": [
    {
      "model_display_name": "qwen3-coder [Ollama's cloud]",
      "model": "qwen3-coder:480b-cloud",
      "base_url": "http://localhost:11434/v1/",
      "api_key": "not-needed",
      "provider": "generic-chat-completion-api",
      "max_tokens": 128000
    }
  ]
}
Connecting to ollama.com
-
Create an API key from ollama.com and export it as
OLLAMA_API_KEY. -
Add the cloud configuration block to
~/.factory/config.json:{ "custom_models": [ { "model_display_name": "qwen3-coder [Ollama's cloud]", "model": "qwen3-coder:480b", "base_url": "https://ollama.com/v1/", "api_key": "OLLAMA_API_KEY", "provider": "generic-chat-completion-api", "max_tokens": 128000 } ] }
Run droid in a new terminal to load the new settings.
Goose
Install Goose Desktop.
Usage with Ollama
- In Goose, open Settings → Configure Provider.

Connecting to ollama.com
- Create an API key on ollama.com and save it in your
.env - In Goose, set API Host to
https://ollama.com
Goose CLI
Install Goose CLI
Usage with Ollama
- Run
goose configure - Select Configure Providers and select Ollama

Connecting to ollama.com
- Create an API key on ollama.com and save it in your
.env - Run
goose configure - Select Configure Providers and select Ollama
- Update OLLAMA_HOST to
https://ollama.com
Hermes Desktop
Hermes Desktop is a native AI assistant app by Nous Research. It provides a desktop chat interface for Hermes Agent, an AI agent that can work with models, run tools, manage projects, use memory and skills, and connect to messaging gateways.
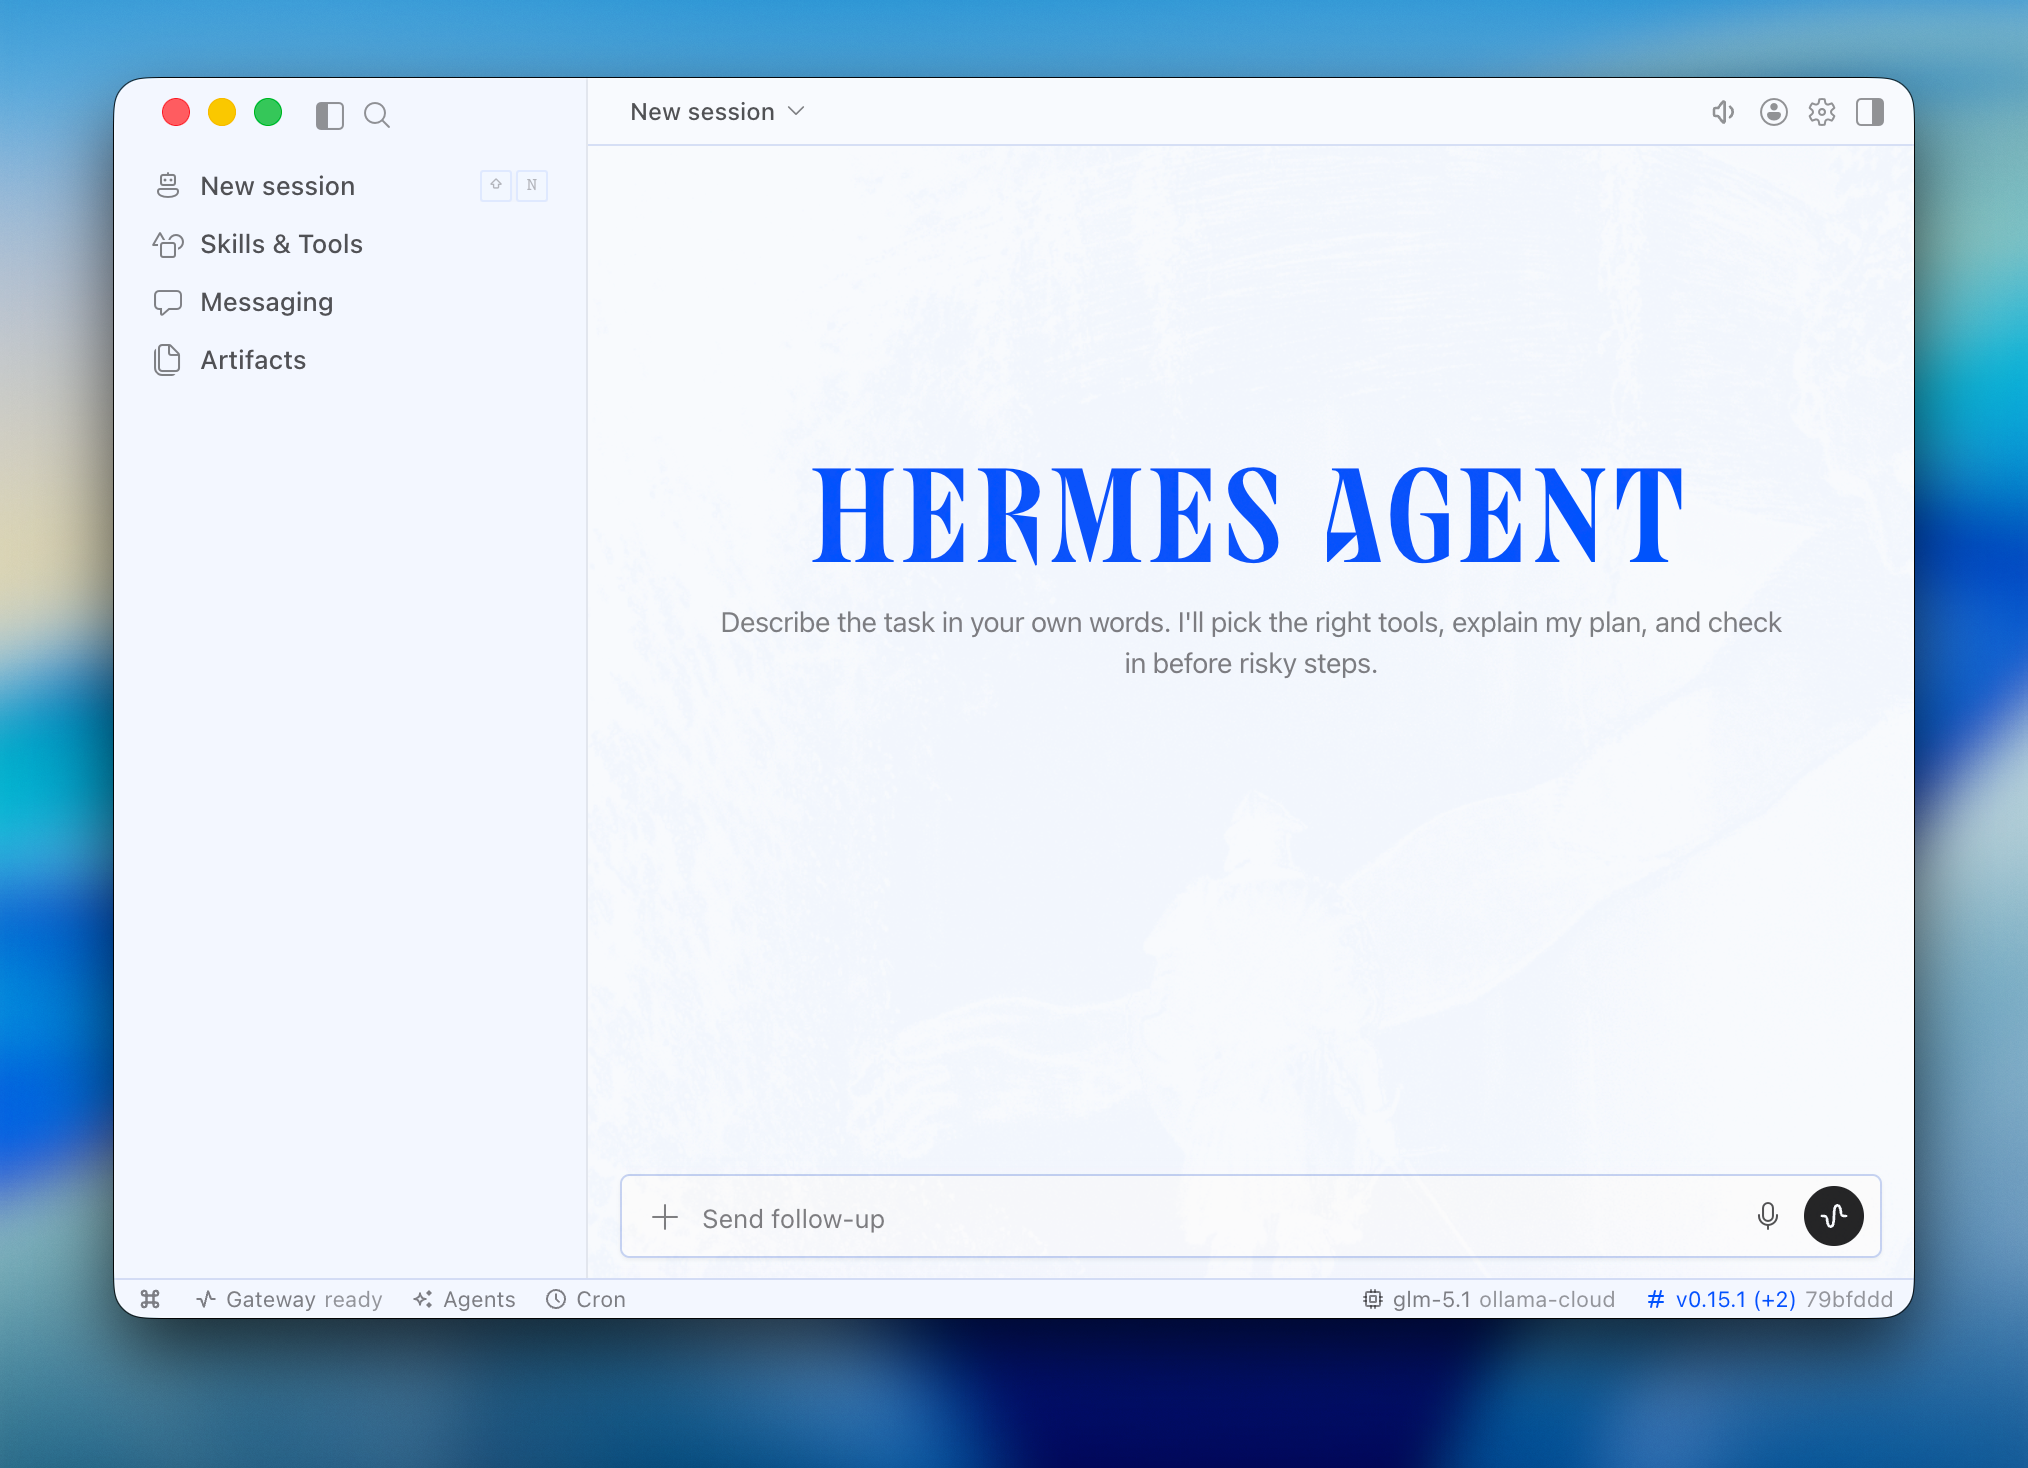
Quick start
ollama launch hermes-desktop
Ollama handles the setup flow automatically:
- Install - If Hermes isn't installed, Ollama prompts to install the Hermes command-line agent. On first desktop launch, Hermes builds its packaged desktop app.
- Model - Pick a model from the selector
- Configure - Ollama configures Hermes Desktop to use your selected Ollama model
- Launch - Ollama opens Hermes Desktop
Run directly with a model
ollama launch hermes-desktop --model <model>
Run ollama launch hermes-desktop again to switch models later.
Install Hermes Desktop directly
On macOS and Windows, the Hermes Desktop installer is the recommended upstream installation path. It installs the desktop app and Hermes Agent together. If you prefer the command line, ollama launch hermes-desktop remains the explicit Ollama-managed path and uses the same Hermes configuration, sessions, skills, and memory as the CLI.
To force Hermes to rebuild its packaged desktop app:
ollama launch hermes-desktop -- --force-build
Hermes Agent
Hermes Agent is a self-improving AI agent built by Nous Research. It features automatic skill creation, cross-session memory, and 70+ skills that it ships with by default.

Quick start
ollama launch hermes
Ollama handles everything automatically:
- Install — If Hermes isn't installed, Ollama prompts to install the Hermes command-line agent
- Model — Pick a model from the selector (local or cloud). See currently-supported models here.
- Onboarding — Ollama configures the Ollama provider, points Hermes at
http://127.0.0.1:11434/v1, and sets your model as the primary - Gateway — Optionally connects a messaging platform (Telegram, Discord, Slack, WhatsApp, Signal, Email) and launches the Hermes chat
Connect messaging apps
Link Telegram, Discord, Slack, WhatsApp, Signal, or Email to chat with your models from anywhere:
hermes gateway setup
Reconfigure
Use Hermes's model picker to change providers or models later:
hermes model
Manual setup
If you'd rather drive Hermes's own wizard instead of ollama launch hermes, install it directly:
curl -fsSL https://hermes-agent.nousresearch.com/install.sh | bash
Hermes launches the setup wizard automatically. Choose Quick setup:
How would you like to set up Hermes?

 →  Quick setup — provider, model & messaging (recommended)
    Full setup — configure everything
Connect to Ollama
-
Select More providers...
-
Select Custom endpoint (enter URL manually)
-
Set the API base URL to the Ollama OpenAI-compatible endpoint:
API base URL [e.g. https://api.example.com/v1]: http://127.0.0.1:11434/v1 -
Leave the API key blank (not required for local Ollama):
API key [optional]: -
Hermes auto-detects downloaded models, confirm the one you want:
Verified endpoint via http://127.0.0.1:11434/v1/models (1 model(s) visible) Detected model: kimi-k2.5:cloud Use this model? [Y/n]: -
Leave context length blank to auto-detect:
Context length in tokens [leave blank for auto-detect]:
Connect messaging
Optionally connect a messaging platform during setup:
Connect a messaging platform? (Telegram, Discord, etc.)

 →  Set up messaging now (recommended)
    Skip — set up later with 'hermes gateway setup'
Launch
Launch hermes chat now? [Y/n]: Y
Overview
Use Ollama models in your apps and tools.
Launch a coding agent
Run ollama launch in a terminal to choose a coding agent.
Connect a desktop app
On macOS, open the Ollama app and select Apps in the sidebar. Connect Claude or ChatGPT.
Use local and cloud Ollama models. Use Ollama models in Codex mode.Run a personal assistant
Run ollama launch in a terminal and choose OpenClaw or Hermes Agent.
Work in your editor
Install the Ollama extension to use models in VS Code Chat.JetBrains
This example uses IntelliJ; same steps apply to other JetBrains IDEs (e.g., PyCharm).
Install
Install IntelliJ.
Usage with Ollama
To use **Ollama**, you will need a [JetBrains AI Subscription](https://www.jetbrains.com/ai-ides/buy/?section=personal&billing=yearly).- In Intellij, click the chat icon located in the right sidebar

- Select the current model in the sidebar, then click Set up Local Models

- Under Third Party AI Providers, choose Ollama
- Confirm the Host URL is
http://localhost:11434, then click Ok - Once connected, select a model under Local models by Ollama

marimo
Install marimo. You can use pip or uv for this. You
can also use uv to create a sandboxed environment for marimo by running:
uvx marimo edit --sandbox notebook.py
Usage with Ollama
- In marimo, go to the user settings and go to the AI tab. From here
you can find and configure Ollama as an AI provider. For local use you
would typically point the base url to
http://localhost:11434/v1.

- Once the AI provider is set up, you can turn on/off specific AI models you'd like to access.

- You can also add a model to the list of available models by scrolling to the bottom and using the UI there.

- Once configured, you can now use Ollama for AI chats in marimo.

- Alternatively, you can now use Ollama for inline code completion in marimo. This can be configured in the "AI Features" tab.

Connecting to ollama.com
- Sign in to Ollama's cloud with
ollama signin - In the ollama model settings add a model that ollama hosts, like
gpt-oss:120b. - You can now refer to this model in marimo!
n8n
Install n8n.
Using Ollama Locally
- In the top right corner, click the dropdown and select Create Credential

- Under Add new credential select Ollama

Run n8n in docker with --add-host=host.docker.internal:host-gateway
or add the following to a docker compose file:
extra_hosts:
  - "host.docker.internal:host-gateway"
You should see a Connection tested successfully message.
- When creating a new workflow, select Add a first step and select an Ollama node


Connecting to ollama.com
- Create an API key on ollama.com.
- In n8n, click Create Credential and select Ollama
- Set the API URL to
https://ollama.com - Enter your API Key and click Save
NemoClaw
NemoClaw is NVIDIA's open source security stack for OpenClaw. It wraps OpenClaw with the NVIDIA OpenShell runtime to provide kernel-level sandboxing, network policy controls, and audit trails for AI agents.
Quick start
Pull a model (see all supported models here):
ollama pull nemotron-3-nano:30b
Run the installer:
curl -fsSL https://www.nvidia.com/nemoclaw.sh | \
  NEMOCLAW_NON_INTERACTIVE=1 \
  NEMOCLAW_PROVIDER=ollama \
  NEMOCLAW_MODEL=nemotron-3-nano:30b \
  bash
Connect to your sandbox:
nemoclaw my-assistant connect
Open the TUI:
openclaw tui
Ollama support in NemoClaw is still experimental.
Platform support
| Platform | Runtime | Status |
|---|---|---|
| Linux (Ubuntu 22.04+) | Docker | Primary |
| macOS (Apple Silicon) | Colima or Docker Desktop | Supported |
| Windows | WSL2 with Docker Desktop | Supported |
CMD and PowerShell are not supported on Windows — WSL2 is required.
Ollama must be installed and running before the installer runs. When running inside WSL2 or a container, ensure Ollama is reachable from the sandbox (e.g. OLLAMA_HOST=0.0.0.0).
System requirements
- CPU: 4 vCPU minimum
- RAM: 8 GB minimum (16 GB recommended)
- Disk: 20 GB free (40 GB recommended for local models)
- Node.js 20+ and npm 10+
- Container runtime (Docker preferred)
Oh My Pi
Oh My Pi (OMP) is a terminal coding agent with IDE-style tools built in. It combines chat, project context, structured code edits, language server support, debugging tools, browser access, plugins, and subagents in one terminal workflow.
Ollama can configure OMP to use Ollama as its model provider and launch an interactive session.
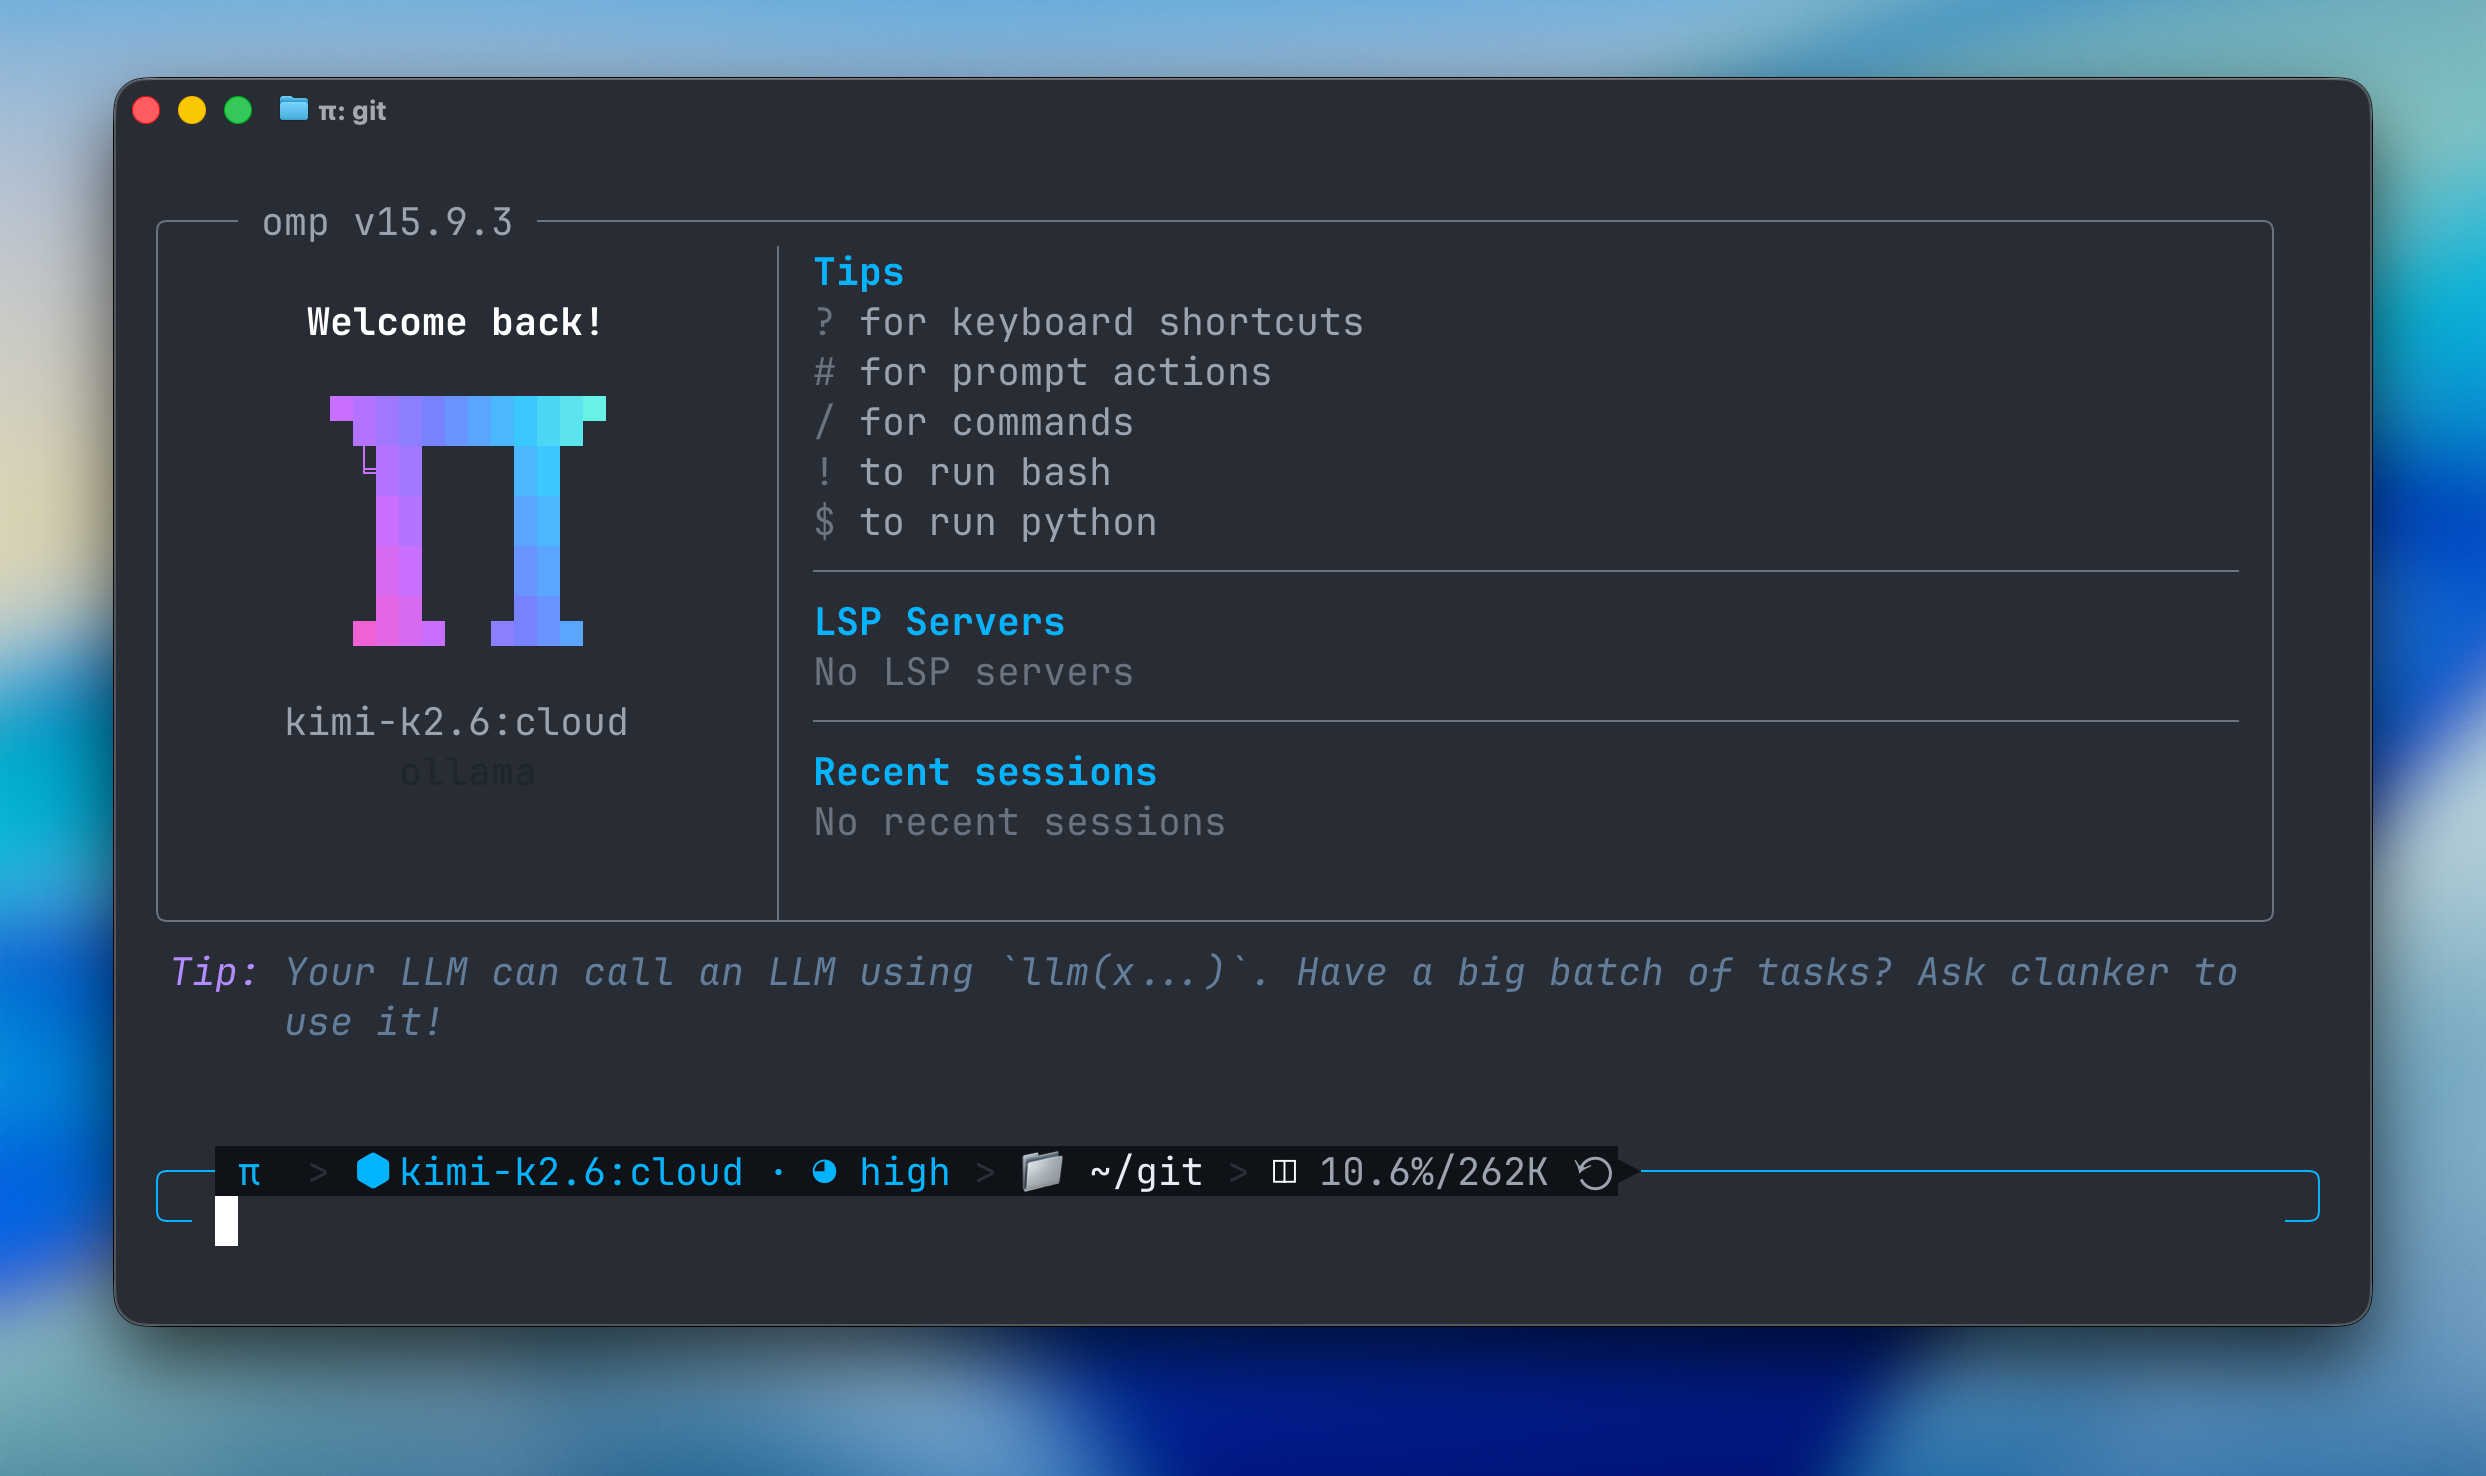
Quick setup
ollama launch omp
This configures Ollama as a provider, sets up web search tools, and starts OMP.
Run directly with a model
ollama launch omp --model <model>
Plugins
OMP supports plugins for extra tools and capabilities. When launching OMP through Ollama, the Ollama web search plugin is managed automatically.
Manual setup
Install OMP from omp.sh, then run:
ollama launch omp --config
Onyx
Onyx is a self-hostable Chat UI that integrates with all Ollama models. Features include:
- Creating custom Agents
- Web search
- Deep Research
- RAG over uploaded documents and connected apps
- Connectors to applications like Google Drive, Email, Slack, etc.
- MCP and OpenAPI Actions support
- Image generation
- User/Groups management, RBAC, SSO, etc.
Onyx can be deployed for single users or large organizations.
Install Onyx
Deploy Onyx with the quickstart guide.
Resourcing/scaling docs [here](https://docs.onyx.app/deployment/getting_started/resourcing).Usage with Ollama
- Login to your Onyx deployment (create an account first).


You can also connect Onyx Cloud to Ollama's cloud from the setup flow.
Send your first query

OpenClaw
OpenClaw is a personal AI assistant that runs on your own devices. It bridges messaging services (WhatsApp, Telegram, Slack, Discord, iMessage, and more) to AI coding agents through a centralized gateway.
Quick start
ollama launch openclaw
Ollama handles everything automatically:
- Install — If OpenClaw isn't installed, Ollama prompts to install it via npm
- Security — On the first launch, a security notice explains the risks of tool access
- Model — Pick a model from the selector (see supported local and cloud models here)
- Onboarding — Ollama configures the provider, installs the gateway daemon, sets your model as the primary, and enables OpenClaw's bundled Ollama web search
- Gateway — Starts in the background and opens the OpenClaw TUI
OpenClaw requires a larger context window. It is recommended to use a context window of at least 64k tokens if using local models. See Context length for more information.
Previously known as Clawdbot. ollama launch clawdbot still works as an alias.
Web search and fetch
OpenClaw ships with a bundled Ollama web_search provider that lets local or cloud-backed Ollama setups search the web through the configured Ollama host.
ollama launch openclaw
Ollama web search is enabled automatically when launching OpenClaw through Ollama. To configure it manually:
openclaw configure --section web
Ollama web search for local models requires ollama signin.
Configure without launching
To change the model without starting the gateway and TUI:
ollama launch openclaw --config
To use a specific model directly:
ollama launch openclaw --model kimi-k2.5:cloud
If the gateway is already running, it restarts automatically to pick up the new model.
Non-interactive (headless) mode
Run OpenClaw without interaction for use in Docker, CI/CD, or scripts:
ollama launch openclaw --model kimi-k2.5:cloud --yes
The --yes flag auto-pulls the model, skips selectors, and requires --model to be specified.
Connect messaging apps
openclaw configure --section channels
Link WhatsApp, Telegram, Slack, Discord, or iMessage to chat with your local models from anywhere.
Stopping the gateway
openclaw gateway stop
OpenCode
OpenCode is an open-source coding agent that runs in your terminal, reads your project, edits files, and runs commands.
Ollama configures OpenCode to use local and cloud models.
Get started
Launch OpenCode with Ollama:
ollama launch opencode
Capabilities
<div className="capability-list-item">
  <div className="capability-list-icon"><Icon icon="terminal" /></div>
  <div>
    <div className="capability-list-heading">Command line</div>
    <div className="capability-list-copy">Run commands from your working directory</div>
  </div>
</div>

<div className="capability-list-item">
  <div className="capability-list-icon"><Icon icon="code" /></div>
  <div>
    <div className="capability-list-heading">File edits</div>
    <div className="capability-list-copy">Read and edit files in your project</div>
  </div>
</div>

<div className="capability-list-item">
  <div className="capability-list-icon"><Icon icon="users" /></div>
  <div>
    <div className="capability-list-heading">Subagents</div>
    <div className="capability-list-copy">Split work across tasks</div>
  </div>
</div>

<div className="capability-list-item">
  <div className="capability-list-icon"><Icon icon="file-text" /></div>
  <div>
    <div className="capability-list-heading">Web fetch</div>
    <div className="capability-list-copy">Fetch and summarize web pages</div>
  </div>
</div>

<div className="capability-list-item">
  <div className="capability-list-icon"><Icon icon="image" /></div>
  <div>
    <div className="capability-list-heading">Vision</div>
    <div className="capability-list-copy">Send images and screenshots</div>
  </div>
</div>
Models
Choose a model with enough context for your repository.
Use larger models without downloading them. Choose a model and set a 64k+ context window.OpenCode requires a context length of 64k or higher. See Context length for more information.
Manual setup
1. Install OpenCode
curl -fsSL https://opencode.ai/install | bash
npm install -g opencode-ai
2. Configure Ollama as a provider
Add an Ollama provider to opencode.json:
{
  "$schema": "https://opencode.ai/config.json",
  "provider": {
    "ollama": {
      "npm": "@ai-sdk/openai-compatible",
      "name": "Ollama",
      "options": {
        "baseURL": "http://localhost:11434/v1"
      },
      "models": {
        "qwen3.5": {
          "name": "qwen3.5"
        }
      }
    }
  }
}
3. Run OpenCode
opencode
To configure OpenCode with Ollama without starting an interactive session:
ollama launch opencode --config
Configuration precedence
ollama launch opencode starts OpenCode with an inline config for the selected Ollama model. It does not overwrite ~/.config/opencode/opencode.json; existing OpenCode settings still apply.
Models defined only in opencode.json do not appear in the ollama launch model picker.
See OpenCode's config precedence.
Pi
Pi is a minimal and extensible coding agent.
Quick setup
ollama launch pi
This installs Pi if needed, configures Ollama as a provider including web tools, and drops you into an interactive session.
To configure without launching:
ollama launch pi --config
Run directly with a model
ollama launch pi --model qwen3.5:cloud
Cloud models are also available at ollama.com.
Extensions
Pi ships with four core tools: read, write, edit, and bash. All other capabilities are added through its extension system.
On-demand capability packages invoked via /skill:name commands.
Install from npm or git:
pi install npm:@foo/some-tools
pi install git:github.com/user/repo@v1
See all packages at pi.dev
Web search
Pi can use web search and fetch tools via the @ollama/pi-web-search package.
When launching Pi through Ollama, package install/update is managed automatically. To install manually:
pi install npm:@ollama/pi-web-search
Autoresearch with pi-autoresearch
pi-autoresearch brings autonomous experiment loops to Pi. Inspired by Karpathy's autoresearch, it turns any measurable metric into an optimization target: test speed, bundle size, build time, model training loss, Lighthouse scores.
pi install https://github.com/davebcn87/pi-autoresearch
Tell Pi what to optimize. It runs experiments, benchmarks each one, keeps improvements, reverts regressions, and repeats — all autonomously. A built-in dashboard tracks every run with confidence scoring to distinguish real gains from benchmark noise.
/autoresearch optimize unit test runtime
Each kept experiment is automatically committed. Each failed one is reverted. When you're done, Pi can group improvements into independent branches for clean review and merge.
Manual setup
Install
Install Pi:
npm install -g @earendil-works/pi-coding-agent
Add a configuration block to ~/.pi/agent/models.json:
{
  "providers": {
    "ollama": {
      "baseUrl": "http://localhost:11434/v1",
      "api": "openai-completions",
      "apiKey": "ollama",
      "models": [
        {
          "id": "qwen3-coder"
        }
      ]
    }
  }
}
Update ~/.pi/agent/settings.json to set the default provider:
{
  "defaultProvider": "ollama",
  "defaultModel": "qwen3-coder"
}
Pool
Pool is Poolside's software agent for the terminal, built for enterprise development workflows.
Install
Install Pool:
Usage with Ollama
Quick setup
ollama launch pool
Run directly with a model
ollama launch pool --model kimi-k2.6:cloud
Pass arguments through to Pool
Arguments after -- are passed directly to Pool:
ollama launch pool -- --help
Manual setup
Pool connects to Ollama using the OpenAI-compatible API via environment variables.
- Set the environment variables:
export POOLSIDE_STANDALONE_BASE_URL=http://localhost:11434/v1
export POOLSIDE_API_KEY=ollama
- Run Pool with an Ollama model:
pool -m kimi-k2.6:cloud
Or run with environment variables inline:
POOLSIDE_STANDALONE_BASE_URL=http://localhost:11434/v1 POOLSIDE_API_KEY=ollama pool -m kimi-k2.6:cloud
Roo Code
Install Roo Code from the VS Code Marketplace.
Usage with Ollama
- Open Roo Code in VS Code and click the gear icon on the top right corner of the Roo Code window to open Provider Settings
- Set
API ProvidertoOllama - (Optional) Update
Base URLif your Ollama instance is running remotely. The default ishttp://localhost:11434 - Enter a valid
Model ID(for exampleqwen3orqwen3-coder:480b-cloud. See all supported models here) - Adjust the
Context Windowto at least 32K tokens for coding tasks
Coding tools require a larger context window. It is recommended to use a context window of at least 32K tokens. See Context length for more information.
Connecting to ollama.com
- Create an API key from ollama.com
- Enable
Use custom base URLand set it tohttps://ollama.com - Enter your Ollama API Key
- Select a model from the list
VS Code
Use Ollama models in VS Code Chat with the Ollama extension.
Requirements
- Visual Studio Code 1.127 or newer
- Ollama installed and running
- At least one local or cloud model available in Ollama
Earlier VS Code versions do not reliably cancel requests from language model providers.
Ollama 0.17.6 or newer is recommended for cloud model sign-in and richer model metadata. Older versions may still work with local models.
Install the extension
- Install the Ollama extension from the VS Code Marketplace.
- Open Chat in VS Code.
- Open the model picker at the bottom of the chat input.
- Choose a model from the Ollama section.
The extension discovers models from http://127.0.0.1:11434 by default.
Add a model
Pull a local model:
ollama pull qwen3.6
To use a cloud model, pull it and sign in:
ollama pull kimi-k2.6:cloud
ollama signin
Local models do not require sign-in.
Context length
VS Code may show a model's maximum supported context length even when Ollama allocates a smaller context at runtime.
For local models, open Ollama Settings, set the context length to at least 64k, reload the VS Code window, and resend your prompt. See Context length for more information.
Troubleshooting
If Ollama models do not appear in the model picker:
- Make sure Ollama is running.
- Run
ollama listand confirm that models are available. - Run Ollama: Refresh Models from the Command Palette.
- Run Ollama: Diagnose Models and check the Ollama output channel.
If a cloud model asks you to sign in, run ollama signin.
Xcode
Install XCode
Usage with Ollama
Ensure Apple Intelligence is setup and the latest XCode version is v26.0
- Click XCode in top left corner > Settings

- Select Locally Hosted, enter port 11434 and click Add

- Select the star icon on the top left corner and click the dropdown

Connecting to ollama.com directly
- Create an API key from ollama.com
- Select Internet Hosted and enter URL as
https://ollama.com - Enter your Ollama API Key and click Add
Zed
Install Zed.
Usage with Ollama
- In Zed, click the star icon in the bottom-right corner, then select Configure.

- Under LLM Providers, choose Ollama
- Confirm the Host URL is
http://localhost:11434, then click Connect - Once connected, select a model under Ollama

Connecting to ollama.com
- Create an API key on ollama.com
- In Zed, open the star icon → Configure
- Under LLM Providers, select Ollama
- Set the API URL to
https://ollama.com