# Meta Box 开发者文档

Meta Box 开发者文档，介绍自定义字段与扩展。

# Abilities

import LiteYouTubeEmbed from 'react-lite-youtube-embed';
import 'react-lite-youtube-embed/dist/LiteYouTubeEmbed.css';

The abilities from Meta Box are built on the [WordPress Abilities API](https://developer.wordpress.org/apis/abilities-api/) to let AI agents - such as Claude or Cursor - perform actions on your site's content. To handle the communication, Meta Box uses the official [MCP Adapter plugin](https://github.com/WordPress/mcp-adapter), which translates WordPress abilities into the Model Context Protocol (MCP) that AI agents understand.

Depending on which abilities are enabled, AI agents can get, create, update, or delete custom post types, taxonomies, posts, terms, field groups, custom fields, and field values that Meta Box supports.

## Connecting AI agents to WordPress

First, connect WordPress to an AI agent via the [MCP Adapter plugin](https://github.com/WordPress/mcp-adapter). It exposes WordPress as an MCP server that AI agents can connect to.

### 1. Install MCP Adapter plugin

1. Download the [latest release of MCP Adapter](https://github.com/WordPress/mcp-adapter/releases) from GitHub
2. Go to **Plugins → Add New → Upload Plugin**, select the ZIP file, then install and activate the plugin

### 2. Generate application password

MCP Adapter uses Application Passwords for authentication (not your account password).

1. Go to **Users → Profile**
2. Scroll to the **Application Passwords** section
3. Enter a name (e.g. "MCP Agent"), then click **Add New Application Password**
4. Copy the generated password - it is shown only once

:::warning
An application password grants the same capabilities as the user account it belongs to. To restrict permissions, create a dedicated WordPress user with an appropriate role (e.g. Editor or Author) first, then generate an application password under that user.
:::

### 3. Configure MCP clients

Configure MCP clients (Claude Desktop, Claude Code, Cursor, etc.) to connect to your WordPress MCP server using HTTP transport via a proxy. Use `@automattic/mcp-wordpress-remote` to bridge local stdio to remote WordPress HTTP:

```json
{
  "mcpServers": {
    "wordpress-http": {
      "command": "npx",
      "args": [
        "-y",
        "@automattic/mcp-wordpress-remote@latest"
      ],
      "env": {
        "WP_API_URL": "http://your-site.com/wp-json/mcp/mcp-adapter-default-server",
        "LOG_FILE": "/path/to/logs/mcp-adapter.log",
        "WP_API_USERNAME": "your-username",
        "WP_API_PASSWORD": "your-application-password"
      }
    }
  }
}
```

Replace:
- The domain in `WP_API_URL` with your site domain
- `WP_API_USERNAME` with your WordPress username
- `WP_API_PASSWORD` with the Application Password from Step 2
- `LOG_FILE` with the path where logs should be written

For more details, follow the instructions in the [MCP Adapter plugin's GitHub repository](https://github.com/WordPress/mcp-adapter).

## Post type abilities

:::info Technical information

These abilities are available in the [MB Custom Post Types & Custom Taxonomies](/extensions/mb-custom-post-type/) extension, which is bundled in [Meta Box Lite](https://metabox.io/lite/) (free) and [Meta Box AIO](https://metabox.io/aio/) (paid) plugins.

:::

### Creating and managing custom post types

To create a new custom post type, describe the structure you want in natural language. For example:

> *Create a custom post type named Event, set the menu icon to "calendar", enable the "Enable abilities" option in the Features tab, and enable all abilities available under that option.*

![Prompt to create a new custom post type](./img/abilities-api/cpt-prompt.webp)

Within seconds, you should have the post type you asked for:

![The created post type](./img/abilities-api/cpt.webp)

You can also ask your AI agent to update post type settings, such as enabling a hierarchical structure or changing the menu icon.

### Abilities for posts

To enable abilities for posts of a custom post type, go to the **Features** tab when creating or editing a post type, then turn on **Enable abilities**. Available actions include:

- Getting post type data (the definition)
- Getting, creating, updating, and deleting posts under that post type

![Enable abilities for posts](./img/abilities-api/cpt-abilities.webp)

You can enable or disable each ability independently. Once enabled, compatible AI agents can invoke these abilities through the Abilities API.

For example, after creating an Event post type, you can ask the AI agent to generate posts for it:

> *Find 5 latest WordPress events in the world. They're posts of the event post type*

![Ask an AI agent to create posts](./img/abilities-api/post-prompt.webp)

The agent creates the posts without manual entry:

![Posts created by an AI agent](./img/abilities-api/posts.webp)

You can also update posts. For example:

> *Update the status of the posts to published.*

Or delete posts with a simple prompt:

> *Delete the events in Asia.*

The posts are updated or deleted according to your request.

## Taxonomy abilities

:::info Technical information

These abilities are available in the [MB Custom Post Types & Custom Taxonomies](/extensions/mb-custom-post-type/) extension, which is bundled in [Meta Box Lite](https://metabox.io/lite/) (free) and [Meta Box AIO](https://metabox.io/aio/) (paid) plugins.

:::

### Creating and managing custom taxonomies

The plugin also lets you create, update, and delete custom taxonomies, as well as manage the terms within them.

Start by creating a new custom taxonomy:

> *Create a custom taxonomy named "location" and assign it to the Event custom post type.*

![Prompt to create a taxonomy with an AI agent](./img/abilities-api/tax-prompt.webp)

![The created taxonomy](./img/abilities-api/tax.webp)

When you need to update the taxonomy, describe the change you want:

> *Enable the Re-order terms feature for this taxonomy.*

### Abilities for terms

Taxonomy abilities are configured the same way as post type abilities. You can:

- Get taxonomy data (the definition)
- Get, create, update, and delete terms in that taxonomy

![Enable abilities for terms](./img/abilities-api/tax-abilities.png)

You can then give AI agents prompts like this:

> *Update locations: remove cities and keep only countries.*

Or delete specific terms:

> *Delete the locations in Asia.*

![Prompt to update terms with an AI agent](./img/abilities-api/update-term-prompt.webp)

The result:

![Updated terms](./img/abilities-api/updated-terms.webp)

## Field group abilities

:::info Technical information

These abilities are available in the [MB Builder](/extensions/meta-box-builder/) extension, which is bundled in [Meta Box Lite](https://metabox.io/lite/) (free) and [Meta Box AIO](https://metabox.io/aio/) (paid) plugins.

:::

Field group abilities let AI agents register and manage field groups and fields. They are built into Meta Box and available by default - you do not need to enable them before using them with compatible AI agents.

With these abilities, AI agents can:

* Create field groups
* Update (edit) field groups
* Delete field groups
* Add or remove fields
* Update field settings, such as labels, IDs, and types
* Move fields up or down

For example, to create a field group for the `event` post type, use a prompt like this:

> *Create a field group Event Details for the event post type. That field group includes 2 fields: Address (type: text, ID: address). Date and Time (type: Datetime, ID: datetime).*

![Prompt to create a field group with an AI agent](./img/abilities-api/field-prompt.webp)

Result:

![Field group created by an AI agent](./img/abilities-api/fields.png)

You can also update the field group - for example, by changing a field ID, setting text length limits, or adding a new field:

> *Add a Map field (type: Open Street Map) below the Address field, and set the address field ID to `address`.*

Or:

> *Move the Date and Time field to the top of the field group.*

If you are not sure which fields to add, AI agents can suggest suitable ones based on your requirements.

## Field value abilities


:::info Technical information

These abilities are available in the **Meta Box** plugin (free), which is bundled in [Meta Box Lite](https://metabox.io/lite/) (free) and [Meta Box AIO](https://metabox.io/aio/) (paid) plugins.

:::

Similar to other objects, the plugin lets you:

* Get field values
* Set values for custom fields
* Edit field values
* Delete field values

This is especially useful when importing structured data from external sources.

Here is an example of automatically finding information and filling in custom fields:

> *Search details for the 5 latest WordPress events you provided, then fill in all the custom fields of those events.*

![Prompt to fill in custom field values](./img/abilities-api/field-value-prompt.webp)

In the post editor, the fields are populated:

![Filled-in field values](./img/abilities-api/field-value.webp)

You can also edit field values. For example:

> *Update the date format to Jul 4th, 2026.*

Or remove all stored values:

> *Delete all data in the custom fields.*

The Meta Box performs the requested action.

## Video tutorial

The video below shows examples of using the Meta Box abilities to create and manage custom post types, taxonomies, posts, terms, fields, and field values:

<LiteYouTubeEmbed id='TcfxmxDSvd0' />

# Block bindings

Custom fields store structured data - event dates, subtitles, cover images, prices - but that data does not appear on the front end by itself. You still need a way to [display it](/custom-fields/#displaying-fields).

[Block bindings](https://developer.wordpress.org/block-editor/reference-guides/block-api/block-bindings/) do that in Gutenberg. Like **dynamic data** in page builders, they connect a Meta Box field to a core block - a Paragraph shows your subtitle, an Image block shows your cover photo. Meta Box registers your fields as block binding sources by default, so you can use them in Gutenberg without PHP templates or a custom block.

## Why use block bindings?

Block bindings bring Meta Box field data into Gutenberg - connect fields from posts, terms, authors, or settings pages to Paragraph, Heading, Image, Button, and other core blocks, right in the editor.

- **Like dynamic data, but for Gutenberg** - pick a field, and the block shows its value on the front end.
- **No extra code** - bind a Paragraph or Image block directly to a field.
- **Single source of truth** - update the field once. Every bound block reflects the change.
- **Native block styling** - use core blocks with full typography, spacing, and layout controls.

They work in post content, block templates, and synced patterns - alongside [other ways to display fields](/custom-fields/#displaying-fields) when you need them.

This feature requires **WordPress 6.5+**. The **Attributes** panel in the block editor (to pick a field visually) requires **WordPress 6.9+**.

## Binding sources

Meta Box registers a separate source for each object type:

Source | Label | Available with
---|---|---
`meta-box/post-field` | **Meta Box Post Field** | Meta Box (posts and custom post types)
`meta-box/term-field` | **Meta Box Term Field** | [MB Term Meta](/extensions/mb-term-meta/)
`meta-box/author-field` | **Meta Box Author Field** | [MB User Meta](/extensions/mb-user-meta/)
`meta-box/setting-field` | **Meta Box Setting Field** | [MB Settings Page](/extensions/mb-settings-page/)

In the block editor, pick the source that matches where your field is stored, then choose the field (or a field property for structured fields).

## Hiding a field from block bindings

By default, Meta Box makes fields available for block bindings. If you do not want a field to appear in the block editor bindings UI, you can hide it.

### Using MB Builder

1. Edit a field.
2. Open the **Advanced** tab in field settings panel.
3. Turn on **Hide from block bindings?**.

![Hide a field from block bindings in the builder](img/hide-from-block-bindings.webp)

:::info

The instruction above uses [MB Builder](/extensions/meta-box-builder/), an extension providing the UI to create fields, and is already bundled in [Meta Box Lite](https://metabox.io/lite/) and [Meta Box AIO](https://metabox.io/aio/). If you prefer to use code, please see below.

:::

### Using code

Add `'hide_from_block_bindings' => true` to the [field settings](/creating-fields-with-code/#fields):

```php
add_filter( 'rwmb_meta_boxes', function ( $meta_boxes ) {
	$meta_boxes[] = [
		'title'      => 'Movie Details',
		'post_types' => 'movie',
		'fields'     => [
			[
				'name'                     => 'IMDB Rating',
				'id'                       => 'imdb_rating',
				'type'                     => 'number',
				'min'                      => 0,
				'max'                      => 10,
				'step'                     => 0.1,
				// highlight-next-line
				'hide_from_block_bindings' => true,
			],
		],
	];

	return $meta_boxes;
} );
```

## Binding a block to a field

1. Edit a post, template, or pattern in the block editor.
2. Select a block that supports bindings (for example Paragraph, Heading, Button, or Image).
3. In the block settings sidebar, open the **Attributes** panel.
4. Choose the attribute to bind (for example **Content** for a paragraph, or **URL** for an image).
5. Select the Meta Box source for your field type (for example **Meta Box Post Field**), then pick your field (or a field property for structured fields).

The bound attribute uses the field value when the content is rendered on the front end.

![Bind a block attribute to a Meta Box field](img/block-bindings.webp)

:::tip Binding without the UI

The **Attributes** panel is available from **WordPress 6.9** onward. On **WordPress 6.5 to 6.8**, you can still bind attributes in the **Code editor**. Example for a paragraph bound to an `imdb_rating` post field:

```html
<!-- wp:paragraph {
  "metadata":{
    "bindings":{
      "content":{
        "source":"meta-box/post-field",
        "args":{"id":"imdb_rating"}
      }
    }
  }
} -->
<p>Fallback text</p>
<!-- /wp:paragraph -->
```

Use `meta-box/term-field`, `meta-box/author-field`, or `meta-box/setting-field` for fields on terms, authors, or settings pages.

:::

## Structured fields

Scalar fields ([text](/fields/text/), [number](/fields/number/), [email](/fields/email/), and similar) expose a single binding option: the field value as a string.

Structured fields expose **properties** you can bind separately. In the UI they appear as labels like `Poster Image: URL` or `Poster Image: Alt Text`. In code, pass a `key` in the binding args:

```html
<!-- wp:image {
  "metadata":{
    "bindings":{
      "url":{
        "source":"meta-box/post-field",
        "args":{"id":"poster","key":"url"}
      },
      "alt":{
        "source":"meta-box/post-field",
        "args":{"id":"poster","key":"alt"}
      }
    }
  }
} -->
<figure class="wp-block-image"><img alt=""/></figure>
<!-- /wp:image -->
```

Supported properties by field type:

Field type | Properties (`key`)
---|---
`single_image`, `image`, `image_advanced`, `image_upload` | `url`, `alt`, `title`, `caption`, `description`
`file`, `file_advanced`, `file_upload` | `url`, `title`
`background` | `image`
`link` | `url`, `title`, `target`
`map`, `osm` | `latitude`, `longitude`
`post` | `post_title`, `post_excerpt`, `post_content`, `post_date`, `post_modified`, `post_author`, `url`
`taxonomy`, `taxonomy_advanced` | `name`, `slug`, `description`, `url`
`user` | `display_name`, `user_url`
`video` | `src`, `title`, `caption`, `description`
`fieldset_text` | Each option key from the field's `options`

If `key` is omitted, Meta Box falls back to the bound block attribute name (for example, an Image block's `url` attribute).

## Limitations

- **[Groups](/extensions/meta-box-group/) are not supported.** Block bindings map one block attribute to one value (a string, URL, and similar). A group stores nested fields as a structured set of values, so it cannot bind cleanly to a single Paragraph, Heading, or Image attribute. For group-based layouts, use [MB Views](/extensions/mb-views/) or [MB Blocks](/extensions/mb-blocks/) instead.
- **One value only.** If a field is [cloneable](/cloning-fields/) or stores multiple values (for example a multi-select or checkbox list), the binding uses only the **first** value.
- **Editor preview.** Bound attributes are resolved on the front end. The editor lists available fields for binding but does not show live field values in the canvas, and bound values are not editable from the block.
- **Access.** Bound values are only returned when the visitor can view the related object. For posts, that means password-protected or private content stays hidden from unauthorized visitors. For non-public taxonomies, term fields follow the same idea.

# Bundling Meta Box

import FAQ from '@site/src/components/FAQ';

Meta Box and extensions can be used as standalone plugins or bundled within other themes or plugins.

:::warning Licensing

1. If you want to bundle Meta Box into other products or services (plugins, themes, solutions, hosting providers, SASS companies, site maintenance providers, etc.) that sell to other people, please [contact us](https://metabox.io/contact/) for a custom pricing plan.
2. You are **not allowed** to use premium extensions in your free products, like plugins and themes on WordPress.org.

:::

## Using TGM Plugin Activation

It is recommended to use the [TGM Plugin Activation](http://tgmpluginactivation.com) to declare Meta Box and free extensions as dependencies for your themes or plugins. This way, Meta Box and the extensions can be auto-updated to the latest version.

![Using Meta Box in eStar theme](https://imgur.elightup.com/dS3a6pe.png)

To use the, follow these steps:

1. Download [TGMPA Plugin Activation](http://tgmpluginactivation.com/download/). For **I'm going to use TGMPA in a:** select **Plugin**.
1. Extract the downloaded `.zip` file and copy the file `class-tgm-plugin-activation.php` and `example.php` to your theme/plugin folder.
1. Open the `example.php` file and add Meta Box to the required plugin list:

```php
require_once __DIR__ . '/class-tgm-plugin-activation.php';

add_action( 'tgmpa_register', 'prefix_register_required_plugins' );

function prefix_register_required_plugins() {
    $plugins = [
        // highlight-start
        [
            'name'     => 'Meta Box',
            'slug'     => 'meta-box',
            'required' => true,
        ],
        // highlight-end
    ];
    $config  = [
        'id' => 'your-id',
    ];
    tgmpa( $plugins, $config );
}
```

Then, include the `example.php` file in your theme's `functions.php` or your plugin's main file.

## Directly including extensions

:::danger Not recommended

This method disables the auto update mechanism and sometimes causes conflicts with the latest versions of WordPress, or with other plugins that use other versions of Meta Box and extensions. And you have to update extensions manually. You should consider using TGMPA Activation class as described above first, and only use this method if you have no other choice.

:::

Bundling extensions means you include extensions directly in your products and use them as a library.

1. Copy the extension folder to your theme or plugin. You can put it in the theme root folder or a subfolder.
1. Include the extension's main file in the `functions.php` of your theme or your plugin's file:

```php
require get_template_directory() . '/mb-settings-page/mb-settings-page.php';
```

# Cloning fields

The clone feature of Meta Box allows you to create multiple inputs from a text, textarea, select, ... fields without declaring many fields in the code. Combining the clone feature with [groups](/extensions/meta-box-group/) gives you a flexible way to define repeatable content.

:::info Clone is a feature

The difference between Meta Box and other plugins is that the clone feature can be applied to **all field types**. And **it is a feature, not a field type**. Then, every field or group can be cloneable or repeater. They are called cloneable fields or cloneable groups.

:::

## Making a field cloneable

When editing a field, turn on this **Cloneable** option in the settings of the field:

![enable clone feature](https://imgur.elightup.com/KbnSFBe.png)

After turning on the Cloneable option, other clone settings will appear.

![other clone settings](https://imgur.elightup.com/uhhImkb.png)

:::info

The instruction above uses [MB Builder](/extensions/meta-box-builder/), an extension providing the UI to create fields, and is already bundled in [Meta Box Lite](https://metabox.io/lite/) and [Meta Box AIO](/extensions/meta-box-aio/). If you prefer to use code, please see below.

:::

No matter what you are using the UI or code, this is a brief description of the clone settings. The keys are for reference in code.

Settings|Key|Description
---|---|---
Cloneable|`clone`|Make the field cloneable? `true` or `false` (default). Optional.
Sortable|`sort_clone`|Allow to drag-and-drop sort clones. `true` or `false` (default).
Clone default value|`clone_default`|Clone the default value of the field? `true` or `false` (default).
Clone as multiple|`clone_as_multiple`| Whether to store cloned values in multiple rows in the database
Max number of clones|`max_clone`|Limit the number of clones. Must be greater than 2. Optional.
Min number of clones|`min_clone`|Minimum number of clones. Optional.
Add more text|`add_button`|The text for **Add more** clone button. Optional. Default "+ Add more".
Clone empty start|`clone_empty_start`|Allows no fields except the **Add more** button to show up. `true` or `false` (default). Optional.

After saving the field group, in the post editor, you will see an **+ Add more** button below the field input. Clicking it allows you to enter more values:

![view clones in action](https://imgur.elightup.com/PM4Mbqb.png)

If you are a developer and want to use code, then you need to add the clone settings into the [field settings](/creating-fields-with-code/#fields):

```php
add_filter( 'rwmb_meta_boxes', function ( $meta_boxes ) {
	$meta_boxes[] = [
		'title'      => 'Event details',
		'post_types' => 'event',
		'fields'     => [
			[
				'name'  => 'Date and time',
				'id'    => 'datetime',
				'type'  => 'datetime',
				// highlight-start
				'clone' => true,
				// Other clone settings
				// highlight-end
			],
			[
				'name' => 'Location',
				'id'   => 'location',
				'type' => 'text',
			],
			[
				'name'          => 'Map',
				'id'            => 'map',
				'type'          => 'osm',
				'address_field' => 'location',
			],
		],
	];

	return $meta_boxes;
} );
```

## Data of cloneable fields

For cloneable fields, values are stored as a serialized array in a single row in the database, unless you set `'clone_as_multiple' => true`.

Using serialized data has some benefits:

- Works for all field types, including nested groups.
- Works perfectly with the helper function or with WordPress's `get_post_meta` function (WordPress automatically deserializes string and returns an array).
- Reduces the database size (number of rows), especially when you have nested groups of many fields.

## Query posts by cloneable fields

By default, cloned values are stored as a serialized array, which does not allow you to query posts by these values. For example, if you have a cloneable field `start_date` for the `event` post type, and you want to query events in May 2019 like this:

```php
$args = [
	'post_type'  => 'event',
	'meta_query' => [
		// highlight-start
		[
			'key'     => 'start_date', // This field is cloneable
			'value'   => ['2019-05-01', '2019-05-31']
			'compare' => 'BETWEEN',
		],
		// highlight-end
	],
];
$query = new WP_Query( $args );
```

Then it does not work.

To solve this problem, you need to enable the **Clone as multiple** settings for the field.

![Enable the Clone as multiple settings](https://imgur.elightup.com/D2gGXup.png)

With that, Meta Box will **save cloneable values in multiple rows in the database**, where each row contains one value. That means if `start_date` has 2 values `['2019-05-01', '2019-04-30']`, it will be saved in 2 rows in the database, one for `2019-05-01` and one for `2019-04-30`. The data is **not serialized** anymore. And thus, your above query will work!

## Default values

When making a field cloneable, its data is an array of cloned values. So, the `std` parameter (default value) should represent this structure, e.g. an array of cloned values.

```php
add_filter( 'rwmb_meta_boxes', function ( $meta_boxes ) {
	$meta_boxes[] = [
		'title'      => 'Event details',
		'post_types' => 'event',
		'fields'     => [
			[
				'name'  => 'Date and time',
				'id'    => 'datetime',
				'type'  => 'datetime',
				'clone' => true,
				// highlight-start
				'std' => [
					'2022-04-20',
					'2022-04-21',
				],
				// highlight-end
			],
			[
				'name' => 'Location',
				'id'   => 'location',
				'type' => 'text',
			],
			[
				'name'          => 'Map',
				'id'            => 'map',
				'type'          => 'osm',
				'address_field' => 'location',
			],
		],
	];

	return $meta_boxes;
} );
```

# Composer

import FAQ from '@site/src/components/FAQ';

This docs shows you how to use [Composer](https://getcomposer.org/) to install and update Meta Box and its extensions.

:::warning Licensing

1. If you want to bundle **premium extensions** into other products or services (plugins, themes, solutions, hosting providers, SASS companies, site maintenance providers, etc.) that sell to other people, please [contact us](https://metabox.io/contact/) for a custom pricing plan.
2. You are **not allowed** to use **premium extensions** in your free products, like plugins and themes on WordPress.org.

:::

## Meta Box and free extensions

Meta Box and all free extensions are [available on Packagist](https://packagist.org/packages/wpmetabox/).

To use them in your project, simply run:

```bash
composer require wpmetabox/meta-box // For Meta Box
composer require wpmetabox/mb-rest-api // For MB Rest API

composer require wpmetabox/meta-box-lite // Or use Meta Box Lite, which includes Meta Box and all free extensions
```

## Premium extensions

To use Composer to install paid extensions, add `repositories` rule to your `composer.json`:

```json
"repositories":[
	{
		"type": "composer",
		"url": "https://packages.metabox.io/YOUR_LICENSE_KEY"
	}
],
```

Then you can install paid extensions with:

```bash
composer require meta-box/mb-settings-page:dev-master
composer require meta-box/meta-box-group:dev-master
```

Notes:

- The version of premium extensions specified in `composer.json` **must be `dev-master`**. We do not support version constraints for premium extensions yet. You always use the latest version.
- Extensions are **not autoloaded** by default. You can manually load them or autoload by adding extensions' main files to the `autoload` array in `composer.json`.
- Extensions then will be installed in WordPress's `wp-content/plugins` folder thanks to [composer/installers](https://github.com/composer/installers). To move them to the traditional `vendor` folder, add `installer-paths` to your `composer.json` file as follows:

```json
{
	"repositories": [
		{
			"type": "composer",
			"url": "https://packages.metabox.io/YOUR_LICENSE_KEY"
		}
	],
	"require": {
		"wpmetabox/mb-custom-post-type": "^2.3",
		"meta-box/meta-box-group": "dev-master",
		"meta-box/mb-settings-page": "dev-master"
	},
	// highlight-start
	"extra": {
		"installer-paths": {
			"vendor/meta-box/{$name}": [
				"vendor:wpmetabox",
				"vendor:meta-box"
			]
		},
	},
	// highlight-end
	"autoload": {
		"files": [
			"vendor/wpmetabox/mb-custom-post-type/mb-custom-post-type.php",
			"vendor/meta-box/mb-settings-page/mb-settings-page.php",
			"vendor/meta-box/meta-box-group/meta-box-group.php"
		]
	}
}
```

To make the extensions work, load Composer's autoload file:

```php
require 'vendor/autoload.php';
```

Now you can start using Meta Box extensions in your products!

To make it easier for you, we have created a [`composer.json`](https://github.com/wpmetabox/library/blob/master/composer/composer.json) file, which contains a full list of extensions, free and premium. You can use it as a boilerplate and remove the extensions you do not want to use.

Because we use `dev-master` version, Composer cannot load versions to check when running `composer update`. To fix this, run the following command:

```bash
rm -rf vendor && composer clear-cache && composer install
```

:::danger Not recommended

This method disables the auto update mechanism and sometimes causes conflicts with the latest versions of WordPress, or with other plugins that use other versions of Meta Box and extensions. And you have to update extensions manually.

:::

# Creating fields with code

import LiteYouTubeEmbed from 'react-lite-youtube-embed';
import 'react-lite-youtube-embed/dist/LiteYouTubeEmbed.css';
import Tabs from '@theme/Tabs';
import TabItem from '@theme/TabItem';
import FAQ from '@site/src/components/FAQ';

Creating custom fields with code is suitable if you want to keep everything in your themes or plugins. This way, you can re-use them in many websites and put them under a version control like Git.

## Registering custom fields with PHP

To create custom fields, you will need to use the filter `rwmb_meta_boxes` to register field groups. This filter accepts one parameter - the array of field groups:

```php
add_filter( 'rwmb_meta_boxes', function ( $meta_boxes ) {
    $meta_boxes[] = [
        'title'      => 'Event details',
        'post_types' => 'event',
        'fields'     => [
            [
                'name' => 'Date and time',
                'id'   => 'datetime',
                'type' => 'datetime',
            ],
            [
                'name' => 'Location',
                'id'   => 'location',
                'type' => 'text',
            ],
            [
                'name'          => 'Map',
                'id'            => 'map',
                'type'          => 'osm',
                'address_field' => 'location',
            ],
        ],
    ];

    // Add more field groups if you want
    // $meta_boxes[] = ...

    return $meta_boxes;
} );
```

Each field group has several settings and a list of fields, which we will cover below.

## Field group settings

Each field group has several settings for the location or appearance. Please see the list below:

Name|Description
--|--
`id`|ID, must be unique. Optional. If it is absent, it will be generated from the title.
`title`| The field group title. Required.
`post_types`|Custom post types which the field group is for. It can be a string or an array of slugs. Must be in lowercase (like the slug). Optional. Default: `post`.
`context`|Where the field group is displayed. See below for a list of field group contexts. Optional.
`style`|Whether to keep the default WordPress field group style (`default`) or remove the wrapper box and display the fields seamlessly (`seamless`).
`closed`|Whether to collapse the field group when the page loads? Optional. Default: `false`.
`priority`|Priority within the context where the box is displayed (`high` or `low`). Optional. Default: `high`.
`default_hidden`|Hide the field group by default (`true` or `false`)? The field group can be toggled using the checkbox option in screen Help (on the top right). Optional. Default `false`.
`autosave`|Auto save the custom fields' values (like post content and title)? Optional. Default: `false`.
`media_modal`|Add custom fields to media modal when viewing/editing an attachment. Works only when `post_types` is or contains `attachment`. Optional. Default `false`.
`class`|Custom CSS class for the field group wrapper. Optional.

:::info Media modal limitation

Only simple fields such as text, select, radio, checkbox work in the media modal. Other fields that require custom JavaScript do not work.

:::

### Contexts

The plugin supports the following contexts (locations) where a field group can appear:

Name|Description
---|---
`normal`|Below the post editor. This is the default value.
`advanced`|Below the `normal` section.
`side`|On the right sidebar.
`form_top`|Top of the post form, before the post title
`after_title`|After post title
`after_editor`|After the post content editor, but before `normal` section
`before_permalink`|Before permalink

:::warning Gutenberg

Gutenberg editor only supports `normal` and `side` contexts. Other extra contexts are not supported.

:::

## Fields

Fields are added to a field group via the key `fields`. Each field is an array of settings.

Meta Box supports more than 40 field types. They share some common settings but also offer unique settings per field type.

### Field types

When adding a field, you need to know what type it is and how it works. Understanding that helps you choose the right type of field and, therefore, the right type of data that you want to add to your posts.

Below is the list of supported field types in alphabetical order with a brief description. The field type key is used for reference in code. For how they look like and how to use them, please see details in the [Field types](/fields/) menu.

<Tabs>

  <TabItem value="basic" label="Basic" default>

These are the basic and most used field types that do not require any extra library. The UI of these fields is WordPress-native.

Type | Key | Description
--- | --- | ---
Checkbox | `checkbox` | A simple checkbox, usually used for Yes/No question
Checkbox list | `checkbox_list` | A list of checkboxes where you can select multiple choices
Radio | `radio` | Radio input where you can select only one choice
Select | `select` | Select dropdown where you can select one or multiple choice
Text | `text` | A single-line text input
Textarea | `textarea` | A paragraph text input

  </TabItem>

  <TabItem value="advanced" label="Advanced">

These are the advanced field types that usually need an additional library to provide a user-friendly UI.

Type | Key | Description
--- | --- | ---
Background | `background` | Set background properties
Button | `button` | A simple button, usually used for JavaScript triggers
Button group | `button_group` | Select one or multiple choices by enabling button(s) from a group
Color picker | `color` | Color picker
Custom HTML | `custom_html` | Output custom HTML content
Date picker | `date` | Date picker
Datetime picker | `datetime` | Date and time picker
Hidden | `hidden` | For storing a default hidden value
Image Select | `image_select` | Select a choice with images
Key Value | `key_value` | Add an unlimited group of key-value pairs
Google maps | `map` | Google Maps
oEmbed | `oembed` | Input for media from Youtube, Vimeo, and all [supported sites](https://wordpress.org/support/article/embeds/) by WordPress
Open Street Maps | `osm` | Open Street Maps
Password | `password` | For entering a password
Select advanced | `select_advanced` | Beautiful select dropdown using [select2](https://select2.github.io) library
Slider | `slider` | jQuery UI slider
Switch | `switch` | On/off switch with iOS style
Time picker | `time` | Time picker
WYSIWYG editor | `wysiwyg` | WordPress editor

Besides, some field types that are rarely used and we would not recommend using them because their UI is not as good and native as other fields.

Type | Key | Description
--- | --- | ---
Autocomplete | `autocomplete` | Text input that uses an autocomplete library to suggest user input. Not recommended. Use the Select or Select advanced field type instead.
Fieldset text | `fieldset_text` | Group of text inputs. Not recommended. Use the Group field type instead.
Text list | `text_list` | Group of text inputs. Similar to Fieldset text, but has a different UI. Not recommended. Use the Group field type instead.

  </TabItem>

  <TabItem value="html5" label="HTML5">

:::warning

These are field types that use the built-in browser UI without extra libraries. The UI might be different across operating systems and browsers. Please use with care.

:::

Type | Key | Description
--- | --- | ---
Email | `email` | For entering an email address with browser validation
Number | `number` | For entering a number with browser validation
Range | `range` | A slider for selecting a number
URL | `url` | An input for URL with browser validation

  </TabItem>

  <TabItem value="wordpress" label="WordPress">

These are field types that help you select a WordPress object.

Type | Key | Description
--- | --- | ---
Post | `post` | For selecting posts
Sidebar | `sidebar` | For selecting sidebars
Taxonomy | `taxonomy` | For selecting taxonomy terms. Does not save term IDs in post meta, but sets post terms.
Taxonomy advanced | `taxonomy_advanced` | For selecting taxonomy terms and saving term IDs in post meta as a comma-separated string. It does not set post terms.
User | `user` | For selecting users

  </TabItem>

  <TabItem value="upload" label="Upload">

These are field types that help you upload media files.

Type | Key | Description
--- | --- | ---
File | `file` | Simple file upload with default UI like `<input type="file" />`. Not recommended. Use File advanced instead.
File advanced | `file_advanced` | Multiple file uploads with WordPress media popup
File input | `file_input` | A text input for entering a file URL with the ability to select a file from the Media Library
File upload | `file_upload` | Multiple file uploads with a drag and drop area
Image | `image` | Simple image upload with default UI like `<input type="file" />`. Not recommended. Use Image advanced instead.
Image advanced | `image_advanced` | Multiple image uploads with WordPress media popup, usually used for a gallery
Image upload | `image_upload` | Multiple image uploads with a drag and drop area
Single image | `single_image` | Single image upload with WordPress media popup
Video | `video` | Multiple video uploads with WordPress media popup

  </TabItem>

  <TabItem value="layout" label="Layout">

These are field types that help you organize and improve the UI of the fields.

Type | Key | Description
--- | --- | ---
Divider | `divider` | Simple horizontal line
Heading | `heading` | Heading text
Group | `group` | For creating nesting groups of fields. Requires [MB Group](/extensions/meta-box-group/) extension.
Tab | `tab` | For organizing fields in tabs. Requires [MB Tabs](/extensions/meta-box-tabs/) extension.

  </TabItem>

</Tabs>

### Field settings

Each field contains settings to determine where and how data is loaded and saved. All fields share some common settings, but also offer unique settings per field type. There are also settings from extensions which are explained on each extension docs.

Below is the list of settings with a brief description. The keys are for reference in code.

<Tabs>

  <TabItem value="general" label="General">

![general settings](https://imgur.elightup.com/MJ3JRiT.png)

Name | Key | Description
--- | --- | ---
Label | `name` | Field label. Optional. If empty, the field input is 100% width.
ID | `id` | Field ID. Required and must be unique. **It will be used as `meta_key` when saving to the database**. Use only numbers, letters, and underscores (and rarely dashes).
Type | `type` | Field type. Required.
Label description | `label_description` | Label description, displayed below the field label. Optional.
Input description | `desc` | Field description, displayed below the field input. Optional.
Default value | `std` | Default value. Optional.
Placeholder | `placeholder` | Placeholder text for the input or select box. Optional.
Required | `required` | Whether the field is required (`true` or `false`). Optional. Default `false`.
Disabled | `disabled` | Whether the field is disabled (`true` or `false`). Optional. Default `false`.
Read only | `readonly` | Whether the field is read only (`true` or `false`). Optional. Default `false`.
Multiple | `multiple`|Does the field have multiple values (like the `select` field)? Optional. Default `false`.
Cloneable | `clone` | Is the field clonable (repeatable)? `true` or `false`. Optional. Default `false`.
Sortable | `sort_clone`|Ability to drag-and-drop reorder clones (`true` or `false`). Optional. Default `false`.
Clone default value | `clone_default`|Clone the default value of fields? `true` or `false` (default).
Clone as multiple | `clone_as_multiple`|Whether to store clone values in multiple rows in the database? Optional. Default `false`.
Max number of clones | `max_clone`|Maximum number of clones. Optional. Default `0` (unlimited).
Min number of clones | `min_clone`|Minimum number of clones. Optional. Default `0`.
Add more text | `add_button`|The text for **Add more** clone button. Optional. Default "+ Add more".

  </TabItem>

  <TabItem value="advanced" label="Advanced">

![advanced settings](https://imgur.elightup.com/jX7YDH3.png)

Name | Key | Description
--- | --- | ---
Before | `before` | Custom HTML outputted before field's HTML.
After | `after` | Custom HTML outputted after field's HTML.
Custom CSS class | `class` | Custom CSS class, in case you want to customize the field. Optional.
Custom sanitize callback | `sanitize_callback` | Custom PHP callback for sanitizing field value before saving into the database. Set it to `none` to bypass the sanitization. See [more details](/sanitization/).
Save field value | `save_field` | Whether to save field value. Optional. Default `true`. This option does not work in the block editor (Gutenberg).
Hide from block bindings? | `hide_from_block_bindings` | Hide this field from the block editor bindings UI. Optional. Default `false`. See [more details](/block-bindings/).
Custom HTML5 attributes | `attributes` | Custom attributes for inputs. See [more details](/custom-attributes/).
Validation | `validation` | Validation rules for fields. Optional. See [more details](/validation/).
Custom settings | N/A | Custom field settings, useful when you want to add your settings to fields.

  </TabItem>

</Tabs>

:::tip Field ID prefix

You can add a prefix to field IDs to prevent using the same ID with other scripts. If you want to hide the fields in the default WordPress **Custom Fields** meta box, use underscore (`_`) as the prefix.

:::

### Field-specific settings

Besides all common settings, each field type can have its own settings. Please see more details for each field type on the left menu.

:::tip Code examples

To save time reading and writing settings for fields, we have already prepared some code examples that you can get from [Meta Box Code Snippet Library](https://github.com/wpmetabox/library/).

:::

### Shorthand syntax

For **text** field type, you can omit the `type` settings, like this:

```php
add_filter( 'rwmb_meta_boxes', function ( $meta_boxes ) {
    $meta_boxes[] = [
        'title'      => 'Event details',
        'post_types' => 'event',
        'fields'     => [
            [
                'name' => 'Date and time',
                'id'   => 'datetime',
                'type' => 'datetime',
            ],
            // highlight-start
            [
                'name' => 'Location',
                'id'   => 'location',
            ],
            // highlight-end
            [
                'name'          => 'Map',
                'id'            => 'map',
                'type'          => 'osm',
                'address_field' => 'location',
            ],
        ],
    ];

    return $meta_boxes;
} );
```

And if the `id` of the field can be auto-generated from the field name, you can omit it and **define the field as a simple string**:

```php
add_filter( 'rwmb_meta_boxes', function ( $meta_boxes ) {
    $meta_boxes[] = [
        'title'      => 'Event details',
        'post_types' => 'event',
        'fields'     => [
            [
                'name' => 'Date and time',
                'id'   => 'datetime',
                'type' => 'datetime',
            ],
            // highlight-next-line
            'Location',
            [
                'name'          => 'Map',
                'id'            => 'map',
                'type'          => 'osm',
                'address_field' => 'location',
            ],
        ],
    ];

    return $meta_boxes;
} );
```

## Video tutorial

This video shows you all the field types and field settings:

<LiteYouTubeEmbed id='WWeaM5vIAwM' />

## FAQ

<FAQ question="Why does not my default value work?">

The mechanism of `std` in Meta Box works only if the **field group has not been saved before**. It means all fields in that field group, not just the specific field that you set the `std` for. So if there is any field that already has value, then `std` will not work for other fields, even new fields you have just added.

Examples:

When you create a new post, then no fields have values (of course), then `std` works for all fields.

When you edit an existing post that has a field group, then some fields might have values. Therefore, `std` does not work for all fields. In this case, if you edit the field group and add a new field, `std` still does not work for that new field (even it has no value before), because the field group has been saved before.

</FAQ>

<FAQ question="Why does not my context work?">

There are some situations where the context does not work as expected. That is probably because you have dragged and dropped the field groups to reorder them. If you have, then WordPress will save the position/location of them and use the saved position instead of the value in the `context` parameter. The order of field groups is saved in the user meta `meta-box-order_{screen id}` as follows:

![meta box order](https://imgur.elightup.com/A7bkxT9.png)

In this case, deleting this user meta from the database will make the context work again.

</FAQ>

# Creating new field types

If the existing Meta Box field types do not quite fit your needs, you can create your own. In this guide, we will walk through how to create a custom field type called `phone`, which only accepts phone numbers in the format `xxx-xxx-xxxx`.

## 1. Create a new field class

All custom fields in Meta Box are defined as classes. To create a new field type, define a class named `RWMB_{$field_type}_Field` that extends the base `RWMB_Field` class. For our `phone` field, the class name will be `RWMB_Phone_Field`.

```php
class RWMB_Phone_Field extends RWMB_Field {
    // Code for the field goes here
}
```

Save this class into a PHP file (for example: `field-phone.php`) and include it in your theme's `functions.php` file or in your custom plugin:

```php
add_action( 'init', function () {
    require 'path/to/field-phone.php';
} );
```

:::info Why use the `init` hook?

We hook into `init` to make sure all Meta Box files are fully loaded and the `RWMB_Field` class is available.

:::

## 2. Output the field HTML

To display the field so users can enter data, define the `html` method inside your field class:

```php
public static function html( $meta, $field ) {
    return sprintf(
        '<input type="text" name="%s" id="%s" class="rwmb-phone" value="%s" pattern="\d{3}-\d{3}-\d{4}">',
        $field['field_name'],
        $field['id'],
        $meta
    );
}
```

Here we are using the `pattern` attribute to ensure that users enter a phone number in the format `xxx-xxx-xxxx`.

:::info

Good news: you do not need to handle saving, retrieving, or enqueueing scripts/styles manually. Meta Box takes care of that automatically.

:::

Full class example:

```php
class RWMB_Phone_Field extends RWMB_Field {
    public static function html( $meta, $field ) {
        return sprintf(
            '<input type="text" name="%s" id="%s" class="rwmb-phone" value="%s" pattern="\d{3}-\d{3}-\d{4}">',
            $field['field_name'],
            $field['id'],
            $meta
        );
    }
}
```

:::info Inherited methods

This class inherits all methods from the `RWMB_Field` class. See the **method reference** below for details.

:::

## 3. Add the field to the builder (optional)

If you want to use your custom field in the [builder](/extensions/meta-box-builder/), you need to register it via the `mbb_field_types` filter:

```php
use MBB\Control;

add_filter( 'mbb_field_types', function ( $field_types ) {
	$field_types['phone'] = [
		'title'    => __( 'Phone', 'your-text-domain' ),
        'icon'     => 'phone',
		'category' => 'advanced',
		'controls' => [
			'name', 'id', 'type', 'label_description', 'desc',
			Control::Select( 'icon_type', [
				'label'   => __( 'Icon type', 'your-text-domain' ),
				'options' => [
					'dashicons'   => __( 'Dashicons', 'your-text-domain' ),
					'fontawesome' => __( 'Font Awesome', 'your-text-domain' ),
					'url'         => __( 'Custom URL', 'your-text-domain' ),
				],
			], 'dashicons' ),
			Control::Input( 'icon', [
				'label'      => __( 'Icon', 'your-text-domain' ),
				'dependency' => 'icon_type:dashicons',
			] ),
			Control::Input( 'icon_fa', [
				'label'      => '<a href="https://fontawesome.com/icons?d=gallery&m=free" target="_blank" rel="noopenner noreferrer">' . __( 'FontAwesome icon class', 'your-text-domain' ) . '</a>',
				'dependency' => 'icon_type:fontawesome',
			] ),
			Control::Input( 'icon_url', [
				'label'      => __( 'Icon URL', 'your-text-domain' ),
				'dependency' => 'icon_type:url',
			] ),
			'clone_settings',
			'before', 'after', 'class', 'save_field', 'sanitize_callback', 'attributes', 'custom_settings',
		],
	];

	return $field_types;
} );
```

This code registers a `phone` field type under the **Advanced** category with several available controls.

When you click **+ Add field** in the builder, it will appear like this:

![adding new field type](img/new-field-type-phone.png)

**Field type parameters:**

The `mbb_field_types` filter accepts a single parameter: an associative array of field types. Each type supports these parameters:

- `title`: The field type's display title.
- `icon`: The icon for the field (Dashicons only).
- `category`: The inserter popup category (options: `basic`, `advanced`, `html5`, `wordpress`, `upload`, `layout`).
- `controls`: The available controls in the builder. These can be:
    - Simple strings (`name`, `id`, `type`).
    - Control objects like `MBB\Control::Input` or `MBB\Control::Select`.

Each control has a specific type and several parameters:

1. Setting name
1. Control properties, which is an array:
    - `label`: Control label text.
    - `tooltip`: Helper text shown as a tooltip.
    - `options`: For select-type controls, in the format `'value' => 'label'`.
    - `dependency`: Show this control only when another control has a certain value (e.g. `{$other_control_setting_name}:{$value}`). Optional.
1. Default value. Optional.
1. Settings tab: `general` (default), `appearance`, or `advanced`. Optional.

In case your control has only `label` property, you can set the property as a string.

**Supported control types:**

| Control Type               | Description                                                                |
| -------------------------- | -------------------------------------------------------------------------- |
| `MBB\Control::Checkbox`    | A simple checkbox.                                                         |
| `MBB\Control::Input`       | A text input. Add `'type' => 'number'` to accept only numbers.             |
| `MBB\Control::Select`      | A single-select dropdown. Requires an `options` array.                     |
| `MBB\Control::ReactSelect` | A multi-select dropdown. Requires `options`, and default must be an array. |
| `MBB\Control::Textarea`    | A textarea input.                                                          |

## 4. Use the new field

Once registered, you can use the new `phone` field type like any other:

```php
add_filter( 'rwmb_meta_boxes', function ( $meta_boxes ) {
    $meta_boxes[] = [
        'title'      => 'Profile',
        'post_types' => 'speaker',
        'fields'     => [
            'Name',
            // highlight-start
            [
                'name' => 'Hotline',
                'id'   => 'hotline',
                'type' => 'phone',
            ],
            // highlight-end
        ],
    ];

    return $meta_boxes;
} );
```

When you edit a post, you will see the new field:

![new field type](https://imgur.elightup.com/lK8DRW7.png)

:::info

For more complex fields, you can override additional methods from the `RWMB_Field` class. You may want to enqueue scripts, styles, or sanitize values before saving. See the **methods reference** below for details.

:::

:::warning Cloneable fields

If your field should support [cloning](/cloning-fields/), make sure your inputs have a CSS class starting with `rwmb`. The cloning script automatically detects these inputs and updates their `id` and `name` attributes correctly.

:::

## `RWMB_Field` Class Methods

All methods in `RWMB_Field` (and child classes) are **static**. This design improves performance by reusing the same code for all fields instead of creating new instances.

Here is a quick overview of the most important methods:

### `add_actions`

This method allows a field to add custom hooks for its needs. For example: callbacks for ajax call ([like `file`](https://github.com/wpmetabox/meta-box/blob/master/inc/fields/file.php#L36)), add hooks to output custom content in admin footer ([like `file_advanced`](https://github.com/wpmetabox/meta-box/blob/master/inc/fields/media.php#L51)), etc. This method is called when the meta box is loaded. You can also add custom code to this method or calls to other functions which need to run when code is loaded. This method does not have any arguments.

### `admin_enqueue_scripts`

This method allows you to enqueue scripts and styles for a field. This method does not have any arguments.

### `show`

This method outputs the field's HTML markup. Fields should **not** overwrite this method to output custom HTML. Instead of that, overwrite methods `html`, `begin_html`, `end_html` described below. This method has 2 arguments:

- `$field`: array of field arguments
- `$saved`: a param used to detect whether this meta box is saved into database or not
- `$post_id`: the current post ID

### `html`

This method returns (not echoes, only returns) field's HTML markup. This is the input controls of the field and is put inside `.rwmb-input` CSS class. Each field **must** overwrite this method to return its HTML for inputs. This method has 2 arguments:

- `$meta`: field meta value
- `$field`: array of field arguments

### `begin_html`

This method returns the beginning HTML output of a field. The beginning HTML output contains field name and opening tag for inputs. By default it is:

```php
<div class="rwmb-label">
    <label for="{$field_id}">{$field_name}</label>
</div>
<div class="rwmb-input">
```

This method should **not** be overwritten by field's class, unless it is needed to do so ([like `heading` field](https://github.com/wpmetabox/meta-box/blob/master/inc/fields/heading.php#L27)). This method has 2 arguments:

- `$meta`: field meta value
- `$field`: array of field arguments

### `end_html`

This method returns the ending HTML output of a field. The ending HTML output contains clone button, field description and closing tag for inputs. By default it is:

```php
{$clone_button}
{$field_description}
</div> <!-- .rwmb-input -->
```

This method should **not** be overwritten by field's class, unless it is needed to do so ([like `heading` field](https://github.com/wpmetabox/meta-box/blob/master/inc/fields/heading.php#L40)). This method has 2 arguments:

- `$meta`: field meta value
- `$field`: array of field arguments

### `meta`

This method retrieves meta value for a field. In most cases, this method does all the job of retrieving meta value of a field. But in some cases, a descendant class may overwrite this method to retrieve meta value for more complicated logic. This method has 3 parameters:

- `$post_id`: current post ID, from which we retrieve meta value
- `$saved`: a param used to detect whether this meta box is saved into database or not
- `$field`: array of field arguments

### `value`

This method sets field meta value before saving in database. By default it just returns the value from `$_POST`. Field class can overwrite this method to set meta value for more complicated logic ([like `taxonomy_advanced`](https://github.com/wpmetabox/meta-box/blob/master/inc/fields/taxonomy-advanced.php#L22)). This method has 4 parameters:

- `$new`: field meta value which will be saved in the database
- `$old`: old meta value of field
- `$post_id`: current post ID, from which we retrieve meta value
- `$field`: array of field arguments

### `save`

This method saves field meta value in database. In most cases, this method does all the job of saving meta value of a field to database. But in some cases, a descendant class may overwrite this method to handle saving itself ([like `taxonomy` field](https://github.com/wpmetabox/meta-box/blob/master/inc/fields/taxonomy.php#L194)). This method has 4 parameters:

- `$new`: field meta value which will be saved in the database
- `$old`: old meta value of field
- `$post_id`: current post ID, from which we retrieve meta value
- `$field`: array of field arguments

### `normalize_field`

This method normalizes field arguments, adds missing arguments, adds default value for fields, etc. Depending on field type, each field class can overwrite this method to define its own default value. This method has 1 parameter:

- `$field`: array of field arguments

# Custom attributes

With Meta Box, you can add custom attributes for inputs like text, URL, email field. This feature is very helpful if developers want to add HTML5 attributes or something like `data-*` attribute for their custom JavaScript code.

## How to add custom attributes to fields

To add custom attributes to the fields, click the **Advanced** tab in the field settings, and click the **Add New** button under **Custom HTML5 Attributes**:

![custom input attributes](https://imgur.elightup.com/IFiPfAr.png)

Then add your attribute name and value.

:::info

The instruction above uses [MB Builder](/extensions/meta-box-builder/), an extension providing the UI to create fields, and is already bundled in [Meta Box Lite](https://metabox.io/lite/) and [Meta Box AIO](/extensions/meta-box-aio/). If you prefer to use code, please see below.

:::

Currently, this feature is supported in text, URL, email, checkbox, radio, date, time, datetime fields.


:::info Complex values

By default, custom attributes accept strings as keys and values. If you want to enter complex values, like array, please use the [dot notation](/extensions/meta-box-builder/#dot-notation) or [JSON notation](/extensions/meta-box-builder/#json-notation).

:::

## Adding custom attributes with code

Custom attributes are registered as an array `attributes` in the field settings, in format `'key' => 'value'` like this:

```php
'fields' => [
    [
        'name'       => 'Username',
        'id'         => 'text',
        'type'       => 'text',
        // highlight-start
        'attributes' => [
            'required'  => true,
            'minlength' => 10,
        ],
        // highlight-end
    ],
],
```

If you want to add a custom `data-*` attribute, you can add it like this:

```php
'attributes' => [
    // highlight-start
    // Simple value
    'data-option1'  => 'value1',
    // Array of values
    'data-option2'  => json_encode( ['key1' => 'value1', 'key2' => 'value2'] ),
    // highlight-end
],
```

### Common attributes

There are several attributes that you can set under the `attributes` array, or directly in the field settings (e.g. outside the `attributes` array).

So, you can write like this:

```php
'fields' => [
    [
        'name'       => 'Username',
        'id'         => 'text',
        'type'       => 'text',
        // highlight-start
        'attributes' => [
            'required'  => true,
            'minlength' => 10,
        ],
        // highlight-end
    ],
],
```

Or like this:

```php
'fields' => [
    [
        'name'       => 'Username',
        'id'         => 'text',
        'type'       => 'text',
        // highlight-start
        'required'  => true,
        'minlength' => 10,
        // highlight-end
    ],
],
```

Here is the list of common attributes:

- disabled
- required
- autofocus
- readonly
- maxlength
- minlength
- pattern

# Custom fields

After creating custom post types and custom taxonomies, you will need to add more details to your posts. For example, you will need "date" and "location" for the "event" post type. Such details are called custom fields and that is the main thing that Meta Box does for you.

## What are custom fields?

Custom fields, also called metadata, are arbitrary extra data attached to posts to provide more information about the posts.

Custom fields are a very important feature of WordPress and make WordPress a powerful CMS. You will see custom fields everywhere, for example:

- On a hotel booking website: custom fields are used to add information for address, rating, or price
- On an e-commerce website: they are used to add details for price, quantity, or size. FYI, WooCommerce uses custom fields to store this data.

## How to create custom fields?

To create custom fields, you should use the [**MB Builder**](/extensions/meta-box-builder/) extension to have an intuitive interface. This extension is already bundled in [**Meta Box Lite**](https://metabox.io/lite/) so you can use it right away.

Custom fields are organized in groups. Each group is displayed as a collapsible panel below the post editor.

Go to **Meta Box » Custom Fields** and click **Add New**. You will see a screen to add fields to the group:

![Adding custom fields to the group](img/create-field-group.png)

Enter the field group title at the top and then click the **+ Add Field** button and select a field type to add to the group. Meta Box provides [40+ field types](/fields/) for all of your data types.

After that, a new field will appear in the field list. Clicking on the field bar will open the field settings panel in the left sidebar, where you can edit settings for the field, such as title or default value.

Each setting is clearly labeled, with tooltips available for extra guidance. To know more about field settings, please see [this docs](/field-settings/).

When finishing adding fields, click the **Settings** icon and select the post type where the fields are displayed for.

![selecting a post type for the field group](img/fields-settings.png)

After that click the **Save Changes** button to finish.

Now go to your post type and add a new post. You will see the field group with custom fields displayed below the editor where you can enter the data you want:

![editing a post with custom fields](https://imgur.elightup.com/TwDYnBQ.png)

In the case that you do not want to use [Meta Box Lite](https://metabox.io/lite/), you have two ways to have MB Builder:

* Get [MB Builder](https://metabox.io/plugins/meta-box-builder/) individually. In this case, the Meta Box plugin is required to be installed.
* Purchase a [premium plan](https://metabox.io/pricing/) to use **Meta Box AIO** that includes all extensions, including MB Builder.

:::info Do you know?

The technical term of field groups in WordPress is "meta box". You will see them via WordPress functions like `add_meta_box` or `remove_meta_box`. That is why we name our brand **Meta Box**!

:::

:::tip For developers

You can also [create custom fields with code](/creating-fields-with-code/), which is suitable if you want to keep everything in your themes or plugins.

:::

## Displaying fields

After having all the data for custom fields, it is time to show them on the front end.

We will display the event details for the event post type that we created in the previous steps for example. This is the single event page on the front end, and we will display the event details below the event description:

![Event page](https://imgur.elightup.com/rSPicJm.png)

To do that, we will use the [MB Views](/extensions/mb-views/) extension, which offers a powerful and flexible way to select and display fields.

:::info Don't have a license?

MB Views is a premium extension and is available for [premium licenses](https://metabox.io/pricing/) only. If you do not own the right license, please purchase one.

:::

To begin, we need to create a "view". A "view" is a template where we show our fields. To create a view, go to **Meta Box » Views** and click **Add New** button.

On the edit view screen, enter the view title. To insert a field to the template, click the **Insert Field** button, which opens a panel with all the available fields:

![Click to the Insert Field button, which opens a panel with all the available fields](https://imgur.elightup.com/1IPcVPr.png)

You will see other WordPress fields as well such as post title or post content. For the custom fields we created, just choose one and click on its name on the list.

![For the custom fields we created, just choose one and click on its name on the list](https://imgur.elightup.com/wydo9s9.png)

For some kinds of data, Meta Box may offer some options for the output. It will show a popup asking for the output format as follows:

![selecting a date format](https://imgur.elightup.com/OPXkorx.png)

Choose an output format from the dropdown and click the Insert button to insert the field to the template. After that, you will see the template now has the following text:

```html
{{ post.datetime | date( 'F j, Y' ) }}
```

![Choose an output format from the dropdown, and the text is displayed in the template](https://imgur.elightup.com/S0YCRfH.png)

That is the value of the field which will be displayed on the front end. However, displaying only text might be confusing, so we will add a label for it by adding the `<strong>Date and time:</strong>` before the text and wrap it in a paragraph (between `<p>` and `</p>` tags) to add some space. The template now looks like:

```html
<p>
	<strong>Date and time:</strong> {{ post.datetime | date( 'F j, Y' ) }}
</p>
```

:::tip

You can use any HTML tags and/or WordPress shortcodes in the view template.

:::

Now repeat the process for other fields: location and map. For map, as it is displayed as an Open Street Maps, we will need to change the HTML a little bit to put it below the label:

![template for the event post type](https://imgur.elightup.com/TeWN22i.png)

Now you need to set up the view to display below the post content of the event page in the **Settings** box as follows:

![view settings](https://imgur.elightup.com/U3kJnLe.png)

Finally, click the **Publish** button to finish.

Now go to the event page on the front end and you will see the custom fields that we created:

![view event details on the front end](https://imgur.elightup.com/iOAEwBT.png)

:::info

If you use a page builder to display the data, you can refer to the [tutorials](https://docs.metabox.io/tutorials/builders/) for usage in real cases.

:::

:::tip For developers

You can also [display custom fields with code](/displaying-fields-with-code/), which is suitable if you want to keep everything in your themes or plugins.

:::

## Next steps

Now you know all the basics for working with custom fields in Meta Box. Depending on your needs, I would suggest you take a look at:

- [Advanced topics](/category/advanced/), or
- Explore the [field type gallery](/fields/) to know which fields are suitable for your needs, or
- Explore more features provided by [extensions](/extensions/)

If you have any questions, feel free to ask in the [support forum](https://support.metabox.io/) or discuss in the [Facebook community group](https://www.facebook.com/groups/metaboxusers).

Thanks for using Meta Box and happy building websites!

# Custom post types

import LiteYouTubeEmbed from 'react-lite-youtube-embed';
import 'react-lite-youtube-embed/dist/LiteYouTubeEmbed.css';

When building a website, there may be sections such as events and projects where the content and appearance are very different from posts and pages. That is when you need custom post types.

## What are custom post types?

Custom post types are different types of content in WordPress. You should consider creating a custom post type for a particular content type if:

- It needs to be displayed differently from posts and pages, or
- It does not look and feel like a post or a page, or
- It needs some additional fields and characteristics

## How to create a custom post type?

Creating custom post types is done easily with the [MB Custom Post Types & Custom Taxonomies](/extensions/mb-custom-post-type/) extension. This extension is already bundled in [Meta Box Lite](https://metabox.io/lite/), [Meta Box AIO](/extensions/meta-box-aio/), or you can install it for free from [WordPress.org](https://wordpress.org/plugins/mb-custom-post-type/).

To create a new custom post type, go to **Meta Box** » **Post Types** » **New Post Type**:

![create a new custom post type](https://imgur.elightup.com/Z7h0zMP.png)

There are several settings divided into tabs. In most cases, you only need to enter the plural name, singular name, and slug in the **General** tab and click the **Publish** button to register the post type.

:::info Settings

To understand the settings in detail, [see the docs](/extensions/mb-custom-post-type/#post-type-settings) for the MB Custom Post Types & Custom Taxonomies extension.

:::

## Creating custom taxonomies

When you have a lot of posts of a custom post type, you might want to categorize them. For example, categorize music albums by genre or artist. To categorize posts like that, you need custom taxonomies.

Taxonomies in WordPress are a mechanism for grouping posts, like category and tag. In the example above, "genre" and "artist" are custom taxonomies for the custom post type "music album".

To create a new custom taxonomy, go to **Meta Box » Taxonomies** and click **Add New**:

![create a new taxonomy](https://imgur.elightup.com/K0mVDFp.png)

There are several settings divided into tabs. In most cases, you only need to enter the plural name, singular name, and slug in the **General** tab and click the **Publish** button to register the taxonomy.

:::info Settings

To understand the settings in detail, [see the docs](/extensions/mb-custom-post-type/#taxonomy-settings) for the MB Custom Post Types & Custom Taxonomies extension.

:::

## Video tutorial

The video below shows you the steps and explains the settings for a custom post type and a custom taxonomy:

<LiteYouTubeEmbed id='-oYrHGOri4w' />

## Next steps

After creating a custom post type, [add custom fields](/custom-fields/) to add more details for posts of that post type! That is the most important part of the whole process and is the heart of Meta Box.

# Custom Select / Checkbox Tree

If you have used the [taxonomy field](/fields/taxonomy/), you will see it has an option to display options in a checkbox / select tree. When users select a parent item, it will show children items. It is quite a nice feature for users. But how to do that with normal checkbox list or select field types?

The answer is simple: it is already supported. You need to register options for these fields with code like this:

```php
add_filter( 'rwmb_meta_boxes', function ( $meta_boxes ) {
    $meta_boxes[] = [
        'title'  => 'Test',
        'fields' => [
            [
                'type'    => 'select_tree', // or checkbox_list
                'id'      => 'cb',
                'name'    => 'Hierarchical checkboxes',
                'options' => [
                    [ 'value' => 'value1', 'label' => 'label 1' ],
                    [ 'value' => 'value2', 'label' => 'label 2' ],
                    // highlight-start
                    [ 'value' => 'sub1', 'label' => 'Sub 1', 'parent' => 'value1' ],
                    [ 'value' => 'sub2', 'label' => 'Sub 2', 'parent' => 'value1' ],
                    // highlight-end
                ],
                'placeholder' => 'Select an item',
                'flatten'     => false,
            ],
        ],
    ];
    return $meta_boxes;
} );
```

To enable select/checkbox tree, you need to:

- Set the option in format of `[ 'value' => 'Your value', 'label' => 'Your label' ]`
- For child items, add `'parent' => 'parent_value'`
- Set `'flatten' => false` for the field
- Set the field type `checkbox_list` if you want a checkbox tree or `select_tree` if you want a select tree.

# Database

Wondering how the Meta Box stores custom fields in the database? Understanding this can help you get the custom fields easily and understand the returned value from `get_post_meta` or helper functions.

## How fields are saved in the database?

In general, each custom field is saved as **one row** in the database, where the field `id` will be the `meta_key` and the value will be the `meta_value` in the meta table. This is the same way that WordPress saves data with `add_post_meta` or `update_post_meta` function.

- If you use [custom tables](/extensions/mb-custom-table/), the field value will be saved in the column with the name equal to the field `id`.
- If you create a field for a [settings page](/extensions/mb-settings-page/), the whole data for the settings page will be saved as an array in an option in the format of `['field_id' => 'field_value']`.

The sections below describe how field values are formatted.

## Non-cloneable fields

For non-cloneable fields, the plugin stores field value in the database in a WordPress-compatible way as follows:

- If a field has a single value, it will be saved in a single row in the post meta table.
- If a field has multiple values (set by `'multiple' => true` like `select`, `checkbox_list`, `file`, `image`, etc.), each value will be saved in a single row in the post meta table.

This way you can use `add_post_meta` or `update_post_meta` to update meta values and `get_post_meta` to retrieve them.

## Cloneable fields

For cloneable fields, values are stored as a serialized array in a single row in the database, unless you set `'clone_as_multiple' => true`.

Using serialized data has some benefits:

- Works for all field types, including nested groups.
- Works perfectly with the helper function or with WordPress's `get_post_meta` function (WordPress automatically unserializes string and returns an array).
- Reduces the database size (number of rows), especially when you have nested groups of many fields.

However, serialized data has a big disadvantage: **you cannot query posts by serialized values**.

For example, if you have a cloneable field `start_date` for the `event` post type, and you want to query events in May 2019 like this:

```php
$args = [
	'post_type'  => 'event',
	'meta_query' => [
		[
			'key'     => 'start_date', // This field is cloneable
			'value'   => ['2019-05-01', '2019-05-31']
			'compare' => 'BETWEEN',
		],
	],
];
$query = new WP_Query( $args );
```

Then it does not work.

To solve this problem, you need to enable the **Clone as multiple** settings for the field.

With that, Meta Box will **save cloneable values in multiple rows in the database**, where each row contains one value. That means if `start_date` has 2 values `['2019-05-01', '2019-04-30']`, it will be saved in 2 rows in the database, one for `2019-05-01` and one for `2019-04-30`. The data is **not serialized** anymore. And thus, your above query will work!

# Displaying fields with code

import FAQ from '@site/src/components/FAQ';

If you are a developer and familiar with changing template file with PHP code, you can use Meta Box helper functions to display fields:

- [`rwmb_get_value()`](/functions/rwmb-get-value/): to get a field value as a variable
- [`rwmb_the_value()`](/functions/rwmb-the-value/): to display a field

In addition, we also provide [`rwmb_meta()`](/functions/rwmb-meta/) function, which is a wrapper of the 2 functions above which:

- Returns the HTML output for rich-content fields: `map`, `osm`, and `oembed`, same as `rwmb_the_value()`,
- Returns the same value as `rwmb_get_value()` for other field types.

Now open your template file for the single event content. Usually, it is `template-parts/content.php`, `single-event.php` or `single.php` file, depending on your theme structure. Then add the following code below the content area:

```php
<?php
/**
 * Template part for displaying single post content
 */
?>

<article id="post-<?php the_ID(); ?>" <?php post_class(); ?>>
        <header class="entry-header">
                <?php the_title( '<h1 class="entry-title">', '</h1>' ); ?>
        </header>

        <div class="entry-content">
                <?php the_content(); ?>

                // highlight-start
                <p>
                    <strong>Date and time:</strong> <?php rwmb_the_value( 'datetime' ) ?>
                </p>
                <p>
                    <strong>Location:</strong> <?php rwmb_the_value( 'location' ) ?>
                </p>
                <p>
                    <strong>Map:</strong>
                </p>
                <?php rwmb_the_value( 'map' ) ?>
                // highlight-end
        </div>
</article>
```

:::warning Block themes

For block themes, everything is blocks and there are no PHP template files. In that case, please use the [MB Views](/extensions/mb-views/) extension.

:::

All functions accept the following parameters:

Name|Description
---|---
`$field_id`|The field ID. Required.
`$args`|Extra arguments for some field types (image, file, etc.). Can be array or a string in format `param1=value1&param2=value2`. See more details in field types. Optional.
`$object_id`|Object ID that custom fields are got from. Optional. If not present, the current post ID is used.
`$echo`|Echo the HTML output (`true` - default) or return it (`false`). Applied only for `rwmb_the_value()` function.

## FAQ

<FAQ question="Why does my site crash when I deactivate Meta Box?">

If you are using our helper functions in your theme, then they become unavailable when Meta Box is deactivated. You can fix that by going to the admin area » Plugins and re-activate Meta Box.

Alternatively, you can add the following code into your theme's `functions.php` file to make the error go away. However, the custom fields will not display, either.

```php
if ( ! function_exists( 'rwmb_the_value' ) ) {
    function rwmb_the_value( $key, $args = [], $post_id = null ) {
        return null;
    }
}
if ( ! function_exists( 'rwmb_get_value' ) ) {
    function rwmb_get_value( $key, $args = [], $post_id = null ) {
        return null;
    }
}
if ( ! function_exists( 'rwmb_meta' ) ) {
    function rwmb_meta( $key, $args = [], $post_id = null ) {
        return null;
    }
}
```

</FAQ>

<FAQ question="Can I use WordPress's get_post_meta() function to get custom field value?">

Absolutely. Our helper function is just a wrapper of WordPress's `get_post_meta` function.

</FAQ>

<FAQ question="Why do I not see values of custom fields?">

There are some cases where you register custom fields conditionally or only for the back end like you wrap the code under `is_admin()`. In that case, make sure you remove the condition and register custom fields for both the back end and front end.

</FAQ>

<FAQ question="Can I use a page builder to show Meta Box fields?">

Absolutely. We have official support for Beaver Builder and Elementor. Some page builders already have built-in support for Meta Box like Oxygen Builder, Bricks, and Brizy. See the [list of compatible plugins](/integrations/) and refer to their docs for how to use them with Meta Box.

</FAQ>

# Edit meta boxes

When you use a WordPress theme or plugin which [integrates Meta Box](/bundling/), all the information of fields and meta boxes are fixed, such as: meta box title, number of fields, fields' names and descriptions, ... How to change these texts or add/remove fields of an existing meta box or even remove a meta box?

Assuming we have 2 meta boxes registered in a parent theme:

```php
add_filter( 'rwmb_meta_boxes', 'prefix_register_meta_boxes' );
function prefix_register_meta_boxes( $meta_boxes ) {
    // 1st meta box
    $meta_boxes[] = array(
        'id'     => 'personal',
        'title'  => 'Personal Information',
        'fields' => array(
            array(
                'name'  => 'Name',
                'id'    => 'name',
                'desc'  => 'Enter your full name: First Last',
                'type'  => 'text',
            ),
            array(
                'name'  => 'Occupation',
                'id'    => 'occupation',
                'desc'  => 'What do you do?',
                'type'  => 'text',
            ),
        ),
    );

    // 2nd meta box
    $meta_boxes[] = array(
        'id'     => 'address',
        'title'  => 'Address Info',
        'fields' => array(
            array(
                'name'  => 'Street',
                'id'    => 'street',
                'type'  => 'text',
            ),
            array(
                'name'  => 'City',
                'id'    => 'city',
                'type'  => 'text',
            ),
            array(
                'name'  => 'State',
                'id'    => 'state',
                'type'  => 'text',
            ),
        ),
    );

    return $meta_boxes;
}
```

which are rendered as following:

![meta boxes](https://imgur.elightup.com/VwDhVeD.png)

We want to:

- Remove "Personal Information" meta box
- Change title of "Address Info" meta box to "Address"
- Add description for field "Street" in "Address" meta box
- Add field "zip_code" (text field) to "Address" meta box

Our custom code will be put in `functions.php` file of the child theme.

The principle is simple as following:

- Hook to `rwmb_meta_boxes` filter with a high priority to get all registered meta boxes
- Then we check meta boxes by ID or title to get the meta boxes we want to edit / remove
- Remove or change meta boxes information if needed (such as meta box title)
- For that meta box, we loop through all custom fields and change fields' info
- And finally add more fields to that meta box if needed

The code is quite straight as following (with all necessary comments):

```php
// Priority 20 makes sure all meta boxes are already registered
add_filter( 'rwmb_meta_boxes', 'prefix_edit_meta_boxes', 20 );
function prefix_edit_meta_boxes( $meta_boxes ) {
    // Loop through all meta boxes to find the ones we need
    foreach ( $meta_boxes as $k => $meta_box ) {
        // Remove "Personal Information" meta box
        if ( isset( $meta_box['id'] ) && 'personal' == $meta_box['id'] ) {
            unset( $meta_boxes[$k] );
        }

        // Edit "Address Info" meta box
        if ( isset( $meta_box['id'] ) && 'address' == $meta_box['id'] ) {
            // Change title to "Address"
            $meta_boxes[$k]['title'] = 'Address';

            // Loop through all fields
            foreach ( $meta_box['fields'] as $j => $field ) {
                // Add description for "Street" field
                if ( 'street' == $field['id'] ) {
                    $meta_boxes[$k][$j]['desc'] = 'Enter street address';
                }
            }

            // Add field "zip_code" to this meta box
            $meta_boxes[$k]['fields'][] = array(
                'name' => 'Zip code',
                'id'   => 'zip_code',
                'type' => 'text',
            );
        }
    }

    // Return edited meta boxes
    return $meta_boxes;
}
```

Here is the result:

![edit remove meta boxes](https://imgur.elightup.com/CxkIV6L.png)

:::tip

It is recommended to set meta box ID to make it easier to loop through all meta boxes.

:::

# Extensions

Learn about Meta Box extensions, what features they offer and how to use them.

## User Interface

<div className="thumbs color-blue">

[![custom post types](/extensions/custom-post-types.png) <span className="thumb_text">MB Custom Post Types</span>](/extensions/mb-custom-post-type/)

[![builder](/extensions/builder.png) <span className="thumb_text">MB Builder</span>](/extensions/meta-box-builder/)

[![views](/extensions/views.png) <span className="thumb_text">MB Views</span>](/extensions/mb-views/)

[![columns](/extensions/columns.png) <span className="thumb_text">MB Columns</span>](/extensions/meta-box-columns/)

[![tabs](/extensions/tabs.png) <span className="thumb_text">MB Tabs</span>](/extensions/meta-box-tabs/)

[![tooltip](/extensions/tooltip.png) <span className="thumb_text">MB Tooltip</span>](/extensions/meta-box-tooltip/)

[![admin columns](/extensions/admin-columns.png) <span className="thumb_text">MB Admin Columns</span>](/extensions/mb-admin-columns/)

[![conditional logic](/extensions/conditional-logic.png) <span className="thumb_text">MB Conditional Logic</span>](/extensions/meta-box-conditional-logic/)

[![include exclude](/extensions/include-exclude.png) <span className="thumb_text">MB Include Exclude</span>](/extensions/meta-box-include-exclude/)

[![show hide](/extensions/show-hide.png) <span className="thumb_text">MB Show Hide</span>](/extensions/meta-box-show-hide/)

[![text limiter](/extensions/text-limiter.png) <span className="thumb_text">MB Text Limiter</span>](/extensions/meta-box-text-limiter/)

[![template](/extensions/template.png) <span className="thumb_text">MB Template</span>](/extensions/meta-box-template/)

</div>

## Data

<div className="thumbs color-green">

[![group](/extensions/group.png) <span className="thumb_text">MB Group</span>](/extensions/meta-box-group/)

[![frontend submission](/extensions/frontend-submission.png) <span className="thumb_text">MB Frontend Submission</span>](/extensions/mb-frontend-submission/)

[![settings page](/extensions/settings-page.png) <span className="thumb_text">MB Settings Page</span>](/extensions/mb-settings-page/)

[![term meta](/extensions/term-meta.png) <span className="thumb_text">MB Term Meta</span>](/extensions/mb-term-meta/)

[![user meta](/extensions/user-meta.png) <span className="thumb_text">MB User Meta</span>](/extensions/mb-user-meta/)

[![user profile](/extensions/user-profile.png) <span className="thumb_text">MB User Profile</span>](/extensions/mb-user-profile/)

[![blocks](/extensions/blocks.png) <span className="thumb_text">MB Blocks</span>](/extensions/mb-blocks/)

[![relationships](/extensions/relationships.png) <span className="thumb_text">MB Relationships</span>](/extensions/mb-relationships/)

[![custom-table](/extensions/custom-table.png) <span className="thumb_text">MB Custom Table</span>](/extensions/mb-custom-table/)

[![geolocation](/extensions/geolocation.png) <span className="thumb_text">MB Geolocation</span>](/extensions/meta-box-geolocation/)

[![rest api](/extensions/rest-api.png) <span className="thumb_text">MB REST API</span>](/extensions/mb-rest-api/)

[![revision](/extensions/revision.png) <span className="thumb_text">MB Revision</span>](/extensions/mb-revision/)

<!-- [![checkbox](/thumbs/checkbox.png) <span className="thumb_text">MB Comment Meta</span>](/extensions/mb-comment-meta/) -->

</div>

## Integrations

<div className="thumbs color-amber">

[![acf](/extensions/acf.png) <span className="thumb_text">MB ACF Migration</span>](/extensions/mb-acf-migration/)

[![toolset](/extensions/toolset.png) <span className="thumb_text">MB Toolset Migration</span>](/extensions/mb-toolset-migration/)

[![rankmath](/extensions/rankmath.png) <span className="thumb_text">MB Rank Math</span>](/extensions/mb-rank-math/)

<!-- [![yoast seo](/extensions/yoastseo.png) <span className="thumb_text">MB Yoast SEO Integration</span>](/extensions/meta-box-yoat-seo/) -->

<!-- [![facetwp](/extensions/facetwp.png) <span className="thumb_text">MB FacetWP Integration</span>](/extensions/meta-box-facetwp-integrator/) -->

<!-- [![elementor](/extensions/elementor.png) <span className="thumb_text">MB Elementor Integration</span>](/extensions/mb-elementor-integrator/) -->

<!-- [![beaver](/extensions/beaver.png) <span className="thumb_text">MB Beaver Builder Integration</span>](/extensions/meta-box-beaver-themer-integrator/) -->

<!-- [![searchwp](/extensions/searchwp.png) <span className="thumb_text">MB SearchWP Integration</span>](/extensions/meta-box-searchwp-integrator/) -->

</div>

## Solutions

<div className="thumbs color-red">

[![favorite posts](/extensions/favourite-posts.png) <span className="thumb_text">MB Favorite Posts</span>](/extensions/mb-favorite-posts/)

[![testimonials](/extensions/testimonials.png) <span className="thumb_text">MB Testimonials</span>](/extensions/mb-testimonials/)

<!-- [![user-avatar](/extensions/user-avatar.png) <span className="thumb_text">MB User Avatar</span>](/extensions/mb-user-avatar/) -->

</div>

## Bundle

<div className="thumbs color-cyan">

[![aio](/extensions/aio.png) <span className="thumb_text">Meta Box AIO</span>](/extensions/meta-box-aio/)

<!-- [![checkbox](/thumbs/checkbox.png) <span className="thumb_text">MB Core</span>](/extensions/mb-core/) -->

</div>

# Field settings

import Tabs from '@theme/Tabs';
import TabItem from '@theme/TabItem';

Each field contains settings to determine where and how data is loaded and saved. All fields share some common settings, but also offer unique settings per field type. There are also settings from extensions which are explained on each extension docs.

Below is the list of common field settings with a brief description. The keys are for reference in code.

<Tabs>

  <TabItem value="general" label="General">

![general settings](https://imgur.elightup.com/MJ3JRiT.png)

Name | Key | Description
--- | --- | ---
Label | `name` | Field label. Optional. If empty, the field input is 100% width.
ID | `id` | Field ID. Required and must be unique. **It will be used as `meta_key` when saving to the database**. Use only numbers, letters, and underscores (and rarely dashes).
Type | `type` | Field type. Required.
Label description | `label_description` | Label description, displayed below the field label. Optional.
Input description | `desc` | Field description, displayed below the field input. Optional.
Default value | `std` | Default value. Optional.
Placeholder | `placeholder` | Placeholder text for the input or select box. Optional.
Required | `required` | Whether the field is required (`true` or `false`). Optional. Default `false`.
Disabled | `disabled` | Whether the field is disabled (`true` or `false`). Optional. Default `false`.
Read only | `readonly` | Whether the field is read only (`true` or `false`). Optional. Default `false`.
Multiple | `multiple`|Does the field have multiple values (like the `select` field)? Optional. Default `false`.
Cloneable | `clone` | Is the field clonable (repeatable)? `true` or `false`. Optional. Default `false`.
Sortable | `sort_clone`|Ability to drag-and-drop reorder clones (`true` or `false`). Optional. Default `false`.
Clone default value | `clone_default`|Clone the default value of fields? `true` or `false` (default).
Clone as multiple | `clone_as_multiple`|Whether to store clone values in multiple rows in the database? Optional. Default `false`.
Max number of clones | `max_clone`|Maximum number of clones. Optional. Default `0` (unlimited).
Min number of clones | `min_clone`|Minimum number of clones. Optional. Default `0`.
Add more text | `add_button`|The text for **Add more** clone button. Optional. Default "+ Add more".
Hide from front end | `hide_from_front`|Whether to hide the field from front-end submission forms. Required the [MB Frontend Submission](https://metabox.io/plugins/mb-frontend-submission/) extension to work.
Hide from REST API | `hide_from_rest`|Whether to hide the field from REST API responses. Required the [MB REST API](https://metabox.io/plugins/mb-rest-api/) extension to work.

  </TabItem>

  <TabItem value="advanced" label="Advanced">

![advanced settings](https://imgur.elightup.com/jX7YDH3.png)

Name | Key | Description
--- | --- | ---
Before | `before` | Custom HTML outputted before field's HTML.
After | `after` | Custom HTML outputted after field's HTML.
Custom CSS class | `class` | Custom CSS class, in case you want to customize the field. Optional.
Custom sanitize callback | `sanitize_callback` | Custom PHP callback for sanitizing field value before saving into the database. Set it to `none` to bypass the sanitization. See [more details](/sanitization/).
Save field value | `save_field` | Whether to save field value. Optional. Default `true`. This option does not work in the block editor (Gutenberg).
Hide from block bindings? | `hide_from_block_bindings` | Hide this field from the block editor bindings UI. Optional. Default `false`. See [more details](/block-bindings/).
Custom HTML5 attributes | `attributes` | Custom attributes for inputs. See [more details](/custom-attributes/).
Validation | `validation` | Validation rules for fields. Optional. See [more details](/validation/).
Custom settings | N/A | Custom field settings, useful when you want to add your settings to fields.

  </TabItem>

</Tabs>

# Field types

Learn about field types, what they are and when you should use them.

## Basic

<div className="thumbs color-blue">

[![checkbox](/thumbs/checkbox.png) <span className="thumb_text">Checkbox</span>](/fields/checkbox/)

[![checkbox-list](/thumbs/checkbox-list.png) <span className="thumb_text">Checkbox List</span>](/fields/checkbox-list/)

[![radio](/thumbs/radio.png) <span className="thumb_text">Radio</span>](/fields/radio/)

[![select](/thumbs/select.png) <span className="thumb_text">Select</span>](/fields/select/)

[![text](/thumbs/text.png) <span className="thumb_text">Text</span>](/fields/text/)

[![textarea](/thumbs/textarea.png) <span className="thumb_text">Textarea</span>](/fields/textarea/)

</div>

## Advanced

<div className="thumbs color-green">

[![autocomplete](/thumbs/autocomplete.png) <span className="thumb_text">Autocomplete</span>](/fields/autocomplete/)

[![background](/thumbs/background.png) <span className="thumb_text">Background</span>](/fields/background/)

[![block editor](/thumbs/block-editor.png) <span className="thumb_text">Block Editor</span>](/fields/block-editor/)

[![button](/thumbs/button.png) <span className="thumb_text">Button</span>](/fields/button/)

[![button group](/thumbs/button-group.png) <span className="thumb_text">Button Group</span>](/fields/button-group/)

[![color](/thumbs/color.png) <span className="thumb_text">Color</span>](/fields/color/)

[![custom html](/thumbs/custom-html.png) <span className="thumb_text">Custom HTML</span>](/fields/custom-html/)

[![date](/thumbs/date.png) <span className="thumb_text">Date picker</span>](/fields/date/)

[![datetime](/thumbs/datetime.png) <span className="thumb_text">Datetime picker</span>](/fields/datetime/)

[![fieldset-text](/thumbs/fieldset-text.png) <span className="thumb_text">Fieldset text</span>](/fields/fieldset-text/)

[![hidden](/thumbs/hidden.png) <span className="thumb_text">Hidden</span>](/fields/hidden/)

[![image select](/thumbs/image-select.png) <span className="thumb_text">Image Select</span>](/fields/image-select/)

[![icon](https://i0.wp.com/images.elightup.com/meta-box/docs/fields/icon/thumb.png) <span className="thumb_text">Icon</span>](/fields/icon/)

[![key value](/thumbs/key-value.png) <span className="thumb_text">Key value</span>](/fields/key-value/)

[![key value](/thumbs/link.png) <span className="thumb_text">Link</span>](/fields/link/)

[![map](/thumbs/map.png) <span className="thumb_text">Google Maps</span>](/fields/map/)

[![oembed](/thumbs/oembed.png) <span className="thumb_text">oEmbed</span>](/fields/oembed/)

[![osm](/thumbs/osm.png) <span className="thumb_text">Open Street Maps</span>](/fields/osm/)

[![password](/thumbs/password.png) <span className="thumb_text">Password</span>](/fields/password/)

[![select-advanced](/thumbs/select-advanced.png) <span className="thumb_text">Select Advanced</span>](/fields/select-advanced/)

[![slider](/thumbs/slider.png) <span className="thumb_text">Slider</span>](/fields/slider/)

[![switch](/thumbs/switch.png) <span className="thumb_text">Switch</span>](/fields/switch/)

[![text-list](/thumbs/text-list.png) <span className="thumb_text">Text list</span>](/fields/text-list/)

[![time](/thumbs/time.png) <span className="thumb_text">Time picker</span>](/fields/time/)

[![wysiwyg](/thumbs/wysiwyg.png) <span className="thumb_text">WYSIWYG editor</span>](/fields/wysiwyg/)

</div>

## HTML5

<div className="thumbs color-amber">

[![email](/thumbs/email.png) <span className="thumb_text">Email</span>](/fields/text/)

[![number](/thumbs/number.png) <span className="thumb_text">Number</span>](/fields/number/)

[![range](/thumbs/range.png) <span className="thumb_text">Range</span>](/fields/range/)

[![url](/thumbs/url.png) <span className="thumb_text">URL</span>](/fields/text/)

</div>

## WordPress

<div className="thumbs color-red">

[![post](/thumbs/post.png) <span className="thumb_text">Post</span>](/fields/post/)

[![sidebar](/thumbs/sidebar.png) <span className="thumb_text">Sidebar</span>](/fields/sidebar/)

[![taxonomy](/thumbs/taxonomy.png) <span className="thumb_text">Taxonomy</span>](/fields/taxonomy/)

[![taxonomy advanced](/thumbs/taxonomy-advanced.png) <span className="thumb_text">Taxonomy advanced</span>](/fields/taxonomy-advanced/)

[![user](/thumbs/user.png) <span className="thumb_text">User</span>](/fields/user/)

</div>

## Upload

<div className="thumbs color-cyan">

[![file](/thumbs/file.png) <span className="thumb_text">File</span>](/fields/file/)

[![file advanced](/thumbs/file-advanced.png) <span className="thumb_text">File advanced</span>](/fields/file-advanced/)

[![file input](/thumbs/file-input.png) <span className="thumb_text">File input</span>](/fields/file-input/)

[![file upload](/thumbs/file-upload.png) <span className="thumb_text">File upload</span>](/fields/file-upload/)

[![image](/thumbs/image.png) <span className="thumb_text">Image</span>](/fields/image/)

[![image advanced](/thumbs/image-advanced.png) <span className="thumb_text">Image advanced</span>](/fields/image-advanced/)

[![single image](/thumbs/single-image.png) <span className="thumb_text">Single image</span>](/fields/single-image/)

[![image upload](/thumbs/image-upload.png) <span className="thumb_text">Image upload</span>](/fields/image-upload/)

[![video](/thumbs/video.png) <span className="thumb_text">Video</span>](/fields/video/)

</div>

## Layout

<div className="thumbs color-pink">

[![divider](/thumbs/divider.png) <span className="thumb_text">Divider</span>](/fields/divider/)

[![group](/thumbs/group.png) <span className="thumb_text">Group</span>](/extensions/meta-box-group/)

[![heading](/thumbs/heading.png) <span className="thumb_text">Heading</span>](/fields/heading/)

[![tab](/thumbs/tab.png) <span className="thumb_text">Tab</span>](/extensions/meta-box-tabs/)

</div>

# Hide Tabs with Conditional Logic

Conditional Logic works with any DOM elements. That means you can hide your tabs created by [MB Tabs](/extensions/meta-box-tabs/) extension with MB Conditional Logic. This guide shows you how to do that.

## Basic

Because tabs are not regular fields or meta boxes, you have to use `rwmb_outside_conditions` filter to tell Conditional Logic to add this element. Imagine that you have created a meta box like this:

```php
add_filter( 'rwmb_meta_boxes', function($meta_boxes) {
    $meta_boxes[] = array(
        'title'     => 'MB Tabs 2',
        'tabs'      => array(
            'bio'      => 'Biography',
            'interest' => 'Interest',
        ),
        'tab_style' => 'box',
        'fields'    => array(
            array(
                'name' => 'Bio',
                'id'   => 'bio',
                'type' => 'textarea',
                'tab'  => 'bio',
            ),
            array(
                'name' => 'Interest',
                'id'   => 'interest',
                'type' => 'textarea',
                'tab'  => 'interest',
            ),
        ),
    );

    return $meta_boxes;
});
```

This will generate a meta box with two tabs `Biography` and `Interest`. And here is the HTML output:

```html
<ul class="rwmb-tab-nav">
    <li class="rwmb-tab-bio rwmb-tab-active" data-panel="bio"><a href="#">Biography</a></li>
    <li class="rwmb-tab-interest" data-panel="interest"><a href="#">Interest</a></li>
</ul>
```

If you want to hide a tab, just add its class to `rwmb_outside_conditions` filter. For example, if I want to hide `Interest` tab when post format is `aside`, add these lines:

```php
add_filter( 'rwmb_outside_conditions', function( $conditions ) {
    $conditions['.rwmb-tab-interest'] = array(
        'hidden' => array( 'post_format', 'aside' ),
    );
    return $conditions;
} );
```

This will tell Conditional Logic to hide `.rwmb-tab-interest` selector when `post_format` is `aside`

## Hide the first tab

In case you want to hide the first tab, you have to hide its tab pane also and show the next tab pane. This example shows you how to do that:

```php
add_filter( 'rwmb_outside_conditions', function( $conditions ) {
    $conditions['.rwmb-tab-bio, .rwmb-tab-panel-bio'] = array(
        'hidden' => array( 'post_format', 'aside' )
    );
    $conditions['.rwmb-tab-panel-interest'] = array(
        'visible' => array( 'post_format', 'aside' )
    );
    return $conditions;
} );
```

# HTML5 Input Types

## Overview

In addition to the [supported field types](/fields/), Meta Box also supports all HTML5 input types, such as `url` and `tel`. You can start using them without writing any extra code.

## What is HTML5 input types?

[HTML5 input types](http://html5doctor.com/html5-forms-input-types/) are types for the text input that are added to the HTML5 and are supported by all browsers. They act similar to `text` input, but for other data types, such as URL, email or date. Using HTML5 input types has some benefits:

- You have built-in UI like the arrow up/down for `number` or a picker for date/time/week. The UI is various in different browsers, but it works. It also supports mobile devices.

![built-in UI for week input](https://imgur.elightup.com/owRtMYv.png)

- You have built-in validation. If users enter invalid data (for `url` or `email`), the browser will throw an error.

![invalid email error](https://imgur.elightup.com/vmUkaIP.png)

- Finally, you have a semantic markup

Here is the list of HTML5 input types that you can use:

Input Type | Description
---|---
`search`|Search input field
`email`|Email input field, which has validation for email
`url`|URL input field, which has validation for URL (e.g. must starts with `http`)
`tel`|Telephone input field
`number`|Number input field, which has up/down arrows to increase/decrease the number.
`range`|Range input field, which allows you select a number by dragging a control.
`month`|Month input field, which has the built-in UI for picking a month
`week`|Week input field, which has the built-in UI for picking a week
`datetime-local`|Datetime input field, which has the built-in UI for picking a date and time with the local timezone

Please note that some types such as `date`, `datetime`, `time` and `color` are already implemented with different UI. So they are not available as the custom HTML5 input types anymore.

## Using HTML5 input types with Meta Box

Using HTML5 input types with Meta Box is as simple as `text` field. All you need to do is **set the `type` attribute** of the field to the corresponding HTML 5 input type.

For example, the code below creates a `tel` field:

```php
[
    'id'   => 'field_id',
    'type' => 'tel', // New HTML 5 input type
    'name' => 'Telephone',
]
```

That is it.

In order to customize the field, you might want to add some [custom attributes](/custom-attributes/) to the input such as `size`, `pattern`. Even without custom attributes, the field works just fine and you will benefit from all things that HTML5 provides.

# Include Exclude vs Show Hide vs Conditional Logic

We have 3 extensions that can help you control the visibility of a meta box for a certain post/page:

- [MB Include Exclude](/extensions/meta-box-include-exclude/)
- [MB Show Hide](/extensions/meta-box-show-hide/)
- [MB Conditional Logic](/extensions/meta-box-conditional-logic/)

That might be confusing as you do not know which extension is the right choice for you. So the main difference between them is the following: **MB Include Exclude** hides meta boxes **by PHP**, meaning:

- Meta boxes are removed completely from the editing screen, no HTML markup is outputted at all
- Since meta boxes are removed completely, there are no inputs at all and thus, there are no meta values are saved at all
- There is no way to show the meta boxes again unless reloading the page

Both **MB Conditional Logic** and **Show Hide** hide meta boxes **by Javascript**, meaning:

- The HTML of meta boxes are outputted, inputs are only hidden and the meta values are submitted when saving post and are saved in the database
- You can show them without reloading the page

The **MB Conditional Logic** differs from [Show Hide](/extensions/meta-box-conditional-logic/): it has **more advanced options** which allows you to show/hide not only meta boxes but also fields and specific HTML elements. The Show/Hide extension can show/hide only meta boxes. Besides, the number of conditions in Conditional Logic are more than Show/Hide extension (greater, less than, not equal, etc.).

# Installation

import FAQ from '@site/src/components/FAQ';

## Requirements

To run Meta Box, we recommend:
- PHP 7.4 or greater
- Latest version of WordPress

Meta Box also works with PHP 7.0 and older versions of WordPress. These versions have reached the official end of life and may expose your site to security vulnerabilities.

## Installing Meta Box

Meta Box offers [three different versions](/introduction/#meta-box-overview), each with slightly different installation steps.

We recommend using [**Meta Box Lite**](https://metabox.io/lite/), a free version with essential features and a user-friendly interface.

Here is how to install it:

1. Go to [our website](https://metabox.io/lite/), fill in your email, and download it.
2. Go to **Plugins** > **Add New Plugin** > **Upload Plugin**.
3. Upload the downloaded file and click **Install Now**.

![Install Meta Box Lite](https://imgur.elightup.com/INF4fIQ.png)

Then, click **Activate** to start using Meta Box Lite. You can see it in the admin dashboard.

![Meta Box Lite in the admin dashboard](https://imgur.elightup.com/epQY3XW.png)

:::info

For advanced features, buy a [premium plan](https://metabox.io/pricing/), and install the **Meta Box AIO** plugin with all extensions (both free and paid).
:::

## Next steps

You have everything ready!

As most WordPress websites require custom post types, [learn how to create them](/custom-post-types/).

## FAQ

<FAQ question="What is included in Meta Box Lite and is it completely free?">

Yes, **Meta Box Lite** is 100% free. It includes Meta Box, [MB Builder](/extensions/meta-box-builder/), and all free extensions. This gives you the tools to create and manage dynamic content at no cost.
</FAQ>

<FAQ question="Do I need to install Meta Box to use Meta Box Lite?">

No, **Meta Box Lite** already includes Meta Box. There is no need to install it separately.
</FAQ>

# Introduction

## What is Meta Box?

When you use WordPress as a CMS (not just for blogging), you need more than just posts and pages. For example, to show events on your website, you need a content type called "event" with some fields to store event details such as date and location. In WordPress, we call them [custom post type](/custom-post-types/) and [custom field](/custom-fields/). To create custom post types and custom fields, you need a plugin like Meta Box.

Meta Box is a framework that helps you create custom post types and custom fields quickly and easily. A framework provides all the tools you need to manage data and build features for your WordPress websites. It saves you time and lets you focus on business logic.

Meta Box provides powerful features [via extensions](/extensions/). These include front-end form submission, post relationships, custom table storage, conditional logic, Gutenberg blocks, and integrations with many third-party plugins.

Whether you are a WordPress user or developer, Meta Box is a toolkit that grows with you. We help you boost your productivity and workflow. We cannot wait to see what you build.

## Why Meta Box?

There are many plugins for working with custom fields. We believe Meta Box is the best choice for building a performant and full-featured website.

**Easy for everyone**

With a user-friendly interface, low-code features, and built-in snippets, you can work with Meta Box easily even if you are not a developer.

**Full-featured**

Meta Box offers the most complete set of features among custom fields plugins. Whatever you need, Meta Box has it for you.

**Lightweight & fast**

Being thoroughly optimized for code and data storage, Meta Box never impacts your website speed or performance.

**Extensibility**

With APIs and actions, filters in many necessary places, you can change how to display fields, change data, or do other things like sending emails.

Learn more about [Meta Box philosophy](/philosophy/).

## Meta Box overview

Meta Box has 3 versions:

* **Meta Box**: the foundation and framework of all [extensions](https://docs.metabox.io/extensions/) and features. You can add individual extensions (free or premium) to have advanced features. It has no UI and suits developers only, who need to use code.
* [**Meta Box Lite**](https://metabox.io/lite/): a single free UI version of Meta Box. It includes the Meta Box plugin, [MB Builder](/extensions/meta-box-builder/), and all the free extensions to create custom post types, custom taxonomies, custom fields, and relationships.
* [**Meta Box AIO**](https://metabox.io/aio/): a single premium plugin. It includes the Meta Box plugin and all the extensions (both free and premium). Meta Box AIO lets you install only one plugin and have everything from Meta Box, so the plugin list stays short and clean.

In short, if you are a free user, use Meta Box Lite. For paid users, use Meta Box AIO!

Now you know about Meta Box, [start using it](/installation/)!

# Local JSON

Besides [creating fields with PHP](/creating-fields-with-code/), you can also register custom fields with JSON. This way is more convenient and easier to manage the fields since you can put them in a separate file, use version control (Git), use caching, and get better code editor support with JSON schema.

This feature is available in the [Meta Box Builder](https://metabox.io/plugins/meta-box-builder/) extension and is included in both [Meta Box Lite](https://metabox.io/lite/) and [Meta Box AIO](https://metabox.io/aio/).

## How it works

To use local JSON to register custom fields, you need to create a new folder called `mb-json` in your theme that is writable by the web server.
After that, you can put the JSON files in the folder and Meta Box will automatically load the JSON files and register the fields, with no more database queries.

## JSON format

The JSON format is the same as when you export a field group and is very similar to the [PHP version](/creating-fields-with-code/) when you create a field group, except the `$schema` and `modified` attributes:

```json
{
  "$schema": "https://schemas.metabox.io/field-group.json",
  "title": "Event details",
  "post_types": "event",
  "fields": [
    {
      "name": "Date and time",
      "id": "datetime",
      "type": "datetime"
    },
    {
      "name": "Location",
      "id": "location",
      "type": "text"
    },
    {
      "name": "Map",
      "id": "map",
      "type": "osm",
      "address_field": "location"
    }
  ],
  "modified": 1739955432
}
```

We use a **JSON schema** so you can take advantage of the code editor's auto-completion feature (like in VSCode). In the JSON file, you need to set the `$schema` attribute as follows:

```json
https://schemas.metabox.io/field-group.json
```

## Syncing changes

Meta Box will automatically discover **new** or **updated** JSON files in the `mb-json` folder and display them in the **Sync available** tab, showing the status of the JSON files, where you can sync JSON to the database, so you can edit the fields visually, and then sync back to the JSON file.

![Sync available](./img/local-json-sync-available.png)

Before syncing, you can also review the changes by clicking on the **Review** link.

![Review changes](./img/local-json-review.png)

:::info Detecting changes

When you change the content of a JSON file, and want Meta Box to detect the change to show the **Sync available** status, you have to **increase the `modified` attribute** in the JSON file. This attribute stores the last update time in timestamp.

:::

After syncing, you will see the field group in the admin list like this:

![After sync](./img/local-json-sync.png)

Then you can change the field group, add more fields or edit existing fields. You can save changes to the JSON file just by saving the field group in the WordPress admin. The JSON file will be updated automatically. Please note that deleting a field group in the admin will also delete the JSON file.

:::warning Purpose

Syncing from JSON to the database has only one purpose: to edit fields visually, and then sync back to JSON files (or export to JSON file to save somewhere else). Meta Box will **NOT** load fields from the database (to avoid making unnecessary queries), and use JSON files only.

:::


## Adding custom folders

By default, the plugin will look for the JSON files in the `mb-json` folder in the active theme. You can add custom folders to load JSON files by using the `mb_json_paths` filter. Here is an example:

```php
add_filter( 'mb_json_paths', function( $paths ) {
    $paths[] = '/path/to/your/folder';
    $paths[] = '/path/to/your/folder2'; // Another folder

    return $paths;
} );
```

## Security

It is a good practice to hide the JSON files from the public. The easiest way to do that is adding an `index.php` file to the folder. This way, when people try to access the folder, they will see a blank page.

```php
<?php
// Silence is golden.
```

# Online Generator

[Online Generator](https://metabox.io/online-generator/) is a tool to help you create and set up **custom fields** using a simple, friendly user interface. With it, you can add fields, set options and generate needed code that is ready to copy and paste.

Before using **Online Generator**, make sure you [installed and activated Meta Box plugin](/installation/).

## Create and set up custom fields

### Add fields

To add fields, click **field types** on the left. Related fields are put into groups for a fast reference. You can also search for a field by typing in the search box.

![select a field type](https://imgur.elightup.com/smn7Cd1.png)

Once you add a new field, the field settings panel will appear on the right, where you can enter field details such as ID, label or description.

![edit field settings](https://imgur.elightup.com/JbpVTeK.png)

You can also toggle the field settings by clicking the field title bar.

### Remove, duplicate, reorder fields

On the title bar, there are 2 icons for removing and duplicating fields. When you hover the mouse over the field settings, you will see move up and down buttons for reorder fields.

![remove, duplicate, reorder fields](https://imgur.elightup.com/L3lpw58.png)

### Settings

Once you complete adding fields, click the **Settings** tab to add settings for the **custom fields**.

![settings tab](https://imgur.elightup.com/arWhycr.png)

Parameter|Description
---|---
Field group title| Name the field group as you want (Required)
Field group ID| Field group ID. If you did not type anything here, the field group ID would be automatically generated from the title (Optional)
Post types|Custom post types which the field group is for.
Position|Where the field group is displayed.
Priority|Priority within the context where the box is displayed
Autosave|Auto save the custom fields' values (like post content and title)?
Field ID prefix|Auto add a prefix to all field IDs to keep them separated from other field groups or other plugins.
Text domain|Required for multilingual website. Used in the exported code only.

## Generate code

After you finish configuring your custom fields and meta boxes, click the **Generate code** button to get the code for the meta box. Then copy and paste them into the theme's `function.php` file.

You might want to modify the code if needed. After copying to your theme's `functions.php` file, go to **All Posts > Add New** to see the result!


## Conclusion

**Online Generator** is a great tool for WordPress beginners and developers to generate custom meta boxes and custom fields for the [Meta Box plugin](https://metabox.io/). It saves you a lot of time with a friendly UI and lets you build a bunch of fields without touching code.

It works as a stand-alone tool, meaning that it cannot be put inside your WordPress admin. Instead, you can copy the generated code and paste it into your theme's functions.php file.

In the case that you want to use it inside your WordPress admin and have extra settings for fields or [premium extensions](https://metabox.io/plugins/), do not forget to try [MB Builder](https://docs.metabox.io/extensions/meta-box-builder/).

Besides using the generator for the custom fields, you may want to have custom post types and custom taxonomies. So, **Meta Box** also provides several WordPress generator tools such as [WordPress Custom Post Type Generator](https://metabox.io/post-type-generator/), and [WordPress Custom Taxonomy Generator](https://metabox.io/taxonomy-generator/). Or, you can use the [MB Custom Post Type plugin](https://metabox.io/plugins/custom-post-type/) to create custom post type and custom taxonomy inside your website. It is free and available on [wordpress.org](https://wordpress.org/plugins/mb-custom-post-type/).

Let us try it and give us your feedback.

# Philosophy

## Plugins-As-Libraries

Meta Box is created as a library to help WordPress users work with custom post types and custom fields easier. As a library, it has some uniqueness:

- It is very lightweight and contains only what is really needed.
- It can be [used in other themes or plugins](/bundling/) to provide the functionality needed for the themes or plugins.
- Extra functionality is provided by extensions, which can be installed as libraries as well.

:::warning No admin menu?

Because Meta Box is a library, the **free version** has no admin pages for configuration or settings. Instead, it provides an API that you can use to speed up the process of creating meta boxes and custom fields. Developers need to [use code](/creating-fields-with-code/) to create custom fields.

For normal users and beginners, we recommend using the [Meta Box Lite](https://metabox.io/lite/), which includes a UI to build custom fields inside WordPress. If you are a premium user, you can use the [Meta Box AIO](https://metabox.io/aio/), which includes all the extensions and a UI to build custom fields inside WordPress.
:::

## Modular

Meta Box is modular, which means each functionality is separated into an extension. Each extension is a WordPress plugin and can be installed and used independently or together. Extensions can also be used as libraries and you can [bundle them](/bundling/) in your themes or plugins.

The modularity keeps all the extensions as minimal as possible and keeps Meta Box not bloated.

:::tip

If you are afraid of a long plugin list, use our Meta Box AIO or MB Core, which are available for premium users. They contain all extensions in one plugin and you can enable or disable each extension easily. This shortens the plugin list while still providing all the needed functionality.

:::

## Performance

Performance is our top priority. Everything in Meta Box is considered carefully to perform well on large sites with hundreds of thousands of records. Because of this, we try hard to optimize code and follow WordPress coding standards as well as best coding practices.

Meta Box is lightweight, fast, clean, and will always stay that way.

## Flexibility

Built for both developers and normal WordPress users, we offer a powerful set of options to build and customize WordPress sites with custom post types and custom fields. People have choices to work with Meta Box via code or UI, from the back end to the front end, with or without other plugins like page builders.

Everything in Meta Box can be customized with a comprehensive list of [actions](/category/actions/) and [filters](/category/filters/). Developers can also extend Meta Box to [create new field types](/creating-new-field-types/), build [plugins and awesome stuff](https://github.com/wpmetabox/awesome-meta-box).

# Post Type Generator

[Post Type Generator](https://metabox.io/post-type-generator/) is a free online tool to help you create and set up custom post types easily with a simple and intuitive user interface. With this tool, you can copy and paste PHP code for custom post types in a few clicks.

One notable feature of this tool is that it can be used independently from Meta Box. Therefore, you do not need to install the Meta Box to use Post Type Generator.


## Set up a New Custom Post Type

### Set up General Options

After opening this tool [here](https://metabox.io/post-type-generator/), fill in the basic information for your new custom post type like **Plural name, Singular name** and **Slug** in the **General** tab. The **Function name** and **Text domain** already have default values, but you can change them as well.

![Set up General information of your custom post type created with Meta Box Post Type Generator tool](https://imgur.elightup.com/WZsxlhE.png)

### Set up Labels

The **Labels** tab lets you enter the labels of your post types that will show up in the Admin Dashboard.

![Set up labels of your custom post type created with Meta Box Post Type Generator tool](https://imgur.elightup.com/C3PtAc3.png)

### Set up Advanced Options

In the **Advanced** tab, the description of each field will help you set up some advanced options for your post types display.

![Set up advance information of your custom post type created with Meta Box Post Type Generator tool](https://imgur.elightup.com/JcmKDgq.png)

Pay attention to some fields:

- **Publicly queryable?** If you tick the box, it can query to take the data of your post type so that the content of it can be displayed on the front end.
- Similarly, put a tick to the **Show UI?** and **Show in nav menus?** if you want to show your post type UI and show your post type in nav menus in the Dashboard. It is recommended to enable them for easy management.
- **Hierarchical?** If you want your post type to have a parent post type and sub post type to sort and manage it conveniently, enable this.

For more details about all the fields in this tab, please read [this instruction](https://developer.wordpress.org/reference/functions/register_post_type/) from WordPress.

### Set up Supports and Taxonomies

In the **Supports** tabs, you can choose which elements to display in the WordPress Editor when editing your custom post types.

![Set up the supported components of your custom post type created with Meta Box Post Type Generator tool](https://imgur.elightup.com/qRslf7w.png)

In the **Taxonomies** tab, the two default WordPress taxonomies are listed here. Choose which kind of taxonomy to be included in your post type.

![Set up taxonomies of your custom post type created with Meta Box Post Type Generator tool](https://imgur.elightup.com/S5sBSfa.png )

## Generate Code and Insert It to the Functions.php File

When you complete all the steps above, click the **Generate Code** button. Just wait a moment and the code will show up right under the button.

![Meta Box Post Type Generator tool generates code to create your custom post type ](https://imgur.elightup.com/RIrSc7I.png)

Copy the code and insert it to the `functions.php` file and it is all done.

# Reorder posts & terms

This feature lets you **drag and drop** posts (from any custom post type) or terms (from any custom taxonomy) to rearrange their order right inside the WordPress admin. It is perfect when you need a custom order that does not follow the default publish date or alphabetical sorting.

This functionality is included in the **[MB Custom Post Types & Custom Taxonomies](/extensions/mb-custom-post-type/)** extension - completely free to use.

## Reordering posts

To enable this feature, open your custom post type settings, switch to the **Features** tab, and turn on the **Re-Order Posts** option:

![Enable the reorder posts feature](./img/reorder/enable-reorder-posts.png)

If you are registering the post type via code, simply add:

```php
'order' => true,
```

Once enabled, you will see a new **Re-Order** tab in the post type's admin menu. Click it and rearrange your posts using drag-and-drop.

![Click on the Re-Order tab to rearrange posts](./img/reorder/reorder-posts.gif)

### Hierarchical post type support

Reordering works smoothly with hierarchical post types. When you move a parent post, all of its child posts automatically follow - similar to how fields in a group move together.

![Hierarchical support](./img/reorder/hierarchical-posts.gif)

### Frontend display

Your custom order is applied automatically on all archive pages or anywhere you query that post type.

![Posts on the frontend](./img/reorder/frontend.png)

### Reorder posts of other post types

By default, the plugin supports reordering posts of the post types created by Meta Box. If you want to apply this feature to other post types that are built-in WordPress (like `post` or `page`) or created by other plugins or themes, use this snippet:

```php
add_filter( 'mbcpt_post_type_reorderable', function( $enable, $post_type ) {
	if ( $post_type = 'your-post-type' ) {
		return true;
	}
	return $enable;
}, 10, 2 );
```

## Reordering terms

To reorder taxonomy terms, go to **Meta Box → Taxonomies**, open your taxonomy settings, and enable the feature in the **Features** tab:

![Enable the reorder terms feature](./img/reorder/enable-reorder-terms.png)

Or enable it via code:

```php
'order' => true,
```

After that, visit the taxonomy screen and click the **Re-Order** button to sort terms using drag-and-drop - including **hierarchical terms**.

![Drag and drop terms to reorder](./img/reorder/reorder-hierarchical-terms.gif)

Ordered terms also appear exactly in the same sequence in the post editor:

![Ordered terms in the post editor](./img/reorder/post-editor.png)

### Reorder terms of other taxonomies

By default, the plugin supports reordering terms of the taxonomies created by Meta Box. If you want to apply this feature to other taxonomies that are built-in WordPress (like `category` or `tag`) or created by other plugins or themes, use this snippet:

```php
add_filter( 'mbcpt_taxonomy_reorderable', function( $enable, $taxonomy ) {
	if ( $taxonomy = 'your-taxonomy' ) {
		return true;
	}
	return $enable;
}, 10, 2 );
```

# Sanitization

import FAQ from '@site/src/components/FAQ';

To ensure the user input is safe to save to the database, Meta Box provides a mechanism to sanitize fields' values. The sanitization is automatically applied for all built-in field types. For some fields such as select or radio, Meta Box also validates the submitted value to ensure it is a valid value (e.g. available in the field options).

The sanitization is applied for both single and cloneable fields. With cloneable fields, sanitization is applied for each cloned value.

## Default sanitize callbacks

We try to provide appropriate callbacks for built-in field types and use built-in WordPress sanitization functions as much as possible.

To see the list of default sanitize callbacks, please [see the plugin source code](https://github.com/wpmetabox/meta-box/blob/master/inc/sanitizer.php#L50).

:::warning

- **Textarea field**: Meta Box **removes all scripts and iframes** from the value. If you want to enter scripts (like Google Analytics) or embed videos, then you need to disable sanitization. See below for details.
- **Choice fields**: Meta Box validates the input to make sure it is in the field options.
- **[Groups](/extensions/meta-box-group/)** are not sanitized due to their complexity.

:::

## Bypass the sanitization

If you do not want to sanitize the input value for a specific field (we do not encourage this, obviously), then go to the **Advanced** tab and set **Custom sanitize callback** to "none":

![disable sanitization](https://imgur.elightup.com/hqzOpTt.png)

In this case, whatever users input will be saved.

:::info

The instruction above uses [MB Builder](/extensions/meta-box-builder/), an extension providing the UI to create fields, and is already bundled in [Meta Box Lite](https://metabox.io/lite/) and [Meta Box AIO](/extensions/meta-box-aio/). If you prefer to use code, please see below.

:::

If you use code, then set `'sanitize_callback' => 'none'` in the [field settings](/field-settings/):

```php
[
    'type'              => 'text',
    'id'                => 'amount',
    'name'              => 'Amount',
    // highlight-next-line
    'sanitize_callback' => 'none',
]
```


## Custom sanitize callback

To provide a custom sanitize callback for a field, please enter a function name to the **Custom sanitize callback** settings in the **Advanced** tab when editing a field.

![custom sanitizate callback](https://imgur.elightup.com/NnS4XAC.png)

And do not forget to define the function in your theme or plugin.

The code below uses code to define a custom sanitize callback that auto adds a currency symbol "$" to a text field if it is missed:

```php
add_filter( 'rwmb_meta_boxes', function( $meta_boxes ) {
    $meta_boxes[] = [
        'title' => 'Test Sanitization Money Field',
        'fields' => [
            [
                'type'              => 'text',
                'id'                => 'amount',
                'name'              => 'Amount',
                // highlight-next-line
                'sanitize_callback' => 'my_sanitize_money_field',
            ]
        ],
    ];
    return $meta_boxes;
} );

// highlight-start
function my_sanitize_money_field( $value, $field, $old_value, $object_id ) {
    if ( 0 !== strpos( $value, '$' ) ) {
        $value = '$' . $value;
    }
    return $value;
}
// highlight-end
```

The sanitize callback is passed 4 parameters as follows:

Parameter|Description
---|---
`$value` | The submitted value
`$field` | The field settings
`$old_value` | The old value which is in the database
`$object_id` | The current object ID

## Sanitizing subfields in a group

Because the group field saves its value in the database as a serialized array, to sanitize subfields, we need to put the `sanitize_callback` function for the outer group and use it to check the values of subfields:

```php
'fields' => [
    [
        'name'              => 'My group',
        'id'                => 'my_group_id',
        'type'              => 'group',
        // highlight-next-line
        'sanitize_callback' => 'my_subfield_validation',
        'fields'            => [
            [
                'name' => 'Text',
                'id'   => 'text',
                'type' => 'text',
            ],
            [
                'name' => 'Textarea',
                'id'   => 'textarea',
                'type' => 'textarea',
            ],
        ],
    ],
],
```

The returned value of the sanitize callback is the group value, e.g. an array of subfield values.

```php
function my_subfield_validation( $group ) {
    if ( empty( $group['text'] ) ) {
        $group['text'] = 'Hello World!';
    }

    return $group;
}
```

## FAQ

<FAQ question="Why does my textarea field not save values?">

Probably you are trying to save a script like Google Analytics or an embedded video. Meta Box removes all these things during sanitization. To save them, please disable sanitization for the field. See the "Bypass the sanitization" section for details.

</FAQ>

# Save WYSIWYG content as post content

Sometimes you want to move the traditional editor for the post to another location, probably inside a meta box. It will keep everything more organized. For example, if you have an event post type, then you might have the following data:

- Start date and time
- End date and time
- Venue
- Description
- Gallery

Then keeping the description (which can be the post content) along with other fields makes it easier for users to fill in the data. While this is impossible to do with the default WordPress editor, we can do that with the [Meta Box](https://metabox.io) plugin. The steps to do that are described below:

1. Remove the default editor (we do not want to display it at the top)
1. [Create a new wysiwyg field](/fields/wysiwyg/)
1. Set that field to take the post content as the value
1. Save that field content into post content

The code is quite straightforward as below:

```php
// Remove the editor. Change 'post' to your custom post type.
add_action( 'init', function () {
    remove_post_type_support( 'post', 'editor' );
} );

add_filter( 'rwmb_meta_boxes', function ( $meta_boxes ) {
    // Get the current post content and set as the default value for the wysiwyg field.
    $post_id = filter_input( INPUT_GET, 'post', FILTER_SANITIZE_NUMBER_INT );
    $post_content = get_post_field( 'post_content', $post_id );

    $meta_boxes[] = [
        'title'      => 'Test',
        'post_types' => 'post', // Change 'post' to your custom post type.
        'fields'     => [
            // Register a wysiwyg field of which the content is saved as post content.
            [
                'type' => 'wysiwyg',
                'name'       => 'Fake content',
                // highlight-start
                'id'         => 'content',
                'std'        => $post_content,
                'save_field' => false,
                // highlight-end
            ],
            // Custom style to overwrite the editor style set by WordPress.
            [
                'type' => 'custom_html',
                'std'  => '<style>#wp-content-editor-tools{background:none;padding-top:0;}</style>',
            ],
        ],
    ];

    return $meta_boxes;
} );

// Set the value for the 'content' field.
add_filter( 'rwmb_content_field_meta', function() {
    $post_id = filter_input( INPUT_GET, 'post', FILTER_SANITIZE_NUMBER_INT );
    return get_post_field( 'post_content', $post_id );
} );
```

There are 2 important things in the code above:

1. To make Meta Box save the wysiwyg content to post content, we have to set it `'id' => 'content'`. This `id` is used to tell WordPress to get the submitted value and save it to post content.
1. Because we use the WordPress's id for the field, some WordPress styles are applied and make the field look weird. We have to use a `custom_html` field to output some CSS to fix it. Note that you might want to enqueue another stylesheet to do the same job. Here we use the `custom_html` for the quick fix, it just works.

The code above works for `post`. If you want to make it work for another post type, do not forget to change the post type in the code above!

# Shortcode

Besides [normal ways](/custom-fields/#displaying-fields) to display fields on the website, Meta Box also provides a simple shortcode `[rwmb_meta]` to help you show custom fields in the post content or widgets easily.

```php
[rwmb_meta id="field_id" object_id="15"]
```

## Attributes

Attribute|Description
---|---
`id`|The field ID. Required.
`object_id`|The object ID. Optional. If not defined, then the current object ID is used.
`attribute`|Get a single attribute from the field value (such as URL of the image or term slug). The field value is get with the [rwmb_get_value()](/functions/rwmb-get-value/) helper function. This works only when the value is an array.
`render_shortcode`|Whether to render inner shortcodes inside the value of the field. For example, if you enter a shortcode in a textarea/editor field, this attribute will render that shortcode and return the rendered content. Default true.

This shortcode works exactly like the [rwmb_the_value()](/functions/rwmb-the-value/) function with the same parameters.

:::tip Other attributes

You can pass **other attributes** to the shortcode if you want. If you do so, those attributes will be passed to the [rwmb_the_value()](/functions/rwmb-the-value/) function as the 2nd parameter.

:::

## Examples

**Getting the value of a text field:**

```php
[rwmb_meta id="phone"]
```

**Getting image URL (`single_image`):**

```php
[rwmb_meta id="company_logo" attribute="url" size="thumbnail"]
```

**Getting a term meta:**

```php
[rwmb_meta id="color" object_id="15" object_type="term"]
```

**Getting a settings:**

```php
[rwmb_meta id="phone" object_id="site_option" object_type="setting"]
```

**Getting a field value from a custom table:**

```php
[rwmb_meta id="area" object_id="15" storage_type="custom_table" table="properties"]
```

## Bypass HTML filtering
By default, the shortcode will be filtered by the `wp_kses_post()` function to remove all insecure HTML tags and attributes. If you want to bypass this filtering, you can use the `rwmb_meta_shortcode_secure` filter:

```php
add_filter( 'rwmb_meta_shortcode_secure', '__return_false' );
```

To bypass HTML filtering for a specific field, you can use the `rwmb_meta_shortcode_secure_{$field_id}` filter:

```php
add_filter( 'rwmb_meta_shortcode_secure_footer_script', '__return_false' );
```

# Status column

The status column lets you quickly switch the status of field groups, custom post types, custom taxonomies, settings pages, and relationships between Publish and Draft without opening each item individually. You can enable this feature for posts of a custom post type as well.

![The status column for the field groups](./img/status-column/status.png)

This feature adds a small toggle button directly to the management screen. Switch it **on** to publish, or **off** to save as a draft.

As a result, the traditional **Publish**/**Update** actions on the edit screens of field groups, custom post types, custom taxonomies, settings pages, and relationships are replaced with a single **Save Changes** button.

## Custom post types

To add a status column to the table of the post list of a custom post type, when you [create that post type](/custom-post-types/) with Meta Box, navigate to the **Features** tab, then enable the setting as below:

![Enable the status column for the posts of custom post type](./img/status-column/enable-feature.png)

Then, you will see the Status column displayed. Turn the button on to publish or turn it off to save the post to a draft.

![The status column of the posts](./img/status-column/status-posts.png)

If your post type is not created by Meta Box, then you can use this filter to enable this feature for the post type:

```php
add_filter( 'mbb_toggle_status_post_types', function( $post_types ) {
	$post_types[] = 'your-post-type-slug';
	return $post_types;
} );
```

# Support policy

## Support channels

The official support channel is the [support forum](https://support.metabox.io), which is public. Only premium users can open a new topic. For free plugins, we also support via [WordPress.org support forum](https://wordpress.org/support/plugin/meta-box/).

There is also a [Facebook group](https://www.facebook.com/groups/metaboxusers), which is for community discussion, not for support.

We rarely support via email. Email is mostly used for sending private info. Please use the support forum first before sending us emails.

## Scope of support

We only support our plugins, not general WordPress issues (like custom post types, custom taxonomies, etc.). Our support includes plugin installation, configuration, update and use.

We do **not** support:

- Bugs that come from other plugins.
- Compatibility with other plugins, unless we have an extension for them.
- For plugins that officially support Meta Box, like Oxygen Builder, SearchWP, Admin Columns, ... please reach out to them if you have any issue with installation, configuration, compatibility, or usage.
- For other plugins that have no support for Meta Box, contact them to ask for Meta Box integration, or [let us know](https://metabox.io/contact/) so we can put it in our roadmap. We cannot promise or guarantee future integration.
- Customization for your specific needs.
- Custom development. We do custom development **as an outsourcing service** and are [available for hire](https://metabox.io/contact/).


## Support time

All questions will be answered within 24 hours.

We support during the working time from 8 AM to 5 PM in the ICT timezone (GMT+7), from Monday to Friday. For questions asked on the weekends or holidays, they will be answered in the next working day.

:::info Ready?

If you have any support question, open a topic on the [support forum](https://support.metabox.io). We will answer as soon as possible!

:::

# Taxonomy Generator

[Taxonomy Generator](https://metabox.io/taxonomy-generator/) is a free online tool to create custom taxonomy easily and quickly. You can use it without installing Meta Box.

## Set up a New Custom Post Taxonomy

### Set up General Options

Open this tool [here](https://metabox.io/taxonomy-generator/) and put the **Plural Name, Singular Name** and **Slug** of your custom taxonomy in the **General** tab. The **Function name** and **Text domain** already have default values, but you can change them as well.

![Set up general information of your custom taxonomy created with Meta Box Taxonomy Generator tool](https://imgur.elightup.com/eJdGyjQ.png)

### Set up Labels

The **Labels** tab lets you enter the labels of your custom taxonomy that will show up in the Admin Dashboard.

![Set up labels of your custom taxonomy created with Meta Box Taxonomy Generator tool](https://imgur.elightup.com/uUKLw6w.png)

### Set up Advanced Options

In the **Advanced tab**, just read the description of each field. They will help you set up some advanced options for your custom taxonomy.

Remember that if you tick the box **Public?**, it can query to take the data of your custom taxonomy so that the content of it can be displayed on the front end.

![Set up advanced information of your custom taxonomy created with Meta Box Taxonomy Generator tool](https://imgur.elightup.com/LXB8eLN.png)

For more detail about all the fields in this tab, please read [this instruction](https://developer.wordpress.org/reference/functions/register_taxonomy/) from WordPress.

### Set up Post Types Tab

The Post Types tab lists the two default post types **Post** and **Page** here. Just decide whether your custom taxonomy will display in your posts or pages.

![In Taxonomy Generator, set up the post type where your custom taxonomy will display](https://imgur.elightup.com/gfBFDWz.png)

## Generate Code and Insert It to the Functions.php File

When you complete all steps above, click the **Generate Code** button. Just wait a moment and the code will show up right under the button.

![Meta Box Taxonomy Generator generates code](https://imgur.elightup.com/MudzzYG.png)

Copy the code and insert it to the `functions.php` file and it is all done.

# Tools

[Meta Box AIO](https://metabox.io/aio/) includes four tools that help you clean up and optimize your WordPress database. They focus on removing unused data, fixing field inconsistencies, and handling post types efficiently.
These tools let you:

* Remove orphaned custom field entries
* Delete data from unused or deleted field keys
* Migrate data from one field key to another
* Move posts from one post type to another

![Meta Box's tools for cleaning up database](./img/tools/tools-clean-database.png)

They act as a small maintenance toolkit to keep your database clean and running smoothly.

## Removing orphan fields

This tool **deletes custom field** that no longer belong to any post, term, or user. It helps you clean up leftover data and free your database with a single click.

![Remove orphan fields.](./img/tools/remove-orphan-fields.png)

## Removing custom fields

This tool helps you **remove all data for a specific custom field key across posts, terms, or users** when you delete fields you no longer use. It cleans up leftover data that would otherwise take up unnecessary space in your database.

![Remove custom fields](./img/tools/remove-custom-fields.png)

## Changing custom field key

The **Change Custom Field Key** tool helps you migrate all data from an old custom field key to a new one when you rename a custom field (for example, from location to address), ensuring nothing is lost and your content stays consistent.

![Migrates all data from the old key to the new one](./img/tools/change-custom-field-key.png)

You will also get suggestions of existing field keys, making it easier to select and update.

## Changing post type

This tool helps you move posts to a different post type when a post type is disabled or removed.

For example, if the **Restaurant** post type is disabled, its posts remain in the database but are inaccessible. Using this tool, you can move them to **Post**, making them visible and usable again.

![Change-post-type](./img/tools/change-post-types.png)

As a result, the posts in the Restaurant post type will be moved to Post.

![Result of changing post types](./img/tools/change-post-dashboard.png)

Each tool is easy to use. Choose an option and click. Remember to back up your database before running them.

# Tutorials

<div className="tutorials">
<div className="tutorials_banner">
<div className="banner_left--item1">

[![create custom post type taxonomies](/tutorials/banner-1.png)](/tutorials/create-custom-post-types-taxonomies/)

</div>
<div className="banner_right--item2">

[![create custom fields](/tutorials/banner-2.png)](/tutorials/create-custom-fields/)

</div>
<div className="banner_right--item3">

[![create category thumbnails](/tutorials/banner-3.png)](/tutorials/category-thumbnails/)

</div>
<div className="banner_right--item4">

[![filter posts](/tutorials/banner-4.png)](/tutorials/filter-posts-by-custom-fields-taxonomies/)

</div>
</div>
	<div className="tutorials_trending">
		<div className="items trending--first">
			<h2 className="trending_category">Trending now</h2>
			<a className="trending" href="/tutorials/category-thumbnails/">
				<h2 className="trending_title">Creating category thumbnails</h2>
			</a>
		</div>
		<div className="items trending--second">
			<img alt="icon" src="/tutorials/Rectangle.png"/>
			<a className="trending" href="/tutorials/displaying-featured-posts-with-wp-grid-builder/">
				<h2 className="trending_title">Displaying featured posts</h2>
			</a>
		</div>
		<div className="items trending--third">
			<img alt="icon" src="/tutorials/Rectangle.png"/>
			<a className="trending" href="/tutorials/create-simple-listing-meta-box-bricks/">
				<h2 className="trending_title">Creating a simple listing site</h2>
			</a>
		</div>
	</div>
	<div className="tutorials_category">
		<div className="items">
			<a href="/tutorials/beginners/">
				<h2 className="items_heading">Beginners</h2>
			</a>

[![beginners](/tutorials/category-1.png)](/tutorials/create-custom-post-types-taxonomies/)
<ul>
	<li><a href="/tutorials/custom-fields-vs-taxonomies/">Custom fields vs custom taxonomies</a></li>
	<li><a href="/tutorials/move-data-to-custom-tables/">Copying fields’ data to custom tables</a></li>
	<li><a href="/tutorials/copy-custom-fields/">Copying custom fields from sites to sites</a></li>
	<li><a href="/tutorials/export-import-custom-fields-meta-box-builder/">Exporting and importing custom fields</a></li>
</ul>
		</div>
		<div className="items">
			<a href="/tutorials/case-studies/">
				<h2 className="items_heading">Case Studies</h2>
			</a>

[![case studies](/tutorials/category-2.png)](/tutorials/create-simple-listing-meta-box-bricks/)
<ul>
	<li><a href="/tutorials/create-simple-listing-meta-box-bricks/">Creating a simple listing - with Bricks</a></li>
	<li><a href="/tutorials/create-faqs-page-meta-box-elementor/">Creating a FAQs page - with Elementor</a></li>
	<li><a href="/tutorials/create-buttons-dynamic-links/">Creating buttons with dynamic link</a></li>
	<li><a href="/tutorials/create-video-gallery-page-meta-box-oxygen/">Creating a video gallery page - with Oxygen</a></li>
</ul>
		</div>
		<div className="items">
			<a href="/tutorials/general-guide/">
				<h2 className="items_heading">General Guide</h2>
			</a>

[![general guide](/tutorials/category-3.png)](/tutorials/add-custom-fields-to-yoast-seo/)
<ul>
	<li><a href="/tutorials/add-custom-fields-to-yoast-seo/">Adding custom fields to Yoast SEO meta tags</a></li>
	<li><a href="/tutorials/move-data-to-custom-tables/">Moving custom fields’ data to custom tables</a></li>
	<li><a href="/tutorials/display-users-list/">Displaying a user list on the frontend</a></li>
	<li><a href="/tutorials/get-posts-by-custom-fields/">Getting posts by custom fields</a></li>
</ul>
		</div>
		<div className="items">
			<a href="/tutorials/extensions/">
				<h2 className="items_heading">Extensions</h2>
			</a>

[![extensions](/tutorials/category-5.png)](/tutorials/create-subscription-form-connect-to-mailchimp/)
<ul>
	<li><a href="/tutorials/create-subscription-form-connect-to-mailchimp/">Creating subscription form connecting to Mailchimp</a></li>
	<li><a href="">Creating settings page for customizer options</a></li>
	<li><a href="/tutorials/analyze-content-seo-rank-math/">Analyzing content in custom fields for SEO</a></li>
	<li><a href="/tutorials/add-testimonials/">Adding testimonials</a></li>
</ul>
		</div>
		<div className="items">
			<a href="/tutorials/builders/">
				<h2 className="items_heading">Page Builders</h2>
			</a>

[![mb with builders](/tutorials/category-4.png)](/tutorials/create-faqs-page-meta-box-oxygen/)
<ul>
	<li><a href="/tutorials/create-faqs-page-meta-box-oxygen/">Creating an FAQs page - with Oxygen</a></li>
	<li><a href="/tutorials/create-simple-listing-meta-box-bricks/">Creating a simple listing - with Bricks</a></li>
	<li><a href="/tutorials/create-team-members-page-meta-box-elementor/">Showing featured products - with Elementor</a></li>
	<li><a href="/tutorials/display-latest-products-meta-box-zion/">Displaying latest products - with Zion</a></li>
</ul>
		</div>
		<div className="items">
			<a href="/tutorials/mb-views/">
				<h2 className="items_heading">MB Views</h2>
			</a>

[![mb views](/tutorials/category-6.png)](/tutorials/create-buttons-dynamic-links/)
<ul>
	<li><a href="/tutorials/create-buttons-dynamic-links/">Creating buttons with dynamic link</a></li>
	<li><a href="/tutorials/create-user-profile-page/">Creating user profile page on frontend</a></li>
	<li><a href="/tutorials/create-dynamic-landing-page/">Creating a dynamic landing page</a></li>
	<li><a href="/tutorials/create-team-members-page-mb-views/">Creating a team members page</a></li>
</ul>
		</div>
	</div>
</div>

# Updates

import FAQ from '@site/src/components/FAQ';

Meta Box and all extensions can be updated automatically or manually. The automatic update uses the WordPress update mechanism, which checks for new versions twice a day. This is the recommended way to get new updates from our website.

## Automatic update

To enable automatic updates, you need a valid license key. Go to [My Account](https://metabox.io/my-account/) page to get it.

Then go to **Meta Box » License**, enter your license key and click **Save Changes** button.

![entering meta box license key](https://imgur.elightup.com/vybVU36.png)

From now on, when WordPress checks for new versions of plugins, it also checks for new versions of Meta Box extensions. If there is any new update, you will see this:

![New versions](https://imgur.elightup.com/Gul7JuL.png)

Then you can update the extensions the same way as for other plugins by clicking the **Update now** link.

## Manual update

You can also update the extensions manually by following these steps:

1. Go to [My Account](https://metabox.io/my-account/) page.
1. On your account page, you will see all downloads for your purchased extensions. Download the extension(s) to your computer, unzip the file and upload the extension folder to your website, overwriting the old files.

## FAQ

<FAQ question="Why can I not update even with a valid license key?">

We cache the requests to check updates in a WordPress transient, which has a one-day lifetime. To force WordPress to check for updates, you need to remove this transient. To do that, install the [WP-Sweep](https://wordpress.org/plugins/wp-sweep/) plugin and clear all transients. Then go to **Dashboard » Updates** and click the **Check again** button.

</FAQ>

<FAQ question="Can I define the license key via a constant in wp-config.php?">

You can define the license key in a constant in the `wp-config.php` file instead of storing it in the database. It might be more secure since no one can see it from the WordPress dashboard or in the database. To do that, define it via the `META_BOX_KEY` constant:

```php
define( 'META_BOX_KEY', 'ABCDEFGHIJKLMNOPQRSTUVWXYZ123456' ); // Your Meta Box license key.
```

</FAQ>

# Using custom HTML to output anything

`custom_html` is a very useful field in Meta Box, which helps you to _output anything_ in the post edit screen. It can be a warning box or an instruction for users to help them enter the correct data. But do you know that **you can use PHP** to render the HTML for the field?

Using PHP, you can query the database, get WordPress information and show it. There is no limit with PHP. This guide helps you understand the field using a callback function to query the WordPress database and output the result. For the demo purpose: **I will set up a connection from a post to many pages (1 to many). And when editing a page, I need to know which posts refer to the current page**. So, creating a connection from a page to many posts is very simple with a field `post` like this:

```php
array(
    'id'        => 'page',
    'name'      => 'Page',
    'type'      => 'post',
    'post_type' => 'page',
    'multiple'  => true,
),
```

To get the list of posts that refer to the current page, I will use a field `custom_html` like this:

```php
array(
    'id'       => 'posts',
    'type'     => 'custom_html',
    'callback' => 'prefix_get_connected_posts',
),
```

Note the `callback` parameter: this callback refers to a custom PHP function (in this case `prefix_get_connected_posts`) which renders the content for the field. Implementing this function is quite easy as below:

```php
function prefix_get_connected_posts() {
    if ( ! $page_id = filter_input( INPUT_GET, 'post',  FILTER_SANITIZE_NUMBER_INT ) ) {
        return '';
    }
    $output = '';
    $posts  = get_posts( [
        'posts_per_page' => - 1,
        'meta_key'       => 'page',
        'meta_value'     => $page_id,
    ] );
    foreach ( $posts as $post ) {
        $output .= '<li><a href="' . get_permalink( $post )  . '">' . get_the_title( $post ) . '</a></li>';
    }

    return $output ? '<ul>' . $output . '</ul>' : '';
}
```

Here is the full code:

```php
add_filter( 'rwmb_meta_boxes', function ( $meta_boxes ) {
    // Connect a post with multiple pages.
    $meta_boxes[] = [
        'title'  => 'Connection',
        'fields' => [
            [
                'id'        => 'page',
                'name'      => 'Page',
                'type'      => 'post',
                'post_type' => 'page',
                'multiple'  => true,
            ],
        ],
    ];

    // Show connected posts to a page
    $meta_boxes[] = [
        'title'      => 'Connected Posts',
        'post_types' => 'page',
        'fields'     => [
            [
                'id'       => 'posts',
                'type'     => 'custom_html',
                'callback' => 'prefix_get_connected_posts',
            ],
        ],
    ];

    return $meta_boxes;
} );

function prefix_get_connected_posts() {
    if ( ! $page_id = filter_input( INPUT_GET, 'post', FILTER_SANITIZE_NUMBER_INT ) ) {
        return '';
    }
    $output = '';
    $posts  = get_posts( [
        'posts_per_page' => - 1,
        'meta_key'       => 'page',
        'meta_value'     => $page_id,
    ] );
    foreach ( $posts as $post ) {
        $output .= '<li><a href="' . get_permalink( $post ) . '">' . get_the_title( $post ) . '</a></li>';
    }

    return $output ? '<ul>' . $output . '</ul>' : '';
}
```

And here is the result:

When editing a post:

![edit posts](https://imgur.elightup.com/J81E2ZO.png)

When editing a page:

![edit page](https://imgur.elightup.com/P6guXho.png)

# Validation

Meta Box has a built-in validation module for all fields. You can use validation to make a field required, check password length, check phone number format, etc. The validation is done on the **client side**.

There are 2 ways of doing validation: basic validation with input attributes and advanced validation with jQuery validation plugin. You can choose which one fits your needs.

## Basic validation

Meta Box supports [custom attributes](/custom-attributes/) for all input fields. You can use these attributes to validate the values of fields.

:::warning

This type of validation uses browser validation, thus the UI and the error message depend on the browser (like language).

:::

When editing a field, switch to the **Advanced** tab, and scroll down to the **Custom HTML5 attributes**. Then click **Add New** button to add a new rule.

![validation with html5 attributes](https://imgur.elightup.com/Cewt9OG.png)

In the **Key** input box, you can select any rule from the dropdown (if you do not see the dropdown, press the down arrow button), or enter the attribute name manually. And then enter the desired value in the **Value** input box.

:::info

The instruction above uses [MB Builder](/extensions/meta-box-builder/), an extension providing the UI to create fields, and is already bundled in [Meta Box Lite](https://metabox.io/lite/) and [Meta Box AIO](/extensions/meta-box-aio/). If you prefer to use code, please see below.

:::

These are the available attributes that you can use for validation:

Attribute| Description
---|---
`max` | Maximum value
`maxlength` | Maximum number of characters
`min` | Minimum value
`minlength` | Minimum number of characters
`pattern` | Match a regular expression
`required` | Required
`step` | Match the step increment. Enter `any` to accept any step.
`type` | Mostly used as `url` or `email` to validate value as a valid URL or email

If you prefer to [use code to create fields](/creating-fields-with-code/), add pairs of `'key' => 'value'` rules for the field settings array:

```php
[
    'type' => 'text',
    'id'   => 'phone',
    'name' => 'Phone number',

    // highlight-start
    'required' => true,       // Make the field required.
    'pattern'  => '[0-9]{9}', // Must have 9 digits
    // highlight-end
]
```

## Advanced validation

For more advanced validation, including new rules and custom error messages, you might want to use the validation module, powered by the popular [jQuery validation plugin](https://jqueryvalidation.org/). It comes bundled with a useful set of validation methods and an API to write your own methods. All methods come with default error messages in English and translations into 37 other languages.

To define validation rules, switch to the **Advanced** tab, and scroll down to the **Validation**. Then click **Add New** button to add a new rule.

![validation with validation library](https://imgur.elightup.com/qAvW1LC.png)

For each rule, the list of types is available as a dropdown, so you can select it. Depending on the rule type, you can enter a value and/or custom error message.

These are available validation rules that you can use:

Name|Description
---|---
`required` | Makes the element required
`minlength` | Makes the element require a given minimum length
`maxlength` | Makes the element require a given maximum length
`rangelength` | Makes the element require a given value range. Array.
`min` | Makes the element require a given minimum
`max` | Makes the element require a given maximum
`range` | Makes the element require a given value range. Array.
`email` | Makes the element require a valid email
`url` | Makes the element require a valid URL
`date` | Makes the element require a date
`dateISO` | Makes the element require an ISO date
`number` | Makes the element require a decimal number
`digits` | Makes the element require digits only
`creditcard` | Makes the element require a credit card number
`equalTo` | Requires the element to be the same as another one. Value must be the ID of another field.
`extension` | Makes the element require certain file extensions. For `file`, `image` fields only.
`accept` | Makes a file upload accept only specified mime-types. For `file`, `image` fields only.
`phoneUS` | Validate for valid US phone number
`remote` | Requests a resource to check the element for validity. Value can be the URL of the resource to request for server-side validation (string) or options to fully customize the request, see [jQuery.ajax](https://api.jquery.com/jQuery.ajax). The server-side resource is called via jQuery.ajax and gets a key/value pair corresponding to the name of the validated element and its value as a GET parameter. The response is evaluated as JSON and must be `true` for valid elements, and can be any `false`, `undefined` or `null` for invalid elements, using the default message. Or it can be a string, e.g. "That name is already taken, try peter123 instead" to display as the error message.

If you prefer code, you need to add a key `validation` to the [field group settings](/creating-fields-with-code/#field-group-settings). This key has a parameter `rules` for validation rules and `messages` for error messages.

```php
add_filter( 'rwmb_meta_boxes', function ( $meta_boxes ) {
    $meta_boxes[] = [
        'title'      => 'Personal info',
        'post_types' => 'team_member',
        'fields'     => [
            [
                'name' => 'Email',
                'id'   => 'email',
                'type' => 'text',
            ],
            [
                'name' => 'Address',
                'id'   => 'address',
                'type' => 'text',
            ],
        ],
        // highlight-start
        'validation' => [
            'rules'  => [
                'email' => [
                    'required'  => true,
                    'minlength' => 7,
                ],
                // Rules for other fields
            ],
            'messages' => [
                'email' => [
                    'required'  => 'Email is required',
                    'minlength' => 'Email must be at least 7 characters',
                ],
                // Error messages for other fields
            ],
        ],
        // highlight-end
    ];

    return $meta_boxes;
} );
```

:::warning Fields with multiple inputs

The jQuery validation library actually uses the **input name**, not the input ID. In most cases, they are the same. But for some cases where a field has multiple inputs like a checkbox list, then the checkboxes do not have IDs.

In this case, **you need to use input name for the rules**. For example, if you use a taxonomy field displayed as a checkbox list, you should set validation rules as follows:

```php
'validation' => [
    'rules'  => [
        // highlight-next-line
        'my_taxonomy[]' => [
            'required'  => true,
        ],
    ],
    'messages' => [
        // highlight-next-line
        'my_taxonomy[]' => [
            'required'  => 'You must select a tag to proceed',
        ],
    ],
],
```

For the field types "File" and "Image", the input name has the format `_file_fieldID[]`, you should set validation rules as follows:

```php
'fields'     => [
    [
        'name' => 'Uploaded Files',
        'id'   => 'my_files',
        'type' => 'file',
    ],
],
'validation' => [
    'rules'    => [
        // highlight-next-line
        '_file_my_files[]' => [
            'extension' => 'pdf',
        ],
    ],
    'messages' => [
        // highlight-next-line
        '_file_my_files[]' => [
            'extension' => 'file extension not allowed',
        ],
    ],
],
```

:::

## Remote validation

Remote validation is supported by the jQuery validation library, which is used by Meta Box. Using remote validation helps you use server data (such as from a post or a setting) and return dynamic error messages.

To validate fields remotely with PHP, use the `remote` parameter for the validation rule array as follows:

```php
'validation' => [
    'rules' => [
        'field_id1' => [
            // highlight-next-line
            'remote' => admin_url( 'admin-ajax.php?action=my_action1' ),
        ],
    ],
    'messages' => [
        'field_id1' => [
            // highlight-next-line
            'remote'  => 'Value is not valid.',
        ],
    ],
],
```

Please note that remote validation is only triggered when the field is changed so it is recommended to set the `required` rule to `true` to make sure the field is not empty before sending the request.

The validation performs via an ajax request with action `my_action1`. In your theme's `functions.php` file or your plugin, you need to create a callback to handle this ajax request that outputs:

- "true" if the value is valid
- "false" if the value is not valid. In this case, the error message is set in the `messages` array as above
- A custom string (not "false") if the value is not valid and you want to return it as a custom error message

```php
add_action( 'wp_ajax_my_action1', function () {
    // Get the field value via the global variable $_GET
    if ( $_GET['field_id1'] === 'something' ) {
        echo 'true'; // Valid
    } else {
        echo 'false'; // Invalid
        // or
        // echo 'This value is invalid, please try again.'; // Custom error message
    }
    die;
} );
```

### Custom error message
As mentioned above, you can return a custom error message instead of `'false'` to display it as the error message sent from the server.

By default, the jQuery Validation library expects a JSON response from the server, any values that are not valid JSON will be ignored. So you will need to set the `dataType` parameter to `text` to return a custom error message.

```php
// AJAX callback
add_action( 'wp_ajax_my_action1', function () {
    // Get the field value via the global variable $_GET
    if ( $_GET['field_id1'] === 'something' ) {
        echo 'true'; // Valid
    } else {
        echo 'This value is invalid, please try again.'; // Custom error message
    }
    die;
} );
```

```php
// Field settings
'validation' => [
    'rules' => [
        'field_id1' => [
            'remote' => [
                'url' => admin_url( 'admin-ajax.php?action=my_action1' ),
                // highlight-next-line
                'dataType' => 'text'
            ]
        ],
    ],
    'messages' => [
        'field_id1' => [
            'remote'  => 'Value is not valid.',
        ],
    ],
],
```

:::tip Other parameters

The `remote` parameter also accepts an array of options to fully customize the request, see [jQuery.ajax](https://api.jquery.com/jQuery.ajax).
:::

# rwmb_before

This action runs before all fields in a field group is displayed. It's usually used for outputting custom HTML.

```php
do_action( 'rwmb_before', $meta_box );
```

It takes 1 parameter: the instance of `RW_Meta_Box` class for the current field group.

To run this action for a specific field group, use a variation of this action:

```php
do_action( "rwmb_before_{$field_group_id}", $meta_box );
```

## Examples

This code wraps a field group with ID `event-details` into a custom div:

```php
add_action( 'rwmb_before_event-details', function( $meta_box ) {
	echo '<div class="my-div">';
} );

add_action( 'rwmb_after_event-details', function( $meta_box ) {
	echo '</div>';
} );
```

# rwmb_after

This action runs after all fields in a field group is displayed. It's usually used for outputting custom HTML.

```php
do_action( 'rwmb_after', $meta_box );
```

It takes 1 parameter: the instance of `RW_Meta_Box` class for the current field group.

To run this action for a specific field group, use a variation of this action:

```php
do_action( "rwmb_after_{$field_group_id}", $meta_box );
```

## Examples

This code wraps a field group with ID `event-details` into a custom div:

```php
add_action( 'rwmb_before_event-details', function( $meta_box ) {
	echo '<div class="my-div">';
} );

add_action( 'rwmb_after_event-details', function( $meta_box ) {
	echo '</div>';
} );
```

# rwmb_before_save_post

This action runs before a field group is saved.

```php
do_action( 'rwmb_before_save_post', $object_id );
```

It takes 1 parameter: current object ID.

:::info

Although the action name is `rwmb_before_save_post`, it applies to all object types, including term, user, or setting. We keep the name for historical reasons.

:::

To run this action for a specific field group, use a variation of this action:

```php
do_action( "rwmb_{$field_group_id}_before_save_post", $object_id );
```

## Examples

**Changing a field value before saving:**

```php
add_action( 'rwmb_event-details_before_save_post', function() {
    $_POST['location'] = 'United States';
	rwmb_request()->set_post_data( $_POST );
} );
```

**Changing a field value based on another field value:**

```php
add_action( 'rwmb_event-details_before_save_post', function() {
    if ( $_POST['event_type'] === 'festival' ) {
        $_POST['event_start_time'] = '09:00';
        $_POST['event_end_time'] = '17:00';
		rwmb_request()->set_post_data( $_POST );
    }
} );
```

:::info

When modifying the global `$_POST` data, note that for a **cloneable field** with `'start_clone' => true`, the original value is an array where index `0` is empty and actual values start from index `1`. When you call `rwmb_request()->set_post_data()`, this empty value at index `0` is removed and will not be saved to the database.

:::

# rwmb_after_save_post

This action runs after all fields in a field group are saved.

```php
do_action( 'rwmb_after_save_post', $object_id );
```

It takes 1 parameter: current object ID.

:::info

Although the action name is `rwmb_after_save_post`, it applies to all object types, including term, user, or setting. We keep the name for historical reasons.

:::

To run this action for a specific field group, use a variation of this action:

```php
do_action( "rwmb_{$field_group_id}_after_save_post", $object_id );
```

## Examples

**Combining values of 2 fields into another one:**

```php
add_action( 'rwmb_my-field-group_after_save_post', function( $object_id ) {
    if ( isset( $_POST['field_1'] ) && isset( $_POST['field_2'] ) ) {
        $value = $_POST['field_1'] . $_POST['field_2'];
        update_post_meta( $object_id, 'field_combine', $value );
    }
} );
```

**Saving a sub-field of a group into a separated custom field:**

This is helpful when you have a group of many fields and want to query posts by a sub-field. As the group value is serialized, querying by a sub-field is not possible. With this trick, you can do that.

```php
add_action( 'rwmb_event-details_after_save_post', function( $object_id ) {
    $event = $_POST['event'];
    $date = $event['date'];
    update_post_meta( $object_id, 'event_date', $date );
} );
```

This way, you can query posts by `event_date`.

**Sending an email after saving a field group:**

```php
add_action( 'rwmb_event-details_after_save_post', function( $object_id ) {
    $title = get_the_title( $object_id );
    $event_date = get_post_meta( $object_id, 'event_date', true );

    $subject = 'Event updated';
    $body = "The following event is updated:\n\n
    Title: $title\n\n
    Date: $event_date";
    $to = get_option( 'admin_email' );

    wp_mail( $to, $subject, $body );
} );
```

# rwmb_after_save_field

This action runs after a field is saved.

```php
do_action( 'rwmb_after_save_field', $null, $field, $new, $old, $object_id );
```

It accepts the following parameters:

Name|Description
---|---
`$null`|Not used
`$field`|Field settings
`$new`|The new (submitted) field value
`$old`|The old field value
`$object_id`|The object ID

This action has variations:

- `rwmb_after_save_field`: apply to all fields
- `rwmb_{$field_type}_after_save_field`: apply to fields with a particular type
- `rwmb_{$field_id}_after_save_field`: apply to a field with a particular id

## Examples

**Logging all values of a field using another custom field:**

```php
add_action( 'rwmb_event_date_after_save_field', function ( $null, $field, $new, $old, $object_id ) {
    $log   = get_post_meta( $object_id, 'log_event_dates', true );
    $log[] = $new;
    update_post_meta( $object_id, 'log_event_dates', $log );
}, 10, 5 );
```

**Update another custom field based on a field value:**

```php
add_action( 'rwmb_event_date_after_save_field', function ( $null, $field, $new, $old, $object_id ) {
    if ( $new < '2022-04-01' ) {
        update_post_meta( $object_id, 'current_year', true );
    }
}, 10, 5 );
```

# rwmb_enqueue_scripts

This action runs after all Meta Box scripts and styles are enqueued to allows developers to enqueue more scripts and styles.

```php
do_action( 'rwmb_enqueue_scripts', $meta_box );
```

It takes 1 parameter: the instance of `RW_Meta_Box` class for the current field group.

## Examples

This code enqueues a CSS file for a specific field group.

```php
add_action( 'rwmb_enqueue_scripts', function( $meta_box ) {
	if ( $meta_box->id === 'event-details' ) {
		wp_enqueue_style( 'event', get_template_directory_uri() . '/css/admin/event.css' );
	}
} );
```

# MB ACF Migration

import LiteYouTubeEmbed from 'react-lite-youtube-embed';
import 'react-lite-youtube-embed/dist/LiteYouTubeEmbed.css';

MB ACF Migration extension helps you to migrate field groups and custom field data from Advanced Custom Fields (ACF) to Meta Box. It works with both free and pro versions of Advanced Custom Fields.

## Video tutorial

This is the walkthrough video created by David McCan that shows you how to migrate data from ACF to Meta Box:

<LiteYouTubeEmbed id='JD75cXNmIso' />

## Backup the database

Before migrating data, make sure you have a backup of your database. During the migration process, because of the difference in [data format](/database/), the plugin will attempt to modify the existing data in custom fields created by ACF. We try to do it at a very minimum level and create a backup of fields for some specific cases, but it's still important to make a backup just in case something goes wrong.

## Migrate

Before migrating, make sure you keep Advanced Custom Fields, Meta Box (required) and extensions (optional) activated. To know which extensions you might need, please see the **How it works** section below. Normally, if you use Meta Box AIO and keep all extensions activated, you don't have to worry about this.

To migrate, go to **Meta Box > ACF Migration** and click the **Migrate** button.

The plugin will show the process of migrating. When it's done, you'll see the text "Done".

![migrate acf to meta box](https://imgur.elightup.com/ixRIrIE.png)

## How it works

MB ACF Migration tries to migrate all the following data from ACF to Meta Box. Please note that not all data types and settings in ACF have an equivalent in Meta Box. The plugin will try to migrate as much as it can. The details are explained below:

### Field groups

ACF field groups are migrated to Meta Box's field groups, which requires [MB Builder](/extensions/meta-box-builder/). Most of the field group settings are the same as in Meta Box.

:::warning

**We do not remove ACF field groups** after migration, for safety. Instead, we changed their status to 'Inactive'. You can remove them later after all the data is processed.

:::

For **field group locations**, the basic rules are already supported in Meta Box and extensions. You might need extensions such as:

- [MB Term Meta](/extensions/mb-term-meta/): If you set locations for taxonomies.
- [MB User Meta](/extensions/mb-user-meta/): If you set locations for users.
- [MB Comment Meta](https://metabox.io/plugins/mb-comment-meta/): If you set locations for comments.
- [MB Settings Pages](/extensions/mb-settings-page/): If you set locations for settings pages.

For "Blocks", although there's an [equivalent in Meta Box](/extensions/mb-blocks/), the data of blocks are stored in post content and hard to parsed and migrated, so it's ignored at the moment.

For other rules like "Page Type", "Widget", "Menu", "Menu Item", there's no equivalent in Meta Box and they will be ignored.

Besides, if you use complex locations, then you'll need [MB Include Exclude](/extensions/meta-box-include-exclude/) extension. Due to the difference in how plugins create rules, the plugin works the following way:

- If there's only one location group: the plugin will migrate all rules with operator `AND`.
- If there are multiple location groups: the plugin will take the first rule of each group and combine them with operator `OR`.

### Settings pages

ACF requires you to use code to register settings pages. In Meta Box, thanks to [MB Builder](/extensions/meta-box-builder/), you can create and manage settings pages with UI.

During the migration, the plugin will try to create settings pages with UI if you have settings pages registered with ACF.

### Custom fields data

Most ACF field types work well with Meta Box, such as text, radio, select, etc. However, there's still a difference in how plugins store values in the database. Because of that, we'll process as the following:

1. **Remove all extra keys** in the database. ACF stores an extra meta in the database for field reference. It has the format `_{$field_id}`. This is redundant and causes the database to bloat. We don't need them and thus, we remove them.
2. For **fields that have multiple values** such as gallery, select (with multiple options), ACF saves their values as serialized arrays. We'll migrate them multiple rows in the database (similar to what `add_post_meta` does with the last parameter `false`).
3. For **layout fields**, ACF saves values of each sub-fields in a row in the database. We'll migrate them into groups (which requires [MB Group](/extensions/meta-box-group/)).

Details are below:

Field type | Meta Box's equivalent
--- | ---
Gallery | Image advanced
Select | Select advanced if stylised UI is enabled, normal select otherwise
Checkbox | Checkbox list
Post, Page link, Relationship | Post. In the case of page link, it works only with a post is selected, archive links don't work.
Taxonomy | Taxonomy advanced
Google maps | A pair of address field - which is a text field, and a Google maps field
Group | Non-cloneable group. Requires [MB Group](/extensions/meta-box-group/).
Repeater | Cloneable group. Requires [MB Group](/extensions/meta-box-group/).
Flexible content | Cloneable group with 2 sub-fields: a select field for selecting a layout, and a non-cloneable group for data. Requires [MB Group](/extensions/meta-box-group/) and [MB Conditional Logic](/extensions/meta-box-conditional-logic/).

:::info Field backup

For these fields, as the data format is different, for the safety, we create a backup for each field value. The new field value is stored with the key `_acf_bak_{$field_id}`.

:::

However, the following field types are not supported, because there're no equivalent field types in Meta Box:
- Link
- Accordion
- Clone

For other field types, the data is untouched.

# MB Admin Columns

**MB Admin Columns** helps you display the custom fields' values in the table of the post list in the **All Posts** screen in the **back end**. It works with any custom post types and supports for terms and users as well (requires [MB Term Meta](/extensions/mb-term-meta/) and [MB User Meta](/extensions/mb-user-meta/) correspondingly).

Showing fields' values in the post table give users a better overview of the posts without going to edit each post. It saves you time verifying/viewing the data.

![meta box admin columns](https://imgur.elightup.com/7joEGrL.png)

## Showing custom fields as admin columns

To show a custom field as an admin column, go to **Meta Box > Custom Fields** and edit a field group. Click on a field that you want to show as an admin column and turn on the option "Admin column":

![Show as an admin column settings](img/admin-columns/admin-columns-option.png)

More settings will appear below that let you customize the admin column for that field:

![Admin columns settings](img/admin-columns/customize-settings.png)

These settings are self-explained. We also add some tooltips next to the setting title to give you more information if needed. Here is the list of the settings with the explanation:

Name|Description
---|---
Column position|Where to show the column. You have to choose the placement (before, after, or replace) and a target column ID.
Column title|By default, the plugin shows the field name as the column title. If you want to change it, enter a custom text here.
Column content before|The content outputted before the field value.
Column content after|The content outputted after the field value.
Sortable|Whether the column is sortable.
Searchable|Whether the column is searchable.
Filterable|Whether the column is filterable. It's applied only to the taxonomy field, which allows you to filter posts by taxonomy terms.
Item link type|Whether to link the value to the post edit screen or post view on the front end.

:::info

The instruction above uses [MB Builder](/extensions/meta-box-builder/), an extension providing the UI to create fields, and is already bundled in [Meta Box Lite](https://metabox.io/lite/) and [Meta Box AIO](/extensions/meta-box-aio/). If you prefer to use code, please see below.

:::

## Using code

If you're a developer and prefer using code to register admin columns, then you need to set the `admin_columns` settings for the field. Below is a sample code to register admin columns for a post type `book`:

```php
add_filter( 'rwmb_meta_boxes', function ( $meta_boxes ) {
	$meta_boxes[] = [
		'title'      => 'Book Info',
		'post_types' => 'book',
		'fields'     => [
			[
				'name'          => 'Cover',
				'id'            => 'cover',
				'type'          => 'image_advanced',
				// highlight-start
				'admin_columns' => [
					'position' => 'before title', // Show before the 'Title' column
					'link'     => 'edit',         // Link to the edit post screen
				],
				// highlight-end
			],
			[
				'name'          => 'Author',
				'id'            => 'book_author',
				'type'          => 'text',
				// highlight-next-line
				'admin_columns' => 'after title', // Show after the 'Title' column
			],
			[
				'name'          => 'Pages',
				'id'            => 'pages',
				'type'          => 'number',
				// highlight-next-line
				'admin_columns' => true,          // Just show this column
			],
		],
	];
	return $meta_boxes;
} );
```

The `admin_columns` settings can be in one of 3 following formats:

1. A boolean `true`: to simply display the admin column.
1. A string "before title": to specify the column position. It accepts 2 words: the first one is the placement ("before", "after" or "replace") and the last one is the target existing column ID.
1. An array of advanced configurations, as below:

```php
'admin_columns' => [
    'position'   => 'after title',
    'title'      => 'Price',
    'before'     => '$',
    'after'      => ' USD',
    'sort'       => true,
    'searchable' => true,
    'filterable' => false,
    'link'       => 'edit',
	'width'      => '10%',
],
```

Key|Description
---|---
`position`|Specify where to insert the new column. It accepts 2 words: the first one is the placement ("before", "after" or "replace") and the last one is the target existing column ID.
`title`|Column title. Optional. Default is the field name.
`before`|Custom HTML outputted before the column content. Optional.
`after`|Custom HTML outputted after the column content. Optional.
`sort`|Whether to sort the column by meta value? Set to `true` to just enable sorting. Set to `numeric` to sort values as numeric. Default `false`.
`searchable`|Allow searching posts by meta value. Optional. Default `false`.
`filterable`|Allow filtering posts by the custom taxonomy. Applied only if the field is the `taxonomy` field. Default `false`.
`link`|Whether to link the value to the post edit screen (value `edit`) or post view on the front end (value `view`) or no link (`false`).
`width`|The column width.

Note that the `sort` parameter is used to sort displayed posts by altering the WordPress query. It works only with non-clonable and non-multiple fields.

## Custom admin columns

By default, the extension is made to work with fields created by Meta Box. However, there are situations where you want to make it work with non-custom fields by Meta Box. And that's possible. Follow the steps below (note that it requires some coding):

**Step 1: Creating a custom PHP class**

Create a new file `custom.php` (you can name it anything you want) in your plugin/theme folder where you need to extend the `\MBAC\Post` class:

```php
class Prefix_Custom_Admin_Columns extends \MBAC\Post {
    public function columns( $columns ) {
        $columns  = parent::columns( $columns );
        $position = 'after';
        $target   = 'title';
        $this->add( $columns, 'column_id', 'Column Title', $position, $target );
        // Add more if you want
        return $columns;
    }
    public function show( $column, $post_id ) {
        switch ( $column ) {
            case 'column_id':
                echo 'Column content';
                break;
            // More columns
        }
    }
}
```

The custom column(s) is added via the call `$this->add( $columns, 'column_id', 'Column Title', $position, $target );`. You can repeat that code to add as many columns as you want.

In the `show` function, you must add code to display the content of these columns.

**Step 2: Instantiating the class**

In your plugin main file or `functions.php` of your theme, add the following code to create an instance of the class above:

```php
add_action( 'admin_init', 'prefix_add_custom_columns', 20 );
function prefix_add_custom_columns() {
    require_once 'custom.php';
    $post_type = 'post';
    new Prefix_Custom_Admin_Columns( $post_type, [] );
}
```

The call `new Prefix_Custom_Admin_Columns( $post_type, [] );` tells WordPress to add custom column(s) to `$post_type`. You can change this to another post type if you want.

# MB Blocks

import LiteYouTubeEmbed from 'react-lite-youtube-embed';
import 'react-lite-youtube-embed/dist/LiteYouTubeEmbed.css';

With the help of MB Blocks, WordPress developers are now able to create Gutenberg blocks using PHP only. There is no JavaScript configuration and build process. The plugin is also compatible with Full-Site Editing, so your blocks can be used to create templates in the FSE.

Here is a screenshot of a custom Gutenberg block (hero area) that's created using MB Blocks:

![Custom Gutenberg block](https://imgur.elightup.com/fVTmMWi.png)

The preview of the block is displayed in the main content area while the block configuration is displayed on the right. This allows you to edit the block content and live-preview the block in real time. Later, you can also change where the block settings are displayed (on the sidebar or right in the main content area).

## Block registration with MB Builder

The easiest way to create a block is using [MB Builder](/extensions/meta-box-builder/). The plugin provides you with the UI to create blocks easily. This is the video on doing that:

<LiteYouTubeEmbed id='v3ke1DBlWuk' />

## Block registration with block.json

WordPress recommends using `block.json` for block registration because of [these benefits](https://developer.wordpress.org/block-editor/reference-guides/block-api/block-metadata/#benefits-of-using-the-metadata-file).

MB Blocks supports registering blocks using a `block.json` file. It respects WordPress standards so the registration steps are the same as native WordPress block registration.

### Creating the block.json file

Assuming we're creating a hero content block, which has 3 fields: title, image, and content, create a `block.json` file with the following content. It's recommended to put it in a folder `blocks/block-name` (in this example, it's `blocks/hero-content`) within your theme, but you can put it anywhere. We'll use the path for registering the block later.

```json
{
    "$schema": "https://schemas.wp.org/trunk/block.json",
    "apiVersion": 3,
    "name": "meta-box/hero-content",
    "title": "Hero Content",
    "description": "A custom hero content block that uses MB fields.",
    "style": [
        "file:./hero-content.css"
    ],
    "category": "formatting",
    "icon": "format-quote",
    "keywords": [
        "hero-content",
        "quote"
    ],
    "supports": {
        "anchor": true
    },
    "attributes": {
        "image": {
            "type": "object",
            "default": {
                "full_url": "https://example.com/photo.png"
            }
        },
        "title": {
            "type": "string",
            "default": "Hello, World!"
        },
        "content": {
            "type": "string",
            "default": "This is a hero content block."
        }
    },
    "render": "file:./hero-content.php"
}
```

You can see the syntax is the same as WordPress's JSON specification for the [block metadata](https://developer.wordpress.org/block-editor/reference-guides/block-api/block-metadata/). The differences are:

- The block name must start with `meta-box/` to make it work with Meta Box.
- The `attributes` must be an array of fields, where the field IDs are the properties and the field types and default values are the properties values. These fields must match the Meta Box fields that we will register below.

:::success

To create a `block.json` file, you can use our [Block Generator](https://metabox.io/block-generator/), which provides a friendly user interface to enter block data.

:::

### Registering the block

After creating the `block.json` file, you must register it with WordPress. Put the following snippet in your theme or plugin.

```php
function your_prefix_register_blocks() {
	// Specify the path to the block.json's folder.
	register_block_type( get_template_directory() . '/blocks/hero-content' );
}

add_action( 'init', 'your_prefix_register_blocks' );
```

### Registering block fields

Now you need to register block fields with Meta Box. The block fields must match the fields defined in the `block.json`'s `attributes` property above.

Registering block fields is similar to [registering a field group](/creating-fields-with-code/) in Meta Box. The only difference is that you must set `type` to `block`:

```php
add_filter( 'rwmb_meta_boxes', function( $meta_boxes ) {
    $meta_boxes[] = [
        'title'       => 'Hero Content',
        'id'          => 'hero-content',
        'description' => 'A custom hero content block',

		// highlight-next-line
        'type'        => 'block',

        // Block fields, must match block.json's attributes.
        'fields'      => [
            [
                'type' => 'single_image',
                'id'   => 'image',
                'name' => 'Image',
            ],
            [
                'id'   => 'title',
                'name' => 'Title',
            ],
            [
                'type' => 'textarea',
                'id'   => 'content',
                'name' => 'Content',
            ],
        ],
    ];
    return $meta_boxes;
} );
```

After that, you can go to edit a post and insert your block into the post content!

### Rendering the block

In the `block.json` file, you can specify the PHP template to render the block via the `render` parameter.

```json
{
	"render": "file:./hero-content.php"
}
```

(this means render the block with the PHP file `hero-content.php` in the same folder as the `block.json` file)

By following WordPress standards, these parameters are available in the block template file:

- `$attributes`: the block attributes, which have all the block settings and fields' data. Attributes are automatically [prepared for you](#automatically-prepare-attributes) so you can access them directly.
- `$content`: the block's inner content.
- `$block`: the block object, an instance of `WP_Block` class.

```php
<div <?= get_block_wrapper_attributes(); ?>>
    <?= esc_html( $attributes['title'] ); ?>

	<img src="<?= $attributes['image']['full_url'] ?>">

	<p><?= $attributes['content'] ?></p>
</div>
```

#### Using MB Views

You can also use MB Views to render the block. This is useful when you want to create views with twig, manage JS, CSS from within the Dashboard.

To do so, first, make sure you have the [MB Views](/extensions/mb-views/) plugin installed and activated. Then, instead of using `file:` prefix, use `view:` instead.

```json
{
    "render": "view:testimonial"
}
```

Now create a view by going to Meta Box > Views and create a new view with the name `testimonial`. In the view, you can use twig syntax to render the block. For example:

```php
<div {{ mb.get_block_wrapper_attributes() }}>
	<img class="testimonial__image" src="{{ attributes.image.full_url }}">
	<div class="testimonial__body">
		<div class="testimonial__content" style="min-height: 50px;">
		    <InnerBlocks />
		</div>
		<div class="testimonial__author">{{ attributes.name }}</div>
	</div>
</div>
```

:::tip

You can access `{{ block }}`, `{{ attributes }}`, `{{ content }}` in the view like the above example.

Array can be accessed directly by their keys, via dot syntax e.g. `{{ attributes.image.full_url }}`, `{{ attributes.name }}`.

You can also use CSS and JS tabs in the view to add styles and scripts for the block.

PHP functions need to be prefixed with `mb.` to be used in the view.

:::


Set the view's type to `Block` and name to `testimonial`. Then save the view.

![Settings](https://imgur.elightup.com/UzauX1A.png)

### Block styles and scripts

The `block.json` allows you to add styles and scripts for blocks as follows. In the value, it’s possible to pass a script handle registered with the `wp_register_script` or `wp_register_style` functions, a path to a JavaScript/CSS file relative to the `block.json` file, or a list with a mix of both.

```json
{
	// Editor script: will only be enqueued in the editor.
	"editorScript": "file:./index.js",
	// Script: will be enqueued both in the editor and on the frontend.
	"script": "file:./script.js",
	// View script: will be enqueued only on the frontend.
	"viewScript": [ "file:./view.js", "example-shared-view-script" ],
	// View script module: will be enqueued only on the frontend.
	"viewScriptModule": [ "file:./view.js", "example-shared-script-module-id" ],

	// Editor style: will only be enqueued in the editor.
	"editorStyle": "file:./index.css",
	// Style: will be enqueued both in the editor and on the frontend.
	"style": [ "file:./style.css", "example-shared-style" ],
	// View style: will be enqueued only on the frontend.
	"viewStyle": [ "file:./view.css", "example-view-style" ],
}
```

## Block registration without block.json

If you don't want to use `block.json` to register blocks, you can do that with pure PHP. The process is similar to [registering a field group](/creating-fields-with-code/) in Meta Box. The only difference is that you need to add some settings for the block.

Assuming we're creating a hero content block with 3 fields: title, image, and content. Open your theme's `functions.php` file (or your plugin's PHP file) and add the following code:

```php
add_filter( 'rwmb_meta_boxes', function( $meta_boxes ) {
	$meta_boxes[] = [
		'title'           => 'Hero Content',
		'id'              => 'hero-content',
		'description'     => 'A custom hero content block',

		// highlight-start
		// Block settings.
		'type'            => 'block',
		'icon'            => 'awards',
		'category'        => 'layout',
		'context'         => 'side',
		'render_template' => get_template_directory() . '/blocks/hero/template.php',
		'enqueue_style'   => get_template_directory_uri() . '/blocks/hero/style.css',
		'supports' => [
			'align' => ['wide', 'full'],
		],
		// highlight-end

		// Block fields.
		'fields'          => [
			[
				'type' => 'single_image',
				'id'   => 'image',
				'name' => 'Image',
			],
			[
				'id'   => 'title',
				'name' => 'Title',
			],
			[
				'type' => 'textarea',
				'id'   => 'content',
				'name' => 'Content',
			],
		],
	];
	return $meta_boxes;
} );
```

The block settings are inherited from the Block *JavaScript* API with a few differences. See the [block registration](https://developer.wordpress.org/block-editor/developers/block-api/block-registration/) page on the Gutenberg Handbook if you need more details.

### Block settings

#### `title`

The block title. It's used to display the block when you click the Block Inserter in Gutenberg.

#### `id`

The block ID. Must be unique.

:::warning No underscores

A block ID can only contain lowercase alphanumeric characters and dashes and must begin with a letter. It doesn't accept underscores, i.e. `my_block` won't work, but `my-block` will work.

:::

#### `version`

The block version. This version number is also used to enqueue CSS and JavaScript files to avoid browser caching.

#### `icon`

The block icon. Can be any of [WordPress' Dashicons](https://developer.wordpress.org/resource/dashicons/) (without the prefix `dashicons-`), or a custom `svg` element (string) or [FontAwesome 5 free icons](https://fontawesome.com/).

Example:

```php
// Specifying a dashicon for the block
'icon' => 'book-alt',

// FontAwesome 5 icon
'icon' => 'fas fa-user',

// Specifying a custom svg for the block
'icon' => '<svg viewBox="0 0 24 24" xmlns="http://www.w3.org/2000/svg"><path fill="none" d="M0 0h24v24H0V0z" /><path d="M19 13H5v-2h14v2z" /></svg>',
```

If you need an advanced configuration for the icon, you can set `icon` as an array that can contain background and foreground colors, these colors will appear with the icon when they are applicable e.g.: in the inserter.

```php
'icon' => [
    // Specifying a background color to appear with the icon e.g.: in the inserter.
    'background' => '#7e70af',
    // Specifying a color for the icon (optional: if not set, a readable color will be automatically defined)
    'foreground' => '#fff',
    // Specifying a dashicon for the block
    'src' => 'book-alt',
],
```

#### `description`

The block description. Optional.

#### `type`

Tells Meta Box to register this as a Gutenberg block (not as a normal meta box). This must be set to `block`.

#### `category`

Specify the block category, which is used to help users browse and discover them. Available values: `text`, `media`, `design` (default), `widgets`, `theme`, `embed`. If a theme or a plugin registers a custom category, you can use it, too.

#### `keywords`

List of keywords that users can use to search the block from the block inserter.

```php
// Make it easier to discover a block with keyword aliases.
'keywords' => ['image', 'photo', 'pics'],
```

#### `context`

Where to show the block settings. If set to `side` (default), the block settings are displayed on the right sidebar when you select the block. If set to `normal`, the block settings are displayed when you click the Edit icon in the block toolbar.

See the short video below to understand.

<LiteYouTubeEmbed id='FOw0bPG_jjw' />

#### `supports`

Custom supports for the block. This parameter accepts an array like this:

```php
'supports' => [
	'align'           => ['wide', 'full'],
	'customClassName' => true,
	'multiple'        => true,
	'reusable'        => true,
	'lock'            => false,
],
```

The following parameters are available for `supports`:

`align`

Add supports for the block alignment. Note that your theme must add styling for the Gutenberg alignment.

```php
// Add the support for the block alignment (left, center, right, wide, full).
'align' => true,
// Pick which alignment options to display.
'align' => [ 'left', 'right', 'full' ],
```

`customClassName`

This property adds a field to define a custom CSS class name for the block's wrapper. It's useful when you want to add custom styling for a specific instance of the block.

`multiple`

If you want to have a block that can be inserted into each post one time only (like a hero area block), then set this parameter to `false`. A non-multiple block's icon is automatically dimmed (unclickable) to prevent multiple instances.

`reusable`

A block may want to disable the ability to be converted into a reusable block. By default, all blocks can be converted to reusable blocks. If supports reusable is set to `false`, the option to convert the block into a reusable block will not appear.

`lock`

If you want to remove the support for locking UI, set this parameter to `false`.

#### `mode`

The default mode of the block: `edit` to make it show the edit fields when loaded, `preview` (default) to show the rendered HTML when loaded.

```php
'mode' => 'edit',
```

#### `render_callback`

A custom PHP callback or MB Views to display the block content, it accepts the following parameters:

- `$attributes`: the block attributes, which have all the block settings and fields' data. Attributes are automatically [prepared for you](#automatically-prepare-attributes) so you can access them directly.
- `$content`: the block's inner content.
- `$block`: the block object, an instance of `WP_Block` class.
- `$is_preview`: whether previewing the block in the admin. Deprecated.
- `$post_id`: the current post ID. Deprecated. You can get the post ID with `get_the_ID()`.

Please note that you can use all of these parameters **regardless of the number of parameters and order**.

For example: `( $attributes, $block )`, `( $block, $attributes )`, `( $attributes, $content )`... are valid function signatures.

```php
// Specify a custom PHP callback to display the block.
'render_callback' => 'my_hero_callback',

// Or using $this class method.
'render_callback' => [ $this, 'my_hero_callback' ],

// Or using static method.
'render_callback' => [ 'MyClass', 'my_hero_callback' ],

// You can also use MB Views to render the block by prefixing the view name with `view:`.
'render_callback' => 'view:hero-view',
```

```php
<?php
function my_hero_callback( $attributes ) {
	// Fields's data.
	if ( empty( $attributes['data'] ) ) {
		return;
	}

	// Custom CSS class name.
	$class = 'hero ' . ( $attributes['className'] ?? '' );
	if ( ! empty( $attributes['align'] ) ) {
		$class .= " align{$attributes['align']}";
	}
	?>
	<div class="<?= $class ?>" style="background-color: <?= $attributes['background_color'] ?>">
		<img class="hero__image" src="<?= $attributes['image']['full_url'] ?>">

		<div class="hero__body">
			<h2><?= $attributes[ 'title' ] ?></h2>
			<div class="hero__content"><?= $attributes[ 'content' ] ?></div>
		</div>
	</div>
	<?php
}
```

#### `render_template`

Sometimes you might want to separate the code that outputs a custom Gutenberg block into a template part, then you can use `render_template` parameter to specify the full path to that template part.

```php
'render_template' => get_template_directory() . '/blocks/hero/template.php',
```

Inside the template file, you have full access to these parameters, just like `render_callback`:

- `$attributes`: the block attributes, which have all the block settings and fields' data. Attributes are automatically [prepared for you](#automatically-prepare-attributes) so you can access them directly.
- `$content`: the block's inner content.
- `$block`: the block object, an instance of `WP_Block` class.
- `$is_preview`: whether previewing the block in the admin. Deprecated.
- `$post_id`: the current post ID. Deprecated. You can get the post ID with `get_the_ID()`.

So, inside the `blocks/hero/template.php`, you can write:

```php
<?php
// Fields' data.
if ( empty( $attributes['data'] ) ) {
	return;
}

// Custom CSS class name.
$class = 'hero ' . ( $attributes['className'] ?? '' );
if ( ! empty( $attributes['align'] ) ) {
	$class .= " align{$attributes['align']}";
}
?>
<div class="<?= $class ?>" style="background-color: <?= $attributes[ 'background_color' ] ?>">
	<img class="hero__image" src="<?= $attributes['image']['full_url'] ?>">

	<div class="hero__body">
		<h2><?= $attributes[ 'title' ] ?></h2>
		<div class="hero__content"><?= $attributes[ 'content' ] ?></div>
	</div>
</div>
```

#### `enqueue_style`

If you want to specify a custom styling for this specific block, then set this parameter to the URL of the custom CSS file that will be used to style the block.

```php
'enqueue_style'   => get_template_directory_uri() . '/blocks/hero/style.css',
```

If you have multiple blocks, then using multiple CSS files might hurt the performance of your website since you have many CSS files enqueued. In that case, please put the styles in your theme, and use the functions [enqueue_block_assets()](https://developer.wordpress.org/reference/hooks/enqueue_block_assets/) and [enqueue_block_editor_assets()](https://developer.wordpress.org/reference/hooks/enqueue_block_editor_assets/) to enqueue your styles.

#### `enqueue_script`

If your block requires custom JavaScript actions, then set this parameter to the URL of the custom JavaScript file that will be used to do JavaScript tasks for the block (like initializing a slider).

```php
'enqueue_script'   => get_template_directory_uri() . '/blocks/hero/script.js',
```

Please note that this script should be run in 2 cases:

- When the block is done loading on the front end
- When the block preview is done loading in the block editor on the back end

On the back end, every time you modify the block settings, the block preview is re-rendered. The whole HTML of the block preview will be replaced by the new HTML.

So, to trigger a custom code when the block preview is loaded, you need to add an event listener to the event `mb_blocks_preview/{$block_id}` and run your code there:

```js
// Run when a block preview is done loading.
$( document ).on( 'mb_blocks_preview/hero-area', function( e ) {
	console.log( e.target ); // e.target is the wrapper div of the block.
	// Do something.
} );
```

To make it work for both the front end and back end, you can write your JavaScript like this:

```js
( function( $ ) {
    function init() {
        // Do something.
    }

    // Run when a document ready on the front end.
    $( document ).ready( init );

    // Run when a block preview is done loading.
    $( document ).on( 'mb_blocks_preview/hero-area', init );
} )( jQuery );
```

Note that jQuery is already added as a dependency for the script, so you can use it in your script.

#### `enqueue_assets`

If your block has some CSS / JavaScript dependencies (such as a JavaScript library), then using `enqueue_style` and `enqueue_script` might not be a good option since it allows you to enqueue only one single CSS / JS file.

In that case, use `enqueue_assets` to enqueue your assets. This parameter accepts a PHP callback function, like this:

```php
'enqueue_assets' => function() {
	wp_enqueue_style( 'slick', '//cdn.jsdelivr.net/npm/slick-carousel@1.8.1/slick/slick.css', [], '1.8.1' );
	wp_enqueue_script( 'slick', '//cdn.jsdelivr.net/npm/slick-carousel@1.8.1/slick/slick.min.js', ['jquery'], '1.8.1', true );
	wp_enqueue_script( 'my-custom-script', get_template_directory_uri() . '/blocks/hero/script.js', ['slick'], '', true );
}
```

:::info

Because `enqueue_assets` callback is called at `enqueue_block_assets`, it will fire on the front end even when the block is not used. It's better to use `enqueue_style` and `enqueue_script` to load assets only when the block is used.

:::

#### `preview`

This attribute allows you to set preview data for the block, which will show when you click on the plus icon (+) on the toolbar:

![block preview](https://imgur.elightup.com/bwMPY4t.png)

The block preview is just the block rendered with sample data. And you'll just need to set the parameter `preview` as an array of that sample data.

For example, if you have a "Team Member" block (as above) that has 3 fields: image, title, and description, you can set the `preview` parameter as follows:

```php
'preview' => [
	'image'       => 'https://domain.com/person.jpg', // Image URL
	'title'       => 'William Shakespeare',
	'description' => 'Lorem ipsum dolor sit amet, consectetur adipisicing elit, sed do eiusmod tempor incididunt ut labore et dolore magna aliqua. Ut enim ad minim veniam',
]
```

#### `storage_type`

Sets the storage for the block fields. Default, it's `attributes`, which means saving block fields in the attributes.

If you want to save the block fields into custom fields, set it to `post_meta`. Saving block fields in the custom fields makes the block act as a wrapper of custom fields. In this case, to prevent bugs, you *should* set `multiple` to `false` to prevent inserting the same block multiple times (see `supports` parameter above).

If you want to save the block fields into custom tables, you need to activate the [MB Custom Table](/extensions/mb-custom-table/) extension first. Then set `storage_type` and `table` as follows:

```php
'storage_type' => 'custom_table',
'table'        => 'your table name',
```

See [MB Custom Table documentation](/extensions/mb-custom-table/) for more details.

### Block fields

Each block can have unlimited fields. Adding fields to blocks is similar to adding fields to a custom meta box. All you need to do is specify the fields in the parameter `fields` from the block settings.

```php
add_filter( 'rwmb_meta_boxes', function( $meta_boxes ) {
	$meta_boxes[] = [
		// Other block settings.

		// Block fields.
		'fields'          => [
			[
				'type' => 'single_image',
				'id'   => 'image',
				'name' => 'Image',
			],
			[
				'id'   => 'title',
				'name' => 'Title',
			],
			// Other fields,
		],
	];
	return $meta_boxes;
} );
```

Each field is an array of its settings. See [this guide](/field-settings/) for details about field settings.

## Block rendering

There are various ways to render a block (via `render` property if you use `block.json` or via `render_callback` or `render_template` if you don't use `block.json`). In any case, the plugin provides you these variables that you can use:

- `$attributes`: the block attributes, which have all the block settings and fields' data. Attributes are automatically [prepared for you](#automatically-prepare-attributes) so you can access them directly.
- `$content`: the block's inner content.
- `$block`: the block object, an instance of `WP_Block` class..

### Automatically prepare attributes

By default, all attributes inside `$attributes` are automatically prepared for you. `$attributes[ $field_id ]` returns the value of the [`rwmb_get_value()`](/functions/rwmb-get-value/) function, which gives you all the data for the field.

For example, if you have a `single_image` field, the value of that field is stored as a number (attachment ID). But when you access the field value via `$attributes['image']`, you'll get the whole attachment object like below, which is more convenient to use:

```php
[
    'ID'          => 123,
    'name'        => 'logo-150x80.png',
    'path'        => '/var/www/wp-content/uploads/logo-150x80.png',
    'url'         => 'https://example.com/wp-content/uploads/logo-150x80.png',
    'width'       => 150,
    'height'      => 80,
    'full_url'    => 'https://example.com/wp-content/uploads/logo.png',
    'title'       => 'Logo',
    'caption'     => 'Logo caption',
    'description' => 'Used in the header',
    'alt'         => 'Logo ALT text',
    'srcset'      => 'large.jpg 1920w, medium.jpg 960w, small.jpg 480w', // List of responsive image src
    'sizes'       => [], // List of image sizes. See https://developer.wordpress.org/reference/functions/wp_get_attachment_metadata/
    'image_meta'  => [], // List of image meta. See https://developer.wordpress.org/reference/functions/wp_get_attachment_metadata/
]
```

And you can use it in your block template like this:

```php
<img src="<?= $attributes['image']['full_url'] ?>">
```

This preparation is helpful for not-simple fields like image, file, post, taxonomy, etc.

### Accessing raw data

In case you want to access the raw data (e.g., the attachment ID), you can use the `data` key inside `$attributes`. `$attributes['data']` contains all the info of fields as an array in the format of `'field_id' => 'field_value'`.

Note that, unlike `$attributes[ $field_id ]`, the field value in `$attributes['data']` is *not* prepared, which means it's the raw value.

For example, for a `single_image` field, the value of `$attributes['data']['image']` is the attachment ID.

### Rendering helper functions

In addition to the automatic preparation of attributes, to make it easier to access the block fields' data, we created 2 helper functions: `mb_get_block_field()` and `mb_the_block_field()`.

These functions work exactly like the [`rwmb_get_value()`](/functions/rwmb-get-value/) and [`rwmb_the_value()`](/functions/rwmb-the-value/), but applied for the current block only. The first function returns the data stored for a block field, while the 2nd one outputs that data.

```php
// Get block image field.
$image = mb_get_block_field( 'image' );
echo $image['full_url'];

// Output the block content field.
mb_the_block_field( 'content' );
```

### Reserved attributes

When you create a block, there are some reserved attributes that you should avoid using for field's ID, unless your purpose is to override the default MB Block's behavior. These attributes are:

- `id`: the auto generated ID for the block, which is unique for each block.
- `name`: the block name.

These attributes are used by MB Blocks for easier to style and manipulate the block. If you a field with IDs `id` or `name`, the field's value will override the default value generated by MB Blocks.

In that case, if you want to get the block name, you can use the variable `$block->name`. `$block` is a variable that is always available in your template (or callback). It's an instance of the [`WP_Block`](https://developer.wordpress.org/reference/classes/wp_block/) class.

### Deprecated parameters

These parameters are available in the previous versions of MB Blocks and are deprecated since 1.5.0. They're still working but will be removed in the future. Please use the alternative methods instead.

- `$is_preview`: a boolean variable to let you know if you're in the preview mode for Gutenberg or on the front end. It's useful when you want to display a custom message to users when they edit the block on the back end. To check if the active block is in preview mode, use `defined( 'REST_REQUEST' ) && REST_REQUEST` instead.
- `$post_id`: the current post ID. You can access via `get_the_ID()` function instead.

## Inner blocks

WordPress has an amazing feature for Gutenberg blocks called [InnerBlocks](https://developer.wordpress.org/block-editor/how-to-guides/block-tutorial/nested-blocks-inner-blocks/), which allows you to insert other blocks inside a block. Since version 1.4, MB Blocks also supports this feature.

Assuming you want to create a custom testimonial block, which has the following data:

- An image
- A title
- A paragraph for the testimonial content
- And a select field for the testimonial style (something like an image on the right or above the content)

It's easy to make those fields with MB Blocks. However, it might be less flexible than using the default Gutenberg heading and paragraph blocks for the title and content field. So, we might want to wrap those 2 fields into a `InnerBlocks` like this:

- Image
- InnerBlocks
- Style

This is an example code of the block:

```php
<?php
add_filter( 'rwmb_meta_boxes', function( $meta_boxes ) {
	$meta_boxes[] = [
		'title'           => 'Testimonial',
		'id'              => 'testimonial',
		'type'            => 'block',
		'context'         => 'side',
		'render_callback' => function( $attributes ) {
			?>
			<div class="testimonial testimonial--<?= $attributes['style'] ?>">
				<div class="testimonial__text">
					<InnerBlocks />
				</div>
				<div class="testimonial__image">
					<?php mb_the_block_field( 'image' ) ?>
				</div>
			</div>
			<?php
		},
		'fields'          => [
			[
				'type' => 'select',
				'id'   => 'style',
				'name' => 'Style',
				'options' => [
					'default'     => 'Default',
					'image_above' => 'Image above',
				],
			],
			[
				'type' => 'single_image',
				'id'   => 'image',
				'name' => 'Image',
			],
		],
	];
	return $meta_boxes;
} );
```

When inserting a field in the admin, you'll see the block like this:

![inner blocks](https://imgur.elightup.com/p42aGbT.png)

As you can see the InnerBlocks on the left, where the usual placeholder is displayed "Type / to choose a block". And you can insert headings (of any type H1, H2, H3, etc.) and the content very easily.

![inner blocks in action](https://imgur.elightup.com/GckMMnA.png)

:::tip

I use [Wayfinder](https://wordpress.org/plugins/wayfinder/) plugin to show the block outline, which makes it easier to see which blocks are being edited.

:::

```html
<InnerBlocks class="testimonial__text" />
```

To make it more powerful, MB Blocks supports the following properties of InnerBlocks. They're the same as in the [block handbook](https://developer.wordpress.org/block-editor/how-to-guides/block-tutorial/nested-blocks-inner-blocks/).

### `allowedBlocks`

`allowedBlocks` helps you to restrict blocks that are available to insert into the InnerBlocks. The blocks that are not specified, will be not available to be inserted.

In your template (or render callback), you can set `allowedBlocks` like this:

```php
<InnerBlocks
	allowedBlocks="<?= esc_attr( json_encode( [
		'core/heading',
		'core/paragraph',
	] ) ) ?>"
/>
```

This allows you to insert only heading and paragraph blocks.

### `orientation`

By default, InnerBlocks expects its blocks to be shown in a vertical list. A valid use case is to style InnerBlocks to appear horizontally. When blocks are styled in such a way, the orientation prop can be used to indicate a horizontal layout:

```php
<InnerBlocks orientation="horizontal" />
```

### `template`

Use the template property to define a set of blocks that prefill the InnerBlocks component when inserted. You can set attributes on the blocks to define their use. The example below shows a book review template using InnerBlocks component and setting placeholder values to show the block usage.

```php
<InnerBlocks
	template="<?= esc_attr( json_encode( [
		[ 'core/heading',   [ 'placeholder' => 'Enter testimonial title...' ] ],
		[ 'core/paragraph', [ 'placeholder' => 'Enter testimonial content...' ] ],
	] ) ) ?>"
/>
```

### `templateLock`

Template locking allows locking the InnerBlocks area for the current template. Options:

- `all` — prevents all operations. It is not possible to insert new blocks. Move existing blocks or delete them.
- `insert` — prevents inserting or removing blocks, but allows moving existing ones.
- `false` — prevents locking from being applied to an InnerBlocks area even if a parent block contains locking. ( Boolean )

If locking is not set in an InnerBlocks area: the locking of the parent InnerBlocks area is used.

If the block is a top-level block: the locking of the Custom Post Type is used.

### Wrapper div issue

By default, WordPress will create a couple of wrappers `<div>` for inner blocks **in the editor** (in the admin) to function, this causes inconsistent styling for the editor and the frontend. For example, if you create inner blocks structure like this:

```html
<div class="my-block">
	<div class="my-block__inner">
		<InnerBlocks />
	</div>
</div>
```

If you add items to the inner blocks, in the frontend, its structure looks like this:

```html
<div class="my-block">
	<div class="my-block__inner">
		<h2>My heading</h2>
		<p>My content</p>
	</div>
</div>
```

However, in the editor, it will render like this (e.g. two extra `div`):

```html
<div class="my-block">
	<div class="my-block__inner">
		// highlight-start
		<div class="block-editor-block-list__block wp-block is-selected ...">
			<div>
			// highlight-end
				<h2>My heading</h2>
				<p>My content</p>
			// highlight-start
			</div>
		</div>
		// highlight-end
	</div>
</div>
```

This causes the editor and the frontend have different markup, which makes it hard to style the block consistently in both places using the same CSS.

To fix this, MB Blocks lets you **remove two extra `div` of inner blocks** in the admin by adding `class`, `id`, or `style` directly to `<InnerBlocks />`. So, instead of writing:

```html
<div class="my-block">
	<div class="my-block__inner">
		<InnerBlocks />
	</div>
</div>
```

You should write:

```html
<div class="my-block">
	<InnerBlocks class="my-block__inner" />
</div>
```

By doing this, it tells WordPress that MB Blocks will control the output of inner blocks in the editor, so both editor and front end will rendered like:

```html
<div class="my-block">
	<div class="my-block__inner">
		<h2>My heading</h2>
		<p>My content</p>
	</div>
</div>
```

## Block templates

Sometimes you want to load default blocks when creating a new post. Block templates allow specifying a default initial state for an editor session. Use the argument `template` when [registering the post type](/custom-post-types/):

```php
'template'              => [
    ['meta-box/{$block_id}']
]
```

## Block data

Each block created using MB Blocks is a *dynamic block*. By default, the block data is saved as a JSON string in the block content.

If you view the post content via a tool like PHPMyAdmin, you'll see the block is stored as a string like this:

```html
<!-- wp:meta-box/hero-content {"id":"block_jyqlhbauqz4jz51ahab","data":{"image":"10","title":"Hi, I’m Martin Green","subtitle":"WEB DEVELOPER \u0026 DESIGNER","content":"Sed ut perspiciatis unde omnis iste natus error sit voluptatem accusa ntium doloremque laudantium, totam rem aperiam, eaque ipsa quae ab illo inventore veritatis et quasi architecto beatae vitae dicta suntlo explica bo. Nemo enim ipsam voluptatem quia voluptas.","signature":"9","button_text":"Discover More","button_url":"#","background_color":"#f5f7f8"},"align":"wide"} /-->
```

When you decode the JSON string, you'll see the block data as an object like this:

```json
{
  "id": "block_jyqlhbauqz4jz51ahab",
  "data": {
    "image": "10",
    "title": "Hi, I’m Martin Green",
    "subtitle": "WEB DEVELOPER \u0026 DESIGNER",
    "content": "Sed ut perspiciatis unde omnis iste natus error sit voluptatem accusa ntium doloremque laudantium, totam rem aperiam, eaque ipsa quae ab illo inventore veritatis et quasi architecto beatae vitae dicta suntlo explica bo. Nemo enim ipsam voluptatem quia voluptas.",
    "signature": "9",
    "button_text": "Discover More",
    "button_url": "#",
    "background_color": "#f5f7f8"
  },
  "align": "wide"
}
```

It has the following attributes:

- `name`: the block name. Note that if you have a field with ID `name`, the field value will overwrite this property. In this case, if you want to get the block name, you can use the variable `$block->name`.
- `id`: a unique ID for the block. Note that it's different from the block settings ID. This ID can be used to set the `id` parameter in the HTML if you want.
- `align`: block alignment
- `anchor`: block anchor
- `className`: custom CSS class for the block
- `data`: an array of the block fields' data, in the format of `'field_id' => 'field_value'`

The data is passed to the `render_callback` or `render_template` as a `$attributes` parameter. So you can use it to render the block. See the [block rendering](#block-rendering) section for more details.

### Saving block data in post meta or custom tables

Besides saving the block data as a JSON string in the block's attributes, the plugin allows you to save data in post meta or custom tables. This makes blocks behave the same as a normal field group.

If you want to save block data in post meta, in the meta box's group, set the `storage_type` to `post_meta`:

```php
[
	'storage_type' => 'post_meta',
	'supports' => [
		'multiple' => false,
	],
]
```

In this case, to prevent bugs, you *should* set `multiple` to `false` to prevent inserting the same block multiple times (the codes above already have that).

If you want to save the block fields into custom tables, you need to activate the [MB Custom Table](/extensions/mb-custom-table/) extension first. Then set `storage_type` and `table` as follows:

```php
[
	'storage_type' => 'custom_table',
	'table' => 'your_table_name',
	'supports' => [
		'multiple' => false,
	],
]
```

:::warning Caveats

When saving block data in post meta or custom tables, there is no attributes stored in the block itself.
Automatic preparation of attributes is not available, helpers functions like `mb_get_block_field()` and `mb_the_block_field()` will not work.
You will have to use the [rwmb_meta](/functions/rwmb-meta/) function to get the block data.

:::

## Hooks

`mb_${blockId}_settings`

This is a filter to let developers change the block settings **via Javascript**. It accepts one parameter - `settings`, the block settings array.

In this filter, `blockId` is the block ID, which has the format `meta-box/id` where `id` is the field group ID.

To use a JavaScript hook, please refer to [this tutorial](https://metabox.io/wordpress-javascript-hooks/).

## Video Tutorial

**Create Custom Gutenberg Blocks With Meta Box (only PHP)**

<LiteYouTubeEmbed id='PAisKy8eC2U' />

**Build Gutenberg Blocks Visually With MB Builder**

<LiteYouTubeEmbed id='v3ke1DBlWuk' />

See more details on [using MB Builder with MB Blocks](https://metabox.io/build-gutenberg-blocks-visually-with-meta-box-builder/).

## Examples

The complete code example for the video (and used to write this tutorial) is [available in the Library](https://github.com/wpmetabox/library/tree/master/extensions/mb-blocks/hero). You can copy the code and put it in your theme. Then start to modify it to create your own Gutenberg blocks.

# MB Builder

import LiteYouTubeEmbed from 'react-lite-youtube-embed';
import 'react-lite-youtube-embed/dist/LiteYouTubeEmbed.css';

This extension helps you create custom fields, settings pages, and relationships  with a user-friendly interface.

## Creating custom fields

Custom fields are organized in groups. Each group is displayed as a collapsible panel below the post editor.

To create a field group, go to **Meta Box » Custom Fields** and click **Add New**. You'll see a screen to add fields to the group:

![adding custom fields to the group](img/builder/add-field.png)

On the left side bar, there are three icons with corresponding panels: Add field, Structure, and Settings. Panels are resizable.

Enter the group title on the top and then click the **+ Add Field** button and select a field type to add to the group. There are two buttons you can click to add a new field:

![Two positions to add a new field](img/builder/add-new-field.png)

After that, a new field will appear in the field list. Clicking on that field on the preview to open the field settings panel where you can edit settings. Besides, to edit the label and ID of the field, you can double click on the preview to change them directly.

:::tip Quickly find a field type

To find a field type quickly, type its name in the input box above the field list. The plugin will filter the fields and show only matched fields.

:::

:::tip

You can delete, duplicate or add a new field above/below the current field by clicking the icons in the field toolbar. To reorder fields, drag and drop them to the new positions.

:::

You can see the field settings and structure at the same time by opening the floating structure panel. It’s also resizable.

![The floating structure panel](img/builder/floating.gif)

When finishing adding fields, click the **Settings** icon and select the location where the fields are displayed for.

![selecting a post type for the field group](img/builder/field-group-location.png)

After that click the **Save Changes** button to finish.

## Field settings

When adding fields to a field group, each field has its own settings. The list of settings with detailed explanation is [here](/field-settings/). MB Builder creates UI for them.

To view and edit field settings, click anywhere in the field preview:

![Edit field settings](img/builder/setting.png)

Each field settings are self-explained. We also add some tooltips next to the setting title to give you more information if needed.

All field settings are divided into some sections: General, Appearance, Conditional logic, Validation and Advanced. The General tab has most settings you need while the Appearance decides how your field display in the post editor. Besides:

* Conditional logic: if you install the [MB Conditional Logic](/extensions/meta-box-conditional-logic/), then this part is for creating rules with UI.
* Validation: helps you to create [complex validation rules](/validation/).
* Advanced tab has the following settings:
	- Custom CSS class: if you need to cusomize the style of the field.
	- Before & after: For entering custom HTML that outputed before and after the field.
	- Custom sanitize callback: if you need [custom sanitization](/sanitization/).
	- Save field value: if you don't want Meta Box to save the field value (which rarely happens) and you want to handle saving by yourself, then uncheck this checkbox.
	- Custom HTML5 attributes: helps you add [custom HTMl5 attributes](/custom-attributes/) to your input fields.
	- Custom settings: if you want to add extra settings to the field. We'll cover it in a next section.

![edit field advanced settings](img/builder/advanced-panel.png)

Note that: plugins and developers might add more settings for fields. We'll see how to do that later in this docs.

## Field group settings

The field group settings are put in the tab **Settings** panel:

![field group settings](img/builder/settings-panel.png)

There are several settings:

* Location: where you select this field group is for posts, terms, users, comments, blocks or settings pages. For each object type, you'll be able to select corresponding post types, taxonomies or settings pages. Please note that it's required to install and activate corresponding extensions: [MB Term Meta](/extensions/mb-term-meta/), [MB User Meta](/extensions/mb-term-meta/), [MB Comment Meta](https://metabox.io/plugins/mb-comment-meta/), [MB Blocks](/extensions/mb-blocks/), and [MB Settings Page](/extensions/mb-settings-page/). In there, the Advanced rules allows you to add advanced rules for which category, post, user, ... the field group appears for. Requires the [MB Include Exclude](/extensions/meta-box-include-exclude/) extension.
* Toggle rules: select which conditions to show or hide the field group. Requires the [MB Show Hide](/extensions/meta-box-show-hide/) extension.
* Conditional Logic: setup the conditional logic rules to toggle the field group based on other fields' values. Requires the [MB Conditional Logic](/extensions/meta-box-conditional-logic/) extension.
* Post settings, such as context, priority if you select the location is for posts.
* Custom block settings, such as block icon, render callback if you select the location is for blocks, which means creating custom Gutenberg blocks. Requires [MB Blocks](/extensions/mb-blocks/) extension. See the **Create Gutenberg blocks** section below.
* Tab style and default active tab: these are the settings for [MB Tabs](/extensions/meta-box-tabs/) extension.
* Custom table settings, including table name, table prefix and option to create custom table automatically. These are the settings for [MB Custom Table](/extensions/mb-custom-table/) extension. Note that if you select to create the custom table automatically, all columns will have the data type `TEXT` to ensure maximum compatibility.
* Advanced:
  + Custom CSS class: the custom CSS class for the wrapper `div` if you need to cusomize the style of the field group.
  + Field ID prefix: if you want to prefix all fields in the field group, then this settings is for that. It's optional, but a good practice to keep your custom fields separated from other custom fields. You can also use underscore `_` as prefix to keep your fields hidden in the default WordPress **Custom Fields** meta box.
  + Custom settings: if you want to add extra settings to the field group. See below for details.

## Custom settings

Custom settings is a feature for both fields and field groups, which allows you to add extra settings for them in case the builder doesn't have. It's useful when you want to add your own settings or the settings the builder hasn't added yet (in this case, please let us know).

:::info Key-value settings

What describes in this section is applied also for similar key-value settings, including: choice field options, JavaScript options (date, datepicker, slider, ...), query args (post, taxonomy, taxonomy advanced, user) and custom HTML5 attributes.

:::

To add custom settings, scroll down to the last setting of the **Advanced** section of the fields or field group. Then click **+ Add New** button and add new settings. Like this:

![custom settings](img/builder/custom-settings-mask.png)

Which will produce the result like this:

```php
[
    'id'   => 'new-your-phone',
    'name' => 'New Your phone',
    'type' => 'text',

    // Custom settings.
    'mask'   => '012-345-6789',
    'enable' => false
],
```

Remember, MB Builder treats `true`, `false` as boolean values.

If you want to add complex custom settings, like multi-dimentional arrays:

```php
[
    'type'       => 'post',
    'id'         => 'field_id',
    'query_args' => [
        'tax_query' => [
            [
                'taxonomy' => 'category',
                'field'    => 'slug',
                'terms'    => 'technology',
            ],
        ],
    ],
],
```

Then you can use the dot notation or JSON for custom attributes:

### Dot notation

Dot notation is a way that let you define structural data (hierarchical data) with dots (.). Each dot (.) defines a level in your data.

If you want to enter a structural custom settings for a field like:

```php
'my_prop' => [
    'param1' => 'Value 1',
    'param2' => 'Value 2',
    'param3' => 'Value 3',
]
```

This can be understood like this:

```php
"my_prop.param1": "Value 1",
"my_prop.param1": "Value 2",
"my_prop.param1": "Value 3",
```

Here the params param1, param2, param3 are sub-params of the my_prop and they're defined with a dot prefixed.

Implementing that in MB Builder as follows:

![implement structural custom settings](img/builder/custom-settings-prop.png)

Another case is when you want to add a set of data without keys. The data in PHP looks like this:

```php
'my_prop' => [
    'Value 1',
    'Value 2',
    'Value 3',
]
```

Although keys are not implemented, we can understand that this list (array) uses numeric keys: 0, 1, 2. So we can rewrite it as:

```php
'my_prop': [
    0: 'Value 1',
    1: 'Value 2',
    2: 'Value 3',
]
```

Similar to above, this can be understood as:

```
"my_prop.0": "Value 1",
"my_prop.1": "Value 2",
"my_prop.2": "Value 3",
```

And can be implemented as follows in MB Builder:

![adding array of data for custom settings](img/builder/custom-settings-prop0.png)

Combining these, you can define a complex data structure as follows (this is a post field with advanced query args):

```php
[
    'type'       => 'post',
    'id'         => 'field_id',
    'query_args' => [
        'tax_query' => [
            [
                'taxonomy' => 'category',
                'field'    => 'slug',
                'terms'    => 'technology',
            ],
        ],
    ],
],
```

In MB Builder:

![dot notation for advanced query args](img/builder/tax-query.png)

### JSON notation

Another way to enter nested array in MB Builder, you can use JSON notation. Paste the JSON string into the value input, and this JSON will be parsed into an array in PHP.

For example, the `tax_query` above can be implemented like this:

![json value](img/builder/tax-query-args.png)

## Getting PHP code

For each field group, MB Buider can create a PHP code that you can copy and paste into your theme's `functions.php` file (or your plugin file) and then *deactivate the MB Builder extension*.

This is helpful if you want to:

- [Share field groups to other websites](https://metabox.io/copy-custom-fields-with-meta-box-builder/) which doesn't have MB Builder installed.
- Improve the performance since field groups are loaded directly from your file.

To get the code, click the **Get PHP Code** button on the toolbar:

![export code](img/builder/theme-code.png)

On this screen, set the text domain (for field labels in case you want to translate them in a multilingual website) and the function name. Then click the **Generate** button to generate the code. Finally, click the **Copy** button to copy the code and paste it into your theme's `functions.php` file.

When you copy PHP code and paste it into your theme's `functions.php` file, you can **safely deactivate MB Builder** (do *not* deactivate Meta Box, it's still required).

For detailed instruction, please see [this tutorial](https://metabox.io/copy-custom-fields-with-meta-box-builder/).

Please note that once you take the PHP code and remove the settings from the MB Builder, there's no way to edit the field group in the MB Builder directly from the exported code.

In order to do re-edit the field group, we suggest after taking the PHP code, export the field group settings from MB Builder (see the section below). Then whenever you want to edit the field group, just import it back and edit.

## Export / Import

To export one or more field groups, go to the main screen *Meta Box &rarr; Custom Fields*. Then click the checkboxes next to the field groups' titles you want to export. Then choose **Export** from the Bulk Actions dropdown. Then click **Apply**.

![export field groups](https://imgur.elightup.com/r1moj0S.png)

Or you can export individual field group by clicking on **Export** link when hover the mouse over the field group title:

![export a single field group](img/builder/export.png)

To import field groups, select the *Import* button at the top of the page. Then choose the downloaded file in the previous step, then press **Upload file and import**. That’s all!

![import field groups](img/builder/import.png)

For detailed instruction, please see [this tutorial](https://metabox.io/export-import-custom-fields-meta-box-builder/).

Video tutorial:

<LiteYouTubeEmbed id='BGVY-5W6d7g' />

## Creating Gutenberg blocks

Since v3.1.0, MB Builder allows you to create Gutenberg blocks visually, without writing code. See this video tutorial on how to do that:

<LiteYouTubeEmbed id='v3ke1DBlWuk' />

Note that the plugin supports Twig template engine to write block template code. See [Twig documentation](https://twig.symfony.com/doc/1.x/templates.html) for how to use variables, conditions and functions.

For more convenient, the plugin supports the following variables:

- `{{ align }}`: block alignment (if the block supports it).
- `{{ anchor }}`: block anchor (if the block supports it).
- `{{ className }}`: custom CSS class name (if the block supports it).
- `{{ is_preview }}`: whether or not in preview mode.
- `{{ post_id }}`: the current post ID.

To access the field value, you can use `{{ field_id }}`, where `field_id` is the field ID. If the field returns an array (such as `single_image` field), you can access to field's attribute with `{{ my_image.full_url }}`.

Besides, the plugin also allows you to use any PHP/WordPress function via `mb.function()` where `function` is the function name. For example, the code below get the post object and output the post title:

```php
{% set post = mb.get_post( post_id ) %}
{{ post.post_title }}
```

Or this code will output the site title:

```php
{% set site_title = mb.get_bloginfo( 'name' ) %}
{{ site_title }}
```

## Creating settings pages

This feature helps you to create custom settings pages (or Customize panels) with UI. It requires the [MB Settings Page](/extensions/mb-settings-page/) extension.

To start, go to **Meta Box > Settings Pages** and click **Add New**.

![create settings pages](img/builder/create-settings-page.png)

Here you can enter all the settings for the settings page. All settings are self-explained. Please see the [documentation of MB Settings Page](/extensions/mb-settings-page/) to understand them.

## Creating relationships

This feature helps you to create relationships between posts, terms and users with UI. It requires the [MB Relationships](/extensions/mb-relationships/) extension.

To start, go to **Meta Box > Relationships** and click **Add New**.

![create relationships](img/builder/relationship.png)

Here you can enter all the settings for each side of the relationship (**From** and **To**). For each side, there are 3 tabs of settings:

- General: for general settings such as object type and post type.
- Meta Box: for extra meta box settings. These settings are the same as the field group settings when creating custom fields.
- Field: for extra field settings. These settings are the same as the field settings (post, term or user depending on the object type).

Please see the [documentation of MB Relationships](/extensions/mb-relationships/) to understand them.

## Extending the builder

### Adding custom controls to fields

If you develop [extra solutions for Meta Box](https://metabox.io/resources/), then you might need to add a custom settings for fields. Luckily, MB Builder has API for you to create custom controls for these settings.

To add a control, use the following hook:

```php
add_filter( 'mbb_field_controls', 'your_prefix_add_field_controls', 10, 2 );

function your_prefix_add_field_controls( $controls, $type ) {
	// Add a checkbox control.
	$controls[] = \MBB\Control::Checkbox( 'custom_layout', __( 'Custom layout', 'your-text-domain' ) );

	// Add a select control.
	$controls[] = \MBB\Control::Select(
		'layout',
		[
			'label'   => __( 'Layout', 'your-text-domain' ),
			'tooltip' => __( 'Select the layout for the field', 'your-text-domain' ),
			'options' => [
				'one-third'  => __( 'One-third', 'your-text-domain' ),
				'one-half'   => __( 'One-half', 'your-text-domain' ),
				'two-third'  => __( 'Two-third', 'your-text-domain' ),
				'full-width' => __( 'Full-width', 'your-text-domain' ),
			],
			'dependency' => 'custom_layout:true',
		],
		'one-half',
		'general'
	);

	return $controls;
}
```

The filter `mbb_field_controls` accepts 2 parameters:

- `$controls`: Array of controls.
- `$type`: Field type, useful if you want to add controls to specific field types only.

Each control has a specific type (`\MBB\Control::Select` in the above example, which is a select dropdown) and several parameters:

1. Setting name
1. Control properties, which is an array:
    - `label`: the control label.
    - `tooltip`: the content of the tooltip, if you want to explain what the control is for users.
    - `options`: array of options for the select control, in format of `'value' => 'label'`.
    - `dependency`: if you want to show the control only when another control has a specific value, then set this to `{$other_control_setting_name}:{$value}`. Optional.
1. Default value. Optional.
1. Settings tab: `general` (default) or `advanced`. Optional.

In case your control has only `label` property, you can set the property as a string (see the checkbox control in the above example).

List of supported control types:

Name|Description
---|---
`MBB\Control::Checkbox` | A checkbox
`MBB\Control::Input` | An input text. You can set the `'type' => 'number'` for the control property to make it accepts only numbers.
`MBB\Control::Select` | A select dropdown where you can select only a single value. You need to set `options` property for the control as shown in the above example.
`MBB\Control::ReactSelect` | A select dropdown where you can select multiple values. You need to set `options` property for the control and the default value must be an array.
`MBB\Control::Textarea` | A textarea.

This is the result of the above example:

![custom field controls](img/builder/custom-layout.png)

### Adding custom controls field groups

Similarly, you can add custom controls for the whole field group. Here is how we do to add custom controls when [MB Tabs](/extensions/meta-box-tabs/) extension is activated.

```php
add_filter( 'mbb_settings_controls', 'your_prefix_add_settings_controls' );

function your_prefix_add_settings_controls( $controls ) {
	$controls[] = \MBB\Control::Select( 'tab_style', [
		'label'   => __( 'Tab style', 'meta-box-builder' ),
		'tooltip' => __( 'Change how look and feel of tabs in MB Tabs', 'meta-box-builder' ),
		'options' => [
			'default' => __( 'Default', 'meta-box-builder' ),
			'box'     => __( 'Box', 'meta-box-builder' ),
			'left'    => __( 'Left', 'meta-box-builder' ),
		],
	] );
	$controls[] = Control::Input( 'tab_default_active', __( 'Default active tab ID', 'meta-box-builder' ) );

	return $controls;
}
```

The filter `mbb_settings_controls` accepts only one parameter - an array of controls. Each control is defined similarly as for fields.

### Changing the parsed settings

In most cases, when adding a new control or a new field type, the settings are saved correctly. These settings will be parsed to a PHP array and is used by Meta Box and extensions. The parsed result is also used when you generate PHP code.

In some specific cases, you might want to set custom value to the fields instead of the value set in the controls. To do that, use the following hook:

```php
// For fields.
$field_settings = apply_filters( 'mbb_field_settings', $field_settings );
$field_settings = apply_filters( "mbb_field_settings_{$field_type}", $field_settings );

// For field group.
$field_group_settings = apply_filters( 'mbb_meta_box_settings', $field_group_settings );
```

For example: you created 2 controls for `custom_layout` (checkbox) and `layout` (select) for fields (see example in the section "Adding your own field settings" above). When parsing, you don't want to set `custom_layout` to `true` if `layout` has a value as it's redundant. You can do that with:

```php
add_filter( 'mbb_field_settings', 'your_prefix_parse_field_settings' );

function your_prefix_parse_field_settings( $field_settings ) {
	if ( ! empty( $field_settings['layout'] ) ) {
		unset( $field_settings['custom_layout'];
	}
	return $field_settings;
}
```

## Video tutorial

Here is a quick video showing how to use the MB Builder to create custom fields in WordPress:

<LiteYouTubeEmbed id='_DaFUt92kYY' />

## Upgrade

When updating from version 4 to version 5, the plugin automatically migrates data of field groups to compatible with the new React app. The migration process doesn't touch your existing data, so you're always safe.

## Further reading

- [How to Add and Configure Custom Fields Using MB Builder](https://metabox.io/add-configure-custom-fields-meta-box-builder/)
- [How to Export and Import Custom Fields with MB Builder](https://metabox.io/export-import-custom-fields-meta-box-builder/)
- [How to Easily Copy Custom Fields From One Site to Others with MB Builder](https://metabox.io/copy-custom-fields-with-meta-box-builder/)

# MB Columns

MB Columns helps you put custom fields into columns in a 12-column grid. You can create nested columns for sub-fields in [groups](/extensions/meta-box-group/) or put multiple fields into one column.

![put custom fields in columns](https://i2.wp.com/metabox.io/wp-content/uploads/2014/07/meta-box-columns-screenshot.png)

## Simple syntax

To specify number of columns for each field, add `columns` parameter for that field. The plugin will automatically calculate number of columns and wrap fields into a div "row" and apply styles for them.

The code below registers some fields and make each field obtain 4 columns of the grid (thus, you'll see 3 columns layout):

```php
add_filter( 'rwmb_meta_boxes', 'prefix_columns_demo_register' );
function prefix_columns_demo_register( $meta_boxes ) {
    $meta_boxes[] = array(
        'title'  => 'MB Columns Demo',
        'fields' => array(
            array(
                'name'    => 'Name',
                'id'      => 'name',
                'type'    => 'text',
                // Number of columns (in grid 12)
                'columns' => 4,
            ),
            array(
                'name'    => 'Email',
                'id'      => 'email',
                'type'    => 'email',
                'columns' => 4,
            ),
            array(
                'name'    => 'Mobile',
                'id'      => 'mobile',
                'type'    => 'text',
                'columns' => 4,
            ),
        ),
    );
    return $meta_boxes;
}
```

## Advanced syntax

The advanced syntax is helpful if you need to put **multiple fields in 1 column**.

```php
add_filter( 'rwmb_meta_boxes', 'prefix_register_meta_boxes' );
function prefix_register_meta_boxes( $meta_boxes ) {
    $meta_boxes[] = array(
        'id'     => 'test-columns',
        'title'  => 'MB Columns Demo',
        'columns' => array(
            'column-1' => 4,                   // Define the size of the column (from 1 to 12)
            'column-2' => array(               // More advanced syntax
                'size' => 8,                   // Column size (1-12)
                'class' => 'custom-css-class', // Custom CSS class for the column
            ),
        ),
        'fields' => array(
            array(
                'name'    => 'Name',
                'id'      => 'name',
                'type'    => 'text',
                'column'  => 'column-1',
            ),
            array(
                'name'    => 'Email',
                'id'      => 'email',
                'type'    => 'email',
                'column'  => 'column-1',
            ),
            array(
                'name'    => 'State',
                'id'      => 'state',
                'type'    => 'select_advanced',
                'options' => array(
                    'NY' => 'New York',
                    'CA' => 'California',
                ),
                'column'  => 'column-2',
            ),
            array(
                'name'    => 'Description',
                'id'      => 'description',
                'type'    => 'textarea',
                'column'  => 'column-2',
            ),
        ),
    );

    return $meta_boxes;
}
```

In the advanced syntax, you need to define a parameter `columns` for the meta box. It's the list of columns for all fields in the following format:

```php
'columns' => array(
    'column-1' => 4,                   // Define the size of the column (from 1 to 12)
    'column-2' => array(               // More advanced syntax
        'size' => 4,                   // Column size (1-12)
        'class' => 'custom-css-class', // Custom CSS class for the column
    ),
),
```

Then each field in the meta box need to specify which column it belongs to by setting `'column' => 'column-0'`.

## Notes

This extension uses 12-columns grid, so when defining number of columns, you must define them so that the total columns for each row equals to 12.

For example:

- Row 1: field 1 (3 columns), field 2 (3 columns), field 3 (3 columns), field 4 (3 columns)
- Row 2: field 5 (6 columns), field 6 (6 columns)
- Row 3: field 7 (12 columns)

# MB Conditional Logic

import LiteYouTubeEmbed from 'react-lite-youtube-embed';
import 'react-lite-youtube-embed/dist/LiteYouTubeEmbed.css';

**MB Conditional Logic** helps you to show or hide meta boxes, custom fields or any elements based on other fields' values.

<LiteYouTubeEmbed id='m_FtbydM_-I' />

You can also combine conditions. It works not only for meta boxes or custom fields, but also other HTML elements.

## Getting started

### With UI

If you are using [MB Builder](/extensions/meta-box-builder/) (which is included in [Meta Box Lite](https://metabox.io/lite/) or [Meta Box AIO](https://metabox.io/pricing/)), you can set conditional logic for a specific field by clicking the plus in the **Conditional Logic** section:

![conditional logic in MB Builder](img/conditional-logic/add-conditional-logic.png)

In this section, you can choose to show or hide a field when all or any conditions match. For each rule, you need to select or enter a dependency field ID, the operator and enter the field value. The dependency field ID is auto-suggested from the list of current fields and you can add as many rules as you want:

![conditional logic rules](img/conditional-logic/add-rules.png)

Using MB Builder is intuitive and self-explained.

For advanced usage (like with custom conditions or using outside field groups), please use code which are explained in detailed below.

### With code

In case you use code to register meta boxes, you need to add an extra parameter `visible` or `hide` to a field (or a meta box if you want to hide the whole meta box) to set the conditional logic for it.

For example, Tthe code below registers a meta box that is **hidden when the post format is "aside"**. The meta box also have 2 custom fields: Brand and Product. **The Product field will be hidden if user select a brand that's not "Apple"**.

```php
add_filter( 'rwmb_meta_boxes', function( $meta_boxes ) {
	$meta_boxes[] = [
		'title' => 'Brands and Products',

		// highlight-start
		// Hide this meta box when post format is aside
		'hidden' => [ 'post_format', 'aside' ],
		// highlight-end

		'fields' => [
			[
				'id'      => 'brand',
				'name'    => 'Brand',
				'type'    => 'select',
				'options' => [
					'Apple'  => 'Apple',
					'Google' => 'Google',
				],
			],
			[
				'id'      => 'apple_products',
				'name'    => 'Which Apple product that you love?',
				'type'    => 'radio',
				'options' => [
					'iPhone' => 'iPhone',
					'iPad'   => 'iPad',
				],

				// highlight-start
				// Hide this field when user selected a brand that's not 'Apple'
				'hidden' => [ 'brand', '!=', 'Apple' ]
				// highlight-end
			],
		],
	];

	return $meta_boxes;
} );
```

## Syntax

To make a meta box or a field visible/hidden, please add a setting for the meta box or the field with the following syntax:

```php
// Condition to show.
'visible' => [ 'field', 'operator', 'value' ],

// Condition to hide
'hidden' => [ 'field', 'operator', 'value' ],
```

Name|Description
---|---
`field`| Meta Box field ID or ID of a DOM element to compare.
`operator` | Comparison operators: `=`, `>=`, `<=`, `>`, `<`, `!=`, `in`, `contains`, `between`, `starts with`, `ends with`, `match`. All of them can combine with `not` operator to become negate operator. Default: `=`. Optional.
`value` | Value to compare with.

:::info

You can bypass `operator` if it's `=`, which is the default value. So you can write:

```php
'visible' => [ 'field', 'value' ],
// or
'hidden' => [ 'field', 'value' ],
```

:::

The normal operators like `=`, `!=`, etc. are pretty clear. Let's see the advanced operators like `contains`, `starts with`, etc.

## Advanced Operators

### `contains`

The operator `contains` can check if **a field value contains another string or value**:

```php
'visible' => ['brand', 'contains', 'pp'] // Apple, App, ...
```

In case a field has multiple value (checkbox list, select multiple...), this operator checks **if the field value (which is an array) contains a value**:

```php
'visible' => ['brand', 'contains', 'Apple'];
```

It also works with `taxonomy_advanced` field. In this case, please **set the value to the term ID**. For example, if you need to check if a taxonomy advanced field has a value:

```php
'visible' => ['product_type', 'contains', 4]; // 4 is a term ID.
```

### `in`

This operator is used to check if **a field value is in an array of specific values**:

```php
'visible' => ['brand', 'in', ['Apple', 'Samsung']];
```

In case a field has multiple value (checkbox list, select multiple...), this operator checks if **any of the field value is in the specified array**. For example, if the `brand` field above is a `checkbox_list` field, then it will be visible if users select any of the value "Apple" or "Samsung":

```php
'visible' => ['brand', 'in', ['Apple', 'Samsung']];
```

If you use with a `taxonomy_advanced` field, please **set the value to the term IDs**:

```php
'visible' => ['product_type', 'in', [2, 4]]; // The field will be visible if the product type has any term with ID 2 or 4.
```

### `between`

This operator check if the field value is between minimum and maximum values.

Let say that we have a date field `released_date` and we want to show another field only when `released_date` is between "2015-06-01" and "2015-12-01":

```php
'visible' => [ 'released_date', 'between', [ '2015-06-01', '2015-12-01' ] ]
```

Please note that the `between` operator does not only compare numeric fields but also date and time fields.

### `starts with`

This operator checks if field value starts with a string:

```php
'visible' => [ 'brand', 'starts with', 'App' ] // Apple, App
```

### `ends with`

This operator checks if field value ends with a string:

```php
'visible' => [ 'brand', 'ends with', 'le' ] // Apple, Google
```

### `match`

This operator checks if field value matches a regular expression:

```php
'visible' => [ 'brand', 'match', '[a-z]$' ],
```

### `not`

We can combine `not` operator with other operators to negative the meaning of them. So we'll have `not contains`, `not in`, `not match`, `not starts with`, `not ends with`, `not between`.

## Multiple conditions

Sometimes, you'll need to use more than one conditional logic. To do that, you can define multiple conditions to show or hide a meta box or a custom field. For example:

```php
// Visible when 'brand' is 'Apple' AND 'released_year' is between 2010 and 2015
'visible' => [
    [ 'brand', 'Apple' ],
    [ 'released_year', 'between', [ 2010, 2015 ] ],
],
```

By default, if you define compound statement, the logic will correct if **ALL** of them are correct. In case you want to visible a field if **ONE** of them is correct, move all statements to `when` key and put new `relation` key like this example:

```php
// Visible when 'brand' is 'Apple' OR 'released_year' is between 2010 and 2015
'visible' => [
    'when' => [
         [ 'brand', 'Apple' ],
         [ 'released_year', 'between', [ 2010, 2015 ] ],
     ],
     'relation' => 'or'
],
```

## Special values

This section shows you how to specify the `value` in the conditions for some specific fields.

### Checkbox field

For checkboxes, use `0` or `false` if it's not checked, `1` or `true` if it's checked.

```php
'visible' => [ 'checkbox_field', true ], // Visible if checkbox_field is checked
```

### Media fields

For media fields that use WordPress media popup to handle upload like `file_advanced`, `image_advanced`, the extension checks **number of uploaded files** instead of their values.

This example shows or hides a field depends on there's a file uploaded:

```php
// Visible when file_advanced field is has file
'visible' => [ 'file_advanced', '>', 0 ],

// Or hidden if image_advanced doesn't contains anything
'hidden' => [ 'image_advanced', 0 ],
```

## Toggle by other elements

MB Conditional Logic can work with other HTML elements the same as Meta Box fields. With this feature, you can show or hide any meta box or field based on post types, page parent, post ID, categories...

To make it work with HTML element, instead of passing the field ID as the first parameter, please pass the **element's ID**.

Here are the list of available built-in WordPress elements:

Param|Description
---|---
`post_ID`|Post ID
`page_template`|Page template
`parent_id`|Parent post ID
`post_format`|Post format

Examples:

Display a meta box (or a field) if page template is `template-custom.php`:

```php
'visible' => [ 'page_template', 'template-custom.php' ],
```

### Featured image

Featured image is a special HTML element. It has the field name/ID `_thumbnail_id` and when empty, WordPress sets the value to `-1`. The plugin can detect changes for featured image and let you define conditions with it.

Examples:

Make a field visible if no featured image:

```php
'visible' => [ '_thumbnail_id', '=', '-1' ],
```

Make a field visible if featured image is set:

```php
'visible' => [ '_thumbnail_id', '!=', '-1' ],
```

Or make a field visible only if featured image is a specific image with ID `123`:

```php
'visible' => [ '_thumbnail_id', '=', '123' ],
```

## Using outside field groups

The extension can even work with elements outside field groups. Let's say you want to hide an element `.custom-div` when a field with ID `brand` is `Microsoft`, then you can do that with the following code:

```php
add_filter( 'rwmb_outside_conditions', function( $conditions ) {
    $conditions['.custom-div'] = [
        'hidden' => ['brand', 'Microsoft'],
        // or you can write this for clarity
        'hidden' => ['#brand', 'Microsoft'],
	];
    return $conditions;
} );
```

Note that the `.custom-div` can be any CSS selector, like `#custom-id` or `.my-class .children`.

If you want to hide an element `.custom-div` based on a value of an input, which is not a Meta Box field, specify its ID as follows:

```php
add_filter( 'rwmb_outside_conditions', function( $conditions ) {
    $conditions['.custom-div'] = array(
        'hidden' => ['#input-id', 'value'],
    );
    return $conditions;
} );
```

If you want to hide a tab created by [MB Tabs](/extensions/meta-box-tabs/), [see this](/hide-tabs-with-conditional-logic/).

## Using with taxonomies

### Post category

For post category, use `post_category` as the first parameter:

```php
'visible' => ['post_category', 'in', [4, 5, 6]]
```

By default, the extension uses category IDs to check. If you want to use slug, use the following code:

```php
'visible' => ['slug:post_category', 'in', ['fashion', 'gaming', 'technology']]
```

### Post tag

Support for post tag is available only for Gutenberg editor.

To add conditions by post tag, use `tags` as the first parameter:

```php
'visible' => ['tags', 'in', [4, 5, 6]]
```

Unlike post category, you have to use tag IDs.

### Custom taxonomies

For custom taxonomies, use `tax_input[taxonomy_slug]` as the first parameter:

```php
'hidden' => ['tax_input[product]', 'in', [5, 6, 7]],
```

Similarly to post category, it works with slug, too.

```php
'hidden' => ['slug:tax_input[product]', '!=', 'drones']
```

## Using with Group

The extension uses jQuery to check the field ID and value to match the condition. For the sub-fields in a **non-cloneable** group, the field ID actually has the format `groupID_fieldID`. You need to use that format for the condition like this:

```php
[
	'id'     => 'group',
	'type'   => 'group',
	'fields' => [
		[
			'id'    => 'brand',
			'name'  => 'Brand',
			'type'  => 'select',
			'options' => [
				'apple'     => 'Apple',
				'google'    => 'Google',
				'microsoft' => 'Microsoft'
			],
		),
		[
			'id'    => 'apple_products',
			'name'  => 'Which Apple product that you love?',
			'type'  => 'radio',
			'options' => [
				'iPhone'  => 'iPhone',
				'iPad'    => 'iPad',
				'Macbook' => 'Macbook',
			],

			// highlight-next-line
			'visible' => [ 'group_brand', '=', 'apple' ]
		],
	],
],
```
If the group is **cloneable**, the conditional logic **runs inside the clone only**. In this case you **don't** have to change the sub-field IDs like above.

## Custom callback

To set conditional logic with custom JavaScript callback, just put your function call in the first parameter. Like so:

In your JavaScript file:

```js
// Your custom JavaScript function that checks the condition
function my_custom_callback() {
    return true;
}
```

In your PHP file:

```php
'visible' => [ 'my_custom_callback()', true ]
```

Please note that your function can return anything you want and you can use any operator to compare. For example

```js
// Your js
function dummy_function() {
    return ['foo', 'bar', 'baz];
}
```

```php
// Your field or meta box
'hidden' => [ 'dummy_function()', 'contains', 'bar' ];
```

## Toggle types

By default, we use jQuery `.show()` and `.hide()` method (which equivalent to CSS `display` property) to toggle elements. Imagine you have three fields named A, B, and C. So by default it will display vertical like so:

```
A
-
B
-
C
```

Or if you use Column extension, it will display horizontal like so:

```
A | B | C
```

What happen when field B is hidden? The field C will jump to B place, sometimes, you will want to keep the position of these field, so if field B is hidden, it should keep the blank space like so:

```
A
-

-
C
```
Or

```
A | | C
```

So, basically, we have to use CSS `visibility` property instead of `display` property. To do so, just add `'toggle_type' => 'visibility'` to your Meta Box.

We also support **slide and fade animations**. In order to use these animation just set `toggle_type` to `slide` or `fade`.

In short, we support 4 toggle types: `visibility`, `display`, `slide`, `fade`.

## Running conditional logic manually

There are situations where you manually modify some fields' values by code. In those cases, no events of the changes are fired, and your conditions might not be applied for other fields.

To fix that, you can run the conditions manually via JavaScript like this:

```js
let $scope = $( '.scope' );
rwmb.runConditionalLogic( $scope );
```

Where `.scope` is a selector of the wrapper element, which contains all the fields you want to apply conditional logic to. It might be a field group, or any `div`, or even the whole page. When running this code, the conditional logic will be applied to all fields inside this wrapper element. In other words, some fields will be visible or hidden based on the current values of other fields.

## Notes

### Cloneable groups

It's important to note that, when you have a **cloneable group**, then all the rules are applied **within** the group clones only. It won't work if the rule refers to a field outside of the group.

In other words, both the dependency and dependant of the rules must be sub-fields of the group.

### Chained hidden fields

Another important rule is that **if a field is hidden, then all fields depend on it will be hidden** regardless of their values.

For example, if you have 3 fields A, B, C and set the rule as follow:

```
IF A = 1 or B = 1 THEN show C
```

Then if A or B is hidden, the C is always hidden, regardless values of A and B.

## Known issues

Conditional Logic doesn't works with [autocomplete](/fields/autocomplete/) field.

# MB Custom Post Types & Custom Taxonomies

import LiteYouTubeEmbed from 'react-lite-youtube-embed';
import 'react-lite-youtube-embed/dist/LiteYouTubeEmbed.css';
import Tabs from '@theme/Tabs';
import TabItem from '@theme/TabItem';
import FAQ from '@site/src/components/FAQ';

This extension helps you create custom post types and custom taxonomies with a user-friendly interface.

## Creating post types

To create a new custom post type, go to **Meta Box » Post Types** and click **New Post Type**:

![create a new custom post type](https://imgur.elightup.com/3GKvMnb.png)

There are several settings divided into tabs. In most cases, you only need to enter the plural name, singular name, and slug in the **General** tab and click the **Publish** button to register the post type.

### Post type settings

If you want to customize the post type such as changing the menu icon or disabling the block editor (Gutenberg) for it, please see the settings below.

:::tip

From our experience, the most important settings are in the **Advanced** tab.

:::

<Tabs>
  <TabItem value="general" label="General" default>

![creating a post type](https://imgur.elightup.com/GhMqEU4.png)

Name | Description
---|---
Plural name | General name for the post type, usually plural. Required.
Singular name | Name for one object of this post type. Required.
Slug | Post type key. Must not exceed 20 characters and may only contain lowercase alphanumeric characters, dashes, and underscores.

When entering a singular name for the post type, the slug is automatically generated. You can manually change the slug if necessary.

  </TabItem>

  <TabItem value="label" label="Label">

Labels are automatically generated from the post type's plural and singular names.

![label settings](https://imgur.elightup.com/h3pXR2Y.png)

Name | Description
---|---
Add new | Label for adding a new singular item. Default is 'Add New' for both hierarchical and non-hierarchical types.
Add new item | Label for adding a new singular item. Default is 'Add New Post' / 'Add New Page'.
Edit item | Label for editing a singular item. Default is 'Edit Post' / 'Edit Page'.
New item | Label for the new item page title. Default is 'New Post' / 'New Page'.
View item | Label for viewing a singular item. Default is 'View Post' / 'View Page'.
View items | Label for viewing post type archives. Default is 'View Posts' / 'View Pages'.
Search items | Label for searching items. Default is 'Search Posts' / 'Search Pages'.
Not found | Label used when no items are found. Default is 'No posts found' / 'No pages found'.
Not found in trash | Label used when no items are in the Trash. Default is 'No posts found in Trash' / 'No pages found in Trash'.
Parent items | Label used to prefix parents of hierarchical items. Not used on non-hierarchical post types. Default is 'Parent Page:'.
All items | Label to signify all items in a submenu link. Default is 'All Posts' / 'All Pages'.
Nav menu archives | Label for archives in nav menus. Default is 'Post Archives' / 'Page Archives'.
Attributes meta box | Label for the attributes meta box. Default is 'Post Attributes' / 'Page Attributes'.
Media frame button | Label for the media frame button. Default is 'Insert into post' / 'Insert into page'.
Media frame filter | Label for the media frame filter. Default is 'Uploaded to this post' / 'Uploaded to this page'.
Featured image meta box | Label for the featured image meta box title. Default is 'Featured image'.
Setting the featured image | Label for setting the featured image. Default is 'Set featured image'.
Removing the featured image | Label for removing the featured image. Default is 'Remove featured image'.
Used as featured image | Label in the media frame for using a featured image. Default is 'Use as featured image'.
Menu name | Label for the menu name. Default is the same as plural name.
Table filter hidden heading | Label for the table views hidden heading. Default is 'Filter posts list' / 'Filter pages list'.
Table date filter hidden heading | Label for the date filter in list tables. Default is 'Filter by date'.
Table pagination hidden heading | Label for the table pagination hidden heading. Default is 'Posts list navigation' / 'Pages list navigation'.
Table hidden heading | Label for the table hidden heading. Default is 'Posts list' / 'Pages list'.
Item published | Label used when an item is published. Default is 'Post published.' / 'Page published.'
Item published privately | Label used when an item is published with private visibility. Default is 'Post published privately.' / 'Page published privately.'
Item switched to draft | Label used when an item is switched to a draft. Default is 'Post reverted to draft.' / 'Page reverted to draft.'
Item scheduled | Label used when an item is scheduled for publishing. Default is 'Post scheduled.' / 'Page scheduled.'
Item updated | Label used when an item is updated. Default is 'Post updated.' / 'Page updated.'

  </TabItem>

  <TabItem value="advanced" label="Advanced">

![advanced settings](https://imgur.elightup.com/AzdNBWH.png)

Name | Description
---|---
Description | A short descriptive summary of what the post type is.
Public | Whether a post type is intended for use publicly either via the admin interface or by front-end users. Default false.
Hierarchical | Whether the post type is hierarchical (e.g. page). Default false.
Exclude from search | Whether to exclude posts with this post type from front-end search results. Default is the opposite value of the public settings.
Publicly queryable | Whether queries can be performed on the front end for the post type as part of `parse_request()`. Default is inherited from the public settings.
Show UI | Whether to generate and allow a UI for managing this post type in the admin. Default is the value of the public settings.
Show in menu | Where to show the post type in the admin menu.
Menu position after | The position in the menu order the post type should appear.
Menu icon | The URL to the icon to be used for this menu (Dashicons).
Show in nav menus | Makes this post type available for selection in navigation menus. Default is the value of the public settings.
Show in admin bar | Makes this post type available via the admin bar. Default is the value of show in menu settings.
Show in REST | Whether to include the post type in the REST API. Set this to true for the post type to be available in the block editor.
REST API base slug | Custom base URL of REST API route. Default is the post type slug.
Capability type | The string to use to build the read, edit, and delete capabilities. Default 'post'.
Has archive | Whether there should be post type archives. Will generate the proper rewrite rules if the rewrite settings are enabled. Default false.
Custom archive slug | The custom archive slug. Default is the post type slug.
Custom rewrite slug | Customize the permalink slug. Default is the post type slug.
Prepended permalink structure | Whether the permalink should be prepended. Example: if your permalink is `/blog/`, then your links will be: `false` -> `/news/`, `true` -> `/blog/news/`. Default true.
Query var | Sets the custom query var key for this post type. Default is the post type slug.
Can export | Whether to allow this post type to be exported. Default true.
Delete with user | Whether to delete posts of this type when deleting a user.

  </TabItem>

  <TabItem value="supports" label="Supports">

These are core features the post type supports.

![supports settings](https://imgur.elightup.com/Fk9dp5w.png)

Name | Description
---|---
Title | Post title
Editor | Post editor (the main content)
Excerpt | Post excerpt
Author | Post author
Thumbnail | The featured image
Trackbacks | The trackbacks/pingbacks from other websites
Custom fields | The custom fields meta box in the edit screen
Comments | Enable comments for posts of this type
Revisions | Enable revisions for posts of this type
Page attributes | The attributes meta box to select post template and parent
Post formats | Enable post format for posts

  </TabItem>

  <TabItem value="taxonomies" label="Taxonomies">

This is the list of taxonomies that are registered for the post type. Select the taxonomies you want to use for the post type.

![taxonomies settings](https://imgur.elightup.com/aggYlsw.png)

  </TabItem>

  <TabItem value="features" label="Features" default>

![The Features tab of MB Custom Post Type](./img/cpt-features-tab.png)

Name | Description
---|---
Re-Order Posts | Order posts of that post type using a drag and drop interface. [Learn more here](/reorder-posts-terms/).
Add toggle status column | Add a column to quickly toggle post status between published and draft.

  </TabItem>

</Tabs>

### Getting PHP code

If you're familiar with PHP, you might want to get the PHP code to register the post type. To do that, click the **Get PHP Code** button and copy the generated code. Then can insert it into your theme's `functions.php` file (or your plugin's file). After inserting, you can deactivate the extension to make your site a little bit faster.

## Creating taxonomies

To create a new custom taxonomy, go to **Meta Box » Taxonomies** and click **Add New**:

![create a new taxonomy](https://imgur.elightup.com/zKK4f87.png)

There are several settings divided into tabs. In most cases, you only need to enter the plural name, singular name, and slug in the **General** tab and click the **Publish** button to register the taxonomy.

The settings are similar to creating post types above.

### Taxonomy settings

If you want to customize the taxonomy such as setting the hierarchy or showing it in the post type list table, please see the settings below.

:::tip

From our experience, the most important settings are in the **Advanced** tab.

:::


<Tabs>
  <TabItem value="general" label="General" default>

![create taxonomies](https://imgur.elightup.com/yy7wy9w.png)

Name | Description
---|---
Plural name | General name for the taxonomy, usually plural. Required.
Singular name | Name for one object of this taxonomy. Required.
Slug | Taxonomy key, must not exceed 32 characters and may only contain lowercase alphanumeric characters, dashes, and underscores.

When entering a singular name for the taxonomy, the slug is automatically generated. You can manually change the slug if necessary.

  </TabItem>

  <TabItem value="labels" label="Labels" default>

Labels are automatically generated from the taxonomy's plural and singular names.

![taxonomy label settings](https://imgur.elightup.com/LtuXkrh.png)

Name | Description
---|---
Search items | Label for searching items. Default 'Search Tags'/'Search Categories'.
Popular items | Label for most popular items, only used for non-hierarchical taxonomies. Default 'Popular Tags'.
All items | Label to signify all items in a submenu link. Default 'All Tags'/'All Categories'.
Parent item | Label for parent item, only used for hierarchical taxonomies. Default 'Parent Category'.
Parent item colon | The same as parent item, but with colon : in the end.
Edit item | Label for adding a new singular item. Default 'Edit Tag'/'Edit Category'.
View item | Label for viewing a singular item. Default 'View Tag'/'View Category'.
Update item | Label for updating a singular item. Default 'Update Tag'/'Update Category'.
Add new item | Label for adding a new singular item. Default 'Add New Tag'/'Add New Category'.
New item name | Label for new item name. Default 'New Tag Name'/'New Category Name'.
Separate items with commas | This label is only used for non-hierarchical taxonomies. Default 'Separate tags with commas', used in the meta box.
Add or remove items | This label is only used for non-hierarchical taxonomies. Default 'Add or remove tags', used in the meta box when JavaScript is disabled.
Choose from most used | This label is only used on non-hierarchical taxonomies. Default 'Choose from the most used tags', used in the meta box.
Not found | Label used in the meta box and taxonomy list table. Default 'No tags found'/'No categories found'.
No terms | Label used in the posts and media list tables. Default 'No tags'/'No categories'.
Filter by | This label is only used for hierarchical taxonomies, used in the posts list table. Default 'Filter by category'.
Table pagination hidden heading | Label for the table pagination hidden heading.
Table hidden heading | Label for the table hidden heading.
Most used tab | Title for the Most Used tab. Default 'Most Used'.
Back to items | Label displayed after a term has been updated.
Menu name | Label for the tab in the admin menu.

  </TabItem>

  <TabItem value="advanced" label="Advanced" default>

![ taxonomy advanced settings](https://imgur.elightup.com/dOCcR5d.png)

Name | Description
---|---
Description | A short descriptive summary of what the taxonomy is for.
Public | Whether a taxonomy is intended for use publicly either via the admin interface or by front-end users.
Public queryable| Whether the taxonomy is publicly queryable. If not set, the default is inherited from the public settings.
Hierarchical | Whether the taxonomy is hierarchical. Default false.
Show UI | Whether to generate and allow a UI for managing terms in this taxonomy in the admin. If not set, the default is inherited from the public settings (default true).
Show in menu | Whether to show the taxonomy in the admin menu. If true, the taxonomy is shown as a submenu of the object type menu. If false, no menu is shown. The show UI settings must be true. If not set, default is inherited from the show UI settings.
Show in nav menus | Makes this taxonomy available for selection in navigation menus. If not set, the default is inherited from the public settings.
Show on edit page | Whether to show the taxonomy meta box on the edit page.
Show in REST | Whether to include the taxonomy in the REST API. Set this to true for the taxonomy to be available in the block editor.
REST API base slug | To change the base URL of the REST API route. Default is the taxonomy slug.
Show tag cloud | Whether to list the taxonomy in the Tag Cloud Widget controls. Default is inherited from the show UI settings.
Show in quick edit | Whether to show the taxonomy in the quick/bulk edit panel. Default is inherited from the show UI settings.
Show admin column | Whether to display a column for the taxonomy on its post type list table. Default false.
Custom rewrite slug | Customize the permastruct slug. Default is the taxonomy slug.
Prepended permalink structure | Should the permastruct be prepended. Default true. Example: if your permalink structure is `/blog/`, then your links will be: false -> `/news/`, true -> `/blog/news/`.
Hierarchical URL | Either hierarchical rewrite tag or not. Default false.
Query var | Sets the query var key (taxonomy slug) for this taxonomy.
Sort | Whether terms in this taxonomy should be sorted.

  </TabItem>

  <TabItem value="post type" label="Post types" default>

This is the list of post types that are connected with the taxonomy. Select the post types you want to connect to the taxonomy.

![post types settings](https://imgur.elightup.com/MQCmchM.png)

  </TabItem>

  <TabItem value="permissions" label="Permissions" default>

![Permissions tab](./img/taxonomy-permissions-tab.png)

Name | Description
---|---
Manage terms | The capability required for managing terms.
Edit terms | The capability required for editing terms.
Delete terms | The capability required for deleting terms.
Assign terms | The capability required for assigning terms.

  </TabItem>


  <TabItem value="features" label="Features" default>

![The Features tab of Custom Taxonomy](./img/taxonomy-features-tab.png)

Name | Description
---|---
Re-Order Terms | Order terms of this taxonomy using a drag and drop interface. [Learn more here](/reorder-posts-terms/).

  </TabItem>

</Tabs>

### Getting PHP code​

If you're familiar with PHP, you might want to get the PHP code to register the taxonomy. To do that, click the **Get PHP Code** button and copy the generated code. Then can insert it into your theme's `functions.php` file (or your plugin's file). After inserting, you can deactivate the extension to make your site a little bit faster.

## Video tutorial

The video below shows you the steps and explains the settings for a custom post type (and also custom taxonomy):

<LiteYouTubeEmbed id='-oYrHGOri4w' />

## Notes

### Custom capabilities for custom post types

When creating custom post types, you have 3 options to set capabilities: copy from "post", copy from "page" or create custom capabilities. While copying from "post" or "page" is clear (the plugin applies the same capabilities from post or page for this custom post type), creating custom capabilities might be confusing.

When you select "custom" for capabilities, the plugin does the following (assumming we have a post type `book`):

- Set `'capability_type' => array( 'book', 'books' ),`, and
- Set `'map_meta_cap' => true`

These 2 steps will create the following capabilities for the post types:

```php
[edit_post]              => 'edit_book'
[read_post]              => 'read_book'
[delete_post]            => 'delete_book'

// Primitive capabilities used outside of map_meta_cap():

[edit_posts]             => 'edit_books'
[edit_others_posts]      => 'edit_others_books'
[publish_posts]          => 'publish_books'
[read_private_posts]     => 'read_private_books'

// Primitive capabilities used within map_meta_cap():

[read]                   => 'read',
[delete_posts]           => 'delete_books'
[delete_private_posts]   => 'delete_private_books'
[delete_published_posts] => 'delete_published_books'
[delete_others_posts]    => 'delete_others_books'
[edit_private_posts]     => 'edit_private_books'
[edit_published_posts]   => 'edit_published_books'
[create_posts]           => 'edit_books'
```

And thanks to `map_meta_cap`, the admin role can edit the posts types.

### Block templates with MB Blocks

Sometimes you want to load default blocks created by [MB Blocks](/extensions/mb-blocks/) when creating a new post. Block templates allow specifying a default initial state for an editor session. Use the argument `template` when registering the post type:

`'template'              => [
    ['meta-box/{$block_id}']
]`

### Reserved terms

There is a complete set of reserved keywords, or terms, in WordPress that should not be used in certain circumstances as they may conflict with core functionality. See more in [the documentation](https://codex.wordpress.org/Reserved_Terms).

## FAQ

<FAQ question="Why do I see 404 errors (not found) for my custom post type?">

The problem is that WordPress hasn't refreshed the rewrite rules for the custom post type. Please go to **Settings » Permalink** and re-save the settings.

</FAQ>

<FAQ question="How do I customize the permalink for custom post types?">

Meta Box only supports changing the rewrite slug for custom post types. If you want more customization for the permalink, you'll need a plugin like [Custom Post Type Permalinks](https://wordpress.org/plugins/custom-post-type-permalinks/) or if you're a developer, you can follow [this guide](https://www.shibashake.com/wp/custom-post-type-permalinks-part-2).

</FAQ>

<FAQ question="How do I add custom taxonomies to the permalink of custom post types?">

Similar to the question above, Meta Box only supports changing the rewrite slug for custom post types. If you want to add custom taxonomies to the permalink of custom post types, you'll need a plugin like [Custom Post Type Permalinks](https://wordpress.org/plugins/custom-post-type-permalinks/) or if you're a developer, you can follow [this guide](https://wordpress.stackexchange.com/q/94817/2051).

</FAQ>

<FAQ question="How do I change a post type slug without losing posts?">

After changing your post type slug, you can use the plugin [Post Type Switcher](https://wordpress.org/plugins/post-type-switcher/) to switch the posts from the old post type to the new one.

</FAQ>

<FAQ question="Will my posts be deleted if I remove a post type?">

No, they're still in the database, but not visible. To show them again, create a post type with the old slug.

</FAQ>

<FAQ question="Can I change the back-end UI for selecting taxonomy to radio buttons?">

The default WordPress UI can't be changed to radio buttons. However, you can remove the default WordPress UI and create a [taxonomy field](/fields/taxonomy/) with Meta Box, which supports many ways to display and choose terms, including radio buttons. See this video for how to do that:

<LiteYouTubeEmbed id='6KBmZX-c6MY' />

</FAQ>

<FAQ question="Can I use this extension without Meta Box?">

Yes! This extension can work independently without Meta Box. If you only need custom post types and/or custom taxonomies (no custom fields), then you can install the extension for free from [WordPress.org](https://wordpress.org/plugins/mb-custom-post-type/).

</FAQ>

# MB Custom Table

import LiteYouTubeEmbed from 'react-lite-youtube-embed';
import 'react-lite-youtube-embed/dist/LiteYouTubeEmbed.css';

**MB Custom Table** helps you to save custom fields' values to a custom table instead of the default WordPress meta table. All custom fields for a post are saved in a single row, where each column contains the value of a corresponding field.

This reduces the number of rows in the database which can help improve the performance when the data grows and lets you have all of your data in one place, so you can easily view, edit, import, and export it.

![custom table overview](https://imgur.elightup.com/BzE1Fvx.png)

## Getting started

The easiest way to work with custom tables is using [MB Builder](/extensions/meta-box-builder/). It provides a UI to create custom tables and automatically save custom fields to table columns.

When creating a field group with MB Builder, click on the settings button on the left sidebar and you'll see options to use a custom table as follows:

![Create a custom table with MB Builder](img/save-data-custom-table.png)

Turn on the option to **Custom table**, and enter the **Table name**. By default, the table name doesn't contain the WordPress table prefix. If you want to use the WordPress table prefix, enable the **Include table prefix** option (and don't enter the prefix manually).

If you select the option **Auto create table**, the plugin will attempt to create the table for you. Once it's done, you'll see the custom table in your database, which has columns that match your custom field IDs, each column per field ID. To make the data compatible with the field data, the plugin uses the data type `TEXT` for all columns.

Now you can go to the edit post screen (or the edit user profile if you use the meta box for users) and save the post. You'll see the data is saved in the new custom table instead of the post meta table.

:::info How does it work?

The plugin will map custom table columns with custom field IDs, one column per custom field. If you have a group field, then the column name will be the top-level group ID, and it won't create columns for sub-fields. When you save a post, each custom field is stored in a corresponding column.

:::

## Using custom tables with code

Using custom tables with code is suitable if you want to have more control over the data type or index key which can help improve the performance. It's recommended when you're a developer and you're familiar with MySQL.

### Creating a custom table

Use the plugin API to create a custom table as follows:

```php
add_action( 'init', function () {
	MetaBox\CustomTable\API::create(
		'my_custom_table',                // Custom table name.
		[                                 // List of columns with data types.
			'address' => 'TEXT NOT NULL',
			'phone'   => 'TEXT NOT NULL',
			'email'   => 'VARCHAR(20) NOT NULL',
		],
		[ 'email' ],                      // List of columns that will be indexed.
	);
} );
```

Here we use the `init` hook to make sure the API is ready to use. The code will generate an SQL query for creating a custom table like this:

```php
$sql = 'CREATE TABLE my_custom_table (
  ID int(11) unsigned NOT NULL,
  address TEXT NOT NULL,
  phone TEXT NOT NULL,
  email VARCHAR(20) NOT NULL
  PRIMARY KEY  (ID)
  KEY email
)';
```

Parameter|Description
---|---
`table_name`|The custom table name. Required.
`columns`|Array of table columns, where the key is the column name and the value is the [MySQL data type](https://dev.mysql.com/doc/refman/8.0/en/data-types.html). Required.
`keys`|Array of key column names, which will be indexed. Optional. Note that if you want to index BLOB and TEXT columns, make sure you set a fixed length for them.

### Notes

A. Use **only alphanumeric and underscore characters** for the table name. Do not use any special characters, dashes, or spaces.

B. The **table name doesn't need to include the WordPress table prefix**. The extension does not put any constraints on you to define the table name. If you want to include the WordPress table prefix, do this:

```php
global $wpdb;
MetaBox\CustomTable\API::create( "{$wpdb->prefix}my_custom_table", [
	'address' => 'TEXT NOT NULL',
	'phone'   => 'TEXT NOT NULL',
	'email'   => 'VARCHAR(20) NOT NULL',
] );
```

C. **Do not add ID column**. The ID column is automatically created and set as the primary key in the table. It's used to store the object ID for future reference. Object ID can be the post ID, user ID, or term ID depending on what meta type the table is used for.

D. The **column names must match custom field IDs**, one column per custom field. If you create a column to store a group, then the column name must be the top-level group ID. Don't create columns for sub-fields.

E. The extension uses WordPress's recommended method to create a custom table, which means if the table already exists, the code will do nothing. Although, **it's recommended to run the code that creates custom tables [only when activating your plugin](https://developer.wordpress.org/plugins/creating-tables-with-plugins/)**, like this:

```php
register_activation_hook( __FILE__, function() {
	MetaBox\CustomTable\API::create( 'my_custom_table', [
		'address' => 'TEXT NOT NULL',
		'phone'   => 'TEXT NOT NULL',
		'email'   => 'VARCHAR(20) NOT NULL',
	], [ 'email' ] );
} )
```

But if you can't run the code when activating your plugin, it's fine to run the code with the `init` or `plugins_loaded` hook.

### Using existing tables

You can also use an existing table to store your data. The table can be [manually created](https://developer.wordpress.org/plugins/creating-tables-with-plugins/) by a plugin, a theme, or any tool like phpMyAdmin. To use it with Meta Box:

- **The custom table must have the ID column**. It's required to connect entries in the custom table with WordPress posts, terms, or users table.
- **The columns in the custom table much match the field IDs in your meta box**.

### Connecting custom fields to a custom table

To tell a field group to use a custom table to store custom fields, you need to specify 2 parameters `storage_type` and `table` like this:

```php
add_filter( 'rwmb_meta_boxes', function( $meta_boxes ) {
	$meta_boxes[] = [
		'title'        => 'Meta Box Title',
		// highlight-start
		'storage_type' => 'custom_table',
		'table'        => 'my_custom_table', // Your custom table name
		// highlight-end
		'fields'       => [
			[
				'id'   => 'address',
				'name' => 'Address',
			],
			[
				'id'   => 'phone',
				'name' => 'Phone',
			],
			[
				'id'   => 'email',
				'type' => 'email',
				'name' => 'Email',
			],
		],
	];
	return $meta_boxes;
} );
```

:::warning Column names and field IDs

Again, column names have to match your custom fields' IDs, one column per custom field. If you create a column to store a group, then the column names must be the top-level group ID. No need to create columns for sub-fields.

:::

Now you can go to the edit post screen (or the edit user profile if you use the meta box for users) and save the post. You'll see the data is saved in the new custom table instead of the post meta table.

### Video tutorial

<LiteYouTubeEmbed id='o8ICxe8nbrI' />

## Getting field value

Use the helper [rwmb_meta()](/functions/rwmb-meta/) function to get a field value. The only difference is you need to specify the table name in the 2nd argument:

```php
$args = [
	'storage_type' => 'custom_table',
	'table'        => $table_name,
];
$value = rwmb_meta( $field_id, $args, $post_id );
echo $value;
```

Also, note that the call to the custom table will be cached, e.g. if you call the helper function several times for the same `$post_id`, it will only query once. This technique will improve the database performance.

You can also use the [`[rwmb_meta]`](/shortcode/) shortcode to display a field value. You need to set the shortcode attributes similar to the `rwmb_meta()` helper function:

```
[rwmb_meta id="field_id" storage_type="custom_table" table="table_name"]
```

## Group fields

For group fields, it's worth mentioning that the whole group value, including sub-field values, is saved as a serialized array in **one column**. So, they're not as flat as other fields.

That means:

- When you create a table, please create only one column for the group (even if that group contains many sub-fields or sub-groups). The column name must be the group ID.
- The group value is serialized, you cannot make SQL queries against the sub-fields values. Thus, you don't benefit from the custom table structure. So, be careful to decide on what fields should be in groups and what fields should not. It's recommended to use groups only for *data storing, not for querying*.

While the data of the group is serialized, it will be unserialized when getting via helper functions. So you don't have to unserialize yourself.

## Query posts with WP_Query

It's important to understand that the plugin doesn't hook to the `WP_Query` to get posts by custom fields stored in the custom table. In other words, using `meta_*` in `WP_Query` for custom fields won't work.

To get posts by custom fields in the custom table, you need to make an extra query to get the post IDs first. Then use these IDs to get full post objects.

Here is an example:

```php
global $wpdb;
$ids = $wpdb->get_col( "SELECT ID FROM your_table WHERE field1 = 'value1' OR field2 = 'value2'" );

if ( empty( $ids ) ) {
	echo 'There are no posts';
} else {
	$query = new WP_Query( [
		'post_type' => 'post',
		'post__in'  => $ids,
	] );
	// Do something
}
```

This technique also works with terms and users.

## Custom models

Besides custom tables for built-in WordPress posts, terms, and users, the plugin allows you to create custom models, that mimic the WordPress posts, but store the data completely in custom tables. So you don't need to connect to posts, terms, or users anymore. The data is stored only in one table, which is more efficient.

Pros:

- Better data structure, because you can define the custom table to match your needs.
- Don't mess with WordPress tables. You manage data on your own.
- Complete CRUD for models so you can create/edit/delete them quickly.
- Compatible with all Meta Box field types.
- Use the similar Meta Box and WordPress API/UI to show a list of models or edit models.
- Compatible with MB Admin Columns extension to show fields in admin columns.

Cons:

- Models don't have front-end templates like posts. You won't have permalinks for each model and their archive. Models should be used for managing data. If you want to have the power of the templates, then you should use the normal custom tables above.
- Limited compatibility with some extensions such as MB Relationships and MB Views.

### Usage

To create and use custom models, you need to follow 3 steps below:

#### Step 1: Register a model

Registering a model is very similar to a custom post type in WordPress, with fewer parameters. The code below registers a custom model `transaction`.

```php
// Step 1: Register a model.
add_action( 'init', function() {
	mb_register_model( 'transaction', [
		'table'  => 'transactions',
		'labels' => [
			'name'          => 'Transactions',
			'singular_name' => 'Transaction',
		],
		'menu_icon' => 'dashicons-money-alt',
		'supports' => [ 'author', 'published_date', 'modified_date' ],
	] );
} );
```

Parameter | Description
---|---
`table`|Custom table for the model. Required.
`labels`|An array of labels for this model. Required. See below for the list of labels.
`show_in_menu`|Where to show the menu in the admin menu. Optional. Default `true`.
`menu_position`|The position in the menu where the model should appear. Optional. Default `null` (at the bottom).
`menu_icon`|The URL to the icon to be used for this menu. Pass a base64-encoded SVG using a data URI, which will be colored to match the color scheme -- this should begin with 'data:image/svg+xml;base64,'. Pass the name of a Dashicons helper class to use a font icon, e.g. 'dashicons-chart-pie'. Pass 'none' to leave div.wp-menu-image empty so an icon can be added via CSS. Defaults to use the posts icon.
`parent`|Menu parent, if you want to show the model as a sub-menu. Optional.
`capability`|The capability to access the menu and create/edit/delete models. Default `edit_posts`.
`supports`|Feature(s) the model supports. Array. Optional. Can be any of `author`, `published_date`, `modified_date`.

**List of labels:**

Name|Description
---|---
`name`|General name for the model, usually plural.
`menu_name`|Label for the menu name. The default is the same as the name.
`singular_name`|Name for one item of this model.
`add_new`|Label for 'Add New' models.
`add_new_item`|Label for adding a new singular item.
`edit_item`|Label for editing a singular item.
`search_items`|Label for searching plural items.
`not_found`|Label used when no items are found.
`all_items`|Label to signify all items in the page title.
`item_updated`|Label used when an item is updated.
`item_added`|Label used when an item is added.
`item_deleted`|Label used when an item is deleted.

**Supports:**

Sometimes, you may want your model to automatically include metadata such as the author, published date, or modified date - without having to manually set them each time.

To do this, you can use the `supports` parameter when defining your model. This parameter is **optional** and accepts an array of supported features:

- `author` - Automatically assigns the current user as the author.
- `published_date` - Automatically sets the date when the model is created.
- `modified_date` - Automatically updates the date when the model is modified.

For example:

```php
'supports' => [ 'author', 'published_date', 'modified_date' ],
```

By adding these options, your model will automatically handle common metadata fields, making your workflow simpler and more consistent.

#### Step 2: Create a custom table for the model

Creating a custom table is exactly the same to the section above. However, for models, the plugin automatically:

- Adds an `ID` column, and sets it as primary key and auto-increment.
- Adds columns for supports (`author`, `published_date`, `modified_date`) if needed.
- Adds a key for `author` if the model supports it.

#### Step 3: Register fields for the model, corresponding to the custom table structure

Registering fields for models is the same as for posts. You just need to specify which model the meta box is for.

If your custom table has many fields, you can split them into multiple meta boxes, to enter the data more conveniently. The order of fields doesn't matter when saving.

```php
// Step 3: Register fields for the model, corresponding to the custom table structure.
add_filter( 'rwmb_meta_boxes', function ( $meta_boxes ) {
	$meta_boxes[] = [
		'title'        => 'Transaction Details',
		// highlight-start
		'models'       => ['transaction'], // Model name
		'storage_type' => 'custom_table',  // Must be 'custom_table'
		'table'        => 'transactions',  // Custom table name
		// highlight-end
		'fields'       => [
			[
				'id'          => 'created_at',
				'type'        => 'datetime',
				'name'        => 'Created at',
				'js_options'  => [
					'timeFormat' => 'HH:mm:ss',
				],
				'admin_columns' => true,
			],
			[
				'id'     => 'amount',
				'type'   => 'number',
				'name'   => 'Amount',
				'append' => 'USD',
				'admin_columns' => [
					'position' => 'after id',
					'sort'     => true,
				],
			],
			[
				'id'   => 'gateway',
				'name' => 'Gateway',
				'admin_columns' => true,
			],
			[
				'id'   => 'status',
				'type' => 'select',
				'name' => 'Status',
				'options' => [
					'pending'   => 'Pending',
					'completed' => 'Completed',
					'refunded'  => 'Refunded',
				],
				'admin_columns' => true,
			],
		],
	];

	$meta_boxes[] = [
		'title'        => 'Additional Transaction Details',
		// highlight-start
		'models'       => ['transaction'], // Model name
		'storage_type' => 'custom_table',  // Must be 'custom_table'
		'table'        => 'transactions',  // Custom table name
		// highlight-end
		'fields'       => [
			[
				'id'   => 'email',
				'type' => 'email',
				'name' => 'Email',
				'admin_columns' => [
					'position'   => 'after amount',
					'searchable' => true,
				],
			],
			[
				'id'            => 'screenshot',
				'type'          => 'image_advanced',
				'name'          => 'Screenshots',
				'admin_columns' => true,
			],
		],
	];

	return $meta_boxes;
} );
```

After completing 3 steps, you'll see the Transactions menu on the left and you can add/edit/delete models easily as follows:

<LiteYouTubeEmbed id='FenYCOFdCLI' />

### Getting field values for models

To get a field value for models, you can use 2 methods:

Using custom table API to get the raw value in the custom table.

```php
$value = \MetaBox\CustomTable\API::get_value( $field_id, $model_id, $table_name );

// Example: returns 'completed'
$status = \MetaBox\CustomTable\API::get_value( 'status', 3, 'transactions' );
```

Using the helper function to get the formatted value:

```php
$value = rwmb_meta( $field_id, [
	// highlight-next-line
	'object_type' => 'model', // Must be 'model',
	'type'        => $model,
], $model_id );

// Example: returns 'Completed'
$status = rwmb_meta( 'status', [
	'object_type' => 'model',
	'type'        => 'transaction',
], 3 );
```

### Bulk actions

#### Add a custom bulk action

The plugin provides a way to handle bulk actions for custom models. By default, it supports only the `delete` action.

To add more custom bulk actions, use the `mbct_{$model}_bulk_actions` filter, which filter accepts an array with the key as the action name and value as the action label.

```php
add_filter( 'mbct_transaction_bulk_actions', function ( $actions ) {
	$actions['refund-all'] = 'Refund';
	return $actions;
} );
```

#### Create bulk action handlers

To hanle a bulk action, create a function named `mbct_{$action}_bulk_action`. The action name is auto-converted to lowercase and uses underscores instead of hyphens. In the example above, the function name is `mbct_refund_all_bulk_action`.

The function can accept up to 3 parameters: `$ids`, `$model`, and `$request` **regardless of the number of parameters and order**, e.g. `( $ids, $model )`, `( $model, $ids )`, `( $request, $ids, $model )`... are valid function signatures.

Parameter|Type|Description
---|---|---
`$ids`|`int[]`|An array of object IDs
`$model`|`MetaBox\CustomTable\Model`|The model object. You can use this object to get the model name, table name, and other information.
`$request`|`RWMB_Request`|The request object which contains the request data. In every request, we have `action`, `bulk_action`, `ids`, `model`, and `_ajax_nonce` fields. You can get the value of a field by calling `$request->post( $field_name )`.

```php
function mbct_refund_all_bulk_action( $ids, $model ) {
	foreach ( $ids as $id ) {
		\MetaBox\CustomTable\API::update( $id, $model->table, [
			'status' => 'refunded',
		] );
	}
	wp_send_json_success();
}
```

Alternatively, you can hook to `mbct_{$action}_bulk_action` to handle the bulk action, which accepts the same parameters as the callback function.

```php
add_action( "mbct_{$action}_bulk_action", my_function( $ids, $model, $request ) {
	foreach ( $ids as $id ) {
		\MetaBox\CustomTable\API::update( $id, $model->table, [
			'status' => 'refunded',
		] );
	}
	wp_send_json_success();
}, 10, 3 );
```

#### Redirection and custom message

By default, the page will get reloaded after the bulk action is completed. You can set the redirect URL by passing an array with the `redirect` key in the `wp_send_json_success()` function in your callback function.

```php
// in your callback function
wp_send_json_success( [
	'redirect' => add_query_arg( 'model-message', 'updated', admin_url( 'admin.php?page=model-transaction' ) ),
] );
```

The above code will redirect the user to the `admin.php?page=model-transaction&model-message=updated`.

Since the plugin supports custom messages via the `model-message` query string and matches it with labels in the custom model.
You can set the custom message by adding the `item_updated` label in the `labels` parameter of the model registration.

```php
// In your model registration
mb_register_model( 'transaction', [
	/// ...
	'labels' => [
		'name'          => 'Transactions',
		'singular_name' => 'Transaction',
		// highlight-next-line
		'item_updated'  => 'Transaction updated.',
	],
	//...
] );
```

As the above example. The *Transaction updated* message will be shown to the user after the bulk action is completed.

#### Custom error message

You can also set a custom error message by calling `wp_send_json_error( $message )` in your callback function, in which `$message` is an error string.

For example:

```php
// In your callback function
if ( ! current_user_can( 'manage_options' ) ) {
	wp_send_json_error( 'Sorry, you are not allowed to do this action.' );
}
```

The error message will be shown as a browser alert box to the user.

### Hooks

`mbct_{$model}_query_where`

Filters the where statement in the query in the custom model table list. Accepts one parameter - the where statement. It should include the term `WHERE` if not empty.

```php
add_filter( 'mbct_transaction_query_where', function( $where ) {
	return $where ? $where . ' AND status="completed"' : 'WHERE status="completed"';
} );
```

`mbct_{$model}_query_order`

Filters the order statement in the query in the custom model table list. Accepts one parameter - the order statement. It should include the `ORDER BY` term if not empty.

```php
add_filter( 'mbct_transaction_query_order', function( $order ) {
	return $order ? $order : 'ORDER BY created_at DESC';
} );
```

`mbct_{$model}_prepare_items`

Filters the SQL query in the custom model table list to get items. Accepts one parameter - the SQL.

This filter is useful when you want to join the current model table with other tables to filter the results.

```php
add_filter( 'mbct_transaction_prepare_items', function( $sql ) {
	$sql = str_replace(
		'SELECT * FROM wp_transactions',
		'SELECT t.*, c.ID FROM wp_transactions t JOIN wp_customers c ON t.ID = c.transaction_id'
		$sql
	);
	return $sql;
} );
```

`mbct_{$model}_total_items`

Filters the SQL query in the custom model table list to get total items. Accepts 2 parameters:

- `$sql`: the full SQL query,
- `$where`: the `WHERE` statement in the query.

```php
add_filter( 'mbct_transaction_total_items', function( $sql, $where ) {
	$sql = "SELECT COUNT(t.*) FROM wp_transactions t JOIN wp_customers c ON t.ID = c.transaction_id $where";
	return $sql;
}, 10, 2 );
```

`mbct_{$model}_columns`

Filters the list of columns in the custom model table list. Accepts one parameter - the array of columns.

`mbct_{$model}_sortable_columns`

Filters the list of sortable columns in the custom model table list. Accepts one parameter - the array of sortable columns.

`mbct_{$model}_column_output`

Filters the output of a column in the custom model table list. Accepts 4 parameters:

- `$output`: the output
- `$column_name`: the column name
- `$item`: the array of the item data
- `$model`: the model name

`mbct_{$model}_row_actions`

Filters the list of actions for each row item in the custom model table list (default is Edit and Delete). Accepts one parameter - an associate array of actions.

`mbct_{$model}_bulk_actions`

Filters the list of bulk actions for each row item in the custom model table list (default is Delete). Accepts one parameter - an associate array of actions.

`mbct_{$action}_bulk_action`

Fires when a bulk action is performed, used to handle the bulk action. Accepts 3 parameters:

Parameter|Type|Description
---|---|---
`$ids`|`int[]`|An array of object IDs
`$model`|`MetaBox\CustomTable\Model`|The model object. You can use this object to get the model name, table name, and other information.
`$request`|`RWMB_Request`|The request object which contains the request data. In every request, we have `action`, `bulk_action`, `ids`, `model`, and `_ajax_nonce` fields. You can get the value of a field by calling `$request->post( $field_name )`.

[See bulk actions](#bulk-actions) for details.

`mbct_restrict_manage_posts`

Fires after the bulk action for the custom model table list. It's usually used to output custom filters for the table. Accepts 2 parameters:

- `$model`: the model name
- `$which`: `top` or `bottom` - the position of the filters

`mbct_manage_posts_extra_tablenav`

Fires after the bulk action and after `mbct_restrict_manage_posts`. Accepts one parameter - `$which` which can be `top` or `bottom` - the position in the table.

`mbct_submit_box`

Filters the output of the submit meta box. Accepts 2 parameters:

- `$output`: the HTML output
- `$model`: the model name

`mbct_before_submit_box`

Fires before the output of the submit meta box. Accepts one parameter - the model name.

`mbct_after_submit_box`

Fires after the output of the submit meta box. Accepts one parameter - the model name.

`mbct_before_add`<br />
`mbct_after_add`<br />
`mbct_before_update`<br />
`mbct_after_update`<br />

These are actions that fire before/after adding/updating data in a custom table. Accepts 3 parameters:

- `$object_id`: the object ID
- `$table`: the table name
- `$row`: the associate array of data

`mbct_before_delete`<br />
`mbct_after_delete`<br />

These are actions that fire before/after deleting data in a custom table. Accepts 2 parameters:

- `$object_id`: the object ID
- `$table`: the table name

`mbct_add_data`<br />
`mbct_update_data`<br />

These are filters that let you change the data before inserting/updating into the custom table. Accepts 3 parameters:

- `$row`: the associate array of data
- `$object_id`: the object ID
- `$table`: the table name

These filters should return an array of data (e.g., the `$row`).

### Notes

Each model can have only one custom table.

While models work with all Meta Box field types, the data of cloneable/multiple/group fields is always an array, thus it's saved as a serialized array in the model table column.

## API

The plugin has the following APIs for you to work with the data in custom tables. These APIs work well with both custom tables for posts/terms/users and models.

### `exists`

Check if a custom table has a row for an object. In other words, check if an object has data stored in a custom table.

```php
$exists = \MetaBox\CustomTable\API::exists( $object_id, $table );

if ( $exists ) {
	// Do something.
}
```

### `get`

Get all custom fields data for an object from a custom table. The returned data is an array, where keys are custom field IDs, and values are custom field values.

The data is raw, meaning it's not formatted yet. For example: for images, you'll get the attachment IDs instead of an array of URL, width, height, size, etc. as you get via `rwmb_the_value` function.

Parameters:

`$object_id` (int) (required) The object (row) ID.<br />
`$table` (string) (required) The custom table name.<br />
`$force` (bool) (optional) Whether to force to get the data from the database, not from the cache. Default is `true`.<br />

```php
$data = \MetaBox\CustomTable\API::get( $object_id, $table, $force );

// Inspect the data.
print_r( $data );

/*
Result:
[
	'field_1' => 'value 1',
	'field_2' => 'value 2',
	'field 3' => ['one', 'two', 'three'],
]
*/
```

### `add`

Add an array of custom field values for an object. Make sure the data for the object doesn't exist yet in the database.

```php
$data = [
	'field_1' => 'value 1',
	'field_2' => 'value 2',
	'field 3' => ['one', 'two', 'three'],
];
\MetaBox\CustomTable\API::add( $object_id, $table, $data );
```

In case you want to add a row for a custom model, set `$object_id` to `null`.

Technically, this method calls the [`wpdb::insert`](https://developer.wordpress.org/reference/classes/wpdb/insert/) method, which returns the number of rows inserted (which is always `1`) or `false` on error.

If you want to get the ID of the inserted row, please use this code:

```php
global $wpdb;
$id = $wpdb->insert_id;
```

If there's an error (like the data format is not compatible with the table column format), you can get the error message like this:

```php
print_r( $wpdb->last_error );

// Output:
// WordPress database error: Processing the value for the following field failed: status. The supplied value may be too long or contain invalid data.
```

### `update`

Update the data for an object. Works similarly to `add`. Make sure the data for the object exists in the database.

```php
$data = [
	'field_1' => 'value 1',
	'field_2' => 'value 2',
	'field 3' => ['one', 'two', 'three'],
];
\MetaBox\CustomTable\API::update( $object_id, $table, $data );
```

### `delete`

Delete all data for an object in the custom table.

```php
\MetaBox\CustomTable\API::delete( $object_id, $table );
```

## Further reading

[How to Move Custom Fields' Data to Custom Tables](https://metabox.io/move-custom-fields-data-to-custom-tables/)

<LiteYouTubeEmbed id='JaEvtYa4Hcg' />

# MB Favorite Posts

## Overview

**MB Favorite Posts** is a WordPress plugin that helps you create the “Favorite Post” button easily. Users can click the button to **bookmark posts as favorites**, and then review them on a Dashboard page. You can enable this feature for **both guests and logged-in users**.

![The Favorite button on the front end of a WordPress website](https://imgur.elightup.com/JIiikVW.png)

**Note**: MB Favorite Posts plugin is only available for the [Lifetime Bundle](https://metabox.io/pricing/).

## Installation

First, you need to install and activate Meta Box from [wordpress.org](https://wordpress.org/plugins/meta-box/). Next, download MB Favorite Posts plugin from the [My Account](https://metabox.io/my-account/) page, then upload the <code>.zip</code> file from the **Admin Dashboard**. MB Favorite Posts and [other solutions](https://metabox.io/product-category/solutions/) are not included in Meta Box AIO, so you can install them independently without Meta Box AIO.

Upon finishing, the Favorite Posts Button will be automatically added to your WordPress website with the default settings:

![MB Favorite Posts plugin automatically add the button to your WordPress website](https://imgur.elightup.com/y5MAFRk.png)

To configure the Favorite Posts button to fit your needs, move to the next step.

## Settings

Go to **Settings** > **Favorite Posts**. You will see the UI with sections as follows:

![plugin settings](https://imgur.elightup.com/xLgurGV.png)

Here you can change the style for the button. We create 3 predefined styles for you to choose from:

- Default: which has a form of a button
- Like: a simple like icon (similar to Facebook like button)
- Rounded: a rounded button with an icon only

You can customize the style for all elements of the button, such as text, text color, icon, etc.

There are also options to let you specify where and when the button is displayed.

### Dashboard Page and Register Page

MB Favorite Posts are integrated with [MB User Profile](/extensions/mb-user-profile/) to help users create the Dashboard page and the Register page automatically without coding.

The Dashboard page shows all the favorite posts of a user, and the Register page contains a form that users can sign up for accounts to use the Favorite Posts feature.

**Note**: when a user signs up for an account on the Register Page, his user role will be **Subscriber**.

You can choose available pages on the website and change them to the Dashboard page and the Register page.

![Change available pages on the website to the Dashboard page and the Register page](https://imgur.elightup.com/UMR7SsL.png)

For example, I choose these pages:

![Change two pages to the Dashboard page and the Register page](https://imgur.elightup.com/6e5wOLu.png)

Better yet, you should create brand new pages for this purpose. To do so, go to **Pages** > **Add New**, fill in the name for the page and click **Publish**.

![Create brand new pages on the WordPress website](https://imgur.elightup.com/6lDi2YI.png)

The Register page and the Dashboard page will be displayed on the front end as follows:

![The Register page shows up on the WordPress website](https://imgur.elightup.com/uwH64JE.png)

![The Dashboard page shows up on the WordPress website](https://imgur.elightup.com/4uDV7P1.png)

To delete a post from the favorite list, just click the icon on the right of the post name:

![Delete a post from the favorite list.](https://imgur.elightup.com/KxbKTyf.png)

## Shortcodes

The plugin provides 3 shortcodes:
You can put them anywhere on the website (sidebar, page content, etc.).

`[mbfp-posts]`: to show the list of favorite objects

`[mbfp-button]`: to show the "Add to favorite" button

```php
[mbfp-button id="post_id" class="custom_class" add="add_text" added="added_text" show_count="true"]
```
It accepts the following parameters:

Name|Description
---|---
`id`|The ID of the post. Optional. If missed, the shortcode will get the current object ID.
`class`|Custom class name. Optional.
`add`|Custom button text when the post isn't added to favorites. Optional. If missed, the shortcode will get the value from the plugin settings.
`added`|Custom button text when the post is added to favorites. Optional. If missed, the shortcode will get the value from the plugin settings.
`font_size`|Size of text. Optional. Default 14px.
`show_count`|Show the total favorites of a post. Optional. Default false.
`show_icon`|Show icon in button. Optional. Default false.
`icon`|Custom icon. You can choose one of these [ heart, star, pin, like, award ]. Optional. Default heart icon.
`icon_only`|Show icon only. Optional. Default false.
`icon_size`|Size of icon. Optional. Default 16px.


`[mbfp-count]`: to show the total number favorite of a object
```php
[mbfp-count id="post_id" ]
```
It accepts the following parameters:

Name|Description
---|---
`id`|The ID of the post. Optional. If missed, the shortcode will get the current object ID.

## Data

The data of favorites is stored in 2 places:

- User meta: the plugin stores array (serialized) of favorite post IDs in the user meta with key `mbfp_posts`. If you enable for non-logged in users, then the array of favorite post IDs is stored in the cookie.
- Post meta: the plugin also stores array (serialized) of user IDs, who added a post to their favorites, in the post meta with key `mbfp_count`. This post meta is used to count how many favorites a post has.

So if you want to query favorite posts of an user, you can do the following:

```php
$post_ids = get_user_meta( $user_id, 'mbfp_posts', true );
$query = new WP_Query( [
    'post_type' => 'post',
    'post__in'  => $post_ids,
] );
// Do something with $query.
```

You can also query which users favorite a post:

```php
$user_ids = get_post_meta( $post_id, 'mbfp_count', true );
$users = get_users( [
    'include' => $user_ids,
] );
// Do something with $users.
```
## Hook

### `mbfp_cookie_expiration`:

This filter is used to allow developers to change the cookie expiration day

```php
add_filter( 'mbfp_cookie_expiration', function( $days ) {
    $days = '1 month';
    return $days;
}, 10, 3 );
```

### `mbfp_limit`:

This filter is used to define the maximum number of favorite posts.

```php
add_filter( 'mbfp_limit', function( $limit ) {
    $limit = 100;
    return $limit;
} );
```

# MB Frontend Submission

import FAQ from '@site/src/components/FAQ';

MB Frontend Submission helps you create front-end forms for users to submit data to your website. It allows you to submit data for posts like post fields (title, content, etc.) and also custom fields created by Meta Box. It also support to custom table models and works with all extensions like [MB Group](/extensions/meta-box-group/) or [MB Conditional Logic](/extensions/meta-box-conditional-logic/).

![submission form](https://imgur.elightup.com/jfXHqSc.png)

## Submission form

### Adding the submission form

To add a submission form to a page, select the **Submission Form** block from the block inserter. And you'll see the form preview like this:

![Adding a form submission to a page with the Gutenberg block](https://imgur.elightup.com/PEI5I91.png)

Clicking on the block will reveal the form settings on the right. All settings are self-explained and have their description.

The plugin also provides a shortcode to insert the submission form into a page:

```php
[mb_frontend_form id="field-group-id" post_fields="title,content"]
```

You can also submit data to a [MB Custom Table](/extensions/mb-custom-table/) model:

```php
[mb_frontend_form id="field-group-id" object_type="model"]
```

If you're using [MB Builder](/extensions/meta-box-builder/), go to **Meta Box > Custom Fields** admin page and copy the content in the **Shortcode** column for the field group that you created:

![Copy submission form shortcode in MB Builder](https://imgur.elightup.com/sfeWhBA.png)

Below is the list of the settings. The attribute is used for the shortcode.

Name|Attribute|Description
---|---|---
ID|`id`|Field group ID(s). If multiple field groups, enter their IDs separated by commas. Optional.
Ajax|`ajax`|Enable Ajax submission. `true` or `false` (default).
Allow scroll|`allow_scroll`|Enable scroll to message after ajax submission. `false` or `true` (default).
Edit|`edit`|Allow users to edit the post after submitting. `true` or `false` (default). If `true` then ajax submission will be disabled.
Allow delete|`allow_delete`|Allow users to delete the submitted post. `true` or `false` (default).
Force delete|`force_delete`|Whether to delete the submitted post permanently or temporarily (move to Trash).
Show add more|`show_add_more`|Show add new button after submit. `true` or `false` (default).
Object type|`object_type`|The object type for the submitted data. Can be either `post` or `model`. Default is `post`.
Object ID|`object_id`| Optional. Used when you want to update an existing object. If you want to pass the ID of the current post, set it to `current`.
Post type|`post_type`|The submitted post type. Optional. Default is the first post type defined in the meta box. If the meta box is made for multiple post types, you should set this attribute to the correct one.
Post ID *(deprecated)*|`post_id`|The post ID. Optional. Used when you want to update an existing post. If you want to pass the ID of the current post, set it to `current`. This attribute is deprecated, use `object_id` instead.
Post status|`post_status`|The status for submitted posts. See [the list here](https://wordpress.org/documentation/article/post-status/).
Post fields|`post_fields`|List of post fields you want to show in the frontend, separated by commas. Supported the following fields: `title`, `content`, `excerpt`, `date`, and `thumbnail`.
Title field label|`label_title`| Label for the post title field.
Content field label|`label_content` | Label for the post content field.
Excerpt field label|`label_excerpt`| Label for the post excerpt field.
Date field label|`label_date` | Label for the post date field.
Thumbnail field label|`label_thumbnail` | Label for the post thumbnail field.
Submit button text|`submit_button`|The submit button text.
Add new button text|`add_button`|The add new button text.
Delete button text|`delete_button`|The delete button text.
Custom redirect URL|`redirect`|Custom redirect URL.
Confirmation text|`confirmation`|The text for the confirmation message when the form is successfully submitted.
Delete confirmation text|`delete_confirmation`|The text for the confirmation message when the post is deleted.
reCaptcha key|`recaptcha_key`|Google reCaptcha site key (version 3). Optional.
reCaptcha secret|`recaptcha_secret`|Google reCaptcha secret key (version 3). Optional.

### Hiding a field

When you set the form to display fields from a field group, all fields are displayed by default. If you want to hide a field from front-end forms, then you need to set a settings for it.

If you use [MB Builder](/extensions/meta-box-builder/) to build the field group, please enable the settings **Hide from front end** from the field's **Advanced** settings menu:

![Hide a field from the front end](img/hide-front-end.png)

If you use code to register fields, please set the field as follows:

```php
[
    'id'              => 'gallery',
    'name'            => 'Gallery',
    'type'            => 'image_advanced',
    // highlight-next-line
    'hide_from_front' => true,
]
```

### Dynamic population

The dynamic population feature allows you to dynamically populate a shortcode attribute with a value. This value can be passed via the query string and/or hook.

#### Query string

You can populate the post ID for the shortcode via the query string by appending the dynamic population parameter for the attribute to the end of your form URL along with your custom value.

```
https://example.com/form-url/?rwmb_frontend_field_object_id=123
```

The query parameter is `rwmb_frontend_field_object_id`.

Note that *only* object ID is supported for populating via query string since version 2.2.0.

#### Hooks

Shortcode attributes can also be populated via WordPress hooks. This example below changes the `post_id` to `123`:

```php
add_filter( 'rwmb_frontend_field_value_post_id', 'my_custom_population_function', 10, 2 );
function my_custom_population_function( $value, $args ) {
    if ( $args['id'] === 'your_meta_box_id' ) { // Only filter for a specific form.
        $value = 123;
    }
    return $value;
}
```

This snippet would be pasted in your theme's `functions.php` file or your plugin's PHP file.

The filter has the following format:

```php
$value = apply_filters( "rwmb_frontend_field_value_{$attribute}", $value, $args );
```

The callback function accepts 2 parameters: the attribute value and the array of all attributes. You should use `$args['id]` to check if you're filtering for the right form.

### Templates

The plugin allows you to use custom template files for post fields and the confirmation message.

The plugin will look for a template file in the following order:

- Inside a folder `mb-frontend-submission` of your child theme
- Inside a folder `mb-frontend-submission` of your parent theme
- In the plugin's `templates` folder

To overwrite the output of post fields, please follow the steps below:

- Create a folder `mb-frontend-submission` in your theme.
- Copy a template file that you want to change from the plugin's `templates` folder to the new `mb-frontend-submission` folder, keeping the same folder structure.
- Modify the new template file.

### Field order

Sometimes you want to **mix post fields with custom fields** or change post content to a `textarea` field. You can do that with the following steps:

- Remove the `post_fields` attribute from the shortcode
- Add post fields as normal custom fields to your meta box settings, like this:

```php
$meta_boxes[] = [
    'title'  => 'Bill Submit',
    'id'     => 'bill',
    'fields' => [
        [
            'name' => 'Submission Date',
            'id'   => 'submission_date',
            'type' => 'date',
        ],
        [
            'name' => 'Title',
            // highlight-next-line
            'id'   => 'post_title',
        ],
        [
            'name'    => 'Type',
            'id'      => 'type',
            'type'    => 'select',
            'options' => [
                'docs'    => 'Document',
                'receipt' => 'Receipt',
            ],
        ],
        [
            'name' => 'Description',
            'type' => 'textarea',
            // highlight-next-line
            'id'   => 'post_content',
        ],
        [
            'name' => 'Thumbnail',
            'type' => 'single_image',
            // highlight-next-line
            'id'   => '_thumbnail_id',
        ],
    ],
]
```

To make the plugin recognize the post fields, you need to set correct IDs for them as follows:

Field|ID
---|---
Post title|`post_title`
Post content|`post_content`
Post excerpt|`post_excerpt`
Post date|`post_date`
Post thumbnail|`_thumbnail_id`

With this method, you're able to set the label for post fields or change settings (even field type) for them easily using any [field settings](/field-settings/).

### Validation

There are 2 ways to validate fields: on the front end with JavaScript and on the back end with PHP.

For front-end validation with JavaScript, please see [this documentation](/validation/).

To validate on the back end with PHP, please use the `rwmb_frontend_validate` filter as follows:

```php
add_filter( 'rwmb_frontend_validate', function( $validate, $config ) {
    // Check only if you're on the right form.
    if ( 'your-meta-box-id' !== $config['id'] ) {
        return $validate;
    }
    // Check if users have selected files for an image upload field.
    if ( empty( $_POST['image_upload_field'] ) ) {
        $validate = false; // Return false to show an error message.
    }
    return $validate;
}, 10, 2 );
```

If you want to show a custom error message, return a string for the filter, like this:


```php
add_filter( 'rwmb_frontend_validate', function( $validate, $config ) {
    if ( 'your-meta-box-id' !== $config['id'] ) {
        return $validate;
    }
    if ( empty( $_POST['image_upload_field'] ) ) {
        $validate = 'Please select at least one image to upload'; // Return a custom error message
    }
    return $validate;
}, 10, 2 );
```

### File upload

#### User capability

To be able to upload files or images with the media popup (via fields `file_advanced`, `file_upload`, `image_advanced`, `image_upload`), users have to log in and proper capability `upload_files` to access the Media Library. If your users don't have that capability (like if they have the "subscriber" role), then the upload fields don't work. In that case, you can add the capability for that role as follows:

```php
add_action( 'init', function () {
    $subscriber = get_role( 'subscriber' );
    $subscriber->add_cap( 'upload_files' );
} );
```

Another solution is using `file` or `image` fields. Both of them work similarly. They just don't have a nice UI, but they do the job very well.

#### Post thumbnail

Another improvement you might want to add is to use the media popup to pick an image as the post thumbnail. By default, it uses the `image` field, which provides a simple input for an image.

To do that, you need to change the field type for the thumbnail from `image` to `single_image`. Here are the steps:

- Create a folder `mb-frontend-submission` in your theme, inside that folder, create a sub-folder `post`.
- Copy the file `thumbnail.php` from the plugin's `templates/post` folder to the `post` folder above.
- Replace the content of the copied `thumbnail.php` with [this code](https://pastebin.com/6AFcPF7b).

Please note that to open the media popup, users need to log in and have the proper capability. See the section above for how to do that.

### Embedding forms

If you have a front-end submission form on site A, then you want to output it on site B by embedding the form within an iframe, there might be a problem with the cookie policy on browsers that prevent it from submitting.

To make it work please add this snippet to `functions.php` in your theme on site A:

```php
add_action( 'template_redirect', function () {
    if ( session_status() !== PHP_SESSION_NONE || headers_sent() ) {
        return;
    }

    $params = session_get_cookie_params();
    session_set_cookie_params( $params['lifetime'], '/; samesite=None', $_SERVER['HTTP_HOST'], true, false );
    session_start();
}, 9 );
```

The snippet above will set the cookie setting `samesite=None` and `Security=true`. Note that you can only use it on sites that use HTTPS (connection security) and on Chrome and Firefox. It doesn't work on Safari because Safari is blocking third-party cookies. Setting `samesite=None` also might be a security issue, so please be sure you want to do that. For more details, please [see this article](https://web.dev/samesite-cookies-explained/).

## User dashboard

Similar to the submission form, MB Frontend Submission provides a Gutenberg block for you to insert into a page. The block let users view and edit their submitted posts.

To insert a block, select the **User dashboard** block from the block inserter:

![User dashboard block](https://imgur.elightup.com/didLg44.png)

If you prefer to use shortcodes, use the following shortcode:

```php
[mb_frontend_dashboard edit_page="124"]
```

Below is the list of the settings. The attribute is used for the shortcode.

Name|Attribute|Description
---|---|--
Edit page|`edit_page`|The ID of the page, where users can submit posts.
Field group ID(s)|`id`|Overwrite field group ID(s) from the edit page. If multiple field groups, enter their IDs separated by commas.
Object type|`object_type`|The object type for the submitted data. Can be either `post` or `model`. Default is `post`.
Model name|`model_name`|The model name for the submitted data. Required if `object_type` is `model`.
Post type|`post_type`|Overwrite the submitted post type from the edit page.
Show welcome message|`show_welcome_message`|Show the welcome message `true` (default) or `false`.
Columns|`columns`|List of columns to be displayed in the dashboard, separated by commas. For example: `title`, `date`, and `status`...
Title column label|`label_title`|The label for the title column.
Date column label|`label_date`|The label for the date column.
Status column label|`label_status`|The label for the status column.
Actions column label|`label_actions`|The label for the actions column.
Post Action Link|`title_link`|The link action when clicking post titles: `edit` or `view` (default).
Add new button text|`add_new`|The add new button text.

:::warning

You **must** create a page for submitting posts first, then use its ID in the `edit_page` attribute.

:::

When users visit this page, they'll see a dashboard like this:

![user posts dashboard](https://imgur.elightup.com/LxPh4xH.png)

On this dashboard, users can:

- View a list of their submitted posts with the corresponding statuses
- Edit or delete submitted posts
- Or submit a new post

The plugin is smart enough to detect the correct settings from the submission form to the correct posts. So you can have *multiple* submission forms and multiple dashboards on the same website.

<FAQ question="How to manually set edit page attributes?">

By default, the plugin **implicitly** gets the attributes for the submission form from the edit page. That's why you must set the edit page in the block, shortcode or page builder elements.

However, there are cases you want to **explicitly** set these attributes, you can do so by setting the **Field group ID(s)** or the **Post type** attributes from the block, shortcode or page builder elements settings. These values will overwrite the values in the edit page.

You can also set these attributes with a filter like this:

```php
add_filter( 'rwmb_frontend_dashboard_edit_page_atts', function( $attributes, $edit_page_id ) {
    $attributes['post_type'] = 'book';
    return $attributes;
}, 10, 2 );
```

Note that the plugin only needs the field group ID(s) (`id`) and/or post type (`post_type`) attributes.
</FAQ>

## Integrations

MB Frontend Submission has integrations with **the block editor** (Gutenberg) and the following page builder plugins:

- Bricks
- Elementor

![Adding submission form and user dashboard in Bricks and Elementor](https://imgur.elightup.com/oH7RBcv.png)

For these page builders, there is a new section named Meta Box when you add an element. There’ll be two new elements in this section, one is **Submission Form** and another is **User Dashboard**. They work the same way as in the corresponding blocks in Gutenberg with the live preview on the page and visually settings.

## Hooks

To allow developers to do other things when the form is submitted, we have created some actions and filters.

### General hooks

`rwmb_frontend_redirect`

This filter allows you to change the URL of the redirect page after the form is submitted. It accepts 1 parameter `$config` - the shortcode attributes.

```php
$redirect = apply_filters( 'rwmb_frontend_redirect', $redirect, $config );
```

Note that `$config['post_id']` has the submitted post ID.

Example: redirect to a page based on a submitted value:

```php
add_filter( 'rwmb_frontend_redirect', function( $redirect, $config ) {
    // Make sure you work on the correct form.
    if ( 'my-id' !== $config['id'] ) {
        return $redirect;
    }

    // Get submitted data via $_POST.
    $value = empty( $_POST['field_id'] ) ? null : $_POST['field_id'];
    if ( 'yes' === $value ) {
        $redirect = 'https://yourdomain.com/custom-page/';
    }
    return $redirect;
}, 10, 2 );
```

`rwmb_frontend_validate`

This filter is used to check if the form is validated. You can use this filter to add a custom check for the data before it's processed.

```php
apply_filters( 'rwmb_frontend_validate', $validate, $config );
```

The filter has 2 parameters:

- `$validate`: the returned value of validation. If `true`, then the validation is successful. `false` - if not and the plugin will show a default error message. If you want to show a custom error message, just return it as a string. See the **Validation** section above.
- `$config`: the form configuration.

### Form hooks

`rwmb_frontend_before_process`

This action fires before the form is processed, e.g. saved or updated. It accepts one parameter `$config` - the form configuration, taken from the shortcode attributes.

`rwmb_frontend_after_process`

This action fires after the form is processed, e.g. saved or updated. It accepts 2 parameters:

- `$config` - the form configuration, taken from the shortcode attributes.
- `$post_id` - the submitted post ID

You can use this action to do a custom redirect to your Thank you page or send an email notification.

```php
add_action( 'rwmb_frontend_after_process', function( $config, $post_id ) {
    if ( 'my-meta-box' === $config['id'] ) {
        wp_mail( 'admin@domain.com', 'New submission', 'A new post has been just submitted.' );

        wp_safe_redirect( 'thank-you' );
        die;
    }
}, 10, 2 );
```

`rwmb_frontend_before_form`

This action fires before form output. It accepts one parameter `$config` - the form configuration, taken from the shortcode attributes.

`rwmb_frontend_after_form`

This action fires after form output. It accepts one parameter `$config` - the form configuration, taken from the shortcode attributes.

`rwmb_frontend_before_display_confirmation`

This action fires before the confirmation message is displayed. It accepts one parameter `$config` - the form configuration, taken from the shortcode attributes.

`rwmb_frontend_after_display_confirmation`

This action fires after the confirmation message is displayed. It accepts one parameter `$config` - the form configuration, taken from the shortcode attributes.

`rwmb_frontend_before_submit_button`

This action fires before the submit button is displayed. It accepts one parameter `$config` - the form configuration, taken from the shortcode attributes.

`rwmb_frontend_submit_button`

This filter allows you to change the submit button HTML. It accepts 2 parameters:
- `$submit_button` - the submit button HTML.
- `$post_id` - the post ID

`rwmb_frontend_after_submit_button`

This action fires after the submit button is displayed. It accepts one parameter `$config` - the form configuration, taken from the shortcode attributes.

`rwmb_frontend_before_delete`

This action fires before the post is deleted. It accepts one parameter `$config` - the form configuration, taken from the shortcode attributes.

`rwmb_frontend_after_delete`

This action fires after the post is deleted. It accepts 2 parameters:

- `$config` - the form configuration, taken from the shortcode attributes.
- `$post_id` - the deleted post ID

### Post data filters

`rwmb_frontend_insert_post_data`

This filter is used to modify the submitted post data before it's passed to the `wp_insert_post` function to **create a new post**. It accepts 2 parameters: the array of post data and the shortcode parameters.

```php
$data = apply_filters( 'rwmb_frontend_insert_post_data', $data, $config );
```

`rwmb_frontend_update_post_data`

This filter is used to modify the submitted post data before it's passed to the `wp_update_post` function to **update an existing post**. It accepts 2 parameters: the array of post data and the shortcode parameters.

```php
$data = apply_filters( 'rwmb_frontend_update_post_data', $data, $config );
```

### Post field filters

Sometimes you want to add more things to the post fields, such as making the post title required, adding a description for post content, or even adding a custom HTML before the post thumbnail. You can do that with the following post filter:

```php
// Post title
$field = apply_filters( 'rwmb_frontend_post_title', [
    'type' => 'text',
    'name' => 'Title',
    'id'   => 'post_title',
] );

// Post thumbnail
$field = apply_filters( 'rwmb_frontend_post_thumbnail', [
    'type'             => 'image',
    'name'             => 'Thumbnail',
    'id'               => '_thumbnail_id',
    'max_file_uploads' => 1,
] );

// Post excerpt
$field   = apply_filters( 'rwmb_frontend_post_excerpt', [
    'type' => 'textarea',
    'name' => 'Excerpt',
    'id'   => 'post_excerpt',
] );

// Post date
$field = apply_filters( 'rwmb_frontend_post_date', [
    'type' => 'datetime',
    'name' => 'Date',
    'id'   => 'post_date',
] );

// Post content
$field   = apply_filters( 'rwmb_frontend_post_content', [
    'type' => 'wysiwyg',
    'name' => 'Content',
    'id'   => 'post_content',
] );
```

Each post field is treated as a normal Meta Box field (see here for the full list of [field settings](/field-settings/)).

So, to make the post title required, you can do like this:

```php
add_filter( 'rwmb_frontend_post_title', function( $field ) {
    $field['required'] = true;
    return $field;
} );
```

### Post actions

`rwmb_frontend_before_save_post`

This action fires before the post is created or updated.

```
do_action( 'rwmb_frontend_before_save_post', $object );
```

The action accepts 1 parameter: the instance of the `\MBFS\Post` class, which handles the submission. It has the following public properties that you can use:

- `$post_type`: The current post type
- `$post_id`: The submitted post ID
- `$fields`: The post fields
- `$config`: The configuration, taken from the shortcode attributes

`rwmb_frontend_after_save_post`

This action fires after the post is created or updated. At that time, all the custom fields in the meta box are already saved into the post meta.

```
do_action( 'rwmb_frontend_after_save_post', $object );
```

The action accepts 1 parameter: the instance of the `\MBFS\Post` class, which handles the submission. It has the following public properties that you can use:

- `$post_type`: The current post type
- `$post_id`: The submitted post ID
- `$fields`: The post fields
- `$config`: The configuration, taken from the shortcode attributes

### Dashboard

`rwmb_frontend_dashboard_edit_page_atts`

This filter allows you to explicitly set the attributes for the edit page. See **User Dashboard** section above.

```php
add_filter( 'rwmb_frontend_dashboard_edit_page_atts', function( $attributes, $edit_page_id ) {
    $attributes['post_type'] = 'book';
    return $attributes;
}, 10, 2 );
```

`rwmb_frontend_dashboard_query_args`

This filter is used for changing the query args for getting posts on the dashboard page. By default, the plugin will get posts that have the same author as the current user. If you want to change this query, then use this filter.

```php
add_filter( 'rwmb_frontend_dashboard_query_args', function( $args ) {
    $args['cat'] = 1; // Get only posts in category ID = 1.

    return $args;
} );
```

`rwmb_frontend_welcome_message`

This filter is used to change the welcome message. It accepts 3 parameters:

- `$message`: the message content (in HTML)
- `$user`: the current user
- `$query`: the post query

`rwmb_frontend_dashboard_edit_page_content`

This filter is used to change the edited page content. The edit page content is used for parsing the edit form configuration. It accepts only one parameter - the content in HTML.

`rwmb_frontend_dashboard_post_title`

This filter is used to change the title link of posts in the post table. It accepts 2 parameters:

- `$title`: the post title link (in HTML)
- `$post_id`: the post ID

`rwmb_frontend_dashboard_edit_action`

This filter is used to change the edit link for posts in the dashboard. It has 2 parameters: the edit link HTML and the post ID.

```php
add_filter( 'rwmb_frontend_dashboard_edit_action', function( $edit_action, $post_id ) {
    $svg_icon = get_template_directory_uri() . 'icons/edit.svg';
    return '<a href="' . add_query_arg( 'rwmb_frontend_field_post_id', $post_id, 'https://domain.com/submit-page' ) . '><img src="' . $svg_icon . '""></a>';
}, 10, 2 );
```

`rwmb_frontend_dashboard_delete_action`

This filter is used to change the delete button for posts in the dashboard. It has 2 parameters: the delete button HTML and the post ID.

`rwmb_frontend_before_edit_action`

This action fires before the edit button is displayed.

`rwmb_frontend_before_delete_action`

This action fires before the delete button is displayed.

`rwmb_frontend_end_actions`

This action fires after all action buttons are displayed.

## FAQ

<FAQ question="How to add more field groups (meta boxes) to the frontend submission form?">

You can add more field group IDs to the attribute `id` of the form shortcode and separate them by commas.

`[mb_frontend_form id="meta-box-id-1,meta-box-id-2,meta-box-id-3" post_fields="title,content"]`

</FAQ>

<FAQ question="How to add relationships to the frontend submission form?">

Each relationship box has the ID `{$relationship_id}_relationships_from` and `{$relationship_id}_relationships_to`. You can include these IDs in the form shortcode to show it on the front end.

`[mb_frontend_form id="meta-box-id-1,posts-to-page_relationships_from" post_fields="title,content"]`

</FAQ>

<FAQ question="Why does the frontend dashboard not display the post type?">

You need to add the attribute `post_type` to the frontend submission shortcode

`[mb_frontend_form id="meta-box-id" post_fields="title,content" post_type="post-type-slug"]`

</FAQ>

## Known issues

### Styling

The extension outputs the default fields' HTML with CSS comes from the Meta Box plugin. The style is basic and works in most cases. However, to make it match perfectly with your theme's style, you need to do some work with CSS.

### Caching

As you might know, Meta Box uses [nonces](https://developer.wordpress.org/apis/security/nonces/) to prevent misuse or malicious requests. As the nonce fields are outputted directly in the HTML, they might be cached by caching plugins such as W3 Total Cache, WP Super Cache, etc. And thus, the verification of the nonce might not work properly and break the form submission. In this case, please do not cache the page where the form is embedded (both caching plugins allow you to do that).

## Tutorials

- [Adding guest authors and guest posts](/tutorials/add-guest-authors/)
- [MB Frontend Submission: Dashboard, Ajax, reCaptcha & More](https://metabox.io/mb-frontend-submission-dashboard-ajax-recaptcha/)
- [How to Create a Classified Ads Website using Meta Box](https://metabox.io/create-classified-ads-website-using-meta-box/)

# MB Geolocation

MB Geolocation helps you fill in address fields (street address, zip code, city, state, and country) quickly by using Geocoding API from Google Maps/Open Street Maps.

![auto suggest geolocation data](https://i1.wp.com/metabox.io/wp-content/uploads/2016/03/meta-box-geolocation.gif)


## Configuration

To make the geolocation work, you need to configure 4 things:

- Enable the geolocation API
- Setup the field group settings
- Setup the ID for the address field to make it suggests addresses from geolocation API
- Setup the ID (or binding ID) for other fields to retrieve data from geolocation API when selecting an address

Follow each step below.

### Geolocation API

Create a project in the [Google Cloud Platform Console](https://console.cloud.google.com/google/maps-apis/overview), and enable the following APIs:

- Google Maps API
- Geocoding API
- Places API

After that, [create an API key](https://developers.google.com/maps/documentation/javascript/get-api-key) for Google Maps. You'll need this key to perform any call to Google Maps platform.

:::success Open Street Maps

If you use **Open Street Maps**, then you can bypass this step. Open Street Maps doesn't require any configuration.

:::

### Field group settings

If you use **Open Street Maps**, you need to *add an Open Street Maps field* to your field group. Then add `geo` to your field group custom settings in the MB Builder like this:

![enable geolocation for open street maps](img/geo.png)

If you use code, then add this line to your field group settings:

```php
'geo' => true,
```

If you use **Google Maps**, it's _not_ required to add a Google Maps field to your field group. To enable geolocation, add the following custom settings in the field group settings in the MB Builder like this:

![enable geolocation for google maps](img/google-map.png)

If you use code, then add this line to your field group settings:

```php
'geo' => [
    'api_key' => 'YOUR API KEY',
],
```

:::info

If you have a Google Maps field in your field group, then you can set the Google API key once, either for the Geolocation extension (as above) or for the `map` field. No need to enter the same key for both of them.

:::

You can also add options to Geolocation, which can contains these properties:

- `types`: array of geocode types:
    - `geocode`: only geocoding results, no business results.
    - `address`: only geocoding results with a precise address.
    - `establishment`: business results.
    - `(cities)`: only results that match either `locality` or `administrative_area3`.
    - `(regions)`: any result matching the following types:
        - `locality`
        - `sublocality`
        - `postal_code`
        - `country`
        - `administrative_area1`
        - `administrative_area2`
- `componentRestrictions`: restrict results to a specific country, must be ISO 3166-1 Alpha-2 compatible country code. You can find code information at [Wikipedia: List of ISO 3166 country codes](https://en.wikipedia.org/wiki/List_of_ISO_3166_country_codes).

Examples:

```php
// Restrict the result in Australia only
'geo' => [
    'api_key' => 'YOUR API KEY',
    // highlight-start
    'componentRestrictions' => [
        'country' => 'au'
    ],
    // highlight-end
],

// Return only business results
'geo' => [
    'api_key' => 'YOUR API KEY',
    // highlight-next-line
    'types' => ['establishment'],
],

// Return only cities and business results
'geo' => [
    'api_key' => 'YOUR API KEY',
    // highlight-next-line
    'types' => ['(cities)', 'establishment'],
],
```

### Address field

The address field is used to retrieve the suggestions from the Geolocation API. To add an address field, add a text field **with an ID that starts with `address`** (like `address` or `address_something`)...

### Other fields

When you select an address from autocomplete list, the geolocation API will return a list of address components. To make the field retrieve the data, **set the field's ID the same as one of the address components**.

For example, if you create a text field with ID `locality`, when you select an address, the city of the address will be filled into this text field.

Here is the list of components for **Google Maps**:

Component|Description
---|---
`street_address`|indicates a precise street address.
`route`|indicates a named route (such as "US 101").
`intersection`|indicates a major intersection, usually of two major roads.
`political`|indicates a political entity. Usually, this type indicates a polygon of some civil administration.
`country`|indicates the national political entity and is typically the highest order type returned by the Geocoder.
`administrative_area_level_1`|indicates a first-order civil entity below the country level. Within the United States, these administrative levels are states. Not all nations exhibit these administrative levels.
`administrative_area_level_2`|indicates a second-order civil entity below the country level. Within the United States, these administrative levels are counties. Not all nations exhibit these administrative levels.
`administrative_area_level_3`|indicates a third-order civil entity below the country level. This type indicates a minor civil division. Not all nations exhibit these administrative levels.
`administrative_area_level_4`|indicates a fourth-order civil entity below the country level. This type indicates a minor civil division. Not all nations exhibit these administrative levels.
`administrative_area_level_5`|indicates a fifth-order civil entity below the country level. This type indicates a minor civil division. Not all nations exhibit these administrative levels.
`colloquial_area`|indicates a commonly-used alternative name for the entity.
`locality`|indicates an incorporated city or town political entity.
`sublocality`|indicates a first-order civil entity below a locality. Some locations may receive one of the additional types: sublocality_level_1 through to sublocality_level_5. Each `sublocality`|level is a civil entity. Larger numbers indicate a smaller geographic area.
`neighborhood`|indicates a named neighborhood.
`premise`|indicates a named location, usually a building or collection of buildings with a common name
`subpremise`|indicates the first-order entity below a named location, usually a singular building within a collection of buildings with a common name.
`postal_code`|indicates a postal code as used to address postal mail within the country.
`natural_feature`|indicates a prominent natural feature.
`airport`|indicates an airport.
`park`|indicates a named park.
`post_box`|indicates a specific postal box.
`street_number`|indicates the precise street number.
`floor`|indicates the floor of a building address.
`room`|indicates the room of a building address.
`lat`|indicates latitude of the result
`lng`|indicates longitude of the result
`geometry`|same as `latitude,longitude`
`formatted_address`|returns human-readable complete address
`id`|unique id of current location
`url`|url of current location
`opening_hours`| Opening hours
`phone`|Phone number
`formatted_phone_number`|Formatted phone number
`international_phone_number`|International phone number
`website`|Website URL
`rating`|Rating value
`user_ratings_total`|Total number of ratings by users

For more information about address components visit: [Google Address Component Types](https://developers.google.com/maps/documentation/geocoding/intro#Types)

Here are the address components for **Open Street Maps**:

Component|Description
---|---
`building`|Building address
`house_number`|House number
`aeroway`|Aeroway
`road`|Road address
`neighbourhood`|Neighbourhood
`suburb`|Suburb
`village`|Village
`town`|Town
`city`|City
`county`|County
`state`|State
`postcode`|Postcode
`country`|Country
`country_code`|Country code

## Advanced

Sometimes you don't want the fields to have the *exact* ID as the address components, or if you want to combine multiple components into one field, then follow the guides below.

### Long and short names

Let's say we have a country named 'Australia'. The long name is 'Australia' and the short name is 'AU'. If we have a state named 'Queensland', 'Queensland' is the long name and 'QLD' is the short name.

By default, MB Geolocation will populate the long name of the field. But you can use the short name by **adding `_short` at the end of field ID**. For example: `administrative_area_level_1_short`, `country_short`.

:::warning

This feature is available for **Google Maps** only.

:::

### Custom binding

Let's say we have a field with id `dummy_field`, this field ID is not in the *address component* list so the plugin won't auto-populate data to it. To make the plugin auto-populate data (`administrative_area_level_1`) to that field, add the following parameter to the field:

With MB Builder:

![custom binding](https://imgur.elightup.com/DuvReWa.png)

or with code:

```php
'binding' => 'administrative_area_level_1', // returns 'Queensland'
```

You can tell that field to use the short version by prepending the `short:` keyword:

![custom binding short](https://imgur.elightup.com/Q3mXgMP.png)

```php
'binding' => 'short:administrative_area_level_1', // returns 'QLD'
```

You can also merge two fields, and add any character you want to bind to that field. Like so:

![merge fields](https://imgur.elightup.com/iowxhWs.png)

```php
'binding' => 'city + " " + country', // returns QLD Australia
```

### Multiple addresses

In case you have multiple "groups" of address fields, such as address details for head office and address details for a company branch. In each group, there is an autocomplete address field. And it will auto-populate only fields in the group, e.g. the address for head office only populates the fields in the head office group, not in the company branch.

In this case, please set another attribute `'address_field' => 'address_id'` for *each* field in the group. See an example code below:

![specify address field](https://imgur.elightup.com/azK52Y5.png)

If you do with code, then your field group looks like this:

```php
/**
 * Head office
 */

// Address
[
    'id' => 'address_ho',
    'name' => 'Address - Head Office',
],
// City
[
    'id' => 'city_ho',
    'name' => 'City - Head Office',
    'binding' => 'locality',
    // highlight-next-line
    'address_field' => 'address_ho',
],

/**
 * A company branch
 */

// Address
[
    'id' => 'address_br',
    'name' => 'Address - Branch',
],
// City
[
    'id' => 'city_br',
    'name' => 'City - Branch',
    'binding' => 'locality',
    // highlight-next-line
    'address_field' => 'address_br',
],
```

## Two-way data binding

If you have a map field, then whenever you *change an address or manually change the value of latitude and longitude fields, the pin on the map will change* according to the new location.

And whenever you *change the pin location, the latitude and longitude will change* (if you have these fields).

However, if you change the pin location, the address field will *NOT* change.

# MB Group

import Helpers from '../_parts/_helpers.md';

**MB Group** helps you to organize custom fields into repeatable and collapsible groups. You can use this extension to group related fields into one group to create hierarchy. You can clone the whole group, or sub-group. There's no limitation on the nesting level.

![meta box group example](https://i1.wp.com/metabox.io/wp-content/uploads/2015/02/meta-box-group-example.png)

## Tutorial

If this is your first time using [MB Group](/extensions/meta-box-group/), start with this beginner-friendly guide:

👉 [How to Create a Group of Custom Fields with MB Group](https://metabox.io/create-group-of-custom-fields-with-meta-box-group/)

The rest of this page is a detailed reference. Feel free to come back whenever you need to check specific settings or examples.

## Settings

MB Group introduces a new field type: `group`. Here are its available settings:

| Name           | Description |
|----------------|-------------|
| `name`         | Field label. Works like other fields. Optional. |
| `id`           | Field ID, used to store the group's values (including all sub-fields). |
| `type`         | Must be set to `group`. |
| `fields`       | An array of sub-fields. Each sub-field is declared like a normal field. |
| `clone`        | Makes the group clonable (repeater). |
| `sort_clone`   | Allows drag-and-drop reordering of clones. `true` or `false`. |
| `collapsible`  | Makes the group collapsible. `true` or `false` (default `false`). Optional. |
| `save_state`   | Save the collapse/expand state? `true` or `false` (default `false`). Optional. |
| `default_state`| Default state when the page loads: `collapsed` or `expanded` (default). |
| `group_title`  | Title of collapsible groups. See [Collapsible Groups](#collapsible-groups). |

### Example: Simple group with sub-fields

To add a group, create a field with `type => group` and list its sub-fields inside the `fields` parameter:

```php
add_filter( 'rwmb_meta_boxes', function ( $meta_boxes ) {
    $meta_boxes[] = [
        'title'  => 'Album Tracks',
        'fields' => [
            [
                'id'         => 'standard',
                'type'       => 'group',  // Group!
                'clone'      => true,     // Clone whole group?
                'sort_clone' => true,     // Drag and drop clones to reorder them?

                // List of sub-fields.
                'fields'     => [
                    [
                        'name' => 'Track name',
                        'id'   => 'text',
                    ],
                    [
                        'name' => 'Release Date',
                        'id'   => 'date',
                        'type' => 'date',
                    ],
                    [
                        'name'    => 'Genre',
                        'id'      => 'genre',
                        'type'    => 'select_advanced',
                        'options' => [
                            'pop'  => 'Pop',
                            'rock' => 'Rock',
                        ],
                    ],
                ],
            ],
        ],
    ];
    return $meta_boxes;
} );
```
Here's how it looks:

![clone group (repeater)](https://imgur.elightup.com/KVIJzSa.png)

### Nested groups

You can even put a group **inside another group**, creating multi-level nested structures:

```php
add_filter( 'rwmb_meta_boxes', function ( $meta_boxes ) {
    $meta_boxes[] = [
        'title'  => 'Multi-level nested groups',
        'fields' => [
            [
                'id'     => 'group',
                'type'   => 'group',
                'fields' => [
                    [
                        'name' => 'Text',
                        'id'   => 'text',
                    ],
                    // highlight-start
                    [
                        'name'   => 'Sub group',
                        'id'     => 'sub_group',
                        'type'   => 'group',
                        'fields' => [
                            // Normal field (cloned)
                            [
                                'name'  => 'Sub text',
                                'id'    => 'sub_text',
                            ],
                        ],
                    ],
                    // highlight-end
                ],
            ],
        ],
    ];
    return $meta_boxes;
} );
```

✅ MB Group supports **unlimited nesting levels**.

### Collapsible groups

Want to make your groups collapsible? Just set:

```php
'collapsible' => true
```

Collapsible groups support extra settings:

| Name            | Description                                                                          |
| --------------- | ------------------------------------------------------------------------------------ |
| `save_state`    | Save the expanded/collapsed state? `true` or `false`. Default `false`.               |
| `default_state` | Default state when the page loads: `collapsed` or `expanded` (default).              |
| `group_title`   | Title of each group item. Can include static text, clone index, or sub-field values. |

#### Dynamic group titles

You can mix static text, clone index, and sub-field values in the `group_title`:

```php
'group_title' => 'Branch {#}: {sub_field_1} - {sub_field_2}',
```

- `{#}` → group index (if clonable).
- `{sub_field_id}` → value of a sub-field.
- Combine as many as you need.

#### Example: Collapsible group with nested groups

```php
add_filter( 'rwmb_meta_boxes', function ( $meta_boxes ) {
    $meta_boxes[] = [
        'title'  => 'Company Branches',
        'fields' => [
            [
                'id'          => 'g1',
                'name'        => 'Branches',
                'type'        => 'group',
                'clone'       => true,
                'collapsible' => true,
                'group_title' => '{name}', // ID of the subfield

                'fields' => [
                    [
                        'name' => 'Name',
                        'id'   => 'name',
                    ],
                    [
                        'name' => 'Address',
                        'id'   => 'address',
                    ],
                    [
                        'id'          => 'contacts',
                        'type'        => 'group',
                        'clone'       => true,
                        'collapsible' => true,
                        'group_title' => '{person}',
                        'fields'      => [
                            [
                                'id'   => 'person',
                                'name' => 'Person',
                            ],
                            [
                                'id'   => 'phone',
                                'name' => 'Phone',
                            ],
                        ],
                    ],
                ],
            ],
        ],
    ];

    return $meta_boxes;
} );
```

## Data storage

- Group values are saved as an array of sub-field values (including nested groups).
- Data is stored in the database as a serialized array.
- Sub-field data is saved "as is" (no extra sanitizing or transformation).

:::warning

It's important to understand that when a field is placed inside a **group**, **its value is saved exactly as it is**. The plugin **does not apply any sanitization or transformation** when saving or retrieving field values. This behavior helps avoid heavy processing, especially when working with complex structures or deeply nested groups.

Example:

If you add a `date` field inside a group and set a `save_format` that differs from the display format, the `save_format` will **not** be applied. In this case, the saved value will always match the **displayed value** - no formatting changes are made during saving.

:::

## Getting sub-field values

To retrieve group data, use `rwmb_meta()`:

```php
$group_value = rwmb_meta( 'group_id' ) ?: [];
```

This returns an associative array of sub-field IDs and values:

```php
[
    'sub_field_1' => 'value 1',
    'sub_field_2' => 'value 2',
]
```

To access a sub-field:

```php
$value = $group_value['sub_field_1'] ?? '';
echo $value;
```

If the group is cloneable, `rwmb_meta()` returns an array of groups, like this:

```php
[
    [ 'sub_field_1' => 'value 1', 'sub_field_2' => 'value 2' ],
    [ 'sub_field_1' => 'value 3', 'sub_field_2' => 'value 4' ],
]
```

Loop through them:

```php
$groups = rwmb_meta( 'group_id' ) ?: [];
foreach ( $groups as $group ) {
    echo $group['sub_field_1'] ?? '';
}
```

### Example: Contacts group

Registering a group of contacts:

```php
add_filter( 'rwmb_meta_boxes', function ( $meta_boxes ) {
    $meta_boxes[] = [
        'title'  => 'Contacts',
        'fields' => [
            [
                'id'     => 'contacts',
                'type'   => 'group',
                'clone'  => true,
                'fields' => [
                    [ 'id' => 'name',  'name' => 'Name' ],
                    [ 'id' => 'email', 'name' => 'Email' ],
                    [ 'id' => 'phone', 'name' => 'Phone' ],
                ],
            ],
        ],
    ];
    return $meta_boxes;
} );
```

Displaying contacts in `single.php`:

```php
$contacts = rwmb_meta( 'contacts' ) ?: [];
foreach ( $contacts as $contact ) {
    echo '<div class="contact">';
    echo '<h4>Contact info</h4>';
    echo '<p><strong>Name:</strong> ' . $contact['name'] . '</p>';
    echo '<p><strong>Email:</strong> ' . $contact['email'] . '</p>';
    echo '<p><strong>Phone:</strong> ' . $contact['phone'] . '</p>';
    echo '</div>';
}
```

### Outputting groups with page builders

- ✅ Elementor and Oxygen: can output group sub-fields directly.
- ❌ Other builders (e.g., Beaver Builder, Divi): use an [MB View](/extensions/mb-views/) or a shortcode

Example shortcode (group with `title`, `images`, and `desc`):


```php
add_shortcode( 'my_group', function() {
    $group = rwmb_meta( 'group_field_id' );
    if ( empty( $group ) ) {
        return '';
    }

    $output = '';

    // Title
    $title = $group['title'] ?? '';
    $output .= $title ? '<h3>' . $title . '</h3>' : '';

    // Images
    $image_ids = $group['images'] ?? [];
    if ( $image_ids ) {
        $output .= '<div class="images">';
        foreach ( $image_ids as $id ) {
            $image = RWMB_Image_Field::file_info( $id, ['size' => 'thumbnail'] );
            $output .= '<img src="' . $image['url'] . '">';
        }
        $output .= '</div>';
    }

    // Description
    $desc = $group['desc'] ?? '';
    $output .= $desc ? wpautop( $desc ) : '';

    return $output;
} );
```

Usage: Add `[my_group]` into your post/page content or page builder module.

### Sub-field values

`rwmb_meta()` returns **raw values** for sub-fields. It does not format them like it does for individual fields.

| Field type                 | Value                       |
| -------------------------- | --------------------------- |
| `taxonomy`, `user`, `post` | Object ID(s)                |
| File & image fields        | Attachment ID(s)            |
| `map`, `osm`               | `"latitude,longitude,zoom"` |
| `oembed`                   | URL                         |
| `wysiwyg`                  | Raw content (no `<p></p>`)  |

Example: getting image info from sub-fields:

```php
$group = rwmb_meta( 'group_id' );
$image_ids = $group['image_key'] ?? [];
foreach ( $image_ids as $id ) {
    $image = RWMB_Image_Field::file_info( $id, ['size' => 'thumbnail'] );
    echo '<img src="' . $image['url'] . '">';
}
```

<Helpers />

## Setting default values

There are 2 ways to set default values:

- Per sub-field → using `std` on each field.
- Whole group → using `std` on the group.

### Per sub-field

```php
add_filter( 'rwmb_meta_boxes', function( $meta_boxes ) {
	$meta_boxes[] = [
		'title' => 'Test Group Default Value',
		'fields' => [
			[
				'type' => 'group',
				'id'   => 'group',
				'fields' => [
					[
						'id'   => 'name',
						'name' => 'Name',
                        // highlight-next-line
						'std'  => 'My Name',
					],
					[
						'type' => 'email',
						'id'   => 'email',
						'name' => 'Email',
                        // highlight-next-line
						'std'  => 'myemail@domain.com',
					],
				],
			]
		],
	];
	return $meta_boxes;
} );
```

Result:

![default sub-field value](https://imgur.elightup.com/pml8twS.png)

### Whole group

Instead of setting `std` for each field, define an array for the group:

```php
add_filter( 'rwmb_meta_boxes', function( $meta_boxes ) {
	$meta_boxes[] = [
		'title' => 'Test Meta Box',
		'fields' => [
			[
				'type' => 'group',
				'id'   => 'group',
				'fields' => [
					[
						'id'   => 'name',
						'name' => 'Name',
					],
					[
						'type' => 'email',
						'id'   => 'email',
						'name' => 'Email',
					],
				],

				// highlight-start
				'std' => [
					'name'  => 'My name',
					'email' => 'myemail@domain.com',
				],
				// highlight-end
			]
		],
	];
	return $meta_boxes;
} );
```

If the group is **cloneable**, `std` should be an array of group values:

```php
'std' => [
    [ 'name' => 'Name 1', 'email' => 'email1@domain.com' ],
    [ 'name' => 'Name 2', 'email' => 'email2@domain.com' ],
],
```

And here is the result:

![default group value](https://imgur.elightup.com/rqxfxA8.png)

See this video for demonstration:

<iframe src="https://www.loom.com/embed/c8f04fb84025428c895f14137b194035" frameborder="0" allowfullscreen width="100%"></iframe>

## Changing clone button text

Change the button label with `add_button`:

```php
[
	'type'       => 'group',
	'name'       => 'Tracks',
	'id'         => 'tracks',
    // highlight-next-line
	'add_button' => 'Add another track',
	'fields'     => [
		// Sub-fields here.
	],
],
```

## Clone default values

When cloning a group:

- If the group has `'clone_default' => true`, all sub-fields will use their default values.
- If a sub-field is cloneable, its own `clone_default` takes priority.

Learn more: [`clone_default` parameter](/cloning-fields/)

## Changing group titles with JavaScript

You can filter group titles with JavaScript:

```js
jQuery( function() {
    // Change "myVendor/myPlugin" to your unique namespace
    rwmb.hooks.addFilter( 'group.title', 'myVendor/myPlugin', function( title ) {
        // Change the title and return the value here.
        return title + ' Some random string';
    } );
} );
```

## Known issues

- When cloning nested groups, input `id` attributes may change in unpredictable ways. Avoid relying on them in custom JavaScript.
- For `wysiwyg` fields inside cloneable groups, **don't end the field ID with `_{number}`** (like `_12`). This pattern is reserved by the clone script. Use another format instead.

# MB Include Exclude

This extension helps you to define advanced location rules for where to show field groups.

## Settings

To add include, exclude conditions to your meta box to show/hide it, you need to add parameter `include` or `exclude` accordingly to the meta box configuration.

Each parameter (`include`, `exclude`) is an array and has the same following elements:

- `relation`: The logical operator to combine conditions: `AND` or `OR`. Default is `OR`. Case insensitive. Optional.

If one of the following conditions matched (`relation` = `OR`) or all of the following conditions matched (`relation` = `AND`), then the meta box is shown (`include`) or hidden (`exclude`).

Parameter | Description
--- | ---
`ID` | List of post IDs, match if current post ID is in the list. Can be array or comma separated. Optional.
`parent` | List of post parent IDs, match if parent ID of the current post is in the list. Can be array or comma separated. Optional.
`slug` | List of post slugs, match if current post slug is in the list. Can be array or comma separated. Optional.
`template` | List of page templates, match if the current post has a page template in the list. Can be array or comma separated. Optional.
`category` | List of categories IDs or names or slugs, match if the current post has a category in the list. Can be array or comma separated. Optional.
`tag` | List of tag IDs or names or slugs, match if the current post has a tag in the list. Can be array or comma separated. Optional.
`{$taxonomy_slug}` | List of custom taxonomy terms' IDs or names or slugs. Here `taxonomy_slug` is the slug of the taxonomy (like `section`, `region`, etc.). Match if the current post has a term in the list. Can be array or comma separated. Optional.
`parent_category` | List of parent categories IDs or names or slugs, match if the current post has a parent category in the list. Can be array or comma separated. Optional.
`parent_tag` | List of parent tag IDs or names or slugs, match if the current post has a parent tag in the list. Can be array or comma separated. Optional.
`parent_{$taxonomy_slug}` | List of parent custom taxonomy terms' IDs or names or slugs. Here `taxonomy_slug` is the slug of the taxonomy (like `section`, `region`, etc.). Match if the current post has a parent term in the list. Can be array or comma separated. Optional.
`user_role` | List of user roles (`administrator`, `editor`, etc.), match if the current user has the role in the list. Can be array or comma separated. Optional.
`user_id` | List of user IDs, match if the current user has user ID in the list. Can be array or comma separated. Optional.
`edited_user_role`|Role of the being edited user. Works on the user profile or user edit screens only. Requires [MB User Meta](/extensions/mb-user-meta/) extension.
`edited_user_id`|User ID of the being edited user. Works on the user profile or user edit screens only. Requires [MB User Meta](/extensions/mb-user-meta/) extension.
`is_child` | Boolean, match if the current post/page is a child page or not. Optional.
`custom` | Name of the custom function that performs the check (returns `true` or `false`). This function will take 1 parameter the meta box array. Match if the function returns `true`. Optional. Since v1.0.1, function name can be a string or array(object, method name) or array(class, static method name)

## Sample code

```php
add_filter( 'rwmb_meta_boxes', 'prefix_include_exclude_demo' );
function prefix_include_exclude_demo( $meta_boxes ) {
    $meta_boxes[] = array(
        'title'   => 'Include Meta Box',

        // Register this meta box for posts matched below conditions
        'include' => array(
            // With all conditions below, use this logical operator to combine them. Default is 'OR'. Case insensitive. Optional.
            'relation'        => 'OR',

            // List of post IDs. Can be array or comma separated. Optional.
            'ID'              => array( 1, 2 ),

            // List of post parent IDs. Can be array or comma separated. Optional.
            'parent'          => array( 3, 4 ),

            // List of post slugs. Can be array or comma separated. Optional.
            'slug'            => array( 'contact', 'about' ),

            // List of page templates. Can be array or comma separated. Optional.
            'template'        => array( 'full-width.php', 'sidebar-page.php' ),

            // List of categories IDs or names or slugs. Can be array or comma separated. Optional.
            'category'        => array( 1, 'Blog', 'another' ),

            // List of tag IDs or names or slugs. Can be array or comma separated. Optional.
            'tag'             => array( 1, 'fun' ),

            // Custom taxonomy. Optional.
            // Format: 'taxonomy' => list of term IDs or names or slugs (can be array or comma separated)
            'location'        => array( 12, 'USA', 'europe' ),
            'os'              => array( 'Windows', 'mac-os' ),

            // List of parent categories IDs or names or slugs. Can be array or comma separated. Optional.
            'parent_category' => 'Parent',

            // List of parent tag IDs or names or slugs. Can be array or comma separated. Optional.
            'parent_tag'      => 'Parent',

            // Parent custom taxonomy. Optional.
            // Format: 'parent_taxonomy' => list of term IDs or names or slugs (can be array or comma separated)
            'parent_location' => array( 12, 'USA', 'europe' ),

            // Check if current post/page is a child page
            'is_child'        => true,

            // List of user roles. Can be array or comma separated. Optional.
            'user_role'       => 'administrator',

            // List of user IDs. Can be array or comma separated. Optional.
            'user_id'         => array( 1, 2 ),

            // Custom condition. Optional.
            // Format: 'custom' => 'callback_function'
            // The function will take 1 parameter which is the meta box itself
            'custom'          => 'manual_include',
        ),

        'fields' => array(
            array(
                'name' => 'Name',
                'id'   => 'name',
                'type' => 'text',
            ),
        ),
    );

    // 2nd meta box
    $meta_boxes[] = array(
        'title'   => 'Exclude Meta Box',

        // Don't register this meta box for posts matched below conditions
        'exclude' => array(
            'relation'  => 'OR',
            'ID'        => array( 1, 2 ),
            'parent'    => array( 3, 4 ),
            'slug'      => array( 'contact', 'about' ),
            'template'  => array( 'full-width.php', 'left-sidebar.php' ),
            'category'  => array( 1, 'News' ),
            'tag'       => array( 1, 'fun' ),
            'user_role' => array( 'administrator', 'editor' ),
            'user_id'   => array( 1, 2 ),
            'location'  => array( 12, 'USA', 'europe' ),
            'os'        => array( 'Windows', 'mac-os' ),
            'is_child'  => true,
            'custom'    => 'manual_exclude',
        ),

        'fields' => array(
            array(
                'name' => 'Job',
                'id'   => 'job',
                'type' => 'text',
            ),
        ),
    );

    return $meta_boxes;
}

function prefix_include_exclude_manual_include( $meta_box ) {
    if ( $meta_box['title'] == 'Include Meta Box' )
        return true;
    return false;
}
```

## Using with Sage

[Sage](https://roots.io/sage/) is a starter theme made by Roots.io. The latest version 9 uses [Laravel Blade](https://laravel.com/docs/5.3/blade) as a template system. When using the MB Include Exclude extension to detect page template in Sage, it's important to remember that the extension uses the value WordPress stores in the database, e.g. the value in the Page Template dropdown, which is `views/mytemplatename.blade.php`. So the code for `template` rule will be:

```php
'template' => 'views/mytemplatename.blade.php',
```

# MB Pods Migration

MB Pods Migration extension helps you to migrate field groups, custom field data, and relationships from Pods to Meta Box.

:::warning

This extension only migrates the data created by Pods within a site. It doesn't migrate your website from local to the development environment (you'll need another plugin for this) nor the way you use the data like getting the data and displaying it on the front end. After the migration, just go to the database and check how it changes.

:::

## Backup the database

Before migrating data, make sure you have a backup of your database. During the migration process, because of the difference in [data format](/database/), the plugin will attempt to modify the existing data in custom fields created by Pods. We try to do it at a very minimum level and create a backup of fields for some specific cases, but it's still important to make a backup just in case something goes wrong.

## Migrate

Before migrating, make sure you keep Pods, Meta Box (required) and extensions (optional) activated. To know which extensions you might need, please see the **How it works** section below. Normally, if you use Meta Box AIO and keep all extensions activated, you don't have to worry about this.

To migrate, go to **Meta Box > Pods Migration** and click the **Migrate** button.

The plugin will show the process of migrating. When it's done, you'll see the text "Done".

![Migrate from Pods to Meta Box](https://i0.wp.com/images.elightup.com/meta-box/plugins/pods-migration/admin-screen.png)

## How it works

MB Pods Migration tries to migrate all the following data from Pods to Meta Box. Please note that not all data types and settings in Pods have an equivalent in Meta Box. The plugin will try to migrate as much as it can. The details are explained below:

### Post types and taxonomies

The plugin will migrate all custom post types and custom taxonomies created in Pods to Meta Box. This job requires the [MB Custom Post Type](/extensions/mb-custom-post-type/) extension. All the settings like labels and icons are migrated as well.

:::warning

**We must remove Pods post types and taxonomies** after migration, as we cannot change their status to 'Inactive'. Therefore, please ensure that all data is processed before proceeding with the deletion.

:::

### Field groups

Pods field groups are migrated to Meta Box's field groups, which requires [MB Builder](/extensions/meta-box-builder/). Most of the field group settings are the same as in Meta Box.

:::warning

**We must remove Pods field groups** after migration, as we cannot change their status to 'Inactive'. Therefore, please ensure that all data is processed before proceeding with the deletion.

:::

For **field group locations**, the basic rules are already supported in Meta Box and extensions. You might need extensions such as:

- [MB Term Meta](/extensions/mb-term-meta/): If you set locations for taxonomies.
- [MB User Meta](/extensions/mb-user-meta/): If you set locations for users.
- [MB Settings Page](/extensions/mb-settings-page/): If you set locations for settings page.

Besides, if you use complex locations, then you'll need [MB Include Exclude](/extensions/meta-box-include-exclude/) extension. Due to the difference in how plugins create rules, the plugin works the following way:

- If there's only one location group: the plugin will migrate all rules with operator `AND`.
- If there are multiple location groups: the plugin will take the first rule of each group and combine them with operator `OR`.

### Custom fields data

Most Pods field types work well with Meta Box, such as text, radio, select, etc. However, there's still a difference in how plugins store values in the database and we try to mimic the effect as much as possible. The settings for fields in Pods were previously stored in individual rows in the database (in a complex manner). We have now migrated them to a single 'settings' meta key and stored them in one row.

:::info Meta key

Pods stores the field values in the database with the meta key = field ID, which is the same as Meta Box. So, in most cases, we reuse these values. Only in cases that the data format is not compatible with Meta Box, we'll modify the value to match.

:::

### Settings Page

The plugin also migrates all Settings Page from Pods to Meta Box. You'll need the [MB Builder](/extensions/meta-box-builder/) and [MB Settings Page](/extensions/mb-settings-page/) to do this. We'll migrate the settings and data of all Pods settings page to Meta Box.

:::warning

**We must remove Pods settings page** after migration, as we cannot change their status to 'Inactive'. Therefore, please ensure that all data is processed before proceeding with the deletion.

:::

### Relationships

The plugin also migrates all relationships from Pods to Meta Box. You'll need the [MB Builder](/extensions/meta-box-builder/) and [MB Relationships](/extensions/mb-relationships/) to do this. As the settings are quite different between the plugins, we'll migrate the settings of all Pods relationships to many-to-many relationships in Meta Box.

Of course, the data of relationships (the connections between items) are also migrated.

:::warning

**We must remove Pods relationships** after migration, as we cannot change their status to 'Inactive'. Therefore, please ensure that all data is processed before proceeding with the deletion.

:::

# MB Rank Math

import LiteYouTubeEmbed from 'react-lite-youtube-embed';
import 'react-lite-youtube-embed/dist/LiteYouTubeEmbed.css';

MB Rank Math helps you to add content of custom fields to Rank Math Content Analysis to have better SEO score.

![MB Rank Math Integration](https://imgur.elightup.com/tIyC0u9.jpg)

## Settings

To let Rank Math get a field's content to analyze, add `'rank_math_analysis' => true` to the field:

```php
[
	'name' => 'My custom editor',
	'id'   => 'custom_content',
	'type' => 'wysiwyg',
	'rank_math_analysis' => true,
],
```

The plugin supports all types of fields, such as text, textarea and wysiwyg.

This is the video tutorial:

<LiteYouTubeEmbed id='I3ncHxLxwlM' />

# MB Relationships

import Tabs from '@theme/Tabs';
import TabItem from '@theme/TabItem';

MB Relationships helps you create relationships between posts, terms, and users in WordPress. When you edit an item (post, term, or user), you can select other items to connect to. It works with all post types, custom taxonomies, and users, and supports many-to-many, one-to-many, many-to-one, and one-to-one relationships.

This is an example of a many-to-many relationship between events (a custom post type) and speakers (users).

![Events to speakers relationship](https://i0.wp.com/images.elightup.com/meta-box/docs/relationships/events-to-speakers.png)

The plugin uses a custom table for storing relationships and integrates with default WordPress queries to retrieve the connected items easily. Using a custom table has several benefits:

- Bidirectional by nature
- Easier querying items in both directions (`from` and `to`) or querying sibling items
- Not polluting the post/term/user meta tables
- Better performance

The custom table is automatically created when the plugin is activated.

## Creating relationships

You can create a relationship in either of the following ways:

- **Using [MB Builder](/extensions/meta-box-builder/)**, which provides a UI for creating relationships. This is a premium extension already bundled in [Meta Box Lite](https://metabox.io/lite/) or [Meta Box AIO](https://metabox.io/aio/).
- **Using code**.

Before going into the detailed settings of a relationship, note that when a relationship is created, you'll see a meta box (usually on the right side - this position can be changed). Inside that meta box, there is a field ([`post`](/fields/post/), [`taxonomy_advanced`](/fields/taxonomy-advanced/), or [`user`](/fields/user/) depending on the object type) for selecting connected items. The field is cloneable by default, or a single-select dropdown when **Has one relationship** is enabled. The settings are divided into 3 parts: settings for the relationship, the meta box, and the field.

Now let's see how to create a relationship with MB Builder.

### Using MB Builder

To create a relationship, go to **Meta Box > Relationships** and click **Add New**.

![Create a relationship with MB Builder](img/relationships/create-relationship.png)

Here you can enter all the settings for the relationship and each side of the relationship (**From** and **To**).

#### Relationship settings

Name | Description
---|---
Delete data in database? | Whether to delete relationship data from the database when the relationship is deleted.
Reciprocal relationship | Whether the relationship is reciprocal, e.g. a relationship between items of the same type. If you enable this, make sure the settings for the "From" and "To" sides are the same.

When editing an item, the plugin shows a meta box for selecting connected items. For reciprocal relationships between items of the same type, the plugin shows 2 meta boxes (one for each "from" and "to" side) unless you enable this setting, which limits the UI to a single meta box.

#### Side settings

For each side, there are 3 tabs of settings:

- **General**: for general settings such as object type and post type.
- **Meta Box**: for extra meta box settings. These settings are the same as the field group settings when creating custom fields.
- **Field**: for extra field settings. These settings are the same as the field settings ([post](/fields/post/), [taxonomy_advanced](/fields/taxonomy-advanced/), or [user](/fields/user/) depending on the object type).

<Tabs>
  <TabItem value="general" label="General" default>

![general settings for a relationship side](img/relationships/general.png)

Name | Description
---|---
Object type | The type of object for this side. If you choose "Term" or "User", make sure [MB Term Meta](/extensions/mb-term-meta/) or [MB User Meta](/extensions/mb-user-meta/) is activated.
Post type | If you select object type = "Post", the post type settings appear so you can select the post type.
Taxonomy | If you select object type = "Term", the taxonomy settings appear so you can select the taxonomy.
Has one relationship | When enabled, each item on this side can connect to only one item on the other side. The field becomes a single-select dropdown, and the plugin enforces the limit when saving data. When enabled on the other side, items that are already connected elsewhere are hidden from the dropdown.
Empty message | The custom message displayed when there are no connections. Leave blank to use the default message "No connections".
Show admin filter | Add a select dropdown to filter posts by this relationship. Works only for posts.
Show as admin column | Show the connections in the admin list table for posts, terms, or users. When enabled, additional settings appear below.
Column position | The position of the admin column. Set it before, after, or in place of an existing column by choosing an option from the dropdown and selecting or entering the target column ID. The plugin provides a list of common WordPress columns - press the down arrow key to browse them. If you use a [custom admin column](/extensions/mb-admin-columns/), enter its column ID here.
Column title | Custom admin column title. Leave blank to use the default title from the relationship meta box.
Item link type | How each connected item appears in the admin column: linked to the edit screen, linked to view it on the frontend, or without links.

  </TabItem>
  <TabItem value="meta-box" label="Meta Box">

The plugin automatically creates meta boxes to let you select connected items. The meta box settings are very much like a [normal meta box](/creating-fields-with-code/#field-group-settings) when you create custom fields, but simpler.

![meta box settings for a relationship side](img/relationships/meta-box.png)

Name | Description
---|---
Title | The custom meta box title. Leave blank to default to "Connected To" or "Connected From".
Context | Where to show the meta box.
Priority | The priority of the meta box. Meta boxes with higher priority appear first.
Style | The meta box style: default (with wrapper) and seamless (no wrapper).
Collapse by default | Whether to collapse the meta box when the edit page loads.
Custom CSS class | If you want to style your meta box, then enter a custom CSS class here.

  </TabItem>
  <TabItem value="field" label="Field">

To select connected items, the plugin uses Meta Box's [post](/fields/post/), [taxonomy advanced](/fields/taxonomy-advanced/), or [user](/fields/user/) field according to the object type of the relationship. This tab shows the settings for the field.

:::warning

These settings apply to the field displayed **on the other side** of the relationship - where you select items for this side.

So, if you have a relationship from `post` to `user` and you are configuring the "From" side (for `post`), the `post` field appears only when you are editing a `user` (the "To" side).

:::

![field settings for a relationship side](img/relationships/field.png)

Name | Description
---|---
Label | The field label. Leave empty to hide the label.
Label description | A description displayed below the field label.
Input description | A description displayed below the field input.
Placeholder | The placeholder text for the select dropdown.
Query args | Custom query args to get posts, terms, or users to select from. A set of key-value pairs representing arguments for `WP_Query` (posts), `get_terms` (terms), or `get_users` (users).
Max items | The maximum number of selected items. For one-to-one or one-to-many relationships, use **Has one relationship** in the General tab instead. `Max items` only limits how many rows appear in the field UI and does not enforce uniqueness on the other side.
Add more text | The custom text for the "Add more" button.
Before | Custom HTML to output before the field.
After | Custom HTML to output after the field.
Custom CSS class | If you want to style the field, then enter a custom CSS class here.

  </TabItem>
</Tabs>

### Using code

The code below registers a relationship **from posts to pages**:

```php
add_action( 'mb_relationships_init', function() {
    MB_Relationships_API::register( [
        'id'   => 'posts_to_pages',
        'from' => 'post',
        'to'   => 'page',
    ] );
} );
```

This code shows 2 meta boxes on the post and page edit screens:

- For posts: a meta box to select connected pages.
- For pages: a meta box showing posts connected to that page.

If you want to register a relationship **from categories to posts**, use the following code:

```php
add_action( 'mb_relationships_init', function () {
    MB_Relationships_API::register( [
        'id'   => 'categories_to_posts',
        'from' => [
            // highlight-start
            'object_type' => 'term',
            'taxonomy'    => 'category',
            // highlight-end
        ],
        'to'   => 'post',
    ] );
} );
```

Or register a relationship **from users to posts**:

```php
add_action( 'mb_relationships_init', function () {
    MB_Relationships_API::register( [
        'id'   => 'users_to_posts',
        'from' => [
            // highlight-next-line
            'object_type' => 'user',
        ],
        'to'   => 'post',
    ] );
} );
```

To register a **one-to-many** relationship (each product has one brand, each brand has many products), enable `has_one_relationship` on the side where each item has only one partner (the product/From side in this example):

```php
add_action( 'mb_relationships_init', function () {
    MB_Relationships_API::register( [
        'id'   => 'products_to_brands',
        'from' => [
            'object_type'          => 'post',
            'post_type'            => 'product',
            'has_one_relationship' => true,
        ],
        'to'   => [
            'object_type' => 'post',
            'post_type'   => 'brand',
        ],
    ] );
} );
```

For a **one-to-one** relationship, set `has_one_relationship` to `true` on both `from` and `to`.

#### Syntax

The main API function `MB_Relationships_API::register` has the following parameters:

Name|Description
---|---
`id`|The relationship ID (or type). Used to distinguish this relationship from others. Required.
`from`|The "from" side of the relationship. Required. See below for details.
`to`|The "to" side of the relationship. Required. See below for details.
`reciprocal`|Whether the relationship is reciprocal (`true` or `false`). Optional.

Both sides `from` or `to` accept various parameters for the connection and meta box:

- If you pass **a string** to `from` or `to`, the plugin treats it as the **post type**. The relationship is created between posts of the specified post types.
- If you pass **an array** to `from` or `to`, the array accepts the following parameters:

Name|Description
---|---
`object_type`|The object type the relationship is created from/to: `post` (default), `term` or `user`. Optional.
`post_type`|The post type if the `object_type` is set to `post`. Default `post`. Optional.
`taxonomy`|The taxonomy if the `object_type` is set to `term`.
`has_one_relationship`|Whether each item on this side can connect to only one item on the other side (`true` or `false`). Default `false`. For one-to-one, set `true` on both `from` and `to`.
`empty_message`|The message displayed when there are no connections.
`meta_box`|Meta box settings, has the [same settings as a normal meta box](/creating-fields-with-code/#field-group-settings). Below are common settings you might want to change:
-- `title`|The meta box title. Default is "Connect To" for "from" side and "Connected From" for "to" side.
`field`|Field settings, has the same settings as a [post](/fields/post/), [user](/fields/user/) or [taxonomy](/fields/taxonomy/) field according to the object type. Below are common settings you might want to change:
-- `name` | Field title.
-- `placeholder` | Placeholder text.
-- `query_args`|Custom query arguments to get objects of `object_type`. Passed to `WP_Query()`, `get_terms()`, or `get_users()` depending on `object_type`.
-- `max_clone` | Maximum number of connections. Does not enforce uniqueness on the other side. Use `has_one_relationship` for one-to-one or one-to-many relationships.

:::warning

The field settings apply to the field displayed **on the other side** of the relationship - where you select items for this side.

So, if you have a relationship from `post` to `user` and you are configuring the "From" side (for `post`), the `post` field appears only when you are editing a `user` (the "To" side).

:::

#### Admin column

The plugin supports showing connected items in the admin list table of posts/terms or users. To enable this feature, add the `admin_column` parameter to the `from` or `to` relationship configuration:

```php
MB_Relationships_API::register( [
    'id'   => 'posts_to_pages',
    'from' => [
        'object_type'  => 'post',
        // highlight-next-line
        'admin_column' => true,
    ],
    'to'   => [
        'object_type'  => 'post',
        'post_type'    => 'page',
        // highlight-next-line
        'admin_column' => 'after title',
    ],
] );
```

Similar to [MB Admin Columns](/extensions/mb-admin-columns/), the plugin supports 3 formats of the parameter:

1. A boolean `true`: display the admin column at the end of the list table. The column title matches the connection meta box title.
1. A string such as `"before title"`: specify the column position. The first word is the placement (`"before"`, `"after"`, or `"replace"`) and the second is the target column ID.
1. An array of advanced settings, as below:

```php
'admin_column' => [
    'position' => 'after title',
    'title'    => 'Price',
    'link'     => 'edit',
],
```

Key|Description
---|---
`position`|Specify where to insert the new column. It's the same as described in the #2 method above.
`title`|Column title. Optional. Default is the meta box title.
`link`|Configure the link for items in the admin column. Can be `view` (link to the frontend - default), `edit` (link to the edit screen), or `false` (no link).


### Bi-directional relationships

While relationships are registered with distinct "from" and "to" sides, the connections themselves are bi-directional. You can query in either direction without issue. The query API is explained in the next section.

The data is stored in the database as a pair of (from_id, to_id), making it independent of either side.

## Getting connected items

### API

Using the API is the fastest and simplest way to get connected items:

```php
$pages = MB_Relationships_API::get_connected( [
    'id'   => 'posts_to_pages',
    'from' => get_the_ID(),
] );
foreach ( $pages as $p ) {
    echo $p->post_title;
}
```

If you need more control over connected items (like sorting or limiting the number of items), see the sections below for each type of content.

### Posts

To get pages connected to a specific post, use the following code:

```php
<?php
$connected = new WP_Query( [
    'relationship' => [
        'id'   => 'posts_to_pages',
        'from' => get_the_ID(), // You can pass object ID or full object
    ],
    'nopaging'     => true,
] );
while ( $connected->have_posts() ) : $connected->the_post();
    ?>
    <a href="<?php the_permalink(); ?>"><?php the_title(); ?></a>
    <?php
endwhile;
wp_reset_postdata();
```

To query connected posts, pass a `relationship` parameter to `WP_Query()`.

To display posts connected to a specific page (a **backward query**), replace `from` with `to` in the code above:

```php
$connected = new WP_Query( [
    'relationship' => [
        'id' => 'posts_to_pages',
        'to' => get_the_ID(), // You can pass object ID or full object
    ],
    'nopaging'     => true,
] );
```

That's all.

**Why use `WP_Query()`?**

There are 3 reasons to use `WP_Query()`:

1. **Flexibility** - You can combine relationship queries with other criteria. For example, get related posts *and* filter by category in a single query. Without `WP_Query()`, you would need two separate queries.
1. **Performance** - `WP_Query()` is optimized for posts and runs a single database query. It returns full post objects by default, or just IDs if you set `'fields' => 'ids'`.
1. **Familiarity** - `WP_Query()` is standard in WordPress development. There is no need for a separate query API for the same purpose.

Also note that in the example above, `nopaging` is set to `true`, which disables pagination so the query returns all connected posts.

For the full list of supported parameters for `WP_Query()`, please see the [documentation](https://developer.wordpress.org/reference/classes/wp_query/).

### Terms

Similar to posts, getting connected terms is simple:

```php
$terms  = get_terms( [
    'taxonomy'     => 'category',
    'hide_empty'   => false,
    'relationship' => [
        'id' => 'categories_to_posts',
        'to' => get_the_ID(), // You can pass object ID or full object
    ],
] );
foreach ( $terms as $term ) {
    echo $term->name;
}
```

We use the WordPress `get_terms()` function with an additional `relationship` parameter for the same reasons as posts.

For the full list of supported parameters for `get_terms()`, please see the [documentation](https://developer.wordpress.org/reference/functions/get_terms/).

### Users

Similar to posts, getting connected users is simple:

```php
$users  = get_users( [
    'relationship' => [
        'id' => 'users_to_posts',
        'to' => get_the_ID(), // You can pass object ID or full object
    ],
] );
foreach ( $users as $user ) {
    echo $user->display_name;
}
```

We use the WordPress `get_users()` function with an additional `relationship` parameter for the same reasons as posts.

For the full list of supported parameters for `get_users()`, please see the [documentation](https://codex.wordpress.org/Function_Reference/get_users).

### Current item

In the examples above, we use `get_the_ID()` to get the current post ID. That function does not work when querying connected posts from a relationship such as `categories_to_posts` on a term archive.

In those cases, use the following functions:

Function|Description
---|---
[`get_queried_object()`](https://codex.wordpress.org/Function_Reference/get_queried_object)|Returns the currently queried object. On a single post or page, it returns the post object. On a category archive, it returns the category object, and so on. Note that `from` and `to` accept both an object ID and a full object.
[`get_queried_object_id()`](https://developer.wordpress.org/reference/functions/get_queried_object_id/)|Returns the ID of the currently queried object. Same as above, but returns only the ID.
[`get_current_user_id()`](https://developer.wordpress.org/reference/functions/get_current_user_id/)|Returns the current user ID.

## Getting sibling items

Assume you have 2 custom post types: `student` and `class`. Each student can join 1 or more classes (many-to-many relationship). How do you get the classmates of a given student?

To get siblings of a post, add `'sibling' => true` to the query:

```php
$siblings = new WP_Query( [
    'relationship' => [
        'id'      => 'posts_to_pages',
        'to'      => get_the_ID(),
        // highlight-next-line
        'sibling' => true,
    ],
    'nopaging'     => true,
] );
```

The code is similar to the above section, except for the extra `sibling` parameter. That parameter works for all post, term, or user queries.

## Post archive

All the examples above work well for a single post, term, or user. On a blog archive page, however, querying connected posts per item creates dozens of extra queries - one per post on the page.

To solve this problem, we need to use the following code:

```php
global $wp_query, $post;

MB_Relationships_API::each_connected( [
    'id'   => 'posts_to_pages',
    'from' => $wp_query->posts, // 'from' or 'to'.
] );

while ( have_posts() ) : the_post();

    // Display connected pages
    foreach ( $post->connected as $p ) :
        echo $p->post_title;
        // More code here...
    endforeach;

endwhile;
```

### How does it work?

On each request, WordPress automatically runs a query that finds the appropriate posts to display. These posts are stored in the global `$wp_query` variable.

The API function `MB_Relationships_API::each_connected()` will take a list of posts from `$wp_query->posts` and pull the related pages from the database (with a single database query) and assign them to each post via the `connected` property. So, you can loop through `$post->connected` and display connected pages.

If you use a custom query instead of the default WordPress query, pass the array of post objects to the function:

```php
$my_query = new WP_Query( [
    // your parameters
] );

MB_Relationships_API::each_connected( [
    'id'   => 'posts_to_pages',
    'from' => $my_query->posts, // Set to $my_query.
] );

while ( $my_query->have_posts() ) : $my_query->the_post();

    // Display connected pages
    foreach ( $post->connected as $p ) :
        echo $p->post_title;
        // More code here.
    endforeach;

endwhile;
```

The property name can be customized with `'property' => 'your_property_name'`. See the sections below.

### Multiple connections

If you have multiple relationships between objects, you can call `each_connected()` multiple times:

```php
// Get connected pages and assign them to property 'connected_pages'.
MB_Relationships_API::each_connected( [
    'id'       => 'posts_to_pages',
    'from'     => $wp_query->posts,
    'property' => 'connected_pages',
] );

// Get connected users and assign them to property 'artists'.
MB_Relationships_API::each_connected( [
    'id'       => 'users_to_posts',
    'from'     => $wp_query->posts,
    'property' => 'artists',
] );

while ( have_posts() ) : the_post();

    // Display connected pages
    foreach ( $post->connected_pages as $post ) : setup_postdata( $post );
        the_title();
        ...
    endforeach;
    wp_reset_postdata(); // Set $post back to original post

    // Display connected users
    foreach ( $post->artists as $artist ) :
        echo $artist->display_name;
    endforeach;

endwhile;
```

### Nesting

Since `each_connected()` accepts an array of post objects, nested queries are straightforward:

```php
$my_query = new WP_Query( [
    'post_type' => 'movie'
] );
MB_Relationships_API::each_connected( [
    'id'       => 'movies_to_actors',
    'from'     => $my_query->posts,
    'property' => 'actors',
] );

while ( $my_query->have_posts() ) : $my_query->the_post();

    // Another level of nesting
    MB_Relationships_API::each_connected( [
        'id'       => 'actors_to_producers',
        'from'     => $post->actors,
        'property' => 'producers',
    ] );

    foreach ( $post->actors as $post ) : setup_postdata( $post );
        echo '<h3>Connected Producers</h3>';

        foreach ( $post->producers as $post ) : setup_postdata( $post );
            the_title();

            ...
        endforeach;
    endforeach;

    wp_reset_postdata();
endwhile;
```

## Query by multiple relationships

For example, if you have event-to-band and event-to-artist relationships and want to get all bands and artists connected to an event, use the following:

```php
$query = new WP_Query( [
    'relationship' => [
        'relation' => 'OR',
        [
            'id'   => 'events_to_bands',
            'from' => get_the_ID(),
        ],
        [
            'id'   => 'events_to_artists',
            'from' => get_the_ID(),
        ],
    ],
    'nopaging'     => true,
] );
while ( $query->have_posts() ) {
    $query->the_post();
    echo get_the_title() . '<br>';
}
wp_reset_postdata();
```

## Managing connections programmatically

The plugin provides public APIs to create or delete connections between two items in code.

### `has`

This function checks whether two objects have a specific relationship.

```php
$has_connection = MB_Relationships_API::has( $from, $to, $id );
if ( $has_connection ) {
    echo 'They have a relationship.';
} else {
    echo 'No, they do not have any relationship.';
}
```

Name|Description
---|---
`$from`|The ID of the "from" object.
`$to`|The ID of the "to" object.
`$id`|The relationship ID.

### `add`

This function adds a relationship between two objects.

```php
MB_Relationships_API::add( $from, $to, $id, $order_from = 1, $order_to = 1 );
```

This function checks whether the two objects already have a relationship and adds one only if they do not. If **has one relationship** is enabled, it also returns `false` when either side already has a connection.

When the `add` function runs, the plugin fires the following hook:

```php
do_action( 'mb_relationships_add', $from, $to, $id, $order_from, $order_to );
```

### `delete`

This function deletes a specific relationship between two objects.

```php
MB_Relationships_API::delete( $from, $to, $id );
```

This function deletes a relationship between two objects only if one exists.

When the `delete` function runs, the plugin fires the following hook:

```php
do_action( 'mb_relationships_delete', $from, $to, $id );
```

## Shortcode

The plugin provides a single flexible shortcode to display connected items.

```php
[mb_relationships id="posts_to_pages" direction="from" mode="ul"]
```

It accepts the following parameters:

Name|Description
---|---
`id`|Relationship ID. Required.
`items`|List of item IDs to get connected items from or to. Optional. If omitted, the shortcode uses the current object ID.
`direction`|Direction to query: `from` (default) or `to`. Optional.
`mode`|How to display connected items: `ul` (unordered list - default), `ol` (ordered list), `inline` (comma-separated), or `custom`.
`separator`|The separator between connected items if `mode` is set to `custom`. Optional.

## Database

The relationship data is stored in a custom table `mb_relationships` with the following columns:

Column|Description
---|---
`ID`|The connection ID
`from`|The ID of the "from" object
`to`|The ID of the "to" object
`type`|The relationship ID (type)
`order_from`|The order of the item for the "from" side
`order_to`|The order of the item for the "to" side

This structure allows us to create simple and efficient queries. All columns are also indexed to optimize for speed.

If you use the extension as a separate plugin (not bundled inside another), the table is created during plugin activation. This is ideal because the plugin checks for the table only once.

If you bundle the extension inside another plugin, the table is checked and created when the extension loads. The check is fast, but it still adds a small query on each request.

## REST API

The plugin provides REST API endpoints so you can retrieve and update related items from external sources.

Note: each relationship must first be created using [any of the supported methods](#creating-relationships).

### Check for the existence of a connection

Send a `GET` request to `/wp-json/mb-relationships/v1/{id}/exists?from={from ID}&to={to ID}`.

By default, this endpoint does not require authentication or authorization; use the `mb_relationships_rest_api_can_read_relationships` and/or `mb_relationships_rest_api_can_read_relationships_public` filter to modify this.

Example:

```shell
curl --request GET --url 'https://example.test/wp-json/mb-relationships/v1/posts_to_pages/exists?from=14773&to=13577'
```

```json
{
	"has_relationship": true,
	"relationship": "posts_to_pages",
	"to": 13577,
	"from": 14773
}
```

### Get all "to" objects for a specified "from" object

Send a `GET` request to `/wp-json/mb-relationships/v1/{id}/connected-from/{from ID}`.

By default, this endpoint does not require authentication or authorization; use the `mb_relationships_rest_api_can_read_relationships` and/or `mb_relationships_rest_api_can_read_relationships_public` filter to modify this.

Example:

```shell
curl --request GET --url 'https://example.test/wp-json/mb-relationships/v1/posts_to_pages/connected-from/14773'
```

```json
{
	"relationship": "posts_to_pages",
	"from": 14773,
	"to": [
        13577,
        13578,
        13579,
    ],
}
```

### Get all "from" objects for a specified "to" object

Send a `GET` request to `/wp-json/mb-relationships/v1/{id}/connected-to/{to ID}`.

By default, this endpoint does not require authentication or authorization; use the `mb_relationships_rest_api_can_read_relationships` and/or `mb_relationships_rest_api_can_read_relationships_public` filter to modify this.

Example:

```shell
curl --request GET --url 'https://example.test/wp-json/mb-relationships/v1/posts_to_pages/connected-to/13577'
```

```json
{
	"relationship": "posts_to_pages",
	"from": [
        14773,
        14775,
        14777,
    ],
	"to": 13577,
}
```

### Create a new connection

Send a `POST` request to `/wp-json/mb-relationships/v1/{id}` with body parameters `from` and `to`.

By default, this endpoint requires a user with `publish_posts` capability (administrator role); use the `mb_relationships_rest_api_can_create_relationships` and/or `mb_relationships_rest_api_can_create_relationships_public` filter to modify the capabilities.

Example:

```shell
curl --request POST \
  --url https://example.test/wp-json/mb-relationships/v1/posts_to_pages \
  --header 'Authorization: Basic dXNlcjpwYXNzd29yZA==' \
  --header 'Content-Type: multipart/form-data' \
  --form from=14773 \
  --form to=13952
```

```json
{
	"has_relationship": true,
	"relationship": "posts_to_pages",
	"to": 13577,
	"from": 14773
}
```

### Delete a connection

Send a `DELETE` request to `/wp-json/mb-relationships/v1/{id}?from={from ID}&to={to ID}`.

By default, this endpoint requires a user with `delete_posts` capability (administrator role); use the `mb_relationships_rest_api_can_delete_relationships` and/or `mb_relationships_rest_api_can_delete_relationships_public` filter to modify the capabilities.

Example:

```shell
curl --request DELETE \
  --url 'https://example.test/wp-json/mb-relationships/v1/team_member_to_location?from=14773&to=13952' \
  --header 'Authorization: Basic dXNlcjpwYXNzd29yZA=='
```

```json
{
	"has_relationship": false,
	"relationship": "posts_to_pages",
	"to": 13577,
	"from": 14773
}
```

# MB Rest API

import LiteYouTubeEmbed from 'react-lite-youtube-embed';
import 'react-lite-youtube-embed/dist/LiteYouTubeEmbed.css';

[MB Rest API](https://metabox.io/plugins/mb-rest-api/) helps you get and update custom fields via the WordPress Rest API. It's very helpful if you develop an application that uses WordPress as a back end such as a mobile app, or if you need to integrate WordPress with another system.

The extension works only with custom fields created by Meta Box and extensions. For custom custom fields or fields created by other plugins, please refer to [WordPress documentation](https://developer.wordpress.org/rest-api/).

## Endpoints

For posts, terms, users, and comments, MB Rest API doesn't create new Rest API endpoints. Instead, the plugin **extends the [existing WordPress endpoints](https://developer.wordpress.org/rest-api/reference/) for getting and updating data**.

Any custom field groups added to WordPress data like posts (including all custom post types), users, and categories (including all custom taxonomies), will be available in their respective WP REST API endpoints, namely:

```
/wp/v2/{post-type}
	posts, pages, custom-post-types, etc.
/wp/v2/{post-type}/{post_id}
/wp/v2/{custom-taxonomy}
	categories, tags, custom-taxonomy, etc.
/wp/v2/{custom-taxonomy}/{term_id}
/wp/v2/users
/wp/v2/users/{user_id}
/wp/v2/comments
/wp/v2/comments/{comment_id}
```

**For [settings pages](https://metabox.io/plugins/mb-settings-page/)**, because WordPress doesn't have any endpoints to get and update options, the plugin provides a custom endpoint as follows:

```
/meta-box/v1/settings-page
```

We'll see how to use these endpoints below.

## Request methods

MB Rest API uses standard methods as follows:

- `GET`: for getting Meta Box fields
- `POST`: for updating Meta Box fields and requires you to authenticate to perform the request.

## Getting custom fields for posts

Assuming you have a [custom post type](/custom-post-types/) called "Event" and you [create a field group](/custom-fields/) "Event details" for it like this:

![Event details fields](img/rest-api/field.png)

And then enter the data for an event:

![Enter data for an event](https://imgur.elightup.com/lrZHeJw.png)

**Instead of creating extra Rest endpoints, which introduce a new API and syntax, MB Rest API extends the [existing WordPress endpoint for posts](https://developer.wordpress.org/rest-api/reference/posts/#retrieve-a-post) to add data for Meta Box's fields.**

So if the event post ID is `5837`, then you'll need to make a `GET` request to retrieve post data via the standard WordPress post endpoint: `https://domain.com/wp-json/wp/v2/event/5837`.

Here is a sample cURL request:

```bash
curl https://domain.com/wp-json/wp/v2/event/5837
```

or you can [get the data with JavaScript via the Fetch API](https://metabox.io/send-get-post-request-with-javascript-fetch-api/) like this:

```js
const request = await fetch( 'https://domain.com/wp-json/wp/v2/event/5837' );
const response = await request.json();
console.log( response );
```

:::warning Custom post type rest API support

If you use Rest API for a custom post type, make sure you enable Rest API support for it. You can do that with our [MB Custom Post Types & Custom Taxonomies](/extensions/mb-custom-post-type/) or with code according to the [WordPress docs](https://developer.wordpress.org/rest-api/extending-the-rest-api/adding-rest-api-support-for-custom-content-types/). In this article, we're using the "Event" post type which has Rest API supports, and the Rest API base is `event`.

:::

The response is a JSON string that contains full post details (which come from the default WordPress Rest API response) and **also custom fields from Meta Box**. **The Meta Box fields are available in the `meta_box` key** of the response (which is highlighted in the red rectangle in the screenshot from Insomnia above).

Here is the full JSON response with Meta Box fields highlighted:

```json
{
	"id": 5837,
	"date": "2023-07-10T11:41:57",
	"date_gmt": "2023-07-10T04:41:57",
	"guid": {
		"rendered": "http:\/\/mb.test\/?post_type=event&#038;p=5837"
	},
	"modified": "2023-09-27T09:25:51",
	"modified_gmt": "2023-09-27T02:25:51",
	"slug": "php-day-in-london-july-2023",
	"status": "publish",
	"type": "event",
	"link": "http:\/\/mb.test\/event\/php-day-in-london-july-2023\/",
	"title": {
		"rendered": "PHP Day in London &#8211; July 2023"
	},
	"content": {
		"rendered": "",
		"protected": false
	},
	"featured_media": 0,
	"template": "",
	"topic": [
		85
	],
	// highlight-start
	"meta_box": {
		"vanue": "City of London, Greater London, England, United Kingdom",
		"map": {
			"latitude": "51.5156177",
			"longitude": "-0.0919983",
			"zoom": "14"
		},
		"date": "2023-09-30 08:00",
		"speakers": [
			{
				"name": "Brian Garney",
				"company": "Hometown",
				"work_title": "Developer"
			},
			{
				"name": "Ryan Coords",
				"company": "365Devs",
				"work_title": "CTO"
			}
		],
		"price": "50",
		"buy_ticket_url": "https:\/\/amazon.com\/events\/london\/129.html"
	},
	// highlight-end
	"_links": {
		"self": [
			{
				"href": "http:\/\/mb.test\/wp-json\/wp\/v2\/event\/5837"
			}
		],
		"collection": [
			{
				"href": "http:\/\/mb.test\/wp-json\/wp\/v2\/event"
			}
		],
		"about": [
			{
				"href": "http:\/\/mb.test\/wp-json\/wp\/v2\/types\/event"
			}
		],
		"wp:attachment": [
			{
				"href": "http:\/\/mb.test\/wp-json\/wp\/v2\/media?parent=5837"
			}
		],
		"wp:term": [
			{
				"taxonomy": "topic",
				"embeddable": true,
				"href": "http:\/\/mb.test\/wp-json\/wp\/v2\/topic?post=5837"
			}
		],
		"curies": [
			{
				"name": "wp",
				"href": "https:\/\/api.w.org\/{rel}",
				"templated": true
			}
		]
	}
}
```

If you have multiple field groups for a post, then **all fields are merged into a single key `meta_box`** in the response.

If you're using an API testing app like [Postman](https://www.postman.com/) or [Insomnia](https://insomnia.rest/), then you can preview the response in a beautiful format. This is the same request and response created with Insomnia, our favorite API client that we'll use throughout this article (click to enlarge the image):
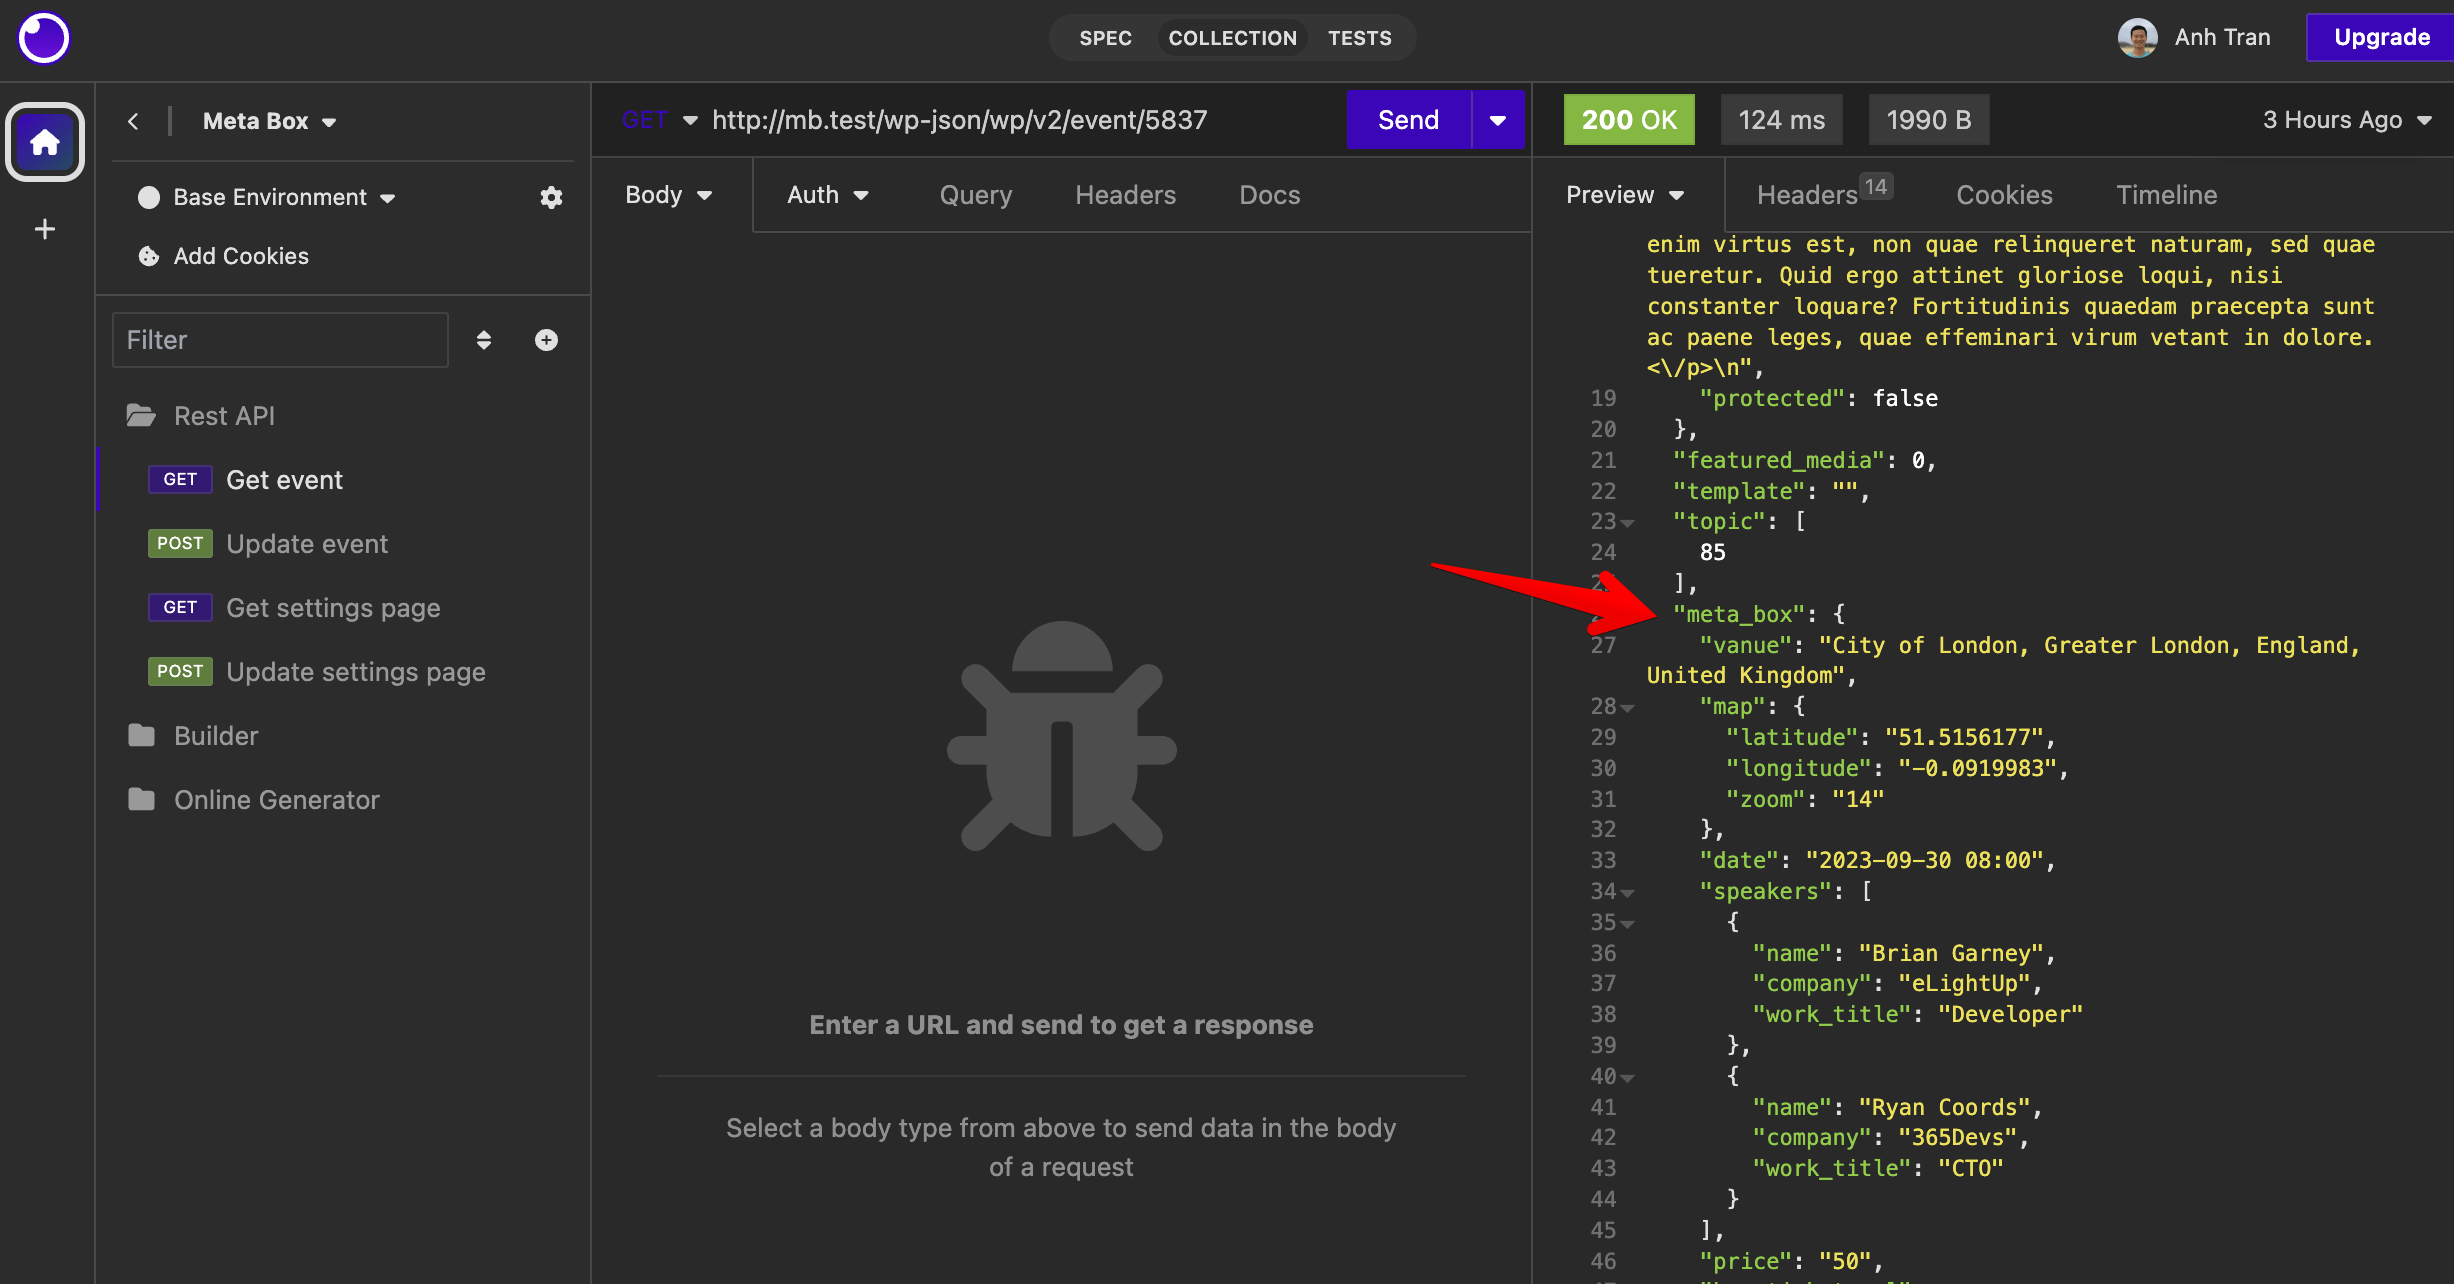
![Getting posts with Insomnia](https://i0.wp.com/images.elightup.com/meta-box/docs/rest-api/get-post-insomnia.png)

:::success Tip

If you don't have Postman or Insomnia and don't want to use a command line, you can simply open the Rest API URL in your browser (Firefox or Google Chrome). They'll show you the response in JSON. Firefox even automatically formats it beautifully.

:::

:::info Data format

Note that the data returned from the Rest API is auto-formatted. For example, for maps, you'll see an array of latitude, longitude, and zoom as in the example above (not the plain text "latitude,longitude,zoom" as in the database). For other fields, like images and files, you'll get more information for the fields, just like you do with the helper functions [`rwmb_meta`](/functions/rwmb-meta/) or [`rwmb_get_value`](/functions/rwmb-get-value/).

:::

## Updating custom fields for posts

To update custom fields via Rest API, we'll need to perform a `POST` request to the same Rest endpoint. Because `POST` request allows you to change data, you'll need to authenticate your requests, using one of the [available authentication methods](#authentication). In this request, we'll need to pass the data as a JSON encoded object, which contains a key `meta_box` for Meta Box fields:

```json
{
	"meta_box": {
		"field_1": "value_1",
		"field_2": "value_2"
	}
}
```

Below is an example of a `POST` request to update an event using cURL:

```bash
curl --request POST \
	--url http://mb.test/wp-json/wp/v2/event/5837/ \
	--user 'USERNAME:PASSWORD'
	--header 'Content-Type: application/json' \
	--data '{
		"title": "London PHP Day 2023",
		"meta_box": {
			"price": "45",
			"buy_ticket_url": "https://ticketbox.com/e/5837"
		}
	}'
```

If you use JavaScript, you can make a `POST` request with the WordPress [apiFetch](https://developer.wordpress.org/block-editor/reference-guides/packages/packages-api-fetch/) utility:

```js
import apiFetch from '@wordpress/api-fetch';

apiFetch( {
	path: '/wp/v2/event/5837',
	method: 'POST',
	data: {
		title: "London PHP Day 2023",
		meta_box: {
			price: "45",
			buy_ticket_url: "https://ticketbox.com/e/5837"
		}
	},
} ).then( res => console.log( res ) );
```

(Note that you can use [vanilla JavaScript with Fetch API to send a `POST` request](https://metabox.io/send-get-post-request-with-javascript-fetch-api/). In this example, we use the WordPress library for simplicity and clarity.)

Or if you prefer to use an API testing tool like Postman or Insomnia, you can do that as well (click the image to enlarge):

![Updating posts with Insomnia](https://i0.wp.com/images.elightup.com/meta-box/docs/rest-api/update-post-insomnia.png)

The response from the update requests is not important as long as the returned status is `200 OK`. This response is simply the same as retrieving data via `GET`, which can be used to examine the data after updating.

In case you use [a group field](/extensions/meta-box-group/), and you want to update a whole group, you can pass it as a full JSON object like this:

```json
{
	"title": "London PHP Day 2023",
	"meta_box": {
		"price": "45",
		"buy_ticket_url": "https://ticketbox.com/e/5837",
		"speakers": [
			{
				"name": "Brian Garney",
				"company": "eLightUp",
				"work_title": "Developer"
			},
			{
				"name": "Ryan Coords",
				"company": "365Devs",
				"work_title": "CTO"
			}
		]
	}
}
```

## Getting & updating custom fields for terms, users, comments

If you want to get fields' values for other object types like terms or users, simply change the Rest API endpoint. WordPress provides a [full list of endpoint references](https://developer.wordpress.org/rest-api/reference/) that you can take a look at (`1234` is a sample ID):

Posts, pages, and custom post types:

```bash
https://domain.com/wp-json/wp/v2/posts/
https://domain.com/wp-json/wp/v2/posts/1234
https://domain.com/wp-json/wp/v2/pages/
https://domain.com/wp-json/wp/v2/pages/1234
https://domain.com/wp-json/wp/v2/post-type-slug/
https://domain.com/wp-json/wp/v2/post-type-slug/1234
```
Categories, tags, and custom taxonomies:

```bash
https://domain.com/wp-json/wp/v2/categories/
https://domain.com/wp-json/wp/v2/categories/1234
https://domain.com/wp-json/wp/v2/tags/
https://domain.com/wp-json/wp/v2/tags/1234
https://domain.com/wp-json/wp/v2/custom-taxonomy-slug/
https://domain.com/wp-json/wp/v2/custom-taxonomy-slug/1234
```

Users:

```bash
https://domain.com/wp-json/wp/v2/users/
https://domain.com/wp-json/wp/v2/users/1234
```

Comments:

```bash
https://domain.com/wp-json/wp/v2/comments/
https://domain.com/wp-json/wp/v2/comments/1234
```

## Getting settings pages

Unlike posts, terms, or users, WordPress doesn't have any endpoints to get and update options, so the plugin provides a custom endpoint for settings pages as follows:

```
/meta-box/v1/settings-page
```

To get settings page data, simply create a `GET` request to this endpoint with a **required parameter `id`, which is the settings page ID**. Please note that to get settings page data, you need to have a proper capability. See the [authentication](#authentication) section below for details.

Here is an example with cURL:

```bash
curl --request GET \
	--url 'https://domain.com/wp-json/meta-box/v1/settings-page?id=website-settings' \
	--user 'USERNAME:PASSWORD'
```

Or via JavaScript with WordPress [apiFetch](https://developer.wordpress.org/block-editor/reference-guides/packages/packages-api-fetch/) library:

```js
import apiFetch from '@wordpress/api-fetch';

apiFetch( {
	path: `/meta-box/v1/settings-page?id=website-settings`,
} ).then( res => console.log( res ) );
```

The response is a JSON with all settings page data:

```json
{
	"address": "4812 Jones Avenue, Winston Salem, NC 27108",
	"phone": "+1-336-720-4261",
	"email": "info@jourrapide.com"
}
```

You can also perform the request in Postman or Insomnia like this:

![Get settings page with Insomnia](https://i0.wp.com/images.elightup.com/meta-box/docs/rest-api/get-settings-page-insomnia.png)

## Updating settings pages

To update a settings page, simply make a `POST` request to the settings page's endpoint `/meta-box/v1/settings-page` with data as JSON like this:

```json
{
	"id": "settings-page-id",
	"data": {
		"field_1": "value_1",
		"field_2": "value_2",
	}
}
```

Here is an example with cURL:

```bash
curl --request POST \
	--url http://mb.test/wp-json/meta-box/v1/settings-page \
	--user 'USERNAME:PASSWORD' \
	--header 'Content-Type: application/json' \
	--data '{
		"id": "website-settings",
		"data": {
			"address": "412 Jones Avenue, Winston Salem, NC 27108",
			"phone": "+1-336-720-4621",
			"email": "contact@jourrapide.com"
		}
	}'
```

or via JavaScript with WordPress [apiFetch](https://developer.wordpress.org/block-editor/reference-guides/packages/packages-api-fetch/) library:

```js
import apiFetch from '@wordpress/api-fetch';

apiFetch( {
	path: '/meta-box/v1/settings-page',
	method: 'POST',
	data: {
		id: "website-settings",
		data: {
			address: "412 Jones Avenue, Winston Salem, NC 27108",
			phone: "+1-336-720-4621",
			email: "contact@jourrapide.com"
		}
	},
} ).then( res => console.log( res ) );
```

You can also perform the request in Postman or Insomnia like this:

![Update settings page with Insomnia](https://i0.wp.com/images.elightup.com/meta-box/docs/rest-api/update-settings-page-insomnia.png)

## Hiding a field

By default, Meta Box returns all fields for the REST API responses. If you want to hide a field from the responses, then you need to set a settings for it.

If you use [MB Builder](/extensions/meta-box-builder/) to build the field group, please enable the settings **Hide from REST API** in the **Advanced** panel from the field's **Settings** panel:

![Hiding a field from REST API responses](img/rest-api/hide.png)

If you use code to register fields, please set the field as follows:

```php
[
    'id'             => 'gallery',
    'name'           => 'Gallery',
    'type'           => 'image_advanced',
    // highlight-next-line
    'hide_from_rest' => true,
]
```

## Authentication

For **posts, terms, users, and comments**, authentication is required when you **update data** via Rest API. The plugin uses the default WordPress authentication methods. This means that if you are building something in the WordPress dashboard, the code will be run in an already logged-in session, and no specific authentication is needed.

If you build something using the REST API endpoints outside a logged-in session (for example a JavaScript application powered by the REST API), you will need to authenticate for any POST requests. Please refer to the [WordPress documentation](https://developer.wordpress.org/rest-api/using-the-rest-api/authentication/) for doing this.

For **settings pages**, authentication is **required for both getting and updating data**. In addition, as the settings page has a parameter `capability`, it requires the current user that is making the request must have that specific capability.

For example, if you create a settings page for users with `manage_options` capability (admins), then when making requests to get and update settings page data, make sure you have the same `manage_options` capability.

## Video tutorial

Here is a quick video tutorial we created to demonstrate how to use Postman to get and update custom fields for posts:

<LiteYouTubeEmbed id='YMjAIZLUeF4' />

# MB Revision

MB Revision adds support for custom fields in WordPress revision that helps you to track changes of custom fields.

## Enabling revision support

First of all, please make sure that you didn't turn off revision in WordPress. To check this, please open your `wp-config.php` and see if this line presents:

```php
define( 'WP_POST_REVISIONS', false );
```

If you can't find it, that means revision is turned on, which is great!

To enable revision support for a meta box, add a new setting to the meta box as follows:

```php
'revision' => true,
```

Now whenever you update a post, WordPress will create a revision for it. And MB Revision ensures all the values of the custom fields are copied from the parent post to that revision.

## Comparing the changes

When you update a post, WordPress automatically creates a revision for that post. You can see the list of revisions in the **Revisions** meta box below the main editor:

![revision list](https://imgur.elightup.com/rThtMe0.png)

Also, in the **Publish** meta box, you'll see a link to browse all revisions:

![browse revision](https://imgur.elightup.com/RqXRfhG.png)

Clicking either on any revision in the list or on *Browse* link brings you to the revision comparison screen. There you'll see something like this:

![revision compare](https://imgur.elightup.com/oObKhaE.png)

Except title and content, which are post fields, other items on this screen are custom fields created by Meta Box. There you'll see highlighted lines or words, which are added or removed by users.

If the custom field has simple value (like a string), it will display fully here. If the custom field has structural value (array), it will display here as a JSON-encoded string. Using JSON allows you to see the values of each element in the array as well as the structure in general.

Please note that the extension works well with [MB Group](/extensions/meta-box-group/) extension.

## Restoring the revision

If you find out that the current version of the post is incorrect, you can compare it with the previous version and optionally restore it. In order to restore a revision, lick on the **Restore this revision** button on the comparison screen.

MB Revision will copy values of the custom fields from the revision to the parent post. So your post will have the correct values of custom fields like it used to be.

## Notes

Because WordPress supports revision for posts and custom post types only, the extension doesn't work for [term meta](/extensions/mb-term-meta/), [user meta](/extensions/mb-user-meta/) or [settings pages](/extensions/mb-settings-page/).

Please make sure you either not define `WP_POST_REVISIONS` or set it to a proper value in `wp-config.php`. This constant disables or limits the number of revisions. Therefore, it might cause unexprected result. Please see [WordPress Codex](https://codex.wordpress.org/Revisions#Revision_Options) for more information.

# MB Settings Page

import Helpers from '../_parts/_helpers.md';
import LiteYouTubeEmbed from 'react-lite-youtube-embed';
import 'react-lite-youtube-embed/dist/LiteYouTubeEmbed.css';

MB Settings Page helps you create settings pages for your website. You can use it to create a theme options page, or a settings page for your plugin, or a custom settings page for clients' websites.

The plugins provide several styles for settings pages where you can have tabs or meta boxes. We try to keep the styles similar to the default WordPress UI as much as possible.

<div className="gallery">
    <div className="gallery_col1">
        <figure>
            <img src="https://imgur.elightup.com/yb9Admk.png" alt="Settings page with WordPress-native tabs" />
            <figcaption>Settings page with WordPress-native tabs</figcaption>
        </figure>
        <figure>
            <img src="https://imgur.elightup.com/QoaD4la.png" alt="Settings page with left tabs" />
            <figcaption>Settings page with left tabs</figcaption>
        </figure>
    </div>
    <div className="gallery_col2">
        <figure>
            <img src="https://i0.wp.com/metabox.io/wp-content/uploads/2015/12/settings-page.jpg" alt="Settings page with meta boxes" />
            <figcaption>Settings page with meta boxes</figcaption>
        </figure>
    </div>
</div>

:::success

You can also combine styles, for example using tabs with meta boxes.

:::

## Creating settings pages

To create a settings page, go to **Meta Box » Settings Pages** and click **Add New**.

![Creating settings pages](img/settings-page/create-settings-page.png)

On the new screen, you'll see all details for the settings page.

:::info

The instruction above uses [MB Builder](/extensions/meta-box-builder/), an extension providing the UI to create fields, and is already bundled in [Meta Box Lite](https://metabox.io/lite/) and [Meta Box AIO](/extensions/meta-box-aio/). If you prefer to use code, please see below.

:::

### Settings

There are several settings for a settings page. All of them are self-explained. We also add some tooltips next to the setting title to give you more information if needed. Here is the list of the settings with the explanation:


Name | Description
---|---
Menu type | Whether to show the settings page as a top-level menu or a submenu of an existing menu. Depending on the menu type, several settings below will appear.
Show menu after | Select the position of the menu. Available only when menu type is Top-level menu.
Default first submenu title | If you create a top-level settings page with some sub-settings pages, you can set the default first submenu title here.
Icon type | What type of menu icon. Available only when menu type is Top-level menu. Supports Dashicons, Font Awesome, SVG, and custom URL.
Icon | The icon for the menu. Available only when the icon type is Dashicons or Font Awesome.
Icon SVG | The custom SVG icon for the menu. Available only when the icon type is SVG.
Icon URL | The URL for the custom icon. Available only when the icon type is Custom URL.
Parent menu | If you select menu type "Submenu", then you can select the parent menu for this sub-menu here.
Required capability | The required capability to access the settings page.
Custom CSS class | Custom CSS for the wrapper div in the settings page, so you can add your styling.
Style | How do you want to style the settings page? Supports "Boxes" which has same the style as normal WordPress meta boxes (like in the edit post screen with the classic editor) and "No boxes" which has the same style as WordPress settings pages.
Columns | The number of columns in the meta boxes. Can be 1 (the same as WordPress settings pages) or 2 (the same as the edit post screen).
Tabs | Array of tabs (key => label) for the settings page.
Tab style | Specify the tab style, which can be "Top" (WordPress-native style) or "Left".
Custom submit button | The custom text for submit button.
Custom message | The custom message is displayed when saving options.
Help content | The content displayed when clicking on the "Help" button on the top right (near the "Screen Options" button) and is organized in tabs. Each tab has its own title and content.
Customizer | Whether to show the settings page in the Customizer as a panel. See the "Creating Customizer settings" section for details.
Customizer only | Whether to show only as a Customizer panel, no admin settings page.
Network | Make the settings page network-wide (in a multisite environment).

Each settings page also has its own ID and option that specifies which option in the database to store data into. By default, the plugin set the option name the same as the ID. You can change it if you want on the **Settings Page** on the top of the settings page:

![Changing settings page ID and option name](img/settings-page/setting-page-id.png)

:::info ID vs. option name

ID is for internal use for Meta Box, like the settings page URL or reference in the field group definition. The option name is for storing and getting data from the database. They can be the same (works in most cases) or different.

:::

:::success

If you want to use make the data of the settings page compatible with Customizer settings for the current theme, e.g. using theme mods to store the data, then set the option name to `theme_mods_$themeslug`.

:::

You can create as many settings pages as you want. You can also create a top-level settings page and several sub-settings pages.

## Using code

If you're a developer and prefer using code to create settings pages, use the filter `mb_settings_pages`. This is a sample code to create a theme options page under the Appearance menu:

```php
add_filter( 'mb_settings_pages', function ( $settings_pages ) {
    $settings_pages[] = [
        'id'          => 'theme-slug',
        'option_name' => 'theme_slug',
        'menu_title'  => 'Theme Options',
        'parent'      => 'themes.php',
    ];
    return $settings_pages;
} );
```

The `mb_settings_pages` filter takes an array of settings pages as the argument. The callback function must return an array of settings pages.

Each settings page is defined by an array of the following options, which is similar to the UI in the **MB Builder** extension above:

Name|Description
---|---
`id`|Settings page ID. Required.
`option_name`|Option name where settings data is saved to. Optional. Takes `id` if missed. If you want to use theme mods, then set this to `theme_mods_$themeslug`.
`class`|Custom CSS for the wrapper div.
`menu_title`|Menu title. Optional. Takes `page_title` if missed.
`page_title`|Page title. Optional. Takes `menu_title` if missed. Note: either `menu_title` or `page_title` (or both) must have value.
`capability`|Required capability to access the settings page. Optional. Default `edit_theme_options`.
`icon_url`|The icon for the menu. Supports [Dashicons](https://developer.wordpress.org/resource/dashicons/) (`dashicons-icon-name`), [FontAwesome free](https://fontawesome.com/search?o=r&m=free) (`fa fa-home`), SVG (`data:image/svg+xml;base64...`) and custom URL.
`position`|Menu position (number). See below for the list of default WordPress menu positions.
`parent`|The ID of the parent page, if you want the settings page to be a submenu. Optional. Can be a WordPress menu or custom settings page menu. See below for the list of WordPress page IDs.
`submenu_title`|Set this to the default submenu title (first submenu) if the settings page is a top-level menu. Optional.
`help_tabs`|The content is displayed when clicking on the Help button on the top right (near the Screen Options button). See below for details.
`style`|How do you want to style the settings page? Supports `boxes` which has same the style as normal WordPress meta boxes (like in the edit post screen) and `no-boxes` which has the same style as WordPress settings pages. In `no-boxes` style, each meta box is a section of the settings page.
`columns`| The number of columns in the meta boxes. Can be 1 (the same as WordPress settings pages) or 2 (the same as the edit post screen).
`tabs`|Array of tabs for the settings page. See the "Tabs" section for more details.
`tab_style`|Specify the tab style, which can be `default` (WordPress-native style) or `left` (tabs are put on the left of the settings page). See the "Tabs" section below for details.
`submit_button`|The custom text for submit button. Optional.
`message`|The custom message displayed when saving options. Optional.
`customizer`|Whether to show the settings page in the Customizer as a panel. `true` or `false` (default). Optional. See below for details.
`customizer_only`|Whether to show only as a Customizer panel, no admin settings page. `true` or `false` (default). Optional.
`network`|Make the settings page network-wide (in a multisite environment). `true` or `false` (default). Optional.

### WordPress menus

This is the list of default WordPress menus with their ID (used for the `parent` parameter) and position (used for the `position` parameter):

Menu|ID|Position
---|---|---
Dashboard|`index.php`|2
Posts|`edit.php`|5
Media|`upload.php`|10
Links|`link-manager.php`|15
Pages|`edit.php?post_type=page`|20
Comments|`edit-comments.php`|25
Appearance|`themes.php`|60
Plugins|`plugins.php`|65
Uses|`users.php`|70
Tools|`tools.php`|75
Settings|`options-general.php`|80

### Tabs

The list of tabs is defined in the `tabs` parameter. A tab can have or doesn't have an icon and can be set like this:

```php
'tabs'        => [
    'general' => 'General Settings',         // No icon
    'design'  => [                           // With icon
        'label' => 'Design Customization',
        'icon'  => 'dashicons-admin-customizer',
    ],
],
```

The `icon` parameter can be a [Dashicons](https://developer.wordpress.org/resource/dashicons/) icon or the URL of your custom icon. You can also use another icon library like FontAwesome by specifying its class (e.g. `fa fa-home`), but in that case, you have to enqueue the font yourself.

This screenshot shows the left tab navigation with icons:

![left tab navigation](https://imgur.elightup.com/QoaD4la.png)

### Help tabs

WordPress has a nice feature that allows us to define instructions, and guidelines in the "Help" section of each admin screen. To see the help content, click the "Help" button on the top right, near the "Screen Options" button.

![Help tabs in the Posts screen](https://imgur.elightup.com/B7YRruB.png)

The content is organized into tabs and you can set it in the MB Builder's UI or with code.

If you use code, set the help tabs as follows:

```php
'help_tabs' => [
    [
        'title'   => 'General',
        'content' => '<p>This tab displays the general information about the theme.</p>',
    ],
    [
        'title'   => 'Homepage',
        'callback' => 'my_custom_function',
        'priority' => 10,
    ],
],
```

Each tab has the following parameters:

Parameter|Description
---|---
`title`|The tab title.
`content`|The tab content.
`callback`|Custom callback to render the tab content. Optional.
`priority`|The priority of the tab, used for ordering. Optional. Default 10.

## Settings fields

After creating a settings page, you need to create settings fields for it. Creating settings fields for settings pages is [similar as for posts](/custom-fields/#how-to-create-custom-fields). You can do it [with UI using MB Builder](/extensions/meta-box-builder/#creating-custom-fields) or [with code](/creating-fields-with-code/).

If you use MB Builder to create fields, make sure to select the correct settings page in the Location settings:

![select settings page in MB Builder](img/settings-page/select-settings-page-in-builder.png)

If you use code, then you need to hook to `rwmb_meta_boxes` and set a param `settings_pages` to the settings page(s) you want to add to, like this:

```php
add_filter( 'rwmb_meta_boxes', function ( $meta_boxes ) {
    $meta_boxes[] = [
        'id'             => 'general',
        'title'          => 'General',
        'context'        => 'normal',
        // highlight-start
        'settings_pages' => 'theme-slug',
        'tab'            => 'general',
        // highlight-end
        'fields'         => [
            [
                'name' => 'Logo',
                'id'   => 'logo',
                'type' => 'file_input',
            ],
        ],
    ];
    return $meta_boxes;
} );
```

:::warning

When using tabs, you must define the `tab` parameter for all meta boxes to make them appear in corresponding tabs. Missing the `tab` parameter makes the meta boxes hidden.

:::

Note:

- If you want to add the meta box to 2 or more settings pages, set it to an array of settings pages' IDs.
- If you set the settings page to have 2 columns, then the value for `context` accepts `normal` for the main content area and `side` for the right sidebar.

## Customizer

**MB Settings Pages** allows you to create settings panels & sections for the Customizer. Using Customizer gives users a better experience because they can preview the settings in real time.

### Panels & sections

When creating Customizer settings, it's important to understand that:

- A settings page is mapped to a Customizer panel
- Each meta box in the settings page is mapped to a Customizer section

To bring a settings page to the Customizer, turn on the **Customizer** settings when you create the settings page as follows:

![Set a settings page as a Customizer panels](img/settings-page/customizer-in-settings-page.png)

Then go to the **Appearance » Customize** and you'll see the settings page is available as follows:

<div className="gallery">
    <div className="gallery_col1">
        <figure>
            <img src="https://imgur.elightup.com/D78hKyG.png" alt="A new panel in the Customizer" />
            <figcaption>A new panel in the Customizer</figcaption>
        </figure>
    </div>
    <div className="gallery_col2">
        <figure>
            <img src="https://imgur.elightup.com/AfaWiGK.png" alt="Meta boxes become Customize sections" />
            <figcaption>Meta boxes become Customize sections</figcaption>
        </figure>
    </div>
</div>

By default, the settings page is available in the both Customizer as well as in the admin area. If you don't want it in the admin area, choose the **Customizer only**.

If you use code, use the following code:


```php
add_filter( 'mb_settings_pages', function ( $settings_pages ) {
    $settings_pages[] = [
        'id'          => 'rubik',
        'option_name' => 'theme_mods_justread',
        'menu_title'  => 'Theme Options',
        'parent'      => 'themes.php',
        // highlight-start
        'customizer'  => true,
        'customizer_only'  => true,
        // highlight-end
    ];

    return $settings_pages;
} );
```

This is a quick video that demonstrates how to use MB Settings Page to create custom panels, sections, and fields in the Customizer with code:

<LiteYouTubeEmbed id='LeV0CsiTe74' />

### Top-level sections

Sometimes you don't want the top-level panel that creates too much hierarchy (panel → sections → fields). You just want top-level sections (sections → fields). That will help users to navigate to your settings in the Customizer faster and easier.

:::warning

This can be done with code only.

:::

In that case, you need to do 2 steps:

**Step 1:** Remove the code that registers settings pages as you don't need settings pages anymore. If you use MB Builder, delete the settings page entry.

**Step 2:** In each meta box, replace the parameter `'settings_pages' => 'rubik'` with `'panel' => ''`, like this:

```php
add_filter( 'rwmb_meta_boxes', function ( $meta_boxes ) {
    $meta_boxes[] = [
        'id'             => 'general',
        'title'          => 'General',
        // highlight-next-line
        'panel'          => '',
        'fields'         => [
            [
                'name' => 'Logo',
                'id'   => 'logo',
                'type' => 'file_input',
            ],
        ],
    ];
    return $meta_boxes;
} );
```

And you'll see the section on the Customizer like this:

![Sections now appear as top-level in the Customizer](https://imgur.elightup.com/xICe0u3.png)

What if you want the _section to be inside another panel_? Like inside another plugin's panel? Set the `panel` parameter to ID of the target panel: `'panel' => 'panel_id'`.

### Compatibility

At the moment, all Meta Box fields are supported in the Customizer, except [file](/fields/file/) and [image](/fields/image/) field types. These field types will be converted to the [file_advanced](/fields/file-advanced/) and [image_advanced](/fields/image-advanced/) automatically to avoid any problems. Other upload field types such as [file_advanced](/fields/file-advanced/), [file_upload](/fields/file-upload/), [image_advanced](/fields/image-advanced/), [image_upload](/fields/image-upload/), [single_image](/fields/single-image/) still work well.

The good news is all the extensions such as [MB Conditional Logic](/extensions/meta-box-conditional-logic/), [MB Tabs](/extensions/meta-box-tabs/) are supported. That will help you create much better experiences for your users.

:::warning postMessage transport

The `postMessage` transport for the Customizer is not supported yet, which means changes are updated by refreshing the whole page instead of updating only the needed part of the page.

:::

## Network settings pages

A network settings page is a settings page that provides settings for all the websites in the network (multisite environment). For example, you might want to enter a Google Maps API key for all the websites or set the contact phone number for all of them.

![Sample network settings page](https://imgur.elightup.com/pjZzrKf.png)

Using _MB Settings Page_, you’re now able to do that easily. If you use MB Builder to create the settings page, simply switch on the **Network** option.

![Set as a network settings page](img/settings-page/network-setting.png)

If you use code, add `'network' => true` to the settings pages args, like this:

```php
add_filter( 'mb_settings_pages', function ( $settings_pages ) {
    $settings_pages[] = [
        'id'          => 'custom-options',
        'option_name' => 'custom_options',
        'menu_title'  => 'Custom Options',
        'icon_url'    => 'dashicons-welcome-widgets-menus',
        // highlight-next-line
        'network'     => true,
    ];

    return $settings_pages;
} );
```

Don't forget to _network activate_ Meta Box and MB Settings Pages. And now, when you go to the network admin area, you'll see a settings page like the screenshot above.

## Backup & restore settings

Backup is a **special field type** added by the plugin that allows you to back up and restore the settings.

If you use MB Builder to create fields, please add a normal textarea field, go to tab Advanced of the field settings, and add a custom settings with the key "type" and value "backup" as follows:

![create a backup field in MB Builder](img/settings-page/custom-settings.png)

If you use code, you need to create a special field with `'type' => 'backup'`, like this:

```php
$meta_boxes[] = [
    'id'             => 'colors',
    'title'          => 'Colors',
    'settings_pages' => 'theme-slug',
    'fields'         => [
        [
            'name' => 'Text Color',
            'id'   => 'text-color',
            'type' => 'color',
        ],
        [
            'name' => 'Backup',
            // highlight-next-line
            'type' => 'backup',
        ],
    ],
];
```

It will show a textarea field in your settings page like this:

![backup and restore settings](https://imgur.elightup.com/n6d6v1n.png)

When you add it to your settings page, it will show all of your settings in JSON. And you can just copy it and save it to a file to back up the settings. To restore the settings, just paste the JSON again and click the Save Settings button.

The backup field inherits from [`textarea`](/fields/textarea/) so you can customize it the way you want: change the field name, description, input size, etc. This field doesn't require an `ID`. And of course, you should have only one backup field on your settings page.

:::warning

The backup field only works if it is a top field. It does not work if it is a subfield in a group.

:::

## Hooks

**`mb_settings_page_load` action**

This action fires when a settings page is loaded. It's used internally to:

- Register meta boxes and custom fields in the settings page, and
- Save the submitted data.

These actions use the default priority `10`. So you can hook to this action to do something *after* the data is saved with a higher priority (like `20`):

```php
add_action( 'mb_settings_page_load', function ( $args ) {
    if ( $args['id'] === 'YOUR SETTINGS PAGE ID' ) {
        // Do something
    }
}, 20 );
```

**`mb_settings_page_after_title` action**

This action fires after outputting the page title. You can use it to output anything like instructions to users.

**`mb_settings_page_submit_buttons` action**

This action fires after the submit button is rendered, which allows you to add more custom buttons next to the submit button.

## Data

By using Settings API, all the fields' values will be saved as an array in a single option in the WordPress options table with the option name is `option_name` in the settings page configuration. Each field is an element of the array with the corresponding key (field ID). It's the recommended way by WordPress that doesn't make your options table bloat.

## Getting field value

You're able to use helper function [rwmb_meta()](/functions/rwmb-meta/) to get field value as follows:

```php
$value = rwmb_meta( $field_id, ['object_type' => 'setting'], $option_name );
echo $value;
```

For network settings, please use the following code:

```php
$value = rwmb_meta( $field_id, ['object_type' => 'network_setting'], $option_name );
echo $value;
```

Notes:

- In the 2nd parameter, you need to pass `'object_type' => 'setting'` or `'object_type' => 'network_setting'`
- In the last parameter, you need to pass the option name for the settings page

Other parameters are the same as for posts. Please see [this documentation](/displaying-fields-with-code/) for details.

:::warning

It requires the extension version 1.2+ to use the helper function. If you're using an older version, please [update now](/updates/).

:::

# MB Show Hide

MB Show Hide helps you to toggle the visibility of a meta box based on some conditions such as categories, page template or post format.

MB Show Hide is a simplified version of [MB Conditional Logic](/extensions/meta-box-conditional-logic/). MB Conditional Logic can control the visibility of custom fields and other HTML elements and supports more types of conditions.

## Settings

To add show, hide conditions to your meta box, you need to add parameter `show` or `hide` accordingly to the meta box configuration.

Each parameter (`show`, `hide`) is an array and has the same following elements:

- `relation`: The logical operator to combine conditions: `AND` or `OR`. The default value is `OR`. Case insensitive. Optional.

If one of the following conditions matched (`relation` = `OR`) or all of the following conditions matched (`relation` = `AND`), then the meta box is shown or hid.

Parameter|Description
--|--
`template`|List of page templates, match if the current page has a page template in the list. Array. Case insensitive. Optional.
`post_format`|List of post formats, match if the current post has a format in the list. Array. Case insensitive. Optional.
`category`|List of categories IDs or names (NO slugs), match if the current post has a category in the list. Array. Case sensitive. Optional.
`taxonomy_slug`|List of custom taxonomy terms' IDs or names (NO slugs). Here `taxonomy_slug` is the slug of the taxonomy (like `section`, `region`, etc.). Match if the current post has a term in the list. Array. Case sensitive. Optional.
`is_child`|Boolean. Match if the current page is a child page or not. Optional.
`input_value`| Array of pairs of CSS selectors and values. Match if the inputs (with specified CSS selector) has the defined value. Note: the `relation` is also applied to rules here. Added in version 0.2.

Since version 4.7, WordPress has added support for [post type templates](https://make.wordpress.org/core/2016/11/03/post-type-templates-in-4-7/). To make it work with `template` rule in Show Hide, you need to update to version 1.2.0+ and set the syntax to:

```php
'template' => array( 'post:my-template.php', 'my_post_type:template-one.php' ),
```

e.g, the value should be in form of `post_type:template-file.php`. If the `post_type:` is missing, then the plugin automatically understands that the template is used for pages only.

## Sample code

```php
add_filter( 'rwmb_meta_boxes', 'prefix_show_hide_demo_register' );
function prefix_show_hide_demo_register( $meta_boxes ) {
    $meta_boxes[] = array(
        'title'  => 'MB Show Hide Demo: Show',

        // Show this meta box for posts matched below conditions
        'show'   => array(
            // With all conditions below, use this logical operator to combine them. Default is 'OR'. Case insensitive. Optional.
            'relation'    => 'OR',

            // List of page templates (used for page only). Array. Optional.
            'template'    => array( 'tpl/blog.php', 'tpl/homepage.php' ),

            // List of post formats. Array. Case insensitive. Optional.
            'post_format' => array( 'Standard', 'Gallery' ),

            // List of categories IDs or names (NOT slugs). Array. Case sensitive. Optional.
            'category'    => array( 3, 'Unpublished', 'Template' ),

            // Custom taxonomy. Optional.
            // Format: 'taxonomy' => list of term IDs or names (NOT slugs). Array. Case sensitive. Optional.
            'location'    => array( 12, 'USA', 'europe' ),
            'os'          => array( 'Windows', 'mac-os' ),

            // Check if page is a child page
            'is_child' => true,

            // Check the value of selector. Format: array( selector, value )
            // Added in version 0.2
            'input_value'   => array(
                '#hide-demo-mb'              => 'yes',
                '#hide-demo-mb-2'            => 'yes',
                'input[name=hide-demo-mb-3]' => true, // If it's a checkbox then true == checked
            ),
        ),

        'fields' => array(
            array(
                'name' => 'Name',
                'id'   => 'name',
                'type' => 'text',
            ),
        ),
    );

    // 2nd meta box
    $meta_boxes[] = array(
        'title'  => 'MB Show Hide Demo: Hide',

        // Hide this meta box for posts matched below conditions
        'hide'   => array(
            // With all conditions below, use this logical operator to combine them. Default is 'OR'. Optional.
            'relation'      => 'OR',

            // List of page templates. Can be array or comma separated. Optional.
            'template' => array( 'full-width.php', 'left-sidebar.php' ),

            // List of categories IDs or names or slugs. Can be array or comma separated. Optional.
            'category'      => array( 1, 'News' ),

            // Custom taxonomy. Optional.
            // Format: 'taxonomy' => list of terms (can be array or comma separated of IDs or names or slugs)
            'location'      => array( 12, 'USA', 'europe' ),
            'os'            => array( 'Windows', 'mac-os' ),

            // Check if page is a child page
            'is_child' => true,

            // Check the value of selector. Format: array( selector, value )
            // Added in version 0.2
            'input_value'   => array(
                '#hide-demo-mb'              => 'yes',
                '#hide-demo-mb-2'            => 'yes',
                'input[name=hide-demo-mb-3]' => true, // If it's a checkbox then true == checked
            ),
        ),

        'fields' => array(
            array(
                'name' => 'Job',
                'id'   => 'job',
                'type' => 'text',
            ),
        ),
    );

    return $meta_boxes;
}
```

# MB Tabs

MB Tabs helps you to put custom fields into tabs for a better view. Tabs can have icons and can be put on the left side of the meta box.

![tab styles](https://imgur.elightup.com/7Oi5dx1.jpg)

:::info Tabs in settings pages

Tabs in the settings pages are created separately with different settings by the [MB Settings Page](/extensions/mb-settings-page) extension. This extension is for grouping fields inside a field group only.

:::

## Creating tabs

First, you need to create custom fields as usual. Go to **Meta Box » Custom Fields** and [create a field group](/custom-fields/#how-to-create-custom-fields) with the custom fields you need.

![Creating a field group with some custom fields](img/tabs/create-field.png)

Then adding tabs to the field group. **Tab is a special field type** and is available in the field list.

:::info

The instruction above uses [MB Builder](/extensions/meta-box-builder/), an extension providing the UI to create fields, and is already bundled in [Meta Box Lite](https://metabox.io/lite/) and [Meta Box AIO](/extensions/meta-box-aio/). If you prefer to use code, please see below.

:::

To add a tab, click the **+ Add Field** button and search for **Tab**:

![Adding a tab field](img/tabs/add-tab.png)

After adding tabs, you need to **reorder** tabs among the fields. **The fields that follow a tab will belong to this tab**.

![Reorder tabs](img/tabs/indicate-tab.png)

## Tab settings

Each tab has its own settings like label or icon. To see and change the tab settings, click the field on the preview, in the left panel, you can see:

![View tab settings](img/tabs/tab-settings.png)

Below is the meaning of each setting:

Name|Description
---|---
Label|The tab label
ID|The tab ID, which is used internally by the plugin
Type|The field type, must be "Tab"
Icon type|The icon type, you can choose between Dashicons (default), Font Awesome, or custom URL. Optional.

If you choose the tab icon type Dashicons, you'll see a list of icons to pick from (as in the screenshot above).

If you want to use a FontAwesome icon for the tab, then select Icon type "Font Awesome" and enter the [icon CSS class](https://fontawesome.com/icons?d=gallery&m=free) in the next input.

If you have a custom image for the tab icon, then select Icon type "Custom URL" and enter the icon URL in the next input.

## Tab style

The plugin provides 3 styles for tabs: "default", "box", and "left" as you can see below:

![Tab style](https://imgur.elightup.com/7Oi5dx1.jpg)

To change a tab style, click on the Settings icon to have the field group settings, and choose one style in the **Tab style**:

![Select a tab style](img/tabs/tab-style.png)

You can also set the default active tab here by entering the tab ID in the **Default active tab ID**.

Now you have your tabs ready. Please edit a post to see them in action!

## Using code

If you're a developer and prefer using code to create tabs, this is a sample code to create simple tabs:

```php
add_filter( 'rwmb_meta_boxes', function ( $meta_boxes ) {
	$meta_boxes[] = [
		'title'     => 'MB Tabs Demo',

        // highlight-start
        'tabs'      => [
			'contact' => 'Contact',
			'social'  => 'Social Media',
		],
        // highlight-end
		'fields'    => [
			[
				'name' => 'Name',
                // highlight-next-line
				'tab'  => 'contact',
			],
			[
				'name' => 'Email',
                // highlight-next-line
				'tab'  => 'contact',
			],
			[
				'name' => 'Facebook',
                // highlight-next-line
				'tab'  => 'social',
			],
			[
				'name' => 'Twitter',
                // highlight-next-line
				'tab'  => 'social',
			],
		],
	];

	return $meta_boxes;
} );
```

To create tabs for your meta box, you need to add these parameters to your meta box settings:

Parameter|Description
---|---
`tabs`|Array of tabs. See below for details.
`tab_style`|The tab style: `default` (like tabs for Categories), `box` (like tabs for Visual and Text modes of the main editor) or `left` (like tabs in the Help screen)
`tab_default_active`|Default active tab ID.
`tab_remember`|Remember the last active tab when saving the post. Boolean. Default is `false`.

The list of tabs is defined in the `tabs` parameter. A tab can have or doesn't have an icon and can be set like this:

```php
'tabs'      => [
    'contact' => 'Contact',       // No icon
    'social'  => [                // With icon
        'label' => 'Social Media',
        'icon'  => 'dashicons-share',
    ]
],
```

The plugin supports the following icon type for tabs:

- [Dashicons](https://developer.wordpress.org/resource/dashicons/): set `icon` to the class name of Dashicons, e.g. `dashicons-email`.
- Icon font: set `icon` to the icon class name. For example, if you want to use Font Awesome, set `'icon' => 'fa fa-home'`. Note that you have to enqueue the CSS for your custom font icon yourself. The plugin only supports Dashicons by default.
- Custom URL: set `icon` to the URL of the image

Then for each field in the meta box, you need to **specify which tab it belongs to** by adding a parameter `'tab' => 'tab-id'` where `tab-id` is one of the tab IDs you have registered above.

# 0066-extensions-22-meta-box-template

---
title: MB Template
---

MB Template helps you write configuration for custom fields in the YAML format, which is human-readable and easy to understand.

![meta box template](https://imgur.elightup.com/UIKF04C.png)

After installing, please go to *Settings &rarr; MB Template* to add the template for custom meta boxes and custom fields.

## Quick sample

Before going into details about using the plugin, let's look at a quick sample to see how it works (screenshot above).

In the plugin settings page, enter the following content written in YAML. This is the settings for a field group. .

```yml
title: Laptop details
post_types: laptop
fields:
  - name: Brand
    type: select
    options:
      hp: HP
      asus: ASUS
      dell: Dell
  - Model
  - name: Images
    type: image_advanced
```

The plugin will parse this content into a PHP array as follows:

```php
[
    'title'      => 'Laptop details',
    'post_types' => 'laptop',
    'fields'     => [
        [
            'name'    => 'Brand',
            'type'    => 'select',
            'options' => [
                'hp'   => 'HP',
                'asus' => 'ASUS',
                'dell' => 'Dell',
            ],
        ],
        'Model',
        [
            'name' => 'Images',
            'type' => 'image_advanced',
        ],
    ],
]
```

This array will be sent to Meta Box and Meta Box will register a field group with this settings array. The result looks like this:

![meta box](https://imgur.elightup.com/C6W5MtS.png)

Now you understand how the plugin works. It's time to get familiar with YAML syntax.

## YAML syntax

In YAML, we mostly defines arrays with `key: value` pairs as you saw above. YAML has different ways to define simple arrays and associated arrays.

### Simple arrays

Simple arrays are called *sequences* in YAML. They use dashes followed by space (`- `) to define items:

```yml
- Item 1
- Item 2
- Item 3
```

You can also use short syntax like this:

```yml
[Item 1, Item 2, Item 3]
```

Both are equivalent to the following PHP code:

```yml
[ 'Item 1', 'Item 2', 'Item 3' ];
```

### Associated arrays

Associated arrays are called *mappings* in YAML. They use a colon followed by a space (`: `) to define each key/value pair:

```yml
key1: value1
key2: value2
key3: value3
```

alternatively:

```yml
{key1: value1, key2: value2, key3: value3}
```

which is equivalent to this PHP code:

```yml
[
    'key1' => 'value1',
    'key2' => 'value2',
    'key3' => 'value3'
]
```

### Nested arrays

Nested arrays (sequences or mappings) can be defined with 1 or more spaces:

```yml
fields:
  - name: Name
    id: name
    type: text
  - name: Image
    id: image
    type: image_advanced
```

which is equivalent to:

```php
[
    'fields' => [
        [
            'name' => 'Name',
            'id'   => 'name',
            'type' => 'text',
        ],
        [
            'name' => 'Image',
            'id'   => 'image',
            'type' => 'image_advanced',
        ],
    ],
]
```

:::tip

- The number of spaces does not matter. But keep the indentation consistent with the same number of spaces.
- Comments can be added by adding `#` at the beginning of the line.
- YAML accepts all data types string, number, booleans, etc.

:::

For more information about using YAML, the Symfony project wrote a [very good guide](https://symfony.com/doc/current/components/yaml/yaml_format.html) to follow. If you want the full reference, you can read it at [YAML homepage](https://www.yaml.org/spec/1.2/spec.html).

## Creating field groups

Each field group or custom field has a list of the settings which is written in `key: value` pairs (associated arrays). We use YAML mapping for these settings.

:::warning

Please refer to [field group settings](/creating-fields-with-code/) and [field settings](/field-settings/) when defining keys.

:::

**If you register single meta box**, then enter field group settings and its fields like this:

```yml
title: Profile
post_types: customer
fields:
  - name: Title
    id: prefix_title
    type: radio
    options:
      mr: Mr.
      ms: Ms.
  - name: Name
    id: name
    type: text
  - name: DOB
    id: dob
    type: date
    js_options:
      dateFormat: 'd-m-y'
```

**If you need to create multiple field groups**, use this template:

```yml
# First field group.
- title: Profile
  post_types: customer
  fields:
    - name: Title
      id: prefix_title
      type: radio
      options:
        mr: Mr.
        mrs: Mrs.
        ms: Ms.
    - name: Name
      id: name
      type: text
    - name: DOB
      id: prefix_dob
      type: date
      js_options:
        dateFormat: 'd-m-y'

# Second field group.
- title: Job Description
  post_types: [customer, supplier]
  fields:
    - name: Job Title
      id: job_title
      type: select_advanced
      options:
        director: Director
        manager: Marketing Manager
        tech: Technical Supporter
      placeholder: Please select your job title
    - name: Job Description
      id: job_desc
      type: wysiwyg
      options:
        media_buttons: false
        quicktags: false
```

## Config files

The plugin has an option that allows you to read the configuration from a specific file (`.yml`), not only from manual input.

To do that, in the plugin settings page, enter the absolute path to the configuration file (`.yml`). You can put the configuration file in any folder of your website. For convenience, the plugin supports the following path variables that you can used in the file paths:

Name|Description
--|--
`%wp-content%`|Path to `wp-content` directory, without trailing slash
`%plugins%`|Path to `wp-content/plugins` directory, without trailing slash
`%themes%`|Path to `wp-content/themes` directory. Same as [`get_theme_root()`](https://codex.wordpress.org/Function_Reference/get_theme_root) function, without trailing slash
`%template%`|Path to current theme directory. Same as [`get_template_directory()`](https://codex.wordpress.org/Function_Reference/get_template_directory) function, without trailing slash
`%stylesheet%`|Path to current child theme directory. Same as [`get_stylesheet_directory()`](https://codex.wordpress.org/Function_Reference/get_stylesheet_directory) function, without trailing slash

For example, if you put the config files in the theme's `meta-box` folder, then you can enter the following path:

```
%stylesheet%/meta-box/
```

If you put in the `wp-content/meta-box-yml` folder as well, then you can use both locations as follows:

```
%stylesheet%/meta-box/, %wp-content%/meta-box-yml/
```

:::tip

You can put multiple files in multiple folders. The plugin will read and parse them all. This process is real-time, which means if you make any changes, they will affect immediately. This is convenient if you want to keep all your configuration files in one place and put them under version control like Git.

:::

## Hooks

`meta_box_template_files`

This filter allows developers to register paths to files and folders to parse YAML files. It accepts one parameters: an array of files/folders.

For example, if you want to add folder(s), which contains your YAML config files, use the following code:

```php
add_filter( 'meta_box_template_files', function( $files ) {
    $files[] = get_template_directory() . '/meta-box-yml';
    $files[] = '/path/to/your/yml/file-or-folder';

    return $files;
} );
```

# MB Term Meta

import Helpers from '../_parts/_helpers.md';
import FAQ from '@site/src/components/FAQ';

MB Term Meta helps you to add custom fields to taxonomies.

![category custom fields](https://imgur.elightup.com/bSykYdo.png)

## Settings

Creating custom meta boxes for taxonomies is similar to posts. The only difference is you need to specify `taxonomies` settings which the meta box will be added to:

```php
add_filter( 'rwmb_meta_boxes', function ( $meta_boxes ) {
    $meta_boxes[] = [
        'title'      => 'Standard Fields',
        // highlight-next-line
        'taxonomies' => 'category', // List of taxonomies. Array or comma-separated string.

        'fields' => [
            [
                'name' => 'Featured?',
                'id'   => 'featured',
                'type' => 'checkbox',
            ],
            [
                'name' => 'Featured Content',
                'id'   => 'featured_content',
                'type' => 'wysiwyg',
            ],
            [
                'name' => 'Featured Image',
                'id'   => 'image_advanced',
                'type' => 'image_advanced',
            ],
            [
                'name' => 'Color',
                'id'   => 'color',
                'type' => 'color',
            ],
        ],
    ];
    return $meta_boxes;
} );
```

## Data

WordPress provides an identical way to store values in the meta tables for post / term / user. This extension utilizes that API and stores field value in the term meta exactly like post meta.

## Getting field value

You're able to use helper function [rwmb_meta()](/functions/rwmb-meta/) to get field value for terms.

```php
$term_id = get_queried_object_id();
$value = rwmb_meta( $field_id, ['object_type' => 'term'], $term_id );
echo $value;
```

:::info

- In the 2nd parameter, you need to pass `'object_type' => 'term'`, and
- The last parameter is the term ID. To get the ID of the the current category/term page, please use the function `get_queried_object_id()`.

:::

Other parameters are the same as for post. Please see [this documentation](/displaying-fields-with-code/) for details.

:::warning

It requires the extension version 1.1+ to use the helper function. If you're using an older version, please [update now](/updates/).

:::

## FAQ

<FAQ question="How to output term meta in MB Views?">

Please use this code to output term meta in a view

`{% set custom_field = mb.rwmb_meta( 'field_id', { object_type: 'term' }, term_id ) %}
{{ custom_field }}`

</FAQ>

# MB Testimonials

## Overview

MB Testimonials is a WordPress plugin that helps you add testimonials to your website easily. It has **7 beautiful pre-made** templates that you can customize with HTML / CSS. In addition, you can display the testimonials in two styles: grid and slider.

**Note**: MB Testimonials plugin is only available for the [Lifetime Bundle](https://metabox.io/pricing/).

## Installation

First, you need to install and activate Meta Box from [wordpress.org](https://wordpress.org/plugins/meta-box/). Next, download MB Favorite Posts plugin from the [My Account](https://metabox.io/my-account/) page, then upload the .zip file from the **Admin Dashboard**.

**Note**: MB Testimonials and [other solutions](https://metabox.io/product-category/solutions/) are not included in Meta Box AIO, so you can install them independently without Meta Box AIO.

## Add Testimonials

Go to **Testimonials** > **Add New**:

![Add new testimonials to your WordPress website](https://imgur.elightup.com/RyEZSdf.png)

Next, fill in the name and the information for the testimonial:

![Fill in the name and the information for the testimonial](https://imgur.elightup.com/4idqJlW.png)

Click **Add more** to add other testimonials or click **Remove** to delete them:

![Add other testimonials.](https://imgur.elightup.com/byK1mL6.png)

In addition, you can drag and drop to arrange testimonials easily:

![Drag and drop to arrange testimonials](https://imgur.elightup.com/Ytwl4TC.gif)

## Configure the Testimonials

In the **Settings** section, choose a built-in template in the **Display** tab:

![Choose a built-in template provided by MB Testimonials plugin](https://imgur.elightup.com/gtgzutL.png)

Right below the templates, go to the **Click here** section to show the code of the chosen template. You can customize the template by editing the code with HTML. Also, you can delete the code and create a new template.

![Customize the template](https://imgur.elightup.com/gtgzutL.png)

In the **Styling** tab, set up the parameters of the testimonials as you want:

![Set up the parameters of the testimonials](https://imgur.elightup.com/WVCHFEi.png)

Finally, don’t forget to click **Publish**.

## Display Testimonials on the Front End

After publishing, the plugin will generate a shortcode for the Testimonials post that we’ve created.

![Use the shortcode to display the testimonials on the front end of your WordPress website](https://imgur.elightup.com/GDKOTw2.png)

Copy and paste this shortcode to pages, posts, widgets, ... where you want to display the testimonials.

![Paste the shortcode of MB Testimonials wherever you want](https://imgur.elightup.com/JW6Q6Ye.png)

The testimonials will display on the front end as follows:

![The testimonials show up on the front end of the WordPress website.](https://imgur.elightup.com/k3Pg8Na.gif)

# MB Text Limiter

MB Text Limiter helps you to limit the number of characters or words entered for text and textarea fields.

## Settings

Assume you have a text field with the following settings:

```php
[
	'title' => 'My Text Field',
	'id'    => 't',
	'type'  => 'text',
],
```

And you want to limit the number of characters for that field to 40. Doing that by adding `'limit' => 40` to the field:

```php
[
	'title' => 'My Text Field',
	'id'    => 't',
	'type'  => 'text',
	'limit' => 40,
],
```

If you need to limit by words, just add `'limit_type' => 'word'`:


```php
[
	'title'      => 'My Text Field',
	'id'         => 't',
	'type'       => 'text',
	'limit'      => 40,
	'limit_type' => 'word',
],
```

That's all!

Note that this extension works only with [text](/fields/text/) and [textarea](/fields/textarea/) fields.

# MB Toolset Migration

import LiteYouTubeEmbed from 'react-lite-youtube-embed';
import 'react-lite-youtube-embed/dist/LiteYouTubeEmbed.css';

MB Toolset Migration extension helps you to migrate field groups, custom field data, and relationships from Toolset to Meta Box.

:::warning

This extension only migrates the data created by Toolset within a site. It doesn't migrate your website from local to the development environment (you'll need another plugin for this) nor the way you use the data like getting the data and displaying it on the front end. After the migration, just go to the database and check how it changes.

:::

## Backup the database

Before migrating data, make sure you have a backup of your database. During the migration process, because of the difference in [data format](/database/), the plugin will attempt to modify the existing data in custom fields created by Toolset. We try to do it at a very minimum level and create a backup of fields for some specific cases, but it's still important to make a backup just in case something goes wrong.

## Migrate

Before migrating, make sure you keep Toolset, Meta Box (required) and extensions (optional) activated. To know which extensions you might need, please see the **How it works** section below. Normally, if you use Meta Box AIO and keep all extensions activated, you don't have to worry about this.

To migrate, go to **Meta Box > Toolset Migration** and click the **Migrate** button.

The plugin will show the process of migrating. When it's done, you'll see the text "Done".

![Migrate Toolset to Meta Box](https://imgur.elightup.com/2rxOfzu.png)

## How it works

MB Toolset Migration tries to migrate all the following data from Toolset to Meta Box. Please note that not all data types and settings in Toolset have an equivalent in Meta Box. The plugin will try to migrate as much as it can. The details are explained below:

### Post types and taxonomies

The plugin will migrate all custom post types and custom taxonomies created in Toolset to Meta Box. This job requires the [MB Custom Post Type](/extensions/mb-custom-post-type/) extension. All the settings like labels and icons are migrated as well.

:::warning

**We do not remove Toolset post types and taxonomies** after migration, for safety. Instead, we changed their status to 'Inactive'. You can remove them later after all the data is processed.

:::

### Field groups

Toolset field groups are migrated to Meta Box's field groups, which requires [MB Builder](/extensions/meta-box-builder/). Most of the field group settings are the same as in Meta Box.

:::warning

**We do not remove Toolset field groups** after migration, for safety. Instead, we changed their status to 'Inactive'. You can remove them later after all the data is processed.

:::

For **field group locations**, the basic rules are already supported in Meta Box and extensions. You might need extensions such as:

- [MB Term Meta](/extensions/mb-term-meta/): If you set locations for taxonomies.
- [MB User Meta](/extensions/mb-user-meta/): If you set locations for users.

Besides, if you use complex locations, then you'll need [MB Include Exclude](/extensions/meta-box-include-exclude/) extension. Due to the difference in how plugins create rules, the plugin works the following way:

- If there's only one location group: the plugin will migrate all rules with operator `AND`.
- If there are multiple location groups: the plugin will take the first rule of each group and combine them with operator `OR`.

### Custom fields data

Most Toolset field types work well with Meta Box, such as text, radio, select, etc. However, there's still a difference in how plugins store values in the database. Because of that, we'll process the following:

1. **Convert meta keys** in the database. Toolset sets meta keys for fields with the format `wpcf-{$field_id}`. The plugin will change the meta key to just `$field_id` for simplicity.
2. For **media fields**, Toolset stores URLs in the database. We'll change them to IDs.
2. For **fields that have multiple values** such as checkbox list, Toolset saves their values as serialized arrays. We'll migrate them multiple rows in the database (similar to what `add_post_meta` does with the last parameter `false`).
3. For **repeatable groups**, Toolset saves values of each sub-fields in a row in the database (in a complicated way). We'll migrate them into groups (which requires [MB Group](/extensions/meta-box-group/)).

:::info Field backup

For these fields, as the data format is different, for safety, we create a backup for each field value. The new field value is stored with the key `_ts_bak_{$field_id}`.

:::

### Relationships

The plugin also migrates all relationships from Toolset to Meta Box. You'll need the [MB Builder](/extensions/meta-box-builder/) and [MB Relationships](/extensions/mb-relationships/) to do this. As the settings are quite different between the plugins, we'll migrate the settings of all Toolset relationships to many-to-many relationships in Meta Box.

Of course, the data of relationships (the connections between items) are also migrated.

:::warning Database tables

For safety, we don't remove Toolset relationships tables (3) after the migration.

:::

# MB Tooltip

MB Tooltip helps you to add help information via tooltips.

![meta box tooltip screenshot](https://i0.wp.com/metabox.io/wp-content/uploads/2014/10/meta-box-tooltip.png)

## Settings

To add a tooltip to a meta field, add `tooltip` parameter for that field. You can define tooltip in one of following formats:

- `'tooltip' => 'Tooltip content',`
- `'tooltip' => array( 'icon' => 'info', 'position' => 'top', 'content' => 'Tooltip content', 'allow_html' => true )`

e.g. if the `tooltip` is a string, the plugin will use icon info and take the string as the tooltip content. If the `tooltip` is an array, then it accepts the following parameters:

Parameter|Description
---|---
`icon`|The tooltip icon. It can be `info` (default), `help` or *URL to custom icon image*. Since version 0.1.1, you can *use any Dashicons* for the icon by specifying its name, for example `dashicons-email`. For full list of Dashicons, please read [this page](https://developer.wordpress.org/resource/dashicons/).
`position`|The tooltip position. Can be `top` (default), `bottom`, `left` or `right`. Optional.
`content`|Tooltip content.
`allow_html`|Whether to render HTML in the tooltip content: `true` (default) or `false`.

## Sample code

This code below adds tooltip to 3 fields:

```php
add_filter( 'rwmb_meta_boxes', 'meta_box_tooltip_demo_register' );
function meta_box_tooltip_demo_register( $meta_boxes ) {
    $meta_boxes[] = array(
        'title'  => 'MB Tooltip Demo',
        'fields' => array(
            array(
                'name'    => 'Default',
                'id'      => 'name',
                'type'    => 'text',

                // Add tooltip to field label, in one of following formats
                // 1) 'tooltip' => 'Tooltip Content'
                // 2) 'tooltip' => array( 'icon' => 'info', 'content' => 'Tooltip Content', 'position' => 'top' )
                // 3) 'tooltip' => array( 'icon' => 'https://url-to-icon-image.png', 'content' => 'Tooltip Content', 'position' => 'top' )
                //
                // In 1st format, icon will be 'info' by default
                // In 2nd format, icon can be 'info' (default), 'help' or any Dashicons (see https://developer.wordpress.org/resource/dashicons/)
                // In 3rd format, icon can be URL to custom icon image
                //
                // 'position' is optional. Value can be 'top' (default), 'bottom', 'left', 'right'
                'tooltip' => 'Info icon, top position',
            ),
            array(
                'name'    => 'Help icon',
                'id'      => 'job',
                'type'    => 'text',
                'tooltip' => array(
                    'icon'     => 'help',
                    'content'  => 'Right position',
                    'position' => 'right',
                ),
            ),
            array(
                'name'    => 'Dashicon',
                'id'      => 'email',
                'type'    => 'text',
                'tooltip' => array(
                    'icon'     => 'dashicons-email',
                    'content'  => 'Dashicon',
                    'position' => 'right',
                ),
            ),
            array(
                'name'    => 'Custom image',
                'id'      => 'email',
                'type'    => 'text',
                'tooltip' => array(
                    'icon'     => 'https://imgur.elightup.com/ZQI2DNx.png',
                    'content'  => 'Custom icon',
                    'position' => 'right',
                ),
            ),
        ),
    );
    return $meta_boxes;
}
```

## Adding tooltip for inputs

The default behavior adds tootips for field labels. Since version 1.1, the plugin supports adding tooltips for field inputs. Because of variation in the UI, the plugin supports only these fields: date time fields, text input fields (`text`, `url`, `email`, `number`, `password`) and select fields.

The option for this feature is `tooltip_input`, which accepts the same parameters as for `tooltip`.

# MB User Meta

import Helpers from '../_parts/_helpers.md';

MB User Meta helps you to add custom fields to user profile.

![user meta](https://i1.wp.com/metabox.io/wp-content/uploads/2016/07/user-meta-1.png)

The extension works only on the back end. If you want to edit user profile on the front end, please see [MB User Profile](/extensions/mb-user-profile/).

## Adding fields to user profile

Registering custom fields for users is similar to posts. The only difference here is you need to specify a parameter `'type' => 'user'`:

```php
add_action( 'rwmb_meta_boxes', function( $meta_boxes ) {
    $meta_boxes[] = array(
        'title' => 'Contact Info',
        'type'  => 'user', // THIS: Specifically for user

        'fields' => array(
            array(
                'name' => 'Mobile phone',
                'id'   => 'mobile',
                'type' => 'tel',
            ),
            array(
                'name' => 'Work phone',
                'id'   => 'work',
                'type' => 'tel',
            ),
            array(
                'name' => 'Address',
                'id'   => 'address',
                'type' => 'textarea',
            ),
            array(
                'name'    => 'City',
                'id'      => 'city',
                'type'    => 'select_advanced',
                'options' => array(
                    'hanoi' => 'Hanoi',
                    'hcm'   => 'Ho Chi Minh City'
                ),
            ),
        ),
    );
    $meta_boxes[] = array(
        'title' => 'Custom avatar',
        'type'  => 'user', // THIS: Specifically for user

        'fields' => array(
            array(
                'name'            => 'Upload avatar',
                'id'              => 'avatar',
                'type'            => 'image_advanced',
                'max_file_uploads' => 1,
            ),
        ),
    );

    return $meta_boxes;
} );
```

Result:

![User meta screenshot](https://imgur.elightup.com/mRZJKhZ.png)

## Data

WordPress provides an identical way to store values in the meta tables for post / term / user. This extension utilizes that API and stores field value in the user meta exactly like post meta.

## Getting field value

You're able to use helper function [rwmb_meta()](/functions/rwmb-meta/) to get field value:

```php
$value = rwmb_meta( $field_id, ['object_type' => 'user'], $user_id );
echo $value;
```

The code is very similar to getting post meta. The differences are:
- In the 2nd parameter, you need to pass `'object_type' => 'user'`, and
- In the last parameter, you need to pass the user ID

Other parameters are the same as for posts. Please see [this documentation](/displaying-fields-with-code/) for details.

:::warning

It requires the extension version 1.1+ to use the helper function. If you're using an older version, please [update now](/updates/).

:::

# MB User Profile

MB User Profile helps you to add information to the user profile and edit these details on the front end. It also includes a register form, login form, and edit profile form that you can embed anywhere using shortcodes.

![user profile page](https://imgur.elightup.com/bqVnDDF.png)

Note: this extension already includes **MB User Meta**.

## Registration form

To insert a registration form to a page, select the **Registration Form** block from the block inserter. And you'll see the form preview like this:

![Registration form block](https://imgur.elightup.com/N0IBus9.png)

Clicking on the block will reveal the form settings on the right. All settings are self-explained and have their description.

You can also use the registration shortcode to display the registration form:

```php
[mb_user_profile_register]
```

Below is the list of the settings. The attribute is used for the shortcode.

Name|Attribute|Description
---|---|---
ID|`id`|Field group ID(s) [created for users](/extensions/mb-user-meta/), separated by commas. Optional. Leave blank to show the default registration form.
Redirect URL|`redirect`|Redirect URL, to which users will be redirected after a successful registration.
Form ID|`form_id`|ID (HTML attribute) of the form.
Title|`label_title`|Label for the title of the form. Default empty.
Username field label|`label_username`|Label for the username input field.
Email field label|`label_email`|Label for the email input field.
Password field label|`label_password`|Label for the password input field.
Confirm password field label|`label_password2`|Label for the confirm password input field.
Submit button text|`label_submit`|Label for the submit button.
Username field ID|`id_username`|ID (HTML attribute) of the username input field.
Email field ID|`id_email`|ID (HTML attribute) of the email input field.
Password field ID|`id_password`|ID (HTML attribute) of the password input field.
Confirm password field ID|`id_password2`|ID (HTML attribute) of the confirm password input field.
Submit button ID|`id_submit`|ID (HTML attribute) of the submit button.
Confirmation text|`confirmation`|Confirmation message if registration is successful.
Send confirmation email|`email_confirmation`|Send a confirmation email when registering (you need to set up an email SMTP to make this function work properly). If this param is `true`, the system will also check the confirmation status when the user login. All previous users are set and confirmed.
Password strength|`password_strength`|Set the required password strength. Available options: `strong`, `medium`, `weak`, `very-weak`, or `false` to disable password strength meter.
Use email for username|`email_as_username`|Use email for username. If this param is `true`, then the username field will disappear.
Always show|`show_if_user_can`|Always show the form if the current user has the proper capability. Should be a [WordPress capability](https://wordpress.org/support/article/roles-and-capabilities/). Useful if admins want to register for other people.
Role for the new user|`role`|Role for the new user. If `append_role` is set to `true`, then the new role is appended, so users will have 2 roles: the default roles set by WordPress and this role. Default empty.
Append role|`append_role`|Whether to append the role to users instead of setting only one role for users.
reCaptcha key|`recaptcha_key`|Google reCaptcha site key (version 3). Optional.
reCaptcha secret|`recaptcha_secret`|Google reCaptcha secret key (version 3). Optional.

## Login form

To insert a login form to a page, select the **Login Form** block from the block inserter. And you'll see the form preview like this:

![Login form block](https://imgur.elightup.com/f3Z3BDw.png)

Clicking on the block will reveal the form settings on the right. All settings are self-explained and have their description.

You can also use the login shortcode to display the login form:

```php
[mb_user_profile_login]
```

Below is the list of the settings. The attribute is used for the shortcode.

Name|Attribute|Description
---|---|---
Redirect URL|`redirect`|Redirect URL, to which users will be redirected after successful login.
Form ID|`form_id`|ID (HTML attribute) of the form.
Title|`label_title`|Label for the title of the form. Default empty.
Username field label|`label_username`|Label for the username input field.
Password field label|`label_password`|Label for the password input field.
Remember checkbox label|`label_remember`|Label for the remember checkbox field.
Lost password field label|`label_lost_password`|Label for the lost password link.
Submit button text|`label_submit`|Label for the submit button.
Username field ID|`id_username`|ID (HTML attribute) of the username input field.
Password field ID|`id_password`|ID (HTML attribute) of the password input field.
Remember checkbox ID|`id_remember`|ID (HTML attribute) of the remember checkbox field.
Submit button ID|`id_submit`|ID (HTML attribute) of the submit button.
Confirmation text|`confirmation`|Confirmation message if login is successful.
Default username value|`value_username`|Default value for the username field.
Default remember|`value_remember`|Default value for the remember checkbox field - `true` or `false` (default).
reCaptcha key|`recaptcha_key`|Google reCaptcha site key (version 3). Optional.
reCaptcha secret|`recaptcha_secret`|Google reCaptcha secret key (version 3). Optional.

## Edit profile form

To insert an edit profile form to a page, select the **Edit Profile Form** block from the block inserter. And you'll see the form preview like this:

![Edit profile form block](https://imgur.elightup.com/VrddaGg.png)

Clicking on the block will reveal the form settings on the right. All settings are self-explained and have their description.

You can also use the edit profile shortcode to display the edit profile form:

```php
[mb_user_profile_info id="field-group-id"]
```

Below is the list of the settings. The attribute is used for the shortcode.

Name|Attribute|Description
---|---|---
ID|`id`|Field group ID(s) [created for users](/extensions/mb-user-meta/), separated by commas. All fields from field groups will be included in the profile form. Required.
User ID|`user_id`|User ID, whose info will be edited. If not specified, the current user ID is used.
Redirect URL|`redirect`|Redirect URL, to which users will be redirected after successful submission.
Form ID|`form_id`|ID (HTML attribute) of the form.
Title|`label_title`|Label for the title of the form. Default empty.
Password field label|`label_password`|Label for the password input field.
Confirm password field label|`label_password2`|Label for the confirm password input field.
Submit button text|`label_submit`|Label for the submit button.
Password field ID|`id_password`|ID (HTML attribute) of the password input field.
Confirm password field ID|`id_password2`|ID (HTML attribute) of the confirm password input field.
Submit button ID|`id_submit`|ID (HTML attribute) of the submit button.
Confirmation text|`confirmation`|Confirmation message if the form submission is successful.
Password strength|`password_strength`|Set the required password strength. Available options: `strong`, `medium`, `weak`, `very-weak`, or `false` to disable password strength meter.
reCaptcha key|`recaptcha_key`|Google reCaptcha site key (version 3). Optional.
reCaptcha secret|`recaptcha_secret`|Google reCaptcha secret key (version 3). Optional.

### Default fields

By default, the user profile form doesn't include any default user fields, such as first name, last name, or biography. To be able to edit these fields, please [create a field group for users](/extensions/mb-user-meta/) with those fields, keeping the same field IDs as WordPress's.

For example, the code below creates a meta box for editing the user's first name, last name, and biography:

```php
add_filter( 'rwmb_meta_boxes', function( $meta_boxes ) {
    $meta_boxes[] = [
        'title'  => 'Default Fields',
        'id'     => 'default-fields',
        'type'   => 'user', // NOTICE THIS
        'fields' => [
            [
                // highlight-next-line
                'id'   => 'first_name',
                'name' => 'First Name',
                'type' => 'text',
            ],
            [
                // highlight-next-line
                'id'   => 'last_name',
                'name' => 'Last Name',
                'type' => 'text',
            ],
            [
                // highlight-next-line
                'id'   => 'description',
                'name' => 'Biography',
                'type' => 'textarea',
            ],
        ],
    ];
    return $meta_boxes;
} );
```

And use it in the user edit profile form with this shortcode:

```php
[mb_user_profile_info id="default-fields"]
```

To make the plugin recognize the user fields, you need to set the correct ID for them:

Field|ID
---|---
User email|`user_email`
User nicename|`user_nicename`
User URL|`user_url`
Display name|`display_name`
First name|`first_name`
Last name|`last_name`
Registration date|`user_registered`
Biography|`description`
Rich editing|`rich_editing`
Syntax highlighting|`syntax_highlighting`
Admin color|`admin_color`
Comment shortcuts|`comment_shortcuts`
Show the admin bar on the front|`admin_bar_front`
User role|`role`

:::warning

These default fields do not work as sub-fields in a group.

:::

### User password

To let users change their password, please use the field group ID `rwmb-user-info` in the shortcode below:

```php
[mb_user_profile_info id="rwmb-user-info"]
```

## Settings

MB User Profile has a settings page under **Meta Box > User Profile** that allows you to change some settings for the plugin.

![User profile settings](https://imgur.elightup.com/NSOCjiE.png)

- **Force password change**: force users to change their password after the first login.
- **Email confirmation success page**: select a page to show when users successfully confirm their email. If no page is selected, a default message will be displayed.
- **Email confirmation error page**: select a page to show when there are errors when users confirming their email. If no page is selected, a default message will be displayed.

## Email templates

MB User Profile sends emails to users when:

- They reset their passwords
- They register and are requested to confirm by email

To overwrite the emails created by the plugin, please:

- Create a folder `mb-user-profile` in your theme (or your child theme)
- Copy the email templates from the MB User Profile's `templates` folder to the `mb-user-profile` folder that you've just created above
- Edit the new templates files

Now the emails sent by the plugin will use the templates in your theme.

## Hooks

### `rwmb_profile_redirect`

This filter allows you to change the URL of the redirect page after the form is submitted. It accepts 2 parameters: redirect URL and form config - the shortcode attributes.

```php
$redirect = apply_filters( 'rwmb_profile_redirect', $redirect, $config );
```

You can use this filter to change the redirect URL after a user updated his profile.

```php
add_filter( 'rwmb_profile_redirect', function( $redirect, $config ) {
    if ( 'my-meta-box' === $config['id'] ) {
        $redirect = 'https://domain.com/thank-you/';
    }
    return $redirect;
}, 10, 2 );
```

### `rwmb_profile_before_process`

This action fires before the form is processed. It accepts one parameter `$config` - the form configuration, taken from the shortcode attributes.

### `rwmb_profile_after_process`

This action fires after the form is processed, e.g. saved or updated. It accepts 2 parameters:

- `$config` - the form configuration, taken from the shortcode attributes.
- `$user_id` - the submitted user ID

You can use this action to do a custom redirect to your Thank you page or send an email notification.

```php
add_action( 'rwmb_profile_after_process', function( $config, $user_id ) {
    if ( 'my-meta-box' === $config['id'] ) {
        wp_mail( 'admin@domain.com', 'New submission', 'A new user has been just submitted.' );

        wp_safe_redirect( 'thank-you' );
        die;
    }
}, 10, 2 );
```

### `rwmb_profile_before_form`

This action fires before form output. It accepts one parameter `$config` - the form configuration, taken from the shortcode attributes.

### `rwmb_profile_after_form`

This action fires after form output. It accepts one parameter `$config` - the form configuration, taken from the shortcode attributes.

### `rwmb_profile_before_display_confirmation`

This action fires before the confirmation message is displayed. It accepts one parameter `$config` - the form configuration, taken from the shortcode attributes.

### `rwmb_profile_after_display_confirmation`

This action fires after the confirmation message is displayed. It accepts one parameter `$config` - the form configuration, taken from the shortcode attributes.

### `rwmb_profile_before_submit_button`

This action fires before the submit button is displayed. It accepts one parameter `$config` - the form configuration, taken from the shortcode attributes.

`rwmb_profile_after_submit_button`

This action fires after the submit button is displayed. It accepts one parameter `$config` - the form configuration, taken from the shortcode attributes.

### `rwmb_profile_validate`

This filter is used to check if the form is validated. You can use this filter to add a custom check for the data before it's processed.

If you return any value other than `true`, the form will not be processed and the error message will be displayed. So, you can return a string as an error message.

```php
$is_valid = apply_filters( 'rwmb_profile_validate', $is_valid, $config );
```

Example:

```php
add_filter( 'rwmb_profile_validate', function ($is_valid) {
	$email = $_POST['user_email'] ?? '';

	if ( $email === 'alex@example.com' ) {
		$is_valid = 'Email is already taken';
	}

	return $is_valid;
} );
```

### `rwmb_profile_insert_user_data`

This filter is used to modify the submitted user data before it's passed to the `wp_insert_user` function to **create a new user**. It accepts 2 parameters: the array of user data and the shortcode parameters.

```php
$data = apply_filters( 'rwmb_profile_insert_user_data', $data, $config );
```

Please note that this filter works only for default user fields such as user email or password. For changing custom field data, please use [`rwmb_{$field_id}_value`](/filters/rwmb-value/) filter.

### `rwmb_profile_update_user_data`

This filter is used to modify the submitted user data before it's passed to the `wp_update_user` function to **update an existing user**. It accepts 2 parameters: the array of user data and the shortcode parameters.

```php
$data = apply_filters( 'rwmb_profile_update_user_data', $data, $config );
```

Please note that this filter works only for default user fields such as user email or password. For changing custom field data, please use [`rwmb_{$field_id}_value`](/filters/rwmb-value/) filter.

### Default form fields

To modify the default register, login, or edit profile form fields, please use the following filters:

```php
$fields = apply_filters( 'rwmb_profile_register_fields', $fields );
$fields = apply_filters( 'rwmb_profile_login_fields', $fields );
$fields = apply_filters( 'rwmb_profile_info_fields', $fields );
```

### `rwmb_profile_before_save_user`

This action fires before the user is created or updated.

```php
do_action( 'rwmb_profile_before_save_user', $object );
```

The action accepts 1 parameter: the instance of the `MB_User_Profile_User` class, which handles the submission. It has the following public properties that you can use:

- `$user_id`: The submitted user ID
- `$config`: The configuration, taken from the shortcode attributes

### `rwmb_profile_after_save_user`

This action fires after the user is created or updated. At that time, all the custom fields in the meta box are already saved into the user meta.

```php
do_action( 'rwmb_profile_after_save_user', $object );
```

The action accepts 1 parameter: the instance of the `MB_User_Profile_User` class, which handles the submission. It has the following public properties that you can use:

- `$user_id`: The submitted user ID
- `$config`: The configuration, taken from the shortcode attributes

## Known issues

### Upload files/images

To be able to upload files or images (via fields `file_advanced`, `file_upload`, `image_advanced`, `image_upload`), users have to log in and proper capability upload_files to access the Media Library. If your users don't have that capability (like if they have the subscriber role), then the upload fields don't work. In that case, you can add the capability for that role as follows:

```php
add_action( 'init', function () {
    $subscriber = get_role( 'subscriber' );
    $subscriber->add_cap( 'upload_files' );
} );
```

Another solution is using `file` or `image` fields. Both of them work similarly. They just don't have a nice UI, but they do the job very well.

### Styling

The extension outputs the default fields' HTML with CSS comes from the Meta Box plugin. The style is basic and works in most cases. However, to make it match perfectly with your theme's style, you need to do some work with CSS.

### Caching

As you might know, Meta Box uses [nonces](https://developer.wordpress.org/apis/security/nonces/) to prevent misuse or malicious requests. As the nonce fields are outputted directly in the HTML, they might be cached by caching plugins such as W3 Total Cache, WP Super Cache, etc. And thus, the verification of the nonce might not work properly and break the form submission. In this case, please do not cache the page where the form is embedded (caching plugins allow you to do that).

# MB Views

import LiteYouTubeEmbed from 'react-lite-youtube-embed';
import 'react-lite-youtube-embed/dist/LiteYouTubeEmbed.css';

MB Views helps you to get Meta Box fields and build your templates in the front end fast and easily.

With MB Views, you can just select the fields you want to show, fill in some parameters and done! The extension supports all custom fields built with Meta Box, and also post fields (such as post title and post content), site settings, user fields, and even query fields.

You can also customize all templates in WordPress, even for post types that don't have Meta Box fields.

## Video tutorial

In this video, we show you step-by-step how to use *MB Views* to create singular and archive templates for a custom post type. We also show you the basis of Twig and how to set location rules.

<LiteYouTubeEmbed id='4udvu8PqfkE' />

## Creating a view

To create a view, go to **Meta Box > Views** and click the **Add New** button.

![create a new view](https://imgur.elightup.com/VO5oV2T.png)

In the view screen, you'll see 2 areas:

- Template editors: where you can enter template code for the view. It contains 3 editors for the template, CSS, and JavaScript.
- Settings: where you can set location rules for the view.

In the main editor, you can enter any HTML or *shortcodes* for the template. All shortcodes will be parsed automatically in the front end.

## Insert fields

To insert a field, click the **Insert Field** button. It will open a panel on the right, where you can see all available fields.

Fields are categorized into 4 tabs:

- Post: contains all post fields and custom fields for posts.
- Site: contains all site fields and settings fields (created by [MB Settings Page](/extensions/mb-settings-page/) plugin).
- User: contains all user fields and custom fields for users (created by [MB User Meta](/extensions/mb-user-meta/) plugin).
- Query: contains loop and pagination for archive pages.

To insert a field, click on the field title to insert it. The field might have additional parameters (such as choosing image size for the image field). And in that case, the plugin will open a popup for you to enter or select options.

![enter field options](https://imgur.elightup.com/MUsLgWu.png)

When you're done entering the field options, click the **Insert** button to insert the field in the editor. The plugin will generate a snippet and insert it into the editor.

If a field doesn't have options, then the plugin will insert a snippet into the editor immediately without opening a popup.

### Main query

The items on the Insert Field tab only work with the main query. We can understand when setting Type and Location for the View. For example, you can only use the item "Term ID" when the Type is Archive and Location is Taxonomy Archive, if you use the item "Post ID", it will not work.

![main query](https://imgur.elightup.com/HAkP7Ci.png)

### Cloneable fields

Cloneable fields are marked with a *repeat* icon, like this:

![cloneable group fields](https://imgur.elightup.com/6KoyJGB.png)

To insert a cloneable field, click on the field title, like inserting a normal field.

The plugin will generate a snippet for the field, like this:

```
{% for clone in post.tickets %}
    Content here might be different depending on the field type
{% endfor %}
```

This is a `for` loop, created by using the Twig template engine. You'll find more details about it below. The content inside the `for` loop might be different depending on the field type.

### Group fields

Group fields are marked with an arrow on the left, just like in the image above. Clicking on the arrow will toggle the group sub-fields.

To insert a sub-field, click on the sub-field title, like inserting a normal field. Depending on the field type, it will open a popup for additional options or not.

:::warning Inserting sub-fields of cloneable groups

If you have a cloneable group, before inserting sub-fields, you **must** insert the `for` loop for the group first. To insert the group, click on the group title. See the Cloneable Fields section above for details.

:::

### Relationship fields

Relationships created with [MB Relationships](/extensions/mb-relationships/) extension can be inserted in the tab **Query**.

Once you registered a relationship, it will show 2 fields here: one for the "from" side, and one for the "to" side. Clicking a field will insert a loop of connected items, and inside the loop, you can insert post/term/user fields as usual.

See tutorial: [How To Display Relationships?](https://metabox.io/mb-views-how-to-display-relationships/)

## Include other views

The plugin allows you to include other views, which helps you to break down large templates into smaller ones and reuse them in other views.

To insert a view, go to the tab **Query**, and click on the view you want to insert. Note that when you include a view into another view, they have access to the same context as the current view. This means that any variable defined in the main view will be available in the included view.

See tutorial: [Creating and Including Template Parts in MB Views](https://metabox.io/mb-views-creating-including-template-parts/)

## Running PHP functions

To run PHP functions, use the `mb` proxy. It acts as a transformer between views and PHP.

Assume you want to get another post in WordPress with post ID 123, you can write a simple PHP code:

```php
$post = get_post( 123 );
echo $post->post_title;
```

With the `mb` proxy, you can call the `get_post()` function like this:

```html
{% set post = mb.get_post( 123 ) %}
{{ post.post_title }}
```

Here you see, the normal PHP function is prefixed by `mb.`, e.g. `get_post` becomes `mb.get_post`. So if you want to call a function `my_custom_function`, you need to write `mb.my_custom_function`. The parameters passed to the function remain the same.

### Custom query

Relate to the Main query above, if you use the function `get_posts()` or `get_post()`, it will return [post object](https://developer.wordpress.org/reference/classes/wp_post/).

```php
WP_Post Object
(
    [ID] =>
    [post_author] =>
    [post_date] =>
    [post_date_gmt] =>
    [post_content] =>
    [post_title] =>
    [post_excerpt] =>
    [post_status] =>
    [comment_status] =>
    [ping_status] =>
    [post_password] =>
    [post_name] =>
    [to_ping] =>
    [pinged] =>
    [post_modified] =>
    [post_modified_gmt] =>
    [post_content_filtered] =>
    [post_parent] =>
    [guid] =>
    [menu_order] =>
    [post_type] =>
    [post_mime_type] =>
    [comment_count] =>
    [filter] =>
)
```

These properties are different from the Post items in the Insert Field tab and you can only use these properties to get the post information. For the post meta, you can use the helper function `rwmb_meta()` or WordPress functions to retrieve it.

```html
{% set args = { post_type: 'post', posts_per_page: -1 } %}
{% set posts = mb.get_posts( args ) %}
{% for post in posts %}
    Post title: {{ post.post_title }}

    Single image:
    {% set image = mb.rwmb_meta( 'single_image', '', post.ID ) %}
    <img src="{{ image['full_url'] }} ">

    Post thumbnail: {{ mb.get_the_post_thumbnail( post.ID, 'thumbnail' ) }}
{% endfor %}
```

In case you want to set arguments for functions, use the `set` syntax. Twig allows you to set complex variables, like [lists with keys and values](https://twig.symfony.com/doc/1.x/templates.html#literals) and then you can pass it to the function:

```html
{% set my_var = ["first", "second"] %}
{% set my_var = {first: "first value", second: "second value"}

{% set value = mb.custom_function( my_var ) %}
```

## Custom data

The plugin allows you to pass custom data to the shortcode via custom attributes. This allows you to build flexible views and show them in multiple places with custom data.

For example, you want to display user info in a view. While fetching custom user data is fine, you might want to set user details (like "name" and "age") in some specific cases. You can pass "name" and "age" to a view shortcode like this:

```
[mbv id="your-view-id" name="Brian" age="50"]
```

And in your view template, you can use this data directly like this:

```html
<p><strong>Name:</strong> {{ name }}</p>
<p><strong>Age:</strong> {{ age }}</p>
```

## Locations

Each view can serve multiple pages on your website. To set where the view appears, go to **Settings** meta box below the editor:

![view locations](https://imgur.elightup.com/Szjmvnd.png)

There are several options:

### Type

What type of page do you want to set the view for? Supports:

- Singular pages
- Archive pages
- Action: the view will display when an action fires
- Code: you can use PHP or [WordPress conditional tags](https://developer.wordpress.org/themes/basics/conditional-tags/) to set the rules where to show the view.
- Shortcode: you need to use a shortcode to insert the view to the location you want. The shortcode is available *after* you save the view.
- Block: For [MB Blocks](/extensions/mb-blocks#using-mb-views), blocks can then use `render: "view:view-name"` to render the view.

### Location Rules

Where you set the rules for the singular and archive pages. Location rules are divided into groups, and in each group, you can set multiple rules.

Rules inside a group are combined with `OR` logical operator, which means the views will serve this page if either condition is satisfied.

Groups are combined with `AND` logical operator, which means the views will serve this page if all conditions are satisfied.

With the combination of `OR` and `AND`, you can build complex rules for views.

### Render type

After choosing location rules, you can decide where to render the view for those chosen pages. You have 2 options:

- Render the whole page layout, including the header and footer. This option is useful when you want to build a completely new page on your site.
- Render the whole layout between the header and footer. Using this option, you have full control to build the layout.
- Render only for the post content area. Using this option, you leave the layout to the theme and control only the post content area.

### Position

If you choose to render the view for the post content area, then you can set it to appear before, after, or replace the content area.

### Order

The order settings is used to set the loading order for views. If you have multiple views for the same page, then views with a lower order will render first.

## Hooks

### `mbv_location_validate`:

This filter is used to allow developers to create custom rules for location validation. It accepts 3 parameters:

- `$result`: the validation result
- `$view`: the view object (which is a post object)
- `$type`: the view type

For example, if you have a view that displays for all archive pages, but you don't want it to appear on pages that have query string `?custom_var=1`, you can do like this:

```php
add_filter( 'mbv_location_validate', function( $result, $view, $type ) {
    // Run for 'my-view-name' only.
    if ( $view->post_name !== 'my-view-name' ) {
        return $result;
    }

    if ( isset( $_GET['custom_var'] ) && $_GET['custom_var'] == 1 ) {
        return false;
    }
    return $result;
}, 10, 3 );
```

### `mbv_location_action_active`

This filter is used to allow developers to create custom rules for location validation for the views that have been displayed on a specific action (type = action). It accepts 3 parameters:

- `$active`: is the view active
- `$view`: the view object (which is a post object)
- `$action`: the action name

For example, if you have a view that displays on `wp_footer`, but you don't want it to appear on pages that have query string `?custom_var=1`, you can do like this:

```php
add_filter( 'mbv_location_action_active', function( $active, $view, $action ) {
    // Run for 'my-view-name' only.
    if ( $view->post_name !== 'my-view-name' || $action !== 'wp_footer' ) {
        return $active;
    }

    if ( isset( $_GET['custom_var'] ) && $_GET['custom_var'] == 1 ) {
        return false;
    }
    return $active;
}, 10, 3 );
```

### `mbv_twig_env`

This filter allows you to change the Twig instance to render the view.

```php
add_filter( 'mbv_twig_env', function( $twig ) {
    // return your own $twig instance.
    return $twig;
} );
```

### `mbv_data`

This filter allows you to add/change/remove data sent to Twig to render the view.

```php
add_filter( 'mbv_data', function( $data, $twig ) {
    $data['custom_var1'] = 'Value 1';
    $data['custom_var2'] = 'Value 2';

    return $data;
}, 10, 2 );
```

## Twig

When editing a template for views, you can use any HTML/CSS/JavaScript.

In some cases, when you need to set a condition for an HTML section or loop through all values of an array, then you can use Twig.

[Twig](https://twig.symfony.com/) is a powerful template engine for PHP, which allows you to write conditions (`if..else`), control structure (`for`), and use filters to transform the output.

For example, if you want to output an image if the post doesn't have a featured image, then you can use the following snippet:

```
{% if post.thumbnail.full %}
    <img src="{{ post.thumbnail.full.url }}">
{% else %}
    <img src="https://via.placeholder.com/800x100">
{% endif %}
```

If a field has multiple values, then you can use `for`-loop to render all the values, like this:

```
{% for country in post.countries %}
    {{ country }}
{% endfor %}
```

You can also use filters to transform the value, like this:

```
{{ post.date | date( 'm/d/Y' ) }}
```

For details about using Twig, please see the [documentation](https://twig.symfony.com/doc/3.x/templates.html).

## External template files

MB Views also allows you to write templates in external files in your themes/plugins and include or use it inside views or with `[mbv]` shortcode.

Using external template files has some benefits:

- You can write templates in Twig instead of PHP, which is a beautiful syntax. Twig templates also support getting WordPress and Meta Box's values easier
- You can put template files under version control like Git to track changes and never lose anything
- You can deploy (upload) templates to other websites with ease via (S)FTP, Git, or any CI/CD

Let's see how to do that:

### Adding template paths

First, you need to register the paths, where the plugin looks for template files. Use the `mbv_fs_paths` as follows:

```php
// Load template files from the 'views' folder in your theme.
add_filter( 'mbv_fs_paths', function( $paths ) {
    $paths[] = get_template_directory() . '/views';
    return $paths;
} );

// Or shorter
add_filter( 'mbv_fs_paths' , function( $paths ) {
    return array_merge( $paths, [ get_template_directory() . '/views' ] );
} );

// Shortest with arrow functions in PHP 7.4+
add_filter( 'mbv_fs_paths' , fn( $paths ) => array_merge( $paths, [ get_template_directory() . '/views' ] ) );
```

You can also register multiple paths, the plugin will try to load templates from these paths, in the registered order:

```php
add_filter( 'mbv_fs_paths' , function( $paths ) {
    return array_merge( $paths, [
        get_template_directory() . '/views',
        get_template_directory() . '/default',
    ] );
} );
```

Or you can use the filesystem loader to add paths:

```php
add_action( 'mbv_fs_loader_init', function( $fs_loader ) {
    // Add a path.
	$fs_loader->addPath( get_template_directory() . '/views' );

    // Prepend a path, which changes the order of registered paths and thus the order to load template files.
    $fs_loader->prepend( get_template_directory() . '/default' );
} );
```

### Using external views

You can include external views in your views using this snippet:

```
{% include 'header.twig' %}
```

This snippet will load the `header.twig` template from the registered paths (in the examples above - the `views` directory in your theme). If you register multiple paths, then the plugin will search for the template in these paths and return the first found template file. So, pay attention to the order of registered paths.

You can also render the template with the `[mbv]` shortcode as follows:

```
[mbv name="header.twig"]
```

Note that the file extension doesn't matter. You can name the file `header.twig`, `header.html`, or anything. It's only used to search for the template files.

### Namespace

When loading template files, the order of registered paths define the order of paths where the plugin search for a template. However, there are some cases when you have templates with the same name but used for a different purpose, such as a `header.twig` for the homepage and another `header.twig` for the rest of the website. You might use different names for files, but there's a better option is using namespaces.

To add a template with a namespace, use the code below:

```php
add_action( 'mbv_fs_loader_init', function( $fs_loader ) {
    // Add 'views/home' folder under the namespace 'home'
	$fs_loader->addPath( get_template_directory() . '/views/home', 'home' );

    // Add another namespace
    $fs_loader->addPath( get_template_directory() . '/views/default', 'default' );
} );
```

Usage:

```
{% include '@home/header.twig' %}
{% include '@default/header.twig' %}

// or with shortcodes

[mbv name="@home/header.twig"]
[mbv name="@default/header.twig"]
```

# MB WPAI Integration

MB WPAI Integration integrates WP All Import with Meta Box which ported from ACF Integration. It creates a section in WP All Import plugin to map Meta Box's fields to import data. Allows you to handle more complex fields and settings.

![MB WP-AI](https://imgur.elightup.com/eFByM8U.png)

## Before you start

This plugin mimic the way ACF Integration works and under the hood, so it's recommend you to read [ACF Integration documentation](https://www.wpallimport.com/documentation/how-to-import-advanced-custom-fields-acf-from-csv/) first.

Also, you need to deactivate ACF Integration addon if you're using it.

## Start importing fields

MB WPAI will create a section called "Meta Box Add-On" in the WP All Import, drag and drop page. Same as ACF Integration. In this section, you can drag and drop matching fields to map them together.

### Step 1: Create a new import

Navigate to **All Import › New Import** and upload a valid import file. Our plugin will automatically identify the file type, i.e., CSV, Excel, XML, etc.

Next, choose from the drop-down list the post type that has the Advanced Custom Fields attached.

In this example, we're importing Meta Box fields to **Posts**.
![New Import](https://imgur.elightup.com/Mptx63n.png)

Click **Continue to Step 2** to move on to the next step.

Keep in mind that your Meta Box fields need to be created and defined for posts prior to importing data.

### Step 2: Review the Import File

The **Review Import File** page appears next. Here, you can review and confirm that the import data looks correct:

![Review Import File](https://imgur.elightup.com/7yGvA1C.png)

The import has detected 3 records to import. To make sure that the data is correct, you can review each record with the gray arrows at the top.

In this step, you can add filers via the **Manage Filtering Options** section, if they are needed.

This example uses an XML. You can also use spreadsheet files.

Once you confirm that the data looks good, click **Continue to Step 3**.

### Step 3: Map the Incoming Data Elements to Meta Box Fields

This brings you to the Drag & Drop interface, which allows you to map the data elements to their respective target fields.

To map the data, drag each desired data element from the panel on the right to its corresponding field on the left.
![Drag & Drop](https://imgur.elightup.com/xy2pUGm.png)

The **Meta Box Add-On** section is where you define fields to import.

Locate that section by scrolling down and then enable the group to import:

![Meta Box Add-On](https://imgur.elightup.com/yJhMFkF.png)

You can map each individual Meta Box field as required:

![MB WP-AI](https://imgur.elightup.com/eFByM8U.png)

You can also concatenate multiple fields into one Meta Box field, or add any static text to the field.

Once all of the relevant data elements are mapped to their target fields, click on **Continue to Step 4** at the bottom to move to the next step.

Before proceeding, make sure that you map all other fields related to the post type or custom post type that you're importing.

### Step 4: Configure the Remaining Settings and Run the Import

The **Import Settings** interface is where you configure the remaining import settings and other options:

Specifically, you need to define a **Unique Identifier** for the import. WP All Import uses the unique identifier to keep track of imported records. To create it, simply click on **Auto-detect**.

You can also define this unique identifier by manually dragging and dropping fields from the right.

![Import Settings](https://imgur.elightup.com/jOy3pLT.png)

Here you can modify the import behavior if it is run again (to update, delete, or create new records found on the import file). You can set up **Scheduling Options** and **Configure Advanced Settings**. With most imports, there's no need to modify any of these settings.

Click the blue **Continue** button at the end to move to the next step.

### Step 5: Verify That the Meta Box Fields Were Created Correctly

Next, you see the **Confirm & Run** interface. In the **Import Summary** section, you can review the import, what's in the import file, and other import settings.

![Confirm & Run](https://imgur.elightup.com/U4gK4qK.png)

If everything looks good, click on **Confirm & Run Import** to start the import.
When it completes, you will see the **Import Complete** screen:

![Import Complete](https://imgur.elightup.com/EuV1GuY.png)

That's it! The import correctly processed the posts and Meta Box fields from this example.
You can review the imported fields by checking any of the imported posts in **Posts › All Posts**.

## Advanced usage

### Concatenate fields

You can concatenate multiple fields into one Meta Box field, or add any static text to the field. This is useful in many situations when you want to combine multiple fields into one field, or add a prefix or suffix to the field.

For example, you have 2 fields: `first_name` and `last_name` and you want to concatenate them into `full_name` field. You can do it by dragging and dropping the fields to the `full_name` field like this:
Or if you have only file name in the import file, but you want to add the full URL to the field, you can do it like this:

![Concatenate fields](https://imgur.elightup.com/7Ovqkoj.png)

#### Concatenate cloneable fields

Concatenation also works with cloneable fields. For example, you have a cloneable field `photos` and you want to add the full URL to each photo. You can do it like this:

```
https://photo.example.com/{photos/photo}
```

In this case, the plugin will loop through all photos and add the full URL to each photo.

### Cloneable fields

#### Using "+ Add more" button (Fixed Repeater Mode)

The easiest way to import cloneable fields is using the "+ Add more" button. Simply like how you do in editing post, click the button to add more fields and map them to the import file. This way is suitable for small number of fields, or files with a fixed number of columns.
![Using Add more button](https://imgur.elightup.com/Q9hYVzP.png)

#### Using selector "all" and "nth" in XPath (Variable Repeater Mode)

If you have a large number of fields, or the number of columns in the import file is dynamic, you can leverage XPath syntax to import them.
This applied for both cloneable and non-cloneable fields, groups and sub-fields.

For example, you have an XML file with the following structure:

```xml
...
<photos>
    <photo>...</photo>
    <photo>...</photo>
    <photo>...</photo>
</photos>
...
```

To import all photos, you can use the following XPath:

```
{photos/photo}
```

For more information about XPath, please read [W3 Schools tutorial](https://www.w3schools.com/xml/xpath_intro.asp).
To check if your XPath is correct, you can use [XPather](http://xpather.com/).

#### Cloneable Data Placements
By default, all cloneable data are imported to the first group. For example, the previous example will import all photos to the first group.
However, you can change the placement of the data by using the following syntax:

```
{photos[.]/photo}
```
Using the "dot" syntax will tell the plugin to move each item to the parent segment. In this case, it will import each photo to a new group.

![Cloneable Data Placements](https://imgur.elightup.com/ZLEYpxE.png)

#### Concatenate cloneable fields

We can also concatenate cloneable fields. For example, you have an XML file with the following structure:

```xml
...
<photos>
    <photo>cat.jpg</photo>
    <photo>dog.jpg</photo>
</photos>
```

You can add `https://photo.example.com/{photos/photo}` to the `photos` field to get the full URL of the photo.

### Group fields

Working with group fields is similar to other fields. Except that the group fields itself is a container of other fields so we will have a new special field called "For each" to handle how we import data to the group fields.

#### Map fields to group fields

To map fields to group fields, simply drag and drop the fields to the group fields like we do with other fields.

#### Adding cloneable group (Fixed Repeater Mode)

Cloneable group fields work the same as cloneable fields. You can simply the "+ Add more" button to add more groups and map fields to them.

#### For each syntax (Variable Repeater Mode)

As mentioned above, the group fields is a container of other fields. So we need to tell the plugin how to import data to the group fields. This is done by using the "For each" syntax.

![For each syntax](https://imgur.elightup.com/IZrykr1.png)

For example, you have an XML file with the following structure:

```xml
...
<photos>
    <photo>
        <title>Cat</title>
        <url>cat.jpg</url>
    </photo>
    <photo>
        <title>Dog</title>
        <url>dog.jpg</url>
    </photo>
</photos>
...
```

To import each photo and its data to a new group, you can use the following XPath for **For each** field:

```
{photos/photo}
```

#### Sub-fields scope

In the previous example, we have 2 sub-fields: `title` and `url`. These sub-fields are only available inside the group fields. So we need to tell the plugin to import them to the group fields. This is done by using the "dot" syntax.

For example, to import the `title` field into sub-field, we can use the following XPath:

```
{.title}
```

Similarly, to import the `url` field into sub-field, we can use the following XPath:

```
{.url}
```

Let's put them together for more clarity:

```
For each: {photos/photo}

We import:
Title: {.title}  (same as {photos/photo/title} but scoped to the group)
URL: {.url} (same as {photos/photo/url} but scoped to the group)
```

**Note:**

- If the sub-fields are not inside the group fields, you can use the normal XPath syntax to import them.
- You are not limited to only direct children xml nodes but also any level inside the group fields. For example: `{.meta/orientation/width}` also works.
- You can also use other features like concatenation, cloneable syntax... with sub-fields.

## Known issues

- When you clone a group, the later group xpath maybe override the previous group xpath when you save the first time.
You'll need to save the import again to fix it. This is due to group.js file currently doesn't work well outside of the post edit screen.
We'll fix it in the next version.

## FAQ
**Does it work with WP All Import free edition?**
Yes, it does.

# MB Yoast SEO Integration

MB Yoast SEO Integration helps you to add content of custom fields to Yoast SEO Content Analysis to have better SEO score.

![yoast seo preview](https://i2.wp.com/metabox.io/wp-content/uploads/2015/08/meta-box-yoast-seo.png?w=760)

## Settings

To let Yoast SEO get a field's content to analyze, add `'add_to_wpseo_analysis' => true` to the field:

```php
[
	'name' => 'My custom editor',
	'id'   => 'custom_content',
	'type' => 'wysiwyg',
	'add_to_wpseo_analysis' => true,
],
```

The plugin supports all types of fields, such as text, textarea and wysiwyg.

# Meta Box AIO

Meta Box AIO is a special plugin that contains all the extensions. It allows you to install only one plugin and have everything, so you can have the plugin list short and clean.

Meta Box AIO includes the Meta Box framework, so you don't have to install it separately.

## Settings page

The plugin has a settings page under *Meta Box &rarr; Extensions*, where you can enable/disable the extensions you need/don't need.

![meta box aio settings page](img/all-extensions.png)

Check/uncheck the checkbox to enable/disable the corresponding extensions. Then click **Save Changes**.

## Filters

While the settings page and the notification to install free extensions are great for users, developers might want to hide them from normal users. To do that, Meta Box AIO provides some filters:

### `mb_aio_show_settings`

This filter is used to show/hide the settings page. The callback function should return `true` to show the settings page, or `false` to hide it.

To hide the settings page, use the following code:

```
add_filter( 'mb_aio_show_settings', '__return_false' );
```

### `mb_aio_extensions`

This filter allows you to change the list of enabled premium extensions. Thus, enable/disable modules by just coding.

This filter takes a list of enabled extensions (their slugs), and returns the filtered list.

For example, the code below enables only the [MB Builder](/extensions/meta-box-builder/) extension:

```php
add_filter( 'mb_aio_extensions', function( $extensions ) {
    $extensions = ['meta-box-builder'];

    // You can also do
    // $extensions[] = 'meta-box-builder';

    return $extensions;
} );
```

## Tools

These are the Meta Box tools for managing custom fields and custom post types. They help you clean up and optimize your WordPress database.

This set of tools is only available in **Meta Box AIO**. To use it, go to **Meta Box** > **Tools**:

![Interface of Meta Box tools](img/tools/tools.png)

:::warning Important

Please back up your database before using any of these tools. This can't be reversed.

:::

### Remove orphan fields

This tool removes all custom fields that are not attached to a valid post, term, or user.

Just click on the **Remove** button, then Meta Box will notify you of the number of custom fields that have been deleted for each object.

![Successfully remove orphan fields](img/tools/remove-orphan-field.png)

### Remove custom fields

Use this tool to remove the specific fields via their field ID.

Simply enter the meta key and choose the object type (post, term, user or all of them).

![Remove custom fields](img/tools/remove-custom-field.png)

### Change custom field key

This is useful when you want to change the custom field key without losing existing data. Meta Box allows you to select the meta key from the suggestion list.

![Change custom field key](img/tools/change-meta-key.png)

After that, you can check the update meta key in the database.

![Change ID in database](img/tools/field-id-change-database.png)

### Change post type

This tool is to change the slug of a post type, page, or media. For the post type, its posts will be converted to the new one.

![Change post type](img/tools/change-post-type.png)

## Notes

When an extension is enabled in Meta Box AIO and is activated as an individual plugin, the individual plugin will has higher priority and will be used. The version bundled inside Meta Box AIO will not be used.

This behavior is expected and has a good benefit: whenever we release a new version for individual extensions, you can try them first on your website to ensure compatibility before updating the whole Meta Box AIO package.

# Autocomplete

import Screenshots from '@site/src/components/Screenshots';
import Choice from '../_parts/_choice.md';

The autocomplete field creates a simple text input with autocomplete feature. You can select multiple values from the predefined list.

This field uses jQuery UI library to perform the autocomplete action.

## Screenshots

<Screenshots name="autocomplete" col1={[
    ['https://imgur.elightup.com/zvZI8qs.png', 'The autocomplete field interface']
]} />

## Settings

Besides the [common settings](/field-settings/), this field has the following specific settings, the keys are for use with code:

Name | Key | Description
--- | --- | ---
Choices | `options` | List of choices, each per line. If you need to set values and labels, use the format "value: Label" for each choice.<br />When using with code, this setting is an array of `'value' => 'Label'`. It can be an URL to a remote resource that returns the array of data in JSON format.
Size of the input box | `size` | Input size. Default `30`. Optional.

This is a sample field settings array for registering this field with code:

```php
[
    'name'    => 'Autocomplete',
    'id'      => 'field_id',
    'type'    => 'autocomplete',
    'options' => [
        'java'       => 'Java',
        'javascript' => 'JavaScript',
        'php'        => 'PHP',
        'csharp'     => 'C#',
        'kotlin'     => 'Kotlin',
        'swift'      => 'Swift',
    ],
],
```

## Getting options remotely via Ajax

In case you want to use remote data instead of user-defined data for the "Choices" (`options`) settings, you can set this setting as an URL of your remote data source.

For example, you can set the "Choices" with the value: `https://yourdomain.com/wp-admin/admin-ajax.php?action=something`, which will send an ajax request to the `admin-ajax.php` file, and then you can handle it with your function as follows:

```php
add_action( 'wp_ajax_something', function() {
    $s = $_REQUEST[ 'term' ];
    // Do some stuff here to find matches.

    $response = [
        [ 'value' => '123', 'label' => 'Some Post' ],
        [ 'value' => '77', 'label' => 'Another Post' ],
    ];

    // Do some stuff to prepare JSON response ( headers, etc ).
    echo wp_json_encode( $response );
    die;
} );
```

Note that the data returned must be in JSON format as above. The ajax request also sends the search term via `$_REQUEST['term']` parameter as you see above.

<Choice />

# Background

import Screenshots from '@site/src/components/Screenshots';

The background field allows you to set background properties for a post. You can set the background color, select an image, and set other background settings.

## Screenshots

<Screenshots name="background" col1={[
    ['/screenshots/background.png', 'The background field interface']
]} />

## Settings

This field doesn't have any specific settings. It only uses  [common settings](/field-settings/).

This is a sample field settings array when creating this field with code:

```php
[
    'id'   => 'background',
    'name' => 'Section background',
    'type' => 'background',
],
```

## Data

This field stores background properties in a serialized array in the post meta.

## Template usage

**Getting the background properties:**

```php
$background = rwmb_meta( 'my_field_id' );
echo $background['color'];
echo $background['image'];
```

This helper function returns an array of background properties:

```php
[
    'color'      => '#111222',
    'image'      => 'https://domain.com/wp-uploads/2017/12/bg.png',
    'position'   => 'top left',
    'attachment' => 'fixed',
    'size'       => 'cover',
    'repeat'     => 'no-repeat',
];
```

**Outputting the CSS for the background:**

```php
<div style="<?php rwmb_the_value( 'my_field_id' ) ?>">
    <h2>My section title</h2>
    <p>My section content</p>
</div>
```

# Block Editor

import Screenshots from '@site/src/components/Screenshots';

The block editor field creates an isolated standalone Gutenberg block editor in meta boxes, settings pages, and other supported Meta Box objects. This is useful when you want to create a custom field for users to edit content with the same experience as the main WordPress block editor.

You can have multiple block editor fields on a same page, and they will not affect each other. Each editor can have a different set of allowed blocks, which is useful when you want to allow users to insert only certain blocks in a specific area of the page.

## Screenshots

<Screenshots name="block-editor" col1={[
    ['/screenshots/block-editor.png', 'The block editor field interface']
]} />

## Settings

Besides the [common settings](/field-settings/), this field has a specific setting, the key is for use with code:

Name | Key | Description
--- | --- | ---
Allowed blocks | `allowed_blocks` | List of allowed block types. Leave empty to allow all blocks.
Height | `height` | Height of the editor. Can be any CSS value. Default is `300px`.
Toolbar position | `toolbar_position` | Position of the toolbar. Can be `top` (default, displayed fixed at the top) or `contextual` (displayed above the block).

This is a sample field settings array when creating this field with code:

```php
[
    'name'           => 'Content Blocks',
    'id'             => 'content_blocks',
    'type'           => 'block_editor',
    'allowed_blocks' => [
        'core/heading',
        'core/columns',
        'core/image',
    ],
]
```

## Data

This field saves data as Gutenberg block markup in the database, just like WordPress stores blocks in `post_content`.

## Displaying the value

Meta Box automatically applies `do_blocks()` when rendering the field value.

```php
rwmb_the_value( 'content_blocks' );
```

If you want to get the value as a string, and apply `do_blocks()` to it, you can use:

```php
$content = rwmb_get_value( 'content_blocks' );
echo do_blocks( $content );
```

# Button Group

import Screenshots from '@site/src/components/Screenshots';
import ChoiceSingle from '../_parts/_choice-single.md';

The button group allows you to select one or more options by enabling buttons from a button group. This field is helpful when you want to display choices in the style of a toolbar.

## Screenshots

<Screenshots name="select" col1={[
    ['https://imgur.elightup.com/gVAILxbl.png', 'The button group field interface']
]} />


## Settings

Besides the [common settings](/field-settings/), this field has the following specific settings, the keys are for use with code:

Name | Key | Description
--- | --- | ---
Buttons | `options` | List of buttons, each per line. If you need to set values and labels, use the format "value: Label" for each choice.<br />When using with code, this setting is an array of `'value' => 'Label'`.
Multiple | `multiple` | Whether to allow select multiple values? `true` or `false` (default).
Display buttons horizontally | `inline` | Whether to display buttons horizontally (`true` - default) or vertically (`false`).

This is a sample field settings array when creating this field with code:

```php
[
    'id'       => 'styles',
    'name'     => 'Styles',
    'type'     => 'button_group',
    'options'  => [
        'bold'      => '<i class="dashicons dashicons-editor-bold"></i>',
        'italic'    => '<i class="dashicons dashicons-editor-italic"></i>',
        'underline' => '<i class="dashicons dashicons-editor-underline"></i>',
    ],
    'inline'   => true,
    'multiple' => true,
],
```

<ChoiceSingle />

# Button

import Screenshots from '@site/src/components/Screenshots';

The button field creates a simple button. It doesn't have any value. Usually, this field is used to trigger custom JavaScript actions.

## Screenshots

<Screenshots name="button" col1={[
    ['https://imgur.elightup.com/9ciaST1.png', 'The button field interface']
]} />

## Settings

This field doesn't have any specific settings. It only uses [common settings](/field-settings/). But there are important settings that you should pay attention to, the keys are for use with code:

Name | Key | Description
--- | --- | ---
Default value | `std` | Button text.
Custom HTML5 attributes | `attributes` | A list of custom HTML5 attributes for the button. [More info](/custom-attributes/).

This is a sample field settings array when creating this field with code:

```php
[
    'type'       => 'button',
    'name'       => 'Advanced Settings',
    'std'        => 'Toggle',
    'attributes' => [
        'data-section' => 'advanced-section',
        'class'        => 'js-toggle',
    ],
],
```

## Data

This field does not save any value in the database.

## Custom JavaScript

As said above, this field is usually used for custom JavaScript actions. To enqueue a JavaScript file to the admin editing page, use the [rwmb_enqueue_scripts](/actions/rwmb-enqueue-scripts/) hook:

```php
add_action( 'rwmb_enqueue_scripts', 'prefix_enqueue_custom_script' );
function prefix_enqueue_custom_script() {
    wp_enqueue_script( 'script-id', get_template_directory_uri() . '/js/admin.js', [ 'jquery' ], '', true );
}
```

And in the `admin.js` script, you can trigger a custom action when click the button:

```js
jQuery( function( $ ) {
    $( '.js-toggle' ).on( 'click', function() {
        // Do something.
    } );
} );
```

# Checkbox list

import Screenshots from '@site/src/components/Screenshots';
import Choice from '../_parts/_choice.md';

The checkbox list field creates a list of tick-able checkboxes with options. You can select multiple choices from the predefined list.

## Screenshots

<Screenshots name="checkbox-list" col1={[
    ['/screenshots/checkbox-list-1.png', 'Checkbox list vertical with "Toggle All" button'],
    ['/screenshots/checkbox-list-2.png', 'Checkbox list inline'],
]} />

## Settings

Besides the [common settings](/field-settings/) such as Label, ID, Default value, Cloneable, etc., this field has the following specific settings:

![specific settings of the field](img/checkbox-list/special-settings.png)

Name | Key | Description
--- | --- | ---
Choices | `options` | List of choices, each per line. If you need to set values and labels, use the format "value: Label" for each choice.<br />When using code, this setting is an array of `'value' => 'Label'`.
Display choices horizontally | `inline` | Display choices in a single line? `true` or `false`.
Display "Toggle All" button | `select_all_none` | Display "Toggle All" button to quickly toggle choices.

:::note

* The keys are for using with code.
* The interface of field settings just comes when you have the [MB Builder extension](https://metabox.io/plugins/meta-box-builder/) in your pocket. It provides the UI to create and configure fields visually. It’s already bundled in the **Meta Box AIO** and **Meta Box Lite**.

:::

When creating the field with **MB Builder**, just input options into the **Choices** box.

![Input the label of the options in the Choices box](img/checkbox-list/choices.png)

In some special cases, you may want the data stored (value) to be different from the data displayed (label), you can input data with the form `value`:`label`.

![the field with settings and options](img/checkbox-list/value-label.png)

This is the field settings array when creating this field with code:

```php
[
    'name'            => 'Checkbox list',
    'id'              => 'field_id',
    'type'            => 'checkbox_list',
    'inline'          => true,
    'select_all_none' => true,
    'options' => [
        'java'       => 'Java',
        'javascript' => 'JavaScript',
        'php'        => 'PHP',
        'csharp'     => 'C#',
        'kotlin'     => 'Kotlin',
        'swift'      => 'Swift',
    ],
],
```

In the post/page editor, the checkbox list will display with options.

![The field displays in the post/page editor](https://imgur.elightup.com/u9Wk4xH.png)

## Data

This field saves multiple values in the database. Each value is stored in a single row in the database with the same key (similar to what `add_post_meta` does with the last parameter `false`).

If the field is cloneable, then the value is stored as a serialized array in a single row in the database. Each value of that array is an array of cloned values.

:::warning

Note that this field stores the **values**, not labels.

:::

## Template usage

### Using MB Views

[MB Views](https://docs.metabox.io/extensions/mb-views/) is an extension for Meta Box, which helps you to get Meta Box fields and build your templates on the front end fast and easily. The extension supports all custom fields built with Meta Box, and also post fields (such as post title and post content), site settings, user fields, and even query fields. MB Views is already bundled in the **Meta Box AIO**. So it's available in the Ultimate and Lifetime plans.

**Displaying selected values or labels:**

In the view, click on the **Insert Field** button.

![Go to Views and click on the Insert Field button](https://imgur.elightup.com/J74Rkam.png)

Find the name of the created field on the list on the right sidebar.

![Find the name of the created field on the list on the right sidebar](https://imgur.elightup.com/rEK9Eqm.png)

There will be two options to output the data, they are the value and label of the choices that we input in the field.

Just choose one to output only the values, or only the labels. In the event that you want to display both of them, just insert the field twice.

![choose one option to output only the values, or only the labels](https://imgur.elightup.com/cI8asuN.png)

Then the code will be like this:

![The code to display selected values](https://imgur.elightup.com/Oaan9xt.png)

Display only the labels:

![Display only the labels](https://imgur.elightup.com/QnDwhsM.gif)

Display both values and labels:

![Display both values and labels](https://imgur.elightup.com/2dPnl1G.gif)

**Displaying cloneable values:**

No matter if the field is cloneable or not, the operation to display data from the field will be the same. The difference is just in the generated code.

![Displaying cloneable values](https://imgur.elightup.com/mmnSFFj.gif)

### Using PHP

**Displaying selected values:**

```php
<?php $values = rwmb_meta( 'my_field_id' ); ?>
<ul>
    <?php foreach ( $values as $value ) : ?>
        <li><?= $value ?></li>
    <?php endforeach ?>
</ul>
```

**Displaying selected labels:**

```php
<p>Choices:</p>
<?php rwmb_the_value( 'my_field_id' ) ?>
```

:::info

`rwmb_the_value()` automatically formats values as an unordered list.

:::

**Displaying both values and labels:**

```php
<?php
$field   = rwmb_get_field_settings( 'my_field_id' );
$options = $field['options'];
$values  = rwmb_meta( 'my_field_id' );
?>
<ul>
    <?php foreach ( $values as $value ) : ?>
        <li>
            Value: <?= $value ?><br>
            Label: <?= $options[ $value ] ?>
        </li>
    <?php endforeach ?>
</ul>
```

**Displaying cloneable values:**

```php
<?php
$field   = rwmb_get_field_settings( 'my_field_id' );
$options = $field['options'];
$values  = rwmb_meta( 'my_field_id' );
?>
<ul>
    <?php foreach ( $values as $clone ) : ?>
        <li>
            <ul>
                <?php foreach ( $clone as $value ) : ?>
                    <li>
                        Value: <?= $value ?><br>
                        Label: <?= $options[ $value ] ?>
                    </li>
                <?php endforeach ?>
            </ul>
        </li>
    <?php endforeach ?>
</ul>
```

# Checkbox

import Screenshots from '@site/src/components/Screenshots';

The checkbox field creates a single checkbox.

## Screenshots

<Screenshots name="checkbox" col1={[
    ['/screenshots/checkbox.png', 'The checkbox field interface'],
]} />

## Settings

Besides the [common settings](/field-settings/), this field has the following specific settings, the keys are for use with code:

Name | Key | Description
--- | --- | ---
Checked by default | `std` | Whether the checkbox is checked by default?

This is a sample field settings array when creating this field with code:

```php
[
    'name' => 'Checkbox',
    'id'   => 'field_id',
    'type' => 'checkbox',
    'std'  => 1, // 0 or 1
],
```

## Data

This field saves the "checked" and "unchecked" values in the database as "1" or "0".

## Template usage

**Conditional check:**

```php
$value = rwmb_meta( 'my_field_id' );
if ( $value ) {
    echo 'Checked';
} else {
    echo 'Unchecked';
}
```

**Displaying "Yes/No":**

```php
rwmb_the_value( 'my_field_id' );
```

# Color

import Screenshots from '@site/src/components/Screenshots';

The color field allows you to select a color. This field uses the built-in WordPress color picker with an extension to select the alpha channel for colors.

## Screenshots

<Screenshots name="color" col1={[
    ['https://imgur.elightup.com/a8IFYvx.png', 'The color field interface']
]} />

## Settings

Besides the [common settings](/field-settings/), this field has the following specific settings, the keys are for use with code:

Name | Key | Description
--- | --- | ---
Allow to select opacity | `alpha_channel` | Whether to add opacity to the color picker. `true` or `false` (default). Optional.
Color picker options | `js_options` | Extra color picker options. [See here](https://automattic.github.io/Iris/).

This is a sample field settings array when creating this field with code:

```php
[
    'name'          => 'Color picker',
    'id'            => 'field_id',
    'type'          => 'color',
    'alpha_channel' => true,
    'js_options'    => [
        'palettes' => ['#125', '#459', '#78b', '#ab0', '#de3', '#f0f'],
    ],
],
```

## Data

This field saves the hex value of the picked color in the database.

If the field is cloneable, then the value is stored as a serialized array in a single row in the database.

## Template usage

**Getting the value:**

```php
<?php $value = rwmb_meta( 'my_field_id' ) ?>
<div style="background-color: <?= $value ?>">
    <h2>My section title</h2>
    <p>My section content</p>
</div>
```

**Displaying the selected color:**

```php
<p>This is the color: <?php rwmb_the_value( 'my_field_id' ) ?></p>
```

which displays the color as a single dot like this:

![display color](https://imgur.elightup.com/gLAVBYS.png)

# Custom HTML

import Screenshots from '@site/src/components/Screenshots';

The custom HTML field allows you to output anything. You can even use a PHP callback function to output the HTML.

This field is usually used to display custom messages/instructions to users. Sometimes, it's used with PHP callback to display more advanced content (such as content from a query).

## Screenshots

<Screenshots name="custom-html" col1={[
    ['https://imgur.elightup.com/LO5Akul.png', 'The custom HTML field interface']
]} />

## Settings

Besides the [common settings](/field-settings/), this field has the following specific settings, the keys are for use with code:

Name | Key | Description
--- | --- | ---
Content | `std` | The custom HTML content.
PHP Callback | `callback` | The PHP function that returns the custom HTML content. Optional.

This is a sample field settings array for registering this field with code:

```php
[
    'type' => 'custom_html',
    'std'  => '<div class="alert alert-warning">This is a custom HTML content</div>',
],
```


## Styling

Because this field is usually used to display custom content, it requires some CSS to make the content looks good. To enqueue a CSS file to the admin editing page, use the [rwmb_enqueue_scripts](/actions/rwmb-enqueue-scripts/) hook:

```php
add_action( 'rwmb_enqueue_scripts', function () {
    wp_enqueue_style( 'style-id', get_template_directory_uri() . '/css/admin.css' );
} );
```

And in the `admin.css` you can put your custom styles.

# Date

import Screenshots from '@site/src/components/Screenshots';

The date field allows you to select a date via a friendly UI. This field uses the jQuery UI datepicker library to select a date.

## Screenshots

<Screenshots name="date" col1={[
    ['https://imgur.elightup.com/MxcgZJy.png', 'The date field interface']
]} />

## Settings

Besides the [common settings](/field-settings/), this field has the following specific settings, the keys are for use with code:

Name | Key | Description
--- | --- | ---
Size of the input box | `size` | Size of the input box. Optional. Default 10. Without this setting, the input box is full-width.
Inline | `inline` | Whether to display the date picker inline with the input and don't require to click to show the date picker? `true` or `false` (default).
Save value as timestamp | `timestamp` | Whether to save the date in the Unix timestamp format (but still display in human-readable format)? `true` or `false` (default).
Date picker options | `js_options`|Date picker options. [See here](http://api.jqueryui.com/datepicker).
Save format | `save_format`|Custom PHP format for the datetime saved in the custom fields. [See here](https://www.php.net/manual/en/function.date.php).

:::warning Timezone and timestampt

This field gets the current time of your local computer and converts it to the timestamp value. So the Unix timestamp saved is the "timezone (UTC) + offset".

:::

This is a sample field settings array when creating this field with code:

```php
[
    'name'       => 'Date picker',
    'id'         => 'field_id',
    'type'       => 'date',
    'js_options' => [
        'dateFormat'      => 'yy-mm-dd',
        'showButtonPanel' => false,
    ],
    'inline'    => false,
    'timestamp' => false,
],
```

## Data

If the `timestamp` is set to `true`, the field value is converted to Unix timestamp and saved to the database. Otherwise, the user input value is saved.

## Date format

It's important to understand that the date format showing in the date picker, which is set via `js_options['dateFormat']` is the jQueryUI format. It's **not** the same as PHP date format! By default, Meta Box sets the format to `yy-mm-dd`. You might want to change it to `dd-mm-yy` (for European countries) or `mm/dd/yy` (for US).

However, this is the format that users see in the date picker. You might want to save the value in another format, like `2022-10-20`, which allows you to [sort or query posts](https://metabox.io/get-posts-by-custom-fields-in-wordpress/) by date. To do that, set the value of "Save format" to `Y-m-d`. Unlike the above, the saved format **is the PHP date format**, which is similar to PHP's `date()` function.

Why is the difference? Because the plugin depends on jQueryUI to render the date picker, so we must use its format. On the back end, we can use what PHP provides us.

If you use code, then the field settings will look like this:

```php
[
    'js_options' => [
        'dateFormat' => 'dd-mm-yy',
    ],
    'save_format' => 'Y-m-d',
],
```

So when displaying to users, the date will have the format of `30-01-2019`, and when saving to the database, it will have the format of `2019-01-30`.

## Template usage

**Displaying the value:**

```php
<p>Entered: <?php rwmb_the_value( 'my_field_id' ) ?></p>
```

**Getting the value:**

```php
<?php $value = rwmb_meta( 'my_field_id' ) ?>
<p>Entered: <?= $value ?></p>
```

**Converting timestamp to another format:**

If you save the field value as a timestamp, then you can convert the value to different format, like this:

```php
<?php $value = rwmb_meta( 'my_field_id' ) ?>
<p>Event date: <?= date( 'F j, Y', $value ) ?></p>
```

Or simpler:

```php
<p>Event date: <?php rwmb_the_value( 'my_field_id', ['format' => 'F j, Y'] ) ?></p>
```

:::info

The 2nd parameter of [rwmb_the_value()](/functions/rwmb-the-value/) accepts and extra parameter "**format**" which specify the datetime format to output in the frontend.

:::

**Querying posts by date:**

Saving values in timestamp allows you to query posts with a specific order by this field:

```php
$query = new WP_Query( [
    'post_type' => 'event',
    'orderby'   => 'meta_value_num',
    'meta_key'  => 'my_field_id',
    'order'     => 'ASC',
] );
```

However, you still can sort posts by meta value if you set date format to something similar to `yy-mm-dd`. Anyway, querying posts by custom fields is [not recommended](https://metabox.io/custom-fields-vs-custom-taxonomies/).

# Datetime

import Screenshots from '@site/src/components/Screenshots';

The datetime field allows you to select a date and time via a friendly UI. This field uses jQuery UI date & time picker libraries.

## Screenshots

<Screenshots name="datetime" col1={[
    ['/screenshots/datetime.png', 'The datetime field interface']
]} />

## Settings

Besides the [common settings](/field-settings/), this field has the following specific settings, the keys are for use with code:

Name | Key | Description
--- | --- | ---
Size of the input box | `size` | Size of the input box. Optional. Default 10. Without this setting, the input box is full-width.
Inline | `inline` | Whether to display the date picker inline with the input and don't require to click to show the date picker? `true` or `false` (default).
Save value as timestamp | `timestamp` | Whether to save the date in the Unix timestamp format (but still display in human-readable format)? `true` or `false` (default).
Date picker options | `js_options`|Date and picker options. See [date picker options](http://api.jqueryui.com/datepicker) and [time picker options](http://trentrichardson.com/examples/timepicker/).
Save format | `save_format`|Custom PHP format for the datetime saved in the custom fields. [See here](https://www.php.net/manual/en/function.date.php).

:::warning Timezone and timestampt

This field gets the current time of your local computer and converts it to the timestamp value. So the Unix timestamp saved is the "timezone (UTC) + offset".

:::

This is a sample field settings array when creating this field with code:

```php
[
    'name'       => 'Date picker',
    'id'         => 'field_id',
    'type'       => 'datetime',
    'js_options' => [
        'stepMinute'      => 15,
        'showTimepicker'  => true,
        'controlType'     => 'select',
        'showButtonPanel' => false,
        'oneLine'         => true,
    ],
    'inline'     => false,
    'timestamp'  => false,
],
```

## Data

If the `timestamp` is set to `true`, the field value is converted to Unix timestamp and saved to the database. Otherwise, the user input value is saved.

## Saving dates in another format

Meta Box already supports customizing the date format **displaying to users** via `js_options`. For example, you can set it to `dd-mm-yy`.

However, you might want to save the date in another format, like `Y-m-d`, which allows you to [sort or query posts](https://metabox.io/get-posts-by-custom-fields-in-wordpress/) by date. To do that, set the value of "Save format" to "Y-m-d".

If you use code, then the field settings will look like this:

```php
[
    'js_options' => [
        'dateFormat' => 'dd-mm-yy',
    ],
    'save_format' => 'Y-m-d',
],
```

So when displaying to users, the date will have the format of `30-01-2019`, and when saving to the database, it will have the format of `2019-01-30`.

## Template usage

**Displaying the value:**

```php
<p>Entered: <?php rwmb_the_value( 'my_field_id' ) ?></p>
```

**Getting the value:**

```php
<?php $value = rwmb_meta( 'my_field_id' ) ?>
<p>Entered: <?= $value ?></p>
```

**Converting timestamp to another format:**

If you save the field value as a timestamp, then you can convert the value to different format, like this:

```php
<?php $value = rwmb_meta( 'my_field_id' ) ?>
<p>Event date: <?= date( 'F j, Y', $value ) ?></p>
```

Or simpler:

```php
<p>Event date: <?php rwmb_the_value( 'my_field_id', ['format' => 'F j, Y'] ) ?></p>
```

:::info

The 2nd parameter of [rwmb_the_value()](/functions/rwmb-the-value/) accepts and extra parameter "**format**" which specify the datetime format to output in the frontend.

:::

**Querying posts by date:**

Saving values in timestamp allows you to query posts with a specific order by this field:

```php
$query = new WP_Query( [
    'post_type' => 'event',
    'orderby'   => 'meta_value_num',
    'meta_key'  => 'my_field_id',
    'order'     => 'ASC',
] );
```

However, you still can sort posts by meta value if you set date format to something similar to `yy-mm-dd`. Anyway, querying posts by custom fields is [not recommended](https://metabox.io/custom-fields-vs-custom-taxonomies/).

# Divider

import Screenshots from '@site/src/components/Screenshots';

The divider field creates a simple horizontal line. It doesn't have any value and is usually used to separate fields for a better reading experience.

## Screenshots

<Screenshots
    name="divider"
    col1={[
        ['https://imgur.elightup.com/JTIlECL.png', 'The divider field default interface'],
    ]}
/>

## Settings

This field doesn't have any specific settings.

This is a sample field settings array when creating this field with code:

```php
[
    'type' => 'divider',
],
```

# Fieldset Text

import Screenshots from '@site/src/components/Screenshots';

The fieldset text creates a set of text inputs. It's useful if you want to save related information.

## Screenshots

<Screenshots name="fieldset-text" col1={[
    ['https://imgur.elightup.com/qh3pfUd.png', 'The fieldset text field interface']
]} />

## Settings

Besides the [common settings](/field-settings/), this field has the following specific settings, the keys are for use with code:

Name | Key | Description
--- | --- | ---
Inputs | `options` | Array of `'key' => 'Input Label'` pairs. `key` is used as keys of the array of values stored in the database.

This is a sample field settings array when creating this field with code:

```php
[
    'id'      => 'field_id',
    'name'    => 'Fieldset Text',
    'type'    => 'fieldset_text',
    'options' => [
        'name'    => 'Name',
        'address' => 'Address',
        'email'   => 'Email',
    ],
],
```

## Data

This field always stores the value as a serialized array in a single row in the database. Each element of that array will have the key as specified in the field's `options`.

## Template usage

**Displaying field inputs' values:**

```php
<?php $value = rwmb_meta( 'my_field_id' ) ?>
<p>Name: <?= $value['name'] ?></p>
<p>Address: <?= $value['address'] ?></p>
<p>Email: <?= $value['email'] ?></p>
```

# File Advanced

import File from '../_parts/_file.md';
import Screenshots from '@site/src/components/Screenshots';

The file advanced field uses the WordPress media popup for selecting / uploading files. You can also reorder files if you want.

## Screenshots

<Screenshots
    name="file-advanced"
    col1={[
        ['https://imgur.elightup.com/mqR9Tue.png', 'The file advanced field interface'],
    ]}
/>

## Settings

Besides the [common settings](/field-settings/), this field has the following specific settings, the keys are for use with code:

Name | Key | Description
--- | --- | ---
Max number of files | `max_file_uploads` | Max number of uploaded files. Optional.
Force delete | `force_delete` | Whether or not delete the files from Media Library when deleting them from post meta. `true` or `false` (default). Optional. Note: it might affect other posts if you use the same file for multiple posts.
MIME types | `mime_type` | The MIME type of files which you want to show in the Media Library. Note: this is a filter for items in the media popup, it doesn't restrict file types when uploading. See [common MIME types](https://developer.mozilla.org/en-US/docs/Web/HTTP/Basics_of_HTTP/MIME_types/Common_types).
Show status | `max_status` | Display how many files uploaded/remaining. Applied only when "Max number of files" is defined. `true` (default) or `false`. Optional.

This is a sample field settings array when creating this field with code:

```php
[
    'id'               => 'file',
    'name'             => 'File Advanced',
    'type'             => 'file_advanced',
    'force_delete'     => false,
    'max_file_uploads' => 2,
    'mime_type'        => 'application/pdf',
    'max_status'       => false,
],
```

## Data

This field saves multiple attachment IDs in the database. Each value (attachment ID) is stored in a single row in the database with the same meta key (similar to what `add_post_meta` does with the last parameter `false`).

## Template usage

<File />

## Filters

This field has some filters to change the texts displayed on the screen..

Filter|Default|Description
---|---|---
`rwmb_media_add_string`|+ Add Media|Add new file string
`rwmb_media_single_files_string`|file|Singular "file" string
`rwmb_media_multiple_files_string`|files|Plural "files" string
`rwmb_media_remove_string`|Remove|File remove string
`rwmb_media_edit_string`|Edit|File edit string
`rwmb_media_view_string`|View|File view string

The code below changes the "+ Add Media" string:

```php
add_filter( 'rwmb_media_add_string', function () {
    return '+ New File';
} );
```

# File Input

import Screenshots from '@site/src/components/Screenshots';

The file input field creates a simple text input for uploading a single file. You can select a file from the Media Library or enter a file URL directly (even a URL for a file hosted on another website). After selecting from the Media Library, the input file URL will be pasted into the input and is saved into the database.

## Screenshots

<Screenshots
    name="file-input"
    col1={[
        ['https://imgur.elightup.com/cPVTMNy.png', 'The file input field interface'],
    ]}
/>

## Settings

This field doesn't have any specific settings. It only uses [common settings](/field-settings/).

## Data

This field saves the input file URL in the database.

## Template usage

**Displaying file:**

```php
<?php $value = rwmb_meta( 'my_field_id' ) ?>
<p><a href="<?= $value >">Download file</a></p>
```

**Displaying uploaded image:**

```php
<?php $value = rwmb_meta( 'my_field_id' ) ?>
<p><img src="<?= $value >"></p>
```

# File Upload

import File from '../_parts/_file.md';
import Screenshots from '@site/src/components/Screenshots';

The file upload field displays an inline upload area that you can drag and drop or select files to upload. It doesn't open the Media Library popup for selecting existing files. You can upload new files only.

## Screenshots

<Screenshots
    name="file-upload"
    col1={[
        ['https://imgur.elightup.com/yGNNhOg.png', 'The file upload field interface'],
    ]}
/>

## Settings

Besides the [common settings](/field-settings/), this field has the following specific settings, the keys are for use with code:

Name | Key | Description
--- | --- | ---
Max number of files | `max_file_uploads` | Max number of uploaded files. Optional.
Force delete | `force_delete` | Whether or not delete the files from Media Library when deleting them from post meta. `true` or `false` (default). Optional. Note: it might affect other posts if you use the same file for multiple posts.
MIME types | `mime_type` | MIME type of files which we want to show in the Media Library. Note: this is a filter for items in the media popup, it doesn't restrict file types when uploading.
Show status | `max_status` | Display how many files uploaded/remaining. Applied only when "Max number of files" is defined. `true` (default) or `false`. Optional.
Max file size | `max_file_size` | Maximum file size that the user can upload, in bytes. Optionally supports b, kb, mb, gb, tb suffixes. e.g. "10mb" or "1gb".

This is a sample field settings array when creating this field with code:

```php
[
    'id'               => 'file',
    'name'             => 'File upload',
    'type'             => 'file_upload',
    'force_delete'     => false,
    'max_file_uploads' => 2,
    'mime_type'        => 'application,audio,video',
    'max_status'       => false,
],
```

## Data

This field saves multiple attachment IDs in the database. Each value (attachment ID) is stored in a single row in the database with the same meta key (similar to what `add_post_meta` does with the last parameter `false`).

## Template usage

<File />

## Filters

This field has some filters to change the texts displayed on the screen..

Filter|Default|Description
---|---|---
`rwmb_media_add_string`|+ Add Media|Add new file string
`rwmb_media_single_files_string`|file|Singular "file" string
`rwmb_media_multiple_files_string`|files|Plural "files" string
`rwmb_media_remove_string`|Remove|File remove string
`rwmb_media_edit_string`|Edit|File edit string
`rwmb_media_view_string`|View|File view string
`rwmb_media_select_string`|Select Files|Select files string
`rwmb_media_or_string`|or|The string "or" in "Drop files here to upload or Select Files"
`rwmb_media_upload_instructions_string`|Drop files here to upload|The upload instruction string

The code below changes the "+ Add Media" string:

```php
add_filter( 'rwmb_media_add_string', function () {
    return '+ New File';
} )
```
## Binding events

You can bind various events during uploading via the `data-uploader` of the input like this:

```php
jQuery( function( $ ){
    setTimeout( function() {
        const myUploader =  $( 'input.rwmb-file_upload.rwmb-media' ).data( 'uploader' );

        myUploader.uploader.bind( 'FileUploaded', function( up, file, res ) {
            console.log( 'File Uploaded' );
        } );
    }, 1000 );
} );
```

:::warning

You need to use `setTimeout` to make sure your code runs after the uploader is initialized.

:::

Here is the list of events of the uploader. You can see more details about them in the [official documentation of plupload](https://www.plupload.com/docs/v2/Uploader#events), the library WordPress and Meta Box use for uploading files.

Event|Description
---|---|---
`Init`|Fires when the current uploader has been initialized.
`PostInit`|Fires after the init event in case you need to perform actions there.
`Refresh`|Fires when the silverlight/flash or other shim needs to move.
`Browse`|Fires when browse_button is clicked and browse dialog shows.
`BeforeUpload`|Fires just before a file is uploaded. Can be used to cancel the upload for the specified file by returning false from the handler.
`UploadFile`|Fires when a file is to be uploaded by the runtime.
`UploadProgress`|Fires while a file is being uploaded. Use this event to update the current file upload progress.
`BeforeChunkUpload`|Fires just before a chunk is uploaded. This event enables you to override settings on the uploader instance before the chunk is uploaded.
`ChunkUploaded`|Fires when a file chunk is uploaded.
`FileUploaded`|Fires when a file is successfully uploaded.
`UploadComplete`|Fires when all files in a queue are uploaded.
`Error`|Fires when an error occurs.
`Destroy`|Fires when destroy method is called.

# File

import File from '../_parts/_file.md';
import CustomUploadFolder from '../_parts/_custom-upload-folder.md';
import Screenshots from '@site/src/components/Screenshots';

The file field creates a simple file upload with default UI like `<input type="file">`. Unlike other media fields, this field doesn't use Media Library UI to upload files.

## Screenshots

<Screenshots
    name="file"
    col1={[
        ['https://imgur.elightup.com/LIWgUZW.png', 'The file field interface'],
    ]}
/>

## Settings

Besides the [common settings](/field-settings/), this field has the following specific settings, the keys are for use with code:

Name | Key | Description
--- | --- | ---
Max number of files | `max_file_uploads` | Max number of uploaded files. Optional.
Force delete | `force_delete` | Whether or not delete the files from Media Library when deleting them from post meta. `true` or `false` (default). Optional. Note: it might affect other posts if you use the same file for multiple posts.
Custom upload folder | `upload_dir` | Full path to a custom upload folder.
Unique filename callback | `unique_filename_callback` | Custom callback to set the uploaded file name. Works only when uploading to a custom folder.

This is a sample field settings array when creating this field with code:

```php
[
    'id'               => 'file',
    'name'             => 'File',
    'type'             => 'file',
    'force_delete'     => false,
    'max_file_uploads' => 2,
],
```

## Data

This field saves multiple attachment IDs in the database. Each value (attachment ID) is stored in a single row in the database with the same meta key (similar to what `add_post_meta` does with the last parameter `false`).

## Custom upload folder

<CustomUploadFolder />

## Template usage

<File />

## Filters

This field has some filters to change the texts displayed on the screen..

Filter|Default|Description
---|---|---
`rwmb_file_upload_string`|Upload Files|File upload string
`rwmb_file_add_string`|+ Add new file|Add new file string
`rwmb_file_delete_string`|Delete|File delete string
`rwmb_file_edit_string`|Edit|File edit string

All filters above accept 2 parameters:

- `$string`: the string needs to be changed
- `$field`: array of the field settings

The code below changes the "+ Add new file" string:

```php
add_filter( 'rwmb_file_add_string', function () {
    return '+ New File';
} );
```

# Heading

import Screenshots from '@site/src/components/Screenshots';

The heading field creates a simple `<h4>` heading, which has an optional description. It doesn't have any value and is usually used to separate fields into sections for better reading experience.

## Screenshots

<Screenshots name="heading" col1={[
    ['https://imgur.elightup.com/CrDtd5s.png', 'The heading field interface']
]} />

## Settings

This field doesn't have any specific settings.

This is a sample field settings array when creating this field with code:

```php
[
    'type' => 'heading',
    'name' => 'Heading',
    'desc' => 'Optional description',
],
```

# Hidden

The hidden field creates a simple hidden input. It's usually used to store custom data that cannot be changed.

## Screenshots

![The hidden field settings](/settings/hidden.png)

## Settings

This field doesn't have any specific settings. It only uses [common settings](/field-settings/).

To store the hidden value, put it in the `std` setting.

This is a sample field settings array when creating this field with code:

```php
[
    'id'   => 'field_id',
    'type' => 'hidden',
    // Hidden field must have predefined value
    'std'  => 'Hidden value',
],
```

## Data

Although the value is fixed in the code, this field still saves it in the database.

## Template usage

To get the field value, use this code

```php
<?php $value = rwmb_meta( 'my_field_id' ) ?>
<p>The hidden value: <?= $value ?>
```

# Icon

import Screenshots from '@site/src/components/Screenshots';

The icon field allows you to select an icon from a predefined icon library and show it on the front end. With this field, you can quickly search and select an icon from any icon library:
- Font Awesome Free (default, built-in)
- Font Awesome Pro (requires your Pro account on the Font Awesome website)
- Any icon font that requires a CSS file like [Line Awesome](https://icons8.com/line-awesome), [Boxicons](https://boxicons.com/), or any icon font in your themes or plugins. This is helpful if you use use many icons from the icon font across your website.
- Your own custom icon library, where you can define your own icons with SVG. This is optimal if you use only some icons, and want to use SVG to improve the performance of the website because it doesn't require you to load a CSS file.

Depending on the icon library you use, you can output the icon on the front end as an icon font, or as an SVG.

## Screenshots

<Screenshots name="icon" col1={[
    ['https://i0.wp.com/images.elightup.com/meta-box/docs/fields/icon/screenshot.png', 'The background field interface']
]} />

## Defining the icon library

### Font Awesome Free

Font Awesome Free is the most popular icon library available on the Internet with more than 2000 icons. It's supported and included by Meta Box and you don't have to download it.

To use Font Awesome Free for your icon field, add a field with type `icon` in the [MB Builder](/extensions/meta-box-builder/) (similar to the settings screenshot above). Leave all the icon settings as default.

If you use code, use the following [field settings](/field-settings/):

```php
[
	'name' => 'Icon',
	'id'   => 'icon',
	// highlight-next-line
	'type' => 'icon', // Required.
]
```

After that, go to edit your post and you'll see the select box for search and pick an icon:

![Select an icon from Font Awesome Free](https://i0.wp.com/images.elightup.com/meta-box/docs/fields/icon/screenshot.png)

:::info

The `icon` field is inherited from the [`select_advanced`](/fields/select-advanced/) field, which makes it have the interface of the "select2" library.

:::

### Font Awesome Pro

To use Font Awesome Pro, you need to [download the "Pro For Web"](https://fontawesome.com/download) package, or [download your own kit](https://fontawesome.com/kits):

![Download Font Awesome Pro for web](https://i0.wp.com/images.elightup.com/meta-box/docs/fields/icon/download-font-awesome-pro.png)

Extract it and find the file `icons.json` under the `metadata` folder:

![Get the icons.json file](https://i0.wp.com/images.elightup.com/meta-box/docs/fields/icon/icons-json.png)

This file contains all the data for icons, including CSS classes and SVG codes. We need to use it to select and output icons.

Now copy it to your theme or your plugin, and then add a field with type `icon` and set the following parameters in the MB Builder UI:

- <u>Icon set</u>: select "Font Awesome Pro"
- <u>Icon file</u>: absolute or relative path from the WordPress root directory to the `icons.json` file

![Setup Font Awesome Pro in MB Builder](https://i0.wp.com/images.elightup.com/meta-box/docs/fields/icon/font-awesome-pro-in-builder.png)

If you use code, the field settings will look similar to this:

```php
[
	'name'      => 'Icon',
	'id'        => 'icon',
	'type'      => 'icon',
	// highlight-start
	'icon_set'  => 'font-awesome-pro',                         // MUST.
	'icon_file' => get_theme_file_path( 'assets/icons.json' ), // Path to icons.json file.
	// highlight-end
]
```

After that, go to edit your post and you'll see the select box for search and pick an icon.

### Custom icon library

To use a custom icon library, you'll need to decide whether you want to use an icon font or use SVGs. Meta Box supports both of them. Below is the pros and cons of both:

Icon font | SVGs
--- | ---
Using CSS | Using SVG
Add CSS & font to the front end, which can reduce page speed | No CSS & font, best for page speed
One CSS file for all icons, no need to prepare SVG for each icon | Need to prepare SVG for each icon

### Using icon font

To use an icon font, you need to prepare the **icon CSS** file, which is a CSS file to enqueue the icon font. In the MB Builder UI, you can enter an absolute URL or a relative URL to that file from the WordPress root directory or a CDN URL if the icon font has support for it (like Line Awesome, Boxicons).

By default, the plugin will try to parse the content of the icon CSS file and extract all CSS classes for you to choose from. However, if your CSS file contains more CSS classes which are not used for icons, or you want to select only some icons, you'll need to prepare the **icon file**, which is a JSON or text file to define the icons you want to use. In the MB Builder UI, enter the absolute or relative path from the WordPress root directory.

This is the field settings for this:

![Setup custom icon font in MB Builder](https://i0.wp.com/images.elightup.com/meta-box/docs/fields/icon/icon-font.png)

If you use code, the field settings will look similar to this:

```php
[
	'name'      => 'Icon',
	'id'        => 'icon',
	'type'      => 'icon',
	// highlight-start
	'icon_file' => 'path/to/icons-file',
	'icon_css'  => 'https://url/to/icon/style.css',
	// highlight-end
]
```

Some icon library uses JavaScript to load the icons. If you use such a library, you can set `icon_css` a callback function that enqueue the JavaScript file:

```php
[
	'name'      => 'Icon',
	'id'        => 'icon',
	'type'      => 'icon',
	'icon_file' => 'path/to/icons-file',
	// highlight-start
	'icon_css'  => function() {
		wp_enqueue_script( 'my_icon_script', 'https://path/to/icon/script.js', [], '', true );
	}
	// highlight-end
]
```

The `icon_file` defines a list of icons you want to use in your project. It's best if you don't want to use all icons from the icon font.

Here is a sample icon field using Boxicons:

```php
[
	'name'      => 'Icon',
	'id'        => 'icon',
	'type'      => 'icon',
	// highlight-start
	'icon_file' => get_theme_file_path( 'assets/icons.txt' ),               // Path to icons.txt in the theme.
	'icon_css'  => 'https://unpkg.com/boxicons@2.1.4/css/boxicons.min.css', // Boxicon CDN.
	// highlight-end
]
```

In the theme, create an `icons.txt` file under the folder `assets` with the following content:

```txt title="assets/icons.txt"
bx bx-heart
bx bx-bookmark-heart
bx bx-check-circle
```

When editing a post, you'll see Boxicons as follows:

![Get the icons.json file](https://i0.wp.com/images.elightup.com/meta-box/docs/fields/icon/boxicons.png)

If you want the icons to have nice labels, you need to create a JSON file to specify values and labels like this:

```json title="assets/icons.json"
{
	"bx bx-heart": "Heart",
	"bx bx-bookmark-heart": "Bookmark",
	"bx bx-check-circle": "Check"
}
```

Don't forget to update your field settings to point `icon_file` to the new `icons.json` file:

```php
[
	'name'       => 'Icon',
	'id'         => 'icon',
	'type'       => 'icon',
	// highlight-next-line
	'icon_file'  => get_theme_file_path( 'assets/icons.json' ),
	'icon_css' => 'https://unpkg.com/boxicons@2.1.4/css/boxicons.min.css',
]
```

When editing a post, you'll see Boxicons as follows:

![Icons with labels](https://i0.wp.com/images.elightup.com/meta-box/docs/fields/icon/boxicons-with-labels.png)


### Using SVGs

To use SVGs, you'll need to get SVGs for your icons first. There are a lot of icon libraries that support downloading SVGs for icons, such as [Boxicons](https://boxicons.com/) or [Tabler icons](https://tablericons.com/). You can pick a specific icon library to use, or use an app like [Iconbuddy](https://iconbuddy.app/) or [Icones](https://icones.netlify.app) to search across multiple libraries.

Depending on how you manage icons within your project, you can *download SVGs and put them in a specific directory*, or *copy the SVG codes*.

If you **download SVGs and put them in a specific directory**, then you need to define the field as follows:

![Setup custom icon directory in MB Builder](https://i0.wp.com/images.elightup.com/meta-box/docs/fields/icon/icon-dir.png)

Where "Icon dir" is the absolute or relative path to the icon directory from the WordPress root path.

If you use code to register the field, your field settings will look like this:

```php
[
	'name'      => 'Icon',
	'id'        => 'icon',
	'type'      => 'icon',
	// highlight-next-line
	'icon_dir'  => get_theme_file_path( 'assets/icons' ), // Path to the icon dir.
]
```

The plugin will get the **file names** and will show them as from the dropdown:

![Show SVG icons in a directory](https://i0.wp.com/images.elightup.com/meta-box/docs/fields/icon/svg-dir.png)

If you want to specify labels for icons, you'll need to create a JSON file as follows:

```json title="assets/icons.json"
{
	"hippo": "Hippo",
	"tractor": "Tractor",
	"truck-monster": "Truck Monster"
}
```

Where keys are the file names and values are the icon labels.

Then in the MB Builder UI, set the "Icon file" parameter the absolute or relative path to that file from the WordPress root directory:

![Show SVG icons in a directory with JSON file](https://i0.wp.com/images.elightup.com/meta-box/docs/fields/icon/icon-dir-with-json.png)

If you use code, the field settings look like this:

```php
[
	'name'      => 'Icon',
	'id'        => 'icon',
	'type'      => 'icon',
	// highlight-next-line
	'icon_file' => get_theme_file_path( 'assets/icons.json' ), // Path to the icon file.
	'icon_dir'  => get_theme_file_path( 'assets/icons' ),
]
```
Then you'll see the labels as follows:

![Show SVG icons with labels](https://i0.wp.com/images.elightup.com/meta-box/docs/fields/icon/svg-icons-with-labels.png)

If you **use the SVG codes**, then you only need to set the "Icon file" parameter. In this case, it **must be a JSON file that contains icon names, labels (optional), and SVG codes**.

This is a sample JSON file:

```json title="assets/icons.json"
{
	"heart": "<svg xmlns='http://www.w3.org/2000/svg' viewBox='0 0 24 24'><path d='M12 4.595a5.904 5.904 0 0 0-3.996-1.558 5.942 5.942 0 0 0-4.213 1.758c-2.353 2.363-2.352 6.059.002 8.412l7.332 7.332c.17.299.498.492.875.492a.99.99 0 0 0 .792-.409l7.415-7.415c2.354-2.354 2.354-6.049-.002-8.416a5.938 5.938 0 0 0-4.209-1.754A5.906 5.906 0 0 0 12 4.595zm6.791 1.61c1.563 1.571 1.564 4.025.002 5.588L12 18.586l-6.793-6.793c-1.562-1.563-1.561-4.017-.002-5.584.76-.756 1.754-1.172 2.799-1.172s2.035.416 2.789 1.17l.5.5a.999.999 0 0 0 1.414 0l.5-.5c1.512-1.509 4.074-1.505 5.584-.002z'></path></svg>",
	"bookmark": "<svg xmlns='http://www.w3.org/2000/svg' viewBox='0 0 24 24'><path d='M18 2H6c-1.103 0-2 .897-2 2v18l8-4.572L20 22V4c0-1.103-.897-2-2-2zm0 16.553-6-3.428-6 3.428V4h12v14.553z'></path></svg>",
	"check": "<svg xmlns='http://www.w3.org/2000/svg' viewBox='0 0 24 24'><path d='M12 2C6.486 2 2 6.486 2 12s4.486 10 10 10 10-4.486 10-10S17.514 2 12 2zm0 18c-4.411 0-8-3.589-8-8s3.589-8 8-8 8 3.589 8 8-3.589 8-8 8z'></path><path d='M9.999 13.587 7.7 11.292l-1.412 1.416 3.713 3.705 6.706-6.706-1.414-1.414z'></path></svg>"
}
```

If you want to set the icon labels, use the following format:

```json title="assets/icons.json"
{
	"heart": {
		"label": "Heart",
		"svg": "<svg xmlns='http://www.w3.org/2000/svg' viewBox='0 0 24 24'><path d='M12 4.595a5.904 5.904 0 0 0-3.996-1.558 5.942 5.942 0 0 0-4.213 1.758c-2.353 2.363-2.352 6.059.002 8.412l7.332 7.332c.17.299.498.492.875.492a.99.99 0 0 0 .792-.409l7.415-7.415c2.354-2.354 2.354-6.049-.002-8.416a5.938 5.938 0 0 0-4.209-1.754A5.906 5.906 0 0 0 12 4.595zm6.791 1.61c1.563 1.571 1.564 4.025.002 5.588L12 18.586l-6.793-6.793c-1.562-1.563-1.561-4.017-.002-5.584.76-.756 1.754-1.172 2.799-1.172s2.035.416 2.789 1.17l.5.5a.999.999 0 0 0 1.414 0l.5-.5c1.512-1.509 4.074-1.505 5.584-.002z'></path></svg>"
	},
	"bookmark": {
		"label": "Bookmark",
		"svg": "<svg xmlns='http://www.w3.org/2000/svg' viewBox='0 0 24 24'><path d='M18 2H6c-1.103 0-2 .897-2 2v18l8-4.572L20 22V4c0-1.103-.897-2-2-2zm0 16.553-6-3.428-6 3.428V4h12v14.553z'></path></svg>"
	},
	"check": {
		"label": "Check",
		"svg": "<svg xmlns='http://www.w3.org/2000/svg' viewBox='0 0 24 24'><path d='M12 2C6.486 2 2 6.486 2 12s4.486 10 10 10 10-4.486 10-10S17.514 2 12 2zm0 18c-4.411 0-8-3.589-8-8s3.589-8 8-8 8 3.589 8 8-3.589 8-8 8z'></path><path d='M9.999 13.587 7.7 11.292l-1.412 1.416 3.713 3.705 6.706-6.706-1.414-1.414z'></path></svg>"
	}
}
```

When you edit a post, you'll see this field like this:

![SVG icons](https://i0.wp.com/images.elightup.com/meta-box/docs/fields/icon/svg-icons.png)

## Settings

Let's see a brief description of them before going into the steps of using a custom icon library:

Name | Key | Description
--- | --- | ---
Icon set | `icon_set` | The name of your icon set.
Icon file | `icon_file` | The full path to the icon file definition, which can be a text or JSON file.
Icon CSS | `icon_css` | URL to the icon CSS file. It's required only when you use icons as an icon font (e.g. no SVG).
Icon dir | `icon_dir` | Full path to the folder that contains all SVGs of icons.

## Data

This field saves the icon name (e.g. **CSS class** if you use an icon font) into the database.

If the field is cloneable, the value is stored as a serialized array in a single row in the database.

## Template usage

### Output format

If you use an **icon font**, Meta Box will automatically enqueue the CSS file of the icon font (which you define in the `icon_css` parameter). The plugin will output an icon font in the format of:

```html
<span class="my-icon-class"></span>
```

In other cases where you use Font Awesome Free/Pro or your own icon library with SVG available, the plugin will output the SVG directly.

### Examples

**Getting the selected icon name (CSS class):**

```php
<?php $icon = rwmb_meta( 'my_field_id' ); ?>
<p>Selected: <?= $value ?></p>
```

**Displaying the selected icon (as an icon font or SVG):**

```php
<?php rwmb_the_value( 'my_field_id' ) ?>
```

# Image Advanced

import Image from '../_parts/_image.md';
import Screenshots from '@site/src/components/Screenshots';

The image advanced field uses the WordPress media popup for selecting / uploading images. You can also reorder images if you want.

## Screenshots

<Screenshots
    name="image-advanced"
    col1={[
        ['https://imgur.elightup.com/tzksNdI.png', 'The image advanced field interface'],
    ]}
/>

## Settings

Besides the [common settings](/field-settings/), this field has the following specific settings, the keys are for use with code:

Name | Key | Description
--- | --- | ---
Max number of files | `max_file_uploads` | Max number of uploaded files. Optional.
Force delete | `force_delete` | Whether or not delete the files from Media Library when deleting them from post meta. `true` or `false` (default). Optional. Note: it might affect other posts if you use the same file for multiple posts.
Show status | `max_status` | Display how many files uploaded/remaining. Applied only when "Max number of files" is defined. `true` (default) or `false`. Optional.
Image size | `image_size` | Image size displays in the edit page. Optional. Default "thumbnail". Image size is used to make sure images are not blurry. It’s not meant to display images with the exact width and height. Images are always displayed as a square.
New image placement | `add_to` | Whether to add new images to the beginning or the end of the list. `beginning` or `end`. Default `end`. Optional.

This is a sample field settings array when creating this field with code:

```php
[
    'id'               => 'image',
    'name'             => 'Image Advanced',
    'type'             => 'image_advanced',
    'force_delete'     => false,
    'max_file_uploads' => 2,
    'max_status'       => false,
    'image_size'       => 'thumbnail',
],
```

## Data

This field saves multiple attachment IDs in the database. Each value (attachment ID) is stored in a single row in the database with the same meta key (similar to what `add_post_meta` does with the last parameter `false`).

## Template usage

<Image />

## Filters

This field inherits from file advanced and thus, uses the [same filters](/fields/file-advanced/) to change the texts displayed on the screen.

Filter|Default|Description
---|---|---
`rwmb_media_add_string`|+ Add Media|Add new image string
`rwmb_media_single_images_string`|image|Singular "image" string
`rwmb_media_multiple_images_string`|images|Plural "images" string
`rwmb_media_remove_string`|Remove|Image remove string
`rwmb_media_edit_string`|Edit|Image edit string
`rwmb_media_view_string`|View|Image view string

The code below changes the "+ Add Media" string:

```php
add_filter( 'rwmb_media_add_string', 'prefix_change_add_string' );
function prefix_change_add_string() {
    return '+ New Image';
}
```

## Tutorials

[How to display uploaded images as a WordPress image gallery?](https://metabox.io/display-uploaded-images-as-wordpress-image-gallery/)

# Image Select

import Screenshots from '@site/src/components/Screenshots';

The image select field allows you to select a choice visually with images. It works similar to the radio/checkbox field but uses images for a more user-friendly interface.

:::

## Screenshots

<Screenshots name="image-select" col1={[
    ['https://imgur.elightup.com/avEo6jC.png', 'The image select field interface']
]} />

## Settings

Besides the [common settings](/field-settings/), this field has the following specific settings, the keys are for use with code:

Name | Key | Description
--- | --- | ---
Choices | `options` | List of choices, each per line. Use the format "value: Image URL" for each choice.<br />When using with code, this setting is an array of `'value' => 'Image URL'`.
Multiple | `multiple` | Whether enable multiple selection? `true` or `false` (default).

This is a sample field settings array when creating this field with code:

```php
[
    'id'       => 'image_select',
    'name'     => 'Layout',
    'type'     => 'image_select',
    'options'  => [
        'left'  => 'http://placehold.it/90x90&text=Left',
        'right' => 'http://placehold.it/90x90&text=Right',
        'none'  => 'http://placehold.it/90x90&text=None',
    ],
],
```
## Data

If "Multiple" is not set, this field saves the selected value in the database.

If "Multiple" is set, this field saves multiple values in the database. Each value is stored in a single row in the database with the same key (similar to what `add_post_meta` does with the last parameter `false`).

If the field is cloneable, the value is stored as a serialized array in a single row in the database.

:::warning

Note that this field stores the **values**, not image URLs.

:::

## Template usage

**Displaying the selected value:**

```php
<?php $value = rwmb_meta( 'my_field_id' ); ?>
<p>Selected: <?= $value ?></p>
```

**Displaying the list of multiple choices:**

```php
<?php $values = rwmb_meta( 'my_field_id' ); ?>
<ul>
    <?php foreach ( $values as $value ) : ?>
        <li><?= $value ?></li>
    <?php endforeach ?>
</ul>
```

**Displaying cloneable values:**

```php
<?php $values = rwmb_meta( 'my_field_id' ); ?>
<ul>
    <?php foreach ( $values as $value ) : ?>
        <li><?= $value ?></li>
    <?php endforeach ?>
</ul>
```

# Image Upload

import Image from '../_parts/_image.md';
import Screenshots from '@site/src/components/Screenshots';

The image upload field displays an inline upload area that you can drag and drop or select images to upload.

## Screenshots

<Screenshots
    name="image-upload"
    col1={[
        ['https://imgur.elightup.com/Ev4iwoQ.png', 'The image upload field interface'],
    ]}
/>

## Settings

Besides the [common settings](/field-settings/), this field has the following specific settings, the keys are for use with code:

Name | Key | Description
--- | --- | ---
Max number of files | `max_file_uploads` | Max number of uploaded files. Optional.
Force delete | `force_delete` | Whether or not delete the files from Media Library when deleting them from post meta. `true` or `false` (default). Optional. Note: it might affect other posts if you use the same file for multiple posts.
Show status | `max_status` | Display how many files uploaded/remaining. Applied only when "Max number of files" is defined. `true` (default) or `false`. Optional.
Image size | `image_size` | Image size displays in the edit page. Optional. Default "thumbnail". Image size is used to make sure images are not blurry. It’s not meant to display images with the exact width and height. Images are always displayed as a square.
New image placement | `add_to` | Whether to add new images to the beginning or the end of the list. `beginning` or `end`. Default `end`. Optional.
Max file size | `max_file_size` | Maximum file size that the user can upload, in bytes. Optionally supports b, kb, mb, gb, tb suffixes. e.g. "10mb" or "1gb".

This is a sample field settings array when creating this field with code:

```php
[
    'id'               => 'image',
    'name'             => 'Image upload',
    'type'             => 'image_upload',
    'force_delete'     => false,
    'max_file_uploads' => 2,
    'max_status'       => false,
    'image_size'       => 'medium',
],
```

## Data

This field saves multiple attachment IDs in the database. Each value (attachment ID) is stored in a single row in the database with the same meta key (similar to what `add_post_meta` does with the last parameter `false`).

## Template usage

<Image />

## Filters

This field inherits from file advanced and thus, uses the [same filters](/fields/file-advanced/) to change the texts displaying on the screen.

Filter|Default|Description
---|---|---
`rwmb_media_add_string`|+ Add Media|Add new image string
`rwmb_media_single_images_string`|image|Singular "image" string
`rwmb_media_multiple_images_string`|images|Plural "images" string
`rwmb_media_remove_string`|Remove|Image remove string
`rwmb_media_edit_string`|Edit|Image edit string
`rwmb_media_view_string`|View|Image view string

The code below changes the "+ Add Media" string:

```php
add_filter( 'rwmb_media_add_string', 'prefix_change_add_string' );
function prefix_change_add_string() {
    return '+ New Image';
}
```

## Tutorials

[How to display uploaded images as a WordPress image gallery?](https://metabox.io/display-uploaded-images-as-wordpress-image-gallery/)

# Image

import Image from '../_parts/_image.md';
import Screenshots from '@site/src/components/Screenshots';
import CustomUploadFolder from '../_parts/_custom-upload-folder.md';

The image field creates a simple image upload with default UI like `<input type="file">`. Unlike other media fields, this field doesn't use Media Library UI to upload images.

This field is very similar to [file](/fields/file/). The only difference is that the file field allows uploading all file types while this field allows only images.

## Screenshots

<Screenshots
    name="image"
    col1={[
        ['https://imgur.elightup.com/8GFxWKP.png', 'The image field interface'],
    ]}
/>

## Settings

Besides the [common settings](/field-settings/), this field has the following specific settings, the keys are for use with code:

Name | Key | Description
--- | --- | ---
Max number of files | `max_file_uploads` | Max number of uploaded files. Optional.
Force delete | `force_delete` | Whether or not delete the files from Media Library when deleting them from post meta. `true` or `false` (default). Optional. Note: it might affect other posts if you use the same file for multiple posts.
Custom upload folder | `upload_dir` | Full path to a custom upload folder.
Unique filename callback | `unique_filename_callback` | Custom callback to set the uploaded file name. Works only when uploading to a custom folder.

This is a sample field settings array when creating this field with code:

```php
[
    'name'         => 'Image Upload',
    'id'           => 'field_id',
    'type'         => 'image',
    'force_delete' => false,
],
```

## Data

This field saves multiple attachment IDs in the database. Each value (attachment ID) is stored in a single row in the database with the same meta key (similar to what `add_post_meta` does with the last parameter `false`).

## Custom upload folder

<CustomUploadFolder />

## Template usage

<Image />

## Filters

This field has some filters to change the texts displayed on the screen.

Filter|Default|Description
---|---|---
`rwmb_file_upload_string`|Upload Files|File upload string
`rwmb_file_add_string`|+ Add new file|Add new file string
`rwmb_file_delete_string`|Delete|File delete string
`rwmb_file_edit_string`|Edit|File edit string

All filters above accept 2 parameters:

- `$string`: the string needs to be changed
- `$field`: array of the field settings

The code below changes the "+ Add new file" string:

```php
add_filter( 'rwmb_file_add_string', function () {
    return '+ New File';
} );
```

## Tutorials

[How to display uploaded images as a WordPress image gallery?](https://metabox.io/display-uploaded-images-as-wordpress-image-gallery/)

# Key Value

import Screenshots from '@site/src/components/Screenshots';

The key-value field allows you to enter an unlimited group of "key-value" pairs. It's usually used for a list of items, such as a product specification.

## Screenshots

<Screenshots name="key-value" col1={[
    ['https://imgur.elightup.com/yA7rRDR.png', 'The key value field interface']
]} />

## Settings

Besides the [common settings](/field-settings/), this field has the following specific settings, the keys are for use with code:

Name | Key | Description
--- | --- | ---
Placeholder | `placeholder` | Array of placeholder texts for key and value inputs. Format `['key' => 'Key placeholder', 'value' => 'Value placeholder']`. Optional.

This is a sample field settings array when creating this field with code:

```php
[
    'id'   => 'key_value',
    'name' => 'Key Value',
    'type' => 'key_value',
    'desc' => 'Add more additional info below:',
],
```

## Data

This field saves a serialized array of data of pairs in a single row in the database.

## Template usage

**Displaying list of key-value pairs:**

```php
<?php $pairs = rwmb_meta( 'my_field_id' ) ?>
<h3>Specification</h3>
<ul>
    <?php foreach ( $pairs as $pair ) : ?>
        <li><label><?= $pair[0] ?>:</label> <?= $pair[1] ?></li>
    <?php endforeach ?>
</ul>
```

or simpler:

```php
<h3>Specification</h3>
<?php rwmb_the_value( 'my_field_id' ) ?>
```

# Link

import Screenshots from '@site/src/components/Screenshots';

The link field allows you to insert or edit a link, which includes a URL, optional title text, an option to open the link in a new tab. You can also select an existing content (post, page, etc.).

## Screenshots

<Screenshots name="link" col1={[
    ['/screenshots/link.png', 'The link field interface']
]} />

## Settings

This field has no additional settings besides the [common settings](https://docs.metabox.io/field-settings/).

This is a sample field settings array when creating this field with code:

```
[
    'name' => 'Social Links',
    'id'   => 'social_links',
    // highlight-next-line
    'type' => 'link',
],
```

## Data

This field saves the value as a serialized array in the database with the following keys:

* `url`: The URL of the link.
* `title`: The link title text.
* `target`: The link target (empty or `_blank`).
* `post_id`: The selected post ID (optional). This is useful when you want to get more details of a selected post.

Example:

```
[
    'url'    => 'https://metabox.io',
    'title'  => 'Meta Box',
    'target' => '_blank',
]
```

If the field is cloneable, then the value is stored as a serialized array in a single row in the database.

## Template usage

**Displaying the link in an `<a>` tag:**

```php
<p>Entered: <?php rwmb_the_value( 'my_field_id' ) ?></p>
```

**Displaying cloneable values:**

```php
<?php $values = rwmb_meta( 'my_field_id' ) ?>
<?php foreach ( $values as $value ) : ?>
    <a href="<?= $value['url'] ?>" target="<?= $value['target'] ?>"><?= $value['title'] ?></a>
<?php endforeach ?>
```

# Google Maps

import Screenshots from '@site/src/components/Screenshots';

The **Google Maps field** lets you select and save a location directly on a map. It works together with an **address text field**, which supports **autocomplete** powered by the Google Maps Geocoding service.

You can set a location in two ways:
- Type an address into the text field (autocomplete helps you quickly find the place).
- Click on the map or drag the marker to a new spot. The field will then save the coordinates automatically.

## Screenshots

<Screenshots name="map" col1={[
    ['https://imgur.elightup.com/zyKqRTD.png', 'The Google Maps field interface']
]} />

## Settings

In addition to the [common field settings](/field-settings/), this field has the following options:

Name | Key | Description
--- | --- | ---
Google Maps API key | `api_key` | Your Google Maps API key. [Get one here](https://developers.google.com/maps/documentation/javascript/get-api-key). **Required.**
Default location | `std` | The map's default location when it first loads. Format: `'53.346881,-6.258860'` (latitude, longitude). If not set, the map defaults to Dublin, Ireland.
Address field | `address_field` | The ID of the address field. For multiple fields, separate IDs with commas. **Required.**
Language | `language` | Set the map language. See the [full list of language codes](https://developers.google.com/maps/faq#languagesupport).
Region | `region` | A [country code top-level domain](https://en.wikipedia.org/wiki/Country_code_top-level_domain). This helps autocomplete suggest results based on a specific region. [Learn more](https://developers.google.com/maps/documentation/geocoding/intro#RegionCodes).
Marker draggable | `marker_draggable` | Determines whether the marker can be dragged. Boolean, default is `true`. When set to `false`, the marker cannot be moved on the map — the location can only be set by searching for an address (Google will place the marker automatically).

:::warning Address field required
You must create a [text field](/fields/text/) for the address input, and pass its ID to the map's **Address field** setting.
:::

The `address_field` can also be a list of multiple field IDs, separated by commas (e.g. `street,city,state`). In this case:

- You can use both text and select fields.
- Autocomplete will not work. Instead, the plugin combines the values from those fields to search for the location and updates the map whenever any field changes.

:::warning
Don't forget to enable the **Geocoding API** in your Google Cloud project - it's required for the autocomplete feature!
:::

Example field setup in code:

```php
// Address field
[
    'id'   => 'my_address',
    'name' => 'Address',
    'type' => 'text',
],
// Map field
[
    'id'            => 'map',
    'name'          => 'Location',
    'type'          => 'map',
    'std'           => '-6.233406,-35.049906,15',
    'address_field' => 'my_address',
    'api_key'       => 'XXXXXXXXX',
],
```

## Data

The field saves the location as:

```
latitude,longitude,zoom
```

Example: `53.346881,-6.258860,14`

## Template usage

### Displaying a map

To show the map on the frontend, use [`rwmb_the_value()`](/functions/rwmb-the-value/) with extra parameters:

```php
<h2>Google Maps</h2>
<?php
$args = [
    'width'        => '640px',
    'height'       => '480px',
    'zoom'         => 14,
    'marker'       => true,
    'marker_icon'  => 'https://url_to_icon.png',
    'marker_title' => 'Click me',
    'info_window'  => '<h3>Title</h3><p>Content</p>.',
];
rwmb_the_value( 'my_field_id', $args );
?>
```

Available parameters:

Name | Description
---|---
`width` | Map width. Default: `640px`. Accepts `%` or `px`.
`height` | Map height. Default: `480px`. Accepts `%` or `px`.
`zoom` | Map zoom level. Default: value set in the admin, or `14` if not set.
`marker` | Show marker? `true` (default) or `false`.
`marker_icon` | URL to a custom marker icon. Optional.
`marker_title` | Marker tooltip (shows on hover).
`info_window` | Content shown when clicking the marker. HTML allowed. Avoid quotes inside to prevent JavaScript issues.
`js_options` | Pass custom JavaScript options. [Reference](https://developers.google.com/maps/documentation/javascript/reference#MapOptions).

The code below shows how to use `js_options` for advanced control how the map is displayed:

```php
$args = [
    'width'      => '640px',
    'height'     => '480px',
    'js_options' => [
        'mapTypeId'   => 'HYBRID',
        'zoomControl' => false,
    ],
];
rwmb_the_value( 'my_field_id', $args );
```

### Getting the raw field value

If you don't need to render the map but just want the coordinates:

```php
$location = rwmb_get_value( $field_id );
echo $location['latitude'];
echo $location['longitude'];
echo $location['zoom'];
```

See more about [`rwmb_get_value()`](/functions/rwmb-get-value/).

### Displaying a map inside a group

If the map is part of a group field, the helper functions above won't work. Instead, use the built-in `RWMB_Map_Field::render_map()` helper:

```php
$args = [
    'width'      => '640px',
    'height'     => '480px',
    'js_options' => [
        'mapTypeId'   => 'HYBRID',
        'zoomControl' => false,
    ],
];
$group_values = rwmb_meta( 'group_id' );
$args = [
    'api_key' => 'your-API-key'
];
// If the group is cloneable
foreach ( $group_values as $group_value ) {
    echo RWMB_Map_Field::render_map( $group_value['map_id'], $args );
}
```

The helper function accepts:

Name | Description
--- | ---
`$location` | Map location in the format `latitude,longitude[,zoom]` (zoom is optional). Same as the map field value.
`$args` | Additional display options. Same as in `rwmb_the_value()`.

## Filters

### `rwmb_google_maps_url`

This filter lets you modify the Google Maps script URL - for example, to add extra libraries.
It receives the script URL as a parameter and should return the modified URL.

For example, the code below adds "geometry" library to the Google Maps script:

```php
add_filter( 'rwmb_google_maps_url', function ( $url ) {
    return add_query_arg( 'libraries', 'geometry', $url );
} );
```

# Number

import Screenshots from '@site/src/components/Screenshots';

The number field creates a simple HTML5 number input. You can enter a number or use the up/down arrow to change the number. It works with both integers and float numbers.

## Screenshots

<Screenshots name="number" col1={[
    ['https://imgur.elightup.com/ioHgKyI.png', 'The number field interface']
]} />

## Settings

This meta number field inherits all settings from the [text field](/fields/text/). Besides, it has the following specific settings, the keys are for use with code:

Name | Key | Description
--- | --- | ---
Step | `step` | The increments for the value. Accepts an integer, a float number, or the string `any` (if you want to enter any value). Default is `1`. Optional.
Min value | `min` | Minimum value. Optional.
Max value | `max` | Maximum value. Optional.

This is a sample field settings array when creating this field with code:

```php
[
    'name' => 'Number',
    'id'   => 'number',
    'type' => 'number',
    'min'  => 0,
    'step' => 0.5,
],
```

## Data

This meta number field saves the entered value into the database.

If the field is cloneable, then the value is stored as a serialized array in a single row in the database.

## Template usage

**Displaying the value:**

```php
<p>Entered: <?php rwmb_the_value( 'my_field_id' ) ?></p>
```

**Getting the value:**

```php
<?php $value = rwmb_meta( 'my_field_id' ) ?>
<p>Entered: <?= $value ?></p>
```

**Formatting the value:**

```php
<?php $value = rwmb_meta( 'my_field_id' ) ?>
<p>Entered: <?= number_format( $value ) ?></p>
```

**Displaying cloneable values:**

```php
<?php $values = rwmb_meta( 'my_field_id' ) ?>
<?php foreach ( $values as $value ) : ?>
    <p><?= $value ?></p>
<?php endforeach ?>
```

# oEmbed

import Screenshots from '@site/src/components/Screenshots';

The oEmbed field creates a simple text input for entering a media URL. This field offers a live preview of the media content such as videos, audios, images, tweets, polls, podcasts, etc. from [many 3rd-party services](https://codex.wordpress.org/Embeds).

It helps to show the live preview below the field when input data, and also display the media’s preview on frontend much easier in most cases.

## Screenshots

<Screenshots name="oEmbed" col1={[
    ['https://imgur.elightup.com/TjOrOMM.png', 'The oEmbed field interface']
]} />

This is an easy way to add videos from [Youtube](http://www.youtube.com/), [Vimeo](http://vimeo.com/), or [Tiktok](https://www.tiktok.com/en), musics from [Spotify](http://www.spotify.com/) or [SoundCloud](http://soundcloud.com/), presentation slideshows from [SlideShare](http://www.slideshare.net/), and so much other content from third-party services into your WordPress site.

## Settings

Besides the [common settings](/field-settings/), this field has the following specific settings, the keys are for use with code:

Name | Key | Description
--- | --- | ---
Size of the input box | `size` | Size of the input box. Without this setting, the input box is full-width
Not available text | `not_available_string` | The text message is displayed to users when the embed media is not available. Accepts HTML.

This is a sample field settings array when creating this field with code:

```php
[
    'id'    => 'oembed',
    'name'  => 'oEmbed(s)',
    'type'  => 'oembed',
],
```

## Data

This field **saves the URL** of the media (video, music, slideshow, podcast, etc.) to the database.

## Template usage

**Displaying the embedded media**:

```php
<h3>Youtube video</h3>
<?php rwmb_the_value( 'my_field_id' ) ?>
```

**Getting the URL:**

```php
$url = rwmb_get_value( 'my_field_id' );
echo $url;
```

## Filters

To change the message for all oEmbed field when no embed is available, use the filter `rwmb_oembed_not_available_string`, which accepts 2 parameters: message and URL.

```php
add_filter( 'rwmb_oembed_not_available_string', function( $message, $url ) {
    $message = 'Sorry, what you are looking here is not available.';
    return $message;
}, 10, 2 );
```

You also can hide the message with CSS on the front end by putting this code into your theme or in *Customize > Additional CSS*:

```css
.rwmb-oembed-not-available {
    display: none;
}
```

# Open Street Map

import Screenshots from '@site/src/components/Screenshots';

The **Open Street Map (OSM) field** lets you select and save a location using [OpenStreetMap](https://openstreetmap.org).

It's very similar to the [Google Maps field](/fields/map/), but it provides a free alternative since [Google now requires billing details](https://metabox.io/meta-box-weekly-updates-july-2018/) (such as a credit card) to use their maps.

This field includes all the features of the Google Maps field. It comes with an address text field that supports **autocomplete**, powered by the [Nominatim](https://wiki.openstreetmap.org/wiki/Nominatim) geocoding service.

You can choose a location in two ways:
- Type in an address and select from the autocomplete suggestions.
- Click directly on the map or drag the marker - the field will automatically save the new coordinates.

The map itself is rendered using the [Leaflet](https://leafletjs.com) library.

## Screenshots

<Screenshots name="osm" col1={[
    ['https://imgur.elightup.com/jJXmxrw.png', 'The Open Street Map field interface']
]} />

## Settings

In addition to the [common field settings](/field-settings/), this field has the following options:

Name | Key | Description
--- | --- | ---
Default location | `std` | The map's default location when it loads. Format: `'53.346881,-6.258860'` (latitude, longitude). If not set, the map will default to Dublin, Ireland.
Address field | `address_field` | The ID of the address field. For multiple fields, separate IDs with commas. **Required.**
Language | `language` | Set the language for more accurate autocomplete results. See the [list of language codes](https://www.w3.org/Protocols/rfc2616/rfc2616-sec14.html). Optional.
Region | `region` | Restrict search results to one or more countries. Accepts [ISO 3166-1 alpha-2 codes](https://en.wikipedia.org/wiki/ISO_3166-1_alpha-2). Optional.
Marker draggable | `marker_draggable` | Determines whether the marker can be moved. Boolean, default is `true`. When set to `false`, the marker cannot be dragged - the location can only be set by searching for an address.

:::warning Address field required
You must create a [text field](/fields/text/) for the address input, and pass its ID to the map's **Address field** setting.
:::

The `address_field` can also be a list of multiple field IDs, separated by commas (e.g. `street,city,state`).
In this case:
- You can use both text and select fields.
- Autocomplete will not work. Instead, the plugin will combine the values of these fields, search for the full address, and update the map whenever any of those fields changes.

Example field setup in code:

```php
// Address field
[
    'id'   => 'my_address',
    'name' => 'Address',
    'type' => 'text',
],
// Map field
[
    'id'            => 'map',
    'name'          => 'Location',
    'type'          => 'osm',
    'std'           => '-6.233406,-35.049906,15',
    'address_field' => 'my_address',
],
```

## Data

The field saves the location as:

```
latitude,longitude,zoom
```

Example: `53.346881,-6.258860,14`

## Template usage

### Displaying the map

To show the map on the frontend, use [`rwmb_the_value()`](/functions/rwmb-the-value/) with extra parameters:

```php
<h2>Maps</h2>
<?php
$args = [
    'width'        => '640px',
    'height'       => '480px',
    'zoom'         => 14,
    'marker'       => true,
    'marker_icon'  => 'https://url_to_icon.png',
    'marker_title' => 'Click me',
    'info_window'  => '<h3>Title</h3><p>Content</p>.',
];
rwmb_the_value( 'my_field_id', $args );
?>
```

Available parameters:

Name | Description
---|---
`width` | Map width. Default: `640px`. Accepts `%` or `px`.
`height` | Map height. Default: `480px`. Accepts `%` or `px`.
`zoom` | Map zoom level. Default: value set in the admin, or `14` if not set.
`marker` | Show marker? `true` (default) or `false`.
`marker_icon` | URL to a custom marker icon. Optional.
`marker_title` | Marker tooltip (shown on hover).
`info_window` | Content shown when clicking the marker. HTML allowed. Avoid using quotes inside to prevent JavaScript issues.
`js_options` | Pass additional map options directly to the Leaflet library. See the [Leaflet map options](https://leafletjs.com/reference-1.3.2.html#map-option).

The code below shows how to use `js_options` for advanced control how the map is displayed:

```php
$args = [
    'width'      => '640px',
    'height'     => '480px',
    'js_options' => [
        'doubleClickZoom' => false,
    ],
];
rwmb_the_value( 'my_field_id', $args );
```

### Getting the raw field value

If you don't need to render the map but just want the coordinates:

```php
$location = rwmb_get_value( $field_id );
echo $location['latitude'];
echo $location['longitude'];
echo $location['zoom'];
```

See more about [`rwmb_get_value()`](/functions/rwmb-get-value/).

### Displaying a map inside a group

If the map is part of a group field, the helper functions above won't work. Instead, use the built-in `RWMB_OSM_Field::render_map()` helper:

```php
$args = [
    'width'  => '640px',
    'height' => '480px',
];
$group_values = rwmb_meta( 'group_id' );
// If the group is cloneable
foreach ( $group_values as $group_value ) {
    echo RWMB_OSM_Field::render_map( $group_value['map_id'], $args );
}
```

The helper function accepts:

Name | Description
--- | ---
`$location` | Map location in the format `latitude,longitude[,zoom]` (zoom is optional). Same as the map field value.
`$args` | Additional display options. Same as in `rwmb_the_value()`.

# Password

import Screenshots from '@site/src/components/Screenshots';

The password field creates a simple password input. The password is encrypted by [wp_hash_password()](https://developer.wordpress.org/reference/functions/wp_hash_password/) before saving it into the database to make sure it's safe.

## Screenshots

<Screenshots name="password" col1={[
    ['https://imgur.elightup.com/xozZVMx.png', 'The password field interface']
]} />

## Settings

Besides the [common settings](/field-settings/), this field has the following specific settings, the keys are for use with code:

Name | Key | Description
--- | --- | ---
Size of the input box | `size` | Size of the input box. Without this setting, the input box is full-width.

This is a sample field settings array when creating this field with code:

```php
[
    'name' => 'Password',
    'id'   => 'password',
    'type' => 'password',
],
```

## Data

This field saves the encrypted password in the database for better security. The password is encrypted by [wp_hash_password()](https://developer.wordpress.org/reference/functions/wp_hash_password/) function.

## Template usage

As the password is encrypted in the database, you **cannot** get the original password via code. There's no reversing function that can turn a password hash into the original one. Otherwise, it will be insecure.

Instead of trying to get the original password, you should check the saved password is correct, like this:

```php
<?php
$value = rwmb_meta( 'my_field_id' );
if ( wp_check_password( 'password to check', $value ) ) {
    echo 'Password is correct';
}
```

# Post

import LiteYouTubeEmbed from 'react-lite-youtube-embed';
import 'react-lite-youtube-embed/dist/LiteYouTubeEmbed.css';
import Screenshots from '@site/src/components/Screenshots';

The post field allows you to select one or multiple post (or any custom post type) objects. This field has several settings that can be displayed as a: simple select dropdown, checkbox list, or beautiful select dropdown with select2 library.

If the post type is hierarchical, you can display the field as a select or checkbox tree, e.g. showing children posts when a parent post is selected.

## Screenshots

<Screenshots
    name="post"
    col1={[
        ['https://imgur.elightup.com/jV4d0TW.png', 'The post field default interface'],
        ['https://imgur.elightup.com/kWVBpgr.png', 'The post field with checkbox list interface'],
        ['https://imgur.elightup.com/Vq8VNuD.png', 'The post field with radio list interface'],
    ]}
/>

## Settings

Besides the [common settings](/field-settings/), this field has the following specific settings, the keys are for use with code:

Name | Key | Description
--- | --- | ---
Post types | `post_type` | Post types to query. Can be a string (for a single post type) or array (for multiple post types). Required.
Query args | `query_args` | Query arguments for getting post objects. Uses the same arguments as [WP_Query](https://developer.wordpress.org/reference/classes/wp_query/#parameters). Optional.
Set as parent | `parent` | Whether or not to set the selected post as the parent for the current being edited post? `true` or `false` (default).
Placeholder | `placeholder` | The placeholder for the select box. Default is "Select a `{post label}`". Applied only when the field type is a select field.
Field type | `field_type` | How the posts are displayed? See below.

This field inherits the look and field (and settings) from other fields, depending on the field type, which accepts the following value:

Field type | Description | Settings inherited from
--- | --- | ---
`select` | Simple select dropdown. | [Select](/fields/select/)
`select_advanced` | Beautiful select dropdown using the select2 library. This is the default value. | [Select advanced](/fields/select-advanced/)
`select_tree` | Hierarchical list of select boxes that allows to select multiple items (select/deselect parent item will show/hide child items). Applied only when the post type is hierarchical (like pages). | [Select](/fields/select/)
`checkbox_list` | Flatten list of checkboxes that allows to select multiple items. | [Checkbox list](/fields/checkbox-list/)
`checkbox_tree` | Hierarchical list of checkboxes that allows to select multiple items (select/deselect parent item will show/hide child items). Applied only when the post type is hierarchical (like pages). | [Checkbox list](/fields/checkbox-list/)
`radio_list` | Flatten list of radio boxes that allows to select only 1 item. | [Radio](/fields/radio/)

This is a sample field settings array when creating this field with code:

```php
[
    'name'        => 'Select a page',
    'id'          => 'page',
    'type'        => 'post',
    'post_type'   => 'page',
    'field_type'  => 'select_advanced',
    'placeholder' => 'Select a page',
    'query_args'  => [
        'post_status'    => 'publish',
        'posts_per_page' => - 1,
    ],
],
```

:::info

The default value of `query_args` is `['post_status' => 'publish']`. If you want to query posts with another status (`draft`, `pending`, etc.) or query attachments (which have the status `inherit`), then change the `post_status` to the corresponding value, or to `any`.

:::

## Ajax load

Meta Box uses Ajax to increase the performance of the field query. Instead of fetching all posts at once, the plugin now fetches only some posts when the page is loaded, and then it fetches more posts when users scroll down to the list.

See this video for a demonstration (the UI of the MB Builder was from the old version, the new version of MB Builder has a better UI):

<LiteYouTubeEmbed id='2acm5gW59Mc' />

:::info

This feature is available only for fields that set the field type to **select advanced**. There are some extra parameters for you to disable or customize.

:::

### Enable/Disable ajax requests

This feature is enabled by default when you set the field type to "select advanced".

If you're using code to create this field, the settings to enable/disable it is `ajax`, which accepts a boolean value (and it's `true` by default):

```php
[
    'id'        => 'project',
    'title'     => 'Project',
    'type'      => 'post',
    'post_type' => 'project',
    // highlight-next-line
    'ajax'      => true,
],
```

Setting this parameter to `false` will disable ajax requests.

### Limit the number of posts for pagination

The number of posts for pagination is set via the `posts_per_page` parameter in the "Query args" setting:

```php
[
    'id'         => 'project',
    'title'      => 'Project',
    'type'       => 'post',
    'post_type'  => 'project',
    'ajax'       => true,
    'query_args' => [
        // highlight-next-line
        'posts_per_page' => 10,
    ],
],
```

When fetching new posts, the new posts will be appended to the list of options in the dropdown, to make the infinite scroll effect.

:::info Initial load

The number of posts **doesn't affect the initial load** of the field. When the field is loaded, Meta Box **only queries for saved posts** (which is usually not many). So the initial query is very minimal and doesn't cause any performance problems.

:::

### Searching parameters

You probably don't want to perform an ajax request when opening the dropdown at first. You might want to _make ajax requests only when users type something_ and search for that. To do that, you need to set the `minimumInputLength` for the input, as below:

```php
[
    'id'         => 'project',
    'title'      => 'Project',
    'type'       => 'post',
    'post_type'  => 'project',
    'ajax'       => true,
    'query_args' => [
        'posts_per_page' => 10,
    ],
    'js_options' => [
        // highlight-next-line
        'minimumInputLength' => 1,
    ],
],
```

This parameter sets the minimum number of characters required to start a search. It may be good if you don't want users to make too many ajax requests that could harm your server.

## Data

This field saves post ID(s) in the database.

If "Multiple" is not set, a single post ID is saved in the database. Otherwise, the field saves multiple post IDs in the database, where each post ID is stored in a single row in the database with the same meta key (similar to what `add_post_meta` does with the last parameter `false`).

If the field is cloneable, then the value is stored as a serialized array in a single row in the database.

If "Parent" is set, this field doesn't save any data. Instead, it sets the selected post as the parent for the current being edited post.

## Template usage

**Getting selected post ID:**

```php
<?php $post_id = rwmb_meta( 'my_field_id' ); ?>
<p>Selected post ID: <?= $post_id ?></p>
```

**Getting selected post object:**

```php
<?php $post_id = rwmb_meta( 'my_field_id' ); ?>
<?php $post = get_post( $post_id ); ?>
<pre>
    <!-- Show all data from the selected post -->
    <?php print_r( $post ); ?>
</pre>
```

**Displaying selected post title:**

```php
<?php $post_id = rwmb_meta( 'my_field_id' ); ?>
<h3><?= get_the_title( $post_id ); ?></h3>
```

or simpler:

```php
<h3><?php rwmb_the_value( 'my_field_id', ['link' => false] ) ?></h3>
```

**Displaying the selected post with link:**

```php
<?php $post_id = rwmb_meta( 'my_field_id' ); ?>
<h3><a href="<?= get_permalink( $post_id ) ?>"><?= get_the_title( $post_id ); ?></a></h3>
```

or simpler:

```php
<h3><?php rwmb_the_value( 'my_field_id' ) ?></h3>
```

**Additional options for `rwmb_the_value()`:**

Using `rwmb_the_value` also has some extra options as follows:

```php
<!-- Displaying the post title without link -->
<?php rwmb_the_value( 'my_field_id', ['link' => false] ) ?>

<!-- Displaying the post title with the link to view the post (default) -->
<?php rwmb_the_value( 'my_field_id' ) ?>
<?php rwmb_the_value( 'my_field_id', ['link' => 'view'] ) ?>

<!-- Displaying the post title with the link to edit the post -->
<?php rwmb_the_value( 'my_field_id', ['link' => 'edit'] ) ?>
```

**Displaying multiple selected posts:**

If "Multiple" is set or the field is cloneable, you can loop through the returned values like this:

```php
<?php $post_ids = rwmb_meta( 'my_field_id' ); ?>
<h3>Related posts</h3>
<ul>
    <?php foreach ( $post_ids as $post_id ) : ?>
        <li><a href="<?= get_permalink( $post_id ) ?>"><?= get_the_title( $post_id ); ?></a></li>
    <?php endforeach ?>
</ul>
```

of simpler:

```php
<h3>Related posts</h3>
<?php rwmb_the_value( 'my_field_id' ); ?>
```

`rwmb_the_value()` automatically outputs multiple selected posts as an unordered list with links to each post.

## Filters

`rwmb_post_choice_label` and `rwmb_{$field_id}_choice_label`

These filters allow developers to change the label of `post` fields. The first label applies to all `post` fields and the second one is for a specific field.

Example: If you are using a field called `my_field` and you want to change the label, use the code below:

```php
function my_field_filter( $label, $field, $post ) {
    return $post->post_title . ' - ' . $post->post_status;
}
add_filter( 'rwmb_my_field_choice_label', 'my_field_filter', 10, 3 );
```

# Radio

import Screenshots from '@site/src/components/Screenshots';

The radio field creates a simple list of radio inputs where you can select a single choice from the predefined list.

## Screenshots

<Screenshots name="radio" col1={[
    ['/screenshots/radio-1.png', 'Radio choices inline'],
    ['/screenshots/radio-2.png', 'Radio choices on multiple lines'],
]} />

## Settings

Besides the [common settings](/field-settings/), this field has the following specific settings, the keys are for use with code:

Name | Key | Description
--- | --- | ---
Choices | `options` | List of choices, each per line. If you need to set values and labels, use the format "value: Label" for each choice.<br />When using with code, this setting is an array of `'value' => 'Label'`.
Inline | `inline` | Display choices on a single line? `true` or `false`.

This is a sample field settings array when creating this field with code:

```php
[
    'name'    => 'Radio',
    'id'      => 'radio',
    'type'    => 'radio',
    'inline'  => false,
    'options' => [
        'value1' => 'Label1',
        'value2' => 'Label2',
    ],
],
```

## Data

This field saves a single selected value in the database.

If the field is cloneable, then the value is stored as a serialized array in a single row in the database.

:::warning

Note that this field stores the **values**, not labels.

:::

## Template usage

**Displaying the selected value:**

```php
<?php $value = rwmb_meta( 'my_field_id' ); ?>
<p>Selected: <?= $value ?></p>
```

**Displaying the selected label:**

```php
<p>My choice: <?php rwmb_the_value( 'my_field_id' ) ?></p>
```

**Displaying both value and label:**

```php
<?php
$field   = rwmb_get_field_settings( 'my_field_id' );
$options = $field['options'];
$value   = rwmb_meta( 'my_field_id' );
?>

Value: <?= $value ?><br>
Label: <?= $options[ $value ] ?>
```

# Range

import Screenshots from '@site/src/components/Screenshots';

The range field creates an HTML5 range field where you can select a number by dragging a control.

This field is very similar to the [number](/fields/number/) field. It just uses a different control to select a number instead of entering it.

## Screenshots

<Screenshots name="range" col1={[
    ['https://imgur.elightup.com/eAHeRJS.png', 'The range field interface']
]} />

## Settings

Besides the [common settings](/field-settings/), this field has the following specific settings, the keys are for use with code:

Name | Key | Description
--- | --- | ---
Step | `step` | The increments for the value. Accepts an integer, a float number, or the string `any` (if you want to enter any value). Default is `1`. Optional.
Min value | `min` | Minimum value. Optional.
Max value | `max` | Maximum value. Optional.

This is a sample field settings array when creating this field with code:

```php
[
    'name' => 'Range',
    'id'   => 'range',
    'type' => 'range',
    'min'  => 0,
    'max'  => 60,
    'step' => 5,
],
```

## Data

This field saves the entered value into the database.

If the field is cloneable, then the value is stored as a serialized array in a single row in the database.

## Template usage

**Displaying the value:**

```php
<p>Entered: <?php rwmb_the_value( 'my_field_id' ) ?></p>
```

**Getting the value:**

```php
<?php $value = rwmb_meta( 'my_field_id' ) ?>
<p>Entered: <?= $value ?></p>
```

**Formatting the value:**

```php
<?php $value = rwmb_meta( 'my_field_id' ) ?>
<p>Entered: <?= number_format( $value ) ?></p>
```

**Displaying cloneable values:**

```php
<?php $values = rwmb_meta( 'my_field_id' ) ?>
<?php foreach ( $values as $value ) : ?>
    <p><?= $value ?></p>
<?php endforeach ?>
```

# Select Advanced

import Screenshots from '@site/src/components/Screenshots';
import ChoiceSingle from '../_parts/_choice-single.md';

The select advanced field creates a beautiful select dropdown using the [select2](https://select2.org/) library.

## Screenshots

<Screenshots name="select-advanced" col1={[
    ['https://imgur.elightup.com/65OkGbt.png', 'The select advanced field interface']
]} />

## Settings

Besides the [common settings](/field-settings/), this field has the following specific settings, the keys are for use with code:

Name | Key | Description
--- | --- | ---
Choices | `options` | List of choices, each per line. If you need to set values and labels, use the format "value: Label" for each choice.<br />When using with code, this setting is an array of `'value' => 'Label'`.
Multiple | `multiple` | Whether to allow select multiple values? `true` or `false` (default).
Placeholder | `placeholder` | The placeholder text.
Display "Toggle All" button | `select_all_none` | Display "Toggle All" button to quickly toggle choices. Applied only when "Multiple" is set.
Select2 options | `js_options` | Options for `select2` library. [See here](https://select2.org/configuration).

By default, Meta Box applies these default options for select2:

Name | Value | Description
--- | ---
`allowClear` | `true` | Allow users to clear selection.
`width` | `resolve` | Set width by element's width.
`placeholder` | `$field['placeholder']` | Make `placeholder` works just like `select` field.

This is a sample field settings array when creating this field with code:

```php
[
    'name'            => 'Select Advanced',
    'id'              => 'select_advanced',
    'type'            => 'select_advanced',
    'options'         => [
        'java'       => 'Java',
        'javascript' => 'JavaScript',
        'php'        => 'PHP',
        'kotlin'     => 'Kotlin',
        'swift'      => 'Swift',
    ],
    'placeholder'     => 'Select an Item',
    'js_options'      => [
        'containerCssClass' => 'my-custom-class',
    ],
],
```

<ChoiceSingle />

# Select

import Screenshots from '@site/src/components/Screenshots';
import ChoiceSingle from '../_parts/_choice-single.md';

The select field creates a simple select dropdown. You can select one or multiple values from the predefined list.

## Screenshots

<Screenshots name="select" col1={[
    ['/screenshots/select-1.png', 'The select field interface']
]} />

## Settings

Besides the [common settings](/field-settings/), this field has the following specific settings, the keys are for use with code:

Name | Key | Description
--- | --- | ---
Choices | `options` | List of choices, each per line. If you need to set values and labels, use the format "value: Label" for each choice.<br />When using with code, this setting is an array of `'value' => 'Label'`.
Multiple | `multiple` | Whether to allow select multiple values? `true` or `false` (default).
Placeholder | `placeholder` | The placeholder text.
Display "Toggle All" button | `select_all_none` | Display "Toggle All" button to quickly toggle choices. Applied only when "Multiple" is set.
Flatten | `flatten` | Display sub items without indentation. `true` or `false` (default). See below to know how to define sub items.
Callback | `_callback` | A callable function that returns an array of choices. The function should return an array of `'value' => 'Label'`.

This is a sample field settings array when creating this field with code:

```php
[
    'name'            => 'Select',
    'id'              => 'select',
    'type'            => 'select',
    'multiple'        => true,
    'placeholder'     => 'Select an item',
    'select_all_none' => true,
    'options'         => [
        'java'       => 'Java',
        'javascript' => 'JavaScript',
        'php'        => 'PHP',
        'kotlin'     => 'Kotlin',
        'swift'      => 'Swift',
    ],
],
```

Besides the normal list of choices, you can define sub choices as follows:

```php
[
    'name'        => 'Select',
    'id'          => 'select',
    'type'        => 'select',
    'placeholder' => 'Select an Item',
    // highlight-next-line
    'flatten'     => false,
    'options' => [
        [
            'value' => 'monkeys',
            'label' => 'Monkeys',
        ],
        [
            'value' => 'king_kong',
            'label' => 'King Kong',
            // highlight-next-line
            'parent' => 'monkeys',
        ],
        [
            'value' => 'curious_george',
            'label' => 'Curious George',
            // highlight-next-line
            'parent' => 'monkeys',
        ],
        [
            'value' => 'donkeys',
            'label' => 'Donkeys',
        ],
        [
            'value' => 'eeyore',
            'label' => 'Eeyore',
            // highlight-next-line
            'parent' => 'donkeys',
        ],
        [
            'value' => 'guss',
            'label' => 'Gus',
            // highlight-next-line
            'parent' => 'donkeys',
        ],
    ],
],
```

Here is how it looks:

![select with sub choices](/screenshots/select-2.png)

<ChoiceSingle />

# Sidebar

import Screenshots from '@site/src/components/Screenshots';

The sidebar field allows you to select one or multiple sidebars. This field has several settings that can be displayed as a: simple select dropdown, checkbox list, or beautiful select dropdown with select2 library.

## Screenshots

<Screenshots
    name="sidebar"
    col1={[
        ['https://imgur.elightup.com/VTvvKSR.png', 'The sidebar field default interface'],
        ['https://imgur.elightup.com/WOcCGA5.png', 'The sidebar field with checkbox list interface'],
        ['https://imgur.elightup.com/jp9BFqE.png', 'The sidebar field with radio list interface'],
    ]}
/>

## Settings

Besides the [common settings](/field-settings/), this field has the following specific settings, the keys are for use with code:

Name | Key | Description
--- | --- | ---
Placeholder | `placeholder` | The placeholder for the select box. The default is "Select a sidebar". Applied only when the field type is a select field.
Field type | `field_type` | How the sidebars are displayed? See below.

This field inherits the look and field (and settings) from other fields, depending on the field type, which accepts the following value:

Field type | Description | Settings inherited from
--- | --- | ---
`select` | Simple select dropdown. | [Select](/fields/select/)
`select_advanced` | Beautiful select dropdown using the select2 library. This is the default value. | [Select advanced](/fields/select-advanced/)
`checkbox_list` | Flatten list of checkboxes which allows to select multiple items. | [Checkbox list](/fields/checkbox-list/)
`radio_list` | Flatten list of radio boxes which allows to select only 1 item. | [Radio](/fields/radio/)

This is a sample field settings array when creating this field with code:

```php
[
    'name'        => 'Sidebar',
    'id'          => 'sidebar',
    'type'        => 'sidebar',
    'field_type'  => 'select_advanced',
    'placeholder' => 'Select a sidebar',
],
```

## Data

This field saves sidebar ID(s) in the database.

If "Multiple" is not set, a single sidebar ID is saved in the database. Otherwise, the field saves multiple sidebar IDs in the database, where each sidebar ID is stored in a single row in the database with the same meta key (similar to what `add_post_meta` does with the last parameter `false`).

If the field is cloneable, then the value is stored as a serialized array in a single row in the database.

## Template usage

**Display widgets for the selected sidebar:**

```php
<div class="sidebar">
    <?php rwmb_the_value( 'my_field_id' ) ?>
</div>
```

**Checking if the selected sidebar has widgets and displaying it:**

```php
<?php
$sidebar_id = rwmb_meta( 'my_field_id' );
if ( is_active_sidebar( $sidebar_id ) ) {
    dynamic_sidebar( $sidebar_id );
}
```

# Single image

import Screenshots from '@site/src/components/Screenshots';

The single image field allows users to select or upload one image via the WordPress media library.

## Screenshots

<Screenshots
    name="single-image"
    col1={[
        ['https://imgur.elightup.com/c7Pa4eH.png', 'The single image field interface'],
    ]}
/>

## Settings

Besides the [common settings](/field-settings/), this field has the following specific settings, the keys are for use with code:

Name | Key | Description
--- | --- | ---
Force delete | `force_delete` | Whether or not delete the files from Media Library when deleting them from post meta. `true` or `false` (default). Optional. Note: it might affect other posts if you use the same file for multiple posts.
Image size | `image_size` | Image size displays in the edit page. Optional. Default "thumbnail". Image size is used to make sure images are not blurry. It’s not meant to display images with the exact width and height. Images are always displayed as a square.

This is a sample field settings array when creating this field with code:

```php
[
    'type' => 'single_image',
    'name' => 'Single Image',
    'id'   => 'my_image',
],
```

## Data

This field saves the attachment ID in the database.

## Template usage

**Displaying uploaded image:**

```php
<?php $image = rwmb_meta( 'my_field_id', ['size' => 'thumbnail'] ); ?>
<h3>Logo</h3>
<img src="<?= $image['url']; ?>">
```

or simpler:

```php
<h3>Logo</h3>
<?php rwmb_the_value( 'my_field_id', ['size' => 'thumbnail'] ) ?>
```

`rwmb_the_value()` outputs the image, and `rwmb_meta()` returns an array of image details:

```php
[
    'ID'          => 123,
    'name'        => 'logo-150x80.png',
    'path'        => '/var/www/wp-content/uploads/logo-150x80.png',
    'url'         => 'https://example.com/wp-content/uploads/logo-150x80.png',
    'width'       => 150,
    'height'      => 80,
    'full_url'    => 'https://example.com/wp-content/uploads/logo.png',
    'title'       => 'Logo',
    'caption'     => 'Logo caption',
    'description' => 'Used in the header',
    'alt'         => 'Logo ALT text',
    'srcset'      => 'large.jpg 1920w, medium.jpg 960w, small.jpg 480w', // List of responsive image src
    'sizes'       => [], // List of image sizes. See https://developer.wordpress.org/reference/functions/wp_get_attachment_metadata/
    'image_meta'  => [], // List of image meta. See https://developer.wordpress.org/reference/functions/wp_get_attachment_metadata/
];
```

**Display the image with link to the full-size version (for lightbox effect):**

```php
<?php $image = rwmb_meta( 'my_field_id', ['size' => 'thumbnail'] ); ?>
<h3>Logo</h3>
<a href="<?= $image['full_url'] ?>"><img src="<?= $image['url']; ?>"></a>
```

or simpler:

```php
<h3>Logo</h3>
<?php rwmb_the_value( 'my_field_id', ['size' => 'thumbnail', 'link' => true] ) ?>
```

The 2nd argument for `rwmb_meta()` and `rwmb_the_value()` is an array of extra parameters and accepts the following parameters:

Name|Description
---|---
`size`|Image size returned. Optional. Default `thumbnail`.
`link`|Set to `true` to show a link to the full-size version. Default `false`.

## Filters

This field inherits from image advanced and thus, uses the [same filters](/fields/image-advanced/) to change the texts displayed on the screen.

Filter|Default|Description
---|---|---
`rwmb_media_add_string`|+ Add Media|Add new image string
`rwmb_media_single_images_string`|image|Singular "image" string
`rwmb_media_multiple_images_string`|images|Plural "images" string
`rwmb_media_remove_string`|Remove|Image remove string
`rwmb_media_edit_string`|Edit|Image edit string
`rwmb_media_view_string`|View|Image view string

The code below changes the "+ Add Media" string:

```php
add_filter( 'rwmb_media_add_string', 'prefix_change_add_string' );
function prefix_change_add_string() {
    return '+ New Image';
}
```

# Slider

import Screenshots from '@site/src/components/Screenshots';

The slider field creates a slider where you can select a number by dragging a control. This field uses jQuery UI library to create the UI.

## Screenshots

<Screenshots name="slider" col1={[
    ['https://imgur.elightup.com/voHxzpJ.png', 'The slider field interface']
]} />

## Settings

Besides the [common settings](/field-settings/), this field has the following specific settings, the keys are for use with code:

Name | Key | Description
--- | --- | ---
Prefix | `prefix` | Text displayed before the field value. Optional.
Suffix | `suffix` | Text displayed after the field value. Optional.
Slider options | `js_options` | jQuery UI slider options. [See here](https://api.jqueryui.com/slider/).

By default, Meta Box applies these default slider options:

Name | Value | Description
--- | ---
`range` | `min` | Create a range from the minimum value to one handle.
`value` | `$field['std']` | Set the default field value.

If you set `range` to `true`, the plugin will save 2 values in the database, separated by pipe (`|`) character, e.g. `15|90`.

This is a sample field settings array when creating this field with code:

```php
[
    'name'       => 'Slider',
    'id'         => 'slider',
    'type'       => 'slider',
    'prefix'     => '$',
    'suffix'     => ' USD',
    'js_options' => [
        'min'   => 10,
        'max'   => 255,
        'step'  => 5,
    ],

    'std' => 150,
],
```

## Data

This field saves a single selected value (without the prefix and suffix) in the database.

If the field is cloneable, the value is stored as a serialized array in a single row in the database.

## Template usage

**Displaying the field value:**

```php
<?php $value = rwmb_meta( 'my_field_id' ) ?>
<p>Selected value: <?= $value ?></p>
```

or simpler:

```php
<p>Selected value: <?php rwmb_the_value( 'my_field_id' ) ?></p>
```

# Switch

import Screenshots from '@site/src/components/Screenshots';

The switch field shows an on/off switch for you to enable/disable something. You can choose a style (rounded or square) and set custom text/icon labels.

## Screenshots

<Screenshots name="switch" col1={[
    ['https://imgur.elightup.com/AVHMUdZl.png', 'The switch field interface']
]} />

## Settings

Besides the [common settings](/field-settings/), this field has the following specific settings, the keys are for use with code:

Name | Key | Description
--- | --- | ---
Style | `style` | The switch style. `rounded` (default) or `square`.
Custom ON status label | `on_label`|The label for "On" status. Can be any HTML. You can set the text "Enable" or a check icon like `<i class="dashicons dashicons-yes"></i>`. When this setting is set to empty string, it displays a style like iOS switch.
Custom OFF status label | `off_label`|Similar to the above but for the "Off" status.

This is a sample field settings array when creating this field with code:

```php
[
    'id'        => 'enable_slider',
    'name'      => 'Enable Slider?',
    'type'      => 'switch',
    'style'     => 'rounded',
    'on_label'  => 'Yes',
    'off_label' => 'No',
],
```

## Data

This field saves the "on" and "off" status in the database as "1" or "0".

## Template usage

**Conditional check:**

```php
$value = rwmb_meta( 'my_field_id' );
if ( $value ) {
    echo 'Checked';
} else {
    echo 'Unchecked';
}
```

**Displaying "On/Off":**

```php
rwmb_the_value( 'my_field_id' );
```

# Taxonomy Advanced

import LiteYouTubeEmbed from 'react-lite-youtube-embed';
import 'react-lite-youtube-embed/dist/LiteYouTubeEmbed.css';
import Screenshots from '@site/src/components/Screenshots';

The taxonomy advanced field allows you to select one or multiple taxonomy terms. This field has several settings that can be displayed as a: simple select dropdown, checkbox list, or beautiful select dropdown with select2 library.

If the taxonomy is hierarchical, you can display the field as a select or checkbox tree, e.g. showing children terms when a parent term is selected.

:::warning Taxonomy vs. taxonomy advanced

- Taxonomy field **doesn't store data**. It just sets post terms. Think about it like a replacement of the *Category* or *Tag* meta box of WordPress.
- Taxonomy advanced **stores terms' IDs** and doesn't set post terms.

:::

## Screenshots

<Screenshots
    name="taxonomy"
    col1={[
        ['https://imgur.elightup.com/PzPkqur.png', 'The taxonomy field default interface'],
        ['https://imgur.elightup.com/Ook0RwT.png', 'The taxonomy field with checkbox list interface'],
        ['https://imgur.elightup.com/iLMFVBY.png', 'The taxonomy field with checkbox tree interface'],
        ['https://imgur.elightup.com/orDECYA.png', 'The taxonomy field with select tree interface'],
    ]}
    col2={[
        ['https://imgur.elightup.com/D7Q5mUA.png', 'The taxonomy field with radio list interface'],
        ['https://imgur.elightup.com/XMhMjoN.png', 'The taxonomy field with radio list inline interface'],
    ]}
/>

## Settings

Besides the [common settings](/field-settings/), this field has the following specific settings, the keys are for use with code:

Name | Key | Description
--- | --- | ---
Taxonomies | `taxonomy` | Taxonomy slug(s). Can be a string (for single taxonomy) or an array (for multiple taxonomies). Required.
Query args | `query_args` | Query arguments for getting taxonomy terms. Uses same arguments as [get_terms()](https://developer.wordpress.org/reference/functions/get_terms/). Optional.
Placeholder | `placeholder` | The placeholder for the select box. The default is "Select a `{taxonomy label}`". Applied only when the field type is a select field.
Add new | `add_new` | Allow users to create a new term when submitting the post (`true` or `false`).
Remove default meta box | `remove_default` | Remove the default WordPress taxonomy meta box. Only works with the classic editor.
Field type | `field_type` | How the terms are displayed? See below.

This field inherits the look and field (and settings) from other fields, depending on the field type, which accepts the following value:

Field type | Description | Settings inherited from
--- | --- | ---
`select` | Simple select dropdown. | [Select](/fields/select/)
`select_advanced` | Beautiful select dropdown using the select2 library. This is the default value. | [Select advanced](/fields/select-advanced/)
`select_tree` | Hierarchical list of select boxes which allows to select multiple items (select/deselect parent item will show/hide child items). Applied only when the taxonomy is hierarchical (like category). | [Select](/fields/select/)
`checkbox_list` | Flatten list of checkboxes which allows to select multiple items. | [Checkbox list](/fields/checkbox-list/)
`checkbox_tree` | Hierarchical list of checkboxes which allows to select multiple items (select/deselect parent item will show/hide child items). Applied only when the taxonomy is hierarchical (like category). | [Checkbox list](/fields/checkbox-list/)
`radio_list` | Flatten list of radio boxes which allows to select only 1 item. | [Radio](/fields/radio/)

This is a sample field settings array when creating this field with code:

```php
[
    'name'       => 'Taxonomy',
    'id'         => 'taxonomy',
    'type'       => 'taxonomy_advanced',
    'taxonomy'   => 'category',
    'field_type' => 'select_advanced',
],
```

## Ajax load

Meta Box uses ajax to increase the performance of the field query. Instead of fetching all terms at once, the plugin now fetches only some terms when the page is loaded, and then it fetches more terms when users scroll down to the list.

See this video for demonstration (made for posts, but works similar for taxonomies, the UI of the MB Builder was from the old version, the new version of MB Builder has a better UI):

<LiteYouTubeEmbed id='2acm5gW59Mc' />

:::info

This feature is available only for fields that set the field type to **select advanced**. There are some extra parameters for you to disable or customize.

:::

### Enable/Disable ajax requests

This feature is enabled by default when you set the field type to "select advanced".

If you're using code to create this field, the settings to enable/disable it is `ajax`, which accepts a boolean value (and it's `true` by default):

```php
[
    'id'       => 'project_cat',
    'title'    => 'Project Categories',
    'type'     => 'taxonomy_advanced',
    'taxonomy' => 'project_cat',
    // highlight-next-line
    'ajax'     => true,
],
```

Setting this parameter to `false` will disable ajax requests.

### Limit the number of terms for pagination

The number of terms for pagination is set via the `number` parameter in the "Query_args" setting:

```php
[
    'id'         => 'project_cat',
    'title'      => 'Project Categories',
    'type'       => 'taxonomy_advanced',
    'taxonomy'   => 'project_cat',
    'ajax'       => true,
    'query_args' => [
        // highlight-next-line
        'number' => 10,
    ],
],
```

When fetching new terms, the new terms will be appended to the list of options in the dropdown, to make the infinite scroll effect.

:::info Initial load

The number of terms **doesn't affect the initial load** of the field. When the field is loaded, Meta Box **only queries for saved terms** (which is usually not many). So the initial query is very minimal and doesn't cause any performance problems.

:::

### Searching parameters

You probably don't want to perform an ajax request when opening the dropdown at first. You might want to _make ajax requests only when users type something_ and search for that. To do that, you need to set the `minimumInputLength` for the input, as below:

```php
[
    'id'         => 'project_cat',
    'title'      => 'Project Categories',
    'type'       => 'taxonomy_advanced',
    'taxonomy'   => 'project_cat',
    'ajax'       => true,
    'query_args' => [
        'number' => 10,
    ],
    'js_options' => [
        // highlight-next-line
        'minimumInputLength' => 1,
    ],
],
```

This parameter sets the minimum number of characters required to start a search. It may be good if you don't want users to make too many ajax requests that could harm your server.

## Data

Unlike the [taxonomy](/fields/taxonomy/) field, this field saves terms' IDs in the database.

If "Multiple" is not set, a single term ID is saved in the database. Otherwise, the field saves multiple term IDs in a single row in the database in the comma-separated strings (e.g. format `1,2,3`).

If the field is cloneable, then the value is stored as a serialized array in a single row in the database.

## Template usage

**Getting selected term object:**

```php
<?php $term = rwmb_meta( 'my_field_id' ); ?>
<pre>
    <!-- Show all data from the selected term -->
    <?php print_r( $term ); ?>
</pre>
```

**Displaying selected term name:**

```php
<?php $term = rwmb_meta( 'my_field_id' ); ?>
<p><?= $term->name; ?></p>
```

or simpler:

```php
<p><?php rwmb_the_value( 'my_field_id', ['link' => false] ) ?></p>
```

**Displaying the selected term with link:**

```php
<?php $term = rwmb_meta( 'my_field_id' ); ?>
<p><a href="<?= get_term_link( $term ) ?>"><?= $term->name ?></a></p>
```

or simpler:

```php
<p><?php rwmb_the_value( 'my_field_id' ) ?></p>
```

**Additional options for `rwmb_the_value()`:**

Using `rwmb_the_value` also has some extra options as following:

```php
<!-- Displaying the term without link -->
<?php rwmb_the_value( 'my_field_id', ['link' => false] ) ?>

<!-- Displaying the term with link to view term (default) -->
<?php rwmb_the_value( 'my_field_id' ) ?>
<?php rwmb_the_value( 'my_field_id', ['link' => 'view'] ) ?>

<!-- Displaying the term with link to edit term -->
<?php rwmb_the_value( 'my_field_id', ['link' => 'edit'] ) ?>
```

**Displaying multiple selected terms:**

If "Multiple" is set or the field is cloneable, you can loop through the returned values like this:

```php
<?php $terms = rwmb_meta( 'my_field_id' ); ?>
<h3>Project categories</h3>
<ul>
    <?php foreach ( $terms as $term ) : ?>
        <li><a href="<?= get_term_link( $term ) ?>"><?= $term->name ?></a></li>
    <?php endforeach ?>
</ul>
```

of simpler:

```php
<h3>Project categories</h3>
<?php rwmb_the_value( 'my_field_id' ); ?>
```

`rwmb_the_value()` automatically output multiple selected terms as an unordered list with links to each term.

## Filters

`rwmb_taxonomy_advanced_choice_label` and `rwmb_{$field_id}_choice_label`

These filters allow developers to change the label of `taxonomy_advanced` fields. The first label applies to all `taxonomy_advanced` fields, and the second one is for a specific field.

Example: If you are using a field called `my_field` and you want to change the label in the select box, use this code:

```php
function my_field_filter( $label, $field, $term ) {
    return $label . ' - Custom text';
}
add_filter( 'rwmb_my_field_choice_label', 'my_field_filter', 10, 3 );
```

# Taxonomy

import LiteYouTubeEmbed from 'react-lite-youtube-embed';
import 'react-lite-youtube-embed/dist/LiteYouTubeEmbed.css';
import Screenshots from '@site/src/components/Screenshots';

The taxonomy field allows you to select one or multiple taxonomy terms. This field has several settings that can be displayed as a: simple select dropdown, checkbox list, or beautiful select dropdown with select2 library.

If the taxonomy is hierarchical, you can display the field as a select or checkbox tree, e.g. showing children terms when a parent term is selected.

:::warning Taxonomy vs. taxonomy advanced

- Taxonomy field **doesn't store data**. It just sets post terms. Think about it like a replacement of the *Category* or *Tag* meta box of WordPress.
- Taxonomy advanced **stores terms' IDs** and doesn't set post terms.

:::

## Screenshots

<Screenshots
    name="taxonomy"
    col1={[
        ['https://imgur.elightup.com/PzPkqur.png', 'The taxonomy field default interface'],
        ['https://imgur.elightup.com/Ook0RwT.png', 'The taxonomy field with checkbox list interface'],
        ['https://imgur.elightup.com/iLMFVBY.png', 'The taxonomy field with checkbox tree interface'],
        ['https://imgur.elightup.com/orDECYA.png', 'The taxonomy field with select tree interface'],
    ]}
    col2={[
        ['https://imgur.elightup.com/D7Q5mUA.png', 'The taxonomy field with radio list interface'],
        ['https://imgur.elightup.com/XMhMjoN.png', 'The taxonomy field with radio list inline interface'],
    ]}
/>

## Settings

Besides the [common settings](/field-settings/), this field has the following specific settings, the keys are for use with code:

Name | Key | Description
--- | --- | ---
Taxonomies | `taxonomy` | Taxonomy slug(s). Can be a string (for single taxonomy) or an array (for multiple taxonomies). Required.
Query args | `query_args` | Query arguments for getting taxonomy terms. Uses same arguments as [get_terms()](https://developer.wordpress.org/reference/functions/get_terms/). Optional.
Placeholder | `placeholder` | The placeholder for the select box. The default is "Select a `{taxonomy label}`". Applied only when the field type is a select field.
Add new | `add_new` | Allow users to create a new term when submitting the post (`true` or `false`).
Remove default meta box | `remove_default` | Remove the default WordPress taxonomy meta box. Only works with the classic editor.
Field type | `field_type` | How the terms are displayed? See below.

This field inherits the look and field (and settings) from other fields, depending on the field type, which accepts the following value:

Field type | Description | Settings inherited from
--- | --- | ---
`select` | Simple select dropdown. | [Select](/fields/select/)
`select_advanced` | Beautiful select dropdown using the select2 library. This is the default value. | [Select advanced](/fields/select-advanced/)
`select_tree` | Hierarchical list of select boxes which allows to select multiple items (select/deselect parent item will show/hide child items). Applied only when the taxonomy is hierarchical (like category). | [Select](/fields/select/)
`checkbox_list` | Flatten list of checkboxes which allows to select multiple items. | [Checkbox list](/fields/checkbox-list/)
`checkbox_tree` | Hierarchical list of checkboxes which allows to select multiple items (select/deselect parent item will show/hide child items). Applied only when the taxonomy is hierarchical (like category). | [Checkbox list](/fields/checkbox-list/)
`radio_list` | Flatten list of radio boxes which allows to select only 1 item. | [Radio](/fields/radio/)

This is a sample field settings array when creating this field with code:

```php
[
    'name'       => 'Taxonomy',
    'id'         => 'taxonomy',
    'type'       => 'taxonomy',
    'taxonomy'   => 'category',
    'field_type' => 'select_advanced',
],
```

## Ajax load

Meta Box uses ajax to increase the performance of the field query. Instead of fetching all terms at once, the plugin now fetches only some terms when the page is loaded, and then it fetches more terms when users scroll down to the list.

See this video for demonstration (made for posts, but works similar for taxonomies, the UI of the MB Builder was from the old version, the new version of MB Builder has a better UI):

<LiteYouTubeEmbed id='2acm5gW59Mc' />

:::info

This feature is available only for fields that set the field type to **select advanced**. There are some extra parameters for you to disable or customize.

:::

### Enable/Disable ajax requests

This feature is enabled by default when you set the field type to "select advanced".

If you're using code to create this field, the settings to enable/disable it is `ajax`, which accepts a boolean value (and it's `true` by default):

```php
[
    'id'       => 'project_cat',
    'title'    => 'Project Categories',
    'type'     => 'taxonomy',
    'taxonomy' => 'project_cat',
    // highlight-next-line
    'ajax'     => true,
],
```

Setting this parameter to `false` will disable ajax requests.

### Limit the number of terms for pagination

The number of terms for pagination is set via the `number` parameter in the "Query_args" setting:

```php
[
    'id'         => 'project_cat',
    'title'      => 'Project Categories',
    'type'       => 'taxonomy',
    'taxonomy'   => 'project_cat',
    'ajax'       => true,
    'query_args' => [
        // highlight-next-line
        'number' => 10,
    ],
],
```

When fetching new terms, the new terms will be appended to the list of options in the dropdown, to make the infinite scroll effect.

:::info Initial load

The number of terms **doesn't affect the initial load** of the field. When the field is loaded, Meta Box **only queries for saved terms** (which is usually not many). So the initial query is very minimal and doesn't cause any performance problems.

:::

### Searching parameters

You probably don't want to perform an ajax request when opening the dropdown at first. You might want to _make ajax requests only when users type something_ and search for that. To do that, you need to set the `minimumInputLength` for the input, as below:

```php
[
    'id'         => 'project_cat',
    'title'      => 'Project Categories',
    'type'       => 'taxonomy',
    'taxonomy'   => 'project_cat',
    'ajax'       => true,
    'query_args' => [
        'number' => 10,
    ],
    'js_options' => [
        // highlight-next-line
        'minimumInputLength' => 1,
    ],
],
```

This parameter sets the minimum number of characters required to start a search. It may be good if you don't want users to make too many ajax requests that could harm your server.

## Data

:::warning No value saved!

This field **does not save any value** in the database. Instead of that, it **sets the taxonomy terms for the current being edited post**. In short, it behaves exactly like the "Category" and "Tags" meta boxes.

:::

The purpose of this field is to replace the default WordPress meta box for taxonomy and offer more options to control how it displays.

For this reason, if you have two taxonomy fields, and select different values for them, after saving, they still show the same value.

:::tip How to save data

If you prefer saving data, check out the [taxonomy advanced](/fields/taxonomy-advanced/) field.

:::

## Template usage

**Getting selected term object:**

```php
<?php $term = rwmb_meta( 'my_field_id' ); ?>
<pre>
    <!-- Show all data from the selected term -->
    <?php print_r( $term ); ?>
</pre>
```

**Displaying selected term name:**

```php
<?php $term = rwmb_meta( 'my_field_id' ); ?>
<p><?= $term->name; ?></p>
```

or simpler:

```php
<p><?php rwmb_the_value( 'my_field_id', ['link' => false] ) ?></p>
```

**Displaying the selected term with link:**

```php
<?php $term = rwmb_meta( 'my_field_id' ); ?>
<p><a href="<?= get_term_link( $term ) ?>"><?= $term->name ?></a></p>
```

or simpler:

```php
<p><?php rwmb_the_value( 'my_field_id' ) ?></p>
```

**Additional options for `rwmb_the_value()`:**

Using `rwmb_the_value` also has some extra options as following:

```php
<!-- Displaying the term without link -->
<?php rwmb_the_value( 'my_field_id', ['link' => false] ) ?>

<!-- Displaying the term with link to view term (default) -->
<?php rwmb_the_value( 'my_field_id' ) ?>
<?php rwmb_the_value( 'my_field_id', ['link' => 'view'] ) ?>

<!-- Displaying the term with link to edit term -->
<?php rwmb_the_value( 'my_field_id', ['link' => 'edit'] ) ?>
```

**Displaying multiple selected terms:**

If "Multiple" is set, you can loop through the returned values like this:

```php
<?php $terms = rwmb_meta( 'my_field_id' ); ?>
<h3>Project categories</h3>
<ul>
    <?php foreach ( $terms as $term ) : ?>
        <li><a href="<?= get_term_link( $term ) ?>"><?= $term->name ?></a></li>
    <?php endforeach ?>
</ul>
```

of simpler:

```php
<h3>Project categories</h3>
<?php rwmb_the_value( 'my_field_id' ); ?>
```

`rwmb_the_value()` automatically output multiple selected terms as an unordered list with links to each user.

## Filters

`rwmb_taxonomy_choice_label` and `rwmb_{$field_id}_choice_label`

These filters allow developers to change the label of `taxonomy` fields. The first label applies to all `taxonomy` fields, and the second one is for a specific field.

Example: If you are using a field called `my_field` and you want to change the label in the select box, use this code:

```php
function my_field_filter( $label, $field, $term ) {
    return $label . ' - Custom text';
}
add_filter( 'rwmb_my_field_choice_label', 'my_field_filter', 10, 3 );
```

# Text List

import Screenshots from '@site/src/components/Screenshots';

The text list field creates a list of text inputs.

## Screenshots

<Screenshots name="text-list" col1={[
    ['https://imgur.elightup.com/Y7qo1No.png', 'The text list field interface']
]} />

## Settings

Besides the [common settings](/field-settings/), this field has the following specific settings, the keys are for use with code:

Name | Key | Description
--- | --- | ---
Inputs | `options`|Array of `'placeholder' => 'label'` for the inputs.

This is a sample field settings array when creating this field with code:

```php
[
    'id'      => 'text_list',
    'name'    => 'Text List',
    'type'    => 'text_list',
    'clone' => true,
    'options' => [
        'John Smith'      => 'Name',
        'name@domain.com' => 'Email',
    ],
],
```

## Data

If the field is not cloneable, the data is stored in multiple rows in the database. Each row has the same meta key as the field ID, and the value is the value in the corresponding text input.

If the field is cloneable, then the value is stored as a serialized array of values in a single row in the database.

## Template usage

**Displaying field inputs' values:**

```php
<?php $values = rwmb_meta( 'my_field_id' ) ?>
<p>Name: <?= $value[0] ?></p>
<p>Email: <?= $value[1] ?></p>
```

**Displaying cloneable values:**

```php
<?php $values = rwmb_meta( 'my_field_id' ) ?>
<ul>
    <?php foreach ( $values as $value ) : ?>
        <li>
            <span>Name: <?= $value[0] ?></span>
            <span>Email: <?= $value[1] ?></span>
        </li>
    <?php endforeach ?>
</ul>
```

**Displaying field values in a table:**

```php
<h3>Values</h3>
<?php rwmb_the_value( 'my_field_id' ) ?>
```

which outputs:

![text list output](https://imgur.elightup.com/jpypypW.png)

HTML:

```html
<table>
    <tr>
        <th>Name</th>
        <th>Email</th>
    <tr>
    <tr>
        <td>Name 1</td>
        <td>email1@domain.com</td>
    </tr>
    <tr>
        <td>Name2</td>
        <td>email2@domain.com</td>
    </tr>
</table>
```

# Text

import Screenshots from '@site/src/components/Screenshots';

The text field creates a simple text input. You can enter any value or select a value from a predefined list.

:::info Input types

This docs is also used for **URL** and **email** field types as they share the same settings. If you want to have full text editing abilities, checkout the [WYSIWYG](/fields/wysiwyg/) field.

:::

## Screenshots

<Screenshots name="text" col1={[
    ['https://imgur.elightup.com/WnedDrd.png', 'The text field interface']
]} />

## Settings

Besides the [common settings](/field-settings/), this field has the following specific settings, the keys are for use with code:

Name | Key | Description
--- | --- | ---
Type | `type` | Allowed values: `text`, `url` or `email`. If the value is `url` or `email`, the field value will be validated accordingly.
Placeholder | `placeholder` | Placeholder for the input. Optional.
Size of the input box | `size` | Size of the input box. Without this setting, the input box is full-width.
Prepend text | `prepend`|Prepend text for the input. The prepended text should be considered as an informative label. It's not saved in the database with the input value.
Append text | `append`|Append text for the input. The appended text should be considered as an informative label. It's not saved in the database with the input value.
Predefined values | `datalist` | Predefined values that users can select from (users still can enter text if they want). If you use code, this parameter has the following sub-parameters<br />- `id`: ID of the div that stores the options. Usually not used and auto-generated as `{$field['id']_list`. Useful if you have several inputs with same datalist.<br />- `options`: Array of predefined values to select from.

This is a sample field settings array when creating this field with code:

```php
[
    'name'        => 'Text',
    'id'          => 'text',
    'desc'        => 'Please enter some text above',
    'type'        => 'text',
    'std'         => 'Default text value',
    'placeholder' => 'Enter something here',
    'datalist'    => [
        'id'      => 'text_datalist',
        'options' => [
            'What',
            'When',
            'Where',
            'Why',
            'Who',
        ],
    ],
],
```

:::tip "type" is optional

You can omit the "type" setting. The plugin automatically sets it to "text" if missing.

```php
add_filter( 'rwmb_meta_boxes', function ( $meta_boxes ) {
    $meta_boxes[] = [
        'title'      => 'Event details',
        'post_types' => 'event',
        'fields'     => [
            [
                'name' => 'Date and time',
                'id'   => 'datetime',
                'type' => 'datetime',
            ],
            // highlight-start
            [
                'name' => 'Location',
                'id'   => 'location',
            ],
            // highlight-end
            [
                'name'          => 'Map',
                'id'            => 'map',
                'type'          => 'osm',
                'address_field' => 'location',
            ],
        ],
    ];

    return $meta_boxes;
} );
```

:::

:::tip Quick define a text field

If your text field only need a label, then you can define it with code simply by the label text. In this case, the field id is auto generated from the label:

```php
add_filter( 'rwmb_meta_boxes', function ( $meta_boxes ) {
    $meta_boxes[] = [
        'title'      => 'Event details',
        'post_types' => 'event',
        'fields'     => [
            [
                'name' => 'Date and time',
                'id'   => 'datetime',
                'type' => 'datetime',
            ],
            // highlight-next-line
            'Location', // id is auto-generated to "location"
            [
                'name'          => 'Map',
                'id'            => 'map',
                'type'          => 'osm',
                'address_field' => 'location',
            ],
        ],
    ];

    return $meta_boxes;
} );
```

:::

## Data

This field saves the entered value into the database.

If the field is cloneable, then the value is stored as a serialized array in a single row in the database.

## Template usage

**Displaying the value:**

```php
<p>Entered: <?php rwmb_the_value( 'my_field_id' ) ?></p>
```

**Getting the value:**

```php
<?php $value = rwmb_meta( 'my_field_id' ) ?>
<p>Entered: <?= $value ?></p>
```

**Displaying cloneable values:**

```php
<?php $values = rwmb_meta( 'my_field_id' ) ?>
<?php foreach ( $values as $value ) : ?>
    <p><?= $value ?></p>
<?php endforeach ?>
```

# Textarea

import Screenshots from '@site/src/components/Screenshots';

The textarea field creates a simple textarea (multiline) input. You can use this field for entering a paragraph of text.

## Screenshots

<Screenshots name="select" col1={[
    ['https://imgur.elightup.com/Wrg9ISA.png', 'The textarea field interface']
]} />

## Settings

Besides the [common settings](/field-settings/), this field has the following specific settings, the keys are for use with code:

Name | Key | Description
--- | --- | ---
Placeholder | `placeholder` | The placeholder text. Optional.
Columns | `cols` | Number of columns. Optional. Default 60.
Rows | `rows` | Number of rows. Optional. Default 4.

## Data

This field saves the entered value into the database.

If the field is cloneable, then the value is stored as a serialized array in a single row in the database.

:::warning

Meta Box **removes all scripts and iframes** from the value. If you want to enter scripts (like Google Analytics) or embed videos, then you need to [disable sanitization](/sanitization/#bypass-the-sanitization).

:::

## Template usage

**Displaying the value:**

```php
<section>
    <h2>About Us</h2>
    <p><?php rwmb_the_value( 'field_id' ) ?></p>
</section>
```

**Getting the value:**

```php
<section>
    <h3>About Us</h3>
    <?php $value = rwmb_meta( 'field_id' ) ?>
    <p><?= $value ?></p>
</section>
```

**Auto adding paragraphs to the text:**

```php
<?php $value = rwmb_meta( 'field_id' ) ?>
<?= wpautop( $value ) ?>
```

**Parse shortcodes:**

```php
<?php $value = rwmb_meta( 'field_id' ) ?>
<?= do_shortcode( $value ) ?>
```

**Parse blocks:**

```php
<?php $value = rwmb_meta( 'field_id' ) ?>
<?= do_blocks( $value ) ?>
```

**Displaying cloneable values:**

```php
<?php $values = rwmb_meta( 'field_id' ) ?>
<?php foreach ( $values as $value ) : ?>
    <p><?= $value ?></p>
<?php endforeach ?>
```

# Time

import Screenshots from '@site/src/components/Screenshots';

The time field allows you to select a time via a friendly UI. This field uses jQuery UI time picker libraries.

## Screenshots

<Screenshots name="time" col1={[
    ['https://imgur.elightup.com/xwV5FN5.png', 'The time field interface'],
    ['https://imgur.elightup.com/S83Wpau.png', 'The time field with select dropdowns']
]} />

## Settings

Besides the [common settings](/field-settings/), this field has the following specific settings, the keys are for use with code:

Name | Key | Description
--- | --- | ---
Size of the input box | `size` | Size of the input box. Optional. Default 10. Without this setting, the input box is full-width.
Inline | `inline` | Whether to display the time picker inline with the input and don't require to click to show the time picker? `true` or `false` (default).
Time picker options | `js_options`| Time picker options. [See here](http://trentrichardson.com/examples/timepicker/).

This is a sample field settings array when creating this field with code:

```php
[
    'name'       => 'Time picker',
    'id'         => 'field_id',
    'type'       => 'time',
    'js_options' => [
        'stepMinute'      => 15,
        'controlType'     => 'select',
        'showButtonPanel' => false,
        'oneLine'         => true,
    ],
],
```

## Data

This field saves ther entered time in the database.

If the field is cloneable, then the value is stored as a serialized array in a single row in the database.

## Template usage

**Displaying entered time:**

```php
<?php $value = rwmb_meta( 'my_field_id' ) ?>
<p>Entered: <?= $value ?>
```

or simpler:

```php
<p>Entered: <?= rwmb_the_value( 'my_field_id' ) ?>
```

# User

import LiteYouTubeEmbed from 'react-lite-youtube-embed';
import 'react-lite-youtube-embed/dist/LiteYouTubeEmbed.css';
import Screenshots from '@site/src/components/Screenshots';

The user field allows you to select one or multiple users. This field has several settings that can be displayed as a: simple select dropdown, checkbox list, or beautiful select dropdown with select2 library.

## Screenshots

<Screenshots
    name="user"
    col1={[
        ['https://imgur.elightup.com/2cEuGhf.png', 'The user field default interface'],
        ['https://imgur.elightup.com/iG6Gwb4.png', 'The user field with checkbox list interface'],
        ['https://imgur.elightup.com/bfLWmxG.png', 'The user field with radio list interface'],
    ]}
/>

## Settings

Besides the [common settings](/field-settings/), this field has the following specific settings, the keys are for use with code:

Name | Key | Description
--- | --- | ---
Query args | `query_args` | Query arguments for getting users. Uses same arguments as [get_users()](https://developer.wordpress.org/reference/functions/get_users/). Optional.
Placeholder | `placeholder` | The placeholder for the select box. The default is "Select a user". Applied only when the field type is a select field.
Field type | `field_type` | How the users are displayed? See below.

This field inherits the look and field (and settings) from other fields, depending on the field type, which accepts the following value:

Field type | Description | Settings inherited from
--- | --- | ---
`select` | Simple select dropdown. | [Select](/fields/select/)
`select_advanced` | Beautiful select dropdown using the select2 library. This is the default value. | [Select advanced](/fields/select-advanced/)
`select_tree` | Hierarchical list of select boxes which allows to select multiple items (select/deselect parent item will show/hide child items). Applied only when the post type is hierarchical (like pages). | [Select](/fields/select/)
`checkbox_list` | Flatten list of checkboxes which allows to select multiple items. | [Checkbox list](/fields/checkbox-list/)
`checkbox_tree` | Hierarchical list of checkboxes which allows to select multiple items (select/deselect parent item will show/hide child items). Applied only when the post type is hierarchical (like pages). | [Checkbox list](/fields/checkbox-list/)
`radio_list` | Flatten list of radio boxes which allows to select only 1 item. | [Radio](/fields/radio/)

This is a sample field settings array when creating this field with code:

```php
[
    'name'        => 'User',
    'id'          => 'user',
    'type'        => 'user',
    'field_type'  => 'select_advanced',
    'placeholder' => 'Select an author',
],
```

## Ajax load

Meta Box uses ajax to increase the performance of the field query. Instead of fetching all users at once, the plugin now fetches only some users when the page is loaded, and then it fetches more users when users scroll down to the list.

See this video for demonstration (made for posts, but works similar for users, the UI of the MB Builder was from the old version, the new version of MB Builder has a better UI):

<LiteYouTubeEmbed id='2acm5gW59Mc' />

:::info

This feature is available only for fields that set the field type to **select advanced**. There are some extra parameters for you to disable or customize.

:::

### Enable/Disable ajax requests

This feature is enabled by default when you set the field type to "select advanced".

If you're using code to create this field, the settings to enable/disable it is `ajax`, which accepts a boolean value (and it's `true` by default):

```php
[
    'id'    => 'project_author',
    'title' => 'Project Author',
    'type'  => 'user',
    // highlight-next-line
    'ajax'  => true,
],
```

Setting this parameter to `false` will disable ajax requests.

### Limit the number of users for pagination

The number of users for pagination is set via the `number` parameter in the "Query_args" setting:

```php
[
    'id'         => 'project_author',
    'title'      => 'Project Author',
    'type'       => 'user',
    'ajax'       => true,
    'query_args' => [
        // highlight-next-line
        'number' => 10,
    ],
],
```

When fetching new users, the new users will be appended to the list of options in the dropdown, to make the infinite scroll effect.

:::info Initial load

The number of users **doesn't affect the initial load** of the field. When the field is loaded, Meta Box **only queries for saved users** (which is usually not many). So the initial query is very minimal and doesn't cause any performance problems.

:::

### Searching parameters

You probably don't want to perform an ajax request when opening the dropdown at first. You might want to _make ajax requests only when users type something_ and search for that. To do that, you need to set the `minimumInputLengthfor` the input, as below:

```php
[
    'id'         => 'project_author',
    'title'      => 'Project Author',
    'type'       => 'user',
    'ajax'       => true,
    'query_args' => [
        'number' => 10,
    ],
    'js_options' => [
        // highlight-next-line
        'minimumInputLength' => 1,
    ],
],
```

This parameter sets the minimum number of characters required to start a search. It may be good if you don't want users to make too many ajax requests that could harm your server.

## Data

This field saves user ID(s) in the database.

If "Multiple" is not set, a single user ID is saved in the database. Otherwise, the field saves multiple user IDs in the database, where each user ID is stored in a single row in the database with the same meta key (similar to what `add_post_meta` does with the last parameter `false`).

If the field is cloneable, then the value is stored as a serialized array in a single row in the database.

## Template usage

**Getting selected user ID:**

```php
<?php $user_id = rwmb_meta( 'my_field_id' ); ?>
<p>Selected user ID: <?= $user_id ?></p>
```

**Getting selected user object:**

```php
<?php $user_id = rwmb_meta( 'my_field_id' ); ?>
<?php $user = get_userdata( $user_id ); ?>
<pre>
    <!-- Show all data from the selected user -->
    <?php print_r( $user ); ?>
</pre>
```

**Displaying selected user info:**

```php
<?php $user_id = rwmb_meta( 'my_field_id' ); ?>
<?php $user = get_userdata( $user_id ); ?>
<p>Display name: <?= $user->display_name ?></p>
<p>Email: <?= $user->user_email ?></p>
```

or simpler:


```php
<p>Display name: <?php rwmb_the_value( 'my_field_id', ['link' => false] ) ?></p>
<p>Email: <?php rwmb_the_value( 'my_field_id', ['display_field' => 'user_email', 'link' => false] ) ?></p>
```

**Additional options for `rwmb_the_value()`:**

Using `rwmb_the_value` also has some extra options as following:

```php
<!-- Displaying the user display name without link -->
<?php rwmb_the_value( 'my_field_id', ['link' => false] ) ?>

<!-- Displaying the user display name with link to view post (default) -->
<?php rwmb_the_value( 'my_field_id' ) ?>
<?php rwmb_the_value( 'my_field_id', ['link' => 'view'] ) ?>

<!-- Displaying the user display name with link to edit post -->
<?php rwmb_the_value( 'my_field_id', ['link' => 'edit'] ) ?>

<!-- Displaying the user email -->
<?php rwmb_the_value( 'my_field_id', ['display_field' => 'user_email'] ) ?>
```

Parameter | Description
--- | ---
`link` | Which type of link to display: `false` - no link, `view` - user posts page, `edit` - edit user page.
`display_field` | The user field to display. Default is `display_name`.

**Displaying multiple selected users:**

If the "Multiple" is set or the field is cloneable, you can loop through the returned values like this:

```php
<?php $user_ids = rwmb_meta( 'my_field_id' ); ?>
<h3>Speakers</h3>
<ul>
    <?php foreach ( $user_ids as $user_id ) : ?>
        <?php $user = get_userdata( $user_id ) ?>
        <li><?= $user->display_name ?></a></li>
    <?php endforeach ?>
</ul>
```

of simpler:

```php
<h3>Speakers</h3>
<?php rwmb_the_value( 'my_field_id', ['link' => false] ); ?>
```

`rwmb_the_value()` automatically output multiple selected users as an unordered list with links to each user.

## Filters

`rwmb_user_choice_label` and `rwmb_{$field_id}_choice_label`

These filters allow developers to change the label of `user` fields. The first label applies to all `user` fields and the second one is for a specific field.

Example: If you are using a field called `some_user` and you want to change the label in the select box to user `first_name` instead of the default `display_name`:

```php
function some_user_filter( $label, $field, $user ) {
    return $user->first_name ;
}
add_filter( 'rwmb_some_user_choice_label', 'some_user_filter', 10, 3 );
```

# Video

import Screenshots from '@site/src/components/Screenshots';

The video field uses the WordPress media popup for selecting / uploading videos.

## Screenshots

<Screenshots
    name="video"
    col1={[
        ['https://imgur.elightup.com/M84bDrX.png', 'The video field interface'],
    ]}
/>

## Settings

Besides the [common settings](/field-settings/), this field has the following specific settings, the keys are for use with code:

Name | Key | Description
--- | --- | ---
Max number of files | `max_file_uploads` | Max number of uploaded files. Optional.
Force delete | `force_delete` | Whether or not delete the files from Media Library when deleting them from post meta. `true` or `false` (default). Optional. Note: it might affect other posts if you use the same file for multiple posts.
Show status | `max_status` | Display how many files uploaded/remaining. Applied only when "Max number of files" is defined. `true` (default) or `false`. Optional.

This is a sample field settings array when creating this field with code:

```php
[
    'name'             => 'Video',
    'id'               => 'field_id',
    'type'             => 'video',
    'max_file_uploads' => 3,
    'force_delete'     => false,
    'max_status'       => true,
],
```

## Data

This field saves multiple attachment IDs in the database. Each value (attachment ID) is stored in a single row in the database with the same meta key (similar to what `add_post_meta` does with the last parameter `false`).

## Template usage

**Displaying videos with HTML5 player:**

```php
<?php $videos = rwmb_meta( 'my_field_id' ); ?>
<h3>Uploaded videos</h3>
<ul>
    <?php foreach ( $videos as $video ) : ?>
        <li><video src="<?= $video['src']; ?>"></li>
    <?php endforeach ?>
</ul>
```

`rwmb_meta()` returns an array of videos, each video has the following information:

```php
[
    'ID'          => 123,
    'src'         => 'https://example.com/wp-content/uploads/intro.mp4',
    'title'       => 'Introduction',
    'type'        => 'video',
    'caption'     => 'Video caption',
    'description' => 'Video description',

    // Array of video ID3 meta. See https://developer.wordpress.org/reference/functions/wp_get_attachment_id3_keys/
    'meta'        => [],

    // Video dimension.
    'dimensions'  => [
        'width'  => 640,
        'height' => 360,
    ],

    // Featured image: full size
    'image'       => [
        'src'    => 'https://example.com/wp-content/uploads/full.jpg',
        'width'  => 1024,
        'height' => 500,
    ],

    // Featured image: thumbnail
    'thumb'       => [
        'src'    => 'https://example.com/wp-content/uploads/full-150x150.jpg',
        'width'  => 150,
        'height' => 150',
    ],
];
```

**Displaying only one video:**

```php
<?php $videos = rwmb_meta( 'my_field_id', ['limit' => 1] ) ?>
<?php $video = reset( $videos ) ?>
<video src="<?= $video['src'] ?>">
```

**Displaying videos in a player with a playlist:**

```php
<h3>Videos</h3>
<?php rwmb_the_value( 'my_field_id' ) ?>
```

**Displaying list of videos with video player for each video:**

```php
<?php $videos = rwmb_meta( 'my_field_id' ) ?>
<ul>
    <?php foreach ( $videos as $video ) : ?>
        <li>
            <?php
            echo wp_video_shortcode( [
                'src'    => $video['src'],
                'width'  => $video['dimensions']['width'],
                'height' => $video['dimensions']['height'],
            ] );
            ?>
        </li>
    <?php endforeach ?>
</ul>
```

# WYSIWYG Editor

import Screenshots from '@site/src/components/Screenshots';

The WYSIWYG field creates an editor to enter rich content. You can enter headings, paragraphs, lists, and insert media.

:::tip What is WYSIWYG?

"WYSIWYG" stands for **W**hat **Y**ou **S**ee **I**s **W**hat **Y**ou **G**et, a general term of visual editor, where you see the formatted content as you type.

:::

## Screenshots

<Screenshots name="wysiwyg" col1={[
    ['https://imgur.elightup.com/Y72Bcvw.png', 'The WYSIWYG field interface'],
]} />

## Settings

Besides the [common settings](/field-settings/), this field has the following specific settings, the keys are for use with code:

Name | Key | Description
--- | --- | ---
Save data in the raw format | `raw` | Whether to save content in the raw format without applying `wpautop()`. Can be `true` or `false` (default). Optional.
Editor options | `options` | A list of editor options, [see here](https://developer.wordpress.org/reference/classes/_WP_Editors/parse_settings/).

By default, the plugin uses 2 editor options:

Name | Default Value | Description
--- | --- | ---
`editor_class` | `rwmb-wysiwyg` | Just to make CSS consistent with other fields
`dfw` | `true` | Allow to use "Distraction Free Writing" mode (full-screen mode)

This is a sample field settings array when creating this field with code:

```php
[
    'name'    => 'WYSIWYG / Rich Text Editor',
    'id'      => 'field_id',
    'type'    => 'wysiwyg',
    'raw'     => false,
    'options' => [
        'textarea_rows' => 4,
        'teeny'         => true,
    ],
],
```

## Data

If `raw` is `true`, this field saves exactly what you enter into the database. Otherwise, it saves the value after applying `wpautop` function.

## Template usage

**Displaying the content:**

```php
<h2>Content</h2>
<?php rwmb_the_value( 'my_field_id' ) ?>
```

:::warning Content formatting

Note that the helper function doesn't format the value of this field nor run shortcodes in the content. In case you want to make it behaves similar to the post content (e.g. format and shortcodes), use this code:

```php
global $wp_embed;
$value = rwmb_meta( 'my_field_id' );
$value = do_shortcode( wpautop( $wp_embed->autoembed( $value ) ) );
echo $value;
```

:::

## Filters

### `rwmb_wysiwyg_settings`

This filter is used to change the options for the editor (which is passed by `$field['option']`) and is applied to all `wysiwyg` fields.

This filter accepts 1 param - an array of editor settings.

# rwmb_meta_boxes

This is the most important filter of Meta Box. It is used to add/remove/edit field groups.

```php
apply_filters( 'rwmb_meta_boxes', $meta_boxes );
```

This filter has one parameter - an array of field groups.

## Examples

**Registering a field group:**

```php
add_filter( 'rwmb_meta_boxes', function ( $meta_boxes ) {
    $meta_boxes[] = [
        'title'      => 'Event details',
        'post_types' => 'event',
        'fields'     => [
            [
                'name' => 'Date and time',
                'id'   => 'datetime',
                'type' => 'datetime',
            ],
            'Location',
            [
                'name'          => 'Map',
                'id'            => 'map',
                'type'          => 'osm',
                'address_field' => 'location',
            ],
        ],
    ];

    return $meta_boxes;
} );
```

**Removing a registered field group `event-details`:**

```php
add_filter( 'rwmb_meta_boxes', function ( $meta_boxes ) {
    foreach ( $meta_boxes as $k => $meta_box ) {
        if ( $meta_box['id'] === 'event-details' ) {
            unset( $meta_boxes[ $k ] );
        }
    }

    return $meta_boxes;
} );
```

# rwmb_normalize_meta_box

This filter is used to normalize field group settings. It's useful when you want to set default values for a field group.

```php
apply_filters( 'rwmb_normalize_meta_box', $meta_box );
```

It accepts one parameter - the field group settings array.

If you want to normalize settings for a specific field group, use a variation of this filter:

```php
apply_filters( "rwmb_normalize_{$meta_box_id}_meta_box", $meta_box );
```

## Examples

Prefix all field groups for the event post type:

```php
add_filter( 'rwmb_normalize_meta_box', function( $meta_box ) {
	if ( $meta_box['post_type'] === 'event' ) {
		$meta_box['id'] = "event_{$meta_box['id']}";
	}
	return $meta_box;
} );
```

# rwmb_normalize_field

This filter is used to normalize field settings. It's useful when you want to set default values for a field.

```php
apply_filters( 'rwmb_normalize_field', $field );
```

It accepts one parameter - an array of field settings.

This filter has variations:

- `rwmb_normalize_field`: apply to all fields
- `rwmb_normalize_{$field_type}_field`: apply to fields with a specific type
- `rwmb_normalize_{$field_id}_field`: apply to a field with a specific id

## Examples

**Auto add a prefix to all fields' IDs:**

```php
add_filter( 'rwmb_normalize_field', function( $field ) {
	$field['id'] = "prefix_{$field['id']}";
	return $field;
} );
```

**Auto add a `_` prefix to all fields' IDs to hide them from the "Custom Fields" meta box:**

```php
add_filter( 'rwmb_normalize_field', function( $field ) {
	$field['id'] = "_{$field['id']}";
	return $field;
} );
```

# rwmb_show

This filter is used to decide whether to show a field group.

```php
apply_filters( 'rwmb_show', $show, $meta_box );
```

It accepts 2 parameters:

Name|Description
---|---
`$show`|The current visibility of the field group
`$meta_box`|Field group settings

To run this filter for a specific field group, use a variation of this filter:

```php
apply_filters( "rwmb_show_{$meta_box_id}", $show, $meta_box );
```

## Examples

**Hide a field group if the current user is not admin:**

```php
add_filter( 'rwmb_show_event-details', function( $show, $meta_box ) {
    if ( current_user_can( 'manage_options' ) ) {
        $show = false;
    }
    return $show;
} );
```

**Hide a field group if current post ID is 123:**

```php
add_filter( 'rwmb_show_event-details', function( $show, $meta_box ) {
    $post_id = isset( $_GET['post'] ) ? $_GET['post'] : null;
    if ( $post_id === 123 ) {
        $show = false;
    }
    return $show;
} );
```

# rwmb_meta

This filter is used to change the returned value of the [rwmb_meta()](/functions/rwmb-meta/) helper function .

```php
apply_filters( 'rwmb_meta', $value, $field_id, $args, $object_id );
```

It accepts 4 parameters:

Name|Description
---|---
`$value`|The value returned by the `rwmb_meta` function
`$field_id`|The field ID
`$args`|Arguments passed to the `rwmb_meta` function
`$object_id`|Object ID

## Examples

Format the value of a date field:

```php
add_filter( 'rwmb_meta', function( $value, $field_id, $args, $object_id ) {
    if ( $field_id === 'event_date' ) {
        $value = date( 'F j, Y', strtotime( $value ) );
    }
    return $value;
}, 10, 4 );
```

# rwmb_get_value

This filter is used to change the returned value of the [rwmb_get_value()](/functions/rwmb-get-value/) helper function.

```php
apply_filters( 'rwmb_get_value', $value, $field_id, $args, $object_id );
```

It accepts 4 parameters:

Name|Description
---|---
`$value`|The value returned by the `rwmb_get_value` function
`$field_id`|The field ID
`$args`|Arguments passed to the `rwmb_get_value` function
`$object_id`|Object ID

## Examples

Format the value of a date field:

```php
add_filter( 'rwmb_meta', function( $value, $field_id, $args, $object_id ) {
    if ( $field_id === 'event_date' ) {
        $value = date( 'F j, Y', strtotime( $value ) );
    }
    return $value;
}, 10, 4 );
```

# rwmb_the_value

This filter is used to change the returned value of the [rwmb_the_value()](/functions/rwmb-the-value/) helper function.

```php
apply_filters( 'rwmb_the_value', $value, $field_id, $args, $object_id );
```

It accepts 4 parameters:

Name|Description
---|---
`$value`|The value returned by the `rwmb_the_value` function
`$field_id`|The field ID
`$args`|Arguments passed to the `rwmb_the_value` function
`$object_id`|Object ID

## Examples

Format the value of a date field:

```php
add_filter( 'rwmb_meta', function( $value, $field_id, $args, $object_id ) {
    if ( $field_id === 'event_date' ) {
        $value = date( 'F j, Y', strtotime( $value ) );
    }
    return $value;
}, 10, 4 );
```

# rwmb_shortcode

This filter is used to change the output of [`[rwmb_shortcode]` shortcode](/shortcode/).

```php
apply_filters( 'rwmb_shortcode', $content );
```

It has one parameter - the output of the shortcode.

# rwmb_value

This filter is used to change a field value before saving it in the database.

```php
apply_filters( 'rwmb_value', $value, $field, $old, $object_id );
```

It accepts 4 parameters:

Name|Description
---|---
`$value`| Field value which will be saved in the database
`$field`| Field settings
`$old`| The old meta value of the field (which was previously in the database)
`$object_id`| The object ID

This filter has variations:

- `rwmb_value`: apply to all fields
- `rwmb_{$field_type}_value`: apply to fields with a specific type
- `rwmb_{$field_id}_value`: apply to a field with a specific id

:::info
If you return an empty string or an empty array (for cloneable fields or fields with multiple values like file, image, checkbox list), the field won't be saved in the database.
:::

## Examples

**Disallowing a value from being saved:**

```php
add_filter( 'rwmb_event_date_value', function( $new, $field, $old, $object_id ) {
	if ( $new === '2022-05-01' ) { // No events on Labor Day
		$new = '';
	}
	return $new;
} );
```

# rwmb_outer_html

import FieldHTML from '../_parts/_field-html.md';

This filter is used to change the outer HTML output of a field. Outer HTML is the surrounding div (the most outside) of the field.

<FieldHTML />

This filter is used to change the **field outer HTML**, e.g. the wrapper div of everything for the field.

```php
apply_filters( 'rwmb_outer_html', $html, $field, $value );
```

This filter accepts 3 parameters:

Name|Description
---|---
`$html`| The outer HTML output of a field
`$field`| Field settings
`$value`| Field value

This filter has variations:

- `rwmb_outer_html`: apply to all fields
- `rwmb_{$field_type}_outer_html`: apply to fields with a specific type
- `rwmb_{$field_id}_outer_html`: apply to a the field with a specific id

# rwmb_wrapper_html

import FieldHTML from '../_parts/_field-html.md';

This filter is used to change the wrapper HTML of a field, e.g. the HTML content **inside the `<div class="rwmb-field..."></div>`**.

<FieldHTML />

Syntax:

```php
apply_filters( 'rwmb_wrapper_html', $html, $field, $meta );
```

This filter accepts 3 parameters:

Name|Description
---|---
`$html`| The wrapper HTML of the field
`$field`| Field settings
`$meta`| Field value

This filter has variations:

- `rwmb_wrapper_html`: apply to all fields
- `rwmb_{$field_type}_wrapper_html`: apply to fields with a specific type
- `rwmb_{$field_id}_wrapper_html`: apply to a the field with a specific id

# rwmb_begin_html

import FieldHTML from '../_parts/_field-html.md';

This filter is used to change the beginning HTML output of a field.

<FieldHTML />

The default beginning HTML of a field is:

```html
<div class="rwmb-label" id="{$field['id]}-label">
    <label for="{$field['id']}">
        {$field['name']}
        <span class="rwmb-required">*</span>
    </label>
    <p id="{$field['id']}-label-description" class="description">{$field['label_description']}</p>
</div>
<div class="rwmb-input">
```

Syntax:

```php
apply_filters( 'rwmb_begin_html', $begin, $field, $value );
```

This filter accepts 3 parameters:

Name|Description
---|---
`$begin`| The beginning HTML output of the field
`$field`| Field settings
`$value`| Field value

This filter has variations:

- `rwmb_begin_html`: apply to all fields
- `rwmb_{$field_type}_begin_html`: apply to fields with a specific type
- `rwmb_{$field_id}_begin_html`: apply to a field with a specific id

# rwmb_end_html

import FieldHTML from '../_parts/_field-html.md';

This filter is similar to [rwmb_begin_html](/filters/rwmb-begin-html/) and is used to change the ending HTML output of a field.

<FieldHTML />

The ending HTML for a field looks like this:

```html
	{$add_clone_button}
	<p id="{$field['id']}-description" class="description">{$field['desc']}</p>
</div><!-- .rwmb-input -->
```

Syntax:

```php
apply_filters( 'rwmb_end_html', $end, $field, $value );
```

This filter accepts 3 parameters:

Name|Description
---|---
`$end`| The ending HTML output of the field
`$field`| Field settings
`$value`| Field value

This filter has variations:

- `rwmb_end_html`: apply to all fields
- `rwmb_{$field_type}_end_html`: apply to fields with a specific type
- `rwmb_{$field_id}_end_html`: apply to a field with a specific id

# rwmb_html

import FieldHTML from '../_parts/_field-html.md';

This filter is used to change the HTML of the **field input**.

<FieldHTML />

This filter is used to change the **field input HTML**, e.g. the HTML of the inputs to enter data.

The HTML of a field input is various and depends on the field type. For example, a text field outputs an `input` tag, while a wysiwyg field outputs a complex `div`.

```php
apply_filters( 'rwmb_html', $html, $field, $value );
```

This filter accepts 3 parameters:

Name|Description
---|---
`$html`| HTML output of a field
`$field`| Field settings
`$value`| Field value

This filter has variations:

- `rwmb_html`: apply to all fields
- `rwmb_{$field_type}_html`: apply to fields with a specific type
- `rwmb_{$field_id}_html`: apply to a field with a specific id

# rwmb_field_meta

This filter is used to change a field value before displaying it in the editing form.

```php
apply_filters( 'rwmb_field_meta', $value, $field, $saved );
```

It accepts 3 parameters:

Name|Description
---|---
`$value`| Field value
`$field`| Field settings
`$saved`| Whether the field group is saved in the database. It's useful when you want to set a default value for a field

This filter has variations:

- `rwmb_field_meta`: apply to all fields
- `rwmb_{$field_type}_field_meta`: apply to fields with a specific type
- `rwmb_{$field_id}_field_meta`: apply to a field with a specific id

# rwmb_choice_label

This filter allows developers to change the label of choice fields (`user`, `post`, `taxonomy`, and `taxonomy_advanced`).

```php
apply_filters( 'rwmb_choice_label', $label, $field, $object );
```

It has 3 parameters:

Name|Description
---|---
`$label`| The output label
`$field`| Field settings
`$object`| The post, user, or term object

This filter has variations:

- `rwmb_choice_label`: apply to all choice fields
- `rwmb_{$field_type}_choice_label`: apply to choice fields with a specific type
- `rwmb_{$field_id}_choice_label`: apply to a field with a specific id

## Examples

**Display a formatted name instead of the default display name:**

```php
add_filter( 'rwmb_some_user_choice_label', function( $label, $field, $object ) {
    return "Mr: {$object->first_name}";
}, 10, 3 );
```

# rwmb_meta

import FAQ from '@site/src/components/FAQ';

`rwmb_meta` is a helper function that helps you get a field value.

It's actually a wrapper of [rwmb_get_value()](/functions/rwmb-get-value/) and [rwmb_the_value()](/functions/rwmb-the-value/) functions to make sure the returned value is always helpful to developers.

More precisely:
- If field type is either oEmbed, Google maps, or Open Street Maps, it's exactly the same as [rwmb_the_value()](/functions/rwmb-the-value/), but returns the field HTML output.
- For other field types, it's exactly the same as [rwmb_get_value()](/functions/rwmb-get-value/).

## Arguments

This function accepts 3 arguments as follows:

```php
rwmb_meta( $field_id, $args, $object_id );
```

Name|Description
---|---
`$field_id`|The field ID. Required.
`$args`|Extra arguments for some field types (like `size` for `image_advanced`) or for another object type (like getting values for terms or users). Can be an array or a string in format `param1=value1&param2=value2`.
`$object_id`|Object (post, term, user) ID. If you need to get value from an option (using MB Settings Page), object ID is the option name. If not present, the current post ID is used.

## Returned value

- If the field has a single value (not `multiple` nor `clone`), then the function returns that value.
- If the field has multiple values (`multiple`, `clone`, or the field type is `group`), then the function returns an array of values.

:::info Embeded fields

For **oEmbed, Google maps, or Open Street Maps**, this function returns the HTML output, e.g. a video player or a embeded map.

:::

:::info Returned value format

Depending on the field types, the returned value can be different. Please refer to each field type in the [Fields](/fields/) section for more details.

:::

## Examples

**Getting the value of a text field:**

```php
<p>
    <strong>Location:</strong> <?= rwmb_meta( 'location' ) ?>
</p>
```

**Getting the value of a radio field from a post with ID 123:**

```php
<?php
$layout = rwmb_meta( 'layout', '', 123 );

if ( $layout === 'content-sidebar' ) {
    get_template_part( 'main-content' );
    get_template_part( 'sidebar' );
} elseif ( $layout === 'full-width' ) {
    get_template_part( 'main-content' );
}
```

**Getting image URL from a single image field:**

```php
<?php $image = rwmb_meta( 'cover', ['size' => 'full'] ) ?>
<p>
    <strong>Cover image:</strong>
</p>
<p>
    <img src="<?= $image['url'] ?>">
</p>
```

**Displaying a gallery with lightbox effect using an image advanced field:**

```php
<?php $images = rwmb_meta( 'gallery', ['size' => 'thumbnail'] ) ?>

<div class="gallery">
    <?php foreach ( $images as $image ) : ?>
        <a href="<?= $image['full_url'] ?>" class="lightbox">
            <img src="<?= $image['url'] ?>">
        </a>
    <?php endforeach ?>
</div>
```

**Displaying a Google maps or Open Street Maps field:**

```php
<p>
    <strong>Map:
</p>
<?= rwmb_meta( 'map' ) ?>
```

**Displaying list of related posts from a post field (with "multiple" setting is enabled):**

```php
<?php $posts = rwmb_meta( 'related' ) ?>

<div class="related-posts">
    <?php foreach ( $posts as $post ) : ?>
        <a href="<?= get_permalink( $post ) ?>">
            <?= get_the_title( $post ) ?>
        </a>
    <?php endforeach ?>
</div>
```

**Displaying a cloneable group:**

```php
<?php $authors = rwmb_meta( 'authors' ) ?>

<?php foreach ( $authors as $author ) : ?>
    <div class="author">
        <p>
            <strong>Name:</strong> <?= $author['name'] ?>
        </p>
        <p>
            <strong>Email:</strong> <?= $author['email'] ?>
        </p>
        <p>
            <strong>Address:</strong> <?= $author['address'] ?>
        </p>
    </div>
<?php endforeach ?>
```

**Getting a term meta from a term with ID 15:**

```php
<?php $color = rwmb_meta( 'color', ['object_type' => 'term'], 15 ) ?>

<div class="featured-section" style="background-color: <?= $color ?>">
    <h2>Featured section</h2>
</div>
```

**Getting a setting:**

```php
<?php $hotline = rwmb_meta( 'hotline', ['object_type' => 'setting'], 'site_option' ) ?>

<div class="topbar">
    <strong>Hotline:</strong> <?= $hotline ?>
</div>
```

**Getting a field value from a custom table:**

```php
<?php $price = rwmb_meta( 'price', ['storage_type' => 'custom_table', 'table' => 'properties'], 15 ) ?>

<p>
    <strong>Property price:</strong> <?= number_format( $price ) ?> USD
</p>
```

## FAQ

<FAQ question="Why does my site crash when I deactivate Meta Box?">

If you're using this function in your theme, then they become unavailable when Meta Box is deactivated. And your site might crash in that situation.

You can fix that by going to the admin area » Plugins and re-activate Meta Box.

Alternatively, you can add the following code into your theme's `functions.php` file to make the error go away, however, the custom fields won't display, either.

```php
if ( ! function_exists( 'rwmb_meta' ) ) {
    function rwmb_meta( $key, $args = [], $object_id = null ) {
        return null;
    }
}
```

</FAQ>

<FAQ question="Why can't I get the label for a select field?">

If you format the options of your select field as:

```php
'options' => [
    'us' => 'United States',
    'uk' => 'United Kingdom',
    'au' => 'Australia',
],
```

Then when using with this function, it returns the value "us", "uk", or "au". To get the label like "United States", please use the [rwmb_the_value()](/functions/rwmb-the-value/) function.

</FAQ>

# rwmb_set_meta

`rwmb_set_meta` is a helper function that helps you to set value for a field.


## Arguments

This function accepts 4 parameters as follows:

```php
rwmb_set_meta( $object_id, $field_id, $value, $args = [] );
```

Parameter|Description
---|---
`$object_id`|Object (post, term, user) ID. If you need to set value for an option (using MB Settings Page), object ID is the option name.
`$field_id`|Field ID.
`$value`|Value. Should be compatible with field value format. See [database](/database/).
`$args`|Extra arguments for some object types or storages. It works similarly in [rwmb_meta](/functions/rwmb-meta/) function. Can be array or a string in format param1=value1&param2=value2. Optional.

:::warning

This function works only when the field is already registered. In Meta Box, fields are registered at hook `init` with priority 20. So, you need to run this function after that:

```php
add_action( 'init', function() {
	rwmb_set_meta( 12, 'my_field', 'my_value' );
}, 99 );
```
:::

## Examples

**Setting a field value for a post:**

```php
add_action( 'init', function() {
	$post_id = 123;
	$field_id = 'my_field';
	$value = 'My custom value';
	rwmb_set_meta( $post_id, $field_id, $value );
}, 99 );
```

**Setting a cloneable group value for a post:**

```php
add_action( 'init', function() {
	$post_id = 123;
	$field_id = 'my_field';
	$value = [
		[
			'name' => 'Andy',
			'email' => 'andy@mail.com',
		],
		[
			'name' => 'Bruce',
			'email' => 'bruce@mail.com',
		],
	];
	rwmb_set_meta( $post_id, $field_id, $value );
}, 99 );
```

**Setting a field value for a term:**

```php
add_action( 'init', function() {
	$term_id = 123;
	$field_id = 'my_field';
	$value = 'My custom value';
	$args = [ 'object_type' => 'term' ];
	rwmb_set_meta( $term_id, $field_id, $value, $args );
}, 99 );
```

**Setting a field value for a user:**

```php
add_action( 'init', function() {
	$user_id = 123;
	$field_id = 'my_field';
	$value = 'My custom value';
	$args = [ 'object_type' => 'user' ];
	rwmb_set_meta( $user_id, $field_id, $value, $args );
}, 99 );
```

**Setting a field value for a settings page:**

```php
add_action( 'init', function() {
	$option_name = 'my_option';
	$field_id = 'my_field';
	$value = 'My custom value';
	$args = [ 'object_type' => 'setting' ];
	rwmb_set_meta( $option_name, $field_id, $value, $args );
}, 99 );
```

**Setting a field value with custom table:**

```php
add_action( 'init', function() {
	$table_name = 'my_table';
	$post_id = 123;
	$field_id = 'my_field';
	$value = 'My custom value';
	$args = [
		'storage_type' => 'custom_table',
		'table'        => $table_name,
	];
	rwmb_set_meta( $post_id, $field_id, $value, $args );
}, 99 );
```

# rwmb_get_value

import FAQ from '@site/src/components/FAQ';

`rwmb_get_value` is a helper function that helps you get a field value.

It's actually a wrapper of `get_post_meta()` function with some additions to match [the way Meta Box saves field values in the database](/database/).

It automatically handles cloneable fields as well as fields with multiple values (like post, taxonomy, or checkbox list).

It also adds some additional information to the returned value (such as image info) to make it's easier for developers.

## Arguments

This function accepts 3 arguments as follows:

```php
rwmb_get_value( $field_id, $args, $object_id );
```

Name|Description
---|---
`$field_id`|The field ID. Required.
`$args`|Extra arguments for some field types (like `size` for `image_advanced`) or for another object type (like getting values for terms or users). Can be an array or a string in format `param1=value1&param2=value2`.
`$object_id`|Object (post, term, user) ID. If you need to get value from an option (using MB Settings Page), object ID is the option name. If not present, the current post ID is used.

## Returned value

- If the field has a single value (not `multiple` nor `clone`), then the function returns that value.
- If the field has multiple values (`multiple`, `clone`, or the field type is `group`), then the function returns an array of values.

:::info Returned value format

Depending on the field types, the returned value can be different. Please refer to each field type in the [Fields](/fields/) section for more details.

:::

## Examples

**Getting the value of a text field:**

```php
<p>
    <strong>Location:</strong> <?= rwmb_get_value( 'location' ) ?>
</p>
```

**Getting the value of a radio field from a post with ID 123:**

```php
<?php
$layout = rwmb_get_value( 'layout', '', 123 );

if ( $layout === 'content-sidebar' ) {
    get_template_part( 'main-content' );
    get_template_part( 'sidebar' );
} elseif ( $layout === 'full-width' ) {
    get_template_part( 'main-content' );
}
```

**Getting image URL from a single image field:**

```php
<?php $image = rwmb_get_value( 'cover', ['size' => 'full'] ) ?>
<p>
    <strong>Cover image:</strong>
</p>
<p>
    <img src="<?= $image['url'] ?>">
</p>
```

**Displaying a gallery with lightbox effect using an image advanced field:**

```php
<?php $images = rwmb_get_value( 'gallery', ['size' => 'thumbnail'] ) ?>

<div class="gallery">
    <?php foreach ( $images as $image ) : ?>
        <a href="<?= $image['full_url'] ?>" class="lightbox">
            <img src="<?= $image['url'] ?>">
        </a>
    <?php endforeach ?>
</div>
```

**Displaying list of related posts from a post field (with "multiple" setting is enabled):**

```php
<?php $posts = rwmb_get_value( 'related' ) ?>

<div class="related-posts">
    <?php foreach ( $posts as $post ) : ?>
        <a href="<?= get_permalink( $post ) ?>">
            <?= get_the_title( $post ) ?>
        </a>
    <?php endforeach ?>
</div>
```

**Displaying a cloneable group:**

```php
<?php $authors = rwmb_get_value( 'authors' ) ?>

<?php foreach ( $authors as $author ) : ?>
    <div class="author">
        <p>
            <strong>Name:</strong> <?= $author['name'] ?>
        </p>
        <p>
            <strong>Email:</strong> <?= $author['email'] ?>
        </p>
        <p>
            <strong>Address:</strong> <?= $author['address'] ?>
        </p>
    </div>
<?php endforeach ?>
```

**Getting a term meta from a term with ID 15:**

```php
<?php $color = rwmb_get_value( 'color', ['object_type' => 'term'], 15 ) ?>

<div class="featured-section" style="background-color: <?= $color ?>">
    <h2>Featured section</h2>
</div>
```

**Getting a setting:**

```php
<?php $hotline = rwmb_get_value( 'hotline', ['object_type' => 'setting'], 'site_option' ) ?>

<div class="topbar">
    <strong>Hotline:</strong> <?= $hotline ?>
</div>
```

**Getting a field value from a custom table:**

```php
<?php $price = rwmb_get_value( 'price', ['storage_type' => 'custom_table', 'table' => 'properties'], 15 ) ?>

<p>
    <strong>Property price:</strong> <?= number_format( $price ) ?> USD
</p>
```

## FAQ

<FAQ question="Why does my site crash when I deactivate Meta Box?">

If you're using this function in your theme, then they become unavailable when Meta Box is deactivated. And your site might crash in that situation.

You can fix that by going to the admin area » Plugins and re-activate Meta Box.

Alternatively, you can add the following code into your theme's `functions.php` file to make the error go away, however, the custom fields won't display, either.

```php
if ( ! function_exists( 'rwmb_get_value' ) ) {
    function rwmb_get_value( $key, $args = [], $object_id = null ) {
        return null;
    }
}
```

</FAQ>

<FAQ question="Why can't I get the label for a select field?">

If you format the options of your select field as:

```php
'options' => [
    'us' => 'United States',
    'uk' => 'United Kingdom',
    'au' => 'Australia',
],
```

Then when using with this function, it returns the value "us", "uk", or "au". To get the label like "United States", please use the [rwmb_the_value()](/functions/rwmb-the-value/) function.

</FAQ>

# rwmb_the_value

import FAQ from '@site/src/components/FAQ';

`rwmb_the_value` is a helper function that outputs the HTML of a field.

It's very helpful in case you want to output a real Google maps or a player for oEmbed field.

Unlike [rwmb_get_value()](/functions/rwmb-get-value/), this function always outputs human-readable content. For example, for a checkbox list or a select field, it outputs the labels of the choices, not the values.

## Arguments

This function accepts 4 arguments as follows:

```php
rwmb_the_value( $field_id, $args, $object_id, $echo );
```

Name|Description
---|---
`$field_id`|The field ID. Required.
`$args`|Extra arguments for some field types (like `size` for `image_advanced`) or for another object type (like getting values for terms or users). Can be an array or a string in format `param1=value1&param2=value2`.
`$object_id`|Object (post, term, user) ID. If you need to get value from an option (using MB Settings Page), object ID is the option name. If not present, the current post ID is used.
`$echo`|Echo the HTML output (`true` - default) or return it (`false`).

## Returned value

By default, the function just outputs the HTML content of the field and doesn't return anything. If you set `$echo` to `false`, then it will return the HTML as a string.

For simple fields like text or select, HTML output is just the field value.

For other fields, HTML can be unordered list (like for a checkbox_list field), Google maps, or list of users.

For **choice fields** (select, select advanced, checkbox list, radio, and button group), this function returns or outputs the choice's **label**, not **value**. For example, if you format the options of your select field as:

```php
'options' => [
    'us' => 'United States',
    'uk' => 'United Kingdom',
    'au' => 'Australia',
],
```

Then when using with this function, it outputs the label "United States" or "Australia" depending on its value. If you want to get the value "us", "uk", or "au", please use the [rwmb_get_value()](/functions/rwmb-get-value/) function.

## Examples

**Displaying the value of a text field:**

```php
<p>
    <strong>Location:</strong> <?php rwmb_the_value( 'location' ) ?>
</p>
```

**Displaying an image (single image field):**

```php
<p>
    <strong>Cover image:</strong>
    <?php rwmb_the_value( 'cover' ) ?>
</p>
```

**Displaying a list of images using an image advanced field:**

```php
<?php rwmb_the_value( 'gallery', ['size' => 'thumbnail'] ) ?>
```

**Displaying a Google maps or Open Street Maps field:**

```php
<?php rwmb_the_value( 'map' ) ?>
```

**Displaying list of related posts from a post field (with "multiple" setting is enabled):**

```php
<div class="related-posts">
    <h3>Related posts</h3>

    <?php rwmb_get_value( 'related' ) ?>
</div>
```

**Displaying a term meta from a term with ID 15:**

```php
<div class="featured-section">
    <h2>Featured section</h2>
    <p>
        <strong>Color:</strong>
        <?php rwmb_get_value( 'color', ['object_type' => 'term'], 15 ) ?>
    </p>
</div>
```

**Displaying a setting:**

```php
<div class="topbar">
    <strong>Hotline:</strong> <?= rwmb_the_value( 'hotline', ['object_type' => 'setting'], 'site_option' ) ?>
</div>
```

**Displaying a field value from a custom table:**

```php
<p>
    <strong>Property price:</strong>
    <?php rwmb_the_value( 'price', ['storage_type' => 'custom_table', 'table' => 'properties'], 15 ) ?> USD
</p>
```

## FAQ

<FAQ question="Why does my site crash when I deactivate Meta Box?">

If you're using this function in your theme, then they become unavailable when Meta Box is deactivated. And your site might crash in that situation.

You can fix that by going to the admin area » Plugins and re-activate Meta Box.

Alternatively, you can add the following code into your theme's `functions.php` file to make the error go away, however, the custom fields won't display, either.

```php
if ( ! function_exists( 'rwmb_the_value' ) ) {
    function rwmb_the_value( $key, $args = [], $object_id = null ) {
        return null;
    }
}
```

</FAQ>

# rwmb_get_field_settings

`rwmb_get_field_settings` is a helper function that gets the field settings by field ID.

It's very helpful in case you want to refer to field's name, field's options array (in a select field) or other settings later in your code.

## Usage

To get field settings by field ID, just call:

```php
$field = rwmb_get_field_settings( $field_id );
/*
Result:
[
    'id' => 'field_id',
    'name' => 'Field Name',
    'type' => 'text,
]
*/
```

However, if you create a custom field for [terms](/extensions/mb-term-meta/), [users](/extensions/mb-user-meta/) or [settings pages](/extensions/mb-settings-page/), you will need to specify object type in the second parameter:

```php
$field = rwmb_get_field_settings( $field_id, ['object_type' => 'term'] ); // or 'user', 'setting
```

## Arguments

This function accepts 3 arguments as below:

```php
$field = rwmb_get_field_settings( $field_id, $args, $object_id );
```

Name|Description
---|---
`$field_id`|The field ID. Required.
`$args`|Extra arguments for some object types or storages. It works similarly in [rwmb_meta](/functions/rwmb-meta/) function. Can be array or a string in format `param1=value1&param2=value2`. Optional.
`$object_id`|Object ID that custom fields are get from. Optional. If not present, current post ID is used.

## Returned value

This function returns full array of field settings.

## Examples

**Getting a select field:**

```php
<?php
$field = rwmb_get_field_settings( 'country' );
```

**Displaying all the sub-fields of a non-cloneable group in the format Field Name: Field Value:**

```php
<?php
$group_id       = 'my_group';
$group_settings = rwmb_get_field_settings( $group_id );
$group          = rwmb_meta( $group_id );

for ( $i = 0; $i < count( $group ); $i++) {
    $field = $group_settings['fields'][$i];
    ?>
    <div class="sub-field"><?= $field['name'] ?>: <?= $group[ $field['id'] ] ?></div>
    <?php
}
```

**Getting a field for a term with ID 15:**

```php
$field = rwmb_get_field_settings( 'color', ['object_type' => 'term'], 15 );
```

**Getting a field from a settings page:**

```php
$field = rwmb_get_field_settings( 'hotline', ['object_type' => 'setting'], 'site_option' );
```

**Getting a field from a custom table:**

```php
$field = rwmb_the_value( 'price', ['storage_type' => 'custom_table', 'table' => 'properties'], 15 );
```

# rwmb_get_object_fields

`rwmb_get_object_fields` is a helper function that gets list of custom fields for a specific object. The object can be a post or a term or a settings page.

## Usage

To get list of object fields, please use the following code:

```php
// For posts
$fields = rwmb_get_object_fields( 123 ); // Get by post ID, or
$fields = rwmb_get_object_fields( 'your_post_type' ); // By post type

// For terms, requires MB Term Meta extension
$fields = rwmb_get_object_fields( 123, 'term' ); // Get by term ID, or
$fields = rwmb_get_object_fields( 'your_taxonomy_slug', 'term' ); // Get by taxonomy slug
```

## Arguments

This function accepts 4 arguments as below:

```php
rwmb_get_object_fields( $type_or_id, $object_type = 'post' );
```

Name|Description
---|---
`$type_or_id`|The object ID or type. Type should be post type/post ID for posts, or taxonomy/term ID for terms or settings page ID for settings pages. Required.
`$object_type`|The object type: `post` (default), `term`, `user` or `setting`. Optional.

## Returned value

This function returns an associated array of fields, with keys are the fields' IDs. Each field is a full array of its own settings.

# rwmb_get_registry

`rwmb_get_registry` is a helper function that gets list of registered meta boxes or fields.

Meta boxes and fields are stored in a meta box registry and field registry correspondingly. This function allows you to retrieve them (and filter them) to get the meta box or field you want.

## Usage

To get meta box or field registry use the code below:

```php
$meta_box_registry = rwmb_get_registry( 'meta_box' );
$field_registry = rwmb_get_registry( 'field' );
```

Each registry has some methods as described below:

## Meta box registry

Meta box registry is a storage of all meta box objects (instances of `RW_Meta_Box` class). The registry stores all meta box objects in a private array of the form `'id' => object`.

To get all meta box objects, use this method:

```php
$meta_boxes = $meta_box_registry->all();
```

To get a specific meta box object by id, use this method:

```php
$meta_box = $meta_box_registry->get( 'id' );
```

To get meta boxes by some attributes, use this method:

```php
$args = [
    'object_type' => 'post',
    'post_types'  => ['post'],
];
$meta_boxes = $meta_box_registry->get_by( $args );
```

Here `$args` is an array of the [meta box settings](/creating-fields-with-code/#field-group-settings) that you use to filter the list of meta boxes.

## Field registry

Similar to meta box registry, field registry is a storage of all fields. Each field is an array of its own settings. Note that fields are **not** objects.

Since fields can have the same ID for different object types (posts, terms, users, settings pages), we can't store fields in the registry in a one-dimentional array as meta box registry. Instead of that, we store it in a multi-dimentional array like this:

```php
[
    'post' => [
        'post'             => [$field1, $field2],
        'page'             => [$field3, $field4],
        'custom_post_type' => [$field5, $field6],
    ],
    'term' => [
        'category'        => [$field1, $field2],
        'post_tag'        => [$field3, $field4],
        'custom_taxonomy' => [$field5, $field6],
    ],
    'user' => [
        'user' => [$field1, $field2],
    ],
    'setting' => [
        'setting_page_1' => [$field1, $field2],
        'settings_page_2' => [$field1, $field2],
    ],
]
```

### Getting a field

To get a specific field, use the code below:

```php
$field = $field_registry->get( $field_id, $sub_type, $object_type );
```

Parameter|Description
---|---
`$field_id`|Field ID
`$sub_type`|The sub-type of the field.<br />For posts, sub-type is the post type slug.<br />For terms, it's the taxonomy slug.<br />For users, it's always `user`.<br />For settings, it's the option name.
`$object_type`|The object type of the field, which is either: `post` (default), `term`, `user` or `setting`. Optional.

```php
$field = $field_registry->get( 'my_field_id', 'my_custom_post_type' );
```

### Getting fields by object type:

To get all fields by object type, use this code:

```php
$fields = $field_registry->get_by_object_type( $object_type = 'post' );
```

Examples:

```php
// Get all fields for posts
$fields = $field_registry->get_by_object_type( 'post' );


// Get all fields for terms
$fields = $field_registry->get_by_object_type( 'term' );


// Get all fields for users
$fields = $field_registry->get_by_object_type( 'user' );


// Get all fields for settings pages
$fields = $field_registry->get_by_object_type( 'setting' );
```

# Integrations

Meta Box works with most WordPress plugins and themes. We test Meta Box with many popular plugins and themes. These include page builders, form plugins, search and filter plugins, SEO plugins, and multilingual plugins.

## Plugins

Meta Box works with other plugins in two ways:

- **Official support**: The plugin has built-in support for Meta Box. You do not need extra setup.
- **MB extension**: A Meta Box extension connects Meta Box to the plugin. Install the extension to use the integration.

### Page builder plugins

Display custom fields in your pages with page builders.

- Beaver Builder - use the [MB Beaver Builder Integration](https://metabox.io/plugins/meta-box-beaver-themer-integrator/)
- Elementor - use the [MB Elementor Integration](https://metabox.io/plugins/mb-elementor-integrator/)
- Oxygen Builder - official support from Oxygen Builder since version 3.9 Beta 1
- Brizy - official support from Brizy
- Bricks - official support from Bricks

### Form plugins

Use these plugins to collect and connect form fields to Meta Box fields. These plugins have official support for Meta Box:

- Fluent Forms
- WS Form
- Bit Form
- Piotnet Forms

### Search and filter plugins

Let visitors search and filter content by Meta Box fields.

- FacetWP - use the [MB FacetWP Integration](https://metabox.io/plugins/meta-box-facetwp-integrator/)
- FilterWP - official support from FilterWP
- SearchWP - use the [MB SearchWP Integration](https://metabox.io/plugins/meta-box-searchwp-integrator/)
- GridbuilderWP - official support from GridbuilderWP
- Piotnet Grid Builder - official support from Piotnet Grid Builder
- [Queryra](https://queryra.com/) - AI search platform, use [their official integration](https://queryra.com/docs/meta-box-integration)

### SEO plugins

Make your custom fields visible to search engines.

- [Slim SEO](https://wpslimseo.com/)
- Rank Math - use the [MB Rank Math](https://metabox.io/plugins/mb-rank-math/) extension
- Yoast SEO - use the [MB Yoast SEO Integration](https://metabox.io/plugins/meta-box-yoast-seo/) extension

### Multilingual plugins

Meta Box has built-in integration for these multilingual plugins. Use them to translate values in custom fields.

- [WPML](/integrations/wpml/)
- [Polylang](/integrations/polylang/)

### Other plugins

- WP All Import/Export: official support from Soffly
- [Auto Listings](https://wpautolistings.com/)
- [WordPress Ultimate CSV, XML Importer Pro](https://www.smackcoders.com/wp-ultimate-csv-importer-pro.html/)

## Themes

These are some of the popular theme shops that use Meta Box to add extra functionality to their themes.

- aThemes
- BeTheme
- Cyberchimps
- Divi - use the [MB Divi Integration](https://metabox.io/plugins/mb-divi-integrator/) extension
- Oshine
- Pixelgrade
- Rara Themes
- RealHomes
- TagDiv
- Themeum
- Themovation

## Hostings

Meta Box works on all hosting providers. It does not require special server settings or extra configuration. Any website that runs WordPress can run Meta Box.

If you need a powerful host that is optimized for developers, you can consider the following providers:

- [Levamo](https://levamo.com/)
- [WPMU Dev](https://premium.wpmudev.org/hosting/)

# Meta Box - Polylang integration

Integration with Polylang offers an intuitive interface to translate both values and labels of all objects, including post types, taxonomies, custom fields, settings pages, and relationships. It works smoothly whether you're using Polylang or Polylang Pro.

Especially, the UI for translating Meta Box field values is the standout feature of this integration, instead of using the `wpml-config.xml` file as Polylang documentation.

## Configuration

After installing Polylang on your site, the setup wizard is automatically launched with all the necessary steps to configure easily a multilingual website.

In there, two of the most essential setup steps are the site languages and the menus.

### Site languages

In the case that you skip the setup wizard, go to **Languages** > **Setup** to add the languages for your site. Then, you should define at least one language by choosing from a list of over 90 predefined languages or creating a custom one. The first language you add becomes the default language of your multilingual website.

![Setup the languages](https://imgur.elightup.com/sSF8iW4.png)

On this screen, you also can configure media, content, and homepage in the next steps. Click on the **Continue** button to set them up.

### Menus

This focuses on displaying and customizing the switch language button on the frontend.

Go to **Appearance** > **Menus**, then follow these steps:

![Set up the language switcher menu](https://imgur.elightup.com/lIG0mgX.png)

1. Click on the **Screen option** button to enable the **Language switcher** option.
2. Select the position of the menu or create a new menu
3. In the **Add menu items** section, navigate to the **Language switcher** tab, check the box, and click on the **Add to menu** button.
4. In the **Languages** tab, check the appropriate options to configure the language switcher and its interface.

Note that the language switcher will display a language only if at least one post or one page has been published in this language.

If you haven’t seen the switcher on the frontend, save your change in the **Manage Locations** tab.

## Overview

Each Meta Box object includes the **value** (data) and **label** (configuration). Meta Box - Polylang integration allows you to translate both of them.

In terms of labels, you can input translations directly without any additional configuration. They are strings in the **Translations** table already. For convenience, Meta Box provides filters based on objects along with their name, as you can see below:

![Meta Box provides filters based on objects to translate labels easily](https://imgur.elightup.com/uXuszXC.png)

So, you can translate labels of post types, taxonomies, fields/field groups, and settings page. You should use them to avoid missing any labels instead of using the search bar.

:::note

Labels must have a value in order to be translated (for example: The “Add more” text of a cloneable field or custom submit button of a settings page). If the label is empty or not set, the translation feature will be skipped for that label.

:::

To translate values, depending on the object you want to translate, there will be corresponding translation methods:

* Values of post types (posts) and taxonomy (terms): Activate languages in the **Settings** submenu, then input translation directly in the post editor and taxonomy admin.
* Field values: Create a wpml-config.xml file that defines the translation action and field ID you need to translate.
* Settings page field values: Simply switch the language on the top bar and enter the translation without any settings.

To display translation on the frontend, you can use MB Views, a page builder or code.

## Post types

For example, I [created a post type](https://docs.metabox.io/tutorials/create-custom-post-types-taxonomies/) named Events. Now, our goal is to translate its labels and posts.

### Post type labels

Go to **Languages** > **Translations**. Then, find the **Meta Box Post Type** option with the name you want from the dropdown list, and click **Filter** to have all the labels of that post type. Simply enter the translations one by one.

![Filter by Meta Box Post type to translate post type labels](https://imgur.elightup.com/VteWkxg.png)

After saving the changes, the translation updated immediately.

![The translations of post type labels are displayed](https://imgur.elightup.com/Wp55M8G.png)

### Post type values

First, you need to activate languages and translations for the custom post type.

Go to **Languages** > **Settings**. Then, click on the **Settings** button in the **Custom post types and Taxonomies** option to activate the translations feature for it.

![Activate languages and translations for the custom post type](https://imgur.elightup.com/1Y9GNLM.png)

After that, go to the post editor to enter the translation for posts. There is a section named **Languages** on the right panel. You can enter the title translation into the box, or click on the “**+**” button to switch to the post in the corresponding language and input the translation of the title and description of the post.

![Click on the + button to input the translation for the posts](https://imgur.elightup.com/vjn0e4G.png)

The icon will be changed to Edit when that language has the translation version.

![The icon is changed to edit](https://imgur.elightup.com/MJw5Ous.png)

Now, in the post type admin, that translation is displayed when you switch the language.

![The translation of posts is displayed](https://imgur.elightup.com/Jy4uLuW.png)

## Taxonomies

Translating custom taxonomy labels and values is the same as translating post types.

### Taxonomy labels

In the **Translation** submenu, filter strings by **Meta Box Taxonomy**. Then, just switch the language in the top bar and enter translation for labels one by one.

![Filter by Meta Box taxonomy to translate taxonomy labels](https://imgur.elightup.com/e7swwEM.png)

After saving translations, you can see they are output like this:

![The translations of taxonomy labels are displayed](https://imgur.elightup.com/o172sjp.png)

### Taxonomy values

To translate terms of taxonomy, you need to activate languages and translations of that taxonomy and the post type that the taxonomy is assigned to.

They are all located in the **Custom post types and Taxonomies** option.

![Activate languages and translations for the custom post type and taxonomy](https://imgur.elightup.com/AL0oeiu.png)

Then, in the taxonomy admin, you have two positions to add translations for the term like this:

![Input translations for terms](https://imgur.elightup.com/exCEMLN.png)

## Custom fields

### Field labels

Meta Box - Polylang integration allows you to translate labels easily, including field group name, `field label`,  `label description`, `input description`, `default value`, `placeholder`, and `adding more text` of cloneable field/group.

Assuming that we need to translate these labels:

![The field labels need to translate](https://imgur.elightup.com/MC70T2x.png)

Navigate to **Languages** > **Translations**. In the list of filters, you can see **Meta Box Field Group**. In this case, I set the language as Show all languages to fill in the translations for all languages at the same time.

![Filter by Meta Box Field group to translate field labels](https://imgur.elightup.com/B8Uqixa.png)

Go to the post editor, you can see the translation of field labels.

![The translations of field labels are displayed](https://imgur.elightup.com/03TVVw1.png)

### Field values

Instead of editing the `wpml-config.xml` file manually as previously, you can now translate field values and manage translations directly with a user-friendly interface. Translating is easy for both developers and non-developers.

Right in the **Settings** tab of the field group, there is a new setting named **Translation**, along with 4 options:

* Do not translate any fields in this field group
* Translate all fields in this field group
* Synchronize values across languages
* Set translation mode per field

![The translation setting offers options to translate the field group](https://imgur.elightup.com/0u6oMI9.png)

When you choose the fourth option, a pop-up includes all the fields and groups with three translation methods:

* **Ignore**: The field value will NOT be copied to the new translation. And you can add the new value as you want.
* **Translate**: The field value will be copied to the new translation, and you can edit it without affecting the other translations
* **Synchronize**: The field value will be synced to all translations whenever you make changes to any translation.

![Choose the translation mode for each field](https://imgur.elightup.com/Ixa2BhO.png)

:::note

* If you have a group, you can only set the translation mode at the group level. All subfields will follow the same translation mode as the group.
* For object-based fields (e.g., image, file, post, term, user), when the translation mode is set to `translate`, the Meta Box – Polylang integration will copy the **ID of the original object** instead of linking to its translated version.

:::

If you use code, you can also translate the values of fields and field groups. Just add the `translation` property, which supports the following values (corresponding translation mode with UI):

* `ignore`: The field group/field value will be left blank in the newly created translation.
* `translate`: The value will be copied and can be edited.
* `copy`: The value will be synced to all translations
* `advanced`: Enable custom translation settings for each field.

For example, to translate the `address` field, the code as below:

![Translate field values using code](https://imgur.elightup.com/OTgSY8K.png)

Then, the field in the post editor is ready for enter the translation with the default value as the field value of the default language.

![Enter the translation for the values](https://imgur.elightup.com/cslzgAq.png)

## Settings pages

### Settings page labels

Similar to translating labels of other objects, this integration helps you filter and translate the settings page labels quickly.

Go to the **Translation** submenu, then filter strings by **Meta Box Settings Page**:

![Filter by Meta Box Settings Page to translate settings page labels](https://imgur.elightup.com/D8yMzvA.png)

Even when you have custom fields on the settings page, the Meta Box - Polylang integration works well for translating field labels. Also, filter by **Meta Box Field Group** to enter translations for them.

![Filter by Meta Box Field group to translate settings page field labels](https://imgur.elightup.com/Cv10qfd.png)

In the settings page, all the labels are switched to the corresponding language seamlessly.

![The translations of setting page labels are displayed](https://imgur.elightup.com/5GGEM21.png)

### Settings page field values

Translating field values in the settings page is simplest since you can enter the translation directly without any additional configuration.

![Translate values of settings page fields](https://imgur.elightup.com/NAevAVT.gif)

Besides, you can still filter strings by **MB Settings Page** in the **Translation** table as other labels.

![Filter by MB Settings Page to translate settings page field values](https://imgur.elightup.com/fLdiIZw.png)

:::warning

When you delete a value from one language on the settings page, the values from other languages are auto-deleted. It happens with not only the Meta Box settings page but also WordPress settings (For instance, site title or site description in **General** settings)

:::

## Relationship labels

In the Translations submenu, filter strings by **Meta Box Relationship** to input the translation for the relationship labels:

![Translate relationship labels](https://imgur.elightup.com/q3UL2Qa.png)

Then, in the post editor, they transfer well when you change the language

![The relationship labels are translated](https://imgur.elightup.com/4Dn6t9O.png)

# Meta Box - WPML Integration

WPML (**WPML Multilingual CMS**) seamlessly integrates with Meta Box, allowing you to easily translate data (both values and labels) of various objects, including posts, taxonomies, custom fields, settings pages, relationships, and users.

## Before you start

You need **WPML Multilingual CMS** and **WPML String Translation** on your site.

Then, you should make sure that you set up WPML already, including the site languages and the language switcher.

Go to **WPML** > **Setup** to start setting up WPML.

### Site languages

The WPML setup wizard is a short process for configuring WPML on your site. It helps you choose which languages to translate your website into, decide whether to use subdirectories or different domains for your translated URLs, and install any additional addons.

Setting up the site language is the first step.

![WPML setup interface](https://imgur.elightup.com/HGQSHPm.png)

This section allows you to choose the languages from the list of 65 languages. In there, you also can regulate which is the default language, and which are custom ones. Also, create a custom language if you can't find languages that you need in the list.

After setting up languages, they will appear in the admin bar, allowing you to switch between languages easily for configuration or enter the translations accordingly in the backend.

![The languages on the admin bar](https://imgur.elightup.com/WEczWMo.png)

### Language switcher

As its name says, this is to switch between languages on the frontend. It will be a form as a button or item in a menu.

Scroll down to the **Menu Language Switcher** section and add a new one.

![Set up the language switcher](https://imgur.elightup.com/z7aqo89.png)

Your new language switcher will now appear next to your navigation menus.

![The language switcher on the frontend allows transform the language](https://imgur.elightup.com/Nsnkfx9.png)

:::warning Notice

If you don’t set it up, there is nothing on the page to change the language to another one. So, the translation versions of all elements including the custom fields are not shown even when they are already existing.

:::

Before translating, you should set admin language as editing language. Navigate to **User** > **Profile**. In the **WPML language settings** section, enable the setting for this:

![Set admin language as editing language](https://imgur.elightup.com/nBZNKxR.png)

## Overview

The available deep compatibility between Meta Box and WPML allows you to translate many objects, as well as the values of their custom fields directly.

In essence, each Meta Box object has two components: configuration (label) and data (value). For example, a custom post type includes its settings (plural name, singular name, etc.) and the posts within it. Similarly, a field group consists of its configuration and the fields displayed in the post editor for entering values.

To translate values, you should follow three steps to translate any object on your site:

1. Make that post type, taxonomy, and custom field translatable (in the **Settings** submenu in WPML).
2. Input translation versions for them.
3. Display the object on the front end (using MB Views, page builders, etc.). The translated versions will go along with the object automatically.

Translating labels of objects is simpler than. Meta Box - WPML integration **detects the labels as strings automatically**. So, you can input translation versions without any complex configuration. This feature allows you to translate labels of all objects, including post types, taxonomies, field groups, fields, settings pages, and relationships. They’re available in the **Translation Management** submenu with corresponding names:

![New tabs help translate labels of objects](https://imgur.elightup.com/26bLfbA.png)

Data will be stored as packages, you can check them in the **String Translation** or **Packages** submenu.

![Package management screen](https://imgur.elightup.com/TvwpKsQ.png)

There are two places to input the translation for labels. One is in the **Translation Management** menu to able to translate multiple items at once. Then, the typical route to translate them is the same as translating normal strings:

1. Select the objects/strings you want to translate and click on the **Translate your content** button.
2. Choose a suitable translation method.
3. Review/ Input the translation in the **Translation** queue.

Or go to the **String Translation** submenu, search and input translation one by one.

After that, when you switch languages on the admin bar, the corresponding content will be transferred immediately.

## Custom post types

After [creating your custom post type](https://docs.metabox.io/tutorials/create-custom-post-types-taxonomies/), you need to make it translatable, then input the translation for posts of the post type.

The custom post types created with Meta Box will be included in the **Post Types Translation** section in the settings of WPML. In this section, locate the custom post type you want to translate. It’s along with three options:

- **Translatable** (only show translated items): The items which don’t have translation are not displayed.
- **Translatable** (use translation if available or fallback to default language): Display all the items with their translation version or default language if they aren’t translated.
- **Not translatable**.

Set it to **Translatable** – only show translated items, and click **Save** to confirm.

![In the Post Types Translation section, make the post types translatable, including custom post types created with Meta Box](https://imgur.elightup.com/LMUgZIk.png)

After enabling the translatable option for the post types, go to **WPML** > **Translation Management**, you can see the tab named your post type along with its post. Select the custom posts you want and click on the **Translate your content** button.

![Go to Translation management submenu to translate custom posts](https://imgur.elightup.com/z9Gla1n.png)

To display the translation of posts, you can use any page builder or MB Views. Then the translation versions will be automatically displayed when the reader clicks on the language switcher.

### Post type labels

Labels of Meta Box post type are detected as strings already. So, they’re available in the **Translation Management** submenu. Find the **Meta Box: Post Type** tab, and choose the post type you want.

![Translate labels of custom post type from Meta Box](https://imgur.elightup.com/g6xjTq2.png)

Then, you can input the translation for each label as usual.

![Enter translations for the labels](https://imgur.elightup.com/WCI8r6y.png)

After translating yourself or using WPML AI, just switch languages to see the translation of post type labels.

![The post type labels are translated](https://imgur.elightup.com/YMdpdKV.png)

## Custom taxonomies

Translating custom taxonomies and their labels is the same as translating post types.

In the settings of WPML, also **set the custom post type**, which the taxonomies is for, is translatable. Notice that the translation versions of taxonomies are available on the page only when its post type also is translatable.

Then, go to the **Taxonomies Translation** section, and find out your custom taxonomies. All the options and translation steps are the same as those for custom post types.

![Make the taxonomies and custom taxonomies translatable in the Taxonomies Translation section](https://imgur.elightup.com/n9QjsMp.png)

To add the translation version for any taxonomy, go to the **Taxonomy Translation** submenu.

![Go to the Taxonomy Translation submenu to add the translation version for taxonomies](https://imgur.elightup.com/250lUA5.png)

### Taxonomy labels

Labels of Meta Box taxonomies are declared as WPML strings without manual installation. So, translating them is effortless. Also in the **Translation Managerment** submenu, select your taxonomy from the **Meta Box: Taxonomy** tab.

![Go to Meta Box: Taxonomy to translate taxonomy labels](https://imgur.elightup.com/q8ShQG8.png)

The labels of a taxonomy are similar to post type labels.

![Enter the translation of taxonomy labels](https://imgur.elightup.com/uHL8luW.png)

Then, these translations are output immediately if you change the site languages.

![Result of translating taxonomy labels](https://imgur.elightup.com/ugRw9te.png)

## Custom fields

### Custom field values

Set up the WPML plugin to translate custom field values in the **Custom Fields Translation** section.

Search the field ID in the **Search** bar to find out the field that you want to translate. There are four options to choose from for each field:

- **Don’t translate**
- **Copy**: each time you update the field, the value in that field is automatically copied to the translated version without being translated.
- **Copy once**: is similar to Copy but it just copies the field’s value for the first time. Other times you update the field, it doesn’t do it.
- **Translate**: is to translate the field.

![Set up the WPML plugin to translate custom field values in the Custom Fields Translation section](https://imgur.elightup.com/HxrGwgp.png)

Assuming that I chose translation method for the post type that custom fields applied to, move to the **Translations** submenu, you can add (if you translate yourself) or view (if you use AI to translate automatically) the translation.

![Go to Translations submenu to add or view translation](https://imgur.elightup.com/aVMExyp.png)

Then, a new screen where we add translations for the custom fields will appear.

![Add or view the translation of field value](https://imgur.elightup.com/TbSeTGL.png)

This also works well with cloneable fields, including cloneable groups.

You can use MB Views for any page builder for displaying them on the frontend.

### Field labels

Meta Box - WPML integration helps you translate labels easily, including `label description`, `input description`, `default value`, `placeholder`, and `adding more text` of cloneable field/group.

For example, I have a field with labels as below:

![The field label need to translate](https://imgur.elightup.com/zkp33YL.png)

In the **Translation Management** submenu, find the **Meta Box: Field Group** tab, and select the field group you want to translate the labels from this tab.

![Go to Meta Box: Field Group tab to translate field labels](https://imgur.elightup.com/kNqnSWH.png)

Then, in the post editor, the translation of labels is outputed automatically when you switch language in the admin bar.

![The label translations display well]( https://imgur.elightup.com/hl4ic4Q.png)

## Settings page fields

### Settings page labels

Similar to the translating labels of other objects, you can translate the settings page labels in the **Translation Management** submenu.

Open the **Meta Box: Settings Page** tab, you can see your settings page in the list. Just click and translate them.

You also can translate field labels on the settings page. That field group is in the **Meta Box: Field Group** tab as well.

![Translate label of settings page and settings page field](https://imgur.elightup.com/hzEoPQG.png)

Then, translations of both field label and settings page label are shown when you switch the languages.

![The translations are shown](https://imgur.elightup.com/yVlUdZk.png)

### Settings page field values

Meta Box supports you translating field values of settings page directly.

Simply switch the language in the admin bar, and input the corresponding translation.

![Switch language and enter the translation directly](https://imgur.elightup.com/r9FRIS9.gif)

For displaying translation on the frontend, you can refer to [this docs](https://docs.metabox.io/extensions/mb-settings-page/#getting-field-value). The [`rwmb_meta()`](https://docs.metabox.io/functions/rwmb-meta/) fucntion can detected the language to get and display the corresponding field value automatically. In this case, I use this code:

```
$value = rwmb_meta( 'name', ['object_type' => 'setting'], 'brand' );
echo $value;
```

## Relationship labels

Meta Box also effortlessly supports translation labels of relationships.

In the **Translation Management** section, click on the **Meta Box: Relationship** tab to select your relationship.

![Go to Meta Box: Relationship to translate relationship label](https://imgur.elightup.com/FD3BkIv.png)

Then, translate them as the other labels, and in the post editor, you can see the content relationship is switched when you change the laguages:

![The tranlation of relationship label displays well](https://imgur.elightup.com/KjKbrUV.png)

In the case that you want to translate relationship values, simply translate the object type, such as post, term, or user.

## Others

Beside the basic objects, Meta Box-WPML also helps you translate other items.

### Custom term meta

In the settings of WPML, enable the translation feature for all of these following objects:

- Post type (in the **Post Types Translation** section)
- Taxonomy (the **Taxonomies Translation** section)
- Custom fields (in the **Custom Term Meta Translation** section)

![Enable the translation feature for post types, taxonomies, custom fields of taxonomies](https://imgur.elightup.com/GAwNV9c.png)

Then, do the same with translating custom taxonomies, go to the **Taxonomy Translation** submenu. When adding a translation version for each taxonomy, the term meta will appear along with the taxonomy information.

![The term meta will appear along with the taxonomy information to add the translation version](https://imgur.elightup.com/xB8ONj2.png)

As usual, when we want to display the term meta value, we use the `get_term_meta` function. This is an example:

![Use the get_term_meta function to display the term meta value](https://imgur.elightup.com/fG75xq7.png)

Even when you have translations for those values, just keep using this function, then the translations will display automatically.

### Custom user meta

By default, WPML translates only the basic fields of the user such as first_name, last_name, nickname, description, and display_name. To make custom user fields translatable, you need to convert them to strings before translating.

So, we should install the **WPML String Translation** add-on.

After installing it, add this filter to the theme file to convert value of a custom field to string:

```
add_filter( 'wpml_translatable_user_meta_fields', function( $fields ) {
   $fields[] = 'your_field_ID';
   return $fields;
} );
```

![Add this filter to the theme file to convert value of a custom field to string](https://imgur.elightup.com/ljOvUY8.png)

Or, use this syntax for bulk converting:

![Or use this syntax for bulk converting](https://imgur.elightup.com/Qim8Kgi.png)

:::tip

We recommend using a child theme in this case to avoid missing the strings when you update your theme.

:::

Then, go to **WPML** > **String Translation**, and scroll down to the **Utilities** section, choose the user roles you would like to make translatable in the **Translate User properties** tab.

![Choose the user roles you would like to make translatable in the Translate User properties tab](https://imgur.elightup.com/1FNNnrI.png)

After that, the fields are in the **Strings translation** table along with their values. Just click on the “**+**” button to add the translation for each value.

![Translate custom fields value](https://imgur.elightup.com/CvzFlY8.png)

To display fields for users on the frontend, you should use the following function:

```
get_the_author_meta( ‘your_custom_user_field_ID’, $user_id );
```

When the field values display, the translation will go along with it.

# Beginners

Let’s start with some basic practices with Meta Box.

<div className="category_wrap">
<div className="tutorials_category tutorials_category--new">

[![creating post types and taxonomies](./thumbnails/beginners-1.png) <h3 class="items_titles">Creating post types and taxonomies</h3>](/tutorials/create-custom-post-types-taxonomies/)

[![creating and configure custom fields](./thumbnails/beginners-2.png) <h3 class="items_titles">Creating and configure custom fields</h3>](/tutorials/create-custom-fields/)

[![custom fields vs taxonomies](./thumbnails/beginners-3.png) <h3 class="items_titles">Custom fields vs custom taxonomies</h3>](/tutorials/custom-fields-vs-taxonomies/)

[![moving fields’ data to custom tables](./thumbnails/beginners-4.png) <h3 class="items_titles">Moving fields’ data to custom tables</h3>](/tutorials/move-data-to-custom-tables/)

[![moving custom fields from sites to sites](./thumbnails/beginners-5.png) <h3 class="items_titles">Copying custom fields from sites to sites</h3>](/tutorials/copy-custom-fields/)

[![exporting and import custom fields](./thumbnails/beginners-6.png) <h3 class="items_titles">Exporting and importing custom fields</h3>](/tutorials/export-import-custom-fields-meta-box-builder/)

[![migrating from ACF to Meta Box](./thumbnails/beginners-7.png) <h3 class="items_titles">Migrating from ACF to Meta Box</h3>](/tutorials/migrate-data-acf-to-meta-box/)

[![migrating from Pods to Meta Box](./thumbnails/beginners-8.png) <h3 class="items_titles">Migrating from Pods to Meta Box</h3>](/tutorials/migrate-pods-to-meta-box/)

[![migrating from CPT UI to Meta Box](./thumbnails/beginners-9.png) <h3 class="items_titles">Migrating from CPT UI to Meta Box</h3>](/tutorials/cpt-ui-to-meta-box/)

[![changing the ID of a Meta Box field](./thumbnails/beginners-10.png) <h3 class="items_titles">Changing the ID of a Meta Box field</h3>](/tutorials/change-id-meta-box-field/)

</div>
</div>

# Case Studies

See how to use Meta Box in the real case studies with comprehensive tutorials.

<div className="category_wrap">
	<div className="tutorials_category">
		<div className="items">
			<h2>Category Featured Images</h2>

[![category featured images](./thumbnails/case-1.png)](/tutorials/category-thumbnails/)
<ul>
	<li><a href="/tutorials/category-thumbnails/">Creating category thumbnails & featured Images</a></li>
	<li><a href="/tutorials/create-taxonomy-thumbnails-featured-images-with-bricks/">Using Meta Box + Bricks</a></li>
	<li><a href="/tutorials/create-taxonomy-thumbnails-featured-images/">Using Meta Box + Oxygen</a></li>
 	<li><a href="/tutorials/create-taxonomy-thumbnails-featured-images-mb-views/">Using MB Views</a></li>

</ul>
		</div>
		<div className="items">
			<h2>Simple Listing</h2>

[![simple listing](./thumbnails/case-2.png)](/tutorials/create-simple-listing-meta-box-bricks/)
<ul>
	<li><a href="/tutorials/create-simple-listing-meta-box-bricks/">Using Meta Box + Bricks</a></li>
	<li><a href="/tutorials/create-simple-listing-with-elementor/">Using Meta Box + Elementor</a></li>
	<li><a href="/tutorials/create-simple-listing-with-breakdance/">Using Meta Box + Breakdance</a></li>
	<li><a href="/tutorials/create-simple-listing-with-kadence/">Using Meta Box + Kadence</a></li>
	<li><a href="/tutorials/create-simple-listing-meta-box-wp-grid-builder/">Using Meta Box + WP Grid Builder</a></li>
	<li><a href="/tutorials/create-simple-listing-mb-views">Using MB Views</a></li>
</ul>
		</div>
		<div className="items">
			<h2>Most Viewed Posts</h2>

[![featured products](./thumbnails/case-add-1.png)](/tutorials/display-most-viewed-posts-with-bricks/)
<ul>
	<li><a href="/tutorials/display-most-viewed-posts-with-bricks/">Using Meta Box + Bricks</a></li>
	<li><a href="/tutorials/display-most-viewed-posts-oxygen/">Using Meta Box + Oxygen</a></li>
	<li><a href="/tutorials/display-most-viewed-posts-with-elementor/">Using Meta Box + Elementor</a></li>
	<li><a href="/tutorials/display-most-viewed-posts-mb-views">Using MB Views</a></li>
</ul>
		</div>
		 <div className="items">
			<h2>Buttons with Dynamic Link</h2>

[![buttons with dynamic link](./thumbnails/case-4.png)](/tutorials/create-buttons-dynamic-links/)
<ul>
	<li><a href="/tutorials/create-buttons-dynamic-links/">Creating buttons with dynamic link</a></li>
</ul>
		</div>
		<div className="items">
			<h2>Video Gallery Page</h2>

[![video gallery page](./thumbnails/case-5.png)](/tutorials/create-video-gallery-page-bricks/)
<ul>
	<li><a href="/tutorials/create-video-gallery-page-bricks/">Using Meta Box + Bricks</a></li>
	<li><a href="/tutorials/create-video-gallery-page-meta-box-oxygen/">Using Meta Box + Oxygen</a></li>
	<li><a href="/tutorials/create-video-gallery-page-with-elementor/">Using Meta Box + Elementor</a></li>
	<li><a href="/tutorials/create-video-gallery-page-with-zion/">Using Meta Box + Zion</a></li>
	<li><a href="/tutorials/create-video-gallery-page-meta-box-breakdance/">Using Meta Box + Breakdance</a></li>
	<li><a href="/tutorials/create-video-gallery-page-with-kadence/">Using Meta Box + Kadence</a></li>
	<li><a href="/tutorials/create-video-gallery-page-mb-views/">Using MB Views</a></li>
</ul>
		</div>
		<div className="items">
			<h2>User Profile Page</h2>

[![user profile page](./thumbnails/case-6.png)](/tutorials/create-user-profile-page/)
<ul>
	<li><a href="/tutorials/create-user-profile-page/">Creating custom user profile page on frontend</a></li>
</ul>
		</div>
		<div className="items">
			<h2>Recipe</h2>

[![recipe](./thumbnails/case-7.png)](/tutorials/create-recipes-meta-box-bricks/)
<ul>
	<li><a href="/tutorials/create-recipes-meta-box-bricks/">Using Meta Box + Bricks</a></li>
	<li><a href="/tutorials/create-recipe-meta-box-oxygen/">Using Meta Box + Oxygen</a></li>
	<li><a href="/tutorials/create-recipe-meta-box-elementor/">Using Meta Box + Elementor</a></li>
	<li><a href="/tutorials/create-recipes-meta-box-zion/">Using Meta Box + Zion</a></li>
	<li><a href="/tutorials/create-a-recipe-brizy/">Using Meta Box + Brizy</a></li>
	<li><a href="/tutorials/create-recipe-breakdance/">Using Meta Box + Breakdance</a></li>
	<li><a href="/tutorials/create-recipe-with-kadence/">Using Meta Box + Kadence</a></li>
	<li><a href="/tutorials/create-recipe-with-divi/">Using Meta Box + Divi</a></li>
	<li><a href="/tutorials/create-recipe-mb-views/">Using MB Views</a></li>
</ul>
		</div>
		<div className="items">
			<h2>Products on Sale</h2>

[![products on sale](./thumbnails/case-29.png)](/tutorials/show-posts-with-specific-criteria-bricks/)
<ul>
	<li><a href="/tutorials/show-posts-with-specific-criteria-bricks/">Using Meta Box + Bricks</a></li>
	<li><a href="/tutorials/show-posts-specific-criteria-oxygen/">Using Meta Box + Oxygen</a></li>
	<li><a href="/tutorials/show-posts-specific-criteria-with-elementor/">Using Meta Box + Elementor</a></li>
	<li><a href="/tutorials/show-posts-specific-criteria-with-zion/">Using Meta Box + Zion</a></li>
	<li><a href="/tutorials/show-posts-specific-criteria-meta-box-breakdance/">Using Meta Box + Breakdance</a></li>
	<li><a href="/tutorials/show-posts-specific-criteria-mb-views/">Using MB Views</a></li>

</ul>
		</div>
		<div className="items">
			<h2>FAQs Page</h2>

[![faqs page](./thumbnails/case-9.png)](/tutorials/create-faqs-page-meta-box-bricks/)
<ul>
	<li><a href="/tutorials/create-faqs-page-meta-box-bricks/">Using Meta Box + Bricks</a></li>
	<li><a href="/tutorials/create-faqs-page-meta-box-oxygen/">Using Meta Box + Oxygen</a></li>
	<li><a href="/tutorials/create-faqs-page-meta-box-elementor/">Using Meta Box + Elementor</a></li>
	<li><a href="/tutorials/create-faqs-page-with-breakdance/">Using Meta Box + Breakdance</a></li>
	<li><a href="/tutorials/create-faqs-page-meta-box-kadence/">Using Meta Box + Kadence</a></li>
	<li><a href="/tutorials/create-faqs-page-meta-box-divi/">Using Meta Box + Divi</a></li>
	<li><a href="/tutorials/create-faqs-page-mb-blocks/">Using MB Blocks</a></li>
	<li><a href="/tutorials/create-faqs-page-mb-views/">Using MB Views</a></li>

</ul>
		</div>
		<div className="items">
			<h2>Featured Products</h2>

[![featured products](./thumbnails/case-3.png)](/tutorials/displaying-featured-posts-with-wp-grid-builder/)
<ul>
	<li><a href="/tutorials/displaying-featured-posts-with-wp-grid-builder/">Using Elementor + WP Grid Builder</a></li>
	<li><a href="/tutorials/show-featured-restaurants-bricks/">Using Meta Box + Bricks</a></li>
	<li><a href="/tutorials/show-featured-restaurants-oxygen/">Using Meta Box + Oxygen</a></li>
	<li><a href="/tutorials/show-featured-restaurants-with-elementor/">Using Meta Box + Elementor</a></li>
	<li><a href="/tutorials/show-featured-restaurants-with-zion/">Using Meta Box + Zion</a></li>
	<li><a href="/tutorials/show-featured-restaurants-with-breakdance">Using Meta Box + Breakdance</a></li>
	<li><a href="/tutorials/show-featured-restaurants-mb-views/">Using MB Views</a></li>
</ul>
		</div>
		<div className="items">
			<h2>Brand Logos</h2>

[![brand logos](./thumbnails/case-8.png)](/tutorials/display-images-from-cloneable-fields-meta-box-oxygen/)
<ul>
	<li><a href="/tutorials/display-images-from-cloneable-fields-meta-box-oxygen/">Using Meta Box + Oxygen</a></li>
	<li><a href="/tutorials/display-images-from-cloneable-fields-meta-box-elementor/">Using Meta Box + Elementor</a></li>
	<li><a href="/tutorials/display-images-from-cloneable-fields-bricks/">Using Meta Box + Bricks</a></li>
	<li><a href="/tutorials/display-images-cloneable-fields-mb-views/">Using MB Views</a></li>
</ul>
		</div>
		<div className="items">
			<h2>Team Members Page</h2>

[![team members](./thumbnails/case-13.png)](/tutorials/create-team-members-page-meta-box-bricks/)
<ul>
	<li><a href="/tutorials/create-team-members-page-meta-box-bricks/">Using Meta Box + Bricks</a></li>
	<li><a href="/tutorials/create-team-members-page-meta-box-oxygen/">Using Meta Box + Oxygen</a></li>
	<li><a href="/tutorials/create-team-members-page-meta-box-elementor/">Using Meta Box + Elementor</a></li>
	<li><a href="/tutorials/create-team-members-page-breakdance/">Using Meta Box + Breakdance</a></li>
	<li><a href="/tutorials/create-team-members-page-with-kadence/">Using Meta Box + Kadence</a></li>
	<li><a href="/tutorials/create-team-members-page-mb-views/">Using MB Views</a></li>
</ul>
		</div>
		<div className="items">
			<h2>Product Variations</h2>

[![product variations](./thumbnails/case-18.png)](/tutorials/display-product-variations-meta-box-bricks/)
<ul>
	<li><a href="/tutorials/display-product-variations-meta-box-bricks/">Using Meta Box + Bricks</a></li>
	<li><a href="/tutorials/display-product-variations-meta-box-oxygen/">Using Meta Box + Oxygen</a></li>
	<li><a href="/tutorials/display-product-variations-mb-views/">Using MB Views</a></li>
</ul>
		</div>
		<div className="items">
			<h2>Opening Hours</h2>

[![opening hours](./thumbnails/case-17.png)](/tutorials/display-opening-hours-restaurant-with-bricks/)
<ul>
	<li><a href="/tutorials/display-opening-hours-restaurant-with-bricks/">Using Meta Box + Bricks</a></li>
	<li><a href="/tutorials/display-opening-hours-restaurants-oxygen/">Using Meta Box + Oxygen</a></li>
	<li><a href="/tutorials/display-opening-hours-restaurant-mb-views/">Using MB Views</a></li>
</ul>
		</div>
		<div className="items">
			<h2>Latest Products</h2>

[![latest products](./thumbnails/case-14.png)](/tutorials/display-latest-product-meta-box-bricks/)
<ul>
	<li><a href="/tutorials/display-latest-product-meta-box-bricks/">Using Meta Box + Bricks</a></li>
	<li><a href="/tutorials/display-latest-product-meta-box-oxygen/">Using Meta Box + Oxygen</a></li>
	<li><a href="/tutorials/display-latest-product-meta-box-elementor/">Using Meta Box + Elementor</a></li>
	<li><a href="/tutorials/display-latest-products-meta-box-zion/">Using Meta Box + Zion</a></li>
	<li><a href="/tutorials/display-latest-product-breakdance/">Using Meta Box + Breakdance</a></li>
 	<li><a href="/tutorials/display-latest-products-with-kadence/">Using Meta Box + Kadence</a></li>
	<li><a href="/tutorials/display-latest-products-mb-views/">Using MB Views</a></li>
</ul>
		</div>
		<div className="items">
			<h2>Product Page</h2>

[![product page](./thumbnails/case-15.png)](/tutorials/create-product-page-meta-box-bricks/)
<ul>
	<li><a href="/tutorials/create-product-page-meta-box-bricks/">Using Meta Box + Bricks</a></li>
	<li><a href="/tutorials/create-product-page-meta-box-oxygen/">Using Meta Box + Oxygen</a></li>
	<li><a href="/tutorials/create-product-page/">Using Meta Box + Gutenberg</a></li>
	<li><a href="/tutorials/create-product-page-elementor/">Using Meta Box + Elementor</a></li>
 	<li><a href="/tutorials/create-product-page-with-brizy/">Using Meta Box + Brizy</a></li>
	<li><a href="/tutorials/create-product-page-meta-box-breakdance/">Using Meta Box + Breakdance</a></li>
	<li><a href="/tutorials/create-product-page-with-kadence/">Using Meta Box + Kadence</a></li>
	<li><a href="/tutorials/create-product-page-divi/">Using Meta Box + Divi</a></li>
	<li><a href="/tutorials/add-custom-fields-to-products-in-woocommerce-meta-box-bricks/">Using Meta Box + Bricks + WooCommerce</a></li>
	<li><a href="/tutorials/create-product-pages-mb-views/">Using MB Views</a></li>
</ul>
		</div>
		<div className="items">
			<h2>Menus for Restaurants</h2>

[![menus for restaurants](./thumbnails/case-16.png)](/tutorials/create-menu-restaurants-meta-box-elementor/)
<ul>
	<li><a href="/tutorials/create-menu-restaurants-meta-box-elementor/">Using Meta Box + Elementor</a></li>
	<li><a href="/tutorials/create-menu-restaurants-bricks/">Using Meta Box + Bricks</a></li>
</ul>
		</div>
		<div className="items">
			<h2>Download Buttons</h2>

[![download buttons](./thumbnails/case-11.png)](/tutorials/create-download-button/)
<ul>
	<li><a href="/tutorials/create-download-button/">Creating Download buttons</a></li>
</ul>
		</div>
		<div className="items">
			<h2>Create Relationships</h2>

[![create relationships](./thumbnails/case-34.png)](/tutorials/create-relationships-with-bricks/)
<ul>
	<li><a href="/tutorials/create-relationships-with-bricks/">Using Meta Box + Bricks</a></li>
	<li><a href="/tutorials/create-relationships-with-oxygen/">Using Meta Box + Oxygen</a></li>
	<li><a href="/tutorials/create-relationships-with-breakdance/">Using Meta Box + Breakdance</a></li>
	<li><a href="/tutorials/create-relationships-mb-views/">Using MB Views</a></li>
</ul>
		</div>
		<div className="items">
			<h2>Dynamic Landing Page</h2>

[![dynamic landing page](./thumbnails/case-12.png)](/tutorials/create-dynamic-landing-page-with-bricks/)
<ul>
	<li><a href="/tutorials/create-dynamic-landing-page-with-bricks/">Using Meta Box + Bricks</a></li>
	<li><a href="/tutorials/create-dynamic-landing-page-with-elementor/">Using Meta Box + Elementor</a></li>
	<li><a href="/tutorials/create-dynamic-landing-page/">Using MB Views</a></li>
</ul>
		</div>
		<div className="items">
			<h2>Add-to-calendar Buttons</h2>

[![add-to-calendar buttons](./thumbnails/case-10.png)](/tutorials/create-add-to-calendar-buttons/)
<ul>
	<li><a href="/tutorials/create-add-to-calendar-buttons/">Creating Add-to-calendar buttons for your events</a></li>
</ul>
		</div>
		<div className="items">
			<h2>Listings On A Map</h2>

[![all listings on a map](./thumbnails/case-19.png)](/tutorials/display-listings-on-map/)
<ul>
	<li><a href="/tutorials/display-listings-on-map/">Displaying all listings on a map</a></li>
</ul>
		</div>
		<div className="items">
			<h2>Search Posts</h2>

[![search posts](./thumbnails/case-20.png)](/tutorials/search-posts-by-taxonomy/)
<ul>
	<li><a href="/tutorials/search-posts-by-taxonomy/">Searching posts by taxonomy</a></li>
	<li><a href="/tutorials/filter-posts-by-taxonomy-mbviews/">Using MB Views</a></li>
</ul>
		</div>
		<div className="items">
			<h2>Add Guest Author and Posts</h2>

[![add guest author and posts](./thumbnails/case-21.png)](/tutorials/add-guest-authors/)
<ul>
	<li><a href="/tutorials/add-guest-authors/">Adding guest authors and guest posts</a></li>
</ul>
		</div>
		<div className="items">
			<h2>Online Admission Form</h2>

[![online admission form](./thumbnails/case-22.png)](/tutorials/create-online-admission-form/)
<ul>
	<li><a href="/tutorials/create-online-admission-form/">Creating online admission form</a></li>
</ul>
		</div>
		<div className="items">
			<h2>Custom Avatar</h2>

[![custom avatar](./thumbnails/case-23.png)](/tutorials/create-custom-avatar/)
<ul>
	<li><a href="/tutorials/create-custom-avatar/">Creating a custom avatar for user</a></li>
</ul>
		</div>
		<div className="items">
			<h2>RSS Content / Title</h2>

[![rss content title](./thumbnails/case-24.png)](/tutorials/change-rss-content/)
<ul>
	<li><a href="/tutorials/change-rss-content/">Changing the RSS content / title</a></li>
</ul>
		</div>
		<div className="items">
			<h2>Dynamic Banners</h2>

[![dynamic banners](./thumbnails/case-25.png)](/tutorials/display-dynamic-banners-meta-box-with-bricks/)
<ul>
	<li><a href="/tutorials/display-dynamic-banners-meta-box-with-bricks/">Using Meta Box + Bricks</a></li>
	<li><a href="/tutorials/create-dynamic-banners/">Using MB Views</a></li>
</ul>
		</div>
		<div className="items">
			<h2>Configure Homepage</h2>

[![configure homepage](./thumbnails/case-26.png)](/tutorials/configure-homepage/)
<ul>
	<li><a href="/tutorials/configure-homepage/">Configure homepage</a></li>
</ul>
		</div>
		<div className="items">
			<h2>Online Reservation Form</h2>

[![online reservation form](./thumbnails/case-27.png)](/tutorials/create-online-reservation-forms/)
<ul>
	<li><a href="/tutorials/create-online-reservation-forms/">Creating online reservation form</a></li>
</ul>
		</div>
		<div className="items">
			<h2>Styling Posts</h2>

[![styling post](./thumbnails/case-28.png)](/tutorials/style-posts-different-categories/)
<ul>
	<li><a href="/tutorials/style-posts-different-categories/">Styling posts in different categories</a></li>
</ul>
		</div>
  		<div className="items">
			<h2>Download and Preview Buttons</h2>

[![download and preview buttons](./thumbnails/case-download-preview.png)](/tutorials/create-download-preview-buttons-with-bricks/)
<ul>
	<li><a href="/tutorials/create-download-preview-buttons-with-bricks/">Using Meta Box + Bricks</a></li>
	<li><a href="/tutorials/create-download-preview-buttons-with-oxygen/">Using Meta Box + Oxygen</a></li>
	<li><a href="/tutorials/create-download-preview-buttons-with-kadence/">Using Meta Box + Kadence</a></li>
	<li><a href="/tutorials/create-download-preview-buttons-with-zion/">Using Meta Box + Zion</a></li>
	<li><a href="/tutorials/create-download-preview-buttons-mb-views/">Using MB Views</a></li>
</ul>
		</div>
		<div className="items">
			<h2>Youtube Video Timestamps</h2>

[![youtube video timestamps](./thumbnails/views-24.png)](/tutorials/create-youtube-video-timestamps-mb-views/)
<ul>
	<li><a href="/tutorials/create-youtube-video-timestamps-mb-views/">Using MB Views</a></li>
</ul>
		</div>
		<div className="items">
			<h2>Display Author Bio</h2>

[![display author bio](./thumbnails/views-26.png)](/tutorials/display-author-bio-in-wordpress-with-bricks/)
<ul>
	<li><a href="/tutorials/display-author-bio-in-wordpress-with-bricks/">Using Meta Box + Bricks</a></li>
	<li><a href="/tutorials/display-author-bio-in-wordpress-mb-views/">Using MB Views</a></li>
</ul>
		</div>
		<div className="items">
			<h2>Random Hero Image</h2>

[![random hero image](./thumbnails/views-27.png)](/tutorials/randomize-hero-image-mb-views/)
<ul>
	<li><a href="/tutorials/randomize-hero-image-mb-views/">Using MB Views</a></li>
</ul>
		</div>
		<div className="items">
			<h2>Show Upcoming Events</h2>

[![show upcoming events](./thumbnails/case-36.png)](/tutorials/show-upcoming-events-with-elementor/)
<ul>
	<li><a href="/tutorials/show-upcoming-events-with-elementor/">Using Meta Box + Elementor</a></li>
	<li><a href="/tutorials/show-upcoming-events-with-bricks/">Using Meta Box + Bricks</a></li>
	<li><a href="/tutorials/show-upcoming-events-with-oxygen/">Using Meta Box + Oxygen</a></li>
	<li><a href="/tutorials/show-upcoming-events-with-breakdance/">Using Meta Box + Kadence</a></li>
	<li><a href="/tutorials/show-upcoming-events-with-mb-views/">Using MB Views</a></li>
</ul>
		</div>
		<div className="items">
			<h2>Custom 404 Page</h2>

[![custom 404 page](./thumbnails/case-37.png)](/tutorials/create-custom-404-page-with-bricks/)
<ul>
	<li><a href="/tutorials/create-custom-404-page-with-bricks/">Using Meta Box + Bricks</a></li>
	<li><a href="/tutorials/create-custom-404-page-with-elementor/">Using Meta Box + Elementor</a></li>
	<li><a href="/tutorials/create-custom-404-page-with-oxygen/">Using Meta Box + Oxygen</a></li>
	<li><a href="/tutorials/create-custom-404-page-with-breakdance/">Using Meta Box + Breakdance</a></li>
	<li><a href="/tutorials/create-custom-404-page-mb-views/">Using MB Views</a></li>
</ul>
		</div>
		<div className="items">
			<h2>Make Timeline</h2>

[![make timeline](./thumbnails/case-38.png)](/tutorials/create-timeline-with-bricks/)
<ul>
	<li><a href="/tutorials/create-timeline-with-bricks/">Using Meta Box + Bricks</a></li>
	<li><a href="/tutorials/create-timeline-mb-views/">Using MB Views</a></li>
</ul>
		</div>
		<div className="items">
			<h2>Coming Soon Page</h2>

[![coming soon page](./thumbnails/case-41.png)](/tutorials/create-coming-soon-page-with-countdown-mb-views/)
<ul>
	<li><a href="/tutorials/create-coming-soon-page-with-countdown-mb-views/">Using MB Views</a></li>
</ul>
		</div>
		<div className="items">
			<h2>Pricing Table Page</h2>

[![pricing table page](./thumbnails/case-42.png)](/tutorials/create-pricing-table-page-with-bricks/)
<ul>
	<li><a href="/tutorials/create-pricing-table-page-with-bricks/">Using Meta Box + Bricks</a></li>
	<li><a href="/tutorials/create-pricing-table-page-with-elementor/">Using Meta Box + Elementor</a></li>
	<li><a href="/tutorials/create-pricing-table-page-with-breakdance/">Using Meta Box + Breakdance</a></li>
	<li><a href="/tutorials/create-pricing-table-page-with-mb-views/">Using MB Views</a></li>
</ul>
		</div>
		<div className="items">
			<h2>Displaying related</h2>

[![pricing table page](./thumbnails/case-39.png)](/tutorials/display-related-posts-based-on-shared-relationship/)
<ul>
	<li><a href="/tutorials/display-related-posts-based-on-shared-relationship/">Displaying related posts by shared relationship</a></li>
	<li><a href="/tutorials/display-related-posts-based-on-shared-relationship-mb-views/">Using MB Views</a></li>
</ul>
		</div>
		<div className="items">
			<h2>Building a Hotel Booking</h2>

[![building a hotel booking](./thumbnails/case-44.png)](/tutorials/build-hotel-booking-website-p1/)
<ul>
	<li><a href="/tutorials/build-hotel-booking-website-p1/">Room archive page</a></li>
	<li><a href="/tutorials/build-hotel-booking-website-p2-backend/">Booking page in backend</a></li>
	<li><a href="/tutorials/build-hotel-booking-website-p3-frontend/">Booking page in frontend</a></li>
</ul>
		</div>
		<div className="items">
			<h2>Filter Posts by Relationships</h2>

[![Filter Posts by Relationships](thumbnails/case-45.png)](/tutorials/role-based-access-control-with-bricks/)
<ul>
	<li><a href="/tutorials/role-based-access-control-with-bricks/">Using Meta Box + Bricks</a></li>
	<li><a href="/tutorials/filter-posts-by-relationtion-mb-views/">Using MB Views</a></li>
	<li><a href="/tutorials/filter-posts-by-relationships-with-oxygen/">Using Meta Box + Oxygen</a></li>
	
</ul>
		</div>
		<div className="items">
			<h2>Reorder Items by Cloneable Fields</h2>

[![Reorder items by cloneable fields](thumbnails/case-46.png)](/tutorials/reorder-items-by-their-values-from-cloneable-custom-fields/)
<ul>
	<li><a href="/tutorials/reorder-items-by-their-values-from-cloneable-custom-fields/">Using MB Views + Bricks</a></li>
	
</ul>
		</div>
	</div>
</div>

# General Guide

See how to use Meta box in common tasks.

<div className="category_wrap">
<div className="tutorials_category tutorials_category--new">

[![filtering posts by custom fields and taxonomies](./thumbnails/guide-1.png) <h3 class="items_titles">Filtering posts by custom fields & taxonomies</h3>](/tutorials/filter-posts-by-custom-fields-taxonomies/)

[![adding custom fields to Yoast SEO Meta Tags](./thumbnails/guide-2.png) <h3 class="items_titles">Adding custom fields to Yoast SEO meta tags</h3>](/tutorials/add-custom-fields-to-yoast-seo/)

[![moving custom fields’ data to custom tables](./thumbnails/guide-3.png) <h3 class="items_titles">Moving custom fields’ data to custom tables</h3>](/tutorials/move-data-to-custom-tables/)

[![displaying a user list on the frontend](./thumbnails/guide-4.png) <h3 class="items_titles">Displaying a user list on the frontend</h3>](/tutorials/display-users-list/)

[![getting posts by custom fields](./thumbnails/guide-5.png) <h3 class="items_titles">Getting posts by custom fields</h3>](/tutorials/get-posts-by-custom-fields/)

[![changing the ID of a Meta Box field](./thumbnails/guide-6.png) <h3 class="items_titles">Changing the ID of a Meta Box field</h3>](/tutorials/change-id-meta-box-field/)

[![adding star rating fields to Meta Box](./thumbnails/guide-7.png) <h3 class="items_titles">Adding star rating fields to Meta Box</h3>](/tutorials/add-star-rating-fields/)

[![creating download buttons](./thumbnails/guide-8.png) <h3 class="items_titles">Creating Download buttons</h3>](/tutorials/create-download-button/)

[![displaying images as a gallery](./thumbnails/guide-9.png) <h3 class="items_titles">Displaying images as a gallery</h3>](/tutorials/display-images-as-gallery/)

[![displaying all listings on a map](./thumbnails/guide-10.png) <h3 class="items_titles">Displaying all listings on a map</h3>](/tutorials/display-listings-on-map/)

[![manually reorder posts](./thumbnails/guide-11.png) <h3 class="items_titles">Reordering posts manually</h3>](/tutorials/reorder-posts-manually-by-custom-fields/)

[![adding custom fields for WooCommerce](./thumbnails/guide-12.png) <h3 class="items_titles">Adding custom fields for WooCommerce</h3>](/tutorials/add-custom-fields-woocommerce/)

[![creating dynamic favicon](./thumbnails/guide-13.png) <h3 class="items_titles">Creating dynamic favicon</h3>](/tutorials/create-dynamic-favicon/)

[![inserting google maps](./thumbnails/guide-14.png) <h3 class="items_titles">Inserting Google Maps</h3>](/tutorials/insert-google-maps/)

[![searching posts by taxonomy](./thumbnails/guide-15.png) <h3 class="items_titles">Searching posts by taxonomy</h3>](/tutorials/search-posts-by-taxonomy/)

[![creating subscription form connecting to Mailchimp](./thumbnails/guide-16.png) <h3 class="items_titles">Creating subscription form connecting to Mailchimp</h3>](/tutorials/create-subscription-form-connect-to-mailchimp/)

[![using custom HTML field to output texts or custom CSS](./thumbnails/guide-17.png) <h3 class="items_titles">Using custom HTML field to output or custom CSS</h3>](/tutorials/create-notification-custom-html-field/)

[![adding paginations & search Boxes to custom fields ](./thumbnails/guide-18.png) <h3 class="items_titles">Adding paginations & search boxes to custom fields </h3>](/tutorials/add-paginations-search-boxes/)

[![analyzing content in custom fields for SEO](./thumbnails/guide-19.png) <h3 class="items_titles">Analyzing content in custom fields for SEO - Rank Math</h3>](/tutorials/analyze-content-seo-rank-math/)

[![analyzing content in custom fields for SEO](./thumbnails/guide-20.png) <h3 class="items_titles">Analyzing content in custom fields for SEO - Yoast SEO</h3>](/tutorials/analyze-content-yoast-seo/)

[![storing cloneable fields in multiple rows in the database](./thumbnails/guide-21.png) <h3 class="items_titles">Storing cloneable fields in multiple rows in the database</h3>](/tutorials/store-cloneable-fields/)

[![adding testimonials](./thumbnails/guide-22.png) <h3 class="items_titles">Adding testimonials</h3>](/tutorials/add-testimonials/)

[![adding related posts](./thumbnails/guide-23.png) <h3 class="items_titles">Adding related posts</h3>](/tutorials/add-related-posts/)

[![changing the RSS content title](./thumbnails/guide-24.png) <h3 class="items_titles">Changing the RSS content / title</h3>](/tutorials/change-rss-content/)

[![creating reusable template parts](./thumbnails/guide-25.png) <h3 class="items_titles">Creating reusable template parts - MB Views</h3>](/tutorials/create-reusable-template-parts/)

[![creating dynamic banners](./thumbnails/guide-26.png) <h3 class="items_titles">Creating dynamic banners</h3>](/tutorials/create-dynamic-banners/)

[![adding custom JavaScript actions](./thumbnails/guide-27.png) <h3 class="items_titles">Adding custom JavaScript actions</h3>](/tutorials/add-javascript-actions-button-field/)

[![adding icon to title of custom fields](./thumbnails/guide-28.png) <h3 class="items_titles">Adding icons to title of custom fields</h3>](/tutorials/add-icons-title-custom-fields/)

[![bundling Meta Box into another plugin](./thumbnails/guide-29.png) <h3 class="items_titles">Bundling Meta Box into another plugin</h3>](/tutorials/bundle-meta-box-into-another-plugin/)

[![adding a favorite button](./thumbnails/guide-31.png) <h3 class="items_titles">Adding a favorite button</h3>](/tutorials/add-favorite-button/)

[![importing data into Meta Box custom fields](./thumbnails/guide-38.png) <h3 class="items_titles">Importing data into Meta Box custom fields</h3>](/tutorials/import-data-meta-box-custom-fields/)

[![how to import all Meta Box custom fields](./thumbnails/guide-39.png) <h3 class="items_titles">Importing all Meta Box custom fields</h3>](/tutorials/import-all-meta-box-custom-fields/)

[![rendering blocks with views](./thumbnails/guide-40.png) <h3 class="items_titles">Rendering blocks with views</h3>](/tutorials/render-block-with-view/)

[![displaying real time open status](./thumbnails/view-20.png) <h3 class="items_titles">Real-time opening status automatically</h3>](/tutorials/realtime-opening-status-automatically/)

[![displaying events group](./thumbnails/case-40.png) <h3 class="items_titles">Displaying events group by month and year</h3>](/tutorials/display-events-group-by-month-year/)

[![translating custom field values](./thumbnails/guide-41.png) <h3 class="items_titles">Translating user meta and term meta</h3>](/tutorials/translate-meta-box-custom-field-values-for-users-taxonomies-wpml/)

[![displaying before after image](./thumbnails/guide-42.png) <h3 class="items_titles">Displaying before after image</h3>](/tutorials/display-before-after-images/)

[![filtering taxonomy plugins](./thumbnails/guide-43.png) <h3 class="items_titles">Filtering posts by taxonomy in the admin dashboard</h3>](/tutorials/filter-posts-by-taxonomy-in-admin-dashboard/)

[![Creating a full-width WordPress dashboard widget](./thumbnails/guide-44.png) <h3 class="items_titles">Full-width dashboard widget</h3>](/tutorials/create-full-width-wordpress-dashboard-widget/)

[![Counting the number of related posts](./thumbnails/guide-45.png) <h3 class="items_titles">Counting the number of related posts</h3>](/tutorials/count-related-posts-mb-views/)

[![Displaying personalized data for users](./thumbnails/guide-46.png) <h3 class="items_titles">Displaying personalized data for users</h3>](/tutorials/display-personalized-data-for-users/)

[![Add alt image khi submit field](./thumbnails/guide-47.png) <h3 class="items_titles">Add alt image khi submit field</h3>](/tutorials/add-alt-text-automatically/)

[![JSON schema autocomplete simplifies](./thumbnails/guide-48.png) <h3 class="items_titles">JSON schema autocomplete simplifies</h3>](/tutorials/json-schema-autocomplete/)

[![Dynamic style with data attributes](./thumbnails/guide-49.png) <h3 class="items_titles">Dynamic style with data attributes</h3>](/tutorials/dynamic-styling-with-data-attributes)

[![Rename taxonomy without losing data](./thumbnails/guide-50.png) <h3 class="items_titles">Rename taxonomy without losing data</h3>](/tutorials/rename-taxonomy-without-losing-data)

</div>
</div>

# Extensions

Learn about Meta Box extensions, what features they offer and how to use them.

<div className="category_wrap">
	<div className="tutorials_category">
		<div className="items">
			<h2>MB Frontend Submission</h2>

[![mb frontend submission](./thumbnails/extensions-1.png)](/tutorials/create-subscription-form-connect-to-mailchimp/)
<ul>
	<li><a href="/tutorials/create-subscription-form-connect-to-mailchimp/">Creating subscription form connecting to Mailchimp</a></li>
	<li><a href="/tutorials/create-online-admission-form/">Creating online admission form</a></li>
</ul>
		</div>
		<div className="items">
			<h2>MB Settings Page</h2>

[![mb settings page](./thumbnails/extensions-2.png)](/tutorials/create-dynamic-banners/)
<ul>
	<li><a href="/tutorials/create-dynamic-banners/">Creating dynamic banners</a></li>
	<li><a href="/tutorials/display-images-cloneable-fields-mb-views/">Display images from cloneable fields - MB Views</a></li>
</ul>
		</div>
		<div className="items">
			<h2>MB Admin Columns</h2>

[![mb admin column](./thumbnails/extensions-6.png)](/tutorials/displaying-featured-posts-with-wp-grid-builder/)
<ul>
	<li><a href="/tutorials/displaying-featured-posts-with-wp-grid-builder/">Displaying featured restaurants</a></li>
	<li><a href="/tutorials/create-team-members-page-mb-views/">Creating a team members page - with MB Views</a></li>
</ul>
		</div>
		 <div className="items">
			<h2>MB Rank Math</h2>

[![mb rank math](./thumbnails/extensions-4.png)](/tutorials/analyze-content-seo-rank-math/)
<ul>
	<li><a href="/tutorials/analyze-content-seo-rank-math/">Analyzing content in custom fields for SEO</a></li>
</ul>
		</div>
		<div className="items">
			<h2>MB Yoast SEO Integration</h2>

[![meta box for yoast SEO](./thumbnails/extensions-5.png)](/tutorials/analyze-content-yoast-seo/)
<ul>
	<li><a href="/tutorials/analyze-content-yoast-seo/">Analyzing content in custom fields for SEO</a></li>
</ul>
		</div>
		<div className="items">
			<h2>MB Conditional Logic</h2>

[![meta box conditional logic](./thumbnails/extensions-3.png)](/tutorials/create-online-admission-form/)
<ul>
	<li><a href="/tutorials/create-online-admission-form/">Creating online admission form</a></li>
</ul>
		</div>
		<div className="items">
			<h2>MB Testimonials</h2>

[![mb testimonials](./thumbnails/extensions-8.png)](/tutorials/add-testimonials/)
<ul>
	<li><a href="/tutorials/add-testimonials/">Adding testimonials</a></li>
</ul>
		</div>
		<div className="items">
			<h2>MB Favorite Posts</h2>

[![mb favorite posts](./thumbnails/extensions-7.png)](/tutorials/add-favorite-button/)
<ul>
	<li><a href="/tutorials/add-favorite-button/"> Adding a favorite button</a></li>
</ul>
		</div>
		<div className="items">
			<h2>MB Columns</h2>

[![mb columns](./thumbnails/extensions-9.png)](/tutorials/create-online-admission-form/)
<ul>
	<li><a href="/tutorials/create-online-admission-form/">Creating online admission form</a></li>
</ul>
		</div>
	</div>
</div>

# Page Builders

Tutorials on combining Meta Box and other builders or tools for real builders studies.

<div className="category_wrap">
	<div className="tutorials_category">
		<div className="items">
			<h2>Bricks</h2>

[![bricks](./thumbnails/builders-1.png)](/tutorials/create-product-page-meta-box-bricks/)
<ul>
	<li><a href="/tutorials/create-product-page-meta-box-bricks/">Creating a product page</a></li>
	<li><a href="/tutorials/create-recipes-meta-box-bricks/">Creating a recipe</a></li>
	<li><a href="/tutorials/create-simple-listing-meta-box-bricks/">Creating a simple listing</a></li>
	<li><a href="/tutorials/create-team-members-page-meta-box-bricks/">Creating a team members page</a></li>
	<li><a href="/tutorials/create-video-gallery-page-bricks/">Creating a video gallery page</a></li>
	<li><a href="/tutorials/create-faqs-page-meta-box-bricks/">Creating an FAQs page</a></li>
	<li><a href="/tutorials/display-latest-product-meta-box-bricks/">Displaying the latest products</a></li>
	<li><a href="/tutorials/show-featured-restaurants-bricks/">Showing the featured restaurants</a></li>
	<li><a href="/tutorials/display-images-from-cloneable-fields-bricks/">Displaying images from cloneable fields</a></li>
 	<li><a href="/tutorials/create-relationships-with-bricks/">Creating relationships</a></li>
	<li><a href="/tutorials/display-product-variations-meta-box-bricks/">Displaying product variations</a></li>
	<li><a href="/tutorials/create-menu-restaurants-bricks/">Creating menus for restaurants</a></li>
	<li><a href="/tutorials/show-posts-with-specific-criteria-bricks/">Showing posts with specific criteria</a></li>
	<li><a href="/tutorials/create-download-preview-buttons-with-bricks/">Creating download and preview buttons</a></li>
	<li><a href="/tutorials/display-most-viewed-posts-with-bricks">Displaying most viewed posts</a></li>
	<li><a href="/tutorials/create-taxonomy-thumbnails-featured-images-with-bricks/">Creating taxonomy thumbnails & featured Images</a></li>
	<li><a href="/tutorials/display-dynamic-banners-meta-box-with-bricks/">Displaying the dynamic banners</a></li>
	<li><a href="/tutorials/create-dynamic-landing-page-with-bricks/">Creating a dynamic landing page</a></li>
	<li><a href="/tutorials/show-upcoming-events-with-bricks">Show upcoming events</a></li>
	<li><a href="/tutorials/display-author-bio-in-wordpress-with-bricks/">Displaying author bio</a></li>
	<li><a href="/tutorials/add-custom-fields-to-products-in-woocommerce-meta-box-bricks/">Adding custom fields to products in WooCommerce</a></li>
	<li><a href="/tutorials/display-opening-hours-restaurant-with-bricks/">Displaying opening hours</a></li>
	<li><a href="/tutorials/create-custom-404-page-with-bricks/">Custom 404 page</a></li>
	<li><a href="/tutorials/create-timeline-with-bricks/">Creating a timeline page</a></li>
	<li><a href="/tutorials/create-pricing-table-page-with-bricks/">Creating a pricing table page</a></li>
	<li><a href="/tutorials/create-filters-real-estate-page-with-bricks/">Creating filter real estate</a></li>
	<li><a href="/tutorials/role-based-access-control-with-bricks/">Filter posts by relationships</a></li>
</ul>
		</div>
		<div className="items">
			<h2>Elementor</h2>

[![elementor](./thumbnails/builders-3.png)](/tutorials/create-product-page-elementor/)
<ul>
	<li><a href="/tutorials/create-product-page-elementor/">Creating a product page</a></li>
	<li><a href="/tutorials/create-recipe-meta-box-elementor/">Creating a recipe</a></li>
	<li><a href="/tutorials/create-simple-listing-with-elementor/">Creating a simple listing</a></li>
	<li><a href="/tutorials/create-team-members-page-meta-box-elementor/">Creating a team members page</a></li>
	<li><a href="/tutorials/create-video-gallery-page-with-elementor/">Creating a video gallery page</a></li>
	<li><a href="/tutorials/create-faqs-page-meta-box-elementor/">Creating an FAQs page</a></li>
	<li><a href="/tutorials/create-buttons-dynamic-links/">Creating buttons with dynamic link</a></li>
	<li><a href="/tutorials/display-images-from-cloneable-fields-meta-box-elementor/">Displaying images from cloneable fields</a></li>
	<li><a href="/tutorials/display-latest-product-meta-box-elementor/">Displaying latest products</a></li>
	<li><a href="/tutorials/show-featured-restaurants-with-elementor/">Showing the featured restaurants</a></li>
	<li><a href="/tutorials/displaying-featured-posts-with-wp-grid-builder/">Displaying featured posts</a></li>
	<li><a href="/tutorials/create-menu-restaurants-meta-box-elementor/">Creating menus for restaurants</a></li>
	<li><a href="/tutorials/show-posts-specific-criteria-with-elementor/">Showing posts with specific criteria</a></li>
	<li><a href="/tutorials/display-most-viewed-posts-with-elementor/">Displaying most viewed posts</a></li>
	<li><a href="/tutorials/create-dynamic-landing-page-with-elementor/">Creating a dynamic landing page</a></li>
	<li><a href="/tutorials/show-upcoming-events-with-elementor/">Show upcoming events</a></li>
	<li><a href="/tutorials/create-custom-404-page-with-elementor/">Custom 404 page</a></li>
	<li><a href="/tutorials/create-pricing-table-page-with-elementor/">Creating a pricing table page</a></li>
</ul>
		</div>
		<div className="items">
			<h2>Oxygen</h2>

[![oxygen](./thumbnails/builders-2.png)](/tutorials/create-product-page-meta-box-oxygen/)
<ul>
	<li><a href="/tutorials/create-product-page-meta-box-oxygen/">Creating a product page</a></li>
	<li><a href="/tutorials/create-recipe-meta-box-oxygen/">Creating a recipe</a></li>
	<li><a href="/tutorials/create-team-members-page-meta-box-oxygen/">Creating a team members page</a></li>
	<li><a href="/tutorials/create-video-gallery-page-meta-box-oxygen/">Creating a video gallery page</a></li>
	<li><a href="/tutorials/create-faqs-page-meta-box-oxygen/">Creating an FAQs page</a></li>
	<li><a href="/tutorials/display-images-from-cloneable-fields-meta-box-oxygen/">Displaying images from cloneable fields</a></li>
	<li><a href="/tutorials/display-latest-product-meta-box-oxygen/">Displaying the latest products</a></li>
	<li><a href="/tutorials/category-thumbnails/">Creating taxonomy thumbnails</a></li>
	<li><a href="/tutorials/create-relationships-with-oxygen/">Creating relationships</a></li>
	<li><a href="/tutorials/display-product-variations-meta-box-oxygen/">Displaying product variations</a></li>
	<li><a href="/tutorials/show-featured-restaurants-oxygen/">Showing the featured restaurants</a></li>
	<li><a href="/tutorials/show-posts-specific-criteria-oxygen/">Showing posts with specific criteria</a></li>
	<li><a href="/tutorials/create-download-preview-buttons-with-oxygen/">Creating download and preview buttons</a></li>
	<li><a href="/tutorials/show-upcoming-events-with-oxygen">Show upcoming events</a></li>
	<li><a href="/tutorials/display-opening-hours-restaurants-oxygen/">Displaying opening hours</a></li>
	<li><a href="/tutorials/create-custom-404-page-with-oxygen/">Custom 404 page</a></li>
</ul>
		</div>
		<div className="items">
			<h2>Breakdance</h2>

[![breakdance](./thumbnails/Breakdance.jpeg)](/tutorials/create-product-page-meta-box-breakdance/)
<ul>
	<li><a href="/tutorials/create-product-page-meta-box-breakdance/">Creating a product page</a></li>
	<li><a href="/tutorials/create-recipe-breakdance/">Creating a recipe</a></li>
	<li><a href="/tutorials/create-simple-listing-with-breakdance/">Creating a simple listing</a></li>
	<li><a href="/tutorials/create-team-members-page-breakdance/">Creating a team members page</a></li>
	<li><a href="/tutorials/create-video-gallery-page-meta-box-breakdance/">Creating a video gallery page</a></li>
	<li><a href="/tutorials/create-faqs-page-with-breakdance/">Creating an FAQs page</a></li>
	<li><a href="/tutorials/display-latest-product-breakdance/">Displaying the latest products</a></li>
	<li><a href="/tutorials/show-featured-restaurants-with-breakdance/">Showing the featured restaurants</a></li>
	<li><a href="/tutorials/create-relationships-with-breakdance/">Creating relationships</a></li>
	<li><a href="/tutorials/show-posts-specific-criteria-meta-box-breakdance/">Showing posts with specific criteria</a></li>
 	<li><a href="/tutorials/show-upcoming-events-with-breakdance/">Show upcoming events</a></li>
	<li><a href="/tutorials/create-custom-404-page-with-breakdance/">Custom 404 page</a></li>
	<li><a href="/tutorials/create-pricing-table-page-with-breakdance/">Creating a pricing table page</a></li>

</ul>
		</div>
		<div className="items">
			<h2>Kadence</h2>

[![kadence](./thumbnails/kadence.png)](/tutorials/create-product-page-with-kadence/)
<ul>
	<li><a href="/tutorials/create-product-page-with-kadence/">Creating a product page</a></li>
	<li><a href="/tutorials/create-recipe-with-kadence/">Creating a recipe</a></li>
	<li><a href="/tutorials/create-simple-listing-with-kadence/">Creating a simple listing</a></li>
	<li><a href="/tutorials/create-team-members-page-with-kadence/">Creating a team members page</a></li>
	<li><a href="/tutorials/create-video-gallery-page-with-kadence/">Creating a video gallery page</a></li>
	<li><a href="/tutorials/create-faqs-page-meta-box-kadence/">Creating an FAQs page</a></li>
	<li><a href="/tutorials/display-latest-products-with-kadence/">Displaying the latest products</a></li>
	<li><a href="/tutorials/create-download-preview-buttons-with-kadence/">Creating download and preview buttons</a></li>
</ul>
		</div>
		<div className="items">
			<h2>Zion</h2>

[![zion](./thumbnails/builders-4.png)](/tutorials/create-recipes-meta-box-zion/)
<ul>
	<li><a href="/tutorials/create-recipes-meta-box-zion/">Creating a recipe</a></li>
	<li><a href="/tutorials/create-video-gallery-page-with-zion">Creating a video gallery page</a></li>
	<li><a href="/tutorials/display-latest-products-meta-box-zion/">Displaying the latest products</a></li>
	<li><a href="/tutorials/show-featured-restaurants-with-zion/">Showing the featured restaurants</a></li>
	<li><a href="/tutorials/show-posts-specific-criteria-with-zion/">Showing posts with specific criteria</a></li>
	<li><a href="/tutorials/create-download-preview-buttons-with-zion/">Creating download and preview buttons</a></li>
</ul>
		</div>
		<div className="items">
			<h2>Beaver Builder</h2>

[![beaver builder](./thumbnails/builders-5.png)](/tutorials/create-buttons-dynamic-links/)
<ul>
	<li><a href="/tutorials/create-buttons-dynamic-links/">Creating buttons with dynamic link</a></li>
</ul>
		</div>
		<div className="items">
			<h2>Brizy</h2>

[![brizy](./thumbnails/Brizy.jpg)](/tutorials/create-a-recipe-brizy/)
<ul>
	<li><a href="/tutorials/create-a-recipe-brizy/">Creating a recipe</a></li>
	<li><a href="/tutorials/create-product-page-with-brizy/">Creating a product page</a></li>
</ul>
		</div>
		<div className="items">
			<h2>WP Grid Builder</h2>

[![wp grid builder](./thumbnails/builders-6.png)](/tutorials/displaying-featured-posts-with-wp-grid-builder/)
<ul>
	<li><a href="/tutorials/displaying-featured-posts-with-wp-grid-builder/">Displaying featured posts</a></li>
	<li><a href="/tutorials/create-simple-listing-meta-box-wp-grid-builder/">Creating a simple listing</a></li>
</ul>
		</div>
		<div className="items">
			<h2>Divi</h2>

[![divi](./thumbnails/builders-7.png)](/tutorials/create-product-page-divi/)
<ul>
	<li><a href="/tutorials/create-product-page-divi/">Creating a product page</a></li>
	<li><a href="/tutorials/create-recipe-with-divi/">Creating a recipe</a></li>
	<li><a href="/tutorials/create-faqs-page-meta-box-divi/">Creating an FAQs page</a></li>
</ul>
		</div>
	</div>
</div>

# MB Views

Build front-end templates for WordPress without touching theme files. Support Twig and all field types.

<div className="category_wrap">
<div className="tutorials_category tutorials_category--new">

[![Create Category Thumbnails & Featured Images](./thumbnails/views-1.png) <h3 class="items_titles">Create category thumbnails</h3>](/tutorials/category-thumbnails/)

[![creating buttons with dynamic link](./thumbnails/views-2.png) <h3 class="items_titles">Creating buttons with dynamic link</h3>](/tutorials/create-buttons-dynamic-links/)

[![creating user profile page](./thumbnails/views-3.png) <h3 class="items_titles">Creating user profile page on frontend</h3>](/tutorials/create-user-profile-page/)

[![displaying most viewed posts](./thumbnails/views-add-1.png) <h3 class="items_titles">Displaying most viewed posts</h3>](/tutorials/display-most-viewed-posts-mb-views)

[![creating a dynamic landing page](./thumbnails/views-4.png) <h3 class="items_titles">Creating a dynamic landing page</h3>](/tutorials/create-dynamic-landing-page/)

[![creating a team members page](./thumbnails/views-5.png) <h3 class="items_titles">Creating a team members page</h3>](/tutorials/create-team-members-page-mb-views/)

[![creating a recipe](./thumbnails/views-6.png) <h3 class="items_titles">Creating a recipe</h3>](/tutorials/create-recipe-mb-views/)

[![displaying the latest products](./thumbnails/views-7.png) <h3 class="items_titles">Displaying the latest products</h3>](/tutorials/display-latest-products-mb-views/)

[![displaying images from cloneable fields](./thumbnails/views-8.png) <h3 class="items_titles">Displaying images from cloneable fields</h3>](/tutorials/display-images-cloneable-fields-mb-views/)

[![creating a product page](./thumbnails/views-9.png) <h3 class="items_titles">Creating a product page</h3>](/tutorials/create-product-pages-mb-views/)

[![creating online admission form](./thumbnails/views-10.png) <h3 class="items_titles">Creating online admission form</h3>](/tutorials/create-online-admission-form/)

[![configuring homepage](./thumbnails/views-11.png) <h3 class="items_titles">Configuring homepage</h3>](/tutorials/configure-homepage/)

[![creating an auto-updated cheat sheet](./thumbnails/views-12.png) <h3 class="items_titles">Creating an auto-updated cheat sheet</h3>](/tutorials/create-auto-updated-cheat-sheet/)

[![displaying opening hours for restaurants](./thumbnails/views-14.png) <h3 class="items_titles">Displaying opening hours for restaurants</h3>](/tutorials/display-opening-hours-restaurant-mb-views/)

[![displaying product variations](./thumbnails/views-15.png) <h3 class="items_titles">Displaying product variations</h3>](/tutorials/display-product-variations-mb-views/)

[![creating an FAQs page](./thumbnails/views-16.png) <h3 class="items_titles">Creating an FAQs page</h3>](/tutorials/create-faqs-page-mb-views/)

[![adding dynamic banners](./thumbnails/views-17.png) <h3 class="items_titles">Creating dynamic banners</h3>](/tutorials/create-dynamic-banners/)

[![showing the featured restaurants](./thumbnails/view-18.png) <h3 class="items_titles">Showing the featured restaurants</h3>](/tutorials/show-featured-restaurants-mb-views/)

[![showing post with specific criteria](./thumbnails/views-19.png) <h3 class="items_titles">Showing post with specific criteria</h3>](/tutorials/show-posts-specific-criteria-mb-views/)

[![creating relationships](./thumbnails/views-20.png) <h3 class="items_titles">Creating relationships</h3>](/tutorials/create-relationships-mb-views/)

[![creating a video gallery](./thumbnails/views-21.png) <h3 class="items_titles">Creating a video gallery page</h3>](/tutorials/create-video-gallery-page-mb-views/)

[![adding custom fields for woocommerce](./thumbnails/views-22.png) <h3 class="items_titles">Adding custom fields for WooCommerce</h3>](/tutorials/add-custom-fields-woocommerce-mb-views/)

[![creating download and preview buttons](./thumbnails/views-23.png) <h3 class="items_titles">Download and preview buttons</h3>](/tutorials/create-download-preview-buttons-mb-views/)

[![creating youtube video timestamps](./thumbnails/views-24.png) <h3 class="items_titles">Youtube video timestamps</h3>](/tutorials/create-youtube-video-timestamps-mb-views/)

[![creating taxonomy thumbnails](./thumbnails/views-25.png) <h3 class="items_titles">Creating taxonomy thumbnails</h3>](/tutorials/create-taxonomy-thumbnails-featured-images-mb-views/)

[![random hero image](./thumbnails/views-27.png) <h3 class="items_titles">Random hero image</h3>](/tutorials/randomize-hero-image-mb-views/)

[![display author bio](./thumbnails/views-26.png) <h3 class="items_titles">Display author bio</h3>](/tutorials/display-author-bio-in-wordpress-mb-views/)

[![video playlist](./thumbnails/views-28.png) <h3 class="items_titles">Video playlist</h3>](/tutorials/display-video-playlist-mb-views/)

[![reading progress bar on post](./thumbnails/views-29.png) <h3 class="items_titles">Reading progress bar on post</h3>](/tutorials/create-reading-progress-bar-wordpress-posts-mb-views/)

[![create reading time to posts](./thumbnails/views-30.png) <h3 class="items_titles">Create reading time to posts</h3>](/tutorials/create-reading-time-to-wordpress-mb-views/)

[![add code to wordPress header and footer](./thumbnails/views-31.png) <h3 class="items_titles">Adding code to header and footer</h3>](/tutorials/add-code-to-wordpress-header-footer-mb-views/)

[![showing upcoming events](./thumbnails/case-36.png) <h3 class="items_titles">Showing upcoming events</h3>](/tutorials/show-upcoming-events-with-mb-views/)

[![creating a timeline page](./thumbnails/case-38.png) <h3 class="items_titles">Creating a timeline page</h3>](/tutorials/create-timeline-mb-views/)

[![displaying real time opening status automatically](./thumbnails/view-20.png) <h3 class="items_titles">Real-time opening status automatically</h3>](/tutorials/realtime-opening-status-automatically/)

[![display before after image](./thumbnails/guide-42.png) <h3 class="items_titles">Display before after image</h3>](/tutorials/display-before-after-images/)

[![creating a coming soon page](./thumbnails/case-41.png) <h3 class="items_titles">Creating a coming soon page</h3>](/tutorials/create-coming-soon-page-with-countdown-mb-views/)

[![creating charts in posts](./thumbnails/views-32.png) <h3 class="items_titles">Creating charts in posts</h3>](/tutorials/create-charts-in-posts-mb-views/)

[![show event to calendar](./thumbnails/views-33.png) <h3 class="items_titles">Show event to calendar</h3>](/tutorials/show-event-on-calendar-mb-views/)

[![create pricing table page](./thumbnails/case-42.png) <h3 class="items_titles">Create pricing table page</h3>](/tutorials/create-pricing-table-page-with-mb-views/)

[![create load more button](./thumbnails/views-34.png) <h3 class="items_titles">Create load more button</h3>](/tutorials/create-load-more-button/)

[![create filters of job listing](./thumbnails/views-35.png) <h3 class="items_titles">Create filters of job listing</h3>](/tutorials/create-filters-job-listing-mb-views/)

[![Create horizontal post accordion](./thumbnails/views-36.png) <h3 class="items_titles">Create horizontal post accordion</h3>](/tutorials/create-horizontal-accordion-mb-views/)

[![manage and displaying course schedule](./thumbnails/views-37.png) <h3 class="items_titles">Manage and displaying course schedule</h3>](/tutorials/managing-displaying-course-schedule-with-filters/)

[![filter posts by date picker field](./thumbnails/views-38.png) <h3 class="items_titles">Filter posts by date picker field</h3>](/tutorials/filter-posts-by-date-picker-field/)

[![pin-newest-featured-posts](./thumbnails/views-39.png) <h3 class="items_titles">Pin Newest Featured Posts</h3>](/tutorials/pin-newest-featured-posts-above-regular-posts-mb-views/)

</div>
</div>

# Automatically adding alt text to uploaded images

The alternative text (Alt text) plays an important role in improving your website's SEO and image rankings. However, manually adding alt-text to every uploaded image in WordPress can be time-consuming, especially for sites that frequently upload large amounts of media.

Fortunately, Meta Box can make this process automatic. So, let’s explore the way to **add alt text for images effortlessly** using the **Meta Box custom field and action hook**.

## Why Should We Use Action Hook to Automate Alt Text in WordPress?

Using an action hook to automatically add alt text is not only more convenient but also more effective. As a result, managing media alt text is optimized.

### Benefits of Automatically Adding Alt Text

Each website usually has thousands of images. And it would be a nightmare to have to add alt text to uploaded images by hand. So, automating set alt text helps you **save time and effort significantly**.

Moreover, you can **avoid missing** filling in the alternative text for the uploaded image. Then, the result on Google Image Search is improved.

### Benefits of Using Action Hook and Custom Fields

Many users are used to uploading images manually to WordPress. However, I suggest a more optimal method: using a custom field since it’s helpful to get the alt text effortlessly via the `rwmb_{field_id}_after_save_field` action hook.

As you may know, custom fields are used for dynamic content. Therefore, you can update images easily without affecting the WordPress core.

[`rwmb_after_save_field`](https://docs.metabox.io/actions/rwmb-after-save-field/) is a Meta Box action hook that runs after a field is saved. And, `rwmb_{field_id}_after_save_field` is one of its variations. It applies to a field with a particular ID. Using this action, **adding alt text will be automatic, dynamic, and flexible**.

You can also specify where the image alt text should come from. It could be the image name, description, or anything else. In this article, I will use the image name as an example.

## Adding image alt text automatically

Before starting, you should install [Meta Box Lite](https://metabox.io/lite/) on your site to have a UI on the backend to visually create a custom field for uploading images. It’s free.

As the method I mentioned above, we’ll use a custom field for uploading images, then use the `rwmb_{field_id}_after_save_field` action hook to set alt text for them.

### Creating a custom field to upload images

Right on the admin dashboard of Meta Box, click on the **Create a field group** quick button.

![Create a new field group](https://imgur.elightup.com/PhEnumD.png)

Besides custom fields to store extra information about the post type or page, add a new field to upload the image in the backend. Meta Box provides two field types for it: **Single Image** (to add an image) and **Image Advanced** (to add many images). For demonstration purposes, I add the **Single Image** field.

![Add a Single image field](https://imgur.elightup.com/pNgK4i3.png)

You should remember the field ID. It’ll be used to set the alt text in the next step.

### Adding action hook to the themes file

Go to your themes file and add this code:

```
add_action( 'rwmb_{field_id}_after_save_field', function ( $new, $old, $object_id ) {
    $alt_text = get_the_title( $object_id );
    update_post_meta( $object_id, '_wp_attachment_image_alt', $alt_text );
}, 10, 3 );
```

![Add code to the themes file to add alt text automatically](https://imgur.elightup.com/Mxim2JU.png)

**Explanation**:

* `rwmb_{field_id}_after_save_field`: is a Meta Box action hook that triggers after a specific field is saved. It runs only when that field is updated.
* `$new`, `$old`, `$object_id`: are the parameters of this action.
* `$alt_text = get_the_title( $object_id )`: is to retrieves the title of the post or attachment with the given ID, then assign to the `alt_text` variable.
* `update_post_meta( $object_id, '_wp_attachment_image_alt', $alt_text )`: is to get data from the `alt_text` variable to assign to the alt text image through `wp_attachment_image_alt`. It is the meta key used by WordPress to store alt text for images.

That’s done.

In the case that you use the **Image Advanced** field in the previous step, the code will be like this:

```
add_action( 'rwmb_{field_id}_after_save_field', function ( $new, $old, $object_id ) {
    foreach ( $object_id as $image_id ) {
        $alt_text = get_the_title( $image_id );
        update_post_meta( $image_id, '_wp_attachment_image_alt', $alt_text );
    }
}, 10, 3 );
```

There is only one difference here: You should retrieve each image and its title via the `image_id` instead of the `object_id`.

### Uploading image

Go to the post editor, you can see the field you created. Click on the + Add Media button to upload an image.

![Click on the + Add media to upload image](https://imgur.elightup.com/nAlQmmb.png)

The alt text is blank now. You don’t need to type it as previously.

![The alt text is blank now](https://imgur.elightup.com/FARK10u.png)

After displaying the image on the frontend using MB Views or any page builders, you can see the alt text is created automatically.

![The alt text is added automatically.](https://imgur.elightup.com/9x87o7N.png)

# Adding code to header and footer in WordPress - Using MB Views

import LiteYouTubeEmbed from 'react-lite-youtube-embed';
import 'react-lite-youtube-embed/dist/LiteYouTubeEmbed.css';

In the header and footer of the WordPress website, you can add custom code such as tracking scripts, meta tags, or custom CSS to connect with external services. Today, let’s try a simple way to **add code to the WordPress header and footer** with the help of **MB Views** from Meta Box.

## Video version

<LiteYouTubeEmbed id='O2z0wpXNY2U' />

## Why MB Views?

To integrate your websites with external services like Google Analytics, Google Search Console, and Facebook Pixel, etc. You usually should add code to the header and footer of the website.

To do it, you can add code to the theme directly. But, it is not an optimal option. We recommend using plugins or third-party services that can help to do that indirectly. It brings two significant benefits:

* The code will be not affected when you change the theme;
* You can manage the code more easily.

**MB Views** is one of those plugins. It will come handy especially when you have Meta Box on your site.

For the header and footer, MB Views supports two actions: **`wp_head`** and **`wp_footer`**. So, your work is just inserting the code into the view, then using one of these actions. Then, everything will be done.

In this blog, I’m giving some examples of adding code to the header and footer, including adding or changing the content in the header or footer, and adding Google Analytics and Google Tag Manager scripts.

## Preparation

These are some tools we need in this tutorial:
* [Meta Box](https://wordpress.org/plugins/meta-box/): to have the framework for using MB Views. You can download it directly from [wordpress.org](https://wordpress.org/plugins/meta-box/).
* [MB Views](https://metabox.io/plugins/mb-views/): to add code to the header and footer.

## 1. Adding or changing the content in the header

We will create a view as usual, then use the two actions I mentioned to define them in the header or footer.

Go to **Meta Box** > **Views** and create a new view.

![Go to Meta Box > Views to create a new view.](https://imgur.elightup.com/cCoXsG0.png)

Add any code you want to declare, get data, style, or anything else...in three tabs provided by MB Views.

![Add any code you want into the Template, CSS, JavaScript tabs](https://imgur.elightup.com/3oFDJq0.png)

For example, in the **Template** tab, I add some code:

```
<meta name="description" content="Meta Box plugin">
<link rel="stylesheet" href="styles.css">
```

![In the Template tab, add some code as an example](https://imgur.elightup.com/3uaTfru.png)

In there, `<meta name="description" content="Meta Box plugin">` is to add a description for the meta tag with the content as `“Meta Box plugin”`.

I also use CSS to style the menu in the header a little bit.

![Also use CSS tab to style](https://imgur.elightup.com/4N2flCf.png)

In the **Javascript** tab, I add a line to display a notification.

![In the Javascript tab, I add a line to display a notification](https://imgur.elightup.com/et05Zl7.png)

After adding the code as you want, scroll down to the **Settings** section.

To add all the above code to the header or footer, we should set the type for this view as **Action**. Then, enter the action in the **Action name** box.

![Set the type for this view as Action and enter the action in the Action name box](https://imgur.elightup.com/Qdyjc9e.png)

After publishing, on the frontend, you’ll see the alert which has content specified in the **JavaScript** tab before.

![There’s an alert displayed](https://imgur.elightup.com/93hEQTC.png)

The menu on the header also turns to red as styling.

![The menu on the header also turns to red as styling](https://imgur.elightup.com/8BoYrRh.png)

## 2. Adding or changing content in the footer

Do the same with the footer.

In another view, add code to the tabs.

![Add some code into three tabs](https://imgur.elightup.com/S70saNZ.gif)

Then, instead of using the action for the header, just use the `wp_footer` action to apply the code to the footer of the website.

![Use the wp_footer action to apply the code to the footer of the website](https://imgur.elightup.com/l8io2DF.png)

Go to the page on frontend. There is a notification since I also added it in the **JavaScript** tab.

![There is a notification on the frontend](https://imgur.elightup.com/CE2PX9M.png)

Also, the footer has a text section in black.

![The footer has a text section in black](https://imgur.elightup.com/9Y8lx10.png)

## 3. Adding code to connect with external services

For a clearer look, let's add the code to connect the website with external services.

Not only changing the content and styling something on your pages, you can also use the MB Views to add scripts from third parties such as Google, Facebook, Hotjar, etc. I’ll link the header with Google Analytics and Google Tag Manager as examples.

### 3.1. Adding Google Analytics code snippet

For Google Analytics, after getting the code snippet from your Google account, go back to your site, and create a new view as well.


![Create a new view to add Google Analytics code snippet](https://imgur.elightup.com/ISeTYKG.png)

Paste the script to the **JavaScript** tab.

![Paste the script to the JavaScript tab](https://imgur.elightup.com/3nlpOO2.png)

Then set the **Type** as **Action**, and name the action as `wp_head` to add the script to the header of the page.


![Set the Type as Action, and name the action as wp_head to add the script to the header of the page](https://imgur.elightup.com/TSoikSh.png)

That’s done.

### 3.2. Adding Google Tag Manager code snippet

Do likewise with the Google Tag Manager code snippet. Get it from your Google account.

Then, add the script to the **JavaScript** tab in a view.


![Add the script of Google Tag Manager to the JavaScript tab](https://imgur.elightup.com/OV7I0rh.png)

And, set the type of the view as action as well. We also should use the `wp_head` action in this case.


![Set the type of the view using the wp_head action](https://imgur.elightup.com/Bcrk9RU.png)

That’s so simple.

# Adding custom fields to products in WooCommerce - Meta Box + Bricks

import LiteYouTubeEmbed from 'react-lite-youtube-embed';
import 'react-lite-youtube-embed/dist/LiteYouTubeEmbed.css';

WooCommerce is a popular platform for eCommerce in WordPress which provides some information saved in the product data section. But, you still may need some things further that it does not provide, such as custom fields for extra information about products. Let’s dive in to explore how to display them with **Meta Box** and **Bricks**.

This is an example of a single page for products in WooCommerce that we will create in this practice.

![An example about a single page for products in WooCommerce](https://imgur.elightup.com/W9WCFGV.png)

## Video version

<LiteYouTubeEmbed id='Jzgd9IXj8fQ' />

## Preparation

Besides some information saved in the product data section that WooCommerce provides, we will add some extra information saved in custom fields created with Meta Box to the page as well.

![Information saved in WooCommerce and custom fields](https://imgur.elightup.com/oR7nisJ.png)

In this practice, we absolutely need **WooCommerce** to have some features for your products and shop.

For custom fields, we need the [Meta Box core plugin](https://wordpress.org/plugins/meta-box/) to have a framework to create them. You can download it directly from [wordpress.org](https://wordpress.org/plugins/meta-box/).

We also need some advanced features from Meta Box which are from some of its extensions:

* [Meta Box Builde](https://metabox.io/plugins/meta-box-builder/): to have a UI on the back end to create custom fields easily;
* [MB Group](https://metabox.io/plugins/meta-box-group/): to group the fields together for better structure. It is optional;
* **Bricks** to help build the page.

## 1. Creating custom fields

Although WooCommerce provides some fields from basic to advanced to input the product information. You may want to have some other information for products in some cases. Then, custom fields will come handy.

These are the fields that I’ll create for example. They are just some basic fields for typical information.

![These are the fields created for extra information](https://imgur.elightup.com/X3DrA65.png)

Go to **Meta Box** > **Custom Fields** to create the fields.

![Go to Meta Box > Custom Fields to create the fields](https://imgur.elightup.com/Lj5XrQh.png)

Meta Box has [more than 50 field types](https://www.youtube.com/watch?v=WWeaM5vIAwM) that can meet almost any type of data you expect to input.

For the basic information, we use the **Text** field.

![This is Text fields for basic information](https://imgur.elightup.com/tUMWLE3.png)

I’ll create some fields that allow the user to choose one from the provided list in the **Select** type.

![Some fields that allow the user to choose one from the provided list in the Select type](https://imgur.elightup.com/OChNbOo.png)

There is a choice box to add options in the **Select** field type.

![A choice box to add options](https://imgur.elightup.com/9zLF3T2.png)

After having all the fields, move to the **Settings** tab, choose **Location** as **Post type**, and select **Product** to apply these fields to it.

![Move to the Settings tab, choose Location as Post type, and select Product to apply these fields](https://imgur.elightup.com/mc0maEH.png)

Pay attention that the product post type is auto-generated by WooCommerce. It is not the post type created with Meta Box.

![The product post type is auto-generated by WooCommerce](https://imgur.elightup.com/vYuBWSh.png)

Now when editing a product, you will see the created fields.

![These are the created fields](https://imgur.elightup.com/A8GjSZQ.png)

Just input some data.

![Input some data in the created fields](https://imgur.elightup.com/1eRx01O.png)

You still can add product data in the **Product data** section provided by Woocommerce. It does not affect the data in the custom fields at all, and vice versa.

![Some product data in the Product data section provided by Woocommerce](https://imgur.elightup.com/GxEe3dL.png)

## 2. Creating a template for the product page

Go to **Bricks** to create a new template for the product page.

![Go to Bricks and create a new template for the product page](https://imgur.elightup.com/ywEQAsO.png)

Select the template type as **Woocommerce Single Product**. Then, edit the created template with Bricks.

![Select the template type as Woocommerce Single Product](https://imgur.elightup.com/KBlGwgy.png)

Go to the settings of this template, set a condition to assign to **Product** in the Post type.

![Set a condition to assign to Product in the Post type](https://imgur.elightup.com/fYK1ZO4.png)

And, also set a preview for it in the **Populate content** section.

![Set a preview for it in the Populate content section](https://imgur.elightup.com/Hx9SYBu.png)

Add a **Section** for covering all the page content.

![Add a Section for covering all the page content](https://imgur.elightup.com/ay6EvkM.png)

### 2.1. Displaying the product information in WooCommerce

Now, I’ll display some information saved in the product data section that WooCommerce provides.

Choose the two columns layout for the **Container** inside the section. Then, add one by one element to display all the product information.

![Choose the two columns layout for the Container inside the section](https://imgur.elightup.com/M7c7Tmd.png)

At the top of the page content area, select **Breadcrumbs** element to generate the corresponding breadcrumbs for each single product page.

![Select Breadcrumbs element to generate the corresponding breadcrumbs](https://imgur.elightup.com/AovOXWi.png)

Bricks provides some elements that are specific for Woocommerce, so you can easily display the product information just by choosing the corresponding elements.

![Bricks provides some elements that are specific for Woocommerce](https://imgur.elightup.com/uFgXq3r.png)

Add the **Product gallery** element to display all the images from the Product gallery field provided by WooCommerce.

![Add the Product gallery element to display all the images](https://imgur.elightup.com/oh2uQ66.png)

For some information about products, add the **Product title** element then add the **Product price**. It’s also from a field provided by Woo.

![For some information about products, add the Product title element then add the Product price](https://imgur.elightup.com/hjPCe39.png)

I’ll choose the **Product Meta** element and then select **Product short description** to describe the product.

![Choose the Product Meta element and then select Product short description to describe the product](https://imgur.elightup.com/Hbsgm6C.png)

A product page also should have the **Add to cart** button and Bricks also provides a dedicated element to have this button for Woo.

![Choose Add to cart button for a product page](https://imgur.elightup.com/rhkttAi.png)

Moreover, Bricks also has a dedicated element for a popular section that displays the tabs of product details, review, comment, and so on.

![Bricks also has a dedicated element for a popular section](https://imgur.elightup.com/6KARt3B.png)

Add **Heading** element for the related products.

![Add Heading element for the related products](https://imgur.elightup.com/qKMnyRL.png)

And select **Related Products** to show it.

![Select Related Products for showing](https://imgur.elightup.com/lVcqmND.png)

### 2.2. Displaying the product information in custom fields

Now, for other information saved in custom fields created with Meta Box, instead of using the elements that are for Woo only, we should choose the normal element, then use the dynamic data feature.

All the data that is saved in the fields is a kind of a list of characteristics about the product, so choose the **List** element to display them.

![Choose the List element to display kind of a list of characteristics about the product](https://imgur.elightup.com/sgUtZSj.png)

I’ll open the **Items** section and there will be a list of items.

![These are the lists of items](https://imgur.elightup.com/GhG6PI2.png)

Just set the name of the item.

![Set the name of the item](https://imgur.elightup.com/SZEh8OY.png)

Then set the Meta for the item using dynamic data.

![Set the Meta for the item using dynamic data](https://imgur.elightup.com/difExU5.png)

I’ll set an icon for the item like this.

![Set an icon for the item](https://imgur.elightup.com/EAGNoo8.png)

Do the same with some kind of information that we have in the fields. Just duplicate the first item for saving time and change the title, the field in the **Meta setting** as well.

This is all information saved in custom fields.

![This is all information saved in custom fields](https://imgur.elightup.com/P59zwO9.png)

This is all the information about the product that I expect to display on the single page but without styling.

![All the information about the product displayed without styling](https://imgur.elightup.com/aQ9DEN6.gif)

## Styling the product page

To have a better look for the product page, you should go back to the page editor with Bricks. Then, choose each element, both the element dedicated for Woo or the one for custom fields created with Meta Box, just change the settings to style them.

Now, you will see the page has turned to a new look.

![This is a new look of the page](https://imgur.elightup.com/aa26q9i.gif)

# Adding custom fields to Yoast SEO meta tags

import LiteYouTubeEmbed from 'react-lite-youtube-embed';
import 'react-lite-youtube-embed/dist/LiteYouTubeEmbed.css';

Normally, when you use Yoast SEO on your site, there will be a section to fill in the title, and description that **helps search engines index them easier**. You can fill in static content or dynamic content in these sections. But in some cases, you may want to get content not only from those default fields but from custom fields. So, how to **add content from custom fields created with Meta Box to Yoast SEO meta tags**, just follow these practices.

I'll get data from Meta Box custom fields, then add to Yoast SEO meta tags as title and description.

![add content to Yoast SEO meta tags as title and description](https://imgur.elightup.com/9Kux9hY.png)

## Video version

<LiteYouTubeEmbed id='0oMK9bXmkPI' />

## Preparation

If you want to add a simple custom field to meta tags, you can use the Yoast SEO snippet variables. It works in 90% of cases. However, if your custom field has complex data such as a list of text (cloneable text field) or a sub-field of a group, then you should use the custom snippet variables.

In this practice, I will create both of these field types with all these methods for easier applying in real cases.

To get started, you would have to use Yoast SEO on your site to use Yoast SEO meta tags. We also need some tools:

* [Meta Box core plugin](https://wordpress.org/plugins/meta-box/): to have a framework to create custom fields;
* [MB Yoast SEO Integration](https://metabox.io/plugins/meta-box-yoast-seo/): to add the content of custom fields to Yoast SEO Content Analysis;
* [MB Builder](https://metabox.io/plugins/meta-box-builder/): to have a UI on the backend to create custom fields more easily;
* [MB Group](https://metabox.io/plugins/meta-box-group/) (optional): to group fields together. I’m using it for demonstration and gives you some typical examples to see clearer how to do it with multiple types of fields.

## 1. Creating custom fields

There is little difference between getting content from the normal field, group, cloneable field, and cloneable group. So I’ll have 4 kinds of them as an example.

![4 kinds of custom fields as an example](https://imgur.elightup.com/hBqdgMy.png)

Go to **Meta Box** and create them.

![Go to Meta Box and create custom fields](https://imgur.elightup.com/YhvfOb5.png)

After creating all the fields, move to the **Settings tab**, choose **Location** as **Post type**, and select any post type you want to apply these fields for it.

![Move to the Settings tab, choose Location as Post type, and select any post type you want to apply](https://imgur.elightup.com/DwkQXTA.png)

After publishing the custom fields, you will see the field in the post editor. Just input some data.

![The field in the post editor](https://imgur.elightup.com/qP0wIXD.png)

## 2. Outputing the custom fields values to be the meta tags

There are two ways to get values from custom fields then add those content to Yoast SEO meta tags:

1. One is using Yoast SEO snippet variables. But it is just for the field which is non-cloneable and stand alone, which means that it’s not in any group.
2. Another one is using custom snippet variables to output content from group, clonable field, cloneable group, or some other special field type.

## 2.1. Using Yoast SEO Snippet Variables

Yoast SEO provides [snippet variables](https://yoast.com/help/list-available-snippet-variables-yoast-seo/) to add data from custom fields to meta tags. Go to the Yoast SEO section and add a variable with a structure like this:

`%%cf_<custom-field-name>%%`

` cf_ ` is the prepend text for variables that get data from custom fields. Just get the **ID** of the field, and replace `<custom-field-name>` with that **ID**.

In the **Yoast SEO** section in the post/page editor, enter that variable to the Meta title box like this:

![Enter that variable to the Meta title box](https://imgur.elightup.com/fPlhZg0.png)

In this case, I did input the variable as `%%cf_product_title%%`. In there, product_title is the ID of my custom field.

Please note that this way makes sense only when the field is non-clonable and NOT in any group.

When you add the variable, the preview will show the text immediately. It’ll be exactly the same with the content saved in the custom field.

![When you add the variable, the preview will show the text immediately](https://imgur.elightup.com/MoFgzCT.png)

To double check if it is in the meta tag or not, just go to the post on the front end and inspect it.

![Go to the post on the front end and inspect to double check if it is in the meta tag or not](https://imgur.elightup.com/ks1LXSz.png)

## 2.2. Using Custom Snippet Variables

To get data from some special custom fields, for example, group or cloneable ones, we should add code to the theme’s file to create custom snippet variables.

![Add code to the theme’s file to create custom snippet variables](https://imgur.elightup.com/3ggMKzF.png)

```php
add_action( 'wpseo_register_extra_replacements', function() {
           wpseo_register_var_replacement( '%%my_information%%', 'my_information_funciton', 'advanced', 'Some help text' );
	wpseo_register_var_replacement( '%%my_features%%', 'my_features_function', 'advanced', 'Some help text' );
	wpseo_register_var_replacement( '%%my_promotions%%', 'my_promotions_function', 'advanced', 'Some help text' );
} );

function my_information_funciton() {
    $value = '';

    // Get product information.
    $settings = rwmb_meta( 'product_information' );

    // Get brief description.
    $value .= isset( $settings['short_description'] ) ? $settings['short_description'] : '';

    // Get ratings.
    $value .= isset( $settings['ratings'] ) ? " {$settings['ratings']} stars" : '';

    return $value;
}

function my_features_function(){
	$value = '';
	$features = rwmb_meta( 'features' ) ?: [] ;
	$value .= ' Features: ';

	foreach ( $features as $item ){
		$value.=$item.', ';
	}
	return $value;
}

function my_promotions_function(){
	$value = '';
	$promotions = rwmb_meta( 'promotions' ) ?: [] ;
	$value .= ' Promotions: ';

	foreach ( $promotions as $group ) {

		// Field promotion_program:
		$value .= $group[ 'promotion_program' ] ?? '';

		// Field expired_date:
		$value .= $group[ 'expired_date' ] ?? '';

	}
	return $value;
}
```

We will use the hook ` wpseo_register_extra_replacements ` to create the custom variables.

![We will use this hook to create the custom variables.](https://imgur.elightup.com/hG6q0Y3.png)

I use the ` wpseo_register_var_replacement ` function from **Yoast SEO** to register that I will create three new variables since I have three fields for example.

![I use this function from Yoast SEO to register that I will create three new variables since I have three fields for example.](https://imgur.elightup.com/fxCPTsS.png)

These are the names of the variables that you can name as you want.

![The names of the variables](https://imgur.elightup.com/uWvFz3Y.png)

Notice that ` advanced and ` ` Some help text ` parameters follow **Yoast SEO** documentation, so you can look for a more detailed guide about these parameters in [there](https://yoast.com/help/list-available-snippet-variables-yoast-seo/).

Corresponding to each variable, we will have a function to get data from custom fields. You also can name those functions.

![Each variablewill have a function to get data from custom fields](https://imgur.elightup.com/vSXegRm.png)

In these functions, you should use the [_rwmb_meta_ helper function](https://docs.metabox.io/filters/rwmb-meta/) to get data or settings of the custom fields no matter which kind of them.

![Use the rwmb_meta helper function to get data or settings of the custom fields](https://imgur.elightup.com/Dlc2zFR.png)

These lines of code to get data from a **group which is non-clonable**.

![These lines of code to get data from a group which is non-clonable](https://imgur.elightup.com/eEy4I7e.png)

In there, this is the **ID** of the group.

![The ID of the group](https://imgur.elightup.com/ZPktVou.png)

These are the **IDs** of the subfields inside that group.

![The IDs of the subfields inside that group](https://imgur.elightup.com/gsaCCgg.png)

This one is to get data from a **cloneable field** that has the ID as ` features `. Since it is cloneable, there’ll be a loop in the function.

![A loop in the function to get data from a cloneable field](https://imgur.elightup.com/KYGITZp.png)

These are to get data from a **clonable group** (ID as ` promotions `) which has two subfields inside with the IDs are ` promotion_program ` and ` expired_date `.

![Get data from a clonable group which has two subfields inside](https://imgur.elightup.com/VN7qXm6.png)

Since the group is cloneable, you can see there also is a loop in the above function.

Now, go to the post editor, and enter the created variables into the box with the structure like this:

`%%<your_custom_variable>%%`

![Enter the created variables into the box with the structure](https://imgur.elightup.com/uVsX0TR.png)

Although **Yoast SEO** does not render content from custom snippet variables in the snippet preview, you can inspect the post and see it.

![Inspect the post and see the result](https://imgur.elightup.com/qXMMooB.png)

# Adding custom fields for WooCommerce

import LiteYouTubeEmbed from 'react-lite-youtube-embed';
import 'react-lite-youtube-embed/dist/LiteYouTubeEmbed.css';

WooCommerce is a popular platform for eCommerce in WordPress which provides numerous features and functions, but you still may need some things further that it does not provide, such as custom fields for extra information about products. That’s when custom fields created with Meta Box will come in handy. But how can we **add those fields to the products which are in an online store built with WooCommerce?**

These are two custom fields that I created with Meta Box and added to a product in WooCommerce.

![Example of a product page provided by WooCommerce and custom fields created with Meta Box](https://imgur.elightup.com/gvZlE3X.png)

## Video Version

<LiteYouTubeEmbed id='XzymaqzE8kw' />

## Preparation

In this practice, we absolutely need tools to create and customize the online store:

* [Meta Box core plugin](https://wordpress.org/plugins/meta-box/): to have a framework to create custom fields;
* [MB Views](https://metabox.io/plugins/mb-views/): to display value from custom fields on the product pages easily;
* [MB Builder](https://metabox.io/plugins/meta-box-builder/): to has a UI in the backend to create custom fields;
* **WooCommerce**: to create and customize the online store.

You can install them individually or use **Meta Box AIO**.

## 1. Creating custom fields

Go to **Meta Box** > **Custom Fields** > **Add New** to create some custom fields.

![Go to Meta Box > Custom Fields > Add New to create some custom fields.](https://imgur.elightup.com/B9c25Gq.png)

I will create two fields, as I said, one is cloneable and one is normal. It is just to help you see the difference clearer when displaying them on the product page.

![There are two fields are created. Color fields is clonable and Guaranty field is normal.](https://imgur.elightup.com/Wxlvra5.png)

After having all the fields, move to the **Settings** tab, choose **Location** as **Post type**, and select **Product** to apply these fields to it. Pay attention that this post type is auto-generated by WooCommerce. It is not the post type created with Meta Box.

![Move to the Settings tab, choose Location as Post type, and select Product to apply these fields.](https://imgur.elightup.com/H5DPos2.png)

Now, when editing a product in WooCommerce, you will see the created fields.

![These are created fields in WooCommerce](https://imgur.elightup.com/LKemwaP.png)

Just input some data.

![Fill some information for Product Information](https://imgur.elightup.com/uZ6CJmH.png)

## 2. Adding action to display fields’ values

The fields are in the backend so far. If you want to display data saved in the fields on the product page, you should use a hook provided by WooCommerce: 'woocommerce_product_meta_end'.

Normally, you should add that hook to the theme’s file. If you have [MB Views](https://metabox.io/plugins/mb-views/) from Meta Box, you can add the hook without touching any theme’s files.

Go to **Meta Box** and create a new view.

![Go to Meta Box and create a new view.](https://imgur.elightup.com/iEjXYmx.png)

### 2.1. Getting and displaying data from fields

In the **Template** tab, click the **Insert field** button and look for the field’s name from the list on the right sidebar to get and display information on the product page. Just click on the name of the fields.

![Click the Insert field button and choose name of the fields to get and display information on the product page.](https://imgur.elightup.com/8Xn0cEN.png)

The code will be added to the template automatically. You can see the difference in code between the normal field and the cloneable one.

![The code added to the template.](https://imgur.elightup.com/QAZ3Oxq.png)

The first line is for the normal field, which is not cloneable. And the three next lines if for the **Color** field. Since it is cloneable, there will be a loop. This loop also is auto-generated when you insert the **Color** field.

We will use CSS to improve the displaying of the data from the field. But, before that, you should separate code lines in **Div** tags and name some classes.

![Add some div tags and classes to use CSS for styling later](https://imgur.elightup.com/KeCwVDQ.png)

Next, go to the **CSS** tab of the view, add some code to style the template. There’s also another tab for JavaScript in the event that you need it for some advanced display.

![Go to the CSS tab of the view, add some code to style the template.](https://imgur.elightup.com/gcc7td2.png)

### 2.2. Setting the action

Now, scroll down to the **Settings** section of the view.

![Scroll down to the Settings section of the view](https://imgur.elightup.com/Kbk1wsC.png)

As I said, we will use a hook provided by WooCommerce. So, we will add this template as an action to that hook.

Set the **Type** of the view as **Action**. In the **Action name** box, as **_'woocommerce_product_meta_end'_** which is the name of the hook. You can read more about this hook in WooCommerce documentation for more details.

![Set the Type of the view as Action. In the Action name box, as 'woocommerce_product_meta_end' which is the name of the hook](https://imgur.elightup.com/BG80UKj.png)

Now, go back to the page on the frontend, you’ll see the data saved in the fields created with Meta Box displayed on the page.

![The product page on the frontend](https://imgur.elightup.com/bqYcREc.png)

# Adding custom fields for WooCommerce

WooCommerce is an open-source eCommerce platform built on WordPress that powers 23% of all eCommerce websites around the world. It has numerous features and functions, but it only meets the basic requirements of an online store. If your product contains special information, you can use Meta Box to add custom fields easily. Let’s find out in this tutorial!

## Preparation

In addition to using [Meta Box](https://metabox.io/), make sure you already have [MB Builder](https://metabox.io/plugins/meta-box-builder/). This extension provides a UI right on the back end, which makes creating custom fields easier.

## 1. Creating custom fields

Go to **Meta Box > Custom Fields > Add New** to create any fields for saving extra information for your products.

![create custom fields](https://imgur.elightup.com/5BklrEY.png)

Meta Box has more than 50 field types, so you can choose any kind of field to input any data you want. We already have a [video about all Meta Box field types](https://www.youtube.com/watch?v=WWeaM5vIAwM) and each field’s features so that you can learn about each one.

Simply select one from the drop-down list to add your desired field, as shown in the image below.

![select the wanted custom fields](https://imgur.elightup.com/jgHdO0x.png)

Here is the example field that I created.

![example of the created custom fields](https://imgur.elightup.com/Qgr9zEl.png)

Finally, move to the **Settings** tab and select the name of the post type that you want to display in the **Post types** section.

![Select name of the post type](https://imgur.elightup.com/Z1TSPTs.png)

Here, the post type of my product articles is *Product*, so I also choose *Product* in **Post types**. Note that this is the post type created by WooCommerce.

After publishing the field group, return to the editor page of the product (post type is Product), and you will see the custom fields you just created displayed there.

![custom fields show in the page editor](https://imgur.elightup.com/p0B7u59.png)

## 2. Displaying custom fields on the front end

Add the following code to the `functions.php` file of the theme:

```php
add_action( 'woocommerce_product_meta_end', function () {
    echo '<div class="extra-info">';
    if ( $meta = rwmb_meta( 'text_1' ) ) {
        echo '<div>', __( 'Guaranty: ', 'twentytwenty' ), $meta, '</div>';
    }
    if ( $meta = rwmb_meta( 'color_1' ) ) {
        echo '<div class="color">', __( 'Color: ', 'twentytwenty' );
        foreach( $meta as $value ) {
            echo '<span style="background:', $value, '"></span>';
        }
        echo '</div>';
    }
    echo "</div>";
} );
```

**Explanation**:

* `woocommerce_product_meta_end` : is the hook of WooCommerce. This hook specifies the position to display the value of the field you are adding. You can refer to a few types of hooks with visual locations described here to find a hook that matches the position you want to place information on;
* `'text_1'`and `'color_1'`: are the IDs of the custom fields created above;
* `'Guaranty:'` and `'Color:'` : are the prefixes I added to display along with the field value;
* `'twentytwenty'` : is the name of the theme I am using.

:::tip

My `'color_1'` field has multiple values, so I need to use the loop to call out all the values. In other information fields that only have a unique value, you can use the code as the `'text_1'` field.

:::

After that, the values of the field I added will display like this:

![The values of the added field will display like this](https://imgur.elightup.com/vIQpq2n.png)

The color section of the product here is temporarily not shown, so I added some CSS to style this part.

```css
.extra-info {
    display:flex;
    flex-flow: row wrap;
    margin-top: 10px;
}
.extra-info div {
    width: 100%;
    margin-top: 10px;
}
.extra-info span {
    width:40px;
    height:40px;
    display:inline-block;
    border:1px solid;
    margin: 0 10px;
}
.color {
    display: flex;
    align-items: center;
}
```

Here is the result:

![The result](https://imgur.elightup.com/0xVlFOM.png)

# Adding a favorite button

import LiteYouTubeEmbed from 'react-lite-youtube-embed';
import 'react-lite-youtube-embed/dist/LiteYouTubeEmbed.css';

**MB Favorite Posts** is a solution of Meta Box for users saving a post to their Favorite lists. This solution provides you with all the needed tools and features to **add a Favorite button**. This tutorial will show how!

## Video version

<LiteYouTubeEmbed id='fSFmNp-Ayew' />

## Preparation

These are the tools we need for this practice:

* [Meta Box](https://metabox.io/): to have a framework to use its solution;
* [MB Favorite Posts](https://metabox.io/plugins/mb-favorite-posts/): to create a favorite button.

After activating the **MB Favorite Posts** solution, a favorite button will automatically appear on the posts of your site like this:

![Favorite button will automatically appear on the posts](https://imgur.elightup.com/cbHgNd6.png)

In default, this button is named as **Add to Favorites**, and shown at the end of the content section of your blog posts. Of course, you can change its name, display position, and ask users to log in before using this button. In particular, you can add a page for users to sign up for a new account or see the list of their favorite posts.

To set up the Favorite button, go to **Settings > Favorite Posts**.

![Set up the favorite button](https://imgur.elightup.com/b1XVrCl.png)

For each side, there are 3 tabs of settings:

* General: for general settings such as Position, Post Types,...
* Button: for button styles and content such as change text, color, or font-size
* Icon: show/hide icon and change parameter

## General settings

![General settings](https://imgur.elightup.com/cf6kslJ.png)

### Pre-built styles

You can change the style for the button. We create 3 predefined styles for you to choose from:

* Default: which has a form of a button
* Like: a simple like icon (similar to Facebook like button)
* Rounded: a rounded button with an icon only

![Style for the button](https://imgur.elightup.com/1FlEIKQ.gif)

### Enabling for non-logged in users

This option is chosen as default. However, if users do not log in, their favorite posts list will be **temporarily saved in the cookie of the browser**, and will be lost when the cookie is deleted.

![The favorite posts list will be temporarily saved in the cookies or the browser](https://imgur.elightup.com/kR3395E.png)

To avoid these annoying cases, you had better allow users to create an account and save their favorite posts list in their account.

First, untick the **Enable for non-logged in users** option > **Register Page** section:

![Choose Register page option](https://imgur.elightup.com/0B0GWGe.png)

If you’ve had a register page already and want to use it, just leave the **Register Page** box blank. Then anyone logging in to their accounts with any roles can use the favorite button.

Or you can create a new blank page.

![Create a new blank page](https://imgur.elightup.com/DRNIbbJ.png)

After that, in the **Register Page** section, you will see the page you have just created in the dropdown list as below:

![The created page](https://imgur.elightup.com/Bsfkh8f.png)

**MB Favorite Posts** will automatically add fields to this register page with a form.

![MB favorite posts will automatically add fields](https://imgur.elightup.com/v9olzco.png)

### Position

Choose where to display the favorite button as you want by this setting. To choose its location on a single post page, you just have to choose 1 of these 3 options in the **Position** section on the setting page like this:

![Choose one of 3 options in Position](https://imgur.elightup.com/oIy4TIa.png)

If you want to display the Favorite button in the posts of a certain post type, tick to choose that post type in the **Post Types** section.

![Choose the post type in the Post Types section](https://imgur.elightup.com/2GmNxJx.png)

Moreover, you can show the favorite button at other positions on a single post or a random page if you want. Just refer to the code in the **Shortcodes** section.

![Refer to the code in the Shortcodes section](https://imgur.elightup.com/ibmcdQw.png)

For example, I added my favorite button to the sidebar of the my website by going to **Appearance > Widgets** and add a **Shortcodes** to paste the shortcode as follow:

![Add a shortcodes to paste the shortcode](https://imgur.elightup.com/zbOSEv1.png)

### Dashboard Page

It is a page where users review their list of favorite posts. When you choose to allow non-logged in users to use this feature, you still have to choose the **Dashboard** page as a certain page, so that users have a place to see their favorite posts list. In case, users choose a post as their favorite, it will be shown on this **Dashboard Page**.

![The chosen posts will be shown in Dashboard Page](https://imgur.elightup.com/re6rDzh.png)

Finally, you need to display your **Favorite Posts** page on your website to help users access it easily. I will set it on my menu as an example.

![Display the favorite posts page on the website](https://imgur.elightup.com/eNLSwfC.png)

When going to the **Favorite Posts** page, you will see a list of favorite posts display like this:

![The list of favorite posts displays like this](https://imgur.elightup.com/HKdPPS9.png)

## Button settings & Icon settings

**Button** and **Icon** tabs in the settings of the MB Favorite Posts solution are so easy to set up. They allow you to customize the style for all elements of the button, such as text, size, color, etc. It also provide a live preview for the bottom, so you can easily set up the button and icon as you want.

![Buttons in the settings](https://imgur.elightup.com/W8fsJ28.png)

![Icon tabs in the settings](https://imgur.elightup.com/0kjcCfA.png)

# Adding guest authors and guest posts

import LiteYouTubeEmbed from 'react-lite-youtube-embed';
import 'react-lite-youtube-embed/dist/LiteYouTubeEmbed.css';

Today, I'll show you how to **allow users to sign up for a guest author account and submit guest posts** using **Meta Box**.

Here is my example.

![Create a page to allow users to sign up for a guest author account and submit guest posts using Meta Box.](https://imgur.elightup.com/vCKKPSS.png)

## Video version

<LiteYouTubeEmbed id='TXcpsVf8ZZg'/>

## Preparation

Specifically, in this case, users will be able to register an account, log in, and then access a management page similar to the above demo. On this page, they will have the ability to edit their account information and also submit posts.

Moreover, they’ll have a section where they can manage the posts that they submitted as well as edit the posts.

![A section where they can manage the posts that they submitted as well as edit the posts](https://imgur.elightup.com/ewplWNE.png)

To solve all the above requirements, we should use [Meta Box](https://wordpress.org/plugins/meta-box/) and its following three extensions:

* [MB Builder](https://metabox.io/plugins/meta-box-builder/): provides a UI in the back end to create custom fields for the guest author’s information as well as the extra information of the post if any;
* [MB User Profile](https://metabox.io/plugins/mb-user-profile/): allows you to create registration forms and manage the guest author accounts;
* [MB Frontend Submission](https://metabox.io/plugins/mb-frontend-submission/): helps create a form to submit posts on the frontend.

## 1. Allowing guest users to register an account

First, we should create a registration form for guest users to register a new account.

Simply head over to the **Settings** menu > **General**, then check the box **Anyone can register** in the **Membership** item.

![In the Settings menu > General, then check the box Anyone can register in the Membership item.](https://imgur.elightup.com/qCgAfLQ.png)

Furthermore, in the **New User Default Role** section, you can choose to set the default role when they register. I set it as **Subscriber**, which provides enough privileges for them to submit posts.

![In the New User Default Role section, you can choose to set the default role when they register.](https://imgur.elightup.com/SD8j3iQ.png)

Typically, when a user registers an account, it only includes some default fields. However, if you want them to provide some additional information, you can create custom fields and allow them to fill in those fields.

## 2. Creating custom fields

Just go to the **Meta Box** > **Custom Fields** > **Add New** to create some fields for guest author information.

![Create some fields for guest author information.](https://imgur.elightup.com/tKobtUS.png)

Actually, the user’s account already has the default fields.

![The user’s account already has the default fields.](https://imgur.elightup.com/t1pDDdP.png)

However, they won’t be displayed on the register page as well as the profile page on frontend. So, I’ll use a trick. Create some custom fields to be the alternative of those fields, and then display the custom fields on those pages.

Make sure to set the **ID** of the fields to be the same as the one of corresponding default fields that WordPress uses. By doing so, when users fill in the custom fields, the data will be automatically transferred into the corresponding WordPress field.

![Set the ID of the fields to be the same as the one of corresponding default fields that WordPress uses.](https://imgur.elightup.com/OFTBMyV.png)

I just created some typical fields, like in the image above. The **First Name** and **Last Name** fields are alternatives for the two default fields, which have the same name. And the **Biography** field is an extra one that I added. There is no requirement on the **ID** of this kind of field. If you want more extra information from the guest author, just add fields as usual.

After creating all the fields, move to the **Settings** tab and remember to set **Location** as **User**.

![Move to the Settings tab and remember to set Location as User.](https://imgur.elightup.com/j4Ydn7S.png)

Once you have published, the field group **ID** will be generated automatically. We’ll use it in the next step.

![The field group ID](https://imgur.elightup.com/2zGW0of.png)

## 3. Creating the registration page

Let’s create a new page for registration.

As usual, users need to set an username and a password for the account on the registration page. Since we have the [MB User Profile](https://metabox.io/plugins/mb-user-profile/) extension from **Meta Box**, we just need to add a block provided by it to have the fields for username and password. It is the **Registration Form** block.

![The Registration Form block](https://imgur.elightup.com/JZbznmt.png)

It should be a form with the username and password fields. But, I logged in an admin account to do this practice, so there will be a message.

![A message replaces a form which has the username and password fields.](https://imgur.elightup.com/7mZ60mJ.png)

The form will display when you go to the page without any login, as you can see here.

![The form will display when you go to the page without any login](https://imgur.elightup.com/am1r412.png)

But, that’s not all the things I want for this page. As I said before, if you want users to provide more information, you can put other custom fields onto this page. I created a field group for example, so I will put it in this place.

![The place where we put a field group.](https://imgur.elightup.com/b0cawNn.png)

Go back to edit the registration page. In the settings of the **Registration Form** block that we’ve just added, fill in the **ID** of the field group that we created into this box.

![Fill in the ID of the field group that we created](https://imgur.elightup.com/EMSvawc.png)

Now, back to the registration page on the frontend, you will see the form will be like this.

![A form in the registration page on the frontend](https://imgur.elightup.com/2LlYrXy.png)

Just create a new account for testing then move to the admin dashboard, you’ll see the new account. And, the provided information also is saved in both the default and custom fields.

![A new account](https://imgur.elightup.com/jxRSITo.png)

## 4. Creating the my account page

After registering for an account, users will need a page where they can log in and manage their account information. I’ll create one as the **My Account** page.

On this page, I’ll display the custom fields that were used to register accounts like in the image below. It allows users to modify their personal information.

![The My Account page](https://imgur.elightup.com/eDIjJtK.png)

Just go to **Pages** > **Add New** to create a new page as usual.

Add a block named **Edit Profile Form**. It’s provided by the [MB User Profile](https://metabox.io/plugins/mb-user-profile/) extension as well.

![Edit Profile Form](https://imgur.elightup.com/YVpl4UC.png)

Look for the settings of this block. Fill in the **ID** of the created field group into the box below. By doing this, the custom fields will be displayed immediately.

![Fill in the ID of the created field group](https://imgur.elightup.com/1JS3tZG.png)

At this right sidebar, you also can customize this form by changing some settings.

For example, change the label of the button.

![Change the label of the button](https://imgur.elightup.com/53Cli8E.png)

To access the **My Account** page, users must log in to their account first. Then, you can see the **My Account** page that I’ve just created with the user's information submitted since they registered.

![The My Account page](https://imgur.elightup.com/Ysj7EAx.png)

## 5. Creating the post submission page

Now, I will create a page to allow guest authors to submit their own posts directly from the frontend without accessing the backend.

Go to **Pages** and create a new one again. Then, look for a block named **Submission Form**. It is available when the [MB Frontend Submission](https://metabox.io/plugins/mb-frontend-submission/) extension is enabled.

![Submission Form](https://imgur.elightup.com/46oRdDD.png)

This block will display a **Title** field and a **Content** field of a post by default.

![The block will display a Title field and a Content field of a post by default.](https://imgur.elightup.com/OH7A7yY.png)

You absolutely can customize this form in the settings on the right sidebar.

Next, choose the **Post Type** to be the **post** option, and then the submitted data will be saved as a post. Or, you can choose any other custom post type as you want the guest post to be.

![Choose the Post Type to be the post option, and then the submitted data will be saved as a post.](https://imgur.elightup.com/yHewt7Z.png)

I highly recommend setting the post status be “draft” or “pending”. This will help you to avoid displaying some unexpected spam content without control.

![Set the post status be “draft” or “pending”](https://imgur.elightup.com/EOpRfLu.png)

In the **Post Fields** section, in addition to the title and content of the article, you can also allow the guest author to enter more information about the post.

![In the Post Fields section, you can also allow the guest author to enter more information about the post.](https://imgur.elightup.com/0SY2MFc.png)

In the event that you want to add other information for the post, you can create custom fields and insert the ID of the field group in the box as seen in this picture. It is similar to the **Register** page that I’ve just created.

![To add other information for the post, you can create custom fields and insert the ID of the field group](https://imgur.elightup.com/n74oQTC.png)

Now, any account can go to this page to submit a post.

## 6. Allowing guest authors to manage posts

Since the guest author has already submitted the posts to the website, we should allow them to manage all the posts they submitted. To do this, I will insert a table onto the **My Account** page that displays all those posts.

Go to edit the page once again, add the **User Dashboard** block. This block is available when you enable the [MB Frontend Submission](https://metabox.io/plugins/mb-frontend-submission/) extension.

![MB Frontend Submission](https://imgur.elightup.com/IOnKq7E.png)

When you select this block, you will see the table appear immediately.

![The table shows how many post provided.](https://imgur.elightup.com/sGlXjF7.png)

There will be a list of posts in the table since I’m using an admin account that submitted a bunch of posts.

Choose the **Submit A Post** option to stipulate that the table will show posts which have been submitted from the **Submit A Post** page only.

![Choose the Submit A Post option to stipulate that the table will show posts which have been submitted from this page only.](https://imgur.elightup.com/LuPajb3.png)

There’re also some other settings on the right sidebar that you can use to customize the table.

Pay attention to the **Add New** button. It will appear at the same time as the table. When the user clicks on this button, they will automatically be directed to the **Submit A Post** page.

Now, let’s login to the testing account that we use as a guest author. On the **My Account** page, there’s no post on the list because this account is totally new.

![There’s no post on the list](https://imgur.elightup.com/1W4kALi.png)

Let’s add a new post by clicking on the **Add New** button to submit the post, or you can go directly to the **Submit A Post** page.

![Add a new post by clicking on the Add New button, or you can go directly to the Submit A Post page.](https://imgur.elightup.com/rkB5712.png)

Back to **My Account** page you will see a post you’ve just submitted is listed in this table. The status of this post is pending, exactly as which I set earlier.

![There is a submitted post with pending status.](https://imgur.elightup.com/xELizKC.png)

If the author wants to edit this post, they can click the button below.

![If the author click the button to edit this post.](https://imgur.elightup.com/z2SOh4p.png)

After changing the title of the post, you will see the post title has been changed.

![The post title has been changed.](https://imgur.elightup.com/rysT7iv.png)

So, everything worked well.

# Adding icons to the title of custom fields

import LiteYouTubeEmbed from 'react-lite-youtube-embed';
import 'react-lite-youtube-embed/dist/LiteYouTubeEmbed.css';

Sometimes you may want to **embellish the fields, or have some signatures for them**. There is not only a way to do that such as adjusting size, space, color, … but also **adding icons into their title**. Instead of using only text for the meta box’s title or field name, we can **use icons for addition or alternative**. Let’s dive in to explore the process of adding icons to the title in detail.

This is an example for adding the icons that we will create in this practice.

![An example for adding the icons to titles of custom fields](https://imgur.elightup.com/4npFj2j.png)

## Video Version

<LiteYouTubeEmbed id='aRPqEdvXxdc'/>

## Preparation

To have custom fields on your site, you might have the [Meta Box plugin](https://wordpress.org/plugins/meta-box/). You can install it directly from [wordpress.org](https://wordpress.org/plugins/meta-box/).

Beside that, if you have the [MB Builder](https://metabox.io/plugins/meta-box-builder/) to create and manage the fields in an intuitive UI, it’ll be easier to add the icons. Otherwise, you can add the HTML script of the icon to the code directly.

I will give you both ways in this practice.

## 1. Enqueuing the icon library

As you know, there are several icon libraries available. You must enqueue your wanted library to the theme before using it.

If you use [FontAwesome](https://fontawesome.com/), [Elusive](http://elusiveicons.com/), or [Genericons](http://genericons.com/), you must follow these executions:

1. Download the library to your computer.
2. Copy the **CSS** and font files and paste them to the theme’s folder.
3. Add this code to the **functions.php** file.

```
function your_prefix_enqueue_admin_style() {
    wp_enqueue_style( 'admin_css', get_stylesheet_directory_uri() 'css_file_direction_in_the_theme_folder' );
}
add_action( 'admin_enqueue_scripts', 'your_prefix_enqueue_admin_style' );
```

Otherwise, you can totally skip this step if you use [Dashicons](https://developer.wordpress.org/resource/dashicons/). This library is developed by WordPress so you can use it without enqueuing.

From now on, you can use any icons from the enqueued library on your site, including the field title.

## 2. Creating custom fields

Now, I will create some fields for adding icons to the titles.

Go to **Meta Box** > **Custom Fields** to create the fields.

![Go to Meta Box > Custom Fields to create the fields](https://imgur.elightup.com/gNg6QgK.png)

These are the fields that I have created. They are all the basic and typical fields, so I made no special settings.

![These are the fields created](https://imgur.elightup.com/jj0pAGv.png)

After having all the fields, move to the **Settings** tab, set the **Location** and select **Post** to apply the fields to it.

![Move to the Settings tab, set the Location and select Post to apply the fields](https://imgur.elightup.com/H1YCtzT.png)

Then, on the editing post, you will see the fields but without icons.

![The fields but without icons in post editor](https://imgur.elightup.com/dthvH4Y.png)

## 3. Getting the icon script

To add icons, I’m going to use icons from the **Dashicons** library.

Go to [this link](https://developer.wordpress.org/resource/dashicons/#ellipsis) on [wordpress.org](http://wordpress.org), and search for an icon you want.

![Search for an icon you want](https://imgur.elightup.com/DDi0yT2.png)

Then, copy the **HTML** of the icon to show it in the next steps.

![Copy the HTML of the icon to show icons](https://imgur.elightup.com/pCBOUZj.png)

## 4. Adding icons to the title of custom fields

As I mentioned before, you can create and manage the fields **using the UI** provided by the [MB Builder extension](https://metabox.io/plugins/meta-box-builder/), or **using code**. No matter which way you are doing, adding icons to the title are quite the same.

### 4.1. Using MB Builder

This is a field group that I made before. It was created by using the UI.

![This is a field group created](https://imgur.elightup.com/jj0pAGv.png)

Now, I will add an icon to the field group title, as well as the titles of all the fields.

To add the icon to the field group title, paste the HTML that we’ve just copied to any place on the title.

![Paste the HTML to add the icon to the field group title](https://imgur.elightup.com/l56TLRu.png)

Do likewise with the titles of the fields. Just paste the HTML of the icon as you want to the title.

![Paste the HTML of the icon to add icons to fields](https://imgur.elightup.com/WEmmQGf.png)

### 4.2. Using code

We’ll add the HTML to the meta box's **title** attribute or the field's **name** attribute.

Here is the original code of a meta box created by Meta Box plugin.

![Here is the original code of a meta box created by Meta Box plugin](https://imgur.elightup.com/30yTlUk.png)

Add and paste HTML script into the line where we set the field group title.

![Paste the HTML to the line is where we set the field group title](https://imgur.elightup.com/0eyplwB.png)

Also paste the HTML scripts of the icons to the lines where we register the name of each field.

![Paste the HTML of the icons to these lines are where register the name of each field](https://imgur.elightup.com/ETZkcZV.png)

## 5. Displaying the icons

Go to the post editor, you will see the icons displayed besides the field group title and each field title. This is how they look in the backend.

![The icons displayed in the backend](https://imgur.elightup.com/4npFj2j.png)

If this field group is also displayed on a page on the frontend, they would display well.

Now, I’ll add a block in the type of **Submission Form**.

![Add a block in the type of Submission Form](https://imgur.elightup.com/JtfdwsZ.png)

After adding the ID of the field group to this box, the fields will display immediately, obviously along with the icons.

![After adding the ID of the field group to this box, the fields will display with icons](https://imgur.elightup.com/YCobk8w.png)

We’ve finished adding the icons. Here is the result on the frontend.

![Here is the result on the frontend](https://imgur.elightup.com/XldNzri.png)

# Adding custom Javascript actions using Button field with Meta Box

import LiteYouTubeEmbed from 'react-lite-youtube-embed';
import 'react-lite-youtube-embed/dist/LiteYouTubeEmbed.css';

In WordPress, there are only default functional buttons on the backend to do some actions like submitting posts or adding categories. Do you want to add other custom functional buttons to make your management much easier? Today, we’ll find a way to add custom JavaScript actions using the Button field with Meta Box in the most convenient way.

You can see it clearer with these two Button fields to remove or input values into multiple custom fields at once.

![example of two Button fields to remove or input values into multiple custom fields at once](https://imgur.elightup.com/HBTBlrd.gif)

## Video version

<LiteYouTubeEmbed id='0PFpPOHf21o' />

## Preparation

Here are the tools we need:
* [Meta Box core plugin](https://wordpress.org/plugins/meta-box/): to have a framework to create custom fields;
* [MB Builder](https://metabox.io/plugins/meta-box-builder/): to have a UI on the back end to easily create the fields.

## 1. Creating custom fields

I’m using WooCommerce so I have a custom post type as **Products** already. Now, just create some fields for it.

![The custom post type named Products already because of using WooCommerce](https://imgur.elightup.com/4FTod1u.png)

### 1.1. Creating custom fields to input data

I’ll create some typical fields. If you don’t know how to add custom fields for a WooCommerce website, you can [read this article](https://metabox.io/add-custom-fields-for-woocommerce/).

Remember the **ID** of these fields because you need to insert them to the code in the third step.

![Some custom fields to input data for the product and thier ID](https://imgur.elightup.com/LVRYVf2.png)

Then, go to the **Settings** tabs, set the **Location** as **Post type** and choose your post type to apply these fields to it. Here I chose **Product**.

![go to the Settings tabs, set the Location as Post type and choose your post type to apply these fields to it](https://imgur.elightup.com/eokKOkQ.png)

Then, you will see the fields displayed on the post editor.

![the custom fields displayed on the post editor](https://imgur.elightup.com/twxIdC6.png)

Normally, to input or remove data from these custom fields, you must click on one by one and do it manually. But with JavaScript, you can use another field to automatically do it in bulk. Let’s do it!

### 1.2. Creating custom buttons

Go to **Meta Box** > **Custom Fields** to create a new field group for the buttons.

![Go to Meta Box > Custom Fields to create a new field group for the buttons](https://imgur.elightup.com/0ClxPy3.png)

Firstly, I’ll create a button to reset the value of all the created fields at once. It means removing the data that are saving in the fields.

Add a field in the type as **Button**.

![Add a field in the type as Button](https://imgur.elightup.com/nERnBW6.png)

Also remember the ID of this field.

Create another button to add default values for those fields at the same time as well.

![Create another button to add default values for those fields at the same time as well.](https://imgur.elightup.com/mar6dWJ.png)

After that, go to the **Settings** tab, set **Location** as the same post type that we applied the previous field group to.

![go to the Settings tab, set Location as the same post type that we applied the previous field group to](https://imgur.elightup.com/opXgF9f.png)

Then, in the post editor of any product, you will see the custom fields and new buttons with the label you created.

![the custom fields and new buttons with the label displayed in post editor](https://imgur.elightup.com/qiOUdlS.png)

But so far, these buttons haven’t worked.

Let’s move on to add JavaScript to handle custom actions for them.

## 2. Adding JavaScript to handle custom actions

We should add some code to the theme’s files or use some third-party plugins as Code Snippets to add code.

In the `functions.php` file, add this code to create a new JS file in the **js** folder.

```
add_action( 'rwmb_enqueue_scripts', function() {
    wp_enqueue_script( 'script-id', get_template_directory_uri() . '/js/admin.js', ['jquery'], '', true );
} );
```
The file is named as **`admin.js`**.

![add code to create a new JS file in the js folder in the functions.php file](https://imgur.elightup.com/5pQSbiN.png)

Go to the created file, and add the following code:

```
jQuery( function ( $ ) {
    $( '#button_reset' ).on( 'click', function() {
        $( '#product-information' ).find( 'input[type=text]' ).val('');
    } );

    $( '#set_default' ).on( 'click', function() {
        $( '#product-information' ).find( '#wholesale_price' ).val('150000');
        $( '#product-information' ).find( '#retail_price' ).val('100000');
        $( '#product-information' ).find( '#discount_price' ).val('80000');
    } );
} );
```

![Go to the created file, and add some code](https://imgur.elightup.com/KofTI05.png)

**Explanation**:

```
$( '#button_reset' ).on( 'click', function() {
```

This is to trigger the moment when users click on the **Reset** button (the ID of the button is `button_reset`).

If they do so, this code will run:

```
$( '#product-information' ).find( 'input[type=text]' ).val('');
```

It will set all the values of the custom fields in the field group with the ID **`product-information`** to blank. It means that all the values of the fields in this field group will be deleted at once.

```
$( '#set_default' ).on( 'click', function() {
```

This is to trigger the moment when users click on the Default button which has the ID as **`set_default`**.

When a user clicks on it, these lines of code will run to set values to the fields:

```
$( '#product-information' ).find( '#wholesale_price' ).val('150000');
$( '#product-information' ).find( '#retail_price' ).val('100000');
$( '#product-information' ).find( '#discount_price' ).val('80000');
```

In there, **`product-information`** is the ID of the field group that contains the custom fields we want to set the values. `wholesale_price`, `retail_price`, and `discount_price` are the IDs of each field that we want to set value for. `'150000'`, `'100000'`, and `'80000'` are the values that we will input to the fields.

If you want to change these default values, you can replace them with any value you want.

![the values that we will input to the fields](https://imgur.elightup.com/jdJmLQM.png)

Now, go back to the post editor. You can click on these two buttons to see how they work.

![click on these two buttons to see how they work](https://imgur.elightup.com/HBTBlrd.gif)

They work nicely!

# Adding paginations & searching box to custom fields

import LiteYouTubeEmbed from 'react-lite-youtube-embed';
import 'react-lite-youtube-embed/dist/LiteYouTubeEmbed.css';

Rendering all the pre-made data of a custom field at once on the screen in the backend can cause the post or page editor to look very confusing. Adding pagination to separate those values into pages, and also providing a search box to search any value right in the field will come in handy.

Here is an example.

![An example of adding Paginations & Searching Box to Custom Fields](https://imgur.elightup.com/vTHuU2Z.png)

The fields include various images that you can choose from. Instead of showing all of them on this screen, I use this pagination and a search box to find a reasonable one easier.

## Video version

<LiteYouTubeEmbed id='nmTzTP8sILs' />

## Preparation

In this post, we will focus on pagination and we'll build a search box that allows users to look up any value in the field.

To get started, we need some tools:

* [Meta Box core plugin](https://wordpress.org/plugins/meta-box/) to have a framework to create custom fields;
* [MB Builder](https://metabox.io/plugins/meta-box-builder/) to have the UI, you can install this extension individually, or use **Meta Box AIO** to enable it.

## 1. Creating custom fields

I will create two fields. One is to show some image options to choose from. The other field allows adding text to search any image that is in the below field.

![The custom fields that I created](https://imgur.elightup.com/zd3m391.png)

Go to **Meta Box**, and add fields as usual.

![Go to Meta Box, and add fields](https://imgur.elightup.com/wwncaF0.png)

The **Search box** should be a **Text** field that allows typing characters inside.

![Choose a Text field for the Search box](https://imgur.elightup.com/LjQXoEc.png)

Move to the **Advanced** tab, and add a class for this field since we will use **JavaScript** later to add the search feature to this field.

![Add a class for the field](https://imgur.elightup.com/zPxbb7E.png)

The next field is to provide some images. So I’ll add it as an **Image Select** field.

![Insert an Image Select field](https://imgur.elightup.com/XXHPoEY.png)

In the **Choices box** of this field’s settings, add some images.

![In the Choices box of this field’s settings, add some images.](https://imgur.elightup.com/AiPDU1Y.png)

This is the **URL** of the image.

![The URL of the image](https://imgur.elightup.com/QVAW1lN.png)

This is the name of the image that you set on your own. The name will be the value saved in the custom field.

![The name of the image that you set on your own](https://imgur.elightup.com/iEdr8gV.png)

In the **Advanced** settings section of this field, I add a **Text** to display after the field. It is to list the pagination numbers later which are regulated by a class named '**pagination**'.

![Add a Text to display after the field](https://imgur.elightup.com/A6I1BPt.png)

After creating all the fields, move to the **Settings** tab, choose **Location** as **Post type**, and select a post type to which you want to assign these fields to.

![Move to the Settings tab, choose Location as Post type, and select a post type to which you want to assign these fields to](https://imgur.elightup.com/7ptLtuh.png)

Then, go to the post editor, you will see the fields displayed. All the images in the field are displayed without any pagination since we haven’t created them. The Search box also hasn’t worked yet.

![All the images in the field are displayed without any pagination](https://imgur.elightup.com/JhjOoaN.png)

## 2. Adding functions to the fields

We should add code to the theme’s files to add some functions for the fields. They help to create the pagination and search features.

Go to the **functions.php** file, and add some lines of code.

```
function estar_add_list_js_library() {
    wp_enqueue_script( 'listjs', '//cdnjs.cloudflare.com/ajax/libs/list.js/1.5.0/list.min.js' );
    wp_enqueue_script( 'estar-custom-scripts', get_stylesheet_directory_uri() . '/js/scripts.js' );
}
add_filter( 'rwmb_enqueue_scripts', 'estar_add_list_js_library' );

add_action('admin_head', 'my_custom_css');
function my_custom_css() {
  echo '<style>
        .pagination li {
            display:inline-block;
            padding:5px;
        }
    <   /style>';
}
```

First, since I will use **JS**, I declared the **JS** online library that I will use in these lines as well as a new file to add code:

```
function estar_add_list_js_library() {
    wp_enqueue_script( 'listjs', '//cdnjs.cloudflare.com/ajax/libs/list.js/1.5.0/list.min.js' );
    wp_enqueue_script( 'estar-custom-scripts', get_stylesheet_directory_uri() . '/js/scripts.js' );
}
add_filter( 'rwmb_enqueue_scripts', 'estar_add_list_js_library' );
```

![Add some codes to declare the JS online library](https://imgur.elightup.com/WAiUtMP.png)

**estar** is the theme that I’m using for my website (you can download [this theme](https://gretathemes.com/wordpress-themes/estar/) here for free).

![The theme that I’m using for my website](https://imgur.elightup.com/EmaTEUP.png)

These lines of code are used to display the pagination and stipulate its style. But we haven’t created it yet.

![These lines of code are used to display the pagination and stipulate its style](https://imgur.elightup.com/tEl1E1Z.png)

Then, go to the created **JS file**. Add the git.

```
jQuery( function( $ ) {
    $( document ).ready( function() {
        var options = {
            valueNames: [
                { attr: 'value', name: 'rwmb-image_select' }
            ],
            pagination: true,
            page: 3,
        };
        var featureList = new List( 'background-for-post', options );
    } );

    $( '#background-for-post .rwmb-image_select-wrapper' ).find( '.rwmb-input' ).addClass( 'list' );
} );
```

![Go to the created JS file and add the git](https://imgur.elightup.com/1hfPUyb.png)

These are to create the pagination.

![These are to create the pagination](https://imgur.elightup.com/MNIuP89.png)

In this example, I divided the options in the Image Select field into 3 pages. ` rwmb-image_select ` also regulated that the pagination is used for the field that is in the type as **Image Select** only.

![The code regulated that the pagination is used for the field that is in the type as Image Select only](https://imgur.elightup.com/X5t0da6.png)

And, the function ` var featureList = new List( 'background-for-post', options ); ` handles the search function for the field that you’ve created above. In there, ` background-for-post ` is the **ID** of the field group I’ve created.

![The function handles the search function for the field that you’ve created above](https://imgur.elightup.com/CMH1E2S.png)

Now, back to the post editor, you'll see the paginations as page numbers 1, 2, and 3. Click on each page, you will see different images. Also, the search box worked well.

![The paginations as page numbers 1, 2, and 3. Also, the search box worked well.](https://imgur.elightup.com/BBBYsKg.gif)

We’ve just finished this practice.

# Adding related posts using custom fields

import LiteYouTubeEmbed from 'react-lite-youtube-embed';
import 'react-lite-youtube-embed/dist/LiteYouTubeEmbed.css';

Adding related ports is a common way to keep your visitor stay on your site and help them find more useful content. In this practice, we will find out how to **choose a specific post to be related to another one using custom fields** created with Meta Box.

This is a typical section for related posts as you can see somewhere.

![This is a typical section for related posts](https://imgur.elightup.com/VtkA5bQ.png)

## Video Version

<LiteYouTubeEmbed id='OHY6oGieFRI' />

## Preparation

There are different ways to add related posts but the most popular is using a tool to automatically choose some posts related by keywords, tags, categories, or taxonomies of the current post.  It’s not using custom fields. However, it might be not precise in some cases, especially when you want particularly related posts to be prior on the list. That’s why you should **use custom fields to choose exactly which posts are related** to the current post.

In this practice, we need these tools:
* [Meta Box core plugin](https://wordpress.org/plugins/meta-box/): to have a framework to create custom fields;
* [MB Views](https://metabox.io/plugins/mb-views/): help us create a template to get and display the related posts on the singular page;
* [MB Builder](https://metabox.io/plugins/meta-box-builder/): to have a UI on the back end to create the custom fields.

Note that you can install all the above extensions individually or use **Meta Box AIO**.

## 1. Creating custom fields

We’ll use only one field for this practice. Go to **Meta Box** > **Custom Fields** > **Add New** to create it.

![Go to Meta Box > Custom Fields > Add New to create fields](https://imgur.elightup.com/Xsbr0l7.png)

Add the field in the type of **Post**. This field type allows you to choose a/multiple posts from a regulated post type.

![Add Post field to choose a/multiple posts from a regulated post type](https://imgur.elightup.com/9zJlC5B.png)

You should configure this field a little bit.

![You should configure Label description, Post types and Field type field.](https://imgur.elightup.com/0fiGpOG.png)

The **Label description** setting provides you a way to notify users about the field.

In the **Post Types** setting, you should choose the post type that the related posts are. In other words, only the posts from the post type set in this box can be chosen.

In the **Field type** setting, you can choose a kind of selecting field then the created field will inherit its style of displaying and inputting data. To know more about the style of each option in this setting, you can refer to the documentation of each providing field type.

You can turn on the **Multiple** option if you want to allow users to add more than related posts.

![Turn on the Multiple option to allow users to add more than related posts.](https://imgur.elightup.com/0VcIohi.png)

After configuring all options for the field, move to the **Settings** tab, set **Location** as **Post type**, then choose a post type of the post where you want to show related posts.

![move to the Settings tab, set Location as Post type, then choose a post type of the post where you want to show related posts](https://imgur.elightup.com/Mq0QoOF.png)

Back to the post editor of your post type, you will see the created field.

![Here is the created field.](https://imgur.elightup.com/zNfwGac.png)

Now you can click on the field, see the list of posts from the post type you set in the settings of the fields. Just choose some ones from the list.

![Choose some posts from the list Related Posts](https://imgur.elightup.com/gtGL6vB.png)

You also can see that this field has the display following the display of the Select Advanced field type as I set.

## 2. Displaying related posts

To display related posts, we should get the posts that are chosen in the created custom field. Then, get their information and show them on the page.

As I mentioned before, you can use **MB Views** to create a template, or add code to the **theme’s file**. Notice that even when you are using a page builder, you still can use **MB Views** following this guide.

### 2.1. Using MB Views

#### 2.1.1. Getting and displaying data from fields

Go to **Views** in Meta Box and create a new view.

![Go to Views in Meta Box and create a new view.](https://imgur.elightup.com/R6GiiOF.png)

In the **Template** tab of the view, click on the **Insert Field** button. Look for the created field for related posts.

![Click on the Insert Field button and look for the created field for related posts.](https://imgur.elightup.com/Wh48Z3W.png)

Select that field and you can choose which information of the post you want to output in the template. Here I choose **Post Thumbnail, Post Title and Post Content** respectively to show the information about related posts on the singular page.

![Choose Post Thumbnail, Post Title and Post Content respectively to show the information about related posts on the singular page.](https://imgur.elightup.com/98dDUXk.png)

However, you cannot add all of them at once. Each clicking on the field on the list will get only one of them. And, the code with syntax as following will be add to the template:

```
{% for item in post.related_posts %}
    {{ item.ID_of_the_field_that_saves_post_information }}
{% endfor %}
```

It’s to get all the posts that users input into the field. Notice that I set this field to allow adding more than one post into the field.

After adding all the wanted post information, you should re-arrange the code to be like this:

```
{% for item in post.related_posts %}
	<img src="{{ item.thumbnail.thumbnail.url }}" width="{{ item.thumbnail.thumbnail.width }}" height="{{ item.thumbnail.thumbnail.height }}" alt="{{ item.thumbnail.thumbnail.alt }}">
	{{ item.title }}
           {{ item.content }}
{% endfor %}
```

![The code with syntax added to the template](https://imgur.elightup.com/7YTqm2z.png)

You also can change the code to output the data as you want. I changed this `{{ item.content}}` variable into `{{ mb.wp_trim_words(item.content,20,'...') }}` variable to limit the number of displaying characters.

![Change `{{ item.content}}` variable into `{{ mb.wp_trim_words(item.content,20,'...') }}` variable to limit the number of displaying characters.](https://imgur.elightup.com/iXuP9zR.png)

#### 2.1.2. Setting the Action to Display Posts

After getting all of the information of the posts as you want, go down to the **Settings** section of the view, set the **Type** as **Singular**

![Go down to the Settings section of the view, set the Type as Singular](https://imgur.elightup.com/aw8dSZe.png)

And choose the location as the singular of your post type.

![Choose the location as the singular of post type.](https://imgur.elightup.com/NZcsmpK.png)

You can choose one from the provided option in the **Render** for and **Position** section to have the right place as you want.

No, go to a page of a post. You will see the related posts.

![Here is related posts before styling](https://imgur.elightup.com/nb0p735.png)

#### 2.1.3. Styling

To have a better look for the related posts section on the page, go back to the created template, add some **div** tags and classes for each information.

![Add some div tags and classes for each information to have a better look](https://imgur.elightup.com/xGBbYm4.png)

You also can add heading, hyperlink, etc. Then, move to the **CSS** tab and add some code.

![Add some code in CSS tab](https://imgur.elightup.com/44JM83H.png)

And this is the result.

![This is the result of related posts.](https://imgur.elightup.com/INGfIz9.png)

### 2.2. Using PHP

The created Post field saves the IDs of chosen related posts. It returns an array of values as follows:

```
array (size=3)
    0 => string '36' (length=2)
    1 => string '25' (length=2)
    2 => string '29' (length=2)
```

So, we use the function to get the value of posts in this form:

```
$post_ids = rwmb_meta( $field_id );
foreach ( $post_ids as $post_id ) {
    echo '<p>'. get_the_title( $post_id ). '</p>';
}
```

In there:

`$field_id`: ID of the Post Field which we set

`$post_ids`: The array of post IDs that the Post Field returns

`rwmb_meta( )`: this is a function provided by Meta Box to get data saved in the custom fields;

`foreach ( ) { }`: this is a loop to get all the posts that are saved in the field;

`echo '<p>'. get_the_title( $post_id ). '</p>'`: to display the post title.

We can customize or export data by IDs. It means that you can get any information from the related posts such as title, thumbnail, excerpt to show on your website. I did get just the title in the above code.

Go to the `single.php` or `single-{custom_post_type_slug}.php` file and put the gist in the above form:

![Go to the single.php or single-{custom_post_type_slug}.php file and put some code.](https://imgur.elightup.com/Anm3MKX.png)

If you want some other information from the post display, just add code inside the loop.

Now, go to the singular page, you will see the title of the posts displayed.

![Title of the posts displayed in the singular page](https://imgur.elightup.com/L7YOk4t.png)

To style the section of the related posts, you can add some div tag, classes, heading, etc. as to the code in the theme’s file as the same as I did with MB Views.

![Add some div tag, classes, heading, etc. as to the code in the theme’s file](https://imgur.elightup.com/wGX3r6B.png)

Then add CSS to the single page via Customizer or theme’s file. Then, you will have a new look of the section.

![This is the result of a typical section for related posts](https://imgur.elightup.com/INGfIz9.png)

# Adding star rating fields

Meta Box hasn’t provided any **field type for star rating** yet. If you want to have one, you should create it on your own by following this tutorial. **This will be a new field type** which will stand by current 40+ field types from Meta Box.

## 1. Creating a plugin to create a new field type

I named this new plugin **MB Rating Field** so go to the **wp-content** folder and create the files with the directory structure as below:

```php
wp-content/plugins/mb-rating-field
css
  - admin.css
  - frontend.css
rating.php
mb-rating-field.php
```

There, just create the files inside and add content for them as following steps.

First, to create the plugin, add the following code to the `mb-rating-field.php` file:

```php
<?php /** * Plugin Name: MB Star Rating
* URI plugin: https://metabox.io
* Description: Add a new star rating field type for Meta Box
* Version: 1.0
* Author: MetaBox.io
* Author URI: https://metabox.io
* License: GPLv2 */
```

Then, you will see the new plugin in the list of installed plugins in the **Dashboard**. Let’s activate it.

![The new plugin in the list of installed plugins](https://imgur.elightup.com/F1XriLc.png)

## 2. Creating a new field type as star rating

In the `rating.php` file, add some code to add the star ratings field type.

```php
if (class_exists ('RWMB_Field')) {
    class RWMB_Rating_Field extends RWMB_Field {}
}
```
This is to create a class named `RWMB_Rating_Field` for this rating field. Usually, if you want to create a certain type of field, you should create a class with the syntax `RWMB _ {$ field_type} _Field`. You can see more details in [this guide](https://docs.metabox.io/custom-field-type/) of Meta Box.

Next, declare this class in the plugin `mb-rating-field.php` file created in Step 1 by adding this code to this file:

```php
add_action ('init', 'prefix_load_rating_type');
function prefix_load_rating_type () {
    require __DIR__. '/rating.php';
}
```
## 3. Creating options for the field type

Once you have the rating field, you need to create options that allow website owners to score stars (from 0.5 to 5 stars).

This rating class will inherit all the methods of the `RWMB_Field` class. In this rating field, we must specify the content of the html method to output the HTML in the backend.

Do it by adding the following code to the `rating.php` file.

```php
public static function html( $meta, $field ) {
	return sprintf(
		'<fieldset class="rwmb-rating" id="%1$s">
		<input type="radio"' . checked( $meta, 5, false ) . 'id="%1$s_star5" name="%2$s" value="5" /><label class="full" for="%1$s_star5" title="5 stars"></label>
		<input type="radio"' . checked( $meta, 4.5, false ) . 'id="%1$s_star4half" name="%2$s" value="4.5" /><label class="half" for="%1$s_star4half" title="4.5 stars"></label>
		<input type="radio"' . checked( $meta, 4, false ) . 'id="%1$s_star4" name="%2$s" value="4" /><label class="full" for="%1$s_star4" title="4 stars"></label>
		<input type="radio"' . checked( $meta, 3.5, false ) . 'id="%1$s_star3half" name="%2$s" value="3.5" /><label class="half" for="%1$s_star3half" title="3.5 stars"></label>
		<input type="radio"' . checked( $meta, 3, false ) . 'id="%1$s_star3" name="%2$s" value="3" /><label class="full" for="%1$s_star3" title="3 stars"></label>
		<input type="radio"' . checked( $meta, 2.5, false ) . 'id="%1$s_star2half" name="%2$s" value="2.5" /><label class="half" for="%1$s_star2half" title="2.5 stars"></label>
		<input type="radio"' . checked( $meta, 2, false ) . 'id="%1$s_star2" name="%2$s" value="2" /><label class="full" for="%1$s_star2" title="2 stars"></label>
		<input type="radio"' . checked( $meta, 1.5, false ) . 'id="%1$s_star1half" name="%2$s" value="1.5" /><label class="half" for="%1$s_star1half" title="1.5 stars"></label>
		<input type="radio"' . checked( $meta, 1, false ) . 'id="%1$s_star1" name="%2$s" value="1" /><label class="full" for="%1$s_star1" title="1 star"></label>
		<input type="radio"' . checked( $meta, 0.5, false ) . 'id="%1$s_starhalf" name="%2$s" value="0.5" /><label class="half" for="%1$s_starhalf" title="0.5 stars"></label>
		</fieldset>',
		$field['field_name'],
		$field['id'],
		$meta
	);
}
```

**Note that** we use the "radio" field type to give the user a 0.5 to 5 band score to rate.

Next, we need to style it a little bit to show the above radio options as stars (currently they are only visible as small circles).

![Style the star rating](https://imgur.elightup.com/kR6T3wI.png)

Just add this code to the `css/admin.css` file.

```css
.rwmb-rating {
    border: none;
    float: left;
}
.rwmb-rating > input { display: none; }
.rwmb-rating > label:before {
    margin: 5px;
    font-size: 1.25em;
    font-family: FontAwesome;
    display: inline-block;
    content: "\f005";
}

.rwmb-rating > .half:before {
    content: "\f089";
    position: absolute;
}
.rwmb-rating > label {
    color: #ddd;
    float: right;
}
/***** CSS Magic to Highlight Stars on Hover *****/

.rwmb-rating > input:checked ~ label, /* show gold star when clicked */
.rwmb-rating:not(:checked) > label:hover, /* hover current star */
.rwmb-rating:not(:checked) > label:hover ~ label { color: #FFD700;  } /* hover previous stars in list */
.rwmb-rating > input:checked + label:hover,
.rwmb-rating > input:checked ~ label:hover,
.rwmb-rating > label:hover ~ input:checked ~ label, .rwmb-rating > input:checked ~ label:hover ~ label { color: #FFED85;  }
.rwmb-rating input[type=radio]:checked+label:before {
    color: unset;
}
```
To get the style in admin, we use the function `admin_enqueue_scripts () to enqueue`. Please enqueue in the `rating.php` file as follows:

```php
public static function admin_enqueue_scripts() {
    wp_enqueue_style( 'rwmb-rating', plugin_dir_url( __FILE__ ) . '/css/admin.css', [], '1.0.0' );
}
```

## 4. Creating a field in type of star rating

Now, we can create custom fields with rating field type using the newly created **MB Star Rating** plugin!

However, it’s not in the MB Builder, you must create the field using code. Add this code to the `functions.php` file:

```php
<?php
add_filter( 'rwmb_meta_boxes', 'your_prefix_register_meta_boxes' );
function your_prefix_register_meta_boxes( $meta_boxes ) {
    $prefix = '';
    $meta_boxes[] = [
        'title'      => esc_html__( 'Project Field', 'text-domain' ),
        'id'         => 'project-field',
        'post_types' => ['post'],
        'context'    => 'normal',
        'priority'   => 'high',
        'fields'     => [
            [
                'id'   => $prefix . 'name',
                'type' => 'text',
                'name' => esc_html__( 'Name', 'text-domain' ),
            ],
            [
                'id'   => $prefix . 'rating',
                'type' => 'rating',
                'name' => esc_html__( 'Rating', 'text-domain' ),
            ],
        ],
    ];
    return $meta_boxes;
}
```

In there, `'post_types'` => `['post']` stipulates the location of the fields as blog posts.

After that, you will see the created custom field display in the post editor.

![Newly created field display in the post editor](https://imgur.elightup.com/Uxg005Y.png)

## 5. Displaying the value from the star rating fields

We have created a custom field to add star ratings to a post / page in the backend. You can use the WordPress `wp_star_rating ()` function to display ratings on the frontend for readers to view.

In the `rating.php` file, you use the `format_single_value ()` method by adding this code:

```php
public static function format_single_value( $field, $value, $args, $post_id ) {
	require_once( ABSPATH . 'wp-admin/includes/template.php' );
	wp_enqueue_style( 'dashicons' );
	wp_enqueue_style( 'frontend', plugin_dir_url(__FILE__) . '/css/frontend.css' );
	$starrating = rwmb_get_value( $field['id'] );
	$args = array(
		'rating' => $starrating,
		'type' => 'rating',
	);
	wp_star_rating( $args );
}

```

**Note**: To use the `wp_star_rating()` function, you need to require the `wp-admin/includes/template.php` file as above.

The above code will output the following HTML on the frontend:

```php
<div class="star-rating" title="Number of stars obtained rating">
     <div class="star star-full"></div>
     <div class="star star-full"></div>
     <div class="star star-full"></div>
     <div class="star star-half"></div>
     <div class="star star-empty"></div>
</div>
```
In case you want the star reviews to look better, you should style a bit. I will enqueue the Dashicons and the frontend.css file as in the method above. Below is the content of the frontend.css file:

```css
@font-face {
    font-family: "dashicons";
    src: url("../fonts/dashicons.eot");
}
@font-face {
    font-family: "dashicons";
    src: url(data:application/x-font-woff;charset=utf-8;base64,) format("woff"),
        url("../fonts/dashicons.ttf") format("truetype"),
        url("../fonts/dashicons.svg#dashicons") format("svg");
    font-weight: normal;
    font-style: normal;
}
.star-rating .star-full:before {
    content: "\f155";
}
.star-rating .star-half:before {
    content: "\f459";
}
.star-rating .star-empty:before {
    content: "\f154";
}
.star-rating .star {
    color: #0074A2;
    display: inline-block;
    font-family: dashicons;
    font-size: 20px;
    font-style: normal;
    font-weight: 400;
    height: 20px;
    line-height: 1;
    text-align: center;
    text-decoration: inherit;
    vertical-align: top;
    width: 20px;
}
```
To display the results to the website, simply insert the following code in your theme's `single.php` file or anywhere you want to display:

```php
rwmb_the_value( 'rating' );
```
In the case that you don’t want to touch the theme files, instead of adding the above line of code to the `single.php` file, just use MB Views to display the field’s value.

And this is the result:

![the result after all steps](https://imgur.elightup.com/Imu5HNb.png)

You can download the code in this tutorial from [Github](https://github.com/wpmetabox/mb-rating-field).

# Adding testimonials

import LiteYouTubeEmbed from 'react-lite-youtube-embed';
import 'react-lite-youtube-embed/dist/LiteYouTubeEmbed.css';

Adding testimonials to the homepage will be easier when you use the MB Testimonials extension. It’s a ready-to-use solution from Meta Box.

## Video version

<LiteYouTubeEmbed id='gNjQwRfI3kY' />

## Preparation

MB Testimonials is only available in the lifetime bundle of Meta Box. If you haven’t got one yet, it’s [here](https://metabox.io/pricing/).

After purchasing, log in to [My Account](https://metabox.io/my-account/) and download the **MB Testimonials** solution, then install and activate it on your website.

Keep in mind that you have to install the Meta Box framework from [wordpress.org](https://wordpress.org/plugins/meta-box/) to use MB Testimonials. There is no need to install the Meta box AIO or any other extensions of Meta Box.

![Install the Meta Box framework](https://imgur.elightup.com/Fq94t5z.png)

After installing the MB Testimonials extension, you will see that a **Testimonials** menu also be auto-created.

## 1. Adding content to the testimonials

Go to the **Testimonials** menu and click **Add New** to create a new post.

Note that in each Testimonial post, you can add many reviews from different users.

Add the content of each testimonial here:

![Add the content of each testimonial](https://imgur.elightup.com/IxIWIQO.png)

A testimonial includes 2 irreplaceable contents: user name and user reviews. However, to make testimonials more credible and trustworthy, you should also add positions and images of the reviewers, attach a link if available, etc.

![Add positions and images of the reviewers](https://imgur.elightup.com/ZoH3tUY.png)

Click **Add more** to add other testimonials, or click **Remove** to delete testimonials.

Next, let’s customize testimonials’ display and layout.

## 2. Customizing testimonials’ layout

Scrolling down to the bottom, you will see the **Display** tab which has 7 built-in templates for testimonials. The templates are illustrated in the list below:

![Customize testimonials' layout](https://imgur.elightup.com/ms0B1c3.png)

This is an outstanding feature of MB Testimonials in comparison to other plugins. It helps you to immediately apply the built-in templates to testimonials without any adjustment.

When going to **Click here** text right below the templates, you will see the code of the template you have just chosen. You can customize and add [custom fields](https://metabox.io/series/custom-fields/) to the template using HTML, or delete the code and create a new one.

![Customize and add custom fields to the template](https://imgur.elightup.com/szSZRwt.gif)

In the **Styling** tab, you can customize other parameters of testimonials, for example, width, number of columns, slider’s mode, … There are a variety of options for you to make your testimonial more stunning.

![Customize other parameters](https://imgur.elightup.com/Q95NSDR.png)

After adding and customizing, just click **Publish** to get your work done.

## 3. Displaying the testimonials

Once you click **Publish**, the plugin will give you a shortcode of the Testimonials post you’ve just made.

![The shortcode of the testimonials](https://imgur.elightup.com/bhtLdNk.png)

Use this shortcode to display the testimonials at any position that you want.

For example, I inserted my shortcode to a new page:

![the result in the front end](https://imgur.elightup.com/3BXBVOR.png)

And this is the result that I got on the front end:

![The final result](https://imgur.elightup.com/dWho03P.gif)

# Analyzing content in custom fields for SEO - Rank Math

import LiteYouTubeEmbed from 'react-lite-youtube-embed';
import 'react-lite-youtube-embed/dist/LiteYouTubeEmbed.css';

We will use custom fields to add extra information to the content analysis of Rank Math by using the MB Rank Math extension from Meta Box. It supports not only the Text, Textarea, and Wysiwyg fields from Meta Box but also **cloneable fields** (or repeated fields).

## Video Version

<LiteYouTubeEmbed id='I3ncHxLxwlM' />

## Preparation

First thing first, make sure that you installed and activated **Meta Box** and **Rank Math**. You can install Meta Box directly from wordpress.org or download it from [metabox.io](https://metabox.io/).

You also need these extensions of Meta Box:

* [MB Builder](https://metabox.io/plugins/meta-box-builder/): to have a UI on the back end to create custom fields easily.
* [MB Rank Math](https://metabox.io/plugins/mb-rank-math/): to allow Rank Math analyze content from custom fields created by Meta Box.

Now, when you go to a post or page, the content in the custom fields hasn’t been added in the Rank Math content analysis yet. To analyze the content in the custom fields, follow this tutorial.

## 1. Configuring custom fields

Go to **Meta Box > Custom Fields** and create or configure some fields.

![Configure custom fields](https://imgur.elightup.com/cFQO3vS.png)

Open the field that you want Rank Math to analyze its content. Then, move to the **Advanced** tab and add new **Custom settings** like this:

![Add new custom settings](https://imgur.elightup.com/dnbaj7F.png)

No matter if the field is cloneable or not, you can add the custom settings as above. It always works.

## 2. Checking the results in Rank Math

Before configuring the fields as above, Rank Math just analyze the content in the Content field like this:

![Rank math analyze the content in the content field](https://imgur.elightup.com/J5fHOMZ.png)

After completing creating custom settings, you can see the content of the field displayed in the Rank Math SEO Analysis. For example, Rank Math analyzes my content in the description field and displays the information about length, focus keyword, …

![The result](https://imgur.elightup.com/qRetDmF.png)

The rest of your work now is writing SEO-optimized content.

# Analyzing content in custom fields for SEO - Yoast SEO

import LiteYouTubeEmbed from 'react-lite-youtube-embed';
import 'react-lite-youtube-embed/dist/LiteYouTubeEmbed.css';

We will use custom fields to add extra information for the posts / products. It also can be indexed by search engines along with the posts/products content, so we should add them to the content analysis of Yoast SEO to know if it is good for SEO or not.

We’ll use the [MB Yoast SEO Integration](https://metabox.io/plugins/meta-box-yoast-seo/) extension from Meta Box. It supports not only the Text, Textarea, and Wysiwyg fields from Meta Box but also cloneable fields (or repeated fields).

## Video version

<LiteYouTubeEmbed id='hI8rwrz3nyI' />

## Preparation

Make sure that you installed and activated both the **Meta Box** and **Yoast SEO** plugins. You can install Meta Box directly from wordpress.org or download it from [metabox.io](https://metabox.io/).

You also need these extensions of Meta Box:

* [MB Builder](https://metabox.io/plugins/meta-box-builder/): to have a UI on the back end to create custom fields easily.
* [MB Yoast SEO Integration](https://metabox.io/plugins/meta-box-yoast-seo/): to add content of custom fields to Yoast SEO Content Analysis to have a better/correct SEO score.

Now, when you go to a post or page, the content in the custom fields hasn’t been added in the SEO analysis yet. To analyze the content in the custom fields, follow this tutorial.

## 1. Configuring custom fields

Go to **Meta Box > Custom Fields** and create or configure some fields.

![Configure custom fields](https://imgur.elightup.com/T3t0fpP.png)

Open the field that you want Yoast SEO to analyze its content. Then, move to the **Advanced** tab and add new **Custom settings** like this:

![Add new custom settings](https://imgur.elightup.com/ptzcLIQ.png)

No matter if the field is cloneable or not, you can add the custom settings as above. It always works.

## 2. Checking the results in Yoast SEO

Before configuring the fields as above, Yoast SEO just analyze the content in the Content field like this:

![check the results in Yoast SEO](https://imgur.elightup.com/CucAdNM.png)

After completing creating custom settings, you can see the content of the field displayed in the SEO Analysis. For example, Yoast SEO analyzes my content in the description field and displays the information about length, focus keyword, …

![The final result](https://imgur.elightup.com/v4dOA0l.png)

The rest of your work now is writing SEO-optimized content.

# Building a hotel booking website using Meta Box - P1

import LiteYouTubeEmbed from 'react-lite-youtube-embed';
import 'react-lite-youtube-embed/dist/LiteYouTubeEmbed.css';

A website for hotel booking usually has 4 common pages:

1. The archive page for all the rooms, along with their information.
2. The Booking page in the backend for your internal use.
3. A front-end page that allows customers to book a room.
4. The booking management page in the backend.

In this first guide, we'll create a room page. Other functionality will be covered in the next tutorials in this series.

This is my page of rooms as an example:

![The archive page of the room](img/hotel-booking-room-archive/final.png)

## Video version

<LiteYouTubeEmbed id='vbzCmmGXt3Y' />

## Preparation

Each room is a post of a custom post type. It usually has information about name, image, price, and other information that will be saved in custom fields. As well as, I use custom taxonomy to store types of rooms.

So, we highly recommend you use [**Meta Box AIO**](https://metabox.io/aio/) to have a framework to create a custom post type, a custom taxonomy, and custom fields. Also, it includes all the Meta Box extensions that you need for your creation.

These are extensions you may need:

* [MB Custom Post Types and Custom Taxonomies](https://metabox.io/plugins/custom-post-type/): to create a custom post type for the room, and a custom taxonomy for the room types.
* [MB Builder](https://metabox.io/plugins/meta-box-builder/): to have a UI on the backend to create the custom field visually and efficiently.
* [MB Views](https://metabox.io/plugins/mb-views/): to create a template for displaying rooms.

Let’s start now!

## 1. Creating a new custom post type

Go to Meta Box > Post Types, and create a new one for the room.

![Go to Meta Box > Post Types, and create a new one for the room](https://i0.wp.com/images.elightup.com/meta-box/blog/hotel-booking-room-archive/cpt.png)

In the **Supports** tab, you can disable the **Editor** option to skip it in the post editor. All the information about the rooms will be added through custom fields.

![You can disable the Editor option](https://i0.wp.com/images.elightup.com/meta-box/blog/hotel-booking-room-archive/editor.png)

After publishing, a new menu will appear right here. It’s your post type.

![The created post type in the menu](https://i0.wp.com/images.elightup.com/meta-box/blog/hotel-booking-room-archive/post-type.png)

## 2. Creating custom fields for the room information

As I said above, we’ll create custom fields to store extra information about rooms.

Go to **Custom Fields** in **Meta Box** and create a new field group.

![Go to Custom Fields in Meta Box and create a new field group](https://i0.wp.com/images.elightup.com/meta-box/blog/hotel-booking-room-archive/create-field.png)

These are some fields I created:

![Some fields I created for rooms](https://i0.wp.com/images.elightup.com/meta-box/blog/hotel-booking-room-archive/fields.png)

They are the basic fields and no special settings. In the case that you want to add more information, just choose the corresponding [field type](https://docs.metabox.io/fields/) provided with Meta Box.

After having all the fields, click to the **Settings** panel, set the **Location** as **Post type**, and choose the **Room** to apply the fields to this post type.

![Set location for the field group](https://i0.wp.com/images.elightup.com/meta-box/blog/hotel-booking-room-archive/location.png)

Now, go to the post editor, and you can see all the fields displayed look like the live preview in the field creation screen.

![The fields are displayed in the post editor](https://i0.wp.com/images.elightup.com/meta-box/blog/hotel-booking-room-archive/field-display.png)

Just enter the data for each room.

## 3. Creating a custom taxonomy

We need taxonomy to save the room type. So, let’s create it.

Go to **Meta Box** > **Taxonomies**.

![Go to Meta Box > Taxonomies](https://i0.wp.com/images.elightup.com/meta-box/blog/hotel-booking-room-archive/create-tax.png)

In the **Advanced** tab, you can enable the setting I highlight in the image below to show the taxonomy as a column in the admin dashboard. It’s available only when you activate the [MB Admin Columns](https://metabox.io/plugins/mb-admin-columns/) extension.

![Enable the Show admin column setting](https://i0.wp.com/images.elightup.com/meta-box/blog/hotel-booking-room-archive/show-column.png)

Next, move to the **Post Types** tab, select the **Room** to apply the taxonomy to it.

![Select the Room in the Post Types tab to apply the taxonomy to it.](https://i0.wp.com/images.elightup.com/meta-box/blog/hotel-booking-room-archive/choose-post-type.png)

Then, you can navigate to the taxonomy to create some terms. 

![Add terms](https://i0.wp.com/images.elightup.com/meta-box/blog/hotel-booking-room-archive/terms.png)

In the post editor, you can see a section that allows you to select the term. Then, they will be in a column like this:

![Choose the taxonomy for each post](https://i0.wp.com/images.elightup.com/meta-box/blog/hotel-booking-room-archive/choose-term.png)

## 4. Displaying rooms on the frontend

To display rooms and their information on the frontend, you can use any page builder you're familiar with, or MB Views. In this practice, I will use MB Views. We have had many tutorials about how to display posts using MB Views, along with different functionalities such as filtering and searching. You can refer to them.

On the Meta Box, click on the **Create a view** button to have a new template for the archive page of rooms.

![Create a view](https://i0.wp.com/images.elightup.com/meta-box/blog/hotel-booking-room-archive/create-view.png)

In the Template tab, you can add code directly or insert a field to get the data you want.

First, I add this code:

```php
{% set args = {  post_type: 'room',   posts_per_page: -1,  orderby: 'date',order: 'DESC'    } %}
{% set posts = mb.get_posts(args) %}
{% for post in posts %}

{% endfor %}
```

![Get posts](https://i0.wp.com/images.elightup.com/meta-box/blog/hotel-booking-room-archive/get-posts.png)

In there:

* `{% set args = { post_type: 'room', posts_per_page: -1, orderby: 'date', order: 'DESC' } %}`: is to declare that we’ll get posts from the `room` post type.
* `mb.get_posts()`:  is a Meta Box function to get the posts.
* `{% for post in posts %}...{% endfor %}`: is a loop we use to get all the posts, since there are various rooms.

Inside the loop, we’ll get data for each room.

For the image, we’ll get the first one in the room gallery. So, I add this part:

```php
{% if post.gallery|length > 0 %}
    {% set first_image = post.gallery|first %}
    <img src="{{ first_image.full.url }}" alt="{{ first_image.alt ?? post.title }}">
{% endif %}
```

![Get images for rooms](https://i0.wp.com/images.elightup.com/meta-box/blog/hotel-booking-room-archive/get-term.png)

To display other information, I use the **Insert Field** button and choose the field from the right panel.

When you click on a field, the code will be generated in the **Template** tab.

![The generated code when you insert a field](https://i0.wp.com/images.elightup.com/meta-box/blog/hotel-booking-room-archive/insert-field.png)

Just insert the field you want to get and display data.

![Insert the field you want to get and display data](https://i0.wp.com/images.elightup.com/meta-box/blog/hotel-booking-room-archive/insert.png)

I added some **`div`** tags and classes, as well as modified the code a little bit.

![Add some div tags and classes and modify the code.](https://i0.wp.com/images.elightup.com/meta-box/blog/hotel-booking-room-archive/div-class.png)

After that, scroll down to the **Settings** tab to set the location of this template. I set the **Type** as **Archive** and select **Room Archive** to apply the template for the archive page of rooms.

![Set the type for the view](https://i0.wp.com/images.elightup.com/meta-box/blog/hotel-booking-room-archive/setting-view.png)

On the frontend, all the data is displayed. But it needs to be made more beautiful.

![All the data is displayed](https://i0.wp.com/images.elightup.com/meta-box/blog/hotel-booking-room-archive/data-display.png)

Back to the created template, move to the **CSS** tab, and add some code to style the page.

![Add CSS to style the page.](https://i0.wp.com/images.elightup.com/meta-box/blog/hotel-booking-room-archive/css.png)

Now, our page is better with the room information.

![The new look of the room page.](https://i0.wp.com/images.elightup.com/meta-box/blog/hotel-booking-room-archive/final.png)

I uploaded the code to [GitHub](https://github.com/wpmetabox/tutorials/tree/master/how-to-build-hotel-booking/p1), you can refer to it.

# Building a hotel booking website using Meta Box - P2 - Booking page in backend

import LiteYouTubeEmbed from 'react-lite-youtube-embed';
import 'react-lite-youtube-embed/dist/LiteYouTubeEmbed.css';

In [the first post of this series](https://docs.metabox.io/tutorials/build-hotel-booking-website-p1/), we created a page showing all the hotel room’s information. It normally has a button or several call-to-action areas to go to the booking page, which allows your customers to make an order. However, cause some businesses have strong direct channels, they want their sales to **make booking orders for their customers** as well. Along with that, to have you imagine how to create a booking page in the frontend later (which is in the 3rd post), I made this post to show you how to create one in the backend. That is for **internal users** only.

![Create a booking page in the back end](https://i0.wp.com/images.elightup.com/meta-box/blog/hotel-booking-back-end/create-booking-page-in-back-end.gif)

Before going ahead, let’s check some tools we need in this practice.

## Video version

<LiteYouTubeEmbed id='9KsJpQkF4Ko' />

## Preparation

Each booking will be saved as a post in a custom post type. All the related information, such as customer details, check-in/check-out dates, order info, payment, and booking status, will be stored in custom fields. We’ll also generate a unique booking ID automatically for each entry to make it easier to track and manage bookings in the backend.

To build a hotel booking website, we need to use [Meta Box AlO](https://metabox.io/aio/) to have all needed features.

Let’s start now!

## 1. Creating a custom post type

We are going to create a new custom post type called Booking. Each booking made will be saved as a post in this post type.

Head to **Meta Box** > **Post Types**, and create a new one.

![Create post type](https://i0.wp.com/images.elightup.com/meta-box/blog/hotel-booking-back-end/create-post-type.png)

Each booking automatically uses its ID as the title and doesn’t need content or images. So I disable the default fields for easier control and just turn on the **Revision** option to allow tracking changes.

![Turn on the Revision option to allow tracking changes.](https://i0.wp.com/images.elightup.com/meta-box/blog/hotel-booking-back-end/revision-option-track-changes.png)

## 2. Creating custom fields for the booking

For the booking page, we need to create many different fields. You should clarify in advance what you want, how users fill in the data, how to show fields and their values, etc. This makes the process much smoother. As my supposition, all the fields I need are as follows:

**Name** | **Field type** | **Function**
--- | --- | ---
Order Number | number | Is an array of numbers and auto-generated whenever the booking is created
Booking Date | date | Date of creating the booking
Person in Charge | user | Choose one from the list of users in WordPress
Customer information | heading | Separate the sections
·  Full Name | text |
·  Mobile | number |
·  Email | email |
·  Address | text |
·  Notes | textarea |
Booking Information | heading | Separate the sections
Booking Details | group | Group of fields regarding the booking room. This group is cloneable for the case that the customer books multiple rooms
· Room | post | Choose one from the list of the rooms
· Price | number |
· Adults | number |
· Children | number |
· Age of Children (1, 2) | number | Each field is for a child. This field is auto-display whenever there is one more child
· Extra Bed | number |
· Check-in Date | date |
· Check-out Date | date |
· Total Nights of Stay | number | Auto-calculated bases on the check-in and check-out date
Total Number of Rooms | number | Auto-calculated bases on the number of the group about the room details
Other Request | textarea |
Payment Information | heading | Separate the sections
·  Total Amount | number | Auto-calculated bases on room details and number of rooms
·  Paid Amount | number | Manual input by sales
·  Unpaid Amount | number | \= Total amount - the paid amount
Booking Status | heading | Separate the sections
·  Booking Status | select | Choose one from the provided statuses
·  Refund (if any) | select | Choose one level (%)  from the provided levels

![All the fields I need](https://i0.wp.com/images.elightup.com/meta-box/blog/hotel-booking-back-end/all-fields.gif)

In the demo, you can see that the fields are grouped into sections based on their purposes, like** Customer Details**, **Room Booking**, **Payment**, and **Booking Status**. Each section has a clear heading and includes related fields underneath, making the form more organized and easier to follow.

The **Booking Information** section is a cloneable group, useful for booking multiple rooms. We also set conditions for some fields to appear only when needed; for example, the **Price** field shows up after selecting a room, and the **Age of Children** fields only appear if there’s more than one child included in the booking. I’ll go into detail for those with special settings.

Since the process is similar, I’ll walk you through the key fields only.

Now, go to **Meta Box**, **Custom Fields**, to create a new field group.

![Create a new group](https://i0.wp.com/images.elightup.com/meta-box/blog/hotel-booking-back-end/create-new-group.png)

Then, create fields one by one.

### 2.1 Creating a number field for order number

Begin with a **Number** field for the order number. Since it is auto-generated information that users can not input or edit, tick the **Disabled** and **Read Only** options.

![A Number field for the order number](https://i0.wp.com/images.elightup.com/meta-box/blog/hotel-booking-back-end/order-number-field.png)

### 2.2 Creating a field for person in charge

For the person in charge of the booking, typically a staff member with a WordPress admin account, we’ll use a **User** field. This allows you to select any user from the admin list.

![The person in charge of the booking field](https://i0.wp.com/images.elightup.com/meta-box/blog/hotel-booking-back-end/person-in-charge-field.png)

### 2.3 Creating a heading to separate the sections

Now, let’s organize the fields a bit to make things clearer and more well-structured. I use a **Layout** field called **Heading** to separate the sections or groups. This one is for customer information. Then, just add a few simple fields for the customer’s details, like name, phone number, and email.

![Use Heading to separate the sections or groups.](https://i0.wp.com/images.elightup.com/meta-box/blog/hotel-booking-back-end/heading-separate-section.png)

###  2.4 Creating a group of fields for booking details

In this section, we’ll create a **Group** of fields containing all booking-related information: type of rooms, price, number of adults, number of children, children’s ages, extra bed, check-in and check-out dates. To group them all, we need help from the MB Group extension we mentioned before.

![Create a Group of fields containing all booking-related information.](https://i0.wp.com/images.elightup.com/meta-box/blog/hotel-booking-back-end/booking-details-group-field.png)

And, enable the cloneable option for the case that the customer books multiple rooms. Then, set C**ustom CSS Class** to track when the user clones the group to book additional rooms. This will help to calculate the total room later.

![Set Custom CSS Class to track when the user clones the group](https://i0.wp.com/images.elightup.com/meta-box/blog/hotel-booking-back-end/custom-css-track-user-clone-group.png)

Besides that, each sub-field in this group has some remarks:

#### 2.4.1 Fields for the Room Name

For the room, choose the field type as **Post**. In the field settings, choose the corresponding post type. This lets users choose from the list of rooms we created earlier [in the previous part](https://docs.metabox.io/tutorials/build-hotel-booking-website-p1/).

#### 2.4.2 The Children field

As the regulation of each hotel, children may be charged or not depending on their ages. So we will create additional fields to fill in their ages. An additional field for age will appear when you add one more in the **Children** field. I restrict the maximum number of children is two as well.

I use [MB Conditional Logic](https://metabox.io/plugins/meta-box-conditional-logic/) to set a condition for the age fields.

![Restrict the maximum number of children](https://i0.wp.com/images.elightup.com/meta-box/blog/hotel-booking-back-end/restrict-maximun-number-children.png)

![Set a condition for children field](https://i0.wp.com/images.elightup.com/meta-box/blog/hotel-booking-back-end/condition-for-children.png)

Like the above image, I set the **Age of Children 1** field displays when **Children >=1**. It is likewise for the **Age of Children 2,** displays when **Children >=2**.

#### 2.4.3 Check-in Date and Check-out Date

We create these fields in the type of normal date with a calendar. In the last post of this series, we will show the vacant room to the calendar in real time.

In the drop-down menu, choose **Date Picker**. This field will show a calendar to choose a date instead of typing.

The following field is for Extra Bed. Very simple with no special settings.

Once all fields are configured, move to the **Settings** tab, set the **Location** as **Post type**, and select **Booking** to apply these fields to it.

![Set location to apply fields to the Booking post type](https://i0.wp.com/images.elightup.com/meta-box/blog/hotel-booking-back-end/set-location-apply-fields.png)

Now, navigate to your post editor of that post type, and you will see custom fields displayed.

![Created fields in the post editor](https://i0.wp.com/images.elightup.com/meta-box/blog/hotel-booking-back-end/fields-in-post-editor.png)

Simply input values in these fields. When choosing any room, there will be a price section that appears as we set the condition before, but it does not display the corresponding price. It's the same when you choose the number of children.

![Price section appears](https://i0.wp.com/images.elightup.com/meta-box/blog/hotel-booking-back-end/price-section.gif)

We have an auto-saved booking with pending status shown as admin columns as well.

![Auto-saved booking](https://i0.wp.com/images.elightup.com/meta-box/blog/hotel-booking-back-end/auto-saved-booking.png)

When the booking is approved, a booking confirmation number will be issued. Let’s add more functions to the custom fields in the next step.

## 3. Adding extra functions to the custom fields

In this step, we are going to deal with some special fields to automatically calculate or generate values for them. Including:

* Automatically generate booking order number;
* Automatically calculate the total number of booking rooms;
* Automatically display the corresponding price of the booking room;
* Automatically calculate the total nights of stay;
* Automatically calculate the total amount.

We’ll need to code much in this part. Let’s go!

Go to your theme folder, and add some code to the `functions.php` file.

![The functions.php file](https://i0.wp.com/images.elightup.com/meta-box/blog/hotel-booking-back-end/function.php.jpg)

### 3.1 Automatically generate booking order number

Each post in the **Booking** post type will have neither a title nor a permalink. All of them will be kinds of the Auto Draft after saving.

This is the post before we create a title for it:

![The post before we create a title](https://i0.wp.com/images.elightup.com/meta-box/blog/hotel-booking-back-end/post-before-create-title.png)

Now, add these codes to the functions.php in the theme folder:

```php
add_action( 'save_post_booking', function ( $post_id ) {
    if ( wp_is_post_revision( $post_id ) || defined( 'DOING_AUTOSAVE' ) ) return;

    $post = get_post( $post_id );
    if ( $post->post_title !== "#$post_id" || $post->post_name !== (string) $post_id ) {
        wp_update_post( [
            'ID'         => $post_id,
            'post_title' => "#$post_id",
            'post_name'  => $post_id,
        ] );
    }

    update_post_meta( $post_id, 'order_number', $post_id );
}, 20 );
```

In there, `update_post_meta($post_id, 'order', $post_id)` helps to set the post ID to be the value of the **Order Number** field.

Save the `functions.php` file, then create a new booking order for a try. You’ll see the title of order as below:

![Post ID is set to be title and permalink of the order
](https://i0.wp.com/images.elightup.com/meta-box/blog/hotel-booking-back-end/set-title-permalink.jpg)

![The order number is auto-generated by post ID](https://i0.wp.com/images.elightup.com/meta-box/blog/hotel-booking-back-end/order-number-auto-generated-by-post-ID.jpg)

### 3.2 Automatically calculate the total number of booking rooms

By default, the quantity of rooms will be 1, equivalent to 1 group of booking details for 1 room. Use this following code so that whenever users add or edit a booking, the JS file will be loaded. It helps handle things like disabling booked dates via AJAX.

```php
function add_admin_scripts( $hook ) {
    $screen = get_current_screen();
    if ( $hook == 'post-new.php' || $hook == 'post.php' ) {
        if ( isset( $screen->post_type ) && 'booking' === $screen->post_type ) {
            wp_register_script( 'booking-js', get_stylesheet_directory_uri() . '/js/booking.js' );

            // Passing AJAX Data into JavaScript
            $ajax_data = array(
                'ajax_url' => admin_url( 'admin-ajax.php' ),
                'nonce'    => wp_create_nonce( 'booking_nonce' ),
            );
            wp_localize_script( 'booking-js', 'booking_ajax', $ajax_data );

            // Passing room data into JavaScript
            $rooms     = get_posts( [
                'post_type'      => 'room',
                'posts_per_page' => -1,
            ] );
            $arr_rooms = [];
            foreach ( $rooms as $room ) {
                $disabled_dates = dates_disable( $room->ID );
                $arr_rooms[]    = [
                    'id'             => $room->ID,
                    'price'          => rwmb_get_value( 'price', '', $room->ID ),
                    'disabled_dates' => $disabled_dates,
                ];
            }
            wp_localize_script( 'booking-js', 'rooms_data', $arr_rooms );

            wp_enqueue_script( 'booking-js' );
        }
    }
}
add_action( 'admin_enqueue_scripts', 'add_admin_scripts' );
```

Afterward, create a **JavaScript** file to handle calculations and dynamic interactions. Now add some script into that file.

![The booking.js file](https://i0.wp.com/images.elightup.com/meta-box/blog/hotel-booking-back-end/booking.js.jpg)

When users add or remove a room group, this script updates the total number of rooms. And also refreshes the price, stay duration, and total cost for all existing room groups.

```js
$('.group-booking .add-clone').on( 'click', function ( e ) {
    setTimeout( function () {
        var rooms = $( '.group-booking .rwmb-group-clone:not(.rwmb-clone-template)' ).length;
        $( '#total_number_of_rooms' ).val( rooms );

        // Update all rooms
        $( ".group-booking .rwmb-field select[name*='[room]']" ).each( function () {
            updateRoom( $( this ) );
        } );
    }, 100 );
} );

// Handle room removal
$( '.group-booking .remove-clone' ).on( 'click', function ( e ) {
    setTimeout( function () {
        var rooms = $( '.group-booking .rwmb-group-clone:not(.rwmb-clone-template)' ).length;
        $( '#total_number_of_rooms' ).val( rooms );
        update_total_payment();
    }, 100 );
} );
```

**In there**:

* `group-booking`: is the Custom CSS Class of the group of fields about booking details;
* `total_number_of_rooms`: is the ID of the Total Number of Room field;
* `add-clone`, `remove-clone`: is the Custom CSS Class of the Add Room or Remove button. To see this information, you may press F12:

![View the custom CSS class of two buttons](https://i0.wp.com/images.elightup.com/meta-box/blog/hotel-booking-back-end/view-custom-css-class-of-buttons.jpg)

### 3.3 Automatically display the corresponding price of the booking Room

First, we set the Price field to **Read only** with a condition to display is that the value of the Room field is not “**empty**”. It means that when the Room field has any value (not leave it blank), the Price field will appear.

![Calculate the price of room](https://i0.wp.com/images.elightup.com/meta-box/blog/hotel-booking-back-end/calculate-price-room.gif)

To do it, add the following code to the **JS** file.

```js
$( '.group-booking' ).on( 'change', "select[name*='[room]']", function () {
    updateRoom( $( this ) );
} );

// Initialize event for extra bed
$( '.group-booking' ).on( 'change', "input[name*='[extra_bed]']", function () {
    var roomSelect   = $( this ).closest( '.rwmb-field' ).siblings().find( "select[name*='[room]']" );
    var check_out    = $( this ).closest( '.rwmb-field' ).siblings().find( "input[name*='[check_out]']" );
    var total_nights = $( this ).closest( '.rwmb-field' ).siblings().find( "input[name*='[total_nights_of_stay]']" );
    var total_amount = $( this ).closest( '.rwmb-field' ).siblings().find( "input[name*='[total_amount]']" );

    if ( check_out.val() ) {
        var roomPrice   = roomSelect.data( 'roomPrice' ) || 0;
        var extra       = parseInt( $( this ).val() ) || 0;
        var total       = parseInt( total_nights.val() ) || 0;
        var total_extra = extra * roomPrice;
        var finalAmount = ( roomPrice + total_extra ) * total;

        if ( ! isNaN( finalAmount ) ) {
            total_amount.val( finalAmount );
            update_total_payment();
        }
    }
} );
```

### 3.4 Automatically calculate the total nights of stay

Before calculating the total nights of stay, we should set a condition that the check-out date must be after the check-in date. I use js to set the `minDate` of the check-out date is the check-in date plus one unit.

We can see some specified code for special aims:

```js
check_in.datepicker( 'destroy' ).datepicker( {
    dateFormat: 'yy-mm-dd',
    beforeShowDay: function ( date ) {
        var formattedDate = $.datepicker.formatDate( 'yy-mm-dd', date );
        var isDisabled    = allDisabledDates.includes( formattedDate );
        var today         = new Date();
        today.setHours( 0, 0, 0, 0 );
        var isPastDate    = date < today;

        return [ ! isDisabled && ! isPastDate, '', isDisabled ? 'This date cannot be booked' : isPastDate ? 'Cannot select past dates' : '' ];
    },
    onSelect: function ( date ) {
        var d        = new Date( date );
        var af_date  = d.getDate() + 1;
        var af_month = d.getMonth() + 1;
        var af_year  = d.getFullYear();
        var min_date = af_year + '-' + af_month + '-' + af_date;

        check_out.datepicker( 'option', 'minDate', min_date );
    }
} );
```

When selecting the check-out date, the following code will call the calculate_total_day function to calculate the number of nights stayed and assign it to the total_nights_of_stay field.

```js
check_out.datepicker( 'destroy' ).datepicker( {
    dateFormat: 'yy-mm-dd',
    beforeShowDay: function ( date ) {
        var formattedDate = $.datepicker.formatDate( 'yy-mm-dd', date );
        var isDisabled    = allDisabledDates.includes( formattedDate );
        var today         = new Date();
        today.setHours( 0, 0, 0, 0 );
        var isPastDate    = date < today;

        return [ ! isDisabled && ! isPastDate, '', isDisabled ? 'This date cannot be booked' : isPastDate ? 'Cannot select past dates' : '' ];
    },
    onSelect: function ( date ) {
        var total      = calculate_total_day( check_in.val(), date );
        if ( ! isNaN( total ) ) {
            total_nights.val( total );

            var extra       = parseInt( extra_bed.val() ) || 0;
            var roomPrice   = roomSelect.data( 'roomPrice' ) || 0;
            var total_extra = extra * roomPrice;
            var finalAmount = ( roomPrice + total_extra ) * total;

            if ( ! isNaN( finalAmount ) ) {
                total_amount.val( finalAmount );
                update_total_payment();
            }
        }
    }
} );
```

After that, add these codes to the `booking.js` file to calculate the total nights of stay:

```js
function calculate_total_day( check_in, check_out ) {
    var date1 = new Date( check_in );
    var date2 = new Date( check_out );

    return ( date2.getTime() - date1.getTime() ) / ( 1000 * 3600 * 24 );
}
```

From now on, your **Total Nights of Stay** field’s value is automatically changed when you choose a date:

![Total Nights of Stay](https://i0.wp.com/images.elightup.com/meta-box/blog/hotel-booking-back-end/total-nights.gif)

### 3.5 Automatically calculate the total amount

The formula to calculate the total amount is as below:

Total Amount = (Price of room 1 + numbers of extra bed in room 1 * price) * nights
                      + (Price of room 2 + numbers of extra bed in room 2 * price) * nights
                      + …
                      + (Price of room N + numbers of extra bed in room N * price) * nights

In there, I set the Extra Bed is a kind of room and has a fixed price. At the same time, I create a field for the Total Amount of Each Room:

Total Amount of Each Room = (Price of room + numbers of extra bed * price) * nights

We just need to summarize all the Total Amount of Each Room to get the Total Amount of the booking.

Add these codes to the booking.js file to calculate the total amount of each room:

```js
function update_total_payment() {
    var total_payment = 0;

    $( ".group-booking .rwmb-field input[name*='[total_amount]']" ).each( function () {
        var value = parseInt( $( this ).val() ) || 0;
        total_payment += value;
    } );

    $( '#total' ).val( total_payment );

    var paid_amount = parseInt( $( '#paid_amount' ).val() ) || 0;
    var unpaid      = total_payment - paid_amount;

    $( '#unpaid_amount' ).val( unpaid );
}

function update_paid_amount() {
    $( '#paid_amount' ).on( 'change', function () {
        $( '#unpaid_amount' ).val( parseInt( $( '#total' ).val() ) - parseInt( $( this ).val() ) );
    } );
}

update_paid_amount();
```

All code is updated on [Github](https://github.com/wpmetabox/tutorials/tree/master/how-to-build-hotel-booking/p2), so you can refer to it:

Therefore, all the fields will automatically run as your logic:

Now let’s book an order on the back end to choose a room and dates to see if the pricing and calculations are working correctly.

![book an order](https://i0.wp.com/images.elightup.com/meta-box/blog/hotel-booking-back-end/create-booking-page-in-back-end.gif)

# Building a hotel booking website using Meta Box – P3 – Booking page for customer

import LiteYouTubeEmbed from 'react-lite-youtube-embed';
import 'react-lite-youtube-embed/dist/LiteYouTubeEmbed.css';

In this part, we are adding a booking form to the Room’s page, which shows all the room’s information. This form allows your customers to submit a booking from the frontend easily.

![Display booking form on the frontend.](img/hotel-booking-frontend/display-booking-form-frontend.gif)

This booking form has some different things from the one we created in part 2, mainly the functionality of fields. Let’s see how.

## Video version

<LiteYouTubeEmbed id='VplE6Ujboi8' />

## Preparation

In this part, we’ll create a custom booking form anywhere you want, inside a room detail, or even in a popup. The submitted data will still be saved in the Booking post type we created earlier in part 2. And of course, we’ll use custom fields to collect all the booking information.

So, we need many basic and advanced features. So, we highly recommend you use [Meta Box AIO](https://metabox.io/aio/) to have a framework to have everything. Also, it includes all the Meta Box extensions that you need for your creation.

In this part, we especially use [MB Frontend Submission](https://metabox.io/plugins/mb-frontend-submission/), which creates editorial forms so users can submit blog posts on the front end. And, [MB Views](https://metabox.io/plugins/mb-views/) to create a template for a single room page to display the booking form on the frontend.

## Creating a single room

I already have some rooms created in [part 1](https://metabox.io/build-hotel-booking-web-use-meta-box-p1/) of this series.

![All rooms](img/hotel-booking-frontend/all-rooms.png)

Now, let’s create a new **php** file for the single room. Add the following code:

```php
<?php get_header(); ?>
<main class="main" role="main">
    <?php
    while ( have_posts() ) { 
        the_post();
        get_template_part( 'template-parts/content/post' );    
    }
    ?>
</main>
<?php get_footer(); ?>
```
This code helps to create a single room page to show the room details, just like a normal single post.

Next, to display the room information more nicely, I’ll use **MB Views** to build a template.

![create template with mbviews](img/hotel-booking-frontend/create-template-mbviews.png)

Now, you can insert custom fields from the room group field or directly write code in the **Template** section.

![insert filed and add code to template](img/hotel-booking-frontend/insert-fields-and-add-codes.png)

```php
<link rel="stylesheet" href="https://cdn.jsdelivr.net/npm/swiper@11/swiper-bundle.min.css" />
<script src="https://cdn.jsdelivr.net/npm/swiper@11/swiper-bundle.min.js"></script>
<div class="swiper main-slider">
    <div class="swiper-wrapper">
        {% for item in post.gallery %}
        <div class="swiper-slide">
            <img src="{{ item.full.url }}" width="{{ item.full.width }}" height="{{ item.full.height }}"
                alt="{{ item.full.alt }}">
        </div>
        {% endfor %}
    </div>

    <!-- Navigation -->
    <div class="swiper-button-prev"></div>
    <div class="swiper-button-next"></div>

    <!-- Dots -->
    <div class="swiper-pagination"></div>
</div>

<!-- Thumbnail slider -->
<div class="swiper thumb-slider">
    <div class="swiper-wrapper">
        {% for item in post.gallery %}
        <div class="swiper-slide">
            <img src="{{ item.full.url }}" width="100" height="60" alt="{{ item.full.alt }}">
        </div>
        {% endfor %}
    </div>
</div>

<div class="infor">
    <div class="regular_price">Price Regular: {{ post.price }}$ </div>
    <ul class="number_of_adults max_children_per_room">
        <li>Number of Adults: {{ post.number_of_adults }}</li>
        <li>Max Children per room: {{ post.max_children_per_room }} </li>
    </ul>
    <div class="additional_information">{{ post.additional_information }} </div>
</div>
```
**Explanation**:

I add code to include CSS and JS from the Swiper library.

```php
<link rel="stylesheet" href="https://cdn.jsdelivr.net/npm/swiper@11/swiper-bundle.min.css" />
<script src="https://cdn.jsdelivr.net/npm/swiper@11/swiper-bundle.min.js"></script>
```
We build two sliders. The first one is for the main slider, showing large room images.

```php
<div class="swiper main-slider">
    <div class="swiper-wrapper">
        {% for item in post.gallery %}
        <div class="swiper-slide">
            <img src="{{ item.full.url }}" width="{{ item.full.width }}" height="{{ item.full.height }}"
                alt="{{ item.full.alt }}">
        </div>
        {% endfor %}
    </div>

    <!-- Navigation -->
    <div class="swiper-button-prev"></div>
    <div class="swiper-button-next"></div>

    <!-- Dots -->
    <div class="swiper-pagination"></div>
</div>
```
In there, we use a loop to get all images from the advanced image field with the `gallery` ID.

The second one is for thumbnail slider, showing smaller preview images. It also loops through the same gallery field.
```php
<!-- Thumbnail slider -->
<div class="swiper thumb-slider">
    <div class="swiper-wrapper">
        {% for item in post.gallery %}
        <div class="swiper-slide">
            <img src="{{ item.full.url }}" width="100" height="60" alt="{{ item.full.alt }}">
        </div>
        {% endfor %}
    </div>
</div>
```
And this part of the code retrieves all room information, such as price, maximum children, adults, and more.

```php
<div class="infor">
    <div class="regular_price">Price Regular: {{ post.price }}$ </div>
    <ul class="number_of_adults max_children_per_room">
        <li>Number of Adults: {{ post.number_of_adults }}</li>
        <li>Max Children per room: {{ post.max_children_per_room }} </li>
    </ul>
    <div class="additional_information">{{ post.additional_information }} </div>
</div>
```
Then, in the **CSS** tab, I’ll add styles for the layout:

```css
.regular_price {
    color: red;
    font-weight: bold;
    font-size: 22px;
}

.additional_information {
    color: #13acc7;
    font-size: 20px;
    font-weight: 500;
}

ul.number_of_adults.max_children_per_room {
    font-weight: bold;
    padding-top: 15px;
}

.infor {
    border-top: 2px solid #919191;
    margin-top: 20px;
    padding-top: 20px;
}

.thumb-slider img {
    height: 85px !important;
}

.main-slider {
    width: 100%;
    /* max-width: 800px; */
    margin: 0 auto 20px;
}

.thumb-slider {
    width: 100%;
    max-width: 800px;
    margin: 0 auto;
}

.swiper-pagination.swiper-pagination-clickable.swiper-pagination-bullets.swiper-pagination-horizontal {
    position: static;
}

.thumb-slider .swiper-slide {
    width: auto;
    opacity: 0.4;
    cursor: pointer;
    transition: opacity 0.3s ease;
}

.thumb-slider .swiper-slide-thumb-active {
    opacity: 1;
    border: 2px solid #007aff;
}

.swiper-slide img {
    width: 100%;
    height: auto;
    object-fit: cover;
    display: block;
}

.swiper-button-next,
.swiper-button-prev {
    color: #007aff;
}

.swiper-pagination {
    text-align: center;
    margin-top: 10px;
}

.thumb-slider .swiper-slide {
    width: auto;
    cursor: pointer;
    transition: border 0.3s ease;
    opacity: 1;
 }

.thumb-slider .swiper-slide-thumb-active {
    border: 2px solid #007aff;
}
```
And in the **JavaScript** tab, I’ll initialize the slider.
```js
const thumbSlider = new Swiper('.thumb-slider', {
    spaceBetween: 10,
    freeMode: true,
    watchSlidesProgress: true,
    breakpoints: {
        0: { slidesPerView: 3 },
        640: { slidesPerView: 4 },
        768: { slidesPerView: 4 },
        1024: { slidesPerView: 5 }
    }
});

const mainSlider = new Swiper('.main-slider', {
    spaceBetween: 10,
    autoHeight: true,
    navigation: {
        nextEl: '.swiper-button-next',
        prevEl: '.swiper-button-prev',
    },
    pagination: {
        el: '.swiper-pagination',
        clickable: true,
    },
    thumbs: {
        swiper: thumbSlider,
    },
});
```
**In particular**:

```js
const thumbSlider = new Swiper('.thumb-slider', {
    spaceBetween: 10,
    freeMode: true,
    watchSlidesProgress: true,
    breakpoints: {
        0: { slidesPerView: 3 },
        640: { slidesPerView: 4 },
        768: { slidesPerView: 4 },
        1024: { slidesPerView: 5 }
    }
});
```
This part declares and creates the thumbnail slider below the main slider, using the properties of Swiper JS.

The next part declares and creates the main slider, also based on the properties of Swiper JS.

```js
const mainSlider = new Swiper('.main-slider', {
    spaceBetween: 10,
    autoHeight: true,
    navigation: {
        nextEl: '.swiper-button-next',
        prevEl: '.swiper-button-prev',
    },
    pagination: {
        el: '.swiper-pagination',
        clickable: true,
    },
    thumbs: {
        swiper: thumbSlider,
    },
});
```

Scroll down to the settings section, choose the type of this template as singular. Then, choose the location as the room and set the position for it.


![set template location](img/hotel-booking-frontend/set-template-location.png)

Now you can see that the single room page displays all the room’s information.

![single room](img/hotel-booking-frontend/single-room.png)

## Adding booking form in single room

Now, let’s add the booking form to the single room page. First, go back to the **PHP** file you created for the single room.

At the position where you want the booking form to appear, insert this code to execute the shortcode and display its output.

```php
echo do_shortcode( '[mb_frontend_form id="booking-fields"]' );
```

You can get the form’s shortcode (`'[mb_frontend_form id="booking-fields"]'`) directly from the field group settings created with **MB Frontend Submission**. Since we don’t need the post title or content for bookings, we simply removed them.

You can see the booking form on the single page.

![Check out the page I made as an example for usersbooking form with no functionality](img/hotel-booking-frontend/booking-form-no-functionality.gif)

However, some fields are unnecessary for customers, so we can add **CSS classes** to hide those fields.

![Remove fields](img/hotel-booking-frontend/remove-fields.png)

Then, in the theme’s **Customizer**, add CSS to hide any fields you don’t need. We can also hide the “**Add more**” button to make sure each submission corresponds to only one booking.

```css
.hide-frontend {
    display: none !important;
}

.rwmb-button.add-clone {
    display: none !important;
}
```
![customizer](img/hotel-booking-frontend/customizer.png)

Therefore, we already have the booking form we wanted. However, functions like automatic price calculation, date selection, and total nights calculation haven’t been implemented yet, so let’s move on to the next step.

![function doesn’t work](img/hotel-booking-frontend/function-not-work.gif)

## Adding extra functions to booking on the frontend

In this part, we’ll add extra functions so the form doesn’t just collect data but also works like a real booking system.

We’re going to:

* Automatically display the corresponding price of the booking room;
* Automatically show the valid booking dates;
* Automatically calculate the total nights of stay;
* Automatically calculate the total amount.

We’ll need to write quite a bit of code for this part. Let’s go!

Go to your theme folder, and open the `functions.php` file you created in Part 2. Add the following code.

```php
function enqueue_scripts() {
    // Register and enqueue script
    wp_enqueue_script( 'jquery-ui-datepicker' );
    wp_enqueue_script( 'booking-js', get_template_directory_uri() . '/js/booking.js', array( 'jquery', 'jquery-ui-datepicker' ), '1.0', true );

    // Pass data into JavaScript using wp_add_inline_script()
    $ajax_data = array(
        'ajax_url' => admin_url( 'admin-ajax.php' ),
        'nonce'    => wp_create_nonce( 'booking_nonce' ),
    );

    $inline_script = 'var booking_ajax = ' . wp_json_encode( $ajax_data ) . ';';
    wp_add_inline_script( 'booking-js', $inline_script, 'before' );

    // Passing room data into JavaScript
    $rooms = get_posts( array(
        'post_type'      => 'room',
        'posts_per_page' => -1,
    ) );

    $rooms_data = array();
    foreach ( $rooms as $room ) {
        // Get room rates from Meta Box
        $room_price = rwmb_get_value( 'price', array(), $room->ID );
        if ( ! $room_price ) {
            $room_price = 0;
        }

        $rooms_data[] = array(
            'id'    => $room->ID,
            'title' => $room->post_title,
            'price' => $room_price,
        );
    }

    $rooms_script = 'var rooms_data = ' . wp_json_encode( $rooms_data ) . ';';
    wp_add_inline_script( 'booking-js', $rooms_script, 'before' );

    // Pass current_room_id if available
    $current_room_id = get_the_ID();
    if ( $current_room_id ) {
        $current_room_script = 'var current_room_id = ' . wp_json_encode( $current_room_id ) . ';';
        wp_add_inline_script( 'booking-js', $current_room_script, 'before' );
    }
}
add_action( 'wp_enqueue_scripts', 'enqueue_scripts' );

// Function to get all days between 2 dates
function get_dates_between( $start_date, $end_date ) {
    $dates = array();
    $current = strtotime( $start_date );
    $end     = strtotime( $end_date );

    while ( $current <= $end ) {
        $dates[] = date( 'Y-m-d', $current );
        $current = strtotime( '+1 day', $current );
    }

    return $dates;
}

add_filter( 'rwmb_frontend_validate', function( $validate, $config ) {
    if ( 'booking-fields' !== $config['id'] ) {
        return $validate;
    }

    // Get all selected rooms in the form
    $selected_rooms = array();
    if ( isset( $_POST['group_booking'] ) && is_array( $_POST['group_booking'] ) ) {
        foreach ( $_POST['group_booking'] as $index => $room ) {
            if ( empty( $room['room'] ) || empty( $room['check_in'] ) || empty( $room['check_out'] ) ) {
                continue;
            }
            // Make sure room_id is an integer
            $room_id = is_array( $room['room'] ) ? $room['room'][0] : $room['room'];
            $selected_rooms[] = array(
                'room_id'   => (int) $room_id,
                'check_in'  => date( "Y-m-d", strtotime( $room['check_in'] ) ),
                'check_out' => date( "Y-m-d", strtotime( $room['check_out'] ) ),
            );
        }
    }

    // Check each selected room
    foreach ( $selected_rooms as $room ) {
        $room_id  = $room['room_id'];
        $check_in = $room['check_in'];
        $check_out = $room['check_out'];

        // Get a list of disabled days for this room
        $disabled_dates = dates_disable( $room_id );

        // Check check-in date
        if ( in_array( $check_in, $disabled_dates ) ) {
            $validate = false;
            break;
        }

        // Check check-out date
        if ( in_array( $check_out, $disabled_dates ) ) {
            $validate = false;
            break;
        }

        // Check the days between check-in and check-out
        $dates = get_dates_between( $check_in, $check_out );
        foreach ( $dates as $date ) {
            if ( in_array( $date, $disabled_dates ) ) {
                $validate = false;
                break 2;
            }
        }
    }

    return $validate;
}, 10, 2 );
```
**Explanation**:

```php
function enqueue_scripts() {
    // Register and enqueue script
    wp_enqueue_script( 'jquery-ui-datepicker' );
    wp_enqueue_script( 'booking-js', get_template_directory_uri() . '/js/booking.js', array( 'jquery', 'jquery-ui-datepicker' ), '1.0', true );

    // Pass data into JavaScript using wp_add_inline_script()
    $ajax_data = array(
        'ajax_url' => admin_url( 'admin-ajax.php' ),
        'nonce'    => wp_create_nonce( 'booking_nonce' ),
    );

    $inline_script = 'var booking_ajax = ' . wp_json_encode( $ajax_data ) . ';';
    wp_add_inline_script( 'booking-js', $inline_script, 'before' );

    // Passing room data into JavaScript
    $rooms = get_posts( array(
        'post_type'      => 'room',
        'posts_per_page' => -1,
    ) );

    $rooms_data = array();
    foreach ( $rooms as $room ) {
        // Get room rates from Meta Box
        $room_price = rwmb_get_value( 'price', array(), $room->ID );
        if ( ! $room_price ) {
            $room_price = 0;
        }

        $rooms_data[] = array(
            'id'    => $room->ID,
            'title' => $room->post_title,
            'price' => $room_price,
        );
    }

    $rooms_script = 'var rooms_data = ' . wp_json_encode( $rooms_data ) . ';';
    wp_add_inline_script( 'booking-js', $rooms_script, 'before' );

    // Pass current_room_id if available
    $current_room_id = get_the_ID();
    if ( $current_room_id ) {
        $current_room_script = 'var current_room_id = ' . wp_json_encode( $current_room_id ) . ';';
        wp_add_inline_script( 'booking-js', $current_room_script, 'before' );
    }
}
add_action( 'wp_enqueue_scripts', 'enqueue_scripts' );
```
These codes prepare everything the booking form needs on the frontend. They load the Java Script file, and pass important data like AJAX settings, room prices, and the current room ID. Thanks to that, the booking form can automatically handle pricing, dates, and calculations in real time.

**In here**:

```php
wp_enqueue_script( 'jquery-ui-datepicker' );
wp_enqueue_script( 'booking-js', get_template_directory_uri() . '/js/booking.js', array( 'jquery', 'jquery-ui-datepicker' ), '1.0', true );
```
This part loads the datepicker library and the custom booking.js file that handles booking calculations and interactions.

```php
$ajax_data = array(
    'ajax_url' => admin_url( 'admin-ajax.php' ),
    'nonce'    => wp_create_nonce( 'booking_nonce' ),
);

$inline_script = 'var booking_ajax = ' . wp_json_encode( $ajax_data ) . ';';
wp_add_inline_script( 'booking-js', $inline_script, 'before' );
```
This section sends AJAX settings to JavaScript, including the admin URL and a security nonce, so the script can safely request disabled dates.

We collect all rooms with their IDs, titles, and prices, then send them as `rooms_data` to JavaScript. This lets the booking form display the correct price when a room is selected.

```php
$rooms = get_posts( array(
    'post_type'      => 'room',
    'posts_per_page' => -1,
) );

$rooms_data = array();
foreach ( $rooms as $room ) {
    // Get room rates from Meta Box
    $room_price = rwmb_get_value( 'price', array(), $room->ID );
    if ( ! $room_price ) {
        $room_price = 0;
    }

    $rooms_data[] = array(
        'id'    => $room->ID,
        'title' => $room->post_title,
        'price' => $room_price,
    );
}

$rooms_script = 'var rooms_data = ' . wp_json_encode( $rooms_data ) . ';';
wp_add_inline_script( 'booking-js', $rooms_script, 'before' );

```
If we are on a single room page, this part below sends the current room ID to JavaScript, so the booking form will automatically pre-select that room.

```php
$current_room_id = get_the_ID();
if ( $current_room_id ) {
    $current_room_script = 'var current_room_id = ' . wp_json_encode( $current_room_id ) . ';';
    wp_add_inline_script( 'booking-js', $current_room_script, 'before' );
}
```
Next, we use the function that creates a list of dates between check-in and check-out. Each day is added one by one to check room availability.

```php
function get_dates_between( $start_date, $end_date ) {
    $dates  = array();
    $current = strtotime( $start_date );
    $end     = strtotime( $end_date );

    while ( $current <= $end ) {
        $dates[] = date( 'Y-m-d', $current );
        $current = strtotime( '+1 day', $current );
    }

    return $dates;
}
```

These following codes are used to validate booking data when users submit the booking form on the frontend. It makes sure no one can book a room on dates that are already disabled.

```php
add_filter( 'rwmb_frontend_validate', function( $validate, $config ) {
    if ( 'booking-fields' !== $config['id'] ) {
        return $validate;
    }

    // Get all selected rooms in the form
    $selected_rooms = array();
    if ( isset( $_POST['group_booking'] ) && is_array( $_POST['group_booking'] ) ) {
        foreach ( $_POST['group_booking'] as $index => $room ) {
            if ( empty( $room['room'] ) || empty( $room['check_in'] ) || empty( $room['check_out'] ) ) {
                continue;
            }
            // Make sure room_id is an integer
            $room_id = is_array( $room['room'] ) ? $room['room'][0] : $room['room'];
            $selected_rooms[] = array(
                'room_id'  => (int) $room_id,
                'check_in' => date( "Y-m-d", strtotime( $room['check_in'] ) ),
                'check_out' => date( "Y-m-d", strtotime( $room['check_out'] ) ),
            );
        }
    }

    // Check each selected room
    foreach ( $selected_rooms as $room ) {
        $room_id  = $room['room_id'];
        $check_in = $room['check_in'];
        $check_out = $room['check_out'];

        // Get a list of disabled days for this room
        $disabled_dates = dates_disable( $room_id );

        // Check check-in date
        if ( in_array( $check_in, $disabled_dates ) ) {
            $validate = false;
            break;
        }

        // Check check-out date
        if ( in_array( $check_out, $disabled_dates ) ) {
            $validate = false;
            break;
        }

        // Check the days between check-in and check-out
        $dates = get_dates_between( $check_in, $check_out );
        foreach ( $dates as $date ) {
            if ( in_array( $date, $disabled_dates ) ) {
                $validate = false;
                break 2;
            }
        }
    }

    return $validate;
}, 10, 2 );
```

**In particularly**:

```php
if ( 'booking-fields' !== $config['id'] ) {
    return $validate;
}
```
This part hooks into the Meta Box validation filter. It runs only for our booking form, identified by booking fields. 

```php
$selected_rooms = array();
if ( isset( $_POST['group_booking'] ) && is_array( $_POST['group_booking'] ) ) {
    foreach ( $_POST['group_booking'] as $index => $room ) {
        if ( empty( $room['room'] ) || empty( $room['check_in'] ) || empty( $room['check_out'] ) ) {
            continue;
        }
        // Make sure room_id is an integer
        $room_id = is_array( $room['room'] ) ? $room['room'][0] : $room['room'];
        $selected_rooms[] = array(
            'room_id'  => (int) $room_id,
            'check_in' => date( "Y-m-d", strtotime( $room['check_in'] ) ),
            'check_out' => date( "Y-m-d", strtotime( $room['check_out'] ) ),
        );
    }
}
```
This block collects all rooms that the user selected, along with their check-in and check-out dates, and formats them for validation. 

```php
foreach ( $selected_rooms as $room ) {
    $room_id  = $room['room_id'];
    $check_in = $room['check_in'];
    $check_out = $room['check_out'];

    // Get a list of disabled days for this room
    $disabled_dates = dates_disable( $room_id );

    // Check check-in date
    if ( in_array( $check_in, $disabled_dates ) ) {
        $validate = false;
        break;
    }

    // Check check-out date
    if ( in_array( $check_out, $disabled_dates ) ) {
        $validate = false;
        break;
    }

    // Check the days between check-in and check-out
    $dates = get_dates_between( $check_in, $check_out );
    foreach ( $dates as $date ) {
        if ( in_array( $date, $disabled_dates ) ) {
            $validate = false;
            break 2;
        }
    }
}
```
This part loads all disabled dates for each selected room, using the `dates_disable` function.

This one below is to check if either the check-in or check-out day is already booked. If yes, validation fails immediately.

```php
// Check check-in date
if ( in_array( $check_in, $disabled_dates ) ) {
    $validate = false;
    break;
}

// Check check-out date
if ( in_array( $check_out, $disabled_dates ) ) {
    $validate = false;
    break;
}
```
Finally, this section checks all the days between check-in and check-out. If any of them overlap with disabled dates, the booking is rejected. 

```php
$dates = get_dates_between( $check_in, $check_out );
foreach ( $dates as $date ) {
    if ( in_array( $date, $disabled_dates ) ) {
        $validate = false;
        break 2;
    }
}
```

That’s it for creating the functions. All the code has been uploaded to [GitHub](https://github.com/wpmetabox/tutorials/tree/master/how-to-build-hotel-booking/p3), so you can check it out there.

Now, let’s move to the frontend and test if those functions work properly. You can now make a booking successfully, and also verify it from the back end.

![function work well](img/hotel-booking-frontend/functions-work-well.gif)

# Bundling Meta Box into another plugin

When you create a website for a client, hiding information such as the used plugins may be a good idea. In this case, **bundling Meta Box into another plugin** will come in handy.

I will create a new plugin then bundle Meta Box into it for example.

## 1. Creating a new plugin

In the **wp-content/plugins** folder, create a new folder named `project-demo` with a `project-demo.php` file inside. The php file will have the following content:

```php
<?php
/**
 * Plugin Name: Project Demo
 * Plugin URI: https://metabox.io
 * Version: 1.0
 * Author: Meta Box
 * Author URI: https://metabox.io
 */
```
In the **Admin Dashboard > Plugins**, you’ll see a new plugin named **Project Demo**. Let's activate it.

## 2. Bundling Meta Box using Composer

We must download the necessary libraries from Meta Box into the plugin you've created.

In the **project-demo** folder, we create a file named `composer.json` with the following content:

```json
{
    "require": {
        "wpmetabox/meta-box": "^5"
    },
    "autoload": {
        "files": [
            "vendor/wpmetabox/meta-box/meta-box.php"
        ]
    }
}
```

**Explanation**:

* `require`: this is the declaration of the libraries that you need to download. In this example, I declare the Meta Box library only. You can refer to other codes to declare the libraries of the extensions here.
* `autoload`: requires loading the libraries automatically when we activate the plugin.

:::caution

This code just bundles the free Meta Box plugin inside my plugin. If you want to add other Meta Box extensions to create advanced custom fields or settings pages, check out [this file](https://github.com/wpmetabox/library/blob/master/composer/composer.json).

When bundling other extensions, especially the premium ones, you must enter the product's license key (details in [this file](https://github.com/wpmetabox/library/blob/master/composer/composer.json)).

:::

In the `project-demo` folder, run **composer install** (make sure you installed Composer).

Finally, run the following code in the `project-demo.php` file to download the libraries that you’ve declared:

```php
require 'vendor/autoload.php';
```

## 3. Create custom post types and custom fields

From now on, you can create custom post types and custom fields using the created plugin. This is quite similar to installing Meta Box on a website. The difference is that if you don't bundle extensions providing UI (such as [MB Builder](https://metabox.io/plugins/meta-box-builder/), [MB Custom Post Type & Custom Taxonomy](https://metabox.io/plugins/custom-post-type/)) into the plugin, you have to code manually. Instead of writing code in the `functions.php` file, you must do it in the `.php` file of the created plugin (`project-demo.php`).

I’ll use the created plugin, which includes Meta Box, to create a new post type named **Project**.

### Creating a custom post type

Add the following code to the `project-demo.php` file:

```php
// Create a new post type
function prefix_register_post_type_project(){
    $label = [
        'name'          => 'Projects',
        'singular_name' => 'Project',
    ];

    $args = [
        'labels'      => $label,
        'supports'    => ['title', 'editor', 'author', 'thumbnail', 'excerpt', 'comments'],
        'rewrite'     => [
            'slug'       => 'project',
            'with_front' => false,
            'feeds'      => true,
            'pages'      => true,
        ],
        'public'            => true,
        'show_ui'           => true,
        'menu_position'     => 20,
        'capability_type'   => 'page',
        'map_meta_cap'      => true,
        'has_archive'       => true,
        'query_var'         => 'project',
        'show_in_rest'      => true,
        'show_in_menu'      => true,
        'show_in_nav_menus' => true,
    ];
    register_post_type( 'project', $args );
}
add_action( 'init', 'prefix_register_post_type_project' );
```

On the **Admin Dashboard**, you’ll see a new menu named `Projects`. It’s the custom post type that you’ve created.

![New menu named project](https://imgur.elightup.com/JD0rMix.png)

### Creating custom fields

To create custom fields, you need to code manually if you didn’t include the Meta Box Buidler to the created plugin. Add code (as in the example below) into the `project-demo.php` file:

```php
// Add custom fields for the Project post type
function prefix_add_fields_project( $meta_boxes) {
    $meta_boxes[] = [
        'title'      => 'Information project',
        'post_types' => 'project',
        'fields'     => [
            [
                'id'   => 'investors',
                'name' => 'Investors',
            ],
            [
                'id'   => 'customer',
                'name' => 'Customer',
            ],
            [
                'id'   => 'description',
                'name' => 'Description',
                'type' => 'textarea',
            ],
            [
                'id'   => 'image',
                'name' => 'Images',
                'type' => 'image_advanced',
            ],
        ],
    ];
    return  $meta_boxes;
}
add_filter( 'rwmb_meta_boxes', 'prefix_add_fields_project' );
```

Try creating/editing an article in the Project post type. The fields will appear as follows:

![Try creating or editing an article in the project post type](https://imgur.elightup.com/hK1uSos.png)

### Creating template for singular post

Let’s create a Template for a single page of the Project post type. Add the following code to the `project-demo.php` file:

```php
// Register a new template for the single page of Project post type
function prefix_project_template( $template ) {
    if ( is_singular( 'project' ) ) {
        $template = plugin_dir_path( __FILE__ ) . 'project-template.php';
    }
    return $template;
}
add_filter( 'template_include', 'prefix_project_template', 99 );
```
Next, create a new file in the project-demo folder that is named `project-template.php` (it must have the name as we’ve declared above) with the following content:

```php
<?php get_header(); ?>
<div class="content">
    <h3><a href="<?php the_permalink() ?>"><?php the_title(); ?></a></h3>
    <p><?= get_the_date('d.m.Y'); ?></p>
</div>
<?php get_footer(); ?>
```

### Getting custom fields' values

Add the following code to the content of the template file (`project-template.php`):

```php
<div class="img-post">
    <?php
    $images = rwmb_meta( 'image', ['size' => 'full'] );
    foreach ( $images as $image ) {
        echo '<img src="'. $image['url']. '">';
    }
    ?>
</div>
<div class="infomation">
    <?php
    $investors = rwmb_meta( 'investors' );
    $customer = rwmb_meta( 'customer' );
    $description = rwmb_meta( 'description' );
    ?>
    <table>
        <tr>
            <td class="col-1">Investors</td>
            <td><?php echo $investors; ?></td>
        </tr>
        <tr>
            <td class="col-1">Customer</td>
            <td><?php echo $customer; ?></td>
        </tr>
        <tr>
            <td class="col-1">Description</td>
            <td><?php echo $description; ?></td>
        </tr>
    </table>
</div>
```
At this time, on the single post page of the **Project** post type, the content will be displayed as follows:

![The content displays like this](https://imgur.elightup.com/zCfYxyZ.png)

Fields and their values are not displayed well, so we need to style them a bit.

### Styling fields

In the `project-demo` folder, I created a file named style.css. Then, I enqueue it to the `project-demo.php` file:

```php
function prefix_project_styles() {
    wp_enqueue_style( 'prefix_main-style', plugin_dir_url( __FILE__ ) . '/style.css' );
}
add_action( 'wp_enqueue_scripts', 'prefix_project_styles' );
```

Depending on how you want to display the custom fields, you add the corresponding code to the `style.css` file. For example:

```css
.information table, td {
    border: 1px solid black;
}

img {
    display: inline-block!important;
    height: auto;
    max-width: 200px!important;
    margin-right: 15px!important;
    margin-bottom: 20px;
}

.content {
    width: 800px;
    margin: 0 auto;
}

.col-1 {
    width: 30%;
}
```
After that, the fields’ values will be displayed as follows:

![The field's values will be displayed](https://imgur.elightup.com/yb88znd.png)

# Creating category thumbnails

import LiteYouTubeEmbed from 'react-lite-youtube-embed';
import 'react-lite-youtube-embed/dist/LiteYouTubeEmbed.css';

**Category thumbnails** (featured images) are images that are chosen as the representative image for categories. This tutorial will show you a simple solution to create thumbnails for categories and **display those thumbnails on a page** and on the **archive pages of each category**.

Here is my example:

![An example for Category Thumbnails](https://imgur.elightup.com/uBSF1Zh.png)

![An example for Category Thumbnails](https://imgur.elightup.com/1POSTVu.png)

## Preparation

In addition to [Meta Box](https://metabox.io/), make sure you already have these extensions:

* [MB Builder](https://metabox.io/plugins/meta-box-builder/): It provides UI to create custom fields;
* [MB Term Meta](https://metabox.io/plugins/mb-term-meta/): It allows to create of custom fields for categories or taxonomies;
* [MB Views](https://metabox.io/plugins/mb-views/): this extension creates a shortcode to display category thumbnails;
* [MB Custom Post Types & Custom Taxonomies](https://metabox.io/plugins/custom-post-type/): (optional) you need this extension when you are creating thumbnails for custom taxonomies of a custom post type.

## Video version

<LiteYouTubeEmbed id='pFgElK8pvn0' />

## Creating custom fields for images

Go to **Meta Box > Custom Fields > Add New**.

I created the **URL** field to save the URL to the media library.

![One is URL to save URL. And, one is Single Image which allows you to upload an image to the media library](https://imgur.elightup.com/uAbyMGW.png)

Also, you must pay attention to the IDs of the fields. We will use them in the next step. So, let it be something easy to recall and distinguish.

Next, move to the **Settings** tab and set the **Location** as **Taxonomy > Category** to assign these fields to categories.

![remember to set the Location as Taxonomy and Category to assign the custom fields for Categories](https://imgur.elightup.com/raVmTtQ.png)

Then, go to the category editor page, and you will see the fields. I filled in the URLs for all the categories instead of uploading images.

![go to a Category Editor page, you will see the custom fields for thumbnails and featured images](https://imgur.elightup.com/jqGHg1w.png)

Images from the links will be used as the thumbnails and featured images.

## Displaying the categories thumbnails

Go to **Meta Box > Views** and create a new view.

![Go to Views and create a new view to display the list of category thumbnails](https://imgur.elightup.com/nCz5fkS.png)

In the **Template** tab, I used this code:

```php
{% set args = {hide_empty: false} %}
{% set categories = mb.get_categories( args ) %}
    {% for category in categories %}
        {{ category.name }
    {% set image_url = mb.get_term_meta( category.term_id, 'url_images_category', true ) %}
    {% if image_url %}
        <img src="{{ image_url }}">
    {% else %}
        <img
src="http://demo1.elightup.com/test-metabox/wp-content/uploads/2020/11/oriental-tiles.png">
    {% endif %}
{% endfor %}

```

In there:

* `get_categories( args )`: to know which category is getting data;
* `mb.get_term_meta ()`: to get values for the fields from the corresponding category by `category.term_id. 'url_images_category'` is ID of fields;
* `<img src="{{ }}">`: to display the image by the link assigned to the variable.

If I don't add a link picture, the last line of code will show a default picture.

For easier styling later, you can add some div tags like this:

![You can add some div tags to style later easiser](https://imgur.elightup.com/Gs3hNpp.png)

Full code here:

```php
{% set args = {hide_empty: false} %}
{% set categories = mb.get_categories( args ) %}
<div class="thumbnail-images">
    {% for category in categories %}
        <div class="item">
            <div class="overlay-thumbnail-categories"></div>
            <div class="category-title"><a href="{{ mb.get_category_link( category.term_id ) }}">{{ category.name }}</a></div>
    {% set image_url = mb.get_term_meta( category.term_id, 'url_images_category', true ) %}
    {% if image_url %}
        <img src="{{ image_url }}">
    {% else %}
        <img src="http://demo1.elightup.com/test-metabox/wp-content/uploads/2020/11/oriental-tiles.png">
    {% endif %}
        </div>
{% endfor %}
</div>

```
In there, I added an A tag: `<a href="{{ mb.get_category_link( category.term_id ) }}">{{ category.name }}</a>` to get the link of the corresponding category by ID. At the same time, display the category name and hyperlink it;

This view will be set as the type of a shortcode. You can use it to easily display the list of categories with thumbnails everywhere you want. It seems to simplify the process a lot.

![This view will be set in the type of Shortcode so that it will auto-generate a shortcode](https://imgur.elightup.com/bTlGp9e.png)

Copy and paste the shortcode into a page, e.g. the homepage.

![Copy and paste the shortcode into a page](https://imgur.elightup.com/A1LRTM7.png)

Then, the thumbnail images and titles of the categories will display on the homepage without styling.

![the thumbnail images and titles of the categories will display on the homepage without styling](https://imgur.elightup.com/8DUoeub.gif)

Back to the view, add some code to the **CSS** tab to style this section.

![Add some CSS code](https://imgur.elightup.com/J0tl0tV.png)

Here is the code I used:

```css
body {
    overflow-x: hidden;
}

.thumbnail-images {
    display: flex;
    flex-wrap: wrap;
    justify-content: center
}
.overlay-thumbnail-categories {
    position: absolute;
    top: 0;
    bottom: 0;
    left: 0;
    right: 0;
    height: 100%;
    width: 100%;
    border-radius: 20px;
    background-image: radial-gradient(ellipse, rgb(0 0 0 / 63%), rgb(0 0 0 / 55%), rgb(0 0 0 / 50%), rgb(0 0 0 / 42%), rgb(0 0 0 / 35%), rgb(0 0 0 / 20%));
}
.item {
    width: 31.5%;
    position: relative;
    margin: 10px;
    align-content: space-between;
}
.item img {
    width: 100%;
    height: 300px;
    object-fit: cover;
    border-radius: 20px;
}
.category-title {
    position: absolute;
    left: 50%;
    top: 50%;
    transform: translate(-50%, -50%);
    padding: 10px;
    font-family: 'Dancing Script', cursive;
    font-size: 30px;
}
.category-title > a {
    text-decoration: none !important;
    color: #f0a030;
}

```
After that, the Top Destinations section has a new look!

![New look of the page](https://imgur.elightup.com/IAIi0HW.png)

## Displaying the featured images on archive pages

This is an archive page before the featured image is added.

![The archive page before adding the featured image](https://imgur.elightup.com/UPaXUH1.png)

We need to edit the theme file to display the top-field images. Go to the `archive.php` file. It is the template file for the archive pages.

Add this code after the header and the first `div` tag.

```php
<?php
    $categories= get_the_category();
    $link_image_source = get_term_meta( $categories[0]->term_id, 'url_images_category', true );
<div class="thumbnail-container">
    <img class="thumbnail-cat" src="<?php echo $link_image_source ?>">
    <div class="thumbnail-overlay"></div>
</div>

```
**In there**:

* `get_the_category()`: to know which archive page the user is;
* `get_term_meta ()`: get the value of the field;
* `url_images_category` is ID of the created custom fields;
* `wp_get_attachment_image_src ()`: to get the link of the uploaded image;
* `src="<?php echo $link_image_source ?>`: to display the image from the link which is the value of the `$link_image_source` variable.

Then, the featured image will display as below:
![the featured image will display](https://imgur.elightup.com/mCrtTIO.png)

Go back to the theme files and style the featured picture, category title, and description using CSS

![use css to style the featured image, category title](https://imgur.elightup.com/k3Hwe22.png)

```css
.thumbnail-container {
    position: relative;
}
.thumbnail-cat {
    width: 100%;
    height: 85vh;
    object-position: 100% 70%;
    object-fit: cover;
    display: block;
    -webkit-clip-path: polygon(0 0, 100% 0, 100% 90%, 0 100%);
    clip-path: polygon(0 0, 100% 0, 100% 90%, 0% 80%);
}
.thumbnail-overlay {
    position: absolute;
    top: 0;
    bottom: 0;
    left: 0;
    right: 0;
    height: 100%;
    width: 100%;
    background: linear-gradient(rgba(0, 0, 0, 0.63) , rgba(255, 255, 255, 0));
}
.page-title.ast-archive-title {
    margin-top: -3.5em;
    font-weight: 500;
    font-family: 'Dancing Script', Cursive;
    color:#f0a030;
}
.ast-archive-description > p {
    font-size: 17px;
    font-style: italic;
}

```

Here is the result:

![The result after all steps](https://imgur.elightup.com/hmGpeWH.png)

# Changing the ID of a Meta Box field

import LiteYouTubeEmbed from 'react-lite-youtube-embed';
import 'react-lite-youtube-embed/dist/LiteYouTubeEmbed.css';

For any reason, you may want to change the ID of the custom field without having an effect on existing data. But, if you only change the ID of the field from the field group settings, the data in the field will be lost. So, how does the data remain intact when changing the field ID? Let’s find it out.

:::warning

Before going to update the field ID, make sure you [backup your database](https://deluxeblogtips.com/best-wordpress-backup-plugins/) first. The methods described here involve running SQL on your database, which can’t revert. Having backups might help you if there's something wrong.

:::

## Video version

<LiteYouTubeEmbed id='VEZSCHtOt5Q' />

## Preparation

Actually, we need the [Meta Box plugin](https://wordpress.org/plugins/meta-box/) only for this practice. Since you have had custom fields on your site already, you obviously have the Meta Box as well.

In addition, I will create the field from scratch for illustration so you can have a clear overview. So, I have the [MB Builder](https://metabox.io/plugins/meta-box-builder/) to create and manage fields visually. It is an extension of Meta Box and available in the [Meta Box Lite](https://metabox.io/lite/) and **Meta Box AIO** as well. In addition, you might want to use some advanced features from other Meta Box extensions, so you also might have them on your site.

Also, you need **permission to access the database** to check and see the changes in the data table.

Let’s start now!

## 1. Creating custom fields

If you have had them already, move on to the next step. Otherwise, if not yet, click on the **Create a field group** button in the dashboard or go to **Custom Fields** submenu and create a new field group.

![Create a new field group](https://imgur.elightup.com/v1KTezX.png)

I will add a basic custom field for illustration purposes.

![A basic custom field with the ID is address](https://imgur.elightup.com/on8v8Ue.png)

Don’t forget to move to the **Settings** tab to set the location for the fields.

![Move to the Settings tab to set the location for the field](https://imgur.elightup.com/gnWZkuZ.png)

The current ID of the field is `address`. After inputting data to the field in some posts, also for illustration purposes, I will take action to change this ID.

Now, just go to the post editor and input data to the field.

![The data was inputted to the field](https://imgur.elightup.com/673uOvT.png)

## 2. Changing the ID of the custom fields

To avoid losing data, you not only **change the ID in the field group settings** but also need to **change the `meta_key` of the field in the database** to match the new ID.

In this article, I’ll change the field’s ID from `address` to `location`.

### 2.1. Changing the ID of the custom field from the field settings

Go back to the field group to change the ID of the field. Just rename the ID.

![Rename the ID in the field settings](https://imgur.elightup.com/XXk3yZl.png)

Then, go to the posts, you will see that the change leads to the missing of all the data that you input to the field. The field in all the posts is blank after the change.

![The inputted data is missing](https://imgur.elightup.com/P04SCyG.png)

If you only change the ID in this way, you must re-enter the data to each post.

### 2.2. Changing the `meta-key` of the field in the database

Normally, Meta Box [saves data of each custom field](https://docs.metabox.io/database/?_gl=1*kowbal*_gcl_au*ODIxMDcyMzgwLjE3MDk2MDk5NTc.) in one row in the post meta table.

![Meta Box saves custom fields in the post meta table of the database](https://imgur.elightup.com/Tvte0TN.png)

The good news is that even when you may not see the data in the fields, they're still stored in the database. You can see the data that I input into the field in the `meta_value` column, as well as the ID from the initial when I created the field in the `meta_key` column.

![The field ID is stored in the meta_key column, and the data is in the meta_value column](https://imgur.elightup.com/mLrldJ7.png)

Although I changed the ID of the field, it doesn’t affect the **`meta_key`** on this table. So, to change the field ID without losing data, you should change the **`meta_key`** as well. We can do it easily using a **SQL quer**y in the php My Admin or in the theme file.

#### 2.2.1. Using the phpMyAdmin

If you have permission to access the phpMyAdmin, go to the **SQL** section of the table where you stored the data, and run the following query:

```
UPDATE wp_postmeta SET meta_key = 'location' WHERE meta_key = 'address'
```

![Run the SQL query to change the meta key from address to location](https://imgur.elightup.com/hzEqgoy.png)

Then, click on the **Go** button to execute it.

![Click the Go button to execute the query](https://imgur.elightup.com/ARlIkfp.png)

After that, back to the table. The `meta_key` now is the new ID of the field.

![The meta_key now is the new ID of the field](https://imgur.elightup.com/mRMwPVm.png)

#### 2.2.2. Adding code to the theme file

If you can’t access phpMyAdmin or are just familiar with using PHP, you can use the theme file to perform the same SQL query. The SQL query is exactly the same as we have in the previous method.

Go to the **functions.php** file, and add some lines of code:

```
function update_your_id() {
    global $wpdb;
    $wpdb->query( "UPDATE $wpdb->postmeta SET meta_key = 'location' WHERE meta_key = 'address'" );
}

update_your_id();
```

![Add some code to the theme file to perform the same SQL query](https://imgur.elightup.com/qlT2WPR.png)

Notice that if you change the theme someday, this will affect your data.

If you can check the data table in the phpMyAdmin now, you also will see the `meta_key` changed.

After changing the ID of the field both in the field settings and database, go to any post where the field is, you will see the data go back.

![The data go back](https://imgur.elightup.com/673uOvT.png)

That’s how we change the ID of any custom fields created with Meta Box without affecting the existing data in those fields.

# Changing the RSS content using custom fields

import LiteYouTubeEmbed from 'react-lite-youtube-embed';
import 'react-lite-youtube-embed/dist/LiteYouTubeEmbed.css';

This article will show you how to **get information from a custom field created by Meta Box**, then **include them into the** [RSS feed](https://gretathemes.com/rss-feed-applications-wordpress/). Now, let’s do it.

## Video version

<LiteYouTubeEmbed id='PJR2Unkz4WE'/>

## Preparation

First, you might have some custom fields with content on your site. As well as, you might have [the Meta Box plugin](https://wordpress.org/plugins/meta-box/) to have a framework to create them.

Besides, in this tutorial, we’ll use the [MB Builder](https://metabox.io/plugins/meta-box-builder/) extension (premium) to have an intuitive UI in the backend to create the fields visually. However, you can also add code or use the [Online Generator](https://metabox.io/online-generator/) tool (free) from Meta Box to create fields.

## 1. Creating custom fields

Feel free to create custom fields for saving any information for your post. If you have had them, move on to the next step. Otherwise, if not yet, just go to **Meta Box** > **Custom Fields** and create them.

![Go to Meta Box > Custom Fields and create fields.](https://imgur.elightup.com/FRD5WT0.png)

Here are some fields I created as an example.

![A simple subscription formSome created fields as an example.](https://imgur.elightup.com/YPrYnej.png)

After creating all the needed fields, remember to set the location to assign these fields to any post type you want.

![Set the location to assign the fields to any post type you want](https://imgur.elightup.com/gbl0AO0.png)

Now, in the post editor, you’ll see all the fields displayed like this:

![All the fields display in the post editor](https://imgur.elightup.com/wpW5tXw.png)

In case you don't use **MB Builder**, you can code to add fields or use the [Online Generator](https://metabox.io/online-generator/) tool of Meta Box, then copy the generated code to save time.

You can add the following code to the functions.php file or add it to the created plugin (if you have one) to create the custom fields.

```css
add_filter( 'rwmb_meta_boxes', 'hp_metaboxs' );
function hp_metaboxs( $meta_boxes ) {
    $meta_boxes[] = array(
        'title'    => 'Hotel Booking Price',
        'fields' => array(
            array(
                'id'        => 'price',
                'name' => 'Price',
                'type'   => 'number',
            ),
            array(
                'id'       => 'availability',
                'name' => 'Availability',
                'type'   => 'radio',
                'options'             => array(
                    'Available'     => 'Available',
                    'Unavailable' => 'Unavailable',
                ),
            ),
        ),
    );
    return $meta_boxes;
}
```

Then, when you edit a post, the custom fields will be displayed like we did with MB Builder.

![The fields display in the post editor when you use Online Generator](https://imgur.elightup.com/wpW5tXw.png)

Just fill in the data. And, we will input this data to the RSS in the next step.

## 2. Displaying custom fields’ values on the frontend

You might want to display the data from custom fields on a page on the frontend. It’s a common purpose of saving data in custom fields. However, please notice that **whether you display the data on the frontend or not, you still can add them into the RSS**.

Anyway, there are several ways to display data stored in custom fields on the frontend.

* Use a page builder for the most convenient way, and do not touch any line of code.
* Add code to the theme’s file.
* Use MB Views for better optimization in coding.

In this case, we will need to **add code to the theme’s file to add data from custom fields to the RSS**, so I will use the same way to display data on the frontend.

Go to **Appearance** > **Theme File Editor**, find a file that regulates the template of the page that you want to display the data.

![Go to a theme’s file that regulates the template of a page you want to display the data](https://imgur.elightup.com/EtxhzlE.png)

Then, add code using the `rwmb_meta` syntax.

![add code using the rwmb_meta syntax](https://imgur.elightup.com/zBzM906.png)

**In there**: `price` and `availablity` are the IDs of the fields.

Go to the page on the frontend, the values of the fields will be displayed.

![The values of the fields will be displayed on the frontend](https://imgur.elightup.com/cdPqj3Y.png)

Now, it’s time to include these values to the RSS feed.

## 3. Adding the values of custom fields to the RSS feed

Go to the `functions.php` file, and add these lines of code.

```css
/**
 * MetaBox- Add custom fields to RSS feed
 *
 */

function prefix_add_custom_fields_to_feed($content) {
    if(is_feed()) {
        $post_id = get_the_ID();
            $price = rwmb_meta('price');
            $output = '<div><h3>Thông tin phòng</h3>';
            $output .= '<p><strong>Price:</strong> ' . $price . '</p>';

            $availability = rwmb_meta('availability');
            $output .= '<p><strong>Availability:</strong> ' . $availability . '</p>';
            $output .= '</div>';
        $content = $content.$output;
    }
    return $content;
}
add_filter('the_content','prefix_add_custom_fields_to_feed');
```

![Add code to the functions.php file](https://imgur.elightup.com/EQ0h5dZ.png)

Let’s go through it in more detail:

* `if(is_feed()) {}`: This condition is to make sure that we are inputting the data into the RSS feed.
* `$post_id = get_the_ID();`: This code will get the ID of the post. Then, we also use the `rwmb_meta` function to get values from fields in the post. And, `price` and `availablity` are still the IDs of those fields.
* The returned value will be passed to the `$output` variable along with some extra text that I just added manually.

![The returned value will be passed to the $output variable along with some extra text that I just added manually](https://imgur.elightup.com/ywCJm7x.png)

* `$content = $content.$output;`: This line will write the data from the `$output` variable into the content of the post.
* `add_filter('the_content','prefix_add_custom_fields_to_feed');`: The `the_content` hook is to add those data to the content of the RSS feed. In the event that you want to add data from the fields to the title of the posts in the RSS feed, use the `the_title` hook.

![Use the the_title hook to add data from the fields to the title of the posts in the RSS feed.](https://imgur.elightup.com/4WuAw7C.png)

Then, go to the RSS file of your site at this address - http://yourwebsite.com/feed. You will see the data from custom fields has been there already.

![In the RSS file of your site, the data from custom fields has been there already.](https://imgur.elightup.com/itblCLZ.png)

So, you’ve finished changing the RSS feed’s content already.

## 4. Extra: Displaying RSS feed on your website

If you want to show the most recent posts using the RSS feed somewhere on your site, for instance, the sidebar. So, go to **Appearance** > **Widgets**, add a new one in the **Sidebar** section.

![Go to Appearance > Widgets, add a new one in the Sidebar section](https://imgur.elightup.com/uIkiXyM.png)

Then, choose the **RSS** block.

![Choose the RSS block](https://imgur.elightup.com/dRwH2Gh.png)

Once again, enter the URL of the feed as the one I showed you in the previous step.

![Enter the URL of the feed](https://imgur.elightup.com/hCgxy6v.png)

Then, some posts whose data is saved in the RSS feed will display.

![Some posts whose data is saved in the RSS feed will display](https://imgur.elightup.com/Nv8aCdH.png)

In the settings of this block, there are some options to choose from to set how many posts will be displayed, and some other information. Just change it as you want.

![The settings of the Rss block](https://imgur.elightup.com/CxoWt30.png)

# Configuring homepage using MB Views

import LiteYouTubeEmbed from 'react-lite-youtube-embed';
import 'react-lite-youtube-embed/dist/LiteYouTubeEmbed.css';

**Regularly updating the homepage brings fresh content** and helps impress website visitors easier. However, it may take time and effort to change its content. You definitely can avoid it with the help of custom fields created with Meta Box and MB Views. Let’s say goodbye to the hassle of coding in theme files!

I’ve just made a simple page with a carousel for the demo like this. Whenever I want to change the images, texts, and buttons but keep the layout, I **just update content in the custom field, then the homepage’s content also change** following without touching to the code.

![The demo of a homepage with a carousel.](https://imgur.elightup.com/G88TAbH.gif)

## Video version

<LiteYouTubeEmbed id='1hTOwWd3y3M'/>

## Preparation

As I said, we will change content in custom fields, then the homepage content will be changed as well. It means that we must create custom fields corresponding to every content on your homepage. Each element will have its own custom field.

For instance, each slider in my carousel contains some information such as the image, title, description, and button. Instead of adding those contents directly into the code, I will create custom fields for each one of them. Then, just get values from those fields to display the content.

These are some tools we need for this practice:

First, we need the [Meta Box framework](https://wordpress.org/plugins/meta-box/). It’s available on [wordpress.org](https://wordpress.org/plugins/meta-box/). We also need some advanced features from some extensions of **Meta Box**. You can download them individually or use **Meta Box AIO** to have them all.

* [MB Views](https://metabox.io/plugins/mb-views/): to have a template for the page and get content from the custom fields to display on the homepage instead of touching any theme files or accessing the server or host;
* [MB Builder](https://metabox.io/plugins/meta-box-builder/): provides a UI to create custom fields to save the content of the homepage.

Finally, I’ll use a pre-built template from [Bootstrap](https://getbootstrap.com/2.3.2/examples/carousel.html). In the event that you are using your own template, you can also follow this practice.

## Creating the homepage

Go to **Pages** > **Add New** to create a new page as usual.

![Create a new page](https://imgur.elightup.com/DzF1s4O.png)

Then, go to the **Settings** menu > **Reading** to set the created page as the homepage.

![Set the created page as the homepage.](https://imgur.elightup.com/2MeNFUs.png)

## Creating template for the homepage

Instead of adding code to the theme files, you can use **MB Views** to create a template. Go to **Meta Box** > **Views** and add a new one.

![Create a new template](https://imgur.elightup.com/EAgllAD.png)

As mentioned before, I will use a pre-build template from **Bootstrap**, so just go to **Bootstrap** and download the template.

![Download the template from Bootstrap.](https://imgur.elightup.com/Ozj83J4.png)

Open the downloaded file, look for the folder of the template you want, copy all the code or a part, then paste it to the **Template** tab on the view. **Note**: In the event that you build the template yourselves, add code to the box as well.

![Paste all the code or a part to the Template tab on the view.](https://imgur.elightup.com/1OFW4MG.png)

You can see that the underlined information in the image below is the content displayed on the page.

![The content displayed on the page](https://imgur.elightup.com/4R2idK7.png)

You can also add CSS and JS code to the **CSS** tab and **JavaScript** tab of the view for styling.

![Add CSS and JS code to the CSS tab and JavaScript tab of the view for styling.](https://imgur.elightup.com/bMp6dms.png)

Finally, scroll down to set the location for this template to apply it to the homepage.

![Set the location for the template](https://imgur.elightup.com/Vf5gGkF.png)

For using Bootstrap template, you should add some lines of code to the theme’s file to declare the online libraries of CSS and JS from **Bootstrap**.

![Add code to the theme’s file to declare the online libraries of CSS from Bootstrap.](https://imgur.elightup.com/ZmK2eFp.png)

![Add code to the theme’s file to declare the online libraries of JS from Bootstrap.](https://imgur.elightup.com/aW0cxcw.png)

This’s how the carousel is on my homepage on the frontend right now.

![The carousel is on my homepage on the frontend](https://imgur.elightup.com/sAXcU47.gif)

The content is now static. Whenever you want to change it, you should go to the view editor and change the text in code. To make it dynamic, let’s move on to the next step.

## Creating custom fields

We should **create custom fields corresponding to the content that we want to have on the page**. Since I created only the carousel, for example, I'll have a group field for it like this.

![A group field saves the homepage information.](https://imgur.elightup.com/3syhIjD.png)

Each slider has its own information with the same structure, so I’ll create subfields inside the group for each kind of information, then make this group cloneable.

![Make the group cloneable](https://imgur.elightup.com/UGukjKf.gif)

Let’s create them.

Go to **Meta Box** and create a group field, and then add some subfields inside the group.

![Add some subfields inside the group](https://imgur.elightup.com/7GbdRmo.png)

Back to the settings of the group, remember to set the group to be cloneable. It will help us add more sliders.

![Set the group to be cloneable](https://imgur.elightup.com/tzbNQi5.png)

That’s all the custom fields that I’m using for this practice. In the real case, you may want to have more content on the homepage, so just add as many fields as you want.

After creating fields, move to the **Settings** tabs, choose **Location** as **Post type**, and select **Page**. Since these fields will be applied to the homepage, go to the **Advanced location rules** options > **Post** and select the name of the homepage.

![Set up the display of the created fields for the homepag](https://imgur.elightup.com/1sFm4Qg.png)

Now, on the homepage editor, you will see the fields. Whenever you click the **Add more** button, you create a new slider for the carousel.

![On the homepage editor, you will see the fields.](https://imgur.elightup.com/cMdzemv.png)

## Customizing the template

Go back to edit the template with **MB Views**.

My carousel now has 3 slides with the same structure of content. So, I have three parts of the code that are quite the same.

![Three parts of the code correspond to 3 sliders](https://imgur.elightup.com/bYkNMDq.png)

When using custom fields, we will use loops to get all the content from the sliders since we save it in a cloneable group. Therefore, just keep the first part and remove the second and third parts.

![Keep the first part and remove the second and third parts](https://imgur.elightup.com/eswPJbO.gif)

Next, just insert fields from the list on the right sidebar to get and display data from those fields. Click on the name of the created cloneable group, and a loop will be generated. Then, move the code of the slide inside the loop.

![Create loop and move the code of the slide inside the loop](https://imgur.elightup.com/2aQcCmw.gif)

Now, replace content of each element with the corresponding field.

![Replace content with the image save in the Single Image field](https://imgur.elightup.com/KwyQIsp.gif)

![Replace the text by inserting data from the corresponding field](https://imgur.elightup.com/ujnrjz3.gif)

We should edit the div tag a little bit.

![Edit the div tag a little bit](https://imgur.elightup.com/gW9tz8F.png)

**In there**:

* `{% if loop.first %}active{% endif %}`: to check if it is the first slider or not. This is to activate the style that we will apply to the slider.
* `{% if loop.first %}text-start{% endif %} {% if loop.last %}text-end{% endif %}`: This code is to check the first slider.

Here is the full code after I modified it:

```css
<div id="myCarousel" class="carousel slide" data-bs-ride="carousel">
    <div class="carousel-indicators">
      <button type="button" data-bs-target="#myCarousel" data-bs-slide-to="0" class="active" aria-current="true" aria-label="Slide 1"></button>
      <button type="button" data-bs-target="#myCarousel" data-bs-slide-to="1" aria-label="Slide 2"></button>
      <button type="button" data-bs-target="#myCarousel" data-bs-slide-to="2" aria-label="Slide 3"></button>
    </div>
    <div class="carousel-inner">
        {% for clone in post.homepage_fields %}
        <div class="carousel-item {% if loop.first %}active{% endif %}">
            <img src="{{ clone.single_image.full.url }}" width="{{ clone.single_image.full.width }}" height="{{ clone.single_image.full.height }}" alt="{{ clone.single_image.full.alt }}">
            <div class="container">
                <div class="carousel-caption  {% if loop.first %}text-start{% endif %} {% if loop.last %}text-end{% endif %}">
                    <h1>{{ clone.title }}</h1>
                    <p>{{ clone.description }}</p>
                    <p><a class="btn btn-lg btn-primary" href="{{ clone.button_link }}">{{ clone.button_text }}</a></p>
                </div>
            </div>
        </div>
        {% endfor %}
    </div>
    <button class="carousel-control-prev" type="button" data-bs-target="#myCarousel" data-bs-slide="prev">
      <span class="carousel-control-prev-icon" aria-hidden="true"></span>
      <span class="visually-hidden">Previous</span>
    </button>
    <button class="carousel-control-next" type="button" data-bs-target="#myCarousel" data-bs-slide="next">
      <span class="carousel-control-next-icon" aria-hidden="true"></span>
      <span class="visually-hidden">Next</span>
    </button>
  </div>
```

To style the carousel a little bit more, you can add some CSS.

![Add CSS to style the carousel a little bit more](https://imgur.elightup.com/Q7LfgLP.png)

Now, go to the homepage, you will see the content has been changed to the ones that are saved in the custom fields.

![The content has been changed to the ones that are saved in the custom fields](https://imgur.elightup.com/G88TAbH.gif)

From now on, whenever you want to change it, just go to the page in the backend, change the information.

![To change content of the homepage, change the information in the page editor.](https://imgur.elightup.com/MtxiYcs.png)

There is no need to touch the code anymore. And the content on the homepage will be replaced with new ones.

![The content on the homepage will be replaced with new ones](https://imgur.elightup.com/sRzQOS5.png)

In the case that you are using a page builder to build your page, you also can **use custom fields created with Meta Box for dynamic content**. That will help a lot to save time and effort to change the content. Those cases or configuring the homepage using **MB Views** in this practice are much like [creating landing pages](https://docs.metabox.io/tutorials/create-dynamic-landing-page/) using [Meta Box](https://metabox.io/). You can refer to it and give it a try.

# Copying custom fields from sites to sites

import LiteYouTubeEmbed from 'react-lite-youtube-embed';
import 'react-lite-youtube-embed/dist/LiteYouTubeEmbed.css';

Instead of rebuilding similar custom fields in different sites, you can use the [MB Builder](https://metabox.io/plugins/meta-box-builder/) extension to easily copy them from one site to others with just a few clicks.

In this practice, I already have the original page with the field group available. Then, copy custom fields from this site to the targeted site.

![The original page with the field group is available, but the targeted site has not yet.](https://imgur.elightup.com/N0IQOgB.png)

As a result, we’ll have two different sites with a similar simple field group like this.

![Two different sites with a similar simple field group](https://imgur.elightup.com/iQCmPqH.png)

This task will be very easy-to-do with 2 methods:

* Method 1: Add Code to the Theme’s Files
* Method 2: Just Use MB Builder

So let’s see how we do it both ways.

## Video version

<LiteYouTubeEmbed id='0_AOradkfyo'/>

## Benefits of cloning custom fields among sites

Actually, cloning is copying the code of the meta boxes (field groups) / custom fields group created in a site, then embedding it into another site. That gives you the same functionality of these meta boxes and custom fields on the embedded site.

There are some benefits of cloning which you definitely are interested in:

* It helps your embedded website operate with the adequacy of necessary custom fields and its configuration. If you follow method 1, your embedded site will operate with much faster speed because of not installing any plugin for these custom fields beyond our [ultra lightweight Meta Box Framework](https://wordpress.org/plugins/meta-box/).
* You only need to create a series of custom fields on local with an adequate configuration as you want. Then embed code of the needed fields in the targeted sites. That ensures that all of the fields which you [import into the sites](https://docs.metabox.io/tutorials/export-import-custom-fields-meta-box-builder/) have the same settings.
* It may not waste time anymore in the field's configuration with the complex attributions or conditions. You only do once, and clone to the sites you need. That’ll save a lot of time.

**Please note that**:
 Cloning meta boxes among sites is different to cloning a custom field inside a meta box. Learn more about [cloning a custom field](https://docs.metabox.io/cloning-fields/).

## Preparation

Here are the tools we need:

Firstly, we need  [the Meta Box plugin](https://wordpress.org/plugins/meta-box/) on all sites to have a framework to create custom fields. It’s available on [wordpress.org](https://wordpress.org/plugins/meta-box/).

If you follow method 1, add code to the theme’s files, you just need to activate MB Builder on the original site where you create the custom fields. To contrast, in the second method, we need to use this extension on all sites.

## 1. Creating custom fields

Note: If you already have custom fields on your website, you can skip this step.

Create the meta boxes and custom fields inside through the UI of MB Builder. Remember to completely configure all the fields.

In there, you can also concurrently use the other extensions of Meta Box to configure your custom fields as you want, ex: [MB Group](https://docs.metabox.io/extensions/meta-box-group/),[ MB Conditional Logic](https://metabox.io/plugins/meta-box-conditional-logic/), [MB Geolocation](https://docs.metabox.io/extensions/meta-box-geolocation/), etc. Depending on your demand, you can create as many as fields you want and set configuration for them.

I just created a simple field group for example:

![I just created a simple field group](https://imgur.elightup.com/ucqWsSt.png)

After publishing, the field displayed like this.

![The field group displays.](https://imgur.elightup.com/ZwcWR4F.png)

## 2. Copying custom fields from one site to another

### 2.1. Method 1:  Adding code to the theme’s files

#### 2.1.1. Exporting Code of the Custom Fields

On the original site, in the field group editor, press the **Get PHP Code** button > **Generate** to automatically generate code.

![Press the Get PHP Code button > Generate to automatically generate code of the field group](https://imgur.elightup.com/krezr9O.png)

Pay attention to the code. In case you have many fields and you want cloning an individual field only, you may create the corresponding field group containing each needed field.

#### 2.1.2. Embedding code of field group in the targeted site

On the targeted site, go to **Appearance** > **Theme File Editor** and paste the copied code to the `functions.php` file.

![Paste the copied code of the field group to the functions.php file.](https://imgur.elightup.com/kq3yMwE.png)

**Remarks**:

* The targeted website doesn’t install MB Builder but must install Meta Box Framework to ensure that the embedded code can operate.
* In case the target is the original website used to create fields, let’s deactivate MB Builder on this site before embedding its code.
* If there has been the other code embedded in the functions.php file and it has the same ID with the new code, only the last one can be operated.
* You can embed code of many different field groups in one site but must ensure that the ID of each field group differs from others then all of the field groups can operate. If the field groups’ IDs are iterated, the last one will be prioritized as the 3rd remark point.

![The ID of the field group is iterated](https://imgur.elightup.com/Zu3A52x.png)

After adding the code into the targeted site, the field group with custom fields will display similar to the original site.

![On the targeted site, the field group with custom fields will display similar to the original site.](https://imgur.elightup.com/iQCmPqH.png)

### 2.2. Method 2: Using MB Builder

**Note**: In this method, we need to use the MB Builder extension on both the original site and the targeted site.

#### 2.2.1. Exporting code of the custom fields

Go to the **Custom Fields** section, click the **Export** button to export the field group into a file.

![Click the Export button to export the field group into a file.](https://imgur.elightup.com/8VJUbDL.png)

#### 2.2.2 Importing file to the targeted site

On the targeted site, also move to the **Custom Fields** section, click the **Import** button to import the downloaded file.

![Move to the Custom Fields section, click the Import button to import the downloaded file](https://imgur.elightup.com/bGLyicp.png)

Now, you can see the field group displays in the page editor. It is the same as it was on the original site.

![The field group displays on both the original site and the targeted site.](https://imgur.elightup.com/iQCmPqH.png)

# Counting the number of related posts using MB Views

import LiteYouTubeEmbed from 'react-lite-youtube-embed';
import 'react-lite-youtube-embed/dist/LiteYouTubeEmbed.css';

**Numbering related posts** and **displaying their total count** is an effective way to enhance user experience. Using the **MB Views** extension from Meta Box, you can implement this feature easily and provide readers with a clear idea of how much relevant content they can explore.

So, I’ll show you two approaches:

* Displaying numbered bullet points for each related post.
* Showing the total number of related posts at the bottom of the section.

![Favorite button will automatically appear on the posts](https://imgur.elightup.com/e654M8s.png)
(Number related posts as well as count the total, using the MB Views extension from Meta Box)

Let’s see how to have it!

## Video version

<LiteYouTubeEmbed id='hiMeLkGX1QA' />

## Preparation

In this tutorial, we’ll use a **Post** field to store multiple related posts and then display them on the frontend. For that, we’ll need a few essential tools to set everything up.

* [The Meta Box plugin](https://wordpress.org/plugins/meta-box/): provides a framework for creating a custom field;
* [MB Views](https://metabox.io/plugins/mb-views/): create a template for displaying and counting related posts;
* [MB Builder](https://metabox.io/plugins/meta-box-builder/): have a UI on the back end for visually creating custom fields to save the related posts.

In the case that you want to display related content in the post of any custom post type, you should activate the [MB Custom Post Type](https://metabox.io/plugins/custom-post-type/) extension as well. In this practice, I’ll use the blog posts for demonstration purposes only, so I skip this extension.

Now, let’s go step by step.

## Creating a custom field for related posts

I’ll add related posts to my blog posts, so I'll create the field without any extra steps. As mentioned earlier, if you're adding these related posts to posts in a custom post type, you'll need to create that post type first, and then create a custom field for it.

For illustration purposes of this practice only, I’ll set up a field to add multiple related posts like this.

![A Post field to add multiple related posts](https://imgur.elightup.com/drvwc77.png)

Now, go to **Meta Box** > **Custom Fields** and create a new field group.

![Create a new field group](https://imgur.elightup.com/t1ZUWwN.png)

Add a field in the type of **Post**. This field type allows you to choose more than one post from a regulated post type. So that, you can use it to choose several posts, then we can see them as related posts.

![Choose the Post field to save multiple postss](https://imgur.elightup.com/q0YPZ6V.png)

You should configure this field a little bit.

Specifically, in the **Post types** setting, you should choose the post type that the related posts are. In other words, only the posts from the post type set in this setting can be chosen.

![Choose the post type that the related posts are](https://imgur.elightup.com/iYt03A4.png)

Next, in the **Field type** setting, you can choose a kind of selecting field, then the created field will inherit its style of displaying and inputting data. To know more about the style of each option in this setting, you can refer to [the documentation](https://docs.metabox.io/fields/post/#settings) of each providing field type.

![In the Field type setting, you can choose a kind of selecting field](https://imgur.elightup.com/IZyvaRW.png)

Additionally, you should turn on the **Multiple** option if you want to allow users to add more than one related post.

![Turn on the Multiple option if you want to allow users to add more than one related post.](https://imgur.elightup.com/XHMrxFk.png)

After configuring all options for the field, move to the **Settings** tab, set **Location** as **Post type**, then choose a post type of the post where you want to show related posts.

![Set location as Post type, then choose a post type of the post where you want to show related posts](https://imgur.elightup.com/gHzA4i4.png)

Go to the post editor, you will see the created field.

![The created field on the post editor](https://imgur.elightup.com/QIzQrL4.png)

Now, you can click on the field and see the list of posts from the post type you set in the settings of the fields.

![When clicking on the field, you can see the list of posts from the post type](https://imgur.elightup.com/AT5fy49.png)

Just choose some of them from the list.

## Displaying related posts

Before counting the number of posts, we need to display them first. Head over to **Views** in **Meta Box** and create a new view for its template.

![Head over to Views in Meta Box and create a new view for its template.](https://imgur.elightup.com/Bn7Dfnj.png)

With **MB Views**, you can add some lines of code to the **Template** tab or insert fields into it by clicking the **Insert Fields** button, and choose any fields on the right sidebar to get data from them.

![With MB Views, add code in the Template tab or insert fields from the sidebar.](https://imgur.elightup.com/bEJzhYo.png)

In this case, insert the created field, and its suitable output.

![Insert the created field, and its suitable output.](https://imgur.elightup.com/73YssjW.png)

Then, it will automatically generate code to the template.

![It will automatically generate code to the template](https://imgur.elightup.com/dZU05me.png)

As we have many posts input in the fields, we have a loop, as shown in the image above. It will list all the related posts that are added into the custom fields.

After that, go down to the **Settings** section of the view, set the **Type** as **Singular**, and choose the location as the singular of your post type.

![In the settings, set Type to Singular and select the singular location of your post type.](https://imgur.elightup.com/AdmRKNd.png)

Then, you’ll see the related posts section in every post.

![The related posts section in every post.](https://imgur.elightup.com/tDqagpO.png)

Next, we will add some numbers to this section to let audiences know the total number of related posts.

## Counting the related posts in the list with bullet points

Back to the template, I add a variable, `{{ loop.index }}`, to automatically number each related post in the list. This helps track and display the order of each post.

![Add a variable to automatically number each related post in the list.](https://imgur.elightup.com/PfMnRDW.png)

Moving on to the frontend, you’ll see the related posts listed with numbered bullet points. This makes it easy for readers to see how much associated content they can explore.

![The related posts listed with numbered bullet points](https://imgur.elightup.com/wwRx49X.png)

Moreover, if you update the custom field, the list will automatically refresh to reflect those changes, ensuring your content stays up-to-date and engaging.

![If you update the custom field, the list will automatically refresh to reflect those changes](https://imgur.elightup.com/bYJv1E7.gif)

## Counting posts in total

Still in the created template, remove the `{{ loop.index }}` variable first.

![Remove the `{{ loop.index }}` variable first](https://imgur.elightup.com/PfMnRDW.png)

And, add a few lines of code.

```
{% set total_related_post =  mb.count(post.related_posts) %}
<b>Total Related Post:</b> {{ total_related_post }}
```

![Add a few lines of code](https://imgur.elightup.com/oqmUC3y.png)

**Explanation**:

* The `total_related_post` variable: represents the number of posts selected in the **Post** field with ID as `related_posts`. Then, I use the count function, `mb.count`, to calculate the total number of posts from that field.

* `<b>Total Related Post:</b> {{ total_related_post }}`: display the number of posts that have been counted above.

Now, you'll see the total number of related posts displayed, giving you a clear insight into the content available.

![The total number of related posts displayed](https://imgur.elightup.com/9hK72Et.png)

If you want to learn more about displaying related posts in a dynamic way, check out our tutorial on [displaying related posts based on a shared relationship](https://docs.metabox.io/tutorials/create-relationships-mb-views/) or explore how to [add related posts with Meta Box](https://docs.metabox.io/tutorials/add-related-posts/).

# Migrating from CPT UI to Meta Box

You can move data from the **CPT UI** to the **Meta Box** with the help of the **MB Custom Post Types** **&amp; Taxonomies** extensions. It will save a lot of time and shorten the process dramatically.

## 1. Backing up the data

:::warning

Remember to back up your data before migrating to avoid unexpected events.

:::

Here is my example. I have this **Companies** post type created by **CPT UI** with all the posts inside.

![Post typed created by CPU UI](https://imgur.elightup.com/vyTY90m.png)

As you can see in the **Plugin** menu, the **CPT UI** has already been activated.

![Activate the CPU UI](https://imgur.elightup.com/U4ZKxGf.png)

I will now proceed to transfer the data.

## 2. Installing plugins

I'll install and activate **MB Custom Post Types** &amp; **Custom Taxonomies**.

After that, the new **Post Types** menu appears on the **Dashboard** along with the **CPT UI Migration sub-menu**.

![New Post Type menu appears on the Dashboard](https://imgur.elightup.com/sxEKSlv.png)

## 3. Migrating the data

Go to the **Post Types** menu &gt; **CPT UI Migration** &gt; Click the **Migrate** button.

![Click the Migrate button in the Post Types menu](https://imgur.elightup.com/FRk0drJ.png)

When the process finishes, it will show a "Done" message.

**Note**: The **CPT UI** menu will automatically disappear when the migration process finishes. This is because Meta Box automatically deactivated it to avoid conflict and errors caused by registering the same post type.

## 4. Validating

The Companies post type and all the terms in the Company Types taxonomy are still there. They are the new ones created by Meta Box. It also means that all the data was migrated successfully.

![The Companies post type has successfully migrated](https://imgur.elightup.com/x7i0sB9.png)

And the **CPT UI** has already been deactivated.

![The CPT UI has already been deactivated](https://imgur.elightup.com/U4ZKxGf.png)

The migration has been done.

# Creating a recipe - Meta Box + Brizy

import LiteYouTubeEmbed from 'react-lite-youtube-embed';
import 'react-lite-youtube-embed/dist/LiteYouTubeEmbed.css';

In the [previous tutorials](https://docs.metabox.io/tutorials/create-recipes-meta-box-zion/) of this series, we’ve found out how to create a recipe page using some of the page builders. In this practice, we’ll use another one - Brizy to do it with the help of Meta Box.

This is the page that I created as an example:

![The example of created recipe](https://imgur.elightup.com/f1XeFRO.png)

## Video version

<LiteYouTubeEmbed id='wCKxZEQ4uRE' />

## Preparation

Each recipe is saved in a post of a custom post type and displayed in a single page. Besides some default fields that may help to save some basic information. You may want to have more space for the extra ones. So, we need custom fields for them.

So, we need these tools in this practice:
* [Meta Box Lite](https://metabox.io/lite/): to create a custom post type named Recipe and have an intuitive UI to create custom fields to save the recipe information;
* [Brizy](https://www.brizy.io/) (Brizy Pro version): to build the pager.

## 1. Creating a custom post type

Click on the Create a post type in the dashboard or go to **Meta Box** > **Post Types** > **Add New** to create a new post type.

![Create a custom post type](https://imgur.elightup.com/68NYL42.png)

After publishing, we’ll have a menu named Recipe in the Admin Dashboard.

![Created post type appears in the Admin Dashboard](https://imgur.elightup.com/TJDJRAH.png)

Let’s create custom fields in the next step.

## 2. Creating custom fields

Go to **Meta Box** > **Custom Fields** to create fields. These are the fields that I created:

![Created fields](https://imgur.elightup.com/NExew0x.png)

Pay attention to a special field for the video. Since **Brizy** supports displaying the video preview from the link saved in the type of text. So, instead of using the **URL** field or the **oEmbed** to save the video link as other tutorials, I’ll use the **Text** field.

![Use Text field to save the link of video](https://imgur.elightup.com/MxWOuhb.png)

After creating all the fields, move to the **Settings** tab, choose **Location** as **Post Type** and then select **Recipe** to apply these fields to it.

![Set location for the created fields](https://imgur.elightup.com/QrBZDjK.png)

Then, you can easily see all the created custom fields in the post editor. Just fill in the recipe’s details.

![Created fields display in the post editor](https://imgur.elightup.com/auwABHx.png)

## 3. Creating the page

Go to **Brizy** > **Templates** to create a new template.

![Create the Page](https://imgur.elightup.com/gFHul7c.png)

Remember to set the condition to set this template for the single post/page of the Recipe.

![Set the condition for the page](https://imgur.elightup.com/WqXrE6r.png)

First, go to the **Global Blocks** to set the header for the page.

![Set the header for the page](https://imgur.elightup.com/mRv2sII.png)

To display the name of the recipe, add a **Title** element. It’ll automatically get the data from the post title.

![Add a title element](https://imgur.elightup.com/Gcw0QQo.png)

For the first section, I divided information into two columns. One column is for the image of the recipe and the other is for the timing information. So, add a **Column** element.

![Add a Column element](https://imgur.elightup.com/7POiMkt.png)

Drag the **Featured Image** element to the first column. The image will be displayed immediately.

![Drag the Featured Image element to the first column](https://imgur.elightup.com/ZFhVSYX.png)

Next, I’ll add **Row** inside the second column. Each row will be used for each type of timing information.

![Add Row inside the second column](https://imgur.elightup.com/sKxGm8I.png)

Inside the row, add a **Text** element, then choose **Typography** to customize the text. You will see a small icon button to choose more options from a dropdown list for the text.

The first one is to add a custom text that you can type any text as you want into the element. All the rest ones on the list are the names of custom fields. Since we save the data about the time in custom fields, choose the corresponding ones.

![Choose Typography element](https://imgur.elightup.com/A9hUdcZ.gif)

To compare the type of time, add another **Text** element. Set it as **Custom Text** to change the text into the type of time.

![Add another Text element](https://imgur.elightup.com/Z5S2yQW.gif)

For other information about the time, do likewise.

![Do likewise with other information](https://imgur.elightup.com/i0b7XC8.png)

Now, let’s get the **Ingredient** section. Add a **Text** element and set it as a heading. Then, type the name of the section.

![Add a text element and set it as a heading](https://imgur.elightup.com/3Pk7CNl.png)

To display the information about the ingredients that is stored in custom fields, add another **Text** element below the heading and also connect it to a custom field. The content will be displayed immediately.

![Add another Text element](https://imgur.elightup.com/uD14rHX.gif)

For other sections, just do the same.

In the **Video** section, instead of adding **Text**, add a **Video** element. A default video will be displayed.

![Add a Video element for the Video section](https://imgur.elightup.com/bVgDpg5.png)

To display the video about the recipe, click to the preview button. Beside the pre-set link, there is also the icon to connect with custom fields.

![Click the preview button](https://imgur.elightup.com/N1XCATf.png)

We’ve done getting all the information about the recipe. Add a new block and then go to the Global Blocks section once again to add the footer for the page.

This is how it displays on the frontend.

![All the information has been obtained](https://imgur.elightup.com/VdhHvbY.png)

If you want to style the page, you can go back to the template editor of Brizy and change the column width as well as the settings of each element to have the style you want. Just customize one by one, then you will see the new look of the page.

![Change the column width](https://imgur.elightup.com/c0A39P2.png)

Here is the result that I want.

![The final result](https://imgur.elightup.com/f1XeFRO.png)

# Creating add-to-calendar buttons

Creating an **"Add to Calendar" button for events, sales promotions, or coming soon pages** with countdown timers can help users quickly add the event to their calendars via the `.ics` file. Thanks to that, readers can remember or create reminders to attend your event. Let’s find out how to make it in this article!

Here is an example which we’ll do for this practice:

![Example of add-to-calendar buttons](https://imgur.elightup.com/mO38pFO.png)

## Preparation

Here are the tools we’ll use in this practice:

* [Meta Box](https://metabox.io/)
* [MB Custom Post Type & Taxonomies](https://wordpress.org/plugins/mb-custom-post-type/): to create custom post types for events;
* [MB Builder](https://metabox.io/plugins/meta-box-builder/): It provides UI to create custom fields;

## 1. Creating a new post type

Go to **Meta Box > Post Types > New Post Type** to create a post type for the events.

![Create a new post type](https://imgur.elightup.com/8iPsfQD.png)

After publishing the post type, you’ll see a new menu.

![The newly created post type appears in the menu dashboard](https://imgur.elightup.com/X6FQ62u.png)

## 2. Creating custom fields

We'll create some fields to save time and other event information.

Go to **Meta Box > Custom Fields > Add New**. Here are the custom fields that I created for example:

![Create custom fields](https://imgur.elightup.com/yq1dTER.png)

After finishing creating the fields, move to the **Settings** tab. In the **Location** section, select **Post Types** as **Events** to apply these fields to the post type.

![set Location for the custom fields as post type](https://imgur.elightup.com/nO6uBiw.png)

Back to the post editor, you will see all the created custom fields. Let’s fill in the information into them.

![Newly created custom fields in the post editor](https://imgur.elightup.com/UUyhiQq.png)

## 3. Creating the add-to-calendar button

First, I create a file named `single-event.php` in the theme folder (I’m using the [Justread](https://gretathemes.com/wordpress-themes/justread/) theme) to edit the template of the singular **Event** page.

After that, include the **Add to Calendar** button on this page by adding the following code to the `single-event.php` file:

```php
<?php
$start_date = rwmb_get_value( start_date, array( 'format' => 'Y-m-d g:iA' ) );
$start_date = wp_date( 'Ymd\THis', $start_date );
$end_date   = rwmb_get_value( end_date, array( 'format' => 'Y-m-d g:iA' ) );
$end_date   = wp_date( 'Ymd\THis', $end_date );
?>

<form method="post" action="?ics=true">
        <input type="hidden" name="start_date" value="<?php echo $start_date; ?>">
        <input type="hidden" name="end_date" value="<?php echo $end_date; ?>">
        <input type="hidden" name="location" value="<?php echo rwmb_meta( 'event_location' ); ?>">
        <input type="hidden" name="summary" value="<?php the_title(); ?>">
        <input type="submit" value="Add to Calendar">
</form>
```

**Note**:

* `start_date`, `end_date`, and `event_location` are the IDs of the three fields that I’ve created in step 1.
* `name="start_date"`, `name="end_date"`, `name="location"`, `name="summary"` are the names of the data variables that will be used in the above code.
* The above code is a form with the POST method to pass the `start_date`, `end_date`, `location`, and `summary data`.

Next, we use the `template_redirect` hook to download the ics file (when users click the Add to Calendar button) with the start_date, end_date, location, and summary data received above.

This hook runs before we determine which template is loaded. In other words, it reloads the page to show a new window for users to download the **ics** file.

All you need to do now is add the following code to the `functions.php` file:

```php
function justread_ics_download() {
        if ( is_singular( ‘event’ ) && isset( $_GET['ics'] ) ) {
                include get_stylesheet_directory() . '/inc/ICS.php';
                header('Content-Type: text/calendar; charset=utf-8');
                header('Content-Disposition: attachment; filename=invite.ics');

                $ics = new ICS(array(
                        'location' => $_POST['location'],
                        'dtstart' => $_POST[start_date],
                        'dtend' => $_POST[end_date],
                        'summary' => $_POST['summary'],
                ));

                echo $ics->to_string();
                exit();
        }
}
add_action( 'template_redirect', 'justread_ics_download' );
```

**Explanation**:

The ICS class is used to export the **ics** file when users click the **Add to Calendar** button and download this file. This class is declared in this `ICS.php` [file](https://github.com/wpmetabox/tutorials/blob/master/ics-calendar/ICS.php).

When going to the event's single page, you will see the result:

![The result](https://imgur.elightup.com/vII8Oua.gif)

When clicking the **Add to Calendar** button, the users will immediately download an **ics** file and then open it with an application on their computer.

![clicking the Add to Calendar button](https://imgur.elightup.com/xYEYGiw.png)

![open it with an application on their computer](https://imgur.elightup.com/mO38pFO.png)

# Creating an auto-updated cheat sheet

import LiteYouTubeEmbed from 'react-lite-youtube-embed';
import 'react-lite-youtube-embed/dist/LiteYouTubeEmbed.css';

Today, we’ll create a submission form to input data, then the data will be automatically inserted into a table in a post.

![Example of a submission form](https://imgur.elightup.com/l46BdPT.png)

## Video version

<LiteYouTubeEmbed id='_XnNwhKFzlY' />

## Preparation

In this tutorial, specifically, we’ll add a cheat sheet about the deals for Black Friday. Each deal will have information like product name, product type, offer start date, end date, and promotion code.

You need to install the following tools:

* [Meta Box](https://metabox.io): to have a framework to create custom post type and custom fields;
* [MB Custom Post Type & Custom Taxonomies](https://metabox.io/plugins/custom-post-type/): to create custom post types for the Black Friday deals;
* [MB Builder](https://metabox.io/plugins/meta-box-builder/): to provide a UI on the back end to create custom fields to save the deals’ information;
* [MB Frontend Submission](https://metabox.io/plugins/mb-frontend-submission/): display custom fields on the frontend to help users submit deals easier;
* [MB Views](https://metabox.io/plugins/mb-views/): display values of the custom fields (deals’ information) on the post.

## 1. Creating a new custom post type

We’ll create a post type for the deals. Each of the deals will be a post of this post type.

Go to **Meta Box > Post Types > Add New**.

![Create a new custom post type](https://imgur.elightup.com/zg4UN4f.png)

## 2. Creating fields for the submission form

Users will have a form to submit a deal, so we’ll create custom fields for it. Each field will be used to import a type of deal’s information.

<table>
<tbody>
<tr>
<td> Name of the Fields </td>
<td> IDs of the Fields </td>
<td> Field types </td>
</tr>
<tr>
<td>Your Product Name</td>
<td>post_title</td>
<td>text</td>
</tr>
<tr>
<td>Your Product Type</td>
<td>product_type</td>
<td>select_advanced</td>
</tr>
<tr>
<td>Your Offer</td>
<td>offer</td>
<td>text</td>
</tr>
<tr>
<td>Start Date</td>
<td>start_date</td>
<td>date</td>
</tr>
<tr>
<td>End Date</td>
<td>end_date</td>
<td>date</td>
</tr>
<tr>
<td>Promotion Code</td>
<td>promotion_code</td>
<td>text</td>
</tr>
</tbody>
</table>


Here I will use the `post_title` field to save product names as the title of the post.

Now, go to **Meta Box > Custom Fields > Add New** to create fields. Here are the fields I have created.

![Created fields](https://imgur.elightup.com/mQbZNFf.png)

After creating the necessary fields, go to the **Settings** tab > **Location** >  choose **Post types** as **Deal** to apply these fields to it.

![Set location for the created fields](https://imgur.elightup.com/Eb4XcL6.png)

In the post editor, you’ll see all the created custom fields.

![The created fields in the post editor](https://imgur.elightup.com/FJEP7B6.png)

If you are in charge of importing data, you can import data directly from the backend. Otherwise, if you want other people to import data into your cheat sheet, you need to bring these fields to the frontend.

## 3. Displaying the submission form on the frontend

Now, we need **MB Frontend Submission** to display the custom fields of this form to the frontend. It’ll automatically generate a shortcode for the field group like this:

![Auto generated shortcode](https://imgur.elightup.com/vofBXWh.png)

You just need to put the shortcode anywhere you want to display the submission form.

![Put the shortcode anywhere to display submission form](https://imgur.elightup.com/Kb2OKhp.png)

However, here I want to add some more things to my form, so I add some attributes to my shortcode like this:

```
[mb_frontend_form id="black-friday-deal" ajax="true" post_status="draft" recaptcha_key="your_key" recaptcha_secret="your_key"]
```

In there:

* `black-friday-deal`: is the ID of the field group I have created in step 2;
* `ajax="true"`: enable ajax loading;
* `recaptcha_key` and `recaptcha_secret`: Google reCaptcha site key and secret key. I use it to avoid being spammed;
* `your_key`: Fill in the corresponding keys of your Google reCaptcha here;
* `post_status="draft"`: I want the data to be censored before posting so I set up this post in the ‘draft’ status right after users have submitted.

And the custom fields of my submission form will show up on the frontend like this:

![The created fields in the frontend](https://imgur.elightup.com/EDsxdKx.png)

If you want to add more things to the submission form, you can add other attributes to the shortcode. You can see a list of addable attributes and detailed instructions [here](https://docs.metabox.io/extensions/mb-frontend-submission/#shortcode-attributes).

## 4. Styling the submission form

Go to **Customizer > Additional CSS** and add some CSS:

```css
.rwmb-form {
    background: #e2e8f0;
    padding: 24px;
    border-radius: 4px;
    margin: 0 auto 30px !important;
}
.rwmb-form .rwmb-meta-box .rwmb-field {
    padding: 0 5px;
}
.rwmb-form .rwmb-field:not(:last-of-type) {
    margin: 0 0 12px;
}
.rwmb-form .rwmb-label,
.rwmb-form .rwmb-field .rwmb-input,
.rwmb-form .rwmb-field .select2-container {
    float: none;
    margin-bottom: 5px;
}
.rwmb-form button, .rwmb-form input {
    width: 100%;
}
.rwmb-form .rwmb-input input,
.rwmb-form .rwmb-input select {
    max-width: 100%;
}
.rwmb-form .select2-container .select2-selection--single,
.rwmb-form .select2-container--default .select2-selection--single .select2-selection__arrow {
    height: 40px;
}
.rwmb-form .select2-container--default .select2-selection--single .select2-selection__rendered {
    line-height: 40px;
}
```

My submission form will turn to this appearance:

![The created submission form](https://imgur.elightup.com/yGTzWlD.png)

## 5. Displaying data into a table on frontend

Go to **Meta Box > Views > Add New**, and add these codes:

```php
{% set args = {post_type: 'deal', posts_per_page: -1, orderby: 'date', order: 'ASC' } %}
{% set posts = mb.get_posts( args ) %}

<table>
    <thead>
        <tr>
            <td>No.</td>
            <td>Name</td>
            <td>Product Type</td>
            <td>Offer</td>
            <td>Start Date</td>
            <td>End Date</td>
            <td>Code</td>
        </tr>
    </thead>
    <tbody>
        {% for p in posts %}
            <tr>
                <td>{{ loop.index }}</td>
                <td>{{ p.post_title }}</td>
                <td>{{ mb.rwmb_meta( 'product_type', '', p.ID ) }}</td>
                <td>{{ mb.rwmb_meta( 'offer', '', p.ID ) }}</td>
                <td>{{ mb.rwmb_meta( 'start_date', '', p.ID ) | date( 'Y-m-d' ) }}</td>
                <td>{{ mb.rwmb_meta( 'end_date', '', p.ID ) | date( 'Y-m-d' ) }}</td>
                <td>{{ mb.rwmb_meta( 'promotion_code', '', p.ID ) }}</td>
            </tr>
        {% endfor %}
    </tbody>
</table>
```
In these lines of code, I use a custom query which is `get_posts`. The attributes such as `post_title`, `your_product_type`, `your_offer`, … are IDs of custom fields.

After that, go to the **Settings** section of this view, and choose **Shortcode** as the **Type**, so that we can use a shortcode to add this table to the post.

![Settings of this view](https://imgur.elightup.com/VTxQSES.png)

I place the shortcode into the content of the post like this:

![Place the shortcode into the content of the post](https://imgur.elightup.com/2teYAb5.png)

This is all of the post content on the frontend with a deal list:

![The result in the front end](https://imgur.elightup.com/IghgQXM.png)

When someone imports data to the submission form, the data will be saved in a post having **Deal** post type and ‘draft’ status. If I review and approve this content, it will turn into ‘Published’. At this time, information about the deal will show up right in the table in my post.

# Creating buttons with dynamic links

Dynamic links are created to show various links in different posts and are displayed as buttons. It can be made in a variety of ways. One method is to use custom fields.

For instance, I have a website about theme reviews here. Each post about a theme has buttons for its own demo and download pages. They are dynamic links.

![Create buttons with dynamic links](https://imgur.elightup.com/4eZDsXP.png)

import LiteYouTubeEmbed from 'react-lite-youtube-embed';
import 'react-lite-youtube-embed/dist/LiteYouTubeEmbed.css';

## Video version

<LiteYouTubeEmbed id='8sD-Lyy6-5c' />

## Preparation

In addition to using Meta Box, make sure you already have these extensions:

* <a href="https://metabox.io/plugins/meta-box-builder/">MB Builder</a>: It provides UI to create custom fields;
* <a href="https://metabox.io/plugins/mb-views/">MB Views</a>: Build front-end templates for WordPress without touching theme files. Support Twig and all field types.

If you are using a page builder such as <a href="https://metabox.io/plugins/mb-elementor-integrator/">Elementor</a> or <a href="https://metabox.io/plugins/mb-elementor-integrator/">Beaver Builder</a>, please activate the corresponding integration from Meta Box.

All these extensions are available in the Meta Box AIO, which includes the Developer and Lifetime licenses.

## Creating custom fields for URLs

First, we need custom fields for saving URLs for each post. If you’ve had <a href="https://metabox.io/plugins/meta-box-builder/">MB Builder</a> in your pocket, you will have a UI on the backend to create custom fields visually. Otherwise, please go to the <a href="https://metabox.io/online-generator/">Online Generator</a>, create fields, generate code, and copy it to get the fields.

They are quite simple with a type of URL and there are no special settings.

![Choose URL type of custom field" height](https://imgur.elightup.com/4YxJdnE.png)

After having these fields, please go to the posts and input some links. That way, you will have data to check if the buttons work.

## Creating buttons without page builder

For someone who is not using any page builder on their site, this part may help. MB Views from Meta Box will help to create a button easily with a shortcode.

Just go to **Views** and create a new view with this code:

```php

<a class="wp-block-button__link" href="{{ post.view_demo }}">
    View demo
</a>
<a class="wp-block-button__link" href="{{ post.download }}">
    Download
</a>

```


In there, `view_demo` and `download` are custom fields with IDs. By the way, because I’m using the <a href="https://gretathemes.com/wordpress-themes/estar/">eStar</a> theme, I must use the `wp-block-button__link` class to create buttons.

The view will generate a shortcode as you see in the below image. Just copy and embed it somewhere.

![The view will generate a shortcode](https://imgur.elightup.com/wqfanwd.png)

For instance, I pasted it to a sidebar on the single blog post page and got these default buttons.

![Example of the default buttons](https://imgur.elightup.com/KbrVNak.png)

Note that this look of the button is from the theme default.

## Creating buttons with dynamic links using Oxygen

I’ve already pre-made a template using <a href="https://oxygenbuilder.com/">Oxygen</a>. It is applied to blog posts.

I will set a container to contain two buttons right under the featured image of the post.

![Set a container to contain two buttons right under the featured image](https://imgur.elightup.com/Vk9dVOF.png)

Now, add a button. At the end of the URL section, there is a button linked to dynamic data. Click it, then choose **Meta** / **Custom** **Field** in the **Post** section. Next, scroll your mouse until you find the ID of the wanted field to connect to the button.

![Set the wanted buttons](https://imgur.elightup.com/0MnXzkH.png)

The remaining thing to do is style the button as you want.

![Style the buttons as you want](https://imgur.elightup.com/mpf6wGt.png)

I also created another one with a new style and linked it to another field. And, here they are in a post, with links.

![Created another one with a new style and link it to another field](https://imgur.elightup.com/VGaSsEY.png)

## Creating buttons with dynamic links using Beaver Builder

I also created a similar template with <a href="https://www.wpbeaverbuilder.com/">Beaver Builder</a>.

First, I add columns to set the layout, and then I add a button. There’s a Link section for inserting a static link to the button’s settings. Click the plus icon to receive Meta Box URLs.

![Create buttons with dynamic links using Beaver Builder](https://imgur.elightup.com/STX2ztz.png)

You will see the **Meta Box Field** option in the drop-down list. Choose it by clicking **Connect**.

![Connect it with Meta Box field option](https://imgur.elightup.com/Y8DWp57.png)

Then, choose the name of the field you want.

The last thing, style your button. That’s all.

To have another button, you can duplicate this one to save time, then reconnect it to another field as well as restyle it.

![To restyle the template, reconnect it to another field](https://imgur.elightup.com/HBwcQAD.png)

Now, go to a post. You will see the buttons with links.

![Buttons with links](https://imgur.elightup.com/yjgAJo7.png)

## Creating buttons with dynamic links using Bricks

The last page builder is <a href="https://bricksbuilder.io/">Bricks</a>. In the same way, add a container with 4 columns first, then buttons.

Different from other page builders, Bricks allows you to choose the type of link from a dropdown list. To get data from custom fields in Meta Box, please choose **Dynamic Data**.

![Meta Box is suggested with the name of custom fields](https://imgur.elightup.com/8AuikQQ.png)

After that, you will see Meta Box is suggested with the name of custom fields following. Choose one if you want.

![Meta Box is suggested with the name of custom fields](https://imgur.elightup.com/WtMoWZg.png)

Bricks will render a corresponding link to this preview post so that you can check if the data is correct.

![Bricks will render a corresponding link to this preview post so that you can check if the data is correct](https://imgur.elightup.com/0OxPFAB.png)

After that, all the work is styling.

![Style as you want" height](https://imgur.elightup.com/7c2FqO2.png)

Then, I’ve got an ace button in the preview. Let’s duplicate it to have a new one. I’ll change the data source and restyle this new button.

![Duplicate it to have a new one](https://imgur.elightup.com/xA5IPOO.png)

Finally, here they are on a post.

![The created post after all steps](https://imgur.elightup.com/1m0k62M.png)

# Creating charts in posts - Using MB Views

import LiteYouTubeEmbed from 'react-lite-youtube-embed'; import 'react-lite-youtube-embed/dist/LiteYouTubeEmbed.css';

Using charts to present information is a vivid and easy-to-understand manner for your audience. Whether you want to display statistics, growth trends, or comparisons among many items, **charts can make your content stand out and attract the attention** of your visitors.

Then, it’s quite easy if you enter data into custom fields and use **MB Views** from Meta Box to bring it to a chart. Let’s see how in this article.

I have a post along with a bar chart as an example here:

![An example of a chart in post](https://imgur.elightup.com/InoMsca.png)

## Video version

<LiteYouTubeEmbed id='0eZNQ5qUmWI'/>

## Preparation

Let me start by outlining the general concept to provide you with an overview.

First, we’ll use a custom field to regulate the type of chart, such as line, bar, or pie. All the data including items, statistics, and colors will be stored in custom fields as well.

![The type of chart and other data will be stored in custom fields](https://imgur.elightup.com/Whm6W0G.png)

Using custom fields helps your content be dynamic. So, your chart will not be affected any time you want to update the data.

We will apply all the fields to posts, so that you can add charts to every post or just some of them. Thanks to the field for the type chart, each post will have a chart with its own style.

Then, we use the MB Views with a bit of JavaScript to display the chart on post.

![Use the MB Views with a bit of JavaScript to display the chart on post](https://imgur.elightup.com/JIzI5K0.png)

So, these are some tools we need to have the charts:

* [Meta Box plugin](https://wordpress.org/plugins/meta-box/): to have a framework to create custom fields and set up a template for displaying chart information. You can download it directly from [wordpress.org](https://wordpress.org/plugins/meta-box/);
* [MB Views](https://metabox.io/plugins/mb-views/): to create a template for displaying the chart;
* [MB Builder](https://metabox.io/plugins/meta-box-builder/): to have a UI on the back end to create custom fields to save the related information of the chart visually;
* [MB Conditional Logic](https://metabox.io/plugins/meta-box-conditional-logic/): to set the rule for displaying fields for each type of chart;
* [MB Group](https://metabox.io/plugins/meta-box-group/): to group the value of the X-axis and Y-axis in an item;
* [MB Settings Page](https://metabox.io/plugins/mb-settings-page/): to create a settings page including chart data in the case that you want to put the chart on a specific post or page.

If you want to display the chart on posts of a custom post type, you should use [MB Custom Post Type](https://metabox.io/plugins/custom-post-type/) as well to create a new custom post type.

You can install them separately or use **Meta Box AIO** to get them all.

Now, let’s dive into detail step by step.

## 1. Creating custom fields for chart information

For demonstration purposes, I will add the chart to blog posts. So, I create custom fields without further steps. In the case that you want to show the chart on posts in a custom post type, you need to create the custom post type first, and then create custom fields for it.

These are some fields that I created as an example.

![Some fields I created for chart](https://imgur.elightup.com/BuBwsRV.png)

Go to **Meta Box** > **Custom Fields**, and create a new field group.

![Go to Meta Box > Custom Fields, and create a new field group](https://imgur.elightup.com/AEepkZS.png)

Then, add custom fields following the below structure and conditions:

|           Name           |             ID             |    Field Type     |                   Settings                    |                                             Condition                                             |
|--------------------------|----------------------------|-------------------|-----------------------------------------------|---------------------------------------------------------------------------------------------------|
|           Type           |           `type`           |       Select      | Options: 1. `line` 2. `bar` 3. `pie`          |                                                                                                   |
|       Chart Title        |       `chart_title`        |       Text        |                                               |                      display only when the `type` field = `line`                                  |
|       Line Color         |       `line_color`         |   Color Picker    |                                               |                                                                                                   |
|       Categories         |        `categories`        |       Group       |                Cloneable                      |                                                                                                   |
|          Key (X)            |       `key_x`           |       Text        |           4 grids                             |                                                                                                   |
|          Value (Y)          |        `value_y`        |       Number      |           4 grids                             |                                                                                                   |
|          Color              |         `color`         |    Color Picker   |           4 grids                             |                       display when the `type` field = `bar` or `pie`                              |

I’ll explain the logic and how they work in detail.

Since there are several types of charts, you should have a field where you can select a style for the chart in each post. Therefore, we’ll add a **Select** field, and input the types with their label and value. The values of the options will be used to set the rule for the fields of the color.

![Add a Select field, and input the types with their label and value.](https://imgur.elightup.com/QoWqEN9.png)

Next, the field for the chart title basically is text.

![Add a Text field for the chart title](https://imgur.elightup.com/QVpCt0e.png)

For the chart data, every chart has the same structure of data as the X-axis and Y-axis. But, they have a difference in color options. So I made some conditional logic to specify which fields will be displayed to input data based on the chosen type of the chart.

For the line chart, there is only one line to illustrate the growth trend. So, besides the keys and values of the object, we need to have a field to pick the color for that line. I use a **Color Picker** field for it.

![Use the Color Picker field type for the color of the line](https://imgur.elightup.com/lKC45E3.png)

This field displays only when the type we chose is **Line**. To set this condition, move to the **Advanced** tab of the field, you’ll see the **Conditional logic** section. It’s available when you have the [MB Conditional Logic](https://metabox.io/plugins/meta-box-conditional-logic/) extension activated.

![Move to the Advanced tab of the field, and find out the Conditional logic section to set the condition](https://imgur.elightup.com/28snCYF.png)

Based on the rule I said before, we should set the key of the rule as the ID of the select field.
Then, the value should be the value of the line.

![Set the key of the rule as the ID of the select field, and the value should be the value of the line](https://imgur.elightup.com/JpzwGH3.png)

This means the **Line Color** field displays only when users set the Select field above as the **Line** option. For more details and advanced on setting conditions with MB Conditional Logic, you can refer to [its doc](https://docs.metabox.io/extensions/meta-box-conditional-logic/).

The data will be set in a couple of fields including the X-axis and the Y-axis. As well as, two axes will be in a line since I set the column size for them. This feature is provided by the [MB Columns](https://metabox.io/plugins/meta-box-columns/) extension, which **allows us to set the field’s display in columns**. This is just optional so I didn’t mention it from the beginning.

Thus, add a **Group** field to group them in pairs first.

![Add a Group field for the couple of fields including the X-axis and the Y-axis](https://imgur.elightup.com/TgRCOGT.png)

Inside this group, add two subfields for the key and value, which also means the X and Y axes.

For the key on the X-axis, the data can be years, time periods, a name, or so on. So, you should use a **Text** field.

![The subfield for the X-axis is Text type](https://imgur.elightup.com/8nkDw5N.png)

To have the key as columns, we should change the size of their columns in the **Columns** option. Assume that the whole line width will be set as 12 grids, so choose a number from 1 to 12 to indicate the size of the field.

![Change the size of the field in the Columns option](https://imgur.elightup.com/MZkAeJ5.png)

Data on the Y-axis is simpler. It’s always numerical. So, add a **Number** field for the second subfield. You also can set the column for it similar to the X-axis.

![Add a Number field for the data on the Y-axis](https://imgur.elightup.com/6HIrH9F.png)

By the way, when the chart is set as another type, there will be another field displayed besides the fields for the X and Y axes. It’s to set the color of each item. So, add another subfield as **Color Picker** for it.

![Add another subfield as Color Picker for the color of each item](https://imgur.elightup.com/nzFx2Sr.png)

This field displays only when the chart is in the type as pie or bar, so move to the **Advanced** tab and add a condition as well.

The key also is the select field since the rule is based on it. I’ll use the `!=` operation, which means that ‘is not’ or ‘not equal’. Then, enter the value of the line type.

![Set condition for displaying the Color field](https://imgur.elightup.com/X78bD1e.png)

This condition is that the **Color** field will display whenever the first option is not chosen.

There will be several items, also pairs of statistics on the chart. So, go back to the settings of the group, and set it as cloneable to add more than one pair of data.

![Set group as cloneable to add more than one pai of data](https://imgur.elightup.com/w1T6R0N.png)

After having all the fields with reasonable settings, move to the **Settings** tab. As I said about purpose, I want to display the charts in posts. So, set the **Location** as **Post** to apply those fields to it. In other cases, you can set it in any post type, or page as well.

![Move to the Settings tab, set the Location as Post to apply those fields to it](https://imgur.elightup.com/8uBeLj5.png)

Now, in any post editor, you will see the custom fields displayed.

When you set the chart type as Line, the color field will display. Just input data for it.

![In the post editor, the field displayed exactly follow settings and rule](https://imgur.elightup.com/pPhY057.png)

In another post, when you try another type of chart, you will see that the color field for the line disappears. And the color for each item is displayed instead.

![If the type is bar or pie, the color for each item is displayed instead](https://imgur.elightup.com/o0zrnsQ.png)

So, the conditions work well.

Now, move on to visualize this data in a chart.

## 2. Getting data of the charts

Head over to **Meta Box** > **Views**, and create a new template for displaying the charts.

![Go to Meta Box > Views, and create a new template for displaying the charts](https://imgur.elightup.com/iMc0pj7.png)

With MB Views, you can add code to the **Template** tab, or insert fields into it by clicking this button, and choosing any fields on the right sidebar to get data from them.

![You can add code directly in the Template tab or insert fields from the list on the right sidebar](https://imgur.elightup.com/7ijinlq.png)

First, we should get data from the fields one by one.

![Insert fields one by one](https://imgur.elightup.com/b04IhyG.gif)

Categories is a cloneable group, so it will automatically generate a loop when you click on it to look for the subfield.

![There’s a loop displayed when we insert the cloneable group](https://imgur.elightup.com/n40xSKF.png)

Just insert the subfield inside the group to get all the clone data.

![Insert subfields inside the group to get all the clone data](https://imgur.elightup.com/HGuATl9.png)

The template is now in the simplest version which is just to get data. We will set the format of the chart later.

Move to the settings of this template. Since the chart can be anywhere inside the article, I keep the template as a **Shortcode**, then the writer can put it everywhere in the post.

![Keep the type of the template as shortcode to put it everywhere in the post](https://imgur.elightup.com/DnJS5ut.png)

After publishing this template, you can see the shortcode is generated. Just copy it.

![Copy the shortcode generated](https://imgur.elightup.com/wl50f5r.png)

Now, go to any post, and paste the shortcode to any place.

![Paste the shortcode to any place you want](https://imgur.elightup.com/bOoTHXh.png)

Then, on the frontend, you can see all the data of the chart displayed but just in text.

![All the data of the chart displayed but just in text](https://imgur.elightup.com/bGAfegc.png)

Let’s move on to convert them all to the chart format.

## 3. Converting data into chart format

This is the principal step of this tutorial. So, keep high attention.

Back to the template that we created for the chart to add some code.

We will use JavaScript to have a beautiful format of the chart, so add this code to declare the JavaScript library.

```
<script src="https://cdnjs.cloudflare.com/ajax/libs/Chart.js/2.9.4/Chart.js"></script>
```

![Declare the JavaScript library](https://imgur.elightup.com/xUYHdnf.png)

Next, we will modify the code a little bit.

### 3.1. Creating variables and transfer values

We should create some variables, and transfer the values from custom fields to those variables.

```
{% set type = post.type.value %}
{% set title = mb.explode(' ',post.chart_title) %}
{% set key = [] %}
{% set value = [] %}
{% set color = [] %}
{% set line_color = post.line_color %}
```

![Create some variables, and transfer the values get from custom fields to those variables.](https://imgur.elightup.com/lTjZxaw.gif)

The `key`, `value`, and `color` variables are set as empty arrays since they will include the values from the fields in a cloneable group, which is obtained by the loop generated.

Also, we should modify inside the loop to transfer all the values to the arrays.

```
{% for clone in post.categories %}
    {% set key = key|merge([clone.key_x]) %}
    {% set value = value|merge([clone.value_y]) %}
    {% set color = color|merge([clone.color]) %}
{% endfor %}
```

![Modify inside the loop to transfer all the values to the arrays](https://imgur.elightup.com/cQOHxyB.png)

### 3.2. Assigning values to attributes of HTML tag

Also in the **Template** tab, I add some code as below:

```
<canvas id="myChart"
data-type='{{type}}'
data-title='{{title|json_encode()}}'
data-line-color='{{line_color}}'
data-color='{{color|json_encode()}}'
data-key='{{key|json_encode()}}'
data-value='{{value|json_encode()}}'

style="width:100%;max-width:600px">
</canvas>
```

![Assign values to attributes of canvas element](https://imgur.elightup.com/oXzmZZE.png)

**Specifically**:

* `canvas`: is an HTML tag to draw images, graphs, animations, and other graphics directly. I use it to have a chart on the webpage.
* `myChart`: is the ID I set for the element that will be the chart. It will be used in the next part of JavaScript.
* `data-X=’{{X|json_encode()}}'`: is to convert the values from the above variables to JSON to use in Javascript. Then assign them to the corresponding attributes.
* `style="width:100%;max-width:600px">`: is to set the size of the area for displaying the chart later. You can change the parameters as you want.

### 3.3. Getting charts using JavaScript

Next, go to the **JavaScript** tab, and add code.

```
var getTimeElement = document.getElementById("myChart");
var title = JSON.parse(getTimeElement.getAttribute("data-title")).join(' ');
var type = getTimeElement.getAttribute("data-type");
var line_color = getTimeElement.getAttribute("data-line-color");
var color = JSON.parse(getTimeElement.getAttribute("data-color"));
var xValues = JSON.parse(getTimeElement.getAttribute("data-key"));
var yValues = JSON.parse(getTimeElement.getAttribute("data-value"));

if (type == 'line') {
    var mb_datasets = [{ borderColor: line_color, data: yValues, fill: false }];
    var mb_legend = false;
} else if (type == 'bar') {
    var mb_datasets = [{ backgroundColor: color, data: yValues, fill: false }];
    var mb_legend = false;
} else {
    var mb_datasets = [{ backgroundColor: color, data: yValues, fill: false }];
    var mb_legend = true;
}

new Chart("myChart", {
    type: type,
    data: {
        labels: xValues,
        datasets: mb_datasets,
    },
    options: {
        legend: { display: mb_legend },
        title: {
            display: true,
            text: title,
        }
    }
});
```

![Go to the JavaScript tab, and add some code](https://imgur.elightup.com/33Pz6OZ.png)

Let’s break down one by one part:

#### 3.3.1. Getting data from the element and attributes

```
var getTimeElement = document.getElementById("myChart");
var title = JSON.parse(getTimeElement.getAttribute("data-title")).join(' ');
var type = getTimeElement.getAttribute("data-type");
var line_color = getTimeElement.getAttribute("data-line-color");
var color = JSON.parse(getTimeElement.getAttribute("data-color"));
var xValues = JSON.parse(getTimeElement.getAttribute("data-key"));
var yValues = JSON.parse(getTimeElement.getAttribute("data-value"));
```

We get data from the element through the `myChart` ID which we set before.

The remaining lines of code are to get data from the attributes of the canvas element which we assign values in the previous part.

#### 3.3.2. Configuring the data based on chart types

We have many types of charts, and each one displays different data. So, I set a condition to get data based on the chart types.

```
if (type == 'line') {
    var mb_datasets = [{ borderColor: line_color, data: yValues, fill: false }];
    var mb_legend = false;
} else if (type == 'bar') {
    var mb_datasets = [{ backgroundColor: color, data: yValues, fill: false }];
    var mb_legend = false;
} else {
    var mb_datasets = [{ backgroundColor: color, data: yValues, fill: false }];
    var mb_legend = true;
}
```

If the chart type is set as **Line**, the `mb_datasets` variable will get data from the line color, and the Y-axis data, the legend (`mb_legend`) will be off.

Otherwise, if the chart type is pie or bar, the color of each item will be obtained along with the Y-axis data.

Also, the legend is turned on only when the chart type is pie.

#### 3.3.3. Initializing the charts

Initialize the chart based on the element which has ID as `myChart` as well:

```
new Chart("myChart", {
    type: type,
    data: {
        labels: xValues,
        datasets: mb_datasets,
    },
    options: {
        legend: { display: mb_legend },
        title: {
            display: true,
            text: title,
        }
    }
});
```

There are some attributes to set the chart, just assign the corresponding variables to them.

The labels will be the X-axis values, also from the **Key** fields.

The data set will be from the `mb_datasets` variable that we set in the above condition.

For the legend, we turn it on or off based on the type of chart. So, the legend of the chart can display the legend only when the condition is met.

That’s all for code.

After updating the template, go to a post to see how it works.

The chart displayed beautifully based on the statistics and colors I input in custom fields.

![The chart displayed beautifully based on the statistics and colors I input in custom fields](https://imgur.elightup.com/NjWD99M.png)

In another post, the bar chart and pie chart are also shown beautifully. And, you also can see the legend of the pie chart we set in JavaScript.

![The pie chart also display well along with the legend](https://imgur.elightup.com/CusYQjH.png)

So, we’ve done creating charts for posts.

## Extra: Creating charts with data saved in a settings page

Not only custom fields in posts, you also can **save data for a chart in a settings page**, then display the chart anywhere on your website. There is not much difference with fields in posts.

Create a new settings page as usual, and change the location of the created fields to the settings page.

![Create a new settings page as usual, and change the location of the created fields to the settings page](https://imgur.elightup.com/L5643ar.png)

Then, input some data to the field in the settings page as well to have some real statistics on the chart in the result later.

Now, go to the create template for the chart we created previously.

The code to display the chart will be exactly the same as previously. The difference is only in where we get the data. Instead of getting data from fields in posts, we will get data from fields in the settings page.

Insert fields from the settings page to get data from them.

![Insert fields from the settings page to get data from them](https://imgur.elightup.com/6kaGxaz.gif)

It’s easy to see that the prefix of fields is `site.chart` with the `chart` as the ID of the settings page we created. It’s different from the prefix of fields from posts: `post`.

![The prefix of fields from settings page is site.chart](https://imgur.elightup.com/h430Wp4.png)

So, just change all the prefixes to be the same with the settings page.

![Change all the prefixes to be the same with the settings page](https://imgur.elightup.com/wUq7Xsy.png)

About the location of the template, you can keep it as a shortcode, then insert the shortcode anywhere on your website, or can regulate an exact place directly as in the below image:

![You can regulate an exact place directly](https://imgur.elightup.com/WmiaiLm.png)

Then, on the frontend, the chart will display well.

![The chart displayed well on the frontend](https://imgur.elightup.com/evIHyMw.png)

If you want to change the type or any data of the chart, go back to the settings page and change the content in the custom fields. The chart will turn into a new one as well.

All the code I use in this tutorial is updated on [GitHub](https://github.com/wpmetabox/tutorials/tree/master/create_chart) for your reference.

You also can explore the power of MB Views in [other tutorials](https://docs.metabox.io/tutorials/mb-views/).

# Creating a coming soon page with countdown - Using MB Views

import LiteYouTubeEmbed from 'react-lite-youtube-embed';
import 'react-lite-youtube-embed/dist/LiteYouTubeEmbed.css';

**An effective coming soon page** with a countdown is versatile for launches, offers, or maintenance. It builds anticipation, keeps visitors interested, and should allow easy updates without affecting the design.

In this tutorial, we’ll focus on using a coming soon page to notify visitors during website maintenance using the **MB Views** extension from Meta Box.

![Coming soon page with countdown using MB Views](https://imgur.elightup.com/u6Aho6E.gif)

## Video version

<LiteYouTubeEmbed id='oVdUtmJ3rEE'/>

## Preparation

I’ll show you how to **use custom fields to manage dynamic content** like images, messages, and timers. This way, whenever you need to make updates, you can easily replace the content in the fields, and the page will automatically reflect the changes.

Let’s look for the detailed list of tools we need for this practice.

* [The Meta Box core plugin](https://wordpress.org/plugins/meta-box/): to have a framework to create a settings page and custom fields for the coming soon page content;
* [MB Settings Page](https://metabox.io/plugins/mb-settings-page/): allows you to create a settings page to input all the information that we want to be on the coming soon page;
* [MB Views](https://metabox.io/plugins/mb-views/): helps to create a template for displaying the coming soon page’s content;
* [MB Builder](https://metabox.io/plugins/meta-box-builder/): to have a UI on the back end to create custom fields visually.

Besides, you can make the most of some other extensions to have your own field structure that fits your page’s content. They may be [Meta Box Tab](https://metabox.io/plugins/meta-box-tabs/), [MB Conditional Logic](https://metabox.io/plugins/meta-box-conditional-logic/), or [MB Group](https://metabox.io/plugins/meta-box-group/), and so on. However, they are just optional.

Let’s start now.

## 1. Creating a settings page

The coming soon page can be a normal page or a settings page as well, and all the content will be included in custom fields. So, I choose to use the settings page for this case.

Go to **Meta Box** > **Settings Pages** and create a new one.

![Go to Meta Box > Settings Pages and create a new page](https://imgur.elightup.com/W2VGf6H.png)

The page is still blank now since we haven’t added any fields to it.

![The coming soon page is still blank now since we haven’t added any fields to it.](https://imgur.elightup.com/HzcLLFv.png)

Let’s move to the next step.

## 2. Creating custom fields for the page content

Instead of directly adding specific content to the page, I'll use custom fields to store all the information.

Go to **Custom Fields** in **Meta Box** and create a new field group.

![Go to Meta Box > Custom Fields and create a new field group](https://imgur.elightup.com/eWLHH5R.png)

Simply create each field one by one.

For the countdown, I recommend using the **Datetime Picker** field to store both the date and the exact time of the launch, ensuring precision and creating urgency for upcoming events.

![Choose Datetime Picker for the countdown](https://imgur.elightup.com/OCehTyg.png)

After creating all the fields, move to the **Settings** tab, set the **Location** as **Settings page**, and choose the created settings page to apply the fields to it.

![In the Settings tab, set the location as the created settings page to apply the fields to it](https://imgur.elightup.com/BHp4Igl.png)

Then, on your settings page, you will see custom fields displayed.

![The custom fields are displayed in the settings page](https://imgur.elightup.com/6UFreog.png)

Just input some content to the fields. They will be used to display on the coming soon page later. Note that the **Time** field is to input the exact date and time when the event takes place. And after that, we’ll use JavaScript to display the countdown.

## 3. Getting all content of the coming soon page

Go to **Meta Box** > **Views** to create a new template for the coming soon page.

![Create a new template for the coming soon page](https://imgur.elightup.com/aMs42t0.png)

With **MB Views**, you can add some lines of code to the box, or insert fields by clicking the **Insert Field** button, then choosing fields on the right sidebar to get data from custom fields.

![You can add code to the box or use the Insert Field button to insert fields](https://imgur.elightup.com/3Arwodt.png)

Since our fields are on a settings page, turn to the **Site** section to see them.

![Turn to the Site section to see fields being on a settings page.](https://imgur.elightup.com/5PgQhU9.png)

First, for the image of the coming soon page, insert the corresponding field. You can choose an image size that fits your page style, as well as its output.

![For the image of the coming soon page, insert the corresponding field.](https://imgur.elightup.com/pTq370r.png)

Next, to display the message and description, choose the right fields one by one.

![Choose the right fields to get the message and description](https://imgur.elightup.com/3TEQxhC.png)

For the timer, insert the **Time** field. And you can choose the right format for it.

![For the timer, insert the Time field.](https://imgur.elightup.com/Sg4mivU.png)

Now, go to the **Settings** section to apply this template for the coming soon page.

For the location of this template, you can choose any page to make it come soon. But in the case the whole website is coming soon, I recommend to set this view as **Code** type, also use the conditional tag to let every visitor who is not logged in see the coming soon page.

![Set type of the template to apply it for the coming soon page](https://imgur.elightup.com/8s7svBM.png)

On the frontend, you’ll see the coming soon page information.

![The coming soon page information](https://imgur.elightup.com/7POWWsP.png)

Now, all the data is in simple text, so you may need to style it a bit. And also, create the countdown, which is a very useful feature for this page. So, let’s move on to the next step.

## 4. Styling the page and creating the countdown

### 4.1 Including some elements

In the created template with **MB Views**, include some **div** tags, classes, and HTML IDs  to make styling easier.

![Include some div tags and classes, and HTML IDs](https://imgur.elightup.com/v7G1zTV.png)

**In there**:

I created a new attribute, `date-time`, to store the value of the **Time** field, so JavaScript can easily use it for a countdown without changing the code later.

These IDs, as shown in the image below, will be used later in JavaScript to create the countdown.

![These IDs will be used later in JavaScript to create the countdown.](https://imgur.elightup.com/YEC3oHU.png)

**Particularly**:

* `main-comingsoon`: is simply for the main container that holds all content related to the coming soon page, including the countdown.
* `run_countdown`: wraps all countdown elements.
* `set_day`, `set_hours`, `set_minutes`, and `set_second`: are used to display the corresponding values for days, hours, minutes, and seconds in the countdown.

After including these elements, the page will have the following structure:

![The coming soon page will turn to a new look after adding div tags, classes, HTML IDs.](https://imgur.elightup.com/YQAWocn.png)

### 4.2 Adding style

In the **CSS** tab of the view, and add some code for styling the page.

![Go to the CSS tab of the view, add some code for styling the page.](https://imgur.elightup.com/KTOZMqO.png)

Then, the page displays with a better look already, but the countdown time does not work yet.

![The coming soon page displays with a better look already, but the countdown time does not work.](https://imgur.elightup.com/B6KfdJs.png)

## 5. Running the countdown

Back to the template, move to the **Javascript** tab, then add code as follows.

![Move to the Javascript tab, then add some code](https://imgur.elightup.com/5Xj2KVo.png)

Let’s go through for more details.

```
var get_date = document.getElementById("main-comingsoon").getAttribute("data-time");
```

This line of code gets the value of the `data-time` attribute that I created earlier.

```
var countDownDate = new Date(get_date).getTime();
```

This one returns a numeric value representing the time for the specified date, calculated in milliseconds.

```
var countdownfunction = setInterval(function () {
```

This is to create the `setInterval` function that runs every second to take an action.

```
var now = new Date().getTime();
```

The line above is to get the current date and time, returning it as a numeric value in milliseconds as well.

```
var distance = countDownDate - now;
```

This calculates the remaining time for the countdown by subtracting the current time from the selected time in the **Time** field.

```
var days = Math.floor(distance / (1000 * 60 * 60 * 24));
var hours = Math.floor((distance % (1000 * 60 * 60 * 24)) / (1000 * 60 * 60));
var minutes = Math.floor((distance % (1000 * 60 * 60)) / (1000 * 60));
var seconds = Math.floor((distance % (1000 * 60)) / 1000);
```
These lines help to calculate the remaining time in days, hours, minutes, and seconds using the `Math.floor()` function to round down to the nearest whole number.

After calculating the remaining time, this part below assigns the results to the corresponding HTML IDs. For example, the number of days is set in the element with the `set_day` ID, and similarly for hours, minutes, and seconds.

```
document.getElementById("set_day").innerHTML = days;
document.getElementById("set_hours").innerHTML = hours;
document.getElementById("set_minutes").innerHTML = minutes;
document.getElementById("set_second").innerHTML = seconds;
```

Finally, this code checks if the timer has finished. If it has, it stops the countdown and hides the coming soon page, allowing users to access the main site. And vice versa.

```
if (distance < 0) {
        clearInterval(countdownfunction);
        document.getElementById("main-comingsoon").remove();
}
```

From now on, whenever visitors go to my website, they’ll find this page. Once the countdown ends, they’ll be directed to the live website immediately.

![Coming soon page with countdown using MB Views](https://imgur.elightup.com/u6Aho6E.gif)

Someday, when you want to change the content of this page, including the image, message, or time you want to finish maintenance, simply go back to the settings page, change the data saved in the custom fields.

![Change data from custom fields](https://imgur.elightup.com/MPi1PRU.png)

Then, you will have a new page with fresher content, and the countdown  also is automatically working well with the new timestamp.

![A new coming soon page with fresher content](https://imgur.elightup.com/1TEVzNx.gif)

If you've worked with [custom 404 pages](https://docs.metabox.io/tutorials/create-custom-404-page-mb-views/), the process is quite similar. Both use custom fields created with Meta Box to store and update information effortlessly.

# Creating a contact form using Meta Box

import LiteYouTubeEmbed from 'react-lite-youtube-embed';
import 'react-lite-youtube-embed/dist/LiteYouTubeEmbed.css';

The contact form makes it simple and reliable for anyone to **leave their information** for buying your product, looking for consulting, or just contacting your brand. And you know what, **Meta Box can help you create a contact form in WordPress very easily**.

I made an example with the most popular form as you can see in the Contact page:

![Contact forms page](https://imgur.elightup.com/UzbIwwc.png)

## Video version

<LiteYouTubeEmbed id='tbbdBTcuBBo'/>

## Preparation

To get started, we need the [Meta Box core plugin](https://wordpress.org/plugins/meta-box/) to have the framework for creating a custom post type for the contacts and custom fields for the form. You can download it directly from [wordpress.org](https://wordpress.org/plugins/meta-box/).

For the advanced features from Meta Box, we need some of its extensions:

* [MB Custom Post Type](https://metabox.io/plugins/custom-post-type/): to create a custom post type for the contacts;
* [MB Frontend Submission](https://metabox.io/plugins/mb-frontend-submission/): to create forms that allow users to submit their information from the front end;
* [MB Builder](https://metabox.io/plugins/meta-box-builder/): to have a UI on the back end to create custom fields;
* [MB Admin Columns](https://metabox.io/plugins/mb-admin-columns/) (optional): to display contact’s information in the admin screen.

## 1. Creating a custom post type for contacts

Go to **Meta Box** and create a new post type to save the contacts.

![Create a new post type to save the contacts](https://imgur.elightup.com/gv6YtCj.png)

After that, you will see a new menu for the post type in the admin dashboard.

![A new menu for the post type in the admin dashboard](https://imgur.elightup.com/R3Aghmg.png)

## 2. Creating custom fields for the form

My form will have some fields as below. In your own case, you may have any other kind of field for users to fill in information. Meta Box has [more than 40 field types](https://youtu.be/WWeaM5vIAwM?feature=shared) that can meet your needs.

![These are some fields that I created](https://imgur.elightup.com/ZcAZvm0.png)

Go to **Meta Box** and create them.

![Go to Meta Box and create custom fields](https://imgur.elightup.com/zWrW6ac.png)

You should set some or all the fields as required, and show them as an admin column to have a clear overview of all the contact information in the admin dashboard.

![Set some or all the fields as required, and show them as an admin column](https://imgur.elightup.com/ORtOrFI.png)

If you want to set this field display as the **Title**, you can set this option as **Replace**, and `title`. It helps to display the field in the place of the title in the admin dashboard, not replace the data saved in the title.

![Set this field display as the Title and set this option as Replace](https://imgur.elightup.com/O6uphzB.png)

In the event that you want the name filled in the field to be the title of the post, you should replace the **ID** of this field to _post_title_.

![You should replace the ID of this field to post_title](https://imgur.elightup.com/xG61wbo.png)

After creating all the wanted fields for the form, move to the **Settings tab**, set the **Location** as **Post type**, and select **Contacts** to apply these fields to it.

![Select Contacts to apply these fields](https://imgur.elightup.com/DxLRYHB.png)

Now, when adding a new post on the **Contacts** post type, you’ll see the fields.

![The Fields after adding a new post on the Contacts post type](https://imgur.elightup.com/DQhIT2a.png)

After filling in the information, you will see the information display on the admin dashboard as well.

![The information display on the admin dashboard](https://imgur.elightup.com/R6BbruY.png)

But, this form is just in the backend now. Users must access the admin page to fill in the form. So, we should bring it to the frontend.

## 3. Displaying the form

Create a page for the **Contact page** as usual.

![Create a page for the Contact page](https://imgur.elightup.com/IDgY5sF.png)

I will bring the custom fields as the form into the content section of this page. So, look for a block named **Submission Form**. This block is available only when you activate the [MB Frontend Submission](https://metabox.io/plugins/mb-frontend-submission/) extension from **Meta Box**.

![Look for a block named Submission Form](https://imgur.elightup.com/JBD7k1G.png)

As default, just the **Title** and **Content** fields display.

![The Title and Content fields display](https://imgur.elightup.com/7Ab4l1C.png)

To have the fields on the page, move to the block’s settings, and fill in the **ID** of the field group that we created for the form. All the fields will be displayed immediately.

![ Fill in the ID of the field group to have the fields on the page](https://imgur.elightup.com/7vlAtaA.png)

I recommend you turn on the option ‘**Enable ajax submission**’. It helps to avoid refreshing the entire page during the submitting process.

![Turn on the option ‘Enable ajax submission’](https://imgur.elightup.com/dlybQAu.png)

Next, choose the post type as **Contact** to stipulate that the submission will be saved as a post in this post type.

![Choose the post type as Contact to stipulate that the submission will be saved as a post in this post type](https://imgur.elightup.com/4sxIrY6.png)

You also can remove the **Title** and **Content** field since we do not need them for the contact form.

![Remove the Title and Content field](https://imgur.elightup.com/CBTanKU.png)

These notification texts also can be changed as you want.

![These notification texts also can be changed as you want](https://imgur.elightup.com/ilXQC57.png)

Now, go to the page on the frontend. You'll see the form with the custom fields we created.

![The form with the custom fields we created](https://imgur.elightup.com/Ms1BDlt.png)

Let’s check if the ones I fill into the form are saved or not.

![Fill into the form are saved or not](https://imgur.elightup.com/TAfCWlz.gif)

It works perfectly!

## 4. Sending email notification

Whenever someone submits the form, the website’s admin should notice it. You can set it to automatically send them an email to notify it.

We should add some lines of code in the theme’s file.

![Add some lines of code in the theme’s file](https://imgur.elightup.com/qctHKA1.png)

```
add_action( 'rwmb_frontend_after_process', function( $config, $post_id ) {
    if ( 'contact-form' !== $config['id'] ) {
        return;
    }
    $email = rwmb_meta( 'your_email', '', $post_id );
    $name = rwmb_meta( 'your_name', '', $post_id );
    $subject = rwmb_meta( 'subject', '', $post_id );
    $message = rwmb_meta( 'message', '', $post_id );
    $body = "<p>Name: $name</p>
        <p>Email: $email</p>
        <p>Subject: $subject</p>
        <p>Message: $message</p>";

    $headers = ['Content-Type: text/html; charset=UTF-8', 'From: My Site Name <support@example.com>',"Reply-To: $email"];
    wp_mail( 'admin@domain.com', 'New contact message', $body,$headers );
}, 10, 2 );
```

This means that we'll add the hook ``` rwmb_frontend_after_process ``` to run our custom code to send the email.

![Add the hook rwmb_frontend_after_process to run our custom code to send the email](https://imgur.elightup.com/geDOXKZ.png)

In the email, I want to let the admin know the contact information, so I will get the data submitted to the fields using the ``` rwmb_meta() ``` function.

![Using the rwmb_meta()  function to get the data submitted to the fields ](https://imgur.elightup.com/rF95EiH.png)

These are the **IDs** of the custom fields that we’ve just created for the form.

![The IDs of the custom fields that we’ve just created for the form](https://imgur.elightup.com/Cxeay2R.png)

These following lines of code are to display that information in the email.

![Following lines of code are to display that information in the email](https://imgur.elightup.com/9ykaROD.png)

This line is to set the type of email, how it displays the sender name, and how to reply.

![This line is to set the type of email, how it displays the sender name, and how to reply](https://imgur.elightup.com/3UmAVSi.png)

'_admin@domain.com_' is the receiver's address who will receive all the notifications about every submission. It should be the email of the admin or anyone who manages the contacts.

![The receiver's address who will receive all the notifications about every submission](https://imgur.elightup.com/uZty8Bc.png)

From now on, whenever someone submits the form, they will see a new contact in both the admin dashboard and their inbox.

![A new contact will display in both the admin dashboard and their inbox](https://imgur.elightup.com/P5UonaW.gif)

# Creating a custom 404 page using MB Views

import LiteYouTubeEmbed from 'react-lite-youtube-embed';
import 'react-lite-youtube-embed/dist/LiteYouTubeEmbed.css';

Today, I’ll show you how to **create a better 404 page** with flexible content that you can change anytime without affecting the design using the **MB Views** extension from Meta Box.

Here is my example:

![The custom 404 page was built by MB Views.](https://imgur.elightup.com/VrCu8Vf.png)

## Video version

<LiteYouTubeEmbed id='xfLNr3qEf4o'/>

## Preparation

The page may contain any kind of information that you think is useful for visitors. You can add an image, a message, buttons to redirect them to other relevant pages, or anything else. All of them should be regulated by content in custom fields. By using custom fields, you can simply change the content in those fields, and the page will automatically display the updated version.

Let’s look for the detailed list of tools we need for this practice.

* [The Meta Box plugin](https://wordpress.org/plugins/meta-box/): to have a framework to create a settings page and custom fields for the 404 page content;
* [MB Settings Page](https://metabox.io/plugins/mb-settings-page/): to create a settings page to input the 404 page’s information;
* [MB Builder](https://metabox.io/plugins/meta-box-builder/): to have a UI on the backend to create the custom fields visually;
* [MB Views](https://metabox.io/plugins/mb-views/): to create a template for displaying the 404 page’s content.

Besides, you can make the most of some other extensions to have your own field structure that fits your page’s content. They may be [Meta Box Tab](https://metabox.io/plugins/meta-box-tabs/), [MB Conditional Logic](https://metabox.io/plugins/meta-box-conditional-logic/), and so on. However, they are just optional. In this practice, I’ll use [MB Group](https://metabox.io/plugins/meta-box-group/) to organize custom fields into groups for simpler management and display.

You can install them individually or just use **Meta Box AIO**.

That’s all. Let’s start now.

## 1. Creating a settings page

The 404 page is not a specific page, so we’ll use a settings page to include all the content and other settings for it.

Go to **Meta Box** > **Settings Pages** and create a new page.

![Go to Meta Box > Settings Pages and create a new page](https://imgur.elightup.com/W2VGf6H.png)

For the position of the settings page, you can put it on every place in the menu. I’ll set this page as a submenu, and choose the Parent menu as the Settings.

![Set the page as a submenu, and choose the Parent menu as the Settings](https://imgur.elightup.com/xzKizar.png)

Then, go to the page in the **Settings** menu. It’s still blank since we haven’t added any content to it yet.

![The page is in the Settings menu, it’s still blank](https://imgur.elightup.com/DXQ1iTH.png)

Let’s move to the next step.

## 2. Creating custom fields for the 404 page’s content

Instead of directly adding specific content to the page, I'll use custom fields to store all the information.

Go to **Meta Box** > **Custom Fields** and create a new field group.

![Go to Meta Box > Custom Fields and create a new field group](https://imgur.elightup.com/RqDFB9a.png)

These are some fields that I’ll create for the page as examples. Feel free to add more fields if you want additional content on the page.

![Some fields that I’ll create for the page as examples](https://imgur.elightup.com/CpjDhAb.png)

For the button, I’ll group the label and URL together, then we’ll have a bundle for each button. So, add a **Group** field type for the button.

![Add Group field for the button](https://imgur.elightup.com/MVAmunx.png)

Inside this group, add two subfields: one for the label, and another for the URL, where you want the visitors to arrive.

![Inside the group, add two subfields for the content and URL](https://imgur.elightup.com/0eJPeNE.png)

You can set the group as collapsible to see buttons in a clear structure. And, to see the buttons apart, you can name the title of the groups as well. Here, I use `{name}` to name the button as the label for management purposes only.

![Name the title of the groups](https://imgur.elightup.com/pTvE8QQ.png)

If you want to add more than one button to the page, it's advisable to set this group as cloneable.

![Set the group is clonable to have more than one button](https://imgur.elightup.com/R18wdTS.png)

After creating all the fields, move to the **Settings** tab, set the **Location** as **Settings page**, and choose the created settings page to apply the fields to it.

![In the Settings tab, set the location as the created settings page to apply the fields to it](https://imgur.elightup.com/UgQIzfv.png)

Then, on your settings page, you will see custom fields displayed.

![The custom fields are displayed in the settings page.](https://imgur.elightup.com/nXU3joS.png)

Just input some content to the fields. They will be used to display on the 404 page later.

## 3. Creating a template for 404 page

Go to **Meta Box** > **Views** to create a new template for the 404 page.

![Create a new template for the 404 page](https://imgur.elightup.com/WR2zrtO.png)

With **MB Views**, you can add some lines of code to the box or insert fields by clicking the **Insert Field** button, then choosing fields on the right sidebar to get data from custom fields.

![You can add code to the box or use the Insert Field button to insert fields](https://imgur.elightup.com/RIoyLr4.png)

Since our fields are on a settings page, turn to the **Site** section to see them.

![Turn to the Site section to see fields being on a settings page.](https://imgur.elightup.com/SojeZFR.png)

First, for the image of the 404 page, insert the **Image** field. And, you can choose an image size that fits your page style.

![For the image of the 404 page, insert the Image field](https://imgur.elightup.com/owi1v9I.png)

Next, to display the message, choose the corresponding one.

![Insert the Message field](https://imgur.elightup.com/CuBsfXY.png)

For the button, insert the **Button** field. Since it’s cloneable, a loop will be generated in the **Template** section.

![For the button, insert the Button field.](https://imgur.elightup.com/9hY644d.png)

Inside the loop, we’ll insert the button name, and its url as well.

![Insert the button name, and its url ](https://imgur.elightup.com/I9LPkfE.png)

Now, go to the **Settings** section to apply this template for the 404 page. Since it is a special page, we need to use a conditional tag provided by WordPress to set the location for this template. First, set the view type as **Code**. Then, put in a tag on the box. With the `is_404()`  tag, we show this template only on pages not found.

![Set type of the template to apply it for the 404 page](https://imgur.elightup.com/TNXZzMm.png)

Now, if you access any broken link of your website, you’ll see the 404 page information displayed.

![The 404 page information displays without styling](https://imgur.elightup.com/Fs9oIWy.png)

You can see that it might not look nice as you'd like, so you may need to style it a bit.

## 4. Styling the 404 page

Back to the created template with **MB Views**, include some div tags and classes to make styling easier.

![Include some div tags and classes](https://imgur.elightup.com/69k9D4T.png)

Also, add some code to the **CSS** tab for styling the page.

![Add some code to the CSS tab for styling the page](https://imgur.elightup.com/vFpuf5a.png)

Then, the 404 page displays with a better look already.

![The 404 page displays with a better look already](https://imgur.elightup.com/VrCu8Vf.png)

From now on, whenever visitors go to an unavailable page on your site, they’ll find the 404 page. Also, the buttons will help drive them to another page that may have some helpful content.

## 5. Changing 404 page content in daily use

Someday, when you want to change the content of the 404 page, including the image, message, or button, simply go back to the settings page, change the data saved in the custom fields.

![Change the content of the 404 page in the settings page](https://imgur.elightup.com/FGF59qb.png)

Then, you will have a new 404 page with fresher content.

![A new 404 page with fresher content](https://imgur.elightup.com/DHMKUKm.png)

That way, you can test which content will match and be good enough to keep the visitor staying longer on your site.

# Creating a Custom 404 Page in WordPress - P4 - Meta Box + Breakdance

import LiteYouTubeEmbed from 'react-lite-youtube-embed';
import 'react-lite-youtube-embed/dist/LiteYouTubeEmbed.css';

Let’s explore an interesting way to have **flexible and meaningful content for a custom 404 page** by using custom fields created with **Meta Box** and displaying them with **Breakdance**.

This is a custom 404 page I created as an example. The page may include any kind of content that you think is useful for the visitors.

![An example of a custom 404 page](https://imgur.elightup.com/xRd5V9C.png)

## Video version

<LiteYouTubeEmbed id='Wx92KGAnhDM'/>

## Preparation

To make all the content on your 404 page dynamic and flexible, you should use custom fields to store them. In my case, they are the image, message, and button, as well as the link on the button. Then, you can change any of them to have a new 404 page.

So, these are tools we need in this practice.

* [Meta Box core plugin](https://wordpress.org/plugins/meta-box/): to have a framework to create custom fields. You can download it directly from [wordpress.org](https://wordpress.org/plugins/meta-box/);
* [MB Settings Page](https://metabox.io/plugins/mb-settings-page/): to create a settings page to input all the information that we want to be on the 404 page;
* [MB Builder](https://metabox.io/plugins/meta-box-builder/): to have a UI on the back end to create custom fields to save that information visually;
* [MB Group](https://metabox.io/plugins/meta-box-group/) (optional): to have your own structure of fields that fit your page’s content;
* **Breakdance**: to build the page.

Now, let’s go step by step.

## 1. Creating a new settings page

The 404 page is not a specific page as usual, so we’ll use a settings page to include all the content and settings for it.

Go to **Meta Box** > **Settings Pages**, and create a new settings page.

![Go to Meta Box > Settings Pages, and create a new one.](https://imgur.elightup.com/ZVhynn7.png)

For the position of the settings page, you can put it on every place in the menu. We have the **Menu Type** section to set where to access the page. In this practice, I’ll set it as a submenu of the **Settings** menu.

![Set the position of the settings page in the menu](https://imgur.elightup.com/wSES9B9.png)

The page is still blank now since we haven’t added any content to it.

![The 404 page is still blank now](https://imgur.elightup.com/B29WyQr.png)

We’ll do it in the next step.

## 2. Creating custom fields for the 404 page’s content

As I mentioned before, instead of adding any specific content to the 404 page, we’ll use custom fields to have dynamic content for it. These custom fields will be set on the created settings page.

Go to **Meta Box** > **Custom Fields**, and create a new field group.

![Go to Meta Box > Custom Fields, and create a new field group](https://imgur.elightup.com/Yz6IA1P.png)

These are some fields that I’ll create for the page as examples. Simply add more fields if you want to have more content on the page.

![Some typical fields for the 404 page as example](https://imgur.elightup.com/s66upgA.png)

Just add field types one by one corresponding to the kind of content.

For the buttons, I’ll group the label and URL together. So, add a **Group** field for the button.

![Add a Group field for the button](https://imgur.elightup.com/lI1NCyH.png)

Inside the group, add two subfields with the corresponding field type.

![Add the subfields for the label and URL of the button](https://imgur.elightup.com/0JqyIks.png)

In my specific case, I set the group as collapsible and named for the button.

![Set the name of the button](https://imgur.elightup.com/0HEKstR.png)

If you want to add more than one button, make the group cloneable by enabling the corresponding option.

![Set the group is clonable to add more than one button](https://imgur.elightup.com/ZLBCruT.png)

After having all the fields with reasonable settings, move to the **Settings** tab, set the **Location** as **Settings page**, and choose the created settings page to apply the fields to it.

![In the Settings tab, set the Location as Settings page, and choose the created settings page to apply the fields to it.](https://imgur.elightup.com/bveviUt.png)

Now, go to your settings page, and you will see custom fields displayed.

![The custom fields display in the settings page](https://imgur.elightup.com/I2EyGOT.png)

Just input content for the page there.

Next, we’ll get and display these input data on the frontend.

## 3. Creating a template for the 404 page

We’ll get and display the content of the 404 page in a template created with Breakdance.

Navigate to **Breakdance** > **Templates**, and add a new template.

![Go to Breakdance > Templates, and add a new template](https://imgur.elightup.com/h9y0Dul.png)

Breakdance supports a specific template for the 404 page.

![Breakdance supports a specific template for the 404 page](https://imgur.elightup.com/Cbudm9i.png)

Just choose that option. Then, edit it in Breakdance.

![Choose that template and edit it in Breakdance](https://imgur.elightup.com/D4kXFM4.png)

Based on your desired 404 page, just add a new section and choose the suitable structure for it. In my case, I add a **Column** element, and select the two-column layout.

![Add layout for the 404 page as you want](https://imgur.elightup.com/kC09h8j.png)

Next, just add some elements into two columns to get and display data for the 404 page.

Inside the first column, I’ll add an **Image** element.

![Add an Image element](https://imgur.elightup.com/GIgadcD.png)

Since it was saved in the custom field created with Meta Box, click on the dynamic data button to choose where we get data from.

![Click on the dynamic data icon to get data from](https://imgur.elightup.com/3OO3P75.png)

Then, in the appeared pop-up, look for the **Meta Box** section, and choose the name of the field that we save the image.

![Choose the name of the field that we save the image in the Metabox section](https://imgur.elightup.com/5bUbVs2.png)

In the second column, add a **Text** element for the message.

![Add a Text element for the message](https://imgur.elightup.com/QKmlxrq.png)

Also, use the dynamic data button, and select the field for the message.

![Select the field for the message](https://imgur.elightup.com/Qe1hgwm.png)

The last one is the buttons. Their label and URLs are saved in the cloneable group. However, Breakdance hasn’t supported getting that kind of data in the settings page. So, we should use code to get them.

Add a **Code Block** element.

![Add a Code Block element](https://imgur.elightup.com/AOqkIQs.png)

Then, add the following code:

```
<?php
$group = rwmb_meta( 'button', ['object_type' => 'setting'], '404-page' );
foreach ($group  as $value) :
    echo $value['title'];
    echo $value['url'];
endforeach;
?>
```

![Add some code to get and display data from cloneable group in the settings page](https://imgur.elightup.com/FBHtDoa.png)

**Specifically**:

* `$group = rwmb_meta( 'button', ['object_type' => 'setting'], '404-page' );`: is to get data from a group in the settings page through the `rwmb_meta()` function provided by Meta Box.
* `button`: is the ID of the group.
* `404-page`: is the ID of the settings page.
* `foreach ($group  as $value) … endforeach;`: is a loop to list all the items since the group is cloneable. Inside the loop, we’ll use the echo function to display data from two subfields with IDs as `title` and `url`.

That’s done for getting content.

Now, on the frontend, the data of the 404 page is displayed. But, the button is in the text format.

![All of the data displayed but the button is in the text format](https://imgur.elightup.com/Joh1lx7.png)

We need to modify it a little bit to have a better look. So, let’s move to the next step.

## 4. Styling the page

Back to edit the created template with Breakdance, change some settings in the Style tab of each element to have the desired look.

![Change some settings in the Style tab of each element to have the desired look](https://imgur.elightup.com/3KiDq47.png)

In the code block where we display the button, I also add some **`div`** tags and classes. Also, modify it.

![Modify the code a little bit](https://imgur.elightup.com/a9rTZCc.png)

In there, to embed the URL on the label of the button, I modify the code like this:

```
<a class="mb_button" href="<?php echo $value['url'];?>"><?php echo $value['title'];?></a>
```

Finally, use CSS to style the button. You can add the CSS to the Code Block as well. There is no need to create another one.

![Use CSS to style the button](https://imgur.elightup.com/xAtLpir.png)

And, this is the final look of my 404 page.

![The new look of the 404 page after styling](https://imgur.elightup.com/iRIComK.png)

Then you will get a 404 page with beautiful, useful, and flexible content that you can change easily without touching the template anymore.

## 5. Updating the content for the 404 page

Somedays, if you want to update the image, message, or button on this page, just back to the settings page, and change the content in the custom fields. Then, you’ll have a 404 page with the new content.

![Change the content in the custom fields to have a new 404 page](https://imgur.elightup.com/jFMRuGc.gif)

It’s more convenient for management. This is exactly the strength of the dynamic content for the 404 page, as well as any page on your site.

You can change it regularly to find out which content will be most sufficient for your visitors.

# Creating a custom 404 page in WordPress - Meta Box + Bricks

import LiteYouTubeEmbed from 'react-lite-youtube-embed';
import 'react-lite-youtube-embed/dist/LiteYouTubeEmbed.css';

Let’s explore an interesting way to have a **custom 404 page** with flexible content using custom fields created with **Meta Box** and displaying them with **Bricks**.

Here is my custom 404 page as an example:

![The custom 404 page was built by Meta Box and Bricks.](https://imgur.elightup.com/g3Md0DC.png)

## Video version

<LiteYouTubeEmbed id='ssAuHEA7Fc0'/>

## Preparation

The page may contain any kind of information that you think is useful for visitors. You can add an image, a message, buttons to redirect them to another page that makes sense to them, or anything else. All of them should be regulated by content in custom fields so that you can change it easily and more conveniently.

Therefore, in this practice, we will use the following tools:

* [Meta Box plugin](https://wordpress.org/plugins/meta-box/) to have a framework to create custom fields. It’s available on [wordpress.org](https://wordpress.org/plugins/meta-box/).
* [MB Settings Page](https://metabox.io/plugins/mb-settings-page/): to create a settings page to input the 404 page’s information;
* [MB Builder](https://metabox.io/plugins/meta-box-builder/): to have a UI on the backend to create the custom fields visually;
* [MB Group](https://metabox.io/plugins/meta-box-group/) (optional): to organize custom fields into the group. In this case, they are the labels and URLs of the buttons;
* **Bricks**: to build the page.

Now, let’s start!

## 1. Creating a new settings page

Since the 404 page is not a specific page as usual, we’ll use a settings page to include all the content of the page.

Go to **Meta Box** >** Settings Pages** and create a new page.

![Go to Meta Box > Settings Pages and create a new page](https://imgur.elightup.com/W6NcuOW.png)

For the position of the settings page, you can put it on every place in the menu. I’ll set this page as a submenu, and choose the **Parent menu** as the **Settings**.

![Set the page as a submenu, and choose the Parent menu as the Settings](https://imgur.elightup.com/s2BxQly.png)

Then, go to the page in the **Settings** menu. It’s still blank since we haven’t added any content to it yet.

![The page is in the Settings menu, it’s still blank](https://imgur.elightup.com/N7AYCGN.png)

Let’s move to the next step.

## 2. Creating custom fields

Instead of adding any specific and static content to the page, I’ll use custom fields to store them all.

Go to **Meta Box** > **Custom Fields** and create a new field group.

![Go to Meta Box > Custom Fields and create a new field group](https://imgur.elightup.com/VecQFXW.png)

These are some fields that I’ll create for the page as examples. Simply add more fields if you want to have more content on the page.

![Some fields that I’ll create for the page as examples](https://imgur.elightup.com/tO43YEU.png)

For the button, we’ll group the label and URL together, then we’ll have a bundle for each button. So, add a **Group** field type for the button.

![Add Group field for the button](https://imgur.elightup.com/PPuXnGc.png)

You can set the group as collapsible to see buttons in a clear structure. And, you can name the title for the group as well. Here, I use `{#}` to number the button for management purposes only.

![Set the title for the group using `{#}` to number the button](https://imgur.elightup.com/PGvd6r7.png)

If you want to add more than one button to the page, you should set this group as cloneable.

![Set the group is clonable to have more than one button](https://imgur.elightup.com/MNEjBez.png)

Inside the group, add two subfields: one for the label, and another for the URL for the direction.

![Inside the group, add two subfields for the content and URL](https://imgur.elightup.com/G02Gmhi.png)

After creating all the fields, move to the **Settings** tab, set the **Location** as **Settings page**, and choose the created settings page to apply the fields to it.

![In the Settings tab, set the location as the created settings page to apply the fields to it](https://imgur.elightup.com/OvVLldb.png)

Then, go to your settings page, and you will see custom fields displayed.

![The custom fields are displayed in the settings page](https://imgur.elightup.com/0nlNtHC.png)

Just input data. Here is my content for example.

![Input data for the settings page](https://imgur.elightup.com/Yo6qK5k.png)

## 3. Creating a template for 404 page

Go to **Bricks** > **Templates** and create a new one to display the 404 page.

![Go to Bricks > Templates and create a new one to display the 404 page.](https://imgur.elightup.com/NhAwCZr.png)

To regulate the template to be used for 404 pages, you must set the type of this template as ‘**Error page**’.

![Regulate the template to be used for 404 pages](https://imgur.elightup.com/Xka2xHL.png)

And then, edit the template with Bricks, you must set a condition to apply the template to the **Error page** as well.

![Set a condition to apply this template to the Error page](https://imgur.elightup.com/cDjEY2H.png)

Depending on the structure of the content that you want to have on the page, just choose a suitable layout.

![Choose a suitable layout.](https://imgur.elightup.com/Nm0nSlD.png)

Now, we should find some elements that match the kinds of content you saved in the custom fields to display them.

To get the content from the custom fields, we’ll use the **Dynamic Data** button for the element. Then, look for the name of the field in the **Meta Box** section. Take the image of the 404 page as an example.

![Get the image of the 404 page](https://imgur.elightup.com/IXqApq0.png)

After that, you will see the image displayed in the preview section immediately.

![The image displayed in the preview section immediately](https://imgur.elightup.com/cUZTvnK.png)

Do likewise for other content.

With the buttons, they are from a cloneable group, so you should use a query loop to get them all. Therefore, add a **Div** element, then enable the query loop for it, and just set the type of data source as the name of the group.

![Add a Div element, then enable the query loop for it, and just set the type of data source as the name of the group.](https://imgur.elightup.com/xppP6hc.png)

Now, add a **Button** element inside the **Div** element.

![Add a Button element inside the Div element](https://imgur.elightup.com/IcqpHwy.png)

We have the label as well as URL for the button saved in custom fields, so we also use dynamic data for this element. We do it in the same way as getting data from other custom fields, click the icon below to set the label, and choose the name of the field where we store the label from the list.

![Get the label of the button](https://imgur.elightup.com/Bk86kG0.png)

For the links of the buttons, set the type as **Dynamic Data**. As well, choose the fields where we store the URLs. The links will automatically be embedded into the button.

![Get the links of the buttons](https://imgur.elightup.com/0tXAoLe.png)

How much content you put in the custom fields, how many elements you should add to this template to display them all.

After that, you should view the page on the frontend to see how it looks.

![The custom 404 page was built by Meta Box and Bricks.](https://imgur.elightup.com/r4kTexs.png)

This is a simple page that I’ve made. That’s all the content that I want to have on this page. But, you might have more than that. Make sure you get and display them all.

## 4. Styling the 404 page

The next part is to modify the layout of the page as well as style each element to have a better look. Just go back to edit the 404 page with **Bricks** to do it.

![Style the 404 page](https://imgur.elightup.com/Cq4es5y.png)

Then you will get a 404 page with beautiful, useful, and flexible content that you can change easily without touching the template anymore.

![404 page displays with beautiful, useful, and flexible content that you can change easily without touching the template anymore.](https://imgur.elightup.com/g3Md0DC.png)

From now on, whenever visitors go to an unavailable page on your site, they’ll find this page. These two buttons will help drive them to another page that may have some helpful content.

In the event that you want to **change the content of the 404 page**, just go back to the settings page, and **change the data saved in the custom fields**.

If you don't want to use a 404 page, you can try a [301 redirect](https://gretathemes.com/create-301-redirects-in-wordpress/#benefits-of-301-redirects), which helps keep people on your site.

Also, for better SEO, check out our series on [analyzing content in custom fields](https://metabox.io/series/SEO-analysis/). Feel free to suggest any tutorials by leaving a comment and following our blog. Thanks for reading!

# Creating a custom 404 page in WordPress - Meta Box + Elementor

import LiteYouTubeEmbed from 'react-lite-youtube-embed';
import 'react-lite-youtube-embed/dist/LiteYouTubeEmbed.css';

404 page is not a kind of main content on your website, since it appears only when visitors come to an unavailable page. However, for better SEO and better experience, we should pay some attention to this kind of page, to harmonize content, and drive visitors to the wanted pages.

So, let’s explore an interesting way to have a **custom 404 page** with flexible content using custom fields created with **Meta Box** and displaying it with **Elementor**. This will help you change the page's content easily in daily use.

Here is my custom 404 page as an example:

![The custom 404 page was built by Meta Box and Elementor](https://imgur.elightup.com/T2DDpXq.png)

## Video version

<LiteYouTubeEmbed id='gm9v7ZPxoAA'/>

## Preparation

Besides the notice of ‘page not found’, you definitely add some other content, to make this page more informative. So, I added an image, a message, and two buttons. All of them will be regulated by content in custom fields.

Therefore, in this practice, we will use the following tools:

* [Meta Box plugin](https://wordpress.org/plugins/meta-box/): to have a framework to create custom fields. It’s available on [wordpress.org](https://wordpress.org/plugins/meta-box/);
* [MB Settings Page](https://metabox.io/plugins/mb-settings-page/): to create a settings page to input the 404 page’s information;
* [MB Builder](https://metabox.io/plugins/meta-box-builder/): to have a UI on the backend to create the custom field visually;
* [MB Elementor Integration](https://metabox.io/plugins/mb-elementor-integrator/): to get data from Meta Box’s custom fields, using dynamic tags of Elementor;
* [MB Group](https://metabox.io/plugins/meta-box-group/) (optional): to organize custom fields into the group. In this case, they are the labels and URLs of the buttons;
* **Elementor** and its pro version to build the page.

Now, let’s start!

## 1. Creating a new settings page

The 404 page is not a specific page on the frontend, so we’re going to use a settings page to include all the content and other settings for it.

Go to **Meta Box** > **Settings Pages** and create a new page.

![Go to Meta Box > Settings Pages and create a new page](https://imgur.elightup.com/wJtdTpq.png)

For the position of the settings page, I’ll set this page as a submenu, and choose the **Parent menu** as the **Settings**.

![Set the page as a submenu, and choose the Parent menu as the Settings](https://imgur.elightup.com/f7ON6Y8.png)

Then, you’ll see the page in the **Settings** menu. It’s still blank now since we haven’t added any content for it.

![The page is in the Settings menu, it’s still blank](https://imgur.elightup.com/SrU2PqM.png)

Let’s move to the next step.

## 2. Creating custom fields

Instead of adding any specific and static content to the page, we’ll use custom fields. Then, input content to the fields.

Go to **Meta Box** > **Custom Fields** and create a new field group.

![Go to Meta Box > Custom Fields and create a new field group](https://imgur.elightup.com/ChyIFBo.png)

These are some fields that I’ll create for the page as examples. In the case that you want more fields for more information, just add them as you go.

![Some fields that I’ll create for the page as examples](https://imgur.elightup.com/xfWd50l.png)

As mentioned, we’ll group the label and URL of the button together, then we’ll have a bundle for each button. So, add a **Group** field type for the button.

![Add Group field for the button](https://imgur.elightup.com/3LxuypF.png)

I also want to add two buttons to the page, so make this group be cloneable.

![Set the group is clonable to have more than one button](https://imgur.elightup.com/JyC78RL.png)

You also can set the title for the group. Here, I use `{#}` to number the button for the management purpose only.

![Set the title for the group using `{#}` to number the button](https://imgur.elightup.com/5JoKeqv.png)

Inside the group, add two subfields: one for the label, and another for the URL, for the direction.

![Inside the group, add two subfields for the content and URL](https://imgur.elightup.com/FLRkKc0.png)

After creating all the fields, move to the **Settings** tab, set the **Location** as **Settings page**, and choose the created settings page to apply the fields to it.

![Move to the Settings tab, set the Location as Settings page, and choose the created settings page to apply the fields to it](https://imgur.elightup.com/jOnhfrH.png)

Then, go to your settings page, you will see custom fields displayed.

![The custom fields are displayed in the settings page](https://imgur.elightup.com/vy3KUtF.png)

Just input data. Here is my content for example.

![Input data for the settings page](https://imgur.elightup.com/ue3aaLL.png)

## 3. Creating skins for the buttons

Since we have a cloneable group for the buttons, and Elementor does not support directly displaying data from them on a template, we should create a skin for it first.

Go to **Templates** > **Theme Builder**.

![Go to Templates > Theme Builder](https://imgur.elightup.com/ZRL5nTH.png)

There will be the **MB Group Skin** menu. Click on it and add a new skin.

![Click on the MB Group Skin and add new skin](https://imgur.elightup.com/HcJkrAl.png)

In the **Preview Settings** section, choose **404**.

![In the Preview Settings section, choose 404](https://imgur.elightup.com/flenLb2.png)

Now, add a **Section** element to cover the button.

![Add a Section element to cover the button](https://imgur.elightup.com/lAvMENe.png)

Then, add a **Button** element.

![Add a Button element](https://imgur.elightup.com/sQ4C2S4.png)

We have the label for the button in the custom fields, so in the **Text** settings of the button, use the **Dynamic Tags** and look for the **Meta Box Field** option.

![In the Text settings of the button, use the Dynamic Tags and look for the Meta Box Field option](https://imgur.elightup.com/mev3DRt.png)

Then, choose the name of the field that saved the button’s label. You will see it on the button immediately.

![Choose the name of the field that saved the button’s label](https://imgur.elightup.com/98EpBUi.png)

For the link in the button, it also is saved in a custom field as well, so use **Dynamic Tags**.

![Use Dynamic Tags in the Link settings to get the URL of the link](https://imgur.elightup.com/8qUxiWf.png)

In the **Meta Box Field** option, find out the field that saves the links.

![In the Meta Box Field option, find out the field that saves the links](https://imgur.elightup.com/5pMW78r.png)

You can style the button to have the new look as you want in the **Style** tab. I simply change the color of the button.

![Style the button a little bit](https://imgur.elightup.com/GCf6rFi.png)

## 4. Creating a template for the 404 page

Now, we’ll create a template to stipulate how information about the 404 page should be displayed.

Also in the **Theme Builder** of Elementor, there is an exclusive section for the 404 page. Go to create a new template in this part now.

![Go to the Error 404 section to add a new template for the 404 page](https://imgur.elightup.com/dUxUQfK.png)

There will be various pre-built templates provided by Elementor, you can exploit them to save time and just change the content, or, build your own one.

First, add a widget with the expected layout.

![Add a widget with the expected layout](https://imgur.elightup.com/QEzVRV9.png)

Then, just add elements into this template as usual.

In the first column, for the image, I’ll add an **Image** element.

![In the first column, I’ll add an Image element](https://imgur.elightup.com/g41XH1f.png)

And use the **Dynamic Tags** to get the image from the custom field we set on the created settings page.

![Use the Dynamic Tags to get the image from the custom field we set on the created settings page](https://imgur.elightup.com/f4vsJAh.png)

Choose the name of the field from the list.

![Choose the name of the field from the list](https://imgur.elightup.com/SZ12dGB.png)

In the second column, to highlight the message, add a **Heading** element.

![In the second column, to highlight the message, add a Heading element](https://imgur.elightup.com/I4K7AfX.png)

Also use the **Dynamic Tags** to choose the field to get the content.

![Use the Dynamic Tags to choose the field to get the content](https://imgur.elightup.com/18gfHMZ.png)

Next, for the buttons, we’ve had a skin for it, so look for the **MB Group** element.

![Add the MB Group element for the buttons](https://imgur.elightup.com/7sRfaLt.png)

Since the data is from a settings page, set the **Object Type** as **Settings page**.

![Set the Object Type as Settings page](https://imgur.elightup.com/jASpEEQ.png)

Then, set the name of the group that we use to store the information for the button.

![Set the name of the group that we use to store the information for the button](https://imgur.elightup.com/N14j6v1.png)

And, the last one, set the created skin in the **Skin** section.

![Set the created skin in the Skin section](https://imgur.elightup.com/jOTAvxu.png)

You can see the two buttons displayed immediately.

## 5. Styling the page

If you want to modify the layout and change the look of the page, just go to the **Style** tab and **Advanced** tab of each element, and change the settings.

![Go to the Style tab and Advanced tab of each element to style the page](https://imgur.elightup.com/PzQFrVu.png)

This is the final look of my 404 page.

![The final look of the custom 404 page](https://imgur.elightup.com/T2DDpXq.png)

From now on, whenever visitors go to an unavailable page on your site, they’ll find this page. These two buttons will help to drive them to another page that may have some helpful content.

In the case that you want to **change the content of the 404 page**, just go back to the settings page, and **change the data saved in the custom fields**.

# Creating a custom 404 page in WordPress - Meta Box + Oxygen

import LiteYouTubeEmbed from 'react-lite-youtube-embed';
import 'react-lite-youtube-embed/dist/LiteYouTubeEmbed.css';

Let’s explore an interesting way to have a **custom 404 page** with flexible content using custom fields created with **Meta Box** and displaying them with **Oxygen**.

Here is my custom 404 page as an example:

![The custom 404 page was built by Meta Box and Oxygen.](https://imgur.elightup.com/rH5v9zL.png)

## Video version

<LiteYouTubeEmbed id='o1mTmQKDlxs'/>

## Preparation

The page may contain any kind of information that you think is useful for visitors. You can add an image, a message, buttons to redirect them to another page that makes sense to them, or anything else. All of them should be regulated by content in custom fields.

Therefore, in this practice, we will use the following tools:

* [Meta Box AIO](https://metabox.io/aio/): to have a framework to create custom fields and a settings page and advanced features from extensions;
* **Oxygen**: to build the page.

Now, let’s start!

## 1.1 Creating a new settings page

Since the 404 page is not a specific page as usual, we’ll use a settings page to include all the content of the page.

Go to **Meta Box** > **Settings Pages** and create a new page.

![Go to Meta Box > Settings Pages, and create a new one.](https://imgur.elightup.com/ZVhynn7.png)

For the position of the settings page, you can put it on every place in the menu. I’ll set this page as a submenu, and choose the **Parent menu** as the **Settings**.

![Set the position of the settings page in the menu](https://imgur.elightup.com/wSES9B9.png)

Then, go to the page in the **Settings** menu. It’s still blank since we haven’t added any content to it yet.

![The page is in the Settings menu, it’s still blank](https://imgur.elightup.com/LtKOXWn.png)

Let’s move to the next step.

## 1.2 Creating custom fields for the 404 page’s content

As I mentioned before, instead of adding any specific content to the 404 page, we’ll use custom fields to have dynamic content for it. These custom fields will be set on the created settings page.

Go to **Meta Box** > **Custom Fields** and create a new field group.

![Go to Meta Box > Custom Fields, and create a new field group](https://imgur.elightup.com/Yz6IA1P.png)

These are some fields that I’ll create for the page as examples. Simply add more fields if you want to have more content on the page.

![Some fields that I’ll create for the page as examples](https://imgur.elightup.com/a2UeSdk.png)

For the button, we’ll group the label and URL together, then we’ll have a bundle for each button. So, add a **Group** field type for the button.

![Add a Group field for the button](https://imgur.elightup.com/lI1NCyH.png)

Inside the group, add two subfields with the corresponding field type.

![Add the subfields for the label and URL of the button](https://imgur.elightup.com/CijbDF4.png)

In my specific case, I set the group as collapsible and named it for the button.

![Set the name of the button](https://imgur.elightup.com/oQemLrc.png)

If you want to add more than one button, make the group cloneable by enabling the corresponding option.

![Set the group is clonable to add more than one button](https://imgur.elightup.com/vtoIV1A.png)

After creating all the fields, move to the **Settings** tab, set the **Location** as **Settings page**, and choose the created settings page to apply the fields to it.

![In the Settings tab, set the Location and choose the created settings page to apply the fields to it.](https://imgur.elightup.com/bveviUt.png)

Then, go to your settings page, and you will see custom fields displayed.

![The custom fields display in the settings page](https://imgur.elightup.com/I2EyGOT.png)

Just input content for the page there.

Next, we’ll get and display these input data on the frontend.

## 1.3 Creating a template for the 404 page

We’ll get and display the content of the 404 page in a template created with Oxygen.

Go to **Oxygen** > **Templates** to add a new template.

![Add new template with Oxygen](https://imgur.elightup.com/DMyy9Go.png)

And, choose any option to inherit its design.

![Choose any option to inherit its design.](https://imgur.elightup.com/IQeXq99.png)

Oxygen supports a specific template for 404 page. Just choose that option.

![Oxygen supports a specific template for 404 page.](https://imgur.elightup.com/bNDZcgA.png)

Then, edit it in Oxygen.

Based on your own design, just add a new section and choose the suitable layout for it.

In my case, first, add a new section.

![Add a new section](https://imgur.elightup.com/z0rXPdi.png)

Then, I add a **Column** component and choose the suitable layout.

![Add a Column component and choose the suitable layout](https://imgur.elightup.com/ih5yHfL.png)

Next, just add some components into two columns to get and display data for the 404 page.

Inside the first column, I’ll add an **Image** component. Move to the **Image URL** tab because I saved the image in the url format.

![Choose Image component for the image](https://imgur.elightup.com/1TLWZX2.png)

Since it was saved in the custom field created with Meta Box, click on the **Data** button, look for the **Meta Box Field** section, and choose the name of the field that we saved the image to get data from it. Then, you can see the image appears immediately.

![Get the image](https://imgur.elightup.com/U6kcGqB.gif)

In the second column, select a **Text** component for the message. And connect it to the corresponding field by clicking the default text, and choosing **Insert data**.

![Add a Text component for the message](https://imgur.elightup.com/5ISpaNB.png)

Now, we’ll see the options in the **Post** section. Choose the **Meta Box Field** option, and select the message field. After that, you’ll see the message of the 404 page.

![Choose the Meta Box Field option, and select the message field.](https://imgur.elightup.com/Aflc2x0.gif)

The last one is the buttons. Their label and URLs are saved in the cloneable group. However, Oxygen hasn’t supported getting that kind of data on the settings page directly. So, we should use code to get them.

Opt for a **Code Block** component, and add some code in the **PHP & HTML** section.

![Add a Code Block component, go to the PHP & HTML section.)](https://imgur.elightup.com/0N2Hgon.png)

![Add some code in the PHP & HTML section](https://imgur.elightup.com/SBIYNX1.png)

Explanation:

```css
$group = rwmb_meta( 'button', ['object_type' => 'setting'], '404-page' );
```

This line of code is to get data from a group in the settings page. `rwmb_meta` is the function provided by Meta Box to get data. `button` is the ID of the group. And `404-page` is the ID of the settings page.

Since the group is cloneable, we need to have a loop to list all the items. Inside the loop, we’ll display data from two subfields: the title and URL.

```css
foreach ($group  as $value) :
    echo $value['title'];
    echo $value['url'];
endforeach;
```
That’s done for getting content.

Go to the page on the frontend. You will see the data is displayed all. But, the button is in text format.

![The data is displayed all. But, the button is in text format.](https://imgur.elightup.com/wVyeVR0.png)

Now, we need to modify it a little bit to have a better look. So, let’s move to the next step.

## 1.4 Styling the 404 page

Back to edit the created template with **Oxygen**, change some settings of each component to have the desired look.

![Change some settings of each component to have the desired look.](https://imgur.elightup.com/82E6XHN.png)

In the **Code Block** where I display the button, I add some div tags and classes, then modify it a little bit.

![In the Code Block where I display the button, I add some div tags and classes](https://imgur.elightup.com/Etzm2gv.png)

**In there**:
```
<a class="mb_button" href="<?php echo $value['url'];?>"><?php echo $value['title'];?></a>
```
This line of code is to embed the URL on the label of the button.

Finally, use **CSS** to style the button.
```
a.mb_button {
     border-radius: 5px;
    margin-right: 30px;
    color: #fff;
    padding: 12px;
    background: #363636;
    text-decoration: none;
}
a.mb_button:hover{
    color: #d39450;
}
```

![Use CSS to style the button](https://imgur.elightup.com/UH99k5E.png)

And this is the final look of my 404 page.

![The custom 404 page was built by Meta Box and Oxygen.](https://imgur.elightup.com/rH5v9zL.png)

Then, you will get a 404 page with beautiful, useful, and flexible content that you can change easily without touching the template anymore.

## 1.5 Updating the content for the 404 page

Somedays, if you want to update the image, message, or button on this page, just go back to the settings page, and change the content in the custom fields.

![Go back to the settings page, and change the content in the custom fields.](https://imgur.elightup.com/yp5hyV0.png)

Then, you’ll have a 404 page with the new content. It’s more convenient for management.

![A 404 page with the new content](https://imgur.elightup.com/DMYMmiB.png)

# Creating a custom avatar for users

import LiteYouTubeEmbed from 'react-lite-youtube-embed';
import 'react-lite-youtube-embed/dist/LiteYouTubeEmbed.css';

As you know, each WordPress user account has a unique avatar. And, you can completely **add or change the avatar by creating a custom field** that allows users to **upload photos right on the website**.

This is the example look.

![Example of the custom avatar for users](https://imgur.elightup.com/nDAnx3y.png)

## Video version

<LiteYouTubeEmbed id='FbjNorcc9Js' />

## Preparation

You’ll need to use the [Meta Box core plugin](https://wordpress.org/plugins/meta-box/) for this practice. You can download it directly from [wordpress.org.](https://wordpress.org/plugins/meta-box/)

We also need some Meta Box extensions to have some advanced features:

* [MB User Meta](https://metabox.io/plugins/mb-user-meta/) or [MB User Profile](https://metabox.io/plugins/mb-user-profile/): They allow you to create fields for users. You can choose to use one of them;
* [MB Builder](https://metabox.io/plugins/meta-box-builder/): to create custom fields with an intuitive UI right in the backend.

## 1. Creating a custom field to upload avatar picture

Go to **Meta Box > Custom Fields > Add new**.

I will add a custom field in the type of Single Image that allows the user upload only one image to the field.

The **ID** of this field will be used in the next steps, so you can change it to an easy-to-remember one.

![Change ID of the custom field to an easy-to-remember one since we will use it in the next step](https://imgur.elightup.com/VuJxEmP.png)

Next, move to the **Settings** tab, set the **Location** as **User**.

![Set the Location of the field group as User to apply it for users](https://imgur.elightup.com/wAIXSKl.png)

Go to the user profile page, you will see the new custom field. Let’s try to add an image.

![The created custom field displays in the user profile page](https://imgur.elightup.com/dgFPO3M.png)

But now, the **Profile Picture** field hasn't received it and recognized it as the user avatar. Thus, we should take some further actions.

## 2. Adding code to theme files

To set the image in the custom field to be the avatar, we should add some code to the theme file.

Go to the theme’s **functions.php** file and add code like this:

```
add_filter( 'get_avatar_url', 'mb_get_avatar_url', 10, 3 );

function mb_get_avatar_url( $url, $id_or_email, $args ) {
    if ( is_numeric( $id_or_email ) ) {
        $user_id = $id_or_email;
    } elseif ( is_string( $id_or_email ) && ( $user = get_user_by( 'email', $id_or_email ) ) ) {
        $user_id = $user->ID;
    } elseif ( is_object( $id_or_email ) && ! empty( $id_or_email->user_id ) ) {
        $user_id = (int) $id_or_email->user_id;
    }

    if ( empty( $user_id ) ) {
        return $url;
    }

    $custom_avatar = rwmb_meta( 'custom_avatar', [ 'object_type' => 'user' ], $user_id );

    if ( ! $custom_avatar ) {
        return $url;
    }

    $url = $custom_avatar['full_url'];

    return $url;
}
```

![The code that we add to the functions.php file to set the image saved in the custom field to be the profile picture](https://imgur.elightup.com/vNiMzXi.png)

**Explanation**

```
add_filter( 'get_avatar_url', 'mb_get_avatar_url', 10, 3 );
```

This is to declare that we will add a filter named `mb_get_avatar_url' to the` `get_avatar_url` hook provided by WordPress. And, you can set the filter name as anything you want.

```
function mb_get_avatar_url( $url, $id_or_email, $args ) {
```

This is to declare that the added filter will have these three parameters: `$url`, `$id_or_email`, and `$args`.

```
if ( is_numeric( $id_or_email ) ) {
    $user_id = $id_or_email;
} elseif ( is_string( $id_or_email ) && ( $user = get_user_by( 'email', $id_or_email ) ) ) {
    $user_id = $user->ID;
} elseif ( is_object( $id_or_email ) && ! empty( $id_or_email->user_id ) ) {
    $user_id = (int) $id_or_email->user_id;
}
```

These above lines of code is to get the ID of the current user. Then assign it to the `$user_id` variable.

```
if ( empty( $user_id ) ) {
    return $url;
}
```

This one is to check if the `$user_id` variable has value or not. If not, the avatar is still the image that is currently set in the Profile Picture field.

Otherwise, if there is any image in the custom field which has the ID as `custom_avatar` and is used for the User object, we’ll use the `rwmb_meta( )` function to get the value of that field in the next line of code.

```
$custom_avatar = rwmb_meta( 'custom_avatar', [ 'object_type' => 'user' ], $user_id );
```

And, only the value saved in the field which matches the ID of the current user (based on the `$user_id` variable) will be obtained. Then that value will be transferred to the `$custom_avatar_user` variable.

```
if ( ! $custom_avatar_user ) {
    return $url;
}
```

These above lines of code is to check if the `$custom_avatar_user` variable is empty, it means that there is no image in the custom field, the avatar still being the image that is currently set in the Profile Picture field.

Otherwise, if there is any value in the `$custom_avatar_user` variable, means you did upload any image to the field, the `$url` variable will be assigned the value from the `$custom_avatar_user` variable. Then, the avatar will be the one from the custom field.

```
$url = $custom_avatar['full_url'];
```

Now just back to the user profile page. The avatar is now like this.

![The profile picture is now as default since we didn't set any image into the field](https://imgur.elightup.com/ctjmQEY.jpg)

Let’s try to upload an image to the custom field and check if this one will change or not.

It works already.

![Upload an image to the custom field, then the profile picture will automatically change to be the same one](https://imgur.elightup.com/GjtYfKx.png)

# Creating and configuring custom fields

import LiteYouTubeEmbed from 'react-lite-youtube-embed';
import 'react-lite-youtube-embed/dist/LiteYouTubeEmbed.css';

## Video version

<LiteYouTubeEmbed id='_DaFUt92kYY' />

## Preparation

We need [Meta Box Lite](https://metabox.io/lite/) to create custom fields visually. It’s free completely.

![Download and install Meta Box Lite](https://imgur.elightup.com/6Kqp8ek.png)

## Adding new field group and custom fields

Click on the **Create a field group** quick action on admin dashboard to create a new one.

![Add new field group and custom fields](https://imgur.elightup.com/fGSraJb.png)

This is the UI to help you create a field group without touching any line of code. You can name the field group and then add custom fields for it.

![The UI without no coding](https://imgur.elightup.com/MV3SGdz.png)

In the **Fields** tab, click on the **Add Fields** then you will see a list of field types. You can find the needed fields from the list or search for it in the search box.

![You can find the needed fields from the list or search for it](https://imgur.elightup.com/VnPr0VJ.png)

Meta Box has **more than 40 field types**, so you can choose any one from the list to input any data you want. For more information about each type, you can refer to [this video](https://youtu.be/WWeaM5vIAwM).

When creating fields, you can drag to rearrange the fields’ order. Or you can duplicate or delete the field depending on your demand.

![You can duplicate or delate the field depending on your demand](https://imgur.elightup.com/ECKnPMI.png)

If you want to create a group field, we need MB Group. It’s a premium Meta Box extension. You can download it individually [here](https://metabox.io/plugins/meta-box-group/) or use **Meta Box AIO** to have all Meta Box extensions. Then, add a field in the **Group** type. You can add sub-fields to this group field by clicking the **Add New** button like this.

![You can add the sub=fields](https://imgur.elightup.com/vFG070v.png)

After adding the fields you want, you can publish the field group. And then, you will see an auto-generated ID based on the name of the field group like this:

![Auto-generated ID based on the name of the field group](https://imgur.elightup.com/29aMz2X.png)

You also can change this field group ID as you want.

## Configuring the each custom fields

In the settings of each field, you will have two tabs which are **General** and **Advanced**. Let’s get through each one.

### General settings

**Common settings in general**:

All the settings in the **General** settings for each field are the common ones for most of the fields.

![All the settings in the General settinngs for each fiedld are the common ones for most of the fields](https://imgur.elightup.com/yZNs9CV.png)

As you can see, there are several settings:

* **Label**: to name the field as you want;
* **ID**: it’s required since you cannot publish the field group if you don’t enter the ID of the field. It will be used as meta_key when saving to the database. Normally, the ID will be auto-generated based on the label of the field, but you can also change it on your own. You should use numbers, characters, and underscores to name it;

![Example of the iD](https://imgur.elightup.com/vLWu3Zd.png)

* **Type**: show the type of the field. You can change it to another field type with keeping the settings such as **Label** and **ID** of the field;

![You can change the field type](https://imgur.elightup.com/5TWZXtd.png)

* **Label Description**: describe the label here. It appears below the field label;
* **Input Description**: describe the field and it will display below the field input;
* **Placeholder**: the placeholder text for the input or search box;

For example, I choose the **Text** field and configure these three settings like this:

![Example of my settings](https://imgur.elightup.com/j31ZpVb.png)

This is how they display:

![How it displays](https://imgur.elightup.com/oSP7p8a.png)

* **Cloneable**: allow you to add more value for the field. You can use this option for every field type, even the **Group** field;

![Cloneable allows you to add more value](https://imgur.elightup.com/aShzeEg.png)

If you tick to choose **Cloneable** option, you’ll see some further settings inside:

![Some futher settings inside after choosing Cloneable option](https://imgur.elightup.com/PYGYpHc.png)

The **Sortable** settings allow drag-and-drop to reorder clones. And, the **Clone as multiple settings to save clones in multiple** rows in the database;

After choosing the **Cloneable** option for the field, you can easily add more value for the field by the **Add New** button.

![Easily add more value for the field by clicking Add new button](https://imgur.elightup.com/A6UxWXk.png)

**Special settings for some fields**:

For the field type such as **Number** and **Text**, there will be these two settings:

* **Prepend Text**: are the text before the input box of the field in the backend;
* **Append Text**: are the text after the input box of the field in the backend;

![Prepend text and append text](https://imgur.elightup.com/qbA9PVi.png)

These texts will display like this:

![ How these texts will display](https://imgur.elightup.com/wkiSsJx.png)

For the selection field types such as **Select**, **Checkbox list**,... you will have a **Choices** box to fill in some options. They will be in the form like this:

![For some field types there will be choices box](https://imgur.elightup.com/e0Zcogs.png)

The left one is the value of the option. And the right one is the label of the option.

![The left one is the value of the option. And the right one is the label of the option](https://imgur.elightup.com/zLZw95R.png)

You can follow this structure or read for more format of the option in the instruction below the box.

Still in the fields in the kinds of selection, you also have the **Default value** settings. If you enter a value into this box, you always see an option that has been chosen already in the post editor. Then, the user still can change the options as they want. E.g. The first option of my **Payment Discount** field is also chosen as default like this.

![How it will display](https://imgur.elightup.com/2TN713A.png)

**Special settings provided by Meta Box extensions**:

With some settings that have hyperlink, they are the settings provided Meta Box extensions.

![With some settings that have hyperlink, they are the settings provided Meta Box extensions](https://imgur.elightup.com/HmXb1xu.png)

For example:

The **Show as an admin column** settings is provided by the **MB Admin Column**. When you tick to choose it, you will see other settings options for you to choose like this.

![The admin column](https://imgur.elightup.com/T0hBFUx.png)

These settings will help your field display in the admin area as follows.

![These settings will help your field display in the admin area like this](https://imgur.elightup.com/3P2dvo2.png)

And, the Columns settings is provided by the **Meta Box Column** extension.

![the Columns settings is provided by the Meta Box Column extension](https://imgur.elightup.com/XvkBfja.png)

Each row to display the fields will be divided into 12 grids. If you want the fields displayed in columns, just change the number in the box to any number up to 12. For example, to set 3 columns as follows, just set the first field as 4 in the **Columns** box, and the others as 4 as well.

![You can change the number of columns in the box](https://imgur.elightup.com/swehWP5.png)

If you use the **MB Tooltip** extension, you will have the **Tooltip** setting.

![Tooltip setting](https://imgur.elightup.com/akiR2vj.png)

This allows you to show the explanation of the field when hovering over the title or the icon.

![The explantion of the field shows](https://imgur.elightup.com/5s8kLX3.png)

Please note that the settings of the sub-fields also follow the ones of normal fields.

![the settings of the sub-fields also follow the ones of normal fields](https://imgur.elightup.com/iuX1q9z.png)

As well as, in the settings of each field, you can hover over the tooltip icons to know clearly about each one option.

![you can hover over the tooltip icons to know clearly about each one option](https://imgur.elightup.com/unw1nqG.png)

### Advanced settings

In the **Advanced** tab of each field, these settings are the same for all the field types.

![These settings are the same for all the field types](https://imgur.elightup.com/JI00mGS.png)

* **Before** and **After**: to add HTML before and after the field output;

![Before and After: to add HTML before and after the field output](https://imgur.elightup.com/yXlTkD8.png)

* **Custom CSS class**: to add your CSS if you want to have custom style;
* **Save field value**: to save the field value into the database. Normally, this option will be chosen in default;
* **Custom sanitize callback**: allow to enter PHP function name for custom sanitization;
* **Custom HTML5 attributes**: if you want some attributes in type of HTML5, refer to [this documentation](https://docs.metabox.io/custom-attributes/) for more details to know how to add it here;
* **Validation**: helps to check the value of the field. Some rules are available in this option. You can also add new rules for your own needs.
* **Custom Settings**: to add your own custom settings. These settings are saved in the field settings as well.

![Custom settings to add your own settings](https://imgur.elightup.com/La3M0jO.png)

Furthermore, if you use the **MB Conditional Logic** extension, you will have a setting like this:

![The setting like this](https://imgur.elightup.com/cP953Y8.png)

The conditional logic will allow you to create rules to control the display of the fields.

![The conditional logic will allow you to create rules to control the display of the fields](https://imgur.elightup.com/E5fvEKS.png)

Each option has its clear explanation, you also see the tooltips of each when hovering over the icon.

For more details about field settings including the general and advanced ones, please read [this documentation](https://docs.metabox.io/field-settings/).

## Configuring the field group

In the field group editor, go to the **Settings** tab and set up the attributes for the field group.

![go to the Settings tab and set up the attributes for the field group](https://imgur.elightup.com/oSG9ZE7.png)

There are also some settings such as **Conditional Logic**, **Custom CSS class** and **Custom settings** that are the same as settings for the fields in the **Advanced** tab of it. But, the difference is that these settings apply to the whole field group.

The **Location** settings is the most-used setting in every case. It allows you to choose the location where you want to display the field group.

![The Location settings is the most-used setting in every case](https://imgur.elightup.com/qM43f81.png)

Which location you choose, the corresponding option will be there.

For example, if you choose the **Location** as **Post Type**, which is the one we usually set for custom fields, you will see two settings inside:

* **Advanced location rules**: to add more rules on where to display the field group such as choosing a post, or a page. It’s quite similar to the **Conditional Logic**. You will have this option when installing **MB Include Exclude** extension;

* **Toggle rules**: allow to show/hide this field group under conditions. It is the settings when you install **MB Show Hide** extension;

![Advanced location rules and toggle](https://imgur.elightup.com/0UGLN5X.png)

The **Position** setting option is to choose the position to display the field group.

![The Position setting option is to choose the position to display the field group](https://imgur.elightup.com/OjH5keL.png)

If you want to make the field group always collapse in the post editor, choose the **Collapsed by default** option.

**Save data in a custom table** is the settings provided by **MB Custom Table** to optimize the database. For more information, look at [this](https://metabox.io/plugins/mb-custom-table/).

There are also some other special settings if you use more Meta Box extensions. To know more details about each extension, refer to this [documentation](https://docs.metabox.io/extensions/).

# Creating custom post types and taxonomies

import LiteYouTubeEmbed from 'react-lite-youtube-embed';
import 'react-lite-youtube-embed/dist/LiteYouTubeEmbed.css';

## Video version

<LiteYouTubeEmbed id='-oYrHGOri4w' />

## Preparation

We need [Meta Box Lite](https://metabox.io/lite/) to create custom post types and custom taxonomies. It's free, so just download and install it on your site.

![Install Meta Box Lite to create custom post types and custom taxonomiesMB custom post typed and custom taxonomies plugin](https://imgur.elightup.com/6Kqp8ek.png)

After you install Meta Box Lite, you will see a quick action name **Create a post type** and the Post Types as a sub-menu in the Meta Box menu.

![There're two positions you can create a new custom post type](https://imgur.elightup.com/68NYL42.png)

## Creating custom post types

Click on the **Create a post type** button. Then, enter the plural and singular name for the post type. About the slug, it’s auto-generated, but you can change it as you want.

In my case, I create a new post type with the name is Project, the slug is _project_.

![Create a new post type with the name is Project](https://imgur.elightup.com/Ar2uT2I.png)

## Configuring the post type

### Changing the labels

If you want to change the labels of the post type, move to the **Labels** tab. All the options are also auto-created based on the post type’s name that you’ve made.

![Options of labels tab are auto-generated on the created post type name](https://imgur.elightup.com/YxfTzn8.png)

**Advanced options**

In the event that you want to add more advanced information for the post type, go to the **Advanced** tab. And then, you will see a new screen with dozens of fields to edit.

![To add more advanced information for the post type, go to the Advanced tab](https://imgur.elightup.com/qdHGC1Z.png)

Here are some options you may need:

* **Public queryable**: it allows to get the taxonomy’s data and display it on the website;
* **Hierarchical**: it allows to make the post type hierarchical - it means you can have a parent post type and its sub-post types inside;
* **Show UI**: it allows to show the post type as the menu in the Dashboard;
* **Show in menu**: once you enable the **Show UI** option, go to specify where to display the post type in the admin menu. There are several options to select like **Show as top-level menu**, **Show as sub-menu of WP Engine**, **Show as sub-menu of Dashboard**, etc.

![With Show as top-level menu default option, two fields will appear](https://imgur.elightup.com/oXk1z33.png)


:::note

If you still keep the Show as top-level menu default option, two fields will appear:

:::


* **Menu position after**: it allows to choose the position in the menu order the post type should appear;
* **Icon Type**: you’ll have three icon types to select for the post type, namely Dashicons, SVG, and Custom URL;

![Choose options you want](https://imgur.elightup.com/CjAacBI.png)

* **Menu icon**: select an icon for the post type. If you choose other options in the **Show in menu field**, only the icons in the type of Dashicons are available;

![Choose the options you want](https://imgur.elightup.com/RmnfwHP.png)

* **Show in nav menu**: show the post type section in the menu;

![Choose the screen elements to show](https://imgur.elightup.com/s1XrH8f.png)

* **REST API base slug**: enter the REST API base lug to get the data of the post type via API;
* **Has archive**: enable post type archives;
* **Custom archive slug**: customize the archive slug;
* **Custom rewrite slug**: customize the permastruct slug;

![Choose the options you want](https://imgur.elightup.com/r1yUpet.png)

### Support features

To choose the features which you want the post type to have, go to the **Supports** tab. This part is the same as the step of declaring the _$support_ parameter when you create post types using the code.

![Choose more features for the post type](https://imgur.elightup.com/9n9pBqx.png)

### Setting taxonomies for the post type

In the **Taxonomies** tab, you can see there are several options for you to choose which taxonomies you want to apply the created post type for. If you create any custom post types, they will also appear here. Keep reading to the next part to know how to create custom taxonomies.

![Set taxonomies for the post type](https://imgur.elightup.com/KVKwlKK.png)

After setting up the custom post types, remember to publish the one you created. Then, you can easily see the post type in the Admin Dashboard. In my case, a new menu named Projects has been shown.

![The created post type will appear in the menu dashboard](https://imgur.elightup.com/g5Nmc9t.png)

## Creating custom taxonomies

Click on the **Create a taxonomy** quick action on the dashboard to move to the Taxonomies submenu.

![Create custom taxonomies](https://imgur.elightup.com/cZrEL4a.png)

Then, you just need to fill in the information of the taxonomy. Similar to creating the custom post types, the slug is also auto-generated and you can also change it as you want.

![Fill in the information of the taxonomy](https://imgur.elightup.com/CohaxS7.png)

## Configuring the taxonomy

### Changing the labels

In the **Labels** tab, all options are also generated automatically, but you can change them as well.

![Set the options of Labels tab as you want](https://imgur.elightup.com/mmmuYHt.png)

### Advanced Options

For the **Advanced** tab, there are several fields which are similar to the advanced tab when creating a post type. However, there are some special options:

* **Hierarchical**: show the taxonomy hierarchical that allows you to type the term you need like this:

![There are some special options for the Advanced tab](https://imgur.elightup.com/2TJyQxr.png)

* **Show on edit page**: display the taxonomy on the edit page;
* **Show it quick edit**: show this taxonomy in the quick/bulk edit panel;
* **Hierarchical URL**: enable it to include the URL of the parent taxonomy in the URL of the sub-taxonomy;

![Choose the options you want](https://imgur.elightup.com/ZgYEVsO.png)

### Setting post type for the taxonomy

In the event that you want to apply the created taxonomy to a post type, move to the **Post Types** tab and select the post type where you want to show it for.

![Set post type for the taxonomy](https://imgur.elightup.com/FeGp5qS.png)

# Creating download buttons in WordPress

import LiteYouTubeEmbed from 'react-lite-youtube-embed';
import 'react-lite-youtube-embed/dist/LiteYouTubeEmbed.css';

The Internet allows us to chat, exchange, search for news, share experiences, and download documents, gadgets, applications, etc. Besides saving documentation from websites, you can share your documents with users on the WordPress website. **Creating a download button using custom fields** is not a bad idea - it looks beautiful, professional, and not difficult to create at all.

In this article, we’re going to show you how to create a download button using custom fields with the **Meta Box plugin**, and then **display this button on the front end** in two ways: adding code to the theme’s file and using **MB Views** - an extension from Meta Box.

Here is an example.

![the clickable buttons allow you to save an attached file to your device in the content area and on the right sidebar](https://imgur.elightup.com/fveYtBL.gif)

I put the download buttons in two positions: one in the content area of a single post, and one on the right sidebar. Both of them must be **clickable** and allow you to **save an attached file** to your device.

## Video version

<LiteYouTubeEmbed id='PXupgf-aANA' />

## Preparation

For this practice, we need the following tools:

* [Meta Box core plugin](https://wordpress.org/plugins/meta-box/): a framework that helps us create the custom field for the download button. It’s available on wordpress.org;
* [MB Builder](https://metabox.io/plugins/meta-box-builder/): a premium extension of Meta Box that provides UI to easily create custom fields right on the back end. Or you can use the free [Online Generator](https://metabox.io/online-generator/) tool instead.
* [MB Views](https://metabox.io/plugins/mb-views/): to display value from custom fields. You also can add code to the `functions.php` file instead of.
* [eStar theme](https://gretathemes.com/wordpress-themes/estar/): to create a child theme

## 1. Creating custom fields

Go to **Meta Box** > **Custom Fields** > **Add New** to create a new field group.

![Go to Meta Box, Custom Fields, Add New to create a new field group](https://imgur.elightup.com/hdE3SJi.png)

In this practice, I use only one field to save the attached files for the buttons. So, add a field with the **File Advanced** field type.

![add the File Advanced field to save the attached file for the buttons](https://imgur.elightup.com/bHACTmq.png)

Move to the **Settings** tab, choose the **Location** as **Post type**, and select the page or the post type as you want to apply the field. For the demonstration purpose, I keep it as the blog posts.

![move to the Settings tab, choose the Location as Post type, and select the page or the post type as you want to apply the field](https://imgur.elightup.com/FwIS4NI.png)

After publishing the field group, in the post editor, you’ll see the created field.

![the created field displays in the post editor](https://imgur.elightup.com/pYbQ3NN.png)

Just upload the document that you want to share with readers by clicking the **Add Media** button.

![clicking the Add Media button to upload the document that you want to share with readers](https://imgur.elightup.com/Rmbe23Y.png)

This field will appear below every post editor, so each post will have its own attached file. Our buttons will allow downloading the corresponding file as well.

Still, readers can’t see the download button on the front end, so let’s do it in the next step.

## 2. Displaying the download button on the frontend

As I mentioned before, I’m providing two ways to display the buttons for the same result. Both of them are using code:

* Adding code to the theme’s files (using PHP code): I do not recommend this method since the code may be affected when we change the theme.
* Using **MB Views** from Meta Box: with MB Views, we will not type code directly, the plugin will generate it automatically.

I still show both these ways, and then you can experiment yourself to choose which makes sense to you.

### Method 1: Using PHP code

#### Getting URLs of the attached files

In the **Theme File Editor**, add some code to the functions.php file of the [child theme](https://gretathemes.com/what-is-child-theme/#what-is-child-theme):

```
function estar_child_add_link() {
    $files = rwmb_meta( 'file_download' );
    foreach ( $files as $file ) :
   		echo $file['url'];
	endforeach;
}
add_action( 'estar_entry_footer_before', 'estar_child_add_link' );
```

![add some code to the functions.php file](https://imgur.elightup.com/XdmyzCa.png)

**Explanation**:

* `'estar'` is the theme that I’m using;
* `rwmb_meta( )`: is the function to get data from custom field created with Meta Box;
* `'file_download'` : the ID of the custom field for saving the documents that we’ve created;
* `echo $file['url']`: to display the URL of the attached file;
* `add_action( 'estar_entry_footer_before', 'estar_child_add_link' );function estar_child_add_link() { ?>`: to specify the location in which you want to display the download button. In this case, I display the download button in the `'estar_entry_footer_before'` hook of the eStar theme. This hook is created right on the tags list. You can refer to this hook [here](https://github.com/elightup/estar/blob/master/template-parts/content/post.php) (line 42).

Now, go to the single post page on the frontend, there will be an URL in the text format before the footer as we set.

![go to the single post page on the frontend, there will be an URL in the text format before the footer as we set](https://imgur.elightup.com/lluqjGZ.png)

The URL is the one from the file that I attached to this post. We’ll turn it to a button later.

#### Creating shortcode for the button

To put the download button in different positions, we should customize the code one more time to create a shortcode.

Add one more line:

```
add_shortcode( 'estar_button_download', 'estar_child_add_link');
```
![create a shortcode to put the download button in different positions](https://imgur.elightup.com/ePKacBc.png)

Then, go to any page, any place to embed the shortcode (in this case, I named it as 'estar_button_download'). I’ll put it on the right sidebar.

![embed the shortcode any place you want](https://imgur.elightup.com/nK5Gk2h.gif)

After that, we had one more URL on the right sidebar.

![one more URL on the right sidebar](https://imgur.elightup.com/VTJsNKu.png)

#### Styling the button

To make those URLs to be the button format, we should go back to the theme file to stipulate the style of it.

I’ll do it in a simple way with an HTML tag and icon, also named the buttons.

![style URLs to be the button format with an HTML tag and icon, also named the buttons](https://imgur.elightup.com/8JOFLsR.png)

Now, go back to a post on the frontend. The download buttons are ready.

![The download buttons are ready on the frontend](https://imgur.elightup.com/iLoPhfi.gif)

### Method 2: Using MB Views

If you have the Meta Box AIO, you can use **MB Views** to get and display the download button easily.

Go to **Meta Box** > **Views** to create a template for the buttons.

![Go to Meta Box, Views to create a template for the buttons](https://imgur.elightup.com/Gvoyi8j.png)

In the **Template** tab, click on the **Insert Field** button.

![In the Template tab, click on the Insert Field button](https://imgur.elightup.com/uoRiwJj.png)

And, find the field you created in the previous step that stores the files.

![find the field you created in the previous step to store the file](https://imgur.elightup.com/thDZxJl.png)

There will be some options to output the files. I just keep the default option to output the URLs of the files.

![some options to output the file](https://imgur.elightup.com/HcT8Ex7.png)

Next, scroll down to the **Settings** section. Also there are multiple options for the type.

![in the Settings section, also there are multiple options for the type](https://imgur.elightup.com/oh477Kz.png)

No matter which option you choose here, this view still generates a shortcode for this template, then you can use it anywhere.

So that, to display the button below the content of the post and the sidebar at the same time, I choose to set the **Type** as **Singular**, and choose the **Location** as **Post** to apply the template to all single posts.

![choose to set the Type as Singular, and choose the Location as Post to apply the template to all single posts](https://imgur.elightup.com/1JFG2Sn.png)

In the **Render for** section, select the position of the download button as you want. I also set it before the footer.

![In the Render for section, select the position of the download button as you want](https://imgur.elightup.com/PyLotSF.png)

After publishing, you can see the shortcode I mentioned before.

![the shortcode displayed automatically after publishing](https://imgur.elightup.com/sw7K953.png)

You should copy it then embed it if you want to put the button on some other place on your website.

On the single post page, the download button is displayed. It’s clickable already.

![On the single post page, the download button is displayed. It’s clickable already](https://imgur.elightup.com/38CI386.gif)

I’ll also add the button to the sidebar. Just copy the shortcode and paste it to the wanted position.

![copy the shortcode and paste it to the wanted position](https://imgur.elightup.com/PSWKJiy.png)

And now, we have 2 download buttons on the page.

![two download buttons on the page](https://imgur.elightup.com/z79F8gD.png)

To rename, as well as style the button, we should go back to the view, and customize the template a little bit more.

![style the buttons](https://imgur.elightup.com/9s2co9X.png)

This is the new look of the buttons.

![the new look of the buttons](https://imgur.elightup.com/sQel9YK.png)

# Creating Download and Preview Buttons - MB Views

import LiteYouTubeEmbed from 'react-lite-youtube-embed';
import 'react-lite-youtube-embed/dist/LiteYouTubeEmbed.css';

If you want to give users options to read previews or download PDF files, you shouldn't skip this article. Here is a quick tutorial on how to create an ebook page with 2 buttons **allowing preview and download the ebook using MB Views**.

In such cases, I created an ebook page as an example:

![An ebook page with download and preview button](https://imgur.elightup.com/eOuohga.png)

## Video version

<LiteYouTubeEmbed id='I718h2v7u_s'/>

## Preparation

This archive page shows the product's detailed information along with 2 buttons. The first one allows directly downloading a PDF file. And the second button is to view it online.

Each ebook will be a unique post of a custom post type. The name of the ebook and its image are the title and featured image of the post. We'll use a custom field provided by Meta Box to store the PDF file and the two buttons will link to this file.

For this practice, we need these tools:

* [Meta Box core plugin](https://wordpress.org/plugins/meta-box/): to have a framework to create a custom post type and custom fields:
* [MB Custom Post Type](https://metabox.io/plugins/custom-post-type/): to create a custom post type for ebooks;
* [MB Views](https://metabox.io/plugins/mb-views/): to create and style the template for the page without touching the theme files;
* [MB Builder](https://metabox.io/plugins/meta-box-builder/): to provide a UI on the back end to create custom fields.

You can install them individually or use **Meta Box AIO**.

## 1. Creating a custom post type

Go to **Meta Box** > **Post Types** > **Add New** to create a new post type for your ebooks.

![Create a new post type for your ebooks](https://imgur.elightup.com/qT4mSI8.png)

After publishing, you will see your new post types in the admin dashboard.

![A new post types in the admin dashboard](https://imgur.elightup.com/HJH7vDO.png)

## 2. Creating custom fields

I’ll create only one custom field to store the **PDF file** for the ebook. So choose the **File Advanced field**.

![Create custom field to store the PDF file for the ebook](https://imgur.elightup.com/OVFP6Vt.png)

Next, move to the **Settings** tab. Choose **Location** as **Post Type** and then select **ebook** to apply this field to the post type.

![Select ebook to apply the field to the post type](https://imgur.elightup.com/sFdDXnz.png)

Go to the post editor, you will see the created custom fields.

![The created custom fields](https://imgur.elightup.com/ZPHUwSg.png)

## 3. Creating the page template

### 3.1. Creating a new page

I’ll create a new page first.

![Create a new page](https://imgur.elightup.com/hEvACcg.png)

![A new ebook page](https://imgur.elightup.com/IXGGJub.png)

### 3.2. Creating a template

Then, go to **Views** of **Meta Box** to create a new template for the page.

![Create a new template for the page](https://imgur.elightup.com/IQUZxVe.png)

### 3.3. Querying the posts

Add some code to the **Template** tab as follows:

![Add some code to the Template tab](https://imgur.elightup.com/wlESRzO.png)

```
{% set args = { post_type: 'ebook', posts_per_page: -1 } %}
{% set posts = mb.get_posts( args ) %}
{% for post in posts %}

{% endfor %}
```

Let’s get through each line with me.

```
{% set args = { post_type: 'ebook', posts_per_page: -1 } %}
```

This line of code is to declare that we will get posts from the post type that has an ID as **'_ebook_'**. The number **_-1_** means that we will display all the posts on the page. You can change it as you want.

Next, we’ll use the **_mb.get_posts( )_** function to get posts.

```
{% for post in posts %}

{% endfor %}
```

This is the loop to display all the posts.

### 3.4. Displaying the ebook information

To display the ebook information, you can add code or just insert fields from the right sidebar into the above loop.

![Insert fields from the right sidebar into the above loop to display the ebook information](https://imgur.elightup.com/LEfECsx.png)

Choose the **Post thumbnail** field to display the book images.

![Choose the Post thumbnail field to display the book images](https://imgur.elightup.com/bXcG7Oj.png)

Then, choose the **Post title** to show the book's name.

![Choose the Post title to show the book's name](https://imgur.elightup.com/uXcoC51.png)

And click on **Post content** for description.

![Click on Post content for description](https://imgur.elightup.com/LZehEU0.png)

### 3.5. Creating buttons

To have a **download button**, insert the custom field that we created.

![Insert the custom field that we created to have a download button](https://imgur.elightup.com/PJ3gnFo.png)

Change some codes to name the button and set it to download ebooks directly.

![Change some codes to name the button and set it to download ebooks directly](https://imgur.elightup.com/brhf993.png)

Insert the custom field once again to have the **preview button**.

![Insert the custom field to have the preview button](https://imgur.elightup.com/6Txs0eW.png)

Just add a name for the button.

![Add a name for the button](https://imgur.elightup.com/QDwnw2X.png)

### 3.6. Assigning the template to the page

Move to the **Settings** section of the **View**. Set the template in the type of **Singular page**.

![Set the template in the type of Singular page](https://imgur.elightup.com/7qvKgYv.png)

Choose the location as **Page** and select **ebook shop** to apply the template to the page.

![Select ebook shop to apply the template to the page](https://imgur.elightup.com/udHScoE.png)

After publishing, go back to the page on the front end, all the product information and buttons are displayed already.

![The product information and buttons are displayed already](https://imgur.elightup.com/xAR784H.png)

## 4. Styling the page

With **MB Views**, we should use **CSS** to style. So, let’s add some div tags and classes for elements.

![Add some div tags and classes for elements](https://imgur.elightup.com/UQEtBVx.png)

Next, add some **CSS** code to this tab.

![Add some CSS code](https://imgur.elightup.com/0897K0x.png)

All of these codes are available on our [Github](https://github.com/wpmetabox/tutorials/tree/master/create-download-and-preview-buttons-mb-view), so you can refer to them.

After updating the template, you’ll see the new look on the front end. You can click on the **Download button** to get the ebook or choose the **Preview button** to read it online.

![Ebook shop with download and preview buttons](https://imgur.elightup.com/zZzqXc1.png)

# Creating download and preview buttons - Meta Box + Bricks

import LiteYouTubeEmbed from 'react-lite-youtube-embed';
import 'react-lite-youtube-embed/dist/LiteYouTubeEmbed.css';

Today, we’re going to use Meta Box and Bricks to create 2 buttons: One is to download a PDF file and the other button is to view the information from the file.

We will create buttons to download and read e-books online as follows. Each button for each ebook will embed their own URL of a PDF file.

![Example of displaying the latest products](https://imgur.elightup.com/VEgnSVN.png)

## Video version

<LiteYouTubeEmbed id='Z2GAVMZKrzQ'/>

## Preparation

Each e-book will be a post in a custom post type. There is some typical information in each post. For the PDF file, we’ll use a custom field created by Meta Box to save it.

In this practice, we need these tools:

* [Meta Box core plugin](https://wordpress.org/plugins/meta-box/): to have a framework to create custom post types and custom fields;
* [MB Custom Post Type](https://metabox.io/plugins/custom-post-type/): to create a custom post type for the e-books;
* [MB Builder](https://metabox.io/plugins/meta-box-builder/): to have an intuitive UI to create custom fields in the backend;
* **Bricks**: to build the e-book page.

## 1. Creating a new custom post type

Go to **Meta Box** > **Post Types** > **Add New** to create a new post type for your e-books.

![Create a new post type for your e-books.](https://imgur.elightup.com/kGoDJrU.png)

## 2. Creating custom fields

I’ll use a custom field to store the PDF file of the e-book. Choose the **File Advanced** type to save this kind of data.

![Choose the File Advanced type to store the PDF file of the e-book.](https://imgur.elightup.com/MI0PQHm.png)

In the real case, you may want to add more custom fields for extra information, but I skip it to make this practice simpler.

After creating the field, move to the **Settings** tab > choose **Location** as **Post type** > select **E-book** to apply this field to this post type.

![In the Settings tab, choose Location as Post type and select E-book to apply this field to this post type.](https://imgur.elightup.com/qTiuTO5.png)

Go to the post editor, you will see the created custom field.

![The created custom fields](https://imgur.elightup.com/38H71WW.png)

Then, just fill in the information and upload a file.

## 3. Creating the buttons

I already have an archive page that displays all the e-books along with some detailed information. I’d like to add a **Download** button and a **Preview** button to the place shown in the image below.


![The place where we add a Download button and a Preview button.](https://imgur.elightup.com/bmh2HKu.png)

Let’s edit the page with Bricks.

First, add a new **Div** element for the **Download** button.

![Add a new Div element for the Download button.](https://imgur.elightup.com/xmH2ww7.png)

In this Div, choose the **HTML tag** as **a [Link]**. This makes the button clickable.

![Choose the HTML tag as a [Link] to make the button clickable.](https://imgur.elightup.com/TeAWK48.png)

Then, select the type of **Link** as **Dynamic Data** to have the option to connect this Div to a custom field. In this case, it's the **PDF Upload** field.


![Select the type of Link as Dynamic Data to have the option to connect the Div element to a custom field.](https://imgur.elightup.com/fyZnBQ1.png)


![Choose the PDF Upload field to connect this field to the Div element.](https://imgur.elightup.com/eznx0tT.png)

To allow users to download the file from the button, we should add an attribute to this Div. Go to the **Style** section > **Attribute** > **Add Attribute**. Add ‘download’ to the Name field. This is an **HTML** attribute.


![To allow users to download the file from the button, add an attribute.](https://imgur.elightup.com/Y678iME.png)

You can add CSS classes to style the button in the box like this.


![Add CSS classes to style the button](https://imgur.elightup.com/RD2eZt1.png)

Now, add the **Basic Text** element to name the button.

![Add the Basic Text element to name the button](https://imgur.elightup.com/yde7WX3.png)

For the **Preview** button, do the same with the **Download** button. So, just duplicate the above Div and rename it as well.

Keep the type of **HTML tag** as **a [Link]** and connection with the **PDF Upload** field.

![For the Preview button, keep the type of HTML tag as a [Link] and connection with the PDF Upload field.](https://imgur.elightup.com/DZVojau.png)

If you want to display the PDF file in a new tab of the browser when clicking this **Preview** button, turn on the option shown in the image below.

![To display the PDF file in a new tab, turn on the Open in new tap option](https://imgur.elightup.com/1kMWrbP.png)

You can also change the CSS classes to have a different style with the **Download** button. Finally, this is just previewing, so remove the attribute that we used for downloading.

![Change the CSS classes to have a different style and remove the attribute that we used for downloading.](https://imgur.elightup.com/qkRcVjN.png)

Now, we have 2 buttons. Change the spacing a little bit, and then you get the final look of them.

On the frontend, you can click the buttons for testing. They work well, as you can see in the gif.

![The Download and Preview buttons work well.](https://imgur.elightup.com/9Ue0u7D.gif)

# Creating download and preview buttons - Meta Box + Kadence

import LiteYouTubeEmbed from 'react-lite-youtube-embed';
import 'react-lite-youtube-embed/dist/LiteYouTubeEmbed.css';

It’s convenient to allow visitors to have two options: read the preview or download the PDF file. Therefore, **creating download and preview buttons** on an e-book page can be a useful topic for you. Today, let’s do it using **Meta Box** and **Kadence**.

Take a look through the e-book page with two buttons that I created as an example:

![The e-book page with the download and preview buttons](https://imgur.elightup.com/yii7GKC.png)

## Video version

<LiteYouTubeEmbed id='plBdD3YUccI' />

## Preparation

Each e-book will be a post of a custom post type. The basic information of the e-book such as image, name, and description are respectively featured images, title, and description of the post. To store the PDF file, we'll use a custom field provided by Meta Box.

So, these are some tool we need:
* [Meta Box core plugin](https://wordpress.org/plugins/meta-box/): to have the framework for creating the custom post type and custom fields. You can download it directly from [wordpress.org](https://wordpress.org/plugins/meta-box/);
* [MB Custom Post Type](https://metabox.io/plugins/custom-post-type/): to create a custom post type for the e-book;
* [MB Builder](https://metabox.io/plugins/meta-box-builder/): to have a UI on the back end to create a custom field for storing the PDF files;
* **Kadence** with some extra types of blocks to build the page.

## 1. Creating a custom post type

Go to **Meta Box** > **Post Types** > **Add New** to create a new one for the e-book.

![Go to Meta Box > Post Types > Add New to create a new one for the e-book](https://imgur.elightup.com/yHPavUx.png)

After publishing, the created custom post type will be displayed in the admin dashboard.

![The created custom post type is displayed in the admin dashboard](https://imgur.elightup.com/nYUvFcu.png)

## 2. Creating custom fields

Go to **Meta Box** > **Custom Fields** to create a new field group as usual.

In this practice, I’ll create only one custom field to store the PDF file for the e-book. So, add the **File Advanced** field.

![Add the File Advanced field to store the PDF file for the e-book](https://imgur.elightup.com/sqyPi30.png)

I keep this field as default without special settings. In the real case, you may want to have some advanced settings for this field or add more custom fields for extra information. But I skip them to make this practice simpler.

After that, move to the **Settings** tab. Then, set the **Location** as **Post type**, and select **E-book** to apply the field to this post type.

![Move to the Settings tab, set the Location as Post type, and select E-book to apply the field to this post type](https://imgur.elightup.com/327JoTq.png)

Go to the post editor, you will see the created custom field.

![The created custom field is displayed in the post editor](https://imgur.elightup.com/RGaKs70.png)

Just fill in the information. And, click on the **+ Add Media** button to upload a file.

![Click on the + Add Media button to upload a file](https://imgur.elightup.com/ijXUfJD.png)

These are some posts I’ve added.

![Some posts as a demonstration](https://imgur.elightup.com/6rwEj9V.png)

## 3. Displaying e-books on the archive page

As I mentioned, e-books will be displayed on the archive page. So, we need to create the page first.

Go to **Pages** > **Add New** to create a new one as usual.

![Go to Pages > Add New to create a new archive page](https://imgur.elightup.com/wDtQbWh.png)

Next, we will get and display e-books on this page.

We have multiple e-books, so I’ll create a query loop to get them all. To do it, add the **Advanced Query Loop** block. It is provided by Kadence.

![Add the Advanced Query Loop block to have query loop to get all of the posts](https://imgur.elightup.com/QboSjy5.png)

In the **Post Types** option, choose the post type we used for the e-books.

![Choose the post type we used for the e-books in the Post Types section](https://imgur.elightup.com/5ARhXGS.png)

There are some default layouts you can choose for the e-book. Choose one of them.

![Choose a layout for the e-book](https://imgur.elightup.com/mXqBMKg.png)

After that, all of the e-books are displayed with the chosen layout.

![All of the e-books are displayed with the chosen layout](https://imgur.elightup.com/mb2LmGr.png)

You can adjust it as you want.

Next, we will add the download and preview buttons for each e-book into this query loop.

## 4. Adding download and preview buttons

### 4.1. Adding a download button

First, for the download button, add an **Advanced Buttons** block.

![Add an Advanced Buttons block for the download button](https://imgur.elightup.com/5ZPsR6O.png)

Then, add a label for the button.

![Add a label for the button](https://imgur.elightup.com/mQUjxDB.png)

To connect the button to the PDF file, click on the **Link** icon to add a dynamic link to the button.

![Click on the Link icon to add a dynamic link for connecting the button to the PDF file](https://imgur.elightup.com/P8nmPWR.png)

The documentation file was saved in the custom field created with Meta Box. So, set the **Link** as **Post Custom Field**.

![Set the Link as Post Custom Field](https://imgur.elightup.com/d4NZxvV.png)

At the same time, select the field that we used to store the PDF file.

![Select the field that we used to store the PDF file](https://imgur.elightup.com/GDlnXVA.png)

To set the download function for this button, open the **Advanced** section of the button, and enable the **Download** option.

![To set the download function for this button, open the Advanced section of the button, and enable the Download option](https://imgur.elightup.com/jQII2TJ.png)

That’s done.

### 4.2. Adding a preview button

For the preview button, do the same.

Also use the **Advanced Buttons** block to add the preview button.

![Use the Advanced Buttons block to add the preview button](https://imgur.elightup.com/dcpyj8d.png)

Set the dynamic link for it as the field we used.

![Set the dynamic link for it as the field we used](https://imgur.elightup.com/9vEKzJj.png)

However, after that, there is no need to add advanced settings to the button since previewing the attached file is the default function of the button. It means that when visitors click on it, the uploaded file will be shown automatically.

Then, go to the page on the front end, you will see the buttons work well.

![The buttons work well on the frontend](https://imgur.elightup.com/nkQKh6s.gif)

Next, it seems like we should style the page a little bit to have a better appearance.

## 5. Styling the page

Back to the page editor with Kadence. Just change some parameters and settings in the **Style** and **Advanced** tab on the right sidebar of each block.

![Change some parameters and settings in the Style and Advanced tab of each block to style the page](https://imgur.elightup.com/r8bI913.png)

Then, we will have the page with a better look.

![The new look of the page after styling](https://imgur.elightup.com/EzIuLeX.gif)

# Creating download and preview buttons - Meta Box + Oxygen

import LiteYouTubeEmbed from 'react-lite-youtube-embed';
import 'react-lite-youtube-embed/dist/LiteYouTubeEmbed.css';

In today's post, we'll walk you through the way to create an e-book page with download and preview buttons using Meta Box and Oxygen**. The e-book files can be downloaded easily or viewed online by website visitors with just one click.

Take a look through the e-book page with two kinds of buttons that I created:

![The e-book page with two kinds of buttons](https://imgur.elightup.com/JkzmLtp.png)

## Video version

<LiteYouTubeEmbed id='G0npHZH9mvA'/>

## Preparation

This is an archive page that shows the product's detailed information along with the buttons. Each e-book will be a unique post of a custom post type. The name of the e-book and its image are the title and featured image of the post. We'll use a custom field provided by Meta Box to store the PDF file.

So, in this practice, we need these tools:

* [Meta Box core plugin](https://wordpress.org/plugins/meta-box/): to have the framework for creating custom post types and custom fields;
* [MB Custom Post Type](https://metabox.io/plugins/custom-post-type/): to create a custom post type for the e-books;
* [MB Builder](https://metabox.io/plugins/meta-box-builder/): to have a UI on the back end to create custom fields to store the PDF files;
* **Oxygen**: to build the page.

## 1. Creating a custom post type

Go to **Meta Box** > **Post Types** to create a new post type for the e-books.

![Create a new post type for the e-books](https://imgur.elightup.com/NxTFiji.png)

After publishing, you’ll see a new item appear in the admin dashboard.

![A new item appear in the admin dashboard](https://imgur.elightup.com/5AIygzf.png)

## 2. Creating custom fields

I’ll create only one custom field to store the PDF file of the e-book. So choose the **File Advanced** type to save this kind of data. The file will be used for both Download and Preview buttons.

![Create one custom field to store the PDF file of the e-book](https://imgur.elightup.com/eaTCm4f.png)

Next, move to the **Settings** tab. Choose **Location** as **Post Type** and then select **E-book** to apply the field to the post type.

![Choose Location as Post Type and then select E-book to apply the field to the post type](https://imgur.elightup.com/oh3s4aO.png)

Go to the post editor, you will see the created custom fields.

![The created custom fields](https://imgur.elightup.com/19yLKXp.png)

## 3. Creating the page

Go to **Oxygen** > **Templates** to add a new template.

![Add a new template](https://imgur.elightup.com/8oNzUTA.png)

![Go to Oxygen > Templates to add a new template](https://imgur.elightup.com/VyL02lB.png)

Next, create a new page.

![Create a new page](https://imgur.elightup.com/NO5teGE.png)

Set the created template to apply it to the new page.

![Set the created template to apply to the new page](https://imgur.elightup.com/6vCNGh9.png)

Then, edit the template with **Oxygen**.

![Edit the template with Oxygen](https://imgur.elightup.com/VmpOekS.png)

Remember to set the preview.

![Set the preview](https://imgur.elightup.com/OOpUhax.png)

Select the **Section** component to cover the page content.

![Select the Section component to cover the page content](https://imgur.elightup.com/3iMJkTD.png)

Then, add a **Heading** and insert data from the page title.

![Add a Heading](https://imgur.elightup.com/UeZKtVt.png)

![Insert data from the page title](https://imgur.elightup.com/B3JvDYJ.gif)

We will display all the e-books first, then add buttons later.

### 3.1. Displaying e-books information

Inside the **Section**, add a **Repeater** component to get all the posts of the `e-book` post type.

![Add a Repeater component to get all the posts of the e-book post type](https://imgur.elightup.com/U0VesT6.png)

Go to the **Query** section in the settings of the **Repeater** to choose the source of data.

![Go to the Query section to choose the source of data](https://imgur.elightup.com/clu23bA.png)

Choose **Custom**, and set the **Post type** as ‘**e-book**’ to get posts from the post type.

![Choose Custom, and set the Post type as ‘e-book’ to get posts from the post type](https://imgur.elightup.com/6AG3yGD.png)

![Set the Post type as ‘e-book’ to get posts from the post type](https://imgur.elightup.com/CC10cvz.png)

Inside the **Repeater**, there will be a **Div**. I’ll add some components to the Div to display the e-book information.

![Inside the Repeater, there will be a Div](https://imgur.elightup.com/eM4IT4l.png)

First, add an **Image** component.

![Add an Image component](https://imgur.elightup.com/yRmTYnc.png)

Insert data from the **Featured Image** of the post

![Insert data from the Featured Image of the post](https://imgur.elightup.com/KRkcvwN.png)

![Insert data from the Featured Image of the post](https://imgur.elightup.com/mhtansp.png)

You can change the settings of the **Div** a little bit to put the e-book into columns and see all the images.

![Change the settings of the Div a little bit to put the e-book into columns and see all the images](https://imgur.elightup.com/cYWMaie.png)

For the name of the books, add a **Text** component.

![Add a Text component](https://imgur.elightup.com/DE4pvtq.png)

Then insert data from the **Post Title**.

![Then insert data from the Post Title](https://imgur.elightup.com/XYa79R2.gif)

For the book description, use the **Text** component.

![Use the Text component](https://imgur.elightup.com/jqqWlnD.png)

And insert data from **Post Content**.

![Choose insert data](https://imgur.elightup.com/Vxf3yJn.png)

![Insert data from Post Content](https://imgur.elightup.com/wnEXEB6.png)

Now, move ahead to create the buttons.

### 3.2. Creating the buttons

Add a **Button** component.

![Add a Button component](https://imgur.elightup.com/9y7sw1K.png)

Change the button label.

![Change the button label](https://imgur.elightup.com/TOAGjcU.png)

In the **URL** setting, insert data from the custom field to the button. Choose **Meta Box Field** option, then select the name of the field that we used to store the PDF file.

![Insert data from the custom field to the button](https://imgur.elightup.com/bgV1Jkj.gif)

This action just helps to embed the URL of the **PDF** file into the button. To allow users to download the file from it, we should add an attribute to the button.

Go to the **Advanced** > **Attributes** section in the settings of the Button component.

![Go to the Advanced > Attributes section in the settings of the Button component](https://imgur.elightup.com/ZdbWMwI.png)

Then add an attribute as a `download` to the button.

![Add an attribute as download to the button](https://imgur.elightup.com/VzDH07r.png)

That’s done for the **Download** button. For the **Preview** button, you can do the same way.

Add **Button** component.

![Add Button component](https://imgur.elightup.com/rXJNWh8.png)

Set the label.

![Set the label](https://imgur.elightup.com/tGfKi2N.png)

Insert **URL** from the field that stores the **PDF file**.

![Insert URL from the field that stores the PDF file](https://imgur.elightup.com/uCQiNRn.gif)

It’s a little bit different with the **Download** button. There is no need to add any attribute as well as any action for the **Preview** button. The file will be open to view when people click on the button.

After getting all the data, we have an e-book page with buttons like this.

![An e-book page with buttons](https://imgur.elightup.com/TX0F5Y9.png)

## 4. Styling the page

Just change the settings of each component to have a better look for them.

![A better look for e-book page](https://imgur.elightup.com/JkzmLtp.png)

# Creating download and preview buttons - Meta Box + Zion

import LiteYouTubeEmbed from 'react-lite-youtube-embed';
import 'react-lite-youtube-embed/dist/LiteYouTubeEmbed.css';

Are you running a WordPress website where you share valuable content like educational materials, documentation, product information, portfolios, or other downloadable files? If so, you’ve probably wondered how to make it easier for users to access your content in a way that suits them best. Giving users the option to preview or download files can make their experience much better. In this practice, we’ll create the Download and Preview buttons for e-books using **Meta Box** and **Zion**.
Check out the e-book page I made as an example, which includes two buttons:

 ![The e-book page as an example](https://i0.wp.com/images.elightup.com/meta-box/blog/download-preview-buttons-zion/e-book%20page.png)

## Video version

<LiteYouTubeEmbed id='7NXZkUhxt4c' />

## Preparation

This archive page shows detailed information about the books along with two buttons. The first one is to save the PDF file to your device, and another allows you to view it online.

Each e-book will be a post of a custom post type. The e-book’s image, name, and description are respectively featured images, title, and description of the post. For the PDF file to preview or download, we'll use a custom field provided by Meta Box.

So, we need:
* [Meta Box Lite](https://metabox.io/lite/) to have a framework that allows creating custom post types and custom fields;tg8
* **Zion Builder** and **its Pro Version** to build the page.

## 1. Creating a custom post type

Go to **Meta Box** > **Post Types** to create a new one for the e-book.

![Go to Meta Box > Post Types to create a new one for the e-book](https://i0.wp.com/images.elightup.com/meta-box/blog/download-preview-buttons-zion/post%20type.png)

After publishing, the created custom post type will be displayed in the admin dashboard.

![After publishing, the created custom post type will be displayed in the admin dashboard](https://i0.wp.com/images.elightup.com/meta-box/blog/download-preview-buttons-zion/new%20post%20type.png)

## 2. Creating custom fields

Go to **Meta Box** > **Custom Fields** to create a new field group.

![Go to Meta Box > Custom Fields to create a new field group](https://i0.wp.com/images.elightup.com/meta-box/blog/download-preview-buttons-zion/custom%20field.png)

In this practice, I just create one custom field to store the PDF file for the e-book. As usual, you can use **File Advanced** to select or upload files. However, **Zion** doesn’t support getting data from it. So, I use **File Input** to upload a single file.

![So, I use File Input to upload a single file](https://i0.wp.com/images.elightup.com/meta-box/blog/download-preview-buttons-zion/file%20input.png)

I’ll keep this field as the default, then there is no special setting for this field.

If you want to store any extra information about the e-book, just add the corresponding field type and set them as you go.

After that, move to the **Settings** tab. Set the **Location** as **Post type**, and select **E-book** to apply the field to this post type.

![Set the location for the field group](https://i0.wp.com/images.elightup.com/meta-box/blog/download-preview-buttons-zion/setting.png)

Then, go to the post editor, you will see the created custom field.

![Then, go to the post editor, you will see the created custom field](https://i0.wp.com/images.elightup.com/meta-box/blog/download-preview-buttons-zion/new%20ebook%20.png)

Just fill in the information, and click on the **Select** button to upload a file.

![Just fill in the information, and click on the Select button to upload a file](https://i0.wp.com/images.elightup.com/meta-box/blog/download-preview-buttons-zion/select.png)

These are some posts I had.
 
![These are some posts I had](https://i0.wp.com/images.elightup.com/meta-box/blog/download-preview-buttons-zion/posts.png)

## 3. Displaying e-books on the archive page

### 3.1. Creating a new page

Create a new archive page for the e-books first. 

Go to **Pages** > Add **New** to create a new one as usual.
 
![Go to Pages > Add New to create a new one as usual](https://i0.wp.com/images.elightup.com/meta-box/blog/download-preview-buttons-zion/new%20page.png)

Then, edit the template with **Zion**.

![Then, edit the template with Zion](https://i0.wp.com/images.elightup.com/meta-box/blog/download-preview-buttons-zion/edit%20with%20zion.png)

First, add the **Section** element to cover all the content of the page.

![First, add the Section element to cover all the content of the page](https://i0.wp.com/images.elightup.com/meta-box/blog/download-preview-buttons-zion/zion.png)

![First, add the Section element to cover all the content of the page](https://i0.wp.com/images.elightup.com/meta-box/blog/download-preview-buttons-zion/add%20section.png)

To set the layout for posts, add a **Column** element.

![To set the layout for posts, add a Column element](https://i0.wp.com/images.elightup.com/meta-box/blog/download-preview-buttons-zion/add%20column.png)

In the **Advanced** tab of the **Column**, enable the **Repeater Provider** to display all the posts from the wanted post type.

![In the Advanced tab of the Column, enable the Repeater Provider to display all the posts from the wanted post type](https://i0.wp.com/images.elightup.com/meta-box/blog/download-preview-buttons-zion/repeater%20options.png)

In the query type section, choose the **Query builder**, then set the **Post type** as **E-books**.
 
![In the query type section, choose the Query builder](https://i0.wp.com/images.elightup.com/meta-box/blog/download-preview-buttons-zion/query%20builder.png) 

![then set the Post type as E-books](https://i0.wp.com/images.elightup.com/meta-box/blog/download-preview-buttons-zion/set%20post%20type%20as%20ebook.png)

You should also enable **Repeater Consumer** to display all the posts in the chosen post type.

![You should also enable Repeater Consumer to display all the posts in the chosen post type](https://i0.wp.com/images.elightup.com/meta-box/blog/download-preview-buttons-zion/enable%20repeater.png)

Now, just add some elements to display the e-book information.

### 3.2. Displaying e-books information

First, add an **Image** element. 

![First, add an Image element](https://i0.wp.com/images.elightup.com/meta-box/blog/download-preview-buttons-zion/add%20image.png)

There will be an icon for using dynamic data that allows us to get data for this element from a source. Click on it and choose the **Featured image**.

![Click on it and choose the Featured image](https://i0.wp.com/images.elightup.com/meta-box/blog/download-preview-buttons-zion/featured-image.gif)

Next, add a **Text** element. **Use dynamic data** and select the **Post title**.

![Next, add a Text element](https://i0.wp.com/images.elightup.com/meta-box/blog/download-preview-buttons-zion/add%20text%20for%20post%20title.png)

![Use dynamic data and select the Post title](https://i0.wp.com/images.elightup.com/meta-box/blog/download-preview-buttons-zion/title.gif)

Continue to add a **Text** element for the description of the e-book. 
 
![Continue to add a Text element for the description of the e-book](https://i0.wp.com/images.elightup.com/meta-box/blog/download-preview-buttons-zion/add%20text%20for%20post%20content.png)

**Use dynamic data** and select the **Post content**.
 
![Use dynamic data and select the Post content](https://i0.wp.com/images.elightup.com/meta-box/blog/download-preview-buttons-zion/use%20dynamic%20data%20for%20post%20content.png)

### 3.3. Adding the buttons for download and preview

To have the **Download** and **Preview** buttons, we use the **Button** elements. 
 
![To have the Download and Preview buttons, we use the Button elements](https://i0.wp.com/images.elightup.com/meta-box/blog/download-preview-buttons-zion/add%20download%20button.png)

For the download button, click on **Button** text and rename it.
 
![For the Download button, click on Button text and rename it](https://i0.wp.com/images.elightup.com/meta-box/blog/download-preview-buttons-zion/button%20text%20download.png)

To connect the button to the PDF file, move to **Link**, click on **Use dynamic data** and choose **Meta Box Field**. Then you can select the field that you used to store the PDF file.
 
![To connect the button to the PDF file, move to Link, click on Use dynamic data and choose Meta Box Field](https://i0.wp.com/images.elightup.com/meta-box/blog/download-preview-buttons-zion/link-download-file.png)
 
![Then you can select the field that you used to store the PDF file](https://i0.wp.com/images.elightup.com/meta-box/blog/download-preview-buttons-zion/field%20option%20download.png)
 
![Then you can select the field that you used to store the PDF file](https://i0.wp.com/images.elightup.com/meta-box/blog/download-preview-buttons-zion/pdf%20upload%20download.png)

Click on the **Link Attribute** feature. 
 
![Click on the Link Attribute feature](https://i0.wp.com/images.elightup.com/meta-box/blog/download-preview-buttons-zion/link%20attributes.png)

Set the **Attribute Key** as Download.
 
![Set the Attribute Key as Download](https://i0.wp.com/images.elightup.com/meta-box/blog/download-preview-buttons-zion/attribute%20key%20download.png)

For the preview button, do the same. Also add the **Button** element.
 
![Also add the Button element](https://i0.wp.com/images.elightup.com/meta-box/blog/download-preview-buttons-zion/add%20button%20preview.png)
 
![Click Button text and rename](https://i0.wp.com/images.elightup.com/meta-box/blog/download-preview-buttons-zion/button%20text%20preview.png)

Set the dynamic link for it as the field we used. However, after that, there is no need to add advanced settings to the button since previewing the attached file is the default function of the button. It means that when visitors click on it, the uploaded file will be shown automatically.
 
![Set the dynamic link for it as the field we used](https://i0.wp.com/images.elightup.com/meta-box/blog/download-preview-buttons-zion/link%20preview.png)
 
![Edit field options](https://i0.wp.com/images.elightup.com/meta-box/blog/download-preview-buttons-zion/field%20option%20preview.png)
 
![choose PDF Upload](https://i0.wp.com/images.elightup.com/meta-box/blog/download-preview-buttons-zion/pdf%20upload%20preview.png)

## 4. Styling the page

Back to the page editor with **Zion**. Just change some parameters and settings in the **Styling** and **Advanced** tab of each block.
 
![Back to the page editor with Zion. Just change some parameters and settings in the Styling and Advanced tab of each block](https://i0.wp.com/images.elightup.com/meta-box/blog/download-preview-buttons-zion/styling-and-advanced.png)

Finally, we will have a page with a better look.

![Finally, we will have a page with a better look](https://i0.wp.com/images.elightup.com/meta-box/blog/download-preview-buttons-zion/finally.png)

# Displaying dynamic banners - MB Views

import LiteYouTubeEmbed from 'react-lite-youtube-embed';
import 'react-lite-youtube-embed/dist/LiteYouTubeEmbed.css';

Displaying dynamic banners in multiple places on a website with the same content but varying in size and position may not be easy to design. If you are looking at how to create banners without using any page builder, we will share an easy and straightforward tip using **MB Views** that you can follow. Let’s dive in to explore the process of creating banners in detail.

This is an example for the banners that we will create in this practice.

![This is an example for the banners](https://imgur.elightup.com/Cv31dWC.png)

## Video Version

<LiteYouTubeEmbed id='o3vny6oma0w' />

## Preparation

I’ll create two banners with the same content but varying in size and position. They are not rendered as images. The background, text, color, or any element of the banner are stipulated from the content saved in custom fields. So you can modify the banner context to whatever you want without having to update the layout or develop a new one.

So, in this practice, we need these tools:

* [Meta Box core plugin](https://wordpress.org/plugins/meta-box/): to have a framework to create custom fields;
* [MB Settings Page](https://metabox.io/plugins/mb-settings-page/): to create a settings page to input banner information;
* [MB Views](https://metabox.io/plugins/mb-views/): to create a template for the banner. It’s just optional;
* [MB Builder](https://metabox.io/plugins/meta-box-builder/): to have a UI on the back end to create custom fields easily.

You can install these extensions individually or just use **Meta Box AIO**.

## 1. Creating a settings page

We’ll use a settings page to include all the content, and other settings of the banner.

Go to **Meta Box** to create a settings page.

![Go to Meta Box to create a settings page](https://imgur.elightup.com/oGVdL1u.png)

There is no need for special settings for it in this practice.

After publishing, you can see a new settings page named **Banner** appeared.

![A new settings page named as Banner](https://imgur.elightup.com/ZVDtPLy.png)

It’s blank now, so just move on to create custom fields for this page.

![The settings page for the banner is blank page so far](https://imgur.elightup.com/HPE9KLQ.png)

## 2. Creating custom fields

Each element for the content of the banner should be put in a separate custom field. These are some fields that I’ll create for the banner.

![There are some fields for banners](https://imgur.elightup.com/6ThnxTo.png)

The first field is to set to display the banner on the frontend or not. You can turn on or turn off the banner easily thanks to it.

![This field is to set to display the banner on the frontend or not](https://imgur.elightup.com/IcTPvCD.png)

All the other fields are the content of the banner. They’re just typical ones. You should create fields based on your own requirements for the banner.

Now, move to the Meta Box menu to create fields.

Choose the **Checkbox** type for the first field, which regulates whether to display the banner or not.

![This is the Checkbox type to display the banner or not](https://imgur.elightup.com/vDwL8HK.png)

For the other fields for the content of the banner, just create them without special settings.

After creating all the fields, move to the **Settings** tab, choose **Location** as **Settings Page**, and select **Banner** to display the created fields to the settings page we use for the banner.

![Move to the Settings tab, choose Location as Settings Page, and select Banner to display the created fields](https://imgur.elightup.com/IDyqo4O.png)

Now the custom fields are ready on the settings page.

![The custom fields on the settings page](https://imgur.elightup.com/ED75X7I.png)

Just add content for the banner.

## 3. Creating a template for banner

We’ll create a template and generate a shortcode to easily display the banner anywhere.

There are two ways to do this.

* **Adding PHP code** into the theme’s file. If you change the theme, the template as well as the shortcode will be missed.

* Using the **MB Views** extension from **Meta Box**. It will ensure it always works.

We’ll go through to see both of these ways, then you can experience them all.

## 4. Creating a template for banner by adding PHP code to the Theme’s File

### 4.1. Getting data for banner

Go to the **functions.php** file, and add some lines of code.

![Go to the functions.php file, and add some lines of code](https://imgur.elightup.com/KNbBgJD.png)

**In there:**

```
$settings = get_option( 'banner' );
```

This line is to get data from the page. In there, `'banner'` is the option name of the settings page.

All of these following lines are to get data from the custom fields.

![These lines are to get data from the custom fields](https://imgur.elightup.com/HKrSvNO.png)

```
wp_get_attachment_image_src( )
```

This function is to get the URL of the image. `'image'` is the ID of the field.

```
$show = $settings['show'];
```

This line is to get the value saved in this field since we have a checkbox field choosing to show or hide the banner.

The `rwmb_meta( )` function is to get the data in text from fields.

![This function to get the data in text from fields](https://imgur.elightup.com/jMVj36V.png)

These are the ID of the fields.

![These are the ID of the fields](https://imgur.elightup.com/BjGrh5n.png)

Beside that, `['object_type' => 'setting']` stipulates the object type as a settings page.

These lines is to display the banner by using all the obtained data.

![These lines is to display the banner by using all the obtained data](https://imgur.elightup.com/KWBESdI.png)

This if `( $show == 1 ) { }` function is the condition to check that you check the box to allow showing the banner or not. If yes, the value saved in the field will be 1.

This is the banner that we will display.

![This is the banner will be displayed](https://imgur.elightup.com/ADhufMW.png)

I do not display all the obtained data directly. Some of them will be used as HTML attributes to specify how the image or the text will be.

For example, the URL of the image used for the background by this: `background-image: url(' .  $image_attributes[0]  . ' ).`.The color and position also are used in the same way.

### 4.2. Displaying the banner

In the above code, I also created a shortcode for the banner, then we can embed it to any place.

```
add_shortcode( 'banner-shortcode', 'short_code_banner' );
```

`banner-shortcode` is the name of the shortcode.

Go to the editor of any page, just paste the shortcode.

For instance, I add the shortcode to a page content and will display it as full width later.

![Go to the editor of any page, just paste the shortcode](https://imgur.elightup.com/uPJkkuG.png)

Then you’ll see the banner displayed.

![The banner displayed without styling](https://imgur.elightup.com/a6dtL5F.png)

To style the banner, we should add some **CSS**.

![Add some CSS for styling](https://imgur.elightup.com/O0GOGZR.png)

Here is the new look of the banner.

![The new look of the banner](https://imgur.elightup.com/VIOvKhN.png)

I also will add the banner to the right sidebar. Also use the shortcode.

![Add shortcode to the right sidebar](https://imgur.elightup.com/zefMSRM.png)

This is how the banner displays.

![This is how the banner displays](https://imgur.elightup.com/PUYvw5X.png)

You can see that the banners in both places are the same in the content and layout, but different in the size.

With dynamic banners, you can easily change the banner content and layout without spending time designing a new one, as well as place the banner in different areas and make changes of them at the same time.

## 5. Creating a template for banner using MB Views

### 5.1. Creating template and getting data

Go to **Views** to create a new template.

![Go to Views to create a new template](https://imgur.elightup.com/1H2jWOT.png)

In the **Template** tab, instead of adding code, we will insert fields one by one that we want to get data from.

![In the Template tab, insert fields one by one to get data from](https://imgur.elightup.com/cuMAk95.png)

Since our fields are on a settings page, in the **Site** section, you will see the list of the fields that we use for the banner.

![The list of the fields that we use for the banner](https://imgur.elightup.com/NFwW79K.png)

Just click one by one to insert fields to the template.

![Click one by one to insert fields to the template](https://imgur.elightup.com/4tdj274.png)

After publishing this template, it will automatically generate a shortcode. We’ll use it to display the banner later.

![A shortcode will be automatically generated](https://imgur.elightup.com/px0i2N8.png)

### 5.2. Displaying the banner content

The same with the method one when we have a shortcode by adding code to the theme file, now we’ll copy the shortcode from the view, then go to a page editor, paste the shortcode to any place.

![Go to a page editor, paste the shortcode to any place](https://imgur.elightup.com/wRwLrgQ.png)

On the frontend, the data will display in the form like this.

![On the frontend, the data will display in the form](https://imgur.elightup.com/stIol7H.png)

### 5.3. Beautifying the banner display

Go back to the template to customize it a bit more to regulate how the data should be rendered on the page.

The logic of the code is the same with method 1 with PHP, but different in detailed text.

![Move some lines of code to make it seem shorter and simpler](https://imgur.elightup.com/l1JAmKX.png)

```
{%  if(site.banner.show) == 1 %}
```

This line is a condition for showing or hiding the banner. It means that if the field with this ID is checked, the stored value will be 1, and then the banner will be allowed to display.

```
style="width: {{ site.banner.width }}
```

This line helps turn data from custom fields to be an attribute to stipulate the style of the banner. In this case, it’s the width of the image `{{ site.banner.width }}` means the field has the ID as `width` in the settings page has the ID as `banner`.

Just update the template, and see the new look of the banner on the page.

![The new look of the banner on the page](https://imgur.elightup.com/CLdD9rw.png)

To prettify the banner, go back to the template in the view, add some **CSS**.

![For styling, go back to the template, add some CSS](https://imgur.elightup.com/0R1SxJq.png)

Now, the banner displays on the frontend at full width with the right layout.

![The banner displays on the frontend at full width with the right layout](https://imgur.elightup.com/VIOvKhN.png)

### 5.4. Displaying banners on multiple positions.

We have a shortcode of the template for the banner like this.

![This is a shortcode of the template for the banner](https://imgur.elightup.com/Qv2OVn9.png)

Just add it to multiple places on a page, or even different pages.

![Add shortcode to multiple places on a page](https://imgur.elightup.com/K8IpxcW.png)

Then you will have the banner in different places.

![The final result of the banner with the same content but different sizes](https://imgur.elightup.com/PUYvw5X.png)

# Creating dynamic favicon in wordPress

import LiteYouTubeEmbed from 'react-lite-youtube-embed';
import 'react-lite-youtube-embed/dist/LiteYouTubeEmbed.css';

Do you recognize those tiny symbols that appear in your browser next to the website name? The favicon is that. The small icon helps to attract and create a memorable image of the brand in the user’s mind. It is typically 16 and 16 pixels in size and is kept in a file called favicon.io in the server's root folder. But, in some other cases, you may want to highlight your products or any page by setting other specific favicons for each of them. Then, using the Meta Box plugin along with editing the theme a little bit will help you get it.

This is the dynamic favicon we’ll create in today's practice. Let’s look at how to do it.

![Dynamic favicon we’ll create](https://imgur.elightup.com/cc7Mq7L.png)

## Video version

<LiteYouTubeEmbed id='Lb42Nv2Bkf0' />

## Preparation

In this practice, I will create dynamic favicons for my product pages. Each singular page of a product will have its own favicon.

So, to get started, we need some tools:

* [Meta Box core plugin](https://wordpress.org/plugins/meta-box/): to have the framework for creating the custom post type for the products and custom field for the favicons;
* [MB Custom Post Type](https://metabox.io/plugins/custom-post-type/): to create a custom post type for products;
* [MB Builder](https://metabox.io/plugins/meta-box-builder/): to have a **UI** on the back end to create the custom field for the favicon easily.

## 1. Creating product pages

We should have product pages before adding favicons for them. You might have it on your site already. But if not, we have another tutorial to [create product pages](https://metabox.io/series/product-page/). You should follow it.

In this practice, I create a post type named **Product**.

![Create a post type named Product](https://imgur.elightup.com/g8piQG7.png)

## 2. Creating a custom field

I’ll create only one custom field to upload the favicon image. Each post of a product will have this field to save its own favicon. In the real case, you may want to create some other fields for extra information about the product.

Just go to the **Meta Box** and create them.

![Go to the Meta Box and create a new custom field](https://imgur.elightup.com/eDDbNQv.png)

In this case, I create only one field for the favicon in the type as **Single Image**.

![I create only one field for the favicon in the type as Single Image](https://imgur.elightup.com/O0S0ODL.png)

After creating the wanted fields, move to the **Settings** tab, set the **Location** as **Post type**, and select **Product** to apply the field to it.

![Move to the Settings tab, set the Location as Post type, and select Product to apply the field to it](https://imgur.elightup.com/Xt8koLp.png)

Now, when adding a new post on the **Products** post type, you’ll see the field.

![The field displayed](https://imgur.elightup.com/vwgGnpV.png)

Try to add an image to the field. Note that, since the favicon has the ratio as 1:1, you should choose an image with the same ratio to make sure that it will be displayed in the best way.

## 3. Setting the field’s value to be favicon

We should interfere with the theme to set the favicon as we want. You definitely can go to the theme’s files and add code. But, with **Meta Box**, we have the **MB Views** to indirectly interfere with the theme. In today’s practice, we will provide a guide for both ways. However, we still highly recommend using **MB Views** since the favicon will not be affected when you change or edit the theme.

### 3.1. Method 1: Adding code to theme’s file

We should add code to the theme’s files to add some functions for the fields.

![Add code to the theme’s files](https://imgur.elightup.com/o7zoZsh.png)

```
function prefix_dynamic_favicon(){
   if ( ! is_singular( 'product' ) ) {
   return;
   }

   $favicon = rwmb_meta( 'favicon', array( 'size' => 'thumbnail' ) );
   $favicon = $favicon ? $favicon['url'] : get_site_icon_url();

   echo "<link rel='shortcut icon' href='$favicon' sizes='32x32' type='image/x-icon'>";
}
add_action( 'wp_head', 'prefix_dynamic_favicon' );
```

Since we will set the favicon for the singular page of the products only, we have the part to check if the current page is the singular page of the product post type or not. If not, it will do nothing. But if it is the wanted page, all the below lines of code will run and we will have the dynamic favicon on the page.

![The part to check if the current page is the singular page of the product post type or not](https://imgur.elightup.com/sQw7dkk.png)

First, I use the ` rwmb_meta( ) ` function to get the value of the field. '_favicon_' is the **ID** of the field that I save the favicon.

![The function to get the value of the field](https://imgur.elightup.com/AuP2ZaD.png)

There also will be some attributes in this function to regulate the output, you should follow the documentation for more details.

![Some attributes in this function to regulate the output](https://imgur.elightup.com/K47cBGc.png)

` $favicon = $favicon ? $favicon['url'] : get_site_icon_url(); : ` is to check if there is any image in the field. If not, it will get the default icon of the site.

![To check if there is any image in the field. If not, it will get the default icon of the site.](https://imgur.elightup.com/jZWgZjQ.png)

If the field has any image, echo ` "<link rel='shortcut icon' href='$favicon' sizes='32x32' type='image/x-icon'>"; ` will display it to be the favicon of the page.

![If the field has any image, codes will display it to be the favicon of the page](https://imgur.elightup.com/4eDPsQZ.png)

These attributes are the default of **HTML**, you should not change it.

![These attributes are the default of HTML](https://imgur.elightup.com/BppjdQF.png)

` wp_head ` is the hook that allows you to print the image to the header tag of the page.

![The hook that allows you to print the image to the header tag of the page](https://imgur.elightup.com/yV0rBq2.png)

Go back to the page on the frontend, and you’ll see the image from the field displayed as the favicon already.

![The image from the field displayed as the favicon already](https://imgur.elightup.com/7WYdYtK.png)

### 3.2. Method 2: Using MB Views

Go to **Views** in **Meta Box** and create a new view.

![Go to Views in Meta Box and create a new view](https://imgur.elightup.com/hsF0HW7.png)

We should get the image saved in the field, so click on the button. And choose the created field that we use for the favicon.

![Click on the button and choose the created field that we use for the favicon](https://imgur.elightup.com/ZIOawsr.png)

You can choose how the image will be output. We should choose the **Image URL** option.

![Choose how the image will be output](https://imgur.elightup.com/Aaq5skQ.png)

Next, change the code a bit to set it to the page title in the browser tab. It’s quite the same with the one we use with **PHP**.

![Change the code a bit to set it to the page title in the browser tab](https://imgur.elightup.com/ggZr5ck.png)

This is the one we get when inserting the field.

![This is the one we get when inserting the field](https://imgur.elightup.com/tjsn3zs.png)

Go down to the settings section of the view, and choose the type of the view as **Action**. Since we also use the hook as method 1 to interfere in the theme, set the **Action** name as the hook we want to use.

![Choose the type of the view as Action, and set the Action name as the hook we want to use](https://imgur.elightup.com/k9IJOs4.png)

In the **Run** on section, choose the type of page you want the favicon to display on.

![Choose the type of page you want the favicon to display on](https://imgur.elightup.com/4uzSttF.png)

Then, set the **Location** as the post type of your product. So, the view will be applied to all the singular pages of the **Product** post type.

![Set the Location as the post type of your product](https://imgur.elightup.com/RPzNMbf.png)

There is no need to use too much code anymore when using **MB Views**. After publishing the view, you also see the favicon.

![After publishing the view, you also see the favicon](https://imgur.elightup.com/Y3V72aK.png)

# Creating dynamic landing page in WordPress - Meta Box + Bricks

import LiteYouTubeEmbed from 'react-lite-youtube-embed';
import 'react-lite-youtube-embed/dist/LiteYouTubeEmbed.css';

If you're struggling and spending too much time creating landing pages for multiple marketing campaigns, even when they have the same content structure, check out this article right away!

We have a comprehensive solution for these cases, named '**dynamic landing page**'. All you need to do is create a sample page with **content stored in custom fields**, and have a template for it with a perfect interface. Then, when having a new campaign, just **duplicate the page** and **change the content in custom fields**. You’ll have a new landing page with new messages without touching the template anymore.

I have a tutorial on how to create a dynamic landing page using Meta Box and Elementor that you may have read in a couple of weeks ago. Doing it with Bricks is in a similar way.

I will take a real case from our company as an example. We have another product, [Slim SEO](https://wpslimseo.com/). It has [Slim SEO Schema](https://wpslimseo.com/products/slim-seo-schema/) and [Slim SEO Link Manager](https://wpslimseo.com/products/slim-seo-link-manager/), two plugins for two different purposes. Each one has their own landing page. You can see that these pages have the same structure but different content.

![Example landing pages which have the same structure and different content](https://imgur.elightup.com/Cx6Lp2Y.png)

To have these two versions, we will use a dynamic landing page to minimize the effort.

## Video version

<LiteYouTubeEmbed id='NZ_rgeK97Fc' />

## Preparation

The mindset will be like this:

1. Create custom fields to save all the content of the page. Each element will have its own field.
2. Create a template with Bricks for a sample page. In there: get and display data from fields
3. Clone the sample page  to a new one for using in a specific campaign.
4. Change the content in the custom fields, then have a new landing page.

We need the following tools for this practice:

* [Meta Box core plugin](https://wordpress.org/plugins/meta-box/): to have the framework for creating custom fields. It’s free, and available on [wordpress.org](https://wordpress.org/plugins/meta-box/);
* [MB Builder](https://metabox.io/plugins/meta-box-builder/): to have a UI on the backend to create the custom fields easily;
* [MB Testimonials](https://metabox.io/plugins/mb-testimonials/): a ready-to-use solution from Meta Box that helps to create a testimonial section with pre-built layouts;
* [MB Group](https://metabox.io/plugins/meta-box-group/) and [MB Tabs](https://metabox.io/plugins/meta-box-tabs/) (optional): to organize custom fields into groups or tabs with a clearer structure;
* **Bricks**: to build the page.

## 1. Creating a new page

Go to **Pages** > **Add New** to create a new page as usual.

![Create a new page ](https://imgur.elightup.com/U1mWRwS.png)

I leave it blank since all the content will be put in the custom fields that I’ll create in the next step.

![Blank page ](https://imgur.elightup.com/EXVm3K3.png)

## 2. Creating custom fields

We will create custom fields for every element on the page and organize them in groups and tabs based on sections on the page.

![Organize custom fields in groups and tabs based on sections on the page thanks to MB Group and MB Tabs](https://imgur.elightup.com/vQSKmeK.png)

For some kinds of content, you may use cloneable fields or cloneable groups.

![You may use cloneable fields or cloneable groups for some kind of content](https://imgur.elightup.com/5yBSvii.png)

Simply create the fields following your content structure. We have [more than 40 field types](https://youtu.be/WWeaM5vIAwM) for almost all kinds of data and layout, so just exploit them best.

Now, go to **Meta Box** > **Custom Fields** and create those fields.

![Go to Meta Box > Custom Fields and create custom fields](https://imgur.elightup.com/tYbRtw7.png)

To create tabs, just add a field with the type as **Tab**.

![To create tabs, add a field with the type as Tab](https://imgur.elightup.com/WpilwCU.png)

Then, add some fields.

![Add some custom fields for the Hero Section](https://imgur.elightup.com/o8OYYC6.png)

All the fields below the **Hero Section** tab field will be displayed in the tab.

For the menu on the landing page, there will be multiple items on the menu. Each one of them includes the label and its link. So I will create a cloneable group.

![Create a cloneable group for the menu since there will be multiple menu items, which includes the label and its link.](https://imgur.elightup.com/doN5AaP.png)

The sub-fields will be used to input the label and URL of each item.

![The sub-fields will be used to input the label and URL of each item.](https://imgur.elightup.com/mgIAaw5.png)

The button information will be in a group as well.

![The button information will be in a group as well](https://imgur.elightup.com/Gm07UT2.png)

Next, I add a new **Tab** field.

![Add a new Tab field](https://imgur.elightup.com/pIM6dKE.png)

Whenever you do that, it’s understood that the fields between the first tab field and this new tab field belong to the first one.

![The fields between the first tab field and the new tab field belong to the first one](https://imgur.elightup.com/YqKMHFk.png)

Continuing to create other custom fields. Just keep in mind the expected structure and create fields to follow it.

![Continue creating custom fields following the expected structure](https://imgur.elightup.com/dB8Wt6j.png)

For the content in the testimonials section, I’ll use the [MB Testimonials](https://metabox.io/plugins/mb-testimonials/) extension to build it, so I’ll create only a custom field for title, and another one for description of this section. All other content of this section will be created later.

![For testimonial section, create custom fields for title, and description.](https://imgur.elightup.com/bjgKSAl.png)

After creating all the fields, move to the **Settings** tab, set the Location as **Post type**, and choose **Page**. Since we created the fields for the landing page, go to the **Advanced location rules** section below and choose the name of the page we created in the previous step to apply all the fields to this page.

![Set location to apply the custom fields to the wanted page](https://imgur.elightup.com/6sUGBnl.png)

Go to the page editor, you will see all the fields.

![All the custom fields displayed](https://imgur.elightup.com/xUoBpks.gif)

Just input the content that you want to be on the landing page to the corresponding fields. I did it with some content for example.

![Input the content that you want to be on the landing page to the corresponding fields](https://imgur.elightup.com/KJWNdax.gif)

## 3. Creating testimonials

There will be a menu here when activating the [MB Testimonials](https://metabox.io/plugins/mb-testimonials/) solution.

![The menu of testimonials in the dashboard when activating the MB Testimonials solution](https://imgur.elightup.com/GZKvIWI.png)

Go there and add a new testimonial for your page.

This section is to add content of each feedback from your customers.

![The section is to add content of each feedback from your customers](https://imgur.elightup.com/qcwKIDK.png)

If you want to add more feedback from another person, just click the **Add more** button.

![Click the Add more button to add more feedback from another person](https://imgur.elightup.com/69WuymZ.png)

This **MB Testimonial** solution also provides some pre-built templates that you can opt for.

![Choose one of pre-built layouts of MB Testimonials solution](https://imgur.elightup.com/2nkzEC1.png)

Also can set some parameters for the styling.

![Set some parameters for the styling](https://imgur.elightup.com/ttD1vbn.png)

After publishing, there will be a shortcode automatically generated, just copy it since we will use it on the page.

![Copy the shortcode automatically generated](https://imgur.elightup.com/Bc0wwbR.png)

We had a useful tutorial on [how to use the MB Testimonials solution](https://docs.metabox.io/extensions/mb-testimonials/) to create and customize the testimonial section. You can watch it for more details.

## 4. Creating template for the landing page

Go to the page editor and edit it with Bricks.

![Go to the page editor and edit it with Bricks.](https://imgur.elightup.com/2iIKfYg.png)

My landing page will have its own header and footer, so I’ll hide these parts.

![The available header and footer of the page.](https://imgur.elightup.com/oEZSsNJ.png)

Go to the **Settings** section > **Page Settings** > **General** , disable the header and footer.

![Disable header and footer as my landing page will have them separately.](https://imgur.elightup.com/8S7v9YB.png)

The landing page has several sections such as header, hero, feature, pricing and so on.  Thus, we need to select the **Section** element to cover the information of each section.

![The Section element to cover the information of each section.](https://imgur.elightup.com/YPRA3xc.png)

There is an available container. We’ll add some elements inside this container to display the section information.

### 4.1 Displaying content from the stand-alone fields

We can add a reasonable element for the content that is from a stand-alone field (which is not in any group). For example, for the logo of the landing page, choose the **Image** element.

![Add a reasonable element for the content that is from a stand-alone field](https://imgur.elightup.com/6DnFe4b.png)

Since it is saved in a custom field created with **Meta Box**, use the **Select dynamic data** button to get the data form the corresponding field.

![Use the Select dynamic data button to get the data form the corresponding field.](https://imgur.elightup.com/GMuso4d.png)

![The corresponding field from Meta Box will be displayed.](https://imgur.elightup.com/emrJxLz.png)

### 4.2 Displaying content from the groups

For the content from the groups, you should use a **Div** element.

![For the content from the groups, you should use a Div element.](https://imgur.elightup.com/pGpXUkj.png)

Take the menu as an example. I have some items for the menu, and they are in a clonable group, so I need to use the query loop for the **Div**. In the **Query** section, turn on the button below and choose the type of data source as the group field where I put the menu items.

![Use the query loop and choose the data source in the Query section.](https://imgur.elightup.com/wuUMNkj.png)

To display the name of those items, add a **Basic Text** element. Use the **Select dynamic data** button and choose the right field. The field we should choose is the sub-field of the group that we use for the menu.

![Get the information about the subfield in the group field.](https://imgur.elightup.com/qtdJ7rr.png)

Then, all the menu items will display immediately.

![All the menu items will display immediately.](https://imgur.elightup.com/O6dRV7o.png)

Each item should be embedded with a specific link. Those links are saved in custom fields as well. So, in the **Link to** section > add **Dynamic Data** > choose the field where we save the links.

![In the Link to section > add Dynamic Data > choose the field where we save the links.v](https://imgur.elightup.com/h9dZykx.png)

So, please notice a rule about getting data from the custom fields.

* Firstly, for the **content from the stand-alone field**, just **add a corresponding element**, then **use the Select dynamic data button to get data** from the wanted field.

* Secondly, for the **content from the groups**, you should use a **Div** element and **use the query loop** for it to allow getting data from its subfields. Then add a reasonable element inside this **Div**, and add dynamic data from the wanted subfield.

Please keep in mind that we should follow this rule through all of this step to get full content from custom fields.

![Follow the rule through all of these steps to get full content from custom fields](https://imgur.elightup.com/vqh2IgM.png)

### 4.3 Styling something using dynamic data

There is a special thing about the button in the hero section. It has the color background stipulated in a custom field. So, you can add an attribute to regulate this button style.

![Add an attribute to regulate the button style](https://imgur.elightup.com/l5pYV1K.png)

You also can use dynamic values from custom field for this attribute as well.

![Use dynamic values from custom field for this attribute as well.](https://imgur.elightup.com/Zm2PMik.png)

### 4.4 Displaying the testimonial section

We also have a special section for testimonials. It has the section’s title and description from custom fields, so follow the rule.

![Follow the rule to get Testimonial section’s title and description from custom fields](https://imgur.elightup.com/P3e5tv0.png)

We created a testimonial with the **MB Testimonials** solution from **Meta Box** and copied its shortcode in the previous step. To get data from **MB Testimonials**, just add a **Shortcode** element.

![To get data from MB Testimonials, just add a Shortcode element](https://imgur.elightup.com/gVuKQ0o.png)

Then, paste the shortcode to the box as follows:

![Paste the shortcode to the box](https://imgur.elightup.com/bv7hnbg.png)

And this is our landing page on the frontend with all information displayed, including testimonials.

![The landing page on the frontend with all information displayed, including testimonials](https://imgur.elightup.com/iqtEfCf.gif)

The next work is styling this page.

## 5. Styling the page

Back to the page editor with **Bricks**. Then customize each element to style it in your own way.

You may want to add some CSS for advanced styling, it’s up to you.

![Add some CSS for advanced styling](https://imgur.elightup.com/YXru4pX.png)

This is the new look of my landing page.

![The new look of my landing page](https://imgur.elightup.com/9domRqm.gif)

I finished creating a landing page with dynamic content from custom fields. But it is just a sample. **It’s not for any specific marketing campaign**. To create one for a campaign, let’s go ahead to the next step.

## 6. Cloning the landing page for specific campaigns

When you have a new marketing campaign, just follow these steps:

1. **Clone the dynamic landing page** that we have just created to a new one;
2. Change the page’s content in custom fields, and you’ll get a new landing page.

To clone the page but keep its layout built with Bricks, we should use a third-party plugin named **Duplicate Page**. It’s available on repo. Just look for it and install.

![Look for and install Duplicate Page to clone the page but keep its layout built with Bricks](https://imgur.elightup.com/s9Ic1Ob.png)

There will be a new option to duplicate the landing page under the page.

![There will be a new option to duplicate the landing page under the page.](https://imgur.elightup.com/7RXHyF8.png)

Just duplicate it to any number of pages you want. I just created two to easily show you the concept.

![CDuplicate to any number of pages you want. ](https://imgur.elightup.com/KgOJ2z8.png)

Next, you should go to **Custom Fields** in **Meta Box**, and add location for the field group that we created for the landing page as the new pages.

![Add location for the field group that we created for the landing page as the new pages.](https://imgur.elightup.com/MlIdCY3.png)

Go to those pages editor, you will see that they inherit all the custom fields including data saved in them.

![The created pages will inherit all the custom fields including data saved in them.](https://imgur.elightup.com/vfP3Ixu.png)

Just change it to the new one matched with your new campaign.

![Just change it to the new one matched with your new campaign](https://imgur.elightup.com/HSxuwSs.png)

Go to the pages on frontend, you will see that you now have different versions of pages. Just different in content but the same layout.

![Different versions of pages with different in content but the same layout](https://imgur.elightup.com/wqNhzqc.png)

## Last words

I hope that this way will help you create landing pages for multiple marketing campaigns faster, more conveniently, and more efficiently. If you want to try this with other page builders, follow [this tut](https://docs.metabox.io/tutorials/create-dynamic-landing-page-with-elementor/).

Additionally, you also can apply this way to customize your homepage easily. We also have a tutorial on [configuring the homepage regularly without touching code every time](https://docs.metabox.io/tutorials/configure-homepage/). Feel free to check it out!

# Creating dynamic landing page in WordPress - Meta Box + Elementor

import LiteYouTubeEmbed from 'react-lite-youtube-embed';
import 'react-lite-youtube-embed/dist/LiteYouTubeEmbed.css';

Did you spend a lot of time and effort creating landing pages for multiple marketing campaigns by adding one by one image or text to the page template, even when they have the same structure of content?

We bring a comprehensive solution for these cases, named **Dynamic Landing Page**. Just build a page as a sample with **content saved in custom fields**, have a template for it with a perfect interface. Then, when having a new campaign, just **duplicate the page**, and **change the content from the fields**. You’ll have a new landing page with new messages without touching the template anymore.

In this practice, we will figure out how to create a dynamic landing page using custom fields created with **Meta Box**, and displaying with **Elementor**.

These are some example landing pages which have the same structure and different content. I will build a sample template for them now.

![](https://imgur.elightup.com/Cx6Lp2Y.png)

## Video version

<LiteYouTubeEmbed id='ePcIeSMp50I' />

## Preparation

We need the following tools for this practice:

* [Meta Box core plugin](https://wordpress.org/plugins/meta-box/): to have the framework for creating custom fields. It’s free, and you can download it directly from [wordpress.org](https://wordpress.org/plugins/meta-box/);
* [MB Builder](https://metabox.io/plugins/meta-box-builder/): to have a UI on the backend to create the custom fields efficiently;
* [MB Testimonials](https://metabox.io/plugins/mb-testimonials/): a ready-to-use solution from Meta Box that helps to create a testimonial section with pre-built layouts;
* [MB Elementor Integration](https://metabox.io/plugins/mb-elementor-integrator/): to get dynamic data from custom fields and display them on the page easily;
* [MB Group](https://metabox.io/plugins/meta-box-group/) and [MB Tabs](https://metabox.io/plugins/meta-box-tabs/) (optional): to organize custom fields into groups or tabs with a clearer structure;
* Elementor and Elementor Pro on your site to build the page.

Let’s start now!

## 1. Creating a new page

Go to **Pages** > **Add New** to create a new page as usual.

![Go to Pages, Add New to create a new page ](https://imgur.elightup.com/FGckQwS.png)

I leave it blank since all the content will be put in the custom fields that I’ll create in the next step.

## 2. Creating custom fields

We will create custom fields for every element on the page and organize them in groups and tabs based on sections on the page.

![organize custom fields in groups and tabs based on sections on the page thanks to MB Group and MB Tabs](https://imgur.elightup.com/fBQoksC.png)

For some kind of content, you may use cloneable fields or cloneable groups.

![you may use cloneable fields or cloneable groups for some kind of content](https://imgur.elightup.com/KTGDmjx.png)

In short, just create the fields following your content structure. We have more than 40 field types for almost every kind of data and layout, so just exploit them best.

Now, go to **Meta Box** > **Custom Fields** and create those fields.

![go to Meta Box > Custom Fields and create custom fields](https://imgur.elightup.com/LBJv7vP.png)

To create tabs, just add a field with the type as **Tab**.

![To create tabs, add a field with the type as Tab](https://imgur.elightup.com/Y1BVqUe.png)

Then add some fields.

![add some custom fields for the Hero Section](https://imgur.elightup.com/l1KGkcX.png)

All the fields below the **Hero Section** tab field will be displayed in the tab.

For the menu on the landing page, there will be multiple items on the menu. Each one of them includes the label and its link. So I will create a cloneable group.

![create a cloneable group for the menu on the landing page since there will be multiple items on the menu. Each one of them includes the label and its link.](https://imgur.elightup.com/TmZdaZu.png)

The sub-fields will be used to input the label and URL of each item.

![The sub-fields will be used to input the label and URL of each item.](https://imgur.elightup.com/ZolPxWo.png)

The button information will be in a group as well.

![The button information will be in a group as well](https://imgur.elightup.com/y5jCXxf.png)

Next, I add a new Tab field.

![add a new Tab field](https://imgur.elightup.com/Ayvt80y.png)

Whenever you do that, it’s understood that the fields between the first tab field and this new tab field belong to the first one.

![the fields between the first tab field and the new tab field belong to the first one](https://imgur.elightup.com/KyKFjLy.png)

Go ahead with the other fields. Just keep in mind the expected structure and create fields to follow it.

![continue creating custom fields following the expected structure](https://imgur.elightup.com/FfupIXi.png)

For the content in the testimonials section, I’ll use the **MB Testimonials** extension to build it, so I’ll create only a custom field for title, and another one for description of this section. All other content of this section will be created later.

![For testimonial section, create custom fields for title, and description. Other information will be made by MB Testimonials](https://imgur.elightup.com/xYX7YDi.png)

After creating all the fields, move to the **Settings** tab, set the **Location** as **Post Type**, and choose **Page**.

![After creating all the fields, move to the Settings tab, set the Location as Post Type, and choose Page](https://imgur.elightup.com/6L68LRw.png)

Go to the **Advanced location rules** section below, and choose the name of the page we created for the dynamic landing page.

![Go to the Advanced location rules section below, and choose the name of the page we created for the dynamic landing page.](https://imgur.elightup.com/Cv2gcb3.png)

Go to the page editor, you will see all the fields.

![all the custom fields displayed](https://imgur.elightup.com/DvQ73hf.gif)

Just input the content that you want to be on the landing page to the corresponding fields. I did it with some content for example.

![input the content that you want to be on the landing page to the corresponding fields](https://imgur.elightup.com/O8o5STZ.gif)

## 3. Creating testimonials

When activating the MB Testimonials solution, there will be a menu in the dashboard.

![The menu of testimonials in the dashboard when activating the MB Testimonials solution](https://imgur.elightup.com/F8oFFka.png)

Go there and add a new testimonial for your page.

This section is to add content of each feedback from your customers.

![The section is to add content of each feedback from your customers](https://imgur.elightup.com/nS1buTv.png)

If you want to add more feedback from another person, just click the **Add more** button.

![click the Add more button to add more feedback from another person](https://imgur.elightup.com/x7QKk9D.png)

This MB Testimonial solution also provides some pre-built layouts. You can choose one.

![choose one of pre-built layouts of MB Testimonials solution](https://imgur.elightup.com/kpdcufR.png)

Also can set some parameters for the styling.

![set some parameters for the styling](https://imgur.elightup.com/8dX1mZV.png)

There will be a shortcode automatically generated, just copy it since we will use it on the page.

![copy the shortcode automatically generated](https://imgur.elightup.com/WVAKBcp.png)

We had another tutorial on [how to use the MB Testimonials solution](https://docs.metabox.io/extensions/mb-testimonials/) to create and customize the testimonial section. You can watch it for more details.

Let’s move on to the next step.

## 4. Create skins to display content from groups

Since we have some fields in groups, and Elementor does not support displaying data from them directly on a template, we should create a skin for each group first.

Note that each skin is just for a group. So, there are how many groups of fields, there also are how many skins.

Go to **Templates** > **Theme Builder**.

![Go to Templates > Theme Builder to create skin for groups](https://imgur.elightup.com/PFVzdlO.png)

There will be the **MB Group Skin** menu. Click on it and add a new skin.

![Click on the MB Group Skin menu and add a new skin.](https://imgur.elightup.com/iB1DIa5.png)

In the **Preview Settings** section, select the **Page** and find out the name of your page.

![In the Preview Settings section, select the Page and find out the name of your page.](https://imgur.elightup.com/D1RQUZV.png)

Let’s add some elements and use Dynamic Tags to get and display content from subfields of the group.

### 4.1. Skin for the Menu

I will take this first skin for the menu for example.

Add a **Section** element to cover the menu.

![Add a Section element to cover the menu](https://imgur.elightup.com/Dv6wprF.png)

Add a **Heading** element for the name of the item.

![Add a Heading element for the name of the item](https://imgur.elightup.com/IcPC2Z4.png)

This name is from custom fields, so use the **Dynamic Tags**, choose the **Meta Box Field** option.

![use the Dynamic Tags, choose the Meta Box Field option to get the name of item](https://imgur.elightup.com/LjS5qgl.png)

Then, look for the name of the field that saves the menu’s name. Here I chose **Menu Tittle**.

![look for the name of the field that saves the menu’s name](https://imgur.elightup.com/30218uC.png)

Although the group for menu items is cloneable, just the first item will display on the preview. It does not matter.

Each menu item should be clickable and link to the URL that saves in custom fields as well. So in the **Link** option, also use **Dynamic Tags**, choose **Meta Box Field** option, and choose the field that saves the links.

![in the Link option, also use Dynamic Tags, choose Meta Box Field option, and choose the field that saves the links of the menu](https://imgur.elightup.com/YmVLXx8.png)

I have finished getting items to display on the menu.

Go ahead to create a new skin for getting content from another group. The next one is for the button.

### 4.2. Skin for the Button

Also add elements and use Dynamic Tags to get data from custom fields.

![Also add elements and use Dynamic Tags to get data for the button from custom fields](https://imgur.elightup.com/juKbtIc.png)

This is a button, so you can style it a little bit.

![style button a little bit](https://imgur.elightup.com/7uh1Hqv.png)

### 4.3. Skin for Features Section

Do the same for the skin to display the featured information.

![Do the same for the skin to display the featured information](https://imgur.elightup.com/IcRXSr6.png)

### 4.4. Skin for Pricing

If your landing page has **nested groups**, just create skin for the subgroup first. In this case, it is the skin for the items in each plan.

![If your landing page has nested groups, just create skin for the subgroup first, here, create the skin for the items in each plan.](https://imgur.elightup.com/B2l6cxl.png)

After that, create another skin for the group that covers it. Just add elements as usual for other content in the group.

![create another skin for the group that covers it. Just add elements as usual for other content in the group](https://imgur.elightup.com/PDjubZa.png)

For content from the subgroup, add the **MB Group** element.

![For content from the subgroup, add the MB Group element](https://imgur.elightup.com/rVyVAW4.png)

Choose the name of the subgroup. And set the skin as the one we’ve just created.

![Choose the name of the subgroup. And set the skin as the one we’ve just created](https://imgur.elightup.com/1txYnIf.png)

Remember to change the Type of this element to be the Subgroup as well.

![change the Type of this element to be the Subgroup](https://imgur.elightup.com/i1YaGIv.png)

### 4.5. Skin for Reasons Section

Next, do likewise to create a skin for the reasons section.

![do likewise to create a skin for the reasons section](https://imgur.elightup.com/nzw6AlJ.png)

I have already created skins for all the groups for my landing page.

![all of the skin for groups for the landing page](https://imgur.elightup.com/wxBmNet.png)

## 5. Creating template for the landing page

Go to the page editor and edit it with Elementor.

![Go to the page editor and edit it with Elementor](https://imgur.elightup.com/XcoRcDz.png)

Set the **Page Layout** as **Elementor Canvas** to make this page totally blank without any pre-built header and footer.

![Set the Page Layout as Elementor Canvas to make this page totally blank without any pre-built header and footer.](https://imgur.elightup.com/p878AD5.png)

To create a header, just choose a reasonable layout. Here, I have 2 columns: one is for the logo, and the rest is for the menu.

![To create a header, choose a reasonable layout. Here, I have 2 columns: one is for the logo, and the rest is for the menu.](https://imgur.elightup.com/3neKWxT.png)

### 5.1. Displaying content from the stand-alone fields

In the first column, add a reasonable element for the content that is from a stand-alone field (which is not in any group), such as the logo of the landing page.

![In the first column, add a reasonable element for the content that is from a stand-alone field](https://imgur.elightup.com/vosZdcw.png)

Then use Dynamic Tags to get data from the corresponding custom field.

![click the dynamic tags and choose the Meta Box Field](https://imgur.elightup.com/qfJT1nA.png)

![choose the corresponding field](https://imgur.elightup.com/zj7Blg1.png)

### 5.2. Displaying content from the groups

For the second column, since it's a menu from a group, and we’ve created a skin in the previous step, just look for the **MB Group** element.

![For the second column, since it's a menu from a group, and we’ve created a skin in the previous step, just look for the MB Group element.](https://imgur.elightup.com/4mby82t.png)

Set the name of the group as the one we created for the menu. And choose the corresponding skin. Then, you will see the menu display with all the items.

![Set the name of the group as the one we created for the menu. And choose the corresponding skin. Then, the menu display with all the items.](https://imgur.elightup.com/BDeA7ag.png)

So, we have a rule about getting data from the custom fields.

* Firstly, for the **content from the stand-alone field**, just **add a corresponding element**, then **use Dynamic Tags to get data** from the wanted field.
* Secondly, for the **content from the groups**, we had **skin** for each group. So, add the **MB Group** element, set the name of the group that we want to get data from, and choose the corresponding skin.

Please be aware that we should follow this rule through all of these steps to get full content from custom fields.

![follow the rule through all of these steps to get full content from custom fields](https://imgur.elightup.com/p4E8JfG.png)

### 5.3. Displaying the testimonial section

We also have a special section for testimonials. It has the section’s title and description from custom fields, so follow the rule.

![follow the rule to get Testimonial section’s title and description from custom fields](https://imgur.elightup.com/wXjnjNF.png)

We created a testimonial with the MB Testimonials solution from Meta Box and copied its shortcode in the previous step. To get data from MB Testimonials, just add a **Shortcode** element.

![To get data from MB Testimonials, just add a Shortcode element](https://imgur.elightup.com/iSG3yQp.png)

Then paste the shortcode to the box as follows:

![paste the shortcode to the box](https://imgur.elightup.com/mKEA5hz.png)

And this is our landing page on the frontend with all information displayed, including testimonials.

![the landing page on the frontend with all information displayed, including testimonials](https://imgur.elightup.com/2GV6vgw.gif)

The next work is styling this page.

## 6. Styling the page

### 6.1. Customizing the skins

You should style each element in the created skins first since the skin regulates how the data from the groups displayed. Just do it one by one.

![You should style each element in the created skins first since the skin regulates how the data from the groups displayed. Just do it one by one](https://imgur.elightup.com/RdMbCMd.png)

### 6.2. Customizing the page template

Lastly, go to edit the page with Elementor. Style each element as well. Absolutely, you may need some CSS for advanced display.

![go to edit the page with Elementor. Style each element as well. you may need some CSS for advanced display](https://imgur.elightup.com/SrfrTLl.png)

You’ll have the new look of the landing page.

![the new look of the landing page](https://imgur.elightup.com/oIfqVMV.gif)

But, I use this page as a sample only. **It’s not for any specific marketing campaign**. To create one for a campaign, we should go ahead to the next step.

## 7. Cloning the landing page for specific campaigns

When you have a new marketing campaign, just follow these steps:

1. **Clone the dynamic landing page** that we have just created to a new one;
2. Change the page’s content in custom fields, and you’ll get a new landing page.

To clone the page but keep its layout built with Elementor, we should use a third-party plugin named **Duplicate Page**. It’s available on repo. Just look for it and install.

![Look for and install Duplicate Page to clone the page but keep its layout built with Elementor](https://imgur.elightup.com/w7aQpgK.png)

There will be a new option to duplicate the landing page under the page.

![There will be a new option to duplicate the landing page under the page.](https://imgur.elightup.com/AugpYWq.png)

Just duplicate it to any number of pages you want. I just created two to easily show you the concept.

![duplicate it to any number of pages you want. I just created two to easily show you the concept](https://imgur.elightup.com/5Wxp3W8.png)

Next, you should go to **Custom Fields** in **Meta Box**, and add location for the field group that we created for the landing page as the new pages.

![go to Custom Fields in Meta Box, and add location for the field group that we created for the landing page as the new pages](https://imgur.elightup.com/Sa8CVav.png)

Go to those pages editor, you will see that they inherit all the custom fields including data saved in them.

![Go to those pages editor, you will see that they inherit all the custom fields including data saved in them](https://imgur.elightup.com/Mx7jSCV.png)

Just change it to the new one matched with your new campaign.

![Just change it to the new one matched with your new campaign](https://imgur.elightup.com/Etb9ehE.png)

Go to the pages on frontend, you will see that you now have different versions of pages. Just different in content but the same layout.

![different versions of pages with different in content but the same layout](https://imgur.elightup.com/pjF8u0p.png)

# Creating a dynamic landing page

The information such as title, tagline, button, image, … of the landing page will be saved in custom fields. When you change them, the landing page will be changed the content but keep the layout and style. It’s called dynamic landing page.

I chose a demo like this as an example:

![Example of a llanding page](https://imgur.elightup.com/yOUXVUG.jpg)

![Example of landing pages](https://imgur.elightup.com/k2BTT9a.jpg)

![Example of landing pages](https://imgur.elightup.com/QpyxYnG.jpg)

## Preparation

As you can see, there are five sections including Hero, Intro, Services, Features, CTA and Footer. Corresponding to each section, there are some types of information. To save this data, we need some custom fields.

So, we need these tools:

* [Meta Box](https://metabox.io/): to have a framework to create custom fields;
* [MB Builder](https://metabox.io/plugins/meta-box-builder/): to have an UI to create custom fields for the landing page in the backend;

## 1. Creating a page

Go to **Pages > Add New** to have a new landing page.

![Create a page](https://imgur.elightup.com/ghISiI4.png)

![Choose landing page](https://imgur.elightup.com/D8YzLxh.png)

## 2. Creating custom fields

Since each section will have different data, I will create some field groups corresponding to each section. You also can add only one field group then add corresponding groups inside for sections.

Go to **Meta Box > Custom Fields** to create new field groups.

![Create new field group](https://imgur.elightup.com/DR8nzGG.png)

I create a field group for each section and have corresponding custom fields for them.

![Create a field group for each section](https://imgur.elightup.com/5ACClAB.png)

For the **Hero** section, these are the fields for it.

![The field for Hero section](https://imgur.elightup.com/2RURipn.png)

Here are the fields of the other sections:

![The fields for other sections](https://imgur.elightup.com/hWMTPlv.png)

For the **Services** section, I created a **Group** field to easily create sub-fields to save information of each service as follows.

![Create sub-field](https://imgur.elightup.com/cFAh11S.png)

Since there will be more than one service, I set this group as **Cloneable** and also set it as **Collapsible** to avoid being messy in the page editor.

![Set group to be cloneable or collapsible](https://imgur.elightup.com/kBJNQt6.png)

For the **Feature** section, I also have a **Group** field.

![Create group field for the feature section](https://imgur.elightup.com/AQOJCb4.png)

This group field has the same settings as the **Section** field.

![Settings the same with section field](https://imgur.elightup.com/M2Md0Uv.png)

These are the fields of the CTA section:

![Fields of the CTA section](https://imgur.elightup.com/omwObY7.png)

After creating all the fields for each section, go to the **Settings** tab of each field group > choose **Location** as **Post Type** and select **Page**. Since we’ll apply these fields to the landing page, in the **Advanced location rules** options, choose **Landing Page**.

![Set location for the fields](https://imgur.elightup.com/HHQjxXD.png)

These settings will apply to all the field groups.

When you go to edit the landing page, you will see all the created field groups and its fields as below:

![Created fields display in the post editor](https://imgur.elightup.com/vNRj2Gr.png)

## 3. Creating template for the page

There are two methods to create a template for the page: using MB Views or a PHP file.

If you add code to the PHP file, when you change the theme, the template will be missed. Otherwise, using MB Views ensures that the page template will not be affected.

### Method 1: Using MB Views

For this method, you will need another Meta Box extension -[ MB Views](https://metabox.io/plugins/mb-views/).

Go to **Meta Box > Views** to create a new template.

![Create new template](https://imgur.elightup.com/U8nwKlY.png)

Since all the content of the page is saved in custom fields, in the **Template** tab, you can easily insert fields through the **Insert Field** button to have all the created fields to get data from.

![Insert fields through Insert field button](https://imgur.elightup.com/6sEx4ra.gif)

![Insert fields](https://imgur.elightup.com/v4AP96u.png)

For easier styling later, you can add some div tags and attributes like this:

![Add some div tags](https://imgur.elightup.com/6olqare.png)

Then, scroll down to the **Settings** tab, choose **Type** as **Singular**. Since we created this template for the landing page, choose **Location** as **Page** and select **Landing Page**.

![Set Location for the fields](https://imgur.elightup.com/UKkEEBf.png)

To style the landing page, go to the CSS tab and add some CSS code to do it.

![Go to CSS tab to style the page](https://imgur.elightup.com/uB7lGAL.png)

Now, the landing page displays as I want.

![The landing page displays as you want](https://imgur.elightup.com/ie3wJiE.jpg)


![The landing page displays as you want](https://imgur.elightup.com/i1FiLwM.jpg)


![The landing page displays as you want](https://imgur.elightup.com/THWKjSp.jpg)

### Method 2: Using PHP file

To get the custom fields’ data and display them in the front end, just replace the hard-coded text or image display in the `template-home.php` file with the helper functions `rwmb_the_value ()` ot `rwmb_meta ()`.

Here, I just take the code for the hero section as an example. The code for remaining is the same.

```php
<section id="banner">
    <div class="inner">
        <h2><?php rwmb_the_value( 'hero_title' ); ?></h2>
        <?php rwmb_the_value( 'hero_desc' ); ?>
        <ul class="actions">
            <li><a href="<?php rwmb_the_value( 'hero_button_link' ); ?>" class="button special"><?php rwmb_the_value( 'hero_button_text' ); ?></a></li>
        </ul>
    </div>
    <a href="#one" class="more scrolly">Learn More</a>
</section>
```

The full code for the whole template is [here](https://gist.github.com/rilwis/ddadc4840749195fab72fa81d9c48c95#file-template-home-with-custom-fields-php).

Finally, just create a page, assign the created template to the page you want and you’ll have a perfect landing page.

# Creating an FAQs page - MB Blocks

import LiteYouTubeEmbed from 'react-lite-youtube-embed';
import 'react-lite-youtube-embed/dist/LiteYouTubeEmbed.css';

In today’s practice, we’re going to **create an FAQs page** by using custom blocks and custom fields with the help of the **MB Blocks** extension from Meta Box.

Here is my simple FAQ page with some pairs of questions and answers.

![An example of the FAQs page using MB Blocks](https://imgur.elightup.com/N71jB4M.png)

## Video version

<LiteYouTubeEmbed id='ZBL6VIlQCII' />

## Preparation

The questions and answers will be saved in custom fields, and displayed by using a Gutenberg block.

These are some tools we need for this practice:

* [The Meta Box core plugin](https://wordpress.org/plugins/meta-box/): to have the framework to create custom fields as well as the block for the Q&As. It’s available on [wordpress.org](https://wordpress.org/plugins/meta-box/).
* [MB Blocks](https://metabox.io/plugins/mb-blocks/): to allow you to create custom Gutenberg blocks. With the help of this extension, we can use PHP or the UI provided by [MB Builder](https://metabox.io/plugins/meta-box-builder/) to create a block. They bring the same result. However, we recommend using MB Builder to limit the use of complex code.
* [MB Group](https://metabox.io/plugins/meta-box-group/): to organize custom fields for questions and answers into a group, so they will be in pairs.

## 1. Creating a new page

First of all, go to **Meta Box** > **Pages** > **Add New Page** to create a totally new one for the FAQs.

![Go to Pages to create a new page for the FAQs](https://imgur.elightup.com/tGUXFDj.png)

I leave it blank, since I will get content by adding the custom block in the next step.

![Just leave this page blank.](https://imgur.elightup.com/cYLMlzJ.png)

## 2. Creating a custom block

I’ll create a custom **Gutenberg** block that includes some custom fields like this:

![Create a custom Gutenberg block that includes some custom fields](https://imgur.elightup.com/c8rhyX5.png)

The group includes 2 subfields inside, one for the questions, and one for the answers. When we want to add more couples of questions and answers, we can click the **Add more** button.

![The Add more button help to add more questions and answers](https://imgur.elightup.com/ed39KAZ.png)

Now, go to **Meta Box** > **Custom Fields** to create the field group.

![Go to Meta Box > Custom Fields to create fields](https://imgur.elightup.com/00jsQUk.png)

Since I activated the **MB Builder**, I have a UI on the backend to create the fields and blocks. And, please pay attention that creating a block is the same with creating a field group.

I’ll also add some fields as usual. Firstly, it should be a group.

![Create a Group field](https://imgur.elightup.com/WZIjHYM.png)

Then, add subfields. One is for the questions, and one is for the answer.

![Add subfields for questions and answers](https://imgur.elightup.com/EYeyn5q.png)

Move back to the settings of the group, turn on the **Collapsible** option to set the group to be collapsible. And, I just keep the **Expanded** option to have the full display of subfields by default.

![Set the group to be collapsible, keep the Expanded option to have the full display of subfields by default.](https://imgur.elightup.com/qP0g3T8.png)

Next, set name for the group’s title.

![Name the group’s title](https://imgur.elightup.com/piQ8Zsh.png)

This is just optional to identify each set of the question and answer. I use some variables to name the group dynamically.

**In there**:

* `#`: This is for numbering the questions.
* `{question}`: This is the ID of the question field. It helps to display the content of the question on the group title.

I also set this group as cloneable. This is pivotal, helps to add multiple pairs of questions and answers.

![Set the group cloneable to have more than one pair of questions and answers](https://imgur.elightup.com/SOU5Rl9.png)

That’s all the custom fields and essential configurations we need in this practice.

After creating all the fields and having reasonable settings, move to the **Settings** tab, and set **Location** for those custom fields. Normally, we set the location as post, or any specific post type, or page as you want to apply fields to. But, to make this field group to be a block, we should set the location as **Block**.

![Set the location as Block](https://imgur.elightup.com/lMJ9Nyi.png)

We have two options to choose where display the field to add content to the block.

![Two options to choose where display the field to add content to the block.](https://imgur.elightup.com/xyS89n2.png)

Move to the page editor of the FAQ page, we can look for the created block to add it to the content section of the page.

![Look for the created block to add it to the content section of the page](https://imgur.elightup.com/i6N0QrN.png)

Since I set the position of the block as on the right sidebar, we will have the fields on the right position.

![The fields on the right side bar](https://imgur.elightup.com/laYrs33.png)

Now, we can try to add some questions and answers to the fields. You can also click **Add more** to add other pairs.

![Click Add more to add other pairs Q&As](https://imgur.elightup.com/U5tRuLA.png)

However, no matter how many pairs of the Q&A you add, there is nothing displayed on the content area of the page, where the block is. The reason is that we had done nothing to display the content yet.

Let's move to the next step.

## 3. Displaying data of the block

### 3.1. Rendering the data

Go back to the settings of the created block. On the **Settings** tab, the **Render** section helps to render the data saved in custom fields that we have in this block to be the content displayed on the block on the frontend.

![The Block Render Settings section helps to render the data saved in custom fields](https://imgur.elightup.com/MzsbYeM.png)

There are three options to choose how to render. You should dig in [the documentation](https://docs.metabox.io/extensions/mb-blocks/) to know their details. I’ll choose the third one.

![Choose option how to render](https://imgur.elightup.com/P5r0xii.png)

There are also some basic instructions to add code in the below image, you can follow it.

![Some basic instructions helps to write code in the Render code box](https://imgur.elightup.com/gOgWVJJ.png)

We use a cloneable group to save the couples of questions and answers, so we should have a loop to display them all.

![A loop to display Q&As](https://imgur.elightup.com/gPI24FW.png)

Inside this loop, enter these lines of code. (We did it following the instruction below).

![Add code following the instruction](https://imgur.elightup.com/cHIIatk.png)

**In there**:

* `question`: the ID of the Question field.
* `answer`: the ID of the Answer field.
* Since it is in a cloneable group, I have the prefix text `- clone`.

Now, go back to the FAQs page editor, and test how the data stored in the custom fields display visually on the page. Whenever you fill in the information in the field, the same information will be simultaneously displayed visually on the page.

![The same information will be simultaneously displayed visually on the page when filling in the information in the field.](https://imgur.elightup.com/FC6QFxd.gif)

These are the questions and answers that we need. However, they naturally have no style, including the display on the preview and on the frontend.

![The Q&As with no style display on the preview](https://imgur.elightup.com/dmhAKZC.png)

![The Q&As with no style display on the frontend](https://imgur.elightup.com/utAtrgh.png)

### 3.2. Styling the block

To have a better look for the questions and answers, those are in a block, we should go back to the settings of the block instead of the page editor. We should add some div tags and classes to the **Render code** section. And you also can use CSS as well.

![Add some div tags, classes and CSS to the Render code section.](https://imgur.elightup.com/szKy3Ei.png)

Then, go back to the page, you will see the new look of the Q&As.

![The new look of the Q&As on the page](https://imgur.elightup.com/N71jB4M.png)

We have finished **creating an FAQs page** using custom blocks and custom fields with the help of the **MB Blocks**. However, this is the way we do it with custom fields. There is also a way to create FAQs using custom post type. It's similar to displaying posts on an archive page, maybe with some filters. Check out our tut for creating a [simple listing page](https://docs.metabox.io/tutorials/create-simple-listing-meta-box-wp-grid-builder/).

# Creating an FAQs page - MB Views

import LiteYouTubeEmbed from 'react-lite-youtube-embed';
import 'react-lite-youtube-embed/dist/LiteYouTubeEmbed.css';

If you are looking at how to **create an FAQs page without using any page builder**, we will share an easy and straightforward tip using **MB Views** that you can follow to build that page. Let’s dive in to explore the process of creating the FAQs page in detail.

This is the page I’d like to create today:

![An FAQs page using MB Views](https://imgur.elightup.com/Z7qgPOG.gif)

## Video Version

<LiteYouTubeEmbed id='W0A535dpksQ' />

## Preparation

The FAQs page contains questions and answers that are saved in the custom fields created with Meta Box. The questions and answers will be classified and separated into tabs. In each tab, each pair of questions and answers also will be grouped together.

So, in this practice, we need these tools:

* [Meta Box core plugin](https://wordpress.org/plugins/meta-box/): to have a framework to create custom fields;
* [MB Views](https://metabox.io/plugins/mb-views/): to create and style the template for the page without touching the theme files;
* [MB Builder](https://metabox.io/plugins/meta-box-builder/): to have a UI on the back end to create custom fields;
* [MB Group](https://metabox.io/plugins/meta-box-group/): to organize the fields for questions and answers into a group since they are in pairs.

You can install them individually or use **Meta Box AIO**.

## 1. Creating a new page

Go to **Pages** > **Add New** to have a new FAQs page.

![A new FAQs page](https://imgur.elightup.com/KlNEJhq.png)

## 2. Creating custom fields

As I mentioned, the questions and answers will be classified in different tabs and also grouped in pairs. So, I’ll create the fields with the following structure.

![The questions and answers will be classified in different tabs and also grouped in pairs](https://imgur.elightup.com/WMIfOFz.png)

The cover group for tabs is cloneable, so you can add as many tabs as you want for multiple kinds of questions.

![The cover group for tabs is cloneable](https://imgur.elightup.com/U3WIHeM.png)

You can also set the title for the group based on the content of the **Tab Name** field for easier identification.

![Set the title for the group based on the content of the Tab Name field](https://imgur.elightup.com/XN5iwwF.png)

Inside each tab, means the group, I create a field to name the tab. This name will be displayed on the left sidebar of the page.

Also, I added a subgroup that contains two subfields. Thanks to this subgroup, the questions and answers are grouped in a pair. The subgroup also is cloneable so you can add more pairs of questions and answers.

![Add a subgroup that contains two subfields](https://imgur.elightup.com/wkc8rOO.png)

There are 2 text fields inside the subgroup. They are for the questions and answers.

![Create 2 text fields inside the subgroup](https://imgur.elightup.com/R61hZAU.png)

This subgroup is set to be cloneable as well. It helps to add multiple pairs of questions and answers.

![Set the subgroup to be cloneable](https://imgur.elightup.com/wq6RdNr.png)

After configuring all the fields, move to the **Settings** tab. Choose **Location** as **Post Type** and select **Page**.

![Select Page in the Settings tab](https://imgur.elightup.com/yDq8atU.png)

To apply these fields to the page you want, go to the **Advanced Location Rules** section below and choose the name of the page.

![Choose the name of the page](https://imgur.elightup.com/BZX5zSn.png)

Now, go to the page editor, you will see the custom fields displayed.

![The custom fields displayed on the page editor](https://imgur.elightup.com/B7TbRo8.png)

## 3. Displaying the FAQs on the page

### 3.1. Getting and display Q&As from custom fields

Go to **Views** in **Meta Box** and create a new one.

![Go to Views in Meta Box and create a new one](https://imgur.elightup.com/TxwUE2f.png)

To get the data saved in the custom fields, just click on the **Insert Field** button and choose the name of the created fields from the list.

![Choose the name of the created fields from the list to get the data saved in the custom fields](https://imgur.elightup.com/oiKptU8.png)

Since the created fields are all the subfields in a group named **Tabs**. You must click on it to open it up. Whenever you click on it, a loop will be added to the template since the group is cloneable.

![A loop will be added to the template when I click to Tabs](https://imgur.elightup.com/bQfuTal.png)

We’ll insert fields inside this loop. First, insert the **Tab Name** field into the loop.

![Insert the Tab Name field into the loop](https://imgur.elightup.com/MkWKTtH.png)

The page I’ll create today has two sections. One on the left are the names of the tabs. And, the one on the right are the questions and answers. It is separated from the left one, so I will add another loop by clicking on the **Tabs** field.

![Add another loop by clicking on the Tabs field](https://imgur.elightup.com/euMpOf1.png)

The group containing the questions and answers is also cloneable, so there will be another loop inside.

![Add another loop inside group](https://imgur.elightup.com/hOuWwnG.png)

Now, just insert the **Question** field and **Answer** field into the loop.

![Insert the Question field and Answer field into the loop](https://imgur.elightup.com/nVtIjnU.png)

You can see the structure clearer like this.

![The structure of the FAQs page](https://imgur.elightup.com/pTfUgay.png)

You should add some **div** tags and classes to use **CSS** for styling later.

![Add some div tags and classes to use CSS for styling later](https://imgur.elightup.com/JXn9xYK.png)

Now, set the template type as **Singular**, and choose the page as its location.

![Set the template type as Singular and choose the page as its location](https://imgur.elightup.com/eO2SsuY.png)

Go to the page on the front end, all the tab names, questions, and answers are displayed already.

![All the tab names, questions, and answers are displayed already on the frontend](https://imgur.elightup.com/BYGIDlU.png)

That’s done for getting the questions and answers from custom fields and displaying them on the page.

### 3.2. Styling the page

Back to the template in the **Views**, go to the **CSS** tab, and add some code.

![Go to the CSS tab and add some code to style the page](https://imgur.elightup.com/8DYGSnG.png)

Then the look of the page will change.

![The look of the page will change](https://imgur.elightup.com/cPP0HSR.png)

For now, when you click on the name of each tab, nothing happens. All the pairs of questions and answers still display on the page. There is no classification. You should add JS to make the tabs work.

### 3.3. Adding JavaScript for tabs

Also back to the template, go to the **JavaScript** tab to add code.

![Go to the JavaScript tab to add code](https://imgur.elightup.com/5luiQpt.png)

```
jQuery(document).ready(function()
{
    function activeTab(obj)
    {
        jQuery('.tab-category ul li').removeClass('active');
        jQuery(obj).addClass('active');
        var id = jQuery(obj).find('a').attr('href');
        jQuery('.ul-cate').hide();
        jQuery(id).show();
    }

    jQuery('.tab-category li').click(function(){
        activeTab(this);
        return false;
    });

    activeTab(jQuery('.tab-category li:first-child'));
});
```

These lines of code are to trigger when users click on any tab name. When I add div tags and classes for each element on the page, I set the class for the tab names as '_tab-category_'. So, we’ll trigger the action based on that class.

![Set the class for the tab names as 'tab-category'](https://imgur.elightup.com/DnWDHmi.png)

I also set classes for the section displaying questions and answers and use it in this code.

![Set classes for the section displaying questions and answers](https://imgur.elightup.com/gbF6Xcc.png)

If you use this code, please change these classes to your own.

Then, we need to add a line of code to the theme’s file to declare the **JavaScript** library

` <script src="https://ajax.googleapis.com/ajax/libs/jquery/3.7.0/jquery.min.js"></script> `

![Add a line of code to the theme’s file to declare the JavaScript library](https://imgur.elightup.com/mQJEKuH.png)

All of the code I’m using in this practice is uploaded on our [Github](https://github.com/wpmetabox/tutorials/tree/master/create-faq-page) channel, you can refer to them.

Now, go to the FAQs page on the frontend, you will see the tabs run as we want.

![The FAQs page on the frontend](https://imgur.elightup.com/pAgEYQf.gif)

# Creating an FAQs page - Meta Box + Bricks

import LiteYouTubeEmbed from 'react-lite-youtube-embed';
import 'react-lite-youtube-embed/dist/LiteYouTubeEmbed.css';

In today’s practice, let me show you a way to create an FAQs page using Meta Box and Bricks.

This image below is a specific example:

![This is example of the created page](https://imgur.elightup.com/q8DrPFt.png)

## Video version

<LiteYouTubeEmbed id='SXo6s4y_XGs' />

## Preparation

The FAQs Page contains questions and answers that are saved in the custom fields created with Meta Box. They are also displayed in an accordion style on the page.

To do it, we need the tools as follow:

Meta Box core plugin to have the framework for creating custom fields. It’s free, and you can download it directly from wordpress.org.
* [MB Group](https://metabox.io/plugins/meta-box-group/): to organize custom fields into pairs for questions and answers;
* [MB Builder](https://metabox.io/plugins/meta-box-builder/): to have a UI on the backend to easily create custom fields to save information about the questions and answers;
* Bricks Builder: to create the FAQs page.

## 1. Creating a new page

Go to **Page** > **Add New** to create a page as usual.

![Created a new page](https://imgur.elightup.com/z303DwT.png)

## 2. Creating custom fields

Go to **Meta Box** > **Custom Fields** > **Add New**. This is the structure of the fields I created:

|      Name       | Field Type |       Settings        |
|-----------------|------------|-----------------------|
|   FAQs Group    |   Group    | Cloneable Collapsible |
|       Questions |    Text    |           -           |
|        Answer   |  Textarea  |           -           |

Since each question will go along with the corresponding answer, we have these 2 fields inside a group.

There will be more than one couple of Q&A. So, we’ll set this group as **Cloneable** to add more questions and answers easily.

![Set this group as Cloneable](https://imgur.elightup.com/ihrV9BB.png)

Then, there’ll be an **Add more** button to allow adding more Q&A to the FAQs page like this:

![Add the add more button](https://imgur.elightup.com/SNfVGgF.png)

In addition, in case you have many questions and answers, you can set this group as **Collapsible**.

![Tick Collapsible option](https://imgur.elightup.com/JqD5lpX.png)

Next, you can name the group’s title using some variables as follows. The `{#}` variable is for numbering the questions and the `{question}` variable is the ID of the question field to display the content of that question.

![Name the group’s title](https://imgur.elightup.com/q6FxvGc.png)

Naming like this will help you identify the set of Q&A more easily and avoid being messy.

![Naming will help you identify the set of Q&A](https://imgur.elightup.com/6En8OdT.png)

After creating all the fields, move to the **Settings** tab, and choose **Location** as **Page**. Since we created the fields for the FAQs page, go to the **Advanced location rules** section below and choose the **FAQ** which is the name of the page.

![Set location and advanced location rules for the created field](https://imgur.elightup.com/EMtO8ii.png)

Then, you can easily see all the fields in the page editor. Just fill in the Q&A now.

![Created field in the post editor](https://imgur.elightup.com/uXQ6nQF.png)

## 3. Editing the page

Still in the page editor, go to **Edit with Bricks**.

First, select the **Section** element to contain all content of the page.

![Select the Section element](https://imgur.elightup.com/Tj20VMP.png)

Next, add a **Post Title** element to get the title of the page.

![Add a Post Title element](https://imgur.elightup.com/ahlSxrH.png)

Inside the **Container**, to show or hide the pairs of questions and answers for detailed information easily, let’s add the accordion. But, instead of using the **Accordion** element, I choose the **Accordion (Nestable)** one so that I can add elements inside it.

![Choose the Accordion (Nestable)](https://imgur.elightup.com/lVauYF1.png)

Normally, you can use each item here for a pair of questions and answers. The **Title** will be the question, and the **Content** will be the answer. The number of items will be the same as the number of the pairs. However, we saved the question and answer in a **cloneable group**, so you only need one item in the accordion and remove the others.

![Delete one item](https://imgur.elightup.com/CT7v3uA.png)

Next, enable the query loop for the item. In the **Type** of the query settings, choose the created group field. Then, the number of displayed accordions will be the same as the number of questions.

![Choose the Select dynamic data button and find the created group field](https://imgur.elightup.com/pbYfndY.png)

To show the question, go to the **Heading** element, choose **Select dynamic data** button, then search for the **Question** field.

![Choose the Select dynamic data button and find the question field](https://imgur.elightup.com/iz2ggzw.png)

For the answer, move to the **Rich Text** element. Choose **Select dynamic data** button, and the corresponding field as well.

![Choose the Select dynamic data button and find the corresponding field](https://imgur.elightup.com/4IhD5fi.png)

Then, you will see all the information displayed like this.

![The information is displayed](https://imgur.elightup.com/sK4OeLy.png)

For styling the page, still in the page editor with **Bricks**, you can style each element by changing their settings.

Then you will see the new look of the page.

![The final result](https://imgur.elightup.com/q8DrPFt.png)

# Creating an FAQs page - Meta Box + Divi

import LiteYouTubeEmbed from 'react-lite-youtube-embed';
import 'react-lite-youtube-embed/dist/LiteYouTubeEmbed.css';

**Creating an FAQs page** on your website is a useful method for visitors to quickly find the information they're looking for. Let’s see how to do it by using **Meta Box** and **Divi**.

This is an example of an FAQ page that I created.

![An example of the FAQs page using Meta Box and Divi](https://imgur.elightup.com/IqwyfIa.png)

## Video version

<LiteYouTubeEmbed id='Ja7maoWDE7g' />

## Preparation

The FAQs page includes several pairs of questions and answers that are saved in custom fields.

To get started, we need [the Meta Box core plugin](https://wordpress.org/plugins/meta-box/) to have a framework for creating custom fields. You can download it directly from [wordpress.org](https://wordpress.org/plugins/meta-box/).

Besides, we’ll use some Meta Box extensions for more advanced features, as follows:

* [MB Divi Integrator](https://metabox.io/plugins/mb-divi-integrator/): helps you use Divi to get data from custom fields created with Meta Box more easily;
* [MB Builder](https://metabox.io/plugins/meta-box-builder/): to have a UI on the backend to easily create custom fields;
* [MB Group](https://metabox.io/plugins/meta-box-group/): to organize custom fields into pairs for questions and answers.

Finally, we need **Divi** to build the page.

## 1. Creating a new page

Go to **Pages** > **Add New** to create a new page. It will be our FAQ page.

![Go to Pages to create a new page for the FAQs](https://imgur.elightup.com/LdsSOWs.png)

I leave it blank, and I will create custom fields in the next step to input content for this page.

![Just leave this page blank.](https://imgur.elightup.com/IMFfcxR.png)

## 2. Creating custom fields

Go to **Meta Box** > **Custom Fields** > **Add New**. This is the structure of the fields I created:

|      Name       | Field Type |       Settings        |
|-----------------|------------|-----------------------|
|   FAQs Group    |   Group    | Cloneable Collapsible |
|       Questions |    Text    |        Subfield       |
|        Answer   |  Textarea  |        Subfield       |

Each question will go along with an answer. So, we add a group to set them in a pair.

Since we may have more than one pair of questions and answers, I set this group cloneable.

![Set the group cloneable as we may have more than one pair of questions and answers](https://imgur.elightup.com/B56hn6u.png)

Then, we’ll have an Add more button like this in the page editor.

![The Add more button help to add more questions and answers](https://imgur.elightup.com/YiqI44x.png)

I also set this group as **Collapsible**. And I just keep the **Expanded** option to have the display of subfields by default.

![Also set the group as Collapsible and keep the Expanded option to have the display of subfields by default.](https://imgur.elightup.com/Gih2Ja4.png)

And you can add titles for the group as follows to identify the set of Q&A more easily.

![Add titles for the group](https://imgur.elightup.com/k2aykN8.png)

**In there**:

* `{#}`: This variable is for numbering the pair.
* `{question}`: This variable is the ID of the **Question** field to show the question on the title.

After creating all the fields and having reasonable settings, move to the **Settings** tab, choose **Location** as **Post type**, and select **Page**. To apply the fields to the page you want, go to the **Advanced location rules** section below and choose your page. In this case, I chose **FAQ**.

![Set location to apply the fields to the FAQ page.](https://imgur.elightup.com/N4mvoPv.png)

After publishing, you will see all of the custom fields in the page editor. Just enter some questions and answers. Click **Add more** to add other pairs.

![All of the custom fields are displayed in the page editor, and you can click Add more to add other pairs.](https://imgur.elightup.com/AZCxGGV.png)

## 3. Creating a Divi layout

The Questions and Answers are **saved in a cloneable group**, so we should create a layout to get data from the sub-fields first.

Go to **Divi Library** > **Add New**.

![Go to Divi Library to create a new layout](https://imgur.elightup.com/ysUI4c5.png)

Next, instead of using modules from Divi, we highly recommend using the **Meta Box Field** module.

![Look for the Meta Box Field module](https://imgur.elightup.com/kKkVcCI.png)

This is the module built by the **Meta Box** team that has more advantages and more optimality. We have introduced it in more detail in [this walkthrough](https://metabox.io/meta-box-divi-integration-walkthrough/#non-cloneable-fieldsgroups), so you can refer to it for more information.

Now, set the location for this module as the sub-field of the group in the **Meta Box Field** section.

![Set the location for this module as the sub-field of the group](https://imgur.elightup.com/ldil1nQ.png)

Go ahead, choose another **Meta Box Field** module for the **Answer** field, then also set the location as the **Answer** field as well.

![Choose another Meta Box Field module for the Answer field, then set the location as the sub-field](https://imgur.elightup.com/RiqLwkG.png)

So, we have done the layout for displaying a pair of the Q&A.

## 4. Applying the layout to the FAQs page

Go to edit the FAQ page with **Divi Builder**, and add a row.

![Add a row to the FAQ page using Divi](https://imgur.elightup.com/H49Yptv.png)

We had a layout for the questions and answers which are from a cloneable group, so add the **Meta Box Cloneable** module.

![Add the Meta Box Cloneable module](https://imgur.elightup.com/YTEvNuV.png)

Next, set its layout as the one we have just created. Also set the **Cloneable Field** section as the group.

![Set the created layout and also set the Cloneable Field section as the group](https://imgur.elightup.com/ItLce6e.png)

All the information of each pair of question and answer will be listed on the page when you go to the page on the frontend.

![All Q&As will be listed on the FAQ page](https://imgur.elightup.com/wvGP8cz.png)

They are all displayed, but without styling. Let’s move on to the next step to make them display with a better look.

## 5. Styling the page

We should go back to the layout that we use to display the data from the sub-fields. Change the settings of each module to have a new style for those data.

![Change the settings of each module to have a new style for that data.](https://imgur.elightup.com/ORH2JQ7.png)

I’ve just changed some things basically.

Then you will see the new look of the Q&As on the page.

![The new look of the Q&As on the page](https://imgur.elightup.com/IqwyfIa.png)

We have finished creating an FAQs page using Meta Box and Divi. However, this is the way we do it with custom fields. There is also a way to create FAQs using custom post type. It might be the same with display posts in an archive page, maybe with some filter, so you can look at the tutorial on how to have a simple listing page.

# Creating an FAQs page - Meta Box + Elementor

import LiteYouTubeEmbed from 'react-lite-youtube-embed';
import 'react-lite-youtube-embed/dist/LiteYouTubeEmbed.css';

We’re going to add FAQs to a page using Meta Box. And, we’ll use Elementor to build the page.

This is the example page:

![Example of FAQs page created by using Meta Box and Elementor](https://imgur.elightup.com/sjpQ1l7.png)

## Video version

<LiteYouTubeEmbed id='nGTT2Vl_t1U' />

## Preparation

We have a FAQs page that needs to have custom fields for saving the questions and corresponding answers for it. So we need these tools to do it:

* [Meta Box](https://metabox.io) to have the framework for creating custom fields. It’s free, and you can download it directly from wordpress.org.
* [MB Group](https://metabox.io/plugins/meta-box-group/): to organize custom fields into robust and intensely user-friendly groups;
* [MB Builder](https://metabox.io/plugins/meta-box-builder/): to have an intuitive UI to create custom fields in the backend;
* [MB Include Exclude](https://metabox.io/plugins/meta-box-include-exclude/): to add more rules on where to display the field group on the FAQs page;
* [MB Elementor Integration](https://metabox.io/plugins/mb-elementor-integrator/): to connect and display data from custom fields created by Meta Box plugin in the Elementor's dynamic tags;
* [Elementor](https://elementor.com/) (Pro version): to build the page for displaying Q&A;

## 1. Creating a new page

Go to **Pages > Add New** to create a new page for FAQs.

![Create a new page](https://imgur.elightup.com/1StiUwk.png)

## 2. Creating custom fields

Go to **Meta Box > Custom Fields** to create a new field group for the page.

These are fields I’ve just created.

![Set group as cloneable to add more questions and answers easily](https://imgur.elightup.com/2B95tfC.png)

Since each question will go along with the corresponding answer, we have these 2 fields inside a group: Questions and Answers.

There also will be more than one couple of Q&A. So, we set this group to be cloneable to easily add more questions and answers. Then, there'll be an **Add More** button to allow adding more Q&A to the FAQs page as follows.

![Adding more options to the page with Add more button](https://imgur.elightup.com/zn6ljsx.png)

To avoid being messy when you have too many Q&A on the page, you can set this group to be collapsible. This is optional only.

![Set the group to be collapsible to display the Q&A in a tidy way](https://imgur.elightup.com/2W0m7B3.png)

It’ll look more clear.

![Fields display the Q&A in a tidy way](https://imgur.elightup.com/UHecgu8.png)

After creating all the fields, move to the **Settings** tab, choose **Location** as **Post type** and select **Page**. Since we created the fields for the FAQs page, go to the **Advanced location rules** section below and choose the FAQ.

![Set location for FAQs page ](https://imgur.elightup.com/emaEfTi.png)

Then, you can easily see all the fields in the page editor. Just fill in the Q&A.

![The page with created custom fields ](https://imgur.elightup.com/DqQ2lHz.png)

## 3. Creating a skin

If you don’t use a cloneable field, you can get the data as usual, all of them will be displayed with the same style. Here, I used a cloneable field and was willing to have a different style for the questions and answers. So, I’ll create a skin to do it easily.

Go to **Templates > Theme Builder > MB Group Skin > Add New** to create a new skin.

![Create a skin in Template from the Menu Dashboard](https://imgur.elightup.com/UGJOh3h.png)

![Click Add New for new skin to appear in the Meta Box groups skin](https://imgur.elightup.com/bFZjnQZ.png)

Remember to set the preview for the skin.

![Set the preview for the skin](https://imgur.elightup.com/MisYHIc.png)

Then, add a **Heading** element for the questions.

![Get the information as answers that save in MB custom fields](https://imgur.elightup.com/v6KL4iO.png)

To get the information of the question saved in custom fields, click the **Dynamic Tags** button in the settings of the **Heading** element > choose **Meta Box Field** in the **Post** section.

![Get the information as answers that save in MB custom fields](https://imgur.elightup.com/t0i8CjF.png)

Then, choose the name of the field you want to get data from. In my case, it’s **Question**.

![Choose the name of the wanted field to get data ](https://imgur.elightup.com/0QQbvwK.png)

For the answer of the corresponding question, add the **Text Editor** element. Then, also use the **Dynamic Tags** button > **Meta Box Fields** > choose the **Answer** fields.

![Choose Text Editor element for the answer of the corresponding questions created ](https://imgur.elightup.com/nbwMXmw.png)

Now, both the question and answer have been obtained already.

It’ll automatically get and display the information saved in the first group (means the 1st question and answer) only for the preview.

Since this skin will be applied for the FAQs page, remember to add a condition when publishing it.

![Add a condition when publishing ](https://imgur.elightup.com/M1jOCwQ.png)

## 4. Applying the skin to the page

Go to **Pages** > edit the FAQs page with Elementor.

![Edit the FAQs page with Elementor](https://imgur.elightup.com/w57xWhG.png)

Since all the information of the Q&A is saved in a cloneable group with subfields, add the **MB Group** element to get the data from that group.

![Add the MB Group element to get the data](https://imgur.elightup.com/6BXDc6m.png)

Then, there’ll be some data displayed in the preview. However, it may not be the information correctly as you want. So, change the settings in the left sidebar to the needed ones as follows.

![Set options in the left side bar to match the information with the previews](https://imgur.elightup.com/XsfnVfl.png)

The **Object Type** of the template will have 2 options are **Post** and **Settings** page. Since our custom fields are for a page, we choose the **Post** option. It will be the same if your fields are applied for a post type. In the event that your custom fields are for a settings page, choose another one.

It will be automatically set as the created-latest group in the **Group** section. If it is not the group field you want, you can change them to the right one.

Then all the data will be displayed correctly, but there is no styling.

For styling, choose the skin that you’ve created in the **Skin** section. Then, it will turn to the new look with the style of the created skin.

![Choose the skin created](https://imgur.elightup.com/p655vfl.png)

Now, all the questions and answers have been shown with different styles.

![Q&A shows with different style](https://imgur.elightup.com/IVCVx89.png)

Since the element which is the question and answer are set in the skin, you need to go back to the created skin to style it if you want to have more advanced styling.

![Back to the created skin to style](https://imgur.elightup.com/wle2LFn.png)

Then all the changes in the skin will be automatically applied for the page.

![The result of created faqs page](https://imgur.elightup.com/sjpQ1l7.png)

------
You may be interested in:

* [Creating a team members page](https://docs.metabox.io/tutorials/create-team-members-page-meta-box-elementors/)
* [Creating buttons with dynamic link](https://docs.metabox.io/tutorials/create-buttons-dynamic-links/)
* [Displaying images from cloneable fields](https://docs.metabox.io/tutorials/display-images-from-cloneable-fields-meta-box-elementor/)

# Creating an FAQs page - Meta Box + Kadence

import LiteYouTubeEmbed from 'react-lite-youtube-embed';
import 'react-lite-youtube-embed/dist/LiteYouTubeEmbed.css';

Continuing our series on [creating an FAQs Page](https://metabox.io/series/faqs-page/) with **Meta Box** and page builders, today we have just explored a different method, using **Meta Box** and **Kadence**. Having an FAQ page is a way to be more proactive and predictive with what readers are going to need help with. Let’s dive in to explore the process of creating the FAQs page in detail.

This is an example of a FAQs page that I created.

![An example of a FAQs page created with Kadence and data from custom fields created with Meta Box.](https://imgur.elightup.com/HPyWQmw.png)

## Video version

<LiteYouTubeEmbed id='QCs6JtW0NMY' />

## Preparation

The FAQs page includes several couples of questions and answers that are saved in custom fields.

To do it, we need the tools as follow:

* [Meta Box core plugin](https://wordpress.org/plugins/meta-box/): to have the framework for creating custom fields. It’s free, and you can download it directly from wordpress.org.
* [MB Builder](https://metabox.io/plugins/meta-box-builder/): to have a UI on the backend to easily create custom fields to save information about the questions and answers;
* [MB Group](https://metabox.io/plugins/meta-box-group/): to organize custom fields into pairs for questions and answers;

## 1. Creating a new page

Go to **Page** > **Add New** to create a page as usual. This will be used for the FAQs page.

![Go to Pages to create a new page for the FAQs](https://imgur.elightup.com/IqCa9ZW.png)

## 2. Creating custom fields

Go to **Meta Box** > **Custom Fields** to create a new field group. I’m having a group with two subfields inside since each question will go along with the corresponding answer.

![This is a new field group with two subfields inside](https://imgur.elightup.com/1lMVy8v.png)

In addition, each question and answer may be too long to display on the post editor, so I set this group as **Collapsible** to collapse the information in the group field.

![set FAQs group as Collapsible to collapse the information in the group field](https://imgur.elightup.com/IdHAhNH.png)

You can also set the title for the group based on the content of the **Question** field for easier identification. The `{#}` variable is for numbering the questions, and the `{question}` variable is the ID of the question field to display the content of that question.

![Add titles for the group](https://imgur.elightup.com/fJTMAx0.png)

There will be more than one couple of Q&A. So, we’ll set this group as **Cloneable** to add more questions and answers easily.

![Set the group cloneable as we may have more than one pair of questions and answers](https://imgur.elightup.com/6zgiCGM.png)

After configuring all the fields, move to the **Settings** tab. Choose **Location** as **Post type** and select **Page**.

![Move to the Settings tab. Choose Location as Post type and select Page](https://imgur.elightup.com/WEvyNDL.png)

Since we created the fields for the FAQs page, go to the **Advanced location rules** section below and select the page name as FAQ

![Go to the Advanced location rules section below and select the page name as FAQ](https://imgur.elightup.com/4nODnBa.png)

Now, go to the page editor, you will see the custom fields displayed.

![This is the custom fields displayed](https://imgur.elightup.com/MEte2ER.png)

Let’s fill in some questions and answers.

![These are some questions and answers filled](https://imgur.elightup.com/E4X53hq.png)

## 3. Displaying the FAQs on the page

Let’s edit the page template with Kadence to display questions and answers on the page.

First, add a **Repeater** block to get all the content saved in the cloneable group that we used to save the questions and answers.

![add a Repeater block to get all the content saved in the cloneable group](https://imgur.elightup.com/UjmlXPM.png)

Choose the **Source** as the page we used for the FAQ page.

![Choose the Source as the page we used for the FAQ page](https://imgur.elightup.com/iZt0f2A.png)

In the **Repeater Field** section, choose the name of the group field that contains the two subfields inside for the question and answer.

![In the Repeater Field section, choose the name of the group field](https://imgur.elightup.com/tbMqciV.png)

We haven’t set anything yet to stipulate how the date will be displayed, so the preview will be like this.

![This is the preview before the date will be displayed](https://imgur.elightup.com/7lKoTnM.png)

For the content of the questions and answers, add blocks inside the **Repeater**, as well as inside the **Repeater Layout**.

![add blocks to show content of the questions and answers](https://imgur.elightup.com/amDPaui.png)

Next, I’ll choose a **Text Advanced** block for the questions.

![choose a Text Advanced block for the questions](https://imgur.elightup.com/25NPea3.png)

Enable the dynamic content for this block. Then, choose the field for the question.

![Enable the dynamic content for this block. Then, choose the field for the question](https://imgur.elightup.com/wNBlS2V.png)

The questions will display immediately on the preview.

Do the same with the Answers. Also, add another **Text Advanced** block, then choose dynamic data from the **Answer** field.

![add another Text Advanced block, then choose dynamic data from the Answer field](https://imgur.elightup.com/l3oEsii.png)

We’ve finished getting and displaying all the questions and answers. You can see it now on the page on frontend but it doesn't look good.

![This is the page on frontend without style.](https://imgur.elightup.com/Yw5atsP.png)

Let’s move on to make them display in a better look.

## 4. Styling the page

Back to the page editor with **Kadence**, change the settings of each block to have the wanted layout and style.

This is the new look of the page as I did as an example.

![This is the new look of the page](https://imgur.elightup.com/HPyWQmw.png)

# Creating an FAQs page - Meta Box + Oxygen

import LiteYouTubeEmbed from 'react-lite-youtube-embed';
import 'react-lite-youtube-embed/dist/LiteYouTubeEmbed.css';

We are going to **create an FAQs page** using **Meta Box** and **Oxygen**. It has questions and answers that have been saved in custom fields created with Meta Box.

This is a specific example that we’ll create in this practice:

![Example of an FAQs page](https://imgur.elightup.com/DNgiXCm.png)

## Video version

<LiteYouTubeEmbed id='K0F-Mbiz_ls' />

## Preparation

For custom fields, we will use [Meta Box](https://metabox.io/) and [MB Builder](https://metabox.io/plugins/meta-box-builder/) to have a UI for creating custom fields right on the back end.

The FAQs page is built with [Oxygen](https://oxygenbuilder.com/). You should use its 3.9 version or higher, which has native integration with Meta Box.

The questions and answers are displayed in an accordion style on the page, which is provided by [OxyExtras](https://oxyextras.com/). This is optional only.

## 1. Creating a new page

Go to **Pages > Add New** to create a page for FAQs.

![Create a new page](https://imgur.elightup.com/n1QF4Yl.png)

## 2. Creating custom fields

Go to **Meta Box > Custom Fields > Add New**. I’ll add a group with two subfields inside. It is also set to be cloneable to have more spaces to add different questions and answers.

![Create custom fields](https://imgur.elightup.com/zwh3H9m.png)

Then, there'll be an **Add More** button to allow adding more Q&A on the **FAQs page**.

![Click Add more button to add more Q&A on the FAQs page](https://imgur.elightup.com/QJCZxzt.png)

I also made this group **Collapsible** so that the information in the group field could be collapsed.

![Set group to be Collapsible to collapse the information](https://imgur.elightup.com/85DgUtu.png)

It’ll help avoid being messy.

![The information is displayed in a tidy way](https://imgur.elightup.com/vl9VY5s.png)

After creating all the fields, move to the **Settings** tab, choose **Location** as **Post type** and select **Page**. Since we created the fields for the FAQs page, go to the **Advanced location rules** section below and select the page name.

![Set Location for the created fields as post type](https://imgur.elightup.com/KieFPaY.png)

Back in the page editor, you will see the fields and can fill in information about questions and answers.

![The fields appear in the page editor](https://imgur.elightup.com/hR9kpeL.png)

## 3. Creating a template with Oxygen

In **Oxygen**, create a new template and choose the **inactive - Default Page** option to inherit its style and choose to apply this template for **Pages**.

![Create a template with Oxygen](https://imgur.elightup.com/pogPyfZ.png)

Back to the **FAQs** page, assign the newly created template to this page in the **Render Page Using Template** section.

![Assign the created template to the FAQs page](https://imgur.elightup.com/98U2QBB.png)

Now, let’s edit the template with **Oxygen**.

In the **Previewing** section, choose the page you want to see in the preview. Then, select a **Section** component to contain all of the FAQs information.

![Choose the page you want to see in the preview](https://imgur.elightup.com/5adiUY5.png)

Next, add the **Pro Accordion** component. This component will only be available when you have **Oxy Extras** on your site. If you don’t have it, you can add **Text** components instead as normal.

![Add a Pro Accordion component](https://imgur.elightup.com/vsIxJLd.png)

Since I used Meta Box custom fields to save the FAQs information, I set the Accordion type as **Accordion - Dynamic Items (Meta Box)**.

![Set Accordion type as Accordion - Dynamic Items (Meta Box) to save the FAQs information ](https://imgur.elightup.com/Jo8ZKIT.png)

You can input the value in the **Dynamic Data** section to show the questions and answers.

![Go to the Dynamic Data section](https://imgur.elightup.com/OHjsovu.png)

![Input parameters to show the Q&A](https://imgur.elightup.com/LpS5GPo.png)

The group we used in this tutorial is cloneable, so add the group's ID into the box which I marked as 1 in the picture above.

The question will be the **Header Text**, so I added the **Question** field's ID in the box which I marked as 2. For the answers, I also input the ID of the **Answer** field and set it in the **Content field** box, which is marked as 3.

After applying parameters, the preview will show you all of the questions and answers.

![Go to the Dynamic Data section](https://imgur.elightup.com/w8gIjN8.png)

Normally, to have a better score for SEO, the FAQs page should have schema markup.

The **Oxy Extras** supports the **FAQ schema** feature. Just go to the **Advanced** section to enable the FAQ Schema Markup.

![Go to the Advanced section of the accordion](https://imgur.elightup.com/w8gIjN8.png)

![Enable the FAQ Schema Markup in the Advanced section](https://imgur.elightup.com/e6qJH4Q.png)

If you haven’t had the **Oxy Extras**, you can try the **Slim SEO Schema** to have the **FAQ Schema** following this tutorial.

Finally, click the **Apply Params** button to end the setup.

![To end up the setup, click Apply Params](https://imgur.elightup.com/v3O4GpT.png)

Now, on the FAQs page, you will see the result like this.

![Result of the created FAQ page after all steps](https://imgur.elightup.com/iL7LKx4.gif)

------

You may be interested in:

* [Creating a product page](https://docs.metabox.io/tutorials/create-product-page-meta-box-oxygen/)
* [Creating a recipe](https://docs.metabox.io/tutorials/create-recipe-meta-box-oxygen/)
* [Creating a team members page](https://docs.metabox.io/tutorials/create-team-members-page-meta-box-oxygen/)

# Creating a FAQs page - Meta Box + Breakdance

import LiteYouTubeEmbed from 'react-lite-youtube-embed';
import 'react-lite-youtube-embed/dist/LiteYouTubeEmbed.css';

Having a FAQs page on your site will help the visitors to find the information they want quickly. There’re many ways to create a page for FAQs and in this practice, we’ll share with you one of the most helpful ways by using **Meta Box** and then use **Breakdance** to build it.

This is an example of a FAQs page that I created.

![this is an example of the FAQs page](https://imgur.elightup.com/XfC5Oy8.png)

## Video version

<LiteYouTubeEmbed id='61YYhzuzD_g' />

## Preparation

The FAQs page includes several couples of question and answer that are saved in custom fields.

Here are some tools we need for this practice:

* [Meta Box core plugin](https://wordpress.org/plugins/meta-box/): to have a framework for creating a custom post type and custom fields;
* [MB Group](https://metabox.io/plugins/meta-box-group/): to organize custom fields into pairs for questions and answers;
* [MB Builder](https://metabox.io/plugins/meta-box-builder/): to have a UI on the backend to easily create custom fields;
* **Breakdance** to build the page. Make sure you activate and update to the latest version to have full integration with Meta Box.

## 1. Creating a new page

Go to **Pages** > **Add New** to create a new blank page.

![Go to Pages > Add New to create a new blank page](https://imgur.elightup.com/44ia28u.png)

It will be our FAQ page.

## 2. Creating custom fields

Go to **Meta Box** > **Custom Fields** > **Add New**. This is the structure of the fields I created:

|      Name       | Field Type |       Settings        |
|-----------------|------------|-----------------------|
|   FAQs Group    |   Group    | Cloneable Collapsible |
|       Questions |    Text    |           -           |
|        Answer   |  Textarea  |           -           |

Each question will go along with an answer. So, we add a group to set them in a pair.

Since we may have more than one pair of questions and answers, I set this group cloneable.

![Set this group cloneable because we may have more than one pair of questions and answers](https://imgur.elightup.com/CJ35O3r.png)

Then we’ll have an **Add more** button like this.

![the Add more button](https://imgur.elightup.com/VSJmQ5g.png)

Each pair of question and answer may have long content, or there may be too many pairs, so you should set this group collapsible.

![Set this group collapsible](https://imgur.elightup.com/YAW97Pi.png)

Then they will display in a more succinct way.

![The questions and answers display in a more succinct way](https://imgur.elightup.com/0tmbMTU.gif)

And you can add titles for the group as follows. The `{#}` variable is for numbering the pair and the `{question}` variable is the ID of the question field to show the question on the title.

![add titles for the group](https://imgur.elightup.com/q7ftCO2.png)

After creating all the fields and having reasonable settings, move to the **Settings** tab, choose **Location** as **Post type**, and select **Page**. To apply the fields to the page you want, go to the **Advanced location rules** section below and choose your page. In this case, I chose **FAQ**.

![Set the location of custom fields created in the Settings tab](https://imgur.elightup.com/enfjiGR.png)

After publishing, you will see all of the custom fields in the page editor. Just enter some questions and answers. Click **Add more** to add other pairs.

![Enter some questions and answers in the page editor. Click Add more to add other pairs](https://imgur.elightup.com/sHez9Wv.png)

## 3. Creating a global block

We’ll have more than one pair of questions and answers. So let’s create a global block to display the information and set the layout and style for a pair.

Go to **Breakdance** > **Global Blocks** to create a new one.

![Go to Breakdance > Global Block to create a new one](https://imgur.elightup.com/mSFWlxF.png)

Add a **Div** element to cover the block.

![Add a Div element to cover the block](https://imgur.elightup.com/h08Hx2L.png)

For the content of the question, add a **Text** element.

![For the content of the question, add a Text element](https://imgur.elightup.com/vsx6ac6.png)

Because the question is saved in the custom field created by Meta Box, we should insert dynamic data from the field to this element through this icon button.

![insert dynamic data from the field to the element through the dynamic data icon button](https://imgur.elightup.com/xZVEVA6.png)

Look for the **Meta Box** section, then select the name of the field that we use to save the question.

![Look for the Meta Box section, then select the name of the field that we use to save the question.](https://imgur.elightup.com/1A2KGSQ.png)

Next, add another **Text** element for the answer.

![add another Text element for the answer](https://imgur.elightup.com/gQCGRnc.png)

Also insert dynamic data from the Answer field.

![Also insert dynamic data from the Answer field.](https://imgur.elightup.com/kPqe2Zh.png)

Now, you can see a couple of questions and answers displayed.

![a couple of questions and answers displayed](https://imgur.elightup.com/fzD6Hrr.png)

You can style this block by changing the settings in the **Style** tab of each element. And this is the new look of the global block.

![the new look of the global block](https://imgur.elightup.com/tcdETRM.png)

## 4. Displaying Q&As on the page

Go back to edit the page in **Breakdance**. It’s still blank now. We’ll display the questions and answers here.

![Go back to edit the page in Breakdance. It’s still blank now](https://imgur.elightup.com/jLsDjF7.png)

They are in a cloneable group, so add a **Repeater Field** element.

![They are in a cloneable group, so add a Repeater Field element](https://imgur.elightup.com/JCNtJWL.png)

In the **Global Block** section of its settings, choose the name of the global block that we’ve just created.

![In the Global Block section of its settings, choose the name of the global block that we’ve just created.](https://imgur.elightup.com/gqBmjWr.png)

Next, go to the **Field** section. Choose the name of the group field that contains the Question and Answer field.

![go to the Field section, choose the name of the group field that contains the Question and Answer field](https://imgur.elightup.com/bRwm6m6.png)

Now, all the questions and answers are displayed with the style we set in the global block.

![all the questions and answers are displayed with the style we set in the global block](https://imgur.elightup.com/Uptl2kQ.png)

You can change the settings of the Repeater Field element to have a better layout. Let’s see the page on frontend. All the questions and answers display adequately.

![All the questions and answers display adequately on the frontend](https://imgur.elightup.com/XfC5Oy8.png)

# Creating filters of job listing for career page using MB Views

import LiteYouTubeEmbed from 'react-lite-youtube-embed';
import 'react-lite-youtube-embed/dist/LiteYouTubeEmbed.css';

This tutorial will walk you through how to **create a job listing page with advanced filtering** options using the **MB Views** extension from Meta Box - ideal for helping users quickly find the most relevant opportunities.

![Create a job listing page with advanced filtering options using the MB Views.](https://imgur.elightup.com/2O6nn41.gif)

## Video version

<LiteYouTubeEmbed id='v4Qvsqap7_k'/>

## Preparation

In this tutorial, I’ll create a custom post type and custom fields for job listings, set up a frontend submission form, and use **MB Views** to build a dynamic layout with real-time filtering.

For a smoother setup, I highly recommend using [Meta Box AIO](https://metabox.io/aio/). This premium version bundles **the framework** with all **the necessary extensions**, making it easier to access the advanced features we’ll be using.

These are the extensions we’ll use:

* [MB Custom Post Type](https://metabox.io/plugins/custom-post-type/): to create a custom post type for job listings;
* [MB Builder](https://metabox.io/plugins/meta-box-builder/): to visually create custom fields for job information and storing details;
* [MB Conditional Logic](https://metabox.io/plugins/meta-box-conditional-logic/): to show or hide specific fields based on selected filters;
* [MB Views](https://metabox.io/plugins/mb-views/): to build a template for displaying job listings with real-time filtering;
* [MB Frontend Submission](https://metabox.io/plugins/mb-frontend-submission/): to display custom fields on the frontend as a form;
* [MB Admin Columns](https://metabox.io/plugins/mb-admin-columns/): to display job-related details neatly in the admin panel.

Now, let’s go step by step.

## 1. Creating a custom post type

As we said before, we’ll need to create a custom post type to store job listings.

Go to **Meta Box**, **Post Types** to create a new one.

![Create a custom post type to store job listings.](https://imgur.com/SxhGixW.png)

After publishing, you’ll see the created custom post type.

![The created custom post type](https://imgur.elightup.com/mo5Cmy1.png)

## 2. Creating custom fields for the job listings

To store job details, we need to create a group of custom fields. This group serves two purposes: **allowing recruiters to submit job posts from the frontend**, and **enabling job seekers to search and filter jobs based on these fields**. It includes important information such as job type, location, required skills, experience level, etc. Feel free to add more fields as needed.

![The example of a field group for job details](https://imgur.elightup.com/0p9Edc0.png)

Now, go to **Meta Box** > **Custom Fields**, and create a new field group.

![Create a new field group.](https://imgur.elightup.com/4KfFvsu.png)

Just add fields one by one corresponding to the kind of content.

Start by adding two **Text** fields: one for the job location and one for the company name, so users can enter where the job is based and the hiring company’s name.

![Add two Text fields for the job location and for the company name.](https://imgur.elightup.com/YhrI3rK.png)

Next, create a **Select** field for users to choose the job type. In this **Choices** section, input the options.

![Create a Select field for users to choose the job type.](https://imgur.elightup.com/vQa1zRG.png)

Pay heed to the **Show as an admin column** option. It’s available when you activate the **MB Admin Columns** extension. Once checked, there’ll be a column in the dashboard to display job types, making it easier to manage them directly from the backend.

![The Show as an admin column option](https://imgur.elightup.com/ncPp4sm.png)

In the same way, add another **Select** field for working time. And also fill in the time options.

![Add another Select field for working time.](https://imgur.elightup.com/njjGRdH.png)

Since I only want this field to appear when the condition is met, I’ll set a rule for it in the **Advanced** tab to configure it. Move to the **Conditional logic** section (available when you have the **MB Conditional Logic** extension), set the key as the job type field ID and the value as the `part_time` option. This ensures the field shows only when the job type is part-time.

![Set the rule so that the field shows only when the job type is part-time.](https://imgur.elightup.com/V0Hx2iO.png)

Continue by adding other fields for the email, the contact number, and the company’s website.

![Add other fields for the email, the contact number, and the company’s website.](https://imgur.elightup.com/MRJRHei.png)

And select a **Checkbox List** field for technical skills, allowing users to select required skills for the job. And add a **Radio** field for experience level to specify the required experience. As I want these two fields to appear in the admin column, enable the **Show as an admin column** option as well.

![Add fields for technical skills and experience level.](https://imgur.elightup.com/ARbRJ3s.png)

Once all fields are configured, move to the **Settings** tab, set the **Location** as **Post type**, and select Job to apply these fields to it.

![Set location to apply these fields to the Job post type.](https://imgur.elightup.com/cXmx9SH.png)

Now, in your page editor, you will see custom fields displayed.

![In your page editor, you will see custom fields displayed.](https://imgur.elightup.com/17bQuXI.png)

Simply input values in these fields. You see, when choosing the part-time option, there will be a working time section that appears as we set the condition before.

![When choosing the part-time option, there will be a working time section.](https://imgur.elightup.com/AKx2Cvy.gif)

These are some posts that I created, for example. The job type, technical skill, and experience level are shown as admin columns as well.

![Some job posts](https://imgur.elightup.com/sLlySmw.png)

## 3. Creating a template to display job listing

First, create a new page for the job listing.

![Create a new page for the job listing.](https://imgur.elightup.com/isx0iov.png)

In this step, we’ll create a template to display posts on the page - that means all the jobs. For filtering the job, I’ll do it later.

Now, head over to **Meta Box** > **Views**, and create a new template specifically for this purpose.

![Create a new template with MB Views.](https://imgur.elightup.com/JYLnvnZ.png)

With **MB Views**, you can insert fields into it by clicking the **Insert Field** button and choosing any fields on the right sidebar to get data from them or by adding some lines of code directly to the **Template** tab.

![Insert fields](https://imgur.elightup.com/AVbkTnC.png)

Start by adding some code below!

```
{% set args = { post_type: 'job', posts_per_page: -1, orderby: 'date', order: 'ASC' } %}
{% set posts = mb.get_posts(args) %}
{% for post in posts %}
```

![Add code to the template tab.](https://imgur.elightup.com/geMEc3W.png)

**Explanation**:

`{% set args = { post_type: 'job', posts_per_page: -1, orderby: 'date', order: 'ASC' } %}`: This whole line is used to query and display posts from a specific post type, sorted by publish date. Particularly,

* `post_type: 'job'`: get posts from the post type with the job slug;
* `posts_per_page: -1`: fetch all posts in that post type. You can change the number to get the expected number of posts;
* `orderby: 'date'`: specify the order by publish date;
* `order: 'ASC'`: ensure the oldest posts appear first.

Use the `mb.get_posts` function to get the posts.

Since we have multiple posts, use a loop to display all of them.

```
{% for post in posts %}
{% endfor %}
```
For displaying the job's information, just click the **Insert Field** button as I mentioned earlier. And then, insert fields inside the loop. For example, choose **Post title** to show the job title.

![Insert the job title.](https://imgur.elightup.com/qPcKixn.png)

Now, to show the location, company name, job type, and other details saved in the custom fields created with Meta Box. Find them in the list, then insert the fields as usual. The code will be generated automatically in the template.

![Insert Meta Box fields](https://imgur.elightup.com/kna4vLh.png)

While inserting, you also can set the output of the field.

After inserting all the fields, move to the **Settings** section to set where this template will appear. Set the **Type** as **Singular**, and choose the location as the page you created earlier for the job listings.

![Choose the location as the job listings page.](https://imgur.elightup.com/WMk32fv.png)

Finally, set the template’s position.

![Set the template’s position.](https://imgur.elightup.com/NFuSuNA.png)

On the frontend, you’ll see all the job information displayed.

![All the job information displayed](https://imgur.elightup.com/yuIwHrF.png)

However, it appears as a basic list without any styling for now. To make it look more visually appealing, we need to apply some styling.

Back to the **Template** tab, add some `div` tags, classes and modify the code for styling.

![Add some div tags, classes and modify the code for styling.](https://imgur.elightup.com/rF1u3LY.png)

And move to the **CSS** tab to add some lines of code.

```
.mb-container h3 {
    margin-bottom: 15px;
}

.mb-container h3 a {
    color: #b94444;
}

.mb-container {
    margin-top: 25px;
}

.mb-item {
    border-radius: 5px;
    background: #f7f7f78a;
    height: 285px;
    font-size: 16px;
    position: relative;
    float: left;
    width: 24%;
    margin: 5px 5px 10px;
    padding: 10px 15px;
    border: 1px solid #48474733;
    color: #262524;
}
```

![Add some code to the CSS tab.](https://imgur.elightup.com/Od9Wvou.png)

Now, the job listings look much better. It's time to set up the filtering functionality.

## 4. Adding filters & live search

I’m going to show a mix of filters. You can choose whatever style works best for you. Move the **Template** tab, add some code to display the search box and filter options for the job listings.

```
<script src="https://ajax.googleapis.com/ajax/libs/jquery/3.7.1/jquery.min.js"></script>
<script src="https://npmcdn.com/isotope-layout@3.0.6/dist/isotope.pkgd.js"></script>
<div class="mb-filter">
    <div id="filter-search">
        <h4>Search Job</h4>
        <div id="job-search-filter"><input type="text" id="quicksearch" placeholder="Search" /></div>
    </div>

    <div id="job-type-filters" class="button-group">
        <h4>Filter by Job Type</h4>
        {% set job_types = [] %}
        {% for post in posts %}
            {% if post.job_type.label not in job_types %}
                {% set job_types = job_types|merge([post.job_type.label]) %}
            {% endif %}
        {% endfor %}
        <button class="button is-checked" data-filter="*">Show All</button>
        {% for job_type in job_types %}
            <button class="button" data-filter=".{{ job_type|replace({' ': '_'}) }}">{{ job_type }}</button>
        {% endfor %}
    </div>

    <div id="technical-skills-filter">
        <h4>Filter by Technical Skills</h4>
        {% set all_skills = [] %}
        {% for post in posts %}
            {% for skill in post.technical_skills %}
                {% if skill.label not in all_skills %}
                    {% set all_skills = all_skills|merge([skill.label]) %}
                {% endif %}
            {% endfor %}
        {% endfor %}
        {% for skill in all_skills %}
            <label>
                <input type="checkbox" class="technical-skill-checkbox" value="{{ skill|replace({' ': '_'}) }}">
                {{ skill }}
            </label><br>
        {% endfor %}
    </div>

    <div id="experience-level-filter">
        <h4>Filter by Experience Level</h4>
        <select id="experience-level-select">
            <option value="*">Show All</option>
            {% set experience_levels = [] %}
            {% for post in posts %}
                {% if post.experience_level.label not in experience_levels %}
                    {% set experience_levels = experience_levels|merge([post.experience_level.label]) %}
                {% endif %}
            {% endfor %}
            {% for level in experience_levels %}
                <option value=".{{ level|replace({' ': '_'}) }}">{{ level }}</option>
            {% endfor %}
        </select>
    </div>
</div>
```

![Add some code to display the search box and filter options for the job listings ](https://imgur.elightup.com/pYHuGvz.png)

**Explanation**:

```
<script src="https://ajax.googleapis.com/ajax/libs/jquery/3.7.1/jquery.min.js"></script>
<script src="https://npmcdn.com/isotope-layout@3.0.6/dist/isotope.pkgd.js"></script>
```

This first script loads jQuery to handle events and dynamically update the HTML content. The second loads Isotope for dynamic filtering, sorting, and grid layout.

```
<div class="mb-filter">
    <div id="filter-search">
        <h4>Search Job</h4>
        <div id="job-search-filter"><input type="text" id="quicksearch" placeholder="Search" /></div>
    </div>
```
These codes are to create a search box where users can type keywords and filter job listings in real time.

In a real case, we can filter job listings based on different criteria, such as job type, technical skills, and experience level. Here’s how I’ve set it up:

```
<div id="job-type-filters" class="button-group">
        <h4>Filter by Job Type</h4>
        {% set job_types = [] %}
        {% for post in posts %}
            {% if post.job_type.label not in job_types %}
                {% set job_types = job_types|merge([post.job_type.label]) %}
            {% endif %}
        {% endfor %}
        <button class="button is-checked" data-filter="*">Show All</button>
        {% for job_type in job_types %}
            <button class="button" data-filter=".{{ job_type|replace({' ': '_'}) }}">{{ job_type }}</button>
        {% endfor %}
    </div>
```

This section retrieves all job types from the list and displays them as buttons. Each button has the `data-filter` attribute containing a CSS class, which is then used for filtering the job listings with Isotope.

```
 <div id="technical-skills-filter">
        <h4>Filter by Technical Skills</h4>
        {% set all_skills = [] %}
        {% for post in posts %}
            {% for skill in post.technical_skills %}
                {% if skill.label not in all_skills %}
                    {% set all_skills = all_skills|merge([skill.label]) %}
                {% endif %}
            {% endfor %}
        {% endfor %}
        {% for skill in all_skills %}
            <label>
                <input type="checkbox" class="technical-skill-checkbox" value="{{ skill|replace({' ': '_'}) }}">
                {{ skill }}
            </label><br>
        {% endfor %}
    </div>
```

This section retrieves all technical skills and displays them as checkboxes, letting users filter by selected skills.

```
<div id="experience-level-filter">
        <h4>Filter by Experience Level</h4>
        <select id="experience-level-select">
            <option value="*">Show All</option>
            {% set experience_levels = [] %}
            {% for post in posts %}
                {% if post.experience_level.label not in experience_levels %}
                    {% set experience_levels = experience_levels|merge([post.experience_level.label]) %}
                {% endif %}
            {% endfor %}
            {% for level in experience_levels %}
                <option value=".{{ level|replace({' ': '_'}) }}">{{ level }}</option>
            {% endfor %}
        </select>
    </div>
```

This one retrieves all experience levels and displays them in a dropdown so that users can select a level to filter the listings accordingly.

Then, you'll need to add some code in the CSS tab again for styling the search boxes and filters.

```
.button:active,
.button.is-checked {
    background-color: #28F;
}

.button:hover {
    background-color: #8CF;
    text-shadow: 0 1px hsla(0, 0%, 100%, 0.5);
    color: #222;
}

#filter-search {
    margin: 20px 0;
}

#quicksearch {
    width: 300px;
    border: 1px solid #747474;
}

#experience-level-filter,
#job-type-filters,
#filter-search,
#technical-skills-filter {
    display: flex;
    flex-wrap: wrap;
    gap: 10px;
}

#technical-skills-filter label {
    display: flex;
    align-items: center;
    gap: 5px;
}

#technical-skills-filter {
    margin: 20px 0;
}

#technical-skills-filter h4 {
    margin-bottom: 0;
}

#experience-level-filter h4,
#job-type-filters h4,
#filter-search h4 {
    margin-bottom: 0;
    padding-top: 10px;
}
```

![Add some code for styling the search boxes and filters.](https://imgur.elightup.com/BDWOeT0.png)

Now, the job search and filter boxes are visible, but they are not functional yet.

![The job search boxes are visible, but they are not functional yet.](https://imgur.elightup.com/hHiudrG.png)

Thus, you need to use JavaScript to make them work.

Go to the **JavaScript** tab, and add the following script.

```
jQuery(function ($) {
    let qsRegex, buttonFilter, dropdownFilter, technicalSkills = [];

    const item = $('.mb-container').isotope({
        itemSelector: '.mb-item',
        layoutMode: 'fitRows',
        filter: function () {
            const $el = $(this);
            return (
                (!qsRegex || $el.text().match(qsRegex)) &&
                (!buttonFilter || $el.is(buttonFilter)) &&
                (!dropdownFilter || $el.is(dropdownFilter)) &&
                (!technicalSkills.length || technicalSkills.some(skill => $el.hasClass(skill)))
            );
        }
    });

    const applyIsotope = () => item.isotope();

    $('#quicksearch').on('keyup', debounce(function () {
        qsRegex = new RegExp($(this).val(), 'gi');
        applyIsotope();
    }, 100));

    function debounce(func, wait) {
        let timeout;
        return function (...args) {
            clearTimeout(timeout);
            timeout = setTimeout(() => func.apply(this, args), wait);
        };
    }

    $('#job-type-filters').on('click', 'button', function () {
        buttonFilter = $(this).data('filter');
        $('#job-type-filters .is-checked').removeClass('is-checked');
        $(this).addClass('is-checked');
        applyIsotope();
    });

    $('.technical-skill-checkbox').on('change', function () {
        const value = $(this).val();
        technicalSkills = $(this).is(':checked')
            ? [...technicalSkills, value]
            : technicalSkills.filter(skill => skill !== value);
        applyIsotope();
    });

    $('#experience-level-select').on('change', function () {
        dropdownFilter = $(this).val();
        applyIsotope();
    });

});
```

![Add script to make the filter work.](https://imgur.elightup.com/OQ9lsdw.png)

**Explanation**:

```
let qsRegex, buttonFilter, dropdownFilter, technicalSkills = [];
```

This part explains the initialization of key variables used for job search filtering, including:

* `qsRegex`: store the regular expression for quick search;
* `buttonFilter`: hold the value of the job type filter, selected via buttons;
* `dropdownFilter`: hold the value selected from a dropdown for filtering jobs based on experience level;
* `technicalSkills`: track the skills chosen via checkboxes.

```
const applyIsotope = () => item.isotope();
```

The line of code above activates Isotope to filter and display job items based on the user's search. It checks each item and shows only those that match the filtering conditions.

```
$('#quicksearch').on('keyup', debounce(function () {
        qsRegex = new RegExp($(this).val(), 'gi');
        applyIsotope();
   }, 100));
```

This is declared to re-initialize Isotope JS after any change in the search.

```
function debounce(func, wait) {
        let timeout;
        return function (...args) {
            clearTimeout(timeout);
            timeout = setTimeout(() => func.apply(this, args), wait);
        };
}
```

This code handles the event that occurs whenever the user types into the search input. The `debounce` function improves performance by delaying the search until the user stops typing.

The following code sections handle different filtering:

By job type:

```
$('#job-type-filters').on('click', 'button', function () {
        buttonFilter = $(this).data('filter');
        $('#job-type-filters .is-checked').removeClass('is-checked');
        $(this).addClass('is-checked');
        applyIsotope();
});
```

By technical skills:

```
$('.technical-skill-checkbox').on('change', function () {
        const value = $(this).val();
        technicalSkills = $(this).is(':checked')
            ? [...technicalSkills, value]
            : technicalSkills.filter(skill => skill !== value);
        applyIsotope();
});
```

By experience level:

```
$('#experience-level-select').on('change', function () {
        dropdownFilter = $(this).val();
        applyIsotope();
});
```

Right now, the job search box works, but the filters aren’t functional yet.

![The job search box works, but the filters aren’t functional yet.](https://imgur.com/xLf3pfa.png)

That’s because while the JavaScript for filtering is already set up, the required HTML attributes are still missing. Let’s add them now.

In the **Template** tab, add more code.

```
{% set job_type_class = post.job_type.label|replace({' ': '_'}) %}
{% set skill_classes = post.technical_skills|map(skill => skill.label|replace({' ': '_'}))|join(' ') %}
{% set experience_level_class = post.experience_level.label|replace({' ': '_'}) %}
<div class="mb-item {{ job_type_class }} {{ skill_classes }} {{ experience_level_class }}">
```

![Add more HTML code to make filter work.](https://imgur.elightup.com/PrEMdBA.png)

Explanation:

```
{% set job_type_class = post.job_type.label|replace({' ': '_'}) %}
{% set skill_classes = post.technical_skills|map(skill => skill.label|replace({' ': '_'}))|join(' ') %}
{% set experience_level_class = post.experience_level.label|replace({' ': '_'}) %}
```

This processes the filter values before adding them as CSS classes to each job item.

These CSS classes; `job_type_class`, `skill_classes`, `experience_level_class`; are added to each job item to enable filtering.

All the code we put it on [Github](https://github.com/wpmetabox/tutorials/tree/master/create-filter-job-listing-page) so you can refer to it there.

Now, the job listings are fully functional! When you apply filters or search, the displayed jobs update accordingly.

![Create a job listing page with advanced filtering options.](https://imgur.elightup.com/xLf3pfa.gif)

## 5. Creating a submit job page

If you want users to submit job listings from the frontend instead of accessing the backend, you can create a **Submit Job** page as follows:

Now, create a new page. Then, add the **Frontend Submission Form** block provided by [MB Frontend Submission](https://metabox.io/plugins/mb-frontend-submission/).

![Add the Frontend Submission Form block.](https://imgur.elightup.com/KkL4n09.png)

Remember the field group ID I set earlier? Enter this ID into the block settings, and you’ll immediately see the submission form fields appear on the page.

![Enter the field group ID into the block settings.](https://imgur.elightup.com/ISMw24G.png)

Choose the created post type so that when users fill in a form, there will be a post appearing in that post type.

![Choose the created post type.](https://imgur.elightup.com/0QPH55M.png)

Switch to the frontend, and you’ll see the **Submit Job** page displaying the form. Users can now enter job details and submit them directly.

![The Submit Job page displays the form.](https://imgur.elightup.com/TEAlfNI.gif)

## 6. Creating a job manager page

Start by creating a new page where users can view and manage the jobs they’ve submitted after logging in.

Add a **User Dashboard** block, which is provided by the **MB Frontend Submission** extension as well.

![Add a User Dashboard block.](https://imgur.elightup.com/woFaq07.png)

There are some default blogs.

![Some default blogs after choosing the User Dashboard block](https://imgur.elightup.com/fHgeoD8.png)

In the settings section, look for an option to select the **Submit Page**. This sets the page where users submit their job listings.

![Set the page where users submit their job listings.](https://imgur.elightup.com/jVPHm2Q.png)

Now, with the **Job Manager** page set up, you can edit or delete the job listings as you want.

![The Job Manager page allows you to edit or delete the job listings.](https://imgur.elightup.com/5J5Jla1.gif)

# 0221-tutorials-create-filters-real-estate-page-with-bricks

---
title: Creating filters for real estate page - Meta Box + Bricks
---# Creating filters for real estate page - Meta Box + Bricks

 
import LiteYouTubeEmbed from 'react-lite-youtube-embed';
import 'react-lite-youtube-embed/dist/LiteYouTubeEmbed.css'; 

Today, I’ll walk you through how to **create a professional-looking property listing** using **Meta Box** and **Bricks Builder**, with filters displayed neatly in the sidebar and results updating instantly based on user selections.

![Create filters for real estate page - Meta Box + Bricks](https://i0.wp.com/images.elightup.com/meta-box/blog/real-estate-filter/Create-filters-for-real-estate-page-meta-box-bricks.gif)

This method isn’t just for properties; it also works great for other types of content like products, job listings, or services where users need to filter by specific criteria.

It’s quite similar to our previous [job listing tutorial](https://docs.metabox.io/tutorials/create-filters-job-listing-mb-views/). We’ll still use custom fields and a custom post type to store the property data. But this time, we’ll take advantage of the built-in features of **Bricks** to handle the filtering in a more visual and streamlined way.

Let’s get started!

## Video version

<LiteYouTubeEmbed id='gGusgklHW7w' />

## Preparation

In this tutorial, I’ll show you how to create a custom post type and custom fields for property listings with **Meta Box**, then use **Bricks** to build a dynamic layout with a real-time filter in the sidebar.

These are the extensions you may want to activate.
* [Meta Box Lite](https://metabox.io/lite/) to have a framework that allows creating custom post types and custom fields;
* **Bricks** is used to build the layout and create a real-time filtering system using query loops and dynamic data.

Now, let’s go step by step.

## 1. Creating a custom post type

As we said before, we’ll begin by creating a custom post type to store property listings, and the information of each one will be saved as a post of that post type.

Right on the Meta Box dashboard, click on the **Create post type** button to create a new one.

![Click on the Create post type button](https://i0.wp.com/images.elightup.com/meta-box/blog/real-estate-filter/Create-post-type.png)

After publishing, it will appear in your dashboard menu.

![The created custom post type](https://i0.wp.com/images.elightup.com/meta-box/blog/real-estate-filter/created-custom-post-type.png)

## 2. Creating a custom taxonomy

Before diving in, keep in mind that whether you use a custom taxonomy or custom fields depends on how you want to structure and filter your content. You can choose either one or both; it’s totally up to you. In this case, I’ll use both for more flexibility.

Now, I’ll create a custom taxonomy for the created post type to categorize properties by their types.

Still in the **Meta Box** screen, create a new taxonomy.

![Go to Meta Box > Taxonomies, and create a new taxonomy](https://i0.wp.com/images.elightup.com/meta-box/blog/real-estate-filter/create-new-taxonomy.png)

In the **Advanced** tab, pay attention to the **Show admin column** setting if you want to show them as an admin column. This setting is available when you have the [MB Admin Columns](https://metabox.io/plugins/mb-admin-columns/) extension. I did not mention it at the beginning because it’s optional.

![Enable the Show admin column option](https://i0.wp.com/images.elightup.com/meta-box/blog/real-estate-filter/Show-admin-column-option.png)

Move to the **Post types** tab, choose the **Property** to assign the custom taxonomy that we’ve created to that post type.

![Choose the post type to apply the taxonomy to.](https://i0.wp.com/images.elightup.com/meta-box/blog/real-estate-filter/apply-taxonomy-to-post-type.png)

Now, you can add some terms to your product’s taxonomy.

![Terms of taxonomy](https://i0.wp.com/images.elightup.com/meta-box/blog/real-estate-filter/Terms-taxonomy.png)

## 3. Creating custom fields for the property

To store property details, we need to create a group of custom fields. They will cover key information such as property price, area, status, and more. Feel free to add additional fields depending on your needs.

Click on the **Create custom fields** button in the dashboard to create a new field group for the property.

![Click on the Create custom fields button in the dashboard to create a new field group](https://i0.wp.com/images.elightup.com/meta-box/blog/real-estate-filter/Create-custom-fields.png)

These are some fields I created:

![Some fields as example](https://i0.wp.com/images.elightup.com/meta-box/blog/real-estate-filter/custom-fields.png)

There’s no special setting for them. You can freely create more fields to store information for products as you want with [40+ field types](https://docs.metabox.io/fields/) provided by **Meta Box**.

For fields that require a selection, such as **Status**, I use the **Select** field type. In the Choices section, I enter the available options, like For sale or For rent.

![For fields that require a selection, use the Select field type.](https://i0.wp.com/images.elightup.com/meta-box/blog/real-estate-filter/Select-field-%20type.png)

Once all fields are configured, move to the **Settings** tab, set the **Location** as **Post type**, and select **Property** to assign these fields to it.

![Set the location for the field group.](https://i0.wp.com/images.elightup.com/meta-box/blog/real-estate-filter/Set-location-for-field-group.png)

Now, navigate to your post editor, you’ll see the custom fields displayed, along with the taxonomy section where you can enter the property type.

![Fields and taxonomy in the post editor](https://i0.wp.com/images.elightup.com/meta-box/blog/real-estate-filter/Fields-taxonomy-in-post-editor.png)

So, just fill in all the information.

These are some posts, for example, that I created. The property type as well as the taxonomy terms also display in the admin dashboard.

![The term is displayed as a column](https://i0.wp.com/images.elightup.com/meta-box/blog/real-estate-filter/term-displays-column.png)

## 4. Showing properties on the page

In this step, we’ll display posts on the page - that means all the properties. For filtering, I’ll do it later.

First, create a new page for the property listing.

![Create a new page](https://i0.wp.com/images.elightup.com/meta-box/blog/real-estate-filter/new-page.png)

Let’s edit the page with **Bricks**.

Add a **Section** element to cover all the page content, then use the available container to insert elements for displaying the property list.

![Add a Section element to cover all the page content](https://i0.wp.com/images.elightup.com/meta-box/blog/real-estate-filter/Section-element-cover-page-content.png)

Before going further, add a **Heading** element for the page title, then click the **Dynamic Data** icon, choose the **Post title** option from the list. This will automatically display the title of the current page on the frontend.

![Get the page title](https://i0.wp.com/images.elightup.com/meta-box/blog/real-estate-filter/get-page-title.png)

Move to the container and choose the layout for it. In my case, I’ll use a 2-column layout: one for the filtering and one for the properties.

![Layout for the filtering and the properties](https://i0.wp.com/images.elightup.com/meta-box/blog/real-estate-filter/two-column-layout.png)

![Choose a 2-column layout: one for the filtering and one for the properties.](https://i0.wp.com/images.elightup.com/meta-box/blog/real-estate-filter/two-column-layout.png)

You can adjust the width of the two columns as you prefer.

Now, get the properties information into column 2.

We want to display all **Property** posts, so we need to use a query loop. To do that, add a **Div** as the wrapper and enable the **Query loop** button > the **Query** section > choose the created post type you want to get data from.

![Add div to get all posts from the post type](https://i0.wp.com/images.elightup.com/meta-box/blog/real-estate-filter/Add-div-get-all-posts.png)

Inside this div, add elements to display the property details.

For the image of the property, choose the element that has the same name. Since these are the post’s featured images, click the **Dynamic Data** icon and choose the **Featured Image** option.

![Get the image of the property.](https://i0.wp.com/images.elightup.com/meta-box/blog/real-estate-filter/Get-property-images.png)

As you can see, the image is displayed in the preview.

![The image is displayed in the preview.](https://i0.wp.com/images.elightup.com/meta-box/blog/real-estate-filter/images-in-preview.png)

Next, add another **Div** to group some property data together - this will help with styling. Then, choose the **Post Title** element for the property name.

![Get the property name.](https://i0.wp.com/images.elightup.com/meta-box/blog/real-estate-filter/Get-property-name.png)

To get its status, choose the **Basic Text** element. As this kind of information is saved in the custom field of **Meta Box**, use the **Dynamic data** button. Then, look for the field where we store the status.

![Get the status of properties](https://i0.wp.com/images.elightup.com/meta-box/blog/real-estate-filter/status-properties.png)

Do similar to get the property’s location and type.

Afterward, I want to display the property area, number of bedrooms, and number of bathrooms along with icons, so choose the **Icon List** element instead of normal text.

![Choose the Icon List element for displaying info with icons.](https://i0.wp.com/images.elightup.com/meta-box/blog/real-estate-filter/Icon-%20List-element.png)

You can style and pick icons as you like. As this info is saved in custom fields created with **Meta Box** as well, in the **Label** section, we’ll use the **Dynamic Data** and then choose the corresponding fields. For instance, I am getting the area.

![Connect data to get the area of the property](https://i0.wp.com/images.elightup.com/meta-box/blog/real-estate-filter/Get-property-area.png)

You can add the right unit. Repeat for bedrooms and bathrooms.

Finally, for the price, do the same with other data.

![Get the property price](https://i0.wp.com/images.elightup.com/meta-box/blog/real-estate-filter/Get-property-price.png)

All the information for the property is now in place.

View the page on the frontend, the property list is showing up. However, it’s still quite basic, so let’s make it more visually appealing.

![The property list is showing up](https://i0.wp.com/images.elightup.com/meta-box/blog/real-estate-filter/list-property-without-functions.png)

To style it, choose each element and change its settings. Then, the property listings look much better.

![The property listing after styling](https://i0.wp.com/images.elightup.com/meta-box/blog/real-estate-filter/property-listing-after-styling.png)

It's time to add and set up the filtering functionality.

## 5. Adding filter functionality for the real estate page

Let’s add some filter functionality so users can search for properties based on type, price, area, construction date, and status. With **Bricks**, filtering has never been easier – it supports filtering by taxonomy and even works perfectly with Meta Box custom fields. Let’s set things up!

In the Bricks settings, enable two options to activate filtering.

![Enable options to activate filtering in Bricks](https://i0.wp.com/i0.wp.com/images.elightup.com/meta-box/blog/real-estate-filter/activate-filtering-bricks.png)

Then, edit the property page again. 

Name the **div** that wraps your property query - this helps you connect filters later, especially useful if the page has multiple queries. The other divs for styling don’t need names.

![Name the div that wraps your property query](https://i0.wp.com/images.elightup.com/meta-box/blog/real-estate-filter/name-query.png)

Now, add a new **div** inside the first column to cover all the filters; this will make styling easier later.

You’ll see **Bricks** supports many filter types, as you can see here:

![Bricks supports many filter types](https://i0.wp.com/images.elightup.com/meta-box/blog/real-estate-filter/filter-types-Bricks.png)

Start creating a search filter. In the **Target query** section, choose the query you created earlier. From now on, the search box will filter results based on that query.

![Create a search filter](https://i0.wp.com/images.elightup.com/meta-box/blog/real-estate-filter/search-filter.png)

For other filters, the structure is the same:

* Add a title
* Choose the right filter element and connect it to the target query.

For the property type, choose the filter element you prefer. I’ll go with **Filter – Checkbox**, since users may want to select multiple types, and checkboxes are perfect for that. Next, connect this filter to the target query. As the property type is saved in the taxonomy, in the **Source** section, choose the corresponding taxonomy. Then, you see the type filter section shows as a checkbox list based on the filter element you chose.

![Create a filter for the property type.](https://i0.wp.com/images.elightup.com/meta-box/blog/real-estate-filter/property-type-filter.png)

For the next filters, follow the concept I mentioned earlier. Add a wanted filter for price (Ex: Filter - Range). Connect it to the query as well. Since price is stored in a Meta Box custom field, choose **Custom Field** as the source, then select **Meta Box** and choose the correct field via **Dynamic Data**.

![settings for price filter](https://i0.wp.com/images.elightup.com/meta-box/blog/real-estate-filter/price-filter-settings.png)

The price filter appears; you can adjust the currency and range display.

![price filter](https://i0.wp.com/images.elightup.com/meta-box/blog/real-estate-filter/Price-filter-display.png)

You can adjust the currency and range display.

Do the same with the remaining filters.

Next, add a **Reset Filter** element; this clears all selected filters and restores the default view. You can set its action and style it.

![Add a Reset Filter element; this clears all selected filters and restores the default view.](https://i0.wp.com/images.elightup.com/meta-box/blog/real-estate-filter/Reset-filter.png)

The last one is for showing active filters, which displays which filters are currently applied.

![Active filters](https://i0.wp.com/images.elightup.com/meta-box/blog/real-estate-filter/active-filter.png)

Now all the filters are visible on the frontend.

![The filters are visible on the frontend.](https://i0.wp.com/images.elightup.com/meta-box/blog/real-estate-filter/Visible-filters.png)

Go back to the editor and style the filter section to make it look better. Thus, let’s give it a try; it works perfectly! The filters you choose will be listed below the active filters section, and the properties shown will satisfy those conditions.

![Create filters for real estate page - Meta Box + Bricks](https://i0.wp.com/images.elightup.com/meta-box/blog/real-estate-filter/Create-filters-for-real-estate-page-meta-box-bricks.gif)

# Creating a full-width WordPress dashboard widget

import LiteYouTubeEmbed from 'react-lite-youtube-embed';
import 'react-lite-youtube-embed/dist/LiteYouTubeEmbed.css';

As a regular user of some classic WordPress themes, I often felt frustrated by the narrow widget area in the admin dashboard. The limited space made it challenging to manage and customize widgets effectively, slowing down my workflow.

I sought a solution to **expand the widget area to full width** to improve that. After some experimentation, I found a straightforward way to achieve this. Right now, I’m excited to share this customization with you guys, helping you **create a more user-friendly and efficient WordPress admin dashboard**.

![Expand the widget area to full width](https://imgur.elightup.com/NtkLlSx.png)

## Benefits of customizing full width widget

Customizing the widget area to full width brings several significant advantages:

* Increase display space: Allows for a clearer view of the content, making it more user-friendly.
* More professional admin interface: The expanded layout not only improves functionality but also gives your dashboard a modern and cleaner appearance.
* Improved efficiency: A full-width widget area can reduce the time spent adjusting and fine-tuning widgets, allowing for a more streamlined workflow.

Let's dive into how you can easily implement this customization in your WordPress admin dashboard.

## Easy to customize

To get started, you can see the images below, which illustrate how the narrow widget area can impact your user experience compared to the improved full-width layout. The difference is striking, making it clear why this change is worthwhile.

![The default narrow sidebar widget area can impact your user experience.](https://imgur.elightup.com/e53k2QK.png)

![The default narrow footer widget area can impact your user experience.](https://imgur.elightup.com/97lZOlk.png)

Now, simply add the following code to the `functions.php` file of your theme. This code will expand the widget area in the admin dashboard to nearly the full screen width, giving you more space for customization.

```css
function custom_widgets() {
    echo '<style>
        .wp-block[data-type="core/widget-area"] {
            max-width: 90%!important;
        }
        .blocks-widgets-container .editor-styles-wrapper {
            max-width: 100%!important;
        }
    </style>';
}
add_action('admin_enqueue_scripts', 'custom_widgets');
```

![Add code to customize full width widget in WordPress admin](https://imgur.elightup.com/p6Lk541.png)

**In there**:

```css
.wp-block[data-type="core/widget-area"] {
     max-width: 90%!important;
 }
```

This expands the widget frame to 90% of the screen width.

```css
.blocks-widgets-container .editor-styles-wrapper {
     max-width: 100%!important;
 }
```

This makes the content inside the widget frame take up the full 100% width.

```css
add_action('admin_enqueue_scripts', 'custom_widgets');
```

The `admin_enqueue_scripts` hook is used to insert CSS into the admin page, and the entire line ensures the `custom_widgets` function's CSS is added.

In practice, you could also adjust other factors like padding, margins, or even change the background color of the widget area for more visual customization.

After saving the file, revisit the widget area in your WordPress admin dashboard. You'll notice that the widget section is now expanded, making it easier to customize.

![The full-width sidebar widget](https://imgur.elightup.com/e53k2QK.png)

![The full-width footer widget](https://imgur.elightup.com/xQxs2Hp.png)

If you're interested in exploring more ways to optimize your WordPress experience, be sure to check out the resources available on Meta Box with some useful tips, such as [tips for license keys](https://metabox.io/license-key-management-remotely/). These sites offer a wealth of tips and tricks to help you make the most of your WordPress dashboard.

# Creating a dynamic horizontal posts accordion - Using MB Views

import LiteYouTubeEmbed from 'react-lite-youtube-embed';
import 'react-lite-youtube-embed/dist/LiteYouTubeEmbed.css';

If you're looking for a way to present your blog in a fresh and dynamic way, then this guide is for you. We'll explore how to create a **horizontal accordion** of featured images with the help of **MB Views** from Meta Box.

This is a page I created as an example of this tutorial:

![An example of horizontal accordion](https://i0.wp.com/images.elightup.com/meta-box/blog/horizontal-accordion/horizontal_accordion.gif)

## Video version

<LiteYouTubeEmbed id='0TP0OE1nYe4'/>

## Benefits of the accordion style

Typically, blog posts are presented in a traditional format: headlines, paragraphs, and images arranged one after another from top to bottom. This structure is clear and easy to read, but it can sometimes feel dull. You have to scroll to view all the content.

When you want to make it innovative and exciting, using an accordion can be a great option. It is a user interface element that allows content to be expanded or collapsed, helping organize information in a compact and interactive way. So, displaying posts as an accordion brings some benefits for your WordPress site:

* Save screen space
* Make your content more eye-catching
* Offer a better user experience: readers can quickly browse through multiple posts without scrolling too much.

There are lots of different accordion styles out there, but we’re going to focus on a horizontal one, using featured images of posts as the interactive tabs.

## Preparation

As you can see on the demo I have at first, the thumbnail and short title are present for each post. They are arranged side by side. When you click on the title, the corresponding post content will be displayed. It may sound tricky or complicated at first, but you'll see that it's absolutely doable, especially with the help of MB Views.

So, in this practice, we recommend you install [**Meta Box AIO**](https://metabox.io/aio/) to have a framework and features of [MB Views](https://metabox.io/plugins/mb-views/) to create a template for displaying posts in a horizontal accordion.

You can also use other extensions inside Meta Box AIO for additional advanced features. 

## 1. Creating a new page

I already have some posts here for demonstration purposes.

![Some posts here for demonstration purposes](https://i0.wp.com/images.elightup.com/meta-box/blog/horizontal-accordion/example-of-posts.png)

I’ll display these posts as an accordion on a page. So, let’s create it first.

Go to **Pages**, and create a new one.

![Go to Pages, and create a new one for the horizontal accordion](https://i0.wp.com/images.elightup.com/meta-box/blog/horizontal-accordion/create-new-page.png)

## 2. Creating a template for horizontal accordion

We’ll display and make the accordion interactive using MB Views.

Go to **Meta Box** > **Views**, and create a template for it.

![Go to Meta Box > Views, and create a template for displaying horizontal accordion](https://i0.wp.com/images.elightup.com/meta-box/blog/horizontal-accordion/create-new-view.png)

With MB Views, you can insert fields through the **Insert Field** button or add code directly. I combine both of them.

### 2.1 Getting data of posts

First, add these lines of code:

```
{% set args = { post_type: 'post', posts_per_page: -1} %}
{% set posts = mb.get_posts( args ) %}
{% for post in posts %}

{% endfor %}
```

![Add some code to get posts](https://i0.wp.com/images.elightup.com/meta-box/blog/horizontal-accordion/get-posts.png)

**In there**:

* `{% set args = { post_type: 'post', posts_per_page: -1} %}`: is to declare that we’ll get posts on the site through the `post` slug. If you want to get posts from a custom post type, just change that slug.
* `mb.get_posts`: is a Meta Box function to get the post.
* `{% for post in posts %}...{% endfor %}`: is a loop to display all of posts since there are various posts.

Inside the loop, we’ll get data for each post. We recommend you use the button I mentioned before, then you can insert any field you want from the right panel. In this case, we need the featured images, post title, and the post ID for linking between the post content and its title. All of them are in the **Post** tab. Just insert them one by one. 

When you insert a field, the code will be generated in the **Template** tab.

![Insert the field you want to get data for posts](https://i0.wp.com/images.elightup.com/meta-box/blog/horizontal-accordion/insert-field.png)

You can also set the size for the post thumbnail. After inserting three fields, our template will be like this:

![The Template tab after insert field for getting data](https://i0.wp.com/images.elightup.com/meta-box/blog/horizontal-accordion/insert-all-needed-field.png)

Next, move to the **Settings** tab to apply the template to the page we created at first. Set the **Type** as **Singular**, and choose your page. You should put the accordion at the top of the post content.

![Apply the template for the page of horizontal accordion](https://i0.wp.com/images.elightup.com/meta-box/blog/horizontal-accordion/setting-template.png)

On the frontend, the page is displayed with all the data we get.

![All the data is displayed](https://i0.wp.com/images.elightup.com/meta-box/blog/horizontal-accordion/data-display.png)

### 2.2 Transforming data to horizontal accordion

In this step, we’ll style the data and add action to have the horizontal accordion.

#### 2.2.1 Styling the data

Back to the created template to add some code. 

First, add a line of code to declare and load the jQuery library we’ll use for having a horizontal accordion.

```
<script src="https://ajax.googleapis.com/ajax/libs/jquery/3.7.1/jquery.min.js"></script>
```

![Add code to declare jQuery library](https://i0.wp.com/images.elightup.com/meta-box/blog/horizontal-accordion/add-jquery-library.png)

For the data we get, you should modify it for styling by adding some **`div`** tags and classes. Then, the code will be like this:

![Modify the code and add div tags and classes](https://i0.wp.com/images.elightup.com/meta-box/blog/horizontal-accordion/modify-code.png)

As you can see, I use `mb.get_permalink()` function to retrieve the URL of the post via its ID.

And, `mb.substr(post.title, 0, 15)` cuts the post title to the first 15 characters, including space. It's used to display a shortened version of the title. You can change this number as you want. 

Next, move to the **CSS** tab to add some code to make the data of the accordion more beautiful.

![Add some code into the CSS tab to style the accordion](https://i0.wp.com/images.elightup.com/meta-box/blog/horizontal-accordion/add-css.png)

#### 2.2.2 Adding action for the interactive thumbnail

Go ahead to the **JavaScript** tab to add an action for the accordion. I’ll add some code:

```
$(function () {
    var width_accordian = $('.accordian ul').css("width");
    $('.accordian .image_title').css("width", width_accordian);

    var lis_count = $('.accordian .mb-item').length;
    function set_width_time() {
        var width = 100 / lis_count;
        $('.accordian .mb-item').css("width", width + '%');
    }
    set_width_time();

    $(".accordian ul li.mb-item").hover(function () {
        var width1 = 40 / (lis_count - 1);
        $('.accordian .mb-item').css("width", width1 + '%');
        $(this).css("width", '60%');
    }, function () {
        set_width_time();
    });
});
```

![Add code to the JavaScript tab to add action for the interactive thumbnail](https://i0.wp.com/images.elightup.com/meta-box/blog/horizontal-accordion/add-javascript-horizontal-accordion.png)

**Specifically**: 

* `var width_accordian = $('.accordian ul').css("width")`: is to get the width of the element inside the accordion.
* `$('.accordian .image_title').css("width", width_accordian)`: set the accordion width to all the images we have.
* `var lis_count = $('.accordian .mb-item').length`: helps count the total posts.
* `var width = 100 / lis_count`: is to equally divide the width among all items.

When the reader hovers over a thumbnail, the below code runs:

```
$(".accordian ul li.mb-item").hover(function () {
        var width1 = 40 / (lis_count - 1);
        $('.accordian .mb-item').css("width", width1 + '%');
        $(this).css("width", '60%');
    }, function () {
        set_width_time();
```

Specifically, the width of the image hovered over will increase to 60%, and the others will equally share the remaining 40%.

That’s done. I’ve uploaded the code I use in this tutorial to [GitHub](https://github.com/wpmetabox/tutorials/tree/master/horizontal-posts-accordion), so you can refer to it.

Now, go to the page on the frontend. You’ll see that the accordion looks good, with a thumbnail and a short title. The width of each featured image changes when you interact with it. Also, the full content of the corresponding post will be shown when you click on the title.

![The horizontal accordion works well](https://i0.wp.com/images.elightup.com/meta-box/blog/horizontal-accordion/horizontal_accordion.gif)

We also have a helpful tutorial on [dynamic styling with data attributes](https://metabox.io/dynamic-styling-using-data-attributes/), a great way to make your pages even more visually appealing.

# Creating a load more button with Meta Box

import LiteYouTubeEmbed from 'react-lite-youtube-embed';
import 'react-lite-youtube-embed/dist/LiteYouTubeEmbed.css';

Today, I’ll show you how to **create a Load More button using Meta Box**, to let users load posts dynamically without refreshing the page. This makes browsing smoother and improves user experience.

![Create a flexible Load More button with Meta Box.](https://imgur.elightup.com/oCsIf99.gif)

Let’s walk through how to do it!

## Video version

<LiteYouTubeEmbed id='XwSC7NUk7s8' />

## Preparation

My archive page shows some posts that are stored in a custom post type. When I click the Load More button, it will load more posts and display them instantly on the page. The number of posts to show at first and load each time will be set in custom fields.

For this practice, here are the tools you’ll need.

First, we need [the Meta Box plugin](https://wordpress.org/plugins/meta-box/) to have a framework to create a custom post type, custom fields, and a settings page.

Also, you may need some advanced features from extensions of Meta Box. So you can install them separately or use **Meta Box AIO** to get everything bundled together.

These are the extensions you may want to activate.

* [MB Custom Post Type](https://metabox.io/plugins/custom-post-type/): to create a custom post type for any content you want to display, whether it’s restaurants, books or other listings;
* [MB Builder](https://metabox.io/plugins/meta-box-builder/): to visually create custom fields for managing archive display settings, including the Load More button;
* [MB Settings Page](https://metabox.io/plugins/mb-settings-page/): to create a settings page where you can control archive settings;
* [MB Views](https://metabox.io/plugins/mb-views/): to create a template for displaying posts and integrating the Load More button.

Now, let’s go step by step.

## 1. Creating a custom post type

Go to **Meta Box** to create a new custom post type for your content.

![Create a new custom post type for your content.](https://imgur.elightup.com/zEqmNtJ.png)

After publishing, you’ll see the created custom post type.

![The created custom post type](https://imgur.elightup.com/ySiVtg3.png)

These are some posts in the post type, for example, I created. This content will be displayed on the archive page as a listing.

![Some posts in the created post type](https://imgur.elightup.com/kEVCcUq.png)

## 2. Creating a settings page for the archive

Since the archive page isn’t a static page you can edit directly, we’ll use a settings page to manage its content and layout flexibly.

Go to **Meta Box** > **Settings Pages**, and create a new settings page.

![Create a new settings page.](https://imgur.elightup.com/SFTwEhM.png)

For now, the page is blank; we’ll add content in the next step.

![The settings page is blank before applying custom fields to it.](https://imgur.elightup.com/9JAfYJK.png)

## 3. Creating custom fields for the load more button

To configure the **Load More** button, we need to store additional settings, such as how many items to show at first, how many to load per click, and how the layout should be structured.

We'll create custom fields for these settings using Meta Box, like this image below.

![Custom fields for archive settings](https://imgur.elightup.com/KDrFv5R.png)

Simply add more fields if you want to have more settings.

Now, go to **Meta Box** > **Custom Fields**, and create a new field group.

![Create a new field group.](https://imgur.elightup.com/GlUSiPF.png)

Just add field types one by one corresponding to the kind of content.

Start by adding a **Text** field for post type. This field allows users to enter the custom post type that will be listed dynamically. It ensures the Load More button loads posts from the correct post type.

![Add a Text field for post type.](https://imgur.elightup.com/3zdoSOt.png)

Next, add a **Number** field for **Item First** to set the number of posts displayed initially.

![Add a Number field for Item First to set the number of posts displayed initially.](https://imgur.elightup.com/gGRxQsE.png)

Then, add another **Number** field labeled **Item Load More** to determine how many additional posts will load each time the button is clicked.

![Add the Item Load More field to determine how many additional posts will load each time the button is clicked.](https://imgur.elightup.com/Q4SufZ1.png)

The last field is the **Select** field for **Column**, which helps users define how many columns the posts should be displayed in.

![Choose the Select field for Column, helping users define how many columns the posts should be displayed in.](https://imgur.elightup.com/ZIV8Al5.png)

After creating all the fields, move to the **Settings** tab, set the **Location** as **Settings Page**, and choose the created settings page to apply the fields to it.

![Set location to apply fields to the archive page](https://imgur.elightup.com/5piTZs7.png)

Afterward, navigate to your settings page, and you will see custom fields displayed.

![In the settings page, you will see custom fields displayed.](https://imgur.elightup.com/sjviGh4.png)

Simply input values in these fields.

Now, let's display the posts along with the selected settings on the frontend.

## 4. Displaying posts on the archive

In this step, we’ll create a template to just display posts on the archive page using the settings we configured earlier. Enhancing the layout and adding interactive features like the Load More button will be covered in the next part.

Head over to **Meta Box** > **Views**, and create a new template specifically for this purpose.

![Go to Meta Box > Views, and create a new template](https://imgur.elightup.com/jXchUPn.png)

With **MB Views**, you can add some lines of code to the **Template** tab or insert fields into it by clicking the **Insert Field** button and choosing any fields on the right sidebar to get data from them.

![Insert fields](https://imgur.elightup.com/MNNMwtH.png)

Since they are on a settings page, move to the **Site** tab and choose the fields one by one.

![Since they are on a settings page, move to the Site tab.](https://imgur.elightup.com/TUR5IV3.png)

It will automatically generate code to the template.

![The generated code in the template](https://imgur.elightup.com/djGuith.png)

You can also set the output of the field.

After inserting all the fields into the template, in the **Settings** section, set the location where we want to display this template. I just keep the settings of the template type as shortcode to display this template anywhere more easily.

![Keep the settings of the template type as shortcode to display this template anywhere.](https://imgur.elightup.com/wKCk1qF.png)

Notice that you should copy the generated shortcode to use it later.

![The generated shortcode](https://imgur.elightup.com/tMfe6fd.png)

Now, go to any place where you want to display the listing. In my case, I’ll create a new page for the archive. Then, add the **Shortcode** block.

![Add the Shortcode block.](https://imgur.elightup.com/gY5bXTi.png)

And paste the created shortcode in the box.

![Paste the created shortcode in the box](https://imgur.elightup.com/vpbcq5d.png)

Now, you can see the values displayed on the frontend. These are the settings we configured earlier, including the post type, the number of posts to show initially, and the number of posts to load each time.

![The values displayed on the frontend](https://imgur.elightup.com/mFnOumT.png)

Next, we'll use these values to dynamically display the posts on the archive page.

Back to the **Template** tab, add code to query and display the posts. Then, modify the code to use the dynamic value retrieved from the archive settings so the post type can be changed easily from the admin area.

```
{{ site.archive.item_first }} <br>
{{ site.archive.item_load_more }} <br>

{% set args = { post_type: site.archive.post_type, posts_per_page: -1 } %}
{% set posts = mb.get_posts( args ) %}
<div class="mb-container">
    <div class="mb-row">
        {% for post in posts %}
        <div class="mb-coloumn coloumn-{{ site.archive.column.value }}">
            <div class="mb-content">
                <div class="item">
                    <img src="{{ post.thumbnail.full.url }}" width="{{ post.thumbnail.full.width }}" height="{{ post.thumbnail.full.height }}" alt="{{ post.thumbnail.full.alt }}">
                    <h3>{{ post.title }} </h3>
                    <div>{{ post.content }}</div>
                </div>
            </div>
        </div>
        {% endfor %}
    </div>
 </div>
```

![Add code to query and display the posts.](https://imgur.elightup.com/EdDeWlG.png)

**In there**:

```
{% set args = { post_type: site.archive.post_type, posts_per_page: -1 } %}
```

This line of code is to declare that we’ll get posts from the post type that is dynamically retrieved from `site.archive.post_type`.
```
{% set posts = mb.get_posts( args ) %}
```

We’ll use the `mb.get_posts` function to get posts.

And since we have multiple posts, we have a loop here to display them.

```
 {% for post in posts %}
…
 {% endfor %}
```

Inside the loop, we have:

```
 <div class="mb-coloumn coloumn-{{ site.archive.column.value }}">
```

This line dynamically sets the number of columns for displaying posts based on the value chosen in the archive settings.

```
<img src="{{ post.thumbnail.full.url }}" width="{{ post.thumbnail.full.width }}" height="{{ post.thumbnail.full.height }}" alt="{{ post.thumbnail.full.alt }}">
<h3>{{ post.title }} </h3>
<div>{{ post.content }}</div>
```
These are some default fields inserted from the right sidebar to display the post’s data, specifically the post thumbnail, title, and content.

Note that I did use some `div` tags and classes for styling.

After that, move to the CSS tab and add some code for styling as well.

```
.mb-container {
    max-width: 100%;
}

.mb-row {
    display: flex;
    -ms-flex-wrap: wrap;
    flex-wrap: wrap;
}

.mb-content .item div {
    padding: 0 10px 5px;
}

.mb-content {
    height: 100%;
    display: block;
    padding: 0 10px 30px;
}

.mb-content h3 {
    margin: 10px;
    color: #d14e4e;
}

.item {
    background: #3658992b;
    height: auto;
    width: 100%;
}

.item img {
    width: 100%;
    height: 250px;
}

.coloumn-2 {
    width: 50%;
}

.coloumn-3 {
    width: 33.33%;
}

.coloumn-4 {
    width: 25%;
}

.coloumn-5 {
    width: 20%;
}
```

![Add code to the CSS tab for styling](https://imgur.elightup.com/FgdG9mP.png)

Especially, use `display: block` to ensure that all posts are visible since now we just want to display all.
```
.coloumn-2 {
    width: 50%;
}

.coloumn-3 {
    width: 33.33%;
}

.coloumn-4 {
    width: 25%;
}

.coloumn-5 {
    width: 20%;
}
```

These lines of code set the width of each column based on the number of columns chosen. These are applied to the created class in the template to ensure the posts are displayed in a grid format.

Now, we’ve displayed the posts on the frontend!

![All posts display on the frontend.](https://imgur.elightup.com/IrX17N6.gif)

But to make it more user-friendly, let’s add a Load More button so visitors can explore more content without reloading the page.

## 5. Adding a load more Button

In the **Template** tab, add some code again and modify it to display the Load More button.

```
<script src="https://cdnjs.cloudflare.com/ajax/libs/jquery/3.3.1/jquery.min.js"></script>
{% set args = { post_type: site.archive.post_type, posts_per_page: -1 } %}
{% set posts = mb.get_posts( args ) %}
<div class="mb-container">
    <div class="mb-row">
        {% for post in posts %}
        <div class="mb-coloumn coloumn-{{ site.archive.column.value }}">
            <div class="mb-content">
                <div class="item">
                    <img src="{{ post.thumbnail.full.url }}" width="{{ post.thumbnail.full.width }}" height="{{ post.thumbnail.full.height }}" alt="{{ post.thumbnail.full.alt }}">
                    <h3>{{ post.title }} </h3>
                    <div>{{ post.content }}</div>
                </div>
            </div>
        </div>
        {% endfor %}
    </div>
    <a href="" data-first="{{ site.archive.item_first }}" data-loadmore="{{ site.archive.item_load_more }}" id="load-more">Load More</a>
</div>
```

![Add code and modify it in the Template tab to have a Load More button.](https://imgur.elightup.com/AxZEiNg.png)

**In there**:

```
<script src="https://cdnjs.cloudflare.com/ajax/libs/jquery/3.3.1/jquery.min.js"></script>
```

This line includes the jQuery library from online.

Use the `data-first` attribute to hold the number of posts displayed initially, while `data-loadmore` specifies how many more posts will be loaded each time the button is clicked. And the ID, `load-more`, is used to target the button with JavaScript to handle the loading functionality.

Next, move to the **CSS** tab again to make a small adjustment. Change `display: block` to `display: none`to hide all posts, allowing JavaScript to control how many posts are displayed at a time.

![Hide all posts](https://imgur.elightup.com/c4M67ds.png)

And add code to style the button.

```
#load-more {
    text-decoration: none;
    transition: 0.3s;
    background-color: #000;
    color: #fff !important;
    padding: 5px 10px;
    border-radius: 4px;
    font-size: 20px;
    margin: 50px 0;
    display: inline-block;
    position: relative;
    left: 50%;
    transform: translate(-50%);
}

#load-more:hover {
    background-color: #d14e4e;
    text-decoration: none;
}
```
Now, go to the **JavaScript** tab to add a function for the button.

```
jQuery(document).ready(function ($) {
    var getTimeElement = document.getElementById("load-more");
    var first = getTimeElement.getAttribute("data-first");
    var loadmore = getTimeElement.getAttribute("data-loadmore");
    $(".mb-content").slice(0, first).show();
    $("#load-more").on("click", function (e) {
        e.preventDefault();
        $(".mb-content:hidden").slice(0, loadmore).slideDown();
        if ($(".mb-content:hidden").length == 0) {
            $("#load-more").css('visibility', 'hidden');
        }
    });
});
```

![Add code to the JavaScript tab.](https://imgur.elightup.com/V0uL2Nd.png)

**In particular**:
```
var getTimeElement = document.getElementById("load-more");
```
This finds the Load More button using its ID, `load-more` .

```
var first = getTimeElement.getAttribute("data-first");
var loadmore = getTimeElement.getAttribute("data-loadmore");
```
These retrieve the values from the button’s attributes. In there, as I said before, data-first determines how many posts are shown initially .data-loadmore specifies how many posts will be revealed per click.

```
$(".mb-content").slice(0, first).show();
```
This line displays the first set of posts based on the first value. For example, the Item First field has the value as 6. It’ll show the first six posts.

When the Load More button is clicked, the function below runs.
```
 $("#load-more").on("click", function (e) {
        e.preventDefault();
        $(".mb-content:hidden").slice(0, loadmore).slideDown();
        if ($(".mb-content:hidden").length == 0) {
            $("#load-more").css('visibility', 'hidden');
        }
    });
```
`e.preventDefault();` is to stop the default action, so when you click the Load More button, it won’t take you to a new page. Instead, it will run the code below to load more posts.

```
$(".mb-content:hidden").slice(0, loadmore).slideDown();
```
This line means that after clicking the button, it will show the next set of hidden posts based on the number entered in the field.

And, check if there are no more hidden posts left.
```
if ($(".mb-content:hidden").length == 0) {
```

If all posts are displayed, the Load More button is hidden.
```
$("#load-more").css('visibility', 'hidden');
```

That's all for the code. You can refer to it on GitHub [here](https://github.com/wpmetabox/tutorials/tree/master/create-load-more-button-using-mb-views).

Now, the **Load More** button is fully functional! When you click it, additional posts appear based on the number set in the custom field. If there are no more posts to load, the button automatically disappears.


![The Load More button is fully functional.](https://imgur.elightup.com/oCsIf99.gif)

With a Load More button in place, customizing your archive page just got easier. With Meta Box, you can store settings like post count, layout, and colors in custom fields — no coding needed. This gives you full control to adjust the archive layout anytime, making content management both flexible and efficient.

# Creating menus for restaurants - Meta Box + Bricks

import LiteYouTubeEmbed from 'react-lite-youtube-embed';
import 'react-lite-youtube-embed/dist/LiteYouTubeEmbed.css';

There will be a large number of restaurants on your site and you may want to create their own menu for each one. In this practice, we’re going to do it using Meta Box and Bricks Builder.

This is an example that I created:

![Example of the created menu](https://imgur.elightup.com/erBL42i.png)

## Video version

<LiteYouTubeEmbed id='IKezivBoazI' />

## Preparation

Normally, we can create a new post type and each dish will be a post of that post type. However, in this case, I want to put dishes into a menu for a particular restaurant. And each restaurant including its information will be displayed on a singular page. So, instead of creating each dish as a separate post of different post type, all the detailed information of the dish in the menu will be saved in custom fields stored in the post containing the restaurants’ information.

Here are the tools we need for this practice:

* [Meta Box core plugin](https://wordpress.org/plugins/meta-box/): to have a framework to create custom post type and custom fields;
* [MB Custom Post Type](https://metabox.io/plugins/custom-post-type/): to create custom post type named Restaurant for the restaurants and menus;
* [MB Builder](https://metabox.io/plugins/meta-box-builder/): to have a UI on the back end to easily create custom fields that save the dishes’s information;
* **Bricks Builder**: to create the singular page to display the menu.

## 1. Creating a custom post type

Go to **Meta Box > Post Types > Add New** to create a new post type for the restaurants.

![Create a custom post type](https://imgur.elightup.com/72YZrNw.png)

## 2. Creating custom fields

Go to **Meta Box > Custom Fields** to create fields. I’ll create all the fields with the structure like this:

<table>
<tbody>
<tr>
<td> Name </td>
<td> Field type </td>
<td> Settings </td>
</tr>
<tr>
<td>Menu Details</td>
<td>Group</td>
<td>

* Collapsible
* Cloneable

</td>
</tr>
<tr>
<td>Name</td>
<td>Text</td>

</tr>
<tr>
<td>Price</td>
<td>Text</td>

</tr>
<tr>
<td>Description</td>
<td>Text</td>

</tr>
<tr>
<td>Image</td>
<td>Single Image</td>

</tr>
</tbody>
</table>

![The created fields](https://imgur.elightup.com/c8DdCdL.png)

As you can see from the above image, there is a group with 4 subfields inside. These subfields are for the dish detail. To add more dishes, set this group to be cloneable.

![Set the group to be cloneable](https://imgur.elightup.com/yiivMPt.png)

Then, there’ll be an **Add more** button to allow adding more dishes.

![Add more button to allow adding more dishes](https://imgur.elightup.com/Va9Tcdg.png)

If there are many dishes on the menu, it will be a bit messy. So, to avoid messing up, you can set this group to be collapsible.

![Set the group to be collapsible](https://imgur.elightup.com/PNeWhyM.png)

It’ll be neat when adding information for the menu like this.

![The information is displayed in a tidy way](https://imgur.elightup.com/0gIVm99.png)

After creating all the fields, move to the **Settings** tab > **Location** as **Post type** > select **Restaurant** to apply these fields to it.

![Set location for the created fields](https://imgur.elightup.com/DcnUzxe.png)

Then, you can see all the created fields in the post editor. Just fill in the dishes’ details.

![All created fields in the post editor](https://imgur.elightup.com/KhFMMUr.png)

## 3. Displaying the menu information

I already have a singular page that displays all of the detailed information of a restaurant which is a post in the Restaurant post type with a template below.

![The singular page to display all the detailed information of the restaurant](https://imgur.elightup.com/JMBi6OR.png)

Let’s edit the template of this page with Bricks to add the menu.

First, to contain all the menu's information, add a new **Div**.

![Add a Div element to contain all the information](https://imgur.elightup.com/cZ2MV4n.png)

Next, choose the **Heading** element and name the menu.

To contain the dishes’ information, add the **Container** element inside the div. Then, to get the data of the dishes, enable the **Use query loop** button. And in the **Query** section, choose the type of data source. Because our information is saved in the custom fields which are included in a clonable group, we should choose the type as **MB Group** along with the name of the group that we have created for the custom field.

![Choose the Heading element to get the dish's name](https://imgur.elightup.com/E1AeYsS.png)

To get the dish’s name, choose the **Heading** element. As the name of the dish is saved in the custom field of Meta Box, use the **Select Dynamic data** button and choose the field name in which we store the name of the dishes. Now you can see that the dishes’ names have just been displayed.

![Choose the Heading element to get the dish's name](https://imgur.elightup.com/K5HAkiu.gif)

For the dish’s price, choose the **Basic Text** element. It’s also stored in the created custom field. So, we also use the **Select Dynamic data** button and choose the field correspondingly. Then, you’ll see the dish’s price displayed immediately.

![Add a Basic text element for the dish's price](https://imgur.elightup.com/tmkgKhO.gif)

To add the dish’s description, do likewise with the dish’s price. Just duplicate the **Basic Text** element and connect it to the corresponding field to get the right information..

For the last information - the dish’s image, choose the **Image** element. Since the images are also saved in the custom field as well, choose the **Select Dynamic data** button and select the right field. Here, you see that the dish’s image has just been obtained already.

![Add a Image element for the dish's image](https://imgur.elightup.com/QPOYEiH.gif)

We have just displayed all the wanted information of the dishes.

Go to the frontend, you’ll see all of the menu information.

![The menu in the frontend](https://imgur.elightup.com/i2e8Jrj.png)

For further styling, you can go back to the page editor with Bricks Builder and customize each element in your own way. We can add some images to decorate the menu. Here, I just style the page as an example:

![The final result](https://imgur.elightup.com/MyvG5PJ.png)

# Creating menus for restaurants - Meta Box + Elementor

import LiteYouTubeEmbed from 'react-lite-youtube-embed';
import 'react-lite-youtube-embed/dist/LiteYouTubeEmbed.css';

In an online food order website, you may have more than one restaurant and each one will have their own menu. Let's see how to create menus for them by using custom fields with the support from Meta Box and Elementor in this practice.

![Example of Restaurant's menu](https://imgur.elightup.com/zt6Mdaw.png)

## Video version

<LiteYouTubeEmbed id='mE_mtLz5lCA' />

## Preparation

Each restaurant on the website will be a post of a custom post type. Then the dishes of their menus will be added to those posts by using custom fields.

For this practice, we need these tools:

* [Meta Box](https://metabox.io): to have a framework to create custom post type and custom fields;
* [MB Custom Post Types & Custom Taxonomies](https://metabox.io/plugins/custom-post-type/): to create custom post types for the restaurant;
* [MB Builder](https://metabox.io/plugins/meta-box-builder/): to have an intuitive UI to create custom fields in the backend to save the extra information of the restaurant’s menus;
* [MB Elementor Integration](https://metabox.io/plugins/mb-elementor-integrator/): to connect and display custom fields created by Meta Box plugin in the Elementor's dynamic tags.
* Make sure you have **Elementor Pro** on your site.

## 1. Creating a custom post type

Go to **Meta Box > Post Types > Add New**.

![Create a new custom post type](https://imgur.elightup.com/w4zyONq.png)

After publishing, we’ll have a new menu named **Restaurants**.

![The post type appear as a menu after creating](https://imgur.elightup.com/WfnjLM7.png)

## 2. Creating custom fields

Go to **Meta Box > Custom Fields** to create fields. I’ll create them with the structure like this:
<table>
<tbody>
<tr>
<td> Name </td>
<td> Field type </td>
<td> Settings </td>
</tr>
<tr>
<td>Menu Details</td>
<td>Group</td>
<td>Collapsible
Cloneable</td>
</tr>
<tr>
<td>Name</td>
<td>Text</td>
<td>-</td>
</tr>
<tr>
<td>Price</td>
<td>Text</td>
<td>-</td>
</tr>
<tr>
<td>Description</td>
<td>Text</td>
<td>-</td>
</tr>
<tr>
<td>Image</td>
<td>Single Image</td>
<td>-</td>
</tr>
</tbody>
</table>

![Go to Meta Box then Custom Fields to create fields](https://imgur.elightup.com/2Ax2rMj.png)

This is a group with four subfields, which are for the dish detail. So, each group will be for a dish only. To add more dishes, set this group to be cloneable.

![Set group to be cloneable](https://imgur.elightup.com/YIx3yBc.png)

Then, there’ll be an **Add more** button to allow adding more dishes.

![Add more dishes by clicking Add more button](https://imgur.elightup.com/NFrLWmN.png)

In case the restaurant has too many dishes, you can set the group to be collapsible.

![Set group to be collapsible](https://imgur.elightup.com/RDxggHr.png)

It’ll be tidier when adding information for the menu like this:

![The information is displayed in a tidy way](https://imgur.elightup.com/kQZRO6I.png)

After creating all the fields, move to the **Settings** tab > **Location** > choose **Post Type** as **Restaurant** to apply these fields to it.

![Set location for the created fields](https://imgur.elightup.com/nQ2ZMor.png)

Then, you can see all the created fields in the post editor.

![Created fields in the post editor](https://imgur.elightup.com/Tv7fWAc.png)

 Just fill in the dishes’ details.

## 3. Creating a skin

To style the menus later, you should create a skin to display the dishes information.

Go to **Templates > Theme Builder**, add a new skin in the type of **MB Group Skin**.

![Create a skin](https://imgur.elightup.com/zaHjbZ7.png)

![Go to MB Group Skin then Add New](https://imgur.elightup.com/AsSMDrN.png)

Set the settings for the skin as you want and remember to choose a post for preview. Then, add the **Heading** element for the name of the dish.

![Add a Headling element](https://imgur.elightup.com/oqaxrPl.png)

To get the name of the dish saved in custom fields, click the **Dynamic Tags** button in the settings of the **Heading** element. And, choose the **Meta Box Field** in the **Post** section.

![Use Dynamic Tags to get the data](https://imgur.elightup.com/5hFozpI.png)


:::warning

Since our custom fields are created for a post type, find the **Meta Box Field** in the **Post** section. In case the custom fields are for a settings page or something else, look for the **Meta Box Field** in the corresponding section in the list.

:::


Then, choose the name of the field you want to get the name of the dish from.

![Choose the name of the wanted field to get the name of the dish form](https://imgur.elightup.com/MtzOjK0.png)

For the price and description of the dish, add the **Text Editor** element. Once again, use the **Dynamic Tags > Meta Box Fields** in the **Post** section, then choose the corresponding fields.

For the image of the dish, add an **Image** element. Also use the Dynamic Tags and select the Image field.

![Add an Inmage section](https://imgur.elightup.com/NxnJxmf.png)

As you can see, it’ll automatically get and display the information saved in the first group (means the 1st dish) only in the preview of the skin.

## 4. Creating a template for the menu

Back to the **Theme Builder > Single Post** to create a new template for post.

![Create template for the post](https://imgur.elightup.com/QbLvPzB.png)

Similar to the skin, remember to set the preview for this template.

Find and add the **MB Group** element to the template.

![Add Meta Box group element](https://imgur.elightup.com/FScgkh5.png)

Then, there’ll be some posts displayed in the preview. But it may not be the information from the posts you want.

![The information is obtained](https://imgur.elightup.com/h2IqKYJ.png)

Look at the left sidebar, the **Object Type** of the template is set by default as **Post** and the **Group** section will automatically be set to the created-lastest group. If it is not the group field you want, you can change them to the right one.

Then all the data will be displayed correctly, but there will be no styling.

For styling, in the **Skin** section, choose the skin that you’ve created in the previous step. Then, it will turn to the new look with the style of the created skin.

![Choose the created skin to style](https://imgur.elightup.com/sAe04lk.png)

## 5. Styling the menu

To have more styling, you can add some decoration for the template as I did.

![Add some decoration for the template](https://imgur.elightup.com/hAkHNIj.png)

However, the elements that are the dish detail are set in the skin, you need to go back to the created skin to style them.

![Go back to the created skin to style the dish details](https://imgur.elightup.com/uFwUmU0.png)

Then all the changes in the skin will be automatically applied to the template.

Here is the final result we’ve got after all the styling. That’s all!

![Final result](https://imgur.elightup.com/zt6Mdaw.png)

# Creating notification using custom HTML field

import LiteYouTubeEmbed from 'react-lite-youtube-embed';
import 'react-lite-youtube-embed/dist/LiteYouTubeEmbed.css';

When input data to custom fields, you definitely can use the field's description to notice or warn users about something. But it is not attractive enough so they can skip it. That’s when you should use an alert message for your custom fields. With Meta Box, you can do it easily with the help of the Custom HTML field type. Let’s explore how to create a notification using this field.

This is a notification that I created for example.

![An example of notification was created by custom HTML field from Meta Box](https://imgur.elightup.com/VXxEXSC.png)

## Video version

<LiteYouTubeEmbed id='ZrerziToyrc' />

## Preparation

We need the following tools for this practice:

* [Meta Box core plugin](https://wordpress.org/plugins/meta-box/) to have the framework for creating custom fields. It’s free, and you can download it directly from [wordpress.org](https://wordpress.org/plugins/meta-box/);
* [MB Builder](https://metabox.io/plugins/meta-box-builder/): to have a UI on the back end to create custom fields;
* [MB Conditional Logic](https://metabox.io/plugins/meta-box-conditional-logic/) (optional): to show or hide custom fields based on the data users fill in another field. It is just optional if you need to show or hide fields in your case.
* [MB Group](https://metabox.io/plugins/meta-box-group/) (optional): to group together the fields along with the Custom HTML field that we use for the notification. This is optional as well. In fact, you obviously can set the Custom HTML field stand alone.

## 1. Creating custom fields

Go to **Meta Box** > **Custom Fields** and create some custom fields.

![Go to Meta Box > Custom Fields to create some custom fields](https://imgur.elightup.com/5TOOpkY.png)

For the first field, choose the type as the **Radio** field. Then, you can fill in some options for choosing into the **Choices** box.

![choose the type as the Radio field, then fill in some options for choosing into the Choices box.](https://imgur.elightup.com/nZC8zqM.png)

Since I want the alert message to go along with another field, I will put both of them into a group. There is no need to have a label for this group, so leave it blank.

![the alert message to go along with another field, so put both of them into a group with blank label](https://imgur.elightup.com/nsMdVS9.png)

This group will appear only when the user chooses the **Yes** option in the **Radio** field, so we will set a conditional logic for this group. Go to the **Advanced** tab in the settings of the group and add the rule.

![Go to the Advanced tab in the settings of the group and add the rule to set the rule when does the alert message apear](https://imgur.elightup.com/RNVU3RY.png)

Fill in the ID of the **Radio** field and the value of the Yes option.

![Fill in the ID of the Radio field and the value of the Yes option](https://imgur.elightup.com/QsSFDQG.png)

Now, add a **Custom HTML** field for the alert. It’ll be a subfield of the group.

![Add the first subfield of the group which has the type as Custom HTML](https://imgur.elightup.com/16tFtXs.png)

Add content for it in the box named **Content (HTML allowed)**.

![Add content for it in the box named Content (HTML allowed)](https://imgur.elightup.com/r0F2LOY.png)

I also added a div tag and classes for this text as `<div class="alert alert-info">` for styling this notification later.

Add the remaining field.

![Add the remaining field. Here is the Text field with the Label is Subject](https://imgur.elightup.com/DWhaLx5.png)

Let’s set the location for these fields. Go to the **Settings** tab, set **Location** as **Post Type**, then choose any post type you want.

![Go to the Settings tab, set Location as Post Type, then choose any post type to set the location of created custom fields](https://imgur.elightup.com/EPpp7rC.png)

Go to the post editor, you will see the fields with the notification.

![the fields with the notification displayed in the post editor](https://imgur.elightup.com/P3U0PpI.png)

The notification is quite not prominent compared to other texts. So, let's style it a little bit.

## 2. Styling the notification

I will use CSS to style the notification. So, go to the theme's files, add this code to declare and create a file named `admin.css`:

```
add_action( 'rwmb_enqueue_scripts', 'enqueue_custom_style' );
function enqueue_custom_style() {
    wp_enqueue_style( 'custom-css', get_template_directory_uri() . '/assets/css/admin.css' );
}
```

![add the code to declare and create a file named admin.css](https://imgur.elightup.com/07s2RAn.png)

Next, go to the file and add some CSS code with the content as follows:

```
.alert-info {
background-color: #d9edf7;
border-color: #bcdff1;
color: #31708f;
}
.alert {
padding: .75rem 1.25rem;
margin-bottom: 1rem;
border: 1px solid transparent;
border-radius: .25rem;
font-weight: bold;
line-height: 2;
display: flex;
align-items: center;
}
```

The `alert` and `alert-info` are two classes that I added in the content of the notification when creating its custom field.

![go to the file, add some CSS code for 2 classes to style the notification](https://imgur.elightup.com/weBA0Mt.png)

Now, go back to a post editor, you will see the message has a new look.

![the final look of the notification](https://imgur.elightup.com/VXxEXSC.png)

# Creating online admission form for schools

instead of submitting hard copies for student information, schools may have online submission forms then students can submit on the website. We’re going to find out how to create that online admission forms in this practice.

Here is the example.

![Example of the online admission form](https://imgur.elightup.com/lP5a6JZ.png)

![Example of the online admission form](https://imgur.elightup.com/naAHmt4.png)

![Example of the online admission form](https://imgur.elightup.com/cHAFehA.png)

## Preparation

Since all the additional information will be saved in different custom fields, we need **[Meta Box](https://metabox.io/)**. It’s free and available on wordpress.org, so you can download it directly.

To have advanced features, we need some of its extensions:

* [MB Custom Post Types and Custom Taxonomies](https://metabox.io/plugins/custom-post-type/): to create custom post type for the student information. Each submission from student will be save in a post;
* [MB Builder](https://metabox.io/plugins/meta-box-builder/): to easily create custom fields to saved extra information about the student information;
* [MB Frontend Submission](https://metabox.io/plugins/mb-frontend-submission/): to create editorial forms so users can submit blog posts on the frontend;
* [MB Views](https://metabox.io/plugins/mb-views/): to create a template to display the admission form;
* [MB Group](https://metabox.io/plugins/meta-box-group/): (optional) to group the fields;
* [MB Columns](https://metabox.io/plugins/meta-box-columns/): (optional) to divide and display the fields into columns with maximum 12 grids;
* [MB Geolocation](https://metabox.io/plugins/meta-box-geolocation/): (optional) to automatically populates location data into the fields with the power of Google Maps/Open Street Maps Geolocation API;
* [MB Conditional Logic](https://metabox.io/plugins/meta-box-conditional-logic/): (optional) to create rules to control the display of the fields.

They’re all in the **Meta Box AIO**. If you haven’t had it, you can download and install each extension individually.

## 1. Creating a new custom post type

Go to **Meta Box > Post Types > Add New** to create a new post type. In my case, the new post type is **Student Info**.

![Create a new custom post type](https://imgur.elightup.com/7YThrpP.png)

After publishing, you will see a new menu in the **Admin Dashboard**.

![New post type appear in the Admin Dashboard](https://imgur.elightup.com/hFkGDMI.png)

## 2. Creating custom fields

### Field types

Regularly, an admission form may have a lot of fields for students to fill in, like personal information, address, contacts, family information, choice of major, medicine information, etc. It is up to the management strategies and demands of each school or university.

Here I just add some basic fields like in the above image. Most of those fields are the **Text** or **Number** fields. In some special others, they might be a little different, for example:

<table>
<tbody>
<tr>
<td> Field </td>
<td> Type of field </td>
<td> Content </td>
</tr>
<tr>
<td>1. Personal Information</td>
<td>heading</td>
<td>To divide the content into separate parts to make it clearer</td>
</tr>
<tr>
<td>Nationality</td>
<td>select advanced</td>
<td>Allow students to choose one or more nationalities from a pre-made list</td>
</tr>
<tr>
<td>Photo</td>
<td>image upload</td>
<td>Allow uploading pictures from computer folders, not Media Library of the website</td>
</tr>
<tr>
<td>Maps</td>
<td>Open Street Maps</td>
<td>Point out the exact address of students on the map</td>
</tr>
<tr>
<td>Program Type</td>
<td>radio</td>
<td>Choose one of the studying programs on a list</td>
</tr>
<tr>
<td>Undergraduate Program</td>
<td>checkbox list</td>
<td>Choose one major or more</td>
</tr>
</tbody>
</table>

After adding all of them, you can add a new post in the **Student Info** post type, and you will see they look like this:

![Add a new post in the Student infor post type](https://imgur.elightup.com/RoqZI5A.png)

If you keep this layout for the fields, each field will be a line on the frontend as the same as you see here. I think it is not appropriate, because people will find it difficult to follow and manipulate.

Thus, I will adjust a little bit by grouping the fields and setting them into columns.

### Creating groups and set columns

Just add a field in the type of group, and add other fields to be its sub-fields.

![Add other fields to be sub-fields](https://imgur.elightup.com/qvBHLcO.png)

To display fields in columns, just set the number in their settings as above.

Each row to display the fields will be divided into 12 grids. If you want the fields displayed in columns, just change the number in the box to any number up to 12.

![Change the number in the box](https://imgur.elightup.com/uHZRY2u.png)

Here is the settings for columns of each field:

<table>
<tbody>
<tr>
<td> Field </td>
<td> Field type </td>
<td> Columns </td>
</tr>
<tr>
<td>1. Personal Information</td>
<td>Heading</td>
<td>12</td>
</tr>
<tr>
<td>(no label)</td>
<td>Group</td>
<td>9</td>
</tr>
<tr>
<td> Full Name</td>
<td>Text</td>
<td>4</td>
</tr>
<tr>
<td> Middle Initial</td>
<td>Text</td>
<td>4</td>
</tr>
<tr>
<td> Last Name</td>
<td>Text</td>
<td>4</td>
</tr>
<tr>
<td> Date of Birth</td>
<td>Date</td>
<td>6</td>
</tr>
<tr>
<td> Gender</td>
<td>Radio</td>
<td>6</td>
</tr>
<tr>
<td> Passport ID</td>
<td>Text</td>
<td>6</td>
</tr>
<tr>
<td> Nationality</td>
<td>Select Advanced</td>
<td>6</td>
</tr>
<tr>
<td>Photo</td>
<td>Image Upload</td>
<td>3</td>
</tr>
<tr>
<td>2. Student’s Contact Information</td>
<td>Heading</td>
<td>12</td>
</tr>
<tr>
<td>Email</td>
<td>Email</td>
<td>6</td>
</tr>
<tr>
<td>Phone Number</td>
<td>Text</td>
<td>6</td>
</tr>
<tr>
<td>Address</td>
<td>Text</td>
<td>12</td>
</tr>
<tr>
<td>(no label)</td>
<td>Group</td>
<td>6</td>
</tr>
<tr>
<td> Building</td>
<td>Text</td>
<td>12</td>
</tr>
<tr>
<td> Road</td>
<td>Text</td>
<td>12</td>
</tr>
<tr>
<td> State</td>
<td>Text</td>
<td>12</td>
</tr>
<tr>
<td> Country</td>
<td>Text</td>
<td>12</td>
</tr>
<tr>
<td> Post Code</td>
<td>Number</td>
<td>12</td>
</tr>
<tr>
<td>Maps</td>
<td>Open Street Maps</td>
<td>6</td>
</tr>
<tr>
<td>3. Contact in Emergency Situations</td>
<td>Heading</td>
<td>12</td>
</tr>
<tr>
<td>Full Name</td>
<td>Group</td>
<td>12</td>
</tr>
<tr>
<td>First Name</td>
<td>Text</td>
<td>4</td>
</tr>
<tr>
<td>Middle Initial</td>
<td>Text</td>
<td>4</td>
</tr>
<tr>
<td>Last Name</td>
<td>Text</td>
<td>4</td>
</tr>
<tr>
<td>Address</td>
<td>Text</td>
<td>12</td>
</tr>
<tr>
<td>Email</td>
<td>Email</td>
<td>4</td>
</tr>
<tr>
<td>Phone Number</td>
<td>Text</td>
<td>4</td>
</tr>
<tr>
<td>Country</td>
<td>Text</td>
<td>4</td>
</tr>
<tr>
<td>4. Program/Course Information</td>
<td>Heading</td>
<td>12</td>
</tr>
<tr>
<td>Program Type</td>
<td>Radio</td>
<td>12</td>
</tr>
<tr>
<td>Undergraduate Programs</td>
<td>Checkbox List</td>
<td>12</td>
</tr>
<tr>
<td>Postgraduate Programs</td>
<td>Radio</td>
<td>12</td>
</tr>
<tr>
<td>Master’s Programs</td>
<td>Checkbox List</td>
<td>12</td>
</tr>
<tr>
<td>Graduate Certificates and Diplomas</td>
<td>Checkbox List</td>
<td>12</td>
</tr>
<tr>
<td>PhD Programs</td>
<td>Checkbox List</td>
<td>12</td>
</tr>
</tbody>
</table>


Here are all the fields that I’ve created in groups and sections:

![The created fields](https://imgur.elightup.com/5pxt1si.png)

![The created fields](https://imgur.elightup.com/k53GyYj.png)

![The created fields](https://imgur.elightup.com/ZcJSrtm.png)

![The created fields](https://imgur.elightup.com/GeQXhlr.png)

### Special settings of custom fields

Besides the fields that have no special settings, there are some fields that you need to focus and set up for them. Let’s see!

**Settings of the Maps field**

To set up the **Maps** field, add the **Open Street Maps** field. Then, you need to fill in the ID of the **Address** field in the **Address** field section. This is compulsory to get the exact location from the Address field and markup on the maps.

![Setting the maps field](https://imgur.elightup.com/9Ar6cER.png)

To make it work, go to the **Settings tab > Custom Settings > Add New** to enter **geo** as the key and true as the value.

![Enter geo in the settings](https://imgur.elightup.com/BqKBKbN.png)

**Add options for the fields in the type of selection**

There are some fields in the type of selection where student can choose an option from a provided list, such as: Program Type, Undergraduate Programs, Postgraduate Programs and PhD Programs.

In the **Program Type** field, I fill in several options in the **Choices** box.

![Fill in several options in the Choices box](https://imgur.elightup.com/LwWapTB.png)

For the **Undergraduate Programs**:

![For the undergraduate programs](https://imgur.elightup.com/mLqiyvQ.png)

For the **PhD Programs**, do likewise.

![For the PhD programs](https://imgur.elightup.com/RYBoaDo.png)

Since the **Postgraduate Programs** will have two options, set it as the **Radio** field with two options filled in the **Choices** box.

![Set the Postgraduate programs as Radio](https://imgur.elightup.com/PYZNfT9.png)

![Setting the fields](https://imgur.elightup.com/gfk5CEk.png)

**Set conditional logic for the fields in the type of section**

Since there will be many majors and courses in each type of program, I will use **MB Conditional Logic** to set when the fields show up to avoid mess up on the page..

Here, I took the **Program Type** and **Undergraduate Program** fields as an example:

The **Program Type** field has three options with values and labels.To show up only the course of **Undergraduate Programs** chosen by the students, go to the **Undergraduate Programs** field > **Advanced** tab and set conditional logic as below:

![The program type field](https://imgur.elightup.com/uMmL2B5.png)

**Note that**: `program_type` is the ID of the **Program Type** field while `undergraduate_program` is the corresponding value of the Undergraduate Programs option that we’ve filled in the Choices box of the Program Type.

It means when the students chose the Program Type as **Undergraduate Programs**, all the courses of it will be displayed.

Do likewise with the other fields. You just need to change the values of the options in the **Conditional logic** section.

![Change the values of the options](https://imgur.elightup.com/894ew2Q.png)

Then the fields will be shown or hide like this:

![The fields will be shown or like](https://imgur.elightup.com/ZLLWg6v.gif)

After creating all the fields, move to the **Settings** tab. Remember to choose the **Location** as **Post Type** and select the **Student Info** post type to apply these fields to it.

![Set location for the created fields](https://imgur.elightup.com/dKVysfN.png)

When you publish the field group, notice the **field group ID** since we’ll use it later.

![Notice the field group ID](https://imgur.elightup.com/LTXAvkp.png)

Now, when creating a new post in the **Student Info** post type, you’ll see all the custom fields:

![Create a new post in the post type](https://imgur.elightup.com/lO24W6A.gif)

## 3. Displaying the form on the frontend

### Creating a new page

Go to **Pages > Add New** to create a new blank page. Here, I created a page named **Admission Form**.

![Create a new page](https://imgur.elightup.com/5iH1C4O.png)

When creating the new page, set the featured image for it. This image will be use as the logo of the school.

![Set the featured image for the created new page](https://imgur.elightup.com/DU57Zdh.png)

Remember to copy the URL of the featured image since we’ll use it to display on the frontend.

### Creating a template for the page

Go to **Meta Box > Views > Add New** to create a new template.

![Create a template for the page]( https://imgur.elightup.com/7YThrpP.png)

To display the admission form, add this code to the **Template** tab:

```php
<div class="container">
	<div class="form-header">
<!-// Put logo of the university to the header – >
    <img src="http://metabox4.wpengine.com/wp-content/uploads/2022/11/Logo-1.png" style="width: 20%">
    <div class="form-header__right" style="text-align: right">
<! – // Set H1 for page on the header – >
        <h1>University Admission Form</h1>
        <span>Student ID: ________ <i>(For office use only)</i></span>
    </div>
</div>
<!-// Display the field group using shortcode – >
[mb_frontend_form id='university-admission-form']
</div>
```

![Add some code](https://imgur.elightup.com/vjtEGye.png)

**Explanation**:

*http://metabox4.wpengine.com/wp-content/uploads/2022/11/Logo-1.png*

This is the URL of the featured image of the page which we use for the logo on the page as well.

```
[mb_frontend_form id='university-admission-form']
```

This is the shortcode of the created field group. This shortcode is automatically generated for you thanks to the help of **MB Frontend Submission**.

To get the shortcode of the field group, make sure that you enable **MB Frontend Submission**. Then, go to **Meta Box > Custom Fields** and you will see the **Shortcode** column like this:

![Get the shortcode of the field group](https://imgur.elightup.com/MgZCv22.png)

This is the full shortcode:

```
[mb_frontend_form id='university-admission-form' post_fields='title,content']
```

But I’ve already deleted the attribute `post_fields='title,content'` since I don’t want to show the Title and Content fields which are the default fields of WordPress.

Finally, scroll down to the **Settings** section, choose the **Type** as **Singular**. Then, set **Location** as **Page** and select the **Admission Form** page.

![Choose type as singular](https://imgur.elightup.com/phw7hCb.png)

This is how the form looks on the page:

![The form in the frontend](https://imgur.elightup.com/lP5a6JZ.png)

![The form in the frontend](https://imgur.elightup.com/naAHmt4.png)

![The form in the frontend](https://imgur.elightup.com/cHAFehA.png)

To have advanced styling, go to the **CSS** tab of the template and add some CSS code:

![Add some css code for styling](https://imgur.elightup.com/yaRmTfz.png)

## 4. Setting the page for reviewing

Instead of saying thank you or notifying students for successful submissions, I want to have a reviewing page for students to check student IDs or print the admission form. To do it, we need to create a reviewing page and redirect them to that page.

### Creating a new page

Go to **Pages > Add New** to create a new page called **Review Admission Form**.

![Create a new page](https://imgur.elightup.com/qRKz6ck.png)

We’ll need a redirect link to redirect students from the admission form page to the reviewing page. To make the link, we add some codes to the `functions.php` file of the theme:

```php
add_filter( 'rwmb_frontend_redirect', function( $redirect, $config ) {
    if ( 'university-admission-form' !== $config['id'] ) {
        return $redirect;
    }
    $redirect = 'https://domain.com/review-admission-form/?student_id=' . $config['post_id'];
    return $redirect;
}, 10, 2 );
```

Explanation:

* `'rwmb_frontend_redirect'`: this hook allows you to change the URL of the page after students submit the form to another page;
* `university-admission-form`: the ID of the field group for the admission form we are using;
* `https://domain.com/review-admission-form/?student_id=' . $config['post_id']`: the structure of the redirect link we will use. You should change the domain to your one here.

At that time, my redirect link will be in this form:

*https://domain.com/review-admission-form/?student_id=12345/*

For example, **12345** is the ID of the post that the student has just entered information into its custom fields.

Next, still in the `functions.php` file, add these codes:

```
function estar_get_method_function( $param ) {
    return isset( $_GET[$param] ) ? $_GET[$param] : '';
}
```
Explanation:

* `estar_get_method_function`: this is the name of the function that I set and `estar` is the theme I’m using. You can set it as you want;

This code will get and return the value of the `student_id` variable from the redirect link. We will need this value right in the next move.

![Add the code to the box](https://imgur.elightup.com/UjaLREU.png)

### Creating a new template for reviewing page

Go to **Meta Box > Views** to create a new template to redirect to the **Review Admission Form** page.

In the **Template** tab of the view, add this code:

```php
{% set pupil_id = mb.estar_get_method_function( 'student_id' ) %}
{% if pupil_id %}
    <div class="form-header">
        <img src="http://metabox4.wpengine.com/wp-content/uploads/2022/11/Logo-1.png" style="width: 20%">
        <div class="form-header__right" style="text-align: right">
            <h1>University Admission Form</h1>
            <span>Student ID: {{ pupil_id }}</span>
        </div>
    </div>
    [mb_frontend_form id='university-admission-form' post_id="{{pupil_id}}"]
    <div class="form-footer">
        <button onclick="window.print()" class="rwmb-button">Print</button>
    </div>
{% endif %}
```
![Add the code to the template](https://imgur.elightup.com/EanI08M.png)

**In this code**:

Because each admission form will be saved in a post of the **Student Info** post type. Thus, I have added the `post_id` attribute to the shortcode above, so that only the data from the custom fields of the corresponding post can show up.

Create a `pupil_id` variable to recognize its value automatically thanks to the returned value of the `estar_get_method_function( 'student_id' )` function.

Additionally, I want to have a Print button instead of Submit, so that students can print their admission forms out. Thus, I added that button to the footer of the page. To hide the Submit button, still in the created template, go to the CSS tab and add this code:

```php
.rwmb-form-submit {
    display: none;
}

```
![Add the code to the CSS tab](https://imgur.elightup.com/JluBCpR.png)

Try a test, after submitting information, the link is changed and the **Student ID** is generated as well:

![The final result](https://imgur.elightup.com/wHDPc7q.png)


![The final result](https://imgur.elightup.com/xpkC9s5.png)


![The final result](https://imgur.elightup.com/Ha9G97T.png)

# Creating online reservation form for restaurants

import LiteYouTubeEmbed from 'react-lite-youtube-embed';
import 'react-lite-youtube-embed/dist/LiteYouTubeEmbed.css';

It's common for restaurants to offer online booking services on their websites. In this tutorial, I'll show you how to create an online reservation form. This form allows clients to provide essential information for their reservation, select their desired services or items, and even calculate the total amount right within the form.

![An online reservation form](https://imgur.elightup.com/7hHtp32.png)

In this practice, I’ll provide you two methods to create this kind of reservation:

* Method 1: Non-coding. But, use a field named **Math Operation** from a 3rd-party (still based on Meta Box) for automatically calculating the total amount.
* Method 2: Using code to calculate the amount.

## Video versions

For the method 1 without coding, you can look for this video:

<LiteYouTubeEmbed id='1OYjsgpa1g0' />

For the method 2 that use some code, you can look for the following video:

<LiteYouTubeEmbed id='K6YfrQ3ZRLY' />

## Preparation

These are some tools we need for this practice:

First, we should have the [Meta Box framework](https://wordpress.org/plugins/meta-box/). It’s available on [wordpress.org](https://wordpress.org/plugins/meta-box/).

Moreover, we’ll need some advanced features from **Meta Box** extensions, as follows.

* [MB Custom Post Type](https://metabox.io/plugins/custom-post-type/): creates custom post type for the reservations.
* [MB Builder](https://metabox.io/plugins/meta-box-builder/): has an intuitive UI to create custom fields in the backend to save the reservation information.
* [MB Frontend Submission](https://metabox.io/plugins/mb-frontend-submission/): creates forms for users to submit their orders from the frontend.

## 1. Creating a new custom post type

Go to **Meta Box** > **Post Types** > **New Post Type** to create a new one for the reservation.

![Create a new custom post type for the reservation](https://imgur.elightup.com/yb4UuGe.png)

## 2. Creating custom fields for the reservation form

Let’s create custom fields to save the reservation information. You can create fields as usual according to your requirements of the booking. Here are some fields I created.

![The created custom fields to save the reservation information](https://imgur.elightup.com/QPgcxgu.png)

### 2.1 For the typical fields

I set the ID of the **Full Name** field as the post title to automatically save the customer name in the title of the post.

![ Set ID of the Full Name field as the post title](https://imgur.elightup.com/MQkyOft.png)

Since this field will be displayed on a page on frontend, you may want to style the field. So you can add a **CSS** class for the field. Just go to the **Advanced** tab in the field settings and name a class in this box.

![Add a CSS class for the fielde](https://imgur.elightup.com/lyESkTd.png)

If you want to show all the information of the user's order in the admin column for better management, simply turn on the option shown in the image below.

![Show all the information of the user's order in the admin column](https://imgur.elightup.com/xdyA11c.png)

Next, I need a field that allows customers to choose a set lunch, so I choose the **Select** field type.

In the **Choices** section, we usually input the set lunch name only. But, I’ll do a trick. Instead of creating another field for price, I put the price as the value of the set lunch. And the label of each option will be the set lunch’s name.

![Set options with the values for the custom fields of choosing a set lunch](https://imgur.elightup.com/JZuwsNv.png)

Similar to the **Private Room** field. I also set the value as price.

![Set the value as price for the Private Room field.](https://imgur.elightup.com/yyMMkl7.png)

### 2.2 For the amount field

As I mentioned before, we have two ways to create this field. The difference is just how you make it to calculate following your own formula.

#### Method 1: Calculate without using code

To make the field calculate following a formula without using any code, you should use a 3rd-party git to have a field type named **Math Operation**.

Without this field, you need to add some code to the theme files to have a field that can automatically calculate based on the values from other fields. But with this field, you should do nothing, just enter the formula, then it will do everything for you.

To have that field, follow [the Github link](https://github.com/kevinlanteri/RWMB_math_operator_Field) and download these 3 files.

![Download these 3 files to install the Math Operation field](https://imgur.elightup.com/9whvnSC.png)

Then, upload them into the corresponding JS and CSS folders and add the following code to the `functions.php` file to declare them.

```css
function child_theme_scripts() {
    wp_enqueue_style('font-awesome', 'https://cdn.jsdelivr.net/fontawesome/4.7.0/css/font-awesome.min.css', '', '4.7.0');
}
add_action( 'wp_enqueue_scripts', 'child_theme_scripts' );
```

Then when creating custom fields, you will see a new field type named **Math Operation**. Just choose it.

![A new field type named Math Operation.](https://imgur.elightup.com/ka8ooS8.png)

In this field, there will be 2 special settings like this.

![2 special settings of the Math Operation field](https://imgur.elightup.com/HzPtGAz.png)

**In there**:

* The first setting is to identify the fields on which the calculation will be made. You should add the ID of all the fields which appear in the below formula.
* The second one is to insert the formula.

That’s done for the **Math Operation** field. Thanks to this field, there is no need to add code anymore. It will work later without any further action.

#### Method 2: Calculate using code

In the case you want to code to add functions to the **Amount** field, just create it in the **Text** field type.

![Choose the Text field type for to the Amount field](https://imgur.elightup.com/55jSx6w.png)

The value of the **Amount** field will be $0 as default and will not change no matter what you change the information in the fields or not. To figure out the amount then apply the number into this field, we can use some code as follows.

In the `functions.php` file, add this code to **create the formula**.

```css
add_action( 'wp_ajax_total', 'text_domain_load_total_ajax' );
add_action( 'wp_ajax_nopriv_total', 'text_domain_load_total_ajax' );
function text_domain_load_total_ajax() {
    $adults = $_POST['adults'] ?? 1;
    $children = $_POST['children'] ?? 0;
    $set_lunch = $_POST['set_lunch'] ?? 0;
    $private_room = $_POST['private_room'] ?? 0;
    $total = ( $adults * $set_lunch ) + ( $children * $set_lunch /2 ) + $private_room;
    $total = '$' . number_format($total, 2, '.', ',');
    wp_send_json_success( $total );
    die();
}
```
**Explanation**:

* `add_action ()`: is a hook to create an action named total;
* `text_domain_load_total_ajax()`: is the function to load the values of all the variables and then put them into the formula;
* `$adults`, `$children`, `$set_lunch`, `$private_room`: are the variables;
* `$adults = $_POST['adults'] ?? 1`: is to check if the **adults** variable has any value. If it has, the value will be admitted. Otherwise, this variable will be applied to the default value, in this case, it is 1. You can set the default value as you want;
* `wp_send_json_success( $total )`: is to return the value of the total variable in json.

So far, no value has passed to any variable yet. All the variables are 0 or 1 as default value as I set in the above code.

Whenever customers change the options in the fields, the value of the options must be recognized and passed to those variables. To load those values, I need to create a script.js file in the js folder of the theme as follows:

```css
(function($){
    $(document).ready(function(){
        $("#adults, #children, #set_lunch, #private_room").on( 'change', function(){
            var adults = $('#adults').val();
            var children = $('#children').val();
            var set_lunch = $('#set_lunch').val();
            var private_room = $('#private_room').val();
            console.log( set_lunch );
            $.ajax( {
                type: "post",
                dataType: "json",
                url : ReservationParams.ajaxURL,
                data: {
                    action: 'total',
                    adults: adults,
                    children: children,
                    set_lunch: set_lunch,
                    private_room: private_room
                },
                success: function(response) {
                    //console.log(response);
                    $('#amount').val(response.data);
                },
                error: function( jqXHR, textStatus, errorThrown ){
                    console.log( 'The following error occurred: ' + textStatus, errorThrown );
                }
            } )
        } )
    })
})(jQuery)
```
![Create a JS file to load the value and send it to the function](https://imgur.elightup.com/Dl9I26A.png)

You can see that I used ajax here to load the values. In there:

* `#adults`, `#children`, `#set_lunch`, `#private_room`: are the IDs of the custom fields in the reservation form;
* `adults`, `children`, `set_lunch`, `private_room`: are the variables using for the above formula, I’m assigning the values of the fields with the corresponding IDs to them;
* `action: 'total'`: The values are being sent by ajax to this action with the url is `url` : `ReservationParams.ajaxURL`;
* `success: function(response)`: if the request succeeds, this will call the value returned by the functions file then print to the custom field which has the ID as amount.

Now, add this code to the `functions.php`, inside the `child_theme_scripts()` function we have added before to enqueue both the `script.js` file and the `url` of ajax.

```css
wp_enqueue_script( 'theme-script', get_stylesheet_directory_uri() . '/js/script.js', array( 'jquery' ), '1.0', true );
wp_localize_script( 'theme-script', 'ReservationParams', array( 'ajaxURL' => admin_url( 'admin-ajax.php' ) ) );
```
![Enqueue the JS file and URL of the AJAX in the functions file to enable them](https://imgur.elightup.com/1HrstKS.png)

**Note**:

* `'theme-script'`: this name is the one you created, please pay attention that you must set it be the same in both lines;
* `'ReservationParams'` and `'ajaxURL'` are from url : `ReservationParams'.ajaxURL`, you can change them, but do it at both.

That’s all for the fields.

### 2.3 Field Group Settings

After creating all the fields, go to the **Settings** tab > choose **Location** as **Post type**, and select the **Reservation** to apply these fields to it.

![Set location to apply the custom fields](https://imgur.elightup.com/hJ2Nkuh.png)

Once you have published the field group, its **ID** will be generated automatically. Just copy it, since we’ll use it in the next step.

![The ID of the field group](https://imgur.elightup.com/rLEOCbx.png)

## 3. Creating the reservation page

I’ll use a page with the pre-built template, which is quite simple to make a demo for this practice. You can see in the demo below, we have the booking form. It’s built from the custom fields which we have just created.

![The booking form](https://imgur.elightup.com/LnQpJt5.png)

### 3.1 Creating a new page

Go to **Pages**, create a new one and choose a template for the page.

![Choose a template for the page](https://imgur.elightup.com/zC5nNEm.png)

### 3.2 Displaying form on the page

Look for the **Submission Form** block provided by **MB Frontend Submission** to have the booking form.

![The Submission Form block provided by MB Frontend Submission to have the booking form](https://imgur.elightup.com/lcCaMXt.png)

Once you select this block, it’ll display the **Title** and **Content** fields by default.

![The default field](https://imgur.elightup.com/cF29S8F.png)

If you want to display the custom fields for the reservation form, add the **ID** of the created field group in the box. Then, you will see all the fields displayed.

![Add the ID of the created field group](https://imgur.elightup.com/zftwRxy.png)

Select **Post Type** as **Reservation** to stipulate that when the user enters data into the form, that data will be saved in the post of the **Reservation** post type.

![Select Post Type as Reservation to stipulate that when the user enters data into the form](https://imgur.elightup.com/uVi8DkC.png)

In this practice, I’ll not use the **Title** and **Content** fields, so hide them by removing the options in the **Post Fields**  section and deleting their labels.

![Delete some fields](https://imgur.elightup.com/9PxTRHB.png)

You also can change the label of the **Submit** button.

![Change the label of the Submit button](https://imgur.elightup.com/6SyAFKG.png)

Go to the page on frontend, you will see fields displayed like this.

![The fields displayed on frontend](https://imgur.elightup.com/yxTPoAn.png)

### 3.3 Styling the form

I will use CSS to style the form.

![Use CSS to style the form](https://imgur.elightup.com/xwGXiBO.png)

Pay attention that I added a class for each field when creating them. So, just use those classes. I put this code on [Github](https://github.com/wpmetabox/tutorials/tree/master/create-online-reservation-form-for-restaurants) so you can refer to it.

### 3.4 Testing the form

Let’s have a test.

![Test the reservation form](https://imgur.elightup.com/oVy0SVK.gif)

You can see in the gif that the **Amount** field automatically changes the number whenever you change the option on the previous fields. This field is working well no matter what method you use to create the formula.

Then, go to the backend to see if the order is saved or not. You can see everything has been stored in a post already.

![The order is saved in backend](https://imgur.elightup.com/1gwdZnc.png)

# Creating posts series

Sometimes, classifying posts by Category or Tag is not enough, and you may need another method. This article will show you how to create a post series using [Meta Box](https://metabox.io/).

## Preparation

Creating a series of posts by Category or Tag has a few drawbacks, as follows:

* Creating too many categories will make the structure and classification of the post bulky and intricate;
* If you set up the post permalink to include the category name, your links will be longer and more complicated with many types of links;
* Category shows from newest to oldest. However, most people should start with the first post and scroll down to the new one. Using a series allows you to reverse the post's sequence. It makes posting easier.

Using [Meta Box](https://metabox.io/) helps manipulate data easily by creating a new taxonomy. To do it, beside the Meta Box core plugin, we need to install the [MB Custom Taxonomy](https://metabox.io/plugins/custom-taxonomy/). It allows you to create and manage custom taxonomies with an intuitive interface.

## 1. Creating a new custom taxonomy

Go to **Meta Box > Taxonomies > Add New**.

![Create a new custom taxonomy](https://imgur.elightup.com/72SvIp3.png)

Then, input information for the taxonomy.

![Input information for the taxonomy](https://imgur.elightup.com/s68tHuG.png)

In the **Post Types** section, select your desired post types. In my case, I chose **Post** (i.e., the default blog posts).

![Select your desired post types in the post type section](https://imgur.elightup.com/t0DrlDM.png)

Remember to save this taxonomy and check it on the post-editing page. You will see an additional item named **Series**, as shown below:

![Save the created taxonomy](https://imgur.elightup.com/AzCpvlg.png)

Enter a name into the box if you want the post to be in a series. You can create one on your own or pick an available one right there.

## 2. Displaying posts in the series

For example, [metabox.io](https://metabox.io/) has a [post series about Custom Fields](https://metabox.io/series/custom-fields/) like this:

![posts in the series](https://imgur.elightup.com/bq4d2Eo.png)

There are some things on this page:

1. Briefly display the list of articles with only their titles.
2. Display posts one by one with their titles, photos, and descriptions.
3. All the posts are displayed from the oldest to the newest.

I’ll do them one by one, as follows:

### Creating a page for each series

In your theme folder, create `taxonomy-{taxonomy}.php`. In this case, `{taxonomy}` is your custom taxonomy slug. Accordingly, my file is called `taxonomy-series.php`.

![Create a page for each series](https://imgur.elightup.com/JJdnqoF.png)

This file will specify how the series will be displayed on the frontend. It's nearly blank now:

![How the series will be on the frontend](https://imgur.elightup.com/znofSVh.png)

Next, copy the `archive.php` file into the `taxonomy-{taxonomy}.php` file you created.

![Copy the file into the created file](https://imgur.elightup.com/hVxbVHW.png)

Then, your series page will display all the posts in the series as the normal archive page.

![Series will display all the posts](https://imgur.elightup.com/5zEKFwv.png)

To have the section to display the list of posts with title only like this, you should add more code.

![Add more code](https://imgur.elightup.com/F80OKDJ.png)

Add the following code to the `taxonomy-{taxonomy}.php` file.

```php
if ( have_posts() ) :
    echo ‘<ul class="series-list">’;
    while ( have_posts() ) : the_post();
        echo '<li><a href="'.get_the_permalink().'">'.get_the_title().'</a></li>';
    endwhile;
    echo ‘</ul>’;
endif;

```

![Add the code](https://imgur.elightup.com/CdkvwO8.png)

Now, your series has been displayed, but in the incorrect sequence (the first posts first, the older posts displayed later).

![The series has been displayed](https://imgur.elightup.com/t9HHyOi.png)

### Reversing the order of the posts

Add the following code to the `functions.php` file in the theme folder.

```php
add_action( 'pre_get_posts', 'series_post_order');
function series_post_order($query){
    if(taxonomy_exists('series')):
        $query->set( 'order', 'ASC' );
        $query->set( 'orderby', 'date' );
    endif;
};
```

Remember to change the above `series` parameter to the name of the taxonomy that you created.

![Change the above series parament to the name of the created taxonomy](https://imgur.elightup.com/WCAcCMF.png)

Here is the result:

![The final result](https://imgur.elightup.com/vTkosBX.png)

# Creating a pricing table page - Meta Box + Breakdance

import LiteYouTubeEmbed from 'react-lite-youtube-embed'; import 'react-lite-youtube-embed/dist/LiteYouTubeEmbed.css';

When your products have some pricing plans instead of only one, a well-designed pricing table page will be an intelligent choice to show offering your products or services.

You can also separate the pricing table into a dedicated page or make it to be a section of any page. It’s a piece of cake with the help of a combination of **Meta Box** and **Breakdance**.

I have a pricing table page as an example:

![An example of pricing table page](https://imgur.elightup.com/tJP7YMc.png)

## Video version

<LiteYouTubeEmbed id='0e5enPbBx4E'/>

## Preparation

All the information about each plan such as title, price, description, features, and even the call-to-action button are saved in custom fields created with Meta Box.

Then, we’ll use Breakdance to display them on the page.

So, these are some tools we need in this practice:

* [Meta Box AIO](https://metabox.io/aio/): to have the framework to create custom fields, and advanced features from [MB Builder](https://metabox.io/plugins/meta-box-builder/) and [MB Group](https://metabox.io/plugins/meta-box-group/)
* **Breakdance** to build the pricing table page.

That’s all. Let’s start now.

## 1. Creating a new page

We’ll display the pricing table on a separate page. So, we need to create it first.

Go to **Pages**, and create a new one.

![Go to Pages, and create a new](https://imgur.elightup.com/e7VdBJR.png)

I leave it blank since all the content will be put in custom fields that I’ll create in the next step.

## 2. Creating custom fields

As I mentioned before, we’ll use custom fields to store every single information about the plans on the pricing page.

All the plans will be grouped and have the same layout and structure with name, price, description, features, and button to get it, just the content is different. So, you may use the cloneable feature for them.

![The plans has the same layout, just different content](https://imgur.elightup.com/XofC3jY.png)

Go to **Meta Box** > **Custom Fields**, and create a new field group.

![Go to Meta Box, Custom Fields, and create a new field group](https://imgur.elightup.com/KKXnq9n.png)

First, add a **Group** field.

![Add a Group field](https://imgur.elightup.com/7BVGBq8.png)

Inside the group, add subfields following the structure you want.

![Inside the group, add subfields following the structure you want](https://imgur.elightup.com/nv8Ic3a.png)

For the features, I also put them into a group for easier management. So, add a **Group** field as well.

![Add a Group field for the features](https://imgur.elightup.com/mqGyrku.png)

Also, add a subfield for it.

![Add subfield for the group of the features](https://imgur.elightup.com/1GCFa2X.png)

I set it collapsible, and set the title for the group as well. In this case, I simply set it based on the order number.

![Set the group as collapsible and set the group titile](https://imgur.elightup.com/KIOiuKz.png)

Since each plan has more than one feature, I set this subgroup as cloneable to add more items.

![Set this subgroup as cloneable to add more items](https://imgur.elightup.com/vL9OfFe.png)

And, add two fields for the label and URL of the button.

![Add fields for the labels and URLs of the buttons](https://imgur.elightup.com/4b2CLq0.png)

For the group of the plan, we also set it as collapsible. Then, the titles for them can be based on the order number and the plan name or anything you want.

![Set the group of the plan as colapsibale and set the group title](https://imgur.elightup.com/C547W0G.png)

As well as, make the group of the plans cloneable to add more than one plan on your pricing table page.

![Make this group cloneable to add more than one plan](https://imgur.elightup.com/8zZUd3c.png)

After having all the fields and essential settings, move to the **Settings** tab, choose **Location** as **Post type**, and select **Page**. To apply the fields to the page you want, go to the **Advanced location rules** section and choose your created page.

![Set location for the field group](https://imgur.elightup.com/RFI7kYl.png)

Then, in the page editor, you will see all of the custom fields.

![The custom fields display in the post editor](https://imgur.elightup.com/V8FN6fx.png)

Just enter information for each plan, and click on the **+ Add more** button to add other plans.

![Click on the + Add more button to add other plans](https://imgur.elightup.com/7cmtLwn.png)

## 3. Creating global blocks to display content from cloneable groups

Before building the pricing page with Breakdance, we should create a global block to display the information and set the layout for each cloneable field or cloneable group first. We have two cloneable groups in this practice: one is for the plans, and one is for the features. So, let’s create global blocks for each of them one by one.

### 3.1. Creating a global block for the features

Go to **Global Blocks** in **Breakdance**, and create a new global block for the features.

![Go to Global Blocks in Breakdance, and create a new global block for the features](https://imgur.elightup.com/vQTVSQs.png)

Add a **Div** element to cover the block.

![Add a Div element to cover the block](https://imgur.elightup.com/KjO0Wof.png)

I’ll display a feature with an icon like this. So, add an **Icon List** element.

![Add an Icon List element](https://imgur.elightup.com/GMrcm0u.png)

Because the features are saved in the custom fields created with Meta Box, we should insert dynamic data from the field to this element via a small icon like the below image.

![Get data for the features via dynamic data icon](https://imgur.elightup.com/twNHDKY.png)

After clicking on it, look for the **Metabox** section, and the name of the field that we use to save the feature.

![Look for the Metabox section, and the name of the field that we use to save the feature](https://imgur.elightup.com/KTp9FWS.png)

You also can change the icon as you want.

![You also can change the icon as you want](https://imgur.elightup.com/LfLkq1k.png)

### 3.2. Creating a global block for the plans

We’ll create another global block for the pricing plans in the same way.

![Create another global block for the pricing plan in the same way](https://imgur.elightup.com/8ODWDxe.png)

Just add the corresponding element to get and display one by one. Also, use the dynamic data button to connect elements to the custom fields.

![Add the corresponding element to get and display one by one, and, use the dynamic data button to connect elements to the custom fields](https://imgur.elightup.com/ciHGHbY.gif)

For the features, we have created a global block for it. So, add a **Repeater Field** element.

![Add a Repeater Field element for the features](https://imgur.elightup.com/NnvXpuZ.png)

Then, select the created block in the **Global Block** section.

![Select the created block in the Global Block section](https://imgur.elightup.com/ZTf600o.png)

And, in the **Field** tab, choose the name of the field group that we used for the features.

![In the Field tab, choose the name of the field group that we used for the features](https://imgur.elightup.com/mHQOQVL.png)

As you can see, all the features display immediately.

For the button, add a **Button** element.

![For the button, add a Button element](https://imgur.elightup.com/Y40barg.png)

Connect the label and URL of the button to the corresponding fields.

![Connect the label and URL of the button to the corresponding fields](https://imgur.elightup.com/HsidByu.png)

That’s done.

Next, we’ll display them on the pricing page.

## 4. Displaying the pricing table page

Edit the page with Breakdance.

![Edit the page with Breakdance](https://imgur.elightup.com/SKV7wUK.png)

Add a **Section** element to cover the pricing section.

![Add a Section element to cover the Pricing section](https://imgur.elightup.com/yJJ3F2R.png)

Then, add a **Div** element. It’ll include the plans.

![Add a Div element to cover the plans](https://imgur.elightup.com/iQoEsTt.png)

The plans are saved in the cloneable field. So, add a **Repeater Field** element.

![Add a Repeater Field element](https://imgur.elightup.com/p3zEX6z.png)

And choose the global block that we created for it in the previous step.

![Choose the global block that we created for it in the previous step](https://imgur.elightup.com/hdfIJib.png)

Also, select the corresponding group.

![Select the corresponding group](https://imgur.elightup.com/n0VSEdy.png)

Now, view the page on the frontend, you can see all the plans with their information displayed.

![All the plans with their information displayed](https://imgur.elightup.com/MkBvwHz.png)

But, you also can see that we should modify this page to have a better look for it.

## 5. Styling the page

To make the pricing table page look better, we’ll style each of the global blocks first.

Edit the block in Breakdance, and, style each element in the **Style** and **Advanced** tabs.

![Style each element in the Style and Advanced tabs](https://imgur.elightup.com/tllF1xD.png)

![Style the block of features](https://imgur.elightup.com/dCv26dT.png)

You should style all of the global blocks you have to have the desired appearance.

![Style block of the plans](https://imgur.elightup.com/uizpgYC.png)

The block for each plan looks good now, we should go to the page and style the page layout a little bit more.

![Style the page layout](https://imgur.elightup.com/99CCemN.png)

Then, the page will be updated with the new look as you set. This is our page after styling.

![The new look of the page](https://imgur.elightup.com/Zn944Fc.png)

That’s done for displaying the pricing table page.

However, to help customers save time considering and make it easier to finalize their purchase, you should highlight the recommended and best-selling plan.

Back to the global block of the plan, and move to the **Advanced** tab.

In the **Advanced** section, I create a new class for the plan. It will be used to add code to emphasize a plan.

![Create a new class for the plan](https://imgur.elightup.com/FJqjhD6.png)

Then, in the **Custom CSS** box, add these codes:

```
article:nth-child(2) > .mb-pricing-tables{
  border: 5px solid #ef7a37;
  transform: scale(1.1);
}
```

![In the Custom CSS box, add some codes](https://imgur.elightup.com/kDXyKcl.png)

**In there**:

* `article:nth-child(2) > .mb-pricing-tables{`: is to define which item is chosen among clones of the `mb-pricing-tables` class. In this practice, I choose `(2)` the second item for demonstration purposes. You can change this order number as you want.
* `transform: scale(1.1)`: is to zoom it in to bring attention to it. You also can change the number or skip it.

And, this is the final look of my pricing page.

![The final look of the pricing table page](https://imgur.elightup.com/tJP7YMc.png)

Somedays, when you want to change the price of a plan, or add features, or something else, just change the content in the custom fields. All the data on this pricing table page is dynamic.

We have had tutorials about [how to create dynamic landing pages](https://docs.metabox.io/tutorials/create-dynamic-landing-page-with-bricks/) including pricing section and other information. We hope that they’re useful for you.

# Creating a pricing table page - Meta Box + Bricks

import LiteYouTubeEmbed from 'react-lite-youtube-embed';
import 'react-lite-youtube-embed/dist/LiteYouTubeEmbed.css';

If your products come with multiple pricing plans rather than just one, a well-structured pricing table page is a smart way to showcase your offerings. Today, we’ll do it with **Meta Box** and **Bricks**.

Here is my example:

![An example of pricing table page](https://imgur.elightup.com/tJP7YMc.png)

## Video version

<LiteYouTubeEmbed id='48E83QvUQlk'/>

## Preparation

All the information about each plan, such as title, price, description, features, and even the call-to-action button, is saved in custom fields created with Meta Box.

We need some tools:

* [Meta Box AIO](https://metabox.io/aio/) to have the framework to create custom fields and advanced features from [MB Builder](https://metabox.io/plugins/meta-box-builder/) and [MB Group](https://metabox.io/plugins/meta-box-group/);
* **Bricks**: to build the pricing table page.

That’s all. Let’s start now.

## 1. Creating a new page

We’ll display the pricing table on a separate page. So, we need to create it first.

Go to **Pages** and create a new one.

![Go to Pages, and create a new](https://imgur.elightup.com/q31dcJ9.png)

I leave it blank since all the content will be put in custom fields that I’ll create in the next step.

## 2. Creating custom fields

As I mentioned before, we’ll use custom fields to store every single piece of information about the plans on the pricing page.

All the plans will be grouped and have the same layout and structure with name, price, description, features, and button to get it, just the content is different. So, you may use the cloneable feature for them.

![The plans has the same layout, just different content](https://imgur.elightup.com/XofC3jY.png)

Go to **Meta Box** > **Custom Fields**, and create a new field group.

![Go to Meta Box, Custom Fields, and create a new field group](https://imgur.elightup.com/7kS269f.png)

First, add a **Group** field.

![Add a Group field](https://imgur.elightup.com/fOnqj7c.png)

Inside the group, add subfields following the structure you want.

![Inside the group, add subfields following the structure you want](https://imgur.elightup.com/4Uh8T45.png)

For the features, I also put them into a group for easier management. So, add a **Group** field as well.

![Add a Group field for the features](https://imgur.elightup.com/lBYRs4Y.png)

Also, add a subfield for it.

![Add subfield for the group of the features](https://imgur.elightup.com/hxPNqNA.png)

I set it collapsible, and set the title for the group as well. In this case, I simply set it based on the order number.

![Set the group as collapsible and set the group titile](https://imgur.elightup.com/opNxQoc.png)

Since each plan has more than one feature, I set this subgroup as cloneable to add more items.

![Set this subgroup as cloneable to add more items](https://imgur.elightup.com/iyKBCLq.png)

And add two fields for the label and URL of the button.

![Add fields for the labels and URLs of the buttons](https://imgur.elightup.com/6FsTWnU.png)

For the group of the plan, we also set it as collapsible. Then, the titles for them can be based on the order number and the plan name or anything you want.

![Set the group of the plan as colapsibale and set the group title](https://imgur.elightup.com/Nlmz2er.png)

As well, make the group of the plans cloneable to add more than one plan on your pricing table page.

![Make this group cloneable to add more than one plan](https://imgur.elightup.com/L6yqLkA.png)

After having all the fields and essential settings, move to the **Settings** tab, choose **Location** as **Post type**, and select **Page**. To apply the fields to the page you want, go to the **Advanced location rules** section and choose your created page.

![Set location for the field group](https://imgur.elightup.com/PXPRMuW.png)

Then, in the page editor, you will see all of the custom fields.

![The custom fields display in the post editor](https://imgur.elightup.com/56haRUD.png)

Just enter information for each plan, and click on the **+ Add more** button to add other plans.

![Click on the + Add more button to add other plans](https://imgur.elightup.com/9HAgEUZ.png)

## 3. Displaying the pricing table page

Let’s edit the pricing table page with Bricks.

Add a **Section** element to cover all the content of the page. There is an available container. We’ll add some elements inside this container to display the pricing table.

![Add a Section element to cover all the content of the page](https://imgur.elightup.com/evv3EVn.png)

Since our information is saved in a cloneable group, we need a **Div** element first.

![Add div element for cloneable group](https://imgur.elightup.com/BvWF5KN.png)

Then, enable the **Use query loop** button. And in the **Query** section, choose the type of data source. This is the MB group along with the name of the group that we have created for the custom field.

![Get data source for the div.](https://imgur.elightup.com/t32eBqn.png)

Now, inside this div, just add some elements to get data from the subfields of the group.

To get the plan’s name, choose the **Heading** element. As the name of the plan is saved in the custom field of Meta Box, use the **Dynamic data** button. Then, look for the field where we store the name of the plan.

![Get the plan’s name](https://imgur.elightup.com/fs979go.png)

Now, you can see that the plans’ names have just been displayed.

![You can see that the plans’ names have just been displayed.](https://imgur.elightup.com/QlU1dfp.png)

For the plan’s price, add the **Basic Text** element. It’s also stored in the created custom field. So, we also use the **Dynamic data** button and choose the field correspondingly.

![Get the plan’s price](https://imgur.elightup.com/4J49q3l.png)

Do the same to get the plan’s description.

Turning to the features of each plan, as they are saved in the cloneable field, add another **Div** element. Also, enable the **Use query loop** button. And in the **Query** section, choose the type of data source as we created for the features.

![Display the features of each plan](https://imgur.elightup.com/NuH5IjF.png)

Inside this div, add an element to get the feature data. I’ll display a feature with an icon. So, add an Icon Box element. Then, choose the icon as you want.

![Choose icon for feature.](https://imgur.elightup.com/frE9nQq.png)

Move to the **Content** section, use the **Dynamic data** again, and choose the corresponding field to get the feature data.

![get the feature data](https://imgur.elightup.com/tnkuoul.png)

Next, we want to display the button, which is to get the plan. In the first div, add a **Button** element. Since it is also saved in the Meta Box custom field, choose the right field to get the corresponding data. It just displays the button without any function.

![Display the button without any function.](https://imgur.elightup.com/Job3rDi.png)

I want to embed a link in this button so that users can click the button to grab the deal. Thus, in the **Link type** section, choose the Dynamic data option, and select the field where there is the url of the button.

![Get the link for the button](https://imgur.elightup.com/soVuG1l.png)

We have done getting all the information of the pricing table page.

![a simple list of detail](https://imgur.elightup.com/7s3ON2R.png)

Now, view the page on the frontend, you can see all the plans with their information displayed. However, it’s just a simple list of details. We want to present it in a table format, so it's more visually appealing and allows customers to easily compare the plans and make a purchase decision.

## 4. Styling the page

To make the pricing table page look better, go back to the page editor with Bricks, and customize each element to style them in your own way.

![Customize each element to style them in your own way with Bricks](https://imgur.elightup.com/IywaIaz.png)

Then, the page is updated with the new appearance.

![The new look of the page](https://imgur.elightup.com/Zn944Fc.png)

However, there's one more thing I want to do: highlight the recommended and best-selling plan.

In the page editor again, add some classes for the container and the div as well so that we can use it for styling later.

![Add classes for styling](https://imgur.elightup.com/s3BlbnU.png)

Then, in the **CSS** section of the div, add these codes.

```
.mb-pricing-container .mb-pricing-tables:nth-child(2) {
    border: 5px solid #ef7a37;
    transform: scale(1.1);
}
```

![In the CSS box, add some codes.](https://imgur.elightup.com/SeL0uyy.png)

**In there**:

* `.mb-pricing-container`  and `.mb-pricing-tables`: classes we added for styling;
* `nth-child(2)`: is to define which item is chosen among clones of the mb-pricing-tables class. In this practice, I choose `(2)` the second item for demonstration purposes. You can change this order number as you want.
* `transform: scale(1.1)`: is to zoom it in to bring attention to it. You also can change the number or skip it.

And, this is the final look of my pricing page.

![The final look of the pricing table page](https://imgur.elightup.com/tJP7YMc.png)

Somedays, when you want to change the price of a plan, or add features, or something else, just change the content in the custom fields. All the data on this pricing table page is dynamic.

# Creating a pricing table page - Meta Box + Elementor

import LiteYouTubeEmbed from 'react-lite-youtube-embed';
import 'react-lite-youtube-embed/dist/LiteYouTubeEmbed.css';

Continuing our series on [creating a pricing page](https://docs.metabox.io/tutorials/create-pricing-table-page-with-bricks/), this article will cover in detail how to build one using the combination of **Meta Box** and **Elementor**. If your product offers multiple pricing plans, this tutorial will help you create a clear and well-structured pricing page.

This is my pricing table page as an example:

![An example of pricing table page](https://imgur.elightup.com/ikpbegg.png)

## Video version

<LiteYouTubeEmbed id='NdIZTrarj9k' />

## Preparation

All the information of the pricing table, including the plan, pricing, description, features, and button, will be saved in custom fields created with Meta Box. Thanks to that, the data will be dynamic. And the page is built by Elementor. So, these are some tools in this practice:

First, we need [**Meta Box AIO**](https://metabox.io/aio/) to have a framework to create custom fields and extensions for advanced features:

* [MB Builder](https://metabox.io/plugins/meta-box-builder/): to have a UI in the backend to create custom fields visually;
* [MB Group](https://metabox.io/plugins/meta-box-group/): to organize custom fields into robust and intense groups;
* [MB Elementor Integrator](https://metabox.io/plugins/mb-elementor-integrator/): to get data from Meta Box’s custom fields, using dynamic tags of Elementor.

And, **Elementor** and its pro version to build the page.

Now, let’s start.

## 1. Creating a new page

We’ll display the pricing table on a new page. So, we need to create it first.

Simply go to **Pages**, and create a new one.

![Go to Pages and create a new one](https://imgur.elightup.com/iOu9ot0.png)

For the page content, we’ll add it through custom fields created with Meta Box in the next step.

## 2. Creating custom fields

We’ll use custom fields to store the plan information to have dynamic and flexible content for the pricing table page.

Each plan is a group. As you can see, they have the same layout with name, price, description, features, and buttons. Just the content is different. So, we’ll use the cloneable feature for them.

Go to **Meta Box** > **Custom Fields**, and create a new field group.

![Go to Meta Box, Custom Fields, and create a new field group](https://imgur.elightup.com/CIp0ozP.png)

First, add a **Group** field for the plan.

![Add a Group field for the plan](https://imgur.elightup.com/ObdSDri.png)

Inside the group, add some subfields following the layout of content you want for your own plan. These are subfields in my case:

![Add some subfields](https://imgur.elightup.com/32SfLEU.png)

There, I use a group to store the features' content for easier management. For this subgroup setting, I set it as collapsible, then named each item based on the order.

![Set the group for the feature collapsible](https://imgur.elightup.com/aHmNb9M.png)

Each plan has more than one feature, so the group should be cloneable.

![The group should be cloneable](https://imgur.elightup.com/1F3JLS6.png)

For the group of the plan, we set it as collapsible as well. The name of each group can be based on the order number and plan title for distinguishing.

![Set the group for the plan collapsible](https://imgur.elightup.com/2tkJqvF.png)

A product usually has several packages for buyers with diverse options. Thus, I enable the cloneable option to add more than one plan.

![The group is cloneable](https://imgur.elightup.com/PJjPcvl.png)

In the case that you want to display other information, just add the respective field types.

After having all the fields with reasonable settings, move to the **Settings** tab, set the **Location** as **Post type**, and select **Page**. To apply the fields to the specific page you want, click on the **Advanced location rules** section below, and select your created page.

![Set the location for the field group](https://imgur.elightup.com/HLWTDGK.png)

Now, go to the page, you can see all the created custom fields ready. Just input data for each plan.

## 3. Creating skins

We have two cloneable groups: one for the features, and another for the plan. However, Elementor does not support directly displaying data from them on a template. We should create a skin for them first.

Go to **Template** > **Theme Builder**. There will be the **Meta Box Group Skin** menu. Click on it and add a new skin.

![Go to Meta Box Group Skin menu to create a new skin](https://imgur.elightup.com/iB1DIa5.png)

### 3.1. Skin for features

Move to the **Setting** tab to set the name and location of the skin for preview. We start with the group of features.

![Set the skin for the features](https://imgur.elightup.com/Cxi4nE4.png)

In the **Preview Settings** section, choose **Page**, and select the pricing table page.

![Set the preview settings as the pricing page](https://imgur.elightup.com/ZFJm74c.png)

Now, add a **Section** element to cover the feature.

![Add a Section element to cover the feature](https://imgur.elightup.com/EFR9CbF.png)

Then choose the layout for the feature you want. Since I want to have an icon at the beginning of the feature content, I choose a suitable layout.

![Choose a suitable layout.](https://imgur.elightup.com/AeWym0W.png)

Just add some elements to this skin.

In the first column, add an **Icon** element.

![Add an Icon element](https://imgur.elightup.com/rennbC3.png)

Then, click on the **Icon Library** button to select the icon from the library.

![Click on the Icon Library button to select the icon from the library.](https://imgur.elightup.com/9yxlkmn.png)

For the remaining column, add a **Text Editor** element.

![Add a Text Editor element](https://imgur.elightup.com/1EVhiPd.png)

Since the data is saved in custom fields created with Meta Box, click the **Dynamic Tags** button. And choose **Meta Box Field** in the **Post** section.

![Click on the Dynamic tags icon and choose Meta Box Field](https://imgur.elightup.com/5zdhVY3.png)

Then, choose the name of the field you want to get data from. In my case, it’s **Item**. The data will be displayed with the content you input.

![Choose the name of the field](https://imgur.elightup.com/RL4EH72.png)

### 3.2. Skin for plans

For the skin of the plan, do the same.

![For the skin of the plan, do the same.](https://imgur.elightup.com/nP7FfKL.png)

Also, add a section to cover the plan.

![Add a section to cover the plan](https://imgur.elightup.com/NeVbEWh.png)

The concept here is we’ll add the suitable elements, then use the **Dynamic Tags** button to get data for the element from Meta Box custom fields.

First, for the plan name, add a **Heading** element.

![Add a Heading element](https://imgur.elightup.com/Iqc6au8.png)

Click on the dynamic tags icon, and select the **Meta Box Field**.

![Click on the dynamic tags icon, and select the Meta Box Field](https://imgur.elightup.com/H9Y9G35.png)

Then choose the right field to get data from.

To display the price, add a **Text Editor** element.

![Add a Text Editor element](https://imgur.elightup.com/PI206NP.png)

Also, click on the dynamic tag icon to get dynamic data and choose the corresponding field.

![Click on the dynamic tag icon to get dynamic data and choose the corresponding field](https://imgur.elightup.com/YTaV1iy.png)

Do the same with the description.

![Do the same with the description](https://imgur.elightup.com/8s2lZwf.png)

There is a slight difference for the feature. It’s saved in the group, and we’ve had a skin for it. Therefore, add the **Meta Box Group** element to get the data from that skin.

![Add the Meta Box Group element](https://imgur.elightup.com/VLLfVwB.png)

The feature is a subgroup in the Plan group. You should set the **Type** of the element as **Sub-group**. Then, choose the group name and the created skin for the feature.

![Choose the group and skin for the element](https://imgur.elightup.com/wlGOo3Y.png)

Immediately, all the features, along with the content and layout displayed as we set before.

The last one is the button. Add a **Button** element.

![Add a Button element](https://imgur.elightup.com/1mLnJ8p.png)

Also, use the dynamic tags to get data for the button’s label and its URL.

![Get data for the button’s label and its URL.](https://imgur.elightup.com/mhWFurj.png)

After getting and displaying all the data, we’ll set the condition for the template. The skin will be applied to the pricing table page, so set the condition as below:

![Set the condition for the template](https://imgur.elightup.com/VZIyBI9.png)

## 4. Creating a template for the pricing table page

We have had the page for the pricing table. So just edit it with Elementor.

![Edit the page with Elementor.](https://imgur.elightup.com/fGMxS3l.png)

Add a section to cover the page.

![Add a section to cover the page](https://imgur.elightup.com/gJqgd9D.png)

If you want to have any additional content, just add a reasonable element. For demonstration purposes, I’ll display plans without any other content.

The plan information is saved in the cloneable group as well. So, add a **Meta Box Group** element.

![Add a Meta Box Group element](https://imgur.elightup.com/t4feZlX.png)

Set the **Group** as the name of the plan group, and select the corresponding skin.

![Select the corresponding skin](https://imgur.elightup.com/TWZCFxv.png)

All the plans, along with their information, were displayed.

This is the pricing table page on the frontend.

![The pricing table page on the frontend](https://imgur.elightup.com/KHv5cqr.png)

But you need to modify the page to make it more beautiful and attractive.

Let’s move to the next step.

## 5. Styling the pricing table page

To change the look of the page, we’ll style each skin on it, then the page template will be updated with the new appearance.

Edit the created skins one by one. Just go to the **Style** tab and **Advanced** tab of each element, and change the settings as you want.

![Go to the Style tab and Advanced tab of each element to style](https://imgur.elightup.com/DBPxQpw.png)

Now, our page is better.

![The new look of the page after styling](https://imgur.elightup.com/HDK4VHy.png)

But it’s not the end. Besides the information about pricing, I also want to highlight the best-selling and recommended plan.

Back to the skin for the plan. Move to the **Advanced** tab to create a class for highlights later.

![Move to the Advanced tab to create a class](https://imgur.elightup.com/2CewLUC.png)

Then, in the **Custom CSS** tab, add this code:

```
div.mbei-group:nth-of-type(2)  .mb-pricing-tables {
    border: 5px solid #EF7A37;
    transform: scale(1.1);
}
```
![Add code to the Custom CSS tab](https://imgur.elightup.com/qToVsJI.png)

**In there**:

* `mb-pricing-tables`: is the class we created for the plan.
* `nth-of-type(2)`: is to regulate which clone of the group will be emphasized. Here, it’s the second.
* `transform: scale(1.1)`: is to zoom the spotlight plan in to attract attention.

That’s done.

And, this is the final look of the pricing table page.

![The final look of the pricing table page](https://imgur.elightup.com/ikpbegg.png)

Somedays, when you want to change the price of a plan, or add features, or something else, just change the content in the custom fields. All the data on this pricing table page is dynamic.

# Creating a pricing table page using MB Views

import LiteYouTubeEmbed from 'react-lite-youtube-embed';
import 'react-lite-youtube-embed/dist/LiteYouTubeEmbed.css';

In this tutorial, I’ll show you how to create a clear and well-structured pricing table using **MB Views**.

Here is my example:

![An example of pricing table page](https://imgur.elightup.com/ikpbegg.png)

## Video version

<LiteYouTubeEmbed id='AqpNYr2zwtU'/>

## Preparation

All the information about each plan, such as title, price, description, features, and even the call-to-action button, is saved in custom fields created with Meta Box.

With this approach, we strongly recommend using **Meta Box AIO** to access the full framework and all the advanced features from Meta Box extensions, including:

* [MB Builder](https://metabox.io/plugins/meta-box-builder/): to have a UI on the backend to create custom fields visually;
* [MB Group](https://metabox.io/plugins/meta-box-group/): to organize custom fields into the groups for plans;
* [MB Views](https://metabox.io/plugins/mb-views/): to create a template for displaying the pricing table page’s content.

You also can install [the Meta Box plugin](https://wordpress.org/plugins/meta-box/) and those extensions individually.

That’s all. Let’s start now.

## 1.1 Creating a new page

We’ll display the pricing table on a separate page. So, we need to create it first.

Go to **Pages** and create a new one.

![Go to Pages, and create a new](https://imgur.elightup.com/TUoI3J5.png)

I leave it blank since all the content will be put in custom fields that I’ll create in the next step.

## 1.2 Creating custom fields

As I mentioned before, we’ll use custom fields to store every single piece of information about the plans on the pricing page.

All the plans will be grouped and have the same layout and structure with name, price, description, features, and button to get it, just the content is different. So, you may use the cloneable feature for them.

![The plans has the same layout, just different content](https://imgur.elightup.com/Bj6dm1m.png)

Go to **Meta Box** > **Custom Fields**, and create a new field group.

![Go to Meta Box, Custom Fields, and create a new field group](https://imgur.elightup.com/KKXnq9n.png)

First, add a **Group** field.

![Add a Group field](https://imgur.elightup.com/7BVGBq8.png)

Inside the group, add subfields following the structure you want.

![Inside the group, add subfields following the structure you want](https://imgur.elightup.com/I5ccfKG.png)

For the features, I also put them into a group for easier management. So, add a **Group** field as well.

![Add a Group field for the features](https://imgur.elightup.com/mqGyrku.png)

Also, add a subfield for it.

![Add subfield for the group of the features](https://imgur.elightup.com/1GCFa2X.png)

I make it collapsible and set the title for the group as well. In this case, I simply do it based on the order number.

![Set the group as collapsible and set the group title](https://imgur.elightup.com/Md1lawx.png)

Since each plan has more than one feature, I set this subgroup as cloneable to add more items.

![Set this subgroup as cloneable to add more items](https://imgur.elightup.com/8oLI6rs.png)

And, add two fields for the label and URL of the button.

![Add fields for the labels and URLs of the buttons](https://imgur.elightup.com/4b2CLq0.png)

For the group of the plan, we also set it as collapsible. Then, the titles for them can be based on the order number and the plan name or anything you want.

![Set the group of the plan as colapsibale and set the group title](https://imgur.elightup.com/C547W0G.png)

As well, make the group of the plans cloneable to add more than one plan on your pricing table page.

![Make group cloneable to add more than one plan](https://imgur.elightup.com/8oLI6rs.png)

After having all the fields and essential settings, move to the **Settings** tab, choose **Location** as **Post type**, and select **Page**. To apply the fields to the page you want, go to the **Advanced location rules** section and choose your created page.

![Set location for the field group](https://imgur.elightup.com/RFI7kYl.png)

Then, in the page editor, you will see all of the custom fields.

![The custom fields display in the post editor](https://imgur.elightup.com/ydJGOU5.png)

Just enter information for each plan, and click on the **+ Add more** button to add other plans.

![An example of pricing table page](https://imgur.elightup.com/kwZkrqV.png)
(Click on the + Add more button to add other plans)

## 1.3 Displaying the pricing table page

First, go to **Meta Box** > **Views**, to create a new template for the pricing table page.

![Create a new template with MB Views](https://imgur.elightup.com/zpjZcpX.png)

With **MB Views**, you can add some lines of code to the box below. Or insert fields by clicking the **Insert Field** button, then choosing fields on the right sidebar to get data from custom fields.

![Insert field to the template](https://imgur.elightup.com/u9PS8JT.png)

Since our fields are on a special page, you can see the field here.

![The field on the right side bar](https://imgur.elightup.com/l3p1iU5.png)

Click into it to insert the **Plans** field. Since it’s cloneable, a loop will be generated in the **Template** section.

![Insert the Plans field](https://imgur.elightup.com/QolmmEW.png)

Inside the loop,  just choose the subfield from the list to insert them one by one.

These are title, price, and description with 3 lines of code appearing corresponding to the chosen fields.

![Insert the title, price, description fields](https://imgur.elightup.com/PPJAKT8.png)

Next, for the plan’s feature, insert this clonable field bellow, then we also have a new loop.

![Get the plan’s feature](https://imgur.elightup.com/J70j1PV.png)

Similarly to the plan, inside this new loop, insert the wanted field.

![Insert field inside the loop](https://imgur.elightup.com/OStOoxj.png)

Back to the first loop, continuing to insert the remaining fields. We have the button text, and the button link.

![Insert the remaining fields into the loop](https://imgur.elightup.com/pwbZild.png)

After inserting all the necessary fields, move to the **Settings** section of the view, and set the **Type** as **Singular**, and the **Location** as **Pages**, then choose the name of the created page.

![Move to the Settings section of the view, and set the Type as Singular, and the Location as Pages, then choose  the name of the created page](https://imgur.elightup.com/wha7TTG.png)

As well as, you can choose a position for the pricing table on the page.

![Choose a position for the pricing table on the page](https://imgur.elightup.com/DDjmpsL.png)

Now, view the page on the frontend, you can see all the plans with their information displayed. However, it’s just a simple list of details.

![All the plans with their information displayed. But, it’s just a simple list of details](https://imgur.elightup.com/oZfQphq.png)

To make it more engaging and user-friendly, let’s transform it into a structured table. This way, customers can easily compare plans and choose the best one!

## 1.4 Styling the page

To make the pricing table page look better, back to the created template with MB Views, add some lines of code.

![Add code for styling](https://imgur.elightup.com/ZWTFFyh.png)

```
<link rel="stylesheet" href="https://cdnjs.cloudflare.com/ajax/libs/font-awesome/5.15.4/css/all.min.css" />
```
This is to call the Awesome font library, to add icons for the features of each plan.

Next, include some **div** tags and classes to make styling easier.

![Add some div tag and classes](https://imgur.elightup.com/QfnuxXL.png)

Notice that, I use the `fa fa-check-circle` class from the Awesome font, helping display the circle icons.

Now, you can see that the pricing information is organized and clearer, with icons displaying the features in a bulleted format.

![The pricing information is organized and clearer, with icons displaying the features in a bulleted format](https://imgur.elightup.com/8A4lL3t.png)

To create a table for pricing plan, back to the view again, in the **CSS** tab, add the following code to style and highlight the recommended and best-selling plan.

![Add code to the CSS tab](https://imgur.elightup.com/CyulpnJ.png)

```css
.mb-pricing-container .mb-item:nth-child(2) {
    border: 5px solid #ef7a37;
    transform: scale(1.1);
}


.mb-content {
    display: flex !important;
    flex-direction: row;
    flex-wrap: wrap;
    width: 100%;

}

.mb-item {
    width: 30%;
    margin: 18px;
    text-align: center;
    border: 3px solid #78787885;
    border-radius: 15px;

}

.mb-title {
    font-size: 23px;
    font-weight: bold;
    margin-top: 15px;
}

.mb-price {
    font-size: 50px;
    font-weight: 800;
    color: #262626;
}

.mb-description {
    padding: 15px 0;
    background: #f7b793;
    font-size: 20px;
    margin: 20px 0;
}

.mb-features {
    padding-left: 2.5em;
    text-align: left;
}

.item-feature {
    font-weight: 500;
    color: #262626;
    font-size: 18px;
    padding: 10px 0;
}

.item-feature i.fa.fa-check-circle {
    color: #ef7a37;
}

.mb-button {
    margin: 20px;
}

.mb-button a:hover {
    text-decoration: underline;
}

.mb-button a {
    background: #ef7a37;
    padding: 8px 15px;
    border-radius: 4px;
    color: #fff;
}
```

**In there**:

* `nth-child(2)`: is to define which plan is chosen among the pricing table. In this practice, I choose `(2)` the second item for demonstration purposes. You can change this order number as you want.
* `transform: scale(1.1)`: is to zoom it in to bring attention to it. You also can change the number or skip it.

All codes are saved in [Github](https://github.com/wpmetabox/tutorials/tree/master/create-pricing-table-with-mb-views), so you can refer to it.

Here’s how my Pricing Table page looks in the end.

![The final look of the pricing table page](https://imgur.elightup.com/ikpbegg.png)

Somedays, when you want to change the price of a plan, add features, or something else, just change the content in the custom fields. All the data on this pricing table page is dynamic.

We have had tutorials about [how to create dynamic landing pages](https://docs.metabox.io/tutorials/create-dynamic-landing-page-with-bricks/), including a pricing section and other information. We hope that they’re useful for you.

# Creating a product page - Meta Box + Divi

import LiteYouTubeEmbed from 'react-lite-youtube-embed';
import 'react-lite-youtube-embed/dist/LiteYouTubeEmbed.css';

An effective product page can increase the customer experience, thereby boosting sales. It may have various information, images, even specifications that we should show on the page to help customers more easily make decisions. Let’s simply **create a product page** with all the needed information using **Meta Box** and **Divi**.

I’ve built a car rental page as an example:

![A product page with detailed information using Meta Box and Divi](https://imgur.elightup.com/aIP5koT.png)

## Video version

<LiteYouTubeEmbed id='m_nVNG0b7SY' />

## Preparation

The page contains the product's detailed information, even an image gallery. It’s a singular page of your product post type. The name and description of the product are the title, and content of the post. The remaining detailed information should be saved in the custom fields that allow you to flexibly style them.

You will need some tools to create a capturing product page that converts.
* [the Meta Box core plugin](https://wordpress.org/plugins/meta-box/): to have the framework for creating custom post types and custom fields for the products;
* [MB Custom Post Type](https://metabox.io/plugins/custom-post-type/): to create a custom post type for the products;
* [MB Builder](https://metabox.io/plugins/meta-box-builder/): to have a UI in the backend to create custom fields easily;
* [MB Divi Integrator](https://metabox.io/plugins/mb-divi-integrator/): helps Divi to get data from custom fields created by Meta Box easier.
* **Divi Builder**: to build the page and display the product information.

That’s all. Let’s get started now!

## 1. Creating a custom post type

Go to **Meta Box** and create a new post type for your products.

![Create a new post type for your products](https://imgur.elightup.com/ZupjzBq.png)

After publishing, you will see a new menu displayed. It's your post type.

![A new post type displayed](https://imgur.elightup.com/uUJvBtB.png)

## 2. Creating custom fields

These are the fields that I’ll create for example. They are just some basic fields for typical information.

![This is some basic fields for typical information](https://imgur.elightup.com/ptvvIYY.png)

Now, go to **Meta Box** to create custom fields.

![Go to Meta Box to create custom fields.](https://imgur.elightup.com/L1TGOzd.png)

First, choose the **Number** field type for the numeric information such as rental price, car year, and max passengers.

![Choose the Number field type for the numeric information](https://imgur.elightup.com/312wMwY.png)

Next, I create some fields that allow the user to choose one from the provided list in the **Select** type.

![Choose the Select type to allow the user to choose one from the provided list](https://imgur.elightup.com/7bObtM9.png)

There is a choice box to add options like this.

![A choice box to add options](https://imgur.elightup.com/cEsHD0m.png)

For the rest information such as fuel usage, engine capacity, max luggage, mileage, we use the **Text** field.

![Choose the Text field for some information](https://imgur.elightup.com/gaKpAAg.png)

The last field is the gallery, choose an **Image Advanced** field to allow the user to upload multiple images.

![Choose an Image Advanced field to allow the user to upload multiple images.](https://imgur.elightup.com/FUdf7Wm.png)

After creating all the fields, move to the **Settings** tab, choose **Location** as **Post type**, and then select **Car Rental** to apply these fields to the post type.

![Set location to apply these fields to the Car Rental post type.](https://imgur.elightup.com/SK0vrhr.png)

Now, go to the post editor, you will see all of the created custom fields.

![All of the created custom fields](https://imgur.elightup.com/vvxP6Z8.png)

Just fill in the information.

## 3. Creating a template for the product page

To display product information on each page, we should create a template for their singular page. Go to **Theme Builder** in **Divi** to create a new one.

![Create new template for the products](https://imgur.elightup.com/Izt4QPi.png)

Then, choose the **All Car Rentals** option to apply the template to all the singular pages of the **Car Rentals** post type.

![Choose the All Car Rentals option to apply the template to all the singular pages of the Car Rentals post type.](https://imgur.elightup.com/wH3UsQ4.png)

First, add a new section to cover all the product information.

My product page is in the type of columns like this.

![My product page is in the type of columns](https://imgur.elightup.com/Z3wQb8u.png)

So, I’ll choose the layout as in the image below.

![Choose the layout for your product page](https://imgur.elightup.com/8AIUssp.png)

Now, let’s get and display information.

In the first column, add the **Meta Box Field** module for the gallery. This is the module built by the Meta Box team that has more advantages and more optimality, especially can get images from custom fields.

![Add the Meta Box Field module for the gallery.](https://imgur.elightup.com/NM5Yckf.png)

Then, just set the location for this module as the field that we store the images.

![Set the location for this module](https://imgur.elightup.com/ZSH0oqF.png)

![Choose the field that we store the images](https://imgur.elightup.com/KAPG5gw.png)

The images will display on the frontend later.

Moving to the second column, I will display the detailed information of the product. Now, add a new row with the wanted layout.

![Add a new row with the wanted layout for the detailed information of the product](https://imgur.elightup.com/MOmuGsK.png)

For the product's name, which is saved in the post title, choose the **Post Title** module.

![For the product's name, choose the Post Title module](https://imgur.elightup.com/FhHM0Ps.png)

Next, to display the product description, select the **Text** module. After that, click on the **Dynamic Content** icon button and choose **Post Excerpt** from the list.

![Display the product description](https://imgur.elightup.com/R7TYMzk.gif)

For the rental price information saved in a custom field, add a new row. Also, add a **Text** module inside.

![Add a new row and a Text module inside for the rental price information](https://imgur.elightup.com/Hhhc9ud.png)

Pay attention that you also can choose the **Meta Box Field** module instead, but we refer to using Divi’s modules in this case since this kind of data is quite simple and this module provides opt-in options for styling.

Here, we also use the **Dynamic Content** icon button to get data from the field.

![Also use the Dynamic Content icon button to get data from the Car Rental Price field](https://imgur.elightup.com/TFqdMF5.png)

You also can add before and after text for the currency unit.

![Add before and after text for the currency unit](https://imgur.elightup.com/dwCN7d5.png)

For the rest of the information, they have the same style with 2 columns. The first one is the title, and the second one is the information that is obtained from the custom fields.

![For the rest of the information, they have the same style with 2 columns.](https://imgur.elightup.com/BBwdANr.png)

So, we’ll use the row with 2 columns.

![Use the row with 2 columns](https://imgur.elightup.com/LfNpkBn.png)

The first one is the title, so select the **Text** module and name it. Take Car Year as an example:

![For the title, select the Text module and just name it](https://imgur.elightup.com/EjTZUEu.png)

In the second column, also add a **Text** module, then connect it to the custom field to get the data using the dynamic content.

![Add a Text module, then connect it to the custom field to get the data using the dynamic content.](https://imgur.elightup.com/CJDv7Sy.gif)

You can style the row a little bit before cloning it for others. Then, just duplicate the row to have other ones.

![Duplicate the row to have other ones](https://imgur.elightup.com/fbcVS9V.png)

Thus, you need to change the title, and field to get the right one.

We’ve just finished getting all of the information about the product. You can see how it displays on the frontend.

![All the product information displays on the frontend](https://imgur.elightup.com/NsviAdx.png)

## 4. Styling the page

Go back to the page template editor. As all the information of the product is saved in custom fields, and you got it individually using separate modules, you can choose each module to change their settings, one by one, to have their own style for each kind of information.

![In the page template editor, choose each module to change their settings.](https://imgur.elightup.com/4Zc7ROK.png)

You also can add some CSS to have a beautiful style for the gallery.

![Add some CSS to have a beautiful style for the gallery.](https://imgur.elightup.com/JIyvliZ.png)

I use the **Slick Slider** library to set the gallery display as a slider. To make the slider work well, we need to declare the **Slick Slider** library in our theme's files.

![Declare the Slick Slider library in our theme's files](https://imgur.elightup.com/Zq1Shu8.png)

![Declare the Slick Slider library in our theme's files](https://imgur.elightup.com/6r85bWX.png)

After styling, this is the final look of the product page.

![The final look of the product page](https://imgur.elightup.com/aIP5koT.png)

# Creating a product page - Meta Box + Elementor

import LiteYouTubeEmbed from 'react-lite-youtube-embed';
import 'react-lite-youtube-embed/dist/LiteYouTubeEmbed.css';

Let’s find out how to create a great product page using Meta Box and Elementor! I take a car rental for the product as an example.

![Example of a product page](https://imgur.elightup.com/eR5DcdE.png)

## Video version

<LiteYouTubeEmbed id='gI0M5nuzPj8' />

## Preparation

The product page is a singular page. All of its information is saved in a post of a custom post type. The name of the product and its descriptions are the title and content of the post. The remaining detailed information will be saved in the custom fields created by **Meta Box**.

![A product page is a singular page](https://imgur.elightup.com/DaLle8J.png)

So, in this practice, we need these tools:

* [Meta Box](https://wordpress.org/plugins/meta-box/): to have a framework to create a custom post type and custom fields;
* [MB Custom Post Type](https://metabox.io/plugins/custom-post-type/): to create custom post types for the products;
* [MB Builder](https://metabox.io/plugins/meta-box-builder/): to have a UI on the back end to create custom fields to save the product information;
* [MB Elementor Integration](https://metabox.io/plugins/mb-elementor-integrator/): to get the dynamic data from custom fields created by Meta Box;
* **Elementor** to build the page.

## 1. Creating a new custom post type

Go to **Meta Box > Post Types > New Post Type** to create a new custom post type.

![Create a new custom post type](https://imgur.elightup.com/1UoEKF3.png)

## 2. Creating custom fields

The product has extra detailed information, so we’ll create custom fields to save them. Go to **Meta Box > Custom Fields**, then create fields as you want.

![Create custom fields](https://imgur.elightup.com/RLzyil1.png)

In my case, I just take a typical example of a car rental with some common fields. Here are the fields that I created.

![The created custom fields](https://imgur.elightup.com/W1deiPo.png)

To know more about the field type, you may have your own specific information for the product. So, you may want to find out each field type to get the matching one. We have a video to talk about all the field types of Meta Box in detail. You can dig into it.

After creating all fields, move to the **Settings** tab > **Location** > choose **Post Type** as **Car Rental** to apply these fields to this post type.

![Set location for the created custom fields as post type](https://imgur.elightup.com/I1gm1Oa.png)

In the post editor, you will see all of the created custom fields.

![All created fields in the post editor](https://imgur.elightup.com/SjBBCpL.png)

## 3. Creating a template

Go to the **Elementor Theme Builder** and create a new template. Since it’s for a singular page of a custom post type, we’ll create it in the type of a single post.

![Create a template](https://imgur.elightup.com/yyXmCoo.png)

After setting the preview for the template, let’s edit it.

My product page has two columns like this:

![Two columns of the product page](https://imgur.elightup.com/YcW9Ksx.png)

So, first, add a widget and choose the layout for it.

![Add a widget and choose the layout](https://imgur.elightup.com/qgwzmNm.png)

In the first column, select the **Image Carousel** to display the image gallery as a slider. Then, to get the image that is saved in the custom field, go to the **Dynamic Tags**, find the **Meta Box Field** in the Post section, and choose the field that is set for the image. After that, you can see all of the images appear.

![Find the corresponding field to get the data by using Dynamic Data](https://imgur.elightup.com/RkfR1jo.gif)

Move to the second column to display other information about the product. The first one is the product's name which is saved in the post titl. So, choose the **Post Title** element > select the **Post Content** element to get the product’s description.

![The rest of the information will have the same style with 2 columns](https://imgur.elightup.com/3uJDuKv.png)

For the rental price information, choose the **Text Editor** element. Since the rental price is saved in custom fields created by **Meta Box**, also use the **Dynamics Tags > Meta Box Field** in the Post section > choose the corresponding fields. A number will be displayed without a unit of the pricing.

![Choose the Text editor element](https://imgur.elightup.com/JKWxASC.gif)

To have the unit displayed here, go to the Advanced section, and add the currency unit.

![Add the currency unit](https://imgur.elightup.com/M9prrn2.png)

For the rest of the information in this section, they have the same style with 2 columns. The first one is the title, and the second one is the information that is obtained from the custom fields.

![The rest of information in this section](https://imgur.elightup.com/SDHPQ9D.png)

Thus, we’ll use the **Inner Section** with 2 columns as well for each row.

![Inner Section with 2 columns for each row](https://imgur.elightup.com/quyDxUW.png)

![2 columns of each row](https://imgur.elightup.com/HDkwhM1.png)

The first column is the title. So, select the **Heading** element, then just name and style it.

![The first column is the title](https://imgur.elightup.com/uSpRUnR.png)

In the second column in the **Inner Section** element, add a **Text Editor** element, then connect it to the custom field to get the data using the dynamic tags. Take **Car Year** as an example.

![Add a Text Editor element](https://imgur.elightup.com/dsNR88Q.gif)

You can duplicate the **Inner Section** to have other rows and change the information to get the right one.

After getting all of the information about the product, remember to set the condition for this template to apply it to the singular page of the **Car Rental**.

![Set the condition](https://imgur.elightup.com/ykzuUrs.png)

Now, in the frontend, all of the product's detailed information is displayed.

![All the information is displayed](https://imgur.elightup.com/Ije0Xxw.png)

## 4. Styling the page

Still in the editor of the created template, just customize each element to get the wanted style.

![Style each element as you want](https://imgur.elightup.com/Nek1KHd.png)

Here is my product page after styling.

![The final result](https://imgur.elightup.com/eR5DcdE.png)

# Creating a product page - Meta Box + Breakdance

import LiteYouTubeEmbed from 'react-lite-youtube-embed';
import 'react-lite-youtube-embed/dist/LiteYouTubeEmbed.css';

In this practice, we’re going to find out the way to create a typical product page with Breakdance.

This is my Car Rental page that I created as an example for the product:

![Example of a product page](https://imgur.elightup.com/KeW7MSD.png)

## Video version

<LiteYouTubeEmbed id='JYnJTnwetwk' />

## Preparation

In this case, my product page is about car rental and it contains the product’s detailed information. All of this information will be saved in posts of a custom post type. The name of the product and its description are the title and content of the post. The remaining detailed information will be saved in the different custom fields.

So to get started, we need these tools:

* [Meta Box core plugin](https://wordpress.org/plugins/meta-box/): to have the framework for creating custom post types and custom fields. It’s free and you can download it directly from wordpress.org;
* [MB Custom Post Types & Custom Taxonomies](https://metabox.io/plugins/custom-post-type/): to create a custom post type for the product named Car Rentals;
* [MB Builder](https://metabox.io/plugins/meta-box-builder/): to have an intuitive UI to create custom fields in the backend for saving information about the products;
* **Breakdance**: to create the page.

## 1. Creating a custom post type

Go to **Meta Box** > **Post Types** to create a new post type.

![Create custom post type by Meta Box](https://imgur.elightup.com/38rvrJG.png)

After publishing, you will see a new menu in the admin dashboard.

![Created a post type by using Meta Box](https://imgur.elightup.com/Zy8olYJ.png)

## 2. Creating custom fields

Go to **Meta Box** > **Custom Fields** to create a new field group.

![Create a new field group with extra informations on custom fields](https://imgur.elightup.com/1TEDsFW.png)

Here are the fields I created to save information about the product. They are just some basic fields for typical information, so just create them as usual.

![All the created fields of custom fields that you set up](https://imgur.elightup.com/LgFtdZx.png)

For the information such as rental price, car year and max passengers, they are just numeric information. So choose the **Number** field.

![Created a number fields before creating product page](https://imgur.elightup.com/LV0t0cy.png)

You can fill in an example year so that when entering information about the car year. So, users can easily understand and enter the information correctly.

![Fill in the Placeholder of the product](https://imgur.elightup.com/LE55yu6.png)

Continue with the max passengers' information. You also can enter numbers in the **Min** value and **Max** value boxes to limit the number of passengers.

![Choose min and max values to set custom fields for page](https://imgur.elightup.com/yXvMhPy.png)

Next, choose the **Select** field to contain selective information. So, you can fill in the options into the **Choices** box.

![Fill in the choices information for page](https://imgur.elightup.com/NlMJU2Y.png)

For other information, select the **Text** field. In the Input description box, you can add some descriptions to add information to the field.

![Fill product information in the input description](https://imgur.elightup.com/gKcsWH5.png)

For the image of the products, choose an **Image Advanced** field to allow users to upload multiple images.

![Select type for the image of the product](https://imgur.elightup.com/Y6str25.png)

After creating all the fields, move to the **Settings** tab, choose **Location** as **Post Type**, and then select the
ar Rental post type to apply these fields to it.

![Move to settings and select the post type](https://imgur.elightup.com/HCq26nl.png)

Now, you will see all the created fields when editing posts in **Car Rental**.

![All the created fields of product page that you made](https://imgur.elightup.com/BsDVNZ5.png)

## 3. Creating the page template

Go to **Breakdance** > **Templates** > **Add Template** to create a new template for the product page.

![Create a new template for page by using Breakdance](https://imgur.elightup.com/MzSAm7F.png)

In the **Location** settings, choose **Car Rentals** in the **Single** section to apply this template to the single page of that post type.

![Apply template to the single page of that post type](https://imgur.elightup.com/yQEgO5K.png)

Then, just edit the newly created template with **Breakdance**.

First, add a **Section** to cover all the content of the page.

![Edit the newly created template for page with Breakdance](https://imgur.elightup.com/1teY4vy.png)

Since I want to divide content on the page into 2 columns, I add a **Column** element, and choose the suitable layout.

![Add a column element and choose the suitable layout for new page](https://imgur.elightup.com/CabE5jJ.png)

In the first column, add a **Gallery** element to display product images.

![Add a gallery element for product page](https://imgur.elightup.com/ezfsrHK.png)

Because we saved the products’ images in a custom field created by **Meta Box**, click on the **Insert Dynamic Data** icon > **Meta Box** section > choose the **Gallery** field which is the one we used to save the images.

![Save the images and set up it on the gallery](https://imgur.elightup.com/MM3tkYe.gif)

Then, you will see all the images displayed immediately.

![All the images of product page displayed](https://imgur.elightup.com/WwwVEca.png)

That’s all for the first column. Let’s move to the second one.

First, add a **Post Title** and **Post Content** to display the name and description of the product which are default of **WordPress**.

![Display the name and description of the product page to show informations product](https://imgur.elightup.com/8ABfo59.png)

For the pricing, add a **Text** element.

![Add a text element on product page to show specific information](https://imgur.elightup.com/AcK9OmZ.png)

There will also be an icon to insert dynamic data into the element. Because the price is also saved in a custom field, we will choose the field from the **Meta Box** section as well.

![Choose the field from the Meta Box section](https://imgur.elightup.com/GS39mES.gif)

You will see the price displayed already, buy only the number.

![the price displayed of the product was showed on the product page](https://imgur.elightup.com/uOSZhcn.png)

To display the unit of the pricing, click to the **Rental Price** option > **Advanced** to add extra text in the **Prepend** and **Append** boxes.

![Use a div to create information of page](https://imgur.elightup.com/hFoJXsc.png)

For the rest information, each row contains two types of the text: the text on the left is statics and the right one is data from the custom fields. So, we will use a **Div** and some elements inside for each row.

![Use a div to create information of page](https://imgur.elightup.com/r3riP5V.png)

Then, add a **Heading** element to add the static text on the left side of the row.

![Add a heading element to product](https://imgur.elightup.com/QOpW0nX.png)

Next, add a **Text** element. To get the information saved in custom fields, click to the **Insert Dynamic Data** icon > **Meta Box** section and choose the corresponding field.

![Add a text element to get the information saved in custom fields](https://imgur.elightup.com/rSeFaA6.png)

For the remaining information, do likewise. Or, you just need to duplicate the above Div, then change the text in the heading as well as the field connected with the Text element.

![Remain information and change the text in the heading as well as the field connected](https://imgur.elightup.com/09AZaJZ.gif)

After getting all the data, you will see all the information of the product display on the single page like this:

![All the information of the product page display](https://imgur.elightup.com/E2NNiGp.png)

If you want to have more styling for the product page, just go back to the template editor with **Breakdance**, and then go to the **Style** tab of each element to customize to style as you want.

![Create new template for product page](https://imgur.elightup.com/DTpnj5w.png)

![Create gallery for product page](https://imgur.com/qos6V76.png)

After styling, the product page has turned to a new look:

![Demo product page using Meta Box and Breakdance finished](https://imgur.elightup.com/KeW7MSD.png)

# Creating a product page - Meta Box + Bricks

import LiteYouTubeEmbed from 'react-lite-youtube-embed';
import 'react-lite-youtube-embed/dist/LiteYouTubeEmbed.css';

We’re going to find out how to create a product page using Meta Box and Bricks. I chose to create a car rental page as an example.

![Example of a Product Page](https://imgur.elightup.com/iufdSei.png)

## Preparation

As you can see, my product page contains the product’s detailed information. Each product will be a post of a custom post type. The basic information such as products’ name and its description are the title and content of the post. Other extra information will be saved in different custom fields.

Here are some tools we need:

* [Meta Box](https://metabox.io/): to have a framework to create custom post types and custom fields;
* [MB Custom Post Types & Custom Taxonomies](https://metabox.io/plugins/custom-post-type/): to create a custom post type named Car Rentals;
* [MB Builder](https://metabox.io/plugins/meta-box-builder/): to have an UI to create custom fields for saving products’ detailed information;
* **Bricks**: to build the page.

## Video version

<LiteYouTubeEmbed id='95DviTWI25o' />

## 1. Creating a post type

Go to **Meta Box > Post Types > Add New** to create a new post type.

![Create a new custom post type](https://imgur.elightup.com/lGQiD5h.png)

After publishing, you will see a new **Car Rentals** menu here.

![New custom post type after created in the admin dash board](https://imgur.elightup.com/eg4njnw.png)

## 2. Creating custom fields

Go to **Meta Box > Custom Fields** to create a new field group. Here, I created some fields as below to save the products’ information:

![Created custom field](https://imgur.elightup.com/NTX5107.png)

For the car year information, you can give some example data for it by filling in an example year in the **Placeholder** box.

![To give some example data for the field, fill in the Placeholder box](https://imgur.elightup.com/Hq7LjQK.png)

You can also enter numbers in the **Min Value** and **Max Value** boxes in order to limit the numbers of passenger like this:

![Enter numbers in the Min Value and Max Value boxes to limit the number of passengers](https://imgur.elightup.com/ayglK5l.png)

For the fuel information, I choose it as a **Select** field to fill in some options in the **Choices** box to allow choosing one from them.

![Fill in some options in the Choices box to allow users to choose](https://imgur.elightup.com/PS4WJJ6.png)

After creating all the needed fields, move to the **Settings** tab, choose **Location** as **Post Type** and select the **Car Rentals** to apply these fields to it.

![Set location in the settings to apply created fields](https://imgur.elightup.com/RosbUB9.png)

You can easily see all the created custom fields when creating a new post in the Car Rentals post type.

 ![All created custom fields in the created post type](https://imgur.elightup.com/Hw2emW6.png)

## 3. Creating a template for the page

Go to **Bricks > Template** to create a new template.

![Create a template for the page](https://imgur.elightup.com/UI0YVKU.png)

Since each product is displayed as a single page, set the template as **Single** and then edit it with **Bricks**.

![Set the template as Single](https://imgur.elightup.com/2mCVaEW.png)

Let’s display the product information in the created template.

To apply the template to the post type we want, go to the **Settings > Template Settings > Conditions** and choose **Post Type** in the list of options. Then, select the wanted post type. Here, it’s **Car Rentals**.

![Apply the template to the wanted post type](https://imgur.elightup.com/uUtj64h.gif)

To show a single post as a preview from the chosen post type, move to the **Populate Content** section and select the content type as a **single post**. In the list of options, choose the post you want to get the data from.

![Select the content type as a single post](https://imgur.elightup.com/t4i3PSH.png)

Now, let’s get the data and display it in the template.

First, to display all the images of the products as a slider, add a **Carousel** element. Since all the products’ images are saved in a custom field created by Meta Box, click the **Select dynamic data** button and find the corresponding field. In this case, it’s the **Gallery**.

![Add a Carousel element](https://imgur.elightup.com/tK8mwH0.png)

Then, all the pictures of the products will be shown immediately.

![All the pictures of the products will be shown imediately](https://imgur.elightup.com/zUnzhN1.png)

Since the name and the description of the car are the post title and post content, add the **Post Title** and **Post Content** element.

![Add the Post title and post content element](https://imgur.elightup.com/m1eb7NW.png)

To display the rental price per day, add the **Rich Text** element. Then, click the **Select dynamic data** button > choose the corresponding field to get the data that is saved in a custom field created by Meta Box.

![Display the rental price per day](https://imgur.elightup.com/54ZOeGo.png)

For all the detailed information of the product, add the **List** element. In this element, add items such as Car Year, Fuel, Max Passenger, etc. You can add title for each item as the name of the characteristic, then add dynamic data from custom fields into the Meta section as follows:

![Add the List element for detailed information](https://imgur.elightup.com/sp1N4Io.png)

Then, still in the list, just add respective items and connect them to the custom fields in the same way.

![Add respective items to the list and connect them to the wanteds custom fields](https://imgur.elightup.com/Hs7YcQD.png)

![Connect them the same way](https://imgur.elightup.com/jWNrKsK.png)

Now, all the information of the product has been displayed.

## 4. Styling the page

You can style some elements and layout of the page as you want in the Bricks visual builder. Choose the wanted element and change the settings in the Style section.

I just styled a little bit for example.

![Style the page](https://imgur.elightup.com/hY89Ndj.png)

Here is my product page after styling.

![The final result](https://imgur.elightup.com/iufdSei.png)

# Creating a product page - Meta Box + Oxygen

import LiteYouTubeEmbed from 'react-lite-youtube-embed';
import 'react-lite-youtube-embed/dist/LiteYouTubeEmbed.css';

I’ll create a car rental page for example of a product page. It’s a singular page of a custom post type.

## Video version

<LiteYouTubeEmbed id='9P2Q49n8sJk' />

## Preparation

Product is a kind of custom post type. In this case, each car for rental will be a post in that post type. Besides the default information such as title and content of the post, a product may have some extra information. E.g. each car will have some information such as price, image gallery, type of fuel, etc. So, we use custom fields to save that information.

![The extra information will be saved in custom fields](https://imgur.elightup.com/KT6xDPo.png)

For this practice, we need these tools:

* [Meta Box](https://metabox.io): to have framework to create custom post types and custom fields;
* [MB Custom Post Type](https://metabox.io/plugins/custom-post-type/): to create custom post types for the product;
* [MB Builder](https://metabox.io/plugins/meta-box-builder/): to have a UI on the backend to create custom fields to save extra information of product.

The last one is [Oxygen](https://oxygenbuilder.com/) which is used to build the page. You should use the 3.9 version or upper, which has integration with Meta Box already.

## 1. Creating a new custom post type

Go to **Meta Box > Post Types > New Post Type**.

![create new custom post type](https://imgur.elightup.com/ZGSNOek.png)

Enter the name for the post type, and if you want some further configuration, follow [this tutorial](http://docs.metabox.io/tutorials/create-custom-post-type-taxonomies/).

## 2. Creating custom fields

Go to Meta Box > Custom Fields, then create fields as you want for the products.

![create new custom fields](https://imgur.elightup.com/akw8HU0.png)

Here are the simple fields that we created:

![example of car rental with some common fields](https://imgur.elightup.com/yRLXjpI.png)

After creating all the essential fields, move to the **Settings** tab > **Location** > choose **Post Type** as **Car Rental** to apply these fields to it.

![Settings tab Location choose Post Type as Car Rental](https://imgur.elightup.com/Q3YdpN5.png)

Back to the post editor, you will see all of the created custom fields. Just fill in some data.

![newly created custom fields](https://imgur.elightup.com/gkVJ6Vx.png)

## 3. Creating a template with Oxygen

Go to the **Oxygen** menu and create a new template.

In the settings of the template, choose a design that you want the template to inherit from, then choose your post type in the **Singular** section to apply the template to it.

![Choose the design for the template you wants to display](https://imgur.elightup.com/ZEyhb85.png)

Now, go to edit any post, we can see the template is already rendered for it.

![Move to the post editor and create a new post in the newly created post type](https://imgur.elightup.com/CTQREhu.png)

After filling in the information for the product, let’s edit the template.

First, select a **Section** component to cover all of the product information.

![select a Section component to contain all of the product information](https://imgur.elightup.com/ppnWLhx.png)

If you want to set columns for the content as below, let’s add a **Column** component.

![split the content into columns](https://imgur.elightup.com/6pDhCvc.png)

![add the column component](https://imgur.elightup.com/ywHmHod.png)

Just set the **Column Layout** as you want.

In this **Column** component, there’ll be two **div** tags available, equivalent to two columns. In the first **div** tag, select the **Carousel Builder** component to display the image gallery as a slider.

Choose **Meta Box gallery** in the Carousel content section, and fill in the ID of the gallery field in the Meta Box image field section. Then, all the images saved in that field will be displayed.

![set the galler](https://imgur.elightup.com/eyUWeFG.png)

You can move to the **Advanced** tab to set the slider display as you want.

Go to the second column with the 2nd **div** tag. To get the title of the post, which is the name of the product, add a **Heading** component. Then, insert data from the post title into this component.

![insert data from the title of the post](https://imgur.elightup.com/MZf00m2.gif)

For the product description, choose the **Text** component and connect it with the content of the post.

Also, choose the **Text** component for the price of the product. The pricing includes the currency, so you can type some text and symbols in this component to get the right format, then insert data from the field.

![display the price of product](https://imgur.elightup.com/IQTqdXh.gif)

For all of the following section, I’ll add a div component.

![add a div component](https://imgur.elightup.com/gFiYiBt.png)

For each row in this section, I also use a **div** component.

![Create a div to hold a row's information](https://imgur.elightup.com/kYAEy6C.png)


In the **div** for a row, choose the **Heading** component and name it as the name of the characteristic. Then, add a **Text** component and connect it to the field, which saves the corresponding data to the characteristic. Last one, style these two components and the **div** that covers them in your own way.

For the remaining characteristics, just clone this **div**, which is used for a row by duplicating. Then, just change the headings and link the **Text** components to the right fields.

![Change the text component to the right field](https://imgur.elightup.com/mvbpUhP.png)

We’ve finished getting all of the information about the product and displayed them on the product page. You can style them as you want.

Here is the result after styling.

![The product page when we finished creating it](https://imgur.elightup.com/Z8h2iDS.png)

# Creating a product page - Meta Box + Brizy

import LiteYouTubeEmbed from 'react-lite-youtube-embed';
import 'react-lite-youtube-embed/dist/LiteYouTubeEmbed.css';

An effective product page can capture customer attention and contain all the information they might need before buying. Follow these practices using Meta Box and Brizy, you’ll be able to simply create a product page that’s full of needed information.

I’ve built a car rental page as an example:

![A Product Page using Meta Box and Brizy](https://imgur.elightup.com/FVancwG.png)

## Video version

<LiteYouTubeEmbed id='354_gelxeak' />

## Preparation

The page contains the product's detailed information, and its gallery. It’s a singular page of your product post type. The name and description of the product are the title, and content of the post. The remaining detailed information will be saved in the custom fields that allows you to flexibly style the page.

You will need some tools to create a capturing product page that converts.
* [Meta Box core plugin](https://wordpress.org/plugins/meta-box/): to have the framework for creating custom post types and custom fields for my products;
* [MB Custom Post Type](https://metabox.io/plugins/custom-post-type/): to create a custom post type for the products;
* [MB Views](https://metabox.io/plugins/mb-views/): to create a template for the image gallery of products;
* [MB Builder](https://metabox.io/plugins/meta-box-builder/): to have a UI in the backend to create custom fields easily;
* **Brizy**: to build the page.

## 1. Creating a custom post type

Go to **Meta Box** and create a new post type for your products.

![Create a new post type for your products](https://imgur.elightup.com/G3fyo3H.png)

After publishing, you will see a new post type displayed.

![A new post type displayed](https://imgur.elightup.com/aDPOgzE.png)

## 2. Creating custom fields

These are the fields that I’ll create for example. They are just some basic fields for typical information.

![This is some basic fields for typical information](https://imgur.elightup.com/ti7rrBB.png)

Go to **Meta Box** to create custom fields.

![Create custom fields](https://imgur.elightup.com/xVBKEEV.png)

First, choose the **Number** field type for the numeric information.

![Choose the Number field type for the numeric information](https://imgur.elightup.com/83GsOrt.png)

![These are the number fields that I created](https://imgur.elightup.com/R0x23QI.png)

Create some fields that allow the user to choose one from the provided list in the **Select** type.

![Create Select fields that allow the user to choose one from the provided list](https://imgur.elightup.com/wOEEjti.png)

![These are Select fields that I created](https://imgur.elightup.com/vCJJ2rj.png)

For the rest information such as fuel usage, engine capacity, max luggage, mileage, we use the **Text** field.

![Use the Text field for the rest information ](https://imgur.elightup.com/DOmwAKa.png)

![These are the Text fields that I created](https://imgur.elightup.com/rAC9K6I.png)

Choose an **Image Advanced** field for the gallery to allow the user to upload multiple images.

![Choose an Image Advanced field for the gallery to allow the user to upload multiple images](https://imgur.elightup.com/jGYsSec.png)

After creating all the fields, move to the **Settings** tab, choose **Location** as **Post Type**, and then select **Car Rental** to apply these fields to the post type.

![Move to the Settings tab to apply these fields to the post type](https://imgur.elightup.com/O6w7Di9.png)

Then, move to the post editor, you will see all of the created custom fields.

![All of the created custom fields](https://imgur.elightup.com/RY2bvDY.png)

## 3. Creating the page

### 3.1. Setting the page

Go to **Brizy** and create a template for the product page.

![Create a template for the product page](https://imgur.elightup.com/2OagrAq.png)

Choose **Single** for the template type.

![Choose Single for the template type](https://imgur.elightup.com/Tes5No1.png)

And choose your product post type name from the list.

![Choose your product post type name from the list](https://imgur.elightup.com/6TAW59p.png)

Then, edit the template with **Brizy**.

![Edit the template with Brizy](https://imgur.elightup.com/4JlcVeM.png)

Add a block.

![Add a block](https://imgur.elightup.com/56RxTwz.png)

Go to the **Global Blocks** section to set the header for the page.

![Set the header for the page](https://imgur.elightup.com/kgiyewz.png)

Add a new block for the page content.

![Add a new block for the page content](https://imgur.elightup.com/ciXA0qB.png)

![Choose create your own](https://imgur.elightup.com/6iw63UN.png)

I use the **Row** element to divide content into two columns. Basically, you can choose one of two elements: **Column** and **Row**. They are quite the same, but there is a difference on how to edit each inside column size.

![Use the Row element to divide content into two columns](https://imgur.elightup.com/FvMV7d9.png)

### 3.2. Creating the gallery

In the first column, I want to show images of the product as a slider. Actually, **Brizy** doesn't have any elements which can get multiple images at once from the **Image Advance** field from **Meta Box**, which saves the product images. Therefore, I use **MB Views** to create a template for it, then use the shortcode to embed it into this column.

Go to **Views** of **Meta Box** to add a new view.

![Go to Views of Meta Box to add a new view](https://imgur.elightup.com/tFwBMFF.png)

First, add a class for the gallery to set the style for them later.

![Add a class for the gallery](https://imgur.elightup.com/keiGj3Y.png)

Click the **Insert Field** button, and choose the name of the field that we’ve used to save the product images.

![Click the Insert Field button](https://imgur.elightup.com/ZWyWA2b.png)

![Choose the name of the field that we’ve used to save the product images](https://imgur.elightup.com/oTzkjgh.png)

You can add some **CSS** to apply a style for the gallery. I use it to set its display as a slider.

![Add some CSS to apply a style for the gallery](https://imgur.elightup.com/AK2x0mK.png)

I uploaded all the code in [Github](https://github.com/wpmetabox/tutorials/tree/master/create-a-product-page-width-brizy), you can go there to see it in detail.

Move to the **Settings** section of the **View**. Set this view in the type of **Shortcode**.

![Set this view in the type of Shortcode](https://imgur.elightup.com/bwt7VFB.png)

Then, a shortcode will be automatically generated right after you publish the view. You can copy it.

![a shortcode automatically generated right after publishing the view](https://imgur.elightup.com/ULjkck0.png)

Back to the template editor with **Brizy**, insert the **Shortcode** element into the first column.

![Insert the Shortcode element into the first column](https://imgur.elightup.com/M4ytIpb.png)

Paste the shortcode generated by the view.

![Paste the shortcode generated by the view](https://imgur.elightup.com/Hfe7KAS.png)

### 3.3. Displaying product information

Move on to the second column, add a **Title** element to show the product name.

![Add a Title element to show the product name](https://imgur.elightup.com/AKB0l8b.png)

As well as, add the **Content** element to display product description.

![Add the Content element to display product description](https://imgur.elightup.com/3z8kvoq.png)

I will use the **Row** element for the next information.

![Use the Row element for the next information](https://imgur.elightup.com/isteBXu.png)

Inside the **Row**, add a **Text** element on the left, and add some text for the information’s name.

![Add a Text element on the left, and add some text for the information’s name](https://imgur.elightup.com/L9anIXJ.png)

On the right, also add a **Text** element.

![Add a Text element](https://imgur.elightup.com/GKzr93v.png)

The information is the pricing that saves in a custom field. So, choose the **Typography** button to customize the text. Click on the **Dynamic data** button and choose a field that you want to get data from.

![Get the information is the pricing that saves in a custom field](https://imgur.elightup.com/nXUU8Gf.gif)

Then the data will display into the element automatically.

![The data will display into the element automatically](https://imgur.elightup.com/G0BUpts.png)

For the next information, use the **Row** element as well.

![Use the Row element as well](https://imgur.elightup.com/K7jnORh.png)

You can do likewise as the previous one to get data from custom fields.

![Get data from custom fields](https://imgur.elightup.com/fuipZZ5.gif)

Since the following ones are the same in the content and style, you can style the first row a little bit.

![Style the first row a little bit](https://imgur.elightup.com/uy2aloJ.gif)

Then, duplicate it to save time displaying and style them.

![Duplicate the row to save time displaying and style](https://imgur.elightup.com/MFaScji.png)

Just change the text in the left column, and change the field in the right column. You’ll get full of this section in the right form.

![Get full of this section in the right form](https://imgur.elightup.com/Q2SwqxP.png)

Also style the pricing a little bit. We’ve done displaying all the information about the product.

![We’ve done displaying all the information about the product](https://imgur.elightup.com/uI0c44a.png)

Add a new block for the footer.

![Add a new block for the footer](https://imgur.elightup.com/WzvevB1.gif)

Then, the product page will display as below:

![The product page will display](https://imgur.elightup.com/FVancwG.png)

# Creating a Product Page - Meta Box + Kadence

import LiteYouTubeEmbed from 'react-lite-youtube-embed';
import 'react-lite-youtube-embed/dist/LiteYouTubeEmbed.css';

There are numerous ways to build ecommerce product pages that I shared in [this series](https://metabox.io/series/product-page/). In this article, we’ll share some best practices for product page design by using Meta Box and Kadence.

This is my product page that I’ve created for illustration, you can see as below:

![My product page that I’ve created](https://imgur.elightup.com/LZwCeva.png)

## Video Version

<LiteYouTubeEmbed id='S4nHT47XYLI' />

## Preparation

This is a single page built with Kadence containing the product's detailed information. Each product is a post of a custom post type. The name of the product and its description are the title and content of the post.

So, in this practice, we need these tools:

* [Meta Box core plugin](https://wordpress.org/plugins/meta-box/): to have a framework to create custom fields and custom post types;
* [MB Custom Post Types and Custom Taxonomies](https://metabox.io/plugins/custom-post-type/): to create a custom post type for the product;
* [MB Builder](https://metabox.io/plugins/meta-box-builder/): to have a UI on the backend to create custom fields easily.
* **Kadence**: to have some extra types of blocks to build the page.

## 1. Creating a Custom Post Type

Go to **Meta Box** > **Post Types** to create a new post type for your product.

![Go to Meta Box > Post Types to create a new post type for your product](https://imgur.elightup.com/PwPLdhU.png)

After publishing, you will see a new menu displayed. It's your post type.

![A new menu displayed](https://imgur.elightup.com/r0cCIoD.png)

## 2. Creating Custom Fields

In this practice, I just create some basic fields for typical information of the product.

![Some basic fields for typical information of the product](https://imgur.elightup.com/kxEo9A4.png)

Go to **Meta Box** > **Custom Fields** to create them one by one.

![Create custom fields one by one](https://imgur.elightup.com/3OUrxJ9.png)

Choosing the **Number** field for numeric information, such as rental price, car year, and max passengers.

![Choosing the Number field for numeric information](https://imgur.elightup.com/DKzwtMs.png)

For the car year information, you can fill in an example year so that when entering information, users can easily understand and enter the information correctly.

![Fill in an example year for the car year information](https://imgur.elightup.com/NwSonRR.png)

About the max passengers' information, you also can enter numbers in the **Min value** and **Max value** boxes to limit the number of passengers.

![Enter numbers in the Min value and Max value boxes to limit the number of passengers](https://imgur.elightup.com/fZGQUJk.png)

Next one, choose the **Select** field to contain selective information such as fuel, doors, gearbox. Fill in the options into the **Choice** box.

![Choose the Select field to contain selective information](https://imgur.elightup.com/GAoLP78.png)

For other information such as fuel usage, engine capacity, max luggage, select the **Text** field. In the **Input** description box, you can add some descriptions to add information to the field.

![Add some descriptions to add information to the field](https://imgur.elightup.com/FbzTQYd.png)

The last one is the gallery. Choose an **Image Advanced** field to allow users to upload multiple images.

![Choose an Image Advanced field to allow users to upload multiple images](https://imgur.elightup.com/o1FYDgq.png)

After creating all the fields, move to the **Settings** tab, choose **Location** as **Post type**. And then, select **Car Rental** to apply these fields to this post type.

![Apply the fields to post type](https://imgur.elightup.com/kWZwuE3.png)

### 3. Creating the Page Template

Go to **Appearance** > **Kadence** > **Elements** > **Add New** to create a template for your product page.

![Create a template for your product page](https://imgur.elightup.com/UAvrBcH.png)

Choose element type as **Template**.

![Choose element type as Template](https://imgur.elightup.com/ctGv8zo.png)

Remember to set a preview for this template.

![Set a preview for the template](https://imgur.elightup.com/UOz4VtP.png)

Set the placement for the template as **Replace Single Post Content**, and choose **Single Car Rentals** to assign this template to the product single page.

![Assign the template to the product single page](https://imgur.elightup.com/RKFHpuk.png)

Add a **Columns** block, and choose the 50/50 layout to divide content and images into two columns.

![Divide content and images into two columns](https://imgur.elightup.com/3m9T5Cy.png)

In the first column, add an **Advanced Gallery** block to display product images.

![Add an Advanced Gallery block to display product images](https://imgur.elightup.com/7hjdv1J.png)

Turn on **Enable Dynamic Gallery** for this block to get images from custom fields.

![Turn on Enable Dynamic Gallery for this block to get images from custom fields](https://imgur.elightup.com/mglXptC.png)

Right after that, you will see the **Dynamic button** on the right sidebar to set the dynamic data for the gallery. Click on it, then choose the **Post Custom Field**, and choose **Gallery**, which is the custom field that we created to store the product images.

![Set the dynamic data for the gallery](https://imgur.elightup.com/WUFnu1f.png)

There will be multiple images, so you should set the gallery layout as **Slider**.

![Set the gallery layout as Slider](https://imgur.elightup.com/zmnOYu2.png)

Set a reasonable size for the images in the **Advanced** section.

![Set a reasonable size for the images in the Advanced section](https://imgur.elightup.com/Dd7LC2O.png)

Move to the second column, add an **Advanced Text** block for the product name.You also can use the **Text** block instead, but it has fewer settings for styling than **Advanced Text**.

![Add an Advanced Text block for the product name](https://imgur.elightup.com/yAoW9TB.png)

Click to the **Dynamic button** and choose **Post Title** to automatically get the product name from it.

![Choose Post Title to automatically get the product name](https://imgur.elightup.com/dEBgmUU.png)

Select **Advanced Text** to display the short description of the product. And, also set the dynamic content for it by clicking the button and pick **Post Excerpt**.

![Set the dynamic content](https://imgur.elightup.com/48wrX2p.gif)

Next, use the **Text** or **Advanced Text** block for the pricing.

![Use Advanced Text block for the pricing](https://imgur.elightup.com/SyqhvDk.png)

Add the unit price in the right form. Then, add dynamic data of pricing from the custom fields in the same way with the gallery.

![Add the unit price in the right form](https://imgur.elightup.com/VZmUGpu.gif)

For the remaining product information, we will use the **Row Layout** block provided by **Kadence**. Then, you can select the two columns layout.

![Use the Row Layout block to remain product information](https://imgur.elightup.com/nk7DVdS.gif)

In the column on the left, add **Advanced Text** block and type the name of the product characteristic.

![Add Advanced Text block and type the name of the product characteristic](https://imgur.elightup.com/emfOKLl.gif)

In the column on the right, add an **Advanced Text** as well, then add dynamic data from the corresponding custom field to it.

![Add an Advanced Text](https://imgur.elightup.com/N6YVbbz.gif)

You can put this row in the basic style and move on to the next one. For saving time, you can duplicate the created row. Change its name, and field to the right one.

![Duplicate the created row and Change its name, and field to the right one](https://imgur.elightup.com/4soBYjg.gif)

After displaying all the wanted information on the page, you will see it look like this on the frontend.

![A product page with Meta Box and Kadence](https://imgur.elightup.com/2Shjzka.png)

That’s done for the page.

# Creating a product page - Meta Box + Zion

import LiteYouTubeEmbed from 'react-lite-youtube-embed';
import 'react-lite-youtube-embed/dist/LiteYouTubeEmbed.css';

A well-designed product page can enhance the customer experience and lead to increased sales. It should include details like various information, images, and specifications to help customers make informed decisions. In this practice, we are going to find out how to **create a Product Page** using **Meta Box** and **Zion**.

Check out the car rental page I made as an example:

![Check out the car rental page I made as an example](https://i0.wp.com/images.elightup.com/meta-box/blog/create-a-product-page/demo.png)

## Video version

<LiteYouTubeEmbed id='f9dv1L9ZbjA' /> 

## Preparation

This page contains the product's detailed information and its gallery. It’s a singular page of your product post type. The name and description of the product are the title and content of the post. The remaining detailed information will be saved in the custom fields.

So, we need the [Meta Box AIO](https://metabox.io/aio/) to have the framework for creating custom post types and custom fields for your products. 

Besides, we need some Meta Box’s extensions for advanced features:

* [MB Custom Post Types](https://metabox.io/plugins/custom-post-type/): to create a custom post type for the products.
* [MB Builder](https://metabox.io/plugins/meta-box-builder/): to have a UI on the backend to create custom fields easily.
* [MB Views](https://metabox.io/plugins/mb-views/): to create a template for displaying a gallery.

Finally, we need **Zion** and **its Pro version** to build the page.

## 1. Creating a custom post type

Go to **Meta Box** > **Post types** and create a new post type for your products.

![Go to Meta Box > Post types and create a new post type for your products](https://i0.wp.com/images.elightup.com/meta-box/blog/create-a-product-page/new%20post%20type.png)

After publishing, you will see a new menu displayed. It's your post type.

## 2. Creating custom fields

In this practice, I just create some basic fields for typical information of the product.

![I just create some basic fields for typical information of the product](https://i0.wp.com/images.elightup.com/meta-box/blog/create-a-product-page/cf%20demo.png)

Go to **Meta Box** > **Custom Fields** to create them one by one.
 
![Go to Meta Box > Custom Fields to create them one by one](https://i0.wp.com/images.elightup.com/meta-box/blog/create-a-product-page/add%20new%20field.png)

Choosing the **Number** field for numeric information, such as rental price, car year, and max passengers.
 
![Choosing the Number field for numeric information](https://i0.wp.com/images.elightup.com/meta-box/blog/create-a-product-page/number%20field.png) 

![rental price, car year, and max passengers](https://i0.wp.com/images.elightup.com/meta-box/blog/create-a-product-page/rental%20price%20car%20year%20max%20passengers.png)

About the max passengers' information, you can also enter numbers in the Min value and Max value boxes to limit the number of passengers.
 
![About the max passengers' information, you can also enter numbers in the Min value and Max value boxes to limit the number of passengers](https://i0.wp.com/images.elightup.com/meta-box/blog/create-a-product-page/minmax.png)

Next one, choose the **Select** field to contain selective information such as fuel, doors, gearbox. Fill in the options into the **Choice** box.
 
![choose the Select field to contain selective information](https://i0.wp.com/images.elightup.com/meta-box/blog/create-a-product-page/fuel%20doors%20gearbox.png)
 
![fuel, doors, gearbox](https://i0.wp.com/images.elightup.com/meta-box/blog/create-a-product-page/choicebox.png)
 
![Fill in the options into the Choice box](https://i0.wp.com/images.elightup.com/meta-box/blog/create-a-product-page/select.png)

For other information such as fuel usage, engine capacity, max luggage, select the **Text** field. In the **Input description** box, you can add some descriptions to add information to the field.
 
![select the Text field](https://i0.wp.com/images.elightup.com/meta-box/blog/create-a-product-page/text.png)
 
![fuel usage, engine capacity, max luggage](https://i0.wp.com/images.elightup.com/meta-box/blog/create-a-product-page/fuel%20usage%20engine%20capacity%20max%20luggage.png)
 
![In the Input description box, you can add some descriptions to add information to the field](https://i0.wp.com/images.elightup.com/meta-box/blog/create-a-product-page/input%20description.png)

The last field is the gallery, choose an **Image Advanced** field to allow the user upload multiple images.
 
![choose an Image Advanced field to allow the user upload multiple images](https://i0.wp.com/images.elightup.com/meta-box/blog/create-a-product-page/image%20advanced.png)
  
![The last field is the gallery](https://i0.wp.com/images.elightup.com/meta-box/blog/create-a-product-page/gallery.png)

After creating all the fields, move to the **Settings** tab, choose **Location** as **Post Type**, and then select **Car Rental** to apply these fields to this post type.
 
![After creating all the fields, move to the Settings tab, choose Location as Post Type, and then select Car Rental to apply these fields to this post type](https://i0.wp.com/images.elightup.com/meta-box/blog/create-a-product-page/location.png)

## 3. Creating a template for the product page

Go to the **Zion Builder** > **Theme builder** > **Add new template** to create a new template.

![Go to the Zion Builder > Theme builder > Add new template to create a new template](https://i0.wp.com/images.elightup.com/meta-box/blog/create-a-product-page/add%20new%20template.png)        

Then, in the list below, check the **All Car Rentals** option so that this template will be used for all posts of the post type. 
 
![Then, in the list below, check the All Car Rentals option so that this template will be used for all posts of the post type](https://i0.wp.com/images.elightup.com/meta-box/blog/create-a-product-page/all%20car%20rental.png)

**Add Body** to this template and now edit it.
 
![Add body to this template and now edit it](https://i0.wp.com/images.elightup.com/meta-box/blog/create-a-product-page/add%20body.png)

Go to the **Page options**, choose **Dynamic data review source**.
 
![Go to the Page option, choose Dynamic data review source](https://i0.wp.com/images.elightup.com/meta-box/blog/create-a-product-page/page%20option.png)

In the **Select** post, you can see the **Source type** and the post type name available. You can also choose the post of that post type to have a preview.

![In the Select post, you can see the Source type and the post type name available. You can also choose the post of that post type to have a preview](https://i0.wp.com/images.elightup.com/meta-box/blog/create-a-product-page/select%20post.png)

Now, add a **Section** to cover all of the product information. Add a **Column**.
 
![Now, add a Section to cover all of the product information. Add a Column](https://i0.wp.com/images.elightup.com/meta-box/blog/create-a-product-page/add%20section.png)

I’ll build the product page following the corresponding layout layout with two columns. The first one is for the gallery, and the rest is for other information. 
 
![I’ll build the product page following the corresponding layout layout with two columns. The first one is for the gallery, and the rest is for other information](https://i0.wp.com/images.elightup.com/meta-box/blog/create-a-product-page/demo%20column.png)

So, select the corresponding layout, and change the **Content orientation** to **horizontal**.
 
![So, select the corresponding layout, and change the Content orientation to horizontal](https://i0.wp.com/images.elightup.com/meta-box/blog/create-a-product-page/horizontal.png)

In the first column, we’ll display the image gallery of the product. However, **Zion** doesn’t support doing it. We need to use **MB Views** to have the gallery, then paste the shortcode generated from the view into this element. 

So, I added a **Shortcode** element.
 
![So, I added a Shortcode element](https://i0.wp.com/images.elightup.com/meta-box/blog/create-a-product-page/shortcode.png)

Next, we’ll move to **Meta Box** > **Views**, and create a new view for the gallery.
 
![Next, we’ll move to Meta Box > Views, and create a new view for the gallery](https://i0.wp.com/images.elightup.com/meta-box/blog/create-a-product-page/create%20a%20new%20view%20for%20the%20gallery.png)

I use the **Insert Field** button to find out which field stores the gallery. After selecting the image size, you can see the loop in the **Template** tab because there is more than one image.
 
![I use the Insert Field button to find out which field stores the gallery. After selecting the image size, you can see the loop in the Template tab because there is more than one image](https://i0.wp.com/images.elightup.com/meta-box/blog/create-a-product-page/loop.png)

After publishing, you can see the **Shortcode** I mentioned before. Just copy it and paste into **Zion**.
 
![After publishing, you can see the Shortcode I mentioned before](https://i0.wp.com/images.elightup.com/meta-box/blog/create-a-product-page/shortcode%20copy.png)
 
![Just copy it and paste into Zion](https://i0.wp.com/images.elightup.com/meta-box/blog/create-a-product-page/shortcode%20paste.png)

Now, we’ll get and display data for the second column.

First, add a **Heading** element for the product name. 
 
![First, add a Heading element for the product name](https://i0.wp.com/images.elightup.com/meta-box/blog/create-a-product-page/heading%20column.png)

Then, click on **Use dynamic data** and choose **Post title**.
 
![Then, click on Use dynamic data and choose Post title](https://i0.wp.com/images.elightup.com/meta-box/blog/create-a-product-page/dynamic%20data%20post%20tittle.png)

For the description, simply use a **Text** element. Also **use dynamic data**, and select **Post content**. 
 
![For the description, simply use a Text element](https://i0.wp.com/images.elightup.com/meta-box/blog/create-a-product-page/text%20description.png)
 
![Also use dynamic data, and select Post content](https://i0.wp.com/images.elightup.com/meta-box/blog/create-a-product-page/post%20content.png)

Next, to display the price, add a **Text** element as well. Its data is saved in a custom field created with **Meta Box**. So, you should **use dynamic data**, then find the **Meta Box Field**. 
 
![Next, to display the price, add a Text element as well. Its data is saved in a custom field created with Meta Box. So, you should use dynamic data, then find the Meta Box Field](https://i0.wp.com/images.elightup.com/meta-box/blog/create-a-product-page/dynamic%20data%20metabox%20field.png)

Inside the **Field options** pop-up, you can see the **Rental Price** field. Click on it, and the price will be shown.
 
![Inside the Field options pop-up, you can see the Rental Price field. Click on it, and the price will be shown](https://i0.wp.com/images.elightup.com/meta-box/blog/create-a-product-page/field%20popup.png)

Regarding the remaining information, they have the same style with 2 columns. The first one is the name of the product characteristic, and the second one is the value that is obtained from the custom fields.

![Regarding the remaining information, they have the same style with 2 columns. The first one is the name of the product characteristic, and the second one is the value that is obtained from the custom fields](https://i0.wp.com/images.elightup.com/meta-box/blog/create-a-product-page/demo%20column%20information.png)

Therefore, I add a **Column** element, then choose a suitable layout. 
 
![Therefore, I add a Column element, then choose a suitable layout](https://i0.wp.com/images.elightup.com/meta-box/blog/create-a-product-page/suitable%20layout.png)

I use the **Text** elements for both columns. For the left column, type the name in the **Content box**. 
 
![I use the Text elements for both columns. For the left column, type the name in the Content box](https://i0.wp.com/images.elightup.com/meta-box/blog/create-a-product-page/type%20name%20of%20content%20box.png)

In the right column, connect the text element to the custom field to get the data using the dynamic content. This process is similar to the price.
 
![In the right column, connect the text element to the custom field to get the data using the dynamic content. This process is similar to the price](https://i0.wp.com/images.elightup.com/meta-box/blog/create-a-product-page/dynamic%20data%20car%20year.png)

For the rest, do the same.

To save time, I duplicate it. Then, change the name and value to get the right one.
 
![To save time, I duplicate it. Then, change the name and value to get the right one](https://i0.wp.com/images.elightup.com/meta-box/blog/create-a-product-page/the%20rest.png)

We’ve just finished getting all of the information about the product. Let’s see how it displays on the frontend.

## 4. Styling the page

Back to the page editor with **Zion**. Just change some parameters and settings in the **Styling** and **Advanced** tab of each block.
 
![Back to the page editor with Zion. Just change some parameters and settings in the Styling and Advanced tab of each block](https://i0.wp.com/images.elightup.com/meta-box/blog/create-a-product-page/styling%20and%20advanced.png)

Now, it’s better, but the gallery hasn’t yet. To style it, back to the view on **Meta Box** that we created.

To transfer the separate images to the gallery, I’ll use some **CSS** and **JavaScript** libraries. So in the **Template** tab, I declared them.

First, add this code:

```
<div class="car-gallery">
{% for item in post.gallery %}
	<img src="{{ item.full.url }}" width="{{ item.full.width }}" height="{{ item.full.height }}" alt="{{ item.full.alt }}">
```
 
![So in the Template tab, I declared them](https://i0.wp.com/images.elightup.com/meta-box/blog/create-a-product-page/code%20in-template%20tab.png)

Then, move to the **CSS** tab to add some code.
 
![Then, move to the CSS tab to add some code](https://i0.wp.com/images.elightup.com/meta-box/blog/create-a-product-page/code%20in-css.png)

Next, go to the **JavaScript** tab to add some code. This will display the images as a carousel.

```
jQuery(document).ready(function ($) {
    $('.car-gallery').slick({
        infinite: true,
        arrows: true,
        slidesToShow: 1,
        slidesToScroll: 1,
        dots: true,
    });
});
```
 
![Next, go to the JavaScript tab to add some code. This will display the images as a carousel](https://i0.wp.com/images.elightup.com/meta-box/blog/create-a-product-page/code%20in-java.png)

In there:

`$('.car-gallery').slick({ `:  is to select the element with car-gallery

```
infinite: true,
arrows: true,
slidesToShow: 1,
slidesToScroll: 1,
dots: true,
```          

These are some attributes as the slider features, such as infinite looping; left and right navigation arrows; and others.

That’s done. Let’s see the page on the frontend. The slideshow works well.
 
![That’s done. Let’s see the page on the frontend. The slideshow works well](https://i0.wp.com/images.elightup.com/meta-box/blog/create-a-product-page/filter-demo.gif)

# Creating a product page - without builders

I’ll create a detailed page about car rental as an example for a product page. It’s a singular page of a custom post type.

![Example of a product page](https://imgur.elightup.com/dRktwaD.png)

## Preparation

Product is a kind of custom post type. In this case, each car for rental will be a post in that post type. Besides the default information such as title and content of the post, a product may have some extra information. E.g. Each car will have some information such as price, image gallery, type of fuel, etc. So, we use custom fields to save that information.

We need to install the following tools:

* **[Meta Box](https://metabox.io)**: to have a framework to create a custom post type and custom fields for the product. It’s free and available on [wordpress.org](https://wordpress.org/).
* **[MB Builder](https://metabox.io/plugins/meta-box-builder/)**: to have an UI in the back-end to create custom fields for the product.
* **[MB Custom Post Type](https://metabox.io/plugins/custom-post-type/)**: to create a custom post type for the product.

## 1. Creating a new custom post type

In the admin dashboard, go to **Meta Box > Post Types > New post type**.

![In the admin dashboard go to New post type](https://imgur.elightup.com/ULeXtVp.png)

After publishing, we’ll have a new menu named **Car Rentals** in the Admin Menu.

![A new nemu appears in the Menu](https://imgur.elightup.com/CNMPsat.png)

## 2. Creating custom fields

Go to **Meta Box > Custom Fields** to create fields. Here is the fields that I created:

![Create custom fields](https://imgur.elightup.com/RIwOiKG.png)

After creating all the fields, move to the Settings tab. Set the Location as Post Type, and select your product’s post type to apply these fields to it.

![Set location for the fields as post type](https://imgur.elightup.com/hEMfKpf.png)

Back to the post editor, the custom fields will be there.

![The custom fields in the post editor](https://imgur.elightup.com/8zhAekK.gif)

## 3. Displaying the product information on the page

First, create a file named single `[$custom_post_type_slug].php` and put it into your theme’s folder. For car rental, the file will be `single-car-rental.php`. This file means that your website will display all the posts which have the post type `car-rental`.

Open that file, and get value from each custom field with the code below:

### Getting the value of the text, number, or select fields:

To get value from these types of field, use this function:

```
$value = rwmb_meta( $field_id );
echo $value;
```

The `$field_id` is the ID of the custom field in which we want to get value.

E.g. To get the value of the price field:

```php
<?php
$price = rwmb_meta( 'price' );
echo $price;
?>
```
### Getting value of image advanced fields:

We’ll use this function:

```php
$images = rwmb_meta( $field_id, array( 'size' => 'thumbnail' ) );
foreach ( $images as $image ) {
    echo '<a href="'.$image['full_url'].'"><img src="'.$image['url'].'"></a>';
}
```
Here:

* `$field_id`: ID of the custom field which you use to upload product images;
* `array( 'size' => 'thumbnail' )`: is an array of parameters to stipulate how the value will display.

In this case, we will get the image from the Gallery field like this:
```php
<?php
$gallery = rwmb_meta( 'car_gallery', array( 'size' => 'thumbnail', 'limit' => 5 ) );
foreach ( $gallery as $img ) {
    echo '<a href="'. $img['full_url']. '"><img src=" '.$img['url']. '"></a>';
}
?>
```
After adding all the code, you can also add some CSS code then will see the product page display like this:

Final result:

![Final result after all steps](https://imgur.elightup.com/dRktwaD.png)

You can refer to the total code including css and js  in this [Git link](https://github.com/wpmetabox/tutorials/blob/master/create-a-product-page-without-builders/single-car-rental.php).

# Creating a product page - Meta Box + Gutenberg

import LiteYouTubeEmbed from 'react-lite-youtube-embed';
import 'react-lite-youtube-embed/dist/LiteYouTubeEmbed.css';


If you are using a theme without any page builders or just using Gutenberg, you can create a product page using MB Views.

I’ll take a car rental page for example:

![Example of a product page](https://imgur.elightup.com/tVV72cn.png)

## Video version

<LiteYouTubeEmbed id='DnKcWGkyhEQ' />

## Preparation

The product is a kind of custom post type. In this case, each car for rental will be a post of that post type. The product’s name and its descriptions are the title and content of the post. We’ll need custom fields to save some extra information about the cars, such as price, image gallery, type of fuel, etc.

![The product is a kind of custom post type](https://imgur.elightup.com/yv2kOpa.png)

For this practice, we need these tools:

* [Meta Box](https://metabox.io): provides a framework to create custom post type and custom fields;
* [MB Custom Post Type](https://metabox.io/plugins/custom-post-type/): to create custom post types for the product;
* [MB Builder](https://metabox.io/plugins/meta-box-builder/): to have a UI on the back end to create custom fields to save extra information of the product;
* [MB Views](https://metabox.io/plugins/mb-views/): to create a template for the product page without touching the theme file.

## 1. Creating a new custom post type

Go to **Meta Box > Post Types > New Post Type**.

![Create a new custom post type](https://imgur.elightup.com/uQhCt4b.png)

Then, enter information and configure the post type.

## 2. Creating custom fields

Go to **Meta Box > Custom Fields**, then create fields as you want.

![Create custom fields](https://imgur.elightup.com/7DGGaUi.png)

In this tutotial, I just take a typical example of car rental with some common fields. Here are the fields that I created.

![The created fields](https://imgur.elightup.com/jRCpmfY.png)

Next, move to the **Settings** tab > **Location** > choose **Post Type** as **Car Rental** to apply these fields to this post type.

![Set Location for the Post type](https://imgur.elightup.com/zXyF1Bu.png)

In the post editor, you will see all of the newly created custom fields.

![Newly created custom fields show in the post editor](https://imgur.elightup.com/mIGtsRv.png)

## 3. Creating a template for the page

To display the product’s details, you normally have to go to the theme’s files to add code or use a page builder. However, you have another way with the **MB Views** extension to create templates for the product page.

Go to **Meta Box > Views** to create a new template. Instead of typing code into the box in the **Template** tab, you can insert fields to get their data.

![Create a Template and insert fields to get data](https://imgur.elightup.com/8TrA6p9.png)

Just click the **Insert Field** button and choose which one you want.

First, get the image gallery of the product, so insert the **Gallery** field and choose an image size for it.

![To create a slider with many product images, insert Gallery field and choose an image size](https://imgur.elightup.com/qiuJz3y.png)

Next, insert the product name and its description. They are the default fields of WordPress.

![insert the product name and description](https://imgur.elightup.com/FP1ofx4.png)

For the fuel, door, and gearbox information, because they are **Select** fields, you’ll have a setting where you can choose the output of the options as **Value** or **Label**.

![For Select fields, choose the output of options](https://imgur.elightup.com/AA92obr.png)

Moving on, I’ll insert the remaining fields in turn.

![Insert the remaining fields](https://imgur.elightup.com/KWEMpxQ.png)

In the **Settings** section of the view, set the **Type** section as **Singular** to assign this template to a single post page. Then, add a rule in the **Location** section to apply it to the Car Rental page only.

![In the Settings section of the view, set the Type section as Singular and add rule in the Location section](https://imgur.elightup.com/o277okt.png)

On the product page, all the product information is already displayed.

![All the product information is displayed in the product page](https://imgur.elightup.com/SrnDUqe.png)

## 4. Styling the page

Before styling, let’s add some **div** tags to separate the page into different sections for easier styling.

![To style easier, add some div tags](https://imgur.elightup.com/DMVE3Bp.png)

Next, go to the **CSS** tab, add some code.

![Go to the CSS tab, add some code](https://imgur.elightup.com/TapZkUJ.png)

I also added some code in the **JavaScript** tab. This is to create a slider for the gallery.

![Go to the JavaScript tab, add some code](https://imgur.elightup.com/a5wBuDh.png)

All of these codes are available on [Github](https://github.com/wpmetabox/tutorials/tree/master/create-a-product-page-with-MB-Views), you can refer to it.

Now, you’ll see the final look of the page on the frontend. That’s done!

![The created product page in the frontend](https://imgur.elightup.com/tVV72cn.png)

# Creating a reading progress bar in WordPress posts - Using MB Views

import LiteYouTubeEmbed from 'react-lite-youtube-embed';
import 'react-lite-youtube-embed/dist/LiteYouTubeEmbed.css';

Today, I’ll use the **MB Views** extension from Meta Box in a real case to **create a simple reading progress bar** in WordPress posts.

## Introducing about the MB Views

MB Views is a powerful tool that helps to create and customize templates. Even though it's all based on code, it is more optimal than using PHP. You can see that clearer in several tutorials that we made before on [our channel](https://www.youtube.com/playlist?list=PLIWLX0sDr8lSUGVubfRMsG6fSN42Lp1bY). You can also see in those tutorials that it is usually **used to get and display data from custom fields created with Meta Box**. But that’s not all the things it can do.

You can also **customize all templates in WordPress with MB Views**, even for post types that don't have Meta Box fields.

This practice will make it clearer.

## Video version

<LiteYouTubeEmbed id='dDwcRLiBUcA'/>

## The reading progress bar

The simple reading progress bar will be shown at the top of the singular page of each blog post, like this:

![A simple reading progress bar is at the top of the singular page of each blog post](https://imgur.elightup.com/tyIxuN7.gif)

This bar will work as an indicator, letting the visitors know how much they have read and how much is left after all. Then, it may help to improve the user experience.

## Preparation

Let’s find out which tools we need for this practice:

* [Meta Box plugin](https://wordpress.org/plugins/meta-box/): to have a framework to use **MB Views** for creating templates. You can install it directly from [wordpress.org](https://wordpress.org/plugins/meta-box/).
* [MB Views](https://metabox.io/plugins/mb-views/): to create a template for the progress bar without touching the theme's files. You can install it individually or if you have the **Meta Box AIO**, this extension is already included there.

## 1. Displaying the reading progress bar

Go to **Meta Box** > **Views**, and create a new template.

![Go to Meta Box > Views, and create a new template.](https://imgur.elightup.com/2j37Z2B.png)

In the **Template** tab, I just add some **div** tags to specify the area to display the bar.

```css
<div id="reading-progress-frame">
    <div id="reading-progress-bar"></div>
</div>
```

![In the Template tab, just add some div tags to specify the area to display the bar.](https://imgur.elightup.com/bimLfjf.png)

**In there**:

* `reading-progress-frame`: This ID is used for the whole area that covers the reading progress bar when it is full.
* `reading-progress-bar`: This ID is used for the bar only.

You can name them whatever you want.

Next, go to the **CSS** tab of the view, I will use the CSS to display the progress bar.

```css
#reading-progress {
    position: fixed;
    width: 100%;
    height: 5px;
    z-index: 99999;
    top: 0;
    left: 0;
}

#reading-progress-fill {
    height: 3px;
    width: 100%;
}

#reading-progress-fill {
    background-color: #ff0000;
}
```

![Add code to the CSS tab](https://imgur.elightup.com/5nYMqCa.png)

Let’s go through it in more detail:

```css
#reading-progress {
    position: fixed;
    width: 100%;
    height: 5px;
    z-index: 99999;
    top: 0;
    left: 0;
}
```

These lines are to set an area to cover the progress bar.

In particular, these lines of code in this image help determine the position of the bar at the top of the page.

![Some code to help determine the position of the bar at the top of the page.](https://imgur.elightup.com/vKiFsUM.png)

The code below is to specify the height and width of the progress bar.

```css
#reading-progress-fill {
    height: 3px;
    width: 100%;
}
```

Rather, the width should be based on the real percentage of reading progress. But I set it full width now just for positioning it in the initial.

![Set the bar full width for positioning it in the initial.](https://imgur.elightup.com/bCBRxIF.png)

For the color of the bar, I set the red color. You should change it to any color that matches your theme.

```css
background-color: #ff0000;
```

That’s all for the display.

Now, move to the **Settings** section of the view. To apply this template to the singular pages of the blog post, set the **Type** as **Singular**. Then, choose the post type.

![In the Settings section, set location to apply this template to the singular pages of the blog post](https://imgur.elightup.com/V53PUl8.png)

Normally, you can choose an option for the position, but, in this case, the progress bar is at the top of the page, and I’ve specified its position in the **CSS** section before. So, the template’s setting does not affect the bar position.

![Set the position for the template, it does not affect the bar position](https://imgur.elightup.com/tygI2n5.png)

Now, go to a post on frontend, you can see the progress bar that we created. It now is all red, no matter whether I scroll the mouse or not.

![Before using Javascript, the progress bar is all red no matter if I scroll the mouse or not.](https://imgur.elightup.com/3dWRNgd.gif)

To make it work following the scroll, let’s move to the next step.

## 2. Making the reading progress bar run

We should add action to the progress bar using JavaScript to trigger when the readers scroll the page as well as identify how much they did read.

But first, we should change the default width of the bar to be zero. It should start from zero, since the readers do so.

![Change the default width of the bar to be zero](https://imgur.elightup.com/z06relF.png)

Then, go to the **JavaScript** tab, add the following code.

```css
const readingProgress = document.querySelector('#reading-progress-fill');
document.addEventListener('scroll', function (e) {
    let w = (document.body.scrollTop || document.documentElement.scrollTop) / (document.documentElement.scrollHeight - document.documentElement.clientHeight) * 100;
    readingProgress.style.setProperty('width', w + '%');
});
```

![Add code to the JavaScript tab](https://imgur.elightup.com/6dZU5Dv.png)

**In there**:

```css
const readingProgress = document.querySelector('#reading-progress-fill');
```

This is to create a JavaScript object for the progress bar. `#reading-progress-fill` is the ID where we set the bar.

```css
document.addEventListener('scroll', function (e) {:
```

This is to trigger the event that readers scroll the page.

I set the`w` variable to calculate the percentage of the page that the reader scrolls. You should rename it.

The following formula will do that.

```css
(document.body.scrollTop || document.documentElement.scrollTop) / (document.documentElement.scrollHeight - document.documentElement.clientHeight) * 100:
```

* `document.body.scrollTop || document.documentElement.scrollTop`: the number of the distance in pixels from the top to the place where the reader is.
* `document.documentElement.scrollHeight`: the total height of the page where the readers can scroll, also in pixels.
* `- document.documentElement.clientHeight`: to eliminate the padding on the page.

All these elements in the formula are the HTML DOM elements. You can refer to [this link](https://www.w3schools.com/jsref/dom_obj_all.asp) to learn more about them.

Finally, the result will be converted to percentage.

![The result will be converted to percentage](https://imgur.elightup.com/kxyKy3w.png)

This line below will force the width of the progress bar to change following the result returned by the w variable.

```css
readingProgress.style.setProperty('width', w + '%');
```

That’s all.

After saving the template, go back to the page on frontend. Now, when we scroll down, the progress bar will appear, and gradually lengthen according to the amount of content read.

![The reading progress bar run after using Javascript](https://imgur.elightup.com/tyIxuN7.gif)

So we’ve already done it.

If you want to change the speed of change in the bar and make it more smoothly, you can add the code below:

```css
transition: width 300ms ease;
```

![Add code to change the speed of change in the bar and make it more smoothly](https://imgur.elightup.com/bOLQPg9.png)

Just change the number to get the effect that you expect.

# Creating reading time to WordPress posts

import LiteYouTubeEmbed from 'react-lite-youtube-embed';
import 'react-lite-youtube-embed/dist/LiteYouTubeEmbed.css';

Providing a number of reading time will help the visitor know in advance how much time it takes to finish reading the post. Let’s find out how to have this reading time number in each article on your WordPress blog. We’ll use the **MB Views** from **Meta Box**.

This is an example for a number of reading time that we will create in this practice.

![An example for a number of reading time](https://imgur.elightup.com/NrVqdKG.png)

## Video version

<LiteYouTubeEmbed id='UyfrImcc9Lo' />

## Why MB Views?

To have the reading time number on posts, we should **use some code**.

In the meantime, we cannot deny that using a plugin to **add code indirectly brings more advantages than doing it in the theme’s files.**

There are some plugins that can help to add code. But, if you have Meta Box on your site, **MB Views will be the best option to avoid installing too many plugins from diverse authors** on your site.

## Preparation

In this practice, we need some tools:
* [Meta Box core plugin](https://wordpress.org/plugins/meta-box/): to create custom fields.
* [MB Views](https://metabox.io/plugins/mb-views/): to create a template to display the reading time number.

## 1. Setting an area for displaying the time information

I will create a template to show the time information in the top section of the post. We should put the reading time on the top since it should be noticed before the visitor reads the post.

![The time information in the top section of the post](https://imgur.elightup.com/NrVqdKG.png)

Go to **Meta Box** > **Views**, and create a new template for setting the position to display timing information.

![Go to Views, and create a new template for displaying time position](https://imgur.elightup.com/LynEixS.png)

In the **Template** tab, add some lines of code like this:

```
<div class="reading-time">
    <span class="dashicons dashicons-clock"></span>
    <div class="time">
        <span id="time"></span>
    </div>
</div>
```

![In the Template tab, add some lines of code](https://imgur.elightup.com/mHPTNPP.png)

**Explanation:**

```
<span class="dashicons dashicons-clock"></span>
```

This line is to get the time icon. It’s just for decoration.

`id="time"`: is an ID I set for this area. It’ll be used to automatically display the time number after calculating using JavaScript later.

After getting all of the information of the time as you want, move to the **Settings** section of the view, set the **Type** as **Singular**, and choose the name of any post type that we set the author for in **Location**.

![Assign this template to the posts](https://imgur.elightup.com/7KxiOHn.png)

Pay heed that I choose the option which shown in below picture to set the reading time display right before the post content.

![Set the reading time display right before the post content](https://imgur.elightup.com/MIHsbNI.png)

Since I added only the icon into this template, there will be only the icon appearing from this template on the posts as well.

![The icon appearing from this template on the posts without the reading time number](https://imgur.elightup.com/eYULHIZ.png)

To have the reading time number, we need to create another view.

## 2. Calculating the reading time

I’m creating a new template to calculate the reading time based on the number of words in the post content.

Come back to **Meta Box** > **Views** and create a new view.

![Go to Meta Box > Views and create a new view](https://imgur.elightup.com/SN3NGUm.png)

We should use JavaScript, so move to the **JavaScript** tab and add code.

```
// Get the article text
const articleText = document.querySelector('.entry-content').innerText;
const time = document.getElementById('time');

// Split the text into an array of words
const wordsArray = articleText.split(' ');

// Count the number of words in the array
const wordCount = wordsArray.length;

// Calculate the estimated reading time
const wordsPerMinute = 200;
const readingTime = Math.ceil(wordCount / wordsPerMinute);

// Display the estimated reading time
time.innerHTML = `${readingTime} MIN`;
```

![Add some lines of code in JavaScript](https://imgur.elightup.com/0ldFOGd.png)

**In there:**

```
const articleText = document.querySelector('.entry-content').innerText;
```

This line of code is to get all the text from the post content.

I also create an object to connect with the ID that we created in the previous view for the reading time.

![An object to connect with the ID that we created for the reading time](https://imgur.elightup.com/rUxcQrn.png)

```
const wordsArray = articleText.split(' ');
```

This line is to put all the text from the post content to an array.

```
const wordCount = wordsArray.length;
```

This array is to count the words.

```
const wordsPerMinute = 200;
```

This line is to have the reading time, I stipulate a number of words that people usually read in a minute. You definitely can change this `200` number.

```
const readingTime = Math.ceil(wordCount / wordsPerMinute);
```

This line is the formula to calculate the minute.

```
time.innerHTML = `${readingTime} MIN`;
```

This line will help to pass the number that the formula figure out to the section where we set to display the number in the previous view.

![This is where we set to display the reading time number](https://imgur.elightup.com/BCubaqw.png)

`MIN` is just the text I added to display along with the number as the unit of time.

We’ve done it with JavaScript.

Now, move down to assign this view to the post where I did for the previous view.

Notice that we should choose the position as **‘After the post content’**. The reason is that this script has to get all the post content, so the post content must be loaded first, then the script. If the script runs first, it will get nothing because there is nothing from the post content loaded.

This also is the reason that I have two views to set the reading time: one for displaying area, one for calculating.

![Assign this view to the post](https://imgur.elightup.com/CH4q7Gl.png)

Now, go to a singular page, you will see the reading time displayed.

![Go to a singular page, the reading time displayed](https://imgur.elightup.com/E3pS9bX.png)

Go to another post, you also can see that the number has also changed. It means that each post will have its own number of reading time based on its number of words.

![Go to another post, the number has also changed](https://imgur.elightup.com/3OgVh87.png)

## 3. Styling the section for reading time

If you want to make the reading time display with a better look, go back to one of the views, and add some CSS.

![Add CSS to make the reading time display with a better look](https://imgur.elightup.com/J8GxkHo.png)

Back to the page on frontend, the new look has been done.

![This is final look of reading time section](https://imgur.elightup.com/NrVqdKG.png)

# Creating a recipe - Meta Box + Breakdance

import LiteYouTubeEmbed from 'react-lite-youtube-embed';
import 'react-lite-youtube-embed/dist/LiteYouTubeEmbed.css';

In today's practice, we're going to create a recipe page with Breakdance.

This is the singular page that I created as an example:

![Example of the created page](https://imgur.elightup.com/b2lJYVn.png)

## Video version

<LiteYouTubeEmbed id='ybqLQFFMu5c' />

## Preparation

In this case, the recipe page is the singular page of the Recipe post type. The recipe’s name and the dish's pictures are the title and featured image of the post. Besides, the remaining detailed information will be saved in custom fields. Each recipe is saved in a post of a custom post type and further information such as time, ingredients and so on will be saved in custom fields.

So, we need [Meta Box Lite](https://metabox.io/lite/) to create custom post type for the recipes and have UI for creating custom field right on the back end. It's free.

And, we use **Breakdance** to create the page.

## 1. Creating a new custom post type

We'll create a new post type for the recipe. You can refer to [this article](https://docs.metabox.io/tutorials/create-custom-post-types-taxonomies/) for more details.

Use quick action in the dashboard or go to **Meta Box** > **Post Types** > **Add New**.

![Create a new post type](https://imgur.elightup.com/ngEWCuU.png)

After publishing, you will see a new Recipes menu like this in the Admin Dashboard.

## 2. Creating custom fields

Go to **Meta Box** > **Custom Fields**. Here are the fields that I created:

![Create custom fields](https://imgur.elightup.com/9dC6gk0.png)

There is a special field that is one for video. Instead of using the **URL** field to save the video link, I use **oEmbed**. This field type allows us to display the video preview directly on the frontend.

![Use oEmbed field so that video will display on the frontend](https://imgur.elightup.com/NVj2YIs.png)

After creating all the fields, move to the Settings tabs, choose Location as Post Type and select Recipe to apply these fields to this custom post type.

![Set Location for the created custom fields](https://imgur.elightup.com/CqTqmfu.png)

Then, you can easily see all the created fields in the post editor. Just fill in data into them.

![Created fields in the post editor](https://imgur.elightup.com/1COAwYl.png)

## 3. Creating a template for the page

Go to **Breakdance** > **Add New** to create a new template for the single post page of the recipe.

![Create a template for the page](https://imgur.elightup.com/jDvuObS.png)

First, add a **Section** element.

![Add a Section element](https://imgur.elightup.com/pKq3HSB.png)

Since the name of the recipe is the title of the post, add a **Post Title** element.

![Add a post title element](https://imgur.elightup.com/A0dIWfB.png)

I’ll use some **Div** tags to divide content into sections and columns as you can see here.

![Add some Div tags to divide content into sections and columns](https://imgur.elightup.com/rpzhu6a.png)

Then, add the **Post Featured Image** element to display the picture.

![Add a Post Featured Image element to display the picture](https://imgur.elightup.com/HWqygXv.png)

The cooking time and others similar are in another column, so I also add another **Div** element. Adding a **Text** element inside, then insert dynamic data to it. Choose the **corresponding** field of the kind of time you want to display from the **Metabox** section.

![Add another Div element](https://imgur.elightup.com/L6misJ7.gif)

You’ll immediately see the number here. To know which kind of it, you can add a prepend or append text for the element.

![The number will be displayed](https://imgur.elightup.com/sk1T0V9.gif)

For others, duplicate the element, then change the connecting field as well as the append text.

Leave this first section with two columns, add a new **Div** element for the new section. Add a heading for it. For the content that saves in the corresponding custom field, add a Text element, then insert data from that field.

![Add a Text element](https://imgur.elightup.com/BI0adPM.png)

Do likewise with other sections or just **duplicate** this **Div** element. Also change the heading, and the connecting field of the Text element.

![Do likewise with other sections](https://imgur.elightup.com/YY999qW.png)

For the **Video** section, instead of using **Text** element, I’ll use **Video** element and connect it with the Video field. There is the preview because I set the custom field in the type of oEmbed. In the case you use any other field type, the URL may display in the kind of text instead of a video preview.

![The URL may display like this](https://imgur.elightup.com/nemx9PL.png)

We’ve done all the information about the recipe.

![All the information has been obtained](https://imgur.elightup.com/8N3nYdZ.png)

Still in the template editor, change the settings of each element to have as your desire. Just customize one by one.

![Style the Page](https://imgur.elightup.com/HF13yjr.png)

Then you will see the new look of the page.

![The final result](https://imgur.elightup.com/b2lJYVn.png)

# Creating a recipe - MB Views

import LiteYouTubeEmbed from 'react-lite-youtube-embed';
import 'react-lite-youtube-embed/dist/LiteYouTubeEmbed.css';

We’re going to **create a recipe** page using MB Views. This page is a singular page of a custom post type and includes information that is stored in custom fields created with Meta Box.

There is some information on the page like this:

![The recipe on a food blog](https://imgur.elightup.com/INT35XD.png)

And, we’re creating a page with another style for demo only.

## Video version

<LiteYouTubeEmbed id='pfX0QYllIb8' />

## Preparation

In this practice, you need to have have these extensions:

* [MB Custom Post Types & Custom Taxonomies](https://metabox.io/plugins/custom-post-type/): It helps to create a custom post type that we need for recipes;
* [MB Builder](https://metabox.io/plugins/meta-box-builder/): It has a UI for creating custom fields right on the back end.
* [MB Views](https://metabox.io/plugins/mb-views/): Build front-end templates for WordPress without touching theme files.

You can download them directly or use Meta Box AIO to have them all
I use [eStar](https://gretathemes.com/wordpress-themes/estar/) in this tutorial.

## 1. Creating a custom post type

Use the quick action in the dashboard or go to **Meta Box > Post Types > New Post Types**.

![Create the Recipe custom post type for posting recipes with Meta Box plugin.](https://imgur.elightup.com/GYpKmFA.png)

I created the Recipe post type with the following information:

![Create the post type](https://imgur.elightup.com/fBqG9cp.png)

## 2. Creating custom fields

Go to **Meta Box > Custom Fields > Add New**.

Here are the custom fields that I created:

![The custom fields for the recipe post type](https://imgur.elightup.com/eQqMYU2.png)

After finishing creating the fields, move to the **Settings** tab. In the **Location** section, select **Post Types** as **Recipe** to apply these fields to the post type.

![Choose the post type as recipe](https://imgur.elightup.com/57Ni4p8.png)

Back to the post editor, you will see all of the newly created custom fields.

![Newly created custom fields in the post editor](https://imgur.elightup.com/CW1s8Jk.png)

## 3. Displaying recipe information on frontend

I’m going to display the recipe information saved in custom fields into this section on the singular post page.

![Custom fields](https://imgur.elightup.com/Wp1BugZ.png)

There are two methods to get and display the custom fields’ value on the front end:

* **Method 1**: Add the code to the theme file.
* **Method 2**: Use **MB Views** extension.

### Method 1: Adding code to the theme file

I’ll use a hook of [eStar](https://gretathemes.com/wordpress-themes/estar/) theme which is `estar_entry_footer_before` to display custom fields’ value. Refer to this hook [here](https://gretathemes.com/docs/estar/#section-theme-hooks).

Just add the following code to the `functions.php` file of the theme:

```php
add_action( 'estar_entry_footer_before', 'estar_child_recipe' );
function estar_child_recipe() {
	if ( ! is_singular( 'recipe' ) ) {
		return;
	}
	$ingredients = rwmb_meta( 'ingredients' );
	$instructions = rwmb_meta( 'instructions' );
	$equipment = rwmb_meta( 'equipment' );
	$video = rwmb_meta( 'video' );
	$notes = rwmb_meta( 'note' );
	$nutrition = rwmb_meta( 'nutrition' );
	$prep_time = rwmb_meta( 'prep_time' );
	$cook_time = rwmb_meta( 'cook_time' );
	$resting_time = rwmb_meta( 'resting_time' );
	$total_time = rwmb_meta( 'total_time' );
	?>
	<div class="recipe-food__container">
		<h2 class="recipe-name">Recipe</h2>
		<div class="recipe-group recipe-times">
			<h3 class="recipe-header">
				<div class="recipe-line"></div>
			</h3>
			<div class="recipe-times__container">
				<div class="recipe-times__item">
					<span class="label">Prep Time</span>
					<span class="recipe-time"><?php echo $prep_time; ?></span>
				</div>
				<div class="recipe-times__item">
					<span class="label">Cook Time</span>
					<span class="recipe-time"><?php echo $cook_time; ?></span>
				</div>
				<div class="recipe-times__item">
					<span class="label">Resting Time</span>
					<span class="recipe-time"><?php echo $resting_time; ?></span>
				</div>
				<div class="recipe-times__item">
					<span class="label">Total Time</span>
					<span class="recipe-time"><?php echo $total_time; ?></span>
				</div>
			</div>
		</div>
		<div class="recipe-group recipe-equipment">
			<h3 class="recipe-header">
				Equipment
				<div class="recipe-line"></div>
			</h3>
			<?php echo do_shortcode( wpautop( $equipment ) ); ?>
		</div>
		<div class="recipe-group recipe-ingredients">
			<h3 class="recipe-header">
				Ingredients
				<div class="recipe-line"></div>
			</h3>
			<?php echo $ingredients; ?>
		</div>
		<div class="recipe-group recipe-instructions">
			<h3 class="recipe-header">
				Instructions
				<div class="recipe-line"></div>
			</h3>
			<?php echo $instructions; ?>
		</div>
		<div class="recipe-group recipe-video">
			<h3 class="recipe-header">
				Video
				<div class="recipe-line"></div>
			</h3>
			<?php echo wp_oembed_get( $video ); ?>
		</div>
		<div class="recipe-group recipe-notes">
			<h3 class="recipe-header">
				Notes
				<div class="recipe-line"></div>
			</h3>
			<?php echo $notes; ?>
		</div>
		<div class="recipe-group recipe-nutrition">
			<h3 class="recipe-header">
				Nutrition
				<div class="recipe-line"></div>
			</h3>
			<?php echo $nutrition; ?>
		</div>
	</div>
	<?php
}
```

**Explanation**:

* `'estar_child_recipe'` is the function name, you can set it on a whim.
* `'ingredients'` , `'instructions'` , `'equipment'` , `'video'` ,` 'note'` ,` 'nutrition'` , `'prep_time'` , `'cook_time'` , `'resting_time'`, `'total_time'` are the IDs of custom fields.
* `do_shortcode( wpautop(  ) )`: remove extra tags from custom field WYSIWYG
* `wp_oembed_get()`: Embeds the object by specified URL. Tries to get the HTML code from the passed URL by using supported WordPress oEmbed providers.

### Method 2: Using the MB Views extension

Go to **Meta Box > Views > Add New**.

![Add MB views](https://imgur.elightup.com/NAnJJ7P.png)

In the **Template** tab of the view, insert wanted fields to get the information by clicking the **Insert Field** button and choosing the corresponding fields from the list.

![Insert the wanted fields](https://imgur.elightup.com/0vPuqpf.gif)

![choose the corresponding fields from the list](https://imgur.elightup.com/t6TDfDz.png)

After getting all the wanted fields, we should add some div tag and class for easier styling in the next step.

![add some div tag](https://imgur.elightup.com/3VWd3TO.png)

I’ve uploaded all of these codes on [Github](https://github.com/wpmetabox/tutorials/blob/master/create-recipe-with-meta-box/template.php), you can refer to it.

Next, scroll down to see the **Settings** section of the view:

![Settings section of the view](https://imgur.elightup.com/eZYZtZn.png)

Set the **Type** of the template as **Singular**, then choose the **Location** as **Recipe** to apply this template to all the posts in the Recipe post type.

Now, whichever method you choose, you’ll get the result like this:

![Set loction for the custom fields](https://imgur.elightup.com/hHzqid1.jpg)

## 3. Styling the recipe page

Go to **Customizer > Additional CSS** and add the CSS code.

This is my example CSS:
```css
.recipe-food__container {
	border: 1px solid #E0E0E0;
	padding: 20px;
	background: #b0e4e4;
}
.recipe-food__container p {
	margin-bottom: 5px;
}
.recipe-group {
	margin-bottom: 30px;
}

.recipe-header {
	display: flex;
	flex-wrap: wrap;
	align-items: center;
	font-size: 1.2em;
	text-transform: uppercase;
	margin-bottom: 15px;
}
.recipe-line {
	flex: auto;
	height: 1px;
	border-bottom: 1px solid #e0e0e0;
	margin-left: 15px;
}
.recipe-times .recipe-line {
	margin-left: 0;
}
.recipe-times__container {
	display: flex;
	padding: 5px;
	margin: 5px 0;
}
.recipe-times__item {
	flex: 1;
	display: flex;
	flex-direction: column;
	text-align: center;
}
.recipe-times__item .label {
	text-transform: uppercase;
	opacity: 0.6;
}
```
Otherwise, if you use the method 2 in the previous step, which means you’re using the MB Views, you can go back to the Views to edit the template and insert the above CSS code to the view.

![Insert the CSS code](https://imgur.elightup.com/rS5NJ1Z.png)

Now my pizza recipe looks much more delicious and beautiful.

![The result](https://imgur.elightup.com/evpVQXw.jpg)

------

You may be interested in:
* [Creating a team members page](https://docs.metabox.io/tutorials/create-team-members-page-mb-views/)
* [Displaying images from cloneable fields](https://docs.metabox.io/tutorials/display-images-cloneable-fields-mb-views/)
* [Creating a product page](https://docs.metabox.io/tutorials/create-product-pages-mb-views/)

# Creating a recipe - Meta Box + Elementor

import LiteYouTubeEmbed from 'react-lite-youtube-embed';
import 'react-lite-youtube-embed/dist/LiteYouTubeEmbed.css';

We’re going to find out how to **create a recipe page** using a page builder - Elementor. This page is a singular page of a custom post type and includes information that is stored in custom fields created with Meta Box.

I made an example like this:

![example of creating a single page](https://imgur.elightup.com/WdagIRI.png)

## Video version

<LiteYouTubeEmbed id='YL3rRGN7Ovc' />

## Preparation

Besides the name and the images of the recipe which are the post title and featured image, we also have extra information about the recipe and how to cook. These information will be saved in different custom fields. So, we need to create custom post type and custom fields in this practice.

So, we need [Meta Box Lite](https://metabox.io/lite/) to have these extensions:

* **[MB Custom Post Types & Custom Taxonomies](https://metabox.io/plugins/custom-post-type/)**: to create a custom post type named Recipe;
* **[MB Builder](https://metabox.io/plugins/meta-box-builder/)**: to have an intuitive UI to create custom fields in the backend to save extra information;
* **[MB Elementor Integrator](https://metabox.io/plugins/mb-elementor-integrator/)**: to connect and display custom fields created by Meta Box plugin in the Elementor's dynamic tags.

Make sure you have **Elementor Pro** on your site.

## 1. Creating a new custom post type

We'll create a new post type for the recipe. You can refer to [this article](https://docs.metabox.io/tutorials/create-custom-post-types-taxonomies/) for more details.

Use quick action in the dashboard or go to **Meta Box** > **Post Types** > **Add New** to create a new post type.

![create new custom post type](https://imgur.elightup.com/68NYL42.png)

After publishing, we’ll have a menu named Recipe in the Admin Dashboard.

![new custom post type appears in the menu navigation](https://imgur.elightup.com/Vo0JaNr.png)

Let’s create custom fields in the next step.

## 2. Creating custom fields

Go to **Meta Box** > **Custom Fields** to create fields. This is the structure of the fields that I created:

Name |Field Type | Settings
--- | --- | ---
Prep Time / Cooking Time / Resting Time / Total Time | Text | -
Instructions | Group | Cloneable, Collapsible
| - Step Number | Text | -
| - Description | Text | -
Video | oEmbed | -
Ingredients / Notes / Nutrition / Equipment | WYSIWYG | -

Since there will be more than one step for the process of cooking, create a group for the instruction with two subfields as below. And, I also set this group to be cloneable to add more steps.

![set group to be clonable](https://imgur.elightup.com/lIwjwUR.png)

Then, there’ll be an **Add More** button to allow adding more steps.

![click Add More button to allow adding more steps](https://imgur.elightup.com/3YvMnW7.png)

In the event that there are too many steps in the recipe, you can set this group to be collapsible.

![set group to be collapsible](https://imgur.elightup.com/ZpCkLh4.png)

It’ll help avoid being messy.

![collapse the group to avoid being messy](https://imgur.elightup.com/95Y1L1g.png)

I also want to add a video and preview it immediately in the back end. So, I use the oEmbed field.

![use oEmbed field to display the preview of the video directly in the frontend](https://imgur.elightup.com/r8VkBu7.png)

After creating all the fields, move to the **Settings** tabs, choose **Location** as **Post Type** and select **Recipe** to apply these fields to it.

![set the location for the new custom post type](https://imgur.elightup.com/vK505N8.png)

Then, you can easily see all the created fields in the post editor. Just fill in the recipes' details.

![newly created custom fields](https://imgur.elightup.com/I1EZRLQ.gif)

## 3. Creating a skin

In this case, we have a cloneable group for the instruction information. If you get the data as usual, all of them will be displayed with the same style. But, I want the data from each field in that group to have its own style. So, I'll create a skin for them.

Go to **Templates > Theme Builder > MB Group Skin > Add New** to create a new skin.

![move to theme builder to add new skin](https://imgur.elightup.com/M9fgsws.png)

![add new skin in the MB Group Skin](https://imgur.elightup.com/1peivE2.png)

Remember to set the preview for the skin.

![click the Dynamic Tags button](https://imgur.elightup.com/MKUnM5B.png)

Then, add a **Heading** element for the step number of the recipe.

![add a Heading element for the step number of the recipe](https://imgur.elightup.com/tNW7MyY.png)

To get the step number saved in custom fields created by Meta Box, click the **Dynamic Tags** button in the settings of the **Heading** element > choose the **Meta Box Field** in the **Post** section.

![click the Dynamic Tags button](https://imgur.elightup.com/InZoOBG.png)

Then, choose the name of the field you want to get. Here, it’s **Step Number**.

![add the Text Editor element for the description](https://imgur.elightup.com/XrHGBg4.png)

For the description of the step, add the **Text Editor** element. Then, also use the **Dynamic Tags** button > **Meta Box Fields** in the **Post** section and choose the corresponding fields.

![add the Text Editor element for the description](https://imgur.elightup.com/7YWgCEs.png)

Now, both the step and step’s description have been obtained already. It’ll automatically get and display the information saved in the first group (means the 1st step) only for the preview. You can style these elements on your own.

![style the elements on your own](https://imgur.elightup.com/vl1YiRp.png)

## 4. Creating a template for the recipe page

Back to the **Theme Builder > Single Post** to create a new template for post.

![create a new template for the post](https://imgur.elightup.com/OXSGiFb.png)

Similar to the skin, remember to set the preview for this template.

To display the name of the recipe which is the title of the post, add the **Post Title** element.

![add the Post Title element to display the name of the recipe](https://imgur.elightup.com/IeLxmrp.png)

We’ll display the featured image of the recipe and the timing data in 2 columns as below:

![display the data as two columns](https://imgur.elightup.com/qzUXgds.png)

So, add the **Inner** section element which has the layout of two columns.

![add the Inner section](https://imgur.elightup.com/YpkjPIR.png)

For the first column, add the **Featured Image** element to get the featured image of the post.

![add the Featured Image element to get the featured image of the post](https://imgur.elightup.com/aAislzD.png)

For the timing data, add the **Text Editor** element. Since the timing data is saved in custom fields created by **Meta Box**, also use the **Dynamic Tags > Meta Box Field** then connect it to the corresponding field.

![add the Text Editor element for the timing data and connect it to the corresponding field](https://imgur.elightup.com/wHoYtaV.png)

![add the Text Editor element for the timing data and connect it to the corresponding field](https://imgur.elightup.com/Ukcm8cF.png)

To name the timing information, go to the Advanced section of the Text Editor element.

![name the timing information](https://imgur.elightup.com/VRSLUgv.png)

Since the content of the timing information is the same, just duplicate the previous element and then connect them to the correct field where you want to get the data.

To display the **Instruction** information, search for **MB Group** element and add it to the template.

![display the Instruction information](https://imgur.elightup.com/fJ4LTRe.png)

Then, there’ll be some data displayed in the preview. Then, set some settings in the left sidebar to the one you need for the instruction.

![data displayed in the preview](https://imgur.elightup.com/06n9S2x.png)

The **Object Type** of the template is set by default as **Post** and the **Group** section will automatically set as the created-lastest group. If it is not the group field you want, you can change them to the right one.

Then all the data will be displayed correctly, but there is no styling.

For styling, in the **Skin** section, choose the skin that you’ve created in the previous step. Then, it will turn to the new look with the style of the created skin.

![choose the created in the previous step for styling](https://imgur.elightup.com/dxIlRxU.png)

Since we use the **oEmbed** field to be able to save the links, use the **Shortcode** element to display the preview of the video. Then click the **Dynamic Tags** button > **Meta Box Field** and choose the Video field.

![use the Shortcode element to display the preview of the video](https://imgur.elightup.com/iZK1Tpr.png)

For other information such as Ingredients, Nutrition, Notes and so on, add a **Heading** element to name the section.

![add a Heading element to name the section for other information](https://imgur.elightup.com/qOKl0C7.png)

Then, add the **Text Editor** and connect it to the right field to get the data through the **Dynamic Tags** button.

![add the Text Editor and connect it to the corresponding field to get data](https://imgur.elightup.com/9I1WOpw.png)

Now, all the data of the recipe has been obtained.

![all the data is obtained](https://imgur.elightup.com/FpYzglN.gif)

Remember to set the condition for this template to apply it to the right singular page.

![set the condition for the template to apply to the right singular page](https://imgur.elightup.com/fkFpzlV.png)

If you want to style for the page, just do it on your own in the editor of both the skin and template.

I’ll style some elements a bit for example.

![style the template in the Elementor visual builder](https://imgur.elightup.com/Jt6MDsV.png)

Now, the recipe has a new look as below:

![the recipe appearance after styling](https://imgur.elightup.com/WdagIRI.png)

------

You may be interested in:
* [Displaying images from cloneable fields](https://docs.metabox.io/tutorials/display-images-from-cloneable-fields-meta-box-elementor/)
* [Displaying the latest products](https://docs.metabox.io/tutorials/display-latest-product-meta-box-elementor/)
* [Showing featured products](https://docs.metabox.io/tutorials/show-featured-products-meta-box-elementor-wp-grid-builder/)

# Creating a recipe - Meta Box + Oxygen

import LiteYouTubeEmbed from 'react-lite-youtube-embed';
import 'react-lite-youtube-embed/dist/LiteYouTubeEmbed.css';

We’ll use Oxygen to build a singular page and get the recipe information stored in the custom fields created with Meta Box.

![Example of a Recipe](https://imgur.elightup.com/SCek8XG.png)

## Video version

<LiteYouTubeEmbed id='HZLS8pe2nDk' />

## Preparation

All of the information about the recipe will be saved in posts of a **custom post type**. The recipe’s name and the dish picture are the title and the featured image of the post. Besides, the remaining detailed information will be saved in **custom fields**.

So, we need [Meta Box Lite](https://metabox.io/lite/) in this practice to create custom post type and have UI for creating custom field.

And, [Oxygen](https://oxygenbuilder.com/) to build the page. You should use the 3.9 version or higher which has the integration with Meta Box already.

## 1. Creating a custom post type

Use the quick action in the dashboard or go to **Meta Box > Post Types > Add New**.

![Create a Custom Post Type](https://imgur.elightup.com/68NYL42.png)

Then, enter information and configure the post type.

## 2. Creating custom fields

Move to **Meta Box > Custom Fields**, then create fields as you want.

![Create Custom Fields](https://imgur.elightup.com/hMEoDLf.png)

Here are the fields I use for this practice:

![Field group created](https://imgur.elightup.com/pWljhJt.png)

Pay attention to the video information. Normally, we use the **URL** field to save links, but if you use it, Oxygen will display the link in text format only. Then, we must take a few more steps to convert the link into the video preview.

However, Meta Box has the **oEmbed** fields that allow you to save the link and display it as the video preview on the frontend directly. So, we’ll use it for more convenience.

![Create oEmbed fields to save the link and display it as the video preview on the frontend](https://imgur.elightup.com/bjmwlGC.png)

Next, move to the **Settings** tab > **Location** > choose **Post Type** as **Recipes** to apply these fields to this post type.

![Set location for Recipe post type](https://imgur.elightup.com/hIBUV0X.png)

In the post editor, you will see all of the newly created custom fields.

![Newly created custom fields](https://imgur.elightup.com/f56IhBp.png)

## 3. Creating a template with Oxygen

Go to the **Oxygen** menu and create a new template.

In the settings of the template, select a design that you want the template to inherit from, then choose your post type in the **Singular** section to apply the template to it.

![Select the wanted design for the template to be inherited from.](https://imgur.elightup.com/v7yxRNu.png)

Now, go to edit any post, we can see the template is already rendered for this product page.

![ The template is rendered for this product page](https://imgur.elightup.com/DyNtTuL.png)

After filling in the information for the recipe, let’s edit the template with Oxygen.

First, select a **Section** component to cover all of the recipe information.

![Select a Section](https://imgur.elightup.com/Dx2dg0D.png)

To get the recipe’s name, which is the title of the post, add a **Heading** component. Then, connect it to the post title to get data.

![Add a Heading component and connect it to the post title to get data.](https://imgur.elightup.com/Fn0YwT4.gif)

In the first section, I’ll divide the content into two columns like this:

![Divide the content into 2 columns](https://imgur.elightup.com/Dm1ogHm.png)

So, add a **Column** component. Then, there’ll be two **div** tags available inside it, equivalent to two columns. In the first div tag, add the **Featured Image** component to get the dish’s image.

![Add an extra div inside as for the row](https://imgur.elightup.com/YZpgSjH.png)

Move to the second column, which covers all the information about the completed time. I’ll add an extra div inside it. This div is for a row.

![Add a Text component, and connect it to the field that saves the corresponding time information](https://imgur.elightup.com/c6uJEsA.png)

Inside this div, add a Text component and connect it to the field that saves the corresponding time information. Then, choose the Heading component and name it. Finally, style the row in your own way.

![Duplicate the div and change the name and fields](https://imgur.elightup.com/XGYqe77.png)

Then, you can duplicate the div that is used for the first row to have more rows. Then, change the names and fields.

![Duplicate the div](https://imgur.elightup.com/kwRlvQn.png)

For the rest section, we create another **div** in the **Section** component. Inside this div, choose the **Heading** component and name it, e.g. Ingredients. Also, add the **Text** component, then connect it to the corresponding field which saves the information about the ingredients, instructions, note, nutrition, equipment.

![Create another div in the section](https://imgur.elightup.com/D1099pU.png)

For the video information, there is a difference. Replace the **Text** component by the **Video**.

To display that data, I'll add a **Video** component. Then, just change the link by inserting the dynamic data from the **oEmbed** field that we use to save the video’s link.

![Add a Video component to display data](https://imgur.elightup.com/kwRlvQn.png)

We’ve finished getting all of the recipe information. On the frontend, you see that all of them are already displayed.

![Back to the frontend, everything is well displayed](https://imgur.elightup.com/HXaAJjv.png)

## 4. Styling the page

Back to the page editor with Oxygen, choose each component and change the settings to style them.

I’ll style the time section for example. This section has 4 row and they should be have the same style, so I’ll use a class for 4 rows. Style a row, then these 4 rows will change the style at once.

![Style the page](https://imgur.elightup.com/5S1rCSw.png)

Go to the recipe page, and you’ll see the new look.

![Back to the frontend, everything is well displayed](https://imgur.elightup.com/SCek8XG.png)

------

You may be interested in:
* [Creating a product page](https://docs.metabox.io/tutorials/create-product-page-meta-box-oxygen/)
* [Creating a team members page](https://docs.metabox.io/tutorials/create-team-members-page-meta-box-oxygen/)
* [Creating a video gallery page](https://docs.metabox.io/tutorials/create-video-gallery-page-meta-box-oxygen/)

# Creating a recipe - Meta Box + Divi

import LiteYouTubeEmbed from 'react-lite-youtube-embed';
import 'react-lite-youtube-embed/dist/LiteYouTubeEmbed.css';

Have you tried MB Divi Integrator? Continuing the [Create a Recipe page](https://metabox.io/series/recipe/) series, today we will figure out the way to create an impressive, eye-catching recipe using **Meta Box** and **Divi Builder** with the help of their integration.

I created a singular page containing the recipe information as an example:

![a singular page containing the recipe information as an example](https://imgur.elightup.com/c0SlVLx.png)

## Video version

<LiteYouTubeEmbed id='jQPYJCTlO1M' />

## Preparation

Each recipe will be saved in a post of a custom post type. The recipe's name and dish picture are the post's title and featured image. Besides, you may want to have more space for the extra information. They will be saved in custom fields and separated into different sections for easier styling and managing.

We just need [Meta Box Lite](https://metabox.io/lite/) to have all the feature I mentioned:

You also should have **Divi Builder** to build the page.

## 1. Creating a custom post type

Click on the **Create a post type** button in the dashboard or go to **Meta Box** > **Post Types** > **Add New** to create a new one for the recipes.

![Go to Meta Box, Post Types, Add New to create a new one for the recipes](https://imgur.elightup.com/68NYL42.png)

After publishing, you will see a new menu displayed. It's your post type.

![created post type displayed as a menu in admin dashboard](https://imgur.elightup.com/yeD7EOm.png)

## 2. Creating custom fields

Go to **Meta Box** > **Custom Fields** to create fields to save the recipe information you want.

![Go to Meta Box, Custom Fields to create fields to save the recipe information you want](https://imgur.elightup.com/vvSlGCJ.png)

These are the fields that I created:

![some fields were created as example](https://imgur.elightup.com/agCdHxk.png)

There is a field for video that is quite special. If you want to display the video preview on the frontend, I highly recommend you use the **oEmbed** field for the video instead of the URL field.

![to display the video preview on the frontend, use the oEmbed field for the video instead of the URL field](https://imgur.elightup.com/w4YDjco.png)

Before publishing, move to the **Settings** tab, set the **Location** as **Post Type**, and select **Recipe** to apply these fields to it.

![move to the Settings tab, set the Location as Post Type, and select Recipe to apply these fields to it](https://imgur.elightup.com/Q1Pmm24.png)

Then, in the post editor of the **Recipe** post type, you will see created custom fields.

![created fields in post editor of the Recipe post type](https://imgur.elightup.com/9ZSKr39.png)

Just input data.

## 3. Creating template for the page

To display each recipe on each page, we should create a template for their singular page.

Go to **Divi** > **Theme Builder** to create a new template.

![Go to Divi, Theme Builder to create a new template for the singular page of each recipe](https://imgur.elightup.com/b6RmIZD.png)

To apply this template for recipes, choose **All Recipes** in the **Template Settings** popup.

![choose All Recipes in the Template Settings popup to apply this template for recipes](https://imgur.elightup.com/Jh6LUqb.png)

Add a row for the first line on the page.

![Add a row for the first line on the page](https://imgur.elightup.com/5tkXUTa.png)

It’s the post title, so search the **Post Title** module.

![It’s the post title, so search the Post Title module](https://imgur.elightup.com/9XjmUzy.png)

For this first section, add a new row. You can choose any layout as you want for this section.

![For this first section, add a new row and choose any layout as you want for this section](https://imgur.elightup.com/qSZZ74k.png)

In the first column, add the **Image** module.

![In the first column, add the Image module](https://imgur.elightup.com/yQJ7wf9.png)

Then click on the **Dynamic Content** icon button.

![click on the Dynamic Content icon button](https://imgur.elightup.com/0aK0Vw2.png)

And choose the **Featured Image** from the dropdown list.

![choose the Featured Image from the dropdown list](https://imgur.elightup.com/8S48T8R.png)

![the image will display like this](https://imgur.elightup.com/3Q7ng4z.png)

Move to the second column, I will display the timing information.

They’re all text, so add the **Text** module.

![add the Text module for the timing information](https://imgur.elightup.com/zUeSoqe.png)

We also use the **Dynamic Content** icon button to get data from custom fields.

![also use the Dynamic Content icon button to get data from custom fields](https://imgur.elightup.com/45peVY7.png)

Since the information is saved in custom fields from Meta Box, find the **Meta Box: Recipe Information** section, and select the custom field you want.

![Since the information is saved in custom fields from Meta Box, find the Meta Box: Recipe Information section, and select the custom field you want](https://imgur.elightup.com/zpYeM2S.png)

You can add the **After text** to have a clearer name the information on the page.

![You can add the After text to have a clearer name the information on the page](https://imgur.elightup.com/heDdmzN.png)

The next three information also are the timing ones, and may have the same style with the first one. So duplicate the **Text** module.

![duplicate the Text module for the next three information](https://imgur.elightup.com/ZSWAom5.png)

Then use the dynamic content feature to change and get data from the corresponding field.

![use the dynamic content feature to change and get data from the corresponding field](https://imgur.elightup.com/sPrNQWb.png)

Also rename the after text.

![rename the after text](https://imgur.elightup.com/MWFFEvJ.png)

![The timing information was gotton](https://imgur.elightup.com/KNftdll.png)

Add a new **Row** for the next section.

![Add a new Row for the next section](https://imgur.elightup.com/n1pxPu6.png)

Choose the **Text** module for the name of the section.

![hoose the Text module for the name of the section](https://imgur.elightup.com/07vlGhX.png)

The ingredients information in this section is saved in a custom field created with Meta Box. But it’s not normal text. It may include some format since the WYSIWYG field. So, instead of using the Text module from Divi as previously, we should use the **Meta Box Field** module.

![we should use the Meta Box Field module to get the data from the WYSIWYG field instead of using the Text module from Divi as previously](https://imgur.elightup.com/xoTi5fJ.png)

This is the module built by the Meta Box team that has more advantages and more optimality, especially it can display the text in the right format as you save in the custom field.

Just set the location for this module as the field you want.

![Click on the location to set location for the module](https://imgur.elightup.com/9doKiUg.png)

![choose the field in the dropdown list](https://imgur.elightup.com/isBEN93.png)

The data will display on the frontend later.

For the next type of information, we also add a couple of modules, one for the title, and one for the data.

The **Text** module for the name of section.

![add a Text module for the name of instructions section](https://imgur.elightup.com/Z6KHHbn.png)

However, the instructions section may include information which are set in steps. I saved them in a cloneable group, so instead of adding a Meta Box Field module, we should add a layout for this group first.

Go to **Divi** > **Divi Library** > **Add New** to create a new layout.

![Go to Divi, Divi Library, Add New to create a new layout for the group](https://imgur.elightup.com/nCapnD8.png)

Set the **Layout Type** as **Section**.

![Set the Layout Type as Section](https://imgur.elightup.com/oNWPoQc.png)

Inside the layout, add the **Meta Box Field** module.

![Inside the layout, add the Meta Box Field module](https://imgur.elightup.com/jI1E72q.png)

And set its location as a subfield of the group to get data from it.

![set its location as a subfield of the group to get data from it](https://imgur.elightup.com/JqsEh3f.png)

![since we have 2 subfields in the group, we need to use 2 Meta Box Field modules](https://imgur.elightup.com/9lEKPpm.png)

Now, back to the page template editor, and add the **Meta Box Cloneable** module.

![back to the page template editor, and add the Meta Box Cloneable module](https://imgur.elightup.com/Pf6yYCB.png)

Set its layout as the one we have just created.

![Set its layout as the one we have just created](https://imgur.elightup.com/rsFdNXT.png)

Also set the **Cloneable Field** as the group.

![set the Cloneable Field as the group](https://imgur.elightup.com/RJIjuEy.png)

All the information of each step will be listed on the page when you go to the page on front end.

For the next, add the **Text** module for the title as well.

![For the next, add the Text module for the title](https://imgur.elightup.com/FNl8LAN.png)

For the data from custom fields, if it’s not a cloneable one, we highly recommend using the **Meta Box Field** module. No matter which kind of data you want to get, even with the video URL, just use this module.

![we highly recommend using the Meta Box Field module because it can get every kind of data even with the video URL](https://imgur.elightup.com/wLrB4cZ.png)

![Every information is gotton](https://imgur.elightup.com/wM8L5in.png)

After getting all of the information, view the page on the frontend, all the information is displayed, and their format is also as they are in the custom fields.

![on the frontend, all the information is displayed with the right format](https://imgur.elightup.com/9676znI.gif)

Let’s move one to make them display better.

## 4. Styling the page

Back to the page template editor, just choose each module to change their settings, one by one.

![To style the page, back to the page template editor, choose each module to change their settings, one by one](https://imgur.elightup.com/eNA21da.png)

I just changed some things basically.

And this is the final look of the page.

![the final look of the page](https://imgur.elightup.com/kHP5gS7.gif)

You definitely can change the template’s layout to have a more efficient display since all the information is now from custom fields, so you can rearrange or set places for them very easily.

# Creating a recipe - Meta Box + Kadence

import LiteYouTubeEmbed from 'react-lite-youtube-embed';
import 'react-lite-youtube-embed/dist/LiteYouTubeEmbed.css';

In this practice, we’ll use **Kadence** to build a singular page and get the recipe information stored in the custom fields created with **Meta Box**.

This is the page for showing a recipe that I created as an example:

![This is the page for showing a recipe](https://imgur.elightup.com/UCn1kj5.png)

## Video version

<LiteYouTubeEmbed id='XqKC7zo272k' />

## Preparation

This page is a single page that contains all the recipe information such as time, ingredients and so on, that will be saved in custom fields. Each recipe is saved in a post of a custom post type. So, we need these tools:

* [**Meta Box Lite**](https://metabox.io/lite/): to create custom post type and have UI on the back end gor creating custom fields.
* **Kadence**: to create the page.

## 1. Creating a new custom post type

Click on the quich action on the dashboard or go to **Meta Box > Post Types > Add New**.

![Go to Meta Box and create new post type](https://imgur.elightup.com/68NYL42.png)

After publishing, you will see a new menu displayed. It's your post type.

![A new menu displayed in new post type](https://imgur.elightup.com/BdFBS36.png)

## 2. Creating custom fields

Go to **Meta Box > Custom Fields** to create fields. These are the fields that I created:

![Go to Meta Box to create fields](https://imgur.elightup.com/NdFqZhM.png)

There is a special field for the video. Instead of using the URL field, I recommend you use the **oEmbed**. We can display the video preview right on the front end thanks to this field type.

![Using oEmbed to display the video preview right on the front end](https://imgur.elightup.com/smXqMg8.png)

After creating all the fields, move to the **Settings** tabs, choose **Location** as **Post Type** and select **Recipe** to apply these fields to this post type.

![Go to Settings, choose Location as Post Type and select Recipe to apply these fields to this post type](https://imgur.elightup.com/bvRQksS.png)

When creating a new post in Recipes, you’ll see all the created custom fields.

![All the created custom fields displayed on the post editor](https://imgur.elightup.com/JLYUTHX.png)

Just fill in some information.

## 3. Creating a template for the page

Go to **Appearance > Kadence > Elements > Add New** to create a template for the recipe page.

![Create a template with Kadence for the recipe page.](https://imgur.elightup.com/90DlAxg.png)

### 3.1. Settings for the template

Choose the element type as **Template**.

![Choose the element type as Template](https://imgur.elightup.com/mR6QFVp.png)

Set a **preview** for easy following.

![Set a preview for easy following.](https://imgur.elightup.com/q7knq81.png)

In the **Placement** section, choose **Replace Single Post Content** and choose to assign the template to the single page of the **Recipes** post type.

![In the Placement section, choose Replace Single Post Content to apply this template for the single page of the Recipe post type](https://imgur.elightup.com/1vkPfK6.png)

### 3.2. Displaying recipe information

For the recipe name information, add a **Heading** block.

![For the recipe name information, add a Heading block.](https://imgur.elightup.com/Hj5lnYy.png)

Then, add **Dynamic data** from the **Post Title** to display the recipe name.

![Add data from the Post Title to display the recipe name.](https://imgur.elightup.com/RLcRTDy.png)

I have two sections for the recipe information.

For this first section, there are 2 columns to show the image and the time information like this.

![Show the image and the time information](https://imgur.elightup.com/OVXWIwl.png)

So, add a **Row Layout** block and choose the layout you want.

![Add a Row Layout block and choose the layout you want for the image and timing information.](https://imgur.elightup.com/Rq02Ila.png)

In the first column, add an **Advanced Image** block to display the dish image.

![Add an Advanced Image block to display the dish image.](https://imgur.elightup.com/nQLZcud.png)

Turn on **Enable Dynamic Image** setting for the block to get images from custom fields. And, choose the **Featured Image** from the dropdown list.

![Turn on Enable Dynamic Image setting and choose the Featured Image](https://imgur.elightup.com/Xx2SWW4.gif)

Move to the second column to add the timing information.

![Add the timing information](https://imgur.elightup.com/CdE3H1X.png)

Each couple of lines like these will be a group. So, add a **Group** block for the first one.

![Add a Group block](https://imgur.elightup.com/mNHwQhy.png)

Inside the **Group**, add a **Paragraph** block to show the time information.

![add a Paragraph block to show the time information.](https://imgur.elightup.com/9mD8Tnq.png)

The timing information is saved in custom fields, so add **dynamic data** to the block as well, and choose the **corresponding field** to get the right data.

![add dynamic data to the block](https://imgur.elightup.com/TmlyFAJ.gif)

The next 3 groups are the same as the timing group, we just change the text and field of the element. Then, you will get the right ones.

![Change the text and field of the element](https://imgur.elightup.com/0IiDJcX.gif)

In the next section, just add a **Section** block to cover each one.

![Add a Section block to cover each one](https://imgur.elightup.com/TFvwOix.png)

Add a **Heading** inside it and type the name of the next information.

![Add a Heading inside it and type the name of the next information](https://imgur.elightup.com/4WrL2ke.png)

After that, insert a **Paragraph**. Click on the** Dynamic** button, choose **Post Custom Field**, and select the wanted field from the list.

![Click on the Dynamic button, choose Post Custom Field](https://imgur.elightup.com/u8I83rh.gif)

All the sections are quite the same, so just clone the created section, change the heading, and change the field as well. The information will be obtained and displayed correctly step by step.

But there is a difference in the Video section. Because the video is saved as an URL in a custom field as **oEmbed**, we should replace the **Paragraph** block with a different one.

To display the video preview from the URL, simply use the **Dynamic HTML** block.

![To display the video preview from the URL, simply use the Dynamic HTML block.](https://imgur.elightup.com/Nc3C9uJ.png)

Go to the **HTML Content** setting, choose **Post Custom Field**, and choose the name of the field that you saved the video.

![Go to the HTML Content setting, choose Post Custom Field, and choose the name of the field that you saved the video](https://imgur.elightup.com/cVmx4Bd.gif)

We’ve done getting all the information about the recipe.

![We’ve done getting all the information about the recipe](https://imgur.elightup.com/3ZNYOPp.jpg)

## 4. Styling the page

For styling, go back to the page editor with **Kadence**. Then, choose each component and change the settings to style them. Or in the case you want to use some CSS, just add classes for them then add **CSS code**.

![Edit page with Kadence by add CSS code.](https://imgur.elightup.com/RsiJhKv.png)

This is how my page in the final look.

![This is final look of a recipe page which also is a singular page](https://imgur.elightup.com/UCn1kj5.png)

# Creating a recipe - Meta Box + Bricks

import LiteYouTubeEmbed from 'react-lite-youtube-embed';
import 'react-lite-youtube-embed/dist/LiteYouTubeEmbed.css';

We’re going to **create a recipe page** using **Meta Box** and **Bricks**. This page is a singular page of a custom post type and includes information that is stored in custom fields created with Meta Box.

The image below is a specific example.

![Example of a recipe](https://imgur.elightup.com/JI0CuA9.jpg)

## Video version

<LiteYouTubeEmbed id='ev24jQJTgCY' />

## Preparation

In this case, the recipe page is the singular page of the Recipe post type. The recipe’s name and the dish's pictures are the title and featured image of the post. Besides, the remaining detailed information will be saved in custom fields.

We need [Meta Box Lite](https://metabox.io/lite/) to create custom post type for the recipes and have UI for creating custom field right on the back end. It's free.

And, we use [Bricks](https://bricksbuilder.io/) to build the page.

## 1. Creating a new custom post type

We'll create a new post type for the recipe. You can refer to [this article](https://docs.metabox.io/tutorials/create-custom-post-types-taxonomies/) for more details.

![Create a new custom post type for the recipe](https://imgur.elightup.com/8iPsfQD.png)

After publishing the post type, you’ll see a new menu.

![New post type showed in the menu dashboard](https://imgur.elightup.com/fBqG9cp.png)

## 2. Creating custom fields

Click on the **Create a field group** button in the dashboard or go to **Custom Fields** submenu to create a new one.

Here are the custom fields that I created:

![Created custom fields to save the recipe information](https://imgur.elightup.com/eQqMYU2.png)

Pay attention to the **Video** field. Instead of using the **URL** field to save the video link, I use **oEmbed**. This field type allows us to display the video frame directly on the front end.

After finishing creating the fields, move to the **Settings** tab. In the **Location** section, select **Post Types** as **Recipe** to apply these fields to the post type.

![Set Location for the custom fields in order to apply them to the Recipe post type](https://imgur.elightup.com/57Ni4p8.png)

Back to the post editor, you will see all the created custom fields.

![Newly created custom fields showed in the post editor](https://imgur.elightup.com/CW1s8Jk.png)

## 3. Creating a page template using bricks

Go to **Bricks > Templates > Add new**.

![Create a template for the recipe page using Bricks](https://imgur.elightup.com/5zptNPs.png)

Then, edit it with **Bricks**.

![Edit the template with Bricks](https://imgur.elightup.com/ZB1CuwK.png)

Go to **Settings > Template Settings > Conditions**> choose **Post Type > Recipes** in the list of options.

![Set conditions for the template to apply it to the Recipes post type](https://imgur.elightup.com/mGPukpK.png)

Choose a post in the **Populate Content** section to see it in the preview.

![Choose a post in the Populate Content section to see its preview](https://imgur.elightup.com/0tKmRBb.png)

Now, let’s get the data and display the recipe in the template.

First, add a new **Container** element to cover all the recipe information.

![Add a new Container element](https://imgur.elightup.com/VfDnLEo.png)

Then, add a **Post Title** element to display the recipe's name.

![Add a Post Title element](https://imgur.elightup.com/HETAWaI.png)

To display the dish image and time, add another **Container** to cover them.

![Add another Container element to display the dish image and time](https://imgur.elightup.com/xRPdzD3.png)

For the dish pictured, add an **Image** element inside that **Container**. It is the featured image of the post, so in the settings of the **Image** element, select **Dynamic Data** and choose the **Featured image** option from the list.

![Add an Image element inside that Container element and select Dynamic Data to get the dish picture](https://imgur.elightup.com/Y1BJxhT.png)

For the time section to complete the dish, add a new container.

Instead of adding **Basic Text**, I’d like to use the **Rich Text** element to get information about the time. The **Basic Text** allows you to get the data only from the field. But, the **Rich Text** allows you to add the extra text along with the data.

![Use Rich Text element to get information about the time](https://imgur.elightup.com/r4mIfoj.png)

To get data from custom fields, click on the **Select Dynamic Data** button with a lightning bolt icon. Then, select the **Meta Box (recipe)** item and choose the field you want to display.

![Choose the wanted field to get the data](https://imgur.elightup.com/GBVvj0C.png)

For the **Ingredient** section, I’ll add a **Heading**. If you want to style this heading, set the HTML tag for it. It also helps you optimize SEO more effectively.

![Add a Heading in the Ingredient section](https://imgur.elightup.com/AYXklRB.png)

For this section's content, add a **Basic Text** element. Then, I also add dynamic data to get the data stored in the custom fields. Find the field name you want.

![Add a Basic Text element and then choose the wanted field to get the data from](https://imgur.elightup.com/qM62cPq.png)

For the **Instruction** section, I will add a **DIV** tag to cover all the information in the step and description fields. Then, I will enable a loop to show a cloneable field. In the **Query** section, get the data that I created in the custom fields.

![Add a DIV tag for the Instruction section](https://imgur.elightup.com/tvDvAng.png)

To display both the step and description fields, I use a rich text element. And get saved data from **Dynamic Data**.

![Use a rich text element to display both steps and description fields](https://imgur.elightup.com/3q4Mz8i.png)

For the **Video** section, I will add a **Heading** and **Video** element.

![Add a Heading and Video element for the Video section](https://imgur.elightup.com/mLC4owd.png)

To get the data from the created **oEmbed** field, go to the **Video** element, and change the source section to **Dynamic Data**. Then, search for the **Video** field you created.

![Change the Source section to Dynamic Data to get the data from the created fields](https://imgur.elightup.com/oGqeKJS.png)

I will do the same with other sets of information.

![Do likewise with other sets of information](https://imgur.elightup.com/HHknTqp.png)

## 4. Styling the page

Just choose the desired element and change the settings in the **Style** section in Bricks’ template editor.

![Style each elements in the Brick's template editor](https://imgur.elightup.com/wrouPIy.png)

Here is the result.

![The result after all steps](https://imgur.elightup.com/ZkaeruX.jpg)

------

You may be interested in:
* [Creating a simple listing site](https://docs.metabox.io/tutorials/create-simple-listing-meta-box-bricks/)
* [Creating a team members](https://docs.metabox.io/tutorials/create-team-members-page-meta-box-bricks/)
* [Creating a product page](https://docs.metabox.io/tutorials/display-latest-product-meta-box-bricks/)

# Creating a recipe - Meta Box + Zion

import LiteYouTubeEmbed from 'react-lite-youtube-embed';
import 'react-lite-youtube-embed/dist/LiteYouTubeEmbed.css';

Let’s create a recipe page which contains different kinds of information stored in custom fields and display each recipe in a singular page. We’ll use **Zion** to build that page.

![Demo page of a recipe page](https://imgur.elightup.com/eDe9LAZ.png)

## Video version

<LiteYouTubeEmbed id='y6XCjCj3EZ8' />

## Preparation

All of the recipe information will be saved in a post of a custom post type. The recipe’s name and dish picture are the post's title and featured image. And the extra information will be saved in custom fields.

Here are the tools that we need for this practice:

* [Meta Box Lite](https://metabox.io/lite/): to create custom post types for the recipe and to have UI in the back end to create custom fields to save extra information about recipe;
* **Zion Builder**: make sure that you have **Zion Builder Pro** to have integration with Meta Box.

## 1. Creating a custom post type

Click on the Create a post type quick button in the dashboard or go to **Meta Box > Post Types > Add New** to create a new post type for the recipes.

![Create a custom post type](https://imgur.elightup.com/kOWxuCF.png)

## 2. Creating custom fields

Move to **Meta Box > Custom Fields** to create as many fields as you want.

![Create fields](https://imgur.elightup.com/XGXqPJH.png)

Here are the fields I use for this practice:

![Created fields for the recipe page](https://imgur.elightup.com/SiVQ6zM.png)

Pay attention to the Video field, we usually use the **URL** field to save links. If you use it, Zion Builder will display the link in text format only on the page. Then, we must do something to convert the link into the video preview.

Instead, we’ll use the **oEmbed** fields of Meta Box. This one allows you to save the link and display it as the video preview directly on the frontend.


![Use oEmbed fields of Meta Box to save the link and to display it as the video preview on the frontend directly](https://imgur.elightup.com/B4Q7Vl5.png)

After creating all the wanted fields, move to the **Settings** tab > **Location** > choose **Post Type** as **Recipes** to apply these fields to this post type.

![Set location for the custom fields](https://imgur.elightup.com/8ANvIPe.png)

Back to the post editor, you will see all of the created custom fields.

![Created fields in the post editor](https://imgur.elightup.com/65lnBhg.png)

Let’s fill in information for the recipe into the fields.

## 3. Creating a template

Go to the **Zion Builder** menu and create a new template.

First, choose the **All Recipes** option so that this template will be used for all posts of the **Recipes** post type.

![Create a template and choose All Recipes option to apply it to all post of Recipe post type](https://imgur.elightup.com/z1tzj64.png)

Next, set the template for the body of the page.

![Set the template for the body of the page](https://imgur.elightup.com/eQFaph4.png)

In the **Page options**, choose **Dynamic data preview source**. Select any post in the created post type to see its preview.

![In the Page options, choose Dynamic data preview source](https://imgur.elightup.com/lSpZIty.png)

Now, let’s edit the template!

Select the layout with one column only to cover all of the recipe information.

![Select a layout for the template](https://imgur.elightup.com/6Fo0qRn.png)

To get the recipe’s name, which is the title of the post, add a **Heading** element, then choose the **Post Title** option in the **Use dynamic data** section.

![Add a Heading element and choose Post Title option to get the recipe's name](https://imgur.elightup.com/3UvudTD.png)

For the first section of the page, I’ll add a component with the layout as 2 columns.

![Add a component with the layout as 2 columns](https://imgur.elightup.com/MOtImVj.png)

In the first column, add an **Image** element. Since the dish image is also the featured image of the post, click on the **Use Dynamic Data** button > choose **Featured Image** in the **Post** section.

![Add an Image element, click Use Dynamic Data button and then choose Featured Image](https://imgur.elightup.com/St0yIcw.png)

For the second column including all the timing information, add 4 **Container** elements inside. Each container will be for a type of time.

![Choose the Text element, use the Dynamic Data for the timing information](https://imgur.elightup.com/dYy9aV2.png)

![Each container will be for a type of time.](https://imgur.elightup.com/8Na1nn9.png)

In the first container, choose the **Text** element. As the timing information is saved in custom fields created by Meta Box, use the **Dynamic Data** button to connect this element to the Meta Box fields. Take the **Prep Time** field as an example.

![Choose the Text element and use Dynamic Data button to connect this element to the Meta Box fields](https://imgur.elightup.com/bDZq8mG.gif)

Then, choose the Heading element and name it. You can style it visually as you want.

We’ll do the same in the next three containers.

Next, I’ll add other containers for each section, like ingredients, instruction, nutrition, etc. In each one, add the Heading element and name it. Next, click the Text element, then connect it to the corresponding field.

![Add containers for each section](https://imgur.elightup.com/8Js5FIM.png)

For the video, I still use the **Text** element to display it because the **Video** element of Zion Builder has not yet supported getting dynamic data. Then, just change the link by inserting the dynamic data from the **oEmbed** field that we use to save the video’s link.

![Insert the dynamic data from oEmbed field to save the video's link](https://imgur.elightup.com/q7HJQfY.png)

After finishing getting all of the recipe information, you will see all of them are already displayed on the frontend.

![all the information is displays](https://imgur.elightup.com/yXgx2go.png)

## 4. Styling the page

Back to the page editor with Zion Builder, you can change the settings of each element to style them.

Here is an example result of how I styled the page in my way.

![The result](https://imgur.elightup.com/eDe9LAZ.png)

------

You may be interested in:
* [Creating a recipe - Zion](https://docs.metabox.io/tutorials/create-recipes-meta-box-zion/)
* [Displaying the latest products - Zion](https://docs.metabox.io/tutorials/display-latest-products-meta-box-zion/)

# Creating relationships - MB Views

import LiteYouTubeEmbed from 'react-lite-youtube-embed';
import 'react-lite-youtube-embed/dist/LiteYouTubeEmbed.css';

In the previous part of [this series](https://metabox.io/series/create-relationships/), we learned how to **create relationships** with several page builders. However, if you don’t want to use them, you still can create and display the relationship between two objects on your website with the help of **MB Relationships and MB Views from Meta Box**. In this practice, we’ll create a bi-directional relationship between Courses and Instructors post type and show them on the page.

This is an archive page for example. It includes a list of courses and the name of instructors who contributed to each course.

![archive page includes a list of courses and the name of instructors who contributed to each course.](https://imgur.elightup.com/tcUoKiA.png)

## Video version

<LiteYouTubeEmbed id='RVvyTgNnxsw' />

## Preparation

We have two separate custom post types: **Courses** and **Instructors**. In this case, the relationship is to link the courses to their instructors, and also link each instructor to the courses to which they contributed. These relationships will be shown on both the singular page of each post type and the archive page for **Courses**.

In this practice, we need these tools:

* [Meta Box core plugin](https://wordpress.org/plugins/meta-box/): to have a framework to create custom post types and custom fields;
* [MB Custom Post Type](https://metabox.io/plugins/custom-post-type/): to create custom post types for the courses and instructors;
* [MB Relationships](https://metabox.io/plugins/mb-relationships/): to create relationships between these post types;
* [MB Views](https://metabox.io/plugins/mb-views/): to create the pages and their template for relationships;
* [MB Builder](https://metabox.io/plugins/meta-box-builder/): to have an intuitive UI on the backend to create custom fields and relationships;
* [MB Admin Columns](https://metabox.io/plugins/mb-admin-columns/) (optional): to display the related courses and related instructors in the dashboard.

## 1. Creating new custom post types

Go to **Meta Box** > **Post Types** to create a new post type for the instructors, and another one for the courses.

![Go to Meta Box > Post Types to create a new custom post type for the instructors, and another one for the courses.](https://imgur.elightup.com/5WUnuXF.png)

After publishing, you will see your new post types in the **Admin Dashboard**.

![your new custom post types in the Admin Dashboard](https://imgur.elightup.com/WtyRval.png)

## 2. Creating custom fields

If you need to save some extra information for each post type, just go to **Meta Box** > **Custom Fields** > **Add New** to create custom fields as usual. In this case, I just create some for the courses as follows.

![Meta Box > Custom Fields > Add New to create custom fields](https://imgur.elightup.com/phyXbjW.png)

After creating all the wanted fields, go to the **Settings** tab, set the **Location** as **Post type**, and select the **Course** to apply created fields to it.

![go to the Settings tab, set the Location as Post type, and select the Course to apply created custom fields to it](https://imgur.elightup.com/BwFj3xU.png)

## 3. Creating the relationships

Go to **Meta Box** > **Relationships** to create the relationships between the Courses and Instructors post types.

![Go to Meta Box > Relationships to create the relationships between the Courses and Instructors post types.](https://imgur.elightup.com/12A1HeA.png)

There’ll be the **From** and **To** section to set the relationship.

![the From and To section to set the relationship](https://imgur.elightup.com/k5tohya.png)

Because we’re setting the relationship between 2 post types, set the **Object Type** as **Post** in both two sections.

![set the Object Type as Post in both two sections](https://imgur.elightup.com/DaaZlJx.png)

In the **Post type** option, choose the post type you want to create a relationship. The relationship is bidirectional, so you can put the post types not in order. For example, I set the **Instructor** in the **From** section, and the rest is **Course**.

![In the Post type option, choose the post type you want to create a relationship I set the Instructor in the From section, and the rest is Course](https://imgur.elightup.com/hicX7co.png)

Because I activated the [MB Admin Columns](https://metabox.io/plugins/mb-admin-columns/) extension before, I have this option in both two sections of the relationship’s settings.

![the option in both two sections of the relationship’s settings](https://imgur.elightup.com/OVrLVah.png)

Check that box to show which courses are related to the post of an instructor and vice versa.

![Check that box to show which courses are related to the post of an instructor and vice versa](https://imgur.elightup.com/dTJ317F.png)

In the **Field** tab, you can set the label for the relationship section that shows in the post editor.

![In the Field tab, you can set the label for the relationship section that shows in the post editor](https://imgur.elightup.com/PTXAZ4t.png)

That’s all to set the relationship. Go to a post editor of the **Course** post type, there’ll be a box at the right sidebar to choose **which instructors are related to the current post**. It displays as a field, this will make sense when you get posts from this field in the next step. You can select several courses in the section.

![there’ll be a box at the right sidebar to choose which instructors are related to the current post You can select several courses in the section](https://imgur.elightup.com/2zQipFB.png)

It’ll be the same when you add related courses for an instructor.

![the box to add related courses for an instructor](https://imgur.elightup.com/IfTtNyF.png)

In the dashboard, all the information will display like this.

![In the dashboard, all the information will display like this](https://imgur.elightup.com/IzrftMS.png)

## 4. Displaying the relationship

In this practice, we’ll display this relationship on both singular pages of the Course post type and Instructor post type, also on the archive page where all the courses are listed.

### 4.1 Displaying the relationship on the singular page of Instructors

This is an example of the **Instructor** post type. It shows detailed information about one instructor. There will be a section to show all the courses that the instructor contributed to.

![example shows detailed information about one instructor and a section to show all the courses that the instructor contributed to.](https://imgur.elightup.com/wO4Af6X.png])

To create the template for the singular page of Instructors, go to **Views** in **Meta Box** and create a new one.

![go to Views in Meta Box and create the template for the singular page of Instructors](https://imgur.elightup.com/tIT5zGj.png)

In the **Template** tab, you can add some code or insert fields from the list in the right sidebar.

![In the Template tab, you can add some code or insert fields from the list in the right sidebar.](https://imgur.elightup.com/btxJ1S0.png)

First, choose the **Post title** to get the name of the instructor.

![choose the Post title to get the name of the instructor](https://imgur.elightup.com/uQyBGqw.png)

Then, choose **Post content** to get detailed information about the instructor.

![choose Post content to get detailed information about the instructor](https://imgur.elightup.com/oUCApg4.png)

Next, we’ll create a section to display a list of courses contributed by this instructor. It’s the relationship that we want. So we will get posts following the created relationships.

Move on to the **Query** tab. There is the name of the relationship that we created.

![Move on to the Query tab. There is the name of the relationship that we created](https://imgur.elightup.com/3iSoQzs.png)

We’re creating a template for the Instructor singular page, so choose the **Connect To** option. It is the name of the field for the relationship when you edit a post in the Instructor post type.

![choose the Connect To option, it is the name of the field for the relationship when you edit a post in the Instructor post type.](https://imgur.elightup.com/HDGDKG1.png)

There are some lines of code display.

**_Explanation_**:

* `{% set relationship = attribute( relationships, 'instructor-to-course' ) %}`: to query the posts following the relationship;
* `{% for post in relationship.to %}`: this loop helps to list the posts because there will be multiple posts.

To display each post's information, just insert some fields as usual inside this loop.

Choose the **Post thumbnail** to show a featured image of the course.

![Choose the Post thumbnail to show a featured image of the course](https://imgur.elightup.com/k1x0W2k.png)

Next, choose the **Post title** to get the name of the course.

![choose the Post title to get the name of the course](https://imgur.elightup.com/zfcyHrn.png)

I have some extra information about the course that saves in custom fields. They’re type, date, place, and price. Just choose them one by one.

![choose type, date, place, and price](https://imgur.elightup.com/ZsxnUFe.png)

After getting all of the information of the posts as you want, move to the **Settings** section of the view, set the **Type** as **Singular**, and choose the name of the post type as **Instructor** in **Location**.

![move to the Settings section of the view, set the Type as Singular, and choose the name of the post type as Instructor in Location.](https://imgur.elightup.com/AfjEZOE.png)

Go to a page that shows any instructor information, you will see the posts displayed like this.

![the information displayes](https://imgur.elightup.com/O4lxmfo.png)

To have a better look for the page, go back to the created template, add some **div** tags and classes for each information.

![add some div tags and classes for each information](https://imgur.elightup.com/86J94Nb.png)

Then add some CSS.

![add some CSS](https://imgur.elightup.com/xSyS2GZ.png)

Back to the page on frontend, the new look has been done.

![the final look of the Singular Page of Instructors](https://imgur.elightup.com/fyz8xqi.png)

### 4.2. Displaying the relationship on the singular page of Courses

We’ll show each course information and the instructor who contributed to them on the page. It uses the relationship we created.

![the page show each course information and the instructor who contributed to](https://imgur.elightup.com/oGpusLt.png)

Go to **Views** and create another template. Do likewise with the singular page of the Instructor.

![Go to Views and create another template](https://imgur.elightup.com/0giSlHx.png)

Just choose the fields from the list on the right sidebar to display the course’s information.

First, choose the **Post thumbnail** to show a featured image of the course.

![choose the Post thumbnail to show a featured image of the course](https://imgur.elightup.com/QAvwyRR.png)

Then choose the **Post title**, **Post content**, even the information in the custom fields such as **Type**, **Date**, **Place**, and **Price**.

![choose the Post title, Post content, even the information in the custom fields such as Type, Date, Place, and Price](https://imgur.elightup.com/bzfFAHI.png)

To display information about the related instructor, I also use the **Query** tab, and choose the **Connect From** option. It’s this option because the field for the relationship in the Course’s post editor has that name.

![use the Query tab to display information about the related instructor, and choose the Connect From option](https://imgur.elightup.com/i1ywLPr.png)

It also may have more than one related instructor, so there is a loop. Insert fields inside this loop to display the instructor information.

In this case, I choose only the **Post title** to have the name of the instructors.

![choose the Post title to have the name of the instructors](https://imgur.elightup.com/HZoKC8U.png)

Also set the **Type** and **Location** for the view to apply it to the singular page of the Course post type.

![set the Type and Location for the view to apply it to the singular page of the Course post type.](https://imgur.elightup.com/BNilrUS.png)

All of the information displayed.

![All of the information displayed](https://imgur.elightup.com/a2A0QMr.png)

Back to the created template, also add some **div** tags and classes.

![add some div tags and classes](https://imgur.elightup.com/7q4JbN1.png)

Then add some CSS.

![add some CSS](https://imgur.elightup.com/kmHoluN.png)

And this is the result.

![the final look of the singular page of course](https://imgur.elightup.com/qm4T7im.png)

### 4.3. Displaying the relationship on an archive page

We’ll create an archive page showing all the courses. On the page, we also display the instructor who contributed to each course.

![archive page showing all the courses and display the instructor who contributed to each course.](https://imgur.elightup.com/GUWYQBs.png)

Move to **Pages** > **Add New** to create a new page as usual.

![Move to Pages > Add New to create a new page as usual](https://imgur.elightup.com/qm0IhGp.png)

To create the template for this page, go to **Views** in **Meta Box** and create a new one.

![go to Views in Meta Box and create a new template](https://imgur.elightup.com/iGnDFLa.png)

In the **Template** tab, insert the **Post title** field to display the page's title.

![In the Template tab, insert the Post title field to display the page's title.](https://imgur.elightup.com/QWFDwsG.png)

For the section that displays the course’s information, add this code.

![For the section that displays the course’s information, add this code](https://imgur.elightup.com/ARwip9b.png)

```
{% set args = { post_type: 'course', posts_per_page: -1, order: 'DESC'} %}
{% set posts = mb.get_posts( args ) %}
{% for post in posts %}

{% endfor %}
```

**_Explanation_**:

* `{% set args = { post_type: 'course', posts_per_page: -1, order: 'DESC'} %}`: is to declare that we’ll get all of the posts from the post type that has the slug as course;
* `mb.get_posts()`: this function is to get posts;
* `{% for post in posts %}`: this loop helps to display all the posts.

Let’s get and display the course’s information as usual by inserting some fields from the list on the right sidebar into this loop. These all things are the information from the post’s default fields and custom fields.

![get and display the course’s information as usual by inserting some fields from the list on the right sidebar into this loop](https://imgur.elightup.com/knj04CW.png)

For the related instructors that store in the relationship field, we use the following code:

```
[instructor_list courseid={{post.ID}}]
```

![For the related instructors that store in the relationship field, we use the following code](https://imgur.elightup.com/vDJBOt5.png)

It is to list all the instructors related to a course that is defined by ID. However, it hasn’t worked yet. We should declare this shortcode in the theme file later to activate it.

Scroll down to the **Settings** section of the views, choose the location as **Page**, and choose the **Courses**.

![Scroll down to the Settings section of the views, choose the location as Page, and choose the Courses](https://imgur.elightup.com/hnzTDlO.png)

Go to the page on frontend, you will see that there is no instructor name displayed since we haven’t activated the mentioned shortcode.

![no instructor name displayed since we haven’t activated the mentioned shortcode](https://imgur.elightup.com/OCXE4HU.png)

You can go to the theme file and add code directly or use a third-party plugin, for example, Code Snippets.

Go to **Snippets**, add a new one, and add code to the **Function** tab.

![Go to Snippets, add a new one, and add code to the Function tab](https://imgur.elightup.com/W4R7MVP.png)

```
add_shortcode( 'instructor_list', function ($atts) {
	extract( shortcode_atts( array(
		   'courseid' =>''
		), $atts));
	ob_start();
	$connected = new WP_Query( [
		'relationship' => [
			'id' 	=>	'instructor-to-course',
			'to'  => $courseid,
		],

	]);

	$resultstr = array();
  	if( $connected->have_posts() ): while ( $connected->have_posts() ) : $connected->the_post();
		 $resultstr[] = '<a href="'.get_the_permalink().'">'.get_the_title().'</a>';
  	endwhile; endif;
	echo implode(", ",$resultstr);
  	wp_reset_postdata();
	return ob_get_clean();
} );
```

**_Explanation_**:

```
$connected = new WP_Query( [
    'relationship' => [
        'id' 	=>	'instructor-to-course',
        'to'  => $courseid,
],
```

These code are to stipulate that we will get data from the relationship that connects to the current post and has the `instructor-to-course` ID.

```
$resultstr = array();
  if( $connected->have_posts() ): while ( $connected->have_posts() ) : $connected->the_post();
    $resultstr[] = '<a href="'.get_the_permalink().'">'.get_the_title().'</a>';
  endwhile; endif;
  echo implode(", ",$resultstr);
  wp_reset_postdata();
  return ob_get_clean();
```

These ones to check if there is any data from the relationship field, we will get the title of the instructor and its permalink.

Go back to the archive page on the frontend, the name of the instructors displayed.

![Go back to the archive page on the frontend, the name of the instructors displayed](https://imgur.elightup.com/Y5LcO3x.png)

To style this page, go back to the view. Add some **div** tags and classes.

![Add some div tags and classesto style the page](https://imgur.elightup.com/njby6OR.png)

Then add some CSS code.

![add some CSS code](https://imgur.elightup.com/W87sQHT.png)

This is the new look for the page.

![the final look of the archive page](https://imgur.elightup.com/3DjsjGz.png)

I uploaded all of these codes which I used for this practice on [Github](https://github.com/wpmetabox/tutorials/tree/master/create-relationships-with-mb-view), so you can refer to them.

# Creating relationships - Meta Box + Breakdance

import LiteYouTubeEmbed from 'react-lite-youtube-embed';
import 'react-lite-youtube-embed/dist/LiteYouTubeEmbed.css';

Continuing the series on **creating a relationship** between two objects on your website, we have just explored a different method, using **Meta Box** and **Breakdance**. In this practice, we’ll create a bi-directional relationship between Courses and Instructors post types and show them on both singular and archive pages.

This is an archive page for example. It includes a list of courses and the name of instructors who contributed to each course.

![This is an archive page](https://imgur.elightup.com/2oZbllI.png)

This is a singular page that shows information of an Instructor. There is also a section to display all the courses contributed by this instructor.

![This is a singular page that shows information of an Instructor](https://imgur.elightup.com/YAvoRst.png)

## Video Version

<LiteYouTubeEmbed id='uUz_sgcvJY8' />

## Preparation

We have two separate custom post types: **Courses** and **Instructors**. In this case, the relationship is to link the courses to their instructors, and also link each instructor to the courses to which they contributed. This bi-directional relationship will be shown on the both singular page of each post type and the archive page for **Courses**.

Here are some Meta Box extensions for the advanced features:

* [Meta Box core plugin](https://wordpress.org/plugins/meta-box/): to have a framework to create custom post types and custom fields, and relationships;
* [MB Custom Post Type](https://metabox.io/plugins/custom-post-type/): to create custom post types for the courses and instructors;
* [MB Relationships](https://metabox.io/plugins/mb-relationships/): to create relationships between these post types;
* [MB Builder](https://metabox.io/plugins/meta-box-builder/): to have an intuitive UI on the backend to create custom fields and relationships;
* [MB Admin Columns](https://metabox.io/plugins/mb-admin-columns/) (optional): to display the related courses and related instructors in the dashboard.
* **Breakdance** to build the pages.

## 1. Creating the custom post types

Go to **Meta Box** > **Post Types** to create a new post type for the instructors, and another one for courses.

![Go to Meta Box > Post Types to create new post types for Instructors and Courses](https://imgur.elightup.com/YLFWpYh.png)

After publishing, you will see new menus displayed. These are my created post types.

![These are created post types](https://imgur.elightup.com/bt0kuUJ.png)

## 2. Creating custom fields

If you want to add some custom fields to save some extra information for each post type, just go to **Meta Box** > **Custom Fields** to create fields as usual. In this practice, I just add some fields for the courses.

![Go to Meta Box > Custom Fields to create fields for the Courses](https://imgur.elightup.com/7OvmoV1.png)

After creating all the wanted fields, go to the **Settings** tab, set the **Location** as **Post type**, and select the post type you want to apply the fields to.

![Go to the Settings tab, set the Location as Post type, and select the post type you want to apply the fields](https://imgur.elightup.com/7VebKWi.png)

## 3. Creating relationships

Go to **Meta Box** > **Relationships** to create the relationships between the Courses and Instructors post types.

![Go to Meta Box > Relationships to create the relationships between the Courses and Instructors](https://imgur.elightup.com/3GjqbEQ.png)

There’ll be two sections: **From** and **To** with the same structure of settings.

![There’ll be two sections: From and To with the same structure of settings](https://imgur.elightup.com/9rtavbY.png)

Because we’re setting the relationship between 2 post types, set the **Object Type** as **Post** in both two sections.

![set the Object Type as Post in both two sections.](https://imgur.elightup.com/zBmN7pj.png)

In the **Post type** option, choose the post type you want to create a relationship. The relationship is bi-directional, so you can put the post types not in order. For example, I set the **Instructor** in the **From** section, and the rest is **Course**.

![Set the Instructor in the From section, and the rest is Course.](https://imgur.elightup.com/XVzeHvU.png)

Because I activated the [MB Admin Columns](https://metabox.io/plugins/mb-admin-columns/) extension before, I have the following option in both two sections of the relationship’s settings.

![Set Admin Colums for two sections of the relationship’s settings.](https://imgur.elightup.com/6DSk001.png)

It will help to display the related posts from the relationship on the dashboard like this.

![the related posts from the relationship displayed on the dashboard](https://imgur.elightup.com/dTJ317F.png)

In the **Field** tab, you can set the label for the relationship section in the post editor.

![In the Field tab, you can set the label for the relationship section in the post editor.](https://imgur.elightup.com/a2BwkVI.png)

After publishing the relationship, you will see a new field on the right sidebar in the post editor of each post type.

In the post editor of the **Course** post type, you will see this one to choose **which instructor is related to the current post**. You can select several instructors in this section.

![Select several instructors in the post editor of the Course post type](https://imgur.elightup.com/bGQhgLR.png)

It’ll be the same when you add related courses for an instructor.

![add related courses for an instructor](https://imgur.elightup.com/NfmhEI0.png)

In the dashboard, all the information will display like this.

![In the dashboard, add related courses for an instructor like this](https://imgur.elightup.com/8liR6rG.jpg)

## 4. Creating a global block for Courses

I will create a section to show all the information of the courses that the instructor contributed to. To display information about each course, we should create a global block.

![create a global block to show all the information of the courses that the instructor contributed to](https://imgur.elightup.com/ekWy8wL.png)

Go to **Breakdance** > **Global Blocks**.

![Go to Breakdance > Global Blocks.](https://imgur.elightup.com/4s8CrHS.png)

Select **Div** element to cover the whole block.

![Select Div element to cover the whole block.](https://imgur.elightup.com/YrvCb8z.png)

Add an **Image** element to show the course image.

![Add an Image element to show the course image.](https://imgur.elightup.com/p9u7vJx.png)

Click on the **Insert Dynamic Data** button to insert dynamic data to this element.

![Click on the Insert Dynamic Data button to insert dynamic data to this element.](https://imgur.elightup.com/Xm4E3cR.png)

Then choose **Featured Image** in the **Post** section.

![choose Featured Image in the Post section.](https://imgur.elightup.com/f92qEPd.png)

The name of the course is the post title and embedded link, so add the **Text Link** element.

![Add the Text Link element for the name of the course](https://imgur.elightup.com/LL8htS3.png)

Then insert dynamic data from the **Post Title**.

![insert dynamic data from the Post Title.](https://imgur.elightup.com/7RrwldL.png)

The **Text Link** element also provides a setting to set the embed link as dynamic data.

![The Text Link element provides a setting to set the embed link as dynamic data.](https://imgur.elightup.com/RlN8KY5.png)

And choose **Post Permalink** inside.

![choose Post Permalink inside.](https://imgur.elightup.com/pDPObEw.png)

I’ll add a **Div** element for each kind of information that is from custom fields.

![Add a Div element for each kind of information](https://imgur.elightup.com/S1PNty1.png)

Go ahead, add a **Text** element for showing the first course’s information.

![Add a Text element for showing the first course’s information.](https://imgur.elightup.com/Ia7yTM9.png)

This course’s information is saved in a custom field created with Meta Box, so also insert dynamic data to the **Text** element. Look for the **Metabox** section, choose the name of the custom field.

![Insert dynamic data to the Text element. In the Metabox section, choose the name of the custom field.](https://imgur.elightup.com/yRW4pyK.png)

For other lines, in the same way, just duplicate this **Div** element, change each **Text** element inside to get the right name and data from custom fields.

![Duplicate Div element, change each Text element inside to get the right name and data from custom fields.](https://imgur.elightup.com/9xAlTWz.png)

You can change those elements to style this block a little bit to have a good look.

![Style the block a little bit to have a good look.](https://imgur.elightup.com/TelQvr5.png)

## 5. Displaying the relationship

In this practice, we’ll display this relationship on the singular page of the Instructor post type; and on the archive page where all the courses are listed.

### 5.1. Displaying the relationship on the singular page of Instructors

This is an example of the Instructor post type. It shows detailed information about one instructor. There will be a section to show all the courses that the instructor contributed to. and, we already have a global block to display each one of those posts.

![This is an example of the Instructor post type](https://imgur.elightup.com/ekWy8wL.png)

Go to **Breakdance** and create a new template for the page.

![Go to Breakdance and create a new template for the page.](https://imgur.elightup.com/Dbo4muk.png)

Remember to set the location for this template as the single page of the Instructors post type.

![Remember to set the location for this template as the single page of the Instructors post type.](https://imgur.elightup.com/GJvWd8V.png)

Add a **Section** element to cover all the content of the page.

![Add a Section element to cover all the content of the page.](https://imgur.elightup.com/7DP89Sd.png)

Add the Post Title element to display the instructor name.

![Add the Post Title element to display the instructor name.](https://imgur.elightup.com/KW9ChHv.png)

Then, add the Post Content element to get the instructor’s description.

![Add the Post Content element to get the instructor’s description.](https://imgur.elightup.com/tSNwsTZ.png)

For the section displaying all the contributed courses, there are multiple posts so we should add the **Post Loop Builder** element.

![Add the Post Loop Builder element to display all the contributed courses](https://imgur.elightup.com/oJLJhQB.png)

Choose the name of the created global block.

![Choose the name of the created global block.](https://imgur.elightup.com/HEQidPf.png)

Since we haven’t set the source of data to query from, there will be no information display.

![Since we haven’t set the source of data to query from, there will be no information display.](https://imgur.elightup.com/7HOjRQ4.png)

To display the course’s information, move to the **Query** section of the Post Loop Builder element, choose **Array**.

![Move to the Query section of the Post Loop Builder element, choose Array to display the course’s information](https://imgur.elightup.com/8jU2yHc.png)

We should add some lines of code like this:

```
return [
  'post_type' => 'course',
  'posts_per_page'=>-1,
  'relationship' => [
    'id'   => 'instructor-to-course',
    'from' => get_the_ID()
  ],
];
```

![add some lines of code](https://imgur.elightup.com/bvoU1U9.png)

`'post_type' => 'course',`

This line code is to stipulate that we will query posts from the Course post type.

```
'relationship' => [
  'id'   => 'instructor-to-course',
  'from' => get_the_ID()
],
```

These lines are to stipulate that only the posts that are set in the relationship will be queried. **'instructor-to-course'** is the ID of the created relationship.

After adding the query, you will see a list of courses displayed automatically.

![A list of courses displayed automatically after adding the query](https://imgur.elightup.com/gS7vKuL.png)

Just style this template now to get a better display.

![Style this template to get a better display.](https://imgur.elightup.com/Dn5mNy7.png)

### 5.2. Displaying the relationship on an archive page

We’ll create an archive page showing all the courses. There will be the same kind of information for each course should be displayed, so you should create a global block for them.

![This is an archive page showing all the courses](https://imgur.elightup.com/Ir8Me9r.png)

In that global block, I also display the related instructor names of the course.

![This is a page show the related instructor names of the course.](https://imgur.elightup.com/2oZbllI.png)

There may be more than one instructor contributing to a course, so we should use a global block to get and display their names.

So, there will be two new global blocks:

![There are two new global blocks](https://imgur.elightup.com/AEb6vUE.png)

### 5.2.1. Displaying the Instructor’s name

Instructor Block is to display the instructor name only, so add a **Text link** element.

![Add a Text link element to display the instructor name](https://imgur.elightup.com/0h55fIu.png)

Click on the **Insert Dynamic Data** button to insert dynamic data from the **Post Title**. Insert link as well from the **Post Permalink**.

![Click on the Insert Dynamic Data button to insert dynamic data from the Post Title. Insert link as well from the Post Permalink.](https://imgur.elightup.com/7Pb6qe4.gif)

Next, we will add the instructor name from the created global block to the block for displaying course information.

This block to display the course on the archive page has the same structure and content with the one for the course on the Instructor singular page, so just copy all the elements from the previous block, and paste to this new one.

![Copy all the elements from the previous block, and paste to this new one.](https://imgur.elightup.com/zNgkoig.gif)

In the new global block for the courses, I’ll add a new **Div** element to display the instructor's name. Or, just duplicate the **Div** element to inherit its style then change the text.

![Add a new Div element to display the instructor's name](https://imgur.elightup.com/bZ5NihZ.png)

Add the **Post Loop Builder** element inside the new Div.

![Add the Post Loop Builder element inside the new Div.](https://imgur.elightup.com/IeICEnf.png)

Choose the global block as the one we created for the instructor.

![Choose the global block as the one we created for the instructor.](https://imgur.elightup.com/SssjiSn.png)

We also need to regulate the query for this element. Choose **Array**, and add code.

![Choose Array, and add code to regulate the query for the element.](https://imgur.elightup.com/7CA0Rba.gif)

```
return [
  'post_type' => 'instructor',
  'posts_per_page'=>-1,
  'relationship' => [
    'id'   => 'instructor-to-course',
    'from' => get_the_ID()
  ],
];
```

These lines are the same with the one we use to display the related course in the previous step. Just replace the ID of the post type with the **instructor**.

This preview post has names of two instructors, so we should style this global block a bit more.

![This preview post has names of two instructors](https://imgur.elightup.com/0gHl3zi.png)

Now, it looks like this.

![The instructor names after styling.](https://imgur.elightup.com/y0sMl40.png)

#### 5.2.2. Creating the archive page

Now, go to create the archive page then edit it in **Breakdance**.

![go to create the archive page then edit it in Breakdance.](https://imgur.elightup.com/Gt4YCXZ.png)

Add a **Section** element to cover the page.

![Add a Section element to cover the page.](https://imgur.elightup.com/poaxvao.png)

Inside the section, add the **Heading** element to the page title.

![Inside the section, add the Heading element to the page title.](https://imgur.elightup.com/kTGNRyv.png)

For the list of courses, use the **Post Loop Builder** again. Set the global block as **Course Archive Block** that we use for the courses displaying on this archive page.

![Use the Post Loop Builder and set the global block as Course Archive Block that using for the courses](https://imgur.elightup.com/bpyqPIF.gif)

And set the query for it. Just replace the post type with **'course'**.

![Set the query for it. Just replace the post type with 'course'.](https://imgur.elightup.com/hHKDUTP.png)

Now, customize the layout. This is the final look I have after styling.

![This is the final look I have after styling](https://imgur.elightup.com/bmzUAyn.png)

# Creating relationships - Meta Box + Bricks

import LiteYouTubeEmbed from 'react-lite-youtube-embed';
import 'react-lite-youtube-embed/dist/LiteYouTubeEmbed.css';

If you want to create a relationship between two objects on your website, the **MB Relationships** from **Meta Box** can help you. In this practice, we’ll create a bi-directional relationship between Courses and Instructors post type for example. In addition, we also display them on the page with the help of **Bricks Builder**.

Here is an archive page I created. It includes courses and the name of instructors who contributed to each course.

![archive page shows courses and the name of instructors who contributed to each course](https://imgur.elightup.com/ikj6Mb1.png)

## Video version

<LiteYouTubeEmbed id='W4AOlPGBuH8' />

## Preparation

We have two separate custom post types: Courses and Instructors. In this case, the relationship is to link the courses to their instructors, and also link each instructor to the courses to which they contributed. This bi-directional relationship will be shown on the both singular page of each post type and the archive page for Courses.

Here are the tools that we need for this practice:

* [Meta Box core plugin](https://wordpress.org/plugins/meta-box/): to have a framework to create custom post types and custom fields, and relationships;
* [MB Custom Post Type](https://metabox.io/plugins/custom-post-type/): to create custom post types for the courses and instructors;
* [MB Relationships](https://metabox.io/plugins/mb-relationships/): to create relationships between these post types;
* [MB Builder](https://metabox.io/plugins/meta-box-builder/): to have an intuitive UI on the backend to create custom fields and relationships;
* [MB Admin Columns](https://metabox.io/plugins/mb-admin-columns/) (optional): to display the related courses and related instructors in the dashboard;
* **Bricks** to build the pages.

## 1. Creating the custom post types

Go to **Meta Box** > **Post Types** to create a new post type for the instructors, and another one for courses.

![Go to Meta Box, Post Types to create a new post type for the instructors, and courses](https://imgur.elightup.com/aGmZQuM.png)

Then, you will see new menus displayed in the **Admin Dashboard**. They’re your post types.

![Custom post types display in the Admin Dashboard](https://imgur.elightup.com/XKuWPo0.png)

## 2. Creating custom fields

If you want to add some custom fields for each post type to save some extra information about the courses or the instructors, just go to **Meta Box** > **Custom Fields** to create fields as usual. In this practice, I just add some fields for the courses.

![go to Meta Box, Custom Fields to create custom fields](https://imgur.elightup.com/OvMDY8e.png)

After creating all the wanted fields, go to the **Settings** tab, set the **Location** as **Post type**, and select the post type you want to apply the fields to it.

![go to the Settings tab, set the Location as Post type, and select the post type you want to apply the custom fields to it](https://imgur.elightup.com/SV6O6cC.png)

## 3. Creating relationships

Go to **Meta Box** > **Relationships** to create the relationships between the Courses and Instructors post types.

![Go to Meta Box, Relationships to create the relationships between the Courses and Instructors post types](https://imgur.elightup.com/HwHL4ut.png)

You can enter all the settings for the relationship and each side of it in two sections.

![enter all the settings for the relationship and each side of it in two sections](https://imgur.elightup.com/w7gcV0z.png)

In this practice, the relationship is bidirectional so you can put the post types not in order. Besides that, because they are post types, set the **Object Type** as **Post** in both two sections.

![set the Object Type as Post in both two sections](https://imgur.elightup.com/UIAXa46.png)

In the **Post type** option, choose the post type you want to create a relationship. For example, I set the **Instructor** in the **From** section, and the other is the **Course**.

![In the Post type option, choose the post type you want to create a relationship](https://imgur.elightup.com/zKOpmXX.png)

Because I activated the [MB Admin Columns](https://metabox.io/plugins/mb-admin-columns/) extension before, I have this option in both two sections of the relationship’s settings.

![show as an admin column option in both two sections of the relationship’s settings](https://imgur.elightup.com/XMDuoQH.png)

I set it to show which courses are related to an Instructor and vice versa.

![when you check the option, you can see which courses are related to an Instructor](https://imgur.elightup.com/xQeBaOe.png)

In the **Field** tab, you can set the label for the relationship section in the post editor.

![In the Field tab, set the label for the relationship section in the post editor](https://imgur.elightup.com/KnQC6pr.png)

There’ll be a box at the right sidebar to choose **which instructor is related to the current post** in the Course post type and vice versa. It displays as a field, this will make sense when you get posts from this field in the next step.

![the box as a field at the right sidebar to choose which instructor is related to the current post in the Course post type](https://imgur.elightup.com/iaqEuU1.png)

After publishing, go to a post editor and you can choose more than one course in the **Related Course** section.

![you can choose more than one course in the Related Course section ](https://imgur.elightup.com/tKQxVHZ.gif)

It’ll be the same when you add related instructors for a course.

In the dashboard, all the information will display like this.

![all the information displays](https://imgur.elightup.com/8liR6rG.jpg)

## 4. Displaying the relationship

In this practice, we’ll display this relationship on both singular pages of the Course post type and Instructor post type; and on the archive page where all the courses are listed.

### 4.1. Displaying on the singular page of Instructors

This is an example of the **Instructor** post type. It shows detailed information about one instructor and the courses related to it.

![example of the Instructor post type shows detailed information about one instructor and the courses related to it](https://imgur.elightup.com/p9TyEXQ.png)

Go to **Bricks** > **Templates** > **Add New** to create a new one.

![Go to Bricks, Templates, Add New to create a new one](https://imgur.elightup.com/SfHwroE.png)

On the right sidebar, choose the **Template type** as **Single**, then edit it with Bricks.

![choose the Template type as Single, then edit it with Bricks](https://imgur.elightup.com/DnVGo4U.png)

Go to the settings of this template, set a condition to assign this one to the Instructor post type.

![Go to the settings of this template, set a condition to assign this one to the Instructor post type.](https://imgur.elightup.com/ccg5sfx.gif)

And also set a preview for it in the **Populate content** section.

![set a preview for it in the Populate content section](https://imgur.elightup.com/949UH6E.png)

Add a **Section** to have a **Container** covering all the page content.

![Add a Section to have a Container covering all the page content](https://imgur.elightup.com/50PgzxM.png)

Add a Post Title element to display the name of the instructor.

![Add a Post Title element to display the name of the instructor.](https://imgur.elightup.com/CyqyETC.png)

To get a description of the instructor, add the **Post Content** element.

![To get a description of the instructor, add the Post Content element](https://imgur.elightup.com/xqJhEhe.png)

For the section displaying all of the courses related to an instructor, add some **Div** elements to set the layout.

![For the section displaying all of the courses related to an instructor, add some Div elements to set the layout](https://imgur.elightup.com/swKCrlK.gif)

To display the courses which are chosen in the **Related Course** field, we should use the query loop in this **Div**.

![To display the courses which are chosen in the Related Course field, we should use the query loop in this Div](https://imgur.elightup.com/uqjGuVM.png)

Normally, we set the **Type** as **Posts** to get posts in the post type we want. However, in this case, we want to show posts that are set in the relationship, so it’s different. You’ll see an option is **‘MB Relationship’ along with the name of the relationship you created before**. Choose it.

![set the Type as MB Relationship along with the name of the relationship you created before](https://imgur.elightup.com/35TZaMS.png)

Then, just add elements to display the course information.

First, add an **Image** element.

![add an Image element](https://imgur.elightup.com/IKkkDCR.png)

And select dynamic data as the **Featured image** to get the featured image of the post.

![select dynamic data as the Featured image to get the featured image of the post](https://imgur.elightup.com/iLzZIGU.png)

Next, add the **Post Title** element to get the title of courses.

![add the Post Title element to get the title of courses](https://imgur.elightup.com/2BSmjHq.png)

Then, I use the **Rich Text** element to display extra information about the courses.

![Rich Text element to display extra information about the courses](https://imgur.elightup.com/Qp6UK48.png)

The information is saved as custom fields of Course in **Meta Box**, so click on the dynamic data button and choose the corresponding field in the dropdown list.

![click on the dynamic data button and choose the corresponding custom field from Meta Box in the dropdown list](https://imgur.elightup.com/e7F2Qez.gif)

For other information, do the same. Duplicate the **Rich Text** element and change the corresponding fields.

![Duplicate the Rich Text element and change the corresponding fields to get and dispaly other information](https://imgur.elightup.com/FMBZKoJ.png)

All the information is displayed like this.

![All the information is displayed](https://imgur.elightup.com/4Qmw3QX.png)

Now, you can go back to the template and style each element to get the new look you want. This is my page after styling.

![the final look of the singular page of instructor](https://imgur.elightup.com/yTKG0Ky.png)

### 4.2. Displaying on the singular page of Courses

Let’s create a singular page of the Course post type and show the instructor who contributed to each course. It uses the relationship we created.

![singular page of the Course post type and show the instructor who contributed to each course](https://imgur.elightup.com/74O4Yjd.png)

Also create another template for the course. Do likewise with the singular page of the Instructor.

![Create course template and set the condition likewise with instructor template](https://imgur.elightup.com/LdrAZaB.gif)

Add a **Section** element for the page.

![Add a Section element for the page](https://imgur.elightup.com/ql84cnK.png)

To display course information, we’ll add some elements to get information from featured images and custom fields. We also use dynamic data as usual.

![add some elements to get information from featured images and custom fields, also use dynamic data](https://imgur.elightup.com/46JVLFO.png)

Lastly, to display information about the related instructor, add a **Div** element.

![to display information about the related instructor, add a Div element](https://imgur.elightup.com/mCp31vM.png)

In this **Div** tag, set a query for it to get and display the instructor related to the course only. Similar to the Instructor singular page, I also set the **Type** of this query as **MB Relationship** along with the name of the relationship we created.

![enable query loop and set the Type of this query as MB Relationship](https://imgur.elightup.com/apxsrNy.png)

Then, add some elements to display instructor information.

Use the **Heading** element to have the Instructor heading.

![Use the Heading element to have the Instructor heading](https://imgur.elightup.com/BoRvdRf.gif)

And, add the **Post Title** to get the name of the instructor.

![add the Post Title to get the name of the instructor](https://imgur.elightup.com/ZFvejVh.png)

If you want to set a hyperlink for the instructor’s name to link to the Instructor's singular page, just enable this button.

![enable button to set a hyperlink for the instructor’s name to link to the Instructor's singular page](https://imgur.elightup.com/Br4fteY.png)

Sometimes, you can see the information incorrectly displayed. Don’t worry, everything will be right on the frontend.

![the final look of the singular page of course](https://imgur.elightup.com/kg7Nk93.png)

### 4.3. Displaying on an archive page

We’ll create an archive page showing all the courses. On the page, we also display the instructor who contributed to each course.

![archive page showing all the courses and display the instructor who contributed to each course](https://imgur.elightup.com/C6GsCzn.png)

Go to **Pages** > **Add New** to create a new page as usual and edit it with Bricks.

![Go to Pages > Add New to create a new page as usual and edit it with Bricks.](https://imgur.elightup.com/Uf2COnX.png)

Add a **Section** to cover the page.

![Add a Section to cover the page](https://imgur.elightup.com/ZCY920M.png)

Then, add the **Heading** element to display the title of the page.

![add the Heading element to display the title of the page](https://imgur.elightup.com/TsBqjEw.png)

Inside the **Container**, add a **Div** element to get the layout to cover all of the courses.

![Inside the Container, add a Div element to get the layout to cover all of the courses.](https://imgur.elightup.com/U26brZy.png)

Enable the query for the **Div**. And set the **Type** as **Posts** and choose **Post type** as **Courses** to display all the posts in the Course post type on this page.

![Enable the query for the Div and set the Type as Posts and choose Post type as Courses to display all the posts in the Course post type on this page.](https://imgur.elightup.com/J0MqplP.png)

Inside the **Div**, let’s add some elements to get and display information about each course.

Similar to the previous part, add an **Image** element and select dynamic data as the featured image for courses.

![add an Image element and select dynamic data as the featured image for courses](https://imgur.elightup.com/L1ka3MI.png)

Add the **Post Title**.

![Add the Post Title.](https://imgur.elightup.com/dvOreJf.png)

And **Rich Text** element with dynamic data to get information from custom fields for extra information about the courses.

![And Rich Text element with dynamic data to get information from custom fields for extra information about the courses](https://imgur.elightup.com/SJB7HFo.png)

Finally, for the related instructor in each course, do likewise with the Course singular page. Add a **Div** element.

![for the related instructor in each course add a Div element](https://imgur.elightup.com/nQhgbxR.png)

Enable the **Query loop** and set the **Type** as **MB Relationship**.

![Enable the Query loop and set the Type as MB Relationship](https://imgur.elightup.com/XQa3iHF.png)

Also, add elements to display instructor information.

Add the **Post Title** element to display the name of the instructor.

![Add the Post Title element to display the name of the instructor.](https://imgur.elightup.com/Amw2vLr.png)

Go to the front end and you’ll see the information displayed completely and exactly.

![the information displayed completely and exactly](https://imgur.elightup.com/wjqoXvH.png)

If you want to style the page, go back to the template in Bricks, and change the setting of each element. This is the final look I have after styling.

![the final look of archive page](https://imgur.elightup.com/NoA3qca.png)

# Creating Relationships - Meta Box + Oxygen

import LiteYouTubeEmbed from 'react-lite-youtube-embed';
import 'react-lite-youtube-embed/dist/LiteYouTubeEmbed.css';

Relationships feature from **Meta Box** allows you to relate post types, users, pages together. In this practice, we’ll share the way to create a bi-directional relationship between Courses and Instructors post types for example. Then, we’ll display the related instructors to a course and vice versa, using **Meta Box** and **Oxygen**.

![Create Relationships - Using Meta Box and Oxygen](https://imgur.elightup.com/avyeAWl.png)

## Video Version

<LiteYouTubeEmbed id='-7x1Y4DMl8g' />

## Preparation

I have **Courses** and **Instructors** as two separate custom post types. I will create a bi-directional relationship between them. The relationship will show the course is contributed by which instructors and the instructor contributes to which courses. This kind of information will be displayed on the archive page and singular page of each post type.

Here are the tools that we need for this practice:

* [Meta Box core plugin](https://wordpress.org/plugins/meta-box/): to have a framework to create custom post types, custom fields, and relationships.
* [MB Custom Post Types](https://metabox.io/plugins/custom-post-type/): to create a custom post type for the courses and instructors.
* [MB Builder](https://metabox.io/plugins/meta-box-builder/): to have a UI on the backend to create custom fields and relationships easily.
* [MB Relationships](https://metabox.io/plugins/mb-relationships/): to create relationships between these post types.
* [MB Admin Columns](https://metabox.io/plugins/mb-admin-columns/) (optional): to display the related courses and related instructors in the dashboard.
* **Oxygen**: to build the pages. You should use its 3.9 version or higher, which has native integration with Meta Box.

## 1. Creating the Custom Post Types

Go to **Meta Box** > **Post Types** to create a new post type for the instructors. Also create a new one for the courses.

![Create a new post type for the instructors](https://imgur.elightup.com/tcunUEp.png)

Then, you will see new menus displayed in the **Admin Dashboard**. They’re your post types.

![There are the post types that we created](https://imgur.elightup.com/RTcYlyS.png)

## 2. Creating Custom Fields

You may want to add some custom fields for each post type for some extra information of the courses or the instructors. It’s optional. Just go to **Meta Box** > **Custom Fields** to create fields as usual. I also created some for the courses as follows.

![Create custom fields for each post type for some extra information of the courses or the instructors](https://imgur.elightup.com/sAQQ0lD.png)

## 3. Creating Relationships

Let’s create relationships between the **Courses** and **Instructors** post types. Go to **Meta Box** > **Relationships** to create a new one.

![Create relationships between the Courses and Instructors post types](https://imgur.elightup.com/eSyFqvL.png)

There’ll be the **From** and **To** section as follows. The relationship is bidirectional, so you can put the two post types into any section.

![Setting relationships](https://imgur.elightup.com/qZUQ07Y.png)

Since they are post types, remember to set the object type as **Post** in both sections.

![Set the object type as Post in both sections](https://imgur.elightup.com/Elxtdjo.png)

Set the **Post type** in the **From** section as one that we want to be in the relationship. In this case I set Instructor, so the rest one in the **To** section will be the **Course**.

![Set the Post type in the From section as one that we want to be in the relationship](https://imgur.elightup.com/7ve4ihj.png)

Because I activated the **MB Admin Column** extension, I have this option in the relationship’s settings.

![Show as an admin column](https://imgur.elightup.com/R9iCN6h.png)

I set it to show the related courses and instructors in a column in the dashboard.

In the Field tab of both sections, you can set a label for the relationship section in the post editor.

![Set a label for the relationship section in the post editor](https://imgur.elightup.com/jIT7vzS.png)

That’s all to set the relationship. Go to a post editor of the **Course** post type, there’ll be a box at the right sidebar to **choose which instructors related to the current post**. As well as, there'll be a box in the post editor of the **Instructor** post type to **choose which courses related to the current instructor**. It displays as a field, this will make sense when you get posts from this field in the next step.

![Choose which courses related to the current instructor](https://imgur.elightup.com/bz40r6I.gif)

Then, in the dashboard, you will see the related posts like this:

![The related posts](https://imgur.elightup.com/53R9rio.jpg)

## 4. Displaying the Relationship

In this part, I will display these relations on both the singular page of the **Course** post type, and the **Instructor** post type, also on the archive page where all the courses are listed.

### 4.1 Displaying the Relationship on a Singular Page

Let’s display the relations on the singular page of the **Course** and the **Instructor** post types.

This is the page to show the detailed information about one instructor. There will be a section to show all the courses that the instructor contributed to.

![The page to show the detailed information about one instructor](https://imgur.elightup.com/tPclXiV.png)

Go to **Oxygen** > **Template** > **Add New Template** as usual.

![Go to Oxygen > Template > Add New Template](https://imgur.elightup.com/gW0WKg3.png)

Remember to set the template as **Singular** and choose the name of the post type as **Instructors** and publish.

![Set the template and choose the name of the post type](https://imgur.elightup.com/ZUO5Rpu.png)

Then edit it with **Oxygen**.

![Edit it with Oxygen](https://imgur.elightup.com/HYH96hF.png)

Choose an instructor for the preview.

![Choose an instructor for the preview](https://imgur.elightup.com/EGhpKoj.png)

Insert a **Section** component.

![Insert a Section component](https://imgur.elightup.com/xO9oIOK.png)

Add a **Heading** to display the name of the instructor from the post title.

![Add a Heading to display the name of the instructor from the post title](https://imgur.elightup.com/PKZj6Dd.gif)

Also add a **Text** component to display the biography of the instructor, that is saved in the post content.

![Display the biography of the instructor](https://imgur.elightup.com/oHIYa6U.gif)

Now, let’s display the related courses. There will be multiple posts, so add a **Repeater** component.

![Add a Repeater component](https://imgur.elightup.com/fI8FYMy.png)

In its **Query** section, choose advanced and add parameters for the query like this.

![Choose advanced and add parameters for the query](https://imgur.elightup.com/izuPMp5.gif)

In there, `course` is the slug of the **Courses** post type. It means that we’ll get posts from this post type.

![The slug of the Courses post type](https://imgur.elightup.com/MZBhjsX.png)

Next, add the second **parameter** as follows.

![Add the second parameter](https://imgur.elightup.com/YuutdnS.png)

To add the value in the parameter, choose **Meta Box field** from the range and we can see the **Related Courses** field that allows us to choose posts which are related to an instructor.

![Choose posts which are related to an instructor](https://imgur.elightup.com/mNbTHUU.gif)

All of these parameters stipulate that only the posts that are listed in the **Related Course** field will be displayed.

![All of these parameters stipulate are listed in the Related Course field](https://imgur.elightup.com/VdUzsf9.png)

Inside the **Repeater** component, there’ll be a **Div**. Add some components inside this **Div** to display the courses’ information.

First, add an **Image** component and insert data from the **Featured Image** of the post.

![Add an Image component and insert data from the Featured Image of the post](https://imgur.elightup.com/G4GiTJf.gif)

Add a **Heading** then insert data from the **Post Title** for the course name.

![Add a Heading then insert data from the Post Title for the course name](https://imgur.elightup.com/LHLz0iE.gif)

You may get the wrong name and image of the course, but don't worry about it. Just keep moving, you will see the right things later.

Keep adding some other components, then insert data from custom fields of the **Courses** as usual. After getting all the wanted information for the course, save the template and go to the page on frontend. You will see the courses along with their information displayed correctly.

![The courses along with their information displayed](https://imgur.elightup.com/CpnU58K.png)

Back to the template, the preview will display correctly as well. You can change the settings of each component to get the wanted look for the page. Here is the one that I got after styling.

![The preview display correctly after styling](https://imgur.elightup.com/LvF2I9D.png)

On the other hand, we also can display the instructor name in the singular page of the course. I already have a singular page with a template to display the course's detailed information. We’ll display the related instructor in this place.

![Display the related instructor](https://imgur.elightup.com/GUNjI5s.png)

Add a **Div** component or just duplicate one from your created **Div** components.

![Display the related instructor](https://imgur.elightup.com/rVzzYXE.png)

Change the text in the **Content** section of the component.

![Change the text in the Content section of the component](https://imgur.elightup.com/5FPl7eb.png)

Then, insert data from the **Related Instructor** field into the component.

![Insert data from the Related Instructor field into the component](https://imgur.elightup.com/hfTk2sf.gif)

If you want to display the instructor name along with the link, choose the **Post URL** option when inserting data like this.

![Choose the Post URL option when inserting data](https://imgur.elightup.com/vP8odGk.png)

Then on the page that shows the course details, you will see the related instructor name as follows.

![The course details on the page](https://imgur.elightup.com/aic6dpz.png)

### 4.2 Displaying the Relationship on an Archive Page

Let’s add related instructors to the archive page for the courses.

![Add related instructors to the archive page for the courses](https://imgur.elightup.com/3qmBOcE.png)

In the template of the page, you may have a **Repeater** element to display all the posts since this is an archive page.

![Repeater element to display all the posts](https://imgur.elightup.com/HR3mW69.png)

Add a **Div** and some **Text** components inside the Repeater.

![Add a Div and some Text components inside the Repeater](https://imgur.elightup.com/6OfFtfv.png)

Change the content of the first **Text** component.

![Change the content of the first Text component](https://imgur.elightup.com/b7mCCOH.gif)

Insert data from the **Related Instructor** field into the second **Text** component.

![Insert data from the Related Instructor field into the second Text component](https://imgur.elightup.com/EoxkAaY.gif)

Save the template and we can see it displayed on the frontend.

![The template displayed on the frontend](https://imgur.elightup.com/p1n1ZlB.png)

# Creating reusable template parts in WordPress

import LiteYouTubeEmbed from 'react-lite-youtube-embed';
import 'react-lite-youtube-embed/dist/LiteYouTubeEmbed.css';

Sometimes you need to display the same information with the same layout as well, but in different places. Instead of storing and getting that data several times, today we are going to use **MB Views** to **create template parts**, then **include them in multiple templates** for reusable purposes.

## Video version

<LiteYouTubeEmbed id='tmpZWOdND1A'/>

## Benefits of using reusable template parts

There are 2 obvious advantages of template parts:

* They remove code duplication across templates.
* It’s easy to update when you need to make changes because you need to edit only the template part that contains changes.

But, these are not the best things about template parts. When you include template parts in a view, **they have access to the same context as the current view**. This means that **any variable defined in the main view will be available in the template parts**.

For example: if you’re creating a template part to display posts in a custom category, like this:

```css
{% set posts = mb.get_posts( args ) %}
<ul>
    {% for post in posts %}
        <li><a href="{{ mb.get_permalink( post ) }}">{{ post.post_title }}</a></li>
    {% endfor %}
</ul>
```

(To understand the syntax, please see the documentation for the [mb proxy](https://docs.metabox.io/extensions/mb-views/?_gl=1*aw83k9*_gcl_au*NzUyMjIwOTc1LjE3MDkyODg1MDc.#running-php-functions))

Then in a view, you can set the query args to show posts in a category ID 3:

```css
{% set args = {post_type: 'post', posts_per_page: 10, cat: 3} %}
{{ include( 'custom-query' ) }}
```

In another view, you can show posts in a category ID 5:

```css
{% set args = {post_type: 'post', posts_per_page: 10, cat: 5} %}
{{ include( 'custom-query' ) }}
```

You can even do more with the include syntax like conditionally including a template part:

```css
{% include ajax ? 'ajax' : 'not-ajax' %}
```

(this syntax is available only for `include` tag, not `include` function)

or include a template inside a for loop to render each item in the loop:

```css
{% for post in posts %}
    {{ include( 'post' ) }}
{% endfor %}
```

Let’s dive into a specific example to look at it in more detail.

## Preparation

Assuming you’re creating a view for the **Event** post type. And, each event has a group of the start date, end date, and location which are saved in custom fields.

![Assuming you’re creating a view for the Event post type, each event has some extra info.](https://imgur.elightup.com/nc0dcYL.png)

So, you may want to display them on both the singular and archive pages.

![The display of fields on both the singular page and the archive page](https://imgur.elightup.com/o9K1Vfi.png)

It’s when you should get the data into a template part. And then, you can include it in the singular page template and also in the archive page template.

![Include the template part in the singular page template, and also the archive page template](https://imgur.elightup.com/IeV2jqm.png)

This task will be very easy-to-do with the help of the **MB Views** extension from **Meta Box**.

These are some tools we need for this practice:

* [Meta Box plugin](https://wordpress.org/plugins/meta-box/): to have a framework to create a custom post type and custom fields for the event. You can install it directly from [wordpress.org](https://wordpress.org/plugins/meta-box/);
* [MB Custom Post Type](https://metabox.io/plugins/custom-post-type/): to create a custom post type for the events;
* [MB Views](https://metabox.io/plugins/mb-views/): to not only get data from custom fields created with Meta Box, but also build template parts, template for pages, and also include the template parts into another template;
* [MB Builder](https://metabox.io/plugins/meta-box-builder/): to have a UI on the backend to create the custom field visually.

## 1. Creating a custom post type

You may have a custom post type for your posts or products, or anything else already. If not, you should go to **Meta Box** > **Post Types** to create a new one.

![Go to Meta Box > Post Types to create a new post type](https://imgur.elightup.com/M7x14ys.png)

After publishing, there will be a new menu. It’s your post type.

![Your post type display as a new menu](https://imgur.elightup.com/lZleb0V.png)

## 2. Creating custom fields

Each event may have some extra information. Then, we should use custom fields to store them, just go to **Meta Box** > **Custom Fields** to create them one by one.

![Go to Meta Box > Custom Fields to create fields](https://imgur.elightup.com/x27WKoq.png)

Depending on the field type, the logic of showing or hiding the fields, and their hierarchy, you may want to use some extensions of Meta Box for tabs, groups, conditional logic, admin columns, and so on. For instance, I have the setting below for fields since I’ve enabled the **MB Admin Columns**. These kinds of extensions are just optional, so I did not mention it from the beginning.

![All the fields display in the post editorAn example of the setting for fields](https://imgur.elightup.com/6VMAIeY.png)

After creating all the needed fields, go to the **Settings** tab, choose **Location** as **Post type**, and select the name of the custom post type that you’ve created.

![Set the location to apply the fields to your post type](https://imgur.elightup.com/PPwWmQX.png)

Now, in the post editor, you will see the custom fields.

![The custom fields in the post editor](https://imgur.elightup.com/wT35dJW.png)

Just input data into them.

Here are some posts that I created for example.

![Here are some posts that I created for example.](https://imgur.elightup.com/3aumiz9.png)

## 3. Creating a template part

Creating a template part is the same as creating any template as usual. Go to **Views** in Meta Box to create a new view.

![Go to Views in Meta Box to create a new view.](https://imgur.elightup.com/crt8uLV.png)

We also add code to the **Template** tab or insert fields to get the data saved in them. I have data from three custom fields that I want to display in this template part, so just click on the **Insert Field** button and choose the created fields from the list.

![Click on the Insert Field button and choose the created fields from the list.](https://imgur.elightup.com/gvFAVKv.png)

The **MB Views** also provide options to choose the format of the output for some kinds of fields. Just choose one that matches your design.

![Choose the format of the output for some kinds of field.](https://imgur.elightup.com/G0UfeSU.png)

Obviously, you can add some code to this template to regulate how the data displays, and also add CSS or JavaScript for the advanced display. But I skip it now to keep this part simple.

In the **Settings** of the view, I just keep the **Type** as **Shortcode** as default because we don’t use this view to render data for any specific pages.

![In the Settings of the view, keep the Type as Shortcode as default as we don’t use this view to render data for any specific pages.](https://imgur.elightup.com/nalAXdz.png)

So, we’ve done the template part. We will use the generated ID to add to different templates.

![Use the generated ID to add to different templates](https://imgur.elightup.com/4EWDRrJ.png)

## 4. Including the template part into a singular page

You may have an existing template for the singular page created in any way. If it’s created with **MB Views**, just open it to edit the template with **MB Views**. Otherwise, if it’s created in other ways, you can create a new view as follows:

![Create new view for the singular page](https://imgur.elightup.com/7Ktr3hB.png)

Anyway, no matter which kind of template, just click the **Insert Field** button on those views. Then, look for the **View** tab, and you will see the name of the view. I also mean the template part that we've just created.

![Click the Insert Field > the View tab you will see the template part](https://imgur.elightup.com/9Ii5sX0.png)

After clicking on the created template part to insert it into the current template, only a short line of script will be automatically generated in the template as well. It’s also the `include` statement.

![The include statement](https://imgur.elightup.com/Qi6lZ0U.png)

**In there**: `event-basic-info` is the slug of the view used for the template part.

So, we’ve already added the template part to another template.

If you want to display the information that is from the template part in more than one place, just redo the insertion action. Then, there is no need to add a bunch of identical lines of code to the page anymore.

If you add this part to an existing template, just update it to save changes. In this case, I’m adding a new view for the singular page, so in the **Settings** section of the view, set the template type as **Singular**, and choose the location as the post type as we want.

![In the Settings section of the view, set the template type as Singular, and choose the location as the post type as we want.](https://imgur.elightup.com/1PdVftp.png)

In the **Render for** section, just choose an option for the expected position.

![In the Render for section, just choose an option for the expected position.](https://imgur.elightup.com/8260oU0.png)

Now, go to the view of any post of the **Event** post type, you can see all the information from the fields as we set in the template part in the previous step.

![In any post of the Event post type, all the information from the fields display as we set in the template part.](https://imgur.elightup.com/dyNJm9R.png)

## 5. Making changes for the template part

If you want to style or customize the section that contains the event information above, instead of going to the template of the singular page, you should go back to the template part where we get data from each field.

![Go back to the template part to customize the script](https://imgur.elightup.com/qeYKIG1.png)

Customize the script as you want. The simplest way is to just add some div tags and classes, as I do, for example.

![I add some div tags and classes for example.](https://imgur.elightup.com/YMr0gDJ.png)

Now, back to the singular page, you can see a new appearance of the section.

![A new appearance of the section.](https://imgur.elightup.com/2CFmKij.png)

It means that you can customize the template part without affecting the page where you have it on.

Also, if you want the information of the section displayed in multiple places on the page, you can add the template part to those places. Then, when you make changes for the template part, all of the sections in every place will be changed at the same time. Easy peasy!

Now, let’s move on to the next part of this tutorial to see another application and the advantages of using the template part.

## 6. Including the template part into an archive page

I assume that you have had an archive page like this.

![An existing archive page](https://imgur.elightup.com/SGS3ugS.png)

I also have the template for it using MB Views.

![The template for the archive page using MB Views](https://imgur.elightup.com/PubfDp9.png)

I’ll include the created template part into this template to display the section of the start date, end date, and location. In the template, look for the place where you want to add the section to.

Next, click the **Insert Field** button, and add the created template part as we did with the singular page. Then, look for the **View** tab, and choose the name of the template part.

![In the View tab, choose the name of the template part.](https://imgur.elightup.com/29B3dwV.png)

The same line of code is generated exactly as the one added to the singular page.

![The same line of code is generated exactly with the one added in the singular page.](https://imgur.elightup.com/GmQ3qOo.png)

Save this template and go to the archive page on the frontend, you also see the extra data displayed as on the singular page. Especially, they display in the same style as the one on the singular page.

![The extra data displayed in the archive page as in the singular page.](https://imgur.elightup.com/fBliaao.png)

Now, you can see why we call the template part ‘reusable’. Not only reuse it in different places on a page, but also on different pages. So, they will all have a uniform style. In the meantime, whenever you customize the template part, all the sections in all places, all pages, also change at the same time.

# Creating a simple listing - Using MB Views

import LiteYouTubeEmbed from 'react-lite-youtube-embed';
import 'react-lite-youtube-embed/dist/LiteYouTubeEmbed.css';

Continuing our series on [how to create simple listing](https://docs.metabox.io/tutorials/create-simple-listing-meta-box-bricks/), where we've explored the way to build custom post listings using various page builders, this sixth part introduces a new approach only with Meta Box. It’s using **MB Views**.

This is my example with a list of restaurants:

![Example of listing along with filter.](https://i0.wp.com/images.elightup.com/meta-box/blog/simple-listing-views/Untitled%20Project-min.gif)
 
## Video version

<LiteYouTubeEmbed id='_-hQ68Ku-Jc' />

## Preparation

We will divide the page into 2 sections: one to display the products along with their information, and one for filters.

![The page is divided into 2 part: products and filters](https://i0.wp.com/images.elightup.com/meta-box/blog/simple-listing-views/two-parts-of-page.png)

Each product (restaurant) will be saved in a post of a custom post type. The product’s name and image are the title and feature images of the post. Other information, such as status, address, and logo, will be saved in separate custom fields.

For the filters, it’s based on the voucher information that is created with custom taxonomy. Each one is a term of that taxonomy. When you click on a voucher, the corresponding restaurants will be shown.

So, we highly recommend you install [**Meta Box AIO**](https://metabox.io/aio/) to have a framework for creating a custom post type, custom taxonomy, and custom fields. As well as, it provides all of the extensions from Meta Box, which help you to have advanced features: 

* [MB Custom Post Types and Custom Taxonomies](https://metabox.io/plugins/custom-post-type/): to create a custom post type and custom taxonomies for products.
* [MB Builder](https://metabox.io/plugins/meta-box-builder/): to have a UI on the backend to create the custom field visually and efficiently. You can test the new interface of MB Builder [here](https://metabox.io/mb-builder-5-0-0-rc1/).
* [MB Views](https://metabox.io/plugins/mb-views/): to create a template for displaying product information and creating a filter.

Let’s go step-by-step.

## 1. Creating a custom post type

Right on the Meta Box dashboard, click on the **Create post type** button.

![Click on the Create post type button](https://i0.wp.com/images.elightup.com/meta-box/blog/simple-listing-views/create-post-type.png)

After publishing, there will be a new menu here. It’s your post type.

![The created custom post type](https://i0.wp.com/images.elightup.com/meta-box/blog/simple-listing-views/post-type-on-menu.png)

## 2. Creating a custom taxonomy

As I said, we’ll have a filter on the page based on a taxonomy. I will divide the vouchers into some discount levels, and each one of them will be a term of the taxonomy. So let’s move on to create them.

Go to **Meta Box** > **Taxonomies**, and create a new one.

![Go to Meta Box > Taxonomies, and create a new taxonomy](https://i0.wp.com/images.elightup.com/meta-box/blog/simple-listing-views/create-taxonomy.png)

In the **Advanced** section, enable the **Show admin column** option if you want to show them as an admin column. This setting is available when you have the MB Admin Columns extension. I did not mention it at the beginning because it’s optional.

![Enable the Show admin column option](https://i0.wp.com/images.elightup.com/meta-box/blog/simple-listing-views/show-admin-column.png)

Next, in the **Post Types** tab, choose the post type that you’ve just created. In my case, it’s the restaurant.

![Choose the post type to apply the taxonomy to.](https://i0.wp.com/images.elightup.com/meta-box/blog/simple-listing-views/choose-post-type.png)

Now, you can add some terms to your product’s taxonomy.

![Terms of taxonomy](https://i0.wp.com/images.elightup.com/meta-box/blog/simple-listing-views/create-terms.png)

## 3. Creating custom fields for product information

Besides the name and image, we need some extra information for the product. In my case, I need to store the address, logo, and the opening status. 

Click on the **Create custom fields** button in the dashboard to create a new field group for the product.

![Click on the Create custom fields button in the dashboard to create a new field group](https://i0.wp.com/images.elightup.com/meta-box/blog/simple-listing-views/create-custom-fields.png)

These are some fields I created:

![Some fields as example](https://i0.wp.com/images.elightup.com/meta-box/blog/simple-listing-views/field.png)

There’s no special setting for them. You can freely create more fields to store information for products as you want with [40+ field types](https://docs.metabox.io/fields/) provided by Meta Box.

After having all the fields you need, move to the **Settings** tab, choose **Location** as **Post type**, and select your post type to apply these fields to it.

![Set location for the field group.](https://i0.wp.com/images.elightup.com/meta-box/blog/simple-listing-views/field-location.png)

Now, when you add a new product, on the post editor screen, you can see the custom fields and a box to set the taxonomy.

![Fields and taxonomy in the post editor](https://i0.wp.com/images.elightup.com/meta-box/blog/simple-listing-views/post-editor.png)

Just add some information for your products.

You can easily view the voucher information in this column.

![The term is displayed as a column](https://i0.wp.com/images.elightup.com/meta-box/blog/simple-listing-views/taxonomy-in-column.png)

## 4. Displaying products on a listing page

We’ll show all the restaurants on a separate page. So, let’s create the page first.

Go to **Pages** and add a new one.

![Create a new page](https://i0.wp.com/images.elightup.com/meta-box/blog/simple-listing-views/create-page.png)

I leave it blank since the page content will be dynamically displayed with MB Views.

Now, go ahead to **Meta Box** > **Views**, and create a new view.

![Go ahead to Meta Box > Views, and create a new view.](https://i0.wp.com/images.elightup.com/meta-box/blog/simple-listing-views/create-view.png)

In the **Template** tab, you can use this button to insert fields or add code directly. I use both these ways.

First, add this code:

```
{% set args = { post_type: 'restaurant', posts_per_page: -1, orderby: 'date', order: 'DESC' } %}
{% set posts = mb.get_posts(args) %}
{% for post in posts %}

{% endfor %}
```

![Add code to get posts](https://i0.wp.com/images.elightup.com/meta-box/blog/simple-listing-views/get-posts.png)

**In there**:

* `{% set args = { post_type: 'restaurant', posts_per_page: -1, orderby: 'date', order: 'DESC' } %}`: is to declare that we’ll get posts from the `restaurant` post type.
* `mb.get_posts()`:  is a Meta Box function to get the posts.
* `{% for post in posts %}...{% endfor %}`: is a loop we use to get all the posts, since there are various restaurants.

Inside the loop, we’ll get data for each product.

First, to get the terms, add this code:

```
{% set vouchers = mb.get_the_terms(post.ID, 'voucher') %}
{% if vouchers %}
    {% for voucher in vouchers %}
        {{ voucher.name }} <br/>
    {% endfor %}
{% endif %}
```

![Add code to get terms](https://i0.wp.com/images.elightup.com/meta-box/blog/simple-listing-views/get-terms.png)

In the above code, I use `mb.get_the_terms()` to get the term. We also have more than one term, so there is a nested loop to get and display the name of the term in the case that the restaurant has a voucher.

To get and display the remaining information, use the button I mentioned before to insert fields from the right panel.

When you click to insert one field, for example, the post title for the product name, a generated code will be added to the **Template** tab.

![The generated code will be added to the Template tab when inserting a field.](https://i0.wp.com/images.elightup.com/meta-box/blog/simple-listing-views/insert-field.png)

The list also includes Meta Box fields. MB Views allows you to choose its size or output for some special fields. Then, we have the code as the image below:

![The template after inserting all the fields](https://i0.wp.com/images.elightup.com/meta-box/blog/simple-listing-views/template-tab.png)

After inserting all the fields you need, scroll down to the **Settings** section. Set the type of the template as **Singular**, then select your page you created for the product listing.

![Set location for the template](https://i0.wp.com/images.elightup.com/meta-box/blog/simple-listing-views/view-settings.png)

Now, view the page on the frontend, you can see all the data is displayed, but it may need to be made more beautiful.

![Product information is displayed on the frontend](https://i0.wp.com/images.elightup.com/meta-box/blog/simple-listing-views/data-display.png)

Back to the template, and add some **`div`** tags and classes, as well as modify the code a little bit.

![Add some div tags and classes, as well as modify the code a little bit.](https://i0.wp.com/images.elightup.com/meta-box/blog/simple-listing-views/add-div-class.png)

Then, move to the **CSS** tab, and add code for styling.

![Move to the CSS tab to add code for styling.](https://i0.wp.com/images.elightup.com/meta-box/blog/simple-listing-views/add-css.png)

After that, our page is more eye-catching.

![The page is better](https://i0.wp.com/images.elightup.com/meta-box/blog/simple-listing-views/better-look.png)

## 5. Adding filters to the page

We’ll use JavaScript to add action for the filter. However, we need to add some code to the created template first.

![Add some code for JavaScript action](https://i0.wp.com/images.elightup.com/meta-box/blog/simple-listing-views/add-code.png)

**Specifically**:

```
<script src="https://ajax.googleapis.com/ajax/libs/jquery/3.7.1/jquery.min.js"></script>
<script src="https://npmcdn.com/isotope-layout@3.0.6/dist/isotope.pkgd.js"></script>
```

These are to declare and load the jQuery and Isocope library we’ll use for filtering and grid layout.

```
<div class="filter-buttons">
    <button data-filter="*" class="filter-tab active">All Restaurants</button>
        {% set terms = mb.get_terms({taxonomy: 'voucher'}) %}
        {% for term in terms %}
        <button data-filter=".{{ term.slug }}" class="filter-tab">{{ term.name }}</button>
        {% endfor %}
    </div>
```

This part is for the button in the filter.

There will be a button for displaying all the restaurants. It has a label as **All Restaurants**.

The remaining buttons are terms of the `voucher` taxonomy along with their slug.

Next, I set the class for each term with this part:

```
{% set vouchers = mb.get_the_terms(post.ID, 'voucher') %}
{% set voucher_classes = '' %}
{% if vouchers is not empty %}
{% set voucher_classes = vouchers|map(v => v.slug)|join(' ') %}
{% endif %}
```

Then, the voucher_classes will be assigned for the slug of the term.

```
<div class="grid-item {{ voucher_classes }}">
```

You should add some CSS to style the filter.

![Add code for styling the filters](https://i0.wp.com/images.elightup.com/meta-box/blog/simple-listing-views/filter-css.png)

Now, go to the **JavaScript** tab to add some code for the action of filtering.

```
jQuery(document).ready(function ($) {
    var $grid = $('.grid').isotope({
        itemSelector: '.grid-item',
        layoutMode: 'fitRows'
    });

    $('.filter-buttons button').on('click', function () {
        var filterValue = $(this).attr('data-filter');
        $grid.isotope({ filter: filterValue });
        $('.filter-buttons button').removeClass('active');
        $(this).addClass('active');
    });
});
```

![Add code to the JavaScript tab](https://i0.wp.com/images.elightup.com/meta-box/blog/simple-listing-views/javascript.png)

**Explanation**:

* `var $grid = $('.grid').isotope({`: is to initialize Isotope, and each item will be specified to the `grid-item` class.
* `layoutMode: 'fitRows'`: is to arrange the items in horizontal rows.
* `$('.filter-buttons button').on('click', function () {`: is to recognize the action when the visitor clicks on a button for filtering through the `filter-buttons` class.
* `data-filter`: is the attribute that value will be retrieved from.

That’s all.

I’ve uploaded all the code to [GitHub](https://github.com/wpmetabox/tutorials/tree/master/create-a-simple-listing-with-mb-views), so you can refer to it.
Now, go to the page on the frontend, and check the filter. It works well.

![The filter works well](https://i0.wp.com/images.elightup.com/meta-box/blog/simple-listing-views/Untitled%20Project-min.gif)

The code also runs when the product has more than one voucher. That product will be shown in all the terms it has.

![The code also runs when the product has more than one voucher](https://i0.wp.com/images.elightup.com/meta-box/blog/simple-listing-views/expand.gif)

# Creating a simple listing site - Meta Box + Bricks

import LiteYouTubeEmbed from 'react-lite-youtube-embed';
import 'react-lite-youtube-embed/dist/LiteYouTubeEmbed.css';

We’re going to create a simple archive page to list all the posts of a custom post type. It’s called simple listing. Beside that, we will display extra information saved in custom fields of each post on this page.

This is an example that I made:

![Example of the created simple listing](https://imgur.elightup.com/5djnIAR.png)

Since Bricks supports filtering posts easily, I will show you how to create a filter for the posts as well.

## Video version

<LiteYouTubeEmbed id='bIq1k7-0QMo' />

## Preparation

We’ll need a custom post type for restaurants for example. Each restaurant will be saved in a post of a post type. The name and images of the restaurant are the title and featured image of the post. Other extra information such as status, address and logo will be saved in different custom fields.

The page will have content and filters like this:

![How the page look like](https://imgur.elightup.com/da4gbL0.png)

For those filters, I use taxonomy to classify restaurants into separate groups and filter them by voucher.

So, there are some tools we need for this practice:

* **[Meta Box Lite](https://metabox.io/lite/)**: to create the Restaurant post type and taxonomy named Voucher to filter posts. Also, it provides a UI in the back end to create custom fields to save extra information about restaurants;
* **Bricks**: to build the page.

## 1. Creating a new custom post type

Go to **Meta Box** > **Post Types** > **New Post Type** to create a new post type for restaurants.

![Create a new post type](https://imgur.elightup.com/bgC0Qnw.png)

After publishing, you’ll have a new menu in your dashboard.

![Menu in the dashboard will appear](https://imgur.elightup.com/brKXI7u.png)

## 2. Creating custom fields and taxonomy

### Creating custom fields

Go to **Meta Box** > **Custom Fields** to create a new field group.

Here are the fields that I created. They’re just simple fields so just create them as usual.

![Go to Meta Box > Custom Fields > Add New to create custom fields.](https://imgur.elightup.com/aO8C8yI.png)

Remember to choose the **easy-to-remember** ID as we’ll need them in the next step.

After creating fields, move to the **Settings** tab, choose **Location** as **Post Type** and select **Restaurant** to apply the created custom fields to it.

![create custom fields](https://imgur.elightup.com/kQeTNqD.png)

### Creating custom taxonomy

As I mentioned before, we’ll use taxonomy to filter posts by voucher. So, go to **Meta Box** > **Taxonomies**, and then create a new one. This taxonomy will save information about restaurants’ vouchers.

![Create a custom taxonomy to save information about restaurant vouchers](https://imgur.elightup.com/prhx0w7.png)

When setting the taxonomy, if you want to display it as a column in the admin screen, go to the **Advanced** tab and tick the **Show admin column** box. It's available when you have [MB Admin Columns (optional)](https://metabox.io/plugins/mb-admin-columns/) on your site.

![Set the taxonomy to show as an admin column](https://imgur.elightup.com/YBAYvYp.png)

However, this is just an optional part so depending on your demand, you can choose to use it or not.

To apply this taxonomy for the post type you want, move to the **Post Types** tab and choose the **Restaurant**.

![Apply the taxonomy to a post type](https://imgur.elightup.com/M4mjX8Y.png)

After publishing the taxonomy, you will see it in the Restaurant menu. Just add terms for it.

![Create terms for the taxonomy](https://imgur.elightup.com/kg9jxoM.png)

Finally, let’s create a post for a restaurant, you will see the custom fields and the voucher taxonomy with terms appear.

![You will see the custom fields and the voucher taxonomy with terms appear in the post editor](https://imgur.elightup.com/ApHXazu.png)

## 3. Building the page

Since we’ll built the page with Bricks, create a new page and edit it with Bricks.

![Create a new page then edit it with Bricks](https://imgur.elightup.com/k7x4Vbs.png)

### Displaying the posts information

In the Bricks visual editor, add a **Container** element.

![Add a Container element to cover all the restaurants’ information](https://imgur.elightup.com/yB5g3EZ.png)

To display the title of the page, add a **Heading** element and change the name.

![Add a Heading element to display the title of the page and type the name of the page on it](https://imgur.elightup.com/1jDLbae.png)

In the container, add the **Posts** element then you will see a list of blog posts as default with featured image, title, and short description in the preview.

![In the container, add the Posts element then you will see a list of blog posts as default with featured image, title, and short description in the preview](https://imgur.elightup.com/PfbBkzB.png)

Since the posts we need to get are in the **Restaurant** post type instead of blog posts, go to the **Query** section of the **Posts** element, change the **Post Type** to the one we want.

![change the Post Type to the one we want](https://imgur.elightup.com/pvZ9Zmi.png)

Next, if you want to change the page’s layout or the display of the featured image, go to the **Layout** and the **Imgae** section.

![Change the page’s layout or the display of the featured image](https://imgur.elightup.com/NokwIHO.png)

Now, let’s get the data from custom fields to the page. Still in the settings of the **Posts** element, go to the **Fields** section.

![Add data from custom fields to the page](https://imgur.elightup.com/Lg0Zfdy.png)

I’ll remove the post excerpt and add some fields. Just click **Add Field** > type the name of the custom fields or the taxonomy you want in the **Dynamic Data**. Then, the data of each post will immediately display in the preview.

![Add field then choose a taxonomy from the Dynamic Data box](https://imgur.elightup.com/xu4e1iK.gif)

![Add field then choose a custom field from the Dynamic Data box](https://imgur.elightup.com/18b4jUh.gif)

For the logo field. It’s a bit different so pay attention to it.

When you add the logo field, it will display the text only. So if you want to show it as an image, **add an extra attribute** to the logo field as follows.

![Add an extra attribute to the logo field to have the image](https://imgur.elightup.com/KLRtNPs.gif)

Furthermore, since Bricks doesn’t support creating classes for the **Posts** element, if you want to style each information later, you can use the **HTML tag**.

Here, I set the restaurant name as **H2**, the address as **H3**, the voucher as **P** and the status as **div**. It’s good for SEO, so let’s set it.

![Set the HTML tag for elements](https://imgur.elightup.com/oS7wH3G.png)

After obtaining all the information, you can also rearrange them to the right order by dragging the fields.

That’s all for getting needed information.

### Creating filters

Go to the **Filter** section of the **Posts** element and choose the wanted taxonomy to classify the posts. Then, you will see it in the preview.

![Go to the Filter section and choose the taxonomy that you use to classify the posts](https://imgur.elightup.com/TEJSeK9.png)

All the filters and information have been gotten already. If you want to have more styling for the section, you can easily do it with Bricks.

In my case, I just change the layout of the **Container** and style a bit for the voucher and logo by adding some CSS.

![change the layout of the Container a little bit such as margin and padding](https://imgur.elightup.com/QrR2T2Y.png)

![change the alignment for the Heading](https://imgur.elightup.com/IXuUy0q.png)

In the event that you want to refer to my CSS code, I put it on [Github](https://github.com/wpmetabox/tutorials/blob/master/create-a-simple-listing-with-Bricks/custom.css).

This is how it displays on the frontend. The filters also work well.

![The filters on the archive page also work well](https://imgur.elightup.com/H0T7qcV.gif)

# Creating a simple listing site - Meta Box + WP Grid Builder

import LiteYouTubeEmbed from 'react-lite-youtube-embed';
import 'react-lite-youtube-embed/dist/LiteYouTubeEmbed.css';

We’ll use WP Grid Builder to **create an archive page for restaurants** and then **get data stored in the custom fields of Meta Box**. The filters based on custom fields values are also available, as you can see in the below picture.

![The structure of a simple listing page using WP Grid Builder + Meta Box](https://imgur.elightup.com/qK10425.png)

## Video version

<LiteYouTubeEmbed id='YP7sMXHdf_Q' />

## Preparation

All of the restaurants' information will be saved in a **custom post type**, and each restaurant will be a post. The restaurant’s name and image are the default title and featured image of the post. And other information such as status, address, voucher, and logo will be saved in different **custom fields**.

On the page, we’ll have **Card**, **Grid**, and **Facet** as the following:

![The illustration of Card, Grid, Facet on the listing page](https://imgur.elightup.com/vsYIhRa.png)

* **Card**: is a box to show up a restaurant information.
* **Grid**: is an area to list all the restaurants.
* **Facet**: is the filter and sort.

In the upcoming execution, we’ll create them one by one.

So, we need:

* **[Meta Box Lite](https://metabox.io/lite/)**: to create the Restaurant post type and taxonomy named Voucher to filter posts. Also, it provides a UI in the back end to create custom fields to save extra information about restaurants;
* **[WP Grid Builder](https://wpgridbuilder.com/)** to build the page.

And the last one, make sure that you installed the integration between WP Grid Builder and Meta Box by installing and activating it in the **Add-ons** section of WP Grid Builder. This will support all the fields created by Meta Box and filter the content from custom fields easily.

![Activate Meta Box plugin](https://imgur.elightup.com/BjrWQ5L.png)

## 1. Creating a new custom post type and custom fields

Go to **Meta Box** > **Post Types** to create a new post type for your restaurants.

![Create a new post type for your restaurant](https://imgur.elightup.com/6KH6CwD.png)

To create custom fields, go to **Meta Box** > **Custom Fields** > **Add New**.

![Create custom fields for the custom post type](https://imgur.elightup.com/nun5Rt6.png)

You can refer to [this tutorial](https://docs.metabox.io/tutorials/create-custom-fields/) to know how to create them.

## 2. Creating a card

Go to **Gridbuilder** > **All Cards** > **Create a Card**.

![Go to Gridbuilder then All Cards and Create a Card](https://imgur.elightup.com/4qQ1rSm.png)

In the settings of the card, I keep the default in the **Card Layout** and **Card Sizing** settings. You can customize all these settings if you want.

![Keep the default in the Card Layout and Card Sizing settings](https://imgur.elightup.com/vKsZ39W.png)

Pay attention to the **Card Type** options. The option you select, the one appointed to the grid layout.

To add content to the card, move to the **Blocks** tab, choose the **Title** block to get the restaurant’s name, and drag it to any place where you want to display the name.

![Choose the Title block to get the restaurant’s name](https://imgur.elightup.com/DAGUocx.png)

Since the address information is saved in a custom field created by Meta Box, choose the **Custom Field** block to get it. In the **Edit Block** popup, name the class for styling later. Then, search for the label or ID of the field you want to get data from.

Do likewise with the voucher and status information.

The logo of the restaurant is a special one. There’s no pre-built block that supports calling out the image from custom fields, so I’ll create a new custom block.

Add the following code to the `functions.php` file:

```php
add_filter(
    'wp_grid_builder/blocks', function( $blocks ) {

        // 'custom_image_block' corresponds to the block slug.
		    $blocks['custom_image_block'] = [
            'name'            => __( 'Custom image block', 'text-domain' ),
			      'render_callback' => function() {

				        // Get current post, term, or user object.
                $post  = wpgb_get_post();
                $image = get_post_meta( $post->ID, 'custom_field_name', true );

				        if ( empty( $image ) ) {
					          return;
				        }

				        $source = wp_get_attachment_image_src( $image );

				        if ( empty( $source ) ) {
					          return;
				        }

				        printf(
					          '<img src="%s" width="%s" height="%s">',
					          esc_url( $source[0] ),
					          esc_attr( $source[1] ),
					          esc_attr( $source[2] )
				        );

			      },
		    ];

		    return $blocks;
    }
);
```
This code is officially provided by WP Grid Builder. I put it on [Github](https://github.com/wpmetabox/tutorials/blob/master/create-a-simple-listing-using-Meta-Box-and-WP-Grid-Builder/functions.php) so you can refer to it. Your work is just inserting the ID of the custom field that you want to get the image into the above code.

![Create a new custom block to get the image](https://imgur.elightup.com/4aNaVUj.png)

Go back to edit the card, you will see a new block named **Custom Image Block**, then add it to the card.

![Choose Custom Image Block to get the restaurant's logo](https://imgur.elightup.com/vFOZdyv.png)

We’ve done all the settings for the card.

## 3. Creating a grid

Open **Gridbuilder** > **All Grids** > **Create a Grid**.

![Gridbuilder &gt; All Grids then Create a Grid](https://imgur.elightup.com/ApxTo14.png)

To get the content from the post type that you want to display in the grid, go to the **Content Query** section and choose the post type that we’ve just created.

![In the Content Query section and choose the post type that we’ve just created](https://imgur.elightup.com/e6g5zRH.png)

For the layout of the grid, it is automatically chosen as the option the same as the **Card Type** of the Card you set before. You cannot choose different options. For example, it is **Mansory** here since I set the **Card Type** as the same option.

![Grid Layout settings](https://imgur.elightup.com/1S1pt57.png)

Then, go down to the **Grid Responsivity** section, adjust the number of columns and spacing of the display on different device screens.

Next, in the **Card Styles** section, set both the **Default Card** and **Post Type Cards** as the **Restaurant Card** which we’ve just created.

![In the Card Styles section, set both the Default Card and Post Type Cards as the Restaurant Card which we’ve just created](https://imgur.elightup.com/GUDFPce.png)

## 4. Creating a facet

To create a facet, go to **Gridbuilder** > **All Facets**.

There’re a lot of pre-made facets that you can use instantly. In my case, I choose the **Selection** facet for my filter and the **Sort** facet to arrange content in order. Then, just import data into these ones instead of creating a new facet.

![Choose the facet types and import data to these ones instead of creating a new facet](https://imgur.elightup.com/BJwTwGk.png)

First, let’s change some settings of the **Selection**. In the **Behaviour** section, you can see that this facet is set as a filter already.

![Change some settings of the Selection](https://imgur.elightup.com/yRdBRxu.png)

You can choose any filter type you want. Here, I chose **Dropdown** for example, then the filter will display like this:

![The example of a dropdown list](https://imgur.elightup.com/Y0lqD99.png)

Next, scroll down, and you will see the **Filter By** section. It’s the most important setting for the facet. There are 3 options of **Data Source** that you can choose from.

![The settings in Filter By section](https://imgur.elightup.com/NDMavni.png)

In this practice, I want to filter restaurants by voucher so that users can see which ones have a 30% or 50% discount, for example. This kind of information is saved in the custom fields created by Meta Box. So, choose **Custom Field** and select the field you want.

For other settings, I keep them as default.

With the **Sort** facet, I also keep it as the default settings. You can remove or add more options for sorting in this section.

![The settings of Sort Facet](https://imgur.elightup.com/omLPAvH.png)

## 5. Creating the archive page

Go to **Page** > **Add New**.

As the example that I've shown, the page is divided into 2 sections. One is for the facets with 2 columns, and another one is for the restaurant's information.

For the first section, I add columns and choose **50/50**. In each column, add a **Facet** block inside, then choose the corresponding one. For example, I add the filter named **Selection** and choose the grid named **Restaurant Grid**. It allows you to filter content from that grid.

The second column will be set as the sort. I also chose the grid named for the sort Restaurant Grid.

![Chooose the grid name for Restaurant grid](https://imgur.elightup.com/2ZpWmDe.gif)

For the second section, it is the content about the restaurant. I’ve already created a grid for it. Thus, add a **Grid** block and choose your created one.

![Add a Grid block and choose your created one](https://imgur.elightup.com/1n7wLdA.gif)

Now, all of the restaurant’s information is displayed. And you can see that the filter and sort work well.

![The result after all steps](https://imgur.elightup.com/t1kxMYs.gif)

## 6. Styling the page

In this practice, I’ll add some CSS and JS code to style the section a little bit in the WP Grid Builder.

Instead of adding code to the theme file, we’ll go to **Customization** in the grid’s settings of WP Grid Builder, then add code to the corresponding boxes.

![Add code to the Custom CSS box in Customization section](https://imgur.elightup.com/HfdIdgM.png)

![Add code to the JavaScript box](https://imgur.elightup.com/j69PI6l.png)

This JS code is to style the status data to set it displays as a dot with colors as following.

![2 statuses of the restaurant](https://imgur.elightup.com/FSNO33g.png)

I put all the code on [Github](https://github.com/wpmetabox/tutorials/blob/master/create-a-simple-listing-using-Meta-Box-and-WP-Grid-Builder/custom.css), so you can refer to it for more details.

Back to the page, all of the information is displayed more beautifully, especially the restaurants’ status and logos.

![The restaurants’s status and logos are displayed beautifully in the listing page](https://imgur.elightup.com/A2NLv5h.png)

# Creating a simple listing - Meta Box + Breakdance

import LiteYouTubeEmbed from 'react-lite-youtube-embed';
import 'react-lite-youtube-embed/dist/LiteYouTubeEmbed.css';

Next to the previous tutorial on [the series](https://metabox.io/series/simple-listing-with-filters/) ‘**creating a simple listing**’ using **Meta Box** and page builders, we’re going to find out a new way to do it with **Breakdance**. We use custom fields and taxonomies created by Meta Box to **display information about products on an archive page and filter them** as well.

We have an archive page that shows a list of restaurants as an example.

![example of an archive page that shows a list of restaurants](https://imgur.elightup.com/qZuHtUP.png)

## Video version

<LiteYouTubeEmbed id='p6i4Nc-F1zU' />

## Preparation

In this practice, we will divide the page into 2 sections: one to display the products and their information, and one for filters.

For the products (I meant restaurants), we will need a custom post type, and each one of them will be saved in a post. Your products may have some extra information, so you can use custom fields to save them. In my case, the restaurant’s name and image are the title and feature images of the post. Other information such as status, address, and logo will be saved in different custom fields.

Regarding the filter, it’s based on a custom taxonomy that I created as vouchers.

![the page includes 2 sections: one to display the products and their information, and one for filters](https://imgur.elightup.com/7n0DyMC.png)

To do it, we need the tools as follow:

* **[Meta Box Lite](https://metabox.io/lite/)**: to create the Restaurant post type and taxonomy named Voucher to filter posts. Also, it provides a UI in the back end to create custom fields to save extra information about restaurants;
* **Breakdance** to build the page.

## 1. Creating a new custom post type

Go to **Meta Box** > **Post Types** to create a new post type for your products.

![Go to Meta Box, Post Types to create a new post type for your products](https://imgur.elightup.com/Ju31w9y.png)

After publishing, you will see a new menu in your dashboard, that’s your created custom post type.

## 2. Creating a new taxonomy

As mentioned, we’ll have a filter for the products based on a taxonomy as vouchers. The voucher will be divided into some discount levels, and each of them will be a term of this taxonomy.

Go to **Meta Box** > **Taxonomies** to create a new taxonomy.

![Go to Meta Box, Taxonomies to create a new taxonomy](https://imgur.elightup.com/x437iFX.png)

In the **Advanced** section, check the **Hierarchical** option if you want to show the taxonomy in a hierarchy.

You may want to check the **Show admin column** option to show it as an admin column. This setting is available when you have the [MB Admin Columns](https://metabox.io/plugins/mb-admin-columns/) extension.

![In the Advanced section, check the Hierarchical option to show the taxonomy in a hierarchy, and Show admin column option to show it as an admin column](https://imgur.elightup.com/xIU7xZP.png)

In the **Post Types** tab, choose your products post type that you’ve just created to apply this taxonomy to it.

![In the Post Types tab, choose the products post type to apply taxonomy to it](https://imgur.elightup.com/U8e5M5C.png)

Now, you can add some term for your product’s taxonomy.

![add some term for your product’s taxonomy](https://imgur.elightup.com/263MEFr.png)

## 3. Creating custom fields

Just go to **Meta Box** > **Custom Fields** > **Add New** to create some custom fields for your products’s extra information if any.

![go to Meta Box, Custom Fields, Add New to create some custom fields for your products’s extra information](https://imgur.elightup.com/UqUFtSg.png)

Here are some typical custom fields I created.

![some typical custom fields I created](https://imgur.elightup.com/YXi1LXs.png)

If you need more fields, freely choose any type of field for your case. Meta Box has [more than 40 field types](https://youtu.be/WWeaM5vIAwM) that you can benefit from.

After creating the fields, move to the **Settings** tab. Then choose the **Location** as **Post type** and select your products post type to apply these fields to it.

![move to the Settings tab, choose the Location as Post type and select your products post type to apply these fields to it](https://imgur.elightup.com/zGUAPnn.png)

After publishing, go to a post editor, you will see the terms of the created taxonomy and the custom fields displayed. Just add some information for your products.

![the terms of the created taxonomy and the custom fields displayed in the post editor](https://imgur.elightup.com/pqHCZe0.png)

## 4. Creating a global block

To display information about each product, we should create a global block. Go to **Breakdance** > **Global Blocks** then create a new one.

![Go to Breakdance, Global Blocks to create global block](https://imgur.elightup.com/ez1bcWa.png)

Set a post for preview.

![Set a post for preview](https://imgur.elightup.com/F3x0RH5.png)

First, add an **Image** element to display the restaurant’s image.

![add an Image element to display the restaurant’s image](https://imgur.elightup.com/oRtmApt.png)

Click on the **Insert Dynamic Data** button.

![Click on the Insert Dynamic Data button](https://imgur.elightup.com/Xm4E3cR.png)

Then choose **Featured Image** in the **Post** section.

![choose Featured Image in the Post section](https://imgur.elightup.com/HXZq94r.png)

Next, add a **Text Link** element for the product name.

![add a Text Link element for the product name](https://imgur.elightup.com/ss8vuZq.png)

It’s from the post title, so click on the **Insert Dynamic Data** button and look for it.

![click on the Insert Dynamic Data button and look for post title](https://imgur.elightup.com/HcrnxBc.png)

This element has a setting that allows you to embed a link into this title. There’s also an option to insert dynamic data to it.

![embed a link into this title by using insert dynamic data in the Link box](https://imgur.elightup.com/qYkRcWQ.png)

Choose **Post Permalink** inside.

![Choose Post Permalink inside](https://imgur.elightup.com/3t54xrX.png)

Go ahead, add a **Text** element for showing the address.

![add a Text element for showing the address](https://imgur.elightup.com/iiPUcts.png)

This information is saved in a custom field created with Meta Box, so also insert dynamic data to this element.

![click on the insert dynamic data button to choose the source of data](https://imgur.elightup.com/28wxyyb.png)

Look for the **Metabox** section, you will see the name of the custom field. Choose it.

![Look for the Metabox section and choose Address](https://imgur.elightup.com/FTnWZGh.png)

In the same way, add an **Image** element to show the logo, also insert dynamic data to get the image of logo.

![add an Image element to show the logo, also insert dynamic data to get the image of logo](https://imgur.elightup.com/A5llLtT.png)

Do likewise for the status information. Add a **Text** element, insert dynamic data from the **Status** field.

![for the Status information, add a Text element, insert dynamic data from the Status field](https://imgur.elightup.com/42myB0m.png)

Now, you can style each element in this global block by changing their settings. I changed them to have this look.

![style each element in this global block by changing their settings](https://imgur.elightup.com/Ejv68n8.png)

## 5. Creating the page

Go to **Pages** and create a new page as usual, then edit it in **Breakdance**.

![Go to Pages and create a new page as usual, then edit it in Breakdance](https://imgur.elightup.com/eHssYew.png)

First, add a **Section** element to cover all the content of the page.

![add a Section element to cover all the content of the page](https://imgur.elightup.com/keVYE25.png)

Inside the section, add the **Heading** element to the page title.

![Inside the section, add the Heading element to the page title](https://imgur.elightup.com/1azAOnI.png)

### 5.1. Getting posts

To display the list of posts, add the **Post Loop Builder** element.

![To display the list of posts, add the Post Loop Builder element](https://imgur.elightup.com/wrd7LyM.png)

In the **Global Block** box, choose the **Restaurant Block** that we’ve made in the previous step.

![In the Global Block box, choose the Restaurant Block that we’ve made in the previous step](https://imgur.elightup.com/svoaMiA.png)

Then go to the **Query** section to set a custom query to get posts.

![go to the Query section to set a custom query to get posts](https://imgur.elightup.com/0flPgkm.png)

Select the name of the post type you use for your products.

![Select the name of the post type you use for your products](https://imgur.elightup.com/mOlEfPq.png)

There are also some other settings for the query in this popup. You can customize the query as you want. In this case, I left them all as default.

Immediately, you will see the products displayed.

![the products displayed](https://imgur.elightup.com/odFUS1l.png)

Now, let’s add a filter bar to this page.

### 5.2. Adding filters

In the settings of the **Post Loop Builder** element, there is the **Filter Bar** section. Click on the **Enable** button to enable a filter bar for this element.

![In the settings of the Post Loop Builder element, Click on the Enable button to enable a filter bar for this element](https://imgur.elightup.com/MRzfVQR.png)

In the **Type** box, choose the taxonomy that we created for the products.

![In the Type box, choose the taxonomy that we created for the products](https://imgur.elightup.com/G8TTpwh.png)

A list of the discount levels that I set as the terms of the taxonomy will be displayed.

![A list of the discount levels that I set as the terms of the taxonomy will be displayed](https://imgur.elightup.com/ZSTs8jV.png)

Next, you can enable the **All Filter** option.

![enable the All Filter option](https://imgur.elightup.com/8aRixc0.png)

That's how I complete adding the filter bar to the page.

### 5.3. Styling the page

You also can style each element on the page a little bit to have a better look.

![style each element on the page a little bit to have a better look](https://imgur.elightup.com/MaeJaVW.png)

All the status dots are green. We should use some JavaScript to automatically change the color of the dot following the value saved in the Status custom field. So, add a **Code Block** element to the page.

![add a Code Block element to the page to automatically change the color of the dot following the value saved in the Status custom field](https://imgur.elightup.com/HGlqhLf.png)

And, add some code into the block.

![add some code into the block](https://imgur.elightup.com/tfw2z0D.png)

Now go to the front end and you can see the final look of the simple listing page.

![go to the front end and you can see the final look of the simple listing page](https://imgur.elightup.com/qZuHtUP.png)

The filter also works well.

![The filter works well](https://imgur.elightup.com/wJGHrnV.gif)

# Creating a simple listing - Meta Box + Elementor

import LiteYouTubeEmbed from 'react-lite-youtube-embed';
import 'react-lite-youtube-embed/dist/LiteYouTubeEmbed.css';

Today, we’ll create a **simple listing with Meta Box and Elementor**. We’ll use custom fields and taxonomies from Meta Box to **showcase product information on an archive page as well as filter it easily**.

As an example, we have an archive page with a list of restaurants.

![An example of an archive page that shows a list of products.](https://imgur.elightup.com/1ov7T6L.png)

## Video version

<LiteYouTubeEmbed id='6mHDBIO_qlY' />

## Preparation

There’s something we should clarify before getting started.

In the backend, we will need a **custom post type** for the products as well as the restaurants, and each one of them will be saved in a post. The restaurant’s name and image are the title and feature images of the post. We also have some extra information for the restaurant, that your products also might have as well, and all of them will be saved in different **custom fields**.

On the frontend, means the listing page, we’ll divide the page into 2 sections: one to display the products and their information, and one for the filter.

![2 sections of the page: one to display the products and their information, and one for filters](https://imgur.elightup.com/EGbGWex.png)

Each box like this image below is for each product, and we will create a template in the type of a loop item in **Elementor** to get the product information.

![Create a loop item template to get information about a product.](https://imgur.elightup.com/zxlPAN6.png)

The filter is based on the voucher information that is created in the form of a taxonomy. Each one is a term of that taxonomy.

So, in the practice, we need [Meta Box Lite](https://metabox.io/lite/) to create a custom post type custom taxonomies for products and have a UI on the backend to create the custom field efficiently.

Beside, you may need to [MB Views](https://metabox.io/plugins/mb-views/) to get and display the status of the restaurants. It's a premium extensions of Meta Box and available in **Meta Box AIO**.

Finally, we’ll use **Elementor** to build the page and use **Elementor Pro**, which has integration with Meta Box, to display the information from custom fields.

## 1. Creating a new post type

Use the quick action in the dashboard or go to **Meta Box** > **Post Types** to create a new post type for your products.

![Create a new post type for your products](https://imgur.elightup.com/l7gvWIM.png)

After publishing, you will see a new menu in your dashboard. It’s your post type.

## 2. Creating custom fields

Your products may have some extra information, so we need custom fields in this case. Just click on the **Create a field group** button in the dashboard or go to **Meta Box** > **Custom Fields** > **Add New** to create some fields for it.

![Go to Meta Box > Custom Fields to create some custom fields for your products’s extra information](https://imgur.elightup.com/YSmZ89L.png)

I just create some typical ones for illustration purposes only.

After creating all the needed fields, go to the **Settings** tab. Choose **Location** as **Post type** and select **Restaurant** to apply these fields to this post type.

![Set location to apply the fields to your product post type.](https://imgur.elightup.com/EI2FtmB.png)

## 3. Creating a new taxonomy

As mentioned, we’ll have a filter on the page based on a taxonomy. I will divide the vouchers into some discount levels, and each one of them will be a term of the taxonomy. So let’s move on to create them.

Create a new taxonomy via the quick action in the Meta Box dashboard or go to **Meta Box** > **Taxonomies** to create a new taxonomy.

![Go to Meta Box > Taxonomies to create a new taxonomy](https://imgur.elightup.com/KhU6ngP.png)

In the **Advanced** section, check the **Hierarchical** box if you want to show the taxonomy in a hierarchy.

If you want to display it as a column in the admin screen, check the **Show admin column** box. This setting is available when you have the [MB Admin Columns](https://metabox.io/plugins/mb-admin-columns/) extension.

![In the Advanced section, check the Hierarchical option to show the taxonomy in a hierarchy, and Show admin column option to show it as an admin columnmy](https://imgur.elightup.com/IkNNrG9.png)

In the **Post Types** tab, choose the product post type that you’ve just created to apply this taxonomy to it.

![Choose the products post type to apply taxonomy to it.](https://imgur.elightup.com/xiWzJQl.png)

Now, you can add some terms to your product’s taxonomy.

![Add some term for your product’s taxonomy](https://imgur.elightup.com/zYa5QrF.png)

Now, in the post editor of your products, you will see the custom fields as well as the voucher items appearing on the right sidebar.

![The terms of the created taxonomy and the custom fields displayed in the post editor](https://imgur.elightup.com/rvseFQe.png)

Just input data into them.

Here are some example posts that I've created. And you can easily view the voucher information from the created taxonomy directly in the admin column.

![The voucher information from the created taxonomy directly in the admin column.](https://imgur.elightup.com/jUrOWvs.png)

## 4. Displaying the product information

As I mentioned before, we should create a loop item template to display all the expected information about the product first. So, go to the **Elementor Theme Builder** and create it.

![Go to the Elementor Theme Builder to create a loop item.](https://imgur.elightup.com/DYPSHoR.png)

![Create a loop item template to display all the expected information about the product.](https://imgur.elightup.com/N8mHuEC.png)

Remember to set the preview.

![Set the preview for the template](https://imgur.elightup.com/GGS6zGF.png)

First, add a section with a one-column layout to contain all the information about a product.

![Add a section with a one-column layout to contain all the information about a product](https://imgur.elightup.com/mq115Rl.png)

Now, add some elements to display the product’s information.

To display the restaurant’s image, add the **Featured Image** element.

![Add the Featured Image element to display the restaurant’s image.](https://imgur.elightup.com/GS6Eo1F.png)

For the name of the restaurant, choose the **Post Title** element as the restaurant’s name is the post title.

![Choose the Post Title element as the restaurant’s name is the post title](https://imgur.elightup.com/FUh5qBC.png)

Go ahead! Add a **Text Editor** element for the restaurant’s address. Since this information is saved in custom fields created by Meta Box, use the **Dynamic Tags**, find the **Meta Box Field** in the **Post** section, and then choose the corresponding fields.

![Add a Text Editor element for the restaurant’s address and use Dynamic Tags](https://imgur.elightup.com/8Itzngw.png)

![Add a Text Editor element for the restaurant’s address and use Dynamic Tags](https://imgur.elightup.com/4bZtQt2.png)

Now, the restaurant’s address is displayed immediately.

![The restaurant’s address is displayed](https://imgur.elightup.com/svRkQV8.png)

In the same way, choose an **Image** element to show the logo. Also, use the **Dynamic Tags** to connect this element with the field. Then, you can see the logo of the restaurant.

![Choose an Image element to show the logo](https://imgur.elightup.com/ofreCW3.gif)

The last thing is the status. It has two colors and will change based on the values saved in the custom fields. To make it auto-changed, we should use a dynamic class, then use CSS to make it the right color automatically. But Elementor doesn't support dynamic classes. So, I will use the **MB Views** to display the status of the restaurant.

Now, go to **Meta Box** and create a new view. Then, add some code to the **Template** tab.

![Use the MB Views to display the status of the restaurant.](https://imgur.elightup.com/j58UxUk.png)

**In there**:

`{% set restaurant_status = mb.rwmb_meta('status') %}`: is to create a variable to get the value from the **Status** field. We use the `rwmb_meta('status')` function to get value. And status is the ID of the field.

We have a condition. If the variable receives the value as open, we will name a class as `restaurant-status` open. Otherwise, if the returned value is close, we will name a class as `restaurant-status` close.

Now, set this template as a shortcode.

![Set the template as a shortcode](https://imgur.elightup.com/CtyvIll.png)

After publishing, a shortcode is generated automatically. Just copy it.

![A shortcode is generated automatically](https://imgur.elightup.com/b6SgUxq.png)

Back to edit the template for your products, choose a **Shortcode** element. And paste the created one in this box below.

![Choose a Shortcode element and paste the created one.](https://imgur.elightup.com/NFWuLFH.png)

So, we’ve done a loop item for the product. Let’s move on.

## 5. Creating the page

Go to **Pag**es and create a new one, as usual.

![Create a new page for the products](https://imgur.elightup.com/AnInt80.png)

### 5.1 Getting posts

For displaying posts, I meant products, we had a template for each post. So now, add the **Loop Grid** element.

![Add the Loop Grid element](https://imgur.elightup.com/qQXiAeF.png)

Choose the template that we have created.

![Choose the template that we have created](https://imgur.elightup.com/PDClN8u.png)

You can see that some blog posts display in the form that we set for the template, but they are wrong. They are blog posts by default.

To replace them with your products, go to the **Query** section and choose the **Source** as your product’s post type.

![To replace default posts with your products, choose the Source as your product’s post type.](https://imgur.elightup.com/95DaJ6l.png)

Then, all of the posts in that post type will display.

![All of the posts in that post type will display](https://imgur.elightup.com/xpfK7xo.png)

All the information about my product is displayed, except the status. We will fix it using CSS later.

### 5.2 Adding filters

For the filter section, just add the **Taxonomy Filter** element to the place you want

![For the filter section, add the Taxonomy Filter element](https://imgur.elightup.com/WcktTMv.png)

Then, select a loop grid and the taxonomy we used for the voucher. After that, a list of the discount levels that we set as the terms of the taxonomy will be displayed.

![Select a loop grid and the taxonomy we used for the voucher](https://imgur.elightup.com/gDb369l.png)

You can see how it works on the frontend. The status doesn’t display since it is still a class and hasn't been set to display yet.

![The status doesn’t display since it is still a class and hasn't been set to display yet.](https://imgur.elightup.com/A4CtYNC.gif)

## 6. Styling the page

Go back to the created template as a loop item for each product. Just customize each element's settings to have the best look for product information.

![Customize each element's settings](https://imgur.elightup.com/g6QtDJ1.png)

In the page editor, do so with the settings of each element.

To display and style the restaurant status, we will add some CSS.

![Add some CSS to display and style the restaurant status.](https://imgur.elightup.com/aWGDa4B.png)

**In there**:

These lines of code are to regulate the shape:

```css
.restaurant-status {
    width:20px;
    height:20px;
    border-radius:50%;
}
```

`background:#26e126` and `background:#eee` are the different colors used for the `.restaurant-status.open` class and the `.restaurant-status.close` class, respectively.

As a result, there is a new dot in the image of each product. Some are green, and some are gray.

Here is the final look of my simple listing page.

![The final look of my simple listing page](https://imgur.elightup.com/HuGC1xB.gif)

# Creating a simple listing - Meta Box + Kadence

import LiteYouTubeEmbed from 'react-lite-youtube-embed';
import 'react-lite-youtube-embed/dist/LiteYouTubeEmbed.css';

Today we’re going to try a new way to do it with **Kadence**. We also **display the products with information** on a page and **filter them** as well.

As an example, we have an archive page with a list of restaurants.

![An archive page with a list of restaurants](https://imgur.elightup.com/vetbHVm.gif)

## Video version

<LiteYouTubeEmbed id='-lJPyhjGu2c' />

## Preparation

The page into two sections: one to display the products along with their information, and one for filters.

![Sections display restaurant information and filters](https://imgur.elightup.com/Uqeuxuo.png)

Each product (restaurant) will be saved in a post of a custom post type. For the product information, the name and image are the title and feature images of the post. Other information such as status, address, and logo will be saved in different custom fields.

Regarding the filers, it’s based on a custom taxonomy that I created for the products.

So, we need to have these tools:
* **[Meta Box Lite](https://metabox.io/lite/)**: to create the Restaurant post type and taxonomy named Voucher to filter posts. Also, it provides a UI in the back end to create custom fields to save extra information about restaurants;
* **Kadence** and its pro version to have some extra types of blocks to build the page.

## 1. Creating a custom post type

Go to **Meta Box** > **Post Types**, and create a new post type for your products.

![Go to Meta Box > Post Types and create a new post type for your products](https://imgur.elightup.com/h97VZVv.png)

After publishing, the created custom post type will be displayed in the admin dashboard.

![The created custom post type is displayed in the admin dashboard](https://imgur.elightup.com/65s9O74.png)

## 2. Creating custom fields

As mentioned, we should create some custom fields to store the extra information for the products.

Go to **Meta Box** > **Custom Fields**, and create the fields.

![Go to Meta Box, Custom Fields, and create the fields to store extra information](https://imgur.elightup.com/fhVPaqB.png)

Here are some typical custom fields I created.

![Some typical custom fields created](https://imgur.elightup.com/MYxpiid.png)

There’s no special setting for them. You can freely create more fields to store information for products as you want with 40+ field types provided by Meta Box.

After creating all the wanted fields, go to the **Settings** tab, choose **Location** as **Post type**, and select your post type to apply these fields to it.

![Go to the Settings tab, choose Location as Post type and select Restaurant to apply these fields to this post type](https://imgur.elightup.com/Cq0zlSn.png)

## 3. Creating a new taxonomy

As I said, we’ll have a filter on the page based on a taxonomy. I will divide the vouchers into some discount levels, and each one of them will be a term of the taxonomy. So let’s move on to create them.

Go to **Meta Box** > **Taxonomies**, and create a new one.

![Go to Meta Box > Taxonomies and create a new taxonomy](https://imgur.elightup.com/f6oW9rS.png)

In the **Advanced** section, check the **Hierarchical** box if you want to show the taxonomy in a hierarchy. As well as, if you want to display it as a column in the admin screen, check the **Show admin column** box. (This setting is available when you have the [MB Admin Column](https://metabox.io/plugins/mb-admin-columns/)s extension).

![In the Advanced section, check the Hierarchical option to show the taxonomy in a hierarchy, and Show admin column option to show it as an admin column](https://imgur.elightup.com/dte7tEE.png)

In the **Post Types** tab, choose the post type that you’ve just created to apply this taxonomy to it.

![Choose the product post type that you’ve just created](https://imgur.elightup.com/dQLfQDd.png)

Now, you can add some terms to your product’s taxonomy.

![Add some terms to your product’s taxonomy](https://imgur.elightup.com/4fxLkfB.png)

After that, when creating a new post in the Restaurant, you will see the custom fields, as well as the terms of taxonomy appearing.

![Custom fields and the terms of taxonomy appear](https://imgur.elightup.com/Z2SseK9.png)

Just fill in the information.

Here are some example posts that I've created.

![Some example posts and the voucher information from the created taxonomy](https://imgur.elightup.com/gwkwfLv.png)

And, you can easily view the voucher information in a column.

## 4. Creating a query card for the products

To display information about each product, you need to create a query card. It allows us to define the template for individual posts.

Go to **Kadence** > **Query Cards** to create a new one.

![Go to Kadence > Query Cards to create a new one](https://imgur.elightup.com/tsDlOYJ.png)

Choose one layout that you want.

![Choose one layout that you want](https://imgur.elightup.com/RXkPx32.png)

Then you will see some default blog posts displayed. We should change these posts to the post type that we use for the products for more accurate preview.

Move to the right sidebar, set the **Preview post type** as your product post type. Pay attention that this affects the preview only, since we haven’t set any query to query the posts yet.

![Set the preview post type to your product post type](https://imgur.elightup.com/SUeHMV9.png)

Then, you will see that the feature image and title of the post are the same exactly with the ones you set for each product. It’s because I chose a template for this query card at first. You can check them all once again. They all have been automatically set as dynamic and chose the corresponding fields.

![The feature image and title of the post are displayed](https://imgur.elightup.com/vuz02Ip.png)

Next, we’ll add some blocks to display restaurant information from custom fields created with Meta Box.

To display the restaurant's address, add the **Advanced Text** block.

![Add the Advanced Text block to display the restaurant's address](https://imgur.elightup.com/rC4K8mU.png)

Then, enable dynamic content, and choose the **Content** as **Post Custom Field** since the address is saved in a custom field. Then, select the field name from the list.

![Enable dynamic content, and choose Post Custom Field then choose the field name](https://imgur.elightup.com/ZSZCXyC.png)

For the logo, choose the **Advanced Image** block.

![Add the Image Advanced block for the logo](https://imgur.elightup.com/IGkPXkT.png)

And, add dynamic data for it as well. Choose the **Post Custom Field** option, and select the name of the field that saves the logo.

![Add dynamic data, choose the Post Custom Field, and select the name of the field that saves the logo](https://imgur.elightup.com/njp8FDf.png)

For the status about the opening or closing time, also add another **Advanced Text** block.

![Add another Advanced Text block for the status](https://imgur.elightup.com/zahRynK.png)

With this information, we don't use dynamic data as commonly. ince the status has two values,we should add conditions to choose which value will be displayed.

In the **Advanced** section of the **Dynamic Content** settings, we should add a **div** tag as fallback content. This means that this block will display the context as ‘open’.

![In the Advanced section, add a div tag as fallback content to display the context as ‘open’](https://imgur.elightup.com/N2emDuR.png)

On the right sidebar, enable the **Conditional Display** option in the **Advanced** settings of the block.

![In the Advanced settings of the block, enable the Conditional Display option](https://imgur.elightup.com/eQwh1oy.png)

Then, set the **Conditional** option as **Post Custom Field**, and set the name of the **Status** field. At the same time, add the comparison as equal to `open`, which is the value of the ‘open’ option that we saved in the custom field. It means that this block with the text `open` will be displayed only when the field is set as open.

![Set the Conditional option as Post Custom Field, then set the name of the Status field](https://imgur.elightup.com/8ZYijes.png)

We will have another **Advanced Text** block for the close status as well. Do exactly the same, but change the class and condition a little bit. Also, change the **div** tag to set the context of this block as ‘**close**’.

![Change the class and condition for close status](https://imgur.elightup.com/C9vL2Om.png)

Now, in the setting of the **Conditional Display** section, the value will be close. When the field is set as close, this block will be displayed. Of course, then the block for the open status won’t be displayed.

![Set the condition and value for close status](https://imgur.elightup.com/62noF4k.png)

The products are displayed with all the information we want. Save this card, and move to the next step.

## 5. Adding a query

We have finished setting the display layout and data of each product. In this step, we will show them all in a layout, also add a filter.

Go to **Kadence** > **Queries** to create a new query for the product.

![Go to Kadence > Queries to create a new query for the product](https://imgur.elightup.com/V0ZigBa.png)

We are going to have a simple listing page with filters. There are also some options for its layout, just choose one.

![Choose one layout.](https://imgur.elightup.com/ZJ0l8Md.png)

In the **Post Types** settings, set the post type of your products. This helps to query posts from this post type.

![Set the post type of your products in the Post Types settings](https://imgur.elightup.com/9BdraGw.png)

Now, set the name of the query card that we’ve just created. This helps to inherit the style and data of displaying each post from this card.

![Set the name of the query card that we’ve just created](https://imgur.elightup.com/CNLXLwG.png)

In the **Filter** block, set its source as **Taxonomy** as default, and choose the name of the taxonomy that I used for the product. It’s **Voucher**.

![Set source as Taxonomy as default, and choose the name of the taxonomy for the restaurants](https://imgur.elightup.com/twwWjA7.png)

So, we’ve done the layout and filter.

## 6. Creating the simple listing page

Just create a page as usual.

![Go to Page > Add New Page to create a new page](https://imgur.elightup.com/lBZQqzr.png)

Next, add the** Advanced Query Loop** block to add the products and filters from the created layout into the page.

![Add the Query Loop Advanced block](https://imgur.elightup.com/716bzR3.png)

Set the name of the query that we created in the previous step.

![Set the name of the query that we created](https://imgur.elightup.com/OrXD94P.png)

Move to the page on frontend, you will see the information of all the restaurants and also the filter displayed accurately. You can try clicking on some terms on the filter bar, they’ll work well.

![The information of all the restaurants and also the filter displayed accurately](https://imgur.elightup.com/5ty1erc.gif)

## 7. Styling the page

To style the page, you can go back to the page editor, or the query to modify the layout. For the display of each product, you should go back to edit the query card.

This is the page after taking some actions to modify.

![The page got a better look](https://imgur.elightup.com/vetbHVm.gif)

You also can try to [create a listing page with advanced filters with UI](https://docs.metabox.io/tutorials/create-simple-listing-meta-box-wp-grid-builder/) provided by MB Builder.

# Creating a subscription form connecting to Mailchimp

import LiteYouTubeEmbed from 'react-lite-youtube-embed';
import 'react-lite-youtube-embed/dist/LiteYouTubeEmbed.css';

We’re going to use the [MB Frontend Submission](https://metabox.io/plugins/mb-frontend-submission/) extension of Meta Box to create a subscription form and connect it with an email marketing service - Mailchimp to manage and send emails fast and easily.

This is a simple subscription form.

![A simple subscription form](https://imgur.elightup.com/MALHkE9.png)

Whenever someone submits the form, their information will be saved in a post of a custom post type. So, you can see the new account in the dashboard like this.

![After submitting the form, the account info will be saved in a post of a custom post type in the dashboard.](https://imgur.elightup.com/IFsCj8h.png)

And, when you connect to the MailChimp service, you can see the account in the email list in MailChimp.

![The contact submitted from the form will be in the email list in MailChimp.](https://imgur.elightup.com/YHtpYqZ.png)

## Video version

<LiteYouTubeEmbed id='dhXyYBzvQEo'/>

## Preparation

We need to install the following tools:

* [The Meta Box plugin](https://wordpress.org/plugins/meta-box): to have a framework to create a custom post type and custom fields for the form. It’s free and available on [wordpress.org](https://wordpress.org/plugins/meta-box).
* [MB Custom Post Type](https://metabox.io/plugins/custom-post-type/): to create a custom post type for subscribers.
* [MB Builder](https://metabox.io/plugins/meta-box-builder/): to have a UI in the backend to visually create custom fields for the form.
* [MB Frontend Submission](https://metabox.io/plugins/mb-frontend-submission/): to display custom fields on the front-end as a form.

Finally, you need to have a Mailchimp account. In case you haven’t had it, go [here](https://login.mailchimp.com/) to create a new one.

## 1. Creating a new post type for subscribers

To save and review subscriber data easily and conveniently, firstly, you need to create a new post type. I named it as Subscribers.

Go to **Meta Box > Post Types > New Post Type**. Then modify the general information for the post type and publish it.

![create new post type for subscribers](https://imgur.elightup.com/SB3KNJK.png)

After publishing, a new menu named **Subscribers** will appear. Information of each subscriber will be saved in a post of this post type.

![Newly created post type appears in the menu](https://imgur.elightup.com/VttNgq4.png)

## 2. Creating a subscription form

Commonly, a subscription form has at least two fields: Name and Email. You may have more fields for further information. But in this case, I just create only these two basic fields for illustration purposes only.

Now, go to **Meta Box** > **Custom Fields** > **Add New** to create fields.

![Go to Meta Box to create fields for the form](https://imgur.elightup.com/j8bURp6.png)

To save database space, I will use the name that is submitted into the form for the post title. So, the ID of the Name field will be the same as the post title.

![The ID of the Name field will be the same as the post title.](https://imgur.elightup.com/WlR1pDd.png)

Apart from that, there are no special settings for the fields I want. Thus, I just create them as usual.

After creating all the fields, go to the **Settings** tab, set the **Location** as **Post type**, and choose **Subscriber** to apply all the fields to this post type.

![Set location for the created fields](https://imgur.elightup.com/oUn8BIv.png)

Once you have published the field group, its ID will be generated automatically. Just copy it since we’ll use it in the next step.

![Get ID of the field group](https://imgur.elightup.com/ADylHdJ.png)

Move to the post editor, you will see only a field for email displayed since we set the Name field as the title.

![Only a field for email displays since we set the Name field as the title.](https://imgur.elightup.com/DXon9rF.png)

I'll not input any data now, since the form will be used on the frontend, then the user can submit it.

## 3. Displaying the subscription form on the front-end

In the real case, you absolutely can add the form to a pre-built page, then the form will be set aside with some other content. However, I skip building those kinds of pages and just create a new blank page to show the form.

Now, go to **Pages** to create a new page as usual.

![Create a new page as usual.](https://imgur.elightup.com/kAFk9pR.png)

Look for the **Submission Form** block, or element, or widget (in the case you’re using a page builder). It’s provided by **MB Frontend Submission** to have the subscription form display.

![Look for the Submission Form block.](https://imgur.elightup.com/e8ItvU7.png)

Once you select this block, it’ll display the title and content fields by default. They are not what we created.

![The title and content fields display by default.](https://imgur.elightup.com/xUFZ31u.png)

To display the created custom fields for the form, add the ID of the field group to the box in the image below. The ID is the one we copied from the field group in the previous step. Then, you will see the fields displayed immediately.

![Add the ID of the field group to the ID box to display the custom fields for the form.](https://imgur.elightup.com/bjiq8Yg.png)

There are some settings of this block on the right sidebar. You can set it as you go. But, you must set the post type as the one you created for the submission. Then, every submission from this form will be saved to a post in that post type.

![Set the post type as the one you created for the submission.](https://imgur.elightup.com/mrxYZ4O.png)

Next, to disable the **Title** and **Content** field in the form, remove them in the **Post Fields** section:

![Disable the Title and Content field in the form.](https://imgur.elightup.com/9pncrWG.png)

Go to the page on the frontend, we will see the form displayed, with two fields as we want.

![The form displays with the Name field and Email field on the frontend.](https://imgur.elightup.com/tMt5uui.png)

You can go to the **Customizer** section > **Additional CSS** to add some code to beautify the subscription form.

```css
.rwmb-form .rwmb-meta-box {
    display: grid;
    grid-template-columns: repeat(2,1fr);
    grid-gap: 20px;
}
.rwmb-form .rwmb-field {
    display: flex;
    align-items: center;
}
.rwmb-form {
    background: #e2e8f0;
    padding: 24px;
    border-radius: 4px;
    max-width: 768px;
    margin: 0 auto;
}

.rwmb-form button {
   width: 100%;
	 margin-top:20px;
}
.rwmb-field:not(:last-of-type){
	  margin:0px !important;
}
```

![Add some CSS code to beautify the subscription form.](https://imgur.elightup.com/K1ait5c.png)

You can see in the gif below the subscription form works well, but just saves the data on your website, and you can see the contact in the back end, not your MailChimp account yet.

![The subscription form works well, but just saves the data on your website so far.](https://imgur.elightup.com/NFH30tp.gif)

So let’s go ahead to connect this form to MailChimp.

## 4. Connecting the subscription form to mailchimp

In this step, we’re going to **integrate the subscription form to MailChimp** to send the subscriber information submitted to the form to MailChimp. With this information, you can [use MailChimp to send email marketing campaigns](https://gretathemes.com/mailchimp-send-wordpress-blog-post-email/) to these subscribers easily.

To do it, I use the following library to connect to the Mailchimp API:

https://github.com/drewm/mailchimp-api

Click the link to download the `Mailchimp.php` file, and then insert it into your theme. I’m using eStar theme and its child theme, so I will create an inc folder and copy the `Mailchimp.php` file into this folder.

Next, add this code to the `functions.php` file:

```css
include get_stylesheet_directory() . '/inc/MailChimp.php';
use \DrewM\MailChimp\MailChimp;

function insertList() {
    $key = 'your API keys mailchimp';
    $list_id = 'id of the list that you want to integrate';
    $merge_var = array(
        'FNAME' => $_POST['post_title'],
        'LNAME' => '',
    );
    $mailchimp = new MailChimp( $key );

    $result = $mailchimp->post( '/lists/' . $list_id . '/members', array(
        'email_address' => $_POST['email'],
        'merge_fields'  => $merge_var,
        'status'        => 'subscribed',
    ) );
    return json_encode( $result );
}

add_action( 'rwmb_frontend_after_process', function( $config, $post_id ) {
    if ( 'subscription-form' === $config['id'] ) {
        insertList();
    }
}, 10, 2 );
```

![Add code to the functions.php file.](https://imgur.elightup.com/mlFyq7I.png)

**In there**:

* `'/inc/MailChimp.php'`: This is the direction of the file that we have just added to the theme folder;
* We use the `rwmb_frontend_after_process` hook to do below actions after the subscriber submits the form. You can look for more details about the hook on [Meta Box documentation](https://docs.metabox.io/extensions/mb-frontend-submission/#form-hooks).
* `'your API keys mailchimp'`: Where you can fill in your MailChimp API keys;
* `'id of the list that you want to integrate'`: Where you can enter the ID of the list to stipulate that the contact will be sent to which contact list in your MailChimp account;
* `$_POST[' '],`: This is to get the value stored in custom fields;

These lines below are the action that we put the contact information (including the email, name, and status) into the contact list into a MailChimp account.

```css
$result = $mailchimp->post( '/lists/' . $list_id . '/members', array(
        'email_address' => $_POST['email'],
        'merge_fields'  => $merge_var,
        'status'        => 'subscribed',
    ) );
    return json_encode( $result );
}
```
And, notice that if you have separated fields for the first name and last name, just fill in the ID to these places in this image. In my case, there is only a field for names.

![Where you can fill in the ID of the field for the first name and last name.](https://imgur.elightup.com/z46BF2h.png)

Now, go back to the form on the page to test how it connects to our Mailchimp account. Just **add a new subscription**. This new subscriber information absolutely will be saved as a post in the backend, as well as in the Mailchimp account dashboard.

![New subscriber information absolutely is saved as a post in the backend.](https://imgur.elightup.com/jHDMUrM.png)

![The new contact is also on the list in my MailChimp account.](https://imgur.elightup.com/YHtpYqZ.png)

Do you remember that I submitted an account named Janessa before I created the integration? Since it was submitted before I made the integration, it does not appear in the MailChimp. Only the new ones will be there.

So, it seems like the integration works well already.

That’s how we have done the integration between the subscription form and your MailChimp account.

# Creating taxonomy thumbnails & featured images - MB Views

import LiteYouTubeEmbed from 'react-lite-youtube-embed';
import 'react-lite-youtube-embed/dist/LiteYouTubeEmbed.css';

Having taxonomy thumbnails will be a good way to make that page be more attractive. In today’s practice, we are going to find out how to create thumbnails for a taxonomy and featured images for a portfolio page with MB Views from Meta Box.

This is an example for the portfolio page that we will create in this practice.

![An example for the portfolio page](https://imgur.elightup.com/fPWSHRH.png)

We often use images in a portfolio page as a term of a taxonomy, which is about an accommodation type, with its own thumbnail.

The image used for the thumbnail also will be used to be the featured image of the archive page of the taxonomy’s term.

![This is the featured image of the archive page](https://imgur.elightup.com/u53Eqt4.png)

## Video version

<LiteYouTubeEmbed id='IAQx6PBW9XA' />

## Preparation

In this practice, we need some tools from Meta Box:

* [Meta Box core plugin](https://wordpress.org/plugins/meta-box/): to create custom post types, taxonomies as well as a custom field to store the images for the taxonomy;
* [MB Custom Post Type](https://metabox.io/plugins/custom-post-type/): to create a custom post type and custom taxonomy for the portfolio;
* [MB Term Meta](https://metabox.io/plugins/mb-term-meta/): to add custom field created with Meta Box to categories, tags, or any custom taxonomies;
* [MB Views](https://metabox.io/plugins/mb-views/): to create templates to display the thumbnails and the featured images without touching the theme’s files;
* [MB Builder](https://metabox.io/plugins/meta-box-builder/): to have an intuitive UI to create the custom field for the images.

## 1. Creating a new custom post type

Go to **Meta Box** > **Post Types** > **Add New**.

![Go to Meta Box to create a new custom post type.](https://imgur.elightup.com/7Zz6by8.png)

After publishing, you will see a new menu displayed in the admin dashboard.

![A new menu of the post type displayed in the admin dashboard.](https://imgur.elightup.com/9KFYE5n.png)

## 2. Creating a custom taxonomy

Go to **Meta Box** > **Taxonomies** > **Add New** to create a new taxonomy.

![Go to Meta Box to create a new custom taxonomy for the created post type.](https://imgur.elightup.com/UdqCdnI.png)

When creating the wanted taxonomy, move to the **Post Types** tab, and choose **Portfolio** to apply this taxonomy to the post type as you want.

![Apply the creating taxonomy to a post type.](https://imgur.elightup.com/aRlI3Qf.png)

Now, you can go back to the created post type, and see a new submenu.

![There will be a place to add new term to the custom taxnonomy.](https://imgur.elightup.com/EM2mkwc.png)

Let’s add some terms for the taxonomy. These are some terms that I created for illustration.

![These are some example terms that created for illustration](https://imgur.elightup.com/XtobpfQ.png)

However, there is no place for any kind of images for custom taxonomy so far. Let’s go ahead to create one with the help of custom fields from Meta Box.

## 3. Creating custom fields

In this practice, I’ll create two custom fields for the taxonomy to give you a more comprehensive guide. In your real case, I recommend you choose one of them and use only one field for simplicity.

Go to **Meta Box** > **Custom Fields** to create the fields.

![Go to Meta Box > Custom Fields to create the fields.](https://imgur.elightup.com/DFMDVcA.png)

First, I choose the field in the type as **URL**. This one allows you to save links of the images. It’ll be useful when you save images in a 3-party service instead of uploading on your site.

Next, choose **Single Image** for the one uploading the images. This one allows you to upload an image and save it to your website gallery.

![I'm creating two fields in two common types.](https://imgur.elightup.com/SKu7Yml.png)

After having the field, move to the **Settings** tab, choose **Location** as **Taxonomy**, and select **Portfolio Type** which is the created taxonomy. Notice that you can set the location as the taxonomy only when you enable the [MB Term Meta](https://metabox.io/plugins/mb-term-meta/) extension.

![Assign the custom field to the Portfolio Type that is the created taxonomy.](https://imgur.elightup.com/ZiONahy.png)

Go back to create a new term for the taxonomy and you will see the created custom fields.

![The created custom field display when creating a new term for the taxonomy of the portfolio.](https://imgur.elightup.com/TdER7AY.png)

Now, you also can edit some terms and see the fields to have an image for each term.

![You also can edit some terms and see the fields to have an image for each term.](https://imgur.elightup.com/GL9kaq2.png)

## 4. Displaying images as taxonomy’s thumbnails

### 4.1. Creating the page and template

Go to **Pages** to create a new page for the portfolio. I will add content for this page via a template created with **MB Views**.

![Go to Pages to create a new page for the portfolio.](https://imgur.elightup.com/8m73IO1.png)

Go to **Meta Box** > **Views** to create a template.

![Go to Views to create a new template for the portfolio page.](https://imgur.elightup.com/2LpUsQt.png)

### 4.2. Getting terms and images

In the template tab of the view, we’ll add some lines of code.

```
{% set args = {taxonomy: 'portfolio-type',hide_empty: false} %}
{% set portfolios = mb.get_terms( args ) %}
{% for portfolio in portfolios %}
		{% set image_upload = mb.get_term_meta( portfolio.term_id, 'upload_portfolio_thumbnail', true ) %}
		{% set image_url = mb.get_term_meta( portfolio.term_id, 'url_portfolio_thumbnail', true ) %}
{% endfor %}
```

![Add some lines of code to get terms and images.](https://imgur.elightup.com/4CC719E.png)

**In there:**

```
{% set args = {taxonomy: 'portfolio-type',hide_empty: false} %}
```

This line is to declare that we’ll get data from the taxonomy because the images are saved in a custom field that is assigned to a taxonomy. `'portfolio-type'` is the slug of the taxonomy.

Next, we use the `mb.get_terms( args )` function to get terms from the taxonomy.

```
{% for portfolio in portfolios %}

{% endfor %}
```

I have this loop to display all the terms that we got from the taxonomy.

![Create some variables to get images from custom fields.](https://imgur.elightup.com/76l0Ntb.png)

```
{% set image_upload = mb.get_term_meta( portfolio.term_id, 'upload_portfolio_thumbnail', true ) %}
{% set image_url = mb.get_term_meta( portfolio.term_id, 'url_portfolio_thumbnail', true ) %}
```

In this part, the `mb.get_term_meta` function helps to obtain data from the custom fields. `'upload_portfolio_thumbnail'` is the ID of the single image field for uploading, and `'url_portfolio_thumbnail'` is the ID of the URL field.

### 4.3. Adding condition to display images

We have two fields for storing images while only one image can be displayed, so I have a condition in the next lines to choose which one will be displayed.

```
{% if image_upload %}
    {% set image_upload_link = mb.wp_get_attachment_image_src( image_upload, large) %}
    <img src="{{ image_upload_link[0] }}">
{% elseif image_url %}
    <img src="{{ image_url }}">
{% else %}
    <img src="https://metabox.io/wp-content/uploads/2020/03/MB-Views-extension.jpg">
{% endif %}
```

This one will be added inside the loop.

![Having a condition to choose image from which field will be displayed.](https://imgur.elightup.com/w9yIY1h.png)

**In there:**

`{% if image_upload %}` is to know if this `image_upload` variable carries any value or not, which also means the single image field stores any image or not. If yes, the next line will run:

```
{% set image_upload_link = mb.wp_get_attachment_image_src( image_upload, large) %}
```

It’s to get the url of the uploaded image from the `image_upload` variable. And then, we’ll use the link to print the url to display the image on the page using this: `<img src="{{ image_upload_link[0] }}">`

`{% elseif image_url %}` means that if there is no image in the uploading field (the `image_upload` variable is empty), we will examine this `image_url` variable. Also, print the image from the stored url using this: `<img src="{{ image_url }}">`

In the case that the `image_url` variable is empty as well, you should set a default image for the thumbnail. Just use the URL of any image to set as default in this line:

```
<img src="https://metabox.io/wp-content/uploads/2020/03/MB-Views-extension.jpg">
```

![Set a default image for the thumbnail if there is no image store in the custom fields.](https://imgur.elightup.com/zXDcXN5.png)

That’s all for the thumbnails.

### 4.4. Noticing

In your real case, you may have only one field for the images, so you can remove one of these lines depending on which field you don’t want to use. As well as, remove the condition and corresponding part of displaying the images.

![Remember to remove corresponding lines of code when you have only field for images.](https://imgur.elightup.com/IErfFYP.png)

Remember to change the name of the variables as you want.

### 4.5. Displaying terms information

```
{{ portfolio.name }}
{{ portfolio.description }}
```

Two lines above are the title and the description of the term. You can type for it, or insert them from this Insert Field button.

![You can choose to type the code or insert field directly on the template.](https://imgur.elightup.com/ZKxqqBM.png)

We’ve done getting all the needed information for the portfolio.

Go down to the **Settings** section of the view, set the **Type** setting as **Singular**. Then, set a rule for **Location** to apply the template to the portfolio page.

![Set the location for the template to apply it to the portfolio page.](https://imgur.elightup.com/36JPKog.png)

Go to the page on the front end, you'll see the data displayed.

![The images and the terms information display on the page.](https://imgur.elightup.com/X0CWjCN.png)

### 4.6. Styling the page

To style the page, go back to the edit template in the **Views**.

Before styling, we should add some **Div** tags and classes to divide information into different parts.

![Add div tags and classes to the template for styling.](https://imgur.elightup.com/dVIBX0z.png)

This line is to create a button to go to the term’s archive page.

![Add a button for each terms to link to the archive page.](https://imgur.elightup.com/dWy4Sdm.png)

This is the page on frontend now.

![The page after divided into section using div tags.](https://imgur.elightup.com/Xz822kg.png)

Back to the view again, go to the **CSS** tab, add some code to style the page.

![Add CSS to the template.](https://imgur.elightup.com/oo8yVJ4.png)

Now you will see the Portfolio page displayed with a better look.

![The portfolio page after styling.](https://imgur.elightup.com/AyL2akH.png)

## 5. Displaying images as featured images

I have a pre-made template for this archive page. But, there is no featured image on the page as default. So I will take the image saved in the custom field to be the featured image of this page, and display it on the top.

![The archive page as default.](https://imgur.elightup.com/VoN64qR.png)

Go back to Meta Box to create a new view.

![Go to view to create a new template for the featured image.](https://imgur.elightup.com/qDT0Vik.png)

And add this script:

```
{% if term.taxonomy == 'portfolio-type' %}
    {% set image_upload = term.upload_portfolio_thumbnail.full.url %}
    {% set image_url = term.url_portfolio_thumbnail %}
    {% if image_upload %}
            <img src="{{ image_upload }}">
        {% elseif image_url %}
            <img src="{{ image_url }}">
        {% else %}
            <img src="https://metabox.io/wp-content/uploads/2020/03/MB-Views-extension.jpg">
        {% endif %}
{% endif %}
```

![Add some code to the template.](https://imgur.elightup.com/RmCuVEd.png)

I also divide the code into parts to explain it clearer.

### 5.1. Defining the archive page

```
{% if term.taxonomy == 'portfolio-type' %}
```

Since we will display the image on the archive page of the term, I have this condition to check whether the current page is the expected page or not. `'portfolio-type'` is the ID of the taxonomy.

### 5.2. Getting images

We will use the same structure of code in the previous template for the portfolio page to get URLs of the images.

```
{% set image_upload = term.upload_portfolio_thumbnail.full.url %}
{% set image_url = term.url_portfolio_thumbnail %}
```

![Create variables to get images from custom fields.](https://imgur.elightup.com/Jgpro28.png)

These `upload_portfolio_thumbnail` and `url_portfolio_thumbnail` variables are the field’s ID.

![These variables are the fields' IDs](https://imgur.elightup.com/2nSexyY.png)

That’s all to get images.

### 5.3. Conditioning to display the images

The next part is the condition. It has the same logic as the one we use for the portfolio page, so I will not dig in any more.

![Add a condition to choose image from which field will be displayed.](https://imgur.elightup.com/bujeh9v.png)

### 5.4. Applying to the page

Now, I’ll leave this setting as default to generate this template as a shortcode.

![Set the template as a shortcode.](https://imgur.elightup.com/toVtj8k.png)

Copy the Shortcode. Then, you can input this shortcode to any place on the page template.

![Add the shortcode to any place on the page.](https://imgur.elightup.com/eMK1xMh.gif)

The page of a term has the image now.

![The image displayed on the page.](https://imgur.elightup.com/wUMWPRT.png)

If you want to have beyonce styling for the image, go back to the template of this featured image and add some CSS.

![Add CSS to the template of displaying image to style it.](https://imgur.elightup.com/NgeSYp0.png)

This is the new look of the featured image of the page.

![The page with the featured image after styling.](https://imgur.elightup.com/fiHE5Nx.png)

# Creating taxonomy thumbnails & featured Images - Meta Box + Bricks

import LiteYouTubeEmbed from 'react-lite-youtube-embed';
import 'react-lite-youtube-embed/dist/LiteYouTubeEmbed.css';

In today’s practice, we are going to find out **how to create thumbnails for a taxonomy and featured images for a portfolio page combining Meta Box and Bricks.**

This is an example for the portfolio page that we will create in this practice.

![This is an example for the portfolio page created by Meta Box and Bricks](https://imgur.elightup.com/Z2WCZ7V.png)

Each part on the page, which is about an accommodation type with its own thumbnail, is from a term of a taxonomy.

The image used for the thumbnail also will be used to be the featured image of the archive page of the taxonomy’s term.

![The featured image of the archive page of the taxonomy’s term](https://imgur.elightup.com/hTPdzAW.png)

## Video version

<LiteYouTubeEmbed id='kREKAKMPQ0s' />

## Preparation

In this practice, we need the [Meta Box core plugin](https://wordpress.org/plugins/meta-box/) to create custom post types, taxonomies as well as a custom field to store the images for the taxonomy.

We also need some advanced features from **Meta Box** which is from some of its extensions:

* [MB Custom Post Type](https://metabox.io/plugins/custom-post-type/): to create a custom post type and custom taxonomy for the portfolio;
* [MB Builder](https://metabox.io/plugins/meta-box-builder/): to have an intuitive UI to create the custom field for the images;
* **Bricks** to build the page.

## 1. Creating a new custom post type

Go to **Meta Box > Post Types > Add New**.

![Go to Meta Box > Post Types > Add New to create custom post type](https://imgur.elightup.com/Wpk4BEM.png)

After publishing, you will see a new menu displayed. It's your post type.

![the created custom post type displayed as a menu](https://imgur.elightup.com/Geumgm5.png)

## 2. Creating a custom taxonomy

Go to **Meta Box > Taxonomies > Add New** to create a new taxonomy.

![Go to Meta Box > Taxonomies > Add New to create a new taxonomy](https://imgur.elightup.com/0InBgvq.png)

When creating the wanted taxonomy, move to the **Post Types** tab and choose **Portfolio** to apply this taxonomy to the post type.

![Assign the custom taxonomy to the Portfolio post type](https://imgur.elightup.com/3KPMyWR.png)

Now, In the created post type editor, you can see a new submenu here.

The taxonomy is a new submenu in the created post type

Then, you can add some terms for the taxonomy. Here are some terms that I created for illustration.

![This is some terms that I created for the taxonomy](https://imgur.elightup.com/CQP6S7Y.png)

But now, there is no place to set an image for each term. So, let’s go ahead to create one.

## 3. Creating custom fields

We will create a custom field that allows users to upload an image for each term. Go to **Meta Box > Custom Fields** to create the field.

Choose the field in the type as **URL**. It allows you save links for the images so that your site won't carry those images.

![Create a new custom field in the type as URL](https://imgur.elightup.com/LX7ZwNf.png)

After having the field, move to the **Settings** tab, choose **Location** as **Taxonomy**, and select **Portfolio Type** that is the created taxonomy.

![Assign the custom field to the Portfolio Type that is the created taxonomy](https://imgur.elightup.com/Ua4xg3m.png)

Then, you’ll see the created custom field when creating a new term for the taxonomy of the portfolio.

![The created custom field display when creating a new term for the taxonomy of the portfolio](https://imgur.elightup.com/bHXIVwW.png)

Now, you can edit some terms, and add a **URL** of an image for each one of them.

![Add a URL of an image for each of term](https://imgur.elightup.com/oaav5GL.png)

## 4. Displaying images as taxonomy’s thumbnails

### 4.1. Creating the portfolio page

Go to **Pages** to create a new page as usual, and then edit it with **Bricks**.

![Go to Pages to create a new page as usual, and then edit it with Bricks](https://imgur.elightup.com/zuRpxry.png)

First, add a **Section** for covering all the page content.

![Add a Section for covering all the page content](https://imgur.elightup.com/UyduTPB.png)

Next, add a **Heading** element to display the page's title.

![Add a Heading element to display the page's title](https://imgur.elightup.com/3HOdhfD.png)

### 4.2. Querying the terms

Now, I will add a **Div** element for the page content, when we will display the term’s information.

![Add a Div element for the page content, where we will display the term’s information](https://imgur.elightup.com/p9yagTt.png)

We should set a query in this **Div** to get all the terms of the **Portfolio Type** taxonomy. So, turn on the **Use query loop** button, and set the type of the query as **Terms**. Then, choose the name of the taxonomy that you use for the portfolio.

![Turn on the Use query loop button and set the type of the query as Terms. Then, choose the name of the taxonomy that you use for the portfolio.](https://imgur.elightup.com/ruiMyQd.png)

That’s done for the query.

### 4.3. Displaying the term’s information

To show the thumbnail of the term that we save the url in the custom field created with **Meta Box**, just add the **Image** element. Then, add dynamic data for it by clicking the **Select dynamic data** button, and choose the name of the created field from the drop down list. After that, all the images will be displayed.

![Add the Image element. Then, add dynamic data, and choose the name of the created field from the drop down list](https://imgur.elightup.com/dhqukXe.gif)

For the section that shows the name and description of the term, I use another **Div**. And, add a **Basic Text** element for each one of them.

![Using another Div and add a Basic Text element for the name and description of the term](https://imgur.elightup.com/hyQ31IE.png)

Now, also add dynamic data, then choose the **Term name** option from the list.

![Add dynamic data then choose the Term name option from the list.](https://imgur.elightup.com/FDZTGFA.gif)

For the term’s description, also add dynamic data to the remaining **Basic Text** element, and choose the **Term description** option.

![Add dynamic data to Basic Text element and choose the Term description option](https://imgur.elightup.com/hRQn8gK.gif)

Finally, you may want to add a button to navigate users to the archive page of each term. So add a **Button** element. Then, set the **Link type** of the button as **Dynamic Data**.

![Add a Button element. Then, set the Link type of the button as Dynamic Data to add a button to the archive page of each term](https://imgur.elightup.com/ENIsRJ3.png)

And select dynamic data for it as well. In the **Terms** section on the dropdown list, choose the **Term archive URL** option.

![In the Terms section on the dropdown list, choose the Term archive URL option](https://imgur.elightup.com/X5R83Oq.png)

So that we have got and displayed all the information of each term on the portfolio page. Your work now just is styling them in your own way by changing the settings of each element. This is one of my own after styling.

![The better look of the portfolio page after styling](https://imgur.elightup.com/Z2WCZ7V.png)

The image I’m using for the thumbnail of each term is the image that I save the URL in the created custom field.

## 5. Displaying images as featured image on archive page

My archive page of each term is now like this.

![This is an archive page of each term with no featured image](https://imgur.elightup.com/SeQKO8m.jpg)

There is no featured image for the term as default. I will use the image saved in the custom field to be the featured image and display it on the top of this page.

Now, go to **Bricks** and edit the template of the archive page.

Inside the **Section** that covers all the page content, add an **Image** element.

![Inside the Section that covers all the page content, add an Image element.](https://imgur.elightup.com/P5B51NW.png)

Let’s select dynamic data for this **Image** element from the custom field. Choose the field name from the list.

![Select dynamic data for this Image element from the custom field and choose the field name from the list](https://imgur.elightup.com/JLTC43v.png)

Then, you can see the image display immediately.

![The featured image display on the archive page of each term of the taxonomy like this](https://imgur.elightup.com/NRR78ea.png)

Now, you can style it in your own way for a better look. And, here it is on the page on the frontend.

![The final look of the archive page](https://imgur.elightup.com/8W4LbiS.jpg)

# Creating taxonomy thumbnails & featured Images

import LiteYouTubeEmbed from 'react-lite-youtube-embed';
import 'react-lite-youtube-embed/dist/LiteYouTubeEmbed.css';

We are going to **create taxonomy thumbnails and featured images using custom fields**. The images will be saved in custom fields, then displayed as thumbnails and featured images of the taxonomy on a portfolio page, like this:

![Taxonomy Thumbnails](https://imgur.elightup.com/O8fP9VI.png)

![Featured image of a term on an archive page](https://imgur.elightup.com/2KDfpx6.png)

## Video version

<LiteYouTubeEmbed id='8Nyg8lw-GH8' />

## Preparation

In addition to using the [Meta Box](https://metabox.io/), make sure you already have these extensions:

* [MB Custom Post Type & Custom Taxonomies](https://metabox.io/plugins/custom-post-type/): a free extension of Meta Box to create custom post types. It’s also available on [wordpress.org](https://wordpress.org/plugins/mb-custom-post-type/);
* [MB Builder](https://metabox.io/plugins/meta-box-builder/): It provides a UI on the back end to create and configure custom fields without code;
* [MB Term Meta](https://metabox.io/plugins/mb-term-meta/): a premium extension of Meta Box to add custom fields created with Meta Box to categories, tags, or any custom taxonomies;
* [MB Views](https://metabox.io/plugins/mb-views/): It helps you create templates without touching the theme’s files;

Finally, [Oxygen Builder](https://oxygenbuilder.com/). I build the pages with Oxygen in this practice. You should use the 3.9 version or the higher one to have native integration with Meta Box.

## Creating a new post type and taxonomy

### Creating a new post type

Go to **Meta Box > Post Types > New Post Type**.

![Create a new post type](https://imgur.elightup.com/8iPsfQD.png)

After publishing, you will see your new post type displayed on the admin dashboard.

![New post displayed in the admin dashboard](https://imgur.elightup.com/5czIMPN.png)

### Creating taxonomy and terms

Go to **Meta Box > Taxonomies > Add New**.

![Create taxonmy and terms](https://imgur.elightup.com/fGePXwC.png)

Upon creating the desired taxonomy, move to the **Post Types** tab and choose **Portfolio** to apply this taxonomy to the post type. And don’t forget to click Publish.

![Create the desired taxonomy](https://imgur.elightup.com/FE7EZ3f.png)

After publishing, a new **Portfolio** post type and **Portfolio Type** taxonomy appear in the **Dashboard** menu. Just add terms for the taxonomy. It’s the same as creating a new category in WordPress.

![The newly created post type and taxonomy appear in the Dashboard menu](https://imgur.elightup.com/iFyfRw5.png)

## Creating custom fields

Go to **Meta Box > Custom Fields > Add New** to create some fields.

I will create two fields, as follows:

* **URL**: It allows users to input an image by entering the image URL.
* **Single Image**: It supports uploading images to the Media Library.

These fields are so simple that I just enter their name and ID without any further configuration.

Then, move to the **Settings** tab, set the **Location** as **Taxonomy** and select **Portfolio Type**.

![Set location for the post type](https://imgur.elightup.com/FFS04q2.png)

Then, go to the **Portfolio Type** taxonomy, and you will see the fields. Let’s upload images for each term here.

![The fields in the taxonomy](https://imgur.elightup.com/m2zFoiu.png)

## Displaying thumbnails on the frontend

### Creating a template

Go to **Meta Box > Views > Add New**, and create a new view.

![Create a template](https://imgur.elightup.com/jfZul2C.png)

In the Template tab, I used this code:

```php
{% set args = {taxonomy: 'portfolio-type',hide_empty: false} %}
{% set portfolios = mb.get_terms( args ) %}
<div class="portfolio container">
    <h1 class="heading-title">Portfolio</h1>
    <div class="thumbnail-images">
    {% for portfolio in portfolios %}
        <div class="item">
            <div class="overlay-thumbnail-categories">
                {% set image_url = mb.get_term_meta( portfolio.term_id, 'url_portfolio_thumbnail', true ) %}
                {% if image_url %}
                     <div class="thumbnail" style="background-image:url({{ image_url }})"></div>
                    <img src="{{ image_url }}">
               {% else %}
                    <img src="http://demo1.elightup.com/test-metabox/wp-content/uploads/2020/11/oriental-tiles.png">
                {% endif %}
            </div>
            <div class="category-title">
                <div class="category-name">{{ portfolio.name }}</div>
                <p class="description">
                    {{ portfolio.description }}
                </p>
                <a href="{{ mb.get_category_link( portfolio.term_id ) }}" target="_blank" rel="noopener">View More</a>
            </div>
        </div>
    {% endfor %}
    </div>
</div>

```
Explanation:

* `{% set args = {taxonomy: 'portfolio-type',hide_empty: false} %}`: to declare the args variable with the data taken from the taxonomy that has the slug as `portfolio-type`;
* `{% set portfolios = mb.get_terms( args ) %}`: this is used to pass the returned data of the args variable to this portfolios variable;
* `{% for portfolio in portfolios %}`: This loop will list all the terms of the taxonomy;
* `wp_get_attachment_image_src ()`: to get the link of the uploaded image of the corresponding term;
* `<img src="{{ }}">`: to display the image by the link assigned to the corresponding variable;
* `<imgsrc="http://demo1.elightup.com/test-metabox/wp-content/uploads/2020/11/oriental-tiles.png">`: In case you don’t upload any image or insert any URL to the two custom fields, it will display a default image from this link. You can choose the default image as you want;
* `{{ portfolio.name }}`: This displays the name of the terms;
* `{{ portfolio.description }}`: this displays the description of the terms;
* `<a href="{{ mb.get_portfolio_link( portfolio.term_id ) }}" target="_blank" rel="noopener">View More</a>`: this code shows View More texts, and places the link of the corresponding post into it. So, when people hover over a post's thumbnail, the texts appear, and they can click to read more.

Now, move to the **Type** section and select **Shortcode**.

![Move to Type section and select Shortcode](https://imgur.elightup.com/KW8U2ry.png)

After publishing, your template will appear as a shortcode. You can use it to display the template anywhere on your website.

![The template will appear as a shortcode](https://imgur.elightup.com/jjMfTYx.png)

### Adding the template to a page

Go to **Pages > Add New** to create a new page. You can also use an existing page.

Then, click **Edit with Oxygen**. In the case, you use any other page builder, you also can use the shortcode and insert as we’re doing in this step.

In Oxygen, click **Add** and search for **Shortcode**.

![Add the template to a page](https://imgur.elightup.com/l8TyKEC.png)

Then, paste the shortcode into the **Full Shortcode** item. And you can see the list of terms that appears with the thumbnails.

![The list of terms appear in the thumbnails](https://imgur.elightup.com/75ayMbQ.png)

### Styling the portfolio section

To make it look better, I will add some **CSS** in the **CSS** tab of the **View**. You can refer to my CSS code [here](https://github.com/wpmetabox/tutorials/blob/master/create-taxonomy-thumbnail-and-featured-image/portfolio.css).

![Add some Css code](https://imgur.elightup.com/u8iz3A3.png)

Here is the result:

![The result](https://imgur.elightup.com/AfqYQyN.png)

## Displaying featured images of taxonomy

I have an archive page for each taxonomy term. However, they haven’t had featured images yet, so I will create one at the top.

![The acrchive page still doesn't have featured images](https://imgur.elightup.com/TGvHgoI.png)

### Adding the featured image to the archive page

Go to **Oxygen > Template > Archive > Edit with Oxygen**. Next, select a term to preview it.

![Add the featured images to archive page](https://imgur.elightup.com/QifwxCx.png)

Then, click **Structure** to see all the elements and structure of your page.

![All the elements and structure of your page](https://imgur.elightup.com/bLRITPm.png)

I’ll add a component named **Code Block**, and drag and drop it into the **Section**, above the **Div**. Then, select **PHP & HTML** and add this code:

![Add a Code Block component](https://imgur.elightup.com/DajUhwT.png)

```php
<?php
    $terms= get_the_terms( $post->ID, 'portfolio-type');
   $link_image_source = get_term_meta( $terms[0]->term_id, 'url_portfolio_thumbnail', true );

   if ( !empty( $terms ) ){
        $term = array_shift( $terms );
    }
?>
<div class="port-thumbnail">
    <img class="thumbnail-cat" src="<?php echo $link_image_source ?>">
</div>
<div class="portfolio-heading"><?php echo $term->name; ?></div>
<div class="portfolio-description"><?php echo category_description(the_category_id()); ?> </div>

```

Explanation:

* `$terms= get_the_terms( $post->ID, 'portfolio-type')`: to get the list of the term from the taxonomy that the ID as `portfolio-type`;
* `get_term_meta ()`: to get the custom fields’ value of the corresponding terms;
* `if ( !empty( $terms ) ){`: to check which archive page of which term that users are in;
* `<?php echo $term->name; ?>`: to display the name of the corresponding term that users are in;
* `<?php echo category_description(the_category_id()); ?>`: similarly, to display the description of the corresponding term;

Here is the result:

![The result](https://imgur.elightup.com/bpIaRIF.png)

### Styling the featured image section

Go to **Manage > Stylesheets > Add Stylesheet** and add code:

![Style the featured image](https://imgur.elightup.com/yUnh1s5.png)

Here is my example CSS that I showed at the beginning of this post:

```css
.port-thumbnail {
    position: relative;
    height: 100vh;
}
.archive-page-layout .port-thumbnail .thumbnail-cat {
    position: absolute;
    top: 0;
    height: 100%;
        width: 100%;
}
.portfolio-heading {
    max-width: 1200px;
    margin: 0 auto;
    width: 100%;
    font-size: 56px;
    font-weight: 700;
    color: #00B1B3;
}
.portfolio-description {
    max-width: 1200px;
    margin: 0 auto;
    width: 100%;
}
.archive-page-layout .ct-section-inner-wrap .ct-code-block {
    width: 100%;
}
.portfolio-description p {
    margin: 0;
}
.port-thumbnail .thumbnail-cat {
    width: 100%;
    height: 100vh;
}
```

The featured image looks much better now:

![The featured image looks much better](https://imgur.elightup.com/0ZMkC3z.png)

Visit other terms, and you can see that all featured images are displayed beautifully.

![All featured images are displayed beautiully](https://imgur.elightup.com/TpW8xv5.gif)

# Creating a team members page - Meta Box + Breakdance

import LiteYouTubeEmbed from 'react-lite-youtube-embed';
import 'react-lite-youtube-embed/dist/LiteYouTubeEmbed.css';

Today, we’ll introduce a way to create a team using Meta Box and Breakdance. This is a sample we’ll use for this practice:

![Example of the team members page](https://imgur.elightup.com/goSGSGz.png)

## Video version

<LiteYouTubeEmbed id='r_9efMiekR0' />

## Preparation

In this case, each member will be a post in a custom post type and will be displayed in a name card as a box, like in the image below. It is created as a global block in Breakdance.

![Each member will be a post in a custom post type](https://imgur.elightup.com/FbE73YE.png)

In the name card, the name and the avatar of the member are the title and the featured image of the post. And other information such as position, Facebook, Instagram, and Mail will be saved in different custom fields created by Meta Box.

For this practice, we need some tools:

* [Meta Box](https://wordpress.org/plugins/meta-box/): to have the framework for creating custom post type and custom fields.
* [MB Custom Post Type](https://metabox.io/plugins/custom-post-type/): to create custom post type for the team members;
* [MB Builder](https://metabox.io/plugins/meta-box-builder/): to provide a UI in the backend to create custom fields easily;
* **Breakdance**: to build the page.

## Creating a new post type

Go to **Meta Box > Post Types**, then create a new post type for the members.

![Create a new post type](https://imgur.elightup.com/BgsY0i9.png)

## Creating custom fields

Let’s create custom fields to save some extra information for members. Go to **Meta Box > Custom Fields > Add New**.

For the position information, choose the **Select** field that allows us to set some options to choose from.

![Create custom fields](https://imgur.elightup.com/qy9g8bu.png)

For other information such as Facebook, Instagram, and Mail, we set them as the URL fields that allow us to fill in a link.

After creating all the fields, move to the **Settings** tab > **Location** > choose **Post Type** as the  **Team Members** post type to apply these fields to it.

![Choose the Select field for the position information](https://imgur.elightup.com/mkhjbnG.png)

Now, go to the post editor, you will see the created custom fields.

![Set the location for the created fields](https://imgur.elightup.com/EZGDIZU.png)

Then, just fill in the information.

## Creating a global block

Now, let’s create a global block to get the team member’s information. Go to **Breakdance** > **Global Blocks** and create a new one.

![Create a Global Block](https://imgur.elightup.com/q4vbE3W.png)

Remember to set the preview for the global block.

My global block is to display the information of each member on a name card. First, we'll add a div for this name card.

![Add a Div for the name card](https://imgur.elightup.com/uOLqALH.png)

In this tutorial, each name card has 2 columns. One is to display the avatar and social icons. And another one is to show the member information.

![Each name card has 2 columns](https://imgur.elightup.com/Z4awhW7.png)

To divide the content into 2 columns, I’ll add 2 new divs. Each one for each column.

In the first column, add a Post Featured Image element to have the avatar saved as the post's featured image.

![Add a Post Featured Image element for the avatar](https://imgur.elightup.com/wNYiatD.png)

Next, we’ll create another div inside this column to contain all the social networks.

Now, select an Icon element to create the social network’s icon. Then, choose the icon's shape.

![Select an Icon element to create the social network's icon](https://imgur.elightup.com/XH98BNV.png)

As the social links are saved in custom fields, we’ll insert the dynamic data into the Icon element. To do it, click the icon shown in the image below and choose the right field in the Metabox section.

![Insert the dynamic data into the Icon element](https://imgur.elightup.com/g9wolyK.png)

Take the member's Facebook profile as an example:

![Take the Facebook profile as an example](https://imgur.elightup.com/aLmC3mH.gif)

For the Instagram and Mail information, do likewise.

Move to the second column, to get the name of the member, it’s the post title, so choose the Heading element then insert dynamic data for this element by choosing the Post Title option in the Post section. You see that the member’s name has just been obtained already.

![Choose the Heading element then insert dynamic data](https://imgur.elightup.com/s3edGgq.gif)

For the position information, add a Text element. As the position is saved in the custom field created by Meta Box, we’ll insert the dynamic data into this element. Also, click the icon as we did before and choose the corresponding field name in the Metabox section. Then, you’ll see the member’s position appear.

![Add a Text element for the position information](https://imgur.elightup.com/FXgXeOC.gif)

To get a short description of the member, also choose the Text element > choose the Post Content option in the Post section.

![Choose Text element to get a short description of the element](https://imgur.elightup.com/HRl7yeL.gif)

We have just displayed all the wanted information from a team member on the name card.

![All the information has been obtained](https://imgur.com/PcCfICY.png)

## Styling the global block

Go back to the created global block. Then, customize each element to get the wanted display.

After styling, you’ll see the new look of the name card which contains each team member’s information.

![Style the global block](https://imgur.elightup.com/8eYqkaS.png)

## Displaying the team members' information

Now, create a new page, and edit it with Breakdance. First, add a section to contain all the information of the team members.

![Display the team member's information](https://imgur.elightup.com/WA9527P.png)

Then, add a heading to name it.

To display the wanted posts, which means for the team members’ information, choose a Post Loop Builder element. In the Global Block section of this element's settings, choose the global block which has just been created.

![Choose a Post Loop Builder](https://imgur.elightup.com/xlwmOEz.png)

To stipulate the source of data and the team members you want to display, go to the **Query** section > **Custom**, then edit the query like this.

![Go to the Query section](https://imgur.elightup.com/ofG6plR.png)

**In there:**

* In the **Source** data, it’ll be automatically set as the **Post Types**, then choose the name of the team members you want to get the post from.
* In the **Post per page** section, enter the number to limit the number of posts you want to display on this page.

After applying the query, the team members’ information has just been obtained.

Now, I’ll set the layout for this page. Then, all of the team members’ information is displayed as I want.

![The final result](https://imgur.elightup.com/FbE73YE.png)

# Creating a team members page - MB Views

import LiteYouTubeEmbed from 'react-lite-youtube-embed';
import 'react-lite-youtube-embed/dist/LiteYouTubeEmbed.css';

We’re going to use a new method to create a team members page using Meta Box only with MB Views.

This is the sample that I made.

![Example of a team member page](https://imgur.elightup.com/TXY7fCC.png)

## Video version

<LiteYouTubeEmbed id='u6XVlG1_3gY' />

## Preparation

Each member’s information will be preserved in a post and displayed as a name card. The member's name and avatar are the title and featured image of the post, respectively. Other information such as position, Facebook, Instagram, and Mail will be saved in custom fields.

To do it, we need Meta Box and its extensions:

* [Meta Box](https://metabox.io): a framework to create custom fields and custom post types. It’s free and available on [wordpress.org](https://wordpress.org/);
* [MB Custom Post Type & Custom Taxonomies](https://metabox.io/plugins/custom-post-type/): to create custom post types named Team Member;
* [MB Builder](https://metabox.io/plugins/meta-box-builder/): create custom fields easily to save team members’ information in the backend;
* [MB Views](https://metabox.io/plugins/mb-views/): to create a template for the team members page.

## 1. Creating a new post type

In the **Admin Dashboard**, go to **Meta Box > Post Types**, then create a new post type for the members.

![Create a new custom post type for the Team Members](https://imgur.elightup.com/eaUVoER.png)

Publish and you will see a new menu in your dashboard.

![The result appears after creating](https://imgur.elightup.com/vrcT9BN.png)

## 2. Creating custom fields

Go to **Meta Box > Custom Fields** to create a new field group.

![Add new fields](https://imgur.elightup.com/pU2U2Wn.png)

For the member’s information, I’ll create some following fields:

![Custom fields for Team Members](https://imgur.elightup.com/ouMfsKe.png)

In the event that you want to add more information, just create additional fields as you go.

After creating all the fields, move to the **Settings** tab of the field group. In the **Location** section, choose the **Post Type** and select **Team Member** to apply these fields to this post type.

![Set location for the custom field as the created post type](https://imgur.elightup.com/sqmVZ9x.png)

When adding a new post in the Team Member post type, you will see all the fields here.

![The custom fields display in the post editor](https://imgur.elightup.com/hrepb82.png)

## 3. Creating a template

In the **Admin Dashboard**, go to **Meta Box > Views > Add New** to create a new template.

![Create a new template.](https://imgur.elightup.com/n4xngkG.png)

In the **Template** tab of the view, add some code:

```php
{% set args = { post_type: 'team-member', posts_per_page: -1, orderby: 'date', order: 'ASC' }
%}
{% set posts = mb.get_posts( args ) %}
{% for post in posts %}
    {{ mb.get_the_post_thumbnail( post.ID,'medium' ) }}
    {{ post.facebook }}{{ post.instagram }}{{ post.mail }}
    {{ post.post_title }}
    {{ post.post_content }}
    {{ mb.rwmb_the_value( 'position', '', post.ID, false ) }}
{% endfor %}
```
![Add new code to the template.](https://imgur.elightup.com/TQW38fy.png)

**Explanation**:

* ```{% set args = { post_type: 'team-member', posts_per_page: -1, orderby: 'date', order: 'ASC' } %}```

This code is used to declare the variable that obtained posts from the Team Member post type. The `posts_per_page: -1` means that it will get all the posts and display them in one page. The `orderby: 'date', order: 'ASC'` are used to define the order of the posts.

* ```{% set posts = mb.get_posts( args ) %}```

This function is to get the posts data from the variable that was declared above.
```
{% for post in posts %}`
    ………
{% endfor %}`
```
This is a loop to display all the posts in the Team Member post type.

```php
{{ mb.get_the_post_thumbnail( post.ID,'medium' ) }}

This function is used to get the avatar of the member which is the featured image of the post.

{{ post.facebook }} {{ post.instagram }} {{ post.mail }}
{{ post.post_title }}
{{ post.post_content }}
```
This function is used to get the data from the fields including both default fields of WordPress and custom fields. `facebook`, `instagram`, `mail` are the IDs of the custom fields. And, the `post_title` and `post_content` are the IDs of the default fields by WordPress.

For the position information, it is saved in a field in the type of **Select** with a special kind of data. So we use the following function to get its data.

```
{{ mb.rwmb_the_value( 'position', '', post.ID, false ) }}
```

The `rwmb_the_value()` is the function to get the label of the options in the **Select** field. In the event you want to get the value of the options, use this `rwmb_meta()` function.

To style the template, I used some div classes and added them to the code.

![Use some Div class to style the template](https://imgur.elightup.com/Yhl503n.png)

You can refer to all the code [here](https://github.com/wpmetabox/tutorials/blob/master/create-a-team-members-page-with-mb-views/template.php).

After adding code, scroll down to the **Settings** section > **Type** option as **Singular** and choose **Location** as **Page**. Then, select **Meet The Team** to apply this template to the wanted page.

![Adjust the template and apply to the page](https://imgur.elightup.com/N2KLyvZ.png)

Go to the **Meet The Team** page and you will see all the data has been displayed already.

![Result after applying the template](https://imgur.elightup.com/Ko8JdeR.png)

Now, all the information of the members has been obtained and displayed to the page.

## 4. Styling the page

If you want to style the page, you can easily do it by adding some CSS in the CSS tab of the created template in the Views.

![Style the page.](https://imgur.elightup.com/GAbooNk.png)

All the CSS code that I used is on [Github](https://github.com/wpmetabox/tutorials/blob/master/create-a-team-members-page-with-mb-views/custom.css). Refer to it for more details.

Update it and see the result on the frontend.

![Result after all steps](https://imgur.elightup.com/TXY7fCC.png)

# Creating a team members page - Meta Box + Bricks

import LiteYouTubeEmbed from 'react-lite-youtube-embed';
import 'react-lite-youtube-embed/dist/LiteYouTubeEmbed.css';

We’ll introduce a way to create a team member page with **Bricks** using custom post type and custom fields.

This is my sample team members page:

![Sample for the Team Members Page with Meta Box and Oxygen](https://imgur.elightup.com/RJ9eO0k.png)

## Video version

<LiteYouTubeEmbed id='h07sZBTGTDQ' />

## Preparation

Each member’s information will be saved in a post and displayed as a name card on the page. All extra information about each member such as Position, Facebook, Instagram, and Mail will be saved in custom fields. Name and image of the member are the title and featured image of the post.

To do it, we need Meta Box and its extensions:

* [Meta Box](https://metabox.io): This is the framework to create custom fields and custom post types. It’s free and available on [wordpress.org](https://wordpress.org/plugins/meta-box/)
* [MB Custom Post Type & Custom Taxonomies](https://metabox.io/plugins/custom-post-type/): to create custom post types for Team Member;
* [MB Builder](https://metabox.io/plugins/meta-box-builder/): provides a UI in the back end to create custom fields easily for Member Information;

We’ll use [Bricks](https://bricksbuilder.io/) to build the page.

## 1. Creating a new custom post type

Go to **Meta Box > Post Types > New Post Type**.

![Create a new custom post type](https://imgur.elightup.com/Nywe9kt.png)

After publishing, you will see your new post type displayed on the admin dashboard.

![The result appears after creating](https://imgur.elightup.com/pjgDm93.png)

## 2. Creating custom fields

Go to **Meta Box > Custom Fields > Add New**.

![Create customs field for Team Members](https://imgur.elightup.com/t3JZZ3b.png)

After finishing creating the fields, move to the **Settings** tab. In the **Location** section, select **Post Types** as **Team Members** to apply these fields to the post type.

![set location for the custom field as the created post type](https://imgur.elightup.com/uh6ZzrP.png)

Finally, go to the post editor, and you will see your created custom fields appear.

![the custom fields display in the post editor](https://imgur.elightup.com/ZNScdEe.png)

## 3. Creating the page

Move to **Pages > Add New** to create a new page. Then, edit it with Bricks.

![create a new template for the team members page](https://imgur.elightup.com/wz7nqeq.png)

First, add a new **Container** element to cover all the team members’ information.

![add a container element](https://imgur.elightup.com/9ZvykU1.png)

Then, add a Heading element to display the title of the page and fill in the name of the page on it.

![add a heading element](https://imgur.elightup.com/OhndX3Z.png)

To get all the posts, we have the **Posts** element and **Related Posts** element. While the **Posts** show posts along with filters and navigation, the **Related Posts** does not. So I choose the **Related Posts** element.

![Choose the Related Posts element to get all the posts](https://imgur.elightup.com/ne8hdSl.png)

When adding the **Related Posts** element, a list of blog posts will be displayed in default.

Since we need the posts in the **Team Member** post type instead of blog posts, go to the **Query** section and change the post type to **Team Member** to get the wanted posts.

![go to the Query change the post type to Team Member to get the wanted post](https://imgur.elightup.com/dVomurP.png)

To change the information that you want to display in each post, move to the Fields section. There is the Post Title, Published Date, and Post Excerpt in default. Remove the one you don’t want to display.

![Add Item > Insert Dynamic Data to add a new field and insert the dynamic data from the custom fields](https://imgur.elightup.com/lSZA7aH.png)

Next, add a new field and insert the dynamic data from the custom fields by clicking **Add Item > Insert Dynamic Data** and find the wanted fields.

For instance, I choose the **Position**. Then, the position of each member will display in the preview immediately.

![Add Item > Insert Dynamic Data to add a new field and insert the dynamic data from the custom fields](https://imgur.elightup.com/SxVeXby.gif)

For other information like Facebook, Instagram, and Mail, simply do the same.

Be noted that, when inserting dynamic data, it just displays them as text. To set them as URLs, you should add an attribute to these fields as below.

![To set information as URLs, you should add an attribute to these fields](https://imgur.elightup.com/vcW2Uzi.gif)

What’s more, the description of each member is the content of the post. So, we just need to add a **Post Content** element.

Now, all the information of the members has been obtained.

![To set information as URLs, you should add an attribute to these fields](https://imgur.elightup.com/gt7XfwX.png)

Because Bricks does not support adding classes for each element, you should use the HTML tag for styling. You can set elements in different levels of HTML tag such as: H1, H2, H3, div, p, … That will help a lot for SEO as well.

![use the HTML tag for styling](https://imgur.elightup.com/bNCoekt.png)

## 4. Styling the page

For styling the page, still in the page editor with Bricks, move to the **Style** section of each element to change the look of them if you want.

![move to the Style section of each element to change the look of them](https://imgur.elightup.com/uoFV9zq.png)

Or, you may use some CSS codes as I did to have advanced styling.

![For more advanced styling, use some CSS codes](https://imgur.elightup.com/1cEFnl7.png)

I placed all of the code on [Github](https://github.com/wpmetabox/tutorials/blob/master/create%20a-team-members-page-with-bricks/custom.css) so you can look it up for further information.

Now, go to see the result on the frontend.

![The result after all steps](https://imgur.elightup.com/RJ9eO0k.png)

# Creating a team members page - Meta Box + Elementor

import LiteYouTubeEmbed from 'react-lite-youtube-embed';
import 'react-lite-youtube-embed/dist/LiteYouTubeEmbed.css';


We will go through some steps to create a team member page using Meta Box and Elementor.

This is a sample we’ll use for this practice:

![Team Members Page](https://imgur.elightup.com/FjOklKG.png)

## Video version

<LiteYouTubeEmbed id='gemgZLtMe84' />

## Preparation

As you can see, each member’s information will be included in a separated box, maybe called a name card. They are saved in posts of a custom post type for team members only.

The name and avatar of the member are the titles and the featured images of the post. And other information such as Position, Facebook, Instagram, and Mail will be saved in different custom fields.

To do it, we need Meta Box and its extensions:

* <a href="https://metabox.io/plugins/custom-post-type/">MB Custom Post Type</a>: to create custom post types for Team Member;
* <a href="https://metabox.io/plugins/meta-box-builder/">MB Builder</a>: provides a UI in the back end to create custom fields easily for Member Information;
* <a href="https://metabox.io/plugins/mb-elementor-integrator/">MB Elementor Integration</a>. allows you to get data from custom fields created by the Meta Box plugin in the templates of Elementor.
* <a href="https://elementor.com/">Elementor</a> (Pro version): to built the page for displaying team members’ information;
* <a href="https://wordpress.org/plugins/ele-custom-skin/">Elementor Custom Skin</a>: to have the Loop template to display the list of posts which are members.

## 1. Creating a new post type

In the **Admin Dashboard**, go to **Meta Box** &gt; **Post Types**, then create a new post type for members.

![create new post type for members](https://imgur.elightup.com/yb8gspm.png)

After publishing the new post types, you will see a new item in your menu.

![Add the post type's name in the box](https://imgur.elightup.com/LECK97n.png)

## 2. Creating custom fields for the post type

Go to **Meta Box** &gt; **Custom Fields** to create a new field group.

For the position information, I’d like to create a **Select** field that allows us to set some options to choose from.

![Create a Select field for Position information](https://imgur.elightup.com/ILn7UvY.png)

For other information such as Facebook, Instagram, and Mail, we set them as **URL** fields that allow us to fill in a link.

![Set URL fields](https://imgur.elightup.com/7R4Yxwc.png)

After creating all the fields, move to the **Settings** tab &gt; **Location** section, choose the **Post Types** as **Team Members** to apply these fields to it.

![Set location for Member Information field group](https://imgur.elightup.com/nXqbnRN.png)

Now, go to the post editor in Team Members post type, you will see the fields. Let's add information for team members.

![Add member's information](https://imgur.elightup.com/CeHd3gg.png)

## 3. Creating a template for the name cards

Go to **Templates** &gt; **Saved Templates** &gt; **Add New.**

Each name card is a post and we’ll display all of them so we should create a template as a loop.

![Create a loop template](https://imgur.elightup.com/1Cg3YHL.png)

Go to the **Preview** settings, choose **Team Members** from the list to get the post from that post type to have a visual preview.

![Get all the posts from team member post type](https://imgur.elightup.com/prLJp0j.png)

Now, we’ll add a widget to create a name card.

Since each name card of a member has 2 columns, one is to display the avatar and social icons, another one is to show the member information, choose the structure as 2 columns for the widget.

![Wiget for the card name](https://imgur.elightup.com/81TJUid.png)

![Select the structure for widget](https://imgur.elightup.com/WoZnO4s.png)

Name the **CSS Classes** in the **Advanced** section for styling the name card later.

![Name the CSS Classes in the Advanced section](https://imgur.elightup.com/WiM15iC.png)

In the first column of the name card, add the **Featured Image** element to have the avatar saved in the featured image of the post. Then, change the size of the image to the thumbnail size.

![Add the Featured Image elements to save the avatar](https://imgur.elightup.com/Ndkj6Xu.png)

All the social contacts are icons with the same style so I’ll add them into a section that will help to style them at once. For it, I choose the **Inner Section**.

![Style the social contacts](https://imgur.elightup.com/wkZE625.png)

Drag an **Icon** element to the section and choose what you want.

To get the links saved in the custom fields such as Facebook, Instagram and Mail, click the **Dynamic Tags** button, choose **Meta Box Field** option in the **Post** section and select the corresponding field.

![Save the link such as Facebook, Mail,... in custom fields](https://imgur.elightup.com/Gi9GB07.gif)

Drag the **Post Title** element to get the name of each member.

![Drag the Post Title element to get the name of each member.](https://imgur.elightup.com/eEAof3c.png)

The position of each member also is saved in a custom field. It’s just text so I add a **Text Editor** element, then also connect it to the corresponding field. Click the **Dynamic Tags** &gt; **Meta Box Field**, then find the **Position** field.

![Add a Text Editor element, then connect it to the corresponding field](https://imgur.elightup.com/NWsSHPj.png)

The description about each member is saved in the **Post** content, so drag the **Post Content** element into the second column.

![Drag the Post Content element as the description about each member is saved.](https://imgur.elightup.com/uUhUlLN.png)

Now, all the information of the team member has been obtained. If you want to style their display, customize the settings of each element as you want.

I made an example as following:

![all the information of the team member has been obtained](https://imgur.elightup.com/w0WufAO.gif)

## 4. Displaying all the members’ name cards on the page

Go to **Pages** &gt; **Add New** to create a Team Members page. Then, **edit it with Elementor**.

Drag the **Posts** widget to the content of the page.

![Drag the Post widget to the content of the page.](https://imgur.elightup.com/VKsQDd7.png)

In the setting of the **Posts** element, I have the **Skin** option in the **Layout** section because I used the **Elementor Custom Skin** plugin. In the **Select a Default Template** settings, choose the **Team Member Template** which we have just created.

![Adjust the layout according to the template created.](https://imgur.elightup.com/hOdCRot.png)

Next, in the **Query** section, choose the source as the post type of your team members to get all the posts from that post type.

![Choose the source as the post type in Query section](https://imgur.elightup.com/g9WZtKT.png)

Now, the preview shows the posts with exactly the information we want.

![Preview of the posts](https://imgur.elightup.com/uQJWMB1.png)

After displaying all the team member’ name cards to the page, you can style the page as you want.

For more advanced styling, I also added some custom CSS. Go to **Posts** element &gt; **Advanced** &gt; **Custom CSS** to add your code.

![Add CSS in the box](https://imgur.elightup.com/zqMlY7Y.png)

Here is my CSS code that you can refer to:

```css
.team-member .elementor-widget:not(:last-child) {
    margin-bottom: 5px;
}
.team-member p {
    margin: 5px;
}
.team-member .member-box .elementor-row .elementor-widget-wrap .social-icon
.elementor-row .elementor-widget-wrap {
    padding: 5px 0;
}
.team-member .member-box .elementor-row .elementor-column .elementor-widget-wrap {
    align-content: center;
}
```
It displays beautifully as I want.

![Team Members Page after adding CSS](https://imgur.elightup.com/b2ENTxJ.png)

# Creating a team members page - Meta Box + Oxygen

import LiteYouTubeEmbed from 'react-lite-youtube-embed';
import 'react-lite-youtube-embed/dist/LiteYouTubeEmbed.css';

We’re having this post to create a team member page with Meta Box and Oxygen.

I also made a sample of the page which is built by Oxygen.

![Sample for the Team Members Page with Meta Box and Oxygen](https://imgur.elightup.com/Zxtz5ca.png)

## Video version

<LiteYouTubeEmbed id='CgI4bxfOkk4' />

## Preparation

Each member’s information will be saved in a separated box, maybe called a name card. They are saved in posts of a custom post type for team members only.

The name and avatar of the member are the titles and the featured images of the post. And other information such as Position, Facebook, Instagram, and Mail will be saved in different custom fields.

Here are some tools we need:

* **[Meta Box](https://metabox.io)**: This is the framework to create custom fields and custom post types. It’s free and available on **[wordpress.org](https://wordpress.org/plugins/meta-box/)**
* **[MB Custom Post Type](https://metabox.io/plugins/custom-post-type/)**: to create custom post types for Team Member;
* **[MB Builder](https://metabox.io/plugins/meta-box-builder/)**: provides a UI in the back end to create custom fields easily for Member Information;
* **[MB Admin Columns](https://metabox.io/plugins/mb-admin-columns/)** (optional): to display the position of each members in the admin area;
* **[Oxygen](https://oxygenbuilder.com/)**: to build the page. You should use the 3.9 version or upper to have integration with Meta Box.

## 1. Creating a new custom post type

Go to **Meta Box > Post Types > New Post Type** to create a Team Members post type.

![Create a new custom post type for the Team Members](https://imgur.elightup.com/yb8gspm.png)

Then, you will see a post type in the Admin Dashboard.

![A post type in the Admin Dashboard](https://imgur.elightup.com/pPBwDKq.png)

## 2. Creating custom fields

Go to **Meta Box > Custom Fields > Add New** to create a new field group for the member’s information.

For the position field, I also want to display it in the admin column. So I tick the option **Show as an admin column**. However, this is just an optional setting. Thus, depending on your needs, you can use it or not.

![set the custom fields display as admin columns](https://imgur.elightup.com/1CTpDiv.png)

After creating all the fields, move to the **Settings** tab > **Location** section, choose the **Post Types** as **Team Members** to apply these fields to it.

![set location for the custom field as the created post type](https://imgur.elightup.com/nXqbnRN.png)

Now, go to the post editor in Team Members post type, you will see the fields. Let's add information for team members.

![the custom fields display in the post editor](https://imgur.elightup.com/CeHd3gg.png)

## 3. Creating a template for the page

In the Oxygen, create a new template and choose **inactive - Default Page** to set it to inherit this style.

![create a new template for the team members page](https://imgur.elightup.com/je3Yd7u.png)

Next, create a new page for the team members and assign the created template to this page in the **Render Page Using Template** section.

![assign template for the page](https://imgur.elightup.com/nJjF8SB.png)

Let’s edit the template!

In the **Previewing** section, choose the page you want to see the preview. Then, select a **Section** component to contain all of the team members’ information.

![add a Section component for the content in the page](https://imgur.elightup.com/FqZQutj.png)

To get the title of the page automatically, add the **Heading** component, then click **Insert Data > Post > Title** to connect this component with the title of the page.

![add title for the page by connecting the component to the page title to get information automatically](https://imgur.elightup.com/tG9l6Xh.gif)

Next, add a **Repeater** component to get the data from all the posts that we use for our team members. To get the source of data, go to **Query > Custom > Post Type** and find the ID of the created post type for our team members.

![add Repeater to get all the posts](https://imgur.elightup.com/lcCdWoA.gif)

In the below image, there are many small boxes which are the number of posts that I have.

![the Repeater displays many boxes, each one is for a post](https://imgur.elightup.com/DQgCOWY.png)

To avoid being messy when displaying the posts, in the **Preview Render** section, choose **Single Mode** to see the preview of a post only.

![change the preview of the Repeater to single mode](https://imgur.elightup.com/wv7wgf5.png)

In this tutorial, each name card of a member has two columns. One is to display the image and social icons. Another one is to show the member information. I'll use two **Div** tags to divide the content into two columns.

![the name card of each member is divided into 2 columns](https://imgur.elightup.com/kVlLHSO.png)

In the first **Div** tag, add the **Featured Image** component to have the avatar saved as the post's featured image.

![add Featured Image component to get the avatar](https://imgur.elightup.com/cwjTTWm.gif)

Next, create another **Div** tag for all social icons in order to style them easier later. Then, choose the **Icon Button** component. Since the social links are also saved in custom fields, connect these icons to the corresponding data. Go to **Insert Dynamic Data > Meta Box Field** > choose the corresponding field.

Take the **Facebook** icon as an example:

![link the custom fields to get the data automatically for the Facebook link](https://imgur.elightup.com/CxPFvce.gif)

Then, you can customize the Facebook icon as you want.

Now, let’s get the member’s information in the second column.

Choose the **Title** component for displaying the member's name since it is the post title.

![add title of the post to get the member name](https://imgur.elightup.com/ui0VQDO.png)

To get the member's position, add the **Text** component. Then, also connect it to the position field like the way we did with the social icons. After clicking the **Insert Data** button, choose **Meta Box Field > Position**.

![connect the custom fields to the text conponent to get the data of member's position](https://imgur.elightup.com/Or9sBIy.gif)

Since the **Position** is a select field, the options in the choices box may have only labels as I set in step 2, or include both value and label as normal. In the template editing with Oxygen, when you get the position’s information, there are two options as well. And, I’ll choose the label.

![set the obtained data to get as label](https://imgur.elightup.com/TusazlW.png)

Finally, choose the **Content** component to get a short introduction of the member.

![add the Content component to get the member's description](https://imgur.elightup.com/YD84SfS.png)

So, on the Meet the Team page, you can see all the information about the members.

![The members' information display on the page](https://imgur.elightup.com/zgYdBjR.gif)

Let’s style this page.

## 4. Styling the page

To style this page, you can choose each component and change the settings.

In the **Advanced** tab, there are a lot of choices so that you can style as you want.

![style each element for better display](https://imgur.elightup.com/nJzvzCM.png)

After styling the components, to see all the posts, just enable the **Preview Render** section to the **Normal Mode**.

![change the preview mode of the repeater to normal mode to show all the posts on preview](https://imgur.elightup.com/4uFS6Kv.png)

In addition, if you want some further styling, you may try adding some CSS.

![add CSS for additional style](https://imgur.elightup.com/7egE2fd.png)

Let’s see the result!

![The team members page after all steps](https://imgur.elightup.com/Zxtz5ca.png)

# Creating a team members page - Meta Box + Kadence

import LiteYouTubeEmbed from 'react-lite-youtube-embed';
import 'react-lite-youtube-embed/dist/LiteYouTubeEmbed.css';

In the previous posts of the [Creating a Team Members Page](https://metabox.io/series/team-members/) series, we have tried with many page builders and Meta Box only. To continue, let’s see how to create the member page using **Meta Box** and **Kadence**.

This page is an example. It shows all your team members and some of their information.

![the page shows all members in the team and their information](https://imgur.elightup.com/58yX6YS.png)

## Video version

<LiteYouTubeEmbed id='OwKakmyronk'/>

## Preparation

Each member information is saved in a post of a custom post type and displayed as a name card. For members' information, the name and the avatar of the member are the title and the featured image of the post. Some extra information such as position, Facebook, Instagram, and Mail will be saved in custom fields.

These are some tools we need in this practice:

* [Meta Box core plugin](https://wordpress.org/plugins/meta-box/): to have the framework for creating the custom post type and custom fields for the members. You can install it directly from [wordpress.org](https://wordpress.org/plugins/meta-box/);
* [MB Custom Post Type](https://metabox.io/plugins/custom-post-type/): to create a custom post type for the team members;
* [MB Builder](https://metabox.io/plugins/meta-box-builder/): to have a UI in the back end to visually create custom fields;
* The pro version of **Kadence** with some extra types of blocks to build the page.

## 1. Creating a new custom post type

Go to **Meta Box** > **Post Types** > **Add New** to create a new one for the team members.

![go to Meta Box, Post Types to create a new one](https://imgur.elightup.com/aAiS9X9.png)

After publishing, the created custom post type will be displayed in the admin dashboard.

![the created custom post type displays in the admin dashboard](https://imgur.elightup.com/MAl6eZ5.png)

## 2. Creating custom fields

As mentioned before, we’ll create some custom fields to save some common information about each member.

Go to **Meta Box** > **Custom Fields** > **Add New** to create a new field group.

![go to Meta Box, Custom Fields to create a new field group](https://imgur.elightup.com/nOgUCXR.png)

These are the fields that I created:

![Some custom fields created to save the members information](https://imgur.elightup.com/gIQdxIP.png)

For the position, use the **Select** field which provides some options to choose from.

![For the position, use the Select field to have some options to choose from](https://imgur.elightup.com/EFGc88D.png)

Then, fill in those options into the **Choices** box.

![Fill in options into the Choices box for the positions of members](https://imgur.elightup.com/VhPCUQ8.png)

For other information such as Facebook, Instagram, and Mail, you can choose the **URL** field to save the link for those social networks.

![Choose the URL field to save the link for those social networks](https://imgur.elightup.com/dtIqS96.png)

Besides, you can use other field types to save other kinds of members’ information as you want.

After creating all the fields, move to the **Settings** tab, choose the **Location** as **Post Type**, and select **Team Member** to apply these fields to it.

![Set the Location for the field group as Post Type, and select Team Member to apply these fields to it](https://imgur.elightup.com/PxLpcem.png)

Go to the post editor, and you will see the created custom fields.

![the created custom fields display in the post editor](https://imgur.elightup.com/lUMC2RK.png)

Just input information for your members.

## 3. Creating a query card

To get information of each member from posts, we should create a query card first. This is a new feature of the **Advanced Query Loop** from **Kadence**. It allows us to define the template for individual posts within the loop.

Go to **Kadence Blocks** > **All Query Cards** and create a new one.

![Go to Kadence Blocks > All Query Cards and create a new query card](https://imgur.elightup.com/HV7wois.png)

![set the name of the query loop card](https://imgur.elightup.com/pRO7pPx.png)

At the first time, you will see the card display data from blog posts by default. Go to the right sidebar, and set the preview as the post type that we created.

![Set the preview of the query card as the post type that we created](https://imgur.elightup.com/Q1Xgg7s.png)

The preview will change, but it’s just changing in the preview, not querying any data.

I’ll design the cards for each person with two columns inside. So add a **Row Layout** block and choose the layout for the content in the card.

![add a Row Layout block and choose the layout for the content in the card](https://imgur.elightup.com/QSMjUGQ.png)

![Open the structure of block to easily see the structure of content](https://imgur.elightup.com/U4s11te.png)

You can remove the default blocks inside the query card which you don’t use.

![remove the default blocks which you don’t use](https://imgur.elightup.com/soVXA3I.png)

In the first column of the added Row Layout block, add the **Advanced Image** block for the member avatar.

![In the first column, add the Advanced Image block for the member avatar.](https://imgur.elightup.com/er2ONY6.png)

Enable the dynamic image for this block. Then choose the **Featured image** from the **Post** to display them.

![Enable the dynamic image for the Advanced Image block, then choose the Featured image from the Post to display them](https://imgur.elightup.com/TB3cFUv.gif)

The next part is a group of icons for social network linking. So, add a **Section** block.

![add a Section block to cover the group of icons for social network linking](https://imgur.elightup.com/FpO8LGb.png)

Then, add an **Icon** block inside this section.

![add an Icon block](https://imgur.elightup.com/WLbAKgh.png)

Choose an icon for it.

![Choose the wanted  icon on the right sidebar](https://imgur.elightup.com/lqizUX9.png)

Also, enable the dynamic link.

![Also enable the dynamic link](https://imgur.elightup.com/4JhZmJS.png)

And, set the link from the **Post Custom Field**.

![choose the link from the Post Custom Field](https://imgur.elightup.com/T50Leuw.png)

Then, choose the name of a field where you save the link in the **Custom Field** box.

![choose the name of a field where you save the link in the Custom Field box](https://imgur.elightup.com/Dnk3a0S.png)

Duplicate the block to add an icon for another social network.

![Duplicate the block to add an icon for another social network](https://imgur.elightup.com/TejsbCq.png)

Then, just change the field for the link to get the right one from the corresponding field.

![change the field for the link of instagram](https://imgur.elightup.com/OtHyTS8.png)

![change the field for the link of mail](https://imgur.elightup.com/xyR17gu.png)

Next, move to the second column.

To get the name of the member, you can use the **Title** block as usual. But in this case, I want to have more options to customize its style, so I choose the **Dynamic HTML** block.

![choose the Dynamic HTML block for the name of the member to have more options to customize its style](https://imgur.elightup.com/hV9EHhv.png)

Then set the **HTML Content** as **Post Title** to get the member name from the title of the post.

![set the HTML Content as Post Title](https://imgur.elightup.com/LEldTSS.png)

We also use this block to get information about the position.

![also use Dynamic HTML block to get information about the position](https://imgur.elightup.com/Qcudiao.png)

Choose the **HTML Content** as **Post Custom Field**.

![Choose the HTML Content as Post Custom Field](https://imgur.elightup.com/7bbyFVH.png)

And look for the **Position** field on the dropdown list.

![look for the Position field on the dropdown list](https://imgur.elightup.com/fO1hUKo.png)

For the description of members, do the same and set the **HTML Content** as **Post Excerpt**.

![For the description of members, do the same and set the HTML Content as Post Excerpt](https://imgur.elightup.com/OIFjLs1.png)

That’s all the information of the members that I want to show.

## 4. Adding query

We regulated how the information was displayed in the Query Card, but haven’t stipulated where it will query from. So now, go to add a new query in Kadence.

Go to **Kadence Blocks** > **All Queries** and add a new query.

![Go to Kadence Blocks, All Queries and add a new query to stipulate where the information will query from.](https://imgur.elightup.com/bBzukqX.png)

There is a field to choose which post type we want to query from. Choose the post type that we use for the members.

![Choose the post type that we use for the members](https://imgur.elightup.com/PZD9J6B.png)

And, don’t forget to select the created card in this box.

![select the created card in the box](https://imgur.elightup.com/ZFlM02g.png)

Then this loop will inherit the content and styling from the created query card.

![the loop inherited its content and styling](https://imgur.elightup.com/bDHF5s6.png)

So, we’ve done the query basically.

Kadence provides some extra blocks here to add filter, pagination, or sorting to the loop.

![extra blocks to add filter, pagination, or sorting to the loop provide by Kadence](https://imgur.elightup.com/n9BVvfI.png)

I’ll try to add pagination for example.

![try to add pagination for the page](https://imgur.elightup.com/3UQd1tv.png)

There are also options to customize the pagination, but I’ll keep it as default.

## 5. Displaying on the page

First, go to **Pages** > **Add New** to create a new page as usual.

![go to Pages, Add New to create a new page as usual](https://imgur.elightup.com/R0T9b7A.png)

Add the **Advanced Query Loop** block provided by **Kadence**.

![Add the Advanced Query Loop block provided by Kadence](https://imgur.elightup.com/WIZEfSS.png)

Then, choose the query loop we created in the previous step.

![choose the query loop we created in the previous step](https://imgur.elightup.com/WO79clL.png)

Go to the page on the front end, you will see the page displaying all the members’ information, along with the pagination that I added.

## 6. Styling the page

Go back to edit the query loop, you can change some parameters in each block, even each one that we use for the query card, to have a better look.

![Go back to edit the query loop, change some parameters in each block to have a better look](https://imgur.elightup.com/5nu4qV6.png)

Here is the final look of the team member page that I want.

![the final look of the team member page](https://imgur.elightup.com/IrHb6PA.gif)

# Having a chronological timeline in WordPress using MB Views

import LiteYouTubeEmbed from 'react-lite-youtube-embed';
import 'react-lite-youtube-embed/dist/LiteYouTubeEmbed.css';

Today, we'll use the **MB Views** extension from Meta Box to **create a professional timeline**, visually presenting events, roadmaps, milestones, and changelogs for easy access.

Here is a simple example!

![An example of the timeline as the changelog along with the date, the version, and details](https://imgur.elightup.com/ANBWmnE.png)

## Video version

<LiteYouTubeEmbed id='JB8Ws8yFcgA' />

## Preparation

The timeline page shows multiple milestones, along with the date and information about the event. Each event will be saved in a post of a custom post type. Then, we use custom fields to manually choose which post (means event) will be shown in the timeline, as well as set their order.

Let's take a look at the tools we'll need for this practice.

* [The Meta Box plugin](https://wordpress.org/plugins/meta-box/) to have a framework for custom post type, custom fields, and **MB Views**;
* [MB Builder](https://metabox.io/plugins/meta-box-builder/): to visually create custom fields on a UI in the backend;
* [MB Views](https://metabox.io/plugins/mb-views/): to create a template for the timeline page;
* [MB Custom Post Type](https://metabox.io/plugins/custom-post-type/) (optional): to create a custom post type if you do not want to use the blog posts for the posts we show in the timeline;
* [MB Group](https://metabox.io/plugins/meta-box-group/) (optional): to group the fields together for better organization.

Make sure these extensions are enabled before we start.

## 1. Creating a new page

In the real case, you may have an existing page with other content and just add the timeline to the page as an additional part. But, in this practice, I’ll create a new page to display the timeline only.

Go to **Pages** > **Add New** to create a new one, as usual.

![Go to Pages > Add New to create a new one as usual](https://imgur.elightup.com/RvpQIRs.png)

## 2. Creating custom fields

To specify the content that will be shown in the timeline, I’m going to add some custom fields to the page.

Each timestamp includes 2 types of information:

* The date regulates the order of the content on the timeline: I use the **Date Picker** field for it.
* The details of the event: You can use some types of custom fields to input those details directly as usual. But, in the case that you want to get the content from some existing posts, you should use the **Post** field type. This is useful if detailed event information is already in a custom post type.

These pieces of information will go along together, so I set them up in a group. Here is the structure of the fields:

![Structure of the custom fields](https://imgur.elightup.com/gQ3SnlJ.png)

To have them, go to **Meta Box** > **Custom Fields** and create a new field group.

![Go to Meta Box > Custom Fields and create a new field group](https://imgur.elightup.com/39wUHLN.png)

First, add a **Group** field.

![Add a Group field](https://imgur.elightup.com/0Mwz8V7.png)

Inside the group, add subfields following the structure I indicated.

The first one is for the time. Meta Box offers several fields for time and date, just pick one that suits you. I choose the **Date Picker** field for illustration purposes.

![Add the Date Picker field for the time](https://imgur.elightup.com/o26M7xG.png)

The second one should be the **Post** field type. As I explained, you can add any kind of field to input content, but if you have posts including that, we can use the **Post** field to indicate those posts. Then, we must set the post type of those posts.

![Use the Post field to choose a post from the regulated post type to have their content.](https://imgur.elightup.com/ILrnNUb.png)

I have no more special settings for these fields.

But for the group, you should set it as collapsible to see all timestamp and its content in a neat structure.

![Set the group as collapsible to see all changes in a clear structure](https://imgur.elightup.com/uxxIots.png)

If you want to easily identify the content of each timestamp on the timeline, you can add a title for the group. There are several suggestions to choose from when you click on the button at the end of the **Group title** box.

![There are some suggestions to set the group title](https://imgur.elightup.com/O69HKu0.png)

**In there**:

* `{#}`: is to number the item;
* `date_timeline` and `post_timeline`: are the IDs of the subfields. They help to set the group title based on the content input to those fields.

Certainly, since a timeline has multiple timestamps, we need more than one post showing on it. Therefore, we should set this group as cloneable. It’s a kind of must-have setting.

![Set the group as cloneable](https://imgur.elightup.com/DGrvZnB.png)

You also can enable the **Sortable** option to rearrange the events based on the group title. In this case, I set the title as the date of the timestamp, so the posts will be sorted by the date that you set for each.

![Enable the Sortable option to rearrange the events](https://imgur.elightup.com/rGcPCyY.png)

After creating the fields and having reasonable settings, move to the **Settings** tab, choose **Location** as **Post type**, and select **Page**. Then, go to the **Advanced location rules** section below, and choose the page we created for the timeline to apply these fields to it.

![Set the location of the field group as the post we use for the timeline.](https://imgur.elightup.com/v388w7x.png)

Now, go to the page editor, you will see the created fields.

![The created fields in page editor](https://imgur.elightup.com/jU8OyZG.png)

In the **Post** field, there is a list including all the posts from the post type that you set for this field.

![There is a list including all the posts from the post type](https://imgur.elightup.com/Hs7hszw.png)

Just choose the date and the post.

To add multiple timelines for the timeline, click on the **+ Add more** button to add the new date and content.

![Click on the + Add more button to add new timestamp.](https://imgur.elightup.com/HwIDNlA.png)

Move on to display this information on the timeline using **MB Views**.

## 3. Getting content from custom fields

First, we need to get all the data saved in custom fields that we made in the previous step. They include the date of the timestamps and its content.

So, head over to **Meta Box** > **Views** and create a new view as usual to do it.

![Create new view with MB Views](https://imgur.elightup.com/SJHIpmR.png)

The data is from the fields, so click on the **Insert Field** button and choose the fields from the list on the right sidebar to get data from them.

![Click on the Insert Field button and choose the fields from the list on the right sidebar to get data from them.](https://imgur.elightup.com/pU2rSsQ.png)

Since we applied custom fields to the post, you should look for them in the **Post** tab. Find out the group that we created for the timeline. It's cloneable, so once we click on it, a loop will be generated in the template.

![Find out the group that we created for the timeline](https://imgur.elightup.com/B4ukuQ1.png)

Next, simply choose the subfields from the list to insert them into the loop one by one.

![Choose the subfields from the list to insert them into the loop one by one](https://imgur.elightup.com/8OJylFz.png)

Meta Box also provides some options to set the output of the data. So, just set the one that fits your needs.

For the post, we also have some options to set its output. Because I want to show all the content of the post for more detail of the event, I choose the **Post content** option.

![Choose the Post content option to show all the content of the post for more detail of the event.](https://imgur.elightup.com/6LJdAhh.png)

After inserting all the fields, scroll down to the **Settings** section of the view, set the **Type** setting as **Singular**, and choose the **Location** as the created page to apply the template to it. It also means adding the timeline to the page. In the other case, you can set other **location** to fit your case.

![In the Settings section, set type and location for the view](https://imgur.elightup.com/6DrM2lt.png)

Then, go to the page on the frontend, we will see all the data displayed in chronological order according to the timestamp that we saved in the **Date** field.

![All the data displayed in chronological order according to the timestamp](https://imgur.elightup.com/GL3irL7.png)

We’ve just displayed the data in an appropriate order. There’s been nothing to show the timeline as a flow of time yet. The flow should be visual to help viewers easily follow the information. So, we should style this timeline a lot more.

## 4. Styling the timeline

In the real case, you may have a lot of ideas for a beautiful timeline. But, in this practice, I’m going to make the timeline in a simple style like this:

![The timeline is in a simple style.](https://imgur.elightup.com/ANBWmnE.png)

If you like it, just follow up this step.

Go back to the view that we made for the timeline to add some code:

![Add code to to style the timeline.](https://imgur.elightup.com/uThyMMb.png)

**Explanation**:

```
<script src="https://cdnjs.cloudflare.com/ajax/libs/jquery/3.7.1/jquery.min.js"></script>
{% for clone in post.timeline %}
```

This line is to declare a JavaScript library. We’ll use it to have the action to have the **Read more** button where we can interact with to read the full content of the event or collapse them all in a short part.

As you can see in the image above, we should add some **div** tags and classes for each element that we want to have on the timeline. Along with the ones I set for the date and the content of the post, I also added a class to have the dot and another one for the **Read more** button.

![Add div and class for each element we want to have in the timeline](https://imgur.elightup.com/HJLL6J8.png)

Next, insert code in the **JavaScript** tab for the **Read more** button.

```
jQuery(function ($) {
    $('.timeline-readmore').click(function () {

        $(this).parent().find('.timeline-post').toggleClass('show-full-content')

        if ($(this).text() == "Read more")
            $(this).text("Read less")
        else
            $(this).text("Read more");
    })
})
```
![Insert code in the JavaScript tab for the Read more button](https://imgur.elightup.com/1vLzFvX.png)

**In there**:

```
$('.timeline-readmore').click(function () {
```

This is to trigger when visitors click on the **Read more** button. And, `timeline-readmore` is the class I created for the button before.

When the button is clicked, this line below will run.

```
$(this).parent().find('.timeline-post').toggleClass('show-full-content')
```

* `timeline-post`: is the class used for the post content where we want to show fully or neatly based on the click on the **Read more** button.
* When the reader clicks on the button, the line will add the `show-full-content` class to the post content section. Since it is a toggle class, it will be removed when having one more click. We will use this class to show full of the post content later. It also means that, when it’s removed, the content will be hidden, as at the beginning.

Along with the change of content, the label on the button also needs to change. When the content shows fully, it should be **Read less** or something else. So I have this following part to turn the labels.

```
 if ($(this).text() == "Read more")
            $(this).text("Read less")
else
            $(this).text("Read more");
```

Finally, go to the **CSS** tab and add some code.

![Go to the CSS tab, and add some code](https://imgur.elightup.com/Oo1MliU.png)

Based on all the classes we added, even the toggle class from JavaScript, we can style the timeline easily.

These are some parts I want to highlight:

```
border-left: 1px solid #dddedf;
```

It is to have a line for the timeline to show the flow of time.

```
.timeline .dot {
    width: 14px;
    height: 14px;
    position: absolute;
    background-color: #000;
    border-radius: 50%;
    min-width: 14px;
    min-height: 14px;
    left: -7px;
    top: 7px;
    box-shadow: 0 0 12px 0 rgba(8, 35, 43, 0.65);
```

The part above is to style the dot for each timestamp.

In addition, I use `max-height: 300px;` to set the max height for the section displaying each post's content to limit the area for each of them. Then, use `overflow: hidden;` to hide all the content that overflows the area.

And the last one, `max-height: unset !important;,` is to remove the max height of the post content section to show all the hidden content.

All of these codes are available on our [GitHub](https://github.com/wpmetabox/tutorials/tree/tutorials/create-timeline) channel, so you can refer to it for more details.

After saving the template, go back to the page on the frontend. You can see the new look of the timeline after styling. The button also works well.

![The new look of the timeline, and the buttons work well.](https://imgur.elightup.com/ANBWmnE.png)

By the way, if you use different page builders, stay tuned for our upcoming guide to [have a chronological timeline](https://docs.metabox.io/tutorials/create-timeline-with-bricks/).

Additionally, we recommend our article on [showing upcoming events](https://docs.metabox.io/tutorials/show-upcoming-events-with-mb-views/), which filters and displays ongoing or future events, ensuring your visitors don’t miss any information. I hope you find it helpful!

# Creating a timeline page - Meta Box + Bricks

import LiteYouTubeEmbed from 'react-lite-youtube-embed';
import 'react-lite-youtube-embed/dist/LiteYouTubeEmbed.css';

Sometimes, you should show the content in a timeline format. This type of content is really useful when you want to display the timeline of an event, historical milestones, roadmap, or changelog of a plugin/theme, etc. A **logical and clear timeline** can help visitors get information easily. In this article, let’s create and display a timeline page using a combination of **Meta Box** with **Bricks**.

This one is an example.

![An example of the timeline as the changelog along with the date, the version, and details](https://imgur.elightup.com/xQk3AN6.png)

## Video version

<LiteYouTubeEmbed id='Isnp3fL5G8g' />

## Preparation

The timeline page shows multiple timestamps along with the date, title of the event, and details. All of the information will be saved in custom fields created with Meta Box.

So, in this tutorial, we need these tools:
* [Meta Box plugin](https://wordpress.org/plugins/meta-box/): to have a framework for creating custom fields to save the updated information. You can download it directly from [wordpress.org](https://wordpress.org/plugins/meta-box/);
* [MB Builder](https://metabox.io/plugins/meta-box-builder/): to have a UI on the back end to create custom fields visually;
* [MB Group](https://metabox.io/plugins/meta-box-group/) (optional): to group the fields together for better organization;
* **Bricks** to build the timeline page.

When all of the tools are activated, let’s dive in step by step.

## 1. Creating a new page

We will display the timeline on a page. So, we should have it first.

Go to **Pages** > **Add New** to create a new one as usual.

![Go to Pages > Add New to create a new one as usual](https://imgur.elightup.com/PdNUHv4.png)

## 2. Creating custom fields

As I mentioned, we need to create some fields to add content about the timeline for the page.

Each point in the timeline includes two types of information:

* The date regulates the order of the content on the timeline. I use the **Date Picker** field for it.
* The details of the event: you can use some types of custom fields to input those details as usual. But in the case that you want to get the content from some existing posts, you should use the **Post** field type.

These fields will go along together. In other words, they are in a group. So, the structure of the fields will be like this:

![Structure of the custom fields](https://imgur.elightup.com/NnGg35f.png)

To have them, go to **Meta Box** > **Custom Fields**, and create a new field group.

![Go to Meta Box > Custom Fields, and create a new field group](https://imgur.elightup.com/rQPr6jh.png)

First, add the **Group** field.

![Add a Group field](https://imgur.elightup.com/1lllx66.png)

Inside the group, add subfields following two types of data.

The first one is for the time. Meta Box supports several fields for time and date, just choose a suitable one in your case. For illustration purposes, I choose the **Date Picker** field.

![(Add the Date Picker field for the time](https://imgur.elightup.com/WdUWqSu.png)

Another subfield is for the event details. Normally, you may use some basic fields to save the content. But it’s in a simple case only. For others, we usually have posts to put into the timeline. So, we should use the **Post** field. It allows us to **choose a post from the regulated post type** to have their content. This option may be more optimal for saving time, especially in the case you have available posts.

![Use the Post field to choose a post from the regulated post type to have their content](https://imgur.elightup.com/JjNZREi.png)

When configuring the Post field, remember to regulate the post type that the posts should be.

There are no more special settings for these two subfields. But, for the group, you should set the group as collapsible to see all changes in a clear structure.

![Set the group as collapsible to see all changes in a clear structure](https://imgur.elightup.com/AGLCb7E.png)

Also, we should set a title for the group to easily identify the content of each point on the timeline. There are some suggestions to choose from when you click on the button at the end of the **Group title** box.

![There are some suggestions to set the group title](https://imgur.elightup.com/aDDeom6.png)

**In there**:

* `{#}`: is to number the item.
* `date_timeline` and `post_timeline`: are the IDs of the subfields. They help to set the group title based on the content input to those fields.

There is certainly more than one milestone that we want to show on a timeline. Therefore, we should set the group as cloneable. It’s a kind of must-have setting.

![Set the group as cloneable](https://imgur.elightup.com/gbktVyW.png)

You also can enable the **Sortable** option to rearrange the events. Absolutely, it’s based on the group title. In this case, I set the title as the date, so the post will be sorted by the date that you input.

![Enable the Sortable option to rearrange the posts](https://imgur.elightup.com/p3FuAR3.png)

After creating the fields and having reasonable settings, move to the **Settings** tab, choose **Location** as **Post type**, and select **Page**. Then, go to the **Advanced location rules** section below, and choose the page we used for the timeline to apply these fields to it.

![Set the Location of the field group as the post we use for the Timeline.](https://imgur.elightup.com/KneNte6.png)

Now, go to the page editor, and you will see the created fields.

![The created fields in page editor](https://imgur.elightup.com/mwJAgfx.png)

In the **Post** field, there is a list including all the posts from the post type that you set for this field.

![There is a list including all the posts from the post type](https://imgur.elightup.com/YmC6zCn.png)

Just choose the date and the post.

To add more timestamps for the timeline, click on the **+ Add more** button to set the new date and content.

![Click on the + Add more button to set the new date and content.](https://imgur.elightup.com/hPX5NFI.png)

In the next step, we will display this information on the page using **Bricks**.

## 3. Displaying timeline information

Edit the page you created in the first step with **Bricks**.

![Edit the page with Bricks](https://imgur.elightup.com/9gd6YIZ.png)

First, add a **Section** element to cover all the content of the page.

![Add a Section element to cover all the content of the page](https://imgur.elightup.com/5aHnHFI.png)

There is an available container. We’ll add some elements inside this container to display the timeline information.

Also for demonstration purposes, I skip displaying the title of the page. Do it as usual if you want.

First, add a **Div** element to specify that we will get content from a cloneable group.

![Add a Div element to specify that we will get content from the cloneable group](https://imgur.elightup.com/C6dQGdD.png)

Enable the query loop and choose the type of the query as the group we use to insert content for the page.

![Enable the query loop and choose the type of the query as the group we use to insert content for the page](https://imgur.elightup.com/g49n5sN.png)

After that, inside the div, just add some elements to get data from two subfields of the group.

To display the date of each point, add a **Basic Text** element.

![Add a Basic Text element to display the date of each point](https://imgur.elightup.com/Pk7r0q1.png)

Use the **Select dynamic data** button to choose the subfield that saves the date information.

![Use the Select dynamic data button to choose the subfield that saves the date information.](https://imgur.elightup.com/mRA5xyN.png)

You also can add some characters to stipulate the format of the date output.

![Add some characters to stipulate the format of the date output](https://imgur.elightup.com/vBv6NLe.png)

Next, add another **Div** element to cover the details of the content for each timestamp.

![Add another Div element to cover the details of the content for each point](https://imgur.elightup.com/cH39ATY.png)

We use the **Basic Text** element as well to get data saved in the Post field.

![Add another Basic Text element to get data saved in the post field](https://imgur.elightup.com/EvWDVww.png)

Also, choose the subfield for getting data from.

![Choose the subfield for getting data from](https://imgur.elightup.com/kNsLqD9.png)

But, it returns only the title of the posts. If you want to show both the title and content of each post, we should add a PHP function for the output data. Bricks supports that so you can do it easily.

Click on the **Select dynamic data** button one more time, and find out the **Output PHP function**.

![Add the Output PHP function](https://imgur.elightup.com/WMg67Yx.gif)

We have the `post_timeline` as the ID of the field we use to get posts from. We still need to modify it a little bit. Also, add the [:value](https://academy.bricksbuilder.io/article/dynamic-data/) attribute to get the value of the field, instead of the title only.

![Modify the dynamic data and an attribute to get the value of the field](https://imgur.elightup.com/ZcHcC6L.png)

As you can see in the above image, the post content is displayed immediately.

View the page on the frontend, you will see all the information is ready.

![All the information is ready on the frontend](https://imgur.elightup.com/XcobV6f.png)

## 4. Styling the timeline

To have a better look for the timeline, back to the page editor with Bricks and change the settings of each element, or add some CSS to style it in your own way. In Particular, we’ll create the **flow of time** and some **points** on it in this step.

Let’s beautify the layout of the timeline.

### 4.1. Setting the line

To show the flow of time, you can set the border for the div that includes the content.

![Set the border for the div to show the flow of time](https://imgur.elightup.com/zV81lvl.png)

### 4.2. Limiting the content display

You also should set the max height for the section displaying each post's content to limit the area for each of them. Then, hide all the content that overflows the area. Each post will display shorter content.

![Set the max height then hide all the content that overflows the area](https://imgur.elightup.com/vt528Ok.png)

### 4.3. Styling the dots of timestamps

Besides normal styling, we’ll add a **Div** element to have some dots on the timeline indicating the timestamps.

![Add a Div element to have the point on the timeline](https://imgur.elightup.com/H5TpRnr.png)

Then, style the div to have the desired dots.

![Style the div to have the desired point](https://imgur.elightup.com/1YHFgrP.png)

### 4.4. The Read more button

Also, when we hide a part of the posts, we should have a **Read more** button in each post content to make the timeline clearer and more decent. So, add a **Button** element.

![Add a Button element for the Read more button](https://imgur.elightup.com/XYXsLJZ.png)

Next, we’ll set the action for this button to make it clickable.

You need to create some classes for the button. In this practice, I create two classes: one for the button, and one for the content. They will be used to regulate action in JavaScript.

![Create a class for the button](https://imgur.elightup.com/O0aWH6H.png)

![Create a class for the content](https://imgur.elightup.com/9nVVu4z.png)

To add an action for the button, add a **Code** element.

![Add a Code element to add action for the button](https://imgur.elightup.com/tlAjtiX.png)

Then, add some lines of code:

```
<script src="https://ajax.googleapis.com/ajax/libs/jquery/3.7.1/jquery.min.js"></script>
<script>
jQuery(function($){
    $('.timeline-readmore').click(function(){
    $(this).parent().find('.timeline-content').toggleClass('show-full-content');

        if($(this).text() == "Read more")
            $(this).text("Read less");
        else
            $(this).text("Read more");
    })
})
</script>
```

![Add some code for the action of the button](https://imgur.elightup.com/A5Zgib8.png)

**In there**:

```
<script src="https://ajax.googleapis.com/ajax/libs/jquery/3.7.1/jquery.min.js"></script>
```

This line of code is to declare the JavaScript library which allows you to run the JavaScript below.

```
$('.timeline-readmore').click(function(){:
```

This is to trigger when visitors click on the button via the `timeline-readmore` class we created for the button before.

```
$(this).parent().find('.timeline-content').toggleClass('show-full-content')
```

It is to show or hide the full content. Particularly, when the button is clicked, the `show-full-content` class will be added to the Basic text element via the `timeline-content` class. All the content will be shown. And, when you click the button one more time, the class will be removed, the content will return to the shortened format.

Along with the change of content, the label on the button also needs to change. So I used the part of the code:

```
if($(this).text() == "Read more")
    $(this).text("Read less");
else
    $(this).text("Read more");
```

When the content is in the full version, the button will turn from **Read more** to **Read less**, and vice versa.

### 4.5. Showing / Hiding the full content

We set the max height for the short form of content before. We also have the class and toggle class for the content section to know when it should be shown fully. Now, we will use CSS to show or hide the content based on those classes.

Move to the **Style** tab, and input these codes into the **CSS** section:

```
.timeline-content .timeline-post.show-full-content {
    max-height: unset !important;
    overflow: auto !important;

}
```

![Remove the max height of the post content section to show all the content](https://imgur.elightup.com/Dgm82mM.png)

This means we’ll remove the max height of the post content section to show all the hidden content when the class `show-full-content` is added to the content section.

On the frontend, you can see the new look of the timeline after styling. The button also works well.

![The new look of the timeline, and the button works well](https://imgur.elightup.com/VhwYcLT.gif)

That’s done.

# Creating user profile page on the frontend

import LiteYouTubeEmbed from 'react-lite-youtube-embed';
import 'react-lite-youtube-embed/dist/LiteYouTubeEmbed.css';

WordPress allows you to add more users to your website, but only from the backend. To let visitors register and manage accounts on the frontend, you can **create a user profile page** and also add custom fields for them to fill in their information. If you are using the Meta Box plugin, you can do it easily.

This is the user profile page I’ll create in this tutorial for example.

![The user profile page](https://imgur.elightup.com/3myNEDx.png)

## Video version

<LiteYouTubeEmbed id='SWts1bnqjRA'/>

## Preparation

Specifically, users will be able to register an account and log in as usual. They will have the ability to change their password on a separate page. Further, on the user profile page, you can display some fields that allow users to edit their account information. It may include some WordPress default fields and also custom fields that I create for some further information.

![The WordPress default field and the other fields in the user profile page.](https://imgur.elightup.com/G3d8JhK.png)

These are some tools we need for this tutorial:

First, we have [the Meta Box framework](https://wordpress.org/plugins/meta-box/). It’s available on [wordpress.org](https://wordpress.org/plugins/meta-box/).

Moreover, we’ll need some advanced features from Meta Box extensions. You can download them individually or use **Meta Box AIO** to have them all.

To create custom fields for users, we need to use [MB User Meta](https://metabox.io/plugins/mb-user-meta/) or [MB User Profile](https://metabox.io/plugins/mb-user-profile/). In this practice, we definitely have to use **MB User Profile** for creating the register page, login page, and user profile page on the frontend. If you do not use **Meta Box AIO**, you don't need to use **MB User Meta**. Otherwise, if you have the **Meta Box AIO**, it will require you to enable the **MB User Meta** extension.

Finally, [MB Builder](https://metabox.io/plugins/meta-box-builder/) helps create custom fields.

## Allowing users to register an account

Simply go to the **Settings** menu > **General**, then check the box **Anyone can register** in the **Membership** section.

![The settings allows users to register an account.](https://imgur.elightup.com/VTZURFF.png)

Furthermore, you can set the default role for the new user in the **New User Default Role** section. There are some options.

![Set the default role for the new user](https://imgur.elightup.com/ddrBXl6.png)

## Creating custom fields

When using the **MB User Profile** extension of **Meta Box**, it’ll provide some fields to create a registration page on the frontend. However, it only includes four fields, as the image shows.

![The MB User Profile extension of Meta Box provides some fields to create a registration page.](https://imgur.elightup.com/xs2yGbK.png)

If you want users to provide additional information, you should create custom fields.

And, by default, WordPress already has fields for users to input information like this.

![WordPress already has fields for users to input information](https://imgur.elightup.com/ySmt9YQ.png)

But these fields can only be filled from the backend. Sometimes, you may not want your users to access the backend and prefer them to input information directly from the frontend. To do that, we’ll create some custom fields to be the alternative to these fields. This way, users can enter the matching information, which will be automatically transferred into the corresponding WordPress fields.

Just go to the **Meta Box** > **Custom Fields** > **Add New**  to create some fields. I’ll create 3 fields to replace the 3 default fields in WordPress.

![Create 3 fields to replace the 3 default fields in WordPress](https://imgur.elightup.com/SeQBcOa.png)

Pay attention to setting these fields to be alternatives to the default fields. This means that when the user fills in the created fields, that data will also be entered into the default fields. To do that, we need to make sure the **ID** of the custom field is the same as the **ID** of the matching default field.

For example, WordPress sets the **First Name** field as `first_name`, so I set my field with the ID as `first_name` as well.

![Set the ID of the First Name field](https://imgur.elightup.com/tF4X8Et.png)

After creating all the necessary fields, move to the **Settings** tab and remember to set **Location** as **User**.

![In the Settings tab, remember to set Location as User](https://imgur.elightup.com/murAhYE.png)

Once you have published, the field group ID will be generated automatically. But, you can also fill out the ID on your own. We’ll use it in the next step.

![The field group ID](https://imgur.elightup.com/EJg3hjL.png)

## Creating the registration page

Let’s create a new page for registration.

As I mentioned before, the **MB User Profile** extension of **Meta Box** will provide a form like this.

![The MB User Profile extension of Meta Box provides a registration form](https://imgur.elightup.com/h0rvEj2.png)

To create the form, in the page editor, select the **Registration Form** block provided by the **MB User Profile** extension.

![Select the Registration Form block](https://imgur.elightup.com/VZnpKnO.png)

It should be a form with the username, password, and email fields. But I logged in with an admin account to do this practice, there will be a message.

![A message displays instead of a form](https://imgur.elightup.com/HUklAYD.png)

The form will display when you go to the page without any login as I showed before. And, you can register an account. However, this page just has some basic information about the account. If you want the user to add some other information that matches the WordPress default fields, I’ll display the created custom fields in this area.

![The place where created custom fields display](https://imgur.elightup.com/v7WZNHk.png)

Go back to edit the registration page. In the settings of the **Registration Form** block that we’ve just added, fill in the **ID** of the field group that we created.

![In the settings of the Registration Form block, fill in the ID of the field group](https://imgur.elightup.com/xBPJPoD.png)

This is the **ID** that I set when creating the field group for the previous registration form. After filling out the **ID**, you won’t see anything new on the page in the backend. You need to go to the frontend to see the differences. Now, the 3 created fields appear here.

![The 3 created fields appear](https://imgur.elightup.com/HO32v7d.png)

Just create a new account for testing, then move to the admin dashboard, you’ll see the new account. And the provided information is also saved in both the default and custom fields.

![The new account in the admin dashboard](https://imgur.elightup.com/5irUqb6.png)

## Creating the login page

After registering for an account, users will need a page where they can log in and manage their account information.

Go to the **Pages** > **Add New** to create a new one. Usually, there'll be 2 fields that are username or email and password in the login form. These types of fields are automatically generated by **MB User Profile** within a block named **Login Form**.

![Choose the Login Form](https://imgur.elightup.com/TNBOLy4.png)

Similar to the registration page, as I'm logged in with an admin account, I don't see the login form; instead, I only see a message.

The form will display when you go to the page without logging in.

![The form will display without logging in.](https://imgur.elightup.com/Z6gEJnF.png)

Now you can login to your account.

## Create the change password page

You may also need the page that allows users to change their password. Let’s create a new page as usual. Add the **Edit Profile Form** block provided by the **MB User Profile** extension of Meta Box as well.

![Add the Edit Profile Form block](https://imgur.elightup.com/4JTr6SY.png)

In the box below, fill in the **ID**. Then, you’ll see these 2 fields displayed immediately.

![Fill in the ID in the settings of the Edit Profile Form block ](https://imgur.elightup.com/mwxs1uU.png)

On the right sidebar, you can also customize the form by changing some settings.

For example, change the label of the button.

![Change the label of the button](https://imgur.elightup.com/Q5QXklc.png)

To access the **Change Password** page, users must log in to their account first. After logging in, you can see the page that I’ve just created allowing users to change their password.

![The Change Password page](https://imgur.elightup.com/77H2E9v.png)

## Creating the user profile page

Usually, users need to access the backend to view and modify their account information. However, if you want to restrict users from entering the backend and only allow them to access the frontend, you can create a user profile page to display their account information, as I showed at the beginning of this tutorial.

As I said, the user profile page will contain the WordPress default fields. Further, you can add other fields to display additional information. They’re from custom fields that we’ll create later.

### Displaying default fields

Now, create a new page.

On the user profile page, add the **Edit Profile Form** block, which is provided by **MB User Profile**.

![Add the Edit Profile Form block,](https://imgur.elightup.com/A7m4J9B.png)

In the block settings, enter the **ID** that I previously created a field group with three default fields into the section. Then, you will see 3 fields displayed on the page immediately.

![In the Edit Profile Form block settings, enter the ID of field group with three default fields](https://imgur.elightup.com/LOSSY7v.png)

Go back to the frontend, and you can see the user profile page with some personal information.

![The user profile page with some personal information.](https://imgur.elightup.com/zFOziMH.png)

It already has the account information that I have logged in to, and you can completely edit it.  Next, let’s add some additional fields to this page.

### Creating and displaying additional fields

Go to **Meta Box** and create a new field group.

![Go to Meta Box and create a new field group](https://imgur.elightup.com/CTtGlJY.png)

You can add any type of field that saves any kind of information you want. There’s no specific requirement for these fields.

Once you have created all the fields, move to the **Settings** tab and remember to set **Location** as **User**.

![Set the location to the new field group.](https://imgur.elightup.com/w9cwTjs.png)

We’ll use the field group **ID** later.

![the field group ID](https://imgur.elightup.com/YLaDLsr.png)

Next, go back to edit the user profile page. In the section in the image below, also fill in the **ID** of the created fields.

![Fill in the ID of the created fields](https://imgur.elightup.com/fMF8dNK.png)

Then, the fields display on the page immediately. You also can customize the form by changing some settings on the right sidebar.

On the frontend, you will see these fields appear.

![The user profile page with both personal information and additional information](https://imgur.elightup.com/3myNEDx.png)

Now, you can fill in the additional information and save it on this user profile page.

## Final words

To finalize all the forms, you should change the settings of each block provided by [MB User Profile](https://docs.metabox.io/extensions/mb-user-profile/) as well as style the fields for better display. For your quick reference, we have a tutorial for styling custom fields using CSS in [this post](https://metabox.io/style-meta-boxs-custom-fields-using-css/).

We hope that with these tools and tutorials, you can easily make your own custom user profile page and get a lot of users. And note that you should use [a transactional email service](https://metabox.io/free-transactional-email-services/) to notify your users after they successfully register an account on your site. That will help you become more professional.

We also have [a tutorial](https://github.com/wpmetabox/docsv2/blob/tutorial/docs/tutorials/add-guest-author-guest-posts.md) about adding Guest Author, which is quite similar to creating a user profile page so I guess you may also like it.

Cheers!

# Creating a video gallery page - Meta Box + Bricks

import LiteYouTubeEmbed from 'react-lite-youtube-embed';
import 'react-lite-youtube-embed/dist/LiteYouTubeEmbed.css';

In this practice, we will find another way to do it with the help of **Meta Box** and **Bricks**.

This is my example about the video gallery page:

![This is example of the created page](https://imgur.elightup.com/n9yefb4.png)
## Video version

<LiteYouTubeEmbed id='zfcyY0aDZ9U' />

## Preparation

The page shows a list of videos with additional information. Each video's information will be saved in a single post. In particular, the information about the video is the default information of the post. For videos, instead of uploading them to the website which makes the site heavy, I will use videos on Youtube and store those links in custom fields and display the videos from them.

So, we need these tools to do it:

* [Meta Box Lite](https://metabox.io/lite/): to create a custom post type for videos and have a UI on the backend to create custom fields easily;
* [Bricks](https://bricksbuilder.io/): to build the page.

## 1. Creating a custom post type

Go to **Meta Box** > **Post Type** to create a new post type.

![Create a custom post type](https://imgur.elightup.com/THfH67F.png)

Pay attention to the **Supports** tab, I want to display the author's information so tick the **Author** option.

![Go to Supports tab and choose Author](https://imgur.elightup.com/HUAflgc.png)

After publishing, you’ll see a new **Videos** menu in the **Admin Dashboard**.

![Created post type](https://imgur.elightup.com/dc5Rg1k.png)

## 2. Creating custom fields

Move to **Meta Box** > **Custom Fields** > **Add New**.

![Add a new custom field](https://imgur.elightup.com/dWxukiv.png)

As I said at the beginning, I’ll create only one custom field to save the video’s links. We normally use the URL field to save links. But on the front end, **Bricks** will display the link in the text format only, then we must take a few more steps to convert it to the video preview.

In this case, **Meta Box** has the oEmbed field that allows you to save the URL and display it as the video preview on the front end directly. So we’ll set the field in the Oembed type for more convenience.

![Choose the Oembed field](https://imgur.elightup.com/GlCjtlq.png)

After creating the field, go to the **Settings** tab, set the Location as the **Post** type, and choose **Video** to apply the created field to this post type.

![Set location for the created field](https://imgur.elightup.com/gW76P1w.png)

After publishing, you'll see the created custom field in the post editor.

![Created field in the post editor](https://imgur.elightup.com/vJ0CAja.png)

As I mentioned about ticking the **Author** option in the post type. Now we can see this section to choose the **Author** for the post here.

![Choose Author option](https://imgur.elightup.com/9ABCggh.png)

Let’s move on to the next steps.

## 3. Creating the page

Move to **Meta Box** > **Pages** > **Add New** to create a new page for the **Video Gallery**.

![Add a new page](https://imgur.elightup.com/WoeAcXy.png)

After creating the page, just edit it with **Bricks**.

First, add a **Section** element to cover the content of the page and add a **Post Title** element inside to get the page title automatically.

![Add a post title element](https://imgur.elightup.com/04MTJ9Q.gif)

Next, add some Div elements to divide content into sections.

Inside a **Div** element, enable the query loop, then go to **Query** > **Post type** > **Videos** to get posts from that post type.

![Enable the query loop and set up the query](https://imgur.elightup.com/1IAcH0j.png)

Now, we’ll display the information of the videos from the posts.

Add a **Video** element to display the video preview. Since the videos are saved in a custom field created by **Meta Box**, set the source of the video as **Dynamic** data instead of Youtube.
Choose the **Select** dynamic data button and find the **Video** oEmbed field in the **Meta Box** section.

![Choose the Select dynamic data button and find the Video oEmbed field](https://imgur.elightup.com/0wZwP3f.png)

Scroll down to the **Overlay** section, choose **Select** dynamic data > **Video** oEmbed field.

![Scroll down to the Overlay section, and choose Select dynamic data > Video oEmbed field](https://imgur.elightup.com/EsjSm8G.gif)

 Then, add a new **Div** element. You’ll see the preview of the video as you want.

![Add a new Div element](https://imgur.elightup.com/RnYUCY4.png)

To get the author of the video, add the Author element inside the **Div**. There‘ll be some information you want to display for the author or not.

![Add the Author element inside the Div](https://imgur.elightup.com/bvTN4lN.png)

For other information about the video, I added a new **Div** tag to group all 3 elements for easy styling later.

Add the **Post Title** element and change the HTML tag also add a class for it to style for the next step.

![Add the Post Title element and change the HTML tag](https://imgur.elightup.com/XQ7pM1E.png)

Add the **Basic Text** to show the author name and use the **Select** dynamic data button to connect it to the right field.

![Add the Basic Text](https://imgur.elightup.com/8BmLWMT.png)

To get the description of the video, add the **Post Content** element.

![Add the Post Content element](https://imgur.elightup.com/2WIup8b.png)

To display the date of the video, add the **Basic Text** element, then connect it to the post date through the **Select** dynamic data button.

![Add the Basic Text element](https://imgur.elightup.com/kl2W7AF.png)

After saving, you will see the video gallery on the page.

![The video gallery is displayed](https://imgur.elightup.com/ozwIB07.png)

For styling the page, just go back to the page editor with **Bricks**. You can choose each element to style each one individually.

![Style the page](https://imgur.elightup.com/01HYy7f.png)

For further styling, you can also use some **CSS**.

![Add some CSS](https://imgur.elightup.com/Vee375q.png)

Now, you’ll see the new look of the page.

![The final result](https://imgur.elightup.com/n9yefb4.png)

# Creating a video gallery page - MB Views

import LiteYouTubeEmbed from 'react-lite-youtube-embed';
import 'react-lite-youtube-embed/dist/LiteYouTubeEmbed.css';

If you don’t want to use any page builder, you can use **MB Views from Meta Box to create a video gallery page**.

This is an example of the video gallery page created with MB Views:

![example for the video gallery page created with MB Views](https://imgur.elightup.com/07ndSkM.png)

## Video Version

<LiteYouTubeEmbed id='8EDWUjTL2uI' />

## Preparation

The page shows a list of videos with some additional information. Each video’s information will be saved in a single post of a custom post type. In particular, the information about the video such as title, description, and author is the default information of the post. For videos, instead of uploading them to the website which makes the site heavy, I’ll use videos on Youtube then store those links in a custom field and display the videos from them.

In this practice, we need **Meta Box AIO**, including:

* [Meta Box core plugin](https://wordpress.org/plugins/meta-box/): to have a framework to create custom post types and custom fields;
* [MB Custom Post Type](https://wordpress.org/plugins/mb-custom-post-type/): to create a custom post type for videos;
* [MB Builder](https://metabox.io/plugins/meta-box-builder/): to have an intuitive UI to create custom fields in the backend;
* [MB Views](https://metabox.io/plugins/mb-views/): helps us create the template for the video gallery page.

## 1. Creating a new custom post type

Go to the **Meta Box** > **Post Types** > **New Post Type** to create a new custom post type for videos.

![Go to the Meta Box > Post Types > New Post Type to create a new custom post type for videos](https://imgur.elightup.com/YPY9Nm3.png)

When creating the post type, we have the **Supports** tab which provides some features to add to your post type. In this case, we’ll display the author’s information on the page, so check the **Author** box.

![check author box in supports tab to display the author’s information](https://imgur.elightup.com/upV5QPo.png)

After publishing, you will see your new post type in the **Admin Dashboard**.

![the created custom postype displayed](https://imgur.elightup.com/VhGNQpB.png)

## 2. Creating custom fields

Go to **Meta Box** > **Custom Fields** > **Add New** to create a new field group.

![Go to Meta Box > Custom Fields > Add New to create a new field group](https://imgur.elightup.com/yPoeBb6.png)

In this practice, I just display some basic information about the video such as title, author, content, and date supported by WordPress by default. As mentioned, I use only one custom field to save the URL of the videos. We should use the **oEmbed** field for it. It allows the **MB Views** to render the video preview from the URL directly.

![use the oEmbed field to render the video preview from the URL directly](https://imgur.elightup.com/hZsGgZT.png)

Then go to the **Settings** tab, set **Location** as **Post Type**, and select **Video** to apply the created field to it.

![go to the Settings tab, set Location as Post Type, and select Video to apply the created field to it](https://imgur.elightup.com/6qmpevs.png)

After publishing, you will see the created custom field in the post editor.

![the created custom field in the post editor](https://imgur.elightup.com/cpupEP4.png)

Since we have checked the **Author** box when creating the post type in the **Supports** tab, we have the section to choose the author for the post.

![author section to choose the author for the post](https://imgur.elightup.com/TekKapY.png)

Let’s move on to the next step.

## 3. Creating the page

First of all, create a new page for the video gallery. Move to **Pages** > **Add New** as usual.

![Pages > Add New to create a new page for the video gallery](https://imgur.elightup.com/jAvbbSj.png)

To create the template for this page, go to **Views** in **Meta Box** and create a new one.

![go to Views in Meta Box to create the template for the page](https://imgur.elightup.com/2T0Irx7.png)

In the **Template** tab, just add some code or insert fields from the list on the right sidebar to get and display information.

![add some code or insert field from the list on the right sidebar to get and display information](https://imgur.elightup.com/XNPs5VL.png)

First, add the **Post Title** field to display the page's title.

![add the Post title field to display the page's title](https://imgur.elightup.com/fgpsvAQ.png)

Next, for the section that displays the video’s information, add this code.

![for the section that displays the video’s information, add this code](https://imgur.elightup.com/8g79Hju.png)

```
{% set args = { post_type: 'video', posts_per_page: 9 } %}
{% set posts = mb.get_posts( args ) %}
{% for post in posts %}

{% endfor %}
```

In there:

`{% set args = { post_type: 'video', posts_per_page: 9 } %}`: is to declare that we’ll get posts from the post type that has the slug as **video** with 9 posts per page;

`mb.get_posts()`: this function is to get posts;

`{% for post in posts %}`: this loop helps to list the posts.

Then, just add some fields from the list on the right sidebar into the loop to display video’s information.

First, choose the **Video Oembed** to display the video preview.

![choose the Video Oembed to display the video preview](https://imgur.elightup.com/yyONNk3.png)

There will be two options to output data. Since we want to display the video preview, choose the first one.

![choose the first output data in settings to display video preview from URL](https://imgur.elightup.com/5lqJKHI.png)

To get and display the author’s information including avatar and name, we will use the mb.get_user() function with following code:

```{% set author = mb.get_user( post.post_author ) %}```

![use the code with the function to get and display the author’s information including avatar and name](https://imgur.elightup.com/bpPg2Mh.png)

Now, to display the video’s information, just insert the corresponding fields.

In the right sidebar, go to the **User** tab, set **Post author**, and choose the **User avatar** field.

![go to the User tab, set Post author, and choose the User avatar field to get author's avatar](https://imgur.elightup.com/G1NNVXO.png)

Choose the **Post title** for the video title in the **Post** tab.

![Choose the Post title for the video title](https://imgur.elightup.com/a09JS9L.png)

Go back to the **User** tab, choose the **User first name**.

![choose the User first name](https://imgur.elightup.com/Mp1lboW.png)

Then insert the **Post content** field.

![insert the Post content field](https://imgur.elightup.com/QO5gSkT.png)

Finally, choose the **Post date**.

![choose the Post date](https://imgur.elightup.com/TaFedis.png)

That’s all the information that we want to display for the video.

Go down to the **Settings** section of the view, choose the **Location** as **Page** and choose the **Video Gallery that is the name of the page we have created.

![Go down to the Settings section of the view, choose the Location as Page and choose the Video Gallery](https://imgur.elightup.com/ohtUkE9.png)

Go to the page on the front end, you’ll see the videos displayed.

![the video displayed on the frontend](https://imgur.elightup.com/u9APx9d.png)

## 4. Styling the page

To style the page, go back to the edit **Template** in the **Views**.

Before styling, we should add some **div** tags and classes for each information of the video.

![add some div tags and classes for each information of the video](https://imgur.elightup.com/1qXGqnI.png)

Next, go to the **CSS** tab of the view, and add some code to style the template.

![go to the CSS tab of the view, add some code to style the template](https://imgur.elightup.com/boSSZ9y.png)

I uploaded all of these codes on [Github](https://github.com/wpmetabox/tutorials/tree/master/creat-a-video-gallery-page-with-mb-views), so you can refer to it for more details.

Now, go back to the page on the frontend, you’ll see a new look of the page.

![the new look of the video gallery page](https://imgur.elightup.com/07ndSkM.png)

# Creating a video gallery page - Meta Box + Breakdance

import LiteYouTubeEmbed from 'react-lite-youtube-embed';
import 'react-lite-youtube-embed/dist/LiteYouTubeEmbed.css';

In today's practice, we're going to find out how to create a video gallery page with the help of Meta Box and Breakdance.

This is an archive page that I created as an example:

![The example of creating a video gallery page with Meta Box and Breakdance](https://imgur.com/Otnspcw.png)

## Video version

<LiteYouTubeEmbed id='TiV3tcumXUk' />

## Preparation

The page shows a list of videos with additional information. Each video's information will be saved in a single post. In particular, the information about the video is the default information of the post. For videos, instead of uploading them to the website which makes the site heavy, I will use videos on Youtube and store those links in custom fields and display the videos from them.

Here are the tools we need for this practice:

* [Meta Box Lite](https://metabox.io/lite/): to create a custom post type for videos and have a UI on the backend to create custom fields easily;
* [Breakdance](https://breakdance.com/): to build the page.

## 1. Creating a new custom post type

Go to **Meta Box** > **Post Types** > **Add New**.

![Create a new custom post type for videos](https://imgur.com/ygeaJpW.png)

Since I want to show the author information for each video, I’ll go to the **Support** tab, and check this box.

![In the settings of the post type, choose some features of the Supports tab to add them to the post type](https://imgur.elightup.com/OHlexXv.png)

After publishing, you will see a new **Videos** menu like this in the **Admin Dashboard**.

![This is a new post type that we created](https://imgur.com/XUUdmL9.png)

## 2. Creating custom fields

Go to **Meta Box** > **Custom Fields** to create custom fields.

![Create new custom fields for videos](https://imgur.com/q3UXgVD.png)

In this practice, the related information of the video is the default supported by **WordPress**. So, I use only one custom field to save the video.

Also, instead of uploading the video, I use a **URL** from another place. However, I won’t use the **URL** field. The **oEmbed** field will be the best choice in this case because **Breakdance** can display the video preview directly from the link saved in this field.

![Choose oEmbed fields that allow you to save the link and display it as the video preview on the frontend](https://imgur.com/DFFW9kj.png)

In the **Settings** tab, choose **Location** as the **Post Type**, and select **Video** to apply the field to it.

![In the Settings tab, set the Location as the Video Post Type to apply the created field to this post type](https://imgur.com/K22UOU7.png)

Then, you will see all the custom fields in the post editor of the **Video** post type.

![In the post editor, you will see the created custom field](https://imgur.com/PFpL5Jb.png)

## 3. Creating a new global block

With **Breakdance**, you should create a global block to get and display information from a post first, then use this global block to display them anywhere on your site.

Go to **Breakdance** > **Global Blocks** > **Add Global Block**.

![Create a global block to get and display information from a post](https://imgur.com/tg07ysp.png)

Remember to set a post for live preview.

Add a **Div** element to cover the block. Then add a **Video** element inside. You’ll see a preview of a random video display.

![Add div and video elements to cover the block](https://imgur.com/dloZuff.gif)

Click on the icon **Insert Dynamic** data, then choose the field in the **Meta Box** section. The video preview will display.

![Choose the field in the Meta Box section](https://imgur.com/VzJYZMr.gif)

For the other information for the video, add a **Column** element to separate them into two columns.

![Add a column element to separate other information for the video](https://imgur.com/ca31KwM.gif)

In the first column, add the **Author** element. It will automatically get information about the author from the post.

![Add the author element to automatically get information about the author from the post](https://imgur.com/hztldMc.png)

You should configure it a little bit to choose which information of the author will be displayed.

![Choose informations of the author will be displayed](https://imgur.com/3mTMSQb.png)

Add the **Post Title** for the video title to the second column.

![Add the post title for the video title](https://imgur.com/c0iwSpo.png)

Add a **Text** element, there’ll be an icon when you hover it to insert dynamic data. Choose the **Author Name** field from the **Author** section.

![Add a text element and choose the author name field for the video](https://imgur.com/RwZoPoc.gif)

Add the **Post Content** element.

![Add the post content element for the video gallery](https://imgur.com/RzgIEhK.png)

For the publish date, also add a **Text** element, then insert data from the **Post Date**. You can add some text or symbol before or after the date by using the prepend and append settings.

![Add some text or symbol to video gallery](https://imgur.com/08eiYfE.gif)

That’s all to display a video in the block.

## 4. Creating the page

Go to **Pages** > **Add New** to create the page, then edit it with **Breakdance**.

Add a **Section** element to cover all the content in the body of the page. Then add the **Post Title** element to display the name of the page.

![Add a section element to cover all the content in the body of the page](https://imgur.com/r4PZ5LR.gif)

Next, look for the **Post Loop Builder**. In the **Global Block** section, choose the one we’ve just created.

![In the global block section, choose the one we’ve just created](https://imgur.com/OyGCgQK.png)

Then move to the **Query** section, choose **Custom**, and edit the query. Choose the **Post Types** as **Videos** to get data from this post type.

![Choose the post types as videos to get data from this post type](https://imgur.com/8YhDgqS.png)

Then your wanted information about the videos will be displayed.

![The video gallery on the page before styling](https://imgur.com/Cz9NwE3.png)

For styling, still in the page editor with **Breakdance**, change the settings of each element to have the look as you desire. Just customize one by one.

![Change the settings of each element to have the look as your desire](https://imgur.com/o4QaSJK.png)

Then you will see the new look of the page.

![The video gallery page have a new look after styling](https://imgur.com/Otnspcw.png)

# Creating a video gallery page - Meta Box + Oxygen

import LiteYouTubeEmbed from 'react-lite-youtube-embed';
import 'react-lite-youtube-embed/dist/LiteYouTubeEmbed.css';

We’ll use Oxygen to **create a page showing a video gallery**. **The video's information is stored in the custom fields created by Meta Box**. Here is an example:

![The example of creating a video gallery page with Meta Box and Oxygen](https://imgur.elightup.com/xg6ygqB.png)

## Video version

<LiteYouTubeEmbed id='rs2kJI8NZYQ' />

## Preparation

The gallery includes a lot of videos, and each one will be saved as a post. So, we'll have a custom post type for it. All the information about the video, such as the title, description, and author is the post’s default information.

To avoid making your site heavier, we will save the videos somewhere else, for example, on Youtube. Then, I’ll save the video link in a custom field.

![Places to save the video's information](https://imgur.elightup.com/yBa2unw.png)

For this practice, we need these tools:

* **[Meta Box Lite](https://metabox.io/lite/)**: to create a custom post type for videos and have a UI on the backend to create custom fields easily;
* **[Oxygen](https://oxygenbuilder.com/)**: to build the page. You should use the 3.9 version or higher, which has integration with Meta Box.

## 1. Creating a new custom post type

Go to **Meta Box** > **Post Types** > **New Post Type** to create a new custom post type for the videos.

![Create a new custom post type for videos](https://imgur.elightup.com/Ddma0xi.png)

In the settings of the post type, we have the **Support** tab that provides some features to add to your post type. In this case, we will display the author’s information for this post, so check the **Author** box here.
![In the settings of the post type, choose some features of the Supports tab to add them to the post type](https://imgur.elightup.com/qSceLhJ.png)

## 2. Creating custom fields

Move to **Meta Box** > **Custom Fields** > **Add New**.

As I said before, I’ll create only one custom field to save the video’s links. Normally, we use the URL field to save links. But if you use it, Oxygen will only display the link as text on the frontend, then we must take a few more steps to convert the link into the video preview.

Instead, Meta Box has the **oEmbed** field type that allows you to save the link and display it as the video preview on the frontend directly. Thus, in this tutorial, we choose the **oEmbed** for more convenience.

![Choose oEmbed fields that allow you to save the link and display it as the video preview on the frontend](https://imgur.elightup.com/3Q52CkV.png)

After creating the field, go to the **Settings** tab, set the **Location** as the **Post Type**, and choose **Video** to apply the newly created field to this post type.

![In the Settings tab, set the Location as the Video Post Type to apply the created field to this post type](https://imgur.elightup.com/yh6aob5.png)

Then, in the post editor, you will see the newly created custom field.

![In the Post Editor, you will see the created custom field](https://imgur.elightup.com/FM7J0e6.png)

Furthermore, since we added the **Author** feature to the **Support** tab, we’ll have the **Author** section to choose the post’s author like this.

![As we added the Author feature in the Supports tab, we will have the Author section to choose the post’s author](https://imgur.elightup.com/UkjEHH1.png)

## 3. Creating a template for page with Oxygen

In the **Oxygen** menu, create a new template and apply it to the wanted page. Then, edit the page with Oxygen.

First, set the preview as usual.

To get the title of the page automatically, add a **Heading** component, then click **Insert Data** > **Post** > **Title** to connect it with the title of the page.

![Get the title of the video gallery page automatically](https://imgur.elightup.com/gR1Xwe8.gif)

Then, add a **Section** component to display the video gallery.

![Add a Section component to display the video gallery](https://imgur.elightup.com/ajscNU2.png)

Inside the **Section** component, add a **Repeater** component and set a data source for it. Go to **Query** > **Custom** > **Post Type** and find the ID of the created post type.

![Inside the Section component, add a Repeater component and set a data source for it](https://imgur.elightup.com/MVf3BNJ.gif)

Add a **Video** component inside the **Repeater**. You will see the default video preview from Oxygen. Now, we need to change the URL of this component to the one in the custom fields.

![To get the wanted video preview, we need to change the URL in Dynamic tag](https://imgur.elightup.com/7rgAiUf.png)

Click the **Data** button. Then, in the **Meta/Custom Field** section, find the field’s ID that you saved the video’s link.

![Get the wanted video preview step by step](https://imgur.elightup.com/8SXcNPn.gif)

For other information about the video, such as the video’s title, description, and author, select the corresponding component as **Text Link, Text, Image**, etc. Then, use the **Data** tag in the same way to automatically get the data from the post.

After adding all the wanted components, you will see all the video’s information displayed like this:

![After adding all the wanted components, you will see all the video’s information displayed](https://imgur.elightup.com/cZ453jD.png)

After saving the template, you will see the video gallery on the page.

![The video gallery on the page before styling](https://imgur.elightup.com/5py7iGN.png)

## 4. Styling the page

Go back to the page editor with Oxygen. For easy styling, you can add some **div** tags for each element or group them together and add classes for them.

You can change the layout of the gallery in the settings of the **Repeater**, or choose each component and change its settings.

![Change the layout of the gallery in the settings](https://imgur.elightup.com/9a01tAh.png)

If you want to have some advanced style for the page, you should use some CSS codes. Go to **Manage** > **Stylesheets** > **Add Stylesheet** and add some code.

![Use some CSS codes to style the video gallery page](https://imgur.elightup.com/9cX1mYv.png)

All the code I’ve uploaded to Github. You can refer to it.

Go to the video gallery page on the frontend, you’ll see the new look.

![The video gallery page have a new look after styling](https://imgur.elightup.com/xg6ygqB.png)

# Creating a video gallery page - Meta Box + Elementor

import LiteYouTubeEmbed from 'react-lite-youtube-embed';
import 'react-lite-youtube-embed/dist/LiteYouTubeEmbed.css';

In this series, we learned how to **create a video gallery page** using page builders. This post is one of them on how to create it using **Meta Box** and **Elementor**.

This is the video gallery page that I’ll create:

![Video gallery page using Meta Box and Elementor](https://imgur.elightup.com/P4EXEZU.png)

## Video Version

<LiteYouTubeEmbed id='1EEXCa2i-8U' />

## Preparation

The page shows a list of videos with some additional information. Each video's information will be saved in a single post. In particular, the information about the video is the default information of the post, even the author. For videos, instead of uploading them to the website which makes it heavy, I’ll use videos on Youtube, then store those links in custom fields and display the video preview from them.

In this practice, we need these tools:

* **[Meta Box Lite](https://metabox.io/lite/)**: to create a custom post type for videos and have a UI on the backend to create custom fields easily. Also, it provides the Meta Box-Elementor integrator to get dynamic data from custom fields and display them in the page built with Elementor effortlessly;
* **Elementor Pro**: to build the page.

## 1. Creating a New Custom Post Type

Go to **Meta Box** > **Post Types** > **Add New** to create a new post type for the videos.

![Create a new post type for the videos](https://imgur.elightup.com/VRE64Mt.png)

Pay attention to the **Supports** tab. I want to display the author’s information, so check the ‘**Author**’ option.

![Check the ‘Author’ option to display the author’s information](https://imgur.elightup.com/1CIrp2f.png)

After publishing, you’ll see a new menu. It’s your post type.

![Post type displays on menu](https://imgur.elightup.com/UAFBvN5.png)

## 2. Creating Custom Fields

Move to **Meta Box** > **Custom Fields** > **Add New** to create a new field group.

![Create a new custom field group](https://imgur.elightup.com/axD7epo.png)

I’ll create only one custom field to save the **URL** of the video as I said at the beginning.

We normally use the **URL field** to save links. But on the front end, **Elementor** will display the link in the text format only then we must take a few more steps to convert it to the video preview.

In this case, Meta Box has the **oEmbed** field that allows you to save the **URL** and display it as the video preview on the front end directly. So, we’ll set the field in the **oEmbed** type for more convenience.

![Set the field in the oEmbed type](https://imgur.elightup.com/MnWrqMP.png)

Creating the new fields was done. Go to the **Settings** tab, choose **Location** as **Post Type** and then, select **Video** post type to apply the created field to it.

![Go to the Settings tab, choose Location as Post Type and then, select Video post type to apply the created field](https://imgur.elightup.com/zVzROms.png)

After publishing, you’ll see the created custom field in the post editor.

![The created custom field display in the post editor](https://imgur.elightup.com/oj3Vvsf.png)

As I mentioned about checking the **Author** option when creating the post type, you’ll see this section to choose the author of the post.

![Choose the author of the post](https://imgur.elightup.com/w89OrIr.png)

Let’s move on to the next steps.

## 3. Creating a Template

We’ll create a template to stipulate how the information of each video will be displayed. Go to **Templates** > **Add News** to create a new template.

![Create a template to stipulate how the information of each video will be displayed](https://imgur.elightup.com/iKuGSDD.png)

Since it is a list of posts, we should choose the template as a **Loop Item**.

![Choose the template as a Loop Item](https://imgur.elightup.com/hrxKD2H.png)

Remember to set the preview for the template.

![Set the preview for the template](https://imgur.elightup.com/zucvnNZ.png)

First, add a **Section** element with the one column layout to contain all the information of the video.

![Add a Section element with the one column layout to contain all the information of the video](https://imgur.elightup.com/1WrQP12.png)

Then, add a **Shortcode** element inside it to display the video preview.

![Add a Shortcode element inside it to display the video preview](https://imgur.elightup.com/Q5t6fQI.png)

Since, the video links are saved in a custom field created with **Meta Box**, use the **Dynamic Tags** and look for **Meta Box Field** in the **Post** section.

![Use the Dynamic Tags and look for Meta Box Field in the Post section](https://imgur.elightup.com/FN6xsfK.png)

After that, choose the field **Video oEmbed** that we use to save the video **URL**. The video preview will display immediately after.

![Choose the field Video oEmbed that we use to save the video URL](https://imgur.elightup.com/ZJZMfnM.png)

For other information about the video, I’ll group them in a section and use the **Inner Section** element with two columns.

![Use the Inner Section element with two columns](https://imgur.elightup.com/3EUIAYi.png)

Next, add an **Author Box** element into the first column.

![Add an Author Box element into the first column](https://imgur.elightup.com/QXhWqWp.png)

You can change its settings to choose to display some kind of **Author** information or not.

![Choose to display some kind of Author information](https://imgur.elightup.com/QXhWqWp.png)

In the second column, add the **Post Title** to display the video title.

![Add the Post Title to display the video title](https://imgur.elightup.com/3Vw7H0o.png)

You may want to display it as a clickable link, so choose the link as **Post URL**.

![Choose the link as Post URL](https://imgur.elightup.com/Gtvy4PL.png)

Next, add a **Text Editor** element to display the author name.

![Add a Text Editor element to display the author name](https://imgur.elightup.com/yDXovhn.png)

This information is saved in the **Author Name** field that is default by **WordPress**. So, use the **Dynamic Tags** and go to the **Author** section to find it.

![Use the Dynamic Tags and go to the Author section to find the information](https://imgur.elightup.com/x61X56B.png)

Next, add the **Post Content** element to display the description about the video.

![Add the Post Content element to display the description about the video](https://imgur.elightup.com/QeY2irj.png)

For the post date information, also add a **Text Editor** element and use **Dynamic Tags** to get information.

![Add a Text Editor element to get the post date information](https://imgur.elightup.com/rzq4mRq.png)

![Use Dynamic Tags to get information](https://imgur.elightup.com/gLjV8oS.png)

Now, all the information about the video is already displayed.

![All the information about the video is already displayed](https://imgur.elightup.com/lbPxNpc.png)

We’ll create a new page and use this template for it in the next step.

## 4. Creating the Page

Let’s create a new blank page as usual.

![Create a new blank page](https://imgur.elightup.com/4vfkBcE.png)

Then, we will edit it with **Elementor**.

![Edit page with Elementor](https://imgur.elightup.com/1f6fJ0X.png)

First, create a **Section** to cover all the posts.

![Create a Section to cover all the posts](https://imgur.elightup.com/S6d84v1.png)

![Select the structure](https://imgur.elightup.com/gGdJhuV.png)

Then, add the **Loop Grid** element inside it.

![Add the Loop Grid element inside](https://imgur.elightup.com/RB1UuvP.png)

In the **Layout** settings of the **Loop Grid**, choose the template as which one we’ve just created.

![Choose the template as which one we’ve just created](https://imgur.elightup.com/un83cY8.png)

Move to the **Query** section, choose the **Source** as **Videos** that is our post type.

![Choose the Source as Videos that is our post type](https://imgur.elightup.com/po60ujg.png)

And then, you’ll see all the videos displayed in the right format.

![All the videos displayed in the right format](https://imgur.elightup.com/ABOWhbt.png)

## 5. Styling the Page

To change the layout of the page such as the grid, the number of posts displayed per page, go to change the **Settings** tab in the page editor with **Elementor**.

![Change the layout of the page](https://imgur.elightup.com/ABOWhbt.png)

To change the way each information displays, you should go to edit each element in the created template for displaying each video.

![Change the way each information displays](https://imgur.elightup.com/AVkWsf0.png)

Back to the page on the frontend, refresh it then you will see a new look.

![Video gallery Page with Meta Box and Elementor](https://imgur.elightup.com/P4EXEZU.png)

# Creating a video gallery page - Meta Box + Kadence

import LiteYouTubeEmbed from 'react-lite-youtube-embed';
import 'react-lite-youtube-embed/dist/LiteYouTubeEmbed.css';

Ready to beautify your website with a stunning video gallery? In today's practice, we're going to find out how to do it with **Meta Box** and **Kadence**.

This is my example.

![A video gallery created with Meta Box and Kadence](https://imgur.elightup.com/ndXhllO.png)

## Video version

<LiteYouTubeEmbed id='JlYEo5T7VlQ' />

## Preparation

The page is an archive page with a list of videos. Each video is kept in a post of a custom post type.

The information of the video is also the default information from the post, even the short description, author, or date. Just the videos are saved in a custom field.

So, we need some tool for this practice:

* **[Meta Box Lite](https://metabox.io/lite/)**: to create a custom post type for videos and have a UI on the backend to create custom fields easily;
* **Kadence** with **its pro version** to have some extra types of blocks to flexibly display the information.

## 1. Creating a new post type

Go to **Meta Box** > **Post Types** to create a new post type for the videos.

![Create a new post type for the videos](https://imgur.elightup.com/UrQfdhp.png)

Since I want to show the author information for each video, go to the **Supports** tab, and check the **Author** box to enable the author feature for the posts.

![Check the box to enable the author feature](https://imgur.elightup.com/SwVCnfd.png)

After publishing, you will see a new menu displayed. It's your post type.

![A new menu display in the dashboard](https://imgur.elightup.com/jkynIAI.png)

## 2. Creating a custom field

Move to **Meta Box** > **Custom Fields** > **Add New** to create a new field group.

![Move to Meta Box > Custom Fields > Add New to create a new field group.](https://imgur.elightup.com/lpux754.png)

In this practice, the related information of the video is the default supported by WordPress. So, I use only one custom field to save the video. Also, instead of uploading the video, I use a **URL** from another place. However, I won’t use the URL field. The **oEmbed** field will be the best choice in this case because **Kadence** can **display the video preview directly from the link saved in this field type**.

![Choose the oEmbed field to save the video’s link](https://imgur.elightup.com/4QEuhAa.png)

After creating the field, in the **Settings** tab, choose **Location** as the **Post type**, and select Video to apply these fields to it.

![Set location to apply the field to the Video post type](https://imgur.elightup.com/rZ8PqwQ.png)

Now, you’ll see the created custom field in the post editor.

![The created custom field in the post editor](https://imgur.elightup.com/IUxR4z7.png)

Pay attention to the **Author** box. This section is available since we set it to enable the author feature for the **Video** post type when creating it.

![The Author box is available since we set it to enable the author feature for the Video post type.](https://imgur.elightup.com/i0PF1yL.png)

Let's add some information and some videos as well.

Now, move on to the next step.

## 3. Creating a query card for the video

To get information about each video from posts, you should create a query card first. This is a new feature of the **Advanced Query Loop** from **Kadence**. It allows us to define the template for individual posts within the loop.

Go to **Kadence Blocks** > **All Query Cards** and create a new one.

![Go to Kadence Blocks > All Query Cards and create a new query card](https://imgur.elightup.com/oQJ8ANU.png)

After choosing the wanted layout for the card, you will see some default blog posts displayed.

![After choosing the wanted layout for the card, some default blog posts display.](https://imgur.elightup.com/mKqU2Yj.png)

Go to the right sidebar, set the preview as the post type that we created.

![Set the preview as the post type that we created](https://imgur.elightup.com/hX7gfgm.png)

The preview will change, but please notice that it’s just changing in the preview, not querying any data.

![The preview will change, not querying any data.](https://imgur.elightup.com/F8qs8Wd.gif)

So now, you can remove some unnecessary blocks, and choose the suitable blocks to get the corresponding information.

First, to get the video preview, choose the **Dynamic HTML** block to have more options to customize the display of the video preview.

![Choose the Dynamic HTML block to have more options to customize the display of the video preview](https://imgur.elightup.com/S6bMTXM.png)

Then, set the **HTML Content** as **Post Custom Field** and select the field of the video.

![Set the HTML Content as Post Custom Field and select the field of the video](https://imgur.elightup.com/Eb8EYl3.png)

Now, you can see the videos displayed immediately.

![The videos display](https://imgur.elightup.com/IEM0UOS.png)

For the additional information of the video, we style it into 2 columns like this:

![2 columns of additional information of the video](https://imgur.elightup.com/vdwxAJL.png)

So, add a **Columns** block, and choose the layout for it.

![Add a Columns block and choose the layout for it](https://imgur.elightup.com/eWcJqMl.png)

In the first column, add an **Advanced Image** block to display the author’s avatar. Instead of selecting any image, just enable dynamic image for this block.

![Add an Advanced Image block to display the author’s avatar, just enable dynamic image for this block](https://imgur.elightup.com/VfMSt8F.png)

Click on the button as the image below shown, and choose the **Author Image** from the dropdown list.

![Choose the Author Image from the dropdown list](https://imgur.elightup.com/I36XJrC.png)

After that, you will see the author's avatar appear.

![The author's avatar appears.](https://imgur.elightup.com/AgPeACn.png)

Move to the second column, choose a **Section** block to cover all the rest information. Next, add a **Text Advanced** block to get the name of the video stored in the title of the post.

![Choose a Section block to cover all the rest information and a Text Advanced block to get the name of the video](https://imgur.elightup.com/AKFUqd1.png)

Now, enable dynamic content, and choose the **Post Title** option.

![Enable dynamic content and choose the Post Title option](https://imgur.elightup.com/BgIQUwF.png)

Next, choose the **Author Name** block. The name says it all!

![Choose the Author Name block to get the names of the authors.](https://imgur.elightup.com/GdbvY9Z.png)

For the video’s description, choose the **Dynamic HTML** block again. Then, set the **HTML Content** as **Post Excerpt**.

![For the video’s description, choose the Dynamic HTML block, then set the HTML Content as Post Excerpt.](https://imgur.elightup.com/UyrbM28.png)

And the last information is the published date, choose another **Dynamic HTML** block and connect it to the post date.

![For the published date, choose the Dynamic HTML block and connect it to the post date.](https://imgur.elightup.com/zykh2TG.png)

That’s all the information in the videos that I want to show.

Now, we can change some parameters in each block to have a better look.

![Change some parameters in each block to have a better look](https://imgur.elightup.com/3QNDH6O.png)

## 4. Displaying the video gallery on the page

It’s time to display the video gallery on the frontend.

### 4.1 Creating a page

First, go to** Meta Box** > **Pages** to create a new page as usual.

![Go to Meta Box > Pages to create a new page](https://imgur.elightup.com/AdWfzmf.png)

### 4.2 Adding query

We’ve regulated how the information displays in the **Query Card**, but haven’t stipulated where it will query from yet. So now, add the **Advanced Query Loop** block provided by Kadence, and create a new query.

![Add the Advanced Query Loop block.](https://imgur.elightup.com/qqcP6zv.png)

![Create a new query](https://imgur.elightup.com/8VJXvMU.png)

For the layout, I will do it later, so skip choosing any pre-made layout.

There’ll be a place to choose which post type we want to query from on the below screen. Choose the post type that we use for the videos.

![Choose the post type that we use for the videos.](https://imgur.elightup.com/vu1qwEP.png)

And, don’t forget to select the created card for the layout of each video display. Then, this loop will inherit its layout and styling.

![Select the created card for the layout of each video display](https://imgur.elightup.com/5FbM6RX.png)

Now, the page displays all the videos along with their information already. You can change the layout of the gallery by changing some settings.

![Change the layout of the gallery by changing some settings](https://imgur.elightup.com/ozrgq5S.png)

You also can use some CSS as well.

![Use some CSS](https://imgur.elightup.com/QIg6mzT.png)

Let’s see how they look on the page!

![The final result of the video gallery](https://imgur.elightup.com/ndXhllO.png)

So, we've created the page for the video gallery.

Sometimes, you may want to display an attractive [video playlist](https://docs.metabox.io/tutorials/display-video-playlist-mb-views/) on your sites as well. You can refer to it

# Creating a video gallery page - Meta Box + Zion

import LiteYouTubeEmbed from 'react-lite-youtube-embed';
import 'react-lite-youtube-embed/dist/LiteYouTubeEmbed.css';

Do you want to display your video list on your page? In [this series](https://metabox.io/series/video-gallery/), I will show you **how to create a video gallery page** with the page builders. In today's practice, we're going to find out how to do it with **Meta Box** and **Zion**.

This is the final look of the video gallery page.

![an example of video gallery page was built by Meta Box and Zion](https://imgur.elightup.com/f8qJXIx.png)

Let’s do it step by step.

## Video version

<LiteYouTubeEmbed id='vjdOhrsmS7Y' />

## Preparation

The page is an archive page with a video list and their information. Each video’s information is kept in a single post of a custom post type.

In this tutorial, I use only 1 custom field to store the URL of the video instead of uploading the video on the website to avoid bloating the site. Then, display a video on the front end from the URL using Zion. You obviously can also add more custom fields to save extra information about the video.

So in this practice, we need these tools:

* **[Meta Box Lite](https://metabox.io/lite/)**: to create a custom post type for videos and have a UI on the backend to create custom fields easily;
* **Zion Builder** and **its Pro Version** to build the video gallery page.

## 1. Creating a new custom post type

Go to **Meta Box** > **Post Types** > **Add New** to create a new post type for the videos.

![Go to Meta Box, Post Types, Add New to create a new post type for the videos](https://imgur.com/z47w9mX.png)

Pay attention to the **Supports** tab when creating the post type. I want to display the author’s information on the gallery page, so check the box to enable the author feature.

![check the Author box in the Supports tab to display the author’s information on the gallery page](https://imgur.elightup.com/2RKLTlK.png)

After publishing, you can see a new menu, it’s your post type.

![the created custom post type displayed](https://imgur.elightup.com/8HIQZsB.png)

## 2. Creating custom fields

Move to **Meta Box** > **Custom Fields** > **Add New** to create a new field group.

![Move to Meta Box, Custom Fields, Add New to create a new field group](https://imgur.com/kSHAtGX.png)

As I mentioned before, I’ll create only one custom field to store the video **URL**. To display the video preview on the page, I highly recommend you use the **oEmbed** field instead of the URL field.

![you should use the oEmbed field instead of the URL field to display the video preview on the page](https://imgur.elightup.com/DSDjlkk.png)

After creating the field, go to the **Settings** tab, choose the **Location** as **Post type**, and select **Video** to apply the custom field to this post type.

![go to the Settings tab, choose the Location as Post type, and select Video to apply the custom field to this post type](https://imgur.com/1Dr7ppQ.png)

Now, you’ll see the created custom field in the post editor.

![the created custom field in the post editor](https://imgur.elightup.com/PDbuToj.png)

Pay attention to the **Author** box. This section is available since we set it to enable the author feature for the Video post type when creating it.

![the Author box is available in post editor since we set it to enable the author feature for the Videos post type when creating it](https://imgur.com/etpWD6n.png)

Now let’s move on to the next steps.

## 3. Creating the page

Go to **Pages** > **Add News** to create a new page for the video gallery, as usual.

![Go to Pages, Add News to create a new page for the video gallery](https://imgur.elightup.com/t1cb2mB.png)

Fill information and then remember to click on the area next to the title to disable the page title. We’ll get and display it by **Zion** later for more flexibility in styling.

![Fill information and then remember to click on the area next to the title to disable the page title. We’ll get and display it by Zion later for more flexibility in styling](https://imgur.elightup.com/DjMIAW0.png)

Now, edit the page with **Zion Builder**.

First, add the **Section** element to cover all the content of the page.

![add the Section element to cover all the content of the page](https://imgur.elightup.com/cQiDUrg.png)

![add the Section element to cover all the content of the page](https://imgur.elightup.com/hPnO5NY.png)

Then, add the **Heading** element inside to get the page title.

![add the Heading element inside to get the page title](https://imgur.elightup.com/uRDSyn6.png)

And, add **dynamic data** from the **Post title** to it.

![add dynamic data from the Post title to the Heading element](https://imgur.elightup.com/Wt9tzKR.png)

To divide the videos into 3 columns, add a **Column** element.

![add a Column element to divide the videos into 3 columns](https://imgur.elightup.com/p5XE5aP.png)

### 3.1. Setting the query

Inside the **Column**, add a **Container** element to cover the post.

![Inside the Column, add a Container element to cover the post](https://imgur.elightup.com/Pt3gNl4.png)

In the **Advanced** tab of the **Container**, enable the **Repeater Provider** to display all the posts from the wanted post type.

![In the Advanced tab of the Container, enable the Repeater Provider to display all the posts from the wanted post type](https://imgur.elightup.com/pV9SsOC.png)

Next, set the **Query type** as **Query builder** and **Post type** as **Videos** to query all the posts from this post type.

![set the Query type as Query builder](https://imgur.elightup.com/i0imGo6.png)

![set the Post type as Videos to query all the posts from this post type](https://imgur.elightup.com/sxB0Den.png)

Remember to enable the **Repeater Consumer** to display all the posts in the chosen post type.

![enable the Repeater Consumer to display all the posts in the chosen post type](https://imgur.elightup.com/YhFZMqz.png)

You will see nothing displayed now since we didn’t get any information from the video. So let’s add some elements to show them.

### 3.2. Displaying video information

Inside **Container**, for the video preview, add a **Text** element.

![Inside Container, for the video preview, add a Text element" width](https://imgur.elightup.com/uy2ssBZ.png)

Since the video URL is saved in a custom field created by **Meta Box**, use the **dynamic data** option, and look for the **Meta Box Field** option.

![Since the video URL is saved in a custom field created by Meta Box, use the dynamic data option, and look for the Meta Box Field option](https://imgur.elightup.com/Z43qaUr.png)

Then choose the **Video Oembed** field from the list. You will see the video preview immediately.

![choose the Video Oembed field from the list then the video preview immediately](https://imgur.elightup.com/SWcZWIz.png)

Next, add some **Column** elements to set the layout for the rest of the video information.

![add some Column elements to set the layout for the rest of the video information](https://imgur.elightup.com/N22a0bJ.png)

One column is to display the avatar of the author, and the other one will display other information about the video.

![One column is to display the avatar of the author, and the other one will display other information about the video](https://imgur.elightup.com/xdZA4WV.png)

In the first column, to get the author’s avatar, add an **Image** element. Then, also add **dynamic data** to it, and choose the **Author Profile Image** option. The picture of the author will be displayed immediately.

![to get the author’s avatar, add an Image element and add dynamic data to it, choose the Author Profile Image option](https://imgur.elightup.com/6XWwOcj.gif)

In the second column, add a **Heading** element for the video title. Also add **dynamic data** for it from the **Post title**.

![add a Heading element for the video title. Also add dynamic data for it from the Post title](https://imgur.elightup.com/xMYA43C.gif)

Add a **Text** element then choose **Author info** from **dynamic data** to get the name of the author.

![Add a Text element then choose Author info from dynamic data to get the name of the author](https://imgur.elightup.com/bj5L1iI.gif)

For the description and date of the video, do likewise, just choose the right field from the list.

![For the description and date of the video, do likewise, and choose the right field from the list](https://imgur.elightup.com/e81rZBD.gif)

You will see how it displays on the front end.

![the video gallery page on the frontend](https://imgur.elightup.com/f4MXooz.gif)

## 4. Styling the page

Go back to **edit the page with Zion**, you can change the settings of each element to get a new look of the page.

You also can add some **CSS** for further styling.

![You can add some CSS for further styling](https://imgur.elightup.com/D9xD1oY.png)

This is the final result of the video gallery page that I want.

![the final result of the video gallery page](https://imgur.elightup.com/f8qJXIx.png)

# Creating YouTube video timestamps on WordPress - MB Views

import LiteYouTubeEmbed from 'react-lite-youtube-embed';
import 'react-lite-youtube-embed/dist/LiteYouTubeEmbed.css';

You might know the timestamps feature on YouTube, but how can you have it for videos on your site? Rather than waiting for a complete video to run from zero seconds to the point you are referring to, timestamps enable you to jump to any second of the video directly where a timestamp regulates. You can add timestamps as many as the parts you want to have fast access. Let’s **create YouTube video timestamps using MB Views**!

This is an example I’d like to create today:

![YouTube video timestamps using MB Views](https://imgur.elightup.com/pDBjaKZ.gif)

## Video Version

<LiteYouTubeEmbed id='bkuxDRumUe8' />

## Preparation

In this practice, I assume that each video is saved in a post of a custom post type. To make the timestamps easier, we should save the video URL in a custom field instead of in the content of the post. Then, we will use custom fields created with Meta Box to input timestamps and short descriptions for them.

In this practice, we need these tools:

* [Meta Box core plugin](https://wordpress.org/plugins/meta-box/): to have a framework to create custom fields, and also the custom post type if any;
* [MB Views](https://metabox.io/plugins/mb-views/): to create and style the template for the page without touching the theme files;
* [MB Builder](https://metabox.io/plugins/meta-box-builder/): to have a UI on the back end to create custom fields.

You can install them individually or use **Meta Box AIO**.

## 1. Creating custom fields

As mentioned, I’ll create a field to input the **ID** of the video. It is a part of the video **URL**, and we just need this for quick and short saving. You can find this **ID** on the **URL** of the video as you can see here.

![the ID on the URL of the video](https://imgur.elightup.com/zowKPBV.png)

The **Timestamp** and **Description** will be grouped in pairs and were set to add more than one timestamp for each video, as follows.

![The Timestamp and Description will be grouped in pairs and were set to add more than one timestamp for each video](https://imgur.elightup.com/eCENMrs.png)

Now, move to the **Meta Box** > **Custom Fields** to create them.

![Go to the Meta Box > Custom Fields to create custom fields](https://imgur.elightup.com/6b8BlZt.png)

Choose the **Text** field for the video **ID**.

![Choose the Text field for the video ID](https://imgur.elightup.com/SErg6B1.png)

Insert a **Group** field for timestamps.

![Insert a Group field for timestamps](https://imgur.elightup.com/Hbrfx5p.png)

We should set it to be **collapsible** since there may be too many timestamps you want to add. Also, turn on the **Cloneable** option to set the group to be cloneable. This helps to add multiple pairs of timestamps and its descriptions.

![Set field to be collapsible and turn on the Cloneable option](https://imgur.elightup.com/RbqvC23.png)

After configuring all the fields, move to the Settings tab. Choose **Location** as **Post type** and select a post type to which you want to assign these fields

![Choose Location as Post type and select a post type to which you want to assign these fields](https://imgur.elightup.com/UvrI2cS.png)

Then, go to the post editor, and you will see the fields displayed.

![The fields displayed](https://imgur.elightup.com/eCENMrs.png)

## 2. Displaying the timestamps

### 2.1. Getting timestamps from custom fields

As I said, I will not add video directly to the post as usual. I will use the **MB Views** to display it, as well as along with the timestamps.

Go to **MB Views** to create a template for it.

![Go to MB Views to create a template](https://imgur.elightup.com/zdFOEsK.png)

As usual, to get data from custom fields, we just go to insert the wanted field from this list.

![Go to insert the wanted field from this list](https://imgur.elightup.com/BvMMHhU.png)

The timestamps are in a cloneable group, so whenever you click to the group, a loop will be generated in the template.

![A loop will be generated in the template when you click to the group](https://imgur.elightup.com/BvMMHhU.png)

Then, insert the subfield inside.

![Insert the subfield inside](https://imgur.elightup.com/EzQzvRT.png)

Insert the **Video ID** field as the same.

![Insert the Video ID field](https://imgur.elightup.com/SvcyHqS.png)

Now, move to the settings of the view, since we will display the timestamps in each post, choose the type as **Singular**.

![Choose the type as Singular](https://imgur.elightup.com/7DXosbL.png)

And choose the post type you want.

![Choose the post type you want](https://imgur.elightup.com/VAGC5DF.png)

Now, go to a post on frontend, and you will see the result. Still there is no video displayed, and all of the timestamps just are text now.

![The result still there is no video displayed, and all of the timestamps just are text now](https://imgur.elightup.com/XHN1G34.png)

So, we should go back to the template and customize the code a bit more to display the video and make the timestamps work as we expected.

### 2.2. Converting data for using JavaScript

We should use JavaScript to display the video from the video **ID**, as well as display timestamps in the clickable style and make them work on the video. That’s why we are going to have an array to store the values and transfer them to a **HTML** tag for using JavaScript later.

Back to the template created with **MB Views**. First, create an array to store the timestamps and descriptions. Add this code at the first line.

``` {% set TimestampsArray = [] %} ```

![Create an array to store the timestamps and descriptions](https://imgur.elightup.com/9puw35k.png)

Then, add these lines of code to pass the value from custom fields to the array.

```
{% set TimestampsArray = TimestampsArray|merge(
  [
    {
      "timestamp": ,
      "description":
    }
   ] ) %}
```

![Add these lines of code to pass the value from custom fields to the array](https://imgur.elightup.com/srxeXyW.png)

` {{clone.timestamp}} ` and ` {{clone.description}} ` are the ones to get data from custom fields. So, move them to the 6th and 7th lines as follows.

![Move clone.timestamp and clone.description to the 6th and 7th lines](https://imgur.elightup.com/XdazTng.png)

Also remove the `{{ }}` symbols.

![Remove the {{ }} symbols](https://imgur.elightup.com/cMYuAZa.png)

I also have another array to store the video **ID** along with the timestamps and description.

![Another array to store the video ID along with the timestamps and description](https://imgur.elightup.com/2tgr4xS.png)

```
{%
    set TimestampsObject =
    [
         {"id":  },
         {
            'Timestamps':
         }

    ]
%}
```

Also move ` {{ post.video_id }} ` to assign it to the array.

![Move post.video_id to assign it to the array](https://imgur.elightup.com/D0u0xj0.png)

Fill in the name of the first array to the ` Timestamps ` key, then the timestamps and description from it will be get and pass to the new array as well.

![Fill in the name of the first array to the Timestamps key](https://imgur.elightup.com/JRIAg6E.png)

Add the code ` <div id="video_player"></div> `. This is an **HTML ID** that’ll be used to display video using JavaScript later.

![The HTML ID that’ll be used to display video using JavaScript later](https://imgur.elightup.com/aMTiiH6.png)

There’s nothing displayed in the template so far.

To display the timestamps, insert fields from the list on the right sidebar once again.

![Insert fields from the list on the right sidebar](https://imgur.elightup.com/McHBlv8.png)

Add an A tag to the line where we display the timestamps information:

```
<li><a href="javascript:void(0);" onclick="setCurrentTime({{loop.index0}})"> </a></li>
```

![Add an A tag to the line where we display the timestamps information](https://imgur.elightup.com/2sXwb10.png)

` onclick="setCurrentTime({{loop.index0}})" ` is an attribute that helps to trigger the moment someone clicks on the timestamp and its description. It’ll let us know where they want to jump to on the timeline of the player.

![The attribute that helps to trigger the moment someone clicks on the timestamp and its description](https://imgur.elightup.com/xi75xXL.png)

As well as, based on that event, we will force the player to play from the regulated time.

Next, for **JavaScript**, add this line:

```
<div id="Timestamps_ID" data-timestamp='{{TimestampsObject|json_encode()}}'></div>
```

It’s to create an **HTML** tag with the data-timestamp attribute to obtain data from the created array.

![Create an HTML tag with the data-timestamp attribute to obtain data from the created array](https://imgur.elightup.com/DaoZjG1.png)

### 2.3. Adding JavaScript

As mentioned, we use **JavaScript** to display the video, and make the timestamps work on the video as well.

Still in the template created with **MB Views**, move to the **JavaScript** tab.

Add some codes as follows to convert the **JSON** that we created in the template to an array containing **JavaScript** objects named ` TimestampsObjectData `.

![Add some codes to convert the JSON](https://imgur.elightup.com/KlZwC8d.png)

```
var getTimestampsID = document.getElementById("Timestamps_ID");
var TimestampsObjectData = JSON.parse(getTimestampsID.getAttribute("data-timestamp"));
```

We must do this to make the following scripts run.

The next part is to initialize a YouTube player based on **YouTube API**.

![Initialize a YouTube player based on YouTube API](https://imgur.elightup.com/TBRtmPx.png)

```
var tag = document.createElement('script');
tag.src = "https://www.youtube.com/iframe_api";
var firstScriptTag = document.getElementsByTagName('script')[0];
firstScriptTag.parentNode.insertBefore(tag, firstScriptTag);
var player;
function onYouTubeIframeAPIReady() {
  my_player = new YT.Player('video_player', {
    videoId: TimestampsObjectData[0].id,
    host: 'http://www.youtube.com',
  });
}
```

` video_player ` is the **HTML ID** that I created in the template.

![The HTML ID that I created in the template](https://imgur.elightup.com/IR9jWnM.png)

` videoId: TimestampsObjectData[0].id, ` helps to get the **ID** of the video from the ` TimestampsObjectData array `.

![This codes help get the ID of the video from the TimestampsObjectData array](https://imgur.elightup.com/3vVd43x.png)

` [0].id stipulates ` that only the **ID** will be get.

![The ID will be get](https://imgur.elightup.com/xDildPw.png)

Also in this script, I created ` my_player ` **JavaScript** object converted from the player. This object will help to create a **JavasScript** action to jump to a specific position on the timeline.

![The object will help to create a JavasScript action to jump to a specific position on the timeline](https://imgur.elightup.com/jCxIFW9.png)

Next, we should convert time to seconds using the following lines of code. We usually use 0:00 - 0:30 - 1:13 format for video timing. Then, we should convert it to 0 - 30 - 73 format.

![Convert time to seconds using the following lines of code](https://imgur.elightup.com/ZP32sFd.png)

```
// Converting Time to Seconds
function hmsToSecondsOnly(str) {
  var p = str.split(':'),
    s = 0, m = 1;

  while (p.length > 0) {
    s += m * parseInt(p.pop(), 10);
    m *= 60;
  }

  return s;
}
```

In the template, we had an attribute `onclick="setCurrentTime({{loop.index0}})"` to trigger which timestamp the user clicked on. So now, we have some lines to admit that moment and force the player to play from the clicked timestamp.

![Trigger which timestamp the user clicked on](https://imgur.elightup.com/ZP32sFd.png)

```
function setCurrentTime(slideNum) {
  Timeobject = TimestampsObjectData[1].Timestamps;
  Timeobject = Timeobject.map(function (item) {
    return hmsToSecondsOnly(item.timestamp)
  })
  my_player.seekTo(Timeobject[slideNum]);
}
```

` setCurrentTime(slideNum) ` is the mentioned attribute.

![The mentioned attribute](https://imgur.elightup.com/vORbWDS.png)

` Timeobject = TimestampsObjectData[1].Timestamps; ` is to get data about the timestamps from the ` TimestampsObjectData ` object.

![This code is to get data about the timestamps from the TimestampsObjectData object](https://imgur.elightup.com/ZVlNwQq.png)

The values stored in this array will have the form as [0:00,Intro ; 0:30,Before Getting Started ; 1:13,Create a Custom Post Type]. It includes the timestamps and their descriptions. However, we need the timestamps only for this action. Then, we have the below lines to remove the description.

![The below lines to remove the description](https://imgur.elightup.com/pLVkEmT.png)

As well as the return values will be converted to seconds format. And now, the array will be [0,30,73] format.

![The return values will be converted to seconds format](https://imgur.elightup.com/67zlbu7.png)

From those values in the array, `[slideNum]` is from the attribute `onclick="setCurrentTime({{loop.index0}})`, and will check it matches to which value in the array. Then, it will find out exactly the position on the timeline of the player that the user wants to jump to.

![slideNum is from the attribute current time](https://imgur.elightup.com/skWhrxr.png)

` my_player.seekTo(Timeobject[slideNum]); ` will help to jump to that position.

![Help to jump to that position](https://imgur.elightup.com/WyqPyYS.png)

Now, go to a post on frontend, you will see the video player frame, along with the timestamp. Whenever you click on a timestamp, the player will jump to the corresponding time on the timeline and play.

![The video player frame, along with the timestamp](https://imgur.elightup.com/NGZtYUd.gif)

### 2.4. Styling the page

If you want to change the displaying of the timestamp, back to the template and custom the code one more time. I’m adding some headings, and classes.

![Change the displaying of the timestamp](https://imgur.elightup.com/OBlbAkA.png)

```
<h2>Video Version</h2>
<div class="video-container">
   <div id="video_player"></div>
   <div class="video-timestamp">
      <div id="Timestamps_ID" data-timestamp='{{TimestampsObject|json_encode()}}'></div>
      <strong>Timestamps:</strong>
      <ul>
         {% for clone in post.timestamps %}
            <li><a href="javascript:void(0);" onclick="setCurrentTime({{loop.index0}})"> {{ clone.timestamp }} {{ clone.description }}</a></li>
         {% endfor %}
      </ul>
   </div>
</div>
```

And now, using **CSS** to change the style.

![Using CSS to change the style](https://imgur.elightup.com/IoqZIyg.png)

```
.video-container ul{
    list-style: none;
    padding-left: 0px;
}
.video-container ul li {
    padding:5px 0px;
}
```

Now, go back to the page on the frontend, you’ll see a new look of the page.

![Youtube video timestamps page](https://imgur.elightup.com/S7TGkme.png)

# Custom fields vs custom taxonomies

With the help of <a href="https://metabox.io/">Meta Box</a>, today you can easily create both custom fields and custom taxonomies to store data for the custom post types. However, many users may be confused about when they should use each of them. Let’s clarify it.

## Why are custom fields and taxonomies necessary?

Since version 3.0, WordPress gives you the capability to add your own custom post types and to use them in different ways. Your website can contain more content types than just "post". They can be "listing" for a real estate website, "product" for an e-commerce website, or "hotel" for a travel website.

When creating a listing, for example, the post title and content are not enough, **you may want to add more info such as area, location, and price for the listing**. That’s why we need to use custom fields and custom taxonomies to handle this problem.

## What's the difference between custom fields and taxonomies?

<a href="https://metabox.io/what-is-custom-fields-in-wordpress/">Custom fields</a>  are used to store arbitrary extra information for a post

**Custom taxonomies are utilized to group posts together**

Therefore, grouping is the main difference between these two things.

For example, I’m building a new site that has a custom post type for television shows. I have to identify which item of a TV show (including Title, Actors, Episode numbers, and Season numbers) makes sense as a taxonomy, which one is a custom field, or (rarely) both.

<table>
<tbody>
<tr>

<td>Custom Taxonomy</td>
<td>Custom Field</td>

</tr>
<tr>
<td>Title</td>
<td>Yes</td>
<td>Yes</td>
<td>Each TV show has lots of episodes so you can group all of them together in a taxonomy, then people can see an episode listing.</td>
</tr>
<tr>
<td>Actors</td>
<td>Yes</td>
<td>Yes</td>
<td>Since actors act in many roles, it would be great to see what shows and episodes they’ve joined by grouping them into a taxonomy for actors.</td>
</tr>
<tr>
<td>Season / Episode</td>
<td>No</td>
<td>Yes</td>
<td>Every TV series has a season 1 so it doesn’t make sense if we group season 1 of all TV shows into a taxonomy. It should be a post meta only.</td>
</tr>
</tbody>
</table>

In conclusion:

* Use custom fields if you want to add extra data to a post. Use custom taxonomies if that data is utilized to group posts together.
* Custom fields are bits of information that are specific to the post item itself. Taxonomies are bits of information shared by many different items.

### Querying posts

You can make a complex query and get your desired posts by using the meta query (with custom fields) and `tax_query` (with custom taxonomies).

There are 2 different things between querying posts by custom fields and custom taxonomies:

1. **You can order posts by custom fields, not by taxonomies.**

This is due to the way WordPress saves data. With custom fields, it saves both meta keys and values, thus you can order by values. With taxonomies, it saves only the key (`term_id`) which is a reference to the terms table.

Simply understand that custom fields are added to posts and are considered a part of posts, so you can order them by that. Conversely, taxonomies are groups of posts, thus it doesn’t make sense if you order posts by taxonomy since each term has a group of posts.

2. **Querying posts by taxonomy is faster than querying by custom fields.**

Taxonomies are built to organize things and provide a way of filtering down to a specific set of posts. Custom fields should only be used for information that isn't going to be searched or filtered for.

Since the taxonomy is a main front-end presentation feature in the WordPress core, queries by it are well optimized. Conversely, the value column in the custom field table is not indexed – so when you query posts by custom fields, it means that you are basically doing a search through data that is not intended for that purpose. Even when you add an index to the post meta table, it won't fix it.

## Front-end template

**Taxonomies have templates, whereas custom fields don’t**. This is the significant difference between them.

For custom taxonomies, WordPress supports various hierarchies of templates, namely `taxonomy-{taxonomy}-{term}.php`, `taxonomy-{taxonomy}.php`, `taxonomy.php`.

About custom fields, you don’t have that. You need to make a custom page template, then put a custom query to get posts and use a <a href="https://docs.metabox.io/displaying-fields/">helper function</a> to show the info. You have to do a lot of work by yourself. And as mentioned before, if you have to query by custom fields, make sure you <a href="https://vip.wordpress.com/documentation/querying-on-meta_value/">avoid performance problems</a>.

## Conclusion

Although custom fields and custom taxonomies have the same main purposes, choosing to use which one may have long-term effects on your website. Making the right decision will help you save a ton of time when developing and using custom fields and custom taxonomies.

The following table can help in your decision-making:

<table>
<tbody>
<tr>
<td>Question</td>
<td>Custom Fields</td>
<td>Custom Taxonomies</td>
</tr>
<tr>
<td>Is the info specific/unique for the post?</td>
<td>Y</td>
<td>N</td>
</tr>
<tr>
<td>Is the info used for display purposes only?</td>
<td>Y</td>
<td>N</td>
</tr>
<tr>
<td>Do you order posts by that info?</td>
<td>Y</td>
<td>N</td>
</tr>
<tr>
<td>Is the info shared between posts?</td>
<td>N</td>
<td>Y</td>
</tr>
<tr>
<td>Is the info reusable?</td>
<td>N</td>
<td>Y</td>
</tr>
<tr>
<td>Do you need to manage (add, edit, remove) the values?</td>
<td>N</td>
<td>Y</td>
</tr>
<tr>
<td>Do you need hierarchical values?</td>
<td>N</td>
<td>Y</td>
</tr>
<tr>
<td>Do you need to browse posts by value?</td>
<td>N</td>
<td>Y</td>
</tr>
<tr>
<td>Do you need to search by the value?</td>
<td>N</td>
<td>Y</td>
</tr>
<tr>
<td>Do you need to filter by the value?</td>
<td>N</td>
<td>Y</td>
</tr>
<tr>
<td>Do you need a template in the front-end?</td>
<td>N</td>
<td>Y</td>
</tr>
</tbody>
</table>

# demo

demo images
![demo](img/filter-relationships-oxygen/demo-min.gif)

# Displaying author bio in Wordpress - MB Views

import LiteYouTubeEmbed from 'react-lite-youtube-embed';
import 'react-lite-youtube-embed/dist/LiteYouTubeEmbed.css';

An author bio is a great asset for any blog where you can display all information about the author behind each post. So, you should have a section for their bio to let readers know more about the author who made the fantastic contents. Moreover, it also helps build credibility with your readers and can strengthen your site’s authority. Let’s find out how to have them using **MB Views** from **Meta Box**.

This is an example for the bio section that we will create in this practice.

![This is an example for the bio section](https://imgur.elightup.com/jZeM1G9.png)

## Video Version

<LiteYouTubeEmbed id='fFd6mEa65ew' />

## Preparation

Each author will be a user on your WordPress website. We have a tutorial on [how to let users have the authority to publish posts](https://docs.metabox.io/tutorials/add-guest-authors/) on your website without accessing the backend. In this practice, I assume that they have it already.

Still, they have an account with some basic and default place for information as WordPress provided. As well as, we’re using custom fields for some extra information that you can flexibly input any kind of data.

Since we use the custom fields to store some of the author information, we need some tools:

* [Meta Box plugin](https://wordpress.org/plugins/meta-box/): to have the framework for creating custom fields;
* [MB Relationships](https://metabox.io/plugins/mb-relationships/): to create a bi-directional relationship between posts and users to know which post from which author;
* [MB User Meta](https://metabox.io/plugins/mb-user-meta/): to assign fields to users;
* [MB Views](https://metabox.io/plugins/mb-views/): to create a template for the section displaying the author information on the post;
* [MB Builder](https://metabox.io/plugins/meta-box-builder/): to create custom fields to save author information on an easy-to-use UI;
* [MB Group](https://metabox.io/plugins/meta-box-group/): to group the fields together for better organization. This is optional;
* [MB Admin Columns](https://metabox.io/plugins/mb-admin-columns/): to manage the posts from which authors and show it on the admin screen. This is optional as well.

## 1. Creating custom fields

We’ll create some custom fields for some further information about the author such as social links, phone, address, etc.

Go to **Meta Box** > **Custom Fields** to create the fields.

![Go to Meta Box > Custom Fields to create the fields.](https://imgur.elightup.com/RjZk1Gj.png)

After having all the fields, move to the **Settings** tab, set the **Location** to apply the fields to **User**. Notice that, we can do this only when activated the [MB User Meta](https://metabox.io/plugins/mb-user-meta/) extension.

![Go to the Settings tab, set the Location to apply the fields to User](https://imgur.elightup.com/iugQxX9.png)

Go to the user profile page, you will see the field in each account, and you can input information to them.

![The field information in user account](https://imgur.elightup.com/Q40wl87.png)

## 2. Creating the relationship

WordPress supports setting an author for each post, but only one author can be chosen. In the real applications, there may be more than one author contributing to the post, so we should use relationships for more optimal use.

Go to **Meta Box** > **Relationships**, and create a bi-directional relationship between the posts and the authors.

![Go to Meta Box > Relationships to create a bi-directional relationship between the posts and the authors](https://imgur.elightup.com/VffskjM.png)

There’ll be two sections: **From** and **To** with the same structure of settings. Because Meta Box supports bi-directional relationship, so these two sections are just for separate two objects to connect, the order will be not matter.

![There are two sections with the same structure of settings](https://imgur.elightup.com/EN5eED0.png)

I set the **Object Type** as **Post** in the **From** section and **User** in the **To** section.

![Set the Object Type as Post in From sections and User in To sections.](https://imgur.elightup.com/OKrFjZW.png)

Because I activated the [MB Admin Columns](https://metabox.io/plugins/mb-admin-columns/) extension before, I have the following option in both two sections of the relationship’s settings. You should check the box to manage the posts and who publishes them better.

![The option in both two sections of the relationship’s settings](https://imgur.elightup.com/qlXxSIw.png)

It will help to display the related posts from the relationship on the dashboard like this.

![This is the related posts from the relationship on the dashboard](https://imgur.elightup.com/PIuuaw8.png)

In the **Field** tab, you can set the label for the relationship section in the post editor.

![Set the label for the relationship section that shows in the post editor](https://imgur.elightup.com/sxmJqgy.png)

Go to the user profile page, you will have a field to choose which posts were contributed by this user.

![This is a field to choose which posts were contributed by this user](https://imgur.elightup.com/fZBnpBN.png)

As well as, in a post editor, you also can choose an author or more for the post.

![The box to choose an author or more for the post](https://imgur.elightup.com/CWRekVG.png)

## 3. Displaying the author bio on the page

Go to **Views** and create a new template for the author bio section.

![Go to Views and create a new template for the author bio section](https://imgur.elightup.com/wombigk.png)

In the **Template** tab, you can add some code or insert fields from the list in the right sidebar.

![Add some code or insert fields from the list in the right sidebar.](https://imgur.elightup.com/cFvs5Py.png)

### 3.1. Querying to get authors

I will display information of the authors who are set in the relationship field, go to the **Query** tab. You’ll see the ID of the relationship that we created.

![Go to the Query tab and see the ID of the relationship that we created](https://imgur.elightup.com/LSPVdwP.png)

We’ll create a template for the author information section, so choose the **Connect To** option. Then, some lines of code will be generated automatically.

![Choose the Connect To option to create a template for the author information section](https://imgur.elightup.com/ziFigD1.png)

**Explanation**

```
{% set relationship = attribute( relationships, 'post-to-user' ) %}
```

This line is to query the users following the relationship.

`'post-to-user'` : This is the ID of the created relationship.

```
{% for user in relationship.to %}
………………………….
{% endfor %}
```

This loop helps to get and display all the authors that were set in the relationship field.

### 3.2. Displaying author information

To display each author's information, just insert some fields as usual inside the loop.

In the **User** tab, I have all the information about the author that saves in custom fields. They’re avatar, title, contact, social … Just insert them one by one.

![Insert fields about the author that saves in custom fields](https://imgur.elightup.com/o3kClqR.gif)

After getting all of the information of the author as you want, move to the **Settings** section of the view, set the **Type** as **Singular**, and choose the name of any post type that we set the author for in **Location**.

![Set the Type as Singular, and choose the name of any post type that we set the author for in Location](https://imgur.elightup.com/zIzQyvc.png)

Go to a singular page now, you will see all the expected author information displayed.

![The expected author information displayed without styling](https://imgur.elightup.com/R2XkW3c.png)

### 3.3. Styling the section

To have a better look for the section, go back to the created template, add some **div** tags and classes for each information.

![Add some Div tags and classes for each information.](https://imgur.elightup.com/G5kEV0M.png)

Then go to the **CSS** tab, add some code.

![Go to the CSS tab, add some code](https://imgur.elightup.com/hOhQMA5.png)

Back to the page on frontend, the new look has been done.

![The final look of the author bio section](https://imgur.elightup.com/XQY5zkz.png)

# Displaying author bio in wordpress - Meta Box + Bricks

import LiteYouTubeEmbed from 'react-lite-youtube-embed';
import 'react-lite-youtube-embed/dist/LiteYouTubeEmbed.css';

Having a section for their bio is to let people know more about the author who made the fantastic content. This way also helps to improve the credit of the content as well as the author on the post. Let’s dive in to explore how to display them with **Meta Box** and **Bricks**.

This is an example for the bio section that we will create in this practice.

![This is an example for the bio section](https://imgur.elightup.com/iVqEoAy.png)

## Video Version

<LiteYouTubeEmbed id='IyffwB3IXhk'/>

## Preparation

Each author will be a user on your WordPress website. They also have an account with some basic and default place for information as WordPress provided. As well as, we’re using custom fields for some extra information that you can flexibly input any kind of data.

As a result, they can publish a post on their own. You can dig into [the tutorial on having Guest Authors](https://metabox.io/add-guest-author-guest-posts-meta-box/) for more details. In this practice, we are going to find out just how to display their information on each post they made.

In this practice, we need some tools:

* [MB Relationships](https://metabox.io/plugins/mb-relationships/): to create a bi-direactional relationship between posts and users to know which post from which author.
* [MB User Meta](https://metabox.io/plugins/mb-user-meta/): It allows you to create fields for users.
* [MB Builder](https://metabox.io/plugins/meta-box-builder/): to create custom fields to save author information on an easy-to-use UI.
* [MB Admin Columns](https://metabox.io/plugins/mb-admin-columns/): to manage the posts from which authors and show it on the admin screen.
* **Bricks** to build the page.

## 1. Creating custom fields

WordPress provides just some basic fields for users to save the most common information. So, to save more things such as social links, phone, address,... I’ll create custom fields, then assign them to users.

Go to **Meta Box** > **Custom Fields** to create the fields.

![Go to Meta Box > Custom Fields to create the fields](https://imgur.elightup.com/Hm0WACb.png)

After having all the fields, move to the **Settings** tab, set the **Location** to apply the fields to **User**. Notice that, we can do this only when activated the [MB User Meta](https://metabox.io/plugins/mb-user-meta/) extension.

![move to the Settings tab, set the Location to apply the fields to User](https://imgur.elightup.com/osVTxd8.png)

Go to the user profile page, you will see the field in each account, and you can input information to them.

![These are the field in each account](https://imgur.elightup.com/mtH9nd4.png)

## 2. Creating the relationship

Go to **Meta Box** > **Relationships**, and create a bi-directional relationship between the posts and the authors.

![Go to Meta Box > Relationships, and create the relationship between the posts and the author](https://imgur.elightup.com/fwbvQIo.png)

There’ll be two sections: **From** and **To** with the same structure of settings.

![Enter all the settings for the relationship and each side of it in two sections](https://imgur.elightup.com/nQRG45r.png)

Because Meta Box supports bi-directional relationship, so these two sections are just for separate two objects to connect, the order will be not matter. I set the **Object Type** as **Post** in the **From** section and **User** in the **To** section.

![set the Object Type as Post in the From section and User in the To section](https://imgur.elightup.com/KbkGP26.png)

Because I activated the [MB Admin Columns](https://metabox.io/plugins/mb-admin-columns/) extension before, I have the following option in both two sections of the relationship’s settings. You should check the box to manage the posts and who publishes them better.

![show as an admin column option in both two sections of the relationship’s settings](https://imgur.elightup.com/h58JdqT.png)

It will help to display the related posts from the relationship on the dashboard like this.

![This is authors are related to posts](https://imgur.elightup.com/PIuuaw8.png)

In the **Field** tab, you can set the label for the relationship section in the post editor.

![In the Field tab, set the label for the relationship section in the post editor](https://imgur.elightup.com/RpJFIKW.png)

After publishing the relationship, you will see a new field on the right sidebar in the post editor of each post type.

![The box as a field at the right sidebar to choose which author is related to the current post](https://imgur.elightup.com/y23c757.png)

Go to the user profile page, you will have a field to choose which posts contributed by this
author.

![This is a field to choose which posts contributed by the author](https://imgur.elightup.com/2rXZLb4.png)

As well as, in the post editor, you also can choose an author who is related to the current post. You can select several authors in this section.

![This box to choose which author is related to the current post](https://imgur.elightup.com/qKe5G24.png)

## 3. Displaying the author information on the page

You might have a template for the singular page where you display the post content.

![This is a template for the singular page where display the post content](https://imgur.elightup.com/jgxXe7K.png)

Go to **Bricks**, and edit the template.

![Go to Bricks, and edit the template](https://imgur.elightup.com/nxRrgfb.png)

Go to the settings of this template, set a condition to assign to **Post** in the Post type.

![In the setting of template, set a condition to assign to Post in the Post type](https://imgur.elightup.com/mHPySAi.gif)

And, also set a preview for it in the **Populate content** section.

![set a preview for it in the Populate content section](https://imgur.elightup.com/cWGNfYn.png)

I’ll add the author bio at the bottom of the page body. So, add the **Heading** element for this section.

![add the Heading element for the author section](https://imgur.elightup.com/u0VIrNE.png)

Add a **Block** for the section.

![Add a Block element for all information of the author](https://imgur.elightup.com/6iHj7OG.png)

I also will use this **Block** element again to set the layout and easier style later. Or, you can use the **Div** element instead.

![Use this Block element again to set the layout and easier style later](https://imgur.elightup.com/yaI4oUP.png)

### 3.1. Setting the query to get user

Before displaying the author information, we should set a **Query** to get only the user who is set as author in the relationship field. So, enable query loop for the block which will cover all the author information.

![Enable query loop for the block to cover all the author information](https://imgur.elightup.com/Cv82Orz.png)

Instead of setting the query type as **User**, I’ll set the name of the relationship between **Post** and **User** that I created in the previous step. This setting helps us to query all the authors related to this post, not only one author if you use the default field for author from WordPress.

![Set the name of the relationship between Post and User to query all the authors related to this post](https://imgur.elightup.com/7moYkWE.png)

Now, it’s time to display the author's information.

### 3.2. Displaying the author information

I will create a section with some basic information about an author like this.

![This is a section with some basic information about an author](https://imgur.elightup.com/JWKuQIg.png)

Based on the fields you have for the author, and which one you want to show, just add reasonable elements inside the Block element that we added the query to.

Add an **Image** element for the author avatar.

![Add an Image element for the author avatar](https://imgur.elightup.com/Od62JNV.png)

Then select dynamic data from the corresponding field.

![select dynamic data from the corresponding field](https://imgur.elightup.com/ATuSO9q.png)

For the name, title, and bio. I choose the **Basic Text** element.

![For the name, title, and bio, choose the Basic Text element](https://imgur.elightup.com/nGf22Sd.png)

And also set dynamic data for each of them. Here I set dynamic data for names as an example.

![Set dynamic data for names as Nicename](https://imgur.elightup.com/zGQmg8p.png)

Do the same with the title and bio.

![Set dynamic data for the title and bio](https://imgur.elightup.com/9saBJBL.gif)

The contact information saved in a group field. We should use a query to get data from the group. So, I added another **Block** element, and enabled the query loop for it. Then, set the type of the query as the name of the group field for the contact information.

![Add another Block element for contact information](https://imgur.elightup.com/3dtZzv4.png)

![Enable the query loop for the Block element, set the type of the query as the name of the group field](https://imgur.elightup.com/UkRm0CL.png)

Then use the **List** element to display the contact info.

![Choose List element to display the contact info](https://imgur.elightup.com/twTFI6P.png)

Add the title for Website information, and set the **Meta** setting as dynamic data from the matched subfield of the group.

![Add the title for Website information, and set the Meta setting as dynamic data from the matched custom field](https://imgur.elightup.com/wLB4enw.png)

For other contact information, do the same. Just change the title and set the **Meta** settings.

The last part is where we show all the icons for the social linking. The links also are saved in a group, so I add a **Block** element once again. Also, set a query for this **Block** element from the group of custom fields for social networks.

![add a Block element and set a query for social networks](https://imgur.elightup.com/W07MBQ3.png)

Then, add some **Icon** elements inside the block. Each one will be used for a social network linking.

![Add some Icon elements used for social network linking](https://imgur.elightup.com/xV7AKbk.png)

In each **Icon** element, choose an icon to display.

![Choose an icon to display](https://imgur.elightup.com/Z2vIsAy.png)

Set the **Link** as **External URL**. Then, in the **URL** option, set dynamic data from a subfield of the group as well.

![Set the Link as External URL and set dynamic data from a subfield of the group](https://imgur.elightup.com/2hg5o6E.png)

Do likewise for all the social network icons.

After getting all the expected information for the author, just go to the page on the front end, you will see the result of all the author information without any style.

![This is the result of all the author information without any style](https://imgur.elightup.com/hsQ5zCZ.png)

### 3.3. Styling the section

To make the author bio section look better, go back to the page template, change the settings of each element.

This is the desired look for the section.

![This is the desired look for the section](https://imgur.elightup.com/iVqEoAy.png)

# Displaying before and after images - Using MB Views

import LiteYouTubeEmbed from 'react-lite-youtube-embed';
import 'react-lite-youtube-embed/dist/LiteYouTubeEmbed.css';

**Displaying before-and-after images** in an interactive way is a powerful tool for showing transformations. It can let your audience visually compare changes or differences. Just drag between the images then they can see a more dynamic comparison.

Let’s see how we can have it with MB Views from Meta Box.

![Display before-and-after images with MB Views](https://imgur.elightup.com/KFWd6zk.gif)

## Video version

<LiteYouTubeEmbed id='PhLZDT1mSWY'/>

## Preparation

To start, let's outline the concept:

1. The before and after images, along with their extra content, will be stored in the custom fields created with Meta Box.
2. Then, we’ll display them using the **MB Views** extension from Meta Box as well.
3. For the before-after effect with dragging interaction, we’ll use a little bit of JavaScript.

Using custom fields allows you to set up and update images and content easily without needing to redesign your layout.

So, we need some of the following tools.

* [The Meta Box core plugin](https://wordpress.org/plugins/meta-box/): to have a framework to create custom fields and set up a template for displaying images. You can download it directly from [wordpress.org](https://wordpress.org/plugins/meta-box/).
* [MB Views](https://metabox.io/plugins/mb-views/): to create a template for displaying before and after images;
* [MB Builder](https://metabox.io/plugins/meta-box-builder/): to have a UI on the back end to create custom fields to save images and related content visually.

Notice that if you are adding before and after images for posts in a custom post type, you should enable the [MB Custom Post Type](https://metabox.io/plugins/custom-post-type/) extension to have the post type as well.

Now, let’s go step by step.

## 1. Creating custom fields to store the images

I’ll add before-after images for my blog posts, so I’ll create the fields without any further steps.

As I mentioned, you can add the images for posts in a custom post type. Then, you should create the post type first. After that, let’s create custom fields to store the images and related content.

For illustration purposes of this practice only, I’ll set up fields to upload the before and after images, also with a **Text** field to add extra information to the images like this:

![Set up fields to upload the before and after images, also fields to add related content](https://imgur.elightup.com/QUbhaix.png)

You absolutely can add additional fields for any related details as you want.

Now, go to **Meta Box** > **Custom Fields** and create a new field group.

![Create a new field group](https://imgur.elightup.com/EXbxnSV.png)

Just add fields one by one corresponding to the kind of content.

For the before image, as well as the after image later, choose the **Single Image** field type.

![For the before image, as well as the after image later, choose the Single Image field type.](https://imgur.elightup.com/2aSdeHr.png)

After creating all the fields, move to the **Settings** tab, set the **Location** as **Post** to apply the fields to it.

![Set the Location as Post to apply the fields to it](https://imgur.elightup.com/Z7qarnG.png)

Now, in any post editor, you will see the custom fields displayed.

![The custom fields displayed in the post editor](https://imgur.elightup.com/vTKtvdV.png)

Just input content there.

## 2. Displaying the images

In this step, we’ll create a template to just display the before and after images along with their related content within a single post. For styling beautifully and adding interactive functions like sliders or overlays for a clear comparison, we’ll cover that in the next part.

Now, head over to **Meta Box** > **Views**, and create a new template specifically for this purpose.

![Create a new template to display the before and after images](https://imgur.elightup.com/SPHbTfT.png)

With MB Views, you can add some lines of code to the **Template** tab, or insert fields into it by clicking the **Insert Field** button, and choose any fields on the right sidebar to get data from them. It will automatically generate code to the template.

![Insert field into the Template tab](https://imgur.elightup.com/oPRZ2MM.png)

With the images, you can select a suitable image size to display, as well as the output.

![Select a suitable image size to display, as well as the output for the images](https://imgur.elightup.com/AWYDSY8.png)

After inserting all the fields into the template, move to the **Settings** section to set the location where we want to display this template. In this case, the concept is that any post which has the before-after images will have them on the post content. So, I set the type of the view as **Singular**, and the location as **Post**.

![Set location as Post to apply the template to it](https://imgur.elightup.com/Ai2ETyP.png)

And, choose a place in the post.

![Choose a place in the post](https://imgur.elightup.com/kK2DBGt.png)

Now, on the frontend, you’ll see the before and after images along with their related information. They will be listed one by one.

![The before and after images along with their related information will be listed one by one](https://imgur.elightup.com/fipKo9q.png)

## 3. Turning the images to slidable

Styling the before and after images is the key to making the comparison stand out. So, I’ll guide you on how to implement an interactive slider, allowing users to drag between the images for a more dynamic and engaging comparison.

Back to the created template with **MB Views**, include some div tags, classes, also HTML ID for each element to make the styling process easier.

![Include some div tags, classes, also HTML ID for each element to make the styling process easier](https://imgur.elightup.com/f4lY22n.png)

You can notice that these IDs will be used in JavaScript later to make the images interactive.

![The IDs will be used in JavaScript later to make the images interactive.](https://imgur.elightup.com/C5k6UBL.png)

### 3.1 Creating a middle bar and navigation arrows

Still in the **Template** tab, add the following code to have a middle bar and the arrows.

```
<div id="resizer">
    <div class="mb-icon">
        <div id="triangle-left"></div>
        <div id="triangle-right"></div>
    </div>
</div>
```

![Add code to have a middle bar and the arrows](https://imgur.elightup.com/erud0lT.png)

### 3.2 Styling the image slider and related content

Next to the **CSS** tab, add these lines of code to beautify the display of before and after images, as well as the content that goes along with them.

```
#triangle-right {
    width: 0;
    height: 0;
    border-top: 8px solid transparent;
    border-left: 8px solid #fff;
    border-bottom: 8px solid transparent;
}

#triangle-left {
    margin-right: 5px;
    width: 0;
    height: 0;
    border-top: 8px solid transparent;
    border-right: 8px solid #fff;
    border-bottom: 8px solid transparent;
}

.mb-icon {
    cursor: pointer;
    background: linear-gradient(62deg, #c93072 5%, #3365c0);
    font-family: "Font Awesome 5 Free";
    font-weight: 900;
    display: flex;
    justify-content: center;
    align-items: center;
    color: white;
    position: absolute;
    margin: 0 0 0 -18px;
    width: 40px;
    height: 40px;
    border-radius: 50%;
    border: 3px solid white;
}

.text-before {
    width: max-content;
    position: absolute;
    bottom: 10px;
    left: 10px;
    color: #fff;
    background: #0c0202;
    padding: 3px 7px;
}

.text-after {
    width: max-content;
    position: absolute;
    bottom: 5px;
    right: 5px;
    color: #fff;
    background: #0c0202;
    padding: 3px 5px;
}

.mb-container img {
    max-width: none;
    width: 100%;
    display: block;
}

#before-after-slider {
    width: 100%;
    position: relative;
    overflow: hidden;
    border: 3px solid white;
}

#after-image {
    display: block
}

#before-image {
    position: absolute;
    height: 100%;
    width: 50%;
    top: 0;
    left: 0;
    overflow: hidden;
    z-index: 2;
}

#resizer {
    position: absolute;
    display: flex;
    align-items: center;
    z-index: 5;
    top: 0;
    left: 50%;
    height: 100%;
    width: 4px;
    background: white;
    -ms-touch-action: pan-y;
    touch-action: pan-y;
}
```

![Add code to the CSS tab to beautify the display of before and after images, as well as the related content.](https://imgur.elightup.com/PGNVzyi.png)

### 3.3 Running the slider

Now, include some script to the **JavaScript** tab for the advanced effect of sliders. These are the whole code I use for JavaScript.

```
const slider = document.getElementById('before-after-slider');
const before = document.getElementById('before-image');
const beforeImage = before.getElementsByTagName('img')[0];
const resizer = document.getElementById('resizer');

let active = false;

document.addEventListener("DOMContentLoaded", function () {
    let width = slider.offsetWidth;
    console.log(width);
    beforeImage.style.width = width + 'px';
});

window.addEventListener('resize', function () {
    let width = slider.offsetWidth;
    console.log(width);
    beforeImage.style.width = width + 'px';
})

resizer.addEventListener('mousedown', function () {
    active = true;
    resizer.classList.add('resize');
});

document.body.addEventListener('mouseup', function () {
    active = false;
    resizer.classList.remove('resize');
});

document.body.addEventListener('mouseleave', function () {
    active = false;
    resizer.classList.remove('resize');
});

document.body.addEventListener('mousemove', function (e) {
    if (!active) return;
    let x = e.pageX;
    x -= slider.getBoundingClientRect().left;
    slideIt(x);
    pauseEvent(e);
});

function slideIt(x) {
    let transform = Math.max(0, (Math.min(x, slider.offsetWidth)));
    before.style.width = transform + "px";
    resizer.style.left = transform - 0 + "px";
}

function pauseEvent(e) {
    if (e.stopPropagation) e.stopPropagation();
    if (e.preventDefault) e.preventDefault();
    e.cancelBubble = true;
    e.returnValue = false;
    return false;
}
```

![Include some script to the Javascript tab for the advanced effect of sliders.](https://imgur.elightup.com/ee5j1JC.png)

Let’s break down one by one part:

#### 3.3.1 Getting elements and creating variables

```
const slider = document.getElementById('before-after-slider');
const before = document.getElementById('before-image');
const beforeImage = before.getElementsByTagName('img')[0];
const resizer = document.getElementById('resizer');
```

These are to get one by one specific elements with the corresponding HTML IDs we added previously.

```
let active = false;
```

This is to keep track of whether the user is currently dragging or not.

#### 3.3.2 Managing middle bar and drag action

Displaying the images based on the slide action actually means redefining the size of one of the images. So, the images will be stacked, and the middle bar also is the limit of one image to display.

We do this code below to adjust the width of the before image to match the width of the cover frame, which also means the frame covers the after image.

```
document.addEventListener("DOMContentLoaded", function () {
    let width = slider.offsetWidth;
    console.log(width);
    beforeImage.style.width = width + 'px';
});
```

When the middle bar is moving, the width of the before image should change following.

```
window.addEventListener('resize', function () {
    let width = slider.offsetWidth;
    console.log(width);
    beforeImage.style.width = width + 'px';
})
```

This following class will be added or removed automatically and conditionally based on the mouse action on the middle bar.

```
resizer.addEventListener('mousedown', function () {
    active = true;
    resizer.classList.add('resize');
});

document.body.addEventListener('mouseup', function () {
    active = false;
    resizer.classList.remove('resize');
});
```

**In there**: `resizer` is the ID we added to the bar previously.

Based on this action, the `resize` class indicates the current position of the middle bar. It also indicates the width of the image should be at the moment.

Next, we should limit the area of action that can be triggered.

```
document.body.addEventListener('mouseleave', function () {
    active = false;
    resizer.classList.remove('resize');
});
```

This one is to stop the dragging if the mouse moves outside the frame area, preventing the dragging action from continuing unintentionally.

```
document.body.addEventListener('mousemove', function (e) {
    if (!active) return;
    let x = e.pageX;
    x -= slider.getBoundingClientRect().left;
    slideIt(x);
    pauseEvent(e);
})
```

This captures the mouse movement event so that the icon and the middle slider move only when the icon is clicked.

Then, alter the width of the before image and the position of the middle bar with the new one based on the calculated distance. So that, when you click the icon and move the mouse, the slider and the width of the before image adjust accordingly.

```
function slideIt(x) {
    let transform = Math.max(0, (Math.min(x, slider.offsetWidth)));
    before.style.width = transform + "px";
    resizer.style.left = transform - 0 + "px";
}
```

#### 3.3.3 Preventing default actions

We use this final part to prevent the default actions of the browser that can be confused with the action on the middle bar. It makes sure that the middle bar moves only when the reader really clicks on it and drags it. Also, the dragging does not affect any other part of the page.

```
function pauseEvent(e) {
    if (e.stopPropagation) e.stopPropagation();
    if (e.preventDefault) e.preventDefault();
    e.cancelBubble = true;
    e.returnValue = false;
    return false;
}
```

That's all for the code. All the code is updated on [Github](https://github.com/wpmetabox/tutorials/tree/master/display-before-after-image) for your reference.

Move on to a post, let's see the final result! When we drag the middle bar, the before image will be shown less or more based on the bar position.


![When we drag the middle bar, the before image will be shown less or more based on the bar position.](https://imgur.elightup.com/KFWd6zk.gif)

If you're interested in exploring more ways to display images dynamically, you might find this tutorial helpful: [Displaying images from cloneable fields](https://docs.metabox.io/tutorials/display-images-cloneable-fields-mb-views/).

# Displaying dynamic banners - MB Views

import LiteYouTubeEmbed from 'react-lite-youtube-embed';
import 'react-lite-youtube-embed/dist/LiteYouTubeEmbed.css';

Displaying dynamic banners in multiple places on a website with the same content but varying in size and position may not be easy to design. If you are looking at how to create banners without using any page builder, we will share an easy and straightforward tip using **MB Views** that you can follow. Let’s dive in to explore the process of creating banners in detail.

This is an example for the banners that we will create in this practice.

![This is an example for the banners](https://imgur.elightup.com/Cv31dWC.png)

## Video Version

<LiteYouTubeEmbed id='o3vny6oma0w' />

## Preparation

I’ll create two banners with the same content but varying in size and position. They are not rendered as images. The background, text, color, or any element of the banner are stipulated from the content saved in custom fields. So you can modify the banner context to whatever you want without having to update the layout or develop a new one.

So, in this practice, we need these tools:

* [Meta Box core plugin](https://wordpress.org/plugins/meta-box/): to have a framework to create custom fields;
* [MB Settings Page](https://metabox.io/plugins/mb-settings-page/): to create a settings page to input banner information;
* [MB Views](https://metabox.io/plugins/mb-views/): to create a template for the banner. It’s just optional;
* [MB Builder](https://metabox.io/plugins/meta-box-builder/): to have a UI on the back end to create custom fields easily.

You can install these extensions individually or just use **Meta Box AIO**.

## 1. Creating a settings page

We’ll use a settings page to include all the content, and other settings of the banner.

Go to **Meta Box** to create a settings page.

![Go to Meta Box to create a settings page](https://imgur.elightup.com/oGVdL1u.png)

There is no need for special settings for it in this practice.

After publishing, you can see a new settings page named **Banner** appeared.

![A new settings page named as Banner](https://imgur.elightup.com/ZVDtPLy.png)

It’s blank now, so just move on to create custom fields for this page.

![The settings page for the banner is blank page so far](https://imgur.elightup.com/HPE9KLQ.png)

## 2. Creating custom fields

Each element for the content of the banner should be put in a separate custom field. These are some fields that I’ll create for the banner.

![There are some fields for banners](https://imgur.elightup.com/6ThnxTo.png)

The first field is to set to display the banner on the frontend or not. You can turn on or turn off the banner easily thanks to it.

![This field is to set to display the banner on the frontend or not](https://imgur.elightup.com/IcTPvCD.png)

All the other fields are the content of the banner. They’re just typical ones. You should create fields based on your own requirements for the banner.

Now, move to the Meta Box menu to create fields.

Choose the **Checkbox** type for the first field, which regulates whether to display the banner or not.

![This is the Checkbox type to display the banner or not](https://imgur.elightup.com/vDwL8HK.png)

For the other fields for the content of the banner, just create them without special settings.

After creating all the fields, move to the **Settings** tab, choose **Location** as **Settings Page**, and select **Banner** to display the created fields to the settings page we use for the banner.

![Move to the Settings tab, choose Location as Settings Page, and select Banner to display the created fields](https://imgur.elightup.com/IDyqo4O.png)

Now the custom fields are ready on the settings page.

![The custom fields on the settings page](https://imgur.elightup.com/ED75X7I.png)

Just add content for the banner.

## 3. Creating a template for banner

We’ll create a template and generate a shortcode to easily display the banner anywhere.

There are two ways to do this.

* **Adding PHP code** into the theme’s file. If you change the theme, the template as well as the shortcode will be missed.

* Using the **MB Views** extension from **Meta Box**. It will ensure it always works.

We’ll go through to see both of these ways, then you can experience them all.

## 4. Creating a template for banner by adding PHP code to the Theme’s File

### 4.1. Getting data for banner

Go to the **functions.php** file, and add some lines of code.

![Go to the functions.php file, and add some lines of code](https://imgur.elightup.com/KNbBgJD.png)

**In there:**

```
$settings = get_option( 'banner' );
```

This line is to get data from the page. In there, `'banner'` is the option name of the settings page.

All of these following lines are to get data from the custom fields.

![These lines are to get data from the custom fields](https://imgur.elightup.com/HKrSvNO.png)

```
wp_get_attachment_image_src( )
```

This function is to get the URL of the image. `'image'` is the ID of the field.

```
$show = $settings['show'];
```

This line is to get the value saved in this field since we have a checkbox field choosing to show or hide the banner.

The `rwmb_meta( )` function is to get the data in text from fields.

![This function to get the data in text from fields](https://imgur.elightup.com/jMVj36V.png)

These are the ID of the fields.

![These are the ID of the fields](https://imgur.elightup.com/BjGrh5n.png)

Beside that, `['object_type' => 'setting']` stipulates the object type as a settings page.

These lines is to display the banner by using all the obtained data.

![These lines is to display the banner by using all the obtained data](https://imgur.elightup.com/KWBESdI.png)

This if `( $show == 1 ) { }` function is the condition to check that you check the box to allow showing the banner or not. If yes, the value saved in the field will be 1.

This is the banner that we will display.

![This is the banner will be displayed](https://imgur.elightup.com/ADhufMW.png)

I do not display all the obtained data directly. Some of them will be used as HTML attributes to specify how the image or the text will be.

For example, the URL of the image used for the background by this: `background-image: url(' .  $image_attributes[0]  . ' ).`.The color and position also are used in the same way.

### 4.2. Displaying the banner

In the above code, I also created a shortcode for the banner, then we can embed it to any place.

```
add_shortcode( 'banner-shortcode', 'short_code_banner' );
```

`banner-shortcode` is the name of the shortcode.

Go to the editor of any page, just paste the shortcode.

For instance, I add the shortcode to a page content and will display it as full width later.

![Go to the editor of any page, just paste the shortcode](https://imgur.elightup.com/uPJkkuG.png)

Then you’ll see the banner displayed.

![The banner displayed without styling](https://imgur.elightup.com/a6dtL5F.png)

To style the banner, we should add some **CSS**.

![Add some CSS for styling](https://imgur.elightup.com/O0GOGZR.png)

Here is the new look of the banner.

![The new look of the banner](https://imgur.elightup.com/VIOvKhN.png)

I also will add the banner to the right sidebar. Also use the shortcode.

![Add shortcode to the right sidebar](https://imgur.elightup.com/zefMSRM.png)

This is how the banner displays.

![This is how the banner displays](https://imgur.elightup.com/PUYvw5X.png)

You can see that the banners in both places are the same in the content and layout, but different in the size.

With dynamic banners, you can easily change the banner content and layout without spending time designing a new one, as well as place the banner in different areas and make changes of them at the same time.

## 5. Creating a template for banner using MB Views

### 5.1. Creating template and getting data

Go to **Views** to create a new template.

![Go to Views to create a new template](https://imgur.elightup.com/1H2jWOT.png)

In the **Template** tab, instead of adding code, we will insert fields one by one that we want to get data from.

![In the Template tab, insert fields one by one to get data from](https://imgur.elightup.com/cuMAk95.png)

Since our fields are on a settings page, in the **Site** section, you will see the list of the fields that we use for the banner.

![The list of the fields that we use for the banner](https://imgur.elightup.com/NFwW79K.png)

Just click one by one to insert fields to the template.

![Click one by one to insert fields to the template](https://imgur.elightup.com/4tdj274.png)

After publishing this template, it will automatically generate a shortcode. We’ll use it to display the banner later.

![A shortcode will be automatically generated](https://imgur.elightup.com/px0i2N8.png)

### 5.2. Displaying the banner content

The same with the method one when we have a shortcode by adding code to the theme file, now we’ll copy the shortcode from the view, then go to a page editor, paste the shortcode to any place.

![Go to a page editor, paste the shortcode to any place](https://imgur.elightup.com/wRwLrgQ.png)

On the frontend, the data will display in the form like this.

![On the frontend, the data will display in the form](https://imgur.elightup.com/stIol7H.png)

### 5.3. Beautifying the banner display

Go back to the template to customize it a bit more to regulate how the data should be rendered on the page.

The logic of the code is the same with method 1 with PHP, but different in detailed text.

![Move some lines of code to make it seem shorter and simpler](https://imgur.elightup.com/l1JAmKX.png)

```
{%  if(site.banner.show) == 1 %}
```

This line is a condition for showing or hiding the banner. It means that if the field with this ID is checked, the stored value will be 1, and then the banner will be allowed to display.

```
style="width: {{ site.banner.width }}
```

This line helps turn data from custom fields to be an attribute to stipulate the style of the banner. In this case, it’s the width of the image `{{ site.banner.width }}` means the field has the ID as `width` in the settings page has the ID as `banner`.

Just update the template, and see the new look of the banner on the page.

![The new look of the banner on the page](https://imgur.elightup.com/CLdD9rw.png)

To prettify the banner, go back to the template in the view, add some **CSS**.

![For styling, go back to the template, add some CSS](https://imgur.elightup.com/0R1SxJq.png)

Now, the banner displays on the frontend at full width with the right layout.

![The banner displays on the frontend at full width with the right layout](https://imgur.elightup.com/VIOvKhN.png)

### 5.4. Displaying banners on multiple positions.

We have a shortcode of the template for the banner like this.

![This is a shortcode of the template for the banner](https://imgur.elightup.com/Qv2OVn9.png)

Just add it to multiple places on a page, or even different pages.

![Add shortcode to multiple places on a page](https://imgur.elightup.com/K8IpxcW.png)

Then you will have the banner in different places.

![The final result of the banner with the same content but different sizes](https://imgur.elightup.com/PUYvw5X.png)

# Displaying the dynamic banners - Meta Box + Bricks

import LiteYouTubeEmbed from 'react-lite-youtube-embed';
import 'react-lite-youtube-embed/dist/LiteYouTubeEmbed.css';

Placing banners with the same content but different sizes on multiple places of the website may take a lot of time in designing. But, you totally can **use custom fields with dynamic content** to create those banners at once. Then, when you want to change the content, just replace it in custom fields without re-design the banner. Let’s do it with **Meta Box** and **Bricks**!

These are two banners that have the same content but different sizes and positions.

![Two banners have the same content but different sizes and positions](https://imgur.elightup.com/irFcAQG.png)

## Video version

<LiteYouTubeEmbed id='smYFaIQpF4U'/>

## Preparation

Specifically, the banner background, text, color, text position, or any element of the banner are stipulated from the content saved in custom fields. These fields will be placed on a settings page.

In this practice, we’ll use the following tools:

* [Meta Box core plugin](https://wordpress.org/plugins/meta-box/): to have framework to create a settings page and custom fields for the banner;
* [MB Settings Page](https://metabox.io/plugins/mb-settings-page/): allows you to create a settings page to input banner information;
* [MB Builder](https://metabox.io/plugins/meta-box-builder/): provides a UI on the back end to easily create custom fields;
* **Bricks Builder**: to build the page and display banners.

## 1. Creating the settings page

We’ll use a settings page to include all the content and other settings of the banner.

Go to **Meta Box** > **Settings Pages** to create a new one. There is no need for special settings for it in this practice.

![Create a settings page](https://imgur.elightup.com/nDLKVh1.png)

After publishing, you can see a new settings page named **Banner**.

![A new settings page named Banner](https://imgur.elightup.com/0yHJVii.png)

You’ll see that it’s blank now, so just move one to create custom fields for it.

## 2. Creating custom fields

Each element for the content of the banner should be put in a separate custom field. These are some fields that I’ll create for the banner.

![The custom fields that I’ll create for the banner](https://imgur.elightup.com/5Hjnlzl.png)

The first field you can see in the image above is to set to display the banner on the frontend or not. You can turn on or turn off the banner easily thanks to it.

All the other fields are the content of the banner. They’re just typical ones. You should create fields based on your own requirements for the banner.

Now, move to the **Meta Box** > **Custom Fields** to create them.

Choose the **Checkbox** type for the first field, which regulates whether to display the banner or not.

![The Checkbox field regulates whether to display the banner or not.](https://imgur.elightup.com/e6zsKTV.png)

For the other fields for the content of the banner, just create them without special settings.

After creating all the fields, move to the **Settings** tab, choose **Location** as **Settings Page**, and select **Banner** to display the created fields to the settings page we use for the banner.

![Set location to display the created fields to the Banner settings page](https://imgur.elightup.com/mD11Yyy.png)

Now, the custom fields are ready on the settings page.

![The custom fields are ready on the settings page](https://imgur.elightup.com/85265aq.png)

You can start adding content for the banner.

## 3. Creating a template for banner

Simply go to **Bricks** and create a template to display the banner and regulate how its content displays. Then, put this template into any place on any page you want.

In the right sidebar, choose the template type.

![Choose the template type](https://imgur.elightup.com/Wu9eQD0.png)

After creating a new template, edit it with **Bricks**.

First, to cover the banner content, add a new section. There’ll be a container inside the section.

![There’ll be a container inside the section.](https://imgur.elightup.com/9utKxfm.png)

### 3.1 Seting rule to display or hide the banner

We’ll add some elements inside this container to display the banner’s content. But first, we should **add a condition to set whether to display the banner or not**, following the value that we choose for the Checkbox field.

I will use CSS to do it. So, I will **add a dynamic class** for the Section element. Go to the Attributes section in this element’s settings, add a new attribute.

![To add a dynamic class for the Section element, add new attributes](https://imgur.elightup.com/gLIBCUy.png)

You can name the class whatever you want.

![You can name the class whatever you want.](https://imgur.elightup.com/vOcadzD.png)

However, to make the class be dynamic, click on the **Select dynamic data** button on the Value box, and choose the field where we stipulate if to display the banner or not.

![To make the class be dynamic, click on the Select dynamic data button, and choose the field stipulating if to display the banner or not.](https://imgur.elightup.com/zvAq1KP.png)

So, the name of the class will be added a variable as below. It’ll change following the status of the **Checkbox** field.

![The name of the class will be added a variable](https://imgur.elightup.com/Blem5iR.png)

Next, go to the **CSS** section, add these codes.

![In the CSS section, add some codes](https://imgur.elightup.com/ux8vHwf.png)

```css
.banner-display-Yes{
  display:block;
}
.banner-display-No{
  display:none;
}
```
`.banner-display-` are the first part of the name of the dynamic class that we have set. `Yes` or `No` is from the variable in the class. If you check the box to show the banner, the value saved in the **Checkbox** field will be `yes`. And the class will be `.banner-display-Yes`, so these lines of code below will display the banner on pages.
```css
.banner-display-Yes{
  display:block;
```
Otherwise, if you uncheck the box, the class will be .banner-display-No, then the banner will disappear thanks to this:

```css
.banner-display-No{
  display:none;
}
```
### 3.2 Displaying banner’s content

Before displaying content from custom fields, we should add some **Div** elements to divide content into separate parts for easier styling later.

![Add some Div elements to divide content into separate parts for easier styling later](https://imgur.elightup.com/txRYcPf.png)

Now, add a **Basic Text** element for the banner’s title.

![Add a Basic Text element for the banner’s title](https://imgur.elightup.com/eEkCRCw.png)

As the banner’s title is saved in a custom field created with **Meta Box**, click the **Select dynamic data** button and choose the right field. It’s **Title**.

![Get the banner’s title from the custom field](https://imgur.elightup.com/bPQRP2J.png)

Currently, it’ll display like in the image below.

![The banner’s title doesn't display as you want on the backend](https://imgur.elightup.com/uflTYhr.png)

Don't worry, you can see the right text on the frontend.

For the banner’s description, select another **Basic Text** element. We also use the **Select dynamic data** button and choose the field correspondingly.

![Get the banner’s description from custom field](https://imgur.elightup.com/WseqX7c.png)

For the background image of the banner, I will add the image from the custom field to be the background of the **Div** element that covers the banner. There also is a button for selecting dynamic data from custom fields as well. Just search for the one where we saved the image for the banner.

![Add the image from the custom field to be the background of the Div element that covers the banner.](https://imgur.elightup.com/hzW8TiF.png)

Now, you can see the image displayed in the background.

![The image displayed in the background](https://imgur.elightup.com/TSY9CKI.png)

I have some fields to regulate the color and position of the text on the banner. Whenever users change the value in those custom fields, their position will automatically change as well. It’ll be done very easily since **Bricks** allows adding some attributes using dynamic data for each element. This is one of the interesting things that makes me love Bricks. I guess you will do so.

In the setting of each element that you want to set the position based on values in custom fields, just add values for the attribute, following what you do with CSS as normally. But, click on the **Select dynamic data** button and find the field where the style is stipulated to insert a variable into the value of each attribute like this.

![Click on the Select dynamic data button and find the field where the style is stipulated to insert a variable into the value of each attribute](https://imgur.elightup.com/LPTkN0I.gif)

![Add an attribute with the style stipulated from the Banner Color and Title’s Position fields.](https://imgur.elightup.com/Q8pvIvr.png)

**In there**:

* `color:{mb_banner_color}`: is for the color, and `{mb_banner_color}` is the variable to get dynamic value from the Color field;
 * `text-align:{mb_banner_titles_position}`: is for the position, and `{mb_banner_titles_position}` is the variable to get dynamic value from the Title’s Position field.

Do the same with the style of the banner’s description, also add an attribute with the style stipulated from the **Description Color** and **Description’s Position** fields.

![Add an attribute with the style stipulated from the Description Color and Description’s Position fields.](https://imgur.elightup.com/CTSWec7.png)

That’s all for the banner template. This is the preview of the banner on the frontend.

![The preview of the banner on the frontend](https://imgur.elightup.com/AhpSQCl.png)

You see, the color and the position of the text follow the settings that we set in the custom fields.

Let’s move on to the next step to put this template to some specific place on the website to display the banner.

## 4. Displaying banner in some places

### 4.1 Displaying banner in sidebar

I will take the sidebar as a typical example for where we put the banner. Just edit the page where the sidebar is on with **Bricks**. I’ll add the banner to this space.

![Add banner in Sidebar](https://imgur.elightup.com/WunOqvV.png)

Go to the right corner of the header bar of **Bricks** and click the **Templates** icon to add templates. Then, choose to insert the one that we’ve just created.

![Insert the created template](https://imgur.elightup.com/W5mGwVy.gif)

You can see that the banner displays immediately.

In the structure of the page, there’re also the elements following those we added in the template.

![After inserting the created template, there’re also the elements following those we added in the template.](https://imgur.elightup.com/FLd4ZuZ.png)

You can also change the style settings of those elements to have a better look. This is how my banner displays in the sidebar on the frontend after that.

![The banner displays in the sidebar on the frontend.](https://imgur.elightup.com/NlFcYOG.png)

### 4.2 Displaying banner as full-width image on a page

In any place of a page, insert the created template for the banner. There’re also the same elements for the banner.

![The same elements for the banner](https://imgur.elightup.com/kFNm0sM.png)

You also should change those elements settings to get the right display for full-width.

Now, on the frontend, you can see both of the two places displaying the banner in different sizes. And, the two banners have the same content and some of the settings for style.

![The two banners in different sizes have the same content and some of the settings for style](https://imgur.elightup.com/zLhmjbU.png)

From now on, whenever you change the values saved in the custom fields, the content of the banners on every place will be changed while their size and layout remains intact.

## Last Words

It’s not difficult to **create dynamic banners using Meta Box and Bricks**, right? From now on, you can have banners in different sizes on your website with the same content and settings. You can apply this way to put banners with the same content in multiplace on your website without designing too many ones. This saves more time and effort. Hope this tutorial will be helpful for you!

In the case that you are not using Bricks or any page builder, we also have [another tutorial](https://docs.metabox.io/tutorials/create-dynamic-banners/) for you. Just take a look and follow the guides.

# Displaying events group by month and year

import LiteYouTubeEmbed from 'react-lite-youtube-embed';
import 'react-lite-youtube-embed/dist/LiteYouTubeEmbed.css';

**Grouping events by month and year** is the perfect solution. It not only allows **visitors to easily find and browse events based on their dates**, but it also lets them quickly **locate upcoming activities or review past events in a structured manner**. Let’s dig into how to achieve it with **Meta Box**!

In this practice, I’ll group events in two ways: one by month and another by month and year.

![Group events by month and year with Meta Box](https://imgur.elightup.com/LjXznGu.gif)

## Video version

<LiteYouTubeEmbed id='_GIp1h-uaTY'/>

## Preparation

In this case, each event will be a post of a custom post type. I’ll create a custom field to store the start date of the event, which we will use to group the events by month and year.

Let’s check which tools are necessary for this practice.

* [The Meta Box plugin](https://wordpress.org/plugins/meta-box/): to have a framework to create a custom post type and a custom field for the events;
* [MB Custom Post Type](https://metabox.io/plugins/custom-post-type/): to create a custom post type for the events;
* [MB Builder](https://metabox.io/plugins/meta-box-builder/): to have a UI on the backend to create the custom field visually.

Now, let’s start!

## Creating a new post type

Go to **Meta Box** > **Post Types** to create a new post type for the events.

![Create a new post type for the events](https://imgur.elightup.com/qc0y2cw.png)

After publishing, a new menu for your post type will appear.

![A new menu for your post type will appear.](https://imgur.elightup.com/VGuO5Xd.png)

## Creating a custom field

For each event, we’ll use a custom field to store the start date. This is crucial because we’ll use this date to classify our events by month and year.

If you want to display additional information for each event, you can create more custom fields as needed. However, for this tutorial, we’ll focus solely on the **Start Date** field to organize and group your events according to the mentioned condition.

Now, move to **Meta Box** > **Custom Fields** and create it.

![Move to Meta Box > Custom Fields to create a custom field](https://imgur.elightup.com/sUv1qrA.png)

For the start of the events, I recommend using the **Date Picker** field type.

![Use the Date Picker field type for the start of the events.](https://imgur.elightup.com/rYd3JJP.png)

Pay attention that you’ll only see the setting for the field when enabling the [MB Admin Columns](https://metabox.io/plugins/mb-admin-columns/) extension. Just turn it on to show the date directly on the management dashboard, then you can easily compare it with the result. This feature is optional, so I did not mention it before.

![Turn the setting on to show the date directly on the management dashboard](https://imgur.elightup.com/XeG9ifO.png)

After creating the needed field, go to the **Settings** tab. Choose **Location** as **Post type**, and select **Event** to apply the field to this post type.

![Set location to apply the field to the Event post type](https://imgur.elightup.com/9tm6HUq.png)

Now, in the post editor, you will see the created custom field.

![The created custom field in the post editor.](https://imgur.elightup.com/c6UTwtu.png)

Just simply input data, and enter the start date for the event.

These are some posts that I created for reference. The start date is shown in the admin columns as well.

![Some created posts. The start date is shown in the admin columns as well.](https://imgur.elightup.com/RFkS2ci.png)

## Displaying events grouped by month and year

There are several kinds of classifications by month and year that you can follow. We should use code to do it all, they will have the same logic and syntax but differ a little bit in details. In this practice, I’ll give the code to do in two ways: group events by month, and another by month and year.

![Group events in two ways: one by month, and another by month and year.](https://imgur.elightup.com/MoH4QPH.png)

Now, we will go with the first one, group the events by month.

### Displaying events grouped by month

No matter the format you want to display events, we should go to the theme file, and add code as follows.

```css
function sort_month_events() {
    $the_query = new WP_Query( [
        'post_type'      => 'event',
        'posts_per_page' => - 1,
        'meta_key'       => 'start_date',
        'orderby'        => 'meta_value',
        'order'          => 'ASC',
    ] );

    $all_events = [];
    while ( $the_query->have_posts() ) :
        $the_query->the_post();
        $date       = strtotime( get_post_meta( get_the_ID(), 'start_date', true ) );
        $month = date( "F Y", $date );
        $all_events[ $month ][] = $the_query->post;
    endwhile;

    $html = '';
    $html.= '<div class="sort-month-events">';
	foreach ( $all_events as $month => $events ) :
		$html.= "<div class='mb-month'>
                            <h3>$month</h3>
                                   <ul>";
			foreach ( $events as $event ) :
                                        $html.= '<li>';
				$html.= date( "j F Y", strtotime(rwmb_meta('start_date', '', $event->ID)) ) . ' :
				<a href="'.post_permalink( $event->ID ).'">'.$event->post_title.'</a>
			     </li>';
                                   endforeach;
			$html.= '</ul>
                 </div>';
            endforeach;
    $html.= '</div>';

    return $html;
}
add_shortcode( 'sort_month', 'sort_month_events' );
```

![Go to the theme file, and add code.](https://imgur.elightup.com/TA7YU0h.png)

Let’s break down the code:

#### Creating a new function to handle everything

```css
function sort_month_events() {}
```

We declare this new function to handle everything, from querying your events to grouping and displaying them. Just name it in your way.

#### Querying to get events

Within the created function, create a query to get all the events and arrange them chronologically by their start date in ascending order.

```css
$the_query = new WP_Query( [
        'post_type'      => 'event',
        'posts_per_page' => - 1,
        'meta_key'       => 'start_date',
        'orderby'        => 'meta_value',
        'order'          => 'ASC',
] )
```

**Specifically**:

* `'post_type'      => 'event',`: to filter the posts in the **Event** post type;
* `'posts_per_page' => -1`: to get all posts without limiting the number of posts.;
* `'meta_key' => 'start_date', & 'orderby' => 'meta_value',`: to sort the posts based on the Start Date custom field, which we've previously set up;
* `'order' => 'ASC'`: arrange the posts in ascending order, it means the earliest events will appear first.

#### Grouping events by month

After getting all the posts as well as the events in ascending order, create an empty array - `$all_events = [];` to organize the events by their corresponding month and year.

Use the following code to check if the query above returns any posts and do a loop to list all the posts.

```css
while ( $the_query->have_posts() ) :
        $the_query->the_post();
        $date       = strtotime( get_post_meta( get_the_ID(), 'start_date', true ) );
        $month = date( "F Y", $date );
        $all_events[ $month ][] = $the_query->post;
endwhile;
```

**In there**:
```css
$date       = strtotime( get_post_meta( get_the_ID(), 'start_date', true ) );
$month = date( "F Y", $date );
```
These lines are to get the **Start Date** of the event, then re-format them with the information about the month (`F`) and year (`Y`).

```css
$all_events[ $year ][ $month ][] = $the_query->post;
```
This line is to pass the date as that format along with the posts into the array. Note that the month is now the key `$month`, and the posts passed to the `$all_events = [];` array will be grouped following the mentioned key.

#### Displaying sorted events

This part is just to display the events from that saved in the array. To do that, we use some loop.

```css
$html = '';
$html.= '<div class="sort-month-events">';
    foreach ( $all_events as $month => $events ) :
		    $html.= "<div class='mb-month'>
            <h3>$month</h3>
                <ul>";
			              foreach ( $events as $event ) :
                        $html.= '<li>';
				                    $html.= date( "j F Y", strtotime(rwmb_meta('start_date', '', $event->ID)) ) . ' :
				                    <a href="'.post_permalink( $event->ID ).'">'.$event->post_title.'</a>
			                  </li>';
                    endforeach;
			       $html.= '</ul>
        </div>';
    endforeach;
$html.= '</div>';

return $html;
```
**In there**:

* `foreach ( $all_events as $month => $events ) :` to list all the months included in the array. It means that only the month has events will be listed.
* `foreach ( $events as $event ) :` to list all the events grouped in the month. Note that we saved the events by groups as months in the array already.
* `$html.= date( "j F Y", strtotime(rwmb_meta('start_date', '', $event->ID)) ) . ' :` display the date of the event with the format as day, month, and year (`j F Y)`.
* `<a href="'.post_permalink( $event->ID ).'">'.$event->post_title.'</a>:` to display the post title, means the name of the event, and its link.

#### Creating a shortcode

Pay attention to the last line, we register the shortcode (`sort_month`) that you can use in posts or pages to display the sorted events.

Now, let’s check how the events display. Simply create a new page and add a **Shortcode** block.

![Create a new page, add a shortcode block](https://imgur.elightup.com/B6N8oMc.png)

Then, insert the created shortcode to the box.

![Insert the created shortcode to the box](https://imgur.elightup.com/u35UQKD.png)

Go to the frontend, you can see the desired section with groups of events sorted by month.

![The desired section with groups of events sorted by month](https://imgur.elightup.com/hDPsSCK.png)

Let’s go ahead to display these events in another sorting.

### Displaying events grouped by months within years

Now, I’ll display the event with groups like this.

![Display events grouped by months within years](https://imgur.elightup.com/WVpvrri.png)

It’s a little bit different from the last one, but still the same logic.

So, back to the theme file, still in the part of the code we added. We’ll add a similar piece of code to it and modify it a little bit to have the wanted result.

```css
function sort_year_events() {
    $the_query = new WP_Query( [
        'post_type'      => 'event',
        'posts_per_page' => - 1,
        'meta_key'       => 'start_date',
        'orderby'        => 'meta_value',
        'order'          => 'ASC',
    ] );

    $all_events = [];
    while ( $the_query->have_posts() ) :
        $the_query->the_post();
        $date       = strtotime( get_post_meta( get_the_ID(), 'start_date', true ) );
        $month = date( "F Y", $date );
        $year = date( "Y", $date );
        $all_events[ $year ][ $month ][] = $the_query->post;
    endwhile;

    $html = '';
    $html.= '<div class="sort-year-events">';
	      foreach ( $all_events as $year => $years ) :
	          $html.= "<div class='mb-year'>
                <h3>$year</h3>";
                foreach ( $years as $month => $events ) :
                    $html.=  "<h6>$month</h6>
                    <ul>";
		                foreach ( $events as $event ) :
                        $html.= '<li>';
		                        $html.= date( "j F Y", strtotime(rwmb_meta('start_date', '', $event->ID)) ) . ' :
		                        <a href="'.post_permalink( $event->ID ).'">'.$event->post_title.'</a>
						            </li>';
                    endforeach;
		                $html.= '</ul>';
	              endforeach;
            $html.=  '</div>';
        endforeach;
    $html.= '</div>';

    return $html;
}
add_shortcode( 'sort_year', 'sort_year_events' );
```

![Add code to the theme file for displaying events grouped by months within years](https://imgur.elightup.com/CSZRty2.png)

Let’s see the difference!

#### Renaming the function

To avoid confusion, we should rename the function.
```css

function sort_year_events() {}
```

#### Grouping event by year

In addition to grouping events by month, we now also group them by year. So, add this line of code below to extract the year from the event's start date.
```css
$year = date( "Y", $date );
```
We add the `$year` variable to the array as a key so that we can sort the events first by year and then by month within each year.

![Add the $year variable to the array as a key so that we can sort the events first by year and then by month within each year](https://imgur.elightup.com/9pUzzgi.png)

#### Modifying to display the sorted event

In the section of displaying the events, alter the new name for the div class. You should do it for style later.

![Alter the new name for the div class](https://imgur.elightup.com/fbaARkU.png)

We need to edit the loop to list the year to cover the old one.

![Modify the loop to list the year to cover the old one](https://imgur.elightup.com/7p74O50.png)

Then, add another loop to display events grouped by month within each year. Particularly, the following one loops through each month within the current year.
```css
foreach ( $years as $month => $events )
```
![Another loop to display events grouped by month within each year](https://imgur.elightup.com/PG18ob3.png)

#### Changing a shortcode

Don’t forget to change the name of the shortcode that we’ll need to use later.

![Change the name of the shortcode that we’ll need to use later](https://imgur.elightup.com/Y9DZ0Sa.png)

Back to the page where we want to display the events, add another section. Then add a new **Shortcode** block, fill in the created shortcode.

![Add a new shortcode block, fill in the created shortcode](https://imgur.elightup.com/DzXFNXY.png)

On the frontend, you can see the events grouped by months within years. And see the difference between the two sections as well.

![The events grouped by months within years before styling](https://imgur.elightup.com/xkzmsel.gif)

For a clearer view, let’s style these sections.

## Styling the sorted event sections

Now, go to the **Customizer** section. And then, add some CSS to style the section where we display events grouped by month and year.

![Add CSS to Customizer to style the sections](https://imgur.elightup.com/zyOGrd2.png)

Just remember to follow the div class we added to the theme file in the previous step.

Now, the section is more visual.

![Group events by month and year with Meta Box after styling](https://imgur.elightup.com/LjXznGu.gif)

If you’re looking to take your event display even further, consider checking out our tutorial on [displaying related events](https://docs.metabox.io/tutorials/display-related-posts-based-on-shared-relationship/). Thanks for reading!

# Displaying uploaded images as a WordPress image gallery

import LiteYouTubeEmbed from 'react-lite-youtube-embed';
import 'react-lite-youtube-embed/dist/LiteYouTubeEmbed.css';

Sometimes, you may want to show product images, a portfolio, or just a photography album on your site. So, the image gallery is very helpful. You can upload images to your website via a custom field then **display them as a gallery** on a page.

Specifically, we’ll use a custom field in the type of **Image Advanced** for uploading multiple images, then display them as an image gallery on a page. I will create a simple one like this.

![Display uploaded images as a WordPress image gallery](https://imgur.elightup.com/zpncoql.gif)

This task will be very easy-to-do with some **lines of code added to the theme’s files**, or simpler with the help of **MB Views**. It’s an extension of Meta Box. So let’s see how we do it in both ways.

## Video Version

<LiteYouTubeEmbed id='6_gpRrPRh8E'/>

## Preparation

We’ll need some tools for this practice:

First, we need the [Meta Box core plugin](https://wordpress.org/plugins/meta-box/) to have a framework for creating the custom field. It’s available on [wordpress.org](https://wordpress.org/plugins/meta-box/).

Next, we may need some advanced features from the **Meta Box** extensions. You can download them individually or use **Meta Box AIO** to have them all.

* [MB Builder](https://metabox.io/plugins/meta-box-builder/): to have a UI in the backend to visually create a custom field to save images;
* [MB Views](https://metabox.io/plugins/mb-views/): to get images from the custom field and display them on the page without touching the theme’s files. But it is optional since you have another method to do it with PHP.

## 1. Creating a page and custom field

In the real case, you can add the gallery to any premade page or settings page. But in this practice, I will create a new one to display only the gallery to simplify the content. Now, go to **Pages** > **Add New** to create a new page.

![Create a new page](https://imgur.elightup.com/JsWdMUU.png)

I leave this page blank since I will add the gallery to this page later.

![Leave this page blank since I will add the gallery to this page later](https://imgur.elightup.com/CiS4fR1.png)

For the custom field to save images, I will create it now and assign it to this page.

Go to **Meta Box** > **Custom Fields** and create that field.

![Go to Meta Box > Custom Fields and create that field.](https://imgur.elightup.com/KEqd0ZH.png)

The field should be the **Image Advance**d type, which allows uploading multiple images.

![The Image Advanced type allows uploading multiple images.](https://imgur.elightup.com/uTTRyfA.png)

Now, go to the **Settings** tab, set the **Location** as **Post type**, and choose **Page**. Since we created a page for it, go to the **Advanced location rules** section below and choose the name of the page.

![Set the location to apply the custom field to the page.](https://imgur.elightup.com/qsSafV2.png)

No matter where you put the field, you can still get images and display them in the desired place.

On my page editor, you can see the field displayed.

![The field displayed on the post editor](https://imgur.elightup.com/rrsvh0z.png)

Just add some images.

## 2. Displaying images as a gallery

In the case that you are not using any page builder to build your website, you can use these two ways to have a gallery from the images uploaded into the field:

* **Using PHP**: We’ll add some lines of code to the theme’s files. It is not as complicated as common thinking. Just follow this practice with some simple git.
* **Using MB Views** from Meta Box: It will do almost the code for you without touching theme’s files, so you just need to click and click. Even when you are using any page builder, you can also use the **MB Views** following this instruction to have your wish gallery on frontend.

We highly recommend you use **MB Views** because of its various advantages. By the way, if you want the gallery to have the best look and be in the style of a slider, as I will do, you should use a JavaScript library for it as **Slick Slider** as I’ll use. So, **to make it to be a slider, you definitely need to add code, no matter which method you are using**.

### 2.1 Using PHP

Go to the **functions.php** file and add these lines of code.

![Add code to the functions.php file](https://imgur.elightup.com/EflBRwW.png)

**In there**:

* `rwmb_meta( 'image_gallery', ['size' => 'large'] )`: is the function to get the value of custom fields.
* `image_gallery`: is the ID of the custom field that we used to save images.
* These lines of code in the image below are just for styling later.

![These codes are just for styling later.](https://imgur.elightup.com/lzcdYRv.png)

Since we'll save multiple images in the fields, we should use a loop to get and display all of them.

![Use a loop to get and display all of the images](https://imgur.elightup.com/ipbBy0C.png)

* `add_shortcode( 'brand_image', 'get_image_field' );` is to create a shortcode named `brand_image`. We will use this shortcode to put the gallery anywhere we want.

Now, go to a page and also add a **Shortcode** block.

![Add a Shortcode block](https://imgur.elightup.com/msHRyxG.png)

Then input the created shortcode into the box.

![Input the created shortcode into the box](https://imgur.elightup.com/dhJ8YSY.png)

Now all of the images are displayed on the page.

![The images are displayed on the page.](https://imgur.elightup.com/RqjmOc8.png)

### 2.2 Using MB Views

Go to **Meta Box** > **Views** to create a new template that we will use for the gallery.

![Create a new template for the gallery.](https://imgur.elightup.com/UfRUvDX.png)

Click on the **Insert Field** button and look for the name of the field that we input images in the right sidebar.

![Insert the Image Gallery field](https://imgur.elightup.com/MssHlpW.png)

You can choose an option for the size of the output images.

![Choose an option for the size of the output images](https://imgur.elightup.com/oAX3zsn.png)

Then some lines of code will be added to the template automatically.

![Some lines of code will be added to the template automatically.](https://imgur.elightup.com/LCd2QeO.png)

That’s all you need to get and display the images.

Now, go to the settings of the template, and you can choose a location to display the gallery. If you have a specific page, just choose it. But in most cases, we should set this template as a shortcode, then you can add this shortcode to any place on your site.

![Set this template as a shortcode](https://imgur.elightup.com/EOyDFRw.png)

Then, there will be a shortcode generated. Just copy and paste it anywhere you want.

![Copy and paste the shortcode anywhere you want.](https://imgur.elightup.com/UfzaRnx.png)

Go to the page editor, add a **Shortcode** block, and paste the created one.

![Add a Shortcode block](https://imgur.elightup.com/q6hJ5Bs.png)

On the frontend, the image gallery displays already, as we used PHP.

![The image gallery displays already, as we used PHP](https://imgur.elightup.com/RqjmOc8.png)

The next work is styling it.

## 3. Styling the gallery

No matter which method you are using, you should use CSS and JS if you want to have a slider with a good look for the gallery.

You can use a 3rd-party library or make it yourself. In this case, I’ll use **Slick Slider**.

![Slick Slider library](https://imgur.elightup.com/p0SbcoW.png)

You can add files or the code above ò the library to the theme’s files or the template created with **MB Views**. The code will be quite the same.

Since I recommend you use **MB Views**, I will follow the second method. Go to the created template and add some lines of code to declare the library.

![Add some lines of code to declare the library in the created template](https://imgur.elightup.com/06TouC4.png)

I’ll also add some div tags and classes into the code, which is the loop.

![Add some div tags and classes into the code](https://imgur.elightup.com/WkQduEt.png)

Then, move to the **CSS** tab and the **JavaScript** tab, add some codes.

![Add code to the CSS tab and the JavaScript tab](https://imgur.elightup.com/detC0uF.png)

The code in the **JavaScript** tab above is to create a slider for the gallery. All of these codes I used are also available on [GitHub](https://github.com/wpmetabox/tutorials/tree/master/displaying-images-as-gallery), so you can refer to them.

After updating the template, you will see a gallery in the style of a slider on the page.

![A gallery in the style of a slider on the page](https://imgur.elightup.com/zpncoql.gif)

## Last Words

I hope this tut helpful for you guys. If you want to see more about how to use the Image Advanced custom field to display an image gallery, please dig into the tut on [creating product pages](https://docs.metabox.io/tutorials/create-product-page/).

In case you want to display an image gallery along with some information associated with the image, you can refer to another way: [display images from cloneable fields](https://docs.metabox.io/tutorials/display-images-cloneable-fields-mb-views/).

# Displaying images from cloneable fields - MB Views

import LiteYouTubeEmbed from 'react-lite-youtube-embed';
import 'react-lite-youtube-embed/dist/LiteYouTubeEmbed.css';

Images like a series of brand logos of typical partners or avatar of clients in the testimonial section, could be saved in custom fields. This tutorial is on how to display them without using any page builders.

## Video version

<LiteYouTubeEmbed id='nteLH6DDKSI' />

## Preparation

We’ll need [Meta Box](https://metabox.io) and some of its extensions for this practice:

* [MB Settings Page](https://metabox.io/plugins/mb-settings-page/): create settings pages for uploading images;
* [MB Builder](https://metabox.io/plugins/meta-box-builder/): it provides a UI to create custom fields;
* [MB Group](https://metabox.io/plugins/meta-box-group/): organize custom fields into cloneable groups, where we input images;
* [MB Views](https://metabox.io/plugins/mb-views/): it helps you to create templates as well as get and display fields’ values.

## 1. Creating a settings page

Go to **Meta Box > Settings Page > Add New** and change the option name.

![Create a Settings Page](https://imgur.elightup.com/xj8IOWJ.png)

Now, a new menu named **Brands** appears. It’s my new **Settings Page**.

![The new Settings Page named Brands appears.](https://imgur.elightup.com/U4H4ELu.png)

## 2. Creating custom fields

In the **Admin Dashboard**, go to **Meta Box > Custom Fields > Add New**. I created fields with the below structure.

<table>
<thead>
<tr>
<th>

**Field**

</th>
<th>

**Types of Field**

</th>
<th>

**ID**

</th>
</tr>
</thead>
<tbody>
<tr>
<td>Brand Group</td>
<td>Group</td>
<td>brand_group</td>
</tr>
<tr>
<td>Brand Logo Upload</td>
<td>Single Image</td>
<td>brand_logo_upload</td>
</tr>
<tr>
<td>Brand Logo Url</td>
<td>Url</td>
<td>brand_logo_url</td>
</tr>
<tr>
<td>Brand Name</td>
<td>Text</td>
<td>brand_name</td>
</tr>
</tbody>
</table>


This is a group with three subfields inside. This group is set to be cloneable to have more spaces to add different brands information.

![Set this group as cloneable to have more spaces to add different brands information.](https://imgur.elightup.com/Hi033mY.png)

As you can see in the structure, I added 2 fields which are **Single Image** and **Url**. One allows you to upload images and save them in the library, and one allows you to input a link of an image from anywhere.

![2 fields which are Single Image and Url help you upload images and input a link of image.](https://imgur.elightup.com/dmaPInv.png)

After having all the needed fields, go to the **Settings** tab and choose the **Location** as the **Settings Page** that we’ve just created to apply the custom fields to it.

![In the Settings tab, choose the Location as the Settings Page that we’ve just created to apply the custom fields.](https://imgur.elightup.com/MHr0exH.png)

Back to the **Settings Page**, you’ll see all of the created custom fields. You can click **Add more** to add another brand’s information.

![The created custom fields are displayed.](https://imgur.elightup.com/4JJ0nEh.png)

## 3. Displaying data from fields

To get the input data from those custom fields to display the brand information, I will use **MB Views** to create a template. Go to **Meta Box > Views** and add a new view.

In the **Template** tab of the view, click the **Insert Field** button to choose the value from which fields to display.

![In the Template tab, you can insert fields to get their data.](https://imgur.elightup.com/2aD8XWb.png)

Since we created custom fields for the **Settings Page**, we go to the **Site** tab then find the created custom fields.

![In Site tab, find the custom fields that I created for the Settings Page](https://imgur.elightup.com/mJIBoAZ.png)

Because this group is cloneable so whenever you open the group here to find any field, it will auto-generate a Loop.

![A Loop is auto generated whenever you open the group to find any field](https://imgur.elightup.com/SLlnKl4.png)

Delete the text ‘INSERT SUB-FIELDS HERE” and choose a field from the list in the sidebar to add a field inside the loop.

![choose a field from the list in the sidebar to add a field inside the loop](https://imgur.elightup.com/HPXAk4U.gif)

When you insert the logo from the **Single Image** field, you can choose the size to output. Here I set it to be the thumbnail.

![Get the value from the Single Image field when the URL field is empty](https://imgur.elightup.com/A9VwBOb.png)

When inserting the fields, I also edit the code a little bit to create a rule for displaying images. For example, I set a rule that if there is no URL input to the **URL** field, the value from the **Single Image** field will be obtained and displayed.

![Get the value from the Single Image field](https://imgur.elightup.com/ndDjfEa.png)

The following code will stipulate that if there is no input data in the **Brand Logo Upload** field, the image from the link in the **URL** field will be displayed.

![The following code will stipulate that if there is no input data](https://imgur.elightup.com/Xro7EVw.png)

Next, if there is data in both the **Image Upload** and **URL** field, I set priority to display the image of the **Brand Logo Upload** field.

![If there is data set priority to display image](https://imgur.elightup.com/2YUI1Vy.png)

If you have any further information for the brand, such as the **Brand Name** that I have in this case, remember to insert them in the next lines.

![Remember to insert the added information in the text line](https://imgur.elightup.com/m4VWKZB.png)

If you want to style this section, add some **div** tags. I also did it and here is all the code.

```php
<div class="brand-group">
{% for clone in site.brands.brand_group %}
    <div class="brand-img">
    {% if clone.brand_logo_url|trim is empty %}
        <img src="{{ clone.brand_logo_upload.thumbnail.url }}" width="{{ clone.brand_logo_upload.thumbnail.width }}" height="{{ clone.brand_logo_upload.thumbnail.height }}" alt="{{ clone.brand_logo_upload.thumbnail.alt }}">
    {% elseif clone.brand_logo_upload.thumbnail.ID|trim is empty %}
        <img src="{{ clone.brand_logo_url }}">
    {% else %}
        <img src="{{ clone.brand_logo_upload.thumbnail.url }}" width="{{ clone.brand_logo_upload.thumbnail.width }}" height="{{ clone.brand_logo_upload.thumbnail.height }}" alt="{{ clone.brand_logo_upload.thumbnail.alt }}">
    {% endif %}
    <p class="name">
        {{ clone.brand_name }}
    </p>
    </div>
{% endfor %}
</div>
```
To finish, move to the **Settings** section, choose the type of view as **Shortcode**.

![choose the type of view as shortcode](https://imgur.elightup.com/nEOIWFM.png)

After publishing this view, a shortcode will be generated automatically. You can copy and paste it to any page you want to display the template.

Now, you can see all of the brand logos along with their names displayed already. But this section hasn’t looked good yet. Thus, we’ll need some JS and CSS to make it look better.

![All the images appeared](https://imgur.elightup.com/mTWu5xF.gif)

## 4. Styling the section

In the view, move to the **CSS** tab and add css into the box.

![Add Css code to the box](https://imgur.elightup.com/hUni7yc.png)

All the css code is uploaded to [Github](https://github.com/wpmetabox/tutorials/blob/effb1b8d4729da57bf3fe5ee77dc2fe2827678a7/display-images-from-cloneable-fields-with-Gutenberg/custom.css), you can refer to it.

After adding css, my brand section turned into a new look.

![The result after adding css code](https://imgur.elightup.com/MQpnntm.png)

 ------

You may be interested in:
* [Creating user profile page on frontend](https://docs.metabox.io/tutorials/create-user-profile-page/)
* [Creating a dynamic landing page](https://docs.metabox.io/tutorials/create-dynamic-landing-page/)
* [Creating a team members page](https://docs.metabox.io/tutorials/create-team-members-page-mb-views/)

# Displaying images from cloneable fields - Meta Box + Bricks

import LiteYouTubeEmbed from 'react-lite-youtube-embed';
import 'react-lite-youtube-embed/dist/LiteYouTubeEmbed.css';


Today, we’ll use Meta Box and Bricks to display images from cloneable fields. Take the brand logos as an example:

![The example of displaying the logos](https://imgur.elightup.com/udymyMf.png)

## Video version

<LiteYouTubeEmbed id='UZ-8JEEUNyc' />

## Before getting started

Typically, we’ll use a custom post type to create multiple posts for brands. But now, I’ll do another way more conveniently and simply - creating a settings page. All brand information will be input to that page. It means that all of them will be in one place only for easier management.

![The settings page](https://imgur.elightup.com/lQaXxjJ.png)

For this practice, we need these tools:

* [Meta Box](https://wordpress.org/plugins/meta-box/): to have the framework for creating custom fields;
* [Meta Box Settings Page](https://metabox.io/plugins/mb-settings-page/): to create settings pages to input images;
* [MB Builder](https://metabox.io/plugins/meta-box-builder/): to have an intuitive UI to create custom fields for saving the brand information;
* [MB Group](https://metabox.io/plugins/meta-box-group/): to organize custom fields into cloneable groups, where we input images;
* **Bricks**: to build the page.

## 1. Creating a settings page

Go to **Meta Box > Settings Page > Add New**.

In my case, the settings page is quite simple and contains only the image of each brand. As there’s no special setting, I'll just change the option name.

![Create a settings page](https://imgur.elightup.com/Vvrql4e.png)

After publishing, you’ll see a new settings page named **Brands** appears as below:

![Created settings page appear](https://imgur.elightup.com/S1Z1BuW.png)

It’s blank now.

## 2. Creating custom fields

Let’s create custom fields for the settings page. They will be used to save the brand information.

In the admin dashboard, go to **Meta Box > Custom Fields > Add New**. I created fields with the structure below.

<table>
<thead>
<tr>
<th>Field</th>
<th>Types of Field</th>
<th>ID</th>
</tr>
</thead>
<tbody>
<tr>
<td>Brand Group</td>
<td>Group</td>
<td>brand_group</td>
</tr>
<tr>
<td>Brand Logo Upload</td>
<td>Single Image</td>
<td>brand_logo_upload</td>
</tr>
<tr>
<td>Brand Name</td>
<td>Text</td>
<td>brand_name</td>
</tr>
</tbody>
</table>

This is a group with 2 subfields inside. It is also set to be cloneable to have more spaces to add information for different brands.

![2 subfields inside](https://imgur.elightup.com/oVFMAGs.png)

After that, go to the **Settings** tab and choose the **Location** as the settings page that we’ve created to apply the custom fields to it.

![Set location for the setting page](https://imgur.elightup.com/q8eWRPv.png)

Back to the settings page, and you’ll see the created custom fields appear. Moreover, to add another brand’s information, you can press the **Add more** button.

![Created custom fields appear](https://imgur.elightup.com/1e8AcPK.gif)

Now, just fill in the brand’s information in the fields.

## 3. Displaying images on the frontend

Let’s edit a page with **Bricks**. I chose the homepage for example.

First, to contain all the brands' information, add a new section. Then, put it anywhere you want to show it on that page.

Next, to add the title of the section, choose the **Heading** element and name it.

![Add a Heading element](https://imgur.elightup.com/EJrofNF.png)

In the **Container** element inside the section, select the **Div** element to contain the brand information.

![Select Div element](https://imgur.elightup.com/ABA7PIF.png)

Then, to get the data of brands, enable the **Use query loop** button. And in the **Query** section, choose the type of data source as **MB Group: Brand Group**. In the name, you can see the ‘Brand Group’ is the name of the group that we’ve just created.

![Enable the Use query loop](https://imgur.elightup.com/8uOrwqN.png)

For the brand’s logos, as they are saved in the custom field created by Meta Box, choose the **Image** element > choose the **Select** **Dynamic** data button > select the right field - **Brand Image Upload**. Now all the brand's logos are displayed already.

![Choose Image element](https://imgur.elightup.com/q0VM7gp.gif)

For the brand’s names, choose the Basic Text element. We also use the Select Dynamic data button and choose the field correspondingly. Then, you’ll see the brand’s name displayed immediately.

![Choose the Basic text elememt](https://imgur.elightup.com/4sd3DoR.gif)

On the homepage, you’ll see all of the brand information.

![All the imformaiton is obtained](https://imgur.elightup.com/HlGt615.png)

## 4. Styling the section

Now, go back to the page editor with **Bricks**, choose each element and change the settings to style them in your own way.

After styling, all the brand logos are displayed as we want.

![Style the section](https://imgur.elightup.com/udymyMf.png)

# Displaying images from cloneable fields - Meta Box + Elementor

import LiteYouTubeEmbed from 'react-lite-youtube-embed';
import 'react-lite-youtube-embed/dist/LiteYouTubeEmbed.css';

We will display images from cloneable fields using Meta Box and Elementor.

The image below is a specific example.

![The example of displaying images from cloneable fields using Meta Box + Elementor](https://imgur.elightup.com/x5JABan.png)

## Video version

<LiteYouTubeEmbed id='yqRud-APqgQ' />

## Preparation

Here are some tools we need:

* **[Meta Box](https://metabox.io)**: to have the framework for creating custom fields. It’s free, and you can download it directly from [wordpress.org](https://wordpress.org/plugins/mb-custom-post-type/);
* **[Meta Box Settings Page](https://metabox.io/plugins/mb-settings-page/)**: to create settings pages;
* **[MB Builder](https://metabox.io/plugins/meta-box-builder/)**: to have an intuitive UI to create custom fields in the backend to save image and other information if any;
* **[MB Group](https://metabox.io/plugins/meta-box-group/)**: to organize custom fields into cloneable groups, where we input images;
* **[MB Elementor Integrator](https://metabox.io/plugins/mb-elementor-integrator/)**: to connect and display custom fields created by Meta Box plugin in the Elementor's dynamic tags.

They’re all in the **Meta Box AIO**. If you haven’t had it, you can download and install each one individually.

Finally, make sure you have **Elementor Pro** on your site.

## 1. Creating a settings page

With **custom post types**, information from each brand will be saved in a separate post. But with a **settings page**, all of them will be on this page only. So, I will use a settings page for more convenience.

Go to **Meta Box > Settings Page > Add New**.

![Create a setting page](https://imgur.elightup.com/upCEEWJ.png)

Change the Option name for the page and other settings as you want.

After publishing, you’ll see a new settings page named Brands appears.

![New settings page named Brands appears](https://imgur.elightup.com/0etweZJ.png)

## 2. Creating custom fields

Go to **Meta Box > Custom Fields > Add New** to create custom fields for the settings page.

The following table illustrates the fields’ structure that I’m using.

<table>
<tbody>
<tr>
<td>Field</td>
<td>Types of Field</td>
<td>ID</td>
</tr>
<tr>
<td>Brand Group</td>
<td>Group</td>
<td>brand_group</td>
</tr>
<tr>
<td>Brand Logo Upload</td>
<td>Single Image</td>
<td>brand_logo_upload</td>
</tr>
<tr>
<td>Brand Name</td>
<td>Text</td>
<td>brand_name</td>
</tr>
</tbody>
</table>


This is a group with two subfields inside. It is also set to be cloneable to have more spaces to add different brands' information.

![Set this group as cloneable to have more spaces to add different brands' information.](https://imgur.elightup.com/nI7og1l.png)

In addition, I set this group as collapsible to collapse the information in the group field.

![Set this group as collapsible to collapse the information of the group field](https://imgur.elightup.com/ZCXl2yG.png)

After that, open the **Settings** tab and choose **Location** as the **Settings Page** we’ve created to apply the custom fields.

![In the Settings tab, choose the Location as the Settings Page to apply the custom fields](https://imgur.elightup.com/aH7KIOK.png)

Go back to the settings page, and you’ll see all of the newly created custom fields. There is an **Add More** button to add another brand’s information.

![The created custom fields are displayed](https://imgur.elightup.com/EsuyCSx.gif)

Now, let’s fill in the information in the fields and move to the next step.

## 3. Creating a skin

Go to **Elementor Theme Builder > MB Group Skin > Add New**.

![Go to Elementor Theme Builder > choose MB Group Skin > Add new skin](https://imgur.elightup.com/0FTgqlB.png)

Set the settings for the skin as you want. Then, add the **Image** element to display the brand logo.

![Set the settings for the skin, then add the Image element to display the brand logo](https://imgur.elightup.com/5Yp7q8R.png)

To get the image from the custom fields created by Meta Box, go to the **Dynamic Tags** and find the **Meta Box Field**.

![Go to the Dynamic Tags and find the Meta Box Field to get the image from custom fields](https://imgur.elightup.com/mHUQTcn.png)

Since the custom field we created is on the settings page, we choose the Meta Box Field in the Site section.

![Choose the Meta Box Field in the Site section](https://imgur.elightup.com/VEkOwof.png)

Then, choose the name of the field you want to get the image from.

![Choose the name of the field you want to get the image from](https://imgur.elightup.com/85HlkAI.png)

For the brand’s title, add a **Text Editor** element. Once again, go to the **Dynamic Tags** and find the **Meta Box Field** in the **Site** section and choose the **Brand Name** option.

![Add a Text Editor element to this section](https://imgur.elightup.com/uOd8XDu.png)

After that, I’ll style both elements a little bit.

![Style both elements a little bit](https://imgur.elightup.com/Ma9aEXQ.gif)

## 4. Displaying the image section on a page

Let’s edit a page with Elementor, I’m doing this with the homepage in this practice.

![Edit the homepage with Elementor](https://imgur.elightup.com/WOgXtDs.png)

First, I add a widget to the homepage to create a section that contains brand information. Then, add a **Heading** to it and style it as you want.

![Add a widget to the homepage to create a section that contains brand information then add a Heading to style](https://imgur.elightup.com/yExxtLm.gif)

Next, to display the images of logos, add the **MB Group** element.

![Add the MB Group element to display the brands’ logos](https://imgur.elightup.com/xfEddmE.png)

Set **Object Type** as **Settings page** because we’ve just input the image into fields in a settings page.

![Set Object Type as Settings page](https://imgur.elightup.com/TjAZfjH.png)

After that, it will set the created-latest group by default. Change it to the one that we use to save the images.

Now, all the data from the group will be displayed, but there is no styling.

![Set the created-latest group by default](https://imgur.elightup.com/Zph2nOn.png)

For styling, choose the skin that you’ve just created above. Then, it will turn to the new look with the style of the created skin.

![Choose the skin that you’ve created](https://imgur.elightup.com/wLnjmcV.png)

Also, you can configure the display of the brand section, such as the number of columns and the spacing between them.

![you can configure the display of the brand section like column's number and spacing](https://imgur.elightup.com/EZF6ASW.png)

Here is the result we’ve got:

![The final result of displaying images from cloneable fields with Meta Box + Elementor](https://imgur.elightup.com/x5JABan.png)

------
You may be interested in:

* [Creating an FAQs page](https://docs.metabox.io/tutorials/create-faqs-page-meta-box-elementor/)
* [Creating buttons with dynamic link](https://docs.metabox.io/tutorials/create-buttons-dynamic-links/)
* [Displaying the latest products](https://docs.metabox.io/tutorials/display-latest-product-meta-box-elementor/)

# Displaying images from cloneable fields - Meta Box + Oxygen

import LiteYouTubeEmbed from 'react-lite-youtube-embed';
import 'react-lite-youtube-embed/dist/LiteYouTubeEmbed.css';

We’re going to find out how to **use Oxygen to display images from cloneable fields** created with Meta Box.

I made an example like this:

![The example of displaying images from cloneable fields using Meta Box and Oxygen](https://imgur.elightup.com/I21QKgJ.png)

## Video Version

<LiteYouTubeEmbed id='mUcuw6NGUC4' />

## Preparation

In addition to using [Meta Box](https://metabox.io), make sure you already have these extensions:

* **[MB Settings Page](https://metabox.io/plugins/mb-settings-page/)**: it helps you to create settings pages, we’ll need a settings page to place the custom fields into.
* **[MB Builder](https://metabox.io/plugins/meta-box-builder/)**: It provides a UI to create custom fields.
* **[MB Group](https://metabox.io/plugins/meta-box-group/)**: this extension helps to organize custom fields into cloneable groups, where we input images.

You can install these extensions individually or use **Meta Box AIO** to have them all in one place.

The last one is [Oxygen](https://oxygenbuilder.com/). You should use the 3.9 version or higher, which has native integration with Meta Box.

## 1. Creating a settings page

With **Custom Post Types**, information from each brand will be saved in a separate post. But with a **Settings Page**, all of them will be on this page only.

Go to **Meta Box > Settings Page > Add New**.

![Create a Settings Page](https://imgur.elightup.com/Mvf52Z4.png)

After publishing, a new menu named **Brands** appears.

![The new Settings Page named Brands appears](https://imgur.elightup.com/tq05p6M.png)

## 2. Creating custom fields

Let’s create custom fields to save images and other information for the created settings page.

Go to **Meta Box > Custom Fields > Add New**.

The following table illustrates the fields’ structure that I’m using.

<table>
<tbody>
<tr>
<td> Field </td>
<td> Types of Field </td>
<td> ID </td>
</tr>
<tr>
<td>Brand Group</td>
<td>Group</td>
<td>brand_group</td>
</tr>
<tr>
<td>Brand Logo Upload</td>
<td>Single Image (sub-field)</td>
<td>brand_logo_upload</td>
</tr>
<tr>
<td>Brand Logo Url</td>
<td>Url (sub-field)</td>
<td>brand_logo_url</td>
</tr>
<tr>
<td>Brand Name</td>
<td>Text (sub-field)</td>
<td>brand_name</td>
</tr>
</tbody>
</table>

This is a group with three subfields inside. It is also set to be **Cloneable** to have more places to add different brands' information.

![Set this group as cloneable to have more spaces to add different brands' information](https://imgur.elightup.com/AejdEzp.png)

**Single Image** and **URL** are added to the structure. One allows you to upload photos to a library, while the other lets you connect to any image.

![2 fields which are Single Image and Url help you upload images and input a link of image](https://imgur.elightup.com/gA0UsTn.png)

After that, open the **Settings** tab and choose **Location** as the **Settings Page** we’ve created to apply the custom fields.

![In the Settings tab, choose the Location as the Settings Page to apply the custom fields](https://imgur.elightup.com/VxvJWFE.png)

Go back to the settings page, and you’ll see all of the newly created custom fields. There is an **Add More** button to add another brand’s information.

![The created custom fields are displayed](https://imgur.elightup.com/EsuyCSx.gif)

Now, let’s fill in the information in the fields and move to the next step.

## 3. Displaying images from the fields

To add a section for displaying brands’ information, go to the Edit with Oxygen section of the page you want.

First, add a Div component.

![Choose a Div component to add a section for displaying brands’ information](https://imgur.elightup.com/4yRloLd.png)

Next, add a Code Block inside the Div. Then, add code to the PHP&amp;HTML section.

![The PHP&amp;HTML section of Code Block](https://imgur.elightup.com/OrkYDBg.png)

![Add code to the PHP&amp;HTML section](https://imgur.elightup.com/P5jDaTg.png)

I’m using this code, you can refer to it.

```php
<?php
$group = rwmb_meta( 'brand_group', ['object_type' => 'setting'], 'brand' );
?>
<div class="brand-group">
    <?php
        <?php
            $image = RWMB_Image_Field::file_info( $value['brand_logo_upload'], ['size' => 'thumbnail'] );
        ?>
        <div class="brand-img">
            <?php if (!empty($image)): ?>
                <img src="<?php echo $image['url']?>"/>
            <?php elseif (!empty($value['brand_logo_url'])): ?>
                <img src="<?php echo $value['brand_logo_url'] ?>"/>
            <?php else: ?>
                <img src="<?php echo $image['url']?>"/>
            <?php endif; ?>
            <p class="name"><?php echo $value['brand_name'] ?></p>
        </div>
    <?php endforeach; ?>
</div>
```
**Explanation**
* `$group = rwmb_meta( 'brand_group', ['object_type' => 'setting'], 'brand' );`create the $group variable to get the value of the field which has the ID as brand_group, from the object which has type as settings page and name as Brands. You can change the name of this variable as you want, but please make sure you input exactly the field ID and object name as yours.
* `<?php foreach( $group as $value): ?>`:since the brand_group the field is cloneable, I create a loop to get value from the $group variable.
* `$image = RWMB_Image_Field::file_info( $value['brand_logo_upload'], ['size' => 'thumbnail'] );`:create the $image variable to obtain value from the field which has ID as brand_logo_upload. This field is a single image field, so we use the RWMB_Image_Field( ) to get value.
* `<?php if (!empty( )): ?>`:is to check if the variable has value or not.
* `img src="<?php echo $image['url']?>"/> and <img src="<?php echo $value['logo_url'] ?>"/>`:display image from the corresponding returned url.
* `<?php echo $value['brand_name'] ?>`: get and display the value from the field brand_name.

```
<?php if (!empty($image)): ?>
    <img src="<?php echo $image['url']?>"/>
```

If the `$image` variable doesn't have a value, we'll use the returned value to show the uploaded image.

```
<?php elseif (!empty($value['brand_logo_url'])): ?>
    <img src="<?php echo $value['logo_url'] ?>"/>
```

If there is any value in the **URL** field, which has ID `brand_logo_url`, we will display the image from that link.
```
<?php else: ?>
    <img src="<?php echo $image['url']?>"/>
```

If both of these fields have a value, we set priority here to display only the image from the **Single Image**.

After adding code, click **Apply Code**.

Now, you can see all of the brand logos, along with their names, displayed in the live preview already.

![After editing with Oxygen, the brand logos along with their names displayed already.](https://imgur.elightup.com/T2ZUjxs.png)

But it hasn’t looked good yet. Thus, we’ll need some CSS to make it look better.

## 4. Styling the section using CSS

From the **Primary** tab in the page editor by Oxygen, choose **CSS** to style the section.

![Choose CSS to style the section](https://imgur.elightup.com/R8mzxkU.png)

You can refer to this CSS.

```css
.brand-group {
    padding-left: calc(30px/2);
    padding-right: calc(30px/2);
    max-width: 1140px;
    margin: 0 auto 10px;
    width: 100%;
	display:flex;
	justify-content: space-between;
}


.brand-img img {
    width: 150px;
    height: 150px;
    object-fit: contain;
    margin: 0 auto;
}

.brand-img .name {
    text-align: center;
    margin: 10px 0;
    font-size: 14px;
    font-weight: 700;
	text-transform: uppercase;
}
```

![Add the code](https://imgur.elightup.com/qbSpxxt.png)

Here is the result.

![The result after all steps](https://imgur.elightup.com/I21QKgJ.png)

------

You may be interested in:

* [Creating a team members page](https://docs.metabox.io/tutorials/create-team-members-page-meta-box-oxygen/)
* [Creating a video gallery page](https://docs.metabox.io/tutorials/create-video-gallery-page-meta-box-oxygen/)
* [Creating an FAQs page](https://docs.metabox.io/tutorials/create-faqs-page-meta-box-oxygen/)

# Displaying the latest products - Meta Box + Breakdance

import LiteYouTubeEmbed from 'react-lite-youtube-embed';
import 'react-lite-youtube-embed/dist/LiteYouTubeEmbed.css';

In today's practice, we're going to create the latest product section using Meta Box and Breakdance.

I take the restaurants as an example for the posts as well as for the products:

![Each restaurant is a post in a custom post type](https://imgur.elightup.com/sTREMWQ.png)

## Video version

<LiteYouTubeEmbed id='HrhJUBQA7Uk' />

## Preparation

In this case, my products are restaurants. Each restaurant will be a post in a custom post type and displayed in a box as in the image below. It is created as a global block in Breakdance.

![Each restaurant is a post in a custom post type](https://imgur.elightup.com/OFq9unJ.png)

In the block, the name of the restaurant and its image are the title and the featured image of the post. Further, you may want to add some extra information for your products, so I have something as a demo, such as logo, address, and voucher. This extra information will be saved in the custom fields created by Meta Box.

And, in this section, only the 6 latest restaurants will be displayed.

For this practice, we need these tools:

* [Meta Box](https://wordpress.org/plugins/mb-custom-post-type/): to have the framework for creating custom post type and custom fields.
* [MB Custom Post Types](https://metabox.io/plugins/custom-post-type/): to create custom post types for the products;
* [MB Builder](https://metabox.io/plugins/meta-box-builder/): to have an intuitive UI to create custom fields in the backend to save the product information;
* **Breakdance**: to build the page and create a section to display the latest posts.

## 1. Creating a new custom post type

Go to **Meta Box > Post Types > New Post Type** to create a new post type for the products.

![Create a new custom post type](https://imgur.elightup.com/ZwkLvos.png)

## 2. Creating custom fields

Each restaurant has extra information, so we’ll create custom fields to save them. Go to Meta Box > Custom Fields to create fields. Here are the fields that I’ll create:

![The created custom fields](https://imgur.elightup.com/ZJ7E9r5.png)

After creating all the fields, move to the **Settings** tab > **Location** > choose **Post Type** as the **Restaurants** post type to apply these fields to it.

![Set location for the created fields as post type](https://imgur.elightup.com/c2WVoJv.png)

Go to the post editor, you will see all of the created custom fields.

![All the created fields appear in the post editor](https://imgur.elightup.com/0by2k0P.png)

Just fill in the information.

## 3. Creating a global block

Now, let’s create a global block to get the post information! Go to **Breakdance > Global Blocks** then create a new one.

![Create a global block](https://imgur.elightup.com/yydOEph.png)

Remember to set the preview for the global block.

My global block is to display the information of each post in a box like this.

![The information of each post is displayed in the global block](https://imgur.elightup.com/upsbvVj.png)

First, we'll add a div for this box.

![Add a div element](https://imgur.elightup.com/EMwkovo.png)

Next, add an **Image** element to display the featured image of the post. To insert dynamic data for this element, just click the icon in the image below and choose the **Featured Image** option in the **Post** section.

![Add an Image element for the featured image](https://imgur.elightup.com/DGURTdQ.png)

For the restaurant’s name, select a **Text Link** element to display the name in link format. Then, choose the **Post Title** option. And, if you want to set the hyperlink, choose the Post Permalink option in the **Link** section.

![Select a Text Link element for the restaurant's name](https://imgur.elightup.com/tstVynR.gif)

To display the restaurant’s address, add a **Text** element. As the address is saved in the custom field created by **Meta Box**, we’ll insert the dynamic data into this element. Also, click the icon as we did before and choose the corresponding field name in the **Meta Box** section. Then, the restaurant’s address will be obtained.

![Do likewise with the voucher information](https://imgur.elightup.com/ZooOCEx.gif)

For the voucher information, do likewise.

For the last one - the logo of the restaurant, we’ll add an Image element for it. The logo is saved in the custom field as well, so we’ll also insert the dynamic data into this element.

![Add an Image element for the logo of the restauran](https://imgur.elightup.com/lN1j9eg.gif)

We have just displayed all the wanted information from the restaurant.

## 4. Adding the section to the homepage

Let’s edit the homepage with Breakdance. First, add a new section to the page to contain all the latest products.

![Add a Section to the Homepage](https://imgur.elightup.com/7We9NeN.png)

Then, add a heading to name it.

For displaying the wanted posts, choose a **Post Loop Builder** element. In the **Global Block** section of this element's settings, choose the global block which has just been created.

![Choose a Post Loop Builder element to display the wanted posts](https://imgur.elightup.com/zuKFTsx.png)

To stipulate the source of data and the products you want to display in the section, go to the **Query** section > **Custom** > then edit the query like this:

![Go to Query section > Custom > then edit the query to stipulate the source of data](https://imgur.elightup.com/AgDuofT.png)

**In there:**

* In the **Source** data, it’ll be automatically set as the **Post Types**, then choose the name of the product you want to get the post from.
* In the **Post per page** section, enter the number to limit the number of posts you want to display in this section.
* In the **Order** section, the query also automatically sets the order by date and descending. It means that the latest post will be displayed first and then the older one. That’s exactly what we want in this practice. So, we just keep this setting by default.

After applying the query, you’ll see all the latest restaurants appear in the order you want.

## 5. Styling the section

Go back to the created global block. Then, customize each element, and also can add some CSS to the element to get the wanted display.

After styling the global block, back to the homepage, you’ll see the information of the posts will have a new look like this.

![Style the section](https://imgur.elightup.com/eA4bAZd.png)

Next, we’ll set the layout of the section for better display. Go to edit the homepage with Breakdance, and change the setting of each element.

After that, you’ll see the new appearance.

![The final result after styling](https://imgur.elightup.com/sTREMWQ.png)

# Displaying the latest products - Meta Box + Bricks

import LiteYouTubeEmbed from 'react-lite-youtube-embed';
import 'react-lite-youtube-embed/dist/LiteYouTubeEmbed.css';

We’ll create a section and choose the products or posts that are the latest ones to display only on the homepage.

I’ll take the restaurants as an example for products.

![Example of displaying the latest products using Meta Box and Bricks](https://imgur.elightup.com/c5ujBZH.png)

## Video version

<LiteYouTubeEmbed id='ThRnmpJgROE' />

## Preparation

As you can see in my example, my products are restaurants which are posts of a custom post type. We’ll display the latest posts first and then the oldest ones based on the posts’ published date. The name and image of the restaurants are the post title and featured image of the post. The extra information such as address, logo, and voucher will be stored in separated custom fields.

These are the tools we need:

* [Meta Box](https://metabox.io): to have a framework for creating custom post types and custom fields.
* [MB Custom Post Types & Custom Taxonomies](https://metabox.io/plugins/custom-post-type/): to create a new custom post types named Restaurant;
* [MB Builder](https://metabox.io/plugins/meta-box-builder/): to create custom fields in the backend for saving restaurants’ information;
* **Bricks**: to build the page. Remember to update and activate the latest version of Bricks on your site.

## 1. Creating a new custom post type

Go to **Meta Box > Post Types > New Post Type** to create a new post type.

![Create a New Custom Post Type](https://imgur.elightup.com/KysSnCO.png)

Publish and you’ll see a new menu named Restaurants in the dashboard.

![a new menu display on the left sidebar](https://imgur.elightup.com/zwO4Ahp.png)

## 2. Creating custom fields

Go to **Meta Box > Custom Fields*8 to create fields.

![the custom fields that we'll create for the post type](https://imgur.elightup.com/WqQ0AkW.png)

After creating all the needed fields, move to the **Settings** tab, choose **Location** as **Post Type** and select **Restaurant** to apply these fields to it.

![set location for the fields to apply them to the wanted post type](https://imgur.elightup.com/nvYip9J.png)

When creating a new post in the Restaurant post type, the custom fields will be there.

![newly created custom fields](https://imgur.elightup.com/VKHeWA1.png)

## 3. Adding a section for the latest products

### Creating and configuring the section

Let’s edit a page to add the section. I’ll take the homepage and **edit it with Bricks**.

![edit the Homepage with Bricks.](https://imgur.elightup.com/ouz94cl.png)

First, add a **Section** element to the page, then you’ll see a **Container** element inside to cover all the restaurants’ information.

![add a Section element](https://imgur.elightup.com/sV8cG5I.png)

Then, add a **Heading** element to name the section

![Add a Heading element to display the title of the section](https://imgur.elightup.com/ujQwD1H.png)

In the **container**, add the **Posts** element then you will see a list of blog posts as default with featured image, title, and short description in the preview.

![add the Posts element](https://imgur.elightup.com/aYZz9TF.png)

Since we need to show the posts saved in **Restaurant** post type instead of blog post, go to the **Query** section of the **Posts** element, choose **Post Type** as **Restaurant**.

![change the post type in the query section](https://imgur.elightup.com/eNTK7H9.png)

Since we’ll display the latest posts first and then the oldest ones, set the order post by **Published date** and then choose the **Descending** option.

![change the order by as you wanted](https://imgur.elightup.com/y1sFh5H.png)

But, it will display all the posts in the chosen post type. So, enter a number to the **Posts per page** box to limit the number of posts. I set 6 here, so only the 6 latest posts will display in the section.

![Enter the number to the Post per page box](https://imgur.elightup.com/yNuz9TK.png)

Next, if you want to change the page’s layout or the display of the featured image, go to the Layout and the Image section to change the settings as you want.

![change the layout options](https://imgur.elightup.com/Oz1MhPE.png)

![change the image options](https://imgur.elightup.com/2CKWlmP.png)

### Displaying products information into the section

Now, let’s add data from custom fields to the section to show extra information about the restaurants. Still in the **Content** section of the **Posts** element, go to the **Fields** and add some fields. You also can remove the field you don’t want to show here, e.g I’ll remove the post excerpt.

![add fields which you created in the cusom fields](https://imgur.elightup.com/h6DKlD1.png)

To display the data in your wanted fields, click **Add Field > Dynamic Data** then find the corresponding fields. The data of each post will immediately display in the preview.

![data of each post will display corresponding to the fields you set](https://imgur.elightup.com/gXk0Cs5.gif)

Repeat these actions to get all the fields. And, pay attention that when you select to get data from the logo field, it will display text as a default. For that reason, to display images, add an attribute as below:

![adjust the logo field to show as picture instead of text](https://imgur.elightup.com/PM6Hgtn.png)


:::tip

You should use the HTML tag for each element for easier styling in the next step.

:::


![You should use the HTML tag for each element for easier styling in the next step](https://imgur.elightup.com/l5ID9rP.png)

Now, all the data saved in custom fields has been obtained and displayed on the frontend.

![all the data saved in custom fields has been obtained and displayed on the frontend](https://imgur.elightup.com/WYMV9q9.png)

## 4. Styling the section

In the Bricks visual editor, you can easily style the section as you want. For further styling, you can also add some CSS code.

![add CSS class for the Posts elements](https://imgur.elightup.com/Y0AnxjC.png)

![add CSS code](https://imgur.elightup.com/SYXlUSC.png)

Here is the result after styling.

![result after all steps](https://imgur.elightup.com/c5ujBZH.png)

# Displaying the latest products - Meta Box + Elementor

import LiteYouTubeEmbed from 'react-lite-youtube-embed';
import 'react-lite-youtube-embed/dist/LiteYouTubeEmbed.css';

We’ll create a section and choose the products or posts that are the latest ones to display only on the homepage.

I’ll take the restaurants as an example for products.

![Example of showing latest products](https://imgur.elightup.com/9K0bmI2.gif)

## Video version

<LiteYouTubeEmbed id='KvYfEO-X4OA' />

## Preparation

I will show the latest restaurants first and then the oldest ones. Each restaurant is a post of a custom post type. All the extra information of each restaurant such as address, logo, status and voucher will be saved in different custom fields.

So we need some tools for this practice:

* [Meta Box](https://metabox.io/): to have a framework to create custom post types and custom fields;
* [MB Custom Post Type & Custom Taxonomies](https://metabox.io/plugins/custom-post-type/): to create a new post type for the restaurants;
* [MB Builder](https://metabox.io/plugins/meta-box-builder/): to easily create custom fields for saving extra information of the restaurant.
* [MB Elementor Integration](https://metabox.io/plugins/mb-elementor-integrator/): to get data saved in custom fields created by Meta Box in the template of Elementor;
* [Elementor](https://elementor.com/) (Pro version): to build the page and display all the restaurants’ information;
* [Elementor Custom Skin](https://wordpress.org/plugins/ele-custom-skin/): to create a loop to display the listing of posts.

## 1. Creating a new custom post type

Go to **Meta Box > Post Types > New Post Type** to create a new custom post type.

![Create a new post type for the latest products.](https://imgur.elightup.com/E0PpYjv.png)

After publishing, you will see a new **Restaurant** menu in the Admin Dashboard.

![A new menu named Restaurant appears.](https://imgur.elightup.com/YTbt5ZN.png)

## 2. Creating custom fields

Go to **Meta Box > Custom Fields** to create a new field group. Then, create custom fields as you want.

![Create custom fields for the lastest products.](https://imgur.elightup.com/hn36nQr.png)

You should set a simple ID to remember since we’ll need them in the next steps.

For the **Status** and **Voucher** information, they are the selections field. So, you can add some options in the **Choices** box like this:

![Add options to the Status field](https://imgur.elightup.com/miN7Qny.png)

![Add options to the Voucher field](https://imgur.elightup.com/cZ2IKzD.png)

After creating all the needed fields, move to the **Settings** tab, choose **Location** as **Post Types** and select **Restaurant** to apply these fields to it.

![Choose the post type as Restaurant in Location section.](https://imgur.elightup.com/gvr0cBD.png)

When you edit any post in the **Restaurant** post type, you’ll see all the created custom fields. Just fill in the data.

![Enter the information into fields.](https://imgur.elightup.com/qm8DIgf.png)

## 3. Creating a new template

We’re going to create a template to display the information of the restaurants.

Go to **Templates > Theme Builder** to add a new template .

![Create a new template](https://imgur.elightup.com/SHuMxdU.png)

Since we’ll have a list of products, choose the template as a loop.

![Choose the template as a Loop.](https://imgur.elightup.com/tie34CB.png)

Then, remember to set the preview in the **Settings** tab for having a live preview.

![Choose any post of the post type in the Settings tab.](https://imgur.elightup.com/q3mtdsr.png)

First, add an **Inner Section** element to group some elements that I want to style at once as the featured image, logo and voucher.

![Add an Inner Section to group some elements](https://imgur.elightup.com/EDvUikT.png)

It has 2 columns inside so I’ll remove one.

![Remove 1 columns in Inner Section.](https://imgur.elightup.com/nxj2Crh.png)

Next, add a **Featured Image** element into the created Inner Section to show the image of the restaurant.

![add the Featured Image widget into the Inner Section](https://imgur.elightup.com/n5uCzxR.png)

To get the value of the **Voucher** field, use a **Text Editor** element. Since this field is created by Meta Box, click the **Dynamic Data** button > choose **Meta Box Field** option in the **Post** section and connect it to the corresponding field. In this case, it’s **Voucher**.

![Click on the Dynamic Tags icon > choose Meta Box Field option in the Post section > choose the field you want.](https://imgur.elightup.com/RkTFBT6.gif)

For the **Logo**, add an **Image** element and also choose the source from a Meta Box field.

![Setting for Logo field.](https://imgur.elightup.com/MbN8a8r.gif)

Moving on, out of the **Inner Section**, add a **Post Title** element and link it to the **Post URL**.

![add a Post Title widget and link it to the Post URL.](https://imgur.elightup.com/ls4qZKm.gif)

The **Address** of the restaurant is also saved in a custom field, add a **Text Editor** element and connect it to the corresponding field like we did to obtain Voucher information.

![Settings for Address field](https://imgur.elightup.com/q9HEYCe.gif)

When users hover over the featured image of the restaurant, I want a text as **View Detail** display, so I add a **Heading** widget here. Rename the **Title** to **View Detail** and link it to the
**Post URL**.

![Setting for View Detail field.](https://imgur.elightup.com/dXaufUA.gif)

For the **Status** information, just do the same as the **Voucher** information.

![Setting for Status field.](https://imgur.elightup.com/zBqWBsP.gif)

Now, you also can see that all the information of the restaurant has been displayed.

## 4. Adding section to the page

Go to edit the page where you want to display the latest products section with Elementor. I take the homepage as an example.

On the homepage, I created a title for this section, just add the posts below it.

Since there is a list of the latest restaurants, drag the **Posts** element to this position on the homepage for displaying them.

![add the list of the latest products to the position on the homepage](https://imgur.elightup.com/j5mZjaD.png)

Because I have the **Elementor Custom Skin** plugin. I have an option to set the skin as **Custom**.

![Choose Custom in Skin tab.](https://imgur.elightup.com/YEEMx3s.png)

Then, select the **Default Template** as the template which we have just created.

Next, in the **Query** section, choose the source as the post type of your products.

![In the Query section, choose the source as the post type of your products.](https://imgur.elightup.com/BoTDDnq.png)

You can also see some settings for you to display the order of posts. Since we will display the newest posts then the oldest ones, so I set the order by date and choose DESC, which means **Descending** options.

![In the Query section, choose the source as the post type of your products.](https://imgur.elightup.com/9rh4I3B.png)

All the products are obtained and displayed in the time order: the latest post first, then the older one.

![The result of displaying the latest products section before styling.](https://imgur.elightup.com/tb3kVVQ.png)

## 5. Styling the section

### Adding CSS code to style each element

To style the section, you can set the CSS classes for each element in the **Advanced** tab.

![In the Advanced tab, set CSS classes to prepare styling for the latest products section.](https://imgur.elightup.com/V1ONafz.gif)

After setting CSS classes for each element, choose the **Section** element that includes all the elements of the posts. Move to the **Advanced** tab > **Custom CSS** and add code to the box.

![Add code to the box](https://imgur.elightup.com/aMXgVuT.png)

I uploaded the code I use to [Github](https://github.com/wpmetabox/tutorials/blob/master/display-latest-posts-with-Elementor/custom.css), so you can easily refer to it.

### Creating slider effect for the section (Optional)

To have the slider effect, you should use some JS. I use the [Slick Slider library](https://github.com/kenwheeler/slick/tree/master/slick) for it. You can add JS code to the theme’s file or use a 3rd party plugin.

I use [this JS code](https://github.com/kenwheeler/slick/blob/master/slick/slick.min.js), you can refer to it.

I made all the manipulations on the video tutorials above. So if you want to know it in detail, please watch the video above.

Then, go to the homepage and you will see the latest products section has already turned into a slider:

![The result after all steps](https://imgur.elightup.com/26ZajWu.png)

# Displaying the latest products - Meta Box + Oxygen

import LiteYouTubeEmbed from 'react-lite-youtube-embed';
import 'react-lite-youtube-embed/dist/LiteYouTubeEmbed.css';

We’re going to figure out how to have a section for the latest products on the homepage using Meta Box and Oxygen.

I created a latest restaurants section as an example:

![Example of displaying the latest products](https://imgur.elightup.com/EuKKW6b.gif)

## Video version

<LiteYouTubeEmbed id='2TndR67aQQk' />

## Preparation

In this case, my products are restaurants. And, I will show the latest restaurants first and then the oldest ones. All the restaurants are posts of a custom post type. Besides basic information such as name and image of the restaurant (which are the title and featured image of the post), the restaurants will have extra information such as address, voucher and logo will be saved in different custom fields.

So, these are several tools we need:

* [Meta Box](https://metabox.io/): to have a framework to create custom post types and custom fields;
* [MB Custom Post Type & Custom Taxonomies](https://metabox.io/plugins/custom-post-type/): to create a new Restaurant post type;
* [MB Builder](https://metabox.io/plugins/meta-box-builder/): to create custom fields to save the data of the restaurants;
* [Oxygen](https://oxygenbuilder.com/): to build the page for displaying the posts. You should use the 3.9 version or upper to have integration with Meta Box.

## 1. Creating a new custom post type

Go to **Meta Box > Post Types > New Post Type** to create a new post type for the restaurants.

After publishing, you’ll see a new Restaurant menu in your dashboard.

![Create a new custom post type](https://imgur.elightup.com/07DcNhO.png)

## 2. Creating custom fields

Go to **Meta Box > Custom Fields** to add a new field group.

![Create custom fields](https://imgur.elightup.com/UzCCNUn.png)

Note that when configuring the fields, you should choose the **easy-to-remember** labels and IDs since we’ll need them in the next step.

As for the **Status** and **Voucher** field, they’re selection field so we’ll have the **Choices** box to add options like this:

![create the needed fields](https://imgur.elightup.com/v4ZGH5g.png)

![the created fields appear in the post editor](https://imgur.elightup.com/5SvFuGM.png)

After creating all the needed fields, go to the **Settings** tab, choose **Location** as **Post Type** and select **Restaurant** to apply these fields to it.

![Set location for the custom fields](https://imgur.elightup.com/OWPyU0n.png)

When creating a new post in the **Restaurant** post type, the custom fields are there.

![The custom fields in the post editor](https://imgur.elightup.com/AvwlKLv.png)

## 3. Adding a section for the latest products section

### Creating and configuring the section

Let’s edit the homepage with Oxygen.

![edit the homepage with oxugen](https://imgur.elightup.com/Dr8Hh8R.png)

Since the latest products section is a list of posts, we'll choose the **Repeater** component.

In this component settings, choose **Query > Custom > Post Type**, then search for the post type you want to get posts. In this case, it’s Restaurant.

![Search the wanted post type](https://imgur.elightup.com/cZbISWW.gif)

### Displaying products information into the section

To display restaurant’s information, add some components to show them such as name, featured image, voucher and so on.

First, to display the image of the restaurants which is the featured image of the post, add the **Featured Image** component.

![Add the featured image component](https://imgur.elightup.com/p0Xta9O.png)

Then, all the featured images have been obtained.

![All the images have been obtained](https://imgur.elightup.com/qEvXZJZ.png)

To display the name of the restaurant (which is the post title), choose the **Text** component. Then, connect this component to the post title to get dynamic data. Click the **Insert Data** button > **Post** section and choose **Title**.

![Connect the text component to the post title](https://imgur.elightup.com/o0kBW3B.gif)

For the address information which is saved in a custom field created by Meta Box, choose the **Text** component as well > connect to a **Meta Box field** to get the data.

![Connect to a meta box field to get the data](https://imgur.elightup.com/5xauy4K.gif)

Then, the addresses corresponding to each restaurant will be obtained.

![The corresponding addresses to each restaurant will be obtained](https://imgur.elightup.com/L347E1G.png)

For other information including status, voucher, do likewise.

For the logo, it’s a single image field, so I choose the **Code Block** component and also set it as **PHP & HTML**.

![Choose the code block component for the logo](https://imgur.elightup.com/NGhmyMM.png)

Add this code below to the box.
```php
<?php
    $image = rwmb_meta( 'logo', array( 'size' => 'origin' ) );
    echo '<img src="', $image['url'], '">';

?>
```

![Add the code](https://imgur.elightup.com/CqF0XJE.png)

**Explanation**:

* `$image = rwmb_meta( 'logo', array( 'size' => 'origin' ) );` is used to get the data from the Logo field;
* `echo '<img src="', $image['url'], '">';` is used to display the image.

After saving the changes for the page, you will see all the information of the restaurants has been displayed.

![all the information has been obtained](https://imgur.elightup.com/MZ15y7n.gif)

## 4. Styling the section

### Adding CSS code to style each element

To style the section, I will restructure some components and set CSS classes for them.


![Restructure some components to style the section](https://imgur.elightup.com/CUmsUXy.gif)

![Set css classes](https://imgur.elightup.com/wmRhexi.png)

Then, still in the Oxygen preview, choose **Manage > Stylesheet** and **Add Stylesheet** to add some CSS.

![Add Stylesheet to add some css](https://imgur.elightup.com/zXm13Wc.gif)

### Creating slider effect for the section (Optional)

To have the slider effect, you should use some JS. I use the Slick Slider library for it. You can add JS code to the theme’s file or use a 3rd party plugin.

I made all the manipulations on the video tutorials above. So if you want to know it in detail, please watch the video above.

Then, go to the homepage and you will see the latest products section has already turned into a slider:

![The product section turn into a slider](https://imgur.elightup.com/EuKKW6b.gif)

# Displaying the latest products - MB Views

We’ll create a section and choose the products or posts that are the latest ones to display only on the homepage.

I’ll take the restaurants as an example for products.

![the example of creating the latest restaurants section.](https://imgur.elightup.com/6EhYqsk.png)

## Preparation

Here, we’ll display the latest restaurants first and then the oldest ones. Each restaurant is a post of a custom post type. All the restaurants will have detailed information including name and image (are the title and featured images of the post) and other extra information such as address, logo, voucher (are saved in different custom fields).

So, here are the tools we need.

* [Meta Box](https://metabox.io/) to have the framework for creating custom post types and custom fields. It’s free and you can download it directly from [wordpress.org](https://wordpress.org/plugins/meta-box/).
* [MB Custom Post Type & Custom Taxonomies](https://metabox.io/plugins/custom-post-type/): to a create post type named Restaurant;
* [MB Builder](https://metabox.io/plugins/meta-box-builder/): to create and configure custom fields to save restaurants’ extra information;
* [MB Views](https://metabox.io/plugins/mb-views/): to create a WordPress template for the section.

## 1. Creating a new custom post type

Go to **Meta Box > Post Types** to create a new post type.

![Create a new post type for the latest products](https://imgur.elightup.com/cIExZCY.png)

After publishing, you will see a new **Restaurant** menu in the **Admin Dashboard**.

![The newly created custom post type appears on the menu dashboard](https://imgur.elightup.com/Ip1pYfc.png)

## 2. Creating custom fields

Go to **Meta Box > Custom Fields** to create a new field group.

![Create Custom Fields for the lastest products.](https://imgur.elightup.com/0XOJMvV.png)

My fields are quite simple so just create them as usual. Note that you should use the **easy-to-remember** ID since we’ll use them in the next step.

For the **Status** and **Voucher** information, I choose the **Select** and **Checkbox List** field respectively to add some options in the **Choices** box.

![Add options to the Status field](https://imgur.elightup.com/IZYsZlG.png)

![Add options to the Voucher field](https://imgur.elightup.com/zBcGWDw.png)

After creating all the fields, move to the **Settings** tab, choose **Location** as **Post Type** and select the **Restaurant** to apply these created fields to that post type.

![Choose the post type as Restaurant in Location section.](https://imgur.elightup.com/j8ix3Jc.png)

Now, when creating a post in the Restaurant post type, you’ll see all the fields.

![Enter the information for the post.](https://imgur.elightup.com/albVCmK.png)

## 3. Displaying posts and its information on the page

Go to **Meta Box > Views** to create a new template.

In the **Template** tab, add this code:
```
{% set args = { post_type: 'restaurant', posts_per_page: -1, orderby: 'date', order: 'DESC' }
%}
{% set posts = mb.get_posts( args ) %}
{% for post in posts %}
            ………
{% endfor %}
```
![Use MB Views to create a new template for the latest products.](https://imgur.elightup.com/njcRNNo.png)

This code is used to display the list of posts (restaurants) in the **descending order**. We’ll  display all the information of the restaurants such as featured images, vouchers, logos, restaurants’ names, addresses, open/close status and **View Detail** buttons.

**Explanation**:

* `{% set args = { post_type: 'restaurant', posts_per_page: -1, orderby: 'date', order: 'DESC' } %}`: This code declares the args variable that gets the data from the post type that has the ID as 'restaurant';
* `posts_per_page: -1` is used to get all the posts from the post type I want. In case that you just want to display a limited number of products, you just have to change -1 by any number you want;
* `orderby: 'date'`: to display the posts according to the publishing date order;
* `order: 'DESC'`: to display the latest posts first, then the older posts. If you want to display the oldest to the latest ones, replace 'DESC' them with 'ASC';
* `{% set posts = mb.get_posts( args ) %}`: this transfer the returned data of the args variable to the posts variable;
* `{% for post in posts %}`: this loop will list the posts;

Inside the loop, insert fields which we want to get the data from.

![Inside the loop, insert fields which we want to get the data from](https://imgur.elightup.com/B8TpKcm.gif)

![The shortcode is generated after click Public.](https://imgur.elightup.com/3tGFCK1.png)

For easier styling later, you can add some div tags like this:

![add soem dic tags](https://imgur.elightup.com/o4rmOuA.png)

Then, scroll down to the **Settings** tab, select **Shortcode** in the **Type** section to save this template as a shortcode.

![The shortcode is generated after click Public.](https://imgur.elightup.com/mmq9xkW.png)

After publishing the template, you’ll see the shortcode generated. Just copy and paste it anywhere you want on the website.

![The shortcode is generated after click Public.](https://imgur.elightup.com/hBWD7NI.png)

For example, I’ve already had a homepage built with Gutenberg. I’ll paste it in this position.

![Paste the shortcode to homepage built with Gutenberg.](https://imgur.elightup.com/rVPA1aE.png)

The section for the latest posts will display on the homepage like this:

![display the latest products on homepage with custom field’ value](https://imgur.elightup.com/1KWIwxo.gif)

You can refer to the code that I used here.

## 4. Styling the section

If you want to have advanced styling, go back to the created template in the **Views**. Depending on your idea about the look of the section, you can add both CSS and JS code to the corresponding tab of the view.

![Add code to this CSS tab in Views](https://imgur.elightup.com/KwDRokj.png)

For example, I add CSS like this:

![Add some CSS code](https://imgur.elightup.com/4TxsHPb.png)

To have styling for the status and create slider for the section, we can use some JS by adding code to the **JavaScript** tab in the view.

![use some JS by adding code to the JavaScript tab in the view](https://imgur.elightup.com/GGAVa0d.png)

You can refer to all the code in this post on our [Github](https://github.com/wpmetabox/tutorials/tree/master/display-latest-posts-with-MB-Views).

This is how this section displays on frontend with the final look.

![The result after all steps](https://imgur.elightup.com/r1RmxjF.gif)

# Displaying the latest products - Meta Box + Zion

import LiteYouTubeEmbed from 'react-lite-youtube-embed';
import 'react-lite-youtube-embed/dist/LiteYouTubeEmbed.css';

We’ll create a section and choose the products or posts that are the latest ones to display only on the homepage.

I’ll take the restaurants as an example for products.

![example for displaying the latest products in a section on the homepage using Meta Box and Zion](https://imgur.elightup.com/OnUhpH9.png)

## Video version

<LiteYouTubeEmbed id='wgklwMfolEc' />

## Preparation

We'll display the latest restaurants and then the oldest ones. Each one’s information will be saved in a post of a custom post type. The extra information such as address, logo, voucher will be saved in custom fields.

So we need some tools to do this practice:

* [Meta Box](https://metabox.io) to have the framework for creating custom post type and custom fields. It’s free, so you can download it directly from [wordpress.org](https://wordpress.org/plugins/meta-box/).
* [MB Custom Post Types & Custom Taxonomies](https://metabox.io/plugins/custom-post-type/): to create a new custom post type named Restaurants;
* [MB Builder](https://metabox.io/plugins/meta-box-builder/): to create custom fields for the Restaurant post type in the backend;
Zion Builder (Pro version): to build the page.

## 1. Creating a custom post type

Go to **Meta Box > Post Types > Add New** to create a new post type.

![create a new custom post type](https://imgur.elightup.com/UGv6Sma.png)

After publishing, we’ll have a new menu named **Restaurants** in the **Admin Dashboard**.

![a new menu display on the left sidebar](https://imgur.elightup.com/tsUMKuy.png)

## 2. Creating custom fields

Go to **Meta Box > Custom Fields** to create fields. I’ll create all the fields like this for the illustration purpose only:

![the custom fields that we'll create for the post type](https://imgur.elightup.com/8QB87vl.png)

There are no special settings for them.

After creating all the fields, move to the **Settings** tab. Remember to choose the **Location** as **Post Type** and select your product’s post type to apply these fields to it.

![set location for the fields to apply them to the wanted post type](https://imgur.elightup.com/u6j1aPR.png)

Now, when creating a new post in my **Restaurant** post type, the custom fields will be there.

![the custom fields displayed in the post editor](https://imgur.elightup.com/vgVr0Cm.png)

## 3. Adding a section for the latest products

### Creating and configuring the section

Let’s edit a page to add the section. I’ll take the homepage and **edit it with Zion Builder**.

![edit the homepage with Zion builder](https://imgur.elightup.com/QBJdACX.png)

First, add a **Section** element to the page. Then, add a **Heading** for it.

![add a section element in the homepage](https://imgur.elightup.com/YKyOBSB.png)

![add a heading for the section](https://imgur.elightup.com/cm51Klz.png)

Next, add a **Container** and a **Column** element inside it.

![add a container inside the section](https://imgur.elightup.com/nXcXLOt.png)

![Add a Column element](https://imgur.elightup.com/mPNhMHQ.png)

In the settings of the **Column** element, go to the **Advanced** tab > **Repeater Options** and enable the repeater provider.

![enable the repeater provider for the column](https://imgur.elightup.com/GHIcLD6.png)

Choose the **Query type** as **Query builder** and select the **Post type** as the post type you want. In my case, it is **Restaurant**.

![query the posts from the wanted post type](https://imgur.elightup.com/XQ0dPUI.png)

Since we’ll display the latest posts first then the oldest ones, set order posts by **date** and then choose the **Descending** option.

![set order for the posts](https://imgur.elightup.com/AVlGARR.png)

Remember to **enable the repeater consumer**.

![enable the repeater consumer](https://imgur.elightup.com/DShULdO.png)

But, it will display all the posts in the chosen post type. So, enter a number to the **Posts per page** box to limit the number of posts. I set 10 here, so only the 10 latest posts will display in the section.

![enable the repeater consumer](https://imgur.elightup.com/6BGUqNF.png)

Because we haven’t chosen any kind of information of the product to show yet, it’s still blank there.

### Displaying products information into the section

Let’s do it by adding some elements.

Add an **Image** element to show the featured image of the post. Then, click the **Use dynamic data** button. In the list of displaying options, find the **Featured image** in the **Post** section.

![Use dynamic data button to get data from posts](https://imgur.elightup.com/KPJJLgR.png)

Now, all the featured images of the restaurants are shown.

![the data from posts are obtained](https://imgur.elightup.com/dUZJ90J.png)

Do likewise for the name of the restaurant, means the post title. Choose a **Heading** element > **Use dynamic data > Post Title**.

![get post titles for the name of restaurants](https://imgur.elightup.com/jkFfzLD.png)

For the address, choose the **Text** element. Then, also click the **Use dynamic** data button. Since the address is saved in a custom field created by Meta Box, find |**Meta Box Field** in the list of options.

![Use dynamic data to get data from the custom fields created by Meta Box](https://imgur.elightup.com/qZAGjOd.png)

Then, choose the corresponding field.

![choose the wanted fields to get the corresponding data](https://imgur.elightup.com/StncaRP.png)

Now, the addresses corresponding to each restaurant will be shown.

![the addresses corresponding to each restaurant will be shown](https://imgur.elightup.com/VQ19mPp.png)

For other information such as **Voucher** and **Logo**, do likewise.

![Add a Text element and link it to the Voucher field](https://imgur.elightup.com/SKqhCc3.png)

![Add a Image element and link it to the Logo field](https://imgur.elightup.com/kuhLDuH.png)

Now, all the information of the restaurant has been obtained and displayed in a section on the Homepage.

![all the information of the restaurant has been obtained and displayed in a section on the homepage](https://imgur.elightup.com/VThxpkm.png)

## 4. Styling the section

If you want to have more styling to make this section more lively, you can easily do it in Zion visual builder.

Here, I just set the layout and change the style of some elements.

![style the layout of the section as you want in Zion visual builder](https://imgur.elightup.com/eOM2VD4.png)

For further styling, you can use some CSS code.

![use CSS for advanced styling](https://imgur.elightup.com/OFF1lNj.png)

Then the section will have a new look as below:

![The result after all steps](https://imgur.elightup.com/OnUhpH9.png)

# Displaying the latest products - Meta Box + Kadence

import LiteYouTubeEmbed from 'react-lite-youtube-embed';
import 'react-lite-youtube-embed/dist/LiteYouTubeEmbed.css';

In today's practice, we're going to show the latest products in a section on a page using Meta Box and Kadence.

We take the restaurants as an example for the posts as well as for the products:

![Example of displaying the latest products](https://imgur.elightup.com/01E3Bmk.png)

## Video version

<LiteYouTubeEmbed id='XdOk6JDqsz8'/>

## Preparation

As I said before, my products are restaurants. Each restaurant will be a post in a custom post type. In this section, only the 6 latest restaurants will be displayed.

The name of the restaurant and its image are the title and featured image of the post. Further, you may want to add some extra information about your products. I also have something such as logo, voucher, and address. This extra information will be saved in the custom fields created with Meta Box.

For this practice, we need these tools:

* [Meta Box core plugin](https://wordpress.org/plugins/meta-box/): to have the framework for creating custom post types and custom fields;
* [MB Custom Post Type](https://metabox.io/plugins/custom-post-type/): to create a custom post type for the products;
* [MB Builder](https://metabox.io/plugins/meta-box-builder/): to have an intuitive UI to create custom fields in the backend;
* **Kadence**: to build the page and create a section to display the latest posts. In this practice, I also use the pro version of Kadence.

## 1. Creating a new custom post type

Go to **Meta Box** > **Post Types** > **New Post Type** to create a new post type for the products.

![Create a new custom post type](https://imgur.elightup.com/pcT8HOJ.png)

## 2. Creating custom fields

Go to **Meta Box** > **Custom Fields** to create fields to save some extra information. These are the fields that I’ll create:

![The created custom fields](https://imgur.elightup.com/adhttur.png)

After creating all the fields, move to the **Settings** tab > **Location** > choose **Post Type** as the **Restaurants** post type to apply these fields to this post type.

![Example of displaying the latest products](https://imgur.elightup.com/54ft9WW.png)

Go to the post editor, you will see all of the created custom fields.

![Set location for the created fields as post type](https://imgur.elightup.com/IAKTEc1.png)

Just fill in the information.

## 3. Adding the section to the homepage

Let’s edit the homepage to create a section for the latest restaurants.

First, add a **Heading** block.

![Add a Heading block to name the section.](https://imgur.elightup.com/N11vyYC.png)

To display the wanted posts, we need the **Query Loop** block.

![The Query Loop block to display the wanted posts.](https://imgur.elightup.com/i8QsY97.png)

After choosing a template for the Query Loop, you will see some default blog posts displayed.

![Default blog posts](https://imgur.elightup.com/1Vu81kx.png)

Their order is by date and descending. It means that the latest post will be shown first, followed by the older ones. That’s exactly what we want.

Now, our work is just changing the posts from blog posts to restaurants. Before that, you can remove some information from the post if you don’t want to display.

To change the posts to the restaurants, move to the **Post Type** section on the right sidebar and choose your post type from the list. In this case, it’s Restaurant.

![Change the posts to the restaurants.](https://imgur.elightup.com/wvtBCyw.png)

Look at the picture below! You can see that the titles are replaced by the restaurants’ names.

![The restaurants’ names appear.](https://imgur.elightup.com/pQgpHD6.png)

It’s time to get some information for the restaurants.

First, add the **Advanced Image** block to display the restaurant’s image.

![Add the Advanced Image block to display the restaurant’s image.](https://imgur.elightup.com/rROhRIz.png)

There is an icon in the picture below to enable dynamic data for this block. Click on the icon, then choose the **Featured Image** from the list.

![Enable dynamic data for the Advanced Image block.](https://imgur.elightup.com/Va8AwRy.gif)

Next, add a **Paragraph** block for the voucher information.

![Add a Paragraph block for the voucher information.](https://imgur.elightup.com/ncKh6H3.png)

Click on the **Dynamic Data** button, and choose **Post Custom Field** option since the voucher information is saved in a custom field.

![On the Dynamic Data button, choose Post Custom Field option as the voucher information is saved in a custom field.](https://imgur.elightup.com/zcun9om.png)

After that, in the **Custom Field** section, we should choose the **Custom Input** option instead of choosing a field as usual. This is because the **Voucher** field is the **Checkbox List** type, and I want to get the label of the selected option from the field.

![In the Custom Field section, choose the Custom Input option.](https://imgur.elightup.com/D0lvNJh.png)

In the **Custom Meta Key** section, fill in the ID of the **Voucher** field.

![In the Custom Meta Key section, fill in the ID of the Voucher field.](https://imgur.elightup.com/sjDcUF3.png)

Now, the voucher information will not display, just a text like this will display instead.

![The voucher information will not display.](https://imgur.elightup.com/EQ3VxZa.png)

Don’t worry! You will see the right information on the frontend. So, keep moving.

To get the restaurant's address, add another **Paragraph** block and add dynamic data for it.

![To get the restaurant's address, add another Paragraph block and add dynamic data for it.](https://imgur.elightup.com/niwXUZh.gif)

The logo will be the same as the feature image. So, choose an **Advanced Image** block and add dynamic data for it. Also choose **Post Custom Field**, then select the name of the field that saves the logo.

![Get the logo information.](https://imgur.elightup.com/fbe1qGo.gif)

If you have more kinds of information for your products, just follow this way to display them.

Finally, I set the number of posts to display in this section as well as change the layout to the **Grid** style.

![Set the number of posts as well as change the layout to the Grid style.](https://imgur.elightup.com/DESNmos.png)

Go to the homepage, you can see all of the information about the restaurants displayed correctly.

![All of the information about the restaurants displayed correctly.](https://imgur.elightup.com/EYqkotZ.png)

## 4. Styling the section

Go back to edit the homepage. You can add some classes for the blocks if you want to use some CSS to style them.

![Add some classes for the blocks.](https://imgur.elightup.com/lvFxvCm.png)

You can also change some settings for each block.

For advanced style, you may want to use some CSS. Go to the **Customizer** section > **Additional CSS** and add some code.

![Go to the Customizer section > Additional CSS and add some code.](https://imgur.elightup.com/9fjCotG.png)

I uploaded all of the code on [Github](https://github.com/wpmetabox/tutorials/blob/master/display-the-latest-products-with-Kadence/custom.css), you can refer to it.

After adding some CSS, you can see the new look of the section immediately.

![Example of displaying the latest products](https://imgur.elightup.com/01E3Bmk.png)

# Displaying all listings on a map with Meta Box

import LiteYouTubeEmbed from 'react-lite-youtube-embed';
import 'react-lite-youtube-embed/dist/LiteYouTubeEmbed.css';

If you own a chain restaurant, coffee shop, store, or even a company that has different branches in different cities, then you may want to markup all of them on a single map, and show this network on your website. Meta Box will give you an easy way to find exactly what you need!

I created a map like that.

![Listings on the map displayed at the same time](https://imgur.elightup.com/MhunFC7.png)

There are several listings on the map displayed at the same time. They are all the restaurants in a chain. Each one of them has a custom marker icon. When clicking on the marker, a popup is displayed with the restaurant name and address.

## Video Version

<LiteYouTubeEmbed id='xSHhNiiOngI' />

## Preparation

To have each restaurant displayed in each place, we should save the information about each restaurant in a post of a custom post type, and, obviously, include its location. In this practice, I use custom fields for the location.

Here are the tools that we will use in this practice:

* [Meta Box core plugin](https://wordpress.org/plugins/meta-box/): to have a framework to create a custom post type for the listings and custom fields for the locations;
* [MB Custom Post Type](https://metabox.io/plugins/custom-post-type/): to create a custom post type for the listings;
* [MB Builder](https://metabox.io/plugins/meta-box-builder/): to have a UI in the back end to create custom fields easily;
* [MB Views](https://metabox.io/plugins/mb-views/) (optional): to create a page template for displaying the listings on the map. In another way, you can add code to the theme’s files instead of using this extension. You can choose one of these ways which I’m going to provide you in this practice.

You can install them individually or just use **Meta Box AIO** for all.

## 1. Creating a new custom post type

Go to **Meta Box** and create a new post type for your listings. It can be restaurants, company branches, coffee shops, or fashion stores, etc.

![Create a new post type for your listings](https://imgur.elightup.com/unBszgu.png)

After publishing, you will see a new menu displayed. It's your new post type.

![A new post type displayed on tha dashboard](https://imgur.elightup.com/uPiWu7M.png)

## 2. Creating custom fields

As mentioned, I’m going to create these three fields. Maybe you want more fields for more information, just add them as you go. But for demonstration purposes, I just use these ones.

![The fields that I created for the practice](https://imgur.elightup.com/zw0o1e3.png)

Go to **Meta Box** and create the fields.

![Go to Meta Box and create the fields](https://imgur.elightup.com/C3DcfGh.png)

Choose the **Text** field for the address.

![Choose the Text field for the address](https://imgur.elightup.com/E1HUQts.png)

I’ll use the **Open Street Maps** field for the map.

![Use the Open Street Maps field for the map](https://imgur.elightup.com/e7tguQ4.png)

I have the **Address** field above where I input the location in text. To autocomplete the address when you type some text in the **Address** field and connect it with the map, we should fill in the ID of the **Address** field into the settings of the map field.

![Fill in the ID of the Address field into the settings of the map field](https://imgur.elightup.com/WrtwGAH.png)

Then, you can type some text to the **Address** field and choose one from the suggested list, or just click on the map, drag and drop the marker to set the location. To know more about this field type, please dig in [our documentation](https://docs.metabox.io/fields/osm/) for more detail.

For the marker icon, I choose a URL field to save the icon link.

After creating all the fields, move to the **Settings** tab. Remember to choose the **Location** as **Post type** and select **Restaurant** to apply these fields to it.

![Choose the Location as Post type and select Restaurant to apply these fields](https://imgur.elightup.com/oKerr3F.png)

Go to the post editor, you will see the created custom fields.

![The created custom fields](https://imgur.elightup.com/oQWGAQO.png)

## 3. Displaying the map and listings

I’m going to have a page for the map only. In your case, you might want to add some content to the page, but I’ll skip it to keep this practice simple.

![Create a new page](https://imgur.elightup.com/rYfIyph.png)

I’ll create a template for the page using both two ways:
1.** Adding code to the theme’s files**: you should add some files to the theme’s folder as well as add code to several different files.
2. **Using the MB Views extension of Meta Box**: just work on a place only for all. Besides that, the template will not be affected when you change the theme.

You should experiment yourself to find which makes sense to you.

### 3.1. Method 1: adding PHP code to the theme

#### 3.1.1. Adding files

Go to your theme folder, and add a new **PHP file** for the page template. You can name it another way as you want.

![Add a new PHP file for the page template](https://imgur.elightup.com/c3mZqA7.png)

We’ll use some **JavaScript** for the map, so go to the **JS** folder, and add a new file.

![Go to the JS folder](https://imgur.elightup.com/gsaNrRV.png)

![Add a new file](https://imgur.elightup.com/xSyJPwk.png)

#### 3.1.2. Adding template

Now, go to the created **PHP file** and add some code.

```
<?php
/**
* Template Name: Listing on a map
*/
get_header();
?>
<div id="map_ID" style="width: 100%; height: 600px"></div>
<?php get_footer(); ?>
```

![Go to the created PHP file and add some code](https://imgur.elightup.com/BSl30XI.png)

**In there:**

` get_header(); and <?php get_footer(); ?> ` are to load the header and footer just like any other pages in your theme.

![This codes is to load the header and footer just like any other pages in your theme](https://imgur.elightup.com/UWcoXrL.png)

` <div id="map" style="width: 100%; height: 600px"></div> ` is the main content area of the page, it simply shows a **Div** with a specific width and height. The **Div** will be used to display the map via this HTML ID: ` id="map" `.

![Show a Div with a specific width and height](https://imgur.elightup.com/0xt1lEV.png)

Now, go to the created page. Choose the template that we have just created.

![Choose the template that we have just created](https://imgur.elightup.com/lqkD0R9.png)

#### 3.1.3. Getting Data

Next, to regulate which content will be displayed on the page, go to add code to the functions.php file.

![Go to add code to the functions.php file](https://imgur.elightup.com/KaEyIav.png)

```
add_action( 'wp_enqueue_scripts', function() {
    if ( is_page_template( 'tbl-listings-map.php' ) ) {
        wp_enqueue_style( 'leaflet', 'https://unpkg.com/leaflet@1.5.1/dist/leaflet.css', [], '1.5.1' );
        wp_enqueue_script( 'leaflet', 'https://unpkg.com/leaflet@1.5.1/dist/leaflet.js', [], '1.5.1', true );

        wp_enqueue_script( 'list', get_parent_theme_file_uri( 'js/list.js' ), ['jquery', 'leaflet'], '1.0', true );

        $locations = [];
        $query = new WP_Query( [
            'post_type' => 'restaurant',
        ] );
        foreach ( $query->posts as $post ) {
            $location            = rwmb_get_value( 'location', '', $post->ID );
            $location['title']   = $post->post_title;
            $location['address'] = rwmb_get_value( 'address', '', $post->ID );
            $location['icon']    = rwmb_get_value( 'icon_url', '', $post->ID );
            $locations[]         = $location;
        }
        wp_localize_script( 'list', 'Locations', $locations );
    }
} );
```

![Add code to the functions.php file](https://imgur.elightup.com/epznESR.png)

**In there:**

` if ( is_page_template( 'tbl-listings-map.php' ) ) { ` is to check if the current page is using the created template, the below lines of code will be applied.

![Check if the current page is using the created template, the below lines of code will be applied](https://imgur.elightup.com/WJcrHjp.png)

` 'tbl-listings-map.php' ` is the name of the **PHP** file that I have just created, you should replace it with your own.

![The name of the PHP file that I have just created](https://imgur.elightup.com/k8y8UsX.png)

```
wp_enqueue_style( 'leaflet', 'https://unpkg.com/leaflet@1.5.1/dist/leaflet.css', [], '1.5.1' );
wp_enqueue_script( 'leaflet', 'https://unpkg.com/leaflet@1.5.1/dist/leaflet.js', [], '1.5.1', true );
```

I’m going to use the **Leaflet library** for **CSS** and **JS** to have the map with a beautiful look. So those lines are to enqueue the libraries.

![Those lines are to enqueue the libraries](https://imgur.elightup.com/k5Aq4ci.png)

```
wp_enqueue_script( 'list', get_parent_theme_file_uri( 'js/list.js' ), ['jquery', 'leaflet'], '1.0', true );
```

This is to enqueue the created file in the **JS** folder.

![Enqueue the created file in the JS folder](https://imgur.elightup.com/1nbh4Ax.png)

I created an array to store all the data about the locations.

![The array to store all the data about the locations](https://imgur.elightup.com/Pm0uV7v.png)

```
        $query = new WP_Query( [
            'post_type' => 'restaurant',
        ] );
```

This line of code is the query to get data from the wanted post type. And, ` restaurant ` is the **ID** of the post type of the restaurants that I’m using.

![The query to get data from the wanted post type](https://imgur.elightup.com/fjdhgrg.png)

There will be multiple posts since there are multiple locations, so we have a loop.

![We have a loop](https://imgur.elightup.com/OrLMlOe.png)

Inside the loop, these are the associative arrays to get data of each element of the location.

![The associative arrays to get data of each element of the location](https://imgur.elightup.com/wrqWrhl.png)

We use the ` rwmb_get_value ` function to get data from the custom fields. ` 'location' `, ` 'address' `, and ` 'icon_url' ` are the **ID** of the fields.

![The function to get data from the custom fields](https://imgur.elightup.com/kUsqDXG.png)

` rwmb_get_value('location','',post->ID) ` will return values from the **Location** field which is the **Open Street Map**. They include both the latitude and longitude.

![This codes will return values from the Location field which is the Open Street Map](https://imgur.elightup.com/k29zyvE.png)

` $post->post_title; ` is to get the title of the post, it’s also the restaurant name.

![Get the title of the post, it’s also the restaurant name](https://imgur.elightup.com/ieixc7S.png)

` rwmb_get_value( 'address', '', $post->ID ); ` is to get the address in text from the **Address** field.

![Get the address in text from the Address field](https://imgur.elightup.com/RrMLteq.png)

` rwmb_get_value( 'icon_url', '', $post->ID ); ` is to get the icon for the marker.

![Get the icon for the marker](https://imgur.elightup.com/ul7VgZN.png)

All of that data will be transferred to the created array by this: ` $locations[] = $location; `

` wp_localize_script( 'list', 'Locations', $locations ); ` is to pass the values from the ` $locations ` array to a **JavaScript Object** that has named **Locations**.

![Pass the values from the $locations array to a JavaScript Object that has named Locations](https://imgur.elightup.com/yynyvIp.png)

We’ll use this object in the created **JS** file to display all the locations on the map.

#### 3.1.4. Displaying data using JavaScript

We just got the data so far and haven't displayed them yet.

To do it, go to the created **JS** file to add code.

```
( function ( document, Locations, L ) {

      // Set the first location.
      var First_Location_Point = L.latLng( Locations[ 0 ].latitude, Locations[ 0 ].longitude );

      // Map options.
      var map_options = {
            center: First_Location_Point,
            zoom: 13
      };

      // Initialize the map.
      var mapObject = L.map( document.querySelector( '#map_ID' ), map_options );

       // Set tile layer for Open Street Map.
    var tileLayer = L.tileLayer('https://{s}.tile.openstreetmap.org/{z}/{x}/{y}.png', {
        attribution: '© <a href="https://www.openstreetmap.org/copyright">OpenStreetMap</a> contributors'
    });
      mapObject.addLayer( tileLayer );

      // // Show marker for each location.
      Locations.forEach( function ( location_on_map ) {
            // Marker options.
            var marker_options = {
                  title: location_on_map.title,
                  icon: L.icon( {
                        iconUrl: location_on_map.icon
                  } )
            };
            var Location_Point = L.latLng( location_on_map.latitude, location_on_map.longitude );
            var marker = L.marker( Location_Point, marker_options ).addTo( mapObject );

            // Show name of the restaurant when click on the icon.
            marker.bindPopup( '<b>' + location_on_map.title + '</b><br>' + location_on_map.address ).openPopup();
      } );

} )( document, Locations, L );
```

![Go to the created JS file to add code](https://imgur.elightup.com/DmbNTMW.png)

` ( function ( document, Locations, L ) { ` is to get data from the created **JavaScript** object.

![Get data from the created JavaScript object](https://imgur.elightup.com/HMBo5hj.png)

When someone goes to the page and looks at the map for the first time, the map should be fixed at a specific point. So, I created a point via this line:

```
var First_Location_Point = L.latLng( Locations[ 0 ].latitude, Locations[ 0 ].longitude );
```

This point will be regulated based on the first set of values in the stored value string.

![This point will be regulated based on the first set of values in the stored value string](https://imgur.elightup.com/rgn5cGG.png)

This part is to set the options for the map.

![Set the options for the map](https://imgur.elightup.com/4sWiOkw.png)

The center point of the map shows for the first time when a user looks at it will be set as the first location.

![Show for the first time when a user looks at it will be set as the first location](https://imgur.elightup.com/FabFBAR.png)

```
var mapObject = L.map( document.querySelector( '#map_ID' ), options );
```

This is to initialize the map. It also means to display the map. The map will be displayed in the place where this **HTML ID** was set. We did it in the php file for the page template.

![Initialize the map](https://imgur.elightup.com/ztpnYrY.png)

The map will have settings as the options as we set.

![The map will have settings as the options as we set](https://imgur.elightup.com/d8q7cam.png)

This part is to set a tile layer, and copyright for the map.

![Set a tile layer, and copyright for the map](https://imgur.elightup.com/D7bJdGh.png)

The next part is the main one of this practice to show all the markers on the map at the same time.

![The main one of this practice to show all the markers on the map at the same time](https://imgur.elightup.com/BVrT2jr.png)

```
Locations.forEach( function ( location_on_map ) { } );
```

This is a loop to get all the data from this object.

![A loop to get all the data from this object](https://imgur.elightup.com/JdjwiwJ.png)

I created two variables to store the data about each location.

![I created two variables to store the data about each location](https://imgur.elightup.com/YhBPn8R.png)

Then transfer all of them to the ` mapObject ` variable. This variable is the one we use to initialize the map above. It also means that we finished adding markers to the map.

![Transfer all of them to the mapObject variable](https://imgur.elightup.com/EuLRuUK.png)

To have a popup to show the detailed information of each marker when clicking on each one,  I have this:

```
marker.bindPopup( '<b>' + location_on_map.title + '</b><br>' + location_on_map.address ).openPopup();
```

![A popup to show the detailed information of each marker when clicking on each one](https://imgur.elightup.com/DIpKWsH.png)

Now, go to the page on the frontend. If nothing goes wrong, here's what you'll see.

![Listings on a map page](https://imgur.elightup.com/G67g126.png)

For each marker, display a popup when click on the icon of each restaurant. The popup will show the title and address of the restaurant in detail.

In the case that you don’t want to touch the theme files, let’s go ahead to see another way with **MB Views**.

### 3.2. Method 2: Using MB Views

Go to **Views** in **Meta Box** and create a new template.

![Go to Views in Meta Box and create a new template](https://imgur.elightup.com/gjQkCn8.png)

#### 3.2.1 Adding template

I’m going to add code to the **Template** tab. The code will be quite the same as what we added in both php files in the first method.

```
<link rel="stylesheet" href="https://unpkg.com/leaflet@1.5.1/dist/leaflet.css" />

<div id="map" style="width: 100%; height: 600px"></div>

{% set args = { post_type: 'restaurant' } %}
{% set posts = mb.get_posts( args ) %}
{% set restaurantsArray = [] %}
{% for post in posts %}
	{% set restaurantsArray = restaurantsArray|merge(
      [
         {
            'longitude':
            'latitude':
            'address':
            'title':
            'icon':
         }
      ] ) %}
{% endfor %}

<div class="restaurants-list" data-items='{{restaurantsArray|json_encode()}}'></div>

<script src="https://cdnjs.cloudflare.com/ajax/libs/jquery/3.7.1/jquery.slim.min.js"></script>
<script src="https://unpkg.com/leaflet@1.5.1/dist/leaflet.js"></script>
```

![Add code to the Template tab](https://imgur.elightup.com/mJ0Xwqa.png)

You can see that there is not much difference in code between the two methods.

` <link rel="stylesheet" href="https://unpkg.com/leaflet@1.5.1/dist/leaflet.css" /> ` is to register the **Leaflet CSS Library**.

![Register the Leaflet CSS Library](https://imgur.elightup.com/3JF24tS.png)

` <div id="map" style="width: 100%; height: 600px"></div> ` is to display the map. We also use **JavaScript** later and use ` id='map_ID' ` of the map.

![Display the map](https://imgur.elightup.com/4A3325i.png)

We have ` {% set args = { post_type: 'restaurant' } %} ` to query data from the restaurant post type.

![Query data from the restaurant post type](https://imgur.elightup.com/ttyedFH.png)

We use the ` mb.get_posts( args  ) ` function to get posts.

![The function to get posts](https://imgur.elightup.com/lkg3IIR.png)

I’m also creating a new empty array to get data about the location from each post. You can name the array as any name as you want.

![Create a new empty array to get data about the location from each post](https://imgur.elightup.com/q16OKVQ.png)

And then, have a loop to get data from all the posts, and assign them to the array using this:
` {% set restaurantsArray = restaurantsArray|merge( `.

![Have a loop to get data from all the posts, and assign them to the array](https://imgur.elightup.com/UlNApuR.png)

These are the keys of the data we’re getting from posts. They are saved in some fields of the post, so we will insert a corresponding field for each one of them.

![Insert a corresponding field for each one of them](https://imgur.elightup.com/qXCseqe.png)

Click on the **Insert Field** button, and choose a field from the list.

![Click on the Insert Field button, and choose a field from the list](https://imgur.elightup.com/ad6z4aG.png)

The longitude is the data saved in the **Open Street Map** field. It is named **Location**, so choose it.

![he longitude is the data saved in the Open Street Map field. It is named Location](https://imgur.elightup.com/1n159rT.png)

There will be some options of the map for the output data, just choose **Longitude**.

![Choose Longitude](https://imgur.elightup.com/cQ9DDp7.png)

After removing the curly braces, the generated code will be like this.

![After removing the curly braces, the generated code will be like this](https://imgur.elightup.com/F8VxbRZ.png)

Do likewise for the latitude. Remember that these data are compulsory to locate a position on the map.

![Insert the latitude data](https://imgur.elightup.com/XgIHp2G.png)

Next, insert the **Address** fields.

![Insert the Address fields](https://imgur.elightup.com/5yioppB.png)

Add the **Post title**.

![Add the Post title](https://imgur.elightup.com/ywI9PVc.png)

And, we also have a field for marker icons.

![We also have a field for marker icons](https://imgur.elightup.com/5CHkij6.png)

In the first method, **WordPress** has the ` wp_localize_script) ` function to convert data from **PHP** to **JavaScript**. But with **MB Views**, we do not use it. Instead of that, we use the ` class="restaurants-list" ` **HTML** class and transfer all the values from the `restaurantsArray` array to this class.

![We use the class="restaurants-list" HTML class and transfer all the values from the restaurantsArray array to this class](https://imgur.elightup.com/UA0lYjs.png)

This line of code is to declare the **Leaflet JavaScript library**.

![This line of code is to declare the Leaflet JavaScript library](https://imgur.elightup.com/1nt1Vio.png)

That’s all for the template.

#### 3.2.2. Adding JavaScript

Still in the view, move to the **JavaScript** tab, and use the code that we use in the **JS** file in the first way.

![Use the code that we use in the JS file in the first way](https://imgur.elightup.com/ivDGVdm.png)

There will be a difference in the first part since we use **HTML** class to store data:

```
(function (document, L) {

      const Locations = $('.restaurants-list').data('items')

})(document, L);
```

![Use HTML class to store data](https://imgur.elightup.com/1NXCBya.png)

All the following lines of code are exactly the same with the script we use in the JS file in the first method. So, I’ll not dig into them anymore.

#### 3.2.3. Applying template to the page

Go to the **Settings** section of the view, and set the type as **Singular**.

![Go to the Settings section of the view, and set the type as Singular](https://imgur.elightup.com/SAPcQFG.png)

Then add a rule to set the location as the created page.

![Add a rule to set the location as the created page](https://imgur.elightup.com/CDaEFRQ.png)

Go to the page, the map and all the markers also displayed.

![The map and all the markers also displayed](https://imgur.elightup.com/2CFxh2z.png)

# Displaying the most viewed posts - MB Views

import LiteYouTubeEmbed from 'react-lite-youtube-embed';
import 'react-lite-youtube-embed/dist/LiteYouTubeEmbed.css';

Today, we’ll showcase the most viewed posts on the homepage to attract customers. It’s so easy with **MB Views**. Let’s take the restaurants as a demo for this practice.

![Example of this practice](https://imgur.elightup.com/4kOQh7l.png)

## Video version

<LiteYouTubeEmbed id='JEph7bhDhm8' />

## Preparation

We’ll create a **custom post type** named **Restaurants** and each restaurant is a post of that post type.

Besides displaying the default information of posts like title and feature image, which are the name and the image for restaurants, you may want to display some extra information. I also take some information about address, voucher, and logo for example. They’ll be saved in custom fields of the posts.

Here are the tools we need for this practice:

* [Meta Box core plugin](https://wordpress.org/plugins/meta-box/): to have a framework for creating a custom post type and custom fields;
* [MB Custom Post Type](https://metabox.io/plugins/custom-post-type/): to create custom post types for the restaurants;
* [MB Builder](https://metabox.io/plugins/meta-box-builder/): to have a UI on the back end to create custom fields to save the extra information of the restaurants;
* [MB Views](https://metabox.io/plugins/mb-views/): to create a template for the most viewed posts section.
* **Post Views Counter** plugin: to count the post views.

Moreover, we’ll use Gutenberg only. But if you use any page builder, you can also follow this tutorial.

## 1. Creating a new custom post type

Go to **Meta Box > Post Types** to create a new post type for the restaurants.

![Create a new custom post type](https://imgur.elightup.com/9bSixyT.png)

## 2. Creating custom fields

Go to **Meta Box > Custom Fields > Add New** to create custom fields.

![Create custom fields](https://imgur.elightup.com/JqG6idp.png)

After creating all the needed fields, go to the **Settings** tab > **Location** > choose **Post Type** as the **Restaurant** post type that we’ve just created to apply the custom fields to it.

![Set Location for the created fields](https://imgur.elightup.com/XGY0Ch6.png)

In the post editor, you will see all of the newly created custom fields.

![Newly created custom fields in the post editor](https://imgur.elightup.com/0tzGv05.png)

## 3. Counting the posts view

Normally, there is no information about the posts’ view available in WordPress as default. We must do it on our own. So, just install the **Post Views Counter** plugin, then go to **Settings > Post Views Counter** and tick the box of the post type you want to count the posts view.

![Set up to count the post views](https://imgur.elightup.com/U9NGVTt.png)

Right after that, you can see the view numbers of each restaurant appear. Based on these numbers, we’ll choose which restaurant has the most views and display it in the section.

![Choose the most viewed restaurant and display it in the section](https://imgur.elightup.com/y4mB0Lj.png)

## 4. Creating a template for the section

In this tutorial, I’ll use **MB Views** to create a template for this section. Whether you use page builders or not, you can still create templates in this way.

Go to **Meta Box > Views** to create a new template. In the **Template** tab, add some code to display the restaurant's information.

```php
{% set args = { post_type: 'restaurant', posts_per_page: 6, orderby: 'post_views', order: 'DESC' } %}
{% set posts = mb.get_posts( args ) %}
{% for post in posts %}
    ……..
{% endfor %}
```

Explanation:

* `{% set args = { post_type: 'restaurant'} %}` : is to declare the `args` variable to get all the posts from the Restaurants post type.
* `posts_per_page: 6` : is used to limit the number of posts. You can change the number “6” to any number you want.
* `orderby: 'post_views'` : is to set the order of the post by the posts view.
* `{% set posts = mb.get_posts( args ) %}`: is to declare the `post` variable to admit the return value of the `args` variable.
* `{% for post in posts %}`: this loop helps to list the posts.

Then, insert fields that we want to get the data into the loop.

To get the restaurant image, which is the featured image, choose the **Post thumbnail** option.

![Choose Post Thumbnail option to get the restaurant image](https://imgur.elightup.com/E7XglfO.png)

We just need to insert each field in turn. It includes the default fields such as **Post thumbnail** like we just got above or **Post title**, or even custom fields like **Address, Logo**, and **Voucher**.

After getting all the restaurant information, scroll down to the **Settings** section of the view, and set the type of this view as **Shortcode**.

![Set the type of this view as Shortcode](https://imgur.elightup.com/V6q3uMT.png)

After publishing, a shortcode is generated. Just paste it anywhere you want to display this section.

## 5. Adding the section to the homepage

As I said before, whether we use page builders like Elementor, Brick Builder, Zion Builder, etc, or not, we can use the shortcode generated by MB Views. Just insert it into the place you want on the page.

With the page using Gutenberg for example, add the **Shortcode** block then paste the shortcode inside.

![Add the shortcode block then paste the shortcode inside](https://imgur.elightup.com/nC9htNj.png)

Then, you’ll see the information of the most viewed restaurants.

![The information of the most viewed restaurants is obtained](https://imgur.elightup.com/JiEpqgD.png)

For other page builders, you do likewise and you’ll get the same result.

## 6. Styling the section

Back to the **Views**, let’s edit the template to style the section.

First, add some **div** tags to this template.

![Add some div tags into the template](https://imgur.elightup.com/zipEfKi.png)

Then go to the **CSS** tab of the view and add some code.

![Add some CSS code](https://imgur.elightup.com/YTJRyc7.png)

This code is available on [GitHub](https://github.com/wpmetabox/tutorials/blob/master/display-most-viewed-restaurant-with-mb-views/custom.css), so you can refer to it for more details.

Then, you’ll see a new look of the section. No matter which page builder you use, you’ll see the new appearance.

![The final result](https://imgur.elightup.com/4kOQh7l.png)

# Displaying the most viewed posts - P2 - Meta Box + Oxygen

import LiteYouTubeEmbed from 'react-lite-youtube-embed';
import 'react-lite-youtube-embed/dist/LiteYouTubeEmbed.css';

We are going to create a section to display the most viewed posts on the homepage built with Oxygen. Let’s take restaurants as an example of these posts.

![Example of displaying the most viewed posts](https://imgur.elightup.com/4kOQh7l.png)

## Video version

<LiteYouTubeEmbed id='3P6KJHquRL4' />

## Preparation

Since we're going to display the most viewed posts, we’ll use a third-party plugin to count the post views. It’s the [Post Views Counter](https://vi.wordpress.org/plugins/post-views-counter/) plugin.

For the posts, we’ll create a **custom post type** named **Restaurants**, and each restaurant will be a post of that post type.

When displaying the most viewed posts, you may wish to show more than just the title and featured image (the default fields). In this case, I’ll display extra information about the address, voucher, and logo. They'll be saved in the custom fields of the post. So, we'll use these tool in this practice:

* [Meta Box Lite](https://metabox.io/lite/): to create custom post types and have UI for creating custom fields;
* [Oxygen Builder](https://oxygenbuilder.com/): use its 3.9 version or higher to have native integration with Meta Box;
* [Post Views Counter](https://vi.wordpress.org/plugins/post-views-counter/): to count the post views.

## 1. Creating a new custom post type

Go to **Meta Box > Post Types** to create a new post type for the restaurants.

![Create a new custom post type](https://imgur.elightup.com/MSAfcUL.png)

## 2. Creating custom fields

Go to **Meta Box > Custom Fields > Add New**.

![Create custom fields](https://imgur.elightup.com/JqG6idp.png)

After creating all the needed fields, go to the **Settings** tab > **Location** > choose **Post Type** as the **Restaurant** post type we’ve just created to apply the custom fields.

![Set location for the created custom fields](https://imgur.elightup.com/XGY0Ch6.png)

In the post editor, you will see all of the newly created custom fields appear.

![All created custom fields appear in the post editor](https://imgur.elightup.com/0tzGv05.png)

## 3. Counting the posts view

Normally, there is no information about the posts’ view available in WordPress by default. We must do it on our own. Install the **Post Views Counter** plugin, then go to **Settings** > **Post Views Counter** and check the box next to the post type whose views you want to count.

![Install Post views counter plugin](https://imgur.elightup.com/U9NGVTt.png)

Right after that, you can see the view numbers of each restaurant appear. Based on these numbers, we’ll choose which restaurant has the most views and display it in the section.

![Choose which restaurants have the most views to display in the section](https://imgur.elightup.com/y4mB0Lj.png)

## 4. Creating the section

Edit a page with **Oxygen**, e.g., the homepage.

First, choose the **Section** component to contain all of the restaurant information. Then, add a **Heading** element and enter the title.

![Add a Heading element to enter the title](https://imgur.elightup.com/iTyWClu.png)

### 4.1. Setting a condition

To get all the posts of the **Restaurant** post type, select the **Repeater** component. Then, go to the **Query** section to choose the data source and set conditions.

Normally, you can choose the **default** or **custom** type to get the posts. However, in this case, I only want a specific number of posts to be displayed based on the condition, so I chose the **advanced** query type.

![Choose Advanced query type to display specific number of posts](https://imgur.elightup.com/EdGsVYQ.png)

Now, let’s create conditions to choose which posts to display. We’ll add some query parameters as follows:

First, add a `post_type` parameter to specify that we’ll get only posts from the restaurant post type. In the box, as shown in the image below, enter the ID of the post type for which you want to get the data.

![Add a post_type parameter ](https://imgur.elightup.com/M1RluBt.png)

Then, add another parameter named `meta_query`. This aims to choose which posts in the restaurant post type are displayed.

![Add a meta_query parameter](https://imgur.elightup.com/OP6iU1a.png)

To limit the number of posts to display in the section, we add the `post_per_page` parameter and set the number of posts you want to display.

![Add the post_per_page parameter to limit the number of posts to display](https://imgur.elightup.com/kuZVzor.png)

We’ve completed the condition settings. After applying, there are 6 boxes for 6 posts. It’s equivalent to the number of posts we set for the section.

![There is a box for each post](https://imgur.elightup.com/AAieadn.png)

### 4.2. Displaying the restaurants' information

Now, it’s time to display information about each restaurant. In the div inside the **Repeater** component, add an **Image** component to display the restaurant’s image, then connect it with the post's featured image.

![Add an Image component in the div that is inside the Repeater component](https://imgur.elightup.com/6jmB9MG.png)

For the voucher information, choose a **Text** component and connect it to the corresponding field.

![Choose a Text component for the voucher information](https://imgur.elightup.com/t6dXKk0.gif)

The next piece of restaurant information we want to display is the restaurant’s logo. Choose an Image component. Because the logo field is created by Meta Box and it returns the URL, go to the Image URL tab to get data from this field.

![Choose an Image component for the restaurant's logo](https://imgur.elightup.com/9WELhe2.gif)

To get the restaurant’s name automatically, add the **Text** component and connect it with the post's title.

![Add the text component to get the restaurant's name](https://imgur.elightup.com/3LmuR7n.png)

For the address information, do the same with the **Voucher** field. Add a **Text** component, then connect it to the **Address** field.

![Add a text component ](https://imgur.elightup.com/TQfAjAv.png)

That’s all. Now, the information for all of the most viewed restaurants is now available on the homepage.

![All the information of the most viewed restaurants is available](https://imgur.elightup.com/YOfw77V.png)

## 5. Styling the section

For styling, go back to the page editor with **Oxygen**. Then, choose each component and change the settings to style them.

You can also add some CSS in the **Custom CSS** tab to have a more advanced style.

![Add some CSS code](https://imgur.elightup.com/QfE6Gyt.png)

Go to the homepage; all the featured restaurants are displayed as we want.

![The final result ](https://imgur.elightup.com/88pjwUb.png)

# Displaying the most viewed posts - Meta Box + Bricks

import LiteYouTubeEmbed from 'react-lite-youtube-embed';
import 'react-lite-youtube-embed/dist/LiteYouTubeEmbed.css';

Today, we’ll display the most viewed posts with Meta Box and Bricks. Here is my example:

![Example of displaying the most viewed posts](https://imgur.elightup.com/shVpLBQ.png)

## Video version

<LiteYouTubeEmbed id='EQ6ciFJSSeM' />

## Preparation

As we're going to display the most viewed posts, we’ll use a third-party plugin named [WP Post Views](https://wordpress.org/plugins/wp-post-views/) to count the post views.

For the posts, we’ll create a custom post type named **Restaurants**, and each restaurant will be a post of that post type.

Beside displaying the default information of posts like the title and feature image, which are the name and image for restaurants, you may want to display some extra information. I also take some information about address, voucher, and logo, for example. They will be saved in custom fields.

Here are the tools we need for this practice:

* **[Meta Box Lite](https://metabox.io/lite/)**: to create custom post types and have UI for creating custom fields;
* **Bricks**: to build the homepage and display the most viewed posts section.

## 1. Creating a new custom post type

Go to **Meta Box** > **Post Types** to create a new post type for the restaurants.

![Create a new custom post type](https://imgur.elightup.com/TB2fB1v.png)

## 2. Creating custom fields

Go to **Meta Box** > **Custom Fields** and create custom fields to save the extra information for the post.

![Create custom fields](https://imgur.elightup.com/T0zQrP1.png)

After creating all the needed fields, go to the **Settings** tab > **Location** > choose **Post type** as the **Restaurant** post type we’ve just created to apply the custom fields.

![Set location for the created custom fields](https://imgur.elightup.com/iPANEBR.png)

In the post editor, you will see all of the created custom fields.

![All created custom fields appear in the post editor](https://imgur.elightup.com/zGjKu27.png)

Then, just fill in the information.

## 3. Counting the posts view

Normally, there is no information about the posts’ view available in WordPress by default. In this practice, I’ll add a column of information about the posts viewed in this window below.

![Add a column of information about the posts viewed ](https://imgur.elightup.com/68M4JZg.png)

To do it, in the settings of the **WP Post Views** plugin, check the box in the image below to display the column showing the post views. Then, choose the post type you want to count the posts view. In this case, it’s the **Restaurants**.

![Settings for the WP Post Views plugin](https://imgur.elightup.com/xC3DgV0.png)

Go back to the list of posts, and you will see the new column appear.

![A column of the posts view](https://imgur.elightup.com/j8rEgaf.png)

The number of this column is the number of the posts view. Based on this number, we’ll choose which one has the most views and display it in the section.

## 4. Creating the section

Now, edit the homepage with **Bricks Builder**.

First, select the **Section** element to have the section that shows the most viewed posts.

![Select the Section element to have the section that shows the most viewed posts](https://imgur.elightup.com/EZVHwCH.png)

Next, add a **Heading** element and name the title.

![Add a Heading element and name the title](https://imgur.elightup.com/c9yVS74.png)

In the **Container** element inside the section, select the **Div** element to contain the restaurant’s information.

![Select the Div element to contain the restaurant’s information.](https://imgur.elightup.com/rvvOYHT.png)

### 4.1 Setting the condition

To get the data of restaurants, in the Div element that I mentioned above, enable the **Use query loop** button. And in the **Query** section, choose the **Type** as **Posts**. Then, choose the post type you want to get data from.

![Get the data of restaurants](https://imgur.elightup.com/5wBt9WP.png)

In this case, I would sort the posts by post views to get the posts with the most views. So, in the **Order By** section, choose the **Meta numeric value** option to get the value in numeric.

![Choose the Meta numeric value option to get the value in numeric](https://imgur.elightup.com/ixiR9gy.png)

Move to the **Order meta key** section to fill in `entry_views`, which is generated by **WP Post Views**, to filter the wanted posts.

![In the Order meta key section to fill in entry_views to filter the wanted posts.](https://imgur.elightup.com/nMS6zg4.png)

In the **Order** section, select the **Descending** option to sort the posts in order from the most viewed posts to the fewer viewed posts.

![Select the Descending option to sort the posts in order from the most viewed posts to the fewer viewed posts.](https://imgur.elightup.com/GcHlkGK.png)

The last one is that we should limit the number of posts displayed in the section. So, set the number of posts you want to show in the **Post per page** section.

![Set the number of posts you want to show in the Post per page section.](https://imgur.elightup.com/o6pZ9P1.png)

### 4.2 Displaying the restaurant’s information

Now, it's time to display the information for each restaurant.

Inside the Div, select the **Image** element to display the image of the restaurant.

![Select the Image element to display the image of the restaurant.](https://imgur.elightup.com/ufh9vpS.png)

Then, click the **Select** dynamic data icon and choose the **Featured Image** option.

![Choose the Featured Image option](https://imgur.elightup.com/ytk9w81.png)

As you can see, the image is displayed in the preview.

![The image is displayed in the preview](https://imgur.elightup.com/PY14iBr.png)

For the voucher information, choose the **Basic Text** element. As the restaurant’s voucher is saved in the custom field created by **Meta Box**, also use the **Select dynamic data** icon and select the right field. Then, you’ll see the restaurant’s voucher displayed immediately.

![Get the voucher information](https://imgur.elightup.com/ZHlAeOZ.gif)

To get the restaurant’s name automatically, add the **Post Title** element.

For the address information, do the same with the **Voucher** field. Add a **Basic Text** element, then connect it to the address field.

![Get the address information](https://imgur.elightup.com/e05xHBd.png)

The restaurant's logo is the last piece of information we want to display. Choose the **Image** element. As the images are saved in the custom field, click the **Select dynamic data** icon and select the coresponding field. You see that the logos of restaurants appear.

![Get the restaurant's logo](https://imgur.elightup.com/Jht3oeJ.png)

We have finished getting all the restaurant information that we want to display in the most viewed posts section.

On the frontend, all the most viewed restaurant information is displayed.

![On the frontend, all the most viewed restaurant information is displayed.](https://imgur.elightup.com/rACjA5A.png)

## 5. Styling the section

For styling, go back to the page editor with **Bricks**. Then, choose each element and change the settings to style them.

You also can add some **CSS** to have a more advanced style.

![Add some CSS to have a more advanced style](https://imgur.elightup.com/vOlBj8y.png)

Go to the homepage, all the featured restaurants are displayed as we want.

![All the most viewed restaurants are displayed as we want](https://imgur.elightup.com/shVpLBQ.png)

# Displaying the most viewed posts - Meta Box + Elementor

import LiteYouTubeEmbed from 'react-lite-youtube-embed';
import 'react-lite-youtube-embed/dist/LiteYouTubeEmbed.css';

Sometimes finding the best content or most wanted products on your website can be hard for your visitors. So, [showing the most viewed posts](https://metabox.io/series/most-viewed-posts/) on your homepage or anywhere on your WordPress website will help them a lot to find the most popular ones.

In this practice, I’ll give you a simple step-by-step guide on **how to display the most viewed posts**, or products as usual, using Meta Box and Elementor.

I’m getting restaurants as an example for the products.

![Display the most viewed posts using Meta Box and Elementor](https://imgur.elightup.com/pdRP9MK.png)

## Video version

<LiteYouTubeEmbed id='3cqhwSMqf1g' />

## Preparation

We have some further information about restaurants. This data is stored in posts from a custom post type. And some of them will be saved in the custom fields.

For this practice, we need these tools:

* **Elementor** and its pro version: to build the homepage and display the most viewed posts section;
* **[WP Post Views](https://wordpress.org/plugins/wp-post-views/)**: to count the post views;
* **[Meta Box Lite](https://metabox.io/lite/)**: to create custom post types and have UI for creating custom fields.

## Creating a new custom post type

Go to **Meta Box**, and create a new post type for the products.

![Go to Meta Box, and create a new post type](https://imgur.elightup.com/aOm6syu.png)

After publishing, you will see your post type displayed as a menu.

![post type displayed as a menu](https://imgur.elightup.com/z6DtrVA.png)

## Creating custom fields

Each restaurant, or product, might have extra information, so we’ll create custom fields to save it. These are some typical fields that I created. These fields have no special settings.

![The fields that I created by using Meta Box](https://imgur.elightup.com/7OGHoNx.png)

Go to **Meta Box** to create them.

![Go to Meta Box and create new fields](https://imgur.elightup.com/hdUziby.png)

After creating all the custom fields, go to the **Settings** tab, choose **Location**, as **Post type**, and select **Restaurant** to apply these fields to this post type.

![Apply the fields to the restaurant post type](https://imgur.elightup.com/idVTgfc.png)

Go to the post editor, and you will see all of the created custom fields.

![The created custom fields](https://imgur.elightup.com/78gcJCH.png)

## Setting up to count the post views

I already added some posts for example. Normally, you only see the post title, the date, and nothing else on the screen. There is no number of the post views anywhere as well.

![Just the post title, the date on the screen](https://imgur.elightup.com/LBPxkSc.png)

To have a number of post views, go to the settings of the **WP Post Views** plugin. Check the show post view column box, and choose the post type you want to count the posts view.

![Setting the WP Post Views plugin](https://imgur.elightup.com/VIjQAWY.png)

Then, this plugin will automatically count the views of the posts in this post type. As well as, displays a column showing the post views. Based on the number of views, we’ll choose which one has the most views and display it in the section.

![Display a column showing the post views](https://imgur.elightup.com/4RmHctA.png)

## Displaying product information

First, go to **Elementor**, and create a template to designate which and how the information from a post will be displayed.

![Go to Elementor, and create a template](https://imgur.elightup.com/FESdlO2.png)

Set the template as the **Loop Item**.

![Set the template as Loop Item](https://imgur.elightup.com/Ytjwujj.png)

Also, set the post type to get the right preview.

![Set the post type to get the right preview](https://imgur.elightup.com/sCkmstR.png)

Then, add reasonable elements for getting the wanted information. First, set the **Featured Image** element to display the restaurant's image.

![Set the Featured Image element to display the restaurant's image](https://imgur.elightup.com/AByGVgg.png)

For the voucher, add the **Text Editor** element.

![Add the Text Editor element for the voucher](https://imgur.elightup.com/rxsD66C.png)

This information is saved in a custom field created with **Meta Box**. So use the **Dynamic Tags**, look for the **Meta Box Field** option.

![Use the Dynamic Tags to insert the information](https://imgur.elightup.com/8VL2Rxv.png)

And, choose the field from the list.

![Choose the field from the list](https://imgur.elightup.com/RLj0rG4.png)

Next, add the **Post Title** for the restaurant name.

![Add the Post Title for the restaurant name](https://imgur.elightup.com/1jgb1Tk.png)

To get the restaurant address, add another **Text Editor** element.

![To get the restaurant address, add another Text Editor element](https://imgur.elightup.com/O4WyKJu.png)

The address is also saved in a custom field, so use the **Dynamic Tags** as well.

![Use the Dynamic Tags to insert address field information](https://imgur.elightup.com/QZ5lfQQ.png)

And, find the **Address** field.

![Find the Address field](https://imgur.elightup.com/A5m7UnZ.png)

For the logo, add an **Image** element.

![For the logo, add an Image element](https://imgur.elightup.com/Pi3WnJu.png)

Also, add **Dynamic Tags** from the **Logo** field, then the image will be displayed.

![Add Dynamic Tags from the Logo field](https://imgur.elightup.com/Ouabkqc.png)

Choose the **Logo** field to show the restaurant logo.

![Choose the Logo field and the image will be displayed](https://imgur.elightup.com/iyELMJj.png)

That’s all the information I want to get and display for each restaurant, I’ll style this template later.

![All the information I want to get and display for each restaurant](https://imgur.elightup.com/8G0RueM.png)

### Displaying posts

Go to edit the homepage with **Elementor**.

![Go to edit the homepage with Elementor](https://imgur.elightup.com/ROwMCGi.png)

Add a new section to cover all information.

![Add a new section to cover all information](https://imgur.elightup.com/xDJxlZA.png)

And, add a **Heading** for it.

![Add a Heading for it](https://imgur.elightup.com/NrpFAdz.png)

Name the title and set some style.

![Name the title and set some style](https://imgur.elightup.com/nT8NeYX.png)

To get posts, add the **Loop Grid** element.

![Add the Loop Grid element to get the posts](https://imgur.elightup.com/6Oopbnz.png)

In the settings of the **Loop Grid** element, choose the created template in the **Layout** section.

![Choose the created template in the Layout section](https://imgur.elightup.com/awfcWIq.png)

Some default blog posts will be displayed on the page preview. To replace them with your products, go to the **Query** section. And set the **Source** as your product’s post type. Then, all the posts from that post type will be displayed. Note that I said ‘all the posts’.

![Set the Source as your product’s post type](https://imgur.elightup.com/IC41ZS4.png)

So, we had a section to display the products already. Next, we should add a custom query to this section to have a condition and choose which posts will be displayed.

![We had a section to display the products already](https://imgur.elightup.com/lIKXY76.png)

### Creating a custom query

The condition is based on the number of views that the **WP Post Views** plugin counts. It will be a custom query.

However, **Elementor** does not support creating custom queries in the builder, so we should use a little bit of code to create one. It’s really easy with the official syntax provided by **Elementor**, just follow it without any concern.

Go to the **functions.php** file, and add some lines of code.

```
function my_query_filter_most_views( $query ) {
    $query->set( 'orderby', 'meta_value_num' );
    $query->set( 'meta_key', 'entry_views' );
    $query->set( 'order', 'DESC' );
}
add_action( 'elementor/query/custom_filter', 'my_query_filter_most_views' );
```

![Go to the Theme File, and add some lines of code](https://imgur.elightup.com/iSHQNBV.png)

Explanations:

* ` $query->set( 'orderby', 'meta_value_num' ); `: set the query based on the numeric value.

* ` $query->set( 'meta_key', 'entry_views' ); `: get the value from the ` 'entry_views' ` variable provided by the WP Post Views plugin. It’s also the number of post views.

* ` $query->set( 'order', 'DESC' ); `: arrange to sort the posts in order from the most viewed posts to the fewer viewed posts.

* ` custom_filter `: the name of the custom query that we’re creating, you can name it as your own. Copy this name, we will use it in the next step.

Then save the file, and go back to edit the page with **Elementor** now.

Go to the section that we created in the previous step. To apply the condition to this section, in the settings of the **Loop Grid** element, look for the **Query ID** box, fill in the name of the created custom query.

![Fill in the name of the created custom query](https://imgur.elightup.com/unMm3bt.png)

The displaying posts will be changed.

![The most viewed posts page created by Meta Box and Elementor](https://imgur.elightup.com/8olGX7V.png)

These are the most viewed posts.

## Styling the section

To style the display of the posts, go back to edit the created template as the **Loop Item**.

![Go back to edit the created template to style the display of the posts](https://imgur.elightup.com/gze6QZO.png)

And, customize each element's settings.

![Customize each element's settings](https://imgur.elightup.com/NINSkur.png)

Go back to the homepage on the frontend, and you will see the section of the most viewed posts with a nice look.

![The section of the most viewed posts with a nice look](https://imgur.elightup.com/pdRP9MK.png)

# Displaying opening hours for restaurants - MB Views

import LiteYouTubeEmbed from 'react-lite-youtube-embed';
import 'react-lite-youtube-embed/dist/LiteYouTubeEmbed.css';

For a website having information about more than one restaurant, each one may have their own opening hours. To have this kind of information, we can use custom fields.

## Video version

<LiteYouTubeEmbed id='8nZwyBbAWXU' />

## Preparation

In this practice, I’ll take an example of an online food order with multiple restaurants on the site. Each restaurant will be a post in their own custom post type. Then, we’ll display the opening hours on the singular post where we put information about each restaurant.

For having time slots for each day, we’ll use custom fields. So, we need the [Meta Box](https://metabox.io) to have a framework to create them. Furthermore, we also need some advanced features from Meta Box that are available in the following extensions:

* [MB Builder](https://metabox.io/plugins/meta-box-builder/): provides an intuitive UI in the back end to create and configure custom fields for opening hours;
* [MB Group](https://metabox.io/plugins/meta-box-group/): helps to arrange fields into groups;
* [MB Conditional Logic](https://metabox.io/plugins/meta-box-conditional-logic/): allows you to create rules to control the display of hours with options.
* [MB Views](https://metabox.io/plugins/mb-views/): create templates and display the custom fields’ value in Opening Hours on the frontend;

## 1. Creating custom fields

Normally, we will create a new custom post type for the **restaurants** first. I skipped that step since I already had it on my website. If you haven’t had it yet, create it first then go to this step.

Go to **Meta Box > Custom Fields > Add New** to create a new field group. Then, add custom fields with the structure like this:

<table>
<thead>
<tr>
<th> Name </th>
<th> ID </th>
<th> Type </th>
<th> Options </th>
<th> Condition </th>
</tr>
</thead>
<tbody>
<tr>
<td>Choose an option</td>
<td>choose_an_option</td>
<td>select</td>
<td>1. all_days_are_the_same
2. difference_between_weekdays_and_weekend
3. custom</td>
</tr>
<tr>
<td>All days have the same opening hours</td>
<td>all_days_have_the_same_opening_hours</td>
<td>group</td>

<td>display only when:
the choose_an_option_ field = the all_days_are_the_same_ option</td>
</tr>
<tr>
<td> Type of opening hours</td>
<td>type_of_opening_hours</td>
<td>select</td>
<td>1. open_all_day
2. close_all_day
3. by_appointment_only
4. enter_hours</td>

</tr>
<tr>
<td> Choose time slots</td>
<td>choose_time_slots</td>
<td>group</td>

<td>display only when: the _type_of_opening_hours_ field = the _enter_hours_ option</td>
</tr>
<tr>
<td>Start time</td>
<td>start_time</td>
<td>time picker</td>

</tr>
<tr>
<td>End time</td>
<td>end_time</td>
<td>time picker</td>

</tr>
<tr>
<td>Weekdays</td>
<td>weekdays</td>
<td>group</td>

<td>display only when: the _choose_an_opton_ field = the _difference_between_weekdays_and_weekend_ option</td>
</tr>
<tr>
<td> Type of opening hours</td>
<td>type_of_opening_hours**_weekdays**</td>
<td>select</td>
<td>1. open_all_day
2. close_all_day
3. by_appointment_only
4. enter_hours</td>

</tr>
<tr>
<td> Choose time slots</td>
<td>choose_time_slots_weekdays</td>
<td>group</td>

<td>display only when: the _type_of_opening_hours_weekdays_ field = the _enter_hours_ option</td>
</tr>
<tr>
<td>Start time</td>
<td>start_time_weekdays</td>
<td>time picker</td>

</tr>
<tr>
<td>End time</td>
<td>end_time_weekdays</td>
<td>time picker</td>

</tr>
<tr>
<td>Weekend</td>
<td>weekend</td>
<td>group</td>

<td>display only when: the _choose_an_opton_ field = the _difference_between_weekdays_and_weekend_ option</td>
</tr>
<tr>
<td> Type of opening hours</td>
<td>type_of_opening_hours**_weekend**</td>
<td>select</td>
<td>1. open_all_day
2. close_all_day
3. by_appointment_only
4. enter_hours</td>

</tr>
<tr>
<td> Choose time slots</td>
<td>choose_time_slots_weekend</td>
<td>group</td>

<td>display only when: the _type_of_opening_hours_weekend_ field = the _enter_hours_ option</td>
</tr>
<tr>
<td>Start time</td>
<td>start_time_weekend</td>
<td>time picker</td>

</tr>
<tr>
<td>End time</td>
<td>end_time_weekend</td>
<td>time picker</td>

</tr>
<tr>
<td>Monday</td>
<td>monday</td>
<td>group</td>

<td>display only when: the _choose_an_option_ field = the _custom_ option</td>
</tr>
<tr>
<td> Type of opening hours</td>
<td>type_of_opening_hours_monday</td>
<td>select</td>
<td>1. open_all_day
2. close_all_day
3. by_appointment_only
4. enter_hours</td>

</tr>
<tr>
<td> Choose time slots</td>
<td>choose_time_slots_weekend</td>
<td>group</td>

<td>display only when: the _type_of_opening_hours_monday_ field = the _enter_hours_ option</td>
</tr>
<tr>
<td>Start time</td>
<td>start_time_weekend</td>
<td>time picker</td>

</tr>
<tr>
<td>End time</td>
<td>end_time_weekend</td>
<td>time picker</td>

</tr>
<tr>
<td>…</td>
<td>…</td>
<td>…</td>
<td>…</td>
<td>…</td>
</tr>
<tr>
<td>Sunday</td>
<td>…</td>
<td>…</td>
<td>…</td>
<td>…</td>
</tr>
</tbody>
</table>

You can see in the above table, the first field is a **select** field with 3 options. I filled in the options into the **Choice** box as below.

![Fill in the options](https://imgur.elightup.com/dYGYZn9.png)

These 3 options will be used to set the display rule of other group fields.

To set conditions to groups, for example, with the **All days have the same opening hours** group, go to the **Advanced tab**, and then set the rule in the **Conditional Logic** section like this:

![Set conditons to groups](https://imgur.elightup.com/AquTHJL.png)

This rule means this group will be displayed when the **Choose an Option** field is selected as **All days have the same opening hours** option which has the value is `all_days_are_the_same`.

Similarly, if the **Choose an Option** field is chosen as the **Difference between weekdays and weekend** options, all the subfields of the **Weekdays** and **Weekend** group will be displayed. Or if the Choose an Option field is selected as the **Custom** option, the group fields for every day in a week will be shown up. That’s the concept of how to create fields.

In each group field, I also have subfields with the same structure.

The **Type of Opening Hours** field is the select field. I have 4 options in the Choice box:

* Open All day;
* Close All day;
* By Appointment Only;
* Enter Hours.

If the restaurant has different opening hours, you can choose **Enter Hours** to display the **Start Time** and **End Time** field in the **Choose Time Slots** group. So, I will set the rule for this group like this:

![Choose Enter Hours to display](https://imgur.elightup.com/Pk70SvN.png)

In case the restaurant opens in multiple time slots, we’ll need this group to be cloneable. So, I tick this box as below:

![Set group to be cloneable](https://imgur.elightup.com/aJP7FdB.png)

After creating all the fields, go to the **Settings** tab of the field group, choose **Location** as **Post Type**, and select **Restaurant** to apply these fields to this post type.

Publish this field group and go to the post editor in **Restaurant**, you will see the custom fields here.

![Created fields in the post editor](https://imgur.elightup.com/OelC36Y.gif)

## 2. Displaying the fields’ value on the frontend

In this step, we’ll get the input data from those custom fields to display into the Restaurant single page with **MB Views**.

If you’ve had a template created by MB Views for the Restaurant single page, just go to it and edit. If not, create one. Then, add code to the view.

The code is quite long, so I put it in my Github [here](https://github.com/wpmetabox/tutorials/tree/master/showing-opening-hours-section-with-MB-Views). You can refer to it for more details. The code is divided into several parts to get corresponding group data. Because of the same concept in all parts, I’ll explain a typical part to be more clear about the logic.

```php
<div class="opening-hours">
<h2>
    Opening Hours
</h2>
<div class="detail-schedule">
    {% set options = post.choose_an_options.value %}
    {% if (options == "all_days_are_the_same") %}
        {% set same_days = post.all_days_have_the_same_opening_hours.type_of_opening_hours.value %}
        {% if ( same_days == "enter_hours") %}
        <div class="date-time">
            <div class="date">
                Mon - Sun
            </div>
            <div class="hour">
            {% for clone in post.all_days_have_the_same_opening_hours.choose_time_slots %}
            <div class="time-slot">
                <p class="starting-hour">
                    {{ clone.start_time | date( 'h:i A' ) }}
                </p>
                <p class="ending-hour">
                    {{ clone.end_time | date( 'h:i A' ) }}
                </p>
            </div>
            {% endfor %}
            </div>
        </div>
    {% else %}
    <div class="date-time">
        <div class="date">
            Mon - Sun
        </div>
        <div class="hour">
            {{ post.all_days_have_the_same_opening_hours.type_of_opening_hours.label }}
        </div>
    </div>
    {% endif %}
```
Here I created a variable named **options** to admit the value from the **Choose an Option** field. Then I set a rule based on its value to display values from the subfield in the corresponding group. It’s quite the same with the rules we created when configuring the fields.

First, if its value is `all_day_are_the_same`, the values of fields in the **All days have the same opening hours** group will be displayed.

![Add the code](https://imgur.elightup.com/fUMwtHG.png)

I set a variable named same_days to admit the value from the **Type of Opening Hours** field. If it is `enter_hours`, the **Choose Time Slots** group will be obtained and displayed the data. As we set before, this group is cloneable, so there is a loop here.

![Add the code](https://imgur.elightup.com/4LO0llZ.png)

After adding code, depending on if the view is new or not, choose the right **Type** and **Location** for the view in the **Settings** section.

Go to the single Restaurant page and see how the opening hours section displays.

![The oopening hours section displays](https://imgur.elightup.com/OEssGcj.png)

All the time slots are shown exactly as I input in the backend. But this section doesn't look as good as I want. So, I will add some CSS to style this section in the next step.

## 3. Styling the opening hours section

Still, in the view of the single Restaurant page, move to the **CSS** tab. And add the code below.
```css
.container.detail-restaurant .opening-hours {
    max-width: 300px;
    margin: 0 auto;
    width: 100%;
}

.container.detail-restaurant .opening-hours h2 {
    margin: 0 0 10px;
        text-align: center;
        border: 4px solid rgba(231,57,72,.85);
    border-right: 0;
    border-left: 0;
}

.container.detail-restaurant .detail-schedule .date-time {
    display: flex;
    width: 100%;
    justify-content: space-between;
    flex-wrap: wrap;
        align-items: baseline;
}

.container.detail-restaurant .detail-schedule .date-time .hour .starting-hour:after{
    content: '-';
    margin: 0 5px;
}

.container.detail-restaurant .detail-schedule .date-time .hour .time-slot {
    display: flex;
}

.container.detail-restaurant .detail-schedule .date-time .date {
    font-weight: 700;
    font-size: 15px;
}

.container.detail-restaurant .detail-schedule {
    display: flex;
    flex-wrap: wrap;
    justify-content: center;
        border-bottom: 4px solid rgba(231,57,72,.85);
    padding-bottom: 10px;
}
```
Now, go back to the single restaurant page, you’ll see the Opening Hours section looks much more beautiful.

![The final result](https://imgur.elightup.com/714VXYe.png)

# Displaying opening hours for restaurants - Meta Box + Bricks

import LiteYouTubeEmbed from 'react-lite-youtube-embed';
import 'react-lite-youtube-embed/dist/LiteYouTubeEmbed.css';

On a website for booking tables for several restaurants, we can show the **daily opening hours** for each one. It helps your customers be more proactive in managing schedules and bookings. It’s a piece of cake to add that information into a single page of each restaurant with the help of **Meta Box** and **Bricks**.

This section is an example:

![The opening hours section on the single page of a restaurant](https://imgur.elightup.com/HK55zKG.png)

## Video version

<LiteYouTubeEmbed id='mjwLTGE0UKI' />

## Preparation

I assume that each restaurant is a post of a custom post type along with some detailed information. And, the opening time will be saved in custom fields created with Meta Box.

In a real case, it can be the same or different between days of the week. Therefore, besides the custom fields to store timing information, we should set a rule for displaying the fields.

So, we need these tools:
* [Meta Box core plugin](https://wordpress.org/plugins/meta-box/): to have the framework for creating the custom post type and custom fields for the restaurants. You can download it directly from [wordpress.org](https://wordpress.org/plugins/meta-box/);
* [MB Custom Post Type](https://metabox.io/plugins/custom-post-type/): to create custom post types for restaurants;
* [MB Builder](https://metabox.io/plugins/meta-box-builder/): to have UI in the backend to create the custom fields visually;
* [MB Conditional Logic](https://metabox.io/plugins/meta-box-conditional-logic/): to create the rules for displaying or hiding the fields;
* [MB Group](https://metabox.io/plugins/meta-box-group/): to organize custom fields into the groups for clearer structure;
* **Bricks** to build the opening hour section.

## 1. Creating a new post type

Go to **Meta Box** > **Post Types**, and create a new one for the restaurants.

![Go to Meta Box > Post Types, and create a new one for the restaurants](https://imgur.elightup.com/VoFhxW5.png)

After publishing, the created custom post type will be displayed in the admin dashboard.

![The created custom post type will be displayed in the admin dashboard.](https://imgur.elightup.com/1U5DFom.png)

## 2. Creating custom fields

In this step, we will create some custom fields to save the opening hours information, then define when they display as well. I’ll skip the other information about the restaurant, but you may want to have some in your real case.

![Structure of custom fields](https://imgur.elightup.com/BiANTWA.png)

Go to **Meta Box** > **Custom Fields** > **Add New** to create a new field group.

![Go to Meta Box > Custom Fields > Add New to create a new field group](https://imgur.elightup.com/luVTkps.png)

Then, add custom fields with the type and condition like this:

|                 Name                 |                  ID                  |    Type     |                                     Options                                     |                                             Condition                                             |
|--------------------------------------|--------------------------------------|-------------|---------------------------------------------------------------------------------|---------------------------------------------------------------------------------------------------|
|           Choose an option           |           choose_an_option           |   Select    | 1. all_days_are_the_same  2. difference_between_weekdays_and_weekend  3. custom |                                                                                                   |
| All days have the same opening hours | all_days_have_the_same_opening_hours |    Group    |                                                                                 |         display only when:  the `choose_an_option` field = the `all_days_are_the_same` option         |
|        Type of opening hours         |        type_of_opening_hours         |   Select    |    1. open_all_day  2. close_all_day  3. by_appointment_only  4. enter_hours    |                                                                                                   |
|          Choose time slots           |          choose_time_slots           |    Group    |                                                                                 |            display only when: the `type_of_opening_hours` field = the `enter_hours` option            |
|              Start time              |              start_time              | Time Picker |                                                                                 |                                                                                                   |
|               End time               |               end_time               | Time Picker |                                                                                 |                                                                                                   |
|               Weekdays               |               weekdays               |    group    |                                                                                 | display only when: the `choose_an_option` field = the `difference_between_weekdays_and_weekend` option |
|        Type of opening hours         |    type_of_opening_hours_**weekdays**    |   select    |    1. open_all_day  2. close_all_day  3. by_appointment_only  4. enter_hours    |                                                                                                   |
|          Choose time slots           |      choose_time_slots_**weekdays**      |    group    |                                                                                 |       display only when: the `type_of_opening_hours_weekdays` field = the `enter_hours` option        |
|              Start time              |         start_time_**weekdays**          | Time Picker |                                                                                 |                                                                                                   |
|               End time               |          end_time_**weekdays**           | Time Picker |                                                                                 |                                                                                                   |
|               Weekend                |               weekend                |    group    |                                                                                 | display only when: the `choose_an_option` field = the `difference_between_weekdays_and_weekend` option |
|        Type of opening hours         |    type_of_opening_hours_**weekend**     |   select    |    1. open_all_day  2. close_all_day  3. by_appointment_only  4. enter_hours    |                                                                                                   |
|          Choose time slots           |      choose_time_slots_**weekend**       |    group    |                                                                                 |        display only when: the `type_of_opening_hours_weekend` field = the `enter_hours` option        |
|              Start time              |          start_time_**weekend**          | Time Picker |                                                                                 |                                                                                                   |
|               End time               |           end_time_**weekend**           | Time Picker |                                                                                 |                                                                                                   |
|                Monday                |                monday                |    group    |                                                                                 |                 display only when: the `choose_an_option` field = the `custom` option                 |
|        Type of opening hours         |     type_of_opening_hours_**monday**     |   select    |    1. open_all_day  2. close_all_day  3. by_appointment_only  4. enter_hours    |                                                                                                   |
|          Choose time slots           |      choose_time_slots_**monday**       |    group    |                                                                                 |        display only when: the `type_of_opening_hours_monday` field = the `enter_hours` option         |
|              Start time              |          start_time_**monday**          | Time Picker |                                                                                 |                                                                                                   |
|               End time               |           end_time_**monday**           | Time Picker |                                                                                 |                                                                                                   |
|                  …                   |                  …                   |      …      |                                        …                                        |                                                 …                                                 |
|                Sunday                |                  …                   |      …      |                                        …                                        |                                                 …                                                 |


I’ll explain the logic and how they work in detail.

The first field is a **Select** field with 3 options as you can see in the **Choices** box.

![The Select field with 3 options](https://imgur.elightup.com/4pI2qFf.png)

We have separate values for each option. They will be used to set the rules for the upcoming fields.

When each option is chosen, different fields show up. We’ll use conditional logic to set the rule for displaying those fields.

For example, the **All days have the same opening hours** group display only when users set the Select field above with the first option. To set that rule, go to the **Advanced** tab, add a rule in the **Conditional Logic** section based on the value of the field like this:

![Go to the Advanced tab, add a rule in the Conditional Logic section based on the value of the field](https://imgur.elightup.com/5Gdu3bt.png)

It means that this group will be displayed when the **Choose an Option** field is selected as the **All days have the same opening hours** option which has the value **all_days_are_the_same**.

Similarly, if the Select field is chosen as the **Difference between weekdays and weekend** option, all the subfields of the **Weekdays** and **Weekend** groups will be displayed. And if the **Choose an Option** field is selected as the **Custom** option, the group fields for every day in a week from Monday to Sunday will be shown up. All of the keys are the same since the rule is based on the Choose an Option field. Also, just change the value to the corresponding option.

![Set the condition for the case that Difference between weekdays and weekend](https://imgur.elightup.com/QfSct10.png)

![Set the condition for the case that custom time slots](https://imgur.elightup.com/ILCZ11A.png)

In each group, we also have subfields with the same structure.

The first subfield is the **Type of Opening Hours** field. It is also a **Select** field as well. I have 4 options in the **Choices** box as below:

![Another Select field with 4 options](https://imgur.elightup.com/K8jd5wW.png)

The second one is a **Group** field for choosing time slots. Note that the day of the corresponding group will be added to this field’s ID to differentiate the fields from other groups. Inside it, there are two subfields for the start time and end time.

![A subgroup to display time slots with two Time Picker fields](https://imgur.elightup.com/taMr4qD.png)

This **Choose time slots** field displays only when you choose **Type of Opening Hours** as the last option: **Enter hours**. So, we also set the rule for this group as following.

![Set the rule for displaying the time slot: only when the Type of opening hours is Enter hours](https://imgur.elightup.com/VX6xU1w.png)

The restaurant can have multiple time slots. Thus, enable the cloneable feature for the group in the **General** tab.

![Enable the Clonable option to add more time slots](https://imgur.elightup.com/uzic9aO.png)

After having all the fields with reasonable settings, move to the **Settings** tab, set the **Location** as **Post type**, and select **Restaurant** to apply these fields to it.

![Move to the Settings tab, set the Location as Post type, and select Restaurant to apply these fields to it](https://imgur.elightup.com/mRCEzYs.png)

Then, go to the post editor in Restaurant, you will see the custom fields displayed following the rule we set.

![The fields and conditions work well in the post editor](https://imgur.elightup.com/rwtemHn.gif)

Just input the data. If the conditions weren’t wrong, all the fields would be displayed in the right way. If not, you should go back to the field settings to check the conditions carefully.

## 3. Displaying opening hours

Go to **Bricks** > **Templates**, and edit the template that we use for the single page.

![Go to Bricks > Templates, and edit the template that we use for the single page](https://imgur.elightup.com/eBUGTjw.png)

Don’t forget to set the preview for the template. First, you should have a separate block for the opening hours section.

![Set the preview for the template and have a separate block for the opening hours section](https://imgur.elightup.com/52EneQQ.png)

Then, add a heading for it.

![Add a new heading for the section](https://imgur.elightup.com/IiMaNbk.png)

Now, let’s display the timing information. It’s the main part of this article.

Since Bricks supports **conditions** to display or hide elements based on dynamic data, we will create elements for every field that we created in the previous step, then use conditions to show or hide the data.

No matter which kind of opening time the restaurant has, we still need to call all the data out. Then, based on the case it is, the elements to show the accurate time will display automatically.

### 3.1. For the first case: All days are the same

Add a new block to cover all the elements for this case. Instead of using a block, you can use a Div element, or anything else that can set this section separately.  Since we will have some elements like this in the next part, we should rename it for better management.

![Add a new block for the timing information in the first case](https://imgur.elightup.com/AmgQsMj.png)

This block displays only when the restaurant opens at the same time everyday, also means that it displays only when the first option in the Select field is chosen. So, we will have a rule for it.

Set that rule by clicking the **Conditions** icon as the below image shows.

![Click on the Conditions icon to set the rule for displaying the block](https://imgur.elightup.com/d9VUllB.png)

The condition is based on the value saved in a custom field, so it’s a kind of dynamic data from custom fields.  Thus, you should set the condition as **Dynamic data**.

![Set the condition as Dynamic data](https://imgur.elightup.com/9sXDI9J.png)

Then, set the rule like this:

![Set the rule for the block](https://imgur.elightup.com/3zwY1Zi.png)

**In there**:

* 1: It’s the ID of the field that the condition is based on. To regulate that the value of the field will be used to compare, you need to add the [:value](https://academy.bricksbuilder.io/article/dynamic-data/) attribute;
* 2: It’s the operation we use to compare. Bricks also provides some other operations, just choose one that makes sense;
* 3: It’s the value of the first option that we had for the Select field.

The whole of this condition means that the block displays only when the **Choose an Option** field is set as the **All days are the same option**.

Now, let’s add some elements inside this block to display the timing information. Since they are all inside the Block element, they also display only when the condition is met.

I use the **Basic Text** element for the name of the days. But, I added a **Div** element before it to style easily.

![Use the Basic Text element for the name of the days](https://imgur.elightup.com/YHtmurs.png)

Next, add a **Div** element for the timing information.

![Add a Div element for the timing information](https://imgur.elightup.com/Hpvw8Cv.png)

Since the information is in the **All days are the same** group, we’ll enable the query loop for this Div to get data. Choose the **Type** of the query as the group we use.

![Enable the query loop and choose the Type as the group we use](https://imgur.elightup.com/mjFz19V.png)

There are also some options in the subfields of this group that lead to some different cases. Thus, we need to use the condition once again.

For the first three options (Open All days, Close All days, By Appointment Only), only the value of this field will be displayed in all three cases. So, I will add only one **Basic Text** element for them.

![Add Basic text element to get data for the first three options](https://imgur.elightup.com/7JN4Lgn.png)

Add dynamic data from the corresponding field to this Basic Text element to get the information saved in the field.

![Add dynamic data from the corresponding field to this element.](https://imgur.elightup.com/KZCtgqr.png)

Then, add a condition in the kind of dynamic data for it as well. This Basic Text element is displayed only when the **Type of Opening Hours** field is one of the three first options. In the other words, whenever the **Enter hours** option is not chosen, it will be shown. So, click on the **Conditions** icon and add a rule like this:

![Set condition for the elements](https://imgur.elightup.com/r3e2yWQ.png)

We also choose the field and the operation, also paste the value for comparison.

Otherwise, in the case that the last option is chosen, we have another **Div** element to display the right information.

![Add another Div element for the Enter hours option](https://imgur.elightup.com/5WdM2rs.png)

We use this element to set a condition to display the time slots since they are displayed only when the last option is chosen. The condition is quite the same as the previous element for the first three options, but I change the operation to equal.

![Set a condition to display the time slots](https://imgur.elightup.com/mNaNvl3.png)

Inside the Div, add another **Div** element to set the Query since the values we want to get for timing information are in a cloneable group.

![Add another Div element to set the query](https://imgur.elightup.com/VBrpNAM.png)

![Set the query for the div as the right group](https://imgur.elightup.com/67G3U2u.png)

Then, add two new **Basic Text** elements, one is for the start time, and one is for the end time inside those Div elements.

![Add two new Basic Text elements for the start time and end time](https://imgur.elightup.com/fDT87Fa.png)

We also use dynamic data for them all to get data from custom fields. Since we have some different start time and end time fields in different groups, just make sure you choose the right ones.

![Choose dynamic data for the start time](https://imgur.elightup.com/Y4uvIH5.png)

![Choose dynamic data for the end time](https://imgur.elightup.com/0Z40ntZ.png)

That’s done for the first case. Let’s go to the front end to check how the data displays. This is the result when you choose one of the three first options:

![The section on the frontend when the three first options is chosen](https://imgur.elightup.com/XX0Og4w.png)

If you choose the last one and enter multiple slots, the timing will be displayed exactly.

![The time slots also display exactly on the frontend](https://imgur.elightup.com/IMDhl7V.png)

So, the data displayed well follows the rule that we set. For a better look of the section, you can style each element a little bit.

![Style the section](https://imgur.elightup.com/ocSPMvZ.png)

However, it’s not the end. We’ve just displayed data when the first option in the first Select field is chosen. So, what happens when one of the rest is chosen? We haven’t set anything to display data in those cases.

Let’s move on for them now.

### 3.2. For the second case: Difference between Weekdays and Weekend

For the second case that there are different opening times between weekdays and weekends, we will use some elements and conditions which are quite the same with the first case. This, instead of adding new elements to display data, you should duplicate the block for the **All days are the same** case. It helps save time a lot since the logic to display information is exactly the same. In this case, we have a total of two blocks: one is for the weekdays, and one is for the weekend.

Our work now is changing the conditions, dynamic data, and content for each element.

I’ll get data for the Weekdays block first. It displays only when the second option in the field is chosen. So, the condition should be changed to the second option.

![Change the condition for the second case](https://imgur.elightup.com/I8FUJNF.png)

Also, change the content of the **Basic Text** element to the name of the day.

![Change the content of the Basic Text element to the name of day](https://imgur.elightup.com/m17aQyO.png)

Next, choose the corresponding group in the query of the **Div** element for the timing info.

![Choose the corresponding group in the query of the Div element for the timing info](https://imgur.elightup.com/U4U1LiY.png)

The dynamic data for the three options is also modified to the right field’s ID.

![The dynamic data for the three options is also modified](https://imgur.elightup.com/x08GtFz.png)

We also should change the condition to display or hide for the element as well.

![Change the condition for displaying 1 of 3 options](https://imgur.elightup.com/t9TOXcj.png)

Do the same with the **Div** element for the time slots including edit the conditions, query and dynamic data.

![Change condition for the time slots](https://imgur.elightup.com/C4ifpoM.png)

![Change the query](https://imgur.elightup.com/Hc8Acg7.png)

![Change the dynamic data](https://imgur.elightup.com/oHr98Qs.png)

For displaying opening time on weekends, also duplicate this element. This section also displays when the second option in this field is chosen, it’s the same with the weekdays. So, there is no need to change the condition.

![The condition for the Weekend block is the same with Weekdays](https://imgur.elightup.com/loADLLI.png)

But, for the remaining elements, we also need to change the names and fields to the corresponding ones. And, remember to look for the right fields from the one related to the **Weekend** option, both in condition or displaying content.

![Change the names, fields, and conditions for the Weekend option](https://imgur.elightup.com/5GHxq90.png)

After changing all the information, when you go to the single page on frontend, the data will display correspondingly with the one in the fields.

![On the frontend, he data will display correspondingly with the one in the fields](https://imgur.elightup.com/Q3yKwAg.png)

And what about the last case?

### 3.3. For the last case: Custom

Actually, it's quite the same with the second case. Instead of dividing days into two kinds as weekdays and weekends, now we will have 7 days from Mon to Sun.

So, just duplicate the block for the Weekend. Also change the name, field ID, option in the condition, as well as the field where we display data.

![Change the name, field ID, option in the condition for the Monday block](https://imgur.elightup.com/guaD5f2.png)

![Days of the Custom option after change data](https://imgur.elightup.com/yO6qxZ5.png)

Then, we’ll get the expected result.

![The data displays exactly](https://imgur.elightup.com/rAWuXsL.png)

That’s done.

You also can style every element to have a better look.

![The section after styling](https://imgur.elightup.com/HK55zKG.png)

So, from now on, whenever the timing information changes in the backend, this template will also change the data displayed on the page as well. Everything will be automatically thanks to the displaying conditions supported by Bricks.

# Displaying opening hours for restaurants - Meta Box + Oxygen

import LiteYouTubeEmbed from 'react-lite-youtube-embed';
import 'react-lite-youtube-embed/dist/LiteYouTubeEmbed.css';

In a website for booking restaurants, there will be a lot of different restaurants. Definitely, each restaurant has its own opening hours and you may want to create a section for the opening time for each one. So, in this next part of the series, we’re going to figure out how to add an opening hours section into the singular page by Meta Box and Oxygen.

This section will be the same as the last ones we created in the [previous tutorial](https://docs.metabox.io/tutorials/display-opening-hours-restaurant-mb-views/).

![Example of opening hours section](https://imgur.elightup.com/NjSFCse.png)

## Video vesion

<LiteYouTubeEmbed id='Q6xb17yaXag' />

## Preparation

In this case, I want to put the opening hours section for a particular restaurant. And each restaurant including its own information will be displayed on a singular page. So, all the detailed information about the restaurants’ working time will be saved in custom fields stored in the post containing the restaurants’ information.

We’ll display some extra information such as time slots for each day, and we'll use custom fields. So, we need [Meta Box plugin](https://metabox.io/) to have a framework to create them. It’s free on [wordpress.org](https://wordpress.org/plugins/meta-box/). We also need additional Meta Box advanced features, which are accessible in the following extensions:

* [MB Custom Post Type and Custom Taxonomies](https://metabox.io/plugins/custom-post-type/): to create custom post type named Restaurant to contain custom fields for saving restaurants’ information;
* [MB Builder](https://metabox.io/plugins/meta-box-builder/): this premium extension of Meta Box provides an intuitive UI in the back end to create and configure custom fields without using code;
* [MB Group](https://metabox.io/plugins/meta-box-group/): this extension helps to arrange fields into groups;
* [MB Conditional Logic](https://metabox.io/plugins/meta-box-conditional-logic/): this extension allows to create rule to control the display of the fields;
* Oxygen: to build the section. Remember to use the 3.9 version or upper to have the native integration with Meta Box.

## 1. Creating a new custom post type

If you read the previous tutorial in this series, you can skip this step. In the event that you haven’t had a post type yet, just create a new one as usual.

Go to **Meta Box > Post Types**.

![Create a custom post type](https://imgur.elightup.com/Axbn3XD.png)

## 2. Creating custom fields

This step is the same as what I showed in the prior tutorial about displaying opening hours.

Go to **Meta Box > Custom Fields > Add New** to create a new field group. Then, add custom fields with the structure like this:

|                 Name                 |                  ID                  |    Type     |                                     Options                                     |                                             Condition                                             |
|--------------------------------------|--------------------------------------|-------------|---------------------------------------------------------------------------------|---------------------------------------------------------------------------------------------------|
|           Choose an option           |           choose_an_option           |   select    | 1. all_days_are_the_same  2. difference_between_weekdays_and_weekend  3. custom |                                                                                                   |
| All days have the same opening hours | all_days_have_the_same_opening_hours |    group    |                                                                                 |         display only when:  the choose_an_option field = the all_days_are_the_same option         |
|        Type of opening hours         |        type_of_opening_hours         |   select    |    1. open_all_day  2. close_all_day  3. by_appointment_only  4. enter_hours    |                                                                                                   |
|          Choose time slots           |          choose_time_slots           |    group    |                                                                                 |            display only when: the type_of_opening_hours field = the enter_hours option            |
|              Start time              |              start_time              | time picker |                                                                                 |                                                                                                   |
|               End time               |               end_time               | time picker |                                                                                 |                                                                                                   |
|               Weekdays               |               weekdays               |    group    |                                                                                 | display only when: the choose_an_opton field = the difference_between_weekdays_and_weekend option |
|        Type of opening hours         |    type_of_opening_hours_**weekdays**    |   select    |    1. open_all_day  2. close_all_day  3. by_appointment_only  4. enter_hours    |                                                                                                   |
|          Choose time slots           |      choose_time_slots_**weekdays**      |    group    |                                                                                 |       display only when: the type_of_opening_hours_weekdays field = the enter_hours option        |
|              Start time              |         start_time_**weekdays**          | time picker |                                                                                 |                                                                                                   |
|               End time               |          end_time_**weekdays**           | time picker |                                                                                 |                                                                                                   |
|               Weekend                |               weekend                |    group    |                                                                                 | display only when: the choose_an_opton field = the difference_between_weekdays_and_weekend option |
|        Type of opening hours         |    type_of_opening_hours_**weekend**     |   select    |    1. open_all_day  2. close_all_day  3. by_appointment_only  4. enter_hours    |                                                                                                   |
|          Choose time slots           |      choose_time_slots_**weekend**       |    group    |                                                                                 |        display only when: the type_of_opening_hours_weekend field = the enter_hours option        |
|              Start time              |          start_time_**weekend**          | time picker |                                                                                 |                                                                                                   |
|               End time               |           end_time_**weekend**           | time picker |                                                                                 |                                                                                                   |
|                Monday                |                monday                |    group    |                                                                                 |                 display only when: the choose_an_option field = the custom option                 |
|        Type of opening hours         |     type_of_opening_hours_**monday**     |   select    |    1. open_all_day  2. close_all_day  3. by_appointment_only  4. enter_hours    |                                                                                                   |
|          Choose time slots           |      choose_time_slots_**weekend**       |    group    |                                                                                 |        display only when: the type_of_opening_hours_monday field = the enter_hours option         |
|              Start time              |          start_time_**weekend**          | time picker |                                                                                 |                                                                                                   |
|               End time               |           end_time_**weekend**           | time picker |                                                                                 |                                                                                                   |
|                  …                   |                  …                   |      …      |                                        …                                        |                                                 …                                                 |
|                Sunday                |                  …                   |      …      |                                        …                                        |                                                 …                                                 |

As you saw in the table above, the first field is a **Select** field and there are 3 options that I filled in the **Choice** box as below.

![Fill the information in the Choice box](https://imgur.elightup.com/cQKTi1W.png)

These 3 options will be used to set the display rule of other group fields.

To set conditions to groups, for example, with the **All days have the same opening hours** group. Go to the **Advanced** tab, and then set the rule in the **Conditional Logic** section like this:

![Set the rule in the Conditional Logic](https://imgur.elightup.com/LFwZofk.png)

This rule means this group will be displayed when the **Choose an Option** field is selected as **All days have the same opening hours** option which has the value is **all_days_are_the_same**.

Similarly, if the **Choose an Option** field is chosen as the **Difference between weekdays and weekend** option, all the subfields of the **Weekdays** and **Weekend** group will be displayed. Or if the **Choose an Option** field is selected as the **Custom** option, the group fields for every day in a week will be shown up. That’s the concept of how to create fields.

![Concept of how to create fields](https://imgur.elightup.com/giCpWKz.png)

![All the subfields of the Weekdays and Weekend group will be displayed](https://imgur.elightup.com/jnj7F10.png)

In each group field, I also have subfields with the same structure.

The **Type of Opening Hours** field is select field. I have 4 options in the Choice box:

* Open All day;
* Close All day;
* By Appointment Only;
* Enter Hours.

![Fill in the information in the Choice box](https://imgur.elightup.com/qxDVyAH.png)

The second subfield is a Group field named Choose Time Slots. Inside it, there are two subfields: **Start Time** and **End Time**.

If the restaurant has multiple opening hours, you can choose **Enter Hours** to display the **Start Time** and **End Time** field in the **Choose Time Slots** group. So, I will set the rule for this group like this:

![Set the rule for the group field](https://imgur.elightup.com/XmK1LWE.png)

In case the restaurant opens in multiple time slots, we’ll need this group to be cloneable. So, I tick this box as below:

![Set the group to be cloneable](https://imgur.elightup.com/9JYVLp9.png)

After creating all the fields, go to the **Settings** tab of the field group, choose **Location** as **Post Type**, and select **Restaurant** to apply these fields to this post type.

![Set Location for the created fields](https://imgur.elightup.com/jpmKrvm.png)

Publish this field group and go to the post editor in **Restaurant**, you will see the custom fields here.

![The created fields appear in the Post editor](https://imgur.elightup.com/E9vxsR5.gif)

They work exactly like the rule we set.

## 3. Displaying the fields’ value

We’ll display the opening hours section using Oxygen. If you’ve had a template created by Oxygen for the Restaurant singular page, just go and edit it.

In the event you haven't had one, go to **Oxygen > Template > Add New Template** to create a new one.

![Create a new template](https://imgur.elightup.com/ESq9hMo.png)

Here, I’ve already had it. So, I just click **Edit with Oxygen**.

Next, add a new **Div** component.

![Add a new Div component](https://imgur.elightup.com/dZSFZnz.png)

In this practice, it includes some complex conditions to choose which fields will be got the value from. However, Oxygen hasn’t supported logic to choose which field yet, we need to use code in this practice. So, I will add a **Code Block** component.

![Add a Code Block component](https://imgur.elightup.com/okuDlLE.png)

Then, choose the **PHP&HTML** and you will see a space to add code.

![Choose the PHP&HTML](https://imgur.elightup.com/7JpbFqf.png)

![There will be a space to add code](https://imgur.elightup.com/XQMZTC7.png)

The code is quite long, so I put it in my Github [here](https://github.com/wpmetabox/tutorials/blob/master/display-opening-hours-with-Oxygen/template.php). You can refer to it for more details. The code is divided into several parts to get corresponding group data. Because of the same concept in all parts, I’ll explain a typical part to be more clear about the logic.


```php
<?php $options = rwmb_meta( 'choose_an_option' ); ?>
<?php if ( $options == "all_days_are_the_same" ): ?>
    <?php $same_days = rwmb_meta( 'all_days_have_the_same_opening_hours' ); ?>
	<?php $same_days_option = $same_days['type_of_opening_hours']; ?>
	<?php $choose_time_slots = $same_days['choose_time_slots'] ?>
	<?php if ( $same_days_option == "enter_hours" ): ?>
		<?php foreach ( $choose_time_slots as $time_slots ): ?>
			<?php echo $time_slots['start_time'] ?>
			<?php echo $time_slots['end_time'] ?>
		<?php endforeach; ?>
	<?php else: ?>
		<?php
			$select_field = isset( $same_days['type_of_opening_hours'] ) ? $same_days['type_of_opening_hours'] : '';
			$group_field = rwmb_get_field_settings( 'all_days_have_the_same_opening_hours' );
			foreach ( $group_field['fields'] as $field ) {
				if ( empty( $field['options'] ) ) {
					continue;
				}
		?>
			<?php if($field['options'][$select_field]): ?>
				<?= $field['options'][$select_field]; ?>
			<?php endif; ?>
					<?php
			}
		?>
	<?php endif; ?>
```

Let’s get through each line with me.


```php
<?php $options = rwmb_meta( 'choose_an_option' ); ?>
```


I created a variable to get the value of the field **Choose an Option** which has the **ID** is `choose_an_option`. We will create a condition based on the returned value to decide which fields will be got the value from.

```php
<?php if ( $options == "all_days_are_the_same" ): ?>
    <?php $same_days = rwmb_meta( 'all_days_have_the_same_opening_hours' ); ?>
```

If the returned value is the first option, we will get the value of **All days have the same opening hours** group.

```php
<?php $same_days_option = $same_days['type_of_opening_hours']; ?>
<?php $choose_time_slots = $same_days['choose_time_slots'] ?>
```
I also have 2 following variables that obtain the value of two fields: **Type of Opening Hour** and **Choose Time Slots**. They are the subfields of the **All days have the same opening hours** group.

Since the **Type of Opening Hour** is a **Select** field with some options as the image below, based on the returned value of this field, we’ll get value from the **Choose Time Slots** group or not.
```php
<?php if ( $same_days_option == "enter_hours" ): ?>
	<?php foreach ( $choose_time_slots as $time_slots ): ?>
		<?php echo $time_slots['start_time'] ?>
		<?php echo $time_slots['end_time'] ?>
	<?php endforeach; ?>
```
If the returned value of the **Type of Opening Hour** field is **Enter hours**, we’ll display the value from the **Choose Time Slots** group field with its subfields: **Start Time** and **End Time** fields. Since the **Choose Time Slots** group is cloneable, we have a loop here.
```php
<?php
	$select_field = isset( $same_days['type_of_opening_hours'] ) ? $same_days['type_of_opening_hours'] : '';
	$group_field = rwmb_get_field_settings( 'all_days_have_the_same_opening_hours' );
	foreach ( $group_field['fields'] as $field ) {
		if ( empty( $field['options'] ) ) {
			continue;
		}
?>
	<?php if($field['options'][$select_field]): ?>
		<?= $field['options'][$select_field]; ?>
	<?php endif; ?>
			<?php
	}
?>
```

For other options in the **Type of opening hours** field, the above is used to display the label of that selected option.

That's the end of the first section, corresponding to the first option of the **Choose an Option** field.

If separate days have different opening hours, call the values from the remaining groups.
The structure of those groups is the same as the **All days have the same opening hours** group, so just simply follow the same logic in the code.

This section on the page is now displayed like this because this code is for getting data from custom fields only.

![The section of the page will displayed like this](https://imgur.elightup.com/Ky5uvnC.png)

To have the display with some other texts as the demo, I’ll add some heading, div tags and class for easier styling later. I’ve uploaded the code on [Github](https://github.com/wpmetabox/tutorials/blob/master/display-opening-hours-with-Oxygen/template.php), you can refer to it.

Now, all the time slots with some additional texts are shown in the section already.

![All the time slots with some additional texts are shown](https://imgur.elightup.com/GAkDggx.png)

However, it doesn’t look as beautiful as I want. So, I will add some CSS to style this section in the next step.

## 4. Styling the section

For styling, you can go back to the Oxygen visual builder and style each component if any.
In this case, I‘ll add some CSS by going to **Manage > Stylesheet** and **Add Stylesheet**.

![Style the Section](https://imgur.elightup.com/0y9yroz.gif)

This is the CSS that I’ve used:
```css
.container.detail-restaurant .opening-hours {
    max-width: 300px;
    margin: 0 auto;
    width: 100%;
}

 .container.detail-restaurant .opening-hours h2 {
    margin: 0 0 10px;
	text-align: center;
	border: 4px solid rgba(231,57,72,.85);
    border-right: 0;
    border-left: 0;
}

 .container.detail-restaurant .detail-schedule .date-time {
    display: flex;
    width: 100%;
    justify-content: space-between;
    flex-wrap: wrap;
	align-items: baseline;
}

.container.detail-restaurant .detail-schedule .date-time .hour .starting-hour:after{
    content: '-';
    margin: 0 5px;
}

.container.detail-restaurant .detail-schedule .date-time .hour .time-slot {
    display: flex;
}

.container.detail-restaurant .detail-schedule .date-time .date {
    font-weight: 700;
    font-size: 15px;
}

.container.detail-restaurant .detail-schedule {
    display: flex;
    flex-wrap: wrap;
    justify-content: center;
	border-bottom: 4px solid rgba(231,57,72,.85);
    padding-bottom: 10px;
}
```

Let’s see how the opening hour section displays on the frontend. It’s much more beautiful, isn't it?

![The final result](https://imgur.elightup.com/NjSFCse.png)

To refer to all the code that I used, you can visit here.

# Displaying personalized data for users

import LiteYouTubeEmbed from 'react-lite-youtube-embed';
import 'react-lite-youtube-embed/dist/LiteYouTubeEmbed.css';

Today, we’ll walk you through a useful way of **displaying dynamic, personalized data for users** on your website with Meta Box.

In this tutorial, I’ll take an example of displaying sales representative information of who is responsible for the current user, I mean client, who has logged in their account already. Each client has their own sales representative, so different clients logged in to their account will see different sales information. This can be super useful to help your client reach out to the account manager easier.

![Display dynamic, personalized data for users](https://imgur.elightup.com/QuNJwcG.gif)

In this tutorial, we’ll achieve it with **Meta Box**. In the same way, we can design any kind of personalized content following this way.

## Video version

<LiteYouTubeEmbed id='WNkqYUOSoVw'/>

## Preparation

Each client or customer already has their own account. They can log in and look at personalized content that is designated for each one of them separately. In this case, the information of the sales representative, also known as the account manager, is that kind of designated content.

The sales information will be saved in custom fields and posts of a custom post type. Then, we will set a relationship between sales and client accounts.

So, we need:[Meta Box AIO](https://metabox.io/aio/): to have a framework to create a custom post type, custom fields, relationships, and advanced features from:

* [MB Admin Columns](https://metabox.io/plugins/mb-admin-columns/): to display columns in the dashboard for clients and sales representatives, making it easier to manage and view relationships;
* [MB Custom Post Type](https://metabox.io/plugins/custom-post-type/): to create a custom post type for the Sales Reps;
* [MB Relationships](https://metabox.io/plugins/mb-relationships/): to create a relationship between the Sales Reps and the users;
* [MB Builder](https://metabox.io/plugins/meta-box-builder/): to have a UI on the back end to create custom fields to save the details of the Sales Rep visually. It also provides the UI to create the relationship in an intuitive way;
* [MB Views](https://metabox.io/plugins/mb-views/): to create a view to display dynamic, specific data for users if you don’t want to add code directly to the theme.

Now, let’s go step by step.

## 1. Creating a custom post type

Go to **Meta Box** > **Post Types** to create a new custom post type specifically for the sales representatives. This will help us manage each Sales Rep’s information separately and more effectively within a single post editor.

![Create a new custom post type specifically for the sales representatives](https://imgur.elightup.com/D3tCkUO.png)

After publishing, you’ll see the created custom post type in the admin dashboard.

![The created custom post type in the admin dashboard](https://imgur.elightup.com/gYVqamO.png)

## 2. Creating custom fields for the Sales Reps

Instead of inputting all the information about each sales representative into the post content, we should use custom fields to store them. Then, we can style each one easier.

Now, go to **Meta Box** > **Custom Fields**, and just add fields one by one corresponding to the kind of content.

![Go to Meta Box > Custom Fields, and just add fields.](https://imgur.elightup.com/sIXzNGz.png)

You absolutely can add additional fields for any related details as you want.

Once creating all the fields, move to the **Settings** tab, set the **Location** as **Post type**, and select the **SalesRep** to apply the fields to it.

![Set location to apply the fields to the post type.](https://imgur.elightup.com/6jrZVh4.png)

Now, in any post editor, you will see the custom fields displayed.

![The custom fields displayed in post editor](https://imgur.elightup.com/dQJKB25.png)

Just input content there.

Below are some posts I have created and filled out information about. I mean, each post also is a sales representative. And I want to assign them to clients.

![Some posts of the SalesRep post type](https://imgur.elightup.com/CBCQII2.png)

## 3. Creating the relationship

When a client, also a user, logs in, they can view detailed information about the sales representative assigned to them. As I mentioned earlier, we need to create a connection between the **User** and the **SalesRep** using the relationship feature in Meta Box.

So, go to **Meta Box** > **Relationships** to create the relationships between two of these objects.

![Create the relationships between two of these objects.](https://imgur.elightup.com/GVjW5va.png)

We have the **From** and **To** sections with the same structure of settings. Because Meta Box supports bi-directional relationships, these two sections are just for two separate objects to connect; the order will not matter.

![The From and To sections with the same structure of settings](https://imgur.elightup.com/VyRD9HD.png)

In this case, I set the SalesRep in the **From** section, and the rest is the User.

Starting with the **From** section, set the **Object Type** as **Post** because we're working with the SalesRep post type.

![set the Object Type as Post because we're working with the SalesRep post type](https://imgur.elightup.com/KPwRIrS.png)

In the **Post type** option, choose the post type you want to create a relationship. In this case, SalesRep.

![In the Post type option, choose the post type you want to create a relationship.](https://imgur.elightup.com/nIoMmeT.png)

Pay heed to the **Show as an admin column** box. It’s available when you activate the **MB Admin Columns** extension. When you check this option, there’ll be a column in the dashboard to show which users are related to the post of a SalesRep. This makes it easier to see the connection between each Sales Rep and their assigned users directly from the backend.

![Check the box to have a column in the dashboard to show which users are related to the post of a SalesRep](https://imgur.elightup.com/1I9Ob6k.png)

In the **Field** tab, you can set the label for the relationship section that appears in the post editor.

![Set the label for the relationship section.](https://imgur.elightup.com/Ufu0jSj.png)

Therefore, there will be a box in the right sidebar with the label we named, allowing you to choose which user is related to the current post.

![A box at the right sidebar to choose which user is related to the current post in the SalesRep post type](https://imgur.elightup.com/sHSqDXy.png)

In the **Max items** section, I set the number to 1 so that you can select just one user. However, in a real scenario, you can enter the number you want to adjust the number of users selected.

![Enter the number you want to adjust the number of users selected](https://imgur.elightup.com/EDQ2Mth.png)

Continuing the **To** section in the same way. Set the **Object type** as **User** because it’s time for the User. And other settings are similar to what we did with the **From** section.

![All settings of the to section.](https://imgur.elightup.com/q4lvsNz.png)

That’s all to set the relationship.

After publishing, go to any user profile or a post editor; you can see a corresponding section like this:

![A corresponding section in the user profile or a post editor](https://imgur.elightup.com/O7Z9y6C.png)

You can fill in the information from either the user profile or the post editor. Since the relationship is bidirectional, whichever option you choose to link the SalesRep, the corresponding field will automatically be updated on the other side as well.

As you can see in the below image, the related information is shown as admin columns:

![The related information shown as admin columns](https://imgur.elightup.com/qDzx5ji.png)

## 4.  Displaying Sales Rep information for current user

As mentioned earlier, I’m providing two methods to display the Sales Rep information for the current user, both achieving the same result. Each method involves using code.

I still show both these ways, and then you can experiment yourself to decide which one works best for you.

### 4.1.  Method 1: Using MB Views

Start by navigating to **Meta Box** > **Views**, and create a new view for displaying the Sales Rep information.

![Create a new view for displaying the Sales Rep information.](https://imgur.elightup.com/7QarK38.png)

In the **Template** tab, we can insert some lines of code.

```
{% if mb.is_user_logged_in %}
    {% set salesrep_related = { relationship: { id: 'salesrep-to-user', to: user.ID }, nopaging: true, post_type: 'salesrep' } %}
    {% set salesreps = mb.get_posts(salesrep_related) %}

    {% for salesrep in salesreps %}
    <div class="mb-container">
        <div class="mb-content">
            <div class="mb-your-sale">Your Sales Representative</div>
            <div class="mb-title-sale">{{  salesrep.post_title }}</div>
            <img src="{{ mb.get_the_post_thumbnail_url(salesrep.ID) }}" alt="{{  salesrep.post_title }}" />
            <div class="mb-phone"><b>Phone Number</b>: {{  salesrep.phone }}</div>
            <div class="mb-email"><b>Email</b>: {{  salesrep.email }}</div>
            <div class="mb-experience"><b>Years of experience</b>: {{  salesrep.years_of_experience }}</div>
            <div class="mb-language"><b>Language</b>: {{  salesrep.language.label }}</div>
            <div class="mb-motto"><b>Working Motto</b>: {{  salesrep.working_motto }}</div>
        </div>
    </div>
    {% endfor %}

{% endif %}
```

![In the Template tab, we can insert some lines of code](https://imgur.elightup.com/crgAB49.png)

Let’s go through it in detail!

#### 4.1.1. Checking user login & retrieve Sales Rep data

```
{% if mb.is_user_logged_in %}
```

This is to check whether the current user is logged in or not. If they are, the following code will be executed. It also means that only the one logged in to their account can see the sales representative.

```
{% set salesrep_related = { relationship: { id: 'salesrep-to-user', to: user.ID }, nopaging: true, post_type: 'salesrep' } %}
```

The `salesrep_related` variable is used to query only posts that are input to the relationship that has the ID - `salesrep-to-user`, also for the current user only. These posts absolutely should belong to a specific post type. In this case, salesrep.

```
{% set salesreps = mb.get_posts(salesrep_related) %}
```

This is to get the list of matching posts and save it to the `salesreps` variable.

#### 4.1.2. Displaying Sales Rep information

These lines of code are used to display the Sales Rep’s information.

```
{% for salesrep in salesreps %}
<div class="mb-container">
        <div class="mb-content">
            <div class="mb-your-sale">Your Sales Representative</div>
            <div class="mb-title-sale">{{  salesrep.post_title }}</div>
            <img src="{{ mb.get_the_post_thumbnail_url(salesrep.ID) }}" alt="{{  salesrep.post_title }}" />
            <div class="mb-phone"><b>Phone Number</b>: {{  salesrep.phone }}</div>
            <div class="mb-email"><b>Email</b>: {{  salesrep.email }}</div>
            <div class="mb-experience"><b>Years of experience</b>: {{  salesrep.years_of_experience }}</div>
            <div class="mb-language"><b>Language</b>: {{  salesrep.language.label }}</div>
            <div class="mb-motto"><b>Working Motto</b>: {{  salesrep.working_motto }}</div>
        </div>
</div>
```

If there is more than one sales representative who takes care of the current client, this loop below processes them one by one and displays them all.

```
{% for salesrep in salesreps %}
```

Particularly, these are basic information stored in usual posts, such as the Sales Rep's name from the post title and their avatar from the post thumbnail.

```
<div class="mb-title-sale">{{  salesrep.post_title }}</div>
<img src="{{ mb.get_the_post_thumbnail_url(salesrep.ID) }}" alt="{{  salesrep.post_title }}" />
```
Also, these are to get the extra information saved in Meta Box custom fields.

```
<div class="mb-phone"><b>Phone Number</b>: {{  salesrep.phone }}</div>
<div class="mb-email"><b>Email</b>: {{  salesrep.email }}</div>
<div class="mb-experience"><b>Years of experience</b>: {{  salesrep.years_of_experience }}</div>
<div class="mb-language"><b>Language</b>: {{  salesrep.language.label }}</div>
<div class="mb-motto"><b>Working Motto</b>: {{  salesrep.working_motto }}</div>
```
They are phone, email, years of experience, language, and working moto. `phone`, `email`, `years_of_experience`, `language`, and `working_motto` are the corresponding IDs of each custom field.

Now, just move to the Settings section of the view, set the Type as Singular, choose the Location as the post type where you want the SalesRep information to display.

![Set location for the view.](https://imgur.elightup.com/kF22XSP.png)

As well, you can choose a suitable position for the data of the Sales Rep on the page.

![Choose a suitable position for the data of the Sales Rep on the page](https://imgur.elightup.com/dKM7b4y.png)

All the Sales Rep information will be displayed. However, some additional styling is required to enhance its visual appeal.

![The Sales Rep information will be displayed](https://imgur.elightup.com/W5hTmMW.png)

Back to the view editor, in the **CSS** tab, add some code for styling.

```
.mb-container {
    background: #e7e7e7;
    text-align: center;
}
.mb-content {
    padding: 20px 50px;
}
.mb-your-sale {
    font-weight: bold;
    font-size: 30px;
}
.mb-title-sale{
    font-weight: bold;
    font-size: 25px;
    color: #bb2c2c;
    margin-bottom:15px;
}
.mb-container img {
    width: 100%;
}
.mb-phone {
	padding-top:20px;
}
.mb-language,
.mb-email,
.mb-experience,
.mb-phone,
.mb-motto {
    font-size: 20px;
    margin-top: 5px;
    text-align: left;
}
```

![Add some code for styling in the CSS tab.](https://imgur.elightup.com/MgE6uUq.png)

Now, let's check the frontend to see the final result! The Sales Rep information looks great. When logging in with a different account, the corresponding Sales Rep who is assigned to that user will be displayed.

![The Sales Rep information looks great.](https://imgur.elightup.com/QuNJwcG.gif)

Let’s move on to another approach!

### 4.2. Method 2: Using PHP

Go to your theme’s file, then add the following code.

```
function your_sales_representative(){
	$connected = new WP_Query( [
        'relationship' => [
            'id'      => 'salesrep-to-user',
            'to'      => get_current_user_id(),
        ],
    ] );

    $html ='';
     while ( $connected->have_posts() ) :
     	$connected->the_post();
     	$id_salesrep = get_the_ID();
     	 $html  .= '<div class="mb-container">
            <div class="mb-content">
            	<div class="mb-your-sale">Your Sales Representative</div>
            	<div class="mb-title-sale">'. get_the_title() .'</div>
            	<img src=" '. get_the_post_thumbnail_url($id_salesrep).'" />
            	<div class="mb-phone"><b>Phone Number</b>: '.rwmb_meta( 'phone', $id_salesrep ) .'</div>
                <div class="mb-email"><b>Email</b>: '.rwmb_meta( 'email', $id_salesrep ) .'</div>
                <div class="mb-experience"><b>Years of experience</b>: '.rwmb_meta( 'years_of_experience', $id_salesrep ) .'</div>
                <div class="mb-language"><b>Language</b>: '.rwmb_meta( 'language', $id_salesrep ) .'</div>
                <div class="mb-motto"><b>Working Motto</b>: '.rwmb_meta( 'working_motto', $id_salesrep ) .'</div>
            </div>
        </div>';
    endwhile;
    return $html;
}

add_shortcode( 'your_sales_rep', 'your_sales_representative' );
```

![Add code to the theme’s file.](https://imgur.elightup.com/7mavJOw.png)

Let’s take a closer look at it:

#### 4.2.1. Creating a new function to handle everything

```
function your_sales_representative(){}
```
This function is used for displaying the Sales Rep information assigned to the current user.

#### 4.2.2. Querying to get Sales Rep

This query is to get posts of the **SalesRep** post type that are related to the currently logged-in user using the relationship.

```
$connected = new WP_Query( [
    'relationship' => [
        'id' => 'salesrep-to-user',
        'to' => get_current_user_id(),
    ],
] );
```
**In there**:

* `salesrep-to-user`: the ID of the created relationship.
* `$id_salesrep = get_the_ID();`: to query only data connected to the current user.

I create an empty variable, `$html ='';`, to store the output data for the Sales Rep, which will be built up next.

```
while ( $connected->have_posts() ) :
    $connected->the_post();
```
This loop goes through each Sales Rep post returned by the above query.

```
$id_salesrep = get_the_ID();
```

This is to get the ID of the current post.

#### 4.2.3. Displaying Sales Rep information

```
$html  .= '<div class="mb-container">
    <div class="mb-content">
        <div class="mb-your-sale">Your Sales Representative</div>
        <div class="mb-title-sale">'. get_the_title() .'</div>
        <img src=" '. get_the_post_thumbnail_url($id_salesrep).'" />
        <div class="mb-phone"><b>Phone Number</b>: '.rwmb_meta( 'phone', $id_salesrep ) .'</div>
        <div class="mb-email"><b>Email</b>: '.rwmb_meta( 'email', $id_salesrep ) .'</div>
        <div class="mb-experience"><b>Years of experience</b>: '.rwmb_meta( 'years_of_experience', $id_salesrep ) .'</div>
        <div class="mb-language"><b>Language</b>: '.rwmb_meta( 'language', $id_salesrep ) .'</div>
        <div class="mb-motto"><b>Working Motto</b>: '.rwmb_meta( 'working_motto', $id_salesrep ) .'</div>
</div>
```
These lines of code follow the HTML structure as well and display the sales representative's information linked to the current user. It’s quite the same with the code we used in the **MB Views**, but use the `rwmb_meta` function to get data from custom fields created with Meta Box.

We also use IDs of the fields as we did before, and `salesrep` is the slug of the custom post type where we saved the sales information.

![ID of the fields](https://imgur.elightup.com/TxRvxMy.png)

#### 4.2.4 Creating a shortcode

Finally, create a shortcode to display the Sales Rep information anywhere when the user is logged in.

```
add_shortcode( 'your_sales_rep', 'your_sales_representative' );
```
Now, go to the desired page and add a **Shortcode** block.

![Add a Shortcode block.](https://imgur.elightup.com/LCBQVVm.png)

Then, input the created shortcode in the box.

![Input the created shortcode.](https://imgur.elightup.com/h32Dt03.png)

So, you can see all the information of a Sales Rep display.

![All the information of a Sales Rep before styling](https://imgur.elightup.com/W5hTmMW.png)

Also, we’ll add **CSS** to style this section.

![Add CSS to style the Sales Rep section](https://imgur.elightup.com/u1GFNvU.png)

I’ve uploaded all lines of code to [GitHub](https://github.com/wpmetabox/tutorials/tree/master/display-sales-rep-information), so feel free to refer to them.

Now, on the frontend, let's see the final result! The Sales Rep looks great already! When logging in with a different account, the Sales Rep specifically assigned to that user will be displayed.

![Display dynamic, personalized data for users](https://imgur.elightup.com/QuNJwcG.gif)

So, it works the same with the first method with MB Views. Now, just choose the one that feels better to you.

If you’re interested in exploring more about relationships and dynamic content, check out this guide on [displaying related posts based on shared relationships with Meta Box](https://docs.metabox.io/tutorials/create-relationships-mb-views/).

# Displaying product variations - MB Views

Let’s create a single product page that contains different information of product variations stored in custom fields. Whenever you click on a color button, all the corresponding information of that variation will be displayed, even in the image gallery.

![Example of product variations](https://imgur.elightup.com/FuWHvCk.gif)

## Preparation

For this practice, we need these tools:

* [Meta Box](https://metabox.io): to have a framework to create custom post type and custom fields for products;
* [MB Custom Post Type & Custom Taxonomies](https://metabox.io/plugins/custom-post-type/): creates custom post types for the products;
* [MB Builder](https://metabox.io/plugins/meta-box-builder/): provides a UI in the back end to create custom fields to save extra information for product variations;
* [MB Group](https://metabox.io/plugins/meta-box-group/): helps you organize custom fields into repeatable and collapsible groups;
* [MB Views](https://metabox.io/plugins/mb-views/): create templates for the product page as well as get the custom fields’ value and display them.

## Video version

(Coming soon)

## 1. Creating a new custom post type

Go to **Meta Box > Post Types > New Post Type**.

![Create a new post type](https://imgur.elightup.com/g3nBd0W.png)

## 2. Creating custom fields

Go to **Meta Box > Custom Fields > Add New** to create fields you want.

![add new custom fields](https://imgur.elightup.com/sB2mWc8.png)

This is the structure of the fields that I’ll create.

<table>
<tbody>
<tr>
<td> Field </td>
<td> Types of Field </td>
<td> ID </td>
</tr>
<tr>
<td>Variations of Product</td>
<td>Group</td>
<td>variations_of_product</td>
</tr>
<tr>
<td>Product Image</td>
<td>Image Advanced</td>
<td>product_image</td>
</tr>
<tr>
<td>Size</td>
<td>Checkbox List</td>
<td>size</td>
</tr>
<tr>
<td>Original Price</td>
<td>Text</td>
<td>original_price</td>
</tr>
<tr>
<td>Promotional Price</td>
<td>Text</td>
<td>promotional_price</td>
</tr>
<tr>
<td>Status</td>
<td>Select</td>
<td>status</td>
</tr>
<tr>
<td>Color Name</td>
<td>Select</td>
<td>color_name</td>
</tr>
</tbody>
</table>

Each product may have more than one variation. Thus, we set the **Variations of Product** group as cloneable to have more spaces to add variations.

![Set groups to be cloneable](https://imgur.elightup.com/T5oEKfl.png)

After creating all the necessary fields, go to the **Settings** tab > **Location** > choose **Post Type** as **Online Shop** to apply these fields to it.

![Choose the wanted post type to apply the created custom fields](https://imgur.elightup.com/2va9DxP.png)

Back to the post editor, you will see all of the created custom fields.

![Created custom fields in the post editor](https://imgur.elightup.com/Ntyl4wY.png)

Now, just enter the information into the fields.

## 3. Displaying the variations information

To display the product variations information on the product page, you normally have to go to the theme’s files to add code or use a page builder. But, you have another way with the **MB Views** from **Meta Box** to create templates without touching the theme’s files.

So, let’s create a new template using it.

Instead of typing code into the box in the **Template** tab, you can insert fields to get their data.

![Insert fields in the template tab](https://imgur.elightup.com/KxxeSJE.png)

Just click the **Insert Field** button and choose which one you want. However, whenever you wanna add a field from a cloneable group, a loop will be added first. Just replace the text inside the loop by the field you want.

![Choose the wanted field](https://imgur.elightup.com/vZWtYLE.gif)

This is how it is after inserting all the fields.

![Insterting all the fields](https://imgur.elightup.com/o4BxH6F.png)

Also in the template, I get the value from the **Product Image** field twice. One displays in the large size, and one in the thumbnail size. All of them will be used to set a slider later.

I also changed the code a little bit to know when the variation has any promotion price and set a rule to display both of the original and promotional prices or just the original one.

![Change the code a little bit](https://imgur.elightup.com/NBp9TcQ.png)

Next, move to the **Settings** section of the view. Assign this template to the single product page.

![Assign this template to the single product page](https://imgur.elightup.com/ZysUrW0.png)

Go to the single product page, you can see the result.

![The result](https://imgur.elightup.com/238hUm2.gif)

It is so messy now. We’ll need some JS and CSS to make it more beautiful with a better layout.

Before styling, we need to edit this template a little bit more. Back to the view, then add some **div** tags to divide elements into sections. I put the code on our [Github](https://github.com/wpmetabox/tutorials/blob/master/display-product-variations/template-views.php), you can refer to it.

There is a notice that I added an A tag in the place where I output the color of variations. I also created a dynamic class there. It will generate different classes using the color name.

![Create dynamic class](https://imgur.elightup.com/nXxFEee.png)

I added an attribute named `data-id` for price, size, status as well as image gallery. This attribute will admit the value of the corresponding color name.

![Add an atribute](https://imgur.elightup.com/oN8nKj0.png)

On the single product page, all the elements have just been rearranged.

![All the elements of single product page have just been rearranged](https://imgur.elightup.com/m0ckVMh.gif)

## 4. Setting rules to display the variations

The images of the product variations will be in a slider and the information of each variation displays only when you choose the matching color. To have it, I use some JS and CSS. However, I’m using **My Custom Functionality** plugin instead of adding them directly to the theme. So, when I change the theme, it won’t be affected.

### Downloading the JS and CSS library

For the JS and CSS, I use the Slick library. It’s also available on [Github](https://github.com/kenwheeler/slick/tree/master/slick). We just need three files here.

![Use Slick library for the JS and CSS](https://imgur.elightup.com/fkSE9Mv.png)

Go to the folder of the My Custom Functionality plugin. Upload them into the corresponding JS and CSS folders.

### Creating custom JS for slider and rules

Next, to set a rule that stipulates for displaying the information of each variation as well as the slider, I’ll create a **custom.js** file in the **js** folder and add the following code to it.

![Create a custom.js file](https://imgur.elightup.com/qpLNLT0.png)

```js
jQuery(document).ready(function ($) {
    $('.slider-single').slick({
        slidesToShow: 1,
        slidesToScroll: 1,
        arrows: false,
        adaptiveHeight: false,
        infinite: false,
        useTransform: true,
        speed: 400,
        cssEase: 'cubic-bezier(0.77, 0, 0.18, 1)',

    });

    $('.slider-nav')
        .on('init', function (event, slick) {
            $('.slider-nav .slick-slide.slick-current').addClass('is-active');
        })
        .slick({
            slidesToShow: 4,
            slidesToScroll: 4,
            dots: false,
            focusOnSelect: false,
            infinite: false,
            responsive: [{
                breakpoint: 1024,
                settings: {
                    slidesToShow: 5,
                    slidesToScroll: 5,
                }
            }, {
                breakpoint: 640,
                settings: {
                    slidesToShow: 4,
                    slidesToScroll: 4,
                }
            }, {
                breakpoint: 420,
                settings: {
                    slidesToShow: 3,
                    slidesToScroll: 3,
                }
            }]
        });

    $('.slider-single').on('afterChange', function (event, slick, currentSlide) {
        $('.slider-nav').slick('slickGoTo', currentSlide);
        var currrentNavSlideElem = '.slider-nav .slick-slide[data-slick-index="' + currentSlide + '"]';
        $('.slider-nav .slick-slide.is-active').removeClass('is-active');
        $(currrentNavSlideElem).addClass('is-active');
    });

    $('.slider-nav').on('click', '.slick-slide', function (event) {
        event.preventDefault();
        var goToSingleSlide = $(this).data('slick-index');

        $('.slider-single').slick('slickGoTo', goToSingleSlide);
    });
    jQuery(".grouped-product .color-contain-group .color-group .color-name a").click(function (e) {
jQuery(".color-contain-group .color-group .color-name").removeClass("active");
jQuery(this).show();
jQuery(this).parent().addClass("active");
jQuery("div[data-id]").removeClass("active");
jQuery("div[data-id='" + jQuery(this).attr("href").replace("#", "") + "']").addClass("active");
jQuery('.slider-single').slick('refresh');
jQuery('.slider-nav').slick('refresh');
e.preventDefault();
    });

    jQuery(".size-contain-group .size-group .info .list-size a").click(function (e) {
        e.preventDefault();
    });

    jQuery('.size-contain-group .size-group .info .list-size .size-name').click(function(){
        jQuery(this).addClass('active');
        jQuery('.size-contain-group .size-group .info .list-size .size-name').not(this).removeClass('active')
    })
})
```
**Explanation**:

* `$('.slider-single').slick({ })` to create a slider for the elements that have the `.slider-single` class. They are product images which I set to display in the large size.
* `$('.slider-nav')`: to create a slider as well. The elements which have the .slider-nav class are product images which I set to display in the thumbnail size.
* `.on('init', function (event, slick) { })`: to identify which thumbnail is in the current slide. And, that thumbnail will be added a class as “is active”.
* `$('.slider-single').on('afterChange', function (event, slick, currentSlide) { })`: to trigger the event that someone clicks on the large image to move to the other one, then the thumbnail slider will be changed to the corresponding thumbnail.
* `$('.slider-nav').on('click', '.slick-slide', function (event) { })`: to trigger that event when someone clicks on the thumbnail slider. Then, it also displays the corresponding large image in the large slider.
* `jQuery(".grouped-product .color-contain-group .color-group .color-name a").click(function (e) { })`: to trigger when someone clicks on a product color using the A tag we added in the view.
* `jQuery(".color-contain-group .color-group .color-name").removeClass("active"); jQuery(this).show(); jQuery(this).parent().addClass("active")`: to remove the active class from the unselected color and add it to the selected one.
* `jQuery("div[data-id]").removeClass("active"); jQuery("div[data-id='" + jQuery(this).attr("href").replace("#", "") + "']").addClass("active")`: to remove and add the active class to all the elements that have value of the data-id attribute as the name of the color. It means that when you click on a color, all the corresponding information of that variation such as price, size, status, and image gallery will be displayed.
* `jQuery('.slider-single').slick('refresh')` and `jQuery('.slider-nav').slick('refresh')`: to refresh both sliders to load new images.

### Declaring the js and css files

Now, add code inside the function `custom_enqueue_files()` in the `plugin.php` file in the case you use the 3rd party plugin as I’m using. In the case you want to insert code directly into the theme file, use the `functions.php` file.

```php
            wp_enqueue_style('slick', plugin_dir_url( __FILE__ ).'/assets/css/slick.css');
	wp_enqueue_style('slick-theme', plugin_dir_url( __FILE__ ).'/assets/css/slick-theme.css');

	wp_enqueue_script('custom', plugin_dir_url( __FILE__ ).'/assets/js/custom.js', ['jquery']);
	wp_enqueue_script('slick-min', plugin_dir_url( __FILE__ ).'/assets/js/slick.min.js', ['jquery']);
	wp_enqueue_script('script', plugin_dir_url( __FILE__ ).'/assets/js/script.js', ['jquery']);
```

Now, the product images have already turned into a slider, but we cannot see all the information of each variation in the right place.

![The product images turn into a slider](https://imgur.elightup.com/QR1FF2Z.gif)

## 5. Styling the product page

Go to the view of Meta Box, add some code into the **CSS** tab of the view.

![Add some code into the css tab](https://imgur.elightup.com/UR1Fdjh.png)

You can refer to all of it on [Github](https://github.com/wpmetabox/tutorials/tree/master/display-product-variations).

Back to a singular product page, it’ll have a new look. When you choose a color, the photo gallery will automatically change according to that color. At the same time, the sizes and prices also change correspondingly.

![The final result](https://imgur.elightup.com/FuWHvCk.gif)

# Displaying product variations - Using Meta Box + Bricks

import LiteYouTubeEmbed from 'react-lite-youtube-embed';
import 'react-lite-youtube-embed/dist/LiteYouTubeEmbed.css';

In this tutorial, let’s find out how to have product variations using custom fields created by Meta Box and display them on a single page by Bricks.

This is the page that I created as an example:

![The example of displaying product variations on the single product page](https://imgur.elightup.com/Pw34n4k.png)

Each of the variations here is set as a color of the product. When you choose a color, it will get the corresponding image gallery. When you choose another one, it will get a different gallery. At the same time, other information of that variation will automatically come up.

Creating variations for the products is quite special practice. If you are using some of the other page builders, you may need to use code. However, you can do it totally visually with Bricks.

Let’s see how to do it.

## Video version

<LiteYouTubeEmbed id='jl988lFpF9o' />

## Preparation

Each product is a post of a custom post type. The name and description of the product is the title and content of the post. Other information such as product image, size, price and status will be saved in custom fields created by Meta Box.

Here are the tools that we need for this practice:

* [Meta Box core plugin](https://wordpress.org/plugins/meta-box/): to have a framework to create custom fields and custom post types;
* [MB Custom Post Types & Custom Taxonomies](https://metabox.io/plugins/custom-post-type/): to create custom post type for the products named Online Shop;
* [MB Builder](https://metabox.io/plugins/meta-box-builder/): to have a UI in the backend to create custom fields easily for saving information about the products;
* [MB Group](https://metabox.io/plugins/meta-box-group/): to organize custom fields into repeatable and collapsible groups;
* **Bricks**: to build the page visually.

## 1. Creating a custom post type

Go to **Meta Box** > **Post Types** > **Add New** to create a new post type for the products.

![Create a new post type](https://imgur.elightup.com/uLCsLDv.png)

After publishing, you’ll see a new **Online Shops** menu in the admin dashboard.

![A new menu appears after creating a new post type](https://imgur.elightup.com/abGmaiG.png)

Let’s create custom fields to save products’ information.

## 2. Creating custom fields

Go to **Meta Box** > **Custom Fields** to create a new field group.

![Create custom fields by Meta Box](https://imgur.elightup.com/Sg8Ttse.png)

Since each variation will have the same types of detailed information, we’ll include them all in a group. This is the group field that I created.

![Create variations of product group](https://imgur.elightup.com/N2J578J.png)

![Variations Product group with subfields inside](https://imgur.elightup.com/OiujakZ.png)

There may be some variations of each product, so this group should be cloneable to have an ‘**Add more**’ button to easily add more variations like this.

![Add more variations](https://imgur.elightup.com/0s7c77I.png)

Set it to be cloneable by this tick.

![Set the Variations of Product group as cloneable to have more spaces to add variations](https://imgur.elightup.com/yudwpEd.png)

After that, move to the **Settings** tab > choose **Location** as **Post Type** and then select the **Online Shop** post type to apply these fields to it.

![Choose the location as post type of the product](https://imgur.elightup.com/bTUXNiv.png)

Now, when adding a new post in the post type, you’ll see all the created fields. Just fill in some information.

![The created custom fields are displayed in post editor](https://imgur.elightup.com/xCVmqQx.png)

## 3. Displaying the product variations on the product page

### 3.1 Creating a new template

Go to **Bricks** > **Templates**.

![Go to Bricks > Templates to create new template](https://imgur.elightup.com/t4mdiPO.png)

Since the product page is a single page, select the template type as **Single**, then just edit it with **Bricks**.

![Select the template type as Single and edit it with Bricks](https://imgur.elightup.com/X0mPi9e.png)

Remember to set conditions for the template to apply it to the single page of the products post type.

![Set conditions for the template](https://imgur.elightup.com/QeEgFOS.png)

And then, you can set the preview of the products page in the **Populate Content** section.

![Set the preview of the products page in the populate content section](https://imgur.elightup.com/RdA38OI.png)

### 3.2 Displaying product's information

First, add a **Section** element to have a container for covering all the product information.

![Add a section element to have a container to cover all the product information](https://imgur.elightup.com/AGtz8zC.png)

Then, I will add some **Div** elements to set the layout for the page. We’ll use a Div element to contain each section for each one of gallery, color, price, size, and status. Inside this cloak **Div** element, there will be another **Div** to create a loop to call all the data of the section.

![Add some Div elements to set the layout for the page](https://imgur.elightup.com/KaVRT3e.png)

Since each variation will have its own image gallery, you should add a **Div** element and enable the query loop for it to call all the images. Choose the type as **MB Group** which is the group that I created to save the product details.

![Choose the type as MB Group in a Div element setting](https://imgur.elightup.com/UXtNVUt.gif)

Then, add a **Carousel** element inside the Div to display the images as a slider.

![Add a Carousel element to display the images as a slider](https://imgur.elightup.com/SnFdjqq.png)

Since the images of the product are saved in the custom fields created by **Meta Box**, go to the **Select dynamic data** section of the **Carousel** and look for the fields that we’ve saved the images.

![Looking for the fields was created at the the Select dynamic data section](https://imgur.elightup.com/GwpHsQg.png)

Now, you will see all the images display immediately.

![The product images have already displayed](https://imgur.elightup.com/oFolyc2.png)

Add a new **Div** element to contain all the other product information.

![Create a new Div element to contain all the other product information](https://imgur.elightup.com/A05wyDq.png)

Inside it, add the **Post Title** and **Post Content** elements to display the products’ name and description.

![Input the post title and post content elements to display the products’ name and description](https://imgur.elightup.com/DoifEOh.png)

For the section to display the color of the product, add another **Div** element.

![Add another Div element to display the color of the product](https://imgur.elightup.com/GNLzJVq.png)

Then, add a **Basic Text** and change the text to differentiate this section.

![Insert a Basic Text and move the text to differentiate this section](https://imgur.elightup.com/wuGXjqA.png)

I’ll also add some **Div** elements for this section as well. One is to display the color labels for the variations. So, enable the query loop for it. Then, also choose the name of the group field that we’ve just created.

![Enable the query loop and choose the name of the group field ](https://imgur.elightup.com/q8MbFG2.png)

Now, to get the color information, add another** **Div element, then choose **HTML** tag as a link. This helps to allow the viewer to click on the color name and the information will be changed to one of the corresponding variations. And then, select the link type as **Dynamic Data** to have the options to connect this div to a custom field. In my case, it's the **Color Name** field.

![Select the link type as Dynamic Data to have the options to connect the new div to a custom field](https://imgur.elightup.com/slzKbr4.gif)

You may want to not redirect the viewer to a new page when choosing color. So add an additional hash character. As a result, just information on the current page will be changed when clicking to select the color.

![Insert an additional hash character to not redirect the viewer to a new page when choosing color](https://imgur.elightup.com/ClFifmp.png)

Next, add a **Basic Text** element, then use the **Select dynamic data** button to get the color information of the product from the custom field.

![Apply the select dynamic data button to get the color information of the product from the custom field](https://imgur.elightup.com/LMHgv7R.png)

For the rest of the information, use the Div element as you want. It’s kind of the logic of getting color. So, just follow what has been done to get the color of the product.

![Use the Div element to show information](https://imgur.elightup.com/xuCq1il.png)

There will be a **Div** element to contain the prices. There will be multiple variations and each one will have its own price, which are saved data in the cloneable group, so also enable the query loop for this **Div** element, and choose the group name that we’ve created.

![Enable the query loop and choose the group name that we’ve created for product](https://imgur.elightup.com/6DFAG7W.png)

After that, add a **Basic Text** element to display the promotional price. Similarly to get the color information, use the **Select dynamic data** button and connect this element to the corresponding field.

![Using the Select dynamic data button for connecting this element to the corresponding field](https://imgur.elightup.com/LMHgv7R.png)

To show the unit of price, you can also add a **currency** character like this:

![Add a currency character to show the unit of price of product](https://imgur.elightup.com/FU5b7Et.png)

For original price, size and status, do likewise.

And then, add a **Button** element to have the button to order or buy the product.

![Including a button element to have the button to order or buy the product](https://imgur.elightup.com/YqQPG58.png)

Let’s see how it displays on the frontend.

![Product information displayed on the frontend](https://imgur.elightup.com/WcpcFiQ.png)

### 3.3 Setting rules to display variations

To trigger when the viewer clicks on the color, then change the information to the corresponding one, we should use some attributes for the added elements and JS code.

Go to the cloak **Div** element that contains each section for gallery, color name, price, size, and status to add attribute like this.

![Using some attributes for the added elements and JS code to change the information to the corresponding one](https://imgur.elightup.com/im3quTD.gif)

Since all the sections of the variation will be called at the same time based on these attributes, make sure to use an unifying name for all the adding attributes. Also, set the attributes’ value as the value in the **Color Name** field by using the dynamic data.

![Using the dynamic data to set the attributes’ value as the value in the Color Name field](https://imgur.elightup.com/SMrvPjU.png)

After that, go to the settings of this template > **Page Settings** > **Custom Code** to add some JS to the **Body (footer) scripts** section to create a function for triggering the moment users click to the color name, then activate and deactivate the information of the corresponding variations.

![Insert some JS to the Body (footer) scripts section to create a function for triggering the moment users click to the color name](https://imgur.elightup.com/ewACPuR.png)

```
<script>
    jQuery(document).ready(function(){     jQuery(".color-name:first,.group-image:first,.price-group:first,.info:first,.status:first").addClass('active');
        jQuery(".color-contain-group .color-group .color-name a").click(function (e) {
        jQuery(".color-contain-group .color-group .color-name").removeClass("active");
        jQuery(this).show();
        jQuery(this).parent().addClass("active");
        jQuery("div[data-id]").removeClass("active");
        jQuery("div[data-id='" + jQuery(this).attr("href").replace("#", "") + "']").addClass("active");
        e.preventDefault();
       });
    });
</script>
```

In there, `jQuery(".color-contain-group .color-group .color-name a").click()` is to trigger when someone clicks on a product color. Then admit the name of the selected color by setting it active. Compare it with the value of the added attribute from other elements. If they are matched, the information from those elements will be displayed.

Now, you can see the active status changing when choosing any color.

![The active status changing when choosing any color](https://imgur.elightup.com/BDMebEN.gif)

For styling the page, you can go back to the template editor with **Bricks** and style any element you want.

![Styling any element as you want with Bricks](https://imgur.elightup.com/9MDGnuo.png)

For styling the color, I will add another attribute for the color name like this.

![Add another attribute for the color name](https://imgur.elightup.com/3Ebx4Sk.png)

If you want to have further styling, go to the Custom Code section again and add some CSS code.

![Add some CSS code in the Custom Code section to have further styling](https://imgur.elightup.com/lSPb96i.png)

Now, the page has turned to a new look.

![The product variations turned into a new look](https://imgur.elightup.com/Pw34n4k.png)

# Displaying product variations - Meta Box + Oxygen

Let’s display product variations that are stored in custom fields to the product page. We’ll use **Oxygen** to build the page.

![Example of product variations](https://imgur.elightup.com/TbbFLpa.gif)

## Video version

(Coming soon)

## Preparation

For this practice, we need these tools:

* [Meta Box](https://metabox.io): to have a framework to create custom post type and custom fields;
* [MB Custom Post Types & Custom Taxonomies](https://metabox.io/plugins/custom-post-type/): to create a custom post type for the products;
* [MB Builder](https://metabox.io/plugins/meta-box-builder/): to have an UI to create custom fields right in the back end to save the product variations;
* [MB Group](https://metabox.io/plugins/meta-box-group/): to organize custom fields into repeatable / cloneable and collapsible groups.

The last one is [Oxygen](https://oxygenbuilder.com/). You should use the 3.9 version or higher, which already has integration with Meta Box.

## 1. Creating a new custom post type

Go to **Meta Box > Post Types > New Post Type**.

![Create a new custom post type](https://imgur.elightup.com/sA6AR2s.png)

## 2. Creating custom fields

The product normally has a lot of information that we need to save in custom fields. Go to **Meta Box > Custom Fields > Add New** to create them.

![create custom fields](https://imgur.elightup.com/sB2mWc8.png)

In this tutorial, just take a typical example of a fashion product and look at the below structure for fields:

<table>
<tbody>
<tr>
<td> Field </td>
<td> Types of Field </td>
<td> ID </td>
</tr>
<tr>
<td>Variations of Product</td>
<td>Group</td>
<td>variations_of_product</td>
</tr>
<tr>
<td>Product Image</td>
<td>Image Advanced</td>
<td>product_image</td>
</tr>
<tr>
<td>Size</td>
<td>Checkbox List</td>
<td>size</td>
</tr>
<tr>
<td>Original Price</td>
<td>Text</td>
<td>original_price</td>
</tr>
<tr>
<td>Promotional Price</td>
<td>Text</td>
<td>promotional_price</td>
</tr>
<tr>
<td>Status</td>
<td>Select</td>
<td>status</td>
</tr>
<tr>
<td>Color Name</td>
<td>Select</td>
<td>color_name</td>
</tr>
</tbody>
</table>


Since the product may have more than one variation, I set this group to be cloneable.

![Set the Variations of Product group as cloneable to have more spaces to add variations.](https://imgur.elightup.com/bTOZOMH.png)

In the **Settings** tab of the field group, remember to set location for it to be your product’s post type.

Back in the post editor of your product, you’ll see the created fields.

![The created custom fields are displayed in post editor.](https://imgur.elightup.com/Ntyl4wY.png)

Just enter information for the product.

## 3. Displaying the variations information

Go to the **Oxygen** menu and create a new template.

In the settings of the template, choose a design that you want the template inherit from, then choose your post type in the **Singular** section to apply the template to it.

![Choose the design and post type for the template.](https://imgur.elightup.com/Lnkfcnq.png)

Back to the post editor of your post type, you will see the section with **Edit with Oxygen** button. Click it to edit the template.

![Click Edit with Oxygen to edit the template.](https://imgur.elightup.com/vTyDODo.png)

Now, add a **Section** component for having a container.

![Add a Section component](https://imgur.elightup.com/kcgbyHK.png)

Then, add the **Code Block** inside and choose the **PHP & HTML** section to add code.

![Go to PHP & HTML in Code Block to add code.](https://imgur.elightup.com/FW8fQ9F.png)

![Add code to the Code Block](https://imgur.elightup.com/txC7S8S.png)

This code was uploaded to [Github](https://github.com/wpmetabox/tutorials/blob/master/display-product-variations/template-oxygen.php), you can refer to it for more details.

There are some points in the code we should clarify:

First, our group is cloneable, so we must create a loop to get information. Usually, you can create a loop only, then display all the fields inside the loop. But, for styling later and setting display rules for the variation easier, we should create a loop for each information separately.

To get product images, I use this code:

```php
<?php foreach ( $variations_of_product as $gallery ) : ?>
	<?php $variation_image_ids = $gallery['product_image'];?>
	<?php foreach ( $variation_image_ids as $large_image ) : ?>
		<?php $large = RWMB_Image_Field::file_info( $large_image, ['size' => 'large'] ); ?>
		<img src="<?php echo $large['full_url'] ?>">
	<?php endforeach; ?>
	<?php foreach ( $variation_image_ids as $thumbnail_image ) : ?>
		<?php $thumbnail = RWMB_Image_Field::file_info( $thumbnail_image, ['size' => 'thumbnail'] ); ?>
		<img src="<?php echo $thumbnail['full_url'] ?>">
	<?php endforeach; ?>
<?php endforeach; ?>
```
In there:
* `<?php $variation_image_ids = $gallery['product_image'];?>`: is to get value from the field that has ID product_image;
* `<?php foreach ( $variation_image_ids as $large_image ): ?>`: a loop to display all the images saved in the field;
* `RWMB_Image_Field::file_info()`: is to get images url.

I displayed all the images twice, one in large size, and one in thumbnail size. They’ll be used to set in the slider later.

For the price, there are Promotional Price and Original Price, but promotional price is not always available. So, I set a rule to display them as below:

```php
<?php $j = 0; ?>
<?php foreach ( $variations_of_product as $price ) : ?>
    <?php $j ++; ?>
    <?php if ($price['promotional_price']): ?>
        <?php echo $price['promotional_price'] ?>
        <?php echo $price['original_price'] ?>
    <?php else: ?>
        <?php echo $price['original_price'] ?>
    <?php endif; ?>
<?php endforeach; ?>
```

For the Size, it is a Checkbox List field with several options and allows choosing more than one option. So that we need a loop to get all the saved options. In addition, each option always has both the value and label. We use this syntax to get the values of options:

```php
<?php $k = 0; ?>
<?php foreach ( $variations_of_product as $size_group ) : ?>
    <?php $k ++; ?>
    <?php $o = 0; ?>
        <?php $values = $size_group['size']; ?>
        <?php foreach ( $values as $value ) : ?>
            <?php $o ++; ?>
            <?php echo $value; ?>
        <?php endforeach;?>
<?php endforeach; ?>
```

The Status field is a **Select** field (which has options as well as the checkbox list), but instead of getting the value of options as the Size, we should get the label. Then, the code will be much different from the Size’s one.

```php
<?php
    foreach ( $variations_of_product as $key => $variation ) {
        $class  = $key === 0 ? ' active' : '';
        $status = isset( $variation['status'] ) ? $variation['status'] : '';
        $group  = rwmb_get_field_settings( 'variations_of_product' );
    foreach ( $group['fields'] as $field ) {
        if ( empty( $field['options'] ) ) {
            continue;
        }
?>
    <?php if($field['options'][$status]): ?>
        <?= $field['options'][$status]; ?>
    <?php endif; ?>
    <?php
        }
    }
?>
```

Furthermore, variations are differentiated by color, so we have this code to get colors:

```php
<?php foreach ( $variations_of_product as $color ) : ?>
	<?php $variation_color = $color['color_name']; ?>
			<a href="#<?php echo $variation_color ?>" class="color <?php echo $variation_color ?>" title="<?php echo $variation_color ?>"><?php echo $variation_color ?></a>
<?php endforeach; ?>
```
In there, I added an *a* tag and a dynamic class. There will be different classes for each color and each one will be the name of the color. This class plays an important role in helping us to define which variations are showing.

Then, I added some `div` tags to the code to set elements in a reasonable layout. I also added an attribute named `data-id` in the gallery, price, size, and status sections.

` data-id="<?php echo $price['color_name'] ?>" `

This attribute will obtain the name of the corresponding color, then we’ll know which images, prices, status, or sizes are of which variation. So that we can easily choose which information should be shown to fit the chosen color.

Apply the code then back to a single product page, you’ll see all the information of product display.

![Apply the code then back to a single product page](https://imgur.elightup.com/fOaCeZD.png)

## 4. Setting rules to display the variations

Information of each variation is not always displayed. They will be shown only when the matching color displays. To set that rule and have a slider for the image gallery, we need some JS code. As well as, we should use some CSS to have a beautiful display.

Please notice that you can use a 3rd party plugin to add JS and CSS instead of inserting them directly into the theme file.

### Downloading the js and css library

For the slider and the rule, I use the Slick library. It is also available on [Github](https://github.com/kenwheeler/slick). We just need three files here.

![JS and CSS files in the Slick library.](https://imgur.elightup.com/fkSE9Mv.png)

### Creating custom js for slider and rules

Next, create a new **custom.js** file in the **js** folder and add code to it.

![Add code to custom.js file.](https://imgur.elightup.com/qpLNLT0.png)

 ```js
jQuery(document).ready(function ($) {
    $('.slider-single').slick({
        slidesToShow: 1,
        slidesToScroll: 1,
        arrows: false,
        adaptiveHeight: false,
        infinite: false,
        useTransform: true,
        speed: 400,
        cssEase: 'cubic-bezier(0.77, 0, 0.18, 1)',

    });

    $('.slider-nav')
        .on('init', function (event, slick) {
            $('.slider-nav .slick-slide.slick-current').addClass('is-active');
        })
        .slick({
            slidesToShow: 4,
            slidesToScroll: 4,
            dots: false,
            focusOnSelect: false,
            infinite: false,
            responsive: [{
                breakpoint: 1024,
                settings: {
                    slidesToShow: 5,
                    slidesToScroll: 5,
                }
            }, {
                breakpoint: 640,
                settings: {
                    slidesToShow: 4,
                    slidesToScroll: 4,
                }
            }, {
                breakpoint: 420,
                settings: {
                    slidesToShow: 3,
                    slidesToScroll: 3,
                }
            }]
        });

    $('.slider-single').on('afterChange', function (event, slick, currentSlide) {
        $('.slider-nav').slick('slickGoTo', currentSlide);
        var currrentNavSlideElem = '.slider-nav .slick-slide[data-slick-index="' + currentSlide + '"]';
        $('.slider-nav .slick-slide.is-active').removeClass('is-active');
        $(currrentNavSlideElem).addClass('is-active');
    });

    $('.slider-nav').on('click', '.slick-slide', function (event) {
        event.preventDefault();
        var goToSingleSlide = $(this).data('slick-index');

        $('.slider-single').slick('slickGoTo', goToSingleSlide);
    });
    jQuery(".grouped-product .color-contain-group .color-group .color-name a").click(function (e) {
jQuery(".color-contain-group .color-group .color-name").removeClass("active");
jQuery(this).show();
jQuery(this).parent().addClass("active");
jQuery("div[data-id]").removeClass("active");
jQuery("div[data-id='" + jQuery(this).attr("href").replace("#", "") + "']").addClass("active");
jQuery('.slider-single').slick('refresh');
jQuery('.slider-nav').slick('refresh');
e.preventDefault();
    });

    jQuery(".size-contain-group .size-group .info .list-size a").click(function (e) {
        e.preventDefault();
    });

    jQuery('.size-contain-group .size-group .info .list-size .size-name').click(function(){
        jQuery(this).addClass('active');
        jQuery('.size-contain-group .size-group .info .list-size .size-name').not(this).removeClass('active')
    })
})
```
Explanation:

* `$('.slider-single').slick({ })` to create a slider for the elements that have the .slider-single class. They are product images which I set to display in the large size.
* `$('.slider-nav')`: to create a slider as well. The elements which have the .slider-nav class are product images which I set to display in the thumbnail size.
* `.on('init', function (event, slick) { })`: to identify which thumbnail is in the current slide. And, that thumbnail will be added a class as “is active”.
* `$('.slider-single').on('afterChange', function (event, slick, currentSlide) { })`: to trigger the event that someone clicks on the large image to move to the other one, then the thumbnail slider will be changed to the corresponding thumbnail.
* `$('.slider-nav').on('click', '.slick-slide', function (event) { })`: to trigger that event when someone clicks on the thumbnail slider. Then, it also displays the corresponding large image in the large slider.
* `jQuery(".grouped-product .color-contain-group .color-group .color-name a").click(function (e) { })`: to trigger when someone clicks on a product color using the A tag we added in the view.
* `jQuery(".color-contain-group .color-group .color-name").removeClass("active"); jQuery(this).show(); jQuery(this).parent().addClass("active")`: to remove the active class from the unselected color and add it to the selected one.
* `jQuery("div[data-id]").removeClass("active"); jQuery("div[data-id='" + jQuery(this).attr("href").replace("#", "") + "']").addClass("active")`: to remove and add the active class to all the elements that have value of the data-id attribute as the name of the color. It means that when you click on a color, all the corresponding information of that variation such as price, size, status, and image gallery will be displayed.
* `jQuery('.slider-single').slick('refresh') and jQuery('.slider-nav').slick('refresh')`: to refresh both sliders to load new images.

### Declaring the js and css files

Add code inside the function **custom_enqueue_files()** in the `plugin.php` file in the case you use the 3rd party plugin. Otherwise, add to the `functions.php` to declare all the above js and css files.

```php
            wp_enqueue_style('slick', plugin_dir_url( __FILE__ ).'/assets/css/slick.css');
	wp_enqueue_style('slick-theme', plugin_dir_url( __FILE__ ).'/assets/css/slick-theme.css');

	wp_enqueue_script('custom', plugin_dir_url( __FILE__ ).'/assets/js/custom.js', ['jquery']);
	wp_enqueue_script('slick-min', plugin_dir_url( __FILE__ ).'/assets/js/slick.min.js', ['jquery']);
	wp_enqueue_script('script', plugin_dir_url( __FILE__ ).'/assets/js/script.js', ['jquery']);
```

Go back to a single product page, there is a slider and some differences.

![The product images have already turned into a slider.](https://imgur.elightup.com/QR1FF2Z.gif)

## 5. Styling the product page

Back to page editor by Oxygen, go to **Manage > Stylesheets > Add Stylesheet** to have space to add CSS.

![Go to Manage > Stylesheets > Add Stylesheet to have space to add CSS](https://imgur.elightup.com/bXom5pT.png)

Then add code into the box. All the code is uploaded into [Github](https://github.com/wpmetabox/tutorials/blob/master/display-product-variations-with-Oxygen/custom.css), so you can refer to it.

![Add CSS to the box](https://imgur.elightup.com/fTmhDu0.png)

Now, on the single product page, you’ll see a final result. When you select a color, the photo gallery will change to that color automatically. At the same time, the sizes and prices also change correspondingly.

![The product variations turned into a new look.](https://imgur.elightup.com/TbbFLpa.gif)

# Displaying related posts based on a shared relationship using MB Views

import LiteYouTubeEmbed from 'react-lite-youtube-embed';
import 'react-lite-youtube-embed/dist/LiteYouTubeEmbed.css';

This time, we’ll display related posts based on a shared relationship using the **MB Views** extension. You can use this approach to show related events by the same artist, products in the same category, or articles by the same author.

We will create a bi-directional relationship between events and artists using another extension from Meta Box - MB Relationships. Then, show events linked to the same artist on a single event page like this.

![Show events linked to the same artist on a single event page](https://imgur.elightup.com/gCYnR7G.png)

## Video version

<LiteYouTubeEmbed id='Q6pZg3zBKJ0'/>

## Preparation

In this practice, we highly recommend using [Meta Box AlO](https://metabox.io/aio/). This premium version includes **the framework** and **all essential extensions**, giving you quick access to the advanced features we’ll use.

Here are some needed extensions:

* [MB Custom Post Type](https://metabox.io/plugins/custom-post-type/): to create custom post types for the events and artists.
* [MB Relationships](https://metabox.io/plugins/mb-relationships/): to create relationships between these post types.
* [MB Views](https://metabox.io/plugins/mb-views/): to create a template for displaying related posts based on a relationship.
* [MB Admin Columns](https://metabox.io/plugins/mb-admin-columns/): to display the related events and related artists in the dashboard. It’s just optional.
* [MB Builder](https://metabox.io/plugins/meta-box-builder/): to have the UI create the relationship in an intuitive way. In addition, if you want to add extra information about the events and artists, you also can use this extension to create custom fields to store that kind of data. In this practice, I don’t use it to create custom fields to make it simpler.

## 1. Creating new custom post types

Go to **Meta Box** > **Post Types** to create a new custom post type for the artists and another one for events.

![Go to Meta Box to create new custom post types for the artists and events.](https://imgur.elightup.com/iFokCSM.png)

After publishing, you’ll see the created custom post types in the admin dashboard.

![The created custom post types in the admin dashboard](https://imgur.elightup.com/llIikjc.png)

Now, we can add some posts for each post type.

Then, let's create a relationship between the events and artists.

## 2. Creating the relationship

Go to **Meta Box** > **Relationships** to create the relationships between the Events and Artists post types.

![Create the relationships](https://imgur.elightup.com/unNtU2B.png)

You can enter all the settings for the relationship and each side of it in the **From** and **To** sections.

![You can enter all the settings for the relationship and each side of it in the From and To sections.](https://imgur.elightup.com/QPj5TFc.png)

Because we’re setting the relationship between two post types, set the **Object type** as **Post** in both sections.

![Set the Object type as Post in both sections.](https://imgur.elightup.com/vlRK9Nx.png)

In the **Post type** option, choose the post type you want to create a relationship with. The relationship is bidirectional, so you can put the post types not in order. I set the **Events** in the **From** section, and the rest is **Artists**.

![In the Post type option, choose the post type to create a relationship with](https://imgur.elightup.com/rB6V3ny.png)

Next, this setting is available when you activate the **MB Admin Columns** extension only.

![The setting enables to show a columns in the dashboard](https://imgur.elightup.com/4oF5Bjv.png)

Once enabled, columns will appear in the dashboard showing related events and artists.

![Columns will appear in the dashboard showing related events and artists.](https://imgur.elightup.com/ja5ibTu.png)

In the **Field** tab, you can set the label for the relationship section that shows in the post editor.

![In the Field tab, you can set the label for the relationship section.](https://imgur.elightup.com/KxQ7w1B.png)

There’ll be a box at the right sidebar to choose **which Artists are related to the current post** in the **Events** post type, and vice versa.

![A section allow you choose which Artists are related to the current post in the Events post type](https://imgur.elightup.com/f8o8pSf.png)

After publishing, go to a post editor; you can see a section like that allowing you to select several artists.

![Select several artists](https://imgur.elightup.com/VbKVNKx.gif)

Here is my example of filling out all relationship information for events and artists.

![All relationship information for events and artists](https://imgur.elightup.com/1mTj4jm.png)

## 3. Showing related posts based on a shared relationship

This is my single event page before this practice.

![Single event page](https://imgur.elightup.com/rdefRcw.png)

Now, I will add other events that the artist of this event also participates in, like I showed at the beginning. I named this section as Related Events.

Now, head over to **Meta Box** > **Views**, and create a new template specifically for this purpose.

![Create a new template.](https://i0.wp.com/images.elightup.com/meta-box/blog/display-related-posts-shared-relationship-mb-views/create-new-template..png)

With **MB Views**, you can add some lines of code directly to do what you want.

![Add code directly](https://i0.wp.com/images.elightup.com/meta-box/blog/display-related-posts-shared-relationship-mb-views/add-code-directly.png)

Here is my example code:

```
<h2 style="font-weight:bold;">Related Events</h2>
{% set artist_related = { relationship: { id: 'event-to-artist', from: post.ID }, post_type: 'artist' } %}
{% set artists = mb.get_posts(artist_related)|reverse %}
{% set unique_events = [] %}

{% for artist in artists %}
    {% set event_related = { relationship: { id: 'event-to-artist', to: artist.ID }, post_type: 'event' } %}
    {% set events = mb.get_posts(event_related)|reverse %}

    {% for event in events %}
        {% if event.ID not in unique_events and event.ID != post.ID %}
            {% set unique_events = unique_events|merge([event.ID]) %}
            <li><a href="{{ event.url }}">{{ event.post_title }}</a></li>
        {% endif %}
    {% endfor %}

{% endfor %}
```

**Explanation**:

```
<h2 style="font-weight:bold;">Related Events</h2>
```

This line sets the title for the section.

```
{% set artist_related = { relationship: { id: 'event-to-artist', from: post.ID }, post_type: 'artist' } %}
```

We create the `artist_related` variable to query posts of the **Artist** post type that are related to the current post via the relationship ID (`event-to-artist`).

```
{% set artists = mb.get_posts(artist_related)|reverse %}
```

Then, use the Meta Box function (`mb.get_posts`) to retrieve the related artists and apply the `reverse` filter to change their order. And the result is saved into the `artists` variable.

```
{% set unique_events = [] %}
```

This line helps to initialize an empty array, avoiding showing duplicate events later.

Loop through each artist in the list.

```
{% for artist in artists %}
```

Inside the loop, we create a new `event_related` variable to get all events connected to that artist, as you can see in the code below.

```
{% set event_related = { relationship: { id: 'event-to-artist', to: artist.ID }, post_type: 'event' } %}
```

Similarly to how we retrieved the artists earlier, we now use the following code to get the events related to each artist, reverse their order, and store the result in the `events` variable.

```
{% set events = mb.get_posts(event_related)|reverse %}
```

Now, we go deeper into another loop to go through each related event.

```
{% for event in events %}
        {% if event.ID not in unique_events and event.ID != post.ID %}
            {% set unique_events = unique_events|merge([event.ID]) %}
        {% endif %}
{% endfor %}
```

It will check if the event is not the current one and hasn’t already been added to our list. If both conditions are met, this line will help to add the event to the list.

And this line below displays the event as a list item, with a clickable link to the event page and the event’s title.

```
<li><a href="{{ event.url }}">{{ event.post_title }}</a></li>
```

That’s all for the code.

Now, just move to the **Settings** section of the view, set the **Type** as **Singular**, choose the **Location** as the post type where you want the event information displayed.

![Set location to the view.](https://i0.wp.com/images.elightup.com/meta-box/blog/display-related-posts-shared-relationship-mb-views/set-view-location.png)

Go to the frontend, related events appear under each single event post. It also works well when you check on another post.

![There are some posts displayed in the related events section on each single event post](https://imgur.elightup.com/ldG9pph.gif)

# Displaying related posts based on a shared relationship with Meta Box

import LiteYouTubeEmbed from 'react-lite-youtube-embed';
import 'react-lite-youtube-embed/dist/LiteYouTubeEmbed.css';

Today, we’re going to **create and display related posts in a single post based on a shared relationship** with **Meta Box**. This can be applied to various scenarios, such as showing related events connected to the same artists, related products within the same category, or additional articles by the same author.

In this example, I’ll show events linked to the same artist on a single event page like this:

![Show events linked to the same artist on a single event page](https://imgur.elightup.com/gCYnR7G.png)

## Video version

<LiteYouTubeEmbed id='Pkgzl3TSy1c'/>

## Preparation

In this practice, we’ll have two separate custom post types: Events and Artists. Also, we will create a bi-directional relationship between them, then show events linked to the same artist on a single event page.

These are some tools we need for this tutorial:

* [The Meta Box core plugin](https://wordpress.org/plugins/meta-box/): provide a framework to create custom post types and relationships;
* [MB Custom Post Type](https://metabox.io/plugins/custom-post-type/): to create custom post types for the events and artists;
* [MB Relationships](https://metabox.io/plugins/mb-relationships/): to create relationships between these post types;
* [MB Admin Columns](https://metabox.io/plugins/mb-admin-columns/) (optional): to display the related events and related artists in the dashboard;
* [MB Builder](https://metabox.io/plugins/meta-box-builder/): to have the UI to create the relationship in an intuitive way. In addition, if you want to add extra information about the events and artists, you also can use this extension to create custom fields to store that kind of data. In this practice, I don’t use it to create custom fields to make it more simple.

## 1. Creating new custom post types

Go to **Meta Box** > **Post Types** to create a new custom post type for the artists and another one for events.

![Go to Meta Box to create new custom post types for the artists and events.](https://imgur.elightup.com/iFokCSM.png)

After publishing, you’ll see the created custom post types in the admin dashboard.

![The created custom post types in the admin dashboard](https://imgur.elightup.com/llIikjc.png)

Now, we can add some posts for each post type.

Then, let's create a relationship between the events and artists.

## 2. Creating the relationship

Go to **Meta Box** > **Relationships** to create the relationships between the Events and Artists post types.

![Create the relationships](https://imgur.elightup.com/unNtU2B.png)

You can enter all the settings for the relationship and each side of it in the **From** and **To** sections.

![You can enter all the settings for the relationship and each side of it in the From and To sections.](https://imgur.elightup.com/QPj5TFc.png)

Because we’re setting the relationship between two post types, set the **Object type** as **Post** in both sections.

![Set the Object type as Post in both sections.](https://imgur.elightup.com/vlRK9Nx.png)

In the **Post type** option, choose the post type you want to create a relationship with. The relationship is bidirectional, so you can put the post types not in order. I set the **Events** in the **From** section, and the rest is **Artists**.

![In the Post type option, choose the post type to create a relationship with](https://imgur.elightup.com/rB6V3ny.png)

Next, this setting is available when you activate the [MB Admin Columns](https://metabox.io/plugins/mb-admin-columns/) extension only.

![The setting enables to show a columns in the dashboard](https://imgur.elightup.com/4oF5Bjv.png)

Once enabled, columns will appear in the dashboard showing related events and artists.

![Columns will appear in the dashboard showing related events and artists.](https://imgur.elightup.com/ja5ibTu.png)

In the **Field** tab, you can set the label for the relationship section that shows in the post editor.

![In the Field tab, you can set the label for the relationship section.](https://imgur.elightup.com/KxQ7w1B.png)

There’ll be a box at the right sidebar to choose **which Artists are related to the current post** in the **Events** post type, and vice versa.

![A section allow you choose which Artists are related to the current post in the Events post type](https://imgur.elightup.com/f8o8pSf.png)

After publishing, go to a post editor, you can see a section like that allowing you to select several artists.

![Select several artists](https://imgur.elightup.com/VbKVNKx.gif)

Here is my example of filling out all relationship information for events and artists.

![All relationship information for events and artists](https://imgur.elightup.com/1mTj4jm.png)

## 3. Showing related posts based on a shared relationship

This is my single event page before this practice.

![Single event page](https://imgur.elightup.com/rdefRcw.png)

Now, I will add other events that the artist of this event also participates in, like I showed at the beginning. I named this section as Related Events.

### 3.1 Adding a pattern for the related events section

First, go to the theme folder. I’m using the Twenty Twenty Four theme, which is a block theme, so I should add a pattern for the related event section.

![Go to the theme folder](https://imgur.elightup.com/Iik4Ew5.png)

Create a new `.php` file in the `patterns` folder, then add the following code.

```css
<?php
/**
 * Title: Related events
 * Slug: twentytwentyfour/related-events
 * Inserter: no
 */
?>

<h2 style="font-weight:bold;">Related Events</h2>

<?php

$current_id = get_the_ID();
$connected = new WP_Query( [
    'relationship' => [
        'id'      => 'event-to-artist',
        'from'      => get_the_ID(),
    ],
] );

$atist_related = [];
while ( $connected->have_posts() ) :
	$connected->the_post();
	$atist_related[] = get_the_ID();
endwhile;

$events_related = [];
foreach ( $atist_related as $id_atist ) :
	$connected1 = new WP_Query( [
	    'relationship' => [
	        'id'      => 'event-to-artist',
	        'to'      => $id_atist,
	    ],
	] );
	while ( $connected1->have_posts() ) :
		$connected1->the_post();

	    $events_related [get_the_ID()] = get_the_title();
	endwhile;
endforeach;

unset($events_related[$current_id]);

?>

<?php foreach ( $events_related as $key => $value ) : ?>
	<li><a href="<?php the_permalink($key); ?>"><?php echo $value; ?></a></li>
<?php endforeach;?>
```
![Create a new php file, then add some code](https://imgur.elightup.com/lCvk5fz.png)

Let’s break down the code:

#### 3.1.1 Getting ID of the current post

I created a new variable to get the ID of the current post.

```css
$current_id = get_the_ID();
```
#### 3.1.2 Querying to get related artists

This query is to get posts from the relationship.

```css
$connected = new WP_Query( [
    'relationship' => [
        'id'      => 'event-to-artist',
        'from'      => get_the_ID(),
    ],
] );
```
* `event-to-artist`: the ID of the created relationship;
* `'from'      => get_the_ID(),`: query to get ID of the posts (means artists) connected with the current post (event).

I also created an empty array `$atist_related = [];`. It will be used to store the returned ID of all the artists who are related to the current post as set in the relationship field.

```css
$atist_related = [];
while ( $connected->have_posts() ) :
	$connected->the_post();
	$atist_related[] = get_the_ID();
endwhile;
```
I did a double check to make sure that there is any returned ID from the query, then push them into the array.

#### 3.1.3 Querying to get related events

This part is to get the related event posts that have the same artists with the current post.So, I created another array, `$events_related = [];`. Then, loop through each artist ID in the `$artist_related` array to query events related to that artist.

```css
$events_related = [];
foreach ( $atist_related as $id_atist ) :
	$connected1 = new WP_Query( [
	    'relationship' => [
	        'id'      => 'event-to-artist',
	        'to'      => $id_atist,
	    ],
	] );
	while ( $connected1->have_posts() ) :
		$connected1->the_post();

	    $events_related [get_the_ID()] = get_the_title();
	endwhile;
endforeach;
```
You can see that , I use the following syntax once again to query events related to the current artist ID using the relationship.

```css
$connected1 = new WP_Query( [
	  'relationship' => [
	      'id'      => 'event-to-artist',
	      'to'      => $id_atist,
	  ],
] );
```
Pay attention that, there is a difference when you query the artist and the event using the relationship.

When we created the relationship, there were two sections named **From** and **To**. If you set the **Event** post type in the **From** section, you should set ‘from’ to get all the artists related to the event. Otherwise, set ‘to’ to get all the events related to the artist.

![A difference when you query the artist and the event using the relationship](https://imgur.elightup.com/16djSpF.png)

Afterward, since I get all the posts related to the artists, it might include the current post. This post should not be displayed in the section, so we need to remove it from the array.

```css
unset($events_related[$current_id]);?>
```

#### 3.1.4 Displaying the related posts

Finally, it’s the part displays each related event with the permalink and title.

```css
<?php foreach ( $events_related as $key => $value ) : ?>
	<li><a href="<?php the_permalink($key); ?>"><?php echo $value; ?></a></li>
<?php endforeach;?>
```

So, we’ve done the pattern for the section.

### 3.2 Including pattern to the template

Move on to the template of the single page. Choose a place to include the pattern.

```css
<!-- wp:group {"style":{"spacing":{"margin":{"top":"var:preset|spacing|40"},"padding":{"bottom":"var:preset|spacing|50"}}},"layout":{"type":"constrained"}} -->
	<div class="wp-block-group">
		<!-- wp:pattern {"slug":"twentytwentyfour/related-events"} /-->
	</div>
	<!-- /wp:group →
```

![Choose a place to include the pattern](https://imgur.elightup.com/caMvIOY.png)

That’s all. All the code is updated on [Github](https://github.com/wpmetabox/tutorials/tree/tutorials/display-related-posts) for your reference.

Go to the frontend, you can see that there are some posts displayed in the related events section on each single event post. It also works well when you check on another post.

![There are some posts displayed in the related events section on each single event post](https://imgur.elightup.com/ldG9pph.gif)

If you simply want to display related content using bi-directional relationships, take a look at [this guide](https://docs.metabox.io/tutorials/create-relationships-mb-views/) for detailed instructions. Thanks for reading!

# Displaying uploaded images as a WordPress image gallery

import LiteYouTubeEmbed from 'react-lite-youtube-embed';
import 'react-lite-youtube-embed/dist/LiteYouTubeEmbed.css';

Sometimes, you may want to show product images, a portfolio, or just a photography album on your site. So, the image gallery is very helpful. You can upload images to your website via a custom field then **display them as a gallery** on a page.

Specifically, we’ll use a custom field in the type of **Image Advanced** for uploading multiple images, then display them as an image gallery on a page. I will create a simple one like this.

![Display uploaded images as a WordPress image gallery](https://imgur.elightup.com/zpncoql.gif)

This task will be very easy-to-do with some **lines of code added to the theme’s files**, or simpler with the help of **MB Views**. It’s an extension of Meta Box. So let’s see how we do it in both ways.

## Video Version

<LiteYouTubeEmbed id='6_gpRrPRh8E'/>

## Preparation

We’ll need some tools for this practice:

First, we need the [Meta Box core plugin](https://wordpress.org/plugins/meta-box/) to have a framework for creating the custom field. It’s available on [wordpress.org](https://wordpress.org/plugins/meta-box/).

Next, we may need some advanced features from the **Meta Box** extensions. You can download them individually or use **Meta Box AIO** to have them all.

* [MB Builder](https://metabox.io/plugins/meta-box-builder/): to have a UI in the backend to visually create a custom field to save images;
* [MB Views](https://metabox.io/plugins/mb-views/): to get images from the custom field and display them on the page without touching the theme’s files. But it is optional since you have another method to do it with PHP.

## 1. Creating a page and custom field

In the real case, you can add the gallery to any premade page or settings page. But in this practice, I will create a new one to display only the gallery to simplify the content. Now, go to **Pages** > **Add New** to create a new page.

![Create a new page](https://imgur.elightup.com/JsWdMUU.png)

I leave this page blank since I will add the gallery to this page later.

![Leave this page blank since I will add the gallery to this page later](https://imgur.elightup.com/CiS4fR1.png)

For the custom field to save images, I will create it now and assign it to this page.

Go to **Meta Box** > **Custom Fields** and create that field.

![Go to Meta Box > Custom Fields and create that field.](https://imgur.elightup.com/KEqd0ZH.png)

The field should be the **Image Advance**d type, which allows uploading multiple images.

![The Image Advanced type allows uploading multiple images.](https://imgur.elightup.com/uTTRyfA.png)

Now, go to the **Settings** tab, set the **Location** as **Post type**, and choose **Page**. Since we created a page for it, go to the **Advanced location rules** section below and choose the name of the page.

![Set the location to apply the custom field to the page.](https://imgur.elightup.com/qsSafV2.png)

No matter where you put the field, you can still get images and display them in the desired place.

On my page editor, you can see the field displayed.

![The field displayed on the post editor](https://imgur.elightup.com/rrsvh0z.png)

Just add some images.

## 2. Displaying images as a gallery

In the case that you are not using any page builder to build your website, you can use these two ways to have a gallery from the images uploaded into the field:

* **Using PHP**: We’ll add some lines of code to the theme’s files. It is not as complicated as common thinking. Just follow this practice with some simple git.
* **Using MB Views** from Meta Box: It will do almost the code for you without touching theme’s files, so you just need to click and click. Even when you are using any page builder, you can also use the **MB Views** following this instruction to have your wish gallery on frontend.

We highly recommend you use **MB Views** because of its various advantages. By the way, if you want the gallery to have the best look and be in the style of a slider, as I will do, you should use a JavaScript library for it as **Slick Slider** as I’ll use. So, **to make it to be a slider, you definitely need to add code, no matter which method you are using**.

### 2.1 Using PHP

Go to the **functions.php** file and add these lines of code.

![Add code to the functions.php file](https://imgur.elightup.com/EflBRwW.png)

**In there**:

* `rwmb_meta( 'image_gallery', ['size' => 'large'] )`: is the function to get the value of custom fields.
* `image_gallery`: is the ID of the custom field that we used to save images.
* These lines of code in the image below are just for styling later.

![These codes are just for styling later.](https://imgur.elightup.com/lzcdYRv.png)

Since we'll save multiple images in the fields, we should use a loop to get and display all of them.

![Use a loop to get and display all of the images](https://imgur.elightup.com/ipbBy0C.png)

* `add_shortcode( 'brand_image', 'get_image_field' );` is to create a shortcode named `brand_image`. We will use this shortcode to put the gallery anywhere we want.

Now, go to a page and also add a **Shortcode** block.

![Add a Shortcode block](https://imgur.elightup.com/msHRyxG.png)

Then input the created shortcode into the box.

![Input the created shortcode into the box](https://imgur.elightup.com/dhJ8YSY.png)

Now all of the images are displayed on the page.

![The images are displayed on the page.](https://imgur.elightup.com/RqjmOc8.png)

### 2.2 Using MB Views

Go to **Meta Box** > **Views** to create a new template that we will use for the gallery.

![Create a new template for the gallery.](https://imgur.elightup.com/UfRUvDX.png)

Click on the **Insert Field** button and look for the name of the field that we input images in the right sidebar.

![Insert the Image Gallery field](https://imgur.elightup.com/MssHlpW.png)

You can choose an option for the size of the output images.

![Choose an option for the size of the output images](https://imgur.elightup.com/oAX3zsn.png)

Then some lines of code will be added to the template automatically.

![Some lines of code will be added to the template automatically.](https://imgur.elightup.com/LCd2QeO.png)

That’s all you need to get and display the images.

Now, go to the settings of the template, and you can choose a location to display the gallery. If you have a specific page, just choose it. But in most cases, we should set this template as a shortcode, then you can add this shortcode to any place on your site.

![Set this template as a shortcode](https://imgur.elightup.com/EOyDFRw.png)

Then, there will be a shortcode generated. Just copy and paste it anywhere you want.

![Copy and paste the shortcode anywhere you want.](https://imgur.elightup.com/UfzaRnx.png)

Go to the page editor, add a **Shortcode** block, and paste the created one.

![Add a Shortcode block](https://imgur.elightup.com/q6hJ5Bs.png)

On the frontend, the image gallery displays already, as we used PHP.

![The image gallery displays already, as we used PHP](https://imgur.elightup.com/RqjmOc8.png)

The next work is styling it.

## 3. Styling the gallery

No matter which method you are using, you should use CSS and JS if you want to have a slider with a good look for the gallery.

You can use a 3rd-party library or make it yourself. In this case, I’ll use **Slick Slider**.

![Slick Slider library](https://imgur.elightup.com/p0SbcoW.png)

You can add files or the code above ò the library to the theme’s files or the template created with **MB Views**. The code will be quite the same.

Since I recommend you use **MB Views**, I will follow the second method. Go to the created template and add some lines of code to declare the library.

![Add some lines of code to declare the library in the created template](https://imgur.elightup.com/06TouC4.png)

I’ll also add some div tags and classes into the code, which is the loop.

![Add some div tags and classes into the code](https://imgur.elightup.com/WkQduEt.png)

Then, move to the **CSS** tab and the **JavaScript** tab, add some codes.

![Add code to the CSS tab and the JavaScript tab](https://imgur.elightup.com/detC0uF.png)

The code in the **JavaScript** tab above is to create a slider for the gallery. All of these codes I used are also available on [GitHub](https://github.com/wpmetabox/tutorials/tree/master/displaying-images-as-gallery), so you can refer to them.

After updating the template, you will see a gallery in the style of a slider on the page.

![A gallery in the style of a slider on the page](https://imgur.elightup.com/zpncoql.gif)

## Last Words

I hope this tut helpful for you guys. If you want to see more about how to use the Image Advanced custom field to display an image gallery, please dig into the tut on [creating product pages](https://docs.metabox.io/tutorials/create-product-page/).

In case you want to display an image gallery along with some information associated with the image, you can refer to another way: [display images from cloneable fields](https://docs.metabox.io/tutorials/display-images-cloneable-fields-mb-views/).

# Displaying a users list on the frontend

import LiteYouTubeEmbed from 'react-lite-youtube-embed';
import 'react-lite-youtube-embed/dist/LiteYouTubeEmbed.css';

In this guide, I'll show you how to **use Meta Box to easily display a user list on a page** as well as publish the user accounts **only when they are allowed** by the owners, besides, hide the accounts that users don’t want to publish.

I’ll make the user list as a table like this:

![Example of a users list](https://imgur.elightup.com/UiBK2AF.gif)

## Video version

<LiteYouTubeEmbed id='Lj7ejCAfyT4'/>

## Preparation

In the user list, we can display the default information as names and some extra information. Those extra details will be saved in custom fields created with **Meta Box**.

I will separate the list into pages, limit the number of users displayed on a page, have pagination for it, and also have a searching box that allows us to find any user (as you see in the above image).

These are the tools we need for this practice:

* [Meta Box core plugin](https://wordpress.org/plugins/meta-box/): to have a framework to create custom fields;
* [MB Builder](https://metabox.io/plugins/meta-box-builder/): to [create custom fields with an intuitive user interface](https://docs.metabox.io/tutorials/create-custom-fields/) (UI) with easy drag-and-drop manipulations on the backend. If you can code to create a custom field, you can skip this extension. But there is another free tool if you still want to use UI, which is the [Online Genera-tor](https://metabox.io/online-generator/).
* [DataTables](https://datatables.net/): It is a library that uses jQuery to add advanced features to tables in HTML. It helps you display and create functions (pagination and search) with tables more easily.

## 1. Creating custom fields

By default, WordPress already has some fields for users to input information. But sometimes, you may need some further information from them. Then, you should create custom fields to save that extra data.

These are some custom fields I will create for this practice as an example.

![Some custom fields I will create for the user list](https://imgur.elightup.com/In9SVPb.png)

In there, the **Publish or not?** field is a special one. This is to choose with two options: Yes or No, also is where users let us know if their account is allowed to display on the list or not.

Go to **Meta Box > Custom Fields** to create a new field group.

![Go to Meta Box > Custom Fields to create fields.](https://imgur.elightup.com/MWTZe9H.png)

For the first field, choose the **Radio** type. It allows adding some options in the **Choices** box for users to choose from. In this case, it’s just publish or not publish. So, I input two options in the Yes/No form, and set the Default value of this field to Yes.

![The Publish or not? field lets us know whether the user wants to publish their account or not.](https://imgur.elightup.com/QKfnu3h.png)

Instead of using the radio field, you can also use some other type, such as Switch, Checkbox, or Select field. They are quite the same for this use.

Other fields are common and typical fields, so just create them as usual. I set no special settings for them.

![Create custom fields as usual for user list](https://imgur.elightup.com/UU5RRXu.png)

After creating all the fields, move to the **Settings** tab and choose **Location** as **User** to display this field group on the User page.

![Set location to display the fields on the User page](https://imgur.elightup.com/xjKIlsN.png)

Now, on the profile page of any user, you will see the fields we have created.

![The fields we have created display on the profile page of any user.](https://imgur.elightup.com/Ijucdis.png)

Just fill in the information.

## 2. Creating a new page

In the real case, you can add the user list to any pre-build page with some other content. But, I will create a new page to display only the user list on the page to keep this practice playing around the main content.

Go to the **Pages** and create a new one as usual.

![Create new page to display a user list](https://imgur.elightup.com/8NMWxVV.png)

I leave this page blank since I will add the user list to it later.

## 3. Displaying a user list on the page

In this practice, I’m providing two ways to display the user list on the page.

* **Using PHP**. We’ll add some lines of code to the theme’s files. It is not as complicated as common thinking. Just follow this practice with some simple git.
* **Using MB Views** from **Meta Box**. This way, you will not touch any theme’s file. This plugin also helps to simplify the code a little bit, even if it is simple already, and the list will not be affected when you change the theme. So, I highly recommend this method.

### 3.1. Method 1: Using PHP

#### 3.1.1. Creating a template

We should create a template for the page first. So, go to the theme folder and create a new php file.

![Go to the theme folder and create a new php file](https://imgur.elightup.com/gmCmKoG.png)

Now, add some codes to the file.

```
<?php
/*
*    Template Name: Users Listing Page
*/
?>
<?php get_header(); ?>
<h1>Users List</h1>
<table id="Userslist">
    <thead>
        <tr>
            <th>Name</th>
            <th>Position</th>
            <th>Office</th>
            <th>Age</th>
            <th>Start date</th>
            <th>Salary</th>
        </tr>
    </thead>
<tbody>
        </tbody>
    <tfoot>
        <tr>
            <th>Name</th>
            <th>Position</th>
            <th>Office</th>
            <th>Age</th>
            <th>Start date</th>
            <th>Salary</th>
        </tr>
    </tfoot>
</table>
<?php get_footer(); ?>
```
![Add some codes to the php file](https://imgur.elightup.com/OQMeTI8.png)

**In there**:

`<?php get_header(); ?> and <?php get_footer(); ?>`: is to display the default header and footer of your website.

These lines of code in the image below are for the table, and it’s quite familiar since it’s the same as the table you usually add to a post.

![These lines of code are for the table.](https://imgur.elightup.com/jHpkjNP.png)

Pay attention that I named this table with an ID as `Userslist`. We will use it for JavaScript later.

Go to the page editor and apply the created template to it.

![Apply the created template to the page](https://imgur.elightup.com/YlGdmhj.png)

Then, on the frontend, you will see the page with the table like this. Just the titles of the table display.

![The page with the table](https://imgur.elightup.com/mSKI5D3.png)

#### 3.1.2. Getting the user information

Now, back to the template file to edit the code. We will get the data and insert it into the body of the table.

But first, we will add some code to add a condition for display users since we have a field to choose to display the user or not.

```
$users = get_users( [
    'meta_key'   => 'publish_account',
    'meta_value' => 'yes',
] );
```
![Add some code to add a condition for display users](https://imgur.elightup.com/65NNY2n.png)

We use the `$users = get_users` function to get the user information. This condition based on the value saved in the **Publish or not?** field. So, the key will be the ID of the field, which is `publish_account`. And `yes` is the value of the option, which means users allow us to display their information. Hence, these lines, which I have added, help to get only users who choose the **Yes** option in the field.

Next, let’s get information from each user.

We have multiple users, so we should use a loop to get all of them.

```
<?php
        foreach ($users as $user) { $user_id = $user->ID; ?>
        <tr>
                <td><?php echo $user->display_name; ?></td>
                <td><?php echo rwmb_meta( 'position', array( 'object_type' => 'user' ), $user_id ); ?></td>
                <td><?php echo rwmb_meta( 'office', array( 'object_type' => 'user' ), $user_id ); ?></td>
                <td><?php echo rwmb_meta( 'age', array( 'object_type' => 'user' ), $user_id ); ?></td>
                <td><?php echo rwmb_meta( 'start_date', array( 'object_type' => 'user' ), $user_id ); ?></td>
                <td>$<?php echo number_format(rwmb_meta( 'salary', array( 'object_type' => 'user' ), $user_id ),3,",","."); ?></td>
</tr>
<?php } ?>
```

![Use a loop to get all users](https://imgur.elightup.com/WdW5f0p.png)

**In there**:

* `$user_id = $user->ID`: this function helps to get user ID and assign it to `$user_id`.
* `$user->display_name`: we use this function to display the user’s names since the name of each user is from a default field provided by WordPress.
* `rwmb_meta( )`: this function helps to get the data from the fields. For example, we use `rwmb_meta( 'position', array( 'object_type' => 'user' ), $user_id )` to get the value of the field with the position ID from the user’s ID.
* `array( 'object_type' => 'user' )`: regulates that only data from the field assigned to the User object will be obtained.

Then, the table on the frontend has this look for now.

![The table on the frontend](https://imgur.elightup.com/cexAMSU.png)

#### 3.1.3. Adding functions to the table

There is a problem that my list just has under 100 users but it looks pretty long. So, if the number of users on your website is much more than that, you will not be able to display it in just one page as above. That's why we should use the DataTables library. This tool will help us paging, sorting, and searching data in tables more easily.

Back to the template file, add this line to register the CSS library of **DataTables**.

```
<link rel="stylesheet" href="https://cdn.jsdelivr.net/npm/datatables@1.10.18/media/css/jquery.dataTables.min.css" />
```

![Add code to register the CSS library of DataTables.](https://imgur.elightup.com/fdKJ6jJ.png)

These codes below are to declare the JavaScript libraries, including the one from **DataTables**.

```
<script src="https://cdnjs.cloudflare.com/ajax/libs/jquery/3.7.1/jquery.min.js"></script>
<script src="https://cdn.jsdelivr.net/npm/datatables@1.10.18/media/js/jquery.dataTables.min.js"></script>
```

![Add code to declare the JavaScript libraries, including the one from DataTables.](https://imgur.elightup.com/rsrXwaJ.png)

Next, add the following script that helps to use the **DataTables** library.

```
(function ($) {
    $(document).ready(function () {
        $('#Userslist').DataTable();
    });
})(jQuery);

```

![Add the script that helps to use the DataTables library.](https://imgur.elightup.com/hJseIp9.png)

Please note that `Userslist` is the ID of the table that we added above. And, the library will do everything to add paging, sorting, and searching functions for you. However, in the event that you want to customize the tables more, there are also many [other customization options from the library](https://datatables.net/examples/index) that you can refer to!

Go to the page, and you can see the user list with those functions as you want.

![The user list with functions as you want.](https://imgur.elightup.com/UiBK2AF.gif)

Visit [here](https://github.com/wpmetabox/tutorials/tree/master/list-users) to see the full source code:

###  3.2. Method 2: Using MB Views

We also need to create a template for the page. But, I won’t go to the theme folder. Instead, just go to **Meta Box** > **Views**, and create a new template.

![Go to Meta Box > Views, and create a new template](https://imgur.elightup.com/w8KhHP7.png)

#### 3.2.1. Getting the user information

First, add the condition.

![Add the condition](https://imgur.elightup.com/nsHtNXu.png)

In the same way, in using PHP, the key will be `publish_account`, the ID of the field. And `yes` is the value of the option.

Now, let’s get the user’s information. Also, use the `mb.get_users( )` function to get users.

![Use the mb.get_users( ) function to get users.](https://imgur.elightup.com/nSC8XrZ.png)

As well, add a loop.

![Add a loop](https://imgur.elightup.com/X7M5WEO.png)

Inside the loop, we will get data from default fields and custom fields. Instead of adding code for this, we will insert fields directly from the list on the right sidebar.

![Insert fields directly from the list on the right sidebar.](https://imgur.elightup.com/dDut7Dx.png)

Here are all the fields we insert:

![All the fields we insert](https://imgur.elightup.com/1DfpUkr.png)

That’s all the information about the user I will get in this practice.

Go to the **Settings** section of the view, set the type of the template as **Singular**. And choose the created page.

![Set the type of the template](https://imgur.elightup.com/meVqiTP.png)

In the event that you want to input the table in any other place, it also provides other options that match your need. If not, just set the type as shortcode, then embed it anywhere. It always works.

Go to the page on the frontend, you will see the data displayed without the table.

![The data displayed without the table.](https://imgur.elightup.com/U5irC5K.png)

#### 3.2.2. Adding the table format

Back to the template in the views, add a heading for the table.

![Add a heading for the table](https://imgur.elightup.com/lqN2NGh.png)

 And, add some code for the table. They are exactly the same as the ones we use with PHP, also as the one we usually use for a table.

![Add some code for the table](https://imgur.elightup.com/1c4mg3K.png)

I also added the loop, which is exactly the same as the loop we created before:

![Add a loop](https://imgur.elightup.com/misy24Z.png)

Now, move each line in this image to the loop in the table.

![Move each line in this image to the loop in the table](https://imgur.elightup.com/4frdEgB.gif)

There is a table on the page now.

![There is a table on the page.](https://imgur.elightup.com/cexAMSU.png)

#### 3.2.3. Adding functions to the table

Once again, go back to the template to add paging, sorting, and searching to the table.

The same with the first method, add three lines at the top and bottom to declare the libraries.

```
<link rel="stylesheet" href="https://cdn.jsdelivr.net/npm/datatables@1.10.18/media/css/jquery.dataTables.min.css" />
```

![Add the line at the top to declare the libraries.](https://imgur.elightup.com/vEB1r3F.png)

```
<script src="https://cdnjs.cloudflare.com/ajax/libs/jquery/3.7.1/jquery.min.js"></script>
<script src="https://cdn.jsdelivr.net/npm/datatables@1.10.18/media/js/jquery.dataTables.min.js"></script>
```

![Add these lines at the bottom to declare the libraries.](https://imgur.elightup.com/rA41uza.png)

Then, go to the **JavaScript** tab, add the same script as method 1. This helps to apply the **DataTables** library to the table.

```
(function ($) {
    $(document).ready(function () {
        $('#Userslist').DataTable();
    });
})(jQuery);
```

![Add CSS to the JavaScript tab](https://imgur.elightup.com/sAdp8xM.png)

`Userslist` still is the ID of the table. As mentioned, the library will do everything to add paging, sorting, and searching functions for you.

And, this is the table with those functions in the final result. The pagination works well, and you can also search for any user.

![The user list table with wanted functions](https://imgur.elightup.com/UiBK2AF.gif)

We have finished **displaying a user list on the frontend** with two methods: using PHP and using MB Views. In the case that you want to do something more for your user, there's something that you may want to dig into: how to [create a custom avatar for users](https://docs.metabox.io/tutorials/create-custom-avatar/) or how to [create a custom user profile page on frontend](https://docs.metabox.io/tutorials/create-user-profile-page/) to avoid accessing the backend from unexpected users. Thanks for reading!

# Displaying a video playlist - MB Views

import LiteYouTubeEmbed from 'react-lite-youtube-embed';
import 'react-lite-youtube-embed/dist/LiteYouTubeEmbed.css';

Using a video playlist allows you to display a collection of videos. You can use this type of content for websites of many fields such as education for courses, exercise for daily movements, music for songs in a category, etc.

The video playlist will keep your visitors engaged for longer, and they will find videos in the same playlist easily. Let’s figure out the way to display a **video playlist** with the help of **MB Views** from Meta Box.

This is a video playlist I created as an example:

![An example of the video playlist with the corresponding video appears when clicking on the title.](https://imgur.elightup.com/i77lwTq.gif)

## Video version

<LiteYouTubeEmbed id='PeMtphQX7LI' />

## Preparation

In the playlist, there will be multiple videos. When you click on one from the left panel, its video player will appear immediately on the side.

The playlist is created manually which allows you to flexibly add or remove any video. The video information includes the ID on Youtube and the title will be saved in custom fields with Meta Box. Then display them using MB Views.

![The playlist includes several videos with their information as title and ID are saved in custom fields](https://imgur.elightup.com/5Lkjhaq.png)

So, these are some tools are needed for this practice:

* [Meta Box plugin](https://wordpress.org/plugins/meta-box/): to have a framework to create custom fields for storing some of the video information. You can download it directly on [wordpress.org](https://wordpress.org/plugins/meta-box/);
* [MB Views](https://metabox.io/plugins/mb-views/): to get data from custom fields and display them on the section of the playlist;
* [MB Builder](https://metabox.io/plugins/meta-box-builder/): to have a UI on the back end to create custom fields visually;
* [MB Group](https://metabox.io/plugins/meta-box-group/) (optional): to group the field for better organization.

Let’s start now!

## 1. Creating custom fields

As I mentioned, we will use custom fields to store video information. Here are the fields that I created for the playlist.

![Structure of custom field to store video information.](https://imgur.elightup.com/pAdmKgC.png)

Each video has a pair of two contents: one is the ID that helps to crawl the video from YouTube and display on the player; another is the title that you name the video yourselves. So, I put them into a group. A playlist also includes several videos, so this group field is made to be cloneable.

Go to **Meta Box** > **Custom Fields** and create a new field group.

![Go to Meta Box > Custom Fields and create a new field group](https://imgur.elightup.com/pbSqDbW.png)

First, add a **Group** field.

![Add a group](https://imgur.elightup.com/S5C55zm.png)

Inside this group, add subfields into it.

The ID is just a part shown on the URL of the video on YouTube, not a full URL. So we will add the **Text** field instead of the **URL** type.

![Add a Text field for the video ID because it’s not a full URL](https://imgur.elightup.com/5YV194d.png)

Also, add this field type for the title. There are no special settings for it.

![Also add the Text field for the title with no special settings.](https://imgur.elightup.com/Ef0aQ5A.png)

For the group settings, I set this group as collapsible to see all videos in a clear structure.

![Set the group as collapsible to see all videos in a clear structure](https://imgur.elightup.com/HJGrBXq.png)

To easily identify the video, you can set the title for the group. Click to the icon at the end of the **Group title** box.

![Set the title for the group to easily identify the video](https://imgur.elightup.com/DOk3v2F.png)

There will be some suggestions to choose from:

* `{#}`: to number the item;
* `id`: to set the name based on the ID of the video
* `title`: to set the name of the group based on the title of the video

In this practice, I choose the last one.

![Choose the last one to set the name of the group based on the title of the video](https://imgur.elightup.com/CnQJbft.png)

Since we have several videos in the playlist, remember to set this group as cloneable. It’s an essential setting.

![Set the group as cloneable](https://imgur.elightup.com/8IgiK7T.png)

You also should enable the **Sortable** option to rearrange the video. It also means that you can set the order of the video on the playlist manually.

![Enable the Sortable option to rearrange the video](https://imgur.elightup.com/sXADjj8.png)

After having all of the reasonable settings for the fields, move to the **Settings** tab, and set the **Location** to apply the fields to any post type as you want. In this practice, I’ll assign it to the blog posts.

![Move to the Settings tab, and set the Location to apply the fields to any post type as you want](https://imgur.elightup.com/RN8kJH7.png)

Then, go to the post editor, you can see the custom fields displayed.

![The custom fields display in the post editor](https://imgur.elightup.com/O96HDfu.png)

Just input some videos and click on the **+ Add more** to add other videos.

![Click on the Add more button to add more video](https://imgur.elightup.com/frgULTQ.png)

In the next step, we will display the videos as a playlist with the help of MB Views.

## 2. Displaying the video playlist

First, we should create a template for the section of the video playlist.

Go to **Meta Box** > **Views** and create a new one as usual.

![Go to Meta Box > Views and create a new template](https://imgur.elightup.com/poOuyOE.png)

### 2.1. Getting information of the videos

To get data from custom fields, click on the **Insert Field** button, and find the fields on the right sidebar.

![To get data from custom fields, click on the Insert Field button, and find them on the right sidebar](https://imgur.elightup.com/OmII23W.png)

Since we applied custom fields on the post, you can see the group of fields that we created in the **Post** tab.

![Since we applied custom fields on the post, you can see the group of fields that we created in the Post tab](https://imgur.elightup.com/v8sezzI.png)

Click on it and some lines of code will be generated in the **Template** section.

![Click on the created field and some lines of code will be generated in the Template section](https://imgur.elightup.com/xu6vmYC.png)

In there, `video` is the ID of the group.

Then, just choose the subfield from the list to insert them into the loop one by one.

![Choose the subfield from the list to insert them into the loop one by one](https://imgur.elightup.com/4O9AVH0.gif)

Move to the **Settings** section of the view, and set the **Type** as **Singular**, and the Location as the post type as you assigned the custom fields to. This setting helps to assign this template to all the singular pages of the post type.

![Move to the Settings section of the view, and set the Type as Singular, and the Location as the post type](https://imgur.elightup.com/vQIo2Br.png)

As well as, you can choose a suitable position for the playlist on the page.

![You can choose a suitable position for the playlist on the page](https://imgur.elightup.com/TOCRVgo.png)

After publishing the view, go to a singular page, you can see the ID and title of the video displayed. But they are just in the text format.

![The ID and title of the video are displayed on the singular page in the text format](https://imgur.elightup.com/p4NBiUP.png)

To have a section where you have a panel to show the video in the playlist, and another one for the video player, we should add some extra code to the created template.

### 2.2. Displaying the videos as a playlist

Back to the view.

Besides adding some **`div`** and classes to style the playlist easily later, I will add some other code as follows to set the added data displaying as thumbnail and title in the first column:

![Add some div, classes and other code](https://imgur.elightup.com/eonYBMf.png)

**Explanation**:

* `id="video-playlist"` (line 4): is an HTML attribute to identify the area for displaying the list of videos.
* `img src="https://img.youtube.com/vi/{{ clone.id }}/mqdefault.jpg"/` (line 7): is the form of URL for displaying the thumbnail beside the title.
* `id`: is the ID of the video that we saved in the custom field. It also helps to identify the image we want to get from YouTube.
* `class="video-name"` (line 8): is the class for the title of the video that displays on the left panel.

Next, to display the iframe for the player, add the following lines of code:

![Add some code to display the iframe for the player](https://imgur.elightup.com/LTc1lMI.png)

**Explanation**:

In the line 14:

* `id="videoarea"`: is the name of the area for displaying the iframe. It will be useful for styling as well as adding action to the playlist in the next step.
* `video[0]`: is to regulate the first video from the playlist to be played in default.

Finally, go to the **CSS** tab, and add some code to prettify the section. Notice that all the classes and IDs for the two areas in the section will be used in this code.

![Add code to the CSS tab to style the playlist](https://imgur.elightup.com/cNeSGU1.png)

Then, go to the page, the section has a new look already. However, nothing happens when you click on each title for now, because we haven’t made it.

![The new look the the video playlist but nothing happens when you click on each title.](https://imgur.elightup.com/WqpyFjy.gif)

Let’s move to the next step.

### 2.3. Adding action to play the videos

Still in the created template of the playlist, we should add some extra things to the code.

![Add an attribute to the title in the created template](https://imgur.elightup.com/q6yuxea.png)

**In there**:

`movieurl="https://www.youtube.com/embed/{{ clone.id }}"` is an attribute to recognize and record which title is clicked. It is also to identify the corresponding video URL from its ID.

Then, go to the **JavaScript**, and add the following code:

![Add some code to the JavaScript tab](https://imgur.elightup.com/3zEyCdJ.png)

**Explanation**:

* `#video-playlist` (line 2): is the ID of the panel that we use to display the video titles and thumbnails.
* `#videoarea` (line 5): is the ID of the area to display the iframe for the player.
* `"src": $(this).find('.video-name').attr("movieurl")` (line 6): is to force the iframe to change the link of the video to the right one as the `movieurl` attribute identified.

Combined with the code in the **Template** tab, we can understand that the iframe on the right panel will be turned from the default one to the one that records in the `movieurl` attribute. It also means that the player will play the video specified by the URL from this attribute.

I uploaded all of these codes on [Github](https://github.com/wpmetabox/tutorials/tree/tutorials/video-playlist-with-mb-views), so you can refer to it for more details.

Now, go to the page, click on a video title. You will see the player play different videos. They are the ones corresponding to the titles in the left panel.

![When you click on one from the left panel, its video player will appear immediately on the side](https://imgur.elightup.com/i77lwTq.gif)

# Displaying featured posts with WP Grid Builder

import LiteYouTubeEmbed from 'react-lite-youtube-embed';
import 'react-lite-youtube-embed/dist/LiteYouTubeEmbed.css';

We'll create a section to **display the featured posts on the homepage** which is built with Elementor. To choose which product is featured and displayed, we'll **use a custom field and use a condition based on this field's value**. The condition will be created with the help of WP Grid Builder.

![Example of Featured Restaurant](https://imgur.elightup.com/HkEGy4I.png)

## Video

<LiteYouTubeEmbed id='w9JLxvGAy4Y' />

## Preparation

The section is shown as a slider on the homepage. It is provided by WP Grid Builder in the Grid type. In the grid, there are cards, and each one displays information about a restaurant.

![The illustration of Grid and Card in the restaurant section](https://imgur.elightup.com/9NML7JD.png)

The restaurant's information will be saved in a **custom post type** named **Restaurants**. Their names and images are the titles and featured images of the posts. And other information, such as address, voucher, and logo also will be saved in **custom fields**.

So, here are the tools we need for this practice:

* [Meta Box](https://metabox.io): to have a framework to create custom post type and custom fields;
* [MB Custom Post Types](https://metabox.io/plugins/custom-post-type/): to create custom post types for the restaurants;
* [MB Builder](https://metabox.io/plugins/meta-box-builder/): to have a UI on the back end to create custom fields to save the extra information of the restaurants;
* [Elementor](https://elementor.com/): to build the page. I use the Elementor Pro;
* [WP Grid Builder](https://wpgridbuilder.com/): to create a condition to choose which restaurants will be displayed.
* **Integrations** between WP Grid Builder and Meta Box, and between WP Grid Builder and Elementor: you can activate them in the Add-ons section of WP Grid Builder.

![Intergrations between WP Grid Builder](https://imgur.elightup.com/eo20R9C.png)

## 1. Creating restaurant post type

Go to **Meta Box > Post Types** to create a new post type for the restaurants.

![Create a new custom post type for ](https://imgur.elightup.com/OyfXcNz.png)

## 2. Creating custom fields for restaurants

Go to **Meta Box > Custom Fields**, then create fields as you want.

![Create custom fields for featured restaurants](https://imgur.elightup.com/qcgRv8D.png)

To select and display which restaurant is featured on the frontend, I’ll create an extra custom field as the **Switch** type.

![Create extra custom field](https://imgur.elightup.com/tOUm3JX.png)

After creating all the needed fields, go to the **Settings** tab > **Location** > choose **Post Type** as the **Restaurant** post type that we’ve just created to apply the custom fields to it.

![Set location for restaurant post type](https://imgur.elightup.com/ahZWfHd.png)

In the post editor, you will see all of the newly created custom fields.

![Newly created fields in the post editor](https://imgur.elightup.com/oYwjdKI.png)

Look at the field which we use to clarify which restaurant is featured, it is in the button style with two statuses. One is the Off status will indicate that you do not want to recommend the restaurant. Otherwise, the On status will let us know that you want to feature the restaurant.

Now, let’s fill in the information for the restaurant into the fields.

## 3. Creating a card view

Go to **Gridbuilder > All Cards > Create a Card**. This is the one to stipulate which information about the products (in this case is the restaurants) will be displayed.

![Create a card](https://imgur.elightup.com/qlbNjeQ.png)

You can change all the settings of the cards as you want in the **General** section.

To add content to the card, move to the **Blocks** section. First, choose the **Title** block to get the restaurant’s name and drag it to any place where you want to display it.

![Set title, drag and drop to the position you want to display](https://imgur.elightup.com/qbApMn9.png)

To style the title, go to the **Appearance** tab in the **Edit Block** popup, and change the settings.

![Style the title](https://imgur.elightup.com/UprwS9C.png)

For the information that is saved in custom fields created by Meta Box, I’ll add a **Custom Field** block.

![Add a custom block to get the information saved in custom fields](https://imgur.elightup.com/MNvRMls.png)

You can add a class name for the block in the **Class Name** section for styling later.

Also in this popup, the **Source Type** is **Custom Field** by default. To get the data from the field in which we want to display the information, choose the name of the field in the **Custom Field** section.

We do this to display the voucher and address information as well.

The logo of the restaurant is a special one. There’s no pre-built block that supports calling out the image from custom fields, so I’ll create a new custom block. Add the following code to the `functions.php` file:

```php
add_filter( 'wp_grid_builder/blocks', function( $blocks ) {
    // 'custom_image_block' corresponds to the block slug.
    $blocks['custom_image_block'] = [
        'name' => __( 'Custom image block', 'text-domain' ),
        'render_callback' => function() {

            // Get current post, term, or user object.
            $post = wpgb_get_post();
            $image = get_post_meta( $post->ID, 'custom_field_name', true );

            if ( empty( $image ) ) {
                return;
            }

            $source = wp_get_attachment_image_src( $image );

            if ( empty( $source ) ) {
                return;
            }

            printf(
                '<img src="%s" width="%s" height="%s">',
                esc_url( $source[0] ),
                esc_attr( $source[1] ),
                esc_attr( $source[2] )
            );

        },
    ];

    return $blocks;
} );
```

:::info

Just replace the `custom_field_name` by the ID of the custom field that you want to get the image.

:::

![Create a new custom block to get the image.](https://imgur.elightup.com/r4xqHop.png)

These lines of code are provided by WP Grid Builder. I put it on [Github](https://github.com/wpmetabox/tutorials/blob/0a8495cb82525150d7afacf5c65baea55fd721c8/create-a-simple-listing-using-Meta-Box-and-WP-Grid-Builder/functions.php), so you can refer to it.

Now, go back to the card editor, a new block named **Custom Image Block** will appear. Just add it to the card.

![Choose Custom Image Block to get the restaurant's logo.](https://imgur.elightup.com/moPVdC6.png)

There is no need to change any options for this block.

That’s all for the card.

## 4. Creating a grid and condition

### Creating a grid to display restaurants

Go to **Gridbuilder > All Grids > Create a Grid**. This is where to display all the products we want to feature.

![Gridbuilder > All Grids > Create a Grid.](https://imgur.elightup.com/1mU3IzZ.png)

To get the posts that you want to display in the grid, go to the **Content Query** section, and choose the content type as **Post Types**. Then, choose the post type that we’ve just created for the restaurant so that the grid can get all the posts from that post type.

![choose the name of the post type created to get the content to display](https://imgur.elightup.com/kPnv9cS.png)

### Setting the condition

Pay attention to the **Custom Fields** section - an important part. This is where you set the condition to display the restaurants.

![Set the condition to display the restaurants](https://imgur.elightup.com/Pi3bYW5.png)

We’ll display the restaurants which have the **Switch** field in the On mode only. So, fill in the ID of the **Switch** field in the **Key Field** section.

In the **Fields Type** section, choose **Numeric** since this **Switch** field has two options On or Off with the corresponding value as 1 and 0. They are the numeric type.

Next, just enter **1** into the **Value Field** box to show the restaurants that have the **Switch** field set in the On mode.

### Setting style for the grid

For the layout of the grid, you can set this section to be a slider by choosing the **Carousel** option in the **Grid Carousel** section.

![choose the Carousel option in the Grid Carousel section](https://imgur.elightup.com/6KThSVc.png)

Next, go to the **Grid Builder** section, and set the navigation of the slider.

To stipulate which information displays in the grid, move to the **Card Style** section. Then, set both the **Default Card** and **Post Type Cards** as the **Featured Restaurants Card** which we’ve just created.

![Choose the card styles you want to display for the post as Featured Restaurant](https://imgur.elightup.com/IWRqW5y.png)

## 5. Displaying the grid on the frontend

Let’s edit the homepage with Elementor.

Add a section to a place you want to display it on the homepage. Add a **Heading**, name it, and style it as you want.

Then, search for the **Grid** element and drag it into the section. In the **Content** box, we need to choose the grid that we have just created.

![In the Content box, choose the grid that we have just created](https://imgur.elightup.com/wykz8KD.png)

Then, you’ll see the featured restaurants displayed on the homepage.

![Featured restaurants as displayed on the homepage](https://imgur.elightup.com/QBwcKeC.png)

## 6. Styling

In the editor for the created grid of WP Grid Builder, go to the **Customization** section and add CSS code.

![Add CSS](https://imgur.elightup.com/OY8PeaF.png)

I also put this code on [Github](https://github.com/wpmetabox/tutorials/blob/2dcff256452fab4bbd189d8a22a8129a94f2ea50/display-the-featured-restaurant%E2%80%99s-section-wpgridbuilder/custom.css), so you can refer to it.

Now, go to the frontend, you will see a new look of the section. That’s done!

![The new and better look of the section after styling](https://imgur.elightup.com/HkEGy4I.png)

# Dynamic styling with data attributes

import LiteYouTubeEmbed from 'react-lite-youtube-embed';
import 'react-lite-youtube-embed/dist/LiteYouTubeEmbed.css';

You usually use classes and IDs to style your WordPress. However, they can not style an element depending on its state, taxonomy, or specific properties. In those cases, data attributes can help you achieve them. So, let’s explore a new way to **target and style elements** in web design using **data attributes**. It helps to make styling dynamic.

In this practice, I’ll use terms as data attributes to style posts based on the different types. Therefore, each kind of hotel has a distinct style. And the posts with the same type will have the same style.

![Example of using data attributes to dynamically style dynamically](https://imgur.elightup.com/N55u20b.png)

## Video version

<LiteYouTubeEmbed id='qzVpJ1ZVuKc' />

## What are data attributes?

Similar to classes and IDs, the data attribute is a **type of HTML attribute** used for styling elements. So, what is different about the data attribute from others?

Data attribute gives you **more context** and **unique**, **valuable data** that identifies the specific elements or posts. So, it makes styling dynamic and flexible. As a result, the HTML will be clear since you don’t have to create too many classes.

We’ll take a look at a specific context to understand it more easily. I have had a list of hotels. They are assigned to the amenities service. Then, I want each type of amenity to have its own style. We can not use classes as usual since every post has the same class named `hotel`. Classes can not target specific posts somehow. But data attributes can do that. And we’ll style based on them. In this case, the term is a data attribute. Each term will be an attribute for styling.

We’ll go into detail about how to style elements with data attributes.

## Preparation

We need to have posts first. In the case of hotels, each hotel is a post of a custom post type. And, as I mentioned before, we’ll use the term as an attribute of data. So, we need [**Meta Box AIO**](https://metabox.io/aio/) in this practice, specifically:

* [MB Custom Post Types and Custom Taxonomies](https://metabox.io/plugins/custom-post-type/): to create a custom post type and custom taxonomy for the hotels or products.
* [MB Admin Columns](https://metabox.io/plugins/mb-admin-columns/): to display taxonomy as a column in the admin screen.

To display posts on the frontend, you can use [MB Views](https://metabox.io/plugins/mb-views/) or any page builder. In this practice, I use **Bricks** to add data attributes directly.

Let’s start now!

## 1. Creating a custom post type

In the case that you use default posts, you can skip this step.

Right in the Meta Box dashboard, click on the **Create a post type** quick action or go to **Meta Box** > **Post Types** to create a new one for the hotel.

![Click on the Create a post type on the dashboard to create a new one.](https://imgur.elightup.com/U2oK8uE.png)

After publishing, a new menu appeared. It’s your post type.

![The created post type is displayed on the menu.](https://imgur.elightup.com/co1wLtW.png)

## 2. Creating a custom taxonomy

As I mentioned before, we’ll use terms as data attributes. So, let’s create a new taxonomy.

Navigate to **Meta Box** > **Taxonomies** to create a new custom taxonomy.

![Move to the Taxonomies submenu to create a custom taxonomy.](https://imgur.elightup.com/d5nwbu5.png)

Since I want to display the taxonomy as a column in the admin screen, move to the **Advanced** tab and check the **Show admin column** option. It’s available when you have the [MB Admin Columns](https://metabox.io/plugins/mb-admin-columns/) extension.

![In the Advanced tab, click the Show admin column option](https://imgur.elightup.com/IT24Xdv.png)

In the **Post Types** tab, choose the post type that you’ve just created to apply this taxonomy to it.

![In the Post Types tab, select the post type.](https://imgur.elightup.com/EaV0zHJ.png)

Now, when you create posts, you can see the section to add amenities for them. In that section, you can type the amenity or choose one from the list below.

![A new section for setting taxonomy in the post editor.](https://imgur.elightup.com/CZgoXac.png)

Then, they are displayed in the column.

![The terms are displayed in a column.](https://imgur.elightup.com/KO0mEqv.png)

## 3. Displaying posts on the page

As I said before, you can use MB Views or a page builder to display hotels in any place you want. For demonstration purposes, I’ll use Bricks to display them on the homepage.

Edit the homepage with Bricks.

![Edit the homepage with Bricks.](https://imgur.elightup.com/MA3RaIk.png)

Add a new section specifically for the hotels.

![Add a new section specifically for the hotels.](https://imgur.elightup.com/4ShDtla.png)

Inside it, add a **Heading** element to name the section.

![Add a Heading element to name the section](https://imgur.elightup.com/bR2X4Hl.png)

Next, add a **Div** element to contain the hotels.

![Add a Div element to contain the hotels](https://imgur.elightup.com/CJ8Wxq5.png)

To get all posts in the `hotel` post type, enable the **Query loop** button. Then, choose the post type you want to get data from in the **Post type** section.

![Enable the Query loop button and choose the post type.](https://imgur.elightup.com/q9Ztg7F.png)

After that, simply add some elements to get data for the hotel as usual.

Add an **Image** element to get the hotel images.

![Add an Image element to get the hotel images.](https://imgur.elightup.com/W6h1TT8.png)

It’s the featured images of posts. So, we’ll use the **Dynamic data** icon, and choose **Feature Image** from the list.

![Use the Dynamic data icon, and choose Feature Image from the list](https://imgur.elightup.com/7nPmhkj.png)

For the hotel’s name, we use the **Basic text** element.

![Use the Basic text element for the hotel’s name.](https://imgur.elightup.com/258J60d.png)

Also, use the dynamic data feature to get data for it. The names of hotels are the post title. So, select it.

![Select the Post title from the dynamic data list.](https://imgur.elightup.com/XAIi15q.png)

To display the type of amenity, add another **Basic Text** element.

![Add another Basic text element for the type of amenity.](https://imgur.elightup.com/4rwbD51.png)

The amenities are terms of taxonomy. We’ll use the Dynamic data button as well and find out the term from the dropdown list.

![Choose the taxonomy from the list.](https://imgur.elightup.com/q7nu30H.png)

If you have extra information saved in custom fields, just add the corresponding elements to get them.

After that, on the frontend, you’ll see all the data displayed already.

![All the data is displayed.](https://imgur.elightup.com/lFeOgOQ.png)

You can style the section to have a better look. Use the **Style** tab as usual.

![Style the section.](https://imgur.elightup.com/0htOTGT.png)

This is my new look for the hotel section.

![The hotel section after styling as usual.](https://imgur.elightup.com/4kNqozm.png)

However, I want to style it based on each service. It means there are differences between types of amenities. It will be easier to check which hotels offer the same service. So, let’s move on to the key point of this tutorial.

## 4. Styling with data attributes

To style any element that is identified, using CSS or classes is impossible. While data attributes are the solution for this demand.

Back to the page editor with Bricks.

In the **Style** tab of the **Div** element, there is a tab called **Attributes**. Open that tab, and enter the name of the attribute in the **Name** box. It’ll be used to style later. You can set any name you want.

![Enter the name of attribute in the Attributes tab](https://imgur.elightup.com/KnQCdsr.png)

The value of the attribute is the data that you style based on. It can be the post title, custom fields, or anything. In this tutorial, I want to style to distinguish the type of hotel. So, click on the **Dynamic data** icon, and select your team. This step is the same as getting data from terms.

![Set the value of the attribute as the term using the dynamic data icon.](https://imgur.elightup.com/LE86xbd.png)

I want to remove the links, so I added the `plain` filter.

![Add the plain filter to remove the links.](https://imgur.elightup.com/saHFtS9.png)

Now, when inspecting the section on the frontend, you’ll see the elements have a new `data-color` attribute attached to them.

![Each post has a new attribute with the value is its term of taxonomy](https://imgur.elightup.com/vHix6nX.png)

We’re taking data that is associated with each hotel and injecting it right into the HTML. So, we can target elements based on that data. Our work is just styling those attributes.

Back to the page template in Bricks, also in the **Style** section of the **Div** element, move to the **CSS** tab, then add some code to have the appearance of the section as you want.

![Add CSS for each data attribute to style them](https://imgur.elightup.com/fqB1jxe.png)

And this is the new look of the section. In there, the hotels that share the same amenity tend to have a similar style.

![The new look of the section with different styles for different amenities](https://imgur.elightup.com/bNrc12y.png)

With data attributes, you can target and style anything without affecting performance. It’s really powerful and potential.

# Export/Import custom fields

import LiteYouTubeEmbed from 'react-lite-youtube-embed';
import 'react-lite-youtube-embed/dist/LiteYouTubeEmbed.css';

Instead of <a href="https://metabox.io/copy-custom-fields-with-meta-box-builder/">using code to embed custom fields from one site to others</a>, we could use another method supported by <a href="https://metabox.io/plugins/meta-box-builder/">MB Builder</a>. This extension allows you to export/import custom fields fast and easily.

:::info

* This method allows you to choose exporting/importing any field group individually;
* This method allows you to export/import only the field settings, excluding the data that is stored in the fields.

:::

## Video Version

<LiteYouTubeEmbed id='BGVY-5W6d7g'/>

## Preparation

We need the [Meta Box Lite](https://metabox.io/lite/) on both websites, the original site and targeted one. It provides a UI to create custom fields and the export and import features.

After activating two plugins, you’ll see a new **Meta Box** menu as below:

![Meta Box dashboard menu](https://imgur.elightup.com/4k3OMlt.png)

## Creating custom fields

On the original site, let’s create some fields. We have a tutorial on creating custom fields with MB Builder, please take a look for more detail [here](https://docs.metabox.io/tutorials/create-custom-fields/).

Here we’ll create a field group named **Author** and export/import its settings to other sites for example.

![Created field group](https://imgur.elightup.com/W6y5utN.png)

## Exporting field groups and custom fields

To export the custom fields from the original site, go to **Meta Box** > **Custom Fields**. Then, a list of field groups will appear. Choose the ones you want to export by ticking the checkbox.

Next, there are two ways to export the field groups.

If you choose one field group, simply click on its **Export** option like this:

![Click on Export option](https://imgur.elightup.com/0nfoK7n.png)

In case you export several field groups, press the **Bulk actions** dropdown, then select the **Export** option and **Apply**.

![To choose several field groups, press the Bulk actions](https://imgur.elightup.com/3uSObWY.png)

After that, the file that contains the data of the selected field groups will be downloaded automatically.

## Importing field groups and custom fields

In the dashboard of the targeted website you want to import the field group, go to **Meta Box** > **Custom Fields** > **Import**.

Then click on **Choose File** and select the downloaded file to import the field group.

![Click on Choose File and select downloaded file](https://imgur.elightup.com/9975GzX.png)

Then go back to the field groups list in the **Custom Fields** menu on the targeted site, and you’ll see the imported field group is displayed as follows:

![Imported field group is displayed](https://imgur.elightup.com/pUZ5i4f.png)

To check whether the field group works well, you might create/edit a page or post where the custom fields are located, the fields will display similar to the original website.

![Edit or created a page to check whether the field group works well](https://imgur.elightup.com/rLSvmBB.png)

# Filtering posts by custom fields with FacetWP

import LiteYouTubeEmbed from 'react-lite-youtube-embed';
import 'react-lite-youtube-embed/dist/LiteYouTubeEmbed.css';

On an archive page, we’ll display posts and filter them by the values stored in the custom fields created by Meta Box. With the help of FacetWP, we can do it easily without coding.

Here is the page about the restaurants I created as an example:

![Two sections of the page](https://imgur.elightup.com/KcIh5xL.gif)

## Video version

<LiteYouTubeEmbed id='kjkVaC_QKQs' />

## Before getting started

There are some things that need to be clarified. On the page, we’ll have two sections. One is used to filter the restaurants by conditions. We’ll create this part using FacetWP. The second part is to show up all the restaurants.

![Two sections of the page](https://imgur.elightup.com/1KwGTbg.png)

All the information of the restaurants is saved in a custom post type. Each restaurant is a post of a custom post type. Besides the basic information such as name and image of the restaurants which are the post title and featured images, other additional information will be saved in different custom fields.

In the upcoming execution, we’ll create them one by one. No matter if you’re using any page builder or not, you can also use FacetWP to filter posts as I’m doing in this practice.

There are the tools we need:

* [Meta Box](https://metabox.io/): to have framework to create custom post types and custom fields;
* [MB Custom Post Types & Custom Taxonomies](https://metabox.io/plugins/custom-post-type/): to create a new post type named Restaurant;
* [MB Builder](https://metabox.io/plugins/meta-box-builder/): to have an intuitive UI to create custom fields for saving restaurants’ information;
* [MB FacetWP Integration](https://metabox.io/plugins/meta-box-facetwp-integrator/): to create a filter based on the Voucher field;
* [Meta Box Elementor Integrator](https://metabox.io/plugins/mb-elementor-integrator/): to connect and display custom fields created by Meta Box in the Elementor’s dynamic tags;
* **Elementor** (pro version): to have integration with Meta Box to build the page;
* **Elementor Custom Skin**: to create a template as a loop to display the list of restaurants.

## 1. Creating a custom post type

Go to **Meta Box > Post Types > Add New** to create a new post type.

![Create a custom post type](https://imgur.elightup.com/6sOZGUC.png)

After publishing, we’ll have a new **Restaurants** menu in the admin dashboard.

![The created post type appears in the admin dashboard](https://imgur.elightup.com/TnHSOKQ.png)

## 2. Creating custom fields

Go to **Meta Box > Custom Fields** to create a new field group. Here are the field that I created:

![The created custom fields](https://imgur.elightup.com/z2NgC9J.png)

For the **Voucher** information, choose the **Checkbox list** field to allow adding some options in the **Choices** box. These options will be used as a condition to filter posts when creating a filter section in the next step.

![Choose the Checkbox list field for the Voucher information to add some options in the Choices box](https://imgur.elightup.com/CAFAseK.png)

After creating all the needed fields, move to the **Settings** tab, choose **Location** as **Post Type** and select **Restaurant** to apply these fields to this post type.

![Set Location for the created post type](https://imgur.elightup.com/aH4gsoe.png)

When creating a new post in Restaurant post type, you’ll see all the created custom fields:

![All created custom fields appear in a new post of the created post type](https://imgur.elightup.com/kNNgVlz.png)

## 3. Creating a template

Depending on the page builder you’re using, there will be some differences in the creating page and template. You may need to create a template for the page or edit the page directly.

In this case, with Elementor, we need to create one. This template is to display all the posts along with their information. About the filter section, we’ll create it later.

Since we’ll have a list of restaurants on the page, we need a special type of template which is a loop. This option is provided by **Elementor Custom Skin**. You can try it.

Go to **Templates > Theme Builder** and choose **Loop**.

![Go to Templates and then Theme Builder](https://imgur.elightup.com/j1X9403.png)

![Choose Loop option](https://imgur.elightup.com/C3XZx7u.png)

Remember to set the preview for the template.

Since the image and name of the restaurants are the featured image and title of the post, add the **Featured Image** and **Post Title** elements.

![Add the Featured Image and Post Title elements ](https://imgur.elightup.com/t88N4jD.png)

For the address of the restaurant, add the **Text Editor** element. Since the restaurants’ addresses are saved in a custom field created by Meta Box and the custom field is for post, let’s use the **Dynamic Tags** > choose **Meta Box Fields** in the **Post** section.

![Add the Text Editor element for the address of the restaurant](https://imgur.elightup.com/dI5pXSb.png)

And then, select the corresponding field. In this case, it’s **Address**.

![Connect the Text Editor element to the correct field by using Dynamic Tags](https://imgur.elightup.com/tG9sWJw.png)

For the voucher information, do the same.

![Do likewise with the voucher information](https://imgur.elightup.com/NRH3aIC.png)

![Connect the element to the right field](https://imgur.elightup.com/D9iY0Xr.png)

Now, all the restaurant’s information has been displayed.

![All the information has been obtained](https://imgur.elightup.com/PQzv5RG.png)

Save the template and remember to set the condition to apply this template.

![Save the template and remember to set the condition to apply this template](https://imgur.elightup.com/23Wa2Fh.png)

## 4. Creating the page

Go to **Pages** to create a new page and **edit it with Elementor**.

![Create a new page](https://imgur.elightup.com/jogEKj6.png)

Add the Posts element to the page.

![Add the Posts element to the page](https://imgur.elightup.com/VGioxUT.png)

In the Skin setting of the Posts element, choose Custom and then select the default template as the one we’ve just created.

![In the Skin setting of the Posts element, choose Custom and then select the created template](https://imgur.elightup.com/YwgDCzr.png)

Next, go to the **Query** section, choose the source as the post type you want. In this case, it’s **Restaurant**.

![In the Query section, choose the source as the wanted post type](https://imgur.elightup.com/ef865A8.png)

Now, the preview shows all the posts with the information as we want.

![The preview shows all the posts with the information.](https://imgur.elightup.com/UIxRMnQ.png)

Let’s see how to add a filter section in the next step.

## 5. Adding filter

This task will be done by FacetWP. If you use other page builders, you can also create the filter as I’m doing in this practice.

In the admin dashboard, go to **Settings** and choose **FacetWP** to create a new filter.

![Create a new filter](https://imgur.elightup.com/xR9nNT6.png)

Since we will filter the post by the promotion of the restaurant which is saved in the **Voucher** field, choose the **Data Source** as **Voucher** in the **Restaurant** post type.

![Choose the Data Source as Voucher in the Restaurant post type](https://imgur.elightup.com/TBkcCS5.png)

Save the changes and copy the shortcode of the facet.

![Save the changes and copy the shortcode of the facet](https://imgur.elightup.com/7KTGmPH.png)

Then, go back to the created page editor with Elementor, add a Shortcode element to paste the code we’ve just copied.

![Add a Shortcode element to paste the copied code](https://imgur.elightup.com/jjFu27A.png)

After applying the code, you’ll see a section to filter posts in the frontend. All the restaurants having the same coupons are filtered correctly.

![All the restaurants having the same coupons are filtered correctly](https://imgur.elightup.com/ZUipHsz.gif)

If you want to style the page, just go back to the template of the page and style each element as you want. Or, you can use some CSS code to have further styling. In this case, I just style the page a bit, for instance:

![Style the page](https://imgur.elightup.com/6k2QCRy.png)

All the changes in style will be applied immediately. This is how it looks on the frontend. The filter section created by FacetWP works well and all the posts have been filtered.

![The result](https://imgur.elightup.com/KcIh5xL.gif)

# Filtering posts by custom fields and taxonomies

import LiteYouTubeEmbed from 'react-lite-youtube-embed';
import 'react-lite-youtube-embed/dist/LiteYouTubeEmbed.css';

Besides using Tag and Category to filter your posts, you can also use custom fields and custom taxonomies to do it. This is a tutorial on doing it with the example of creating two filters for a bookselling site with two different features: publishers and authors.

## Video Version

<LiteYouTubeEmbed id='Byce7gfpZJQ' />

We need [Meta Box Lite](https://metabox.io/lite/) to create a custom post type, custom taxonomy and custom field visually. It's free.

## Using custom taxonomies

### 1. Creating a custom taxonomy

Since I’ve already had a custom post type named **Books**, I will create a custom taxonomy for it. If you don't know how to create a custom post type, refer to [this article](https://docs.metabox.io/tutorials/create-custom-post-type-taxonomies/) for more details.

Use the quick action on the dashboard or go to **Meta Box > Taxonomies > Add New** to create the taxonomies. Then, just fill in the information for it.

![Create custom taxonomy](https://imgur.elightup.com/miT907T.png)

To assign this taxonomy to the **Book** post type, move to the **Post Types** tab and tick to the Book option.

![Assign the created taxonomy to the wanted post type](https://imgur.elightup.com/dGHlcGE.png)

If you want to display the list of the taxonomy’s terms as a checkbox list in the post editor like the below pic, just go to **Advanced** tab, tick the **Hierarchical** box.

![Choose option you want to display the list](https://imgur.elightup.com/DQBQMza.png)

![Go to Advanced section to choose](https://imgur.elightup.com/Wei8Bkq.png)

Otherwise, if you do not check the Hierarchical box, the taxonomy section will display like this:

![The taxonomy section displays the way you choose](https://imgur.elightup.com/qBYQoHQ.png)

After publishing the taxonomy, you will see it in the **Book** menu.

![Created taxonomy appears in the menu](https://imgur.elightup.com/dh8y7kR.png)

Now, you can create terms for the taxonomy.

![Create terms for the taxonomy](https://imgur.elightup.com/RtCi2no.png)

Then, you will see all the terms displayed in the post editor.

![Terms display in the post editor](https://imgur.elightup.com/DQBQMza.png)

### 2. Displaying the taxonomy terms on the archive page

Go to **Appearance > Theme File Editor** > `archive.php` and add this code to where you want to show the terms on the archive page.

```php
<div class="filter-custom-taxonomy">
    <?php $terms = get_terms( 'publisher' ) ?>
    <?php foreach ( $terms as $term ) : ?>
        <a href="?getby=cat&cat=<?= esc_attr( $term->slug ) ?>">
             <?= esc_html( $term->name ) ?>
        </a>
    <?php endforeach; ?>
</div>
```
In there, ***publisher*** is the slug of the created taxonomy. You can replace it with your own one.

This is how your term displays in the archive page:

![The terms display in the archive page](https://imgur.elightup.com/HuBUeD1.png)

### 3. Getting posts by the taxonomy terms

Still in the **Theme File Editor**, go to the `functions.php` file, add these codes:

```php
function yourprefix_filter_archive_by_tax( $query ) {
    if ( is_admin() || ! $query->is_archive() || ! $query->is_main_query() || empty( $_GET['getby'] ) || 'cat' !== $_GET['getby'] ) {
        return;
    }
    $tax_query = [
        [
            'taxonomy' => 'publisher',
            'field'    => 'slug',
            'terms'    => $_GET['cat'],
        ],
    ];
    $query->set( 'tax_query', $tax_query );
    return $query;
}
add_action( 'pre_get_posts', ‘yourprefix_filter_archive_by_tax’);
```

In this code:

* ```yourprefix_filter_archive_by_tax```: This is the name that I set for the function. You can name it as you want

* ```if ( is_admin() || ! $query->is_archive() || ! $query->is_main_query() || empty( $_GET['getby'] ) || 'cat' !== $_GET['getby'] ) {```: This statement does check if the user is on the archive page on frontend and it runs the main query or not.

* ``` $tax_query = [ ['taxonomy' => 'publisher', 'field'    => 'slug', 'terms'    => $_GET['cat'], ], ]; ```: This is to declare the variable to get the posts which have the taxonomy’s slug as `publisher`. `terms`    => $`_GET['cat']` is used to get the slug of the terms inside the taxonomy.

* ```add_action( 'pre_get_posts', ‘yourprefix_filter_archive_by_tax’);```: This is used to add a callback function to an action hook. `pre_get_posts` is the name of the hook filter and the `yourprefix_filter_archive_by_tax` is a callback to add into `pre_get_posts`. We use `pre_get_posts` to modify the query to get the wanted posts. We simply add a `tax_query` by publisher to get posts that have the selected term.

Here is the final result. All books of that term are filtered.

![The final result](https://imgur.elightup.com/qCrvR8p.gif)

## Using custom fields

### 1. Creating a custom field

First of all, create a custom field named **Author** for the **Book** post type. This data saved in the custom field will be used for the filter.

Click on the **Create a field group** button on the dasboard or go to **Meta Box > Custom Fields > Add New > Add Fields**.
For the Book’s Author, I set it as a **Text** field to easily fill in the name of the author.

Note that, you should remember the field’s ID to add it to the code.

![add the field's ID to the code](https://imgur.elightup.com/XLkACEE.png)

Move to the **Settings** tab, choose **Location** as **Post Type**, and select **Book** to apply this field to this post type.

![Set location for the fields](https://imgur.elightup.com/zEivz1d.png)

Here is the created custom field in the post editor.

![created fields](https://imgur.elightup.com/luX44DB.png)

### 2. Displaying the list of fields’ value

Add these codes below in the `archive.php file` to show the custom field’s values:

```php
<div class="filter-custom-field">
    <?php
    global $wpdb;
    $meta_values = $wpdb->get_col( "SELECT DISTINCT meta_value FROM $wpdb->postmeta WHERE meta_key='book_author'" );
    foreach ( $meta_values as $meta_value ) : ?>
        <a href="?getby=field&field=<?= esc_attr( $meta_value ) ?>">
            <?= esc_html( $meta_value ) ?>
        </a>
    <?php endforeach ?>
</div>
```
In this code, we use a raw SQL query to get all values of the `book_author` custom field. These values are stored in the post meta table.

Now, in the archive page, all the created custom fields have been obtained.

![All the created custom fields have been obtained in the archive page](https://imgur.elightup.com/Ri98Mwa.png)

### 3. Getting posts by custom field’s values

In the `functions.php` file, use these codes to set the filter action:

```php
function yourprefix_filter_archive_by_field( $query ) {
    if ( is_admin() || ! $query->is_archive() || ! $query->is_main_query() || empty( $_GET['getby'] ) || 'field' !== $_GET['getby'] ) {
        return;
    }

    $query->set( 'meta_key', 'book_author' );
    $query->set( 'meta_value', $_GET['field'] );

    return $query;
}
add_action( 'pre_get_posts',’yourprefix_filter_archive_by_field’);
```
Similar to filter posts by taxonomy, we use the `pre_get_action` and set the query parameters for meta query: `meta_key`, `meta_value`.

Here is the result when I filter all books of the author:

![The result after all steps](https://imgur.elightup.com/p1Hs1hN.gif)

# Filtering posts by date picker field

import LiteYouTubeEmbed from 'react-lite-youtube-embed';
import 'react-lite-youtube-embed/dist/LiteYouTubeEmbed.css';

In this tutorial, we’ll show you how to **filter posts on the front end using a date picker custom field** with Meta Box. This is ideal for time-sensitive content such as events or movie schedules, allowing visitors to quickly find posts by a specific date or within a date range.

![result](img/filter-posts-by-date-field/result.gif)

## Video Version

<LiteYouTubeEmbed id='65s3mcd8uXo' />

## Preparation

In this tutorial, we’ll create a custom post type to manage all the films in our cinema schedule. 
Each movie will have its own details, such as genres, show date, and showtimes, which we’ll store in custom fields created with Meta Box.

So I recommend using [Meta Box AIO](https://metabox.io/aio/), which includes the framework and all extensions.

## Creating a new custom post type

As I mentioned, we’ll start by creating a new custom post type called **Movies** to store the films. Each movie will be saved as a post in this post type.

Now, go to **Meta Box** > **Post Types** to create a new custom post type for the movies. After publishing, you’ll see the created custom post type in the dashboard’s menu.

![create movie post type](img/filter-posts-by-date-field/create-movie-post-type.png)

## Creating custom fields for movies

Now, we’ll create some custom fields to store information for each movie.

These fields will include details like genres, show dates, and showtimes, everything we need for the movie listings. We’ll make the movie schedule as a group to keep things more organized.

![Fields in post editor](img/filter-posts-by-date-field/fields-in-post-editor.png)

The most important one in this tutorial is the Date Picker field for the show date. This is what we’ll later use to filter movies on the front end.

Now, go to **Meta Box** > **Custom Fields** to create a new field group.

![Create field group](img/filter-posts-by-date-field/create-field-group.png)

First, choose the **Select Advanced** field for movie genres. Add some choice in the **Choices** box. And you can also enable multiple selections so that each movie can belong to several genres at once.

![Genre field](img/filter-posts-by-date-field/genre-field.png)

Next, create another field called Movie Schedule, which contains the date and time information. Here, we’ll use a **Group** field to keep related fields together. And turning on the **Admin column** for this group. It’s available when you have the **MB Admin Column** extension activated. Thus, I can quickly view movie schedules directly in the post list

![Group field](img/filter-posts-by-date-field/group-field.png)

Inside this group, add a **Date Picker** field for the date. Then, go to the **Advanced** tab and set the **minDate** option to “**today**”. This way, you can’t select past dates.

![Date field setting](img/filter-posts-by-date-field/date-field-setting.png)

After that, select the **Time Picker** field for the time. Since each movie might have multiple showtimes on the same day, enable the **Cloneable** option for this field.

![Time field](img/filter-posts-by-date-field/time-field.png)

Once done, move to the **Settings** tab and set the **Location** as **Post Type**. Choose **Movies** to ensure that the custom fields appear only for movie posts.

![Field group location](img/filter-posts-by-date-field/field-group-location.png)

Now, you’ll see all the fields we’ve just created displayed under the post editor. You can now fill in movie details.

![Fields in post editor](img/filter-posts-by-date-field/fields-in-post-editor.png)

The movie schedules are now visible here in the admin dashboard.

![Field in admin dashboard](img/filter-posts-by-date-field/field-in-admin-dashboard.png)

## Showing posts on the page

Before adding the date filter, we first need to make sure that the specific page can already display all the movies.

First, create a new page especially for the cinema schedule.

Next, go to **Meta Box** > **MB Views**, and create a new template specifically for this page.

![Create a template.](img/filter-posts-by-date-field/create-template.png)

With **MB Views**, I get all movie posts by adding some code in the **Template** tab.

![Get all posts by adding code](img/filter-posts-by-date-field/add-code-get-all-posts.png)

**In there**:

```
{% set args = { post_type: 'movie', posts_per_page: -1, orderby: 'date', order: 'ASC' } %}
```

This whole line is used to query and display posts from a specific post type, sorted by publish date. Particularly, it declares that we’ll get posts from the post type with the `movie` slug. And, `posts_per_page: -1` helps fetch all posts in that post type. You can change the number to get the expected number of posts.

Then, I display each movie’s details, especially the date fields for later filtering. I simply click the **Insert Field** button and choose the fields I need.

![Insert fields in the template with view](img/filter-posts-by-date-field/insert-field-views.png)
 
After inserting all the fields, move to the **Settings** section to set where this template will appear. Set the **Type** as **Page**, and choose the location as the page you created earlier for the movie listings.

![Template setting](img/filter-posts-by-date-field/tempate-setting.png)

On the frontend, view the page, and you’ll see all the movie information displayed. However, it appears as a basic list without any styling for now. To make it look more visually appealing, we need to apply some styling.

![Information display without styling](img/filter-posts-by-date-field/infor-displays-no-styling.gif)

Back to the **Template** tab, add some div tags and classes for styling. And modify the code.

![Add classes and div](img/filter-posts-by-date-field/add-div-classes.png)

Move to the **CSS** tab to add some lines of code.

```css
.movie-list {
    display: grid;
    grid-template-columns: repeat(4, 1fr);
    gap: 35px 20px;
}

.movie-item {
    background: #fff;
    border-radius: 12px;
    overflow: hidden;
    box-shadow: 0 3px 10px rgba(0, 0, 0, .08);
    transition: transform .2s ease, box-shadow .2s ease;
    padding-bottom: 14px;
}

.movie-item:hover {
    transform: translateY(-3px);
    box-shadow: 0 6px 18px rgba(0, 0, 0, .12);
}

.movie-thumb {
    position: relative;
    width: 100%;
    aspect-ratio: 16/9;
    overflow: hidden;
    background: #eef1f4;
    border-bottom: 1px solid #eef2f7;
}

.movie-thumb img {
    position: absolute;
    inset: 0;
    width: 100%;
    height: 100%;
    object-fit: cover;
    display: block;
}

.movie-title {
    font-size: 18px;
    font-weight: 700;
    color: #213;
}

.movie-title a {
    text-decoration: none;
    color: #282828;
}

.genres {
    display: flex;
    flex-wrap: wrap;
    gap: 8px;
}

.genre {
    padding: 0px 10px;
    background: #e6e7e9;
    color: #213;
    font-size: 13px;
    font-weight: 500;
    border-radius: 6px;
}

.movie-content {
    padding: 20px 10px 0px;
    line-height: 2.0
}


.showtimes {
    display: flex;
    flex-wrap: wrap;
    gap: 10px;
    margin: 5px 0;
}

.showtime {
    padding: 0px 10px;
    border: 1px solid #ccc;
    border-radius: 8px;
    font-size: 12px;
    font-weight: 600;
    background: #d14141;
    color: #fff;
    cursor: pointer;
}

.movie-date {
    font-size: 15px;
    color: #32abb9;
    font-weight: 700;
}
```

![Add css for styling](img/filter-posts-by-date-field/add-css-styling.png)

Now, the movie listings look much better. Let’s move on to creating the search box and adding the date filter.

## Filtering posts by date picker

Back to the template created by **MB Views**, let’s add some more code to display the search box and filter options for the movie listings.

```php
<div class="filters">
    <div class="filter-inputs">
        <label>From Date: <input type="date" id="from-date"></label>
        <label>To Date: <input type="date" id="to-date"></label>
        <label class="specific-date">Specific Date: <input type="date" id="specific-date"></label>
    </div>
    <button id="clear-filters" type="button">Clear All Filters</button>
</div>
```

**In there**:

```php
<label>From Date: <input type="date" id="from-date"></label>
<label>To Date: <input type="date" id="to-date"></label>
<label class="specific-date">Specific Date: <input type="date" id="specific-date"></label>
```

We add three date inputs: **From Date**, **To Date**, and **Specific Date**. They let users pick days directly from a calendar to filter the movies. For example, you can choose a range of days or just one specific day to see which movies are showing. Each input has an ID, so we can later handle them in JavaScript.

```php
<button id="clear-filters" type="button">Clear All Filters</button>
```

This line of code is to add the **Clear All Filters** button to reset the date filters with one click, so you can start a new search easily.

Turn to the CSS tab and add styles to make the search section look cleaner.

```css
.filters {
    border-radius: 12px;
    padding: 15px;
    background: #f1f1f180;
    display: flex;
    flex-direction: column;
    gap: 12px;
    margin: 20px 0 35px;
}

.filter-inputs {
    display: flex;
    gap: 16px;
    flex-wrap: wrap;
}

.filters label {
    display: flex;
    flex-direction: column;
    font-weight: 600;
    font-size: 16px;
    gap: 6px;
}

#clear-filters {
    align-self: flex-start;
    padding: 8px 16px;
    border: none;
    border-radius: 8px;
    background: #a3372c;
    color: #fff;
    font-weight: 600;
    font-size: 14px;
    cursor: pointer;
    transition: background 0.2s ease;
}

#clear-filters:hover {
    background: #81281e;
}

#clear-filters:active {
    background: #051325;
}

label.specific-date {
    margin-left: 150px;
}
```

It looks nice now, but we still need to make it work.

![Filter doesn’t work](img/filter-posts-by-date-field/filter-not-work.gif)

In the template again, add the line of code below to load the **jQuery** library to make it easier to write JavaScript for the filter later.

```php
<script src="https://code.jquery.com/jquery-3.7.1.min.js"></script>
```

And, I add the following code to assign the date field value in the ‘**Y-m-d**’ format to the data-date attribute. Since both the movie date and the date filter input return the same year-month-day format, it’s easy to compare them.

```php
<div class="movie-item" data-date="{{ post.movie_schedule.date | date( 'Y-m-d' ) }}">
```

![Date format](img/filter-posts-by-date-field/date-fomat.png)

Now, switch to the **JavaScript** tab, add the main script to handle the filtering of the posts.

```js
jQuery(function ($) {
    var $from = $('#from-date');
    var $to = $('#to-date');
    var $spec = $('#specific-date');
    var $items = $('.movie-item');

    $from.on('change', function () {
        $spec.val('');

        if (this.value) {
            $to.attr('min', this.value);
        } else {
            $to.removeAttr('min');
        }

        applyFilter();
    });

    $to.on('change', function () {
        $spec.val('');
        if (this.value) {
            $from.attr('max', this.value);
        } else {
            $from.removeAttr('max');
        }
        applyFilter();
    });

    $spec.on('change', function () {
        $from.val('').removeAttr('max');
        $to.val('').removeAttr('min');
        applyFilter();
    });

    $('#clear-filters').on('click', function (e) {
        e.preventDefault();

        $from.val('').removeAttr('max');
        $to.val('').removeAttr('min');
        $spec.val('');
        $items.show();
    });

    function applyFilter() {
        var from = $from.val();
        var to = $to.val();
        var spec = $spec.val();

        $items.each(function () {
            var d = $(this).data('date');
            var show = true;

            if (spec) {
                show = (d === spec);
            } else {
                if (from) {
                    if (d < from) {
                        show = false;
                    }
                }
                if (to) {
                    if (d > to) {
                        show = false;
                    }
                }
            }

            $(this).toggle(show);
        });
    }
});
```


![Add Javascript](img/filter-posts-by-date-field/add-javascript.png)

Go through it in more detail.

```js
var $from = $('#from-date');
var $to = $('#to-date');
var $spec = $('#specific-date');
var $items = $('.movie-item');
```

This part initializes variables for selecting the start date, end date, specific date, and all post items.

```js
$from.on('change', function () {
    $spec.val('');

    if (this.value) {
        $to.attr('min', this.value);
    } else {
        $to.removeAttr('min');
    }

    applyFilter();
});
```

When the user picks a start date, the specific date field is automatically cleared. Then, the end date input is limited; you can’t choose a date earlier than the start date. If the start date is cleared, that restriction is removed. And finally, the script calls the `applyFilter()` function to update the filtered movie list.

As the user picks a to-date, it does the same as before. Just the reverse of the from-date logic. It clears the specific date and adjusts the date limit.

```js
$to.on('change', function () {
    $spec.val('');
    if (this.value) {
        $from.attr('max', this.value);
    } else {
        $from.removeAttr('max');
    }
    applyFilter();
});
```

If a specific date is chosen instead, it clears both the start and end dates, removes any date limits, and then calls the created function to update the results.

```js
$spec.on('change', function () {
    $from.val('').removeAttr('max');
    $to.val('').removeAttr('min');
    applyFilter();
});
```
When the user clicks “Clear All Filters,” it resets all date selections to default, removes any date limits, and shows all posts again, just like before filtering.

```js
$('#clear-filters').on('click', function (e) {
    e.preventDefault();

    $from.val('').removeAttr('max');
    $to.val('').removeAttr('min');
    $spec.val('');
    $items.show();
});
```

At this point, the script below retrieves the current values of the start, end, and specific date fields so it knows which filters are active.

```js
var from = $from.val();
var to = $to.val();
var spec = $spec.val();
```
We use `$items.each(function () {}` loops through each post item to check one by one whether the post should be visible based on the selected dates.

We get the date value from the post’s data-date attribute.

```js
var d = $(this).data('date');
```

This gives JavaScript the exact date of each post to compare with the selected filters.

`var show = true;` is to set a variable to indicate that each post is visible by default.

If a specific date is chosen, only posts with the same date are shown. Otherwise, if the post’s date is earlier than the start date, it’s hidden. Similarly, if the post’s date is later than the end date, it’s also hidden.

```js
if (spec) {
    show = (d === spec);
} else {
    if (from) {
        if (d < from) {
            show = false;
        }
    }
    if (to) {
        if (d > to) {
            show = false;
        }
    }
}
```

After these checks, the last script updates the display, showing posts that meet the filter conditions and hiding those that don’t.

```js
$(this).toggle(show);
```

That's all for the code, you can refer it [here](https://github.com/wpmetabox/tutorials/tree/master/filter-posts-by-date-picker).

On the frontend, pick the date you want to filter, and then only the movies on that date will be returned and displayed on the page.

![result](img/filter-posts-by-date-field/result.gif)

You can also refer to other Meta Box filtering tutorials, such as [filtering by taxonomy](https://metabox.io/filter-posts-by-taxonomy-mb-views/), [relationships](https://metabox.io/filter-posts-by-relationshipd-mb-views/), or multiple conditions to build more advanced and flexible search experiences.
Happy building with Meta Box!

# Filtering posts by Relationships - Meta Box + Oxygen

import LiteYouTubeEmbed from 'react-lite-youtube-embed';
import 'react-lite-youtube-embed/dist/LiteYouTubeEmbed.css';

Are you building an internal company portal to manage training materials? Each document is connected to a department by a Meta Box relationship. When staff log in, they’ll only see the documents for their own department, not others. If so, you should not skip this article because today, I will show you how to **create a filter posts by relationships** using **Meta Box** and **Oxygen**. 

You may find this topic useful if you are looking to build an internal website. Besides, if you are a seller, like selling courses, you can create courses associated with student groups where each student can only see the courses they have purchased or have permissions for.

Check out the page I made as an example for users:

![Check out the page I made as an example for users](img/filter-relationships-oxygen/demo-min.gif) 

## Video version

<LiteYouTubeEmbed id='zwFtKrKs1_c' />

## Preparation

Here I have several **Documents** and each of them will be a **Post**. I will create a custom post type for **Departments**. Then I will **create a bi-directional relationship** between them. The relationship connects which department will have related posts and vice versa. 

Next, I will create a custom field for the **work department** to classify the department for each **user**. When the user logs in, they will see the archive page displaying related posts of their department by filter condition. This page is built by **Oxygen**. 

So, we need **Oxygen** to build the page.

Next, you need [**Meta Box AIO**](https://metabox.io/aio/) to have the framework for creating custom post types, custom fields and relationships. As well as the Meta Box extensions inside it provide you with advanced features, specifically:

* [MB Admin Columns](https://metabox.io/plugins/mb-admin-columns/): to display the related posts and related departments as a column in the dashboard.
* [MB Custom Post Type](https://metabox.io/plugins/custom-post-type/): to create a custom post type for the departments.
* [MB Relationships](https://metabox.io/plugins/mb-relationships/):  to create relationships between these post types.
* [MB User Meta](https://metabox.io/plugins/mb-user-meta/): to add a work department to user profile.
* [MB Builder](https://metabox.io/plugins/meta-box-builder/): to have a UI on the backend to create custom fields and relationships easily.

That’s all. Let’s get started now.

## Creating custom post types 

Go to **Meta Box** and create a new post type for the **Departments**.

![Go to Meta Box and create a new post type for the Departments](img/filter-relationships-oxygen/add-new-post-type-min.png) 

After creating, you can see the post types displayed in the **Admin Dashboard**. This is the list I have.

![This is the list I have](img/filter-relationships-oxygen/list-departments-min.png) 

## Creating a relationship

Go to **Meta Box**, **Relationship**, and create a new one.

![Go to Meta Box, Relationship, and create a new one](img/filter-relationships-oxygen/add-new-relationship-min.png)

There’ll be the **From** and **To** sections as follows. The relationship is bidirectional, so you can put the two post types into any section.

Since they are post types, remember to set the object type as **Post** in both sections.

![Since they are post types, remember to set the object type as Post in both sections](img/filter-relationships-oxygen/object-type-edit-min.png) 

Set the **Post type** in the **From** section as one that we want to be in the relationship. In this case I set **Posts**, so the rest one in the **To** section will be the **Departments**.

![Set the Post type in the From section as one that we want to be in the relationship](img/filter-relationships-oxygen/post-type-edit-min.png) 

Enable this setting if you want to show them as an admin column. 

![Enable this setting if you want to show them as an admin column](img/filter-relationships-oxygen/admin-column-edit-min.png) 

After publishing, go to the post editor, you will see the section for setting relationships. Just fill the post information and choose its departments. 

![Just fill the post information and choose its departments](img/filter-relationships-oxygen/choose-department-for-post-min.png) 

These are some posts I have. And, you can easily view the **Posts** and the related **Departments** information in these columns.

![And, you can easily view the Posts and the related Departments information in these columns](img/filter-relationships-oxygen/list-posts-department-min.png) 

## Creating a custom field

To add departments to each user, I will create a custom field. Feel free to add additional fields depending on your needs.

Now, go to **Meta Box** > **Custom Fields**, and create a new field group.
 
![Now, go to Meta Box > Custom Fields, and create a new field group](img/filter-relationships-oxygen/add-new-custom-field-min.png) 

For the user department, choose the **Post** field type, then choose **Post** type as **Department**. 

![For the user department, choose the Post field type, then choose Post type as Department](img/filter-relationships-oxygen/user-departments-type.png)

Enable this setting to show them as an admin column. 

![Enable this setting to show them as an admin column](img/filter-relationships-oxygen/admin-column-for-custom-field-min.png)

Then, move to the **Settings** tab, choose **Location** as **User** to apply the field to it.

![Then, move to the Settings tab, choose Location as User to apply the field to it](img/filter-relationships-oxygen/location-as-user-min.png) 

Now, in each user profile, you can see the **Department** field section. Click on it to select the department.

![Now, in each user profile, you can see the Department field section](img/filter-relationships-oxygen/work-department-field-min.png) 

After updating, you can see users with related work departments in the dashboard like this.

![After updating, you can see users with related work departments in the dashboard like this](img/filter-relationships-oxygen/user-department-min.png) 

## Displaying posts on an archive page

Navigate to the **Oxygen** > **Templates**, and add a new template. 

![Navigate to the Oxygen > Templates, and add a new template](img/filter-relationships-oxygen/add-new-page-for-documents-min.png) 

Next, go to **Pages**, create a new page for the **Documents**. 

![Next, go to Pages, create a new page for the Documents](img/filter-relationships-oxygen/add-new-page-for-documents-min.png)

Then, scroll down to the **Oxygen** section, and choose the created template to render the page using it. Edit the page with **Oxygen**.

![Edit the page with Oxygen](img/filter-relationships-oxygen/edit-page-with-oxygen-min.png)

Choose the **Documents** for the **Editing** and **Previewing**.

![Choose the Documents for the Editing and Previewing](img/filter-relationships-oxygen/editing-and-previewing-min.png) 

First, select a **Section** component to contain all of the page content. 

![select a Section component to contain all of the page content](img/filter-relationships-oxygen/add-section.png) 

To get the title of the page automatically, add a **Heading** component, then click **Insert Data**, **Post**, **Title** to connect it with the title of the page.

![To get the title of the page automatically, add a Heading component, then click Insert Data, Post, Title to connect it with the title of the page](img/filter-relationships-oxygen/add-heading-min.gif) 

Since we have more than one post on the page, you should add a Repeater component to define information structure for them all. 

![Since we have more than one post on the page, you should add a Repeater component to define information structure for them all](img/filter-relationships-oxygen/add-repeater-min.png) 

Go to **Query** > **Advanced**, and add parameters for the query like this.

![Go to Query > Advanced, and add parameters for the query like this](img/filter-relationships-oxygen/advanced-query-min.gif) 

In there, `post` is the slug of the **Post** post type. It means that we’ll get posts from this post type. 

![It means that we’ll get posts from this post type](img/filter-relationships-oxygen/post-type-slug-min.png) 

I want to get all the posts we have, so the setting will be like this.

![I want to get all the posts we have, so the setting will be like this](img/filter-relationships-oxygen/post-per-page-min.png) 

Inside the **Repeater** component, there’ll be a **Div**. Add some components inside this **Div** to display the posts’ information.

I added an **Image** component and inserted data from the **Featured Image** of the post.

![I added an Image component and inserted data from the Featured Image of the post](img/filter-relationships-oxygen/add-image-min.gif) 

Next, add a **Heading** then insert data from the **Post Title** for the course name.

![Next, add a Heading then insert data from the Post Title for the course name](img/filter-relationships-oxygen/add-post-tittle-min.gif) 

You may get the wrong name and image of the course, but don't worry about it. Just keep moving, you will see the right things later.

To get the department information of the post, add a **Text** component and insert data from **Meta Box Field**. If you want to display the department’ name along with the **link**, choose the **Post URL** option when inserting data like this. Immediately, you can see the post is displayed exactly with the related department’ name as follows.

![To get the department information of the post, add a Text component and insert data from Meta Box Field](img/filter-relationships-oxygen/add-department-information-min.gif) 

The last information of the post is date, add another **Text** below. Click on this to insert dynamic data. Choose the **Date** and fill the format that you want. In my example, I will put the format like this. 

![The last information of the post is date, add another Text below](img/filter-relationships-oxygen/add-date-min.gif) 

After getting all the wanted information for posts, view the page on frontend. You will see the image along with their information displayed correctly. But, it seems like we should style the page a little bit to have a better appearance.

![After getting all the wanted information for posts, view the page on frontend](img/filter-relationships-oxygen/view-on-frontend-min.gif) 

Back to the template, you can change the settings of each component to get the wanted look for the page. Here is the one that I got after styling.

![Here is the one that I got after styling](img/filter-relationships-oxygen/after-styling-min.png) 

## Filtering posts by relationships

Let’s add filter posts by **Relationships** so users can see the related posts of their department. **Oxygen** allows you to set rules for displaying posts easily. 

In the **Oxygen** settings, click on the **div** right below the **repeater** component, move to the **setting** tabs, choose the **Conditional Settings** icon to set the conditions. 

![choose the Conditional Settings icon to set the conditions](img/filter-relationships-oxygen/conditional-setting-min.png) 

In the conditions’ pop up, add a new rule. Select **User Logged In** below the list and set the next box of the conditions setting like this. This rule means that only valid users will see the displayed posts.

![Select User Logged In below the list](img/filter-relationships-oxygen/user-logged-in-min.png) 

Next, add the second rule. In the dropdown, choose **Dynamic Data**, **Meta Box Field** and **Departments**. Choose **Post Object ID** so that **Users** can see the related posts of their department. 

![Next, add the second rule](img/filter-relationships-oxygen/2nd-rule-min.gif)

In the next box of the conditions setting, choose **contains** to compare whether the data above contains a certain value. Then in the last box, click on the **data** button, move to **Current User** and choose **Meta or Custom** field. Fill the **Meta Key** as `user_department` so that we can get the department field value of the current user.

![In the next box of the conditions setting](img/filter-relationships-oxygen/next-box-setting-min.gif) 

Now, go to the page on frontend, You will see the filter works well.

First, all posts are displayed in the admin account. Log out and log back in to each user account.You can see users in different departments will only see posts from the related department.

![Now, go to the page on frontend, You will see the filter works well](img/filter-relationships-oxygen/demo-min.gif)

# Filtering posts by relationships - MB Views

import LiteYouTubeEmbed from 'react-lite-youtube-embed';
import 'react-lite-youtube-embed/dist/LiteYouTubeEmbed.css';

Filtering and displaying posts based on certain criteria is one of the most common functionalities every website needs. And today, let me show you another method: **filtering by relationship**. We’ll do it with the help of **MB Views** from **Meta Box**.

For demonstration purposes, I’ll build an internal company portal with training documents. When employees in different departments log in, they should only see the documents assigned to their department.

![Example of filtering posts by relationships](img/role-based-access-control-metabox-bricks/result.gif)

## Video version

<LiteYouTubeEmbed id='Wuab_QbG7aE' />

## Preparation

The key idea is that access control relies on conditional display. In this tutorial, we’ll use the default WordPress Posts for the learning materials, and a separate custom post type for Departments. Each post will connect to one or more departments using a Meta Box relationship. To add the user to a department, I use a custom field for the user.

So, you just need [**Meta Box AIO**](https://metabox.io/aio/). It gives you a framework and all the necessary extensions in one package without having to install each separately, specifically:

* [MB Admin Columns](https://metabox.io/plugins/mb-admin-columns/): to display related information neatly in the admin panel;
* [MB Custom Post Type](https://metabox.io/plugins/custom-post-type/): to create the custom post type for departments;
* [MB Relationships](https://metabox.io/plugins/mb-user-meta/): to create the relationship between material posts and departments;
* [MB User Meta](https://metabox.io/plugins/mb-user-meta/): to add the custom field for selecting a work department in each user profile;
* [MB Views](https://metabox.io/plugins/mb-views/): to create the template for displaying the posts belonging to the logged-in user’s department only;
* [MB Builder](https://metabox.io/plugins/meta-box-builder/): to visually create the custom field for the user without writing code.

Now, let’s go step by step.

## 1. Creating a custom post type

Go to **Meta Box** > **Post Types** to create a new custom post type for the Departments.

![Go to Meta Box, Post Types to create a new custom post type.](img/filter-by-relationships-mb-views/create-cpt.png)

After publishing, you’ll see the created custom post type in the menu.

![The created post type.](img/filter-by-relationships-mb-views/cpt.png)

You can see some departments I created as posts here.

## 2. Creating the relationship

Since we want to show documentation based on the department, we need to create a relationship between them. 

Go to **Meta Box** > **Relationships** to create a new one.

![Go to Meta Box, Relationships to create a new one.](img/filter-by-relationships-mb-views/create-relationship.png)

In the interface of MB Relationships, there are the **From** and **To** sections. Setting them up is the same.
 
Because we’re setting the relationship between the default post and a custom post type, set the **Object Type** as **Post** in both sections.

![Set the Object Type as Post in both sections.](img/filter-by-relationships-mb-views/object-type.png)

The relationship is bidirectional, which means it doesn’t matter which side you set up first, data will be linked both ways. For instance, in the **From** section, I set the **Posts** as default posts, and the rest will be `department` post type. 

![Set the Posts as default posts, and the rest will be department post type.](img/filter-by-relationships-mb-views/post-type.png)

If you want to show which departments are related to learning material and vice versa, just check the setting of the admin column as below: 

![Check the setting of the admin column](img/filter-by-relationships-mb-views/column-relationship.png)

After publishing, go to the post editor, you can see a relationship section on the right panel. Absolutely, you can connect it to more than one department.

![The relationship in the post editor.](img/filter-by-relationships-mb-views/post-editor.png)

In the admin dashboard, there is an additional column that shows the relationship we set.

## 3. Creating a custom field for the users

To define a specific department for each user, we’ll use user meta, it means adding a custom field for the user.

Navigate to **Meta Box** > **Custom Fields** and create a new field group.

![Navigate to Meta Box, Custom Fields and create a new field group](img/filter-by-relationships-mb-views/create-field.png)

We already have departments as posts of the created post type. So, add a **Post** field. 

![Add a Post field](img/filter-by-relationships-mb-views/add-post-field.png)

Then, in the **Post types** option, select the exact post type. This will allow us to assign the correct department to each user.

![Set the post type](img/filter-by-relationships-mb-views/choose-post-type.png)

For better usability, you can also enable **Show as an admin column** to display the user’s department directly in the user list. Its functionality is the same as the admin column in the creating relationship above.

![Set the admin column](img/filter-by-relationships-mb-views/column-field.png)

Next, switch to the **Settings** panel and set the **Location** to **User**. As a result, the field will appear in the user profile editing screen.

![Set location for field group](img/filter-by-relationships-mb-views/location.png)

After publishing, open any user profile editor, and you’ll see the created field. Simply select the department to assign the user to it.

![The field in the user profile](img/filter-by-relationships-mb-views/user-profile.png)

At this point, every user is now placed into their respective department.

## 4. Showing all posts on the page

We’ll display all the documentation on an archive page first. Then, adding a filter to show only those from a specific department will be done later.

We need to have a new page that contains all the posts.

![Create a new page](img/filter-by-relationships-mb-views/create-page.png)

Now, I’ll use MB Views to create a template for displaying documentation.

Navigate to **Meta Box** > **Views**, and create a new one.

![Navigate to Meta Box > Views, and create a new one](img/filter-by-relationships-mb-views/create-view.png)

In the **Template** tab, let’s add code or insert fields to show posts and their details. This is already quite familiar in many of our tutorials. At the beginning, I add this code:

```
{% set args = {post_type: 'post', posts_per_page: -1,orderby: 'date',order: 'DESC'} %}
{% set posts = mb.get_posts(args) %}

{% for post in posts %}
    {% set related_args = {
            relationship: { id: 'post-to-department', from: post.ID },
            post_type: 'department',
            posts_per_page: -1
        } %}
    {% set related_departments = mb.get_posts(related_args) %}
{% endfor %}
```

![Add code to get posts](img/filter-by-relationships-mb-views/get-posts.png)

**In there**:

* `{% set args = {post_type: 'post', posts_per_page: -1,orderby: 'date',order: 'DESC'} %}`: is to declare that we’ll get posts on the site through the post slug. If you want to get posts from a custom post type, just change that slug.
* `mb.get_posts`: is a Meta Box function to get the post.
* `{% for post in posts %}...{% endfor %}`: is a loop to display all of posts since there are various posts.
* `post-to-department`: the ID of the relationship. The whole of code is used to retrieve the post from the `department` post type that is connected to the recent post through the post ID.
* `related_departments`: the attribute that stores all the retrieved departments.

Then, also in the loop, I use the **Insert Field** button get and display material information. Just click on the field from the drop-down list on the right panel.

![Insert field](img/filter-by-relationships-mb-views/insert-field.png)

MB Views also supports you in choosing the size or output of some special fields. A documentation can be assigned to more than one department. So, I have a nested loop here for the variable we have had. I just get the department name, I mean the post title. And this is my template after inserting fields:

![Inserts all fields you need](img/filter-by-relationships-mb-views/all-fields.png)

Then, move down to the **Settings** section to apply this template for the page that we created before. I set the **Type** as **Singular**, then, choose the page.

![Set location for template](img/filter-by-relationships-mb-views/template-location.png)

Now, view the page on the frontend, you can see all the data is displayed, including the department.

![The data is displayed](img/filter-by-relationships-mb-views/view-frontend.png)

To make the page more beautiful, go back to the template and add some `**div**` tags and classes. 

![Add div tags and classes](img/filter-by-relationships-mb-views/div.png)

Then, move to the CSS tab to add some code for styling. 

![Add CSS](img/filter-by-relationships-mb-views/css.png)
This is the new look of the page I have. 

![The page after styling](img/filter-by-relationships-mb-views/frontend-style.png)

You can click on a post to read its content.

## 5. Filtering posts by relationships

Our aim is only showing posts that belong to the logged-in user’s department. I’m still the template that was created in the previous step and add some code.

```
{% set show = false %}
{% if mb.is_user_logged_in() %}
    {% if user.department and user.department.title is not empty %}
        {% set user_dept_name = user.department.title|trim %}
        {% for dept in related_departments %}
            {% if dept.post_title|trim == user_dept_name %}
                {% set show = true %}
            {% endif %}
        {% endfor %}
    {% else %}
        {% set show = true %}
    {% endif %}
{% endif %}
```

![Add code to filter by relationship](img/filter-by-relationships-mb-views/filter.png)

Specifically, I use `mb.is_user_logged_in()` function that checks whether the current user is logged in. Then, we check whether the user has a department value to run the code below. Because in the case that the user logged in, but doesn’t have a department, such as admin or founder, he can see all the posts of departments.

In the case that the user is assigned to a specific department, the department title will be get and stored in the `user_dept_name` variable.

Next, I compare the user’s department with the post’s related departments. If they are matches, the documentation will be shown. It means the post will only be shown if the user belongs to the same department.

That’s done.

Now, let’s check it on the frontend. It works well.

![Final result of filtering posts by relationships](img/role-based-access-control-metabox-bricks/result.gif)

# Filtering posts by taxonomy in the admin dashboard

Managing content on WordPress can become overwhelming as the number of posts grows, whether they are regular blog posts or part of a specific custom post type. Even with taxonomies to categorize posts, searching through large volumes of content remains challenging, especially when you need to find specific information within a particular post.

Therefore, **filtering posts is essential to easily find a certain group of content**. Since posts are often categorized by taxonomies, we can filter posts based on these terms right in the backend, making the search process faster and more efficient.

However, WordPress does not support this feature by default, so to enable filtering posts by a specific taxonomy, we’ll need to have a few additional steps.

In this guide, we’ll cover two ways to set up taxonomy filtering for posts in the WordPress admin dashboard:

* **Method 1**: For Meta Box users, using the [MB Custom Post Types & Taxonomies](https://metabox.io/plugins/custom-post-type/) extension, which includes this functionality.
* **Method 2**: For those not using Meta Box, with the standalone [Admin Taxonomy Filter](https://wordpress.org/plugins/admin-taxonomy-filter/) plugin.

![Filter posts by taxonomy using MB Custom Post Types & Taxonomies](https://imgur.elightup.com/KQYelah.gif)

![Filter posts by taxonomy using Admin Taxonomy Filter](https://imgur.elightup.com/4WgDnl2.gif)

Let’s explore how to enable post filtering in this guide!

To start, assuming that you already have posts in a custom post type and taxonomies created with the [MB Custom Post Type & Taxonomy](https://metabox.io/plugins/custom-post-type/) extension from Meta Box.

## Method 1: Using MB Custom Post Types & Taxonomies

If you're already using Meta Box, there's no need for an additional plugin to filter posts by taxonomy. This feature is built directly into the **MB Custom Post Types & Taxonomies** extension.

To enable this, go to any taxonomy which is created with Meta Box. In the **Advanced** tab, simply enable the option **Show admin column**.

![Enable the option Show admin column in the Advanced tab.](https://imgur.elightup.com/XlLzE1o.png)

Now, the taxonomy column will appear on its post type listing screen, allowing you to quickly identify posts by term, without needing to open each post individually.

![The taxonomy column will be displayed in the CPT admin screen](https://imgur.elightup.com/ukcBn53.png)

Then, just click on any term, and you’ll see a list of posts categorized under that term.

![Filter posts by taxonomy ](https://imgur.elightup.com/KQYelah.gif)

If you don’t use Meta Box, you can achieve the same result with Method 2 using the Admin Taxonomy Filter plugin.

## Method 2: Using Admin Taxonomy Filter

### Step 1: Installing a plugin

To filter ports by a taxonomy, we need to use the [Admin Taxonomy Filter](https://wordpress.org/plugins/admin-taxonomy-filter/) plugin. This one is also developed by the Meta Box team, so it works seamlessly with both custom post types and custom taxonomies on your website. You can download this plugin on [wordpress.org](https://wordpress.org/plugins/admin-taxonomy-filter/).

![Install the Admin Taxonomy Filter plugin](https://imgur.elightup.com/3maRXza.png)

Once you’ve installed this plugin, you can filter posts in a custom post type in the admin area by custom taxonomies.

### Step 2: Setting up the taxonomy

Go to **Settings** > **Taxonomy Filter**, and look for the custom post type and choose the taxonomy you want to filter by. This step ensures that the plugin knows which taxonomy should be used for filtering posts within that custom post type.

![Look for the custom post type and choose the taxonomy you want to filter by.](https://imgur.elightup.com/3Jf3M8t.png)

When you’ve selected the taxonomy, let’s move to filter posts by this taxonomy!

### Step 3: Filtering posts by taxonomy

From now on, when you go to a post list in a custom post type, you’ll see a new box to choose a term of the selected taxonomy to filter posts by.

![A new box to choose a term of the selected taxonomy to filter posts by.](https://imgur.elightup.com/wgWycNS.png)

Just selecting a term from the dropdown list and clicking the Filter button. Then, the list of posts categorized under the selected term will then be displayed.

![Filter posts by the taxonomy.](https://imgur.elightup.com/4WgDnl2.gif)

So, the Admin Taxonomy Filter plugin did everything for you.

In another aspect, if you're looking to filter posts by taxonomy on the frontend, check out our detailed guide [here](https://docs.metabox.io/tutorials/search-posts-by-taxonomy/).

# Filtering posts by taxonomy on archive page - P2 - MB Views

import LiteYouTubeEmbed from 'react-lite-youtube-embed';
import 'react-lite-youtube-embed/dist/LiteYouTubeEmbed.css';

In this part of the “**filtering posts by custom taxonomy**” series, we’ll do it using the **MB Views** extension from **Meta Box**.

This is a common need for many industries, especially online travel agencies (OTAs), where users often filter hotels by location to find what they need faster.

![Filter posts by taxonomy](img/filter-taxonomy-mbviews/result.gif)

## Video version

<LiteYouTubeEmbed id='y7zFANsPYTM'/>

## Preparation

First of all, I recommend using [Meta Box AlO](https://metabox.io/aio/), which includes the framework and all extensions. Such as:

* [MB Admin Columns](https://metabox.io/plugins/mb-admin-columns/): to add a column in the dashboard to display each hotel’s location;
* [MB Custom Post Type](https://metabox.io/plugins/custom-post-type/): to create a custom post type for hotels and a custom taxonomy for locations;
* [MB Views](https://metabox.io/plugins/mb-views/): to create a template for the archive page, where you can add functionality to filter posts by taxonomy.

## 1. Creating a new custom post type and a custom taxonomy

Now, go to **Meta Box** > **Post Types** to create a new custom post type for the hotels.

![Create a new custom post type for the hotels.](img/filter-taxonomy-mbviews/new-post-type-hotel.png)

After publishing, you’ll see the created custom post type in the menu dashboard.

![The created custom post type in the menu dashboard](img/filter-taxonomy-mbviews/created-post-type-menu.png)

Next, still in the Meta Box screen, create a new taxonomy for location information.

![Create a new taxonomy for location information.](img/filter-taxonomy-mbviews/new-taxonomy-location.png)

In the **Advanced** tab, pay attention to this setting. It’s available when you activate the [MB Admin Columns](https://metabox.io/plugins/mb-admin-columns/) extension. It’s optional, so I did not mention it before. When you check it, there’ll be a column in the dashboard to show the hotel’s location so that you can compare the results conveniently.

![Set up settings for taxonomy.](img/filter-taxonomy-mbviews/taxonomy-settings.png)

Move to the **Post Types** tab, and choose the Hotel to assign the custom taxonomy that we’ve created to that post type.

![Assign the custom taxonomy that we’ve created to that post type.](img/filter-taxonomy-mbviews/assign-taxonomy-post-type.png)

Now, in the post editor of the **Hotel** post type, we’ll see the taxonomy section, where we can enter the hotel location.

![We’ll see the taxonomy section in the post editor of the Hotel post type.](img/filter-taxonomy-mbviews/taxonomy-section-post-editor.png)

Just fill in all the information.

These are some created posts, for example. The location as well as the taxonomy also display in the admin dashboard.

![The location as well as the taxonomy also display in the admin dashboard. ](img/filter-taxonomy-mbviews/taxonomy-admin-dashboard.png)

**Note**: I just entered a few sample locations as an example. In reality, you’ll probably have a large set of location data across multiple levels, such as countries, provinces, cities, or regions. That time, instead of adding them manually, you should import the data directly into the Location taxonomy to save time. You can use plugins to easily import data.

## 2. Creating a search box for searching posts by taxonomy

Before creating a search box, we need to make sure that the archive page can already display all the posts; I mean all the hotels.

First, go to **Meta Box** > **MB Views**, and create a new template specifically for this purpose.

With **MB Views**, you can insert fields into it by clicking the **Insert Field** button, then choosing any fields on the right sidebar to get data from them, or by adding some lines of code directly to the **Template** tab.

![insert fields](img/filter-taxonomy-mbviews/insert-field-and-codes.png)

```
{% set args = { post_type: 'hotel', posts_per_page: -1, orderby: 'date', order: 'ASC' } %}
{% set posts = mb.get_posts( args ) %}

{% for post in posts %}
    {{ post.title }} <br/>
    <img src="{{ post.thumbnail.full.url }}" width="{{ post.thumbnail.full.width }}" height="{{ post.thumbnail.full.height }}" alt="{{ post.thumbnail.full.alt }}"> <br/>
    {% set post_terms = mb.get_the_terms( post.ID, 'location' ) %}
    {% if post_terms %}
        {% for term in post_terms %}
            {{ term.name }} <br/>
        {% endfor %}
    {% endif %}
{% endfor %}
```

We’ll go through it for more detail!

```
{% set args = { post_type: 'hotel', posts_per_page: -1, orderby: 'date', order: 'ASC' } %}
```

This whole line is used to query and display posts from a specific post type, sorted by publish date. Particularly, it declares that we’ll get posts from the post type with the `hotel` slug. And,  `posts_per_page: -1` helps fetch all posts of that post type. You can change the number to get the expected number of posts.

The `mb.get_posts` function gets the posts.

Since we have multiple posts, use a loop to display all of them.

```
{% for post in posts %}
…..
{% endfor %}
```
For displaying the hotel's information, just click the button I mentioned earlier, insert fields inside the loop. For example, choose **Post title** to show the hotel name.

![insert post title](img/filter-taxonomy-mbviews/insert-post-title.png)

To show the hotel image, find **Post thumbnail** in the list. You also can set the output of it.

![Insert post thumbnail](img/filter-taxonomy-mbviews/insert-post-thumnail.png)
 
The next line is to get all the **location terms** assigned to the current post.

```
{% set post_terms = mb.get_the_terms( post.ID, 'location' ) %}
```

This line below checks if the `post_terms` variable has any value or not.

```
{% if post_terms %}
```

We start a loop to go through each term inside. And insert the term name from the right sidebar, which means the display name of each taxonomy term.

![Insert term name](img/filter-taxonomy-mbviews/insert-term-name.png)

After inserting all the fields, move to the **Settings** section to set where this template will appear. Set the **Type** as **Archive**, and choose the location as the archive you created earlier for the hotel listings.

![Set template location](img/filter-taxonomy-mbviews/set-location-for-template.png)

On the frontend, you’ll see all the hotel information displayed. However, it appears as a basic list without any styling for now.

![All hotel posts](img/filter-taxonomy-mbviews/all-hotel-posts.gif)

To make it look more visually appealing, we need to apply some styling. Back to the **Template** tab, add some div tags and classes for styling, and modify the code.

![Add div, classes for styling](img/filter-taxonomy-mbviews/add-div-classes-styling.png)

And move to the **CSS** tab to add some lines of code.

![Add codes for styling](img/filter-taxonomy-mbviews/add-css-styling.png)

Now, the hotel listings look much better.

![Listing with no filtering](img/filter-taxonomy-mbviews/listings-no-filtering.png)

Let’s move on to creating the search box and adding its functionality.

## 3. Customizing filter for searching posts by taxonomy

Back to the template created by **MB Views**, let’s add some code to display the search box and filter options for the hotel listings.

```
<script src="https://code.jquery.com/jquery-3.7.1.min.js"></script>
```
This first script loads jQuery to handle events and dynamically update the HTML content.

Then, use these following codes to create a search box where users can type keywords and filter hotel listings in real time. This includes an input box for location, a suggestion dropdown, and a search button that filters hotels by the selected location.

```
<div class="hotel-input-wrap">
    <input type="text" id="location" placeholder="Enter location..." />
    <ul id="suggestions" class="suggestions"></ul>
    <button class="filter-action">Search</button>
</div>
```
Turn to the **CSS** tab and add styles to make the search section look cleaner.

```css
/* filter */
.hotel-filter {
    margin: 20px 0;
    display: flex;
    flex-direction: column;
    gap: 5px;
}

.hotel-label {
    font-weight: 600;
    margin-bottom: 4px;
}

.hotel-input-wrap {
    display: flex;
    gap: 8px;
    align-items: center;
    position: relative;
}

#location {
    flex: 1;
    padding: 8px 10px;
    border: 1px solid #646464;
    border-radius: 6px;
    max-width: 250px;
}

#suggestions,
#location-data{
    display:none;
}

.filter-action {
    padding: 8px 15px;
    background: #0b74de;
    color: #fff;
    border: 0;
    border-radius: 6px;
    cursor: pointer;
}


.suggestions {
    position: absolute;
    top: 100%;
    left: 0;
    right: auto;
    width: calc(100% - 90px);
    background: #fff;
    border: 1px solid #e0e0e0;
    box-shadow: 0 6px 18px rgba(0, 0, 0, .06);
    z-index: 9999;
    list-style: none;
    padding: 0;
    overflow: auto;
    max-height: 220px;
    max-width: 250px;
}

.suggestions li {
    padding: 8px 10px;
    cursor: pointer;
}

.suggestions li:hover {
    background: #f5f7fb;
}
```

![add style for filtering](img/filter-taxonomy-mbviews/add-filtering-style.png)

Now, we still need to make the filter work.

In the template again, add the line of code to create an empty array.
```
{% set term_names = [] %}
```
This array will collect all location taxonomy names from the post, convert them to lowercase, and store them in that array.
```
{% if post_terms %}
    {% for term in post_terms %}
        {% set term_names = term_names|merge( [ term.name|lower ] ) %}
    {% endfor %}
{% endif %}
```
It’s later used to add a `data-location` attribute for easier JS filtering.
The following code creates a hidden list of all locations, which is used for the autocomplete feature in the search box. When users start typing a location, JavaScript suggests matching ones.

```
<ul id="location-data">
    {% for term in mb.get_terms( { taxonomy: 'location', hide_empty: false } ) %}
        <li data-id="{{ term.term_id }}">{{ term.name }}</li>
    {% endfor %}
</ul>
```

Now, switch to the **JavaScript** tab, add the main script to handle the filtering of the posts.

![Javascript](img/filter-taxonomy-mbviews/javascript.png)

Go through it in more detail.

```js
const locations = $('#location-data li').map((_, li) => ({
    id: $(li).data('id'),
    name: $(li).text(),
})).get();
```
This part retrieves all the location items from the hidden HTML list and stores them as an array of location IDs and names.

```js
const $input = $('#location');
const $suggest = $('#suggestions');
let selected = '';
```

We declare variables for the search input, the suggestion list, and the selected location.

```js
const clearSuggest = function () {
    $suggest.empty().hide();
};
```
This function clears all list items and hides the suggestion box.
The following code checks if the user’s input has at least two characters. If not, it stops.
Otherwise, it filters the locations whose names include the input text, shows up to 20 results, and displays them in the suggestion box.

```js
const renderSuggestions = function (q) {
    clearSuggest();
    if (q.length < 2) {
        return;
    }

    locations
        .filter(function (l) {
            return l.name.toLowerCase().includes(q);
        })
        .slice(0, 20)
        .forEach(function (l) {
            $suggest.append(
                '<li data-id="' + l.id + '" data-name="' + l.name + '">' + l.name + '</li>'
            );
        });

    if ($suggest.children().length) {
        $suggest.show();
    }
};
```

This function below goes through all elements with the `.hotel-item` class and gets their `data-location` attribute. If the text entered matches one of these locations, the hotel is shown; otherwise, it’s hidden.

```js
const filterHotels = function (filter) {
    $('.hotel-item').each(function (_, el) {
        const loc = ($(el).data('location') || '').toLowerCase();
        $(el).toggle(loc.includes(filter));
    });
};
```

This is the main filtering logic; it controls which hotels are visible based on the selected or typed location.

As the user types, it clears the previous selection and refreshes the suggestions instantly.

```js
$input.on('input', function () {
    selected = '';
    renderSuggestions($input.val().trim().toLowerCase());
});
```

When a user clicks on one of the suggested locations, that location’s name is filled into the input box, and the suggestions list disappears.

```js
$suggest.on('click', 'li', function (e) {
    const name = $(e.currentTarget).data('name');
    selected = name.toLowerCase();
    $input.val(name);
    clearSuggest();
});
```

If the user clicks anywhere outside the input box or the suggestion list, the suggestion box is cleared and hidden.

```js
$(document).on('click', function (e) {
    if (!$(e.target).closest('#location, #suggestions').length) {
        clearSuggest();
    }
});
```

After clicking the **Search** button, the code takes the selected location and shows matching hotels.

```js
$(document).on('click', function (e) {
    if (!$(e.target).closest('#location, #suggestions').length) {
        clearSuggest();
    }
});
```

Finally, if the user presses Enter, it works the same as clicking the Search button. It stops the form from submitting and clears the suggestions.

```js
$input.on('keydown', function (e) {
    if (e.key === 'Enter') {
        e.preventDefault();
        $('.filter-action').trigger('click');
        clearSuggest();
    }
});
```
That’s all for the code. You can refer to the [GitHub](https://github.com/wpmetabox/tutorials/tree/master/searching-posts-by-taxonomy-with-mb-views) repository for more details.

On the frontend, enter a location in the **Search** box, then only the hotels in that location will be returned and displayed on the page.

![results](img/filter-taxonomy-mbviews/result.gif)

You might also like these tutorials about [creating a simple listing](https://docs.metabox.io/tutorials/create-simple-listing-meta-box-bricks/), [filtering posts by custom taxonomies](https://docs.metabox.io/tutorials/filter-posts-by-custom-fields-taxonomies/).

# Getting field settings by field ID

In case you want to refer to the field's name, field's options array (in a select field) or other settings later in your code, the `rwmb_get_field_settings()` function will help you do it as your desire.

![Getting field settings by field ID](https://imgur.elightup.com/dZqo7d0.png)

## About the function

`rwmb_get_field_settings()` is a helper function that gets the field settings by field ID. Just add this code:

```$field = rwmb_get_field_settings( $field_id );```

However, if you create a custom field for terms, user profile or a settings page, you will need to specify the object type in the second parameter:

```$field = rwmb_get_field_settings( $field_id, array( 'object_type' => 'term' ) ); // or 'user', 'setting’```

As you might see, the 2nd parameter is very similar to the 2nd parameter in the `rwmb_meta()` helper function if you use it to get meta value for terms, user profile or settings page. That's because the function `rwmb_get_field_settings()` is used internally inside the helper function to find field settings.

In another case, you **create 2 custom fields with the same ID but different settings for 2 different custom post types**. To get the correct field settings, you need to specify the post ID in the last parameter:

```$field = rwmb_get_field_settings( $field_id, '', $post_id );```

It's the same if you **create 2 custom fields with the same ID for 2 taxonomies or 2 settings pages**. In that case, in addition to the 3rd parameter (which should be term ID or settings page ID), you need to specify the object type in the 2nd parameter, just like you did above.

The general syntax for the function is:

```$field = rwmb_get_field_settings( $field_id, $args, $object_id );```

## Example

The example below is a real use-case of the `rwmb_get_field_settings()` that a user asked. He had a group of text fields and wanted to list all the subfields in the format Field Name: Field Value. Without this function, he needed to manually type the sub-field name and ID. But now he can do it automatically.

```php
<?php
// Function to get the sub-field values from grouped meta fields.
function prefix_meta($group, $field){
    $group = rwmb_meta($group);
    $value = isset($group[$field]) ? $group[$field] : '' ;
    return $value;
}
// Function to dynamically display group based meta information.
function prefix_show_meta_info($group){
    $grp = rwmb_get_field_settings($group);
    $grpsize = rwmb_meta($group);
    for ($i=0; $i < count($grpsize); $i++) { ?>
        <div class="sub-field"><?= $grp['fields'][$i]['name'].": "; ?><?= prefix_meta($group,$grp['fields'][$i]['id']); ?></div>
    <?php }
}

// Call: prefix_show_meta_info('group_id')
```

Using `rwmb_get_field_settings()`, you don't have to remember the field's name anymore. Your code will be minimal and clear.

So, if you need to refer to the field settings, this function is all you need.

# Getting posts by custom fields’ values

import LiteYouTubeEmbed from 'react-lite-youtube-embed';
import 'react-lite-youtube-embed/dist/LiteYouTubeEmbed.css';

In this article, I will get posts in two ways. One is using the `WP_Query` to get the post. The second one is joining the `wp_posts` and `wp_postmeta` tables together and then querying by SQL, which will be more convenient when we have to deal with databases. Let’s see how to do it in both ways.

## Video version

<LiteYouTubeEmbed id='_fg63TxLZeE' />

## Preparation

In addition to using [Meta Box](https://metabox.io/), make sure you already have these extensions:

* [MB Builder](https://metabox.io/plugins/meta-box-builder/): It has a UI for creating custom fields right on the back end.
* [MB Admin Column](https://metabox.io/plugins/mb-admin-columns/): (optional) It helps you to manage and organize posts by custom fields in the admin dashboard.

## Creating custom fields

Go to **Meta Box > Custom Fields** and click **Add New**.

![Create custom fields](https://imgur.elightup.com/2t37zEE.png)

In this section, I will create two fields for each method. One is the **Price** field which I will use for method 1. And, the other field to use for method 2 will be the **Type** field.

![Create 2 fields for each method](https://imgur.elightup.com/sSQ9y93.png)

## Method 1: Get posts using WP_Query

To know more about the parameters of which the constructor method WP_Query accepts, please read [here](https://developer.wordpress.org/reference/classes/wp_query/).

### 1. Creating a search section

Create a page template and use a `WP_Query` to query posts and display them as the search result. Besides, you have the total right to control the query as well as the returns. In the folder `page-templates` of your theme, create a file called `advanced-search.php` in the folder with the below content:

```php
<?php
/**
 * Template Name: Advanced Search
 */
```
Go to **Pages > Add New** and create an **Advanced Search** page then assign the created template to it as shown in the following image:

![Create Advanced Search](https://imgur.elightup.com/jK6wSJ3.png)

Now, we display the search form in the page template and edit the code of that page as below:

```php
<?php
/**
 * Template Name: Advanced Search
 */

get_header(); ?>

    <div class="wrap">
        <div id="primary" class="content-area">
            <main id="main" class="site-main" role="main">
                <form class="advanced-search-form">
                    <div class="form-group">
                        <label>Min Price</label>
                        <input type="number" name="min-price">
                    </div>
                    <div class="form-group">
                        <label>Max Price</label>
                        <input type="number" name="max-price">
                    </div>
                    <div class="form-group">
                        <input type="submit" value="Search">
                    </div>
                </form>
            </main><! – #main – >
        </div><! – #primary – >
    </div><! – .wrap – >
<?php get_footer();
```
These lines of code create two input fields, the Min Price and Max Price, which allow users to fill in some values for searching.

When you refresh the page, the search form will appear with minimum and maximum price fields, as shown below:

![The search form will appear with minimum and maximum price fields](https://imgur.elightup.com/F2wEqcf.png)

### 2. Creating a search function

Now, use the following code to get the values of the minimum and maximum prices which are input to the above fields on the frontend:
```php
<?php
$min_price = $_GET['min_price'] ?: '';
$max_price = $_GET['max_price'] ?: '';
```
Explanation:

`$min_price = $_GET['min_price'] ?: ''; $max_price = $_GET['max_price'] ?: '';`: Declare variables `$min_price` and `$max_price` to get the price from field `min_price` and `max_price`

Then, go back to edit the created template, edit the fields in the form as below:

Field min_price:

```
<input type="number" name="min_price" value="<?php echo esc_attr( $min_price ); ?>">
```

Field max_price:
```
<input type="number" name="max_price" value="<?php echo esc_attr( $max_price ); ?>">
```

After that, to display the search result, add the following code to the `advanced-search.php` file:

```php
<?php if ( $min_price || $max_price ): ?>
    <div class="search-result">
        <?php
        $args = [
            'posts_per_page' => - 1,
            'meta_query' => []
        ];
        if ( $min_price ) {
            $args['meta_query'][] = [
                'key' => 'hcf_price',
                'value' => $min_price,
                'compare' => '>=',
                'type' => 'NUMERIC'
            ];
        }
        if ( $max_price ) {
            $args['meta_query'][] = [
                'key' => 'hcf_price',
                'value' => $max_price,
                'compare' => '<=',
                'type' => 'NUMERIC'
            ];
        }
        $search_query = new WP_Query( $args );
        if ( $search_query->have_posts() ):
            while ( $search_query->have_posts() ) {
                $search_query->the_post();
                get_template_part( 'template-parts/post/content', 'excerpt' );
            }
            wp_reset_postdata();
            ?>in the above code
        <?php else: ?>
            <p>No result found.</p>
        <?php endif; ?>
    </div>
<?php endif; ?>
```
Explanation:

* `<?php if ( $min_price || $max_price ): ?>`: This code checks to see if both variables `min_price` and `max_price` exist.

* `if ( $min_price ) { $args['meta_query'][] = ['key' => 'hcf_price', 'value' => $min_price, 'compare' => '>=', 'type' => 'NUMERIC'];}`: This code returns posts whose fields value is greater than or equal to the value entered for `$min_price`. In there, `'hcf_price'` is the ID of the Price field.

* `if ( $max_price ) { $args['meta_query'][] = [ 'key' => 'hcf_price', 'value' => $max_price 'compare' => '<=', 'type' => 'NUMERIC' ];}`: This code returns posts with values less than or equal to the value of `$max_price`.

* `$search_query = new WP_Query( $args );`: `$search_query` variable to initialize the `WP_Query `class with `$args` as the passed parameter.

* `if ( $search_query->have_posts() ): while ( $search_query->have_posts() ) { $search_query->the_post(); get_template_part( 'template-parts/post/content', 'excerpt' ); } wp_reset_postdata(); ?>in the above code <?php else: ?> <p>No result found.</p> <?php endif; ?> </div> <?php endif; ?>`: create a loop to get posts that match the conditions specified above

In the case that the Price field is used for a custom post type, you should declare the post type in the `$args` variable like this:

```php
$args = [
    'post_type' => 'post_type_slug',
    'posts_per_page' => - 1,
    'meta_query' => []
];
```
:::warning

There is a part about building parameters for the `$args` query based on the values of the min price and max price. We use a comparison function `<=`, `>=` to ensure that the price of products is within the selected pricing range.

:::

Here is the result when someone clicks the Search button. It displays only the products with prices from 1 to 300.

![How it displays](https://imgur.elightup.com/Qa17B8U.png)

Furthermore, in addition to the = and >= operators, there are many other comparison conditions, such as =, !=, and IN. You can combine them with custom fields to build more complex queries. For example, finding products that have a green color, a production year >= 2012, etc. See more about these conditions [here](https://developer.wordpress.org/reference/classes/wp_query/#custom-field-post-meta-parameters).

The complete code for the file `advanced-search.php` can be found [here](https://developer.wordpress.org/reference/classes/wp_query/#custom-field-post-meta-parameters).

## Method 2: Get posts using wp_postmeta

When you install the [MB Admin Columns](https://metabox.io/plugins/mb-admin-columns/) extension of Meta Box, you’ll see the fields’ values displayed in the admin dashboard like this.

![The fields' values display in the admin dashboard](https://imgur.elightup.com/FR2zPy9.png)

Now, I will proceed to search for posts by these values.

### 1. Join the `wp_posts` and `wp_postmeta` tables

WordPress only supports searching for keywords in the titles and content of posts and pages. To search for posts by keywords in the posts / pages titles and custom field values, you need to understand how the WordPress search feature works first.

By default, WordPress only allows searching by keywords on the `wp_posts` table in the database. Meanwhile, the `wp_postmeta` table stores additional data like custom fields’ values.

Thus, to search by custom field values, we need to JOIN `wp_posts` and `wp_postmeta` tables together. This work can be done by adding this code to the `functions.php` file:

```php
function justread_search_join( $join ) {
    global $wpdb;

    if ( is_search() ) {
        $join .=' LEFT JOIN '.$wpdb->postmeta. ' ON '. $wpdb->posts . '.ID = ' . $wpdb->postmeta . '.post_id ';
    }

    return $join;
}
add_filter( 'posts_join', 'justread_search_join' );
```
:::info

justread is the theme I’m using (you can download this free WordPress theme [here](https://wordpress.org/themes/justread/).

:::

### 2. Creating the query for search

Next, you have to edit the query to search for posts by custom field values. To do it, add the following code to the `functions.php` file:

```php
function justread_search_where( $where ) {
    global $pagenow, $wpdb;

    if ( is_search() ) {
        $where = preg_replace(
            "/\(\s*".$wpdb->posts.".post_title\s+LIKE\s*(\'[^\']+\')\s*\)/",
            "(".$wpdb->posts.".post_title LIKE $1) OR (".$wpdb->postmeta.".meta_value LIKE $1)", $where );
    }

    return $where;
}
add_filter( 'posts_where', 'justread_search_where' );
```
### 3. Allowing searching by keyword with spacing

You can now search by using the values of custom fields. However, to allow searching by the keyword having the spacing between text or not, you can add the following code to the `functions.php` file:
```php
function justread_search_distinct( $where ) {
    global $wpdb;

    if ( is_search() ) {
        return "DISTINCT";
    }

    return $where;
}
add_filter( 'posts_distinct', 'justread_search_distinct' );
```
Now, the new feature to search by custom field values is complete. Try to use the keyword "breakfast" to see if this search would be effective or not.

There are two separate posts in the search results that have the term "breakfast" in the **Type** custom field, except for one post with the phrase in its title (Lite breakfast with bread). It indicates that the advanced searching function was effective.

![2 separate posts in the search results](https://imgur.elightup.com/shSvlBJ.png)

# Importing all Meta Box custom fields - Using WP All Import

To import all Meta Box custom fields, you need to map their corresponding data during the import process in WP All Import.

This documentation provides more details on each field and what’s imported for it when using the [Meta Box Import Add-On](https://www.wpallimport.com/import-meta-box-fields/) by WP All Import.

To learn how the import process works, please see [this tutorial](https://docs.metabox.io/tutorials/import-data-meta-box-custom-fields/).

## 1. Basic fields:

These are the most common fields that you can import. Here's more on each basic field type available:

### 1.1. Text

Simple plain-text field. Imports text.

![Import the text field using the Meta Box Import Add-On by WP All Import ](https://imgur.elightup.com/FeNfnSr.png)

### 1.2. Textarea

Same as a text field but with a bigger area. Imports text.

![Import the textarea field using the Meta Box Import Add-On by WP All Import with a bigger area than the text field](https://imgur.elightup.com/1n18T3W.png)

### 1.3. Checkbox List

Multiple choice field. When importing multiple values, separate with a comma. If you have both values and labels in the field definition, use the values. You can use the **Select value for all records** option to choose the same value for all records:

![Use the Select value for all records option to choose the same value for all records](https://imgur.elightup.com/H75h7qa.png)

Alternatively, you can use the **Set with XPath** option to import values dynamically:

![Use the Set with XPath option to import values dynamically](https://imgur.elightup.com/E02qkD9.png)

### 1.4. Checkbox

Single choice field. Imports a value for checked and no value for unchecked.

![For the Checkbox field, imports a value for checked and no value for unchecked](https://imgur.elightup.com/BQfmIKB.png)

### 1.5. Radio

List of radio inputs where you select a single choice. Imports the value as text.

![To import the Radio field, imports the value as text](https://imgur.elightup.com/FA2540n.png)

### 1.6. Select

Select the dropdown to choose one or multiple values. When importing multiple values, separate with a comma. If you have both values and labels in the field definition, use the values.

![To import the Select field, use the values](https://imgur.elightup.com/eFBKSSH.png)

## 2. Advanced Fields:

These contain most of the Meta Box custom fields available to import. Below are more details on each advanced field.

### 2.1. Autocomplete

Plain-text field with autocomplete features. When importing multiple values, separate with a comma. If you have both values and labels in the field definition, use the values.

![Use the values to import the Autocomplete field](https://imgur.elightup.com/PiZ7QFT.png)

### 2.2. Background

This lets you set the background color, select an image, and set other background settings.

![You can set the background color, select an image, and set other background settings](https://imgur.elightup.com/SqjqIp4.png)

### 2.3. Button Group

This field lets you select one or more options by enabling buttons from a button group.

![Import the Button Group field using the Meta Box Import Add-On by WP All Import](https://imgur.elightup.com/sdHT9bt.png)

### 2.4. Color Picker

This field lets you select a color. You have to specify the color hex code preceded by a numeral, e.g., `#ea5f1a`.

![Import the Color Picker field using the Meta Box Import Add-On by WP All Import](https://imgur.elightup.com/j5l6PMX.png)

### 2.5. Date Picker

This field stores a date value. You can import any date format supported by the PHP strtotime() function.

![Import the Date Picker field using the Meta Box Import Add-On by WP All Import](https://imgur.elightup.com/m57joa8.png)

### 2.6. Datetime Picker

This field stores a date and time value. Use any format supported by the PHP strtotime() function.

![Import the Datetime Picker field using the Meta Box Import Add-On by WP All Import](https://imgur.elightup.com/fiA1iek.png)

### 2.7. Fieldset Text

This field is a set of text inputs. You can import values into each text input separately.

![Import the Fieldset Text field using the Meta Box Import Add-On by WP All Import](https://imgur.elightup.com/C09UGIq.png)

### 2.8. Hidden

Simple hidden input text.

![Import the Hidden field using the Meta Box Import Add-On by WP All Import](https://imgur.elightup.com/vMDQdAs.png)

### 2.9. Icon

Imports an icon class name.

![Imports an icon class name](https://imgur.elightup.com/gu8ymVg.png)

### 2.10. Image Select

This field allows you to select a choice visually with images, which works similarly to a radio/checkbox field. When importing multiple values, separate with a comma. If you have both values and labels in the field definition, use the values.

![Use the values to import the Image Select field](https://imgur.elightup.com/UvxDs07.png)

### 2.11. Key Value

This field allows you to input an unlimited group of "key-value" pairs. You can choose between Fixed, Variable (XML), or Variable (CSV). The interface lets you define these fields.

![The interface lets you define the Key Value field with option of Fixed, Variable (XML), or Variable (CSV)](https://imgur.elightup.com/PgRRPzS.png)

You can learn more about importing this data here: **[Cloneable & Repeater Fields](https://docs.google.com/document/d/1vq_iBp8SMVegC1jiUI1NJOQ3aY4BBMEQRffcE4QWV5U/edit#heading=h.pa02dd29k180)**.

### 2.12. oEmbed

Simple text input to import a media URL and show that media. Imports text.

![Import the oEmbed field using the Meta Box Import Add-On by WP All Import](https://imgur.elightup.com/EmJtZrI.png)

### 2.12. Password

Simple password input field.

![Import the Password field using the Meta Box Import Add-On by WP All Import](https://imgur.elightup.com/7tpcWsA.png)

### 2.13. Select Advanced

This field creates a select dropdown field with the [select2](https://select2.org/) library. When importing multiple values, separate with a comma. If you have both values and labels in the field definition, use the values.

![Use the values to mport the Select Advanced field](https://imgur.elightup.com/rJ9KV12.png)

### 2.14. jQuery UI Slider

This field uses a slider to select a number. Imports a numerical value.

![Imports a numerical value to import the jQuery UI Slider field](https://imgur.elightup.com/WMiKcHv.png)

### 2.15. Switch

This field shows an on/off switch to enable or disable something. You have to import `1` for on and `0` for off.

![Import 1 for on and 0 for off](https://imgur.elightup.com/AeqmTmO.png)

### 2.16. Text List

This is a field with a list of text inputs. Each field available to import will have its own input.

![Import the Text List field using the Meta Box Import Add-On by WP All Import](https://imgur.elightup.com/SDNHWjR.png)

### 2.17. Time Picker

This field lets you select a time. You can use any date format supported by the PHP strtotime() function.

![Import the Time Picker field using the Meta Box Import Add-On by WP All Import](https://imgur.elightup.com/2S45C8K.png)

### 2.18. WYSIWYG Editor

This is the What-You-See-Is-What-You-Get field. It provides a bigger text field input to bring in any content you need.

![Import the WYSIWYG Editor field using the Meta Box Import Add-On by WP All Import](https://imgur.elightup.com/wiH2L1x.png)

## 3. HTML5 Fields:

These are the fields for HTML5 input types. They act similar to a text input but for other data types. Here’s more on each HTML5 field type available:

* **Email**: Plain-text field for an email.
* **Number**: Plain-text field for a number.
* **Range**: Plain-text field to import the number range.
* **URL**: Plain-text field to import a URL.

![Import types of HTML5 Fields using the Meta Box Import Add-On by WP All Import](https://imgur.elightup.com/C86X1lv.png)

## 4. WordPress Fields:

These are fields related to WordPress data that you need to link to from Meta Box. Here’s more on each WordPress field type available:

* **Post**: This field links with a post type or custom post type. It accepts post ID, slug, or a title. You can use a separator character to import multiple entries.
* **Sidebar**: This field links to a sidebar from the site.
* **Taxonomy**: This field links with a taxonomy from the site and sets post terms.
* **Taxonomy Advanced**: This field also links with a taxonomy from the site but stores term IDs instead.
* **User**: This field links with a user on the site.

![Import field types related to WordPress](https://imgur.elightup.com/JLitGpe.png)

Learn more about importing these fields here: [How to Import Meta Box WordPress Fields](https://www.wpallimport.com/documentation/import-meta-box-wordpress-fields/).

## 5. Upload Fields:

These fields allow handling attachments and files, as well as images. Here’s more on each upload field type available:

* **File**: Single file upload file.
* **File Advanced**: Multiple file upload.
* **File Upload**: Upload area where you can drag and drop files to upload.
* **Image**: Single image upload.
* **Image Advanced**: Multiple image upload.
* **Image Upload**: Inline upload area where you can drag and drop or select images to upload.
* **Single Image**: Select or upload one image via the WordPress media library.
* **Video**: Video field.

All of these fields look the same during import. Here’s how the **File** field looks:

![Example of the File field importing](https://imgur.elightup.com/6YBuLvT.png)

The only different field is **Single Image**, which looks like this:

![UI of Single Image field imprting](https://imgur.elightup.com/7ZkeSAL.png)

Learn more about importing these fields here: [How to Import Meta Box Upload Fields](https://www.wpallimport.com/documentation/import-meta-box-upload-fields/).

## 6. Cloneable & Repeater Fields

All field types can be turned into cloneable with Meta Box. Here’s more on the different methods available to import cloneable fields:

### 6.1. Fixed

This is used when each data piece is stored in its own column, i.e., using separate elements. For example, if you have a cloneable field containing a link, and your CSV file has five columns – url_one, url_two, url_three, etc:

![When import Cloneable field containing a link, the CSV file has five columns](https://imgur.elightup.com/kWiAbi8.png)

In this scenario, you manually add five rows to the cloneable field via **+ Add more** and drag and drop each field into its corresponding place:

![Manually add five rows to the cloneable field via + Add more and drag and drop each field into its corresponding place](https://imgur.elightup.com/ORGh4eb.png)

### 6.2. Variable (XML)

When importing an XML, data can be stored as sibling elements. For example:

```
<images>
<image>image_example_1.jpg</image>
<image>image_example_2.jpg</image>
<image>image_example_3.jpg</image>
<image>image_example_4.jpg</image>
<image>image_example_5.jpg</image>
</images>
```

Since drag & drop won’t create the correct XPath, you should provide an XPath using the FOREACH syntax available in WP All Import: [Processing and Grouping Multiple Elements with FOREACH Loops](https://www.wpallimport.com/documentation/foreach-loops/).

![You should provide an XPath using the FOREACH syntax available in WP All Import](https://imgur.elightup.com/HCbvX1g.png)

### 6.3. Variable (CSV)

This option is handy when your data is stored in a single column in your CSV file, separated using a separator character.

For example, if you have a cloneable field with a list of colors and their hex codes, and both pieces of data are stored within their own columns inside the CSV file:

![Both pieces of data are stored within their own columns inside the CSV file](https://imgur.elightup.com/zfg2mr7.png)

You must update the **Separator Character**, since it’s different, and then drag & drop each column into the appropriate sub-field. This is how that looks:

![Drag & drop each column into the appropriate sub-field](https://imgur.elightup.com/LdzjP9B.png)

When this Meta Box cloneable data gets imported, the first item in the color column will be associated with the first hex code, the 2nd item in the color column with the 2nd hex code, and so on.

You can learn more about importing cloneable fields here: [How to Import Meta Box Cloneable & Repeater Fields](https://www.wpallimport.com/documentation/import-meta-box-cloneable-repeater-fields/).

# Importing data into Meta Box custom fields - Using WP All Import

To import data into Meta Box custom fields, first install the [Meta Box Import Add-On](https://www.wpallimport.com/import-meta-box-fields/). You must also create the Meta Box custom fields and attach them to the desired post type or CPT before you can import data into them.

To start your import, navigate to **All Import** › **New Import** and use the post type or CPT with the attached Meta Box custom fields. Use the **Drag & Drop** screen to map and then import the Meta Box custom fields into WordPress.

## 1. Starting a new import for Meta Box custom fields

Navigate to **All Import** › **New Import** and upload your import file. Then, choose the post type or custom post type with the attached Meta Box custom fields:

![All Import › New Import and upload your import file, then choose the post type or custom post type with the attached Meta Box custom fields](https://imgur.elightup.com/6xDMuDH.png)

In this example, we’re importing Meta Box custom fields into a “Restaurants” CPT. Proceed by clicking **Continue to Step 2**.

## 2. Validating Meta Box import data

Next, you’ll see the **Review Import File** screen, where you ensure that the data to import is correct and valid.

![Review Import File screen to ensure that the data to import is correct and valid](https://imgur.elightup.com/l9arMTp.png)

This section also lets you apply filters under **Manage Filtering Options** to further narrow down what to import.

Once you’re finished reviewing, click **Continue to Step 3**.

## 3. Mapping data into Meta Box custom fields

Next up is the **Drag & Drop** screen, where you can map the import data into their corresponding fields.

Import elements are mapped by dragging & dropping from right to left:

![In the Drag & Drop screen, import elements are mapped by dragging & dropping from right to left](https://imgur.elightup.com/vJFjlUS.png)

All of the Meta Box custom fields should be mapped inside of the **Meta Box Add-On** section:

![enable the desired field groups in the Meta Box Add-On section to import their Meta Box data](https://imgur.elightup.com/n2pMmQ1.png)

Here, you can enable the desired field groups to import their Meta Box data. Here are some examples:

![example of the chosen group and fields](https://imgur.elightup.com/4067RoE.png)

After mapping all the Meta Box custom fields, click the **Continue to Step 4** button (not shown).

## 4. Setting up import settings

Last, you see the **Import Settings** screen, where most import settings are defined.

The first step on this screen is to click **Auto-detect** to generate a unique identifier, though it can also be defined via drag & drop using the elements from your import file.

![the Import Settings screen to click Auto-detect to generate a unique identifier and control other import options as well as schedule your import and configure other advanced settings](https://imgur.elightup.com/kcqTy3c.png)

This screen also lets you control other import options, such as what happens should the import run again.

Near the bottom, you can also schedule your import and configure other advanced settings. Ignore these options for now and just click **Continue**.

## 5. Running import and checking imported Meta Box fields

Before running the import process, you’ll see the **Confirm & Run** screen, which lets you review a summary of the planned import actions before proceeding.

![Confirm & Run screen lets you review a summary of the planned import actions before proceeding](https://imgur.elightup.com/IB7phEC.png)

If everything looks okay, click **Confirm & Run Import**.

When the import finishes, you’ll see an **Import Complete** message:

![Import Complete message when the import finished](https://imgur.elightup.com/OBEO5UB.png)

That’s it! You can now review your newly imported Meta Box custom fields.

## Import Meta Box custom fields – Frequently Asked Questions

### Are All Meta Box Custom Fields Supported?

Yes, you can import all Meta Box custom fields into WordPress using the Meta Box Import Add-On. It supports all custom fields available in Meta Box.

To import these fields, you must have installed both WP All Import Pro and the Meta Box Import Add-On on your WordPress site.

### Can You Export Meta Box Custom Fields?

Yes, here are the steps to do so:

1. In WP All Export, create a new export.
2. Choose the post type with Meta Box custom fields.
3. Proceed to customize the export template.
4. Run the export process and download the exported data.

To export Meta Box custom fields, you need to have both WP All Export and the Meta Box Export Add-On. Learn more about exporting here: [How to Export Meta Box Custom Fields - Using WP All Export](https://metabox.io/export-meta-box-custom-fields-using-wp-all-export/).

# Inserting Google Maps to a website using custom fields

import LiteYouTubeEmbed from 'react-lite-youtube-embed';
import 'react-lite-youtube-embed/dist/LiteYouTubeEmbed.css';

You **should insert a map to your website** to provide your physical store address to help customers reach it more quickly and easily.

Normally, there are 2 popular ways to add a map to show the locations: It’s embedding Google Maps scripts directly, and another way is using a plugin. However, they both do not work in the case that you are having a listing page site with a long list of different stores, and each one needs to have its own map. Then, **the custom fields with Meta Box come handy** in this way.

## Video version

<LiteYouTubeEmbed id='y2DeORtmAew'/>

## Preparation

Assume that your website has a lot of listings as restaurants, and each one has its own location.

![Your website has a lot of listings as restaurants](https://imgur.elightup.com/jBwuAl8.png)

You should store the location in the post of each restaurant, using a custom field. Then, use the **Map** field from Meta Box, and code to display the location on the frontend. You can **add code directly to the theme file**, but it might not be optimal in some cases. And, we **highly recommend using MB Views from Meta Box** instead.

So, we need these tools for this practice.

* [Meta Box plugin](https://wordpress.org/plugins/meta-box/) to have a framework for creating custom fields, and a template for displaying the map on the frontend;
* [MB Builder](https://metabox.io/plugins/meta-box-builder/): to create custom fields visually;
* [MB Views](https://metabox.io/plugins/mb-views/): to create the template easily in the event that you don’t want to add code directly to the theme.

## 1. Creating custom fields to fill in address

I will add two custom fields, one for entering an address, and one for displaying the location on a map. We will display this map on the frontend later.

Now, go to **Meta Box** > **Custom Fields**, and create them.

![Go to Meta Box > Custom Fields, and create fields](https://imgur.elightup.com/KH3KFN0.png)

First, choose the **Text** field for saving the address.

![Choose the Text field for saving address.](https://imgur.elightup.com/XleJ5xy.png)

Next, create another field to have the map. Meta Box provides 2 field types for maps. They are **Google Maps** and **Open Street Maps**.

![Meta Box provides 2 field types for maps.](https://imgur.elightup.com/rKhVxoF.png)

If you want to use the **Google Maps** field, you should follow [Google’s instructions to get the API key](https://developers.google.com/maps/documentation/javascript/get-api-key) and insert it into the place as shown as below.

![Insert the IPA key into the box](https://imgur.elightup.com/UBR4DH8.png)

Otherwise, if you do not have the key, you can use the **Open Street Maps** field. It requests no key to use. Remember to add the ID of the **Address** field to connect this map to it. If you forgot it, the map cannot work.

![Remember to add the ID of the Address field to connect this map to it](https://imgur.elightup.com/LG0eC05.png)

After you’ve done with two custom fields, move to the **Settings** tab, set **Location** as **Post type**, and choose the post type as the listing you want to apply these fields to.

![Set the location as the post type of the listing you want to apply these fields to.](https://imgur.elightup.com/aH2R9aa.png)

Then, you will see the two created fields in the post editor.

![You will see the two created fields in the post editor.](https://imgur.elightup.com/RFSUwhN.png)

Just enter the address to check how they work. When you enter any character into the field, it will suggest some related locations to choose from. You can choose one, and then the location markup on the map will move to the place exactly as the address is.

![When choosing any address, the location markup on the map will move to the place exactly as the address is.](https://imgur.elightup.com/ZGScci9.gif)

I added some restaurants along with their own locations, for example, to see the result clearer at the end.

![Some restaurants along with their own locations](https://imgur.elightup.com/bE0018T.png)

## 2. Displaying maps on the frontend

We have just created the map on the backend already, so it’s time to bring it to the frontend. As I said before, you can **add code to the theme file** or use **MB Views** for it. Since I recommend the **MB Views**, I’ll talk about it first.

### 2.1 Method 1: Using MB Views

When using **MB Views**, there’ll be a button to add the map to the template without touching any code. It’s so convenient, especially for those who are not familiar with code.

![When using MB Views, there’ll be a button to add the map to the template without touching any code.](https://imgur.elightup.com/Pv44lzb.png)

Go to **Meta Box** > **Views**, and create a new template.

![Create a new template.](https://imgur.elightup.com/HYM6Piw.png)

Click on the mentioned button, and a list of fields will display to choose from. So, choose the one we use for the map.

![Choose the field we use for the map](https://imgur.elightup.com/16hDr8D.png)

For the output of the map, Meta Box also provides some options.

![Set the output of the map](https://imgur.elightup.com/3UZwbWL.png)

There will be a line of code for the map auto-generated into the template, as you can see in the image below.

![A line of code for the map auto generated into the template](https://imgur.elightup.com/HXCXCH7.png)

You don't need to do anything else.

Just move to the **Settings** section of the view, set the **Type** as **Singular**, choose the **Location** as the post type where you want the map display.

![In the Settings section of the view, set the Type as Singular, choose the Location as the post type where you want the map display.](https://imgur.elightup.com/SwMQSF8.png)

As well, you can choose a suitable position for the map on the page.

![Choose a suitable position for the map on the page](https://imgur.elightup.com/89xmR77.png)

You will see the map displayed on the single post page. The map is not static, you absolutely can interact with the map by zooming in and zooming out.

![The interactive map displayed on the single post page](https://imgur.elightup.com/8SpCehR.gif)

When you go to another post, the map displays as well, but with a different location.

![In another post, the map displays as well, but with a different location.](https://imgur.elightup.com/UU6zoQv.png)

So, we have done with MB Views.

Now, let’s see another way to display the map using code.

### 2.2 Method 2: Adding code to the theme file

In the case that you don’t have the **MB Views** in your pocket, you also can use **PHP** to add code to the theme file directly.

Head over to the **functions.php** file, and add these lines of codes.

```css
function add_google_map() {
    $args = array(
        'zoom' => 14,
        'marker' => true,
    );
    $map = rwmb_meta( 'map', $args );
    echo $map;
}
add_action( 'estar_entry_content_after', 'add_google_map' );
```

![Add code to the functions.php file for displaying the map](https://imgur.elightup.com/nr8E1in.png)

Let’s go through it in more detail.

```css
$args = array(
        'zoom' => 14,
        'marker' => true,
    );
```

This part is to regulate the attributes that we want to use for the map, including:

* `'zoom' => 14,`:to allow you to zoom in and zoom out.
* `'marker' => true,`: to turn on a marker. It will be used to highlight the location on the map so that you can see it clearly.

You can also add more attributes as you go.

```css
$map = rwmb_meta( 'map', $args );
```

Next, I use the `rwmb_meta` function to get the data from the custom field that has the ID as map. The returned value is the latitude and longitude of the location that we saved in the field. Then, the code below helps to display the map from those returned values.

```css
echo $map;
```

The last line is to stipulate where the map appears.

```css
add_action( 'estar_entry_content_after', 'add_google_map' );
```

I'm using the `'estar_entry_content_after'` hook to show the map after the content section of the posts. It is a hook of the Estar theme, so if you have a different theme or use it in other places, just look for the suitable one.

That’s all for the code we use for the map.

Since you visit any single post page, you’ll see the map. The result is the same as we did with **MB Views**. There is also a marker. It’s on the location exactly as I saved in the field. I can zoom in and zoom out the map as well.

![The map display on a single post page](https://imgur.elightup.com/8SpCehR.gif)

When I go to another post, I’ll see the map along with another location.

![In another post, I’ll see the map along with the location](https://imgur.elightup.com/UU6zoQv.png)

So, everything on the map is going well.

# JSON schema autocomplete simplifies field group creation

import LiteYouTubeEmbed from 'react-lite-youtube-embed';
import 'react-lite-youtube-embed/dist/LiteYouTubeEmbed.css';

Writing JSON manually for field groups offers flexibility, but it’s easy to make mistakes. **JSON Schema Autocomplete solves that with instant suggestions and validation**.

![JSON Schema autocomplete suggests options as you type.](https://imgur.elightup.com/y7ucROz.png)

## Video version

<LiteYouTubeEmbed id='yN7u6Cc4X2g' />

## What is JSON schema autocomplete?

**JSON Schema** is a standard for defining the structure and expected values of JSON data. It describes what properties are allowed, their data types, whether they’re required, and other constraints.

When you link your JSON file to a JSON Schema, you unlock a powerful autocomplete feature that allows smart editors like VS Code understand the structure of your data and help you write JSON more quickly and accurately, all while offering real-time feedback on your code.

**Particularly**:

* **Autocomplete suggestions for properties**: Smart editors will suggest properties such assuch as "`id`", "`type`", "`name`", etc.
* **Contextual options for each property**: For example, when defining 'type' for a field, it suggests field types supported by Meta Box, such as “`text`”, “`number`”,
“`datetime`”, and more.
* **Error detection**: The editor will flag errors if incorrect data types are used or required properties are missing.

## Why use JSON schema sutocomplete?

JSON Schema autocomplete is more than just a time-saver. It helps you:

* **No need to memorize fields**: Just type a quotation mark (`" "`) and the editor will instantly show a list of valid options.
* **Avoid typos and syntax errors**: If you type something wrong, forget a comma, or miss a required property, the editor will flag it immediately.
* **Write faster**: No more switching tabs to check documentation; everything is right there in your editor.

In fact, [Meta Box has already provided official JSON Schemas](https://github.com/wpmetabox/schema/) for field groups, relationships, and setting pages. This is not commonly found in other custom field plugins, making Meta Box stand out.

Besides, once you create the field group in the JSON file, simply sync it to the database using the [local JSON](https://docs.metabox.io/local-json/#syncing-changes) feature, and then your field group will be set up with the fields and settings you need.

## Experience JSON schema autocomplete in action

To use the JSON Schema Autocomplete feature, you only need to include a `$schema` reference at the top of your `.json` file. Then, the editor will then understand the expected structure, like I mentioned earlier, start suggesting keys, and even highlight errors as you go.

Let’s walk through how to set this up, with an example of a field group for page settings with two fields:

* A Radio field to choose the sidebar position (left or right).
* A Switch field to toggle the sticky header.

Start by creating a file named `mb.json` manually. This is where you'll define your field group and fields using JSON.

![Create a mb.json file manually.](https://imgur.elightup.com/Pth8IZm.png)

Next, include a special line at the top to reference the Meta Box JSON schema:

```
"$schema": "https://schemas.metabox.io/field-group.json"
```

![Include a $schema reference at the top of your mb.json file.](https://imgur.elightup.com/VrkZrR0.png)

This line tells the editor to use the Meta Box JSON Schema for autocomplete and validation.

If you're creating a relationship or settings page, you can easily reference the corresponding schema link since Meta Box has already written schemas for them [here](https://github.com/wpmetabox/schema/).

Now, you'll see how helpful it can be!

Once you want to add some basic information like `title`,` id`, and post types, autocomplete suggests options as you type by listing them in a dropdown.

![Autocomplete suggests options as you type by listing them in a dropdown.](https://imgur.elightup.com/CUtRh9x.png)

Moving to create the fields!

As soon as you define fields inside the `fields` array, autocomplete also works there, helping you choose the correct field type, available options, and more.

![Create fields with autocomplete.](https://imgur.elightup.com/y7ucROz.png)

Even better, if anything is missing or incorrectly formatted, the editor will alert you immediately.

![Get warnings if anything is missing or invalid.](https://imgur.elightup.com/W5sskBp.png)

## Sync JSON file to load field groups

After saving, your JSON file is ready and saved in the correct folder (usually /mb-json/ in your theme), head to the **Meta Box** > **Custom Fields**.

If the file is valid, you’ll see it listed with a **Sync available** status. Just click **Sync**, and your field group will be ready to use, exactly as you defined it.

![Just click Sync, and your field group will be ready to use.](https://imgur.elightup.com/UCwSbWQ.png)

You can also click **Review** to preview the configuration before syncing, in case you want to check for any errors.

Once synced, you’ll see the field group with the same configuration as we created in the JSON file.

![The field group with the same configuration as we created in the json file.](https://imgur.elightup.com/3rNu7MT.png)

If you're curious how this fits into the bigger picture, check out how Meta Box works with [Local JSON](https://metabox.io/local-json/) and [registering blocks via JSON](http://metabox.io/mb-blocks-register-block-using-json-file/). These approaches all share the same goal: bringing more control, reusability, and clarity to your workflow.

By the way, JSON Schema isn’t just for humans; it also powers AI tools like ChatGPT or Cursor to generate field groups from a simple prompt. See how [Meta Box makes custom fields with AI](https://metabox.io/create-custom-fields-with-ai/) easier than ever.

# Managing & displaying course schedule with filters - Using MB Views

import LiteYouTubeEmbed from 'react-lite-youtube-embed';
import 'react-lite-youtube-embed/dist/LiteYouTubeEmbed.css';

Using a schedule filter is perfect for an educational platform offering different course schedules, a booking page for doctors or spa services, movie or theater showtimes, or homestay listings with availability filters. This approach improves the user experience.

In this practice, I will take an example to illustrate the schedule filter for courses using **MB Views**.

![Example of schedule filter in single course](https://i0.wp.com/images.elightup.com/meta-box/blog/schedule-filter/kq.png)

Before going ahead, let’s check some tools we need for this practice.

## Video version

<LiteYouTubeEmbed id='lA0J-3kH1Xw' />

## Preparation

We’ll use a settings page for the schedule, where we show schedule details. Including courses are posts of a custom post type. The remaining information is stored in custom fields. And, to display the schedule filter and data, I use MB Views.

So, I highly recommend you use [**Meta Box AIO**](https://metabox.io/aio/) to have a framework to create a custom post type, custom fields, a settings page, and template. As well as, it provides advanced features from Meta Box extensions. These are some extensions I use in this practice:

* [MB Custom Post Type](https://metabox.io/plugins/custom-post-type/): to create a custom post type for the course
* [MB Settings Page](https://metabox.io/plugins/mb-settings-page/): to create a settings page for the schedule
* [MB Views](https://metabox.io/plugins/mb-views/): to create a view for adding the schedule filter to the page
* [MB Builder](https://metabox.io/plugins/meta-box-builder/): to have a UI in the backend for creating fields visually
* [MB Group](https://metabox.io/plugins/meta-box-group/): to organize custom fields into groups for easier management

Let’s start now.

## 1. Creating a settings page

As I said before, we’ll use the settings page to include all the content of the schedule.

Go to **Meta Box** > **Settings Page**, and add a new one.

![Go to Meta Box > Settings Page, and add a new one](https://i0.wp.com/images.elightup.com/meta-box/blog/schedule-filter/create-settings-page.png)

For the position of the settings page, you can put it in any place you want. In this case, I keep the location by default.

It’s still blank since we haven’t added any content to it yet.

![The settings page is blank.](https://i0.wp.com/images.elightup.com/meta-box/blog/schedule-filter/blank-sp.png)

## 2. Creating a custom post type

We’ll have many courses, and each one is a post of a custom post type. So, let’s create that post type.

Go to **Meta Box** > **Post Types**, and create a new one.

![Go to Meta Box > Post Types](https://i0.wp.com/images.elightup.com/meta-box/blog/schedule-filter/create-cpt.png)

After publishing, our post type appears right here. Move to it to create posts. And these are some courses I created as an example.

![Some courses](https://i0.wp.com/images.elightup.com/meta-box/blog/schedule-filter/posts.png)

## 3. Creating custom fields

Do you remember the settings page where we haven’t added content? We’ll do it in this step, through custom fields.

These are some fields I want to create.

![Some fields](https://i0.wp.com/images.elightup.com/meta-box/blog/schedule-filter/fields.png)

Each item is a day, including information about the teacher, the price, and the courses. The teacher can be chosen from the list, and the course can be selected from the course we created in the previous step. And, we obviously have many items, so I use a cloneable group to have them all.

To create them, navigate to **Custom Fields** in **Meta Box**, and create a new field group.

![Go to Custom Fields in Meta Box](https://i0.wp.com/images.elightup.com/meta-box/blog/schedule-filter/create-cf.png)

First, add a **Group** field.

![Add a Group field](https://i0.wp.com/images.elightup.com/meta-box/blog/schedule-filter/group.png)

Inside this group, add subfields as the structure you want.

Add a **Date Picker** field for the date.

![Add a Date Picker field for the date](https://i0.wp.com/images.elightup.com/meta-box/blog/schedule-filter/sf1.png)

Regarding the teacher, I add a **Select** field, then input the teacher’s names in the **Choices** box.

![Add a Select field, then input the teacher’s names in the Choices box](https://i0.wp.com/images.elightup.com/meta-box/blog/schedule-filter/sf2.png)

Simply add a **Number** field for the price.

![Add a Number field for the price](https://i0.wp.com/images.elightup.com/meta-box/blog/schedule-filter/sf3.png)

Next, regarding the course, add a field in the type of **Post**. [This field type](https://docs.metabox.io/fields/post/) allows you to choose more than one post from a regulated post type.

![Add a Post field](https://i0.wp.com/images.elightup.com/meta-box/blog/schedule-filter/sf4.png)

Then, in the **Post Types** setting, you should choose the post type which you want to choose posts. And enable the multiple setting to choose more than one course.

![Choose post type](https://i0.wp.com/images.elightup.com/meta-box/blog/schedule-filter/sf5.png)

For the group, you should set the group as collapsible to see all changes in a clear structure and set the group title to distinguish it.

![Setting group is collapsible, and group title as you want](https://i0.wp.com/images.elightup.com/meta-box/blog/schedule-filter/collapsible.png)

Next, make the group cloneable to add more than one item.

![Make the group cloneable](https://i0.wp.com/images.elightup.com/meta-box/blog/schedule-filter/cloneable.png)

After having all the fields with essential settings, click on the **Settings** icon, and set the **Location** as **Settings page**, then choose the settings page you want to apply the field group to.

![Set location for the field group](https://i0.wp.com/images.elightup.com/meta-box/blog/schedule-filter/location.png)

Now, go to your settings page, and you will see custom fields displayed. Just input data for each item.

![Fields display in the settings page](https://i0.wp.com/images.elightup.com/meta-box/blog/schedule-filter/fields-in-sp.png)

When you click on the field of the Courses, a list of posts from the post type you set in the settings is shown. Just choose some of them.

![Choose a post from the list.](https://i0.wp.com/images.elightup.com/meta-box/blog/schedule-filter/select-posts.png)

With the entered data, you have two choices for displaying data on the frontend. I’ll use the tabular format for both of them:

1. Simply show information by date. Then, you can have an overview of the courses.
2. Filter all the information related to a course. It is useful when you want to check the schedule of the current single course being viewed. On it, you can check which days the course is scheduled for, who will teach, and how much it costs. Then, comparing and choosing one that fits you is easier. This choice involves a bit of coding knowledge.

Let me show you how to do each one, step by step.

## 4. Displaying all courses on an archive page

In this step, we’ll display courses by day, following the structure of the field group.

We need to have the page first. Go to **Pages** and create a new one.

![Create a page](https://i0.wp.com/images.elightup.com/meta-box/blog/schedule-filter/create-page.png)

Next, we’ll use MB Views to show data on this page. Navigate to the **Meta Box** > **View** and create a new view for displaying courses and other information.

![Go to the Meta Box > View and create a new view](https://i0.wp.com/images.elightup.com/meta-box/blog/schedule-filter/view-archive.png)

In the **Template** tab, you can add code directly, but I recommend you use the **Insert Field** button and choose the field you want to get data from the list on the right panel. Since we saved fields in the settings page, move to the Site tab, and you can see our field group.

![Find the field in the Site tab](https://i0.wp.com/images.elightup.com/meta-box/blog/schedule-filter/insert-field-group.png)

Click on it. It is a cloneable group, so you’ll see a loop is generated.

![A loop was generated for the cloneable group](https://i0.wp.com/images.elightup.com/meta-box/blog/schedule-filter/loop.png)

Inside this loop, just insert subfields one by one. MB Views also allows you to choose the format or output for some special fields. Select one that fits you.

![Insert subfields](https://i0.wp.com/images.elightup.com/meta-box/blog/schedule-filter/insert-sf.png)

There is more than one course on a day. That’s why when you insert the field, of course, there is a nested loop.

![A nested loop for the courses](https://i0.wp.com/images.elightup.com/meta-box/blog/schedule-filter/nested-loop.png)

After that, scroll down to the **Settings** section to set the location for the template. You should set its type as **Singular**, then choose the page you created.

![Set the location for the template](https://i0.wp.com/images.elightup.com/meta-box/blog/schedule-filter/setting-view.png)

Now, view the page on the frontend; you can see all the data is displayed.

![The data is displayed](https://i0.wp.com/images.elightup.com/meta-box/blog/schedule-filter/frontend-archive.png)

To make the data easier to read, I decided to display it as a table. So I returned to the created template to style it.

I’m adding some `div` tags and classes, as well as some code for the table format.

![Modify the template](https://i0.wp.com/images.elightup.com/meta-box/blog/schedule-filter/style1.png)

Pay attention to the line of code `{% if not loop.last %}, {% endif %}` to ensure that a comma is added after each course except the last one.

Then, move to the **CSS** tab to style the table.

![Add CSS to style](https://i0.wp.com/images.elightup.com/meta-box/blog/schedule-filter/css1.png)

And this is the new look of my page.

![The final look of the archive page](https://i0.wp.com/images.elightup.com/meta-box/blog/schedule-filter/archive.png)

## 5. Displaying schedule on the single course

This is our aim in this tutorial. It is to filter information related to a specific course. Your visitors can choose the date, teacher, and price that are suitable for them. I also use MB Views.

Go to **Views**, and create another view.

![Create a new view for the single course](https://i0.wp.com/images.elightup.com/meta-box/blog/schedule-filter/single-view.png)

I’ll add some code directly.

```
{% set course_id = post.ID %}
{% set options = mb.get_option('schedule') %}
{% set schedule = options.schedule_detail ?? [] %}
{% set filtered = [] %}
```

![Get data from the group and settings page](https://i0.wp.com/images.elightup.com/meta-box/blog/schedule-filter/add-code.png)

**Specifically**:

* `{% set course_id = post.ID %}`: is to get the post ID of the course being viewed. It’s also the ID of the course.
* `mb.get_option('schedule')`: is a function to get data from the schedule settings page.
* `{% set schedule = options.schedule_detail ?? [] %}`: is to get data from the `schedule_detail` group field group. It’s the ID of the group we created.
* `{% set filtered = [] %}`: is to create an empty array to later store filtered results.

A course can be taught on different days. So we need a loop to get data from all the items in the schedule.

```
{% for row in schedule %}
    {% set related_courses = row.courses ?? [] %}
    {% if course_id in related_courses %}
        {% set filtered = filtered|merge([row]) %}
    {% endif %}
{% endfor %}
```

![Set condition for the data](https://i0.wp.com/images.elightup.com/meta-box/blog/schedule-filter/insert-single.png)

This part of the code means:

Inside the loop, I retrieve all the courses of each item and assign them to the `related_courses` variable.

In that variable, we’ll check whether it includes the ID of the course that is being viewed; the data row will be added to the array we created before.

Next, add this code:

```
{% if filtered is not empty %}
    <table class="mb-table">
        <thead>
            <tr>
                <th>Day</th>
                <th>Teacher</th>
                <th>Price</th>
            </tr>
        </thead>
        <tbody>
            {% for row in filtered %}
                <tr>
                    <td>{{ row.date | date( 'd F Y' ) }}</td>
                    <td>{{ row.teacher }}</td>
                    <td>${{ row.price }} </td>
                </tr>
            {% endfor %}
        </tbody>
    </table>
{% else %}
    <p>No schedule available for this course.</p>
{% endif %}
```

![Retrieve the data.](https://i0.wp.com/images.elightup.com/meta-box/blog/schedule-filter/column-single.png)

When the array has at least one value, the information, including `date`, `teacher`, and `price`, will be retrieved.

Otherwise, in the case that the filter is empty, the text of “No schedule available for this course” will be shown.

Since we display the data in a table, you should style the table a little bit. Move to the **CSS** tab to add some code.

![Add CSS for the page.](https://i0.wp.com/images.elightup.com/meta-box/blog/schedule-filter/css2.png)

Now, you need to set the location for this template. I want to apply it to a single course. So, also set the **Type** as **Singular**, but choose **Course**.

![Set the location to apply the template for the singular course.](https://i0.wp.com/images.elightup.com/meta-box/blog/schedule-filter/setting2.png)

View a course on the frontend, you can see the expected information.

![The final look of the single post.](https://i0.wp.com/images.elightup.com/meta-box/blog/schedule-filter/kq.png)

# Migrating custom fields data from ACF to Meta Box

You can easily move data from **ACF** to **Meta Box** with the help of the **MB ACF Migration** plugin. It will save a lot of time and shorten the process dramatically.

## Preparation

In addition to using the <a href="https://metabox.io/">Meta Box</a>, make sure you already have these extensions:

* <a href="https://metabox.io/plugins/meta-box-builder/">MB Builder</a>: A Meta Box premium extension that provides a UI to create and manage custom fields on the backend;
* <a href="https://metabox.io/plugins/mb-acf-migration/">MB ACF Migration</a>: This extension is also available in the WordPress repo. Besides, if you use Meta Box AIO or Meta Box Core (in the premium bundle), go to **Meta Box** &gt; **Extensions**, and you will see MB ACF Migration in the list. Just tick to enable it.

![Enable the necessary extentions](https://imgur.elightup.com/Ym7KUMY.png)

Besides these above plugins, remember to install all the Meta Box extensions that correspond to the migrated features. For example, if you have fields in a group created by ACF, you have to enable **MB Group** to migrate the group field data. Or, in ACF, when you set a location to display a field group in taxonomy, you have to activate the **MB Term Meta** extension in Meta Box.

## 1. Checking and backing up the data

**Note**: Remember to back up your data before migrating to avoid unexpected errors.

I have these custom fields created by ACF for example, including **Text**, **Email**, **Gallery**, and **Repeater**. The **Repeater** has three sub-fields: **Checkbox**, **Text**, and **Gallery.**

![Example of created fields created by ACF](https://imgur.elightup.com/8x1UkKO.png)

!["The repeater has three sub-fields](https://imgur.elightup.com/Nfsdi9v.png)

Besides, I used conditional logic to display the image field when users choose the **Project Type** as Web Design. The field group that I created by ACF is shown like this:

![The created field group](https://imgur.elightup.com/5Wa0fr9.gif" )

Make sure that when you migrate custom fields data from ACF to Meta Box, you’ve activated all the necessary plugins, even ACF.

As you can see here in the **Plugin** menu, the ACF has already been activated.

![Activate ACF plugin](https://imgur.elightup.com/h36TWSK.png)

## 2. Installing Meta Box extensions

As I said before, we need to install extensions that correspond to the features that you used with ACF.

In this case, similar to all the above features in **ACF**, I will use these extensions of Meta Box:

* **MB Group**: to have a group field corresponding to Group + Repeater in ACF
* **MB Conditional Logic**: to have the conditional logic feature.

![Install extensions](https://imgur.elightup.com/0DtTi2R.png)

## 3. Migrating the data

Go to the **Meta Box** menu &gt; **ACF Migration** &gt; Click the **Migrate** button.

![Migrate the data](https://imgur.elightup.com/JB0rX9z.png)

When the process finishes, it will show a “Done” message.


:::warning

The **AFC** menu will automatically disappear when the migration process finishes. This is because **Meta Box** turned the ACF plugin off automatically to avoid problems caused by registering the same post type.


:::


## 4. Rechecking the data after migration

Now, you can see that the fields are displayed the same as when you use **ACF**. All the features, like group and conditional logic, also work well.

![Recheck the data after migration](https://imgur.elightup.com/HRrfX3b.png)

Here are the fields that are shown in the field edit. All the information, such as field group ID and ID of each field, has remained:

![The created fields show in field edit](https://imgur.elightup.com/GJbguDw.png)

![All the information has remained](https://imgur.elightup.com/SHaFa9W.png)

And the **ACF** has already been deactivated.

!["ACF has already been deactivated](https://imgur.elightup.com/G7trDkv.png)

The migration has been done.

# Migrating data when switching from cloneable fields to groups

import LiteYouTubeEmbed from 'react-lite-youtube-embed';
import 'react-lite-youtube-embed/dist/LiteYouTubeEmbed.css';

Learn how to safely migrate existing data when switching from cloneable fields to a Group field in Meta Box, so you can upgrade to a more structured setup without losing any information.

![result](img/migrate-cloneable-data-to-group/gif%20result.gif)
result

## Video version

<LiteYouTubeEmbed id='msFfc_2sktg' />

## Preparation
For this guide, we naturally use Meta Box to create custom fields and a post type. Since the goal is to switch the field to a group structure, some premium Meta Box extensions are required. For convenience, we recommend using Meta Box AlO, which includes the framework and all extensions.
In this case, I already have a custom post type called Events, along with a custom field created for it. The field is currently set as cloneable to add multiple speakers.

![cloneable field](img/migrate-cloneable-data-to-group/cloneable-field.png)

Fill in the information in post editor.

![cloneable field in post editor](img/migrate-cloneable-data-to-group/cloneable-field-in-post-editor.png)

Now, convert it to a group field type to store multiple related pieces of information.

## Migrating data from cloneable fields to groups

In real-world scenarios, you may need to group related information to create a better structure. Instead of storing only the speaker name, I also want to add another piece of information, for example, an avatar.

So now, go back to the field editor and change the standalone cloneable field to a Group field.

![Group-field](img/migrate-cloneable-data-to-group/change-group-field.png)

Then, add subfields you need. The most important subfield is the one that stores the speaker name because we’ll migrate the data from the old cloneable field into this new Group structure. And also add a field to store the speaker’s avatar.

![Subfield](img/migrate-cloneable-data-to-group/subfields.png)

In the old post editor, you'll see that the Group field appears correctly. However, the speaker names we previously entered are no longer displayed. But again, the data is still in the database.

![(the speaker names we previously entered are no longer displayed](img/migrate-cloneable-data-to-group/group-field-in-post-editor.png)

So instead of re-entering everything manually, we’ll reconnect the data using a small piece of code. Go to the theme file editor and add the following code:

![Theme-file editor](img/migrate-cloneable-data-to-group/theme-file-editor.png)

```
add_action( 'admin_init', function () {
    if ( get_option( 'event_speaker_migrated' ) ) {
        return;
    }
    $query = new WP_Query( [
        'post_type'      => 'event',
        'posts_per_page' => 100,
        'post_status'    => 'any',
        'meta_query'     => [
            [
                'key'     => 'speaker',
                'compare' => 'EXISTS',
            ],
        ],
    ] );
    foreach ( $query->posts as $post ) {
        $old = get_post_meta( $post->ID, 'speaker', true );
        if ( empty( $old ) || is_array( $old[0] ) ) {
            continue;
        }
        $new = [];
        foreach ( $old as $name ) {
            $new[] = [
                'name'   => $name,
                'title'  => '',
                'avatar' => '',
            ];
        }
        update_post_meta( $post->ID, 'speaker', $new );
    }
    update_option( 'event_speaker_migrated', true );
} );
```
**Explanation**:

```
 add_action( 'admin_init', function () {

   if ( get_option( 'event_speaker_migrated' ) ) {
        return;
    }
```
I create a hook that runs when entering the WordPress admin area. This means the code only runs in the admin dashboard, not on the front end.

We next check whether the migration has already been executed:

If the option event speaker migrated exists, it means the migration already ran before, so we stop the process to prevent it from running again.

Then we query the Event posts. Here, we retrieve up to 100 posts of the event post type and only those that have the meta key as speaker.

```
$query = new WP_Query( [
        'post_type'      => 'event',
        'posts_per_page' => 100,
        'post_status'    => 'any',
        'meta_query'     => [
            [
                'key'     => 'speaker',
                'compare' => 'EXISTS',
            ],
        ],
    ] );
```
We use speaker because that was the field ID of the original cloneable field. Next, we loop through each post:

```
    foreach ( $query->posts as $post ) {
```
We get the old data: This returns the entire array stored by the old cloneable field.

```
        $old = get_post_meta( $post->ID, 'speaker', true );
```
After that, we check whether the data is empty or already in group format. 

```
 if ( empty( $old ) || is_array( $old[0] ) ) {
            continue;
        }
```
Next, we create a new empty array:

```
        $new = [];
```
Here, we convert the old array of strings into an array of structured objects that match the Group field format.

```
        foreach ( $old as $name ) {
            $new[] = [
                'name'   => $name,
                'title'  => '',
                'avatar' => '',
            ];
        }
```
We update the post meta and overwrite the old structure:

```
        update_post_meta( $post->ID, 'speaker', $new );
    }
```
After processing all posts, we save a small option in the WordPress database to mark that the migration is complete. This ensures the migration won’t run again the next time you enter the admin area.

```
    update_option( 'event_speaker_migrated', true );
} );
```
That’s all for the code. You can find the full code on GitHub. After confirming everything works correctly, make sure to remove the code to avoid unexpected problems later.

Refresh the post editor. You’ll see that the speaker names are back, this time inside the new Group structure.

![Data return](img/migrate-cloneable-data-to-group/data-return.png)

From here, you can safely add avatars or any additional subfields without losing your existing data.

If you also need to [migrate data when changing field IDs](https://docs.metabox.io/tutorials/change-id-meta-box-field/), we have a dedicated tutorial for that. You can check it out to learn how to update field IDs without losing existing values.

# Migrating custom post type and fields from Pods to Meta Box

import LiteYouTubeEmbed from 'react-lite-youtube-embed';
import 'react-lite-youtube-embed/dist/LiteYouTubeEmbed.css';

We will move all the data of the custom post type and custom fields created with Pods to Meta Box easily following these few simple steps.

## Video Version

<LiteYouTubeEmbed id='iYGAXypM_c0' />

## Overall

Both Pods and Meta Box use two WordPress standard functions: `get_post_meta()` and `update_post_meta()`.

Besides, these two plugins [save the custom fields' data](https://docs.metabox.io/database/) in the same way: save each field in a line on the post meta table with the `meta_key` field’s ID and the `meta_value` field’s value.

Therefore, to move data from Pods to Meta Box, we just need to create new fields in Meta Box that have the same IDs as the corresponding fields in Pods. As for the custom post types, the method is the same.

I’m going to move data of the **Project** custom type and its custom fields from Pods to Meta Box. In this case, I’ll move only the data of custom fields for **posts**. You can apply the same method for **terms** and **users**.

## Preparation

As I said, we will create a custom post type and custom fields in [Meta Box](https://wordpress.org/plugins/meta-box/), so we need it along with some of its extensions:

* [MB Custom Post Types & Custom Taxonomies](https://metabox.io/plugins/custom-post-type/): to create custom post types easily. It can run without Meta Box. Otherwise, you can try [Post Type Generator](https://metabox.io/post-type-generator/).
* [MB Builder](https://metabox.io/plugins/meta-box-builder/): to create custom fields with an intuitive interface in the backend. If you don’t want to use this premium extension of Meta Box, you can use the free tool provided by Meta Box in the simplified version of MB Builder - [Online Generator](https://metabox.io/online-generator/).

## 1. Getting the post type’s slug & custom field’s ID in Pods

I already have the **Project** post type created with Pods. Its slug is _‘project’_. You can see it in the **Name** column:

![The created post type](https://imgur.elightup.com/0WjFgSH.png)

In the **Project** post type, there are two custom fields. Their IDs are `project_name` and `project_description`.

![There are two custom fields in the post type](https://imgur.elightup.com/rC4Syns.png)

These are posts in the Project post type created by Pods:

![The created post type by Pods](https://imgur.elightup.com/rIp1QNp.png)

And these are the custom fields in the Project post type:

![The custom fields in the post type](https://imgur.elightup.com/WVdDK9B.png)

Now, **deactivate the Pods plugin**. After that, the data of Pods is still in the database.

## 2. Creating a custom post type and move its data from Pods to Meta Box

First, activate the **Meta Box** plugin and its extensions.

Then, go to **Meta Box** > **Post Types** > **Add New**. Fill in the information for the new post type, and note that **its slug must be the same as in Pods**.

![The slug must be the same as in Pods](https://imgur.elightup.com/Oj8lhml.png)

After that, the new custom post type will display in the Admin Menu. When you open the new post type, you will see all the old posts of the **Project** post type that you created with Pods previously.

![The old posts of the created post type wwill appear](https://imgur.elightup.com/rIp1QNp.png)

Especially, the post information such as post title, post content, ... is still kept.

![The post information is still kept](https://imgur.elightup.com/Cgq5FzX.png)

That’s how we’ve done for moving the posts content.

## 3. Creating custom fields and move their data from Pods to Meta Box

Go to **Meta Box** > **Custom Fields** > **Add New** to create new fields corresponding to the fields in Pods.

Pods and Meta Box support many different fields. Therefore, every time you add a new field with Meta Box, it must have the corresponding field type. This makes sure that the data of custom fields are saved in the same method.

For example, the corresponding field type of paragraph text (Pods field) is the text area (Meta Box field).

Similar to the previous step, you must enter the corresponding IDs for the custom fields. You can use the different values for other information like **Label**. However, to make the information consistent, I recommend that you should copy exactly everything.

![Enter the corresponding IDs for the post type](https://imgur.elightup.com/m6f27vU.png)

After creating custom fields with the same ID as Pods, go to edit a post in the Project post type. If the custom fields look like what they were in Pods, everything is done.

![The created post type after all steps](https://imgur.elightup.com/JRBMlce.png)

# move custom post types custom taxonomies from CPT UI to Meta Box

<h1>How to Move All Custom Post Types and Custom Taxonomies from CPT UI to Meta Box</h1>

You can move data from the <strong>CPT UI</strong> to the <strong>Meta Box</strong> with the help of the <strong>MB Custom Post Types</strong> <strong>&amp; Taxonomies</strong> extensions. It will save a lot of time and shorten the process dramatically.

<h2>Step 1: Check and Backup the Data</h2>

<strong><ins>Note</ins></strong>: Remember to back up your data before migrating to avoid unexpected events.

Here is my example. I have this <strong>Companies</strong> post type created by <strong>CPT UI</strong> with all the posts inside.

<img src="https://imgur.elightup.com/vyTY90m.png" alt="Post typed created by CPU UI" width="1200" height="602" />

As you can see in the <strong>Plugin</strong> menu, the <strong>CPT UI</strong> has already been activated.

<img src="https://imgur.elightup.com/U4ZKxGf.png" alt="Activate the CPU UI" width="1560" height="636" />

I will now proceed to transfer the data.

<h2>Step 2: Install the MB Custom Post Type &amp; Custom Taxonomies Plugin</h2>

I'll install and activate <strong>MB Custom Post Types</strong> &amp; <strong>Custom Taxonomies</strong>.

After that, the new <strong>Post Types</strong> menu appears on the <strong>Dashboard</strong> along with the <strong>CPT UI Migration sub-menu</strong>.

<img src="https://imgur.elightup.com/sxEKSlv.png" alt="New Post Type menu appears on the Dashboard" width="1200" height="606" />

<h2>Step 3: Migrating the Data</h2>

Go to the <strong>Post Types</strong> menu &gt; <strong>CPT UI Migration</strong> &gt; Click the <strong>Migrate</strong> button.

<img src="https://imgur.elightup.com/FRk0drJ.png" alt="Click the Migrate button in the Post Types menu" width="1200" height="603" />

When the process finishes, it will show a "Done" message.

<strong>Note</strong>: The <strong>CPT UI</strong> menu will automatically disappear when the migration process finishes. This is because Meta Box automatically deactivated it to avoid conflict and errors caused by registering the same post type.

<h2>Step 4: Recheck the Data After Migration</h2>

The Companies post type and all the terms in the Company Types taxonomy are still there. They are the new ones created by Meta Box. It also means that all the data was migrated successfully.

<img src="https://imgur.elightup.com/x7i0sB9.png" alt="The Companies post type has successfully migrated." width="1200" height="606" />

And the <strong>CPT UI</strong> has already been deactivated.

<img src="https://imgur.elightup.com/U4ZKxGf.png" alt="The CPT UI has already been deactivated" width="1560" height="636" />

The migration has been done.

# Moving custom fields' data to custom tables

import LiteYouTubeEmbed from 'react-lite-youtube-embed';
import 'react-lite-youtube-embed/dist/LiteYouTubeEmbed.css';

By default, WordPress saves custom fields' values in the `wp_postmeta_ table` in the database, in which each row stores a custom field's data. If your website has too many custom fields' data, your database will be bloated considerably. This solution is to move your custom fields' data to a custom table in **only ONE row**. Therefore, you can release the burden of your database and improve your website performance dramatically! Now we will do it in action.

## Video version

<LiteYouTubeEmbed id='JaEvtYa4Hcg' />

## Preparation

To move your custom fields' data to a custom table, here are the tools you need:

* <a href="https://metabox.io/">Meta Box</a> to have a framework to create a custom post type and custom fields for the form. It’s free and available on <a href="https://wordpress.org/plugins/meta-box">wordpress.org</a>.
* <a href="https://metabox.io/plugins/mb-custom-table/">MB Custom Table</a> allows saving custom fields' data in a custom table.
* <a href="https://metabox.io/plugins/meta-box-builder/">MB Builder</a> to have an UI in the back-end to create custom fields for the post type.


:::tip

You can move all the custom fields' data of all custom post types to one custom table. However, it will be difficult to manage, categorize, and may cause confusion for you.

Thus, we're going to move the data of each post type to a separate custom table. This method is a bit more time-consuming, but in the long run, it will be more beneficial. That's because the custom fields' data of different post types are saved in different tables.

:::


We already have a post type named **Companies** with **Company name**, **Address**, and **Start day** fields. This is the field group of these fields in MB Builder:

![Created field group](https://imgur.elightup.com/8lqOR5J.png)

And the custom field's data is saved in the `wp_postmeta`:

![Custom field's data is saved](https://imgur.elightup.com/gKgFnIH.png)

To move this custom field's data to a custom table, follow these steps:

## 1. Creating a custom table

Go to **Meta Box** &gt; **Custom Fields** and edit the field group I mentioned above. Go to the **Settings** tab and just tick the **Save data in a custom table** box.

![Choose Save data in a custom table option](https://imgur.elightup.com/MkML1on.png)

After that, some options will appear, and then you have to choose **Create table automatically** and enter the name of the custom table. I'll name it `wp_custom_company`

![Enter the name of custom table](https://imgur.elightup.com/fk6gt7A.png)

So, you have just created a custom table automatically with **MB Builder.** And now, in your database, you will see a new table named `wp_custom_company`.

![Create a custom table automatically with MB Builder](https://imgur.elightup.com/F6AI9Cv.png)

From now on, the **new data will be automatically saved in the custom table** whenever you update.

How about the **existing data** of this post type? It is still in the `wp_postmeta` table, so we need to use some code to move it to the new `wp_custom_company` table.

## 2. Moving data to the new custom table

This script below is to copy the custom fields' data in the `_wp_postmeta` table and paste it to the `wp_custom_company`. Then, it will delete the old data in the `wp_postmeta` table. Just insert this code into the `functions.php_ file`.

```php
function estar_child_data_company() {
    if ( empty( $_GET['move-data-companies'] ) || ! current_user_can( 'manage_options' ) ) {
        return;
    }

    $paged = isset( $_GET['estar-child-paged'] ) ? $_GET['estar-child-paged'] : 0;
    $paged += 1;
    $url = add_query_arg( 'estar-child-paged', $paged,
'https://yourwebsite.com/wp-admin/?move-data-companies=1' );

    $posts = estar_child_admin_records_get_companies( $paged );
    if ( empty( $posts ) ) {
        die( 'Done' );
    }

    foreach ( $posts as $post ) {
        estar_child_move_data_company( $post );
    }

    echo "
    <script>
    ";

    die;
}
add_action( 'admin_init', 'estar_child_data_company' );

```

This script will run when you access the URL *https://yourwebsite.com/wp-admin/?move-data-companies=1* It's a URL to your WordPress backend, here we use a custom URL parameter `move-data-companies` to let the script know how to process the data.

The script will check if the current user is an admin, so normal users can't run it. When you access the URL, the script will get all the companies via `estar_child_admin_records_get_companies()` and for each company, it will process its data via `estar_child_move_data_company(). ‘estar’` is the theme that I’m using, you can change it to yours.

To prevent long execution, the code doesn't process all companies at once. Instead, it processes only a batch of companies with pagination.

Now, we need to write these 2 functions:

* `estar_child_admin_records_get_companies()`: to take the list of posts
* `estar_child_move_data_company()`: to move data for each post

```php
function estar_child_admin_records_get_companies( $paged = 1 ) {
    $args = [
        'post_type' =&gt; 'companies',
        'posts_per_page' =&gt; 100,
        'paged' =&gt; $paged,
        'fields' =&gt; 'ids',
        'orderby' =&gt; 'ID',
    ];
    $query = new WP_Query( $args );
    return $query-&gt;posts;
}
function estar_child_move_data_company( $post_id ) {
    global $wpdb;

    echo 'Migrating company ', $post_id, '<br>';

    $data = [];

    $data['ID'] = $post_id;

    $data['company_name'] = get_post_meta( $post_id, 'company_name', true );
    $data['address'] = get_post_meta( $post_id, 'address', true );
    $data['start_day'] = get_post_meta( $post_id, 'start_day', true );

    $data = array_filter( $data );
    if ( $data ) {
        $wpdb-&gt;insert( 'wp_custom_company', $data );
    }

    $meta_key_array = [
        'company_name',
        'address',
        'start_day',
    ];
    $meta_key = "'" . implode( "','", $meta_key_array ) . "'";
    $wpdb-&gt;query( $wpdb-&gt;prepare( "
        DELETE FROM wpqq_postmeta
        WHERE post_id = %d AND meta_key IN ( $meta_key )",
        $post_id
    ) );
}

```

This code queries 100 companies in each run. For each company, it gets the custom fields' data from the post meta, and then inserts them into the new custom table. After that, it removes all custom fields from the post meta table.

After adding code, go to this URL: *https://yourwebsite.com/wp-admin/?move-data-companies=1* to enable moving the custom fields' data to the custom table.

![Enable moving the custom fields' data to the custom table](https://imgur.elightup.com/RlNZRFS.png)

After running the script, I go to the `wp_custom_company` custom table to check. And here is the result.

![The result after running the scripts](https://imgur.elightup.com/5c1EPna.png)

As you can see, the custom fields' data of the **Companies** post type is now moved to the `wp_custom_company` table.

It also is deleted from the `wp_postmeta` table at the same time.

Take advantage of this special feature from Meta Box to make your site faster and more performative.

# Pining newest featured posts above regular posts using MB Views

import LiteYouTubeEmbed from 'react-lite-youtube-embed';
import 'react-lite-youtube-embed/dist/LiteYouTubeEmbed.css';

In the previous tut, we focused on [displaying only the featured posts](https://docs.metabox.io/tutorials/show-featured-restaurants-mb-views/). But in many real-world cases, highlighting important content without hiding the rest is a common need. Instead of splitting featured items into a separate section, you can simply prioritize them within the same list for better visibility. In this tutorial, we’re going to explore how to do it using the **MB Views** extension of **Meta Box**.

![result](img/pin-newest-featured-posts/result.png)

## Video version

<LiteYouTubeEmbed id='Oo1iwTXaKTg' />

## Preparation

In this tutorial, we’ll create a custom post type to manage all the tours on our travel website.
Each tour will include essential information, such as price, duration, and whether it’s featured for the month. All details will be stored in custom fields created with Meta Box.

So I recommend using [Meta Box AlO](https://docs.metabox.io/tutorials/show-featured-restaurants-mb-views/), which includes the framework and all extensions you’ll need for this setup.

* [MB Admin Columns](https://metabox.io/plugins/mb-admin-columns/): help you show whether a tour is marked as featured directly in the dashboard, making it easy to quickly scan and manage which tours should be pushed to the top;
* [MB Custom Post Type](https://metabox.io/plugins/custom-post-type/): create a custom post type for tours;
* [MB Views](https://metabox.io/plugins/mb-views/): create a template and control the logic that displays featured tours first.
* [MB Builder](https://metabox.io/plugins/meta-box-builder/): help you create the custom information for each tour, such as price, duration, and the featured status.

## 1. Creating a new custom post type and custom fields

For this tutorial, I’ve already prepared a custom post type called **Tours** to store all the tour packages on the travel website. Each tour is saved as a post inside this post type, making it easy to manage and display them later with MB Views.

![create post type](img/pin-newest-featured-posts/custom-post-type.png)

I also created a custom field group to store all the essential information for each tour.

![Field group](img/pin-newest-featured-posts/field-group.png)

You can see some fields. Pay attention to an important field called ‘The Trend of Month****’. We use the **Checkbox** field type so that you can easily tick it whenever you want to highlight a tour.

![Trend of month field](img/pin-newest-featured-posts/trend-of-month-field.png)

For this field, I enabled the **Admin Column** feature. With the **MB Admin Columns** extension activated, it allows me to quickly see whether a tour is marked as featured directly from the post list.

![Set admin column](img/pin-newest-featured-posts/set-admin-collumn.png)

You can create any other fields you need depending on the information you want to display for each tour.
Once everything is set up, move to the **Settings** tab and set the **Location** as **Post Type**. Choose **Tours** to ensure that the custom fields appear only for tour posts.

![Set location](img/pin-newest-featured-posts/set-location.png)

Now, all the fields we’ve created will appear right under the post editor, and you can start filling in the tour details right away.

![Fields in post editor](img/pin-newest-featured-posts/fields-in-post-editor.png)

The featured status is now visible in the admin dashboard, making it very convenient to manage highlighted tours.

![The trend of month in admin dashboard](img/pin-newest-featured-posts/trend-of-month-in-admin.png)

## 2. Showing the tour listing on the page

Before displaying the newest featured posts at the top of the page, we first need to show all the tours.

First, create a new page specifically for the tour listings.

![create page](img/pin-newest-featured-posts/tour-page.png)

Next, go to **Meta Box** > **MB Views** and create a new template for this page.

![Create template](img/pin-newest-featured-posts/create-template.png)

With **MB Views**, you can add some lines of code directly in the **Template** tab to query and retrieve all posts from the **Tours** post type. To display the tour information from your custom fields, simply click the **Insert Field** button and select any fields from the right sidebar, especially the **Trend of Month** field, which we’ll use in the next step to pin featured tours at the top.

![Insert fields](img/pin-newest-featured-posts/insert-fields.png)

After inserting all the fields, move to the **Settings** section to set where this template will appear. Set the **Type** to **Singular**, and choose the page you created for the tour listings.

![Set template location](img/pin-newest-featured-posts/set-template-location.png)

On the frontend, you’ll see all the tour information displayed. At this stage, it appears as a basic list without any styling.

![result before styling](img/pin-newest-featured-posts/result-before-styling.png)

To make it look more visually appealing, add some div tags and classes in the **Template** tab, then switch to the **CSS** tab to style the layout.

![Add css](img/pin-newest-featured-posts/Add-css.png)

```css
.restaurant-wrapper {
    padding: 20px 0;
    font-family: Arial, sans-serif;
}

.below-grid {
    display: grid;
    grid-template-columns: repeat(4, 1fr);
    gap: 18px;
}

.card-grid-item {
    background: #fff;
    border-radius: 8px;
    border: 1px solid #eee;
    overflow: hidden;
    display: flex;
    flex-direction: column;
    transition: transform .15s, box-shadow .15s;
}


.card-grid-item .thumb {
    width: 100%;
    aspect-ratio: 16 / 9;
    overflow: hidden;
}

.card-grid-item .thumb img {
    width: 100%;
    height: 100%;
    object-fit: cover;
    display: block;
}

.card-grid-item .info {
    padding: 10px;
}


.card-grid-item .title {
    margin: 0;
    font-size: 16px;
    color: #222;
}

.card-grid-item:hover {
    transform: translateY(-4px);
    box-shadow: 0 8px 18px rgba(0, 0, 0, 0.06);
}

.card-grid-item .title a,
.featured-large-card .title a {
    text-decoration: none;
}

.tour-meta {
    display: flex;
    justify-content: space-between;
    align-items: center;
    margin-top: 6px;
    font-size: 14px;
    color: #444;
}

.tour-meta .duration {
    font-weight: 500;
    font-size: 17px;
    font-style: italic;
}

.tour-meta .price {
    font-weight: 700;
    color: #e35858;
    font-size: 18px;
}
```

Now, the tour listings look much better. Let’s move on to displaying the newest featured tours appearing first on the page.

![Tour after styling](img/pin-newest-featured-posts/tour-after-styling.png)

## 3. Displaying newest featured tours first

Back to the template created with **MB Views**, we’ll add a small piece of logic to control the display order by adding some code, so the featured tours appear first, without duplicating any posts.

![add code to pin featured posts](img/pin-newest-featured-posts/add-code-pin-featured-posts.png)

**In there**:

```php
{% set trending_posts = [] %}
{% set normal_posts = [] %}
```

Two empty arrays to categorize the tours: one for Hot Trend tours and one for regular tours.

We loop through all the tours from the existing query to process them one by one.

```php
{% for post in posts %}
```

Inside the loop, we check the value of the **Trend of Month** field. If it’s set to 1, it means this tour is marked as a Hot Trend, so we add it to the trending posts array. Otherwise, the tour is treated as a normal one and pushed into the normal posts array.

```php
{% if post.the_trend_of_month == '1' %}
    {% set trending_posts = trending_posts | merge([post]) %}
{% else %}
    {% set normal_posts = normal_posts | merge([post]) %}
{% endif %}

{% set top_trending = trending_posts[:3] %}
{% set remaining_trending = trending_posts[3:] %}
```

This code is to split the Hot Trend posts into two groups. The first three latest Hot Trend posts are used at the top of the page, while the remaining featured posts are pushed down and displayed together with the normal tours. You can easily change this number to control how many featured tours appear at the top.

This line below combines the two lists into one.

```php
{% set normal_posts = remaining_trending | merge(normal_posts) %}
```
We use the following code to display the featured tours at the top of the page. I did modify the code a bit so that the specified tour posts have a highlighted layout, with the number of columns adjusting dynamically based on how many featured items we have. Each featured tour is highlighted with a Hot Trend badge to make it stand out from the rest.

```php
<div class="featured-top-row columns-{{ top_trending|length }}">
    {% if top_trending|length > 0 %}
        {% for post in top_trending %}
            <div class="featured-large-card">
                <a class="thumb" href="{{ post.link }}">
                    <img src="{{ post.thumbnail.full.url }}" alt="{{ post.thumbnail.full.alt }}" loading="lazy">
                </a>
                <div class="info">
                    <span class="badge">Hot Trend</span>
                    <h3 class="title"><a href="{{ post.url }}">{{ post.title }}</a></h3>
                    <div class="tour-meta">
                        <span class="duration">{{ post.duration.value }}</span>
                        <span class="price">{{ post.price }}$</span>
                    </div>
                </div>
            </div>
        {% endfor %}
    {% endif %}
</div>
```

And, this code below stays unchanged for displaying normal posts as we did before.

```php
<div class="below-grid">
    {% for post in normal_posts %}
        <div class="card-grid-item">
            <a class="thumb" href="{{ post.link }}">
                <img src="{{ post.thumbnail.full.url }}" alt="{{ post.thumbnail.full.alt }}" loading="lazy">
            </a>
            <div class="info">                    
                <h4 class="title"><a href="{{ post.url }}">{{ post.title }}</a></h4>
                <div class="tour-meta">
                    <span class="duration">{{ post.duration.value }}</span>
                    <span class="price">{{ post.price }}$</span>
                </div>
            </div>
        </div>
    {% endfor %}
</div>
```
                              
Turn to the **CSS** tab and add styles to make the highlight section look cleaner.

```css
.featured-top-row {
    display: grid;
    gap: 20px;
    margin-bottom: 24px;
}


.featured-top-row.columns-1 {
    grid-template-columns: 1fr;
}

.featured-top-row.columns-2 {
    grid-template-columns: repeat(2, 1fr);
}

.featured-top-row.columns-3 {
    grid-template-columns: repeat(3, 1fr);
}

.featured-top-row.columns-4 {
    grid-template-columns: repeat(4, 1fr);
}


.featured-large-card {
    background: #fff;
    border: 2px solid #ddd;
    border-radius: 8px;
    overflow: hidden;
    display: flex;
    flex-direction: column;
    min-height: 260px;
    transition: transform .18s, box-shadow .18s;
}

.featured-large-card.empty {
    background: transparent;
    border: 2px dashed #eee;
    display: block;
    min-height: 260px;
}

.featured-large-card .thumb {
    width: 100%;
    aspect-ratio: 16 / 9;
    overflow: hidden;
}

.featured-large-card .thumb img {
    width: 100%;
    height: 100%;
    object-fit: cover;
    display: block;
}

.featured-large-card .info {
    padding: 14px;
    flex: 1;
}

.featured-large-card .badge {
    display: inline-block;
    background: #00c1b3;
    color: #fff;
    padding: 6px 10px;
    border-radius: 4px;
    font-weight: 700;
    font-size: 13px;
    margin-bottom: 10px;
}

.featured-large-card .title {
    margin: 0 0 8px;
    font-size: 20px;
    line-height: 1.15;
}

.featured-large-card .excerpt {
    margin: 0;
    color: #555;
    font-size: 14px;
}

/* Hover */
.featured-large-card:hover {
    transform: translateY(-6px);
    box-shadow: 0 8px 24px rgba(0, 0, 0, 0.08);
}

@keyframes blink {

    0%,
    100% {
        opacity: 1;
    }

    50% {
        opacity: 0.4;
    }
}

.featured-large-card .badge {
    animation: blink 1s infinite;
}

@keyframes shake {
    0% {
        transform: rotate(0deg);
    }

    25% {
        transform: rotate(5deg);
    }

    50% {
        transform: rotate(-5deg);
    }

    75% {
        transform: rotate(3deg);
    }

    100% {
        transform: rotate(0deg);
    }
}

.featured-large-card .badge {
    display: inline-block;
    animation: shake 0.8s infinite;
}


@keyframes zoom {

    0%,
    100% {
        transform: scale(1);
    }

    50% {
        transform: scale(1.2);
    }
}

.featured-large-card .badge {
    display: inline-block;
    animation: zoom 1s infinite;
}


.featured-large-card .badge {
    display: inline-block;
    background: #00c1b3;
    color: #fff;
    padding: 6px 10px;
    border-radius: 4px;
}


.featured-large-card .badge {
    display: inline-block;
    font-size: 13px;
    font-weight: 700;
    color: #e35858;
    background: transparent;
    border: 1px solid #e35858;
    border-radius: 3px;
    padding: 2px 6px;
    text-transform: uppercase;
    letter-spacing: 0.5px;
    box-shadow: 0 2px 6px rgba(0, 0, 0, 0.1);
}


@keyframes ticker {

    0%,
    100% {
        transform: scale(1) translateX(0);
    }

    50% {
        transform: scale(1.1) translateX(2px);
    }
}

.featured-large-card .badge {
    animation: ticker 1s infinite;
}
```

It looks nice now; Hot Trend posts show at the top, but they also appear in the normal list below.

![Featured-post-at-top](img/pin-newest-featured-posts/duplicated-featured-post-at-top.png)

We need to remove these duplicates.

Back to the template with **MB Views**. Currently, the posts array contains all posts, including those already shown at the top. To avoid duplicates, we replace it with normal posts, which include regular posts plus any Hot Trend posts not featured at the top.

![remove duplication](img/pin-newest-featured-posts/remove-duplication.gif)

For example, if we have 5 Hot Trend posts but only show 3 at the top, the remaining 2 are displayed below without repeating.

That’s all for the code. I’ve put everything on [Github](https://github.com/wpmetabox/tutorials/tree/master/pin-newest-featured-posts), so you can check it out there.

Now the featured posts are displaying as intended, without any duplicates

![Result](img/pin-newest-featured-posts/result.png)

You can go to the backend and change a post’s Featured status to test if it works correctly.

# Randomizing hero image in WordPress - MB Views

import LiteYouTubeEmbed from 'react-lite-youtube-embed';
import 'react-lite-youtube-embed/dist/LiteYouTubeEmbed.css';

Each site usually has only one hero image. Then, the visitors will see the same image as well as the same tagline and information on the hero section. It may be boring and can not showcase more than one prominent campaign. Having multiple hero sets with different content and displaying them randomly will make your website more interesting. Let’s do it with the help of MB Views from Meta Box.

This is an example.

![The hero sets display randomly with different backgrounds and content](https://imgur.elightup.com/ZY0ErNB.gif)

## Video version

<LiteYouTubeEmbed id='3U5OVjzdZzk' />

## Preparation

Each set of the hero section includes the image as the background, a tagline, and a short description. They are saved in custom fields in a settings page.

So, there are some tools we need to practice in this case:

* [Meta Box core plugin](https://wordpress.org/plugins/meta-box/): to have a framework to create a settings page and custom fields for the hero section. It’s available on [wordpress.org](https://wordpress.org/plugins/meta-box/);
* [MB Settings Page](https://metabox.io/plugins/mb-settings-page/): to create a settings page to input hero image and other information;
* [MB Views](https://metabox.io/plugins/mb-views/): to get data from custom fields and display them on the homepage as the hero section;
* [MB Builder](https://metabox.io/plugins/meta-box-builder/): to have a UI on the back end to create custom fields easily.

Let’s start!

## 1. Creating a new settings page

We’ll use a settings page to include all the content of the hero section, including the images.

So, go to **Meta Box** > **Settings Pages** and create a new page.

![Go to Meta Box > Settings Page and create a new one](https://imgur.elightup.com/SEBeDmg.png)

After publishing, you can see a new settings page appear in the Admin Dashboard.

![The created settings page displays in the menu of Admin Dashboard](https://imgur.elightup.com/z0VQ14y.png)

We’ve just initialized the page, so it still is blank.

![The settings page is blank now](https://imgur.elightup.com/tYxP2Yv.png)

In the next step, we’ll create some custom fields for this settings page.

## 2. Creating custom fields

Go to **Meta Box** > **Custom Fields** to create a new field group.

![Go to Meta Box > Custom Fields to create a new field group](https://imgur.elightup.com/O5y5svO.png)

Each set displayed on the hero section will be saved in a clonable group with some subfields inside. So, this is the structure of the fields I created.

|      Name       | Field Type    |       Settings        |
|-----------------|---------------|-----------------------|
|   Hero Image    |   Group       | Cloneable+Collapsible |
|        Image    |  Single image |       Subfield        |
|        Title    |  Textarea     |       Subfield        |
|        Subtitle |  Textarea     |       Subfield        |

![The structure of the fields with a clonable group and subfields](https://imgur.elightup.com/xLaC4Uz.png)

Since we have multiple hero sets, I set the group as cloneable. This is the most pivotal setting in this practice.

![Set the group is cloneable](https://imgur.elightup.com/iSt5u3g.png)

We should set this group to be collapsible to see the content more tidily.

![Set the group to be collapsible to see the content more tidily](https://imgur.elightup.com/qNwqv8U.png)

You also can add the title for the group. The `{#}` is for numbering the sets.

![Add the title for the group.](https://imgur.elightup.com/lDj0WCa.png)

After having all the fields, move to the **Settings** tab, set the **Location** as **Settings Page**, and choose the created settings page to assign custom fields to it.

![Move to the Settings tab, set the Location as Settings Page, and choose the created settings page to apply custom fields to it](https://imgur.elightup.com/zSc6h1l.png)

Go to the created settings page, you can see the custom fields are ready.

![The custom fields are ready on the settings page](https://imgur.elightup.com/qJ6kRrO.png)

Just add the hero image and other content.

Click on the **Add more** button to add another set of the hero image and content.

![Click on the Add more button to add another set of the hero image and content](https://imgur.elightup.com/X8qOC2R.png)

To get and display data, we’ll use MB Views in the next step.

## 3. Creating a template for the hero section

Go to **Meta Box** > **Views** and create a new template.

![Go to Meta Box > Views and create a new view](https://imgur.elightup.com/3ce8Mok.png)

### 3.1. Getting all data from custom fields

To get data from the custom fields, click on the **Insert Field** button, and look for any custom field we want from the list.

![Click on the Insert Field button, and look for the custom field from the list to get the data](https://imgur.elightup.com/wEn7gVb.png)

Since the fields in this case are on a settings page, go to the **Site** tab. You will see the group of fields that we created.

![The group we created in the Site tab](https://imgur.elightup.com/rPKKTwz.png)

Click on it and some lines of code will be generated in the **Template** section.

![Some lines of code will be generated in the Template section when click on the group](https://imgur.elightup.com/Z10lJdh.png)

**In there**:

* `{% set group = attribute( site, 'hero-image' ) %}`: is to get data from the group field which on a settings page with the ID as `hero-image`;
* `{% for clone in group.hero_image %}`: is the loop to get full of the data of the cloneable group that has ID as `hero_image`.

Next, just choose a subfield of the group from the list to insert them into the loop.

![Choose a subfield of the group from the list to insert them into the loop as usual](https://imgur.elightup.com/ocafGp4.gif)

Then, move to the settings of the view. There are some options to choose from. I prefer the default one to set this template in the kind of a shortcode to have the shortcode when publishing.

![Set the view type as a shortcode to have the shortcode embedded in any place](https://imgur.elightup.com/T7Q3e1K.png)

After that, go to the homepage, and embed the shortcode to any place.

![Embed the shortcode to any place in the homepage](https://imgur.elightup.com/7e60Uwb.png)

All the images and content of all sets that I input to the fields are displayed.

![All the images and content of all sets that I input to the fields are displayed](https://imgur.elightup.com/MRbjoTQ.png)

However, we need only one set display at once. So, we should customize the template a little bit more to choose randomly which data will be displayed.

### 3.2. Customizing to random get a set of the hero images

As you may know, normally, the data of a non-clonable group will be an array as follows:

```
[[image => "image"],[title => "title"],[description => "description"]]
```

And with a clonable group, the data will be an array like this:

```
[[[image => "image1"],[title => "title1"],[description => "description1"]],
[[image => "image2"],[title => "title2"],[description => "description2"]],
[[image => "image3"],[title => "title3"],[description => "description3"]]]
```

We need only one of the hero sets for each appearance. So, only one associative array will be obtained. Pay heed that each associative array here has its own order number. We’ll use it to choose which one will be displayed.

Now, I’ll replace the loop to the following line of code to create a variable:

```
{%  set item = random(group.hero_image) %}
```

![Replace the loop to another line of code to create a variable](https://imgur.elightup.com/C74jfvB.png)

**Explanation**:

* `random(group.hero_image)`: this is the function in PHP to randomly choose an item number of the group field. It returns the order number of an associative array;
* `hero_image`: the ID of the group field.

Also, customize the code of the image to change the output of them.

![Customize the code of the image to change the output of them](https://imgur.elightup.com/mWyOHm7.png)

As well as replace the prefix with the name of the created variable. It helps to return only the image which is in the corresponding array.

![Replace the prefix with the name of the created variable](https://imgur.elightup.com/lvf8OUm.png)

Also change the prefix for the title and subtitle.

![Change the prefix for the title and subtitle](https://imgur.elightup.com/APwkpPY.png)

After updating the views, go to the homepage and you will see that only one set of the hero image will be displayed at once.

![Then, only one set of the hero image will be displayed at once](https://imgur.elightup.com/owWY8EH.png)

When we refresh the page, another set will be there instead.

![When we refresh the page, another set will be there instead](https://imgur.elightup.com/xlTOOWU.gif)

There is a point here that I turned the image to its URL since I want it to be the background for this section in the next step.

### 3.3. Styling the hero section

Go back to the view to edit the template once again.

Add some **`div`** tags and classes for the content, as well as turn the image to the background.

![Add some div tags and classes for the content, as well as turn the image to the background](https://imgur.elightup.com/J7x3njR.png)

To style the section, move to the **CSS** tab, add some code.

![To style the section, move to the CSS tab, add some code](https://imgur.elightup.com/on1DXcP.png)

Back to the homepage, there will be a new look of the hero section.

![The new look of the hero section](https://imgur.elightup.com/HMTd8E2.png)

Just refresh the page for several times, you will see the picture changed along with the different titles and subtitles.

![The hero sets display randomly with different backgrounds and content](https://imgur.elightup.com/ZY0ErNB.gif)

# Displaying real-time opening status automatically - Using MB Views

import LiteYouTubeEmbed from 'react-lite-youtube-embed';
import 'react-lite-youtube-embed/dist/LiteYouTubeEmbed.css';

Having a real-time-opening-status is a brilliant feature on this kind of site. So, I’d like to share a way to **display the real-time opening status dynamically and automatically** right now on this post. It's easily with the help of MB Views from Meta Box. Let’s see how now!

For the demonstration purposes, I’ll put the status with the opening hours like this:

![The real-time opening status created with MB Views](https://imgur.elightup.com/KjMDYzA.png)

We already had tutorials on [how to have the fields for saving the opening hour, and how to display them on the page](https://metabox.io/series/opening-hours/). So, in this practice, we will pay heed to learn how to make the status real-time only.

## Video version

<LiteYouTubeEmbed id='h8qlU19PpfY' />

## Preparation

Each restaurant is a separate post of a custom post type and has its own opening time slots.

To let visitors know it’s open or closed right at the time when they see the board, the status must be real-time based on comparing the current time and the opening hours set as in the board. All the information related to the opening time of the restaurant, store, or office, will be saved in custom fields created with Meta Box.

So, we need these tools:

* [Meta Box plugin](https://wordpress.org/plugins/meta-box/): to have a framework to create the custom post type and custom fields. You can install it directly from [wordpress.org](https://wordpress.org/plugins/meta-box/).
* [MB Custom Post Type](https://metabox.io/plugins/custom-post-type/): to create a custom post type for the restaurants;
* [MB Views](https://metabox.io/plugins/mb-views/): to create a template to display the opening time and the restaurant status;
* [MB Builder](https://metabox.io/plugins/meta-box-builder/): to have a UI on the backend to create the custom fields visually.

Furthermore, there are some other extensions you may want to use to have the appropriate structure of the custom fields such as group, conditional logic. We mentioned them in detail in other tutorials on [showing opening hours](https://docs.metabox.io/tutorials/display-opening-hours-restaurant-mb-views/).

You can install them individually, or use **Meta Box AIO** to have them all.

Now, let’s embark on step by step.

## 1. Creating custom fields for opening time

As I said before, we need to have custom fields to save the time slots.

Go to **Meta Box** > **Custom Fields**, and create a new field group for the opening time.

![Go to Meta Box > Custom Fields, and create a new field group for the opening time](https://imgur.elightup.com/ts9uZn3.png)

We have had another tutorial on [how to have them and display the timing information in detail](https://docs.metabox.io/tutorials/display-opening-hours-restaurant-with-bricks/) as I mentioned, so you should refer to them for more details of this step and concept.

I’m going to create typical and quite simple groups of fields for this practice following this structure.

![The structure of simple groups of fields to save the opening time](https://imgur.elightup.com/uZjqGYE.png)

No matter what the structure of the fields, the concept of having real-time status still is the same.

After creating all the fields, don’t forget to set the location to apply the field group. Then, go to the post editor to input opening hours.

![Input the opening information in post editor](https://imgur.elightup.com/i4e9HfI.png)

## 2. Displaying the real-time status

You need to have a single page to display detailed information about each restaurant, including the section on their opening hours. You can refer to [this tutorial](https://www.youtube.com/watch?v=mjwLTGE0UKI) on how to display this timing information. In this practice, I made the page already in order to focus on how to have the real-time status based on those timing slots.

Someone uses static text for it and then changes it manually. But it is not optimal. The purpose of this tutorial is to display the real-time opening status **dynamically**. It means that the status will turn between Open and Close **automatically**. For that, we will use Javascript to compare the current time with the time slots saved in custom fields. Let’s do it now!

### 2.1. Step 1: Getting the time slots

First, we should have a new view to get all the time slots.

Go to **Meta Box** > **Views**, and create a new view.

![Go to Meta Box > Views, and create a new one](https://imgur.elightup.com/LrtMRug.png)

In the **Template** tab, click on the **Insert Field** button and look for the fields where we save the timing information since they are saved in custom fields.

![In the Template tab, click on the Insert Field button and look for the fields where we save the timing information](https://imgur.elightup.com/ZOP41o3.png)

The start time and end time are in cloneable groups so there will be a loop added into the template.

![There will be a loop added into the template since the start time and end time are in cloneable groups](https://imgur.elightup.com/XUeYSYh.png)

When we insert the field of time slot, Meta Box will offer some options for the output.

![Meta Box will offer some options for the output for the time slots](https://imgur.elightup.com/LjSwWtv.png)

We should choose **Custom** in this case, and set the format of timing data as the below image. It is the format that will be used in JavaScript later.

![You should choose Custom, and set the format of timing data](https://imgur.elightup.com/Jj1AuUZ.png)

We will save the **Type** of this view as **Shortcode**. The generated shortcode will be used for the page template.

![Set the Type of this view as Shortcode to have a shortcode which used for the page template.](https://imgur.elightup.com/EykyCH9.png)

Right on the place where we put the status, add a **Shortcode** element.

![Add a Shortcode element](https://imgur.elightup.com/zyzE1Vt.png)

Insert the shortcode into the box.

![Insert the shortcode into the box](https://imgur.elightup.com/IMQtpOY.png)

Then on the page, we will see a list of time slots displayed.

![A list of time slots displayed on the page](https://imgur.elightup.com/xG23atD.png)

### 2.2. Step 2: Converting time slots data to a JavaScript object

Back to the view to create some arrays to include all the time slots along with their date.

```
{% set timeArray = [] %}
{% for clone in post.custom_time %}
    {% set  timeSlotsArray= [] %}
    {% for clone in clone.choose_time_slots %}
        {% set timeSlotsArray = timeSlotsArray|merge([ {'start_time':clone.start_time | date( 'H.i' ),'end_time':clone.end_time | date( 'H.i' )} ] ) %}
    {% endfor %}
    {% set timeArray = timeArray|merge([ { 'day':clone.day.value, 'timeSlots':timeSlotsArray} ]) %}
{% endfor %}
```

![Create some array to include all the time slots along with their date](https://imgur.elightup.com/P9WhBkz.png)

**In there**:

* `{% set timeArray = [] %}`: is the array to include all the day along with their time slots.
* `{% set timeSlotsArray = timeSlotsArray|merge([ {'start_time':clone.start_time | date( 'H.i' ),'end_time':clone.end_time | date( 'H.i' )} ] ) %}`: is the array to join the start time and end time of a time slot.
* `{% set  timeSlotsArray= [] %}`: is the array to include all the set of time slots of a day.
* `{% set timeArray = timeArray|merge([ { 'day':clone.day.value, 'timeSlots':timeSlotsArray} ]) %}`: is the array to include all those sets of time of a day, with the name of the day they are.

Then, add these lines of code:

```
<div id="time" data-time='{{timeArray|json_encode()}}'>
    <div id="restaurant-status"></div>
</div>
```

![Add some code as image](https://imgur.elightup.com/6B8cQto.png)

**Explanation**:

* `time`: is an HTML ID we set.
* `data-time`: is the attribute which is transferred from the `timeArray` array. It and the `time` ID will be used for using JavaScript later.
* `restaurant-status`: is the ID we create to display the status.

The context of the status and its style will be stipulated in the next step.

### 2.3. Step 3: Adding JavaScript to compare current time with time slots

Move on to the **JavaScript** tab of the view, and add the following code:

```
var getTimeElement = document.getElementById("time");
var TimeObject = JSON.parse(getTimeElement.getAttribute("data-time"));
// Short day
var date = new Date();
Date.shortDays = ['Sun', 'Mon', 'Tue', 'Wed', 'Thu', 'Fri', 'Sat'];
function short_Days(date) {
    return Date.shortDays[date.getDay()];
}
// Get time now
var now = date.getHours() + "." + date.getMinutes();

// Loop TimeObject
TimeObject.forEach(function (elm) {

    if (elm.day == short_Days(date)) {

        var timeSlots = elm.timeSlots

        var statusArray = [];
        timeSlots.forEach(function (elm) {
            if (parseFloat(now) > parseFloat(elm.start_time) && parseFloat(now) < parseFloat(elm.end_time)) {
                statusArray.push('open')
            } else {
                statusArray.push('close')
            }
        })

        if (statusArray.includes('open')) {
            document.getElementById("restaurant-status").innerHTML = `OPEN`;
        } else {
            document.getElementById("restaurant-status").innerHTML = `CLOSE`;
        }

    }
})
```

![Move on to the JavaScript tab, and add some code](https://imgur.elightup.com/WPLF9zm.png)

Let’s dig into each part for details.

#### 2.3.1. Getting data of time slots

```
var getTimeElement = document.getElementById("time");
var TimeObject = JSON.parse(getTimeElement.getAttribute("data-time"));
```

These lines are to get all the data that we save in the arrays through the `time` ID and `data-time` attribute which was set in the previous step.

#### 2.3.2. Getting current time

```
// Short day
var date = new Date();
Date.shortDays = ['Sun', 'Mon', 'Tue', 'Wed', 'Thu', 'Fri', 'Sat'];
function short_Days(date) {
    return Date.shortDays[date.getDay()];
}
```

This part is to create a function to get the current day.

* `date = new Date()` (line4): is the variation we created for the current day.
* `getDay()` (line 7): is to get the current day.
* `return Date.shortDays[date.getDay()]`: is to convert the current day into the short form as we indicated in the 5th line.

```
var now = date.getHours() + "." + date.getMinutes();
```

This part is to get the current time.

The current time with the hour and minute, and is transferred to the `now` attribute. This data will be used for the condition in the next part.

#### 2.3.3. Comparing current time with time slots

```
if (elm.day == short_Days(date)) {

        var timeSlots = elm.timeSlots

        var statusArray = [];
        timeSlots.forEach(function (elm) {
            if (parseFloat(now) > parseFloat(elm.start_time) && parseFloat(now) < parseFloat(elm.end_time)) {
                statusArray.push('open')
            } else {
                statusArray.push('close')
            }
        })

        if (statusArray.includes('open')) {
            document.getElementById("restaurant-status").innerHTML = `OPEN`;
        } else {
            document.getElementById("restaurant-status").innerHTML = `CLOSE`;
        }

    }
})

```

* `if (elm.day == short_Days(date)) {`: is  to check which day we set in the custom field is the current day. Then, the time slots of that day will be checked, then compared with the current time.
* `var statusArray = []`: is to create the attribute for the status and set it as empty by default.
* `if (parseFloat(now) > parseFloat(elm.start_time) && parseFloat(now) < parseFloat(elm.end_time)) {`: is to compare the start time and end time with the current time through the `now` attribute.

If the current time meets the condition, the `open` value will be pushed into the array of status. Otherwise, if the current time doesn’t meet the condition, the `close` value will be pushed into the array.

#### 2.3.4. Pushing the status

```
if (statusArray.includes('open')) {
    document.getElementById("restaurant-status").innerHTML = `OPEN`;
} else {
    document.getElementById("restaurant-status").innerHTML = `CLOSE`;
}
```

This part is to regulate the context added to the `restaurant-status` HTML ID based on the value transferred to the array. We created this ID in the template before. This context is the text we display on the page for the status.

To style the text, you can use some CSS.

![Add some CSS to style the text](https://imgur.elightup.com/hUDpKFO.png)

That’s done. All the code is updated [here](https://github.com/wpmetabox/tutorials/tree/tutorials/realtime-restaurant-status) for your reference.

Now, let’s check how it works.

Assuming that it’s 11:30 on Friday. Then the status will be **Close**. Because on Friday, the restaurant is open from 7 to 11 o’clock.

![The status works well](https://imgur.elightup.com/7XY07yq.png)

If you change the time slots saved in the custom field. Then, the status turned to **Open** automatically.

![The status is dynamic](https://imgur.elightup.com/KjMDYzA.png)

So, the status works well.

# Renaming taxonomy without losing assigned posts with Meta Box

import LiteYouTubeEmbed from 'react-lite-youtube-embed';
import 'react-lite-youtube-embed/dist/LiteYouTubeEmbed.css';

Assuming that you already have a taxonomy with posts assigned to it. However, in some cases, you may want to rename that taxonomy for SEO purposes or to make it more meaningful. Normally, if you rename a taxonomy, WordPress treats it as a completely new one. As a result, all previously assigned posts will be detached and no longer linked to their terms.

But in this tutorial, we’ll do it differently. We’ll **rename the taxonomy in a way that keeps all existing assignments intact**, so the posts remain connected just as before; no need to reassign anything manually.

![result](img/rename-taxonomy-without-losing-data/result.gif)

Let’s see how to do that.

## Video version

<LiteYouTubeEmbed id='B6vFKFMhd_E' />

## Preparation

For this practice, we only need the free version - [Meta Box Lite](https://metabox.io/lite/) to have the framework and [ MB Custom Post Type](https://metabox.io/plugins/custom-post-type/) for creating custom post types and taxonomies.

For demonstration purposes, I’ll create a sample post type and taxonomy so you can clearly see how the relationships behave before and after renaming.

## Creating a custom post type & taxonomy

First, go to **Meta Box** > **Post Types** to create a custom post type for hotels as an example.

![post type](img/rename-taxonomy-without-losing-data/post-type.png)

Next, still in the **Meta Box** screen, create a new taxonomy for location information.

![taxonomy](img/rename-taxonomy-without-losing-data/taxonomy.png)

In the **Advanced** tab, pay attention to this setting. It’s available when you activate the **MB Admin Columns** extension. It’s optional, so I did not mention it before. When you check it, there’ll be a column in the dashboard to show the hotel’s location so that you can compare the results conveniently.

![associated post type](img/rename-taxonomy-without-losing-data/show-admin-column-option.png)

Back to the **General** tab, in the **Associated post type** section, choose the Hotel to assign the custom taxonomy that we’ve created to that post type.

![associated post types](img/rename-taxonomy-without-losing-data/associated-post-type.png)

Let’s create each term for that taxonomy.

![terms](img/rename-taxonomy-without-losing-data/terms.png)

Now, in the post editor of the Hotel post type, we’ll see the taxonomy section, where we can enter the hotel location.

![taxonomy section](img/rename-taxonomy-without-losing-data/taxonomy-section.png)

Just fill in all the information.

These are some posts, for example, that I created. The locations as well as the taxonomy are also displayed in the admin dashboard. Everything works normally at this stage.

![all-posts](img/rename-taxonomy-without-losing-data/all-posts.png)

## Renaming taxonomy without losing assigned posts

Now let’s say we want to rename the taxonomy from Location to Address to make it clearer and more SEO-friendly.

I change the taxonomy slug from `location` to `address`.

![Change slug](img/rename-taxonomy-without-losing-data/change-taxonomy-slug.png)

After saving, you’ll notice that the terms previously created under the Location taxonomy no longer appear. When going back to the posts, all assigned terms disappear.

![Terms disappear](img/rename-taxonomy-without-losing-data/terms-dissapear.png)

The hotels are no longer connected to their locations. This happens because WordPress treats address as a brand-new taxonomy, even though the old relationships still exist in the database.

So instead of reassigning everything manually, we’ll reconnect the data using a small piece of code. Now, go to the theme file editor and add the following code.

![theme file editor](img/rename-taxonomy-without-losing-data/add-code-to-theme-file.png)

```php
function rename_taxonomy_location_to_address() { 
	global $wpdb;
	$wpdb->query( "UPDATE $wpdb->term_taxonomy SET taxonomy = 'address' WHERE taxonomy = 'location'" );
}
rename_taxonomy_location_to_address();
```
**In there**:

```
function rename_taxonomy_location_to_address() { 
```
This one is to declare a function.

The `global $wpdb` variable allows us to access the WordPress database.

Most importantly, the following line finds all terms that belong to the location taxonomy and converts them to addresses.

```php
$wpdb->query( "UPDATE $wpdb->term_taxonomy SET taxonomy = 'address' WHERE taxonomy = 'location'" );
```
Finally, we run the function.

```php
rename_taxonomy_location_to_address();
```
That’s all for the code. Note that this code should run only once. After confirming that everything works correctly, remove the code immediately.


![result](img/rename-taxonomy-without-losing-data/result.gif)

You’ll see that all posts have their taxonomy terms back. The taxonomy now has the new name, but the terms remain exactly as before. That’s how you rename a taxonomy without losing assigned data.

If you also want to do a similar [migration with custom fields](https://docs.metabox.io/tutorials/change-id-meta-box-field/), we already have a dedicated tutorial for that. You can check it out to learn how to change field IDs without losing existing values.

# Rendering blocks with views in Meta Box

import LiteYouTubeEmbed from 'react-lite-youtube-embed';
import 'react-lite-youtube-embed/dist/LiteYouTubeEmbed.css';

[MB Blocks](https://docs.metabox.io/extensions/mb-blocks/) is a powerful plugin for creating custom Gutenberg blocks. If using a separate template file to render the block is inconvenient, we have a more optimal way for you: **render blocks using views**.

We have this quote block with some simple content as an example. It is rendered and styled using a view provided by the **MB Views** extension from Meta Box.

![A simple custom block rendered and styled using a view](https://imgur.elightup.com/TGtzQmW.png)

## Video version

<LiteYouTubeEmbed id='8D04nVqXKQQ' />

## Why render with views?

If you use the MB Blocks from Meta Box to create custom blocks for a time, you have three options to render a block:

* **PHP callback function**: when the rendering code is in the same file with registering, styling, and other code.
* **Template file**: when you want to put the rendering code in a separate file in the theme folder.
* **Code**: allows you to add code directly on the block setting screen.

However, all of them may be difficult to manage the templates of all the blocks since each one is in a different place.

That’s why we highly recommend using views to render the block with the help of the [MB Views](https://docs.metabox.io/extensions/mb-views/) extension. These are some benefits of this method:

* MB Views can help to **get and display data** from custom fields in the block more **easil**y than ever.
* All the templates for rendering the blocks are in **one place for management**.
* You can **reuse** the view to have the same template for multiple blocks.

## Preparation

We should ensure have all of the following tools:

* [Meta Box core plugin](https://wordpress.org/plugins/meta-box/): to have a framework to create custom blocks, and custom fields for the block if any. You can install it directly from [wordpress.org](https://wordpress.org/plugins/meta-box/);
* [MB Blocks](https://metabox.io/plugins/mb-blocks/): to create custom Gutenberg blocks;
* [MB Views](https://metabox.io/plugins/mb-views/): to create the views for rendering the blocks;
* [MB Builder](https://metabox.io/plugins/meta-box-builder/): to have UI on the backend to register and configure the block visually.

Besides, you can install other extensions to have advanced features for your block and custom fields such as [MB Group](https://metabox.io/plugins/meta-box-group/), [MB Conditional Logic](https://metabox.io/plugins/meta-box-conditional-logic/), etc.

You can install them one by one individually or use **Meta Box AIO** to have them all.

After activating all the needed tools, let’s dive into how to render the blocks using views.

## 1. Registering a custom block

In Meta Box, a custom block also means a field group, even when you have no custom fields inside the block.

So, just go to **Meta Box** > **Custom Fields**, and create a new field group.

![Go to Meta Box > Custom Fields, and create a new field group](https://imgur.elightup.com/lExrgGP.png)

You can add custom fields to the block or not. You still can have the content for the block by adding it directly in the template or view where we use it to render the block. Then, the content will be [static](https://www.youtube.com/watch?v=SrCjDz_d9CI). Otherwise, add custom fields for [dynamic content](https://www.youtube.com/watch?v=v3ke1DBlWuk). Just choose the way that fits you.

For demonstration purposes, I will create custom fields to save information about the quote, its author, and the image. The remaining content will be added directly when rendering.

![Add custom fields to have dynamic content or skip this step to have static one](https://imgur.elightup.com/Yz2Gimt.png)

In the **Settings** tab, remember to set the field group location as **Block** to register the block. This is a must-have setting.

![In the Settings tab, remember to set the field group location as Block to register the block](https://imgur.elightup.com/QDiVEzs.png)

Next, we’ll move to the main part of this tutorial: Render a custom block with a view.

## 2. Rendering block with view

We will have two ways to approach creating a view to render the block:

1. Go to the **Views** menu, create a new one as usual, and set its type as **Block**. Then, go back to the block settings and apply the view.
2. Add a new view in the settings of the block. It’s also where we’ve just registered the block in the previous step.

All roads lead to Rome. You’ll have a view to render the block where you can explore all the power that MB Views provides. As well as, the view can be managed on the page that lists the views, and you can modify it easily.

![Manage the view for the block in the list of Views menu](https://imgur.elightup.com/CNJysml.png)

### 2.1. Creating a view in the MB Views

Go to **Meta Box** > **Views**, and add a new view.

![Go to Meta Box > Views, and add a new view](https://imgur.elightup.com/zUm4MM0.png)

In the template tab, you can add any content to the template. It will be used as the content of the block later.

In the case that the block has some custom fields, you can use the **Insert Field** button and look for the field from the list on the right sidebar. Click on it to get the data from the field and add them to the template.

![Use the Insert Field button and look for the field to get data](https://imgur.elightup.com/Mab5FMv.gif)

Don't forget to add other content that you didn't input to the custom fields of the block.

![Add the content that you didn't input to the custom fields of the block to have static content](https://imgur.elightup.com/tkYPccH.png)

You also can add **`div`** tags, classes, as well as use **CSS**, and **JavaScript** tabs to add code to style the block.

![Add div tags and classes to the view for styling the block](https://imgur.elightup.com/wrCPldf.png)

![Use CSS, and JavaScript tabs to add code to style the block](https://imgur.elightup.com/uIK9cHP.png)

After that, move to the **Settings** section of the view, set the **Type** as **Block**.

![Move to the Settings section of the view, set the Type as Block](https://imgur.elightup.com/AXjoeN0.png)

Save the view, then go back to the block settings.

In the **Block Render Settings** section, open the **Render with** option, and choose the **View** option from the dropdown list.

![In the Block Render Settings section, open the Render with option, and choose the View option](https://imgur.elightup.com/Nox5J2Z.png)

Then, one more setting will display. Just select the view we’ve just created to apply it for the block.

![Select the view we’ve just created to apply it for the block.](https://imgur.elightup.com/YNXpdqa.png)

That’s done.

To check its work, go to a post/page and add the block.

![Go to a post/page and add the block](https://imgur.elightup.com/9o7HOHV.png)

![The block displayed with meta boxes to input data](https://imgur.elightup.com/Y2QX9OX.png)

The content that you add to the custom fields in the block will be displayed immediately in the preview.

![The content that you add to the custom fields in the block will be displayed immediately in the preview](https://imgur.elightup.com/nCwsbwb.gif)

It means that the view works well to render the block content.

### 2.2. Creating a view in the block settings

Still in the **Block Render Settings** section when you register or configure the block, if you choose the option **Render with View**, there is a button to add a new view for the block. If you have no pre-made view for the block to choose from, you should use it.

![The Add View button allows you to create a new view for rendering the block](https://imgur.elightup.com/78NZaQE.png)

It will open a window which is the same with creating a view in the MB Views screen. The functionality of areas, tabs, and buttons is kept intact.

![A window is the same with creating a view in the MB Views screen opened](https://imgur.elightup.com/i2nAEN0.png)

Do the same to get data from fields, or add some other content, or even CSS and JavaScript to style the block.

![Get data from fields, and add some other content, or even CSS and Javascript to style the block.](https://imgur.elightup.com/plooucN.png)

After inserting all the content you want to render for the block, scroll down to the **Settings** section of the view. You can see that the type is set as **Block** by default.

![The type of the view is set as Block by default](https://imgur.elightup.com/HQIrzId.png)

The view is selected automatically in this setting as well. At the same time, there is also a button to edit the view.

![The view is selected automatically in this setting as well and a button to edit the view](https://imgur.elightup.com/q1h7Oux.png)

So that when you want to change the style or content of the block, you can go to this block setting and do it. No more going to the place where you save the template.

In the post/page editor, add the block and you will see everything also works well. And we have a block displayed on the frontend exactly.

![The block on the frontend](https://imgur.elightup.com/TGtzQmW.png)

Besides the render-block-with-view feature, you also can try [registering a block using block.json file](https://metabox.io/mb-blocks-register-block-using-json-file/). All of them follow a goal: Making MB Blocks become a comprehensive tool for having the desired block for you.

# Reordering items by their values from cloneable custom fields - Meta Box + Bricks

import LiteYouTubeEmbed from 'react-lite-youtube-embed';
import 'react-lite-youtube-embed/dist/LiteYouTubeEmbed.css';

Today, we’ll **reorder items by their values from cloneable custom fields**. Imagine that you have a list of services, each with its own name and price, and you want to display them in order from the lowest to the highest. That’s exactly when this method comes in handy. In this tutotial, we’ll walk through a simple case study to show you how it’s done.

I created a car services pricing as an example. As you can see, this page contains the services and its price is sorted in ascending order. All of this information will be saved in the custom fields. 

![I created a car services pricing as an example](img/order-cloneable-field/demo-min.png)

In this practice, I’ll show you two different ways to do it. If you use a page builder, you can refer to the method with **Bricks**. In case you only use **Meta Box**, you can still do it with the support of **MB Views**. I will go into detail on both of these methods, so you can choose the most suitable method for yourself.

Let’s get started!

## Video Version

<LiteYouTubeEmbed id='sZynQjyc4Lw' />

## Preparation

I will use a cloneable group for demonstration in this practice. So, I recommend that you should use [Meta Box AIO](https://metabox.io/aio/) to have the framework for creating custom fields. As well as the Meta Box extensions inside it provide you with advanced features, specifically:

* [MB Builder](https://metabox.io/plugins/meta-box-builder/): to have a UI on the backend to create custom fields easily;
* [MB Group](https://metabox.io/plugins/meta-box-group/): to organize custom fields into the groups.

If you don't use any page builder like I mentioned before, you will need [MB Views](https://metabox.io/plugins/mb-views/) to create a template for displaying prices information and create order cloneable fields by value.

Otherwise, **Bricks** is used to build the layout and create a real-time filtering system using query loops and dynamic data.

Now, let’s go step by step.

## 1. Creating custom fields

To store car services details, we need to create a group of custom fields. They will cover key information such as services name and prices. Feel free to add additional fields depending on your needs.

Now, go to **Meta Box** > **Custom Fields**, and create a new field group. Here I created fields with this structure:

| Field         | Types of Field | ID           |
|--------------|----------------|--------------|
| Services     | Group          | services     |
| Service Name | Text           | service_name |
| Price        | Number         | price        |

This is a group with 2 subfields inside. I also set this group as cloneable to have more spaces to add different services information.

![This is a group with 2 subfields inside. I also set this group as cloneable to have more spaces to add different services information](img/order-cloneable-field/cloneable-min.png)

After saving, go to the page editor then you will see all of the custom fields. Just enter information for each service, you can press the **Add more** button to add another service for your needs.

![Just enter information for each service, you can press the Add more button to add another service for your needs](img/order-cloneable-field/add-more-min.png)

## 2. Method 1: Reordering items by their values from cloneable custom fields with Bricks

Let's sort the car service pricing from low to high by using **Bricks**. I have displayed the information on page first, if you want to see the details, you can find it on this practice. As you can see, the list of services' names and prices is fully displayed, but it is not sorted in any order. 

![As you can see, the list of services' names and prices is fully displayed, but it is not sorted in any order](img/order-cloneable-field/before-min.png)

Now I will arrange the value of the items as I want.

Since **Bricks** doesn't support sorting clonable field values ​​directly, I need to use code to do it.

Now, go to **Appearance** > **Theme File Editor** to add some code functions:

```php
$target_field_id = 'services';
$sort_field = 'price';
$location = 'page';

add_filter( 'bricks/query/run', function( $results, $query_obj ) use ( $target_field_id, $sort_field, $location ) {
	$expected_object_type = 'mb_' . $location . '_' . $target_field_id;
	if ( $query_obj->object_type !== $expected_object_type ) {
        return $results;
    }
	if ( is_array( $results ) && ! empty( $results ) ) {
        usort( $results, function( $a, $b ) use ( $sort_field ) {
            return ( $a[$sort_field] ) <=> ( $b[$sort_field] );
        });
    }
	return $results;
}, 20, 2 );
```

![Now, go to Appearance > Theme File Editor to add some code functions](img/order-cloneable-field/code-bricks-min.png)

**Explanation**:

* `$target_field_id = 'services'`: is the ID of the group that I want to sort. 
* `$sort_field = 'price'`: is the subfield of the group whose value I want to sort.
* `$location = 'page'`: is the location of the field group that is applied to. 
* `add_filter( 'bricks/query/run', function( $results, $query_obj ) use ( $target_field_id, $sort_field, $location ) {`:  is to add a function. It will help process the queried data above based on the declared variables. 
* `$expected_object_type = 'mb_' . $location . '_' . $target_field_id`: is to create the name of the object type that I want Bricks to query from the Meta Box data. It is related to these two variables: `$location` ; `$target_field_id`.
  
```php
if ( $query_obj->object_type !== $expected_object_type ) {
    return $results;
}
```
This part is to show that if the current query is not the query we want to intervene in, return the intact, unchanged result to avoid affecting other queries.

* `if ( is_array( $results ) && ! empty( $results ) ) {`: is to check if the data is an empty array or not.
  
```php
usort( $results, function( $a, $b ) use ( $sort_field ) {
	return ( $a[$sort_field] ) <=> ( $b[$sort_field] );
});
```
This part is to sort the values ​​in the array of this subfield in ascending order.

Here is the front-end page after I sorted items by value. As you can see, these values ​​are sorted in ascending order along with their corresponding service.

![Here is the front-end page after I sorted items by value](img/order-cloneable-field/item13-before-min.png)

The data of price can be dynamic, and the code still works well. For example, pay attention to this item.

![For example, pay attention to this item](img/order-cloneable-field/item13-setting-min.png)

Now, I change its value. 

![Now, I change its value](img/order-cloneable-field/item13-fix-min.png)

Then, that item is moved up to the top. That’s the result I expected.

![Then, that item is moved up to the top](img/order-cloneable-field/item13-after-min.png)

## 3. Method 2: Reordering items by their values from cloneable custom fields with MB Views

In the case that you don’t use any page builder, you can refer to this method. It is also simpler than the above method with the help of **MB Views** from **Meta Box**. I will also display the data first, then sort them.

Go to **Meta Box** > **Views**, and add a new view.

![Go to Meta Box > Views, and add a new view](img/order-cloneable-field/add-new-view-min.png)

In the **Template** tab, you can use the **Insert Field** button to insert fields or add code directly. 

First, add this code:
```
{% for clone in post.services %}
    {{ clone.service_name }} <br/>      
    {{ clone.price }} <br/>    
{% endfor %}
```

![First, add this code](img/order-cloneable-field/insert-field-min.png)

**In there**:

`{% for clone in post.services %}`: is to insert the service name and the price inside. Since it is a clonable group, it’ll be a loop. Inside this loop, insert the subfield you want to get the value of as usual.
`{{ clone.service_name }} <br/>` : is to get all values ​​of subfield in group with ID service_name
`{{ clone.price }} <br/>`: is to get all values ​​of subfield in group with ID price

After inserting all the fields you need, scroll down to the **Settings** section, choose the type of the template as **Singular**, set the **Location** as **Page**, then select your page you created for the car service pricing listing.

![After inserting all the fields you need, scroll down to the Settings section, choose the type of the template as Singular, set the Location as Page, then select your page you created for the car service pricing listing](img/order-cloneable-field/location-as-page-min.png)

Now, go to the page editor and view it on the frontend, you can see all the data is displayed.

![Now, go to the page editor and view it on the frontend, you can see all the data is displayed](img/order-cloneable-field/before-view-min.png)

To make the page more beautiful, I’m adding some div tags and classes, as well as modifying the code a little bit.

![To make the page more beautiful, I’m adding some div tags and classes, as well as modifying the code a little bit](img/order-cloneable-field/add-div-tags-min.png)

Then, move to the **CSS** tab and add code. 

![Then, move to the CSS tab and add code](img/order-cloneable-field/CSS-min.png)

After styling, our page is like this.

![After styling, our page is like this](img/order-cloneable-field/before-min.png)

Now, it’s time to order them. Back to the created template to add code for this purpose.

![Back to the created template to add code for this purpose](img/order-cloneable-field/add-code-mbview-min.png)

**Specifically**:

```
{% set sorted_services = post.services|sort((a, b) => a.price <=> b.price) %}
```

This line is to declare that we’ll create a new array containing a list of services with their prices sorted from low to high. This value will be taken from the subfield with ID price.

Don't forget to update the array you'll be querying for this loop.

![Don't forget to update the array you'll be querying for this loop](img/order-cloneable-field/update-code-min.png)

That's all. It's so simple. All the code is updated on [GitHub](https://github.com/wpmetabox/tutorials/tree/master/ordering-cloneable-fields-by-value) for your reference.

Now, let’s check the page on the frontend; these are our expected results. 

![Now, let’s check the page on the frontend; these are our expected results](img/order-cloneable-field/after-min.png)

# Reordering posts manually using custom fields

import LiteYouTubeEmbed from 'react-lite-youtube-embed';
import 'react-lite-youtube-embed/dist/LiteYouTubeEmbed.css';

Arranging posts in a custom order will be much easier if you use custom fields. It allows you to set any post first without criteria.

![An example of arranging posts in a custom order](https://imgur.elightup.com/Z2Xhqlj.png)

This is the new order of the posts as you can see.

![This is the new order of the posts](https://imgur.elightup.com/HVGMR2D.png)

## Video Version

<LiteYouTubeEmbed id='qX9oPY9yS-E' />

## Preparation

To get started, we need the **Meta Box** to have the framework for creating custom fields. It’s free, so you can download it directly from [wordpress.org](https://wordpress.org/plugins/meta-box/).

Also, we’ll use some of Meta Box’s extensions:

* [MB Builder](https://metabox.io/plugins/meta-box-builder/): to have a UI on the back end to create custom fields easily.

* [Meta Admin Columns](https://metabox.io/plugins/mb-admin-columns/): to manage the posts and view the order more easily in the WordPress admin.

## 1. Creating custom fields

We’ll need to create a custom field to enter the ordinal number for posts like this.

![This is a custom field for enter the ordinal number for posts](https://imgur.elightup.com/iKYGTdL.png)

When you put in a number, we will show it in the dashboard to easily see the position of all the posts.

![This is the position of all the posts](https://imgur.elightup.com/obMNFXu.png)

[MB Builder](https://metabox.io/plugins/meta-box-builder/) can help you easily create custom fields without touching any line of code.

In the dashboard, go to **Meta Box** > **Custom Fields**, click **Add New** button to create a new field group.

![Go to Meta Box > Custom Fields, click Add New button to create a new field group](https://imgur.elightup.com/ZmDvKsK.png)

Choose the **Number** field since we just want to enter a number into the field.

![Choose the Number field to enter a number into the field.](https://imgur.elightup.com/RqeLAVg.png)

I named the field as **Order of the Post** to easily identify it. Now, look at the field’s ID that I marked, you can use the automatically generated ID by Meta Box builder or replace it with your own ID for easy memorizing.

![This is the field’s ID to use the automatically generated ID by Meta Box builder ](https://imgur.elightup.com/ck4OBY6.png)

To see exactly the order by the ordinal number, you can set the field display as an admin column. This setting is available only when you activate the [MB Admin Columns](https://metabox.io/plugins/mb-admin-columns/) extension. Just turn on this button, and then set the position for the column.

![This is an admin column to see exactly the order by the ordinal number](https://imgur.elightup.com/Ug3lln7.png)

After having the field, move to the **Settings** tab, set the **Location** as **Post Type** and select **Post** or your own custom post type to apply the field to it.

![After having the field, move to the Settings tab, set the Location as Post Type and select Post or your own custom post type to apply the field](https://imgur.elightup.com/PAknb6n.png)

After creating the custom field, move to **Post Editor**, open a post that you want to reorder, and find the created field. Enter the number that you want this post to display and update the article.

![Move to Post Editor, enter the number that you want this post to display and update the article.](https://imgur.elightup.com/6ZQsDWQ.png)

After filling in the numbers for posts, you will see them in the admin screen like this.

![After filling in the numbers for posts, you will see them in the admin screen](https://imgur.elightup.com/ZEnMvCA.png)

## 2. Displaying posts in the custom order

Go to a page, and add the **Latest Posts** block.

![Go to a page, and add the Latest Posts block.](https://imgur.elightup.com/L5yd8BB.png)

These posts are displayed in the order based on published date order by default. To change the order to your custom one, we should add some code to the theme’s files.

Look for the **functions.php** file. Add code like this.

```
function memory_custom_post_order_sort( $query ) {
    if ( !$query->is_main_query() && $query->is_home() ) {
        $query->set( 'orderby', 'meta_value_num' );
        $query->set( 'meta_key', 'mb_order' );
        $query->set( 'order', 'ASC' );
    }
}
add_action( 'pre_get_posts', 'memory_custom_post_order_sort' );
```

![Add code in the functions.php file](https://imgur.elightup.com/oZUI1Sb.png)

**Explanation:**

* `'pre_get_posts'`: the hook that fires just before the post query is created
* `is_home()`: ensure that the reordering happens on the homepage only.

```
query->set( 'orderby', 'meta_value' );
$query->set( 'meta_key', 'mb_order' );
$query->set( 'order', 'ASC' );
```

These 3 lines arrange your posts in ascending order according to the value of the field with ID **'mb_order'**. Replace **'mb_order'** with your field ID if you use another ID.

`'ASC'`: display your post in ascending order. If you want the reverse order, change `'ASC'` to `'DESC'`.

After that, save the code and go back to the page on frontend. You will see the new order of the posts. It’s exactly with the number that I entered for them.

![This is the new order of the posts.](https://imgur.elightup.com/HVGMR2D.png)

# Filter posts by relationships - Meta Box + Bricks

import LiteYouTubeEmbed from 'react-lite-youtube-embed';
import 'react-lite-youtube-embed/dist/LiteYouTubeEmbed.css';

Imagine that you’re building an internal company portal with training documents. Each document is linked to a department through a **Meta Box relationship**. When employees in different departments log in, they should only see the documents assigned to their department, not the ones from others.

![Role-Based Access Control with Meta Box + Bricks](img/role-based-access-control-metabox-bricks/result.gif)

Normally, you might filter posts by taxonomy, or by a custom field value. That works fine in many cases. But here, instead of that, we’ll filter **based on relationships between posts**. This approach is different, and can be applied to a variety of scenarios. For example:

* Showing announcements targeted to specific groups of employees.
* Assigning work shifts, like on-duty doctors for a given day.
* Listing staff members by department or specialty.

The key idea is that access control relies on conditional display. Bricks supports conditions out of the box, and in this tutorial, I’ll walk you through how to combine that with Meta Box relationships to restrict and display posts exactly as needed.

Let’s dive in!

## Video version

<LiteYouTubeEmbed id='GQ8g5oV0KTg'/>

## Preparation

In this tutorial, we’ll use the default **WordPress Posts** for the documents and a separate custom post type for **Departments**. Each post will represent a piece of document, and we’ll connect it to one or more departments using a **Meta Box relationship**. Logged-in users will then only see posts linked to their own department.

To make the setup smoother, I recommend using [Meta Box AIO](https://metabox.io/aio/). It gives you all the necessary extensions in one package without having to install each separately.

And, **Bricks** is used to build the layout and set up the filter so that only the posts belonging to the logged-in user’s department are displayed.

Now, let’s go step by step.

## Creating a custom post type

Go to **Meta Box** to create a new custom post type for the **Departments**.

![Create post type](img/role-based-access-control-metabox-bricks/create-post-type.png)

After publishing, you’ll see the created custom post types in the admin menu. And you can see some departments I created as posts, such as Marketing, Development, Human Resources, and Sales.

![Department post type](img/role-based-access-control-metabox-bricks/department-post-type.png)

## Creating the relationship

Go to **Meta Box** > **Relationships** to create a relationship between the default Posts - documents - and the **Departments** post type.

![create a relationship between posts and the Departments](img/role-based-access-control-metabox-bricks/create-relationship.png)

We have the **From** and **To** sections. The relationship is bidirectional, which means it doesn’t matter which side you set up first - data will be linked both ways.

In this case, both sections will have the Object Type set to Post, since we’re connecting the default Posts with the Departments custom post type.

![From and To relationship section](img/role-based-access-control-metabox-bricks/from-to-relationship-sections.png)

In the **From** section, choose Post in the **Post type** option because I set it for the default posts, and the rest is **Department** post type.

![choose Post type option](img/role-based-access-control-metabox-bricks/post-type-option-for-relationship.png
)

Pay attention to the **Show as an admin column** setting. It’s available when you activate the **MB Admin Columns** extension. When you check it, there’ll be a column in the dashboard to show which departments are related to the document and which posts are related to departments.

![Show admin columns](img/role-based-access-control-metabox-bricks/show-admin-columns.png)

After publishing, go to create a new post; you can see a section allowing you to select several departments.

![Department section in post editor](img/role-based-access-control-metabox-bricks/department-section-in-post-editor.png)

Here’s an example of how the relationship between learning posts and departments looks in the admin dashboard.

![relationship admin dashboard](img/role-based-access-control-metabox-bricks/relationship-admin-dashboard.png)

## Creating a custom field for the users

To assign each user to a specific department, we’ll create a custom field that stores this information.

Now, go to **Meta Box** > **Custom Fields**, and create a new field group.

![Create custom fields](https://i0.wp.com/images.elightup.com/meta-box/blog/filter-post-relationship-metabox-bricks/create-custom-fields.png)

Choose the field type as **Post**. And in the **Post types** option, select the exact post type. This will allow us to assign the correct department to each user.

![(Post field type](img/role-based-access-control-metabox-bricks/post-field-type.png)

For better usability, you can also enable the **Admin columns** option to display the user’s department directly in the user list.

![Admin columns for field](img/role-based-access-control-metabox-bricks/admin-columns-for-field.png)

Next, switch to the **Settings** tab and set the **Location** to **User** so the field appears in the user profile editing screen.

![Field-group-settings](img/role-based-access-control-metabox-bricks/field-group-settings.png)

After publishing, open any user profile editor, and you’ll see the new **Department** section. Simply select the department you want to assign to that user and update the profile.

![Department in profile editor](img/role-based-access-control-metabox-bricks/department-in-profile-editor.png)

At this point, every user is now placed into their respective department.

## Showing all posts on the page

Now, let’s display the full list of documents on a page, whether or not they have assigned departments. Later, we’ll add a filter to show only those from a specific department.

First, create a new page named **Documents**. Then, edit the page with **Bricks**.

![Edit with Bricks](img/role-based-access-control-metabox-bricks/edit-page-with-bricks.png)

To start building the layout, add a **Section** element to cover all the page content. There’s already a **Container** available inside, so we’ll add elements into this container to show the list of documents.

![A Section element to cover all the page content](img/role-based-access-control-metabox-bricks/section-cover-documents.png)

Before going further, add a **Post Title** element. It will automatically display the title of the current page on the frontend.

![Get page type](img/role-based-access-control-metabox-bricks/get-page-title.png)

We want to display all documents, so we need to use a query loop. To do that, select a **Div** as the wrapper, and enable the **Query loop** button. And in the **Query** section, choose the default Posts. And enter `-1` in the Posts per page section so that it will retrieve all the documents. I mean all the posts

![Query all posts](img/role-based-access-control-metabox-bricks/query-all-posts.png)

Also, add the second **div** that will later be used to filter the documents into their respective departments. That part will come in the next step.

![Div to filter posts](img/role-based-access-control-metabox-bricks/div-to-filter-posts.png)

Inside this div, add some elements to display each document’s details.

Choose the **Image** element for the post’s image. Since these are the post’s featured images, click the **Dynamic Data** icon and choose the **Featured Image** option. As you can see, the image is displayed in the preview.

![Get post image](img/role-based-access-control-metabox-bricks/get-post-image.png)

Next, add another **Div** to hold the other information, like the title, department, and publish date, for styling purposes.

Now, choose the **Post Title** element to display the title of each document within the query loop. This is different from the page’s Post Title element added earlier, as it specifically pulls the title from each post in the loop.

![Get post title](img/role-based-access-control-metabox-bricks/get-post-title.png)

To show the department that the document is assigned, add a **Basic Text** element. As this info is saved in Meta Box’s relationship, in the **Content** section, we’ll use the **Dynamic Data** and then look for the relationship to connect posts with departments. This ensures each document displays its correct department. So, now we can see the department for that post.

![Display-department](img/role-based-access-control-metabox-bricks/display-department.png)

Finally, for the date of publishing, select another **Basic Text** element. Add a label as you want. Then, use the **Dynamic data** button again and choose the **Post date** option. The label will always display alongside the post date.

![Get post date](img/role-based-access-control-metabox-bricks/get-post-date.png)

All the information for the documents and their assigned departments is in place.

View the page on the frontend: the list of documents is now showing up whether they are assigned to a department or not. However, the layout is still quite basic, so let’s make it more visually appealing.

![Documents display before-styling](img/role-based-access-control-metabox-bricks/documents-display-before-styling.gif)

To style it, choose each element and adjust its settings as desired. Once styled, the list will look much better.

![Document after styling](img/role-based-access-control-metabox-bricks/all-document-after-styling.png)

Next, we’ll move on to filtering the posts conditionally by their department relationship.

## Filtering posts conditionally by relationship

Now we’re going to add conditions so the list only shows posts that belong to the logged-in user’s department.

Head back to the page editor with **Brick**. In the second div that we created earlier, click the **Conditions** icon to start setting them up.

![Set conditions](img/role-based-access-control-metabox-bricks/set-conditions.png)

**In there**:

1. Add a condition to check whether the user is logged in. For that, select **User login**, set the operator to **Is**, and the value to **logged in**. This way, if the user isn’t logged in, they won’t see any posts at all.
2. Set the second condition to match the post’s department with the user’s department. Choose **Dynamic data**, then select the relationship between posts and departments. This returns the list of department names that are linked to the current post. Set the operator to **contains**, meaning we’re checking whether that list includes a certain value. For the value, choose **Department** custom fields, which retrieves the department assigned to the currently logged-in user. This way, Bricks will only display posts whose related departments include the user’s own department.

Let’s tidy things up a bit. Add a custom class named `mb-content` to the parent div that wraps each post. After that, add this snippet to the **CSS** tab. This hides any div that doesn’t contain post content, so we don’t get any awkward blank spaces on the page.

![Add css](img/role-based-access-control-metabox-bricks/add-css.png)

With this setup, only posts whose department matches the logged-in user’s department will be displayed. For example, if you log in as a Developer staff member, you’ll only see posts from the Developer department. If you switch to an HR account, you’ll only see posts from HR and so on.

![ressult](img/role-based-access-control-metabox-bricks/result.gif)

# Searching posts by taxonomy on archive page - P1 - Using Meta Box

import LiteYouTubeEmbed from 'react-lite-youtube-embed';
import 'react-lite-youtube-embed/dist/LiteYouTubeEmbed.css';

We’ll create taxonomies for a custom post type, and in the archive page of this post type, also create a search box that allows users to search for posts based on the name of the taxonomy.

Here is an example of this practice with hotels filtered by location:

![Example of seraching posts by taxonomy](https://i0.wp.com/images.elightup.com/meta-box/blog/filter-posts-taxonomy-archive-page/filter-posts-by-taxonomy.gif)

## Video version

<LiteYouTubeEmbed id='IIVktyNygsg'/>

## Preparation

In this tutorial, we’ll create taxonomies for a custom post type and also create a search box that allows users to search for posts (like hotels) based on the name of the taxonomy (like location).

Therefore, I recommend using the free version - [Meta Box Lite](https://metabox.io/lite/). You can download it from our website directly. With just this version, you’ll already have the framework and the [MB Custom Post Type & Custom Taxonomies](https://metabox.io/plugins/custom-post-type/) extension, which are all you need to create a custom post type for hotels and a custom taxonomy for locations.

If you're using [Meta Box AIO](https://metabox.io/aio/), you definitely already have the framework and that needed free extension.

Besides, we’ll use PHP code for searching hotels by location, so add it to your theme’s file.

Let’s start now.

## 1. Creating a new custom post type and a custom taxonomy

As I mentioned earlier, we’ll start by creating a new custom post type named **Hotel**, and the information of each hotel will be saved as a post of that post type. Then, I’ll create a custom taxonomy for that post type to categorize the hotels based on their locations.

Now, go to **Meta Box** > **Post Types** to create a new custom post type for the hotels.

![Create a new custom post type for the hotels.](https://i0.wp.com/images.elightup.com/meta-box/blog/filter-posts-taxonomy-archive-page/new-post-type-hotel.png)

After publishing, you’ll see the created custom post type in the menu dashboard.

![The created custom post type in the menu dashboard](https://i0.wp.com/images.elightup.com/meta-box/blog/filter-posts-taxonomy-archive-page/created-post-type-menu.png) 

Next, still in the Meta Box screen, create a new taxonomy for location information.

![Create a new taxonomy for location information.](https://i0.wp.com/images.elightup.com/meta-box/blog/filter-posts-taxonomy-archive-page/new-taxonomy-location.png)

In the **Advanced** tab, pay attention to this setting. It’s available when you activate the [MB Admin Columns](https://metabox.io/plugins/mb-admin-columns/) extension. It’s optional, so I did not mention it before. When you check it, there’ll be a column in the dashboard to show the hotel’s location so that you can compare the results conveniently.

![Set up settings for taxonomy.](https://i0.wp.com/images.elightup.com/meta-box/blog/filter-posts-taxonomy-archive-page/taxonomy-settings.png) 

Move to the **Post Types** tab, and choose the Hotel to assign the custom taxonomy that we’ve created to that post type.

![Assign the custom taxonomy that we’ve created to that post type.](https://i0.wp.com/images.elightup.com/meta-box/blog/filter-posts-taxonomy-archive-page/assign-taxonomy-post-type.png) 

Now, in the post editor of the **Hotel** post type, we’ll see the taxonomy section, where we can enter the hotel location.

![We’ll see the taxonomy section in the post editor of the Hotel post type.](https://i0.wp.com/images.elightup.com/meta-box/blog/filter-posts-taxonomy-archive-page/taxonomy-section-post-editor.png)

Just fill in all the information.

These are some created posts, for example. The location as well as the taxonomy also display in the admin dashboard.

![The location as well as the taxonomy also display in the admin dashboard.](https://i0.wp.com/images.elightup.com/meta-box/blog/filter-posts-taxonomy-archive-page/taxonomy-admin-dashboard.png)

**Note**: I just entered a few sample locations as an example. In reality, you’ll probably have a large set of location data across multiple levels, such as countries, provinces, cities, or regions. That time, instead of adding them manually, you should import the data directly into the **Location** taxonomy to save time. You can use plugins to easily import data.

## 2. Creating a search box for searching posts by taxonomy

Before creating a search box, we need to make sure that the archive page can already display all the posts, I mean all the hotels.

First, go to the theme folder. As I mentioned, I’m using the **Justread** theme. So, create a new PHP file, then add some code.

```
get_header();
the_archive_title( '<h1 class="page-title">', '</h1>' );
the_archive_description( '<div class="archive-description">', '</div>' );
if ( have_posts() ) :
    while ( have_posts() ) : the_post();
        get_template_part( 'template-parts/content', get_post_format() );
    endwhile;
else :
    get_template_part( 'template-parts/content', 'none' );
endif; ?>
get_footer();
```

![Create php file and add code](https://i0.wp.com/images.elightup.com/meta-box/blog/filter-posts-taxonomy-archive-page/php-file.png)

Let’s take a look at some key parts:

```
the_archive_title( '<h1 class="page-title">', '</h1>' );
the_archive_description( '<div class="archive-description">', '</div>' );

These lines are for displaying the archive page title and its description. 

if ( have_posts() ) :
    while ( have_posts() ) : the_post();
        get_template_part( 'template-parts/content', get_post_format() );
    endwhile;
else :
    get_template_part( 'template-parts/content', 'none' );
endif; ?>
```

These lines of code check if there are any posts. If there are, it loads the corresponding template to display the post content.

Next, add some `div` tags and classes to make styling easier.

![Add some div tags and classes to make styling easier.](https://i0.wp.com/images.elightup.com/meta-box/blog/filter-posts-taxonomy-archive-page/add-div-tags-classes.png)

After that, let’s create an archive page. Remember to set the right slug so that it will point to the correct archive of the **Hotel** post type.

![Set the right slug so that it will point to the correct archive of the Hotel post type](https://i0.wp.com/images.elightup.com/meta-box/blog/filter-posts-taxonomy-archive-page/set-slug.png)

When you check the frontend, you only see all the hotel posts listed.

![All the hotel posts listed](https://i0.wp.com/images.elightup.com/meta-box/blog/filter-posts-taxonomy-archive-page/hotel-posts-listing.png)

Now, come to the most important part of this step - creating a search box to filter hotels by location.

Back in the theme’s file again, add the following code to show the filter box and search button.

```
<div class="filter-hotel" style="margin-left:48px;">
    <p>Search Hotel</p>
    <input class="filter-input" id="location" type="" name="" placeholder="Location">
    <input class="filter-action" type="submit" name="" value="Search">
</div> 
```

![Add the following code to show the filter box and search button.](https://i0.wp.com/images.elightup.com/meta-box/blog/filter-posts-taxonomy-archive-page/create-filter-box-search-button.png)

This HTML structure creates a simple filter box with a text input for location and a search button.

![A simple filter box with a text input for location and a search button.](https://i0.wp.com/images.elightup.com/meta-box/blog/filter-posts-taxonomy-archive-page/text-input-%20location-search-%20button.gif)

Let’s make it functional in the next step.

## 3. Displaying posts that meet the specific criterion

I want the page not to reload when users click the Search button, so I use Ajax to filter.

### 3.1 Setting up data and Ajax

First, go to the **functions.php** file, and add some code to set things up:

```
function justread_custom_scripts() {
    $terms = get_terms( array(
        'taxonomy'   => 'location',
        'hide_empty' => false,
    ) );
    foreach ( $terms as $term ) {
        $location[] = $term->name;
    }
    $object = [
        'ajax_url' => admin_url( 'admin-ajax.php' ),
        'location_autocomplete' => $location,
    ];

    wp_enqueue_style( 'style-jquery', '//code.jquery.com/ui/1.13.2/themes/base/jquery-ui.css', true );
    wp_enqueue_script( 'jquery-ui-library', 'https://code.jquery.com/ui/1.13.2/jquery-ui.js', array( 'jquery' ), '', true );
    wp_enqueue_script( 'justread-ajax-filter-hotel', get_stylesheet_directory_uri() . '/js/filter-hotel.js', array( 'jquery' ), '', true );
    wp_localize_script( 'justread-ajax-filter-hotel', 'ajax_object', $object );
}
add_action( 'wp_enqueue_scripts', 'justread_custom_scripts' );
```

![Add code to the function.php](https://i0.wp.com/images.elightup.com/meta-box/blog/filter-posts-taxonomy-archive-page/add-code-function-php.png)

**Specifically**:

```
$terms = get_terms( array(
        'taxonomy'   => 'location',
        'hide_empty' => false,
) );
```

We create an array retrieving all the Location taxonomy terms.

```
foreach ( $terms as $term ) {
        $location[] = $term->name;
}
```

This helps loop through terms to get their names.

```
$object = [
        'ajax_url' => admin_url( 'admin-ajax.php' ),
        'location_autocomplete' => $location,
];
```
This part is to have an object that sends each taxonomy value to the AJAX handler for processing.

And include some necessary libraries in the theme.

```
wp_enqueue_style( 'style-jquery', '//code.jquery.com/ui/1.13.2/themes/base/jquery-ui.css', true );
wp_enqueue_script( 'jquery-ui-library', 'https://code.jquery.com/ui/1.13.2/jquery-ui.js', array( 'jquery' ), '', true );
```
Afterward, use the line below to add scripts and styles using the `justread_custom_scripts` function.

```
add_action( 'wp_enqueue_scripts', 'justread_custom_scripts' );
```
### 3.2 Quering posts

Next, still in the function.php file, add more code to query the custom post type data when someone clicks the Search button.

```
function justread_filter_hotel() {
    $location = $_POST['location'];
    $query_arr = array(
        'post_type' => 'hotel',
        'post_status' => 'publish',
        'tax_query' => array(
            array(
                'taxonomy' => 'location',
                'field'    => 'name',
                'terms'    => array( $location ),
                'operator' => 'IN',
            ),
        ),
    );
    $query = new WP_Query( $query_arr );

    if ( $query->have_posts() ) :
        ob_start();
        while ( $query->have_posts() ) : $query->the_post();
            get_template_part( 'template-parts/content', get_post_format() );
        endwhile;
        $posts = ob_get_clean();
    else :
        $posts = '<h1>' . __( 'No post', 'justread' ) .'</h1>';
    endif;

    $return = array(
        'post' => $posts,
    );
    wp_send_json( $return );
}
add_action( 'wp_ajax_justread_filter_hotel', 'justread_filter_hotel' );
add_action( 'wp_ajax_nopriv_justread_filter_hotel', 'justread_filter_hotel' );
```
**Explanation**:

```
function justread_filter_hotel() {
    $location = $_POST['location'];
    $query_arr = array(
        'post_type' => 'hotel',
        'post_status' => 'publish',
        'tax_query' => array(
            array(
                'taxonomy' => 'location',
                'field'    => 'name',
                'terms'    => array( $location ),
                'operator' => 'IN',
            ),
        ),
    );
    $query = new WP_Query( $query_arr );
```
This is to query the hotel post type that matches the location name selected by the user. It uses the criteria defined in the `$query_arr` variable to retrieve the matching posts.

```
if ( $query->have_posts() ) :
        ob_start();
        while ( $query->have_posts() ) : $query->the_post();
            get_template_part( 'template-parts/content', get_post_format() );
        endwhile;
        $posts = ob_get_clean();
    else :
        $posts = '<h1>' . __( 'No post', 'justread' ) .'</h1>';
    endif;

    $return = array(
        'post' => $posts,
    );
    wp_send_json( $return );
```

This code checks if there are posts in the query. If so, it gets the content by loading the appropriate template part. If there are no posts, it shows a “No post” message.

```
add_action( 'wp_ajax_justread_filter_hotel', 'justread_filter_hotel' );
add_action( 'wp_ajax_nopriv_justread_filter_hotel', 'justread_filter_hotel' );
```

These lines allow the `justread_filter_hotel` function to respond to AJAX requests from all users, whether they are logged in or not. **In there**: `'wp_ajax_justread_filter_hotel'` and `'wp_ajax_nopriv_justread_filter_hotel'` are two hooks to perform ajax. They’re named according to the following rule: `wp_ajax_my_action` and `wp_ajax_nopriv_my_action`. In this example, `my_action` is `justread_filter_hotel`.

### Add Script for Filtering

Back to your theme’s file, add a new JS file to run the action filtering the posts. Also, add some code and go through it in more detail.

```
jQuery( function ( $ ) {
    function filterHotel() {
        var location = ajax_object.location_autocomplete;
        $( '#location' ).autocomplete({
            source: location
        });

        $( '.filter-action' ).on( 'click', function() '{
            var location = $( '#location' ).val();
            jQuery.ajax({
                url: ajax_object.ajax_url,
                type: "POST",
                data: {
                    action: 'justread_filter_hotel',
                    location: location,
                },
                success: function(response) {
                    $( '.site-main' ).html(response.post);
                }
            });
        } );
    }
    filterHotel();
} );

```

![Add a new JS file to run the action filtering the posts.](https://i0.wp.com/images.elightup.com/meta-box/blog/filter-posts-taxonomy-archive-page/js-file.png)

**Explanation**:

```
var location = ajax_object.location_autocomplete;
```

The `location` variable gets list values ​​of taxonomies.

```
$( '#location' ).autocomplete({
      source: location
});
```
This is to display a list of associated taxonomies when entering text in the input search box.

```
$( '.filter-action' ).on( 'click', function() '{
```

This line detects when the search button is clicked on the website.

```
var location = $( '#location' ).val();
```

This is to get the text that the user types into the search box.

```
jQuery.ajax({
      url: ajax_object.ajax_url,
      type: "POST",
      data: {
            action: 'justread_filter_hotel',
            location: location,
      },
      success: function(response) {
            $( '.site-main' ).html(response.post);
       }
 });
```
This jQuery code sends a request to get data using the `justread_filter_hotel. function`, and update the main section with the results.

```
filterHotel();
```

This simply activates the function that we created before.

### 3.3 Registering JS file

Now, move to the **function.php** to register the JS file.

```
wp_enqueue_script( 'justread-ajax-filter-hotel', get_stylesheet_directory_uri() . '/js/filter-hotel.js', array( 'jquery' ), '', true );
wp_localize_script( 'justread-ajax-filter-hotel', 'ajax_object', $object );
```

![Register the JS file](https://i0.wp.com/images.elightup.com/meta-box/blog/filter-posts-taxonomy-archive-page/register-js-file.png)

In there: The `wp_enqueue_scripts` hook is used to declare the file. And use the `wp_localize_script` function that helps transfer the taxonomy values from the PHP file to the JS file.

When you enter a location in the Search box, only the hotels in that location will be returned and displayed on the page.

![Filter posts by taxonomy](https://i0.wp.com/images.elightup.com/meta-box/blog/filter-posts-taxonomy-archive-page/filter-posts-by-taxonomy.gif)

In this way, you can create similar filters to search for hotels or posts by any criteria. You can apply it flexibly to create more filtering features for your website. Hope this tip is helpful for you!

If you found this helpful, you might also like these tutorials about [creating a simple listing](https://docs.metabox.io/tutorials/create-simple-listing-meta-box-bricks/), [filtering posts by custom taxonomies](https://docs.metabox.io/tutorials/filter-posts-by-custom-fields-taxonomies/).

# Searching Posts on a Map - MB Views

import LiteYouTubeEmbed from 'react-lite-youtube-embed';
import 'react-lite-youtube-embed/dist/LiteYouTubeEmbed.css';

Today, we are going to find out how to **search posts on a map** using **MB Views**. Imagine that you run a restaurant chain, coffee shop, store, or any business with locations in different cities. Displaying all of them on a single map helps users get a clear overview and explore what’s available at a glance. This is exactly where this method becomes useful. 

I created a map like that for example. It allows users to filter restaurants by rating, type, price, distance in kilometers from the user’s current location, helping them quickly find exactly what they need. 

![I created a map like that for example](img/search-posts-on-map/demo1.gif)

First, I’ll display all the restaurant posts directly on the map so you can see how the locations appear. After that, I’ll move on to building the search filters that will allow users to refine and find restaurants based on specific criteria. 

Let’s get started!

## Video version

<LiteYouTubeEmbed id='CUnT6oucGBs'/>

## Preparation

In this practice, the information of each restaurant will be saved as a post of a custom post type and I will use custom fields for the address, location, rating, price and cuisine type. 

So, I recommend that you should use [Meta Box AIO](https://metabox.io/aio/) to have the framework for creating a template, a custom post type and custom fields. As well as the Meta Box extensions inside it, provide you with advanced features, specifically:

* [MB Custom Post Type](https://metabox.io/plugins/custom-post-type/): to create a custom post type for the restaurants;
* [MB Builder](https://metabox.io/plugins/meta-box-builder/): to have a UI in the back end to create custom fields easily;
* [MB Views](https://metabox.io/plugins/mb-views/): to create a page template for displaying the listings and filtering it on the map.

Now, let’s go step by step.

## 1. Creating a custom post type and custom fields

Go to **Meta Box** and create a new post type for your listings. Here I’ve already set up a post type. 
 
![Here I’ve already set up a post type](img/search-posts-on-map/post-type.png)

And I’ve done the same for the custom fields as well. If you want to see the details, you can find it on [this practice](https://docs.metabox.io/tutorials/create-download-preview-buttons-mb-views/). 

![And I’ve done the same for the custom fields as well](img/search-posts-on-map/custom-field.png)

I created a field group with fields like this. You can customize it as needed.  

![I created a field group with fields like this](img/search-posts-on-map/field-group.png)

Go to the post editor, you will see the created custom fields.

![Go to the post editor, you will see the created custom fields](img/search-posts-on-map/field-created.png)

## 2. Showing restaurants on the map

In this step, we’ll show all posts on the page using **MB Views** from **Meta Box**, which means displaying all restaurants. For filtering, I’ll do it later. We already have a case study that shows how to display listings on a map. You can find it on [this tutorial](https://docs.metabox.io/tutorials/display-listings-on-map/). 

First, create a new page for the restaurant listing. 

![First, create a new page for the restaurant listing](img/search-posts-on-map/new-page.png)

Then, go to **Meta Box** > **Views** and add a new view.

![Then, go to Meta Box > Views and add a new view](img/search-posts-on-map/add-new-view.png)

In the **Template** tab, I’m going to add some code. You can use the **Insert Field** button to insert fields or add code directly. 
```
{% set args = { post_type: 'restaurant', posts_per_page: -1 } %}
{% set posts = mb.get_posts(args) %}

{% for post in posts %}
    {{ post.address }} <br/>
    {{ post.location.latitude }} <br/>
    {{ post.location.longitude }} <br/>
    {{ post.rating.value }} <br/>
    {{ post.price }} <br/>
    {{ post.cuisine_types.value }} <br/>
{% endfor %}
```
![In the Template tab, I’m going to add some code](img/search-posts-on-map/code1-insert.png)

**In there**:

* `{% set args = { post_type: 'restaurant', posts_per_page: -1 } %}`: is to declare that we’ll get posts from the restaurant post type. 
* `mb.get_posts(args)`: is used as a function to get posts. 
* `{% for post in posts %}`: is to insert the restaurant information inside. There will be multiple posts so we have a loop. Inside this loop, insert the field you want to get the value of as usual.
* `{{ post.address }}`: is to get all values in a post ​​with an ID `address`.
* `{{ post.location.latitude }}`:  is to get all values in post ​​with ID `location.latitude`
* `{{ post.location.longitude }}`:  is to get all values in post ​​with ID `location.longitude`
* `{{ post.rating.value }}`:  is to get all values in post ​​with ID `rating`
* `{{ post.price }}`:  is to get all values in post ​​with ID `price`
* `{{ post.cuisine_types.value }}`:  is to get all values in post ​​with ID `cuisine_types`

After inserting all the fields you need, scroll down to the **Settings** section, choose the type of the template as **Singular**, set the **Location** as **Page**, then select your page you created for the filter restaurants.

![After inserting all the fields you need](img/search-posts-on-map/settingtab.png)

Now, go to the page editor and view it on the frontend, you can see all the data is displayed.

![Now, go to the page editor and view it on the frontend, you can see all the data is displayed](img/search-posts-on-map/demo2a.gif)

To improve the layout and show the restaurant information on a map instead of plain text from custom fields, I'm going back to the template to add a few divs, classes, and a small amount of code.
```
<link rel="stylesheet" href="https://unpkg.com/leaflet@1.9.4/dist/leaflet.css" />
<script src="https://code.jquery.com/jquery-3.7.1.min.js"></script>
<script src="https://unpkg.com/leaflet@1.9.4/dist/leaflet.js"></script>

{% set args = { post_type: 'restaurant', posts_per_page: -1 } %}
{% set posts = mb.get_posts(args) %}

<div id="map"></div>
{% set restaurantsArray = [] %}

{% for post in posts %}
    {% set lat = post.location.latitude %}
    {% set lng = post.location.longitude %}
    {% set rating_num = post.rating.value %}
    {% set cuisine = post.cuisine_types.value %}
    {% set price = post.price %}
    {% set address = post.address %}

    {% set restaurantsArray = restaurantsArray|merge([{
        'id': post.ID,
        'title': post.title,
        'lat': lat,
        'lng': lng,
        'rating_num': rating_num,
        'cuisine': cuisine,
        'price': price,
        'address': address
    }]) %}
{% endfor %}

<div id="restaurants-data" data-items='{{ restaurantsArray|json_encode()|raw }}' style="display:none;"></div>
```
![To improve the layout and show the restaurant information on a map instead of plain text from custom fields](img/search-posts-on-map/template2.png)

**Explanation**: 
```
<link rel="stylesheet" href="https://unpkg.com/leaflet@1.9.4/dist/leaflet.css" />
<script src="https://code.jquery.com/jquery-3.7.1.min.js"></script>
```
This code is to download and declare the Leaflet JavaScript library.
`<script src="https://unpkg.com/leaflet@1.9.4/dist/leaflet.js"></script>`: is to add the jQuery library.

`<div id="map"></div>`: is to display the map.
```
{% set restaurantsArray = [] %}

{% for post in posts %}
    {% set lat = post.location.latitude %}
    {% set lng = post.location.longitude %}
    {% set rating_num = post.rating.value %}
    {% set cuisine = post.cuisine_types.value %}
    {% set price = post.price %}
    {% set address = post.address %}

    {% set restaurantsArray = restaurantsArray|merge([{
        'id': post.ID,
        'title': post.title,
        'lat': lat,
        'lng': lng,
        'rating_num': rating_num,
        'cuisine': cuisine,
        'price': price,
        'address': address
    }]) %}
{% endfor %}
```
This part is to create an array to get all data in each post about: ID, Name, Coordinates, Price, Rating, Cuisine and Address.

`<div id="restaurants-data" data-items='{{ restaurantsArray|json_encode()|raw }}' style="display:none;"></div>`

We use the `id="restaurants-data"` as an HTML class, and all values from the array are passed to it.

After that, I added the **CSS** code. 

![After that, I added the CSS code](img/search-posts-on-map/css1.png)

Followed by the **JavaScript** tab to add code.
```
jQuery(function ($) {
    let rawData = $('#restaurants-data').data('items');

    if (typeof rawData === 'string') {
        Locations = JSON.parse(rawData);
    } else {
        Locations = rawData;
    }

    Locations.forEach(it => {
        it.lat = parseFloat(it.lat) || null;
        it.lng = parseFloat(it.lng) || null;
        it.rating_num = parseInt(it.rating_num || (it.rating_num || '').replace(/[^\d]/g, '')) || null;
        it.price = parseInt(it.price) || 0;
        it.cuisine = Array.isArray(it.cuisine) ? it.cuisine.join(', ') : (it.cuisine || '');
        it.title = it.title || '';
        it.address = it.address || '';
    });

    const initialCenter = [21.0285, 105.85];
    const map = L.map('map').setView(initialCenter, 12);
    L.tileLayer('https://{s}.tile.openstreetmap.org/{z}/{x}/{y}.png', { maxZoom: 19 }).addTo(map);

    let currentMarkers = [];
    let userMarker = null;
    let userLocation = null;

    function clearMarkers() {
        currentMarkers.forEach(m => map.removeLayer(m));
        currentMarkers = [];
    }

    function renderMarkers(items) {
        clearMarkers();
        let points = [];
        items.forEach(it => {
            if (!it.lat || !it.lng) return;
            let stars = it.rating_num ? '⭐'.repeat(it.rating_num) : '⭐';
            let popup = `
                <div style="font-family:Arial;min-width:180px;">
                    <strong style="font-size:18px;color:#7a1c1c;">${it.title}</strong><br>
                    <span style="color:#f39c12;">${stars}</span><br>
                    <span>🍽 ${it.cuisine}</span><br>
                    <span>💰 ${it.price} $</span><br>
                    ${it.address ? `📍 ${it.address}` : ''}
                </div>`;
            let mk = L.marker([it.lat, it.lng]).addTo(map).bindPopup(popup);
            currentMarkers.push(mk);
            points.push([it.lat, it.lng]);
        });
        if (points.length) {
            let bounds = L.latLngBounds(points);
            if (userMarker) bounds.extend(userMarker.getLatLng());
            map.fitBounds(bounds, { padding: [40, 40] });
        }
    }
    renderMarkers(Locations);
});
```
![Followed by the JavaScript code](img/search-posts-on-map/jvc1a.png)

**Specifically**:
```
jQuery(function ($) {
    let rawData = $('#restaurants-data').data('items');
```
To start, a variable is created to get the raw data from the div with the restaurants data.
```
    if (typeof rawData === 'string') {
        Locations = JSON.parse(rawData);
    } else {
        Locations = rawData;
    }
```
Next, the code checks the data: if it’s a JSON string, it converts it to an object; if it’s already in that form, leave it unchanged.
```
    Locations.forEach(it => {
        it.lat = parseFloat(it.lat) || null;
        it.lng = parseFloat(it.lng) || null;
        it.rating_num = parseInt(it.rating_num || (it.rating_num || '').replace(/[^\d]/g, '')) || null;
        it.price = parseInt(it.price) || 0;
        it.cuisine = Array.isArray(it.cuisine) ? it.cuisine.join(', ') : (it.cuisine || '');
        it.title = it.title || '';
        it.address = it.address || '';
    });
```
Afterward, it ensures each location’s data has the correct format, valid values, and won’t cause errors.
```
    const initialCenter = [21.0285, 105.85];
    const map = L.map('map').setView(initialCenter, 12);
    L.tileLayer('https://{s}.tile.openstreetmap.org/{z}/{x}/{y}.png', { maxZoom: 19 }).addTo(map);
```
The following section sets up the map with the default center in Hanoi, and applies OpenStreetMap as the base layer.
```
    let currentMarkers = [];
    let userMarker = null;
    let userLocation = null;
```
At the same time, several global variables are declared to support Marker and User Position.
```
    function clearMarkers() {
        currentMarkers.forEach(m => map.removeLayer(m));
        currentMarkers = [];
    }
```
Before rendering new results, all existing markers are cleared and the array is reset to avoid overlapping markers.
```
    function renderMarkers(items) {
        clearMarkers();
        let points = [];
        items.forEach(it => {
            if (!it.lat || !it.lng) return;
            let stars = it.rating_num ? '⭐'.repeat(it.rating_num) : '⭐';
            let popup = `
                <div style="font-family:Arial;min-width:180px;">
                    <strong style="font-size:18px;color:#7a1c1c;">${it.title}</strong><br>
                    <span style="color:#f39c12;">${stars}</span><br>
                    <span>🍽 ${it.cuisine}</span><br>
                    <span>💰 ${it.price} $</span><br>
                    ${it.address ? `📍 ${it.address}` : ''}
                </div>`;
            let mk = L.marker([it.lat, it.lng]).addTo(map).bindPopup(popup);
            currentMarkers.push(mk);
            points.push([it.lat, it.lng]);
        });
        if (points.length) {
            let bounds = L.latLngBounds(points);
            if (userMarker) bounds.extend(userMarker.getLatLng());
            map.fitBounds(bounds, { padding: [40, 40] });
        }
    }
```
Moving on, this function displays markers from an array of items. It loops through the restaurant list, builds popups with the name, rating, cuisine, price, and address, and adjusts the map so all restaurants remain visible. 
```
    renderMarkers(Locations);
});
```
In the end, markers are displayed on the map so that users can see the location of the restaurants.

After styling and adding functions, our page is like this.

![After styling and adding functions, our page is like this](img/search-posts-on-map/demo2b.gif)

## 3. Filtering restaurants on the map

Now, it’s time to create filters for restaurants on the map. Back to the created template to add code for this purpose. I will display all the filters first, then add functions for it later.

![Now, it’s time to create filters for restaurants on the map](img/search-posts-on-map/code3a.png)

**Explanation**: 
```
    {% set ratings = [] %}
    {% for post in posts %}
        {% set rating_num = post.rating.value ?? '' %}
        {% if rating_num is not empty and rating_num not in ratings %}
            {% set ratings = ratings|merge([rating_num]) %}
        {% endif %}
    {% endfor %}
    {% set ratings = ratings|sort %}

    <select id="filter-rating">
        <option value="">- All Ratings -</option>
        {% for rate in ratings %}
            <option value="{{ rate }}">
                {% for i in 1..rate %}⭐{% endfor %}
            </option>
        {% endfor %}
    </select>
```
First, in this part, an array is created to store all rating values from the posts. This is used to display the ratings in a select dropdown on the archive page, allowing users to search restaurants by the number of stars they want. There are a lot of posts so this part will run in a loop.
```
    {% set cuisines = [] %}
    {% for post in posts %}
        {% set type_val = post.cuisine_types.value ?? '' %}
        {% if type_val is iterable %}
            {% for cui in type_val %}
                {% if cui not in cuisines %}
                    {% set cuisines = cuisines|merge([cui]) %}
                {% endif %}
            {% endfor %}
        {% elseif type_val is not empty %}
            {% if type_val not in cuisines %}
                {% set cuisines = cuisines|merge([type_val]) %}
            {% endif %}
        {% endif %}
    {% endfor %}
    {% set cuisines = cuisines|sort %}

    <select id="filter-cuisine">
        <option value="">- All Cuisines -</option>
        {% for cuis in cuisines %}
            <option value="{{ cuis }}">{{ cuis }}</option>
        {% endfor %}
    </select>
```
In the same way, another array is created to store all cuisine types from the posts. These values are also shown in a select dropdown, so users can filter restaurants by their preferred cuisine, and this process also runs in a loop.
```
    <div class="price-range">
        <span class="price-label">💰 Price:</span>
        <div class="price-control">
            <span class="price-min-label">Min</span>
            <input type="range" id="price-min" min="0" max="100" value="10">
        </div>
        <div class="price-control">
            <span class="price-max-label">Max</span>
            <input type="range" id="price-max" min="0" max="100" value="50">
        </div>
        <span id="price-display">10 - 50$</span>
    </div>
```
To handle price filtering, a min–max range bar is set up. At first, it only shows the default minimum and maximum values, then **JavaScript** updates them dynamically when the user drags the slider.
```
    <button id="locate-btn" type="button">📍 My Location</button>
```
After that, a button is added to get the user’s current location. When clicked, it detects the exact position of the user at that moment.
```
    <input type="number" id="filter-radius" placeholder="Radius (km)" min="0" step="1">
```
A radius input is then created so users can define a search range. Once the location is available and a radius is entered, only restaurants within that distance are included in the results.
```
    <button id="filter-btn" type="button">Search</button>
```
Next, a Search button is added to trigger the filtering process based on all selected criteria.
```
    <span id="filter-info"></span>
</div>
```
Last but not least, an area is set up to display the results, where the total number of restaurants found is shown.

Then, move to the **CSS** tab and add some code. 
 
![Then, move to the CSS tab and add some code](img/search-posts-on-map/css2a.png)

After saving, go to the front-end page, you can see all the search filters displayed here. The filters are showing now, but they're not working yet.

![The filters are showing now, but they're not working yet](img/search-posts-on-map/demo3a.gif)

Go back to the page editor to add code for the **JavaScript** tab. This step will help the filters work properly.

![Go back to the page editor to add code for the JavaScript tab](img/search-posts-on-map/jvc2.png)
 
```
$('#locate-btn').on('click', function () {
        let $btn = $(this);
        if (!navigator.geolocation) return alert('Browser does not support geolocation.');
        $btn.prop('disabled', true).text('Getting location...');
        navigator.geolocation.getCurrentPosition(pos => {
            userLocation = { lat: pos.coords.latitude, lng: pos.coords.longitude };
            if (userMarker) map.removeLayer(userMarker);
            userMarker = L.circleMarker([userLocation.lat, userLocation.lng], { radius: 8 }).addTo(map).bindPopup('Your Location').openPopup();
            map.setView([userLocation.lat, userLocation.lng], 13);
            $btn.prop('disabled', false).text('📍 My Location');
            alert('Your location has been detected.');
        }, () => {
            $btn.prop('disabled', false).text('📍 My Location');
            alert('Unable to get location.');
        });
 });
```
I added another feature that gets the user’s location, shows it with a marker, and zooms the map to that spot.
```
    function updatePrice() {
        let min = $('#price-min').val();
        let max = $('#price-max').val();
        $('#price-display').text(`${min} - ${max}$`);
    }

    $('#price-min, #price-max').on('input', updatePrice);
```
In addition, this part updates the text from 10 to 100$ when the user drags the price bar.
```
    $('#filter-btn').on('click', function () {
        let r = $('#filter-rating').val();
        let c = $('#filter-cuisine').val();
        let minP = parseInt($('#price-min').val());
        let maxP = parseInt($('#price-max').val());
        let rad = parseFloat($('#filter-radius').val());

        if (rad && !userLocation) return alert('Vui lòng lấy vị trí của bạn trước.');

        function getDistance(lat1, lon1, lat2, lon2) {
            let R = 6371;
            let dLat = (lat2 - lat1) * Math.PI / 180;
            let dLon = (lon2 - lon1) * Math.PI / 180;
            let a = Math.sin(dLat / 2) * Math.sin(dLat / 2) +
                Math.cos(lat1 * Math.PI / 180) * Math.cos(lat2 * Math.PI / 180) *
                Math.sin(dLon / 2) * Math.sin(dLon / 2);
            let c = 2 * Math.atan2(Math.sqrt(a), Math.sqrt(1 - a));
            return R * c;
        }

        let filtered = Locations.filter(it => {
            let basicFilter = (!r || it.rating_num == r) &&
                (!c || it.cuisine.toLowerCase().includes(c.toLowerCase())) &&
                (it.price >= minP && it.price <= maxP);

            if (!basicFilter) return false;
            if (!rad) return true;
            if (!it.lat || !it.lng) return false;

            let dist = getDistance(userLocation.lat, userLocation.lng, it.lat, it.lng);

            return dist <= rad;
        });

        renderMarkers(filtered);
        $('#filter-info').text(`Result: ${filtered.length} Restaurants`);
    });
```
Subsequently, this section above creates the search button that filters results by rating, cuisine, price, and radius. If the user sets a radius but hasn’t gotten their location yet, it will ask for the location first. I use a helper function to calculate the distance in kilometers between two coordinates. When the radius is missing or set to 0, that filter is skipped. 
```
    renderMarkers(Locations);
    $('#filter-info').text(`Show: ${Locations.length} Restaurants`);
});
```
After filtering, the updated results are rendered and the total number of matches is displayed. That’s all for the code. I’ve put everything on **[Github](https://github.com/wpmetabox/tutorials/tree/master/searching-post-on-the-maps)**, so you can check it out there.

Now, let’s check the page on the frontend, you can see the filters work well. 

![Now, let’s check the page on the frontend, you can see the filters work well](img/search-posts-on-map/demo1.gif)

# Showing events on calendar - MB Views

import LiteYouTubeEmbed from 'react-lite-youtube-embed';
import 'react-lite-youtube-embed/dist/LiteYouTubeEmbed.css';

If you're looking for a way to track and manage important events such as meetings, conferences, holidays, or personal tasks, showing them on the calendar is a brilliant idea. It is also an incredibly useful feature in many applications and information management systems. When events are visually displayed on a calendar, users can plan more efficiently and avoid redundancy or missing important activities.

Instead of adding a new plugin that can reduce the performance of the website, **MB Views** from Meta Box can help you **display events on a calendar effortlessly and effectively**.

I have a page as an example of an event calendar. On it, you can see which event is on which day, and how long it is based on the start date and end date. You can view the event on the calendar by month, week, or day as well.

![An example of](https://imgur.elightup.com/eE5gShL.png)

If you find it necessary or interesting, let's dive into the details of this tutorial together.

## Video version

<LiteYouTubeEmbed id='mAw9TNH7xsU'/>

## Preparation

Displaying events or tasks on the calendar is completely feasible with only Meta Box. Specifically, we’ll create a custom post type for the events; the event's time, such as the start date and end date, will be stored in the custom fields, and then MB Views will help you display them on the calendar.

With that concept, we highly recommend you use **Meta Box AIO** to have the framework and all the needed advanced features from Meta Box extensions, including:

* [MB Custom Post Type](https://metabox.io/plugins/custom-post-type/): to create a custom post type for the events;
* [MB Builder](https://metabox.io/plugins/meta-box-builder/): to have a UI on the backend to visually create the custom fields to store event information;
* [MB Views](https://metabox.io/plugins/mb-views/): to create a template to display events on the calendar.

You also can install Meta Box and those extensions individually.

Let’s start now!

## 1. Creating a custom post type

Each event will be a post of a custom post type. So, we need to create it first.

Click on the **Create a post type** quick action right on the Meta Box dashboard or go to **Meta Box** > **Post Types** > **Add New** to create a new one for the event.

![Click on the Create a post type quick action to create a new custom post type](https://imgur.elightup.com/0zEMI3s.png)

Enter the plural and singular name for the post type. And after publishing, a new menu will appear right here. It’s your post type.

![The new post type appears as a new menu](https://imgur.elightup.com/lmfnSBm.png)

## 2. Creating custom fields

To display events on the calendar, we need the start and end dates. In the real case, the event might include other additional details such as address, moderator, and so on. But in this tutorial, I just use date for the main purpose, so, let’s create custom fields for them.

To do it, you have two methods:

The first one, right after you publish the post type successfully, there is a notice. Just click on the **Add custom fields to this post type** button in there.

![Click to add field group for the post type automatically](https://imgur.elightup.com/2spGFOK.png)

Then, you can see the interface of a field group. It’s applied to the **Event** post type automatically.

The second method is moving to the **Custom Fields** sub-menu, and creating a new field group as usual. Then, set the location for this field group. I’ll follow this way.

![Go to Meta Box, Custom Fields, and create a new field grouphttps://imgur.elightup.com/E3Yspw2.png)

As I said above, these are two fields I created to store the start and end dates.

![Two fields for the start and end date](https://imgur.elightup.com/EnQOOKj.png)


I chose the **Datetime Picker** field type for both the start and end date of the event. If you don’t want to note the time, you can use the **Date Picker** instead.

![Choose the Datetime Picker field type for both the start and end date](https://imgur.elightup.com/SBWbGve.png)

If you want to show the date on the management dashboard, just enable the **Show as admin column** feature. Notice that, you’ll only see this setting for the field when enabling the [MB Admin Columns](https://metabox.io/plugins/mb-admin-columns/) extension. While optional, it's a handy feature to have.

![Enable the Show as admin column to display the field on the dashboard.](https://imgur.elightup.com/b2JcaE2.png)

If you want to store other information, just add corresponding field types as you go.

After creating all the needed fields, move to the **Settings** tab. Choose **Location** as **Post type**, and select **Event** to apply these fields to it.

![Set the location of the field group as Event post type.](https://imgur.elightup.com/xuAxGpE.png)

Then, in the post editor, you will see the created custom fields.

![The created custom field displays in the post editor](https://imgur.elightup.com/ctbqxEA.png)

Simply input data into them.

These are some posts that I created for example. The start date and the end date are shown as admin columns as well.

![I created some posts as example](https://imgur.elightup.com/zG0G0WU.png)

## 3. Creating a template to get event information

You can use any page builder to get event information. But after doing it, I’ll use JavaScript to transform them on the calendar. So, using **MB Views** will be more convenient.

In the Meta Box dashboard, click on the **Create a view** button or go ahead to the **Views** submenu to create a new template for displaying the events.

![Create a new view to display the event calendar](https://imgur.elightup.com/R6YZEGn.png)

With MB Views, you can insert fields into the template by clicking on the **Insert Field** button, and choose any fields on the right sidebar to get data from them. Or, add some lines of code directly.

First, I add these lines of code:

```
{% set args = { post_type: 'event', posts_per_page: -1} %}
{% set posts = mb.get_posts( args ) %}
{% for post in posts %}

{% endfor %}
```
![Add code to get posts from the post type.](https://imgur.elightup.com/5rVD00R.png)

**In there**:

* `{% set args = { post_type: 'event', posts_per_page: -1} %}`: is to declare that we’ll get posts from the `event` post type. `-1` helps to get all posts in that post type.
* `mb.get_posts()`: is a Meta Box function to get the posts.
* `{% for post in posts %}...{% endfor %}`: is a loop we add to get and display all the posts since we have various posts.

Inside the loop, we’ll get information about the event. You should use the button I mentioned before, and insert the field you want from the right panel.

![Click on the button to insert field](https://imgur.elightup.com/CfunedS.png)

For demonstration purposes, I just get three basic information including the event name, start date, and end date. They will be used on the calendar later.

The event name means **Post title**. Click on it from the right panel.

![The event name is the post title](https://imgur.elightup.com/aaRAoKc.png)

For the start and end dates, Meta Box provides some options to set the output of the date. To ensure event transformation works correctly on the calendar, you should choose the format which follows the ISO standard.

![Select the format of date](https://imgur.elightup.com/vOM4VQM.png)

Do the same with the end date.

![The start date and end date after inserting field and choosing format](https://imgur.elightup.com/fStiRJn.png)

The template is now in the simplest version since it is just to get data.

I keep the type of this template as **Shortcode**, then we can put it in any place we want through the generated shortcode.

![Set the type of template as shortcode](https://imgur.elightup.com/UWGEOqw.png)

After publishing this template, the shortcode is generated automatically. Just copy it.

![Copy the generated shortcode](https://imgur.elightup.com/lsToQ6E.png)

Assuming that you want to display the event calendar on a page, go to the page editor, then paste the copied shortcode.

![Paste the shortcode in the place you want](https://imgur.elightup.com/4GgPbKD.png)

On the front end, the information about all the events is displayed.

![The content displayed.](https://imgur.elightup.com/KURGmnB.png)

Next, we’ll transfer this information to the calendar.

## 4. Transfering events information to the calendar

We will use JavaScript to display events on the calendar and make them more beautiful. So, back to the template that we created to modify and add some code.

First, I’ll add some lines to declare some libraries we’ll use to have an event calendar.

```
<script src="https://cdnjs.cloudflare.com/ajax/libs/jquery/3.3.1/jquery.min.js"></script>
<script src="https://cdnjs.cloudflare.com/ajax/libs/moment.js/2.22.2/moment.js"></script>
<script src="https://cdnjs.cloudflare.com/ajax/libs/fullcalendar/3.9.0/fullcalendar.min.js"></script>
<script src="https://cdnjs.cloudflare.com/ajax/libs/fullcalendar/3.9.0/locale-all.js"></script>
<link rel="stylesheet" href="https://cdnjs.cloudflare.com/ajax/libs/fullcalendar/3.9.0/fullcalendar.min.css" />
```

![Declare JavaScript and CSS libraries for the calendar](https://imgur.elightup.com/uabIxpd.png)

In this practice, I use some JavaScript libraries to have some features of the calendar such as date-time format, showing the calendar by week, month, or year, calendar language, and calculating time differences.

I also declare the CSS library for styling the calendar.

Next, I set a variable as an empty array, since it will include the values from the fields in posts, which are obtained by the loop.

![Set a variable as an empty array](https://imgur.elightup.com/BFpEgzH.png)

Then, modify the loop to transfer all the values to the array.

![Modify the loop to transfer all the values to the array](https://imgur.elightup.com/YNHTBCX.png)

Now, add this code:

```
<div id="calendar" data-event='{{ event_info|json_encode() }}'></div>
```
![Create a div tag and convert variable to JSON](https://imgur.elightup.com/JvcmUxG.png)

It’s to create a new **div** tag that has an ID as `calendar`. It’ll be used in JavaScript later. Also, you should convert the variable to JSON to use in Javascript. Then assign it to the `data-event` attribute.

Next, move to the **CSS** tab to make the event and calendar more beautiful.

![Go to the CSS tab to style the calendar](https://imgur.elightup.com/cAWLCIg.png)

Then, move to the **JavaScript** tab, and add some code to transfer events on the calendar.

```
$(function () {
    var getTimeElement = document.getElementById("calendar");
    var data_event = JSON.parse(getTimeElement.getAttribute("data-event"));

    const current_date = new Date();

    $('#calendar').fullCalendar({
        locale: 'en',
        header: {
            left: 'prev,next, today',
            center: 'title',
            right: 'month,basicWeek,basicDay'
        },
        defaultDate: current_date,
        navLinks: true,
        editable: true,
        eventLimit: true,
        events: data_event,
    });
});
```

![Add some code into the JavaScript tab to transfer events on the calendar](https://imgur.elightup.com/gfKgLMC.png)

**Explanation**:

* `var getTimeElement = document.getElementById("calendar")`: is to get data from the element that has the `calendar` ID.
* `var data_event = JSON.parse(getTimeElement.getAttribute("data-event"))`: is to get data from the `data-event` attribute. It includes the values we assigned before.
* `const current_date = new Date()`: is to add a constant as the current date. It’s to set the default position on the calendar.

In the above code, I also configure attributes of the calendar with the help of the library I declared at first. These are some attributes I set for the function. For illustration purposes, I just use some major attributes of the calendar library such as calendar language, header, and the default date. You completely customize them as you want. Pay attention to `eventLimit: true`. It’s for changing the format of the event in a place that has limited space such as a sidebar.

That’s done. I uploaded the code to [GitHub](https://github.com/wpmetabox/tutorials/tree/master/show-events-to-calendar), so you can refer to it.

Now, go to the page, and this is the new look of the event calendar with all the features such as viewing the calendar in day, week, month, and the next or previous period.

![An event calendar with all features.](https://imgur.elightup.com/k8iHMhe.png)

On the calendar, you can see which event is on which day, and how long it is based on the start date and end date.

Will it work well if the event schedule is placed in a different position? I’ll put it on the right sidebar of the homepage as an example.

Also, use the template shortcode.

All the data was displayed as we expected, but the format is different a little bit. To see the event, just click on it.

![The format of event calendar is different a little bit.](https://imgur.elightup.com/A02dW2d.gif)

# Showing the featured restaurants - Bricks

import LiteYouTubeEmbed from 'react-lite-youtube-embed';
import 'react-lite-youtube-embed/dist/LiteYouTubeEmbed.css';

Let’s see how to showcase some featured posts on a page. Take restaurants as an example like this:

![Example of some featured posts on a page](https://imgur.elightup.com/cn3g8F5.png)

## Video version

<LiteYouTubeEmbed id='pK1_OhNiazM' />

## Preparation

This section will display only the restaurants which are manually chosen to be featured. To do it, we will create a custom field to choose which one is featured.

Each restaurant is a post of a custom post type. Its name and image are the post title and the featured image. Besides this basic information, additional information such as address, voucher, and logo will be added as well and saved in different custom fields.

These are the tools we need for this practice:

* [Meta Box core plugin](https://metabox.io/): to have a framework to create custom post types and custom fields;
* [MB Custom Post Types & Custom Taxonomies](https://metabox.io/plugins/custom-post-type/): to create a custom post type named Restaurants:
* [MB Builder](https://metabox.io/plugins/meta-box-builder/): to have an intuitive UI to create custom fields in the backend for saving extra information of the restaurants;
* **Bricks**: to build the featured restaurants section.

## 1. Creating a custom post type

Go to **Meta Box > Post Types** to create a new post type.

![Create a custom post type](https://imgur.elightup.com/DfSCcR4.png)

After publishing, you’ll see a new **Restaurants** menu in the admin dashboard.

![The created restaurants menu disappear in the admin dashboard](https://imgur.elightup.com/ZNP5DlY.png)

## 2. Creating custom fields

Go to **Meta Box > Custom Fields** to create a new field group. I’ll create some fields as below to save extra information:

![Create custom fields](https://imgur.elightup.com/Es8KGeR.png)

To select and display which restaurant is featured on the frontend. I choose the **Switch** field so users can change the selection button.

![Select and display which restaurant is featured on the frontend](https://imgur.elightup.com/BZ5qdEB.png)

You should name an **easy-to-remember** ID for this field since we’ll use it later.

This is how the switch field displays in the post editor. The **Off** status will show that the restaurant is not featured. On the contrary, the **On** status will show that the restaurant is featured.

![On and off status](https://imgur.elightup.com/WxXYW42.png)

![Choose the wanted status](https://imgur.elightup.com/TalYx8T.png)

After creating all the needed fields, move to the **Settings** tab, choose **Location** as **Post Type** and select **Restaurant** to apply these fields to it.

![Choose Location for the created fields](https://imgur.elightup.com/0dVVHBf.png)

Then, you’ll see all the created custom fields when editing any post in the Restaurants post type.

![All the created fields in the post type](https://imgur.elightup.com/YzeWin3.png)

## 3. Creating a section on homepage

Go to **Pages** and **edit Homepage with Bricks**.

![Create a section on the homepage](https://imgur.elightup.com/9F1MCJl.png)

Add a new **Section** element to contain all the restaurants’ information.

![Add a Section element](https://imgur.elightup.com/TPVyidZ.png)

To name the section, add a **Heading** element.

![Add a heading element](https://imgur.elightup.com/cOEIw5O.png)

Now, let’s set the condition to display the featured posts.

### 3.1 Setting the condition

To get all the posts from the post type, we can use the **Posts** element. We also can use this element in this practice. It supports adding conditions to choose which posts you want to show.  However, we’ll use another way to do it by using a **div** tag in this tutorial. So, add a **Div** element.

With this **Div** element, you can get posts with conditions as well. But, to get each information of the posts, you can add different elements then easily style each one with more options of settings instead of coding.

![WSet the condition](https://imgur.elightup.com/MzbJKRX.png)

Since each restaurant is a post of a custom post type, enable the Use the query loop option and set the query to get the wanted posts and post type.

![Set the query to get the wanted posts](https://imgur.elightup.com/G8Ut4Lj.png)

![Choose the options](https://imgur.elightup.com/ystt3kG.png)

We’ll display the featured restaurants only, so scroll down to find the Meta Query section and enter the meta key as the **ID** of the field named **Feature the Restaurant**.

![Enter the meta key as the ID of the field](https://imgur.elightup.com/6QRjuam.png)

Since this is a **Switch** field with 2 options: On or Off. Corresponding to these 2 options, their values are 1 and 0. So if you want to choose the featured posts which you turned on the button, enter 1 corresponding to the **On** option in the **Meta Value***.

Then, choose the **Compare** and **Type** options as **Equal** and **Numeric**, respectively.

![Choose the compare and type options](https://imgur.elightup.com/RMcubig.png)

That’s all for the condition. Next, we’ll display all the information of the restaurants.

### 3.2 Displaying the restaurants information

Add an **Image** element to display the image of the restaurant. Since these images are the featured image of the post, choose the **Select dynamic data** button and find the **Featured Image** option in the **Post** section.

![Add an Image element to display the image](https://imgur.elightup.com/sFQjIs0.png)

Then, all the restaurants’ images have been obtained.

![All the images have been obtained](https://imgur.elightup.com/uX64KhP.png)

For the **Logo** of the restaurant, also add the **Image** element > **select dynamic data** button and search for the field.

![For the Logo of the restaurant](https://imgur.elightup.com/SsMRV52.png)

For the name of the restaurant means the title of the post, add the **Post Title** element. After that, all the names of the restaurant will display correspondingly.

![add the pót tittle element](https://imgur.elightup.com/XZdvxHa.png)

For the **Voucher** information, add the **Basic Text** element and also use the select dynamic data button and find the corresponding fields. Here, it’s Voucher.

![Add the Basic text element](https://imgur.elightup.com/ugU6c4E.png)

To display the **Address** information, do the same.

![Do likewise to display the Address information](https://imgur.elightup.com/RV7RhLu.png)

Now, all the information of the featured restaurants is shown.

![All the information of the featured restaurants is shown](https://imgur.elightup.com/JDmpTch.png)

## 4. Styling the section

For styling, you can easily style each element in the **Bricks visual builder**. In the event that you want to have advanced styling, just add CSS classes for the element you want. Then, go to **Style** tab > **CSS** and add some code in the **Custom CSS** section.

In my cases, I want to style the voucher field with advanced styling so I did it as an example:

![Style the section](https://imgur.elightup.com/oce2lSB.png)

![Add some code](https://imgur.elightup.com/wCui5cP.png)

This is the result of my featured restaurants section:

![The final result](https://imgur.elightup.com/cn3g8F5.png)

# Showing the featured restaurants - P4 - MB Views

import LiteYouTubeEmbed from 'react-lite-youtube-embed';
import 'react-lite-youtube-embed/dist/LiteYouTubeEmbed.css';

In this practice, we’re going to display the featured restaurants using **Meta Box** only with the help of **MB Views**. Let’s see how to do it.

This is a section on homepage that I created as an example to show the featured restaurants:

![The example of the created section](https://imgur.elightup.com/SF3eHvi.png)

This homepage is built by **Gutenberg** and there is a section to show the featured restaurants which are chosen manually in the backend.

## Video version

<LiteYouTubeEmbed id='Kp3hM0mjlCM' />

## Preparation

Each restaurant is a post of a custom post type. Besides the basic information which is the title, featured image of the post, the restaurant’s extra information is saved in custom fields.

So, we need these tools to do this practice:

* [Meta Box plugin](https://wordpress.org/plugins/meta-box/) to have a framework to create custom post types and custom fields;
* [MB Custom Post Type & Custom Taxonomies](https://metabox.io/plugins/custom-post-type/): to create custom post types named Restaurants;
* [MB Builder](https://metabox.io/plugins/meta-box-builder/): to have a UI on the backend to create custom fields for saving restaurants’ information;
* [MB Views](https://metabox.io/plugins/mb-views/): to create the template for the featured restaurants section;
* [MB Admin Columns (optional)](https://metabox.io/plugins/mb-admin-columns/): to show the custom fields as an admin column.

You can install these extensions individually or use **Meta Box AIO** to have all of them.

## 1. Creating a custom post type

Go to **Meta Box** > **Post Types** to create a new post type for the restaurants.

![Create a custom post type](https://imgur.elightup.com/dsjDWsv.png)

After publishing, you’ll see your newly created post type on the menu.

![Newly created post type appear in the menu dashboard](https://imgur.elightup.com/lLlVWCM.png)

## 2. Creating custom fields

Go to **Meta Box** > **Custom Fields** to create a new field group.

![Create custom fields](https://imgur.elightup.com/tpHVa6J.png)

Here are all the fields that I created.

![Created fields](https://imgur.elightup.com/x929fVO.png)

Besides some normal fields for typical information, I create a **Switch** field to choose whether to feature the restaurant or not.

![Create a Switch field](https://imgur.elightup.com/LR0qlMi.png)

Turning on the switch button means that the restaurant will be displayed in the section and vice versa.

![Turn on the switch button](https://imgur.elightup.com/aApoL3l.png)

I’ll also show the values of this field in the admin column to see whether the restaurant is featured or not by ticking this box. This setting is available only when you have the **MB Admin Columns**.

![Tick to choose Show as admin column](https://imgur.elightup.com/AAw5xBk.png)

And this is how it displays on the admin dashboard.

![The fields will display like this](https://imgur.elightup.com/GrV4UAu.png)

After creating all the fields, move to the **Settings** tab, choose **Location** as **Post Type** and select **Restaurant** to apply them to that post type.

![Set location for the created fields](https://imgur.elightup.com/8sJARDe.png)

Then, you’ll see all the newly created custom fields in the post editor. The switch field is also displayed. You can turn on or turn off the button to choose to feature the restaurant or not. Just fill in the information for the restaurant.

![All the newly created custom fields in the post editor](https://imgur.elightup.com/U8MF7eB.gif)

## 3. Creating a template for the section

Go to **Meta Box** > **Views** > **Add New** to create a new template that will be used to the section.

![Create a template for the section](https://imgur.elightup.com/kCGWyXA.png)

In the **Template** tab, add some code to display the featured restaurants:

![Add some code](https://imgur.elightup.com/JWsovKT.png)

```
{% set args = { post_type: 'restaurant', posts_per_page: -1 } %}
{% set posts = mb.get_posts( args ) %}
	{% for post in posts %}
	{% endfor %}
```

In there:

```
{% set args = { post_type: 'restaurant', posts_per_page: -1 } %}
```

This line of code is to declare to get posts from the '**restaurant**' post type.

The function ` mb.get_posts( ) ` is to get posts. And I also have a loop to get multiple posts as above.

Since we just want to display only the restaurants which are featured, we need to add a condition inside the loop.

![Add a condition inside the loop](https://imgur.elightup.com/jWjxEP2.png)

 ```
{% if post.feature_the_restaurant == 1 %}
{% endif %}
```

This is the condition to display the selected posts only. feature_the_restaurant is the **ID** of the **Switch** field. Corresponding to the **On** and **Off** status of it, the value that is saved will be 1 and 0, respectively. So, this line of code means that if the posts have the switch field turned **On**, they will be displayed.

Now, let’s insert fields inside the condition to display information from the posts. You can easily get these lines of code by using the **Insert Fields** button and then choose the corresponding fields you want to get the data from.

![Insert the fields inside the condition](https://imgur.elightup.com/e1MWnFA.gif)

``` <img src="{{ post.thumbnail.full.url }}" width="{{ post.thumbnail.full.width }}" height="{{ post.thumbnail.full.height }}" alt="{{ post.thumbnail.full.alt }}">
<img src="{{ post.logo.full.url }}" width="{{ post.logo.full.width }}" height="{{ post.logo.full.height }}" alt="{{ post.logo.full.alt }}" class="logo">
{% for item in post.voucher %}
{{ item.label }}
{% endfor %}
{{ post.title }}
{{ post.address }}
```

![Add the code](https://imgur.elightup.com/2YjR5Yp.png)

That’s all for the code to get the information of the restaurants.

Now, set this template type as shortcode. After publishing, there will be a shortcode automatically generated like this:

![Set the template type as shortcode](https://imgur.elightup.com/oOtBjhc.png)

Let’s display the section on the homepage. Go to edit the homepage and choose the area where you want to add the section. In there, add a Heading block to name the section.

![Add a Heading element](https://imgur.elightup.com/BX1AzGP.png)

Next, add a **Shortcode** block, paste the one you’ve just copied from the view.

![Add a Shortcode block](https://imgur.elightup.com/fHSCFLv.png)

![Add the shortcode](https://imgur.elightup.com/PaxlFGp.png)

Now, all the restaurants’ information has been displayed.

![All the information has been obtained](https://imgur.elightup.com/Cl2lXGo.png)

If you want to have more styling, just go back to **Views** and edit the created template. We’ll add some div classes to the code first.

![Edit the created template](https://imgur.elightup.com/CALbfEJ.png)

Next, go to the **CSS** tab and add some code.

![Add some code in the CSS](https://imgur.elightup.com/N1tVM7x.png)

I’ve uploaded all the code that I used on **Github** so you can easily refer to it.

Now, you’ll see the new look of the section on the homepage.

![The new look on the homepage](https://imgur.elightup.com/SF3eHvi.png)

# Showing the featured restaurants - Meta Box + Oxygen

import LiteYouTubeEmbed from 'react-lite-youtube-embed';
import 'react-lite-youtube-embed/dist/LiteYouTubeEmbed.css';


We’ll display the featured posts on the frontend using a custom field for manually choosing. Take restaurants as an example:

![Example of showing featured restaurants ](https://imgur.elightup.com/5u7QYM9.png)

## Video version

<LiteYouTubeEmbed id='GZ8dFWAhnXA' />

## Preparation

In my case, I have already made this homepage using Oxygen. The section is to show the featured restaurants which are chosen manually in the backend by a custom field. The restaurants will be stored in a **post type**, and each one will be a post. Along with the default information as title and featured image, I also add some extra ones and display them such as logo, voucher, and address, is saved in **custom fields**.

Furthermore, I also set a condition. It indicates that only selected posts will be displayed in this section. I’ll use a special custom field to know when a post is selected.

Here are the tools we need for this practice:

* [Meta Box core plugin](https://metabox.io/): to have a framework to create custom post types and custom fields;
* [MB Custom Post Type](https://metabox.io/plugins/custom-post-type/): to create custom post types for the restaurants;
* [MB Builder](https://metabox.io/plugins/meta-box-builder/): to have a UI on the back end to create custom fields for saving extra information of the restaurants;
* [MB Admin Columns](https://metabox.io/plugins/mb-admin-columns/): to show the status of whether the restaurants are featured or not in the list of posts.
* **Oxygen**. You should use the 3.9 version or upper, which has integration with Meta Box already.

## 1. Creating a new custom post type

Go to** Meta Box > Post Types** to create a new post type for the restaurants.

![Create a new custom post type](https://imgur.elightup.com/J971WAs.png)

## 2. Creating custom fields

Go to **Meta Box > Custom Fields** and create fields as you want.

![Create custom fields](https://imgur.elightup.com/BHG0wDo.png)

To select which restaurant is featured on the frontend, I’ll create another custom field as the **Switch** type so that users can change the selection button.

![Create custom field as Switch type to select which restaurant is featured on the frontend](https://imgur.elightup.com/Mr1qsiG.png)

This field will display as a button and has two status. The **Off** status will indicate that you do not want to recommend the restaurant. Otherwise, the **On** status will let us know that you want to feature the restaurant.

![Off and On status to show you want to feature restaurant or not](https://imgur.elightup.com/RPBme1A.png)

Since I want to show the restaurant's status and quickly compare the results when displaying the restaurants on the homepage, I use the **MB Admin Columns** extension from Meta Box. To do it, tick the box as in the image below. However, this is just an optional part

![Use MB Admin Columns extension to show the status of the restaurant and compare the results](https://imgur.elightup.com/PZUWCYs.png)

After that, go to the **Settings** tab > **Location** > choose **Post Type** as the **Restaurant** post type that we’ve just created to apply the custom fields to it.

![Set location for the post type ](https://imgur.elightup.com/6txnpzB.png)

In the post editor, you will see all of the created custom fields.

![All created custom fields in the post editor](https://imgur.elightup.com/OEQLG3l.png)

These are the posts that I created as an example. You can easily see which restaurants will be featured like this.

![Example of created posts to see which restaurants will be featured](https://imgur.elightup.com/qI2RZfk.png)

## 3. Creating the section for the featured posts

First, select a **Section** component to contain all of the restaurant's information. Add a **Heading** component and name it to have a title for the section.

![Create the section for the featured posts](https://imgur.elightup.com/1RadUWF.png)

### 3.1. Setting a condition

To get all the posts of the **Restaurant** post type, select a **Repeater** component. Then, go to the **Query** section to choose the data source and set conditions.

Normally, to get the posts, you can choose the **default** or **custom** type. As I only select a certain posts to be displayed based on the condition, I choose the query in the **advanced** type.

![Select a Repeater component to get all the posts of the Restaurant post type](https://imgur.elightup.com/56WjHRI.png)

Now, let’s create conditions to choose which posts to display. We’ll add some query parameters as follows:

First, add a parameter to specify that we’ll get only posts from the restaurant post type. In the box as in the image below, enter the ID of the post type you want to get the data.

![Enter the ID of the wanted post type to get the data](https://imgur.elightup.com/gefnfAE.png)

Next, add another parameter as `meta_query`. This aim is to choose which posts in the restaurant post type are displayed.

![Add another parameter as meta_query to choose which posts in the restaurant post type](https://imgur.elightup.com/9dgat9w.png)

**Explanation**:

* In the **key** option, fill in the ID of the field named **Feature the Restaurant?**, because the condition will be set based on the value of this field.
* In the **type** option, enter **numeric** since this switch field has 2 options: On or Off, corresponding to 1 and 0. They are the numeric type.
* In the **value** option, add the value as **1** because it’s defaulted to the yes status of the switch field. It means that only posts where the switch field is in On status will be displayed in this section.

To limit the number of posts to display in the section, we add the last parameter. Choose the `post_per_page parameter` and set the number of posts you want to display.

![Add the post_per_page parameter to limit the number of posts to display ](https://imgur.elightup.com/1YXSJi4.png)

We’ve done the settings for the condition, press the **Add Parameters** button.

After applying, there are 6 boxes for 6 posts. It’s equivalent to the number of posts we set for the section.

![Equivalent number of boxes for the posts ](https://imgur.elightup.com/hfC2d2H.png)

### 3.2. Displaying the restaurants information

Now, it’s time to display information of each restaurant. In the **div** inside the **Repeater** component, add an **Image** component to display the restaurant’s image, then connect it with the featured image of the post.

![Choose a text component and connect it to the corresponding field](https://imgur.elightup.com/wjnVBty.png)

For the voucher information, choose a **Text** component and connect it to the corresponding field.

![Choose a text component and connect it to the corresponding field](https://imgur.elightup.com/lgm6Ybz.gif)

To get the restaurant’s name automatically, add the **Heading** component, and connect it with the title of the post.

![Add a heading component to get the restaurant's name](https://imgur.elightup.com/fBjvwKO.gif)

For the address information, do the same with the **Voucher** field. Add a **Text** component to it, then connect it to the **Address** field.

![Add a text component to get the address information](https://imgur.elightup.com/r5FcAHS.gif)

The last one we want to display is the restaurant’s logo. Choose an **Image** component. Because the logo field is created by Meta Box and it returns the URL, go to the **Image URL** tab to get data from this field.

![Choose an Image component to display the restaurant's logo](https://imgur.elightup.com/y9FhJjD.gif)

That’s all for getting information about the featured restaurants. Now, on the homepage, all the featured restaurants' information is displayed.

![All the information is displayed](https://imgur.elightup.com/o9MDqBS.png)

## 4. Styling the section

For styling, go back to the page editor with Oxygen. Then, choose each component and change the settings to style them.

You can also add some CSS in the **Custom CSS** tab to have a more advanced style.

![Style the section](https://imgur.elightup.com/wj2TehN.png)

Go to the homepage, all the featured restaurants are displayed as we want.

![All the featured restaurants are displayed as wanted](https://imgur.elightup.com/5u7QYM9.png)

# Showing the featured restaurants - Meta Box + Breakdance

import LiteYouTubeEmbed from 'react-lite-youtube-embed';
import 'react-lite-youtube-embed/dist/LiteYouTubeEmbed.css';

Sometimes you may want to feature some products on your homepage. It's a popular technique to **improve conversion** by attracting customers to the most irresistible products. So, let’s see how we **showcase featured products** on a page with **Meta Box** and **Breakdance**.

I use the restaurants as an example of the products.

![The featured products using Meta Box and Breakdance.](https://imgur.elightup.com/FOO2VOm.png)

## Video version

<LiteYouTubeEmbed id='zy514AFemEY' />

## Preparation

We will create a section to show the featured products which are chosen manually in the backend. The products are stored in a post type, and each one is a post. The product's information, in this case as the restaurants, may include extra information that is saved in the custom fields.

These are some tools we need for this practice:

* [Meta Box core plugin](https://wordpress.org/plugins/meta-box/): to have a framework for creating a custom post type and custom fields;
* [MB Custom Post Type](https://metabox.io/plugins/custom-post-type/): to create a custom post type for the products;
* [MB Box Builder](https://metabox.io/plugins/meta-box-builder/): to create custom fields to save the products information, as well as the custom field to set the product to be featured or not;
* [MB Admin Columns](https://metabox.io/plugins/mb-admin-columns/) (optional): to display the custom fields as an admin column to easily see the information. I use it to show you which products will be featured, so you can easily compare it with the results.
* **Breakdance**: to build the homepage and the section to showcase the products.

## 1. Creating a new custom post type

Go to **Meta Box** > **Post Types** to create a new post type for the products. I meant restaurants in my case.

![Create a new custom post type for your products](https://imgur.elightup.com/e8ryCDS.png)

## 2. Creating custom fields

Go to **Meta Box** > **Custom Fields** to create fields to save extra information for the restaurants as usual.

![Create fields to save extra information for the products](https://imgur.elightup.com/oUL3R2H.png)

Beside some typical fields for demonstration, I have a special field in the **Switch** type. This special field is to select which restaurant is featured on the homepage.

![The Switch field is to select which restaurant is featured on the homepage.](https://imgur.elightup.com/kRt66vw.png)

This field will display as a button and has two status. The **Off** status will indicate that you do not want to recommend the restaurant. Otherwise, the **On** status will let us know that you want to showcase it.

![If you want to feature the restaurant, just turn on the button](https://imgur.elightup.com/gmFYSWT.png)

I’ll show the values of this field in the admin column to see whether the restaurant is featured or not by turning on the button like in the image below. This setting is available only when you have the [MB Admin Columns](https://metabox.io/plugins/mb-admin-columns/) extension from Meta Box.

![The restaurant is featured when you have MB Admin Columns](https://imgur.elightup.com/2tvXUEv.png)

You can see how it displays on the admin dashboard.

![The posts displayed in the section from the column.](https://imgur.elightup.com/8fMSfmW.png)

After having all the fields, go to the **Settings** tab > choose **Location** as **Post type** > select **Restaurant** to apply the fields to it.

![Set location to apply the fields to the Restaurant post type.](https://imgur.elightup.com/AoaYOjE.png)

In the post editor, you’ll see the created custom fields. The **Switch** field is also displayed. You can turn on or turn off the button to choose to feature your product or not.

![Turn on or turn off the button to choose to feature the restaurant or not.](https://imgur.elightup.com/VWg9z3w.gif)

## 3. Creating the global block

With **Breakdance**, you should create a global block to get and display information from a post first, including from the custom fields in that post, then use this global block to display them anywhere on your site.

Go to **Breakdance** and create a new global block.

![Create a new global block](https://imgur.elightup.com/PmYOWnj.png)

Remember to set a post for the live preview.

![Set a post for the live preview](https://imgur.elightup.com/EzcCqG5.png)

My global block is to display the information of each post in a box like this.

![The information of a restaurant](https://imgur.elightup.com/qR1uaPj.png)

### 3.1 Setting the condition to get featured posts

First, select the **Div** element to cover the block.

![Select the Div element to cover the block](https://imgur.elightup.com/TWfHTwa.png)

Go to the settings of the **Div** element, then the **Conditions** section, add a condition to choose which posts will be displayed.

![Add a condition to choose which posts will be displayed.](https://imgur.elightup.com/6AEPoMT.gif)

Choose the **Dynamic Data** option from the list to set the condition based on the data saved in custom fields.

![Choose the Dynamic Data option to set the condition based on the data saved in custom fields.](https://imgur.elightup.com/CwyNX24.png)

This condition will be set based on the value of the created **Switch** field. So, in the **Metabox** section, choose the name of the field.

![In the Metabox section, choose the name of the Switch field.](https://imgur.elightup.com/VqAq30K.png)

The **Switch** field has two statuses: **On** and **Off**, corresponding to the value **1** or **0**. So, enter **1** into the box because it’s defaulted to the **On** status. It means that only posts where the **Switch** field is **On** status will be get and display information.

![Put 1 into the field value box which corresponds to the On status.](https://imgur.elightup.com/HTiTY4N.png)

That’s all for the condition.

### 3.2 Displaying the products information

Now, add some elements to display information about the restaurant.

Inside the **Div**, select the **Image** element to show the restaurant’s image. And click on the icon below to insert dynamic data.

![Click on the icon to insert dynamic data](https://imgur.elightup.com/NyKZwf3.png)

Then, choose the **Featured Image** option from the **Post** section.

![Choose the Featured Image option from the Post section](https://imgur.elightup.com/O3h6Xqc.png)

You see that the restaurant’s image is displayed immediately.

![The restaurant’s image is displayed immediately](https://imgur.elightup.com/B3Bpna3.png)

For the voucher information, choose the **Text** element. As the voucher is saved in the custom field created by **Meta Box**, we’ll insert the dynamic data into the **Text** element. Then, you will see the field name in the **Metabox** section. Choose it.

![Get the voucher information](https://imgur.elightup.com/jRIvwkb.gif)

To get the restaurant’s name automatically, add the **Heading** element, and connect it with the title of the post.

![Get the restaurant’s name](https://imgur.elightup.com/2VMdsDf.png)

As a result, the name of the restaurant appears.

![The name of the restaurant appears](https://imgur.elightup.com/D0DNs0c.png)

For the address information, do the same with the voucher. Add a **Text** element, then insert data from the **Address** field.

![Get the address information](https://imgur.elightup.com/IenArYL.png)

The last information we want to display is the restaurant’s logo. Choose the **Image** element. The logo is saved in the custom field as well, so we’ll also insert the dynamic data into this element. Then, the logo of the restaurant appears.

![Display the restaurant’s logo](https://imgur.elightup.com/Iv8Z4CS.gif)

We have just finished displaying information about a restaurant on the block.

## 4. Creating the featured section

Let’s edit the homepage with **Breakdance** to add a new section to the page.

Now, add a **Heading** element and name the section.

![Add a Heading element and name the section](https://imgur.elightup.com/yv533i7.png)

To display the wanted posts from the created global block, we need the **Post Loop Builder** element.

![Choose the Post Loop Builder element to display the wanted posts from the created global block.](https://imgur.elightup.com/b0xzO0f.png)

In the **Global Block** section of the Post Loop Builder settings, choose the name of the global block we’ve just created.

![Choose the name of the created global block](https://imgur.elightup.com/azTulQ4.png)

There is no product or any information display now. So, move to the **Query** section of the Post Loop Builder element > choose **Custom**, and edit the query like this.

![Edit the query to display the products information](https://imgur.elightup.com/7DHiei7.png)

**In there**: In the **Source** data, it’ll be automatically set as the **Post Types**, then choose the name of the post type you want to get the post from. I chose **Restaurants**. You also can change some other settings as you wish, but I keep them as default.

Now, there’re some posts displayed with the layout and information exactly as we set in the created global block.

![Some products display on the frontend.](https://imgur.elightup.com/NWE1fQC.png)

When I change the layout of this section a little bit, I see it's not like what I’m thinking. You can see something weird. There may be some blank blocks in the section.

![There may be some blank blocks in the section.](https://imgur.elightup.com/q4XGOUm.png)

They do not disappear on the frontend. It is simply the place for the posts that didn’t meet our conditions. Although the posts’ information won’t display as the condition regulates, the posts still have their own space.

To remove them, add a **Code Block** on your homepage, and input some JavaScript to disappear the voids.

![Add a Code Block, and input some JavaScript to disappear the voids.](https://imgur.elightup.com/SGJUJbT.png)

 ```css
jQuery('.ee-post').filter(function() {
return jQuery(this).text().trim() == ""
}).remove();
```
This is how the section looks after removing the voids.

![The featured restaurants section after removing the voids](https://imgur.elightup.com/6eFyxem.png)

## 5. Styling the section

Go back to edit the global block to style the display of the post information. Change the settings of each element to get the wanted look.

Then back to the homepage, you will see all the featured restaurants are displayed as good as you want.

![All the featured products are displayed as good as you want](https://imgur.elightup.com/FOO2VOm.png)

## Last Words

Let’s try out this simple tutorial and effortlessly **showcase your featured products** using **Meta Box** and **Breakdance**. In the event that you’re using another page builder or just do it without any page builder, just go to [our documentation](https://docs.metabox.io/tutorials/case-studies/) and look for the one that fits your case.

If you like an automated approach for selecting and displaying products based on specific conditions instead of doing it manually, the tut ‘[Showing posts with specific criteria - Meta Box + Breakdance](https://docs.metabox.io/tutorials/show-posts-specific-criteria-meta-box-breakdance/)’ will give you a hand.

# Showing the featured restaurants - Meta Box + Elementor

import LiteYouTubeEmbed from 'react-lite-youtube-embed';
import 'react-lite-youtube-embed/dist/LiteYouTubeEmbed.css';

In today’s practice, we're going to show the featured products using **Meta Box** and **Elementor**.

I’m getting restaurants as an example for the products and this is the section I’ll create in this tutorial:

![The featured products using Meta Box and Elementor](https://imgur.elightup.com/1wdDGxA.png)

## Video Version

<LiteYouTubeEmbed id='cdn8muN_yQ4' />

## Preparation

All of the featured restaurants in the section are chosen manually by a custom field in the backend. It’s a switch field. The restaurant will be displayed in the featured section when this button is turned on.

![The restaurant will be displayed in the featured section when this button is turned on](https://imgur.elightup.com/2vBgC2q.png)

So, to get started, we need these tools:

* [Meta Box plugin](https://wordpress.org/plugins/meta-box/): to create the switch field. In addition, you may want to add some extra information about your product, so custom fields also come handy.
* [MB Custom Post Type](https://metabox.io/plugins/custom-post-type/): to create custom post type for the products;
* [MB Builder](https://metabox.io/plugins/meta-box-builder/): to have a UI in the back end to create custom fields;
* [MB Admin Columns](https://metabox.io/plugins/mb-admin-columns/) (optional): to display the custom fields as an admin column to easily see the information. I use it to show you which restaurants will be featured to easily compare with the result.
* [MB Elementor Integration](https://metabox.io/plugins/mb-elementor-integrator/): to get dynamic data from custom fields and display them on the page easily.
* **Elementor** and its pro version: to build the homepage and the section.

You can install them individually or use the Meta Box AIO for all.

## 1. Creating a custom post type

Go to **Meta Box** and create a new custom post type for your products.

![Create a new custom post type for your products](https://imgur.elightup.com/63DJvXS.png)

After publishing, you will see your post type display as a menu.

![The post type displayed as a menu](https://imgur.elightup.com/333f5oW.png)

## 2. Creating custom fields

Go to **Meta Box** > **Custom Fields** to create fields to save extra information for the restaurants as usual.

![Create fields to save extra information for the restaurants](https://imgur.elightup.com/XdyWIfO.png)

I’ll create some custom fields for product information. You also can add other ones.

![Create some custom fields for product information](https://imgur.elightup.com/9Qx6OHx.png)

Besides some familiar fields, I use a switch field to choose to display the restaurant in the section or not. It’s based on the value of the field.

![Use a switch field to choose to display the restaurant in the section or not](https://imgur.elightup.com/4CwZFBj.png)

In the backend, to know if the restaurant is featured or not, just check the following box in the settings of the switch field. It's available only when you have **MB Admin Columns**.

![The restaurant is featured when you have MB Admin Columns](https://imgur.elightup.com/SAeRlAS.png)

After having all the fields, go to the **Settings** tab, choose **Location** as **Post type**, and Restaurant to apply the fields to it.

![Apply the fields to the post](https://imgur.elightup.com/SV7pm4Z.png)

Then, when adding a new post, you’ll see the fields. If you want to feature the restaurant, just turn on the button.

![If you want to feature the restaurant, just turn on the button](https://imgur.elightup.com/2vBgC2q.png)

I added some posts for instance, you can easily see which one will be displayed in the section from the column.

![The posts displayed in the section from the column](https://imgur.elightup.com/EgDc5U3.png)

## 3. Displaying information of a product

Go to **Elementor** and create a template to designate which and how the information from a post of a product will be displayed.

![Create a template to designate which and how the information from a post ò a product will be displayed](https://imgur.elightup.com/EXSvTuU.png)

Set the template as **Loop Item**.

![Set the template as Loop Item](https://imgur.elightup.com/nom3rmd.png)

Choose the post type to get the right preview.

![Choose the post type to get the right preview](https://imgur.elightup.com/0Whce0K.png)

Add a **Section** element.

![Add a Section element](https://imgur.elightup.com/EOWO4DJ.png)

Let's add information for each restaurant. First, insert **Featured Image** element to display restaurant image.

![Insert Featured Image element to display the restaurant image](https://imgur.elightup.com/6JILeZY.png)

Add **Text Editor** for the voucher.

![Add Text Editor for the voucher](https://imgur.elightup.com/FrJyLjQ.png)

Use the **Dynamic Tags**, look for the **Meta Box Field** option, and choose the field from the list.

![Use the Dynamic Tags, look for the Meta Box Field option, and choose the field from the list](https://imgur.elightup.com/R4Ikgiy.gif)

Next, add the **Post Title** for the restaurant name.

![Add the Post Title for the restaurant name](https://imgur.elightup.com/mJ7jRsH.png)

Add an additional **Text Editor** element. It’s for the address which also is saved in a custom field.

![Add an additional Text Editor element](https://imgur.elightup.com/GwoilCE.png)

We should use the **Dynamic Tags** as well, and find the **Address** field.

![We should use the Dynamic Tags as well, and find the Address field](https://imgur.elightup.com/zXqvoPC.gif)

For the logo, add an **Image** element.

![Add an Image element for the logo](https://imgur.elightup.com/aQZRrgT.png)

Then, add **Dynamic Tags** from the logo field to display the image.

![Add Dynamic Tags from the logo field to display the image](https://imgur.elightup.com/ditLy1L.gif)

That's all of the information I want to get and display for the restaurant.

![All of the information I want to get and display for the restaurant](https://imgur.elightup.com/MHcB0fe.png)

## 4. Creating a custom query

We need a condition based on the value of the **Switch** field to choose which posts will be displayed. As a result, we need a **Custom Query** when creating the section of the homepage. **Elementor** does not support it in the builder, so you should use a little bit of code to create one. It’s really easy with the official format provided by **Elementor**, so just follow it without concern.

You can add code directly to the theme file, but it’s not recommended. I’ll use a third party plugin which is **Code Snippets**. You can install it directly from [wordpress.org](https://wordpress.org/plugins/code-snippets/).

To create a custom query, go to **Code Snippets** to add new.

![Go to Code Snippets to create a custom query](https://imgur.elightup.com/BFjBjoe.png)

Add some code to set the condition.

![Add some code to set the condition](https://imgur.elightup.com/K24FBOJ.png)

```
/**
 * Update the query to use specific post types.
 *
 * @since 1.0.0
 * @param \WP_Query $query The WordPress query instance.
 */
function my_query_by_post_types( $query ) {
	$query->set( 'post_type', [ 'restaurant' ] );
}
add_action( 'elementor/query/my_custom_filter', 'my_query_by_post_types' );

/**
 * Update the query by specific post meta.
 *
 * @since 1.0.0
 * @param \WP_Query $query The WordPress query instance.
 */
function my_query_by_post_meta( $query ) {

	// Get current meta Query
	$meta_query = $query->get( 'meta_query' );

	// If there is no meta query when this filter runs, it should be initialized as an empty array.
	if ( ! $meta_query ) {
		$meta_query = [];
	}

	// Append our meta query
	$meta_query[] = [
		'key' => 'feature_the_restaurant',
		'value'=>1,
		'compare' => '='
	];

	$query->set( 'meta_query', $meta_query );

}
add_action( 'elementor/query/my_custom_filter', 'my_query_by_post_meta' );
```

Let’s get through for more detail.

![These lines of code are to declare that we’ll query the post type which has the ID as 'restaurant'](https://imgur.elightup.com/iEpPEfd.png)

```
function my_query_by_post_types( $query ) {
	$query->set( 'post_type', [ 'restaurant' ] );
}
add_action( 'elementor/query/my_custom_filter', 'my_query_by_post_types' );
```

These lines of code are to declare that we’ll query the post type which has the ID as '**_restaurant_**'.

![the ID as 'restaurant'](https://imgur.elightup.com/2j0PLp7.png)

**_my_custom_filter_** is the name of the custom query, you can name it as your own.

![The name of the custom query](https://imgur.elightup.com/maMfxTF.png)

![The mentioned condition](https://imgur.elightup.com/gWw7PCt.png)

```
$meta_query[] = [
	'key' => 'feature_the_restaurant',
	'value'=>1,
	'compare' => '='
];
```

This is the mentioned condition. It means that if the custom field, which has the **ID** as '**_feature_the_restaurant_**', has the value as 1, the post will be got and displayed. **1** is the value of its **On** status.

![The ID as 'feature_the_restaurant', has the value as 1, the post will be got and displayed](https://imgur.elightup.com/ZNhZ55B.png)

Now, move on to display posts on the homepage.

## 5. Creating the section

Go to edit the homepage with **Elementor**.

![Go to edit the homepage with Elementor](https://imgur.elightup.com/oExPxZZ.png)

Add a **Section** elemento to the page as usual.

![Add a Section element to the page as usual](https://imgur.elightup.com/RMKOR3B.png)

Then, insert a **Heading** for it.

![Insert a Heading for it](https://imgur.elightup.com/eoaDCLB.png)

Add the **Loop Grid** element to get posts.

![Add the Loop Grid element to get posts](https://imgur.elightup.com/W8i8c6q.png)

Choose the created template, but some blog posts will be displayed in the form.

![Choose the created template](https://imgur.elightup.com/UCiXVWL.png)

To display the wanted posts from your product post type, go to the **Query** section. Set the **Source** as your product’s post type. Then **all the posts** from that post type will be displayed.

![Go to the Query section. Set the Source as your product’s post type](https://imgur.elightup.com/JuKd3y5.gif)

Fill in the **Query ID** box with the name of the created custom query to apply the condition that we want. The displaying posts will be changed.

![Fill in the Query ID box with the name of the created custom query](https://imgur.elightup.com/LAzmQi0.png)

To style the way each information of the post displays, go back to edit the created template as the **Loop Item** and customize each element’s settings.

Then the section will display with a nice look on the frontend.

![The featured products displayed on the homepage](https://imgur.elightup.com/1wdDGxA.png)

# Showing the featured restaurants - Meta Box + Zion

import LiteYouTubeEmbed from 'react-lite-youtube-embed';
import 'react-lite-youtube-embed/dist/LiteYouTubeEmbed.css';

In today’s practice, we're going to **show the featured products** using **Meta Box** and **Zion**.

In this case, I use the restaurants as an example of the products. This is the section I’ll create:

## Video version

<LiteYouTubeEmbed id='4oIZSLeek6s'/>

## Preparation

All of the featured restaurants in this section are chosen manually by a custom field in the backend. Each restaurant is a post of the custom post type named **Restaurants**.

In addition to the basic information about the restaurant, such as the name and image as the title and featured image of the post, it may include some other information, such as the voucher, address, and logo. This extra information will be saved in separate custom fields.

Here are some tools we need for this practice:

* [Meta Box core plugin](https://wordpress.org/plugins/meta-box/): to have a framework for creating a custom post type and custom fields;
* [MB Custom Post Type](https://metabox.io/plugins/custom-post-type/): create a custom post type for the restaurants;
* [MB Box Builder](https://metabox.io/plugins/meta-box-builder/): create custom fields to save the restaurant information;
* [MB Admin Columns](https://metabox.io/plugins/mb-admin-columns/) (optional): helps to display the custom fields as an admin column to easily see the information. I use it to show you which restaurants will be featured to easily compare with the result.
* **Zion Builder**: to create the featured restaurant section. You should use its **pro version** to make sure it runs smoothly with Meta Box.

## 1. Creating a new custom post type

Go to **Meta Box** > **Post Types** to create a new post type for the restaurants.

![The featured products using Meta Box and Zion.](https://imgur.elightup.com/c3TYzzc.png)

After publishing, you will see your post type displayed as a menu.

![The post type displayed as a menu](https://imgur.elightup.com/YcyWpzX.png)

## 2. Creating custom fields

Go to **Meta Box** > **Custom Fields** to create fields to save extra information for the restaurants as usual.

![The post type displayed as a menu](https://imgur.elightup.com/BEilkwt.png)

Here are all the custom fields that I created.

![All the custom fields for product information.](https://imgur.elightup.com/jA2cQLp.png)

Besides some familiar fields, I create a **Switch** field to choose whether to feature the restaurant or not.

![Use a switch field to choose to display the restaurant in the section or not](https://imgur.elightup.com/Lp2Q83A.png)

Turning on the switch button means that the restaurant will be displayed in the section and vice versa.

![If you want to feature the restaurant, just turn on the button](https://imgur.elightup.com/VInjNQk.png)

I’ll also show the values of this field in the admin column to see whether the restaurant is featured or not by ticking this box. This setting is available only when you have the **MB Admin Columns**.

![The restaurant is featured when you have MB Admin Columns](https://imgur.elightup.com/OlwQU8Y.png)

And this is how it displays on the admin dashboard.

![The posts displayed in the section from the column.](https://imgur.elightup.com/MbfUEv1.png)

After having all the fields, go to the **Settings** tab, choose **Location** as **Post type**, and select **Restaurant** to apply the fields to it.

![Go to the Settings tab, choose Location as Post type, and select Restaurant to apply the fields to it](https://imgur.elightup.com/2Vq031r.png)

In the post editor, you’ll see the created custom fields. The switch field is also displayed. You can turn on or turn off the button to choose to feature the restaurant or not.

![Turn on or turn off the button to choose to feature the restaurant or not.](https://imgur.elightup.com/7pZNBb0.gif)

## 3. Creating the section

Let’s edit the homepage with **Zion Builder**.

To create the section that shows the featured restaurants, add a **Section** element. Then, choose the **Heading** element and name it.

![Choose the Heading element to name the section.](https://imgur.elightup.com/OnhoDvQ.png)

Now, add a **Container** element to cover the posts. You can use a **Column** element to easily set the layout for posts.

![Add a Container element to cover the posts](https://imgur.elightup.com/QCQKO4F.png)

### 3.1 Setting the condition to display featured posts

In the settings of this **Column** element, I’ll add a condition to choose which posts will be displayed. If you don’t use the **Column**, you can add the condition into the **Container** in the same way.

Go to the **Advanced** tab, click on **Advanced conditions** to create a condition.

![Create a new post type for your e-books.](https://imgur.elightup.com/ciwGZOu.png)

The condition will be based on the value of the switch field, so select the **Post custom field** from the list and fill in the **ID** of the switch field into the box.

![Select the Post custom field](https://imgur.elightup.com/yQsptgS.png)

![Fill in the ID of the switch field](https://imgur.elightup.com/GZfthwS.png)

The switch field has two statuses: **On** and **Off**, corresponding to the value **1** or **0**. Since we want to display the post that has this field turned on, we put **1** into the **field value** box.

![Put 1 into the field value box which corresponds to the On status.](https://imgur.elightup.com/eFCc0Ps.png)

That’s all for the condition. It’s quite simple.

There will be multiple posts in the section, so go to the **Repeater Options** and turn on **Enable the repeater provider**.

![Turn on Enable the repeater provider](https://imgur.elightup.com/e0luGOB.png)

In the **Query type** section, choose **Query Builder**. In this case, I set the **Post type** as **Restaurant** to get posts from this post type.

![Set the Post type as Restaurant to get posts from this post type.](https://imgur.elightup.com/wSsMeCZ.png)

Remember to choose **Enable repeater consumers**. This is where you limit the total number of posts that will display.

![Choose Enable repeater consumers to limit the total number of posts that will display.](https://imgur.elightup.com/IsOnVbe.png)

You can enter numbers to the box in the image below to display only the posts in the range. For example, this is to choose to display the posts from the first to the third position. The ones from the 4th position will be disabled.

![Enter number to display only the posts in the range](https://imgur.elightup.com/84Ft0Dq.png)

Leaving these boxes blank means that we will display all the posts that meet the condition. Otherwise, disabling the repeater consumer means that no post will be displayed.

### 3.2 Displaying the restaurants information

Now, we’re moving to add elements to display the restaurant information.

To display the restaurant image, add an **Image** element. Then, click on the **Use dynamic data** icon and choose **Featured Image**.

![Display the restaurant image by using dynamic data.](https://imgur.elightup.com/ESXrXvS.png)

You see that the restaurant's images have been obtained.

![The restaurant's images have been obtained](https://imgur.elightup.com/Xx4VQV9.png)

For displaying the restaurant name that saves in the post title, add a **Heading** element, and also use dynamic data to get information from the **Post Title**.

![Add a Heading element > use dynamic data to get information from the Post Title.](https://imgur.elightup.com/A1aiCQh.png)

To set it as clickable, in the **Link** section, also use dynamic data and choose the **Post/ Page Link** option.

![Set the restaurant name as clickable](https://imgur.elightup.com/nFbFHNL.png)

Next, add a **Text** element for the address. Click on the **Use dynamic data** icon, choose **Meta Box Field** > choose the corresponding field. It is **Address**.

![Display the restaurant address.](https://imgur.elightup.com/remIp3P.png)

Do likewise to display the voucher and logo, just add a reasonable element. We also use dynamic data to get data from the right field.

![Display the voucher](https://imgur.elightup.com/KxWOJ10.png)

![Display the logo](https://imgur.elightup.com/twKoHuP.png)

We’ve displayed the wanted posts along with their information.

![All of the information I want to get and display for the restaurant](https://imgur.elightup.com/OffEeyH.png)

## 4. Styling the section

For styling, go back to the page editor with **Zion**, choose each element inside the section to change its settings. Do it one by one.

![Choose each element inside the section to change its settings.](https://imgur.elightup.com/58aYPoU.png)

Now we have a new look of the section.

![A new look of the featured restaurants section](https://imgur.elightup.com/rD4bUCm.png)

# Showing posts with a specific criteria - MB Views

import LiteYouTubeEmbed from 'react-lite-youtube-embed';
import 'react-lite-youtube-embed/dist/LiteYouTubeEmbed.css';

In this practice, we will find another way to do it with the help of MB Views from Meta Box.

This is the archive page that I created as an example. Only products are on sale will be displayed:

![Example of the created archive page](https://imgur.elightup.com/cujHZlS.png)

## Video version

<LiteYouTubeEmbed id='S5yVT5eTJYE' />

## Preparation

Each dish is a post of a custom post type. In addition to the basic information of the dishes such as the name, description and the image of the dish, there may be some extra information. So, they will be saved in custom fields. In this case, I have two fields in order to save the original price and the promotional price. All the dishes, which have the promotional price, are on sale and will be displayed on the page.

In this practice, we need these tools:

* [Meta Box core plugin](https://wordpress.org/plugins/meta-box/): to have a framework to create custom post types and custom fields;
* [MB Custom Post Types & Custom Taxonomies](https://metabox.io/plugins/custom-post-type/): to create custom post types;
* [MB Builder](https://metabox.io/plugins/meta-box-builder/): to have an intuitive UI to create custom fields in the backend;
* [MB Views](https://metabox.io/plugins/mb-views/): to create a page template for displaying posts;
* [MB Admin Columns](https://metabox.io/plugins/mb-admin-columns/) (optional): to display custom fields as an admin column.

## 1. Creating a custom post type

Go to **Meta Box** > **Post Types** > **Add New** to create a new post type for the dishes.

![Create a custom post type](https://imgur.elightup.com/co5AZcu.png)

Then, you will see a new menu like this in the admin dashboard. It’s your post type.

![New menu displays in the admin dashboard](https://imgur.elightup.com/UlyrAQo.png)

## 2. Creating custom fields

Go to **Meta Box** > **Custom Fields** to create a new field group.

![Create custom fields](https://imgur.elightup.com/va1KaU5.png)

Here are 2 fields I created as an example. The value stored in these 2 fields will be set to the condition to choose which dishes will be displayed.

![Created fields](https://imgur.elightup.com/rJFvzQi.png)

Since I want to know which dishes are having promotion, I set to show both these fields as an admin column like this:

![Show created fields as admin columns](https://imgur.elightup.com/Gz0J4ew.png)

Check this box to show this field as an admin column. You will have this setting when you enable the **MB Admin Columns**.

![Set the created fields as show as admin column](https://imgur.elightup.com/BQPth9F.png)

After creating all the fields, move to the **Settings** tab > **Location** as **Post** type > select **Cuisines** to apply these fields to it.

![Set location for the created fields](https://imgur.elightup.com/ntkUFQu.png)

Now, you’ll see all the created custom fields in the post editor of the Restaurants post type.

![All the created fields appear in the post editor](https://imgur.elightup.com/XtgNvpa.png)

## 3. Creating the archive page

Go to **Views** > **Templates** to create a new template for the page.

![Create a new template for the page](https://imgur.elightup.com/KdBYVqQ.png)

Instead of typing code, you will open the **Insert Field** and choose the field that you need. First, insert the **Post Title** for the page’s name.

![Insert the post title for the page’s name](https://imgur.elightup.com/Ky9LQHQ.png)

To display the posts, I’ll add some code as follows:

```
{% set args = { post_type: 'cuisine', meta_key : 'promotional_price', meta_value: '', meta_compare : '!=', meta_type : 'CHAR', posts_per_page: 6, order: 'DESC' } %}
{% set posts = mb.get_posts( args ) %}
{% for post in posts %}
{% endfor %}
```

![Add some code](https://imgur.elightup.com/7VN7J0e.png)

Let’s get through each line with me.

```
{% set args = { post_type: 'cuisine', meta_key : 'promotional_price', meta_value: '', meta_compare : '!=', meta_type : 'CHAR', posts_per_page: 6, order: 'DESC' } %}
```

This is used to declare getting posts from the **Cuisine** post type which slug is cuisine.

Along with that, I also added some attributes.

```
meta_key : 'promotional_price', meta_value: '', meta_compare : '!=', meta_type : 'CHAR',
```

All of these ones are to set the condition that stipulates that only the posts that have any value in the promotional price field will be got and displayed. **_'promotional_price'_** is the **ID** of the **Promotional Price** field. **_meta_value: '', meta_compare : '!=', meta_type : 'CHAR'_** is to recognize if there is any data in the field or not. The data type to compare is character. If it is NOT that there is no character in the field, the post will be displayed.

```
{% set posts = mb.get_posts( args ) %}
```

This is the function to get posts.

```
{% for post in posts %}
{% endfor %}
```

This is a loop that we used to display multiple posts. Inside the loop, we’ll insert some fields to get data from them as follows to get the information about the products.

First, insert the Post thumbnail to display the dish’s image.

![Insert the post thumbnail to display the dish’s image](https://imgur.elightup.com/EJHQohy.png)

Insert the **Post Title** once again, but this is for the name of the dishes which is saved in the title of the post.

![Insert the post title for the name of the dishes](https://imgur.elightup.com/8KG3i2b.png)

Next are the **Promotional Price** and **Original Price**.

![Add the promotional price and original price code](https://imgur.elightup.com/mnWVrVY.png)

Finally, the **Post Content** to display the dishes description.

![Insert post content to display the dishes description](https://imgur.elightup.com/0G6hexJ.png)

After choosing all the wanted fields to get data from, move to set the Location for this template as **Page**, then choose the name of the created page here.

![Choosing all the wanted fields to get data from](https://imgur.elightup.com/deJll4X.png)

Go back to the page on the frontend, you’ll see the dishes are displayed but with no styling.

![The dishes are displayed on the frontend](https://imgur.elightup.com/PDbiliv.png)

For styling the page, you can go back to the **Views** to edit the template. You should add some div tags into the template. I also added the unit price for the pricing like this.

![Add some div tags into the template](https://imgur.elightup.com/w6BDnZQ.png)

You also can add some **CSS** in the **CSS** tab of the view as follows.

![Add some CSS in the CSS tab of the view](https://imgur.elightup.com/w1JXHRW.png)

This code is available on [GitHub](https://github.com/wpmetabox/tutorials/tree/master/show-posts-with-a-specific-criteria-with-mb-views), so you can refer to it for more details.

Now, you will see a new look of the page on the frontend.

![A new look of the page on the frontend](https://imgur.elightup.com/cujHZlS.png)

# Showing posts with specific criteria - Meta Box + Breakdance

import LiteYouTubeEmbed from 'react-lite-youtube-embed';
import 'react-lite-youtube-embed/dist/LiteYouTubeEmbed.css';

If you want to display some on-sale products in a promotion campaign only, [this series](https://metabox.io/series/specific-criteria/) can be useful for your e-commerce website. In this practice, we’re going to **show posts with specific criteria** that is the on-sale status using **Meta Box** and **Breakdance**.

I did an archive page as an example. This page will display only the dishes which are on sale.

![example of an archive page displays products on sale](https://imgur.elightup.com/LBrcxt1.png)

## Video Version

<LiteYouTubeEmbed id='nUsxc_nOhaQ' />

## Preparation

The products will be the dishes which are posts of a custom post type. In addition to the basic information of the dishes such as the name, description and the image of the dish, there may be some extra information. They’ll be saved in custom fields.

In this case, I have two fields in order to save the original price and the promotional price. The value stored in these 2 fields will be set to the condition to choose which dishes will be displayed. Only one that has the promotional price is on sale and will be displayed on the page.

In this practice, we need these tools:

* [Meta Box core plugin](https://wordpress.org/plugins/meta-box/): to have a framework to create custom post types and custom fields;
* [MB Custom Post Types](https://metabox.io/plugins/custom-post-type/): to create a custom post type for your products;
* [MB Builder](https://metabox.io/plugins/meta-box-builder/): to have an intuitive UI to create custom fields in the backend;
* [MB Admin Columns](https://metabox.io/plugins/mb-admin-columns/) (optional): to display custom fields as an admin column to know exactly which one will be shown on the page;
* **Breakdance**: to build the page.

## 1. Creating a new custom post type

Go to **Meta Box** > **Post Types** > **Add New** to create a new post type for your products. Here I name it **Cuisines**.

![create a new custom post type in Meta Box](https://imgur.elightup.com/6BBVtyJ.png)

Then you’ll see a menu like this. It’s your post type.

![new custom post type for cuisine](https://imgur.elightup.com/R2aQTR2.png)

## 2. Creating custom fields

I’ll create 2 fields as an example. As I mentioned, the value stored in these 2 fields will be set to the condition to choose which dishes will be displayed.

You also can add some other custom fields to save more information about your product, and display them on the page in the same way.

![created fields](https://imgur.elightup.com/YRE2Nf9.png)

If you want to clearly see which products are having promotion, you can set both these fields displayed as admin columns like this.

![Show created fields as admin columns](https://imgur.elightup.com/l0c57yH.png)

Do it by checking this box in both fields’ settings.

![Set the fields as show as admin column](https://imgur.elightup.com/qXWvQh2.png)

You’ll have this setting only when you enable the [MB Admin Columns](https://metabox.io/plugins/mb-admin-columns/) extension.

After creating all the fields, move to the **Settings** tab > set **Location** as **Post type** > select **Cuisines** to apply these fields to it.

![Set the location for the created fields](https://imgur.elightup.com/aSmE2zE.png)

Now, you’ll see all the created custom fields when creating a new post in Cuisines post type.

![all the created custom fields appear in the post editor](https://imgur.elightup.com/XI2IWH3.png)

## 3. Creating a global block

With Breakdance, you should create a global block to get and display wanted information from a post first, then use this global block to display them anywhere on your site.

Go to **Breakdance** > **Global Blocks** then create a new one.

![create a new global block](https://imgur.elightup.com/ZQafBT9.png)

Remember to set a post for live preview in order to easily see how it will display.

![set a post for live preview](https://imgur.elightup.com/TMrCbpd.png)

First, add a **Div** element to cover the block.

![add a Div element to cover the block](https://imgur.elightup.com/if4mRLE.png)

### 3.1. Setting the condition

We should **create a condition** in this element to **choose which posts will be displayed**, in this case **which ones have promotion**. Go to the settings of the **Div** element, you will see the **Conditions** section to add a new one.

![set the condition](https://imgur.elightup.com/FTuROGR.gif)

In the setting of the **Conditions**, choose **Dynamic Data** from the list to set the condition based on the data saved in custom fields.

![choose Dynamic Data to set the condition based on the data saved in custom fields](https://imgur.elightup.com/OO4gv4Q.png)

Since just posts which have any value in the promotional price will be displayed, choose the field here.

![Choose the field](https://imgur.elightup.com/WJRaSkZ.png)

Then change the operation to **is not empty**. That’s all for the condition.

![complete the condition](https://imgur.elightup.com/2Op4HWS.png)

### 3.2 Displaying the products information

Just add some reasonable elements to get product information from the posts.

Add the **Post Featured Image** element. It’ll display immediately.

![Add the Post Featured Image element](https://imgur.elightup.com/GWwDE1U.png)

Next, I use a **Div** element to group all the rest information for easier styling.

![add Div element to group all the rest information](https://imgur.elightup.com/ydWvvXv.png)

Add the **Post Title** element for the dish’s name.

![Add the Post Title element for the product’s name](https://imgur.elightup.com/ez58wAM.png)

Then, add another **Div** the group of the original price and promotional price.

![add Div the group of the original price and promotional price](https://imgur.elightup.com/oDVdiWD.png)

For the original price, add a **Text** element, then insert dynamic data from the field to it.

![add a Text element and insert dynamic data from the field](https://imgur.elightup.com/dDDZrad.gif)

You also can add the prepend and append text for having the unit price in the **Advanced** tab.

![add the prepend and append text in the Advanced tab](https://imgur.elightup.com/GmcG08Q.png)

Next, add another **Text** element for the promotional price, then get data from the corresponding field in the same way as the original price.

![Add Text element and get data for promotional price](https://imgur.elightup.com/vAhgEAO.gif)

Finally, add the **Post Content** element for the description of the dish.

![add the Post Content element for the product's description](https://imgur.elightup.com/SKKTV9K.png)

That’s all the things I want to display in the block.

![all of the product's information displayed](https://imgur.elightup.com/44uN5dC.png)

## 4. Creating the page

Go to **Pages** > **Add New** to create a new page as usual.

![create a new page](https://imgur.elightup.com/iNH1u2F.png)

Then choose **Breakdance** > **Template** > **Add Template** to create a custom template for it.

![create a custom template in breakdance](https://imgur.elightup.com/5q4vxz5.png)

Set the **Location** of the template as **Single/Pages**, and add the condition as follows.

https://imgur.elightup.com/EgCZB5r.gif

In the template editor, add a **Section** element first to cover all the page content.

![set the location for the page and add condition](https://imgur.elightup.com/hPQNRZc.png)

For the page title, add the **Post Title** element.

![add the Post Title element](https://imgur.elightup.com/jPK9hml.png)

Next, to display the posts, we should use the **Post Loop Builder** element. It allows us to display multiple posts at once.

![add the Post Loop Builder element to display the post](https://imgur.elightup.com/MlH7fkP.png)

Set the Global Block as the one we’ve just created.

![Set the Global Block](https://imgur.elightup.com/aTdG2Dy.png)

There'll be nothing displayed. Just go to the **Query** section, edit the query to set the post types that we want to get posts from as Cuisines.

![Add the Query and set the source of post which we get](https://imgur.elightup.com/wQueyFi.gif)

Now, there’re some posts displayed exactly as we set in the created global block.

You may think that just the posts that have value in the promotional price are displayed in this page now because we set the condition in the global block to get them. But, it’s not like that. When changing the layout a little bit, you will see some blank blocks like this.

![blank blocks](https://imgur.elightup.com/d8s52qa.png)

It’s weird!

Even when you check the page on the frontend, they do not disappear. It simply is the place for the posts that didn’t meet our condition. The posts’ information won’t display, but they still have their own space.

To remove them, add a **Code Block** to the template and input following JavaScript code into it.

![add a Code Block to the template](https://imgur.elightup.com/489JOR3.png)

![input JavaScript code](https://imgur.elightup.com/EN8DIOP.png)

```
jQuery('.ee-post').filter(function() {
return jQuery(this).text().trim() == ""
}).remove();
```

Now, the void disappears.

![the void disappears](https://imgur.elightup.com/DXeNxsg.png)

## 5. Styling the page

If you want to style the display of the post information, go back to edit the global block. Change the settings of each element in the **Style** tab to get the wanted look.

![style tab](https://imgur.elightup.com/hZ7ILR7.png)

For the layout, go to the template editor and do the same.

After styling, you’ll see the new appearance.

![The final look](https://imgur.elightup.com/LBrcxt1.png)

# Showing posts with specific criteria - Meta Box + Oxygen

import LiteYouTubeEmbed from 'react-lite-youtube-embed';
import 'react-lite-youtube-embed/dist/LiteYouTubeEmbed.css';

In this practice, we’ll find out how to show posts with this kind of specific criteria using Meta Box and Oxygen.

This is the archive page that I created as an example. Only products are on sale will be displayed:

![Example of the created archive page](https://imgur.elightup.com/MHBfXXi.png)

## Video version

<LiteYouTubeEmbed id='MeshaXL1hrg' />

## Preparation

The products will be the dishes which are posts of a custom post type. In addition to the basic information of the dishes such as the name, description and the image of the dish, there may be some extra information. They’ll be saved in custom fields.

In this case, I have two fields in order to save the original price and the promotional price. All the dishes, which have the promotional price, are on sale and will be displayed on the page.

In this practice, we need these tools:

* [Meta Box core plugin](https://wordpress.org/plugins/meta-box/): to have a framework to create custom post types and custom fields;
* [MB Custom Post Types & Custom Taxonomies](https://metabox.io/plugins/custom-post-type/): to create custom post types named Cuisines;
* [MB Builder](https://metabox.io/plugins/meta-box-builder/): to have an intuitive UI to create custom fields in the backend to save information about the price of products;
* [MB Admin Columns](https://metabox.io/plugins/mb-admin-columns/) (optional): to display custom fields as an admin column.
* **Oxygen**: to build the page.

## 1. Creating a custom post type

Go to **Meta Box** > **Post Types** > **Add New** to create a new post type for the dishes.

![Create a custom post type](https://imgur.elightup.com/CKjbLOa.png)

Then, you will see a new menu like this in the Admin Dashboard. It’s your post type.

![New menu displays in the admin dashboard](https://imgur.elightup.com/R2aQTR2.png)

## 2. Creating custom fields

Go to **Meta Box** > **Custom Fields** to create a new field group.

![Create custom fields](https://imgur.elightup.com/kNWolvM.png)

Here are 2 fields I created as an example. The value stored in these 2 fields will be set to the condition to choose which dishes will be displayed.

![Created fields](https://imgur.elightup.com/4tVvhFa.png)

Since I want to know which dishes are having promotion, I set to show both these fields as an admin column like this:

![Show created fields as admin columns](https://imgur.elightup.com/jqpINJ5.png)

To do it, you will need to tick this box in both fields. You will have this setting when you enable the MB Admin Columns extension.

![Set the created fields as show as admin column](https://imgur.elightup.com/LBf4rOE.png)

After creating all the fields, move to the **Settings** tab > **Location** as **Post type** > select **Cuisines** to apply these fields to it.

![Set location for the created fields](https://imgur.elightup.com/i7P3f45.png)

Now, you’ll see all the created custom fields in the post editor of the **Restaurants** post type.

![All the created fields appear in the post editor](https://imgur.elightup.com/ciVVdkh.png)

## 3. Creating the archive page

### 3.1 Creating a template

Go to **Oxygen** > **Templates** to create a new template for the page.

![Create a template](https://imgur.elightup.com/OheUDtP.png)

Next, create a new page. Note to set the created template to apply it to the page. Then, just edit the created page with Oxygen.

![Edit with Oxygen](https://imgur.elightup.com/DvEbLMh.png)

Remember to set a preview for the page.

![Set preview for the page](https://imgur.elightup.com/KjOWO0g.png)

First, add a **Section** component to contain all the posts.

![Add a Section component](https://imgur.elightup.com/AiqHWlY.png)

Then, to have a page title, add a **Heading** component > **Insert Data** button and choose **Title** in the **Post** section to get the name automatically.

![Add a Heading component](https://imgur.elightup.com/wJxruOF.gif)

To set content in sections for easy styling later, you should use some Div components.

![Use some Div component](https://imgur.elightup.com/FjHdFAJ.png)

### 3.2 Adding condition to display posts

Next, add a **Repeater** component to display all the posts as we want. However, we just choose to show only the dishes which are on sale, so we need to set a condition in the settings of this component.

In the **Query** section, choose ‘**advanced**’, and edit the query to add some parameters as below.

![Add condition to display posts](https://imgur.elightup.com/9cUzpVF.gif)

![Add some parameters](https://imgur.elightup.com/p6w5399.png)

The first parameter means that we’ll get posts from the post type which has the slug as ‘**cuisine**’.

The second one is the condition based on the ‘**promotional_price**’ field. It means that if the field has any value in the field, the post will be displayed.

That’s all for the condition.

### 3.3 Displaying the posts’ information

Let’s add some other components inside the Repeater to display the information of the posts.

Add an **Image** component to get the image of the dishes which is the featured image of the post.

![Add an Image component](https://imgur.elightup.com/pbtK1vG.png)

Click the **Select Dynamic Data** button as below picture, and choose the **Featured Image** option from the list.

![Choose Featured Image option through select dynamic data button](https://imgur.elightup.com/egje5AP.png)

![All the featured images of the posts displayed](https://imgur.elightup.com/XhJhlwt.png)

Then, you’ll see all the featured images of the posts displayed.

![All the featured images of the posts displayed](https://imgur.elightup.com/indFyKZ.png)

To get the names of the dishes from the post title, add a **Heading** component > **Insert Data** button > choose **Title** in the **Post** section.

![Add a Heading component](https://imgur.elightup.com/j2SBt4I.gif)

For the original price of the dish, use the **Text** component.

![Use the Text component](https://imgur.elightup.com/Pd0x993.png)

Choose **Insert Data** to get the data that saves in the custom fields. Since the field is created by **Meta Box**, select the **Meta Box Field** option and choose the corresponding field.

![Choose the right field](https://imgur.elightup.com/Ql3Y4xM.gif)

You’ll see the original price of the dishes displayed immediately.

![The original price will be displayed](https://imgur.elightup.com/vvRDpbY.png)

For the promotional price, do likewise. Or you can duplicate the **Text** component used for the original price and just change the field connecting with it.

![Do likewise with the original price field](https://imgur.elightup.com/Q0KL7B9.png)

For the description of the dish which is the post content, add a **Text** component as well. Then insert data from the **Content** fields of the post.

![Add a Text component for the description](https://imgur.elightup.com/wpW43Vx.png)

![Choose the right field](https://imgur.elightup.com/DNTVUUj.png)

Now, all the information has been obtained and displayed.

![All the information is obtained](https://imgur.elightup.com/VstwqMs.png)

For styling, still in the page editor with Oxygen, you can style each component by changing their settings in the **Advanced** tab.

![Style the page](https://imgur.elightup.com/O9Lpzc0.png)

Then, you will see a new look of the page on the frontend.

![The final look](https://imgur.elightup.com/MHBfXXi.png)

# Showing posts with specific criteria - Meta Box + Elementor

import LiteYouTubeEmbed from 'react-lite-youtube-embed';
import 'react-lite-youtube-embed/dist/LiteYouTubeEmbed.css';

Let’s show products with specific criteria, for example, which are on sale on your website using Meta Box and Elementor.

Here is an example archive page that only shows the dishes on sale.

![Example of an archive page displays products on sale](https://imgur.elightup.com/1iHSC62.png)

## Video Version

<LiteYouTubeEmbed id='SBZP4fmue8c'/>

## Preparation

The products will be the dishes, which are posts of a custom post type. These dishes will have basic information such as name, description, and image. Additionally, there may be extra information stored in custom fields.

In this case, I have two fields in order to save the original price and the promotional price. The values stored in these 2 fields determine which dishes will be displayed. The only one that has the promotional price is on sale and will be displayed on the page.

In this practice, we need these tools:

* [Meta Box core plugin](https://wordpress.org/plugins/meta-box/): to have a framework to create custom post types and custom fields;
* [MB Custom Post Type](https://metabox.io/plugins/custom-post-type/): to create a custom post type for the dishes;
* [MB Builder](https://metabox.io/plugins/meta-box-builder/): to have an intuitive UI to create custom fields in the backend;
* [MB Admin Columns](https://metabox.io/plugins/mb-admin-columns/) (optional): to display custom fields as an admin column to know exactly which one will be shown on the page;
* [MB Elementor Integration](https://metabox.io/plugins/mb-elementor-integrator/): to get dynamic data from custom fields and display them on the page easily;
* **Elementor** and **Elementor Pro**: to build the page.

## 1. Creating a new custom post type

Go to **Meta Box** > **Post Types** > **Add New** to create a new post type for your products. My post type’s name is **Cuisines**.


![Create a new custom post type in Meta Box](https://imgur.elightup.com/8uaBTO3.png)

## 2. Creating custom fields

In this practice, I will create two fields. As mentioned before, the value stored in these two fields will be used as a condition to determine which dishes will be shown.

![Created custom fields for extra information of products](https://imgur.elightup.com/o66Pc7f.png)

You can also add some other custom fields to save more information about your product and display them on the page in the same way.

To easily identify which products have promotions, you can set both of these fields displayed as admin columns like this.

![Show created fields as admin columns](https://imgur.elightup.com/8fmXlwX.png)

To do it, just check this box in both fields’ settings.

![Set the custom fields as show as admin column](https://imgur.elightup.com/edBxiFs.png)

You’ll have this setting only when you enable the [MB Admin Columns](https://metabox.io/plugins/mb-admin-columns/) extension.

After creating all the fields, move to the **Settings** tab > set **Location** as **Post type** > select **Cuisines** to apply these fields to it.

![Set the location for the created fields](https://imgur.elightup.com/3H3TSUq.png)

When creating a new post in **Cuisines** post type, you’ll see all the created custom fields.

![All the created custom fields appear in the post editor](https://imgur.elightup.com/vK1p3lU.png)

## 3. Displaying the products information

We’ll not get posts in this step. Just display information about a product, that is from a post. Go to **Templates** > **Add News** to create a template for it.

![Create a template](https://imgur.elightup.com/FzPxe82.png)

We should choose the template as a **Loop Item** for easier getting posts in the next step.

![Choose the template as a Loop Item for easier getting posts in the next step](https://imgur.elightup.com/hrxKD2H.png)

Remember to set the preview for the template.

![Set the preview for the template](https://imgur.elightup.com/PaYAlW4.png)

![Set the preview for the template](https://imgur.elightup.com/PdW23UK.png)

First, add a **Section** element with the one-column layout to contain all the information about a dish.

![Add a Section element to contain all the information about a dish](https://imgur.elightup.com/NTV3T6I.png)

Now, add some elements to display the dish’s information.

For the image of the dish, choose the **Featured Image** element.

![Choose the Featured Image element to display the image of the dish](https://imgur.elightup.com/KLqtszz.png)

To get the dish’s name, select the **Post Title** element.

![Select the Post Title element to get the dish’s name,](https://imgur.elightup.com/cIICNX4.png)

Next, choose an **Insert Section** element to cover the price, including the original price and the promotional price.

For the original price information, choose the **Text Editor** element. Since this information is saved in custom fields created by Meta Box, use the **Dynamics Tags** and find the **Meta Box Field** in the **Post** section, then choose the corresponding fields like in the image below.

![Add a Text Basic element and insert dynamic data from the field](https://imgur.elightup.com/zSjsqln.gif)

As you can see in the gif above, a number will be displayed without a unit of pricing. To have the unit, go to the **Advanced** section, and add the currency unit.

![Add the currency unit](https://imgur.elightup.com/rmRtv5Q.png)

For the promotional price information, do likewise.

![Get the promotional price information](https://imgur.elightup.com/iDndhkR.png)

To get the last piece of information - the dish’s description, select the **Post Content** element.

![Select the Post Content element to get the dish’s description](https://imgur.elightup.com/zDflpft.png)

We’ve just finished getting all of the information about the dish. You can style each element on your own.

## 4. Creating the page

Let’s create a new page for displaying all the dishes which are on sale. Just add a new black page, then edit it with **Elementor**.

### 4.1 Getting all posts

To get all of the posts to display on the page, add the **Loop Grid** element.

![To get all of the posts to display on the page, add the Loop Grid element.](https://imgur.elightup.com/Allp9z9.png)

In its **Layout** settings, choose the created template. So, you can see that some blog posts will be displayed.

![The display of some default blog posts](https://imgur.elightup.com/zZ5jEY6.png)

To replace them with your products, go to the **Query** section, and choose **Source** as your product’s post type. Then, all of the posts in that post type display.

![Go to the Query section, and choose Source as your product’s post type.](https://imgur.elightup.com/bfvoasl.png)

### 4.2 Setting conditions following the criteria

I just want to display which products are currently on sale. Thus, we need a condition based on the value of the **Promotional Price** field to choose which posts will be displayed. To do it, we need a custom query. But, in this current window, **Elementor** does not support it in the builder, so, you should use some code to create one.

You can add the code to the theme’s file directly. In this case, I recommend using the third party plugin - **Code Snippets**. It helps to create the code without accessing the theme’s file. You can install it directly from [wordpress.org](https://wordpress.org/plugins/code-snippets/).

![Use Code Snippets](https://imgur.elightup.com/1ASOgt7.png)

To create the custom query, go to **Code Snippets** and add new.

![Go to the Query section, and choose Source as your product’s post type.](https://imgur.elightup.com/Ik2liYR.png)

Then, add some code to the box to set the condition.

![To create the custom query, go to Code Snippets and add new.](https://imgur.elightup.com/swUB3UF.png)

```css
/**
 * Update the query to use specific post types.
 *
 * @since 1.0.0
 * @param \WP_Query $query The WordPress query instance.
 */
function my_query_by_post_types( $query ) {
	$query->set( 'post_type', [ 'cuisine' ] );
}
add_action( 'elementor/query/my_custom_filter', 'my_query_by_post_types' );

/**
 * Update the query by specific post meta.
 *
 * @since 1.0.0
 * @param \WP_Query $query The WordPress query instance.
 */
function my_query_by_post_meta( $query ) {

	// Get current meta Query
	$meta_query = $query->get( 'meta_query' );

	// If there is no meta query when this filter runs, it should be initialized as an empty array.
	if ( ! $meta_query ) {
		$meta_query = [];
	}

	// Append our meta query
	$meta_query[] = [
		'key' => 'promotional_price',
		'compare' => 'EXISTS'
	];

	$query->set( 'meta_query', $meta_query );

}
add_action( 'elementor/query/my_custom_filter', 'my_query_by_post_meta' );
```

Let’s get through the code in more detail!


![This code is to declare that we’ll query the post type that has this slug - Cuisine.](https://imgur.elightup.com/fVVYEs5.png)

```
function my_query_by_post_types( $query ) {
	$query->set( 'post_type', [ 'cuisine' ] );
}
add_action( 'elementor/query/my_custom_filter', 'my_query_by_post_types' );
```

This code is to declare that we’ll query the post type that has this slug - **Cuisine**.

`'my_custom_filter'` is the name of the custom query, you can name it as your own. It’ll be used for the following part.

![The line of code is the mentioned condition.](https://imgur.elightup.com/lSbMkla.png)

```
// Append our meta query
$meta_query[] = [
	'key' => 'promotional_price',
	'compare' => 'EXISTS'
];
```

This line of code is the mentioned condition. It is set based on the value of a custom field with the ID as **promotional price**. My condition is to compare whether any value exists in this field or not. If there is, the post will be displayed.

All of this code is available on [GitHub](https://github.com/wpmetabox/tutorials/blob/master/show-posts-with-a-specific-criteria-with-elementor/custom.php), so you can refer to it.

After adding the code snippet, go back to editing the template of the page. In the **Loop Grid**'s settings >  **Query** > **Query ID** > insert the name of the custom query you created to apply the condition that we want.

![In the Loop Grid's settings >  Query > Query ID > insert the name of the custom query to apply the condition that we want.](https://imgur.elightup.com/rBd2oqL.gif)

Back to the frontend, you can see all of the dishes along with the information that we’re looking for.

![The final look of displaying post with specific criteria](https://imgur.elightup.com/V6m7AZn.png)

# Showing posts with specific criteria - Meta Box + Zion

import LiteYouTubeEmbed from 'react-lite-youtube-embed';
import 'react-lite-youtube-embed/dist/LiteYouTubeEmbed.css';

Today, we’ll show you how to display posts with specific criteria, such as products that are on sale, using **Meta Box** and **Zion**.

This is an example archive page that only displays the dishes on sale.

![Example of an archive page displays products on sale](https://imgur.elightup.com/mhYhltr.png)

## Video version

<LiteYouTubeEmbed id='t4yXHWkwbhk' />

## Preparation

The products will be the dishes, which are posts of a custom post type. These dishes will contain essential details such as name, description, and image. Additionally, there may be extra information stored in custom fields.

In this tutorial, I have two fields in order to save the original price and the promotional price. Only dishes that have a value in the promotional price field are on sale and will be displayed on the page.

Here are the needed tools:

* [Meta Box core plugin](https://wordpress.org/plugins/meta-box/): to have a framework to create custom post types and custom fields;
* [MB Custom Post Type](https://metabox.io/plugins/custom-post-type/): to create a custom post type for the dishes;
* [MB Builder](https://metabox.io/plugins/meta-box-builder/): to have an intuitive UI to create custom fields in the backend;
* [MB Admin Columns](https://metabox.io/plugins/mb-admin-columns/) (optional): to display custom fields as an admin column to know exactly which one will be shown on the page;
* **Zion Builder** and **Zion Builder Pro**: to build the page.

## 1. Creating a new custom post type

Go to **Meta Box** > **Post Types** > **Add New** to create a new post type for your products.

![Create a new custom post type for products](https://imgur.elightup.com/dHPs2V5.png)

## 2. Creating custom fields

I’ll create two fields as an example. As I mentioned, the value stored in these 2 fields will be set to the condition to choose which dishes will be displayed.

![Created custom fields for extra information of products](https://imgur.elightup.com/TWzWP5Z.png)

You also can add some other custom fields to save more information about your product and display it on the page in the same way.

To easily identify which products are on sale, you can set both of these fields as admin columns like this.

![Show created fields as admin columns](https://imgur.elightup.com/khMin0M.png)

Do it by checking this box in both fields’ settings.

![Set the custom fields as show as admin column](https://imgur.elightup.com/WpcWAYf.png)

You’ll have this setting only when you enable the MB Admin Columns extension.

After creating all the fields, move to the **Settings** tab > set **Location** as **Post type** > select **Cuisines** to apply these fields to it.

![Set the location for the created fields](https://imgur.elightup.com/xmmmpmW.png)

When creating a new post in the **Cuisines** post type, you’ll see all the created custom fields.

![All the created custom fields appear in the post editor](https://imgur.elightup.com/mv5X2Qj.png)

## 3. Displaying the products on page based on a condition

Now, we’re going to create a new page to display the product information.

Since **Zion Builder** does not support styling this page title, we’ll disable it and create a new one later so that we can style it ourselves.

![Disable the page's title](https://imgur.elightup.com/tHSqnZO.png)

After creating the page, let’s edit it with **Zion Builder**.

First, add the **Section** element to cover all the content of the page.

![Add the Section element to cover all the content of the page](https://imgur.elightup.com/i349C4O.png)

Next, choose the **Container** element. Inside this container, add the **Heading** element to get the page’s title. In the dynamic data section, choose the **Post Title** option.

![Choose the Post Title option to get the page's title.](https://imgur.elightup.com/CZI9MMm.png)

You see the title of the page displayed immediately.

![The title of the page displayed immediately](https://imgur.elightup.com/3sgbk2Y.png)

### 3.1 Setting the condition

To show all the main content of the page for the products currently on sale, add another **Container** element. Since the products are arranged in three columns, add a **Column** element inside.

![Add container and column elements.](https://imgur.elightup.com/nZXv3Bc.png)

To display multiple posts, we need to enable a repeater for the above column.

In the settings of the **Column** element, go to the **Advanced** tab > **Repeater** Options and **enable the repeater provider**.

![Go to the Advanced tab, choose Repeater Options and enable the repeater provider.](https://imgur.elightup.com/ZFMXTo4.png)

Now, we’ll get all the posts from the wanted post type. In the **Post Type** section, find the right one. In my case, it’s **Cuisines**.

![Get all the posts from the Cuisines post type.](https://imgur.elightup.com/Jx9mhTQ.png)

Remember to turn on the **Enable the repeater consumer** option to display all the posts in the chosen post type.

![Turn on the Enable the repeater consumer option to display all the posts in the chosen post type.](https://imgur.elightup.com/yP0biNh.png)

In this practice, I’ll only show the posts that have a value saved in the **Promotional Price** field that is the specific criteria that I mentioned before. To do that, scroll up the settings to go to the **General options** section.

In the **Element visibility** option, choose **Advanced conditions**. Then, the **Element Condition** option will display.

![In the Element visibility option, choose Advanced conditions. Then, the Element Condition option will display.](https://imgur.elightup.com/0izo2Yn.png)

Click on the **Set advanced conditions** button, a popup will appear. It allows you to define the conditions. The mentioned condition is set based on the value of a custom field with the **ID** `promotional_price`. Therefore, choose the **Post custom field** option and fill in the field ID into the box as follows. And, select the **Is set** option because my condition is to set whether any value exists in the **Promotional Price** field or not.

![The condition of getting the wanted posts](https://imgur.elightup.com/oNb3HHr.png)

This condition means that if there is any value in this field, the post will be displayed.

As we haven’t chosen any kind of information about the product to show yet, it’s still blank there.

![As we haven't sealected any product information to display yet, it remains empty.](https://imgur.elightup.com/Hb6uakY.png)

### 3.2 Displaying the products information

Now, let’s add some elements to display the product's information as well as the dish’s information.

For the image of the dish, add the **Image** element. Then, connect it to the featured image of the post by using the **Use dynamic data** button. In the list of displaying options, find the **Featured Image** in the **Post** section.

![Get the image of the dish from custom field.](https://imgur.elightup.com/zYzXxA2.png)

Now, all the featured images have been obtained.

![All the featured images have been obtained.](https://imgur.elightup.com/uttYzf0.png)

Next, select the **Column** element to contain the remaining information about the dish.

For the dish’s name, add the **Heading** element and choose **Post Title** in the dynamic data section.

![Add the Heading element for the dish's name](https://imgur.elightup.com/yVr5JCy.png)

You see that the dishes names are displayed.

![The dishes names are displayed](https://imgur.elightup.com/nV9MVK2.png)

Add the **Column** element one more time to cover both the original price and the promotional price.

For the original price information, choose the **Text Editor** element. Since this information is saved in custom fields created by **Meta Box**, click **Use dynamic data** and find the **Meta Box Field** in the **Post** section, then choose the corresponding field like in the image below.

![The dishes names are displayed](https://imgur.elightup.com/aSq6v15.gif)

As you can see in the gif, a number will be displayed without a unit of pricing. To have the unit displayed, and add the currency unit in the box like this.

![Add the currency unit](https://imgur.elightup.com/tSo6xr2.png)

For the promotional price information, do likewise.

![Get the promotional price information](https://imgur.elightup.com/iSFwJeC.png)

To get the last information - the dish’s description, select another **Text** element. In the dynamic data section, choose the **Post Content** option.

![Get the dish’s description form custom field](https://imgur.elightup.com/LfLsaAr.png)

Now the dishes' descriptions have been obtained.

![The dishes' descriptions have been obtained](https://imgur.elightup.com/xEL0G3N.png)

We’ve just finished getting all of the information about the dish.

## 4. Styling the page

Back in the page editor with **Zion Builder**, you can change the settings of each element to style them as you want.

Go to the frontend, you can see all of the dishes along with the information that we’re looking for.

![All of the dishes along with the information that we’re looking for](https://imgur.elightup.com/mhYhltr.png)

You can compare the list of posts displayed on the page with the ones in the back end. Which one has the promotional price will be the one displayed on the page.

![Which one has the promotional price will be the one displayed on the page.](https://imgur.elightup.com/khMin0M.png)

# Showing posts with specific criteria - Meta Box + Bricks

import LiteYouTubeEmbed from 'react-lite-youtube-embed';
import 'react-lite-youtube-embed/dist/LiteYouTubeEmbed.css';

In sale seasons, you may want to create an archive page to display only the products which are on sale, then this series is for you. In this practice, we’re going to show posts with specific criteria, in this case, it’s the products that are on sale.

I’ll create a page using Bricks to show them like this with an example of dishes for the products.

![Example of showing the posts with criteria](https://imgur.elightup.com/jixQXCm.png)

## Video version

<LiteYouTubeEmbed id='fGm74bVzbkg' />

## Preparation

Each dish is a post of a custom post type and there may be some extra information you want to save in custom fields for them. In this case, I have two fields in order to save the original price and the promotional price. All the dishes which have the promotional price, which means that it’s on sale, will be displayed on the page.

In this practice, we need these tools:

* [Meta Box core plugin](https://wordpress.org/plugins/meta-box/): to have a framework to create custom post types and custom fields;
* [MB Custom Post Types & Custom Taxonomies](https://metabox.io/plugins/custom-post-type/): to create custom post types;
* [MB Builder](https://metabox.io/plugins/meta-box-builder/): to have an intuitive UI to create custom fields in the backend;
* **Bricks** Builder: to create the page.

## Creating a custom post type

Go to **Meta Box > Post Types > Add New** to create a new post type for the dishes. Here, I name it **Cuisines**.

![Create a custom post type](https://imgur.elightup.com/QBR48fA.png)

## Creating custom fields

Go to **Meta Box > Custom Fields** to create fields.

![Create custom fields](https://imgur.elightup.com/o38tqhY.png)

Here are the two fields that I’ve just created.

After creating all the fields, move to the **Settings** tab > **Location** as **Post type** > select **Cuisines** to apply these fields to it.

![Set location for the created fields](https://imgur.elightup.com/bXWE1qR.png)

When creating any post in the **Cuisines** post type, you’ll see all created custom fields.

![New post in the Cuisines post type in the Post Editor](https://imgur.elightup.com/oXohkMV.png)

## Creating the page

Go to **Pages > Add New** to create a new page.

![Create the Page](https://imgur.elightup.com/HilxJ2n.png)

Then, let’s edit it with **Bricks**.

![Edit with Bricks](https://imgur.elightup.com/wf4EwEW.png)

First, add a new Section element to contain all the dishes’ information.

![Add a Section element](https://imgur.elightup.com/5VJ7C5V.png)

Next, add a **Heading** element to display the page’s title. Since the title of the page is the post title, choose **Select dynamic data** > **Post title** to get the page’s name.

![Add a Heading element](https://imgur.elightup.com/ATbL9s5.png)

Now, we’re going to get the dishes. However, we just want to display only the dishes that are on sale. So, we need to set conditions for them. Let’s see how to do it.

## Setting the condition

Inside the **Container**, add a **Div** element to cover all of the post.

![Add a Div element to cover all of the post](https://imgur.elightup.com/BOoOM7B.png)

Since each dish is a post of a custom post type, switch the button to enable the Use the query loop option and set the query. Choose **Post** and **Cuisines** to get the data from posts of that post type.

![Enable the Use the query loop and set the query](https://imgur.elightup.com/mHOxKt6.png)

Because we just want to display only the posts that are on sale, which means the **Promotional Price** field of those posts must have a value.
So, scroll down to the **Meta Query** section. Based on the value of the **Promotional Price** fields, we can clarify which dishes to display. Therefore, in the Meta Key, fill in the ID of the **Promotional Price** field.

![Fill in the ID of promotional price field in the Meta Key](https://imgur.elightup.com/R5dvmSu.png)

Then in the **Compare**, choose **Not equal**. So, all the posts having value in the **Promotional Price** fields will be chosen to display.

![Choose Not equal in the Compare](https://imgur.elightup.com/WFNVyAs.png)

That’s all for the condition. Next, we’ll display the information you want for each post.

## Displaying the cuisines information

To display the image of the dishes, add the **Image** element.

![Add an Image element](https://imgur.elightup.com/rTODJjS.png)

Since these images are the featured image of the post, choose the **Select dynamic data** button and find the **Featured Image** option in the **Post** section.

![Choose Featured Image to get the image of the dish](https://imgur.elightup.com/2YeLnqT.png)

Next, to get the name of the dish which is the post title, add a **Heading** element, and choose the Select dynamic data button, then find **Post Title**.

![Add a Heading element and choose Post title through the Select dynamic data button](https://imgur.elightup.com/HYNVBex.png)

After that, add a **Div** element.

For the price of the dish, instead of adding **Basic Text**, I’d like to use the **Rich Text** element to get information about the price. The **Basic Text** allows you to get the data from the field only, but the **Rich Text** enables adding the extra text along with the data.

So, to display the original price, add a **Rich Text** element.

![Add a Rich text element for the original price field](https://imgur.elightup.com/cZeHc6d.png)

This is the section of the custom fields created by **Meta Box** for the **Cuisines** post type. Go to **Meta Box (Cuisines)** and then find the **Original Price** field.

![Find the correct field](https://imgur.elightup.com/Dd3dK9H.png)

For the promotional price information, do likewise.

![Do likewise with promotional price field](https://imgur.elightup.com/YuoGvPh.png)

To display the description of the dish which is the post content, add a **Basic text** and then connect it to the Post content fields through the **Select dynamic data** button.

![Add a Basic Text for the post content](https://imgur.elightup.com/Vx8IYrS.png)

Now, all the information is shown. This is how it displays on the front end.

![All information has been obtained](https://imgur.elightup.com/L9D39sD.png)

## Styling the page

Still in the page editor with **Bricks**, style any element you want by changing their settings in the **Style** tab.

![Style the page](https://imgur.elightup.com/Ft8whJ1.png)

The archive page now displays beautifully.

![The archive page displays beautifully](https://imgur.elightup.com/jixQXCm.png)

# Showing upcoming events - Meta Box + Breakdance

import LiteYouTubeEmbed from 'react-lite-youtube-embed';
import 'react-lite-youtube-embed/dist/LiteYouTubeEmbed.css';

**Displaying upcoming events** highlights important dates and deadlines, making it easier for everyone to join. Let's use **Meta Box** and **Breakdance** to achieve this!

We're focusing on **displaying events with end dates after the current date**. Each day, if an event's end date has passed, it magically disappears from the page. All automated!

![The upcoming events section created by Meta Box and Breakdance](https://imgur.elightup.com/CI38tj5.png)

## Video version

<LiteYouTubeEmbed id='c7nZCUKpPSQ'/>

## Preparation

Imagine that today is January 30th.

![Assume that today is January 30th.](https://imgur.elightup.com/BEC0jA3.png)

We will filter and display the events that are either ongoing or scheduled for the future. This means that an event with an end date beyond January 30th will be shown on the page.

![An event with an end date beyond January 30th will be shown on the page.)](https://imgur.elightup.com/Z2BIHSb.png)

In this case, each event will be a post of a custom post type. I’ll create some custom fields to store some typical information about events. The start date and the end date will also be used for filtering purposes.

Let’s check which tools are necessary for this practice.

* [The Meta Box plugin](https://wordpress.org/plugins/meta-box/): to have a framework to create a custom post type and custom fields for the events;
* [MB Custom Post Type](https://metabox.io/plugins/custom-post-type/): to create a custom post type for the events;
* [MB Builder](https://metabox.io/plugins/meta-box-builder/): to have a UI on the backend to create the custom fields visually;
* **Breakdance**: to build the page, which contains the upcoming events section.

Now, let’s start!

## 1. Creating a new post type

Go to **Meta Box** > **Post Types** to create a new post type for the events.

![Create a new post type for the events.](https://imgur.elightup.com/abGyY4o.png)

## 2. Creating custom fields

Each event may have some subsidiary information. Then, we should use custom fields to store them; just create them as you go. Here are some typical ones for this practice.

![Some typical custom fields to store event information](https://imgur.elightup.com/xudbLbw.png)

Two of them, the start date and the end date, should be must-have items since they will be used for the filter.

Now, go to **Meta Box** > **Custom Fields** and create them.

![Go to Meta Box > Custom Fields to create fields](https://imgur.elightup.com/wx7123p.png)

I’ll choose the **Date Picker** field type for both the start and end date of the event.

![Choose the Date Picker field type for the start and end date of the event.](https://imgur.elightup.com/lffhi0Z.png)

Pay attention that you’ll only see this setting for the field when enabling the [MB Admin Columns](https://metabox.io/plugins/mb-admin-columns/) extension. Just turn it on to show the date on the management dashboard, then you can easily compare with the result. This feature is optional, so I did not mention it before.

![Turn on the button to show the date on the management dashboard](https://imgur.elightup.com/2N6Xqho.png)

After creating all the needed fields, go to the **Settings** tab > choose **Location** as **Post type**, and select **Event** to apply these fields to this post type.

![Set the location to apply these fields to the Event post type](https://imgur.elightup.com/CWiN4CI.png)

Now, in the post editor, you will see the created custom fields.

![The created custom fields in the post editor](https://imgur.elightup.com/xudbLbw.png)

Simply input data into them.

These are some posts that I created for reference.

![Some created posts](https://imgur.elightup.com/PnvSd9r.png)

The start date and the end date are shown as admin columns as well. You may want to see these ones once again in the end to easily compare them with the ones displayed on the page.

## 3. Creating a global block stipulating the display of an event

With Breakdance, you should start by making a global block. This block will get information from a post first, then show it anywhere on your site.

Go to **Breakdance** > **Global Blocks** and create a new global block.

![Create a new global block.](https://imgur.elightup.com/8NoLKdW.png)

Don't forget to pick a post to see how it looks.

![Pick a post to see how it looks in preview](https://imgur.elightup.com/DOBTDn3.png)

My global block will display the information of each post (I mean event) in a box like this:

![The global block will display the information of each post in a box](https://imgur.elightup.com/6UXo2D1.png)

Now, first, select the **Div** element to cover the block.

![Select the Div element to cover the block](https://imgur.elightup.com/N9kTlLt.png)

Inside this div, add some elements to get detailed information of the events.

For the image of the event, choose a **Post Featured Image** element since it is saved as the post's featured image. And then, the image is displayed in the preview.

![Get the image of the event](https://imgur.elightup.com/6aMfR2B.png)

Next, add the **Post Title** element for the event title.

![Add the Post Title element for the event title](https://imgur.elightup.com/BQoUzQs.png)

Now, I want to display the start date, end date, and location in the same style along with icons, so I choose the **Icon List** element instead of normal text. Since this information is saved in custom fields created with Meta Box, we use **Insert Dynamic Tags** for each item.

![To display the start date, end date, and location, choose the Icon List element, then use Insert Dynamic Tags](https://imgur.elightup.com/QJwKzmq.png)

Then, choose the corresponding fields in the **Metabox** section.

![Choose the corresponding fields in the Metabox section](https://imgur.elightup.com/mN27pHr.png)

Afterward, you'll see the start date appear right away.

![The start date appears](https://imgur.elightup.com/mQ4M5K3.png)

Besides, you can also change any icon for each item you want.

Do the same to display the end date.

For the location, I’ll add another **Icon List** element. Actually, you can use the created icon list for the dates; I just create a new one for separation. Also, use the **Insert Dynamic Tags** to connect this element with the right field.

![Get the location](https://imgur.elightup.com/tQ0XrlO.gif)

That’s all for displaying event information on the block.

## 4. Displaying all events on the page

It’s time to show all the events  on the page. Just to clarify, at this stage, we're displaying "all the events". For filtering, we’ll do it separately in the next step.

Now, edit any page with **Breakdance**.

I’m going to add a section to the page to show the upcoming events.

Begin by selecting a **Section** element.

![Select a Section element for the upcoming events.](https://imgur.elightup.com/axWk8Nh.png)

Next, add a **Heading** element, and give it a title.

![Add a Heading element for section title](https://imgur.elightup.com/CRAHWdz.png)

To display the wanted posts, we need the **Post Loop Builder** element. Then, in the **Global Block** section, choose the one we’ve just created.

![To display the wanted posts, we need the Post Loop Builder element.](https://imgur.elightup.com/Hu3BfOY.png)

You see, there is no information now. So, move to the **Query** section, choose **Custom**, and edit the query to get posts from the custom post type that we use for events.

![Move to the Query section, choose Custom, and edit the query to get posts from the custom post type that we use for events.](https://imgur.elightup.com/O68WI9Q.png)

**In there**:

* In the **Source** data: choose the **Post Types** as **Event** to get data from this post type.
* In the **Posts per page** section: you can enter the number to limit how many posts are shown. In this case, I fill in `-1` to show all the events.

Now, there’re some posts with information displayed exactly as we set in the created global block.

![There’re some posts with information displayed exactly as we set in the created global block.](https://imgur.elightup.com/TDVaUlo.png)

We’ve just finished getting all the posts in the event post type. Note that I specifically mentioned "all the posts" since we will add the filter later.

Let's style the section a bit. You can go back to edit the global block to change how the post information looks, as well as style the section.

So, you can see all the events displayed on the frontend with styling.

![All the events displayed on the frontend with styling](https://imgur.elightup.com/OpoxQwT.png)

To display only the upcoming events, we need a custom query to filter those posts.

## 5. Querying to show only the upcoming events

Go back to the **Query** section of the **Post Loop Builder** element, instead of using the query as the previous step, we should look for the **Array** section to add conditions flexibly. You can see an available code, which is a PHP array commonly used to customize queries for retrieving data.

![In the Query section of the Post Loop Builder element, look for the Array section to add conditions flexibly.](https://imgur.elightup.com/H9VVq3r.png)

Let’s add some code following the structure to display only the upcoming events.

```css
return [
  'post_type' => 'event',
  'posts_per_page'=> -1,
  'meta_key'=> 'end_date',
  'meta_compare'=> '>=',
  'meta_value'=>date('Y-m-d'),
];
```
![Add some code to display only the upcoming events.](https://imgur.elightup.com/dzgRvkW.png)

**Explanation**:

```css
'post_type' => 'event',
'posts_per_page'=> -1,
```
These lines of codes to get all posts in the **Event** post type.

```css
 'meta_key'=> 'end_date',
 'meta_compare'=> '>=',
 'meta_value'=>date('Y-m-d'),
```
This is to compare the end date with the current date. If the events have the end date after the current date, they could be displayed. In there:

* `'meta_key'=> 'end_date',`: to set the meta key as the ID of the field named **End Date**;
* `'meta_compare'=> '>='`: to get the events that have the end date after the current date;
* `'meta_value'=>date('Y-m-d'),`: to get the value of the current date with its format.

Now, just the upcoming events are displayed. Only events have the end date after the current date, which I marked at the beginning, could be displayed.

![The upcoming events section created by Meta Box and Breakdance](https://imgur.elightup.com/CI38tj5.png)

For [displaying posts with specific criteria](https://docs.metabox.io/tutorials/show-posts-specific-criteria-oxygen/), you can refer to our guide. I hope you find it helpful!

# Showing upcoming events - Meta Box + Bricks

import LiteYouTubeEmbed from 'react-lite-youtube-embed';
import 'react-lite-youtube-embed/dist/LiteYouTubeEmbed.css';

Sharing what’s coming up helps us see important dates and deadlines, so we can manage events better. Take **the upcoming events** as an example. Let's use **Meta Box** and **Bricks** to make it happen!

![Show the upcoming events section using Meta Box and Bricks](https://imgur.elightup.com/cHLKvtj.png)

## Video version

<LiteYouTubeEmbed id='sBCGEXOqUKE'/>

## Preparation

This is the rule: just **events with the end date after the current day could be displayed**. Day by day, if it passes the end date of any event, those events will automatically disappear from the page.

Assume that today is December 8th.

![Assume that today is December 8th.](https://imgur.elightup.com/QEmgAj4.png)

We will filter and display the events that are either ongoing or scheduled for the future. This means that an event with an end date beyond December 8th will be shown on the page.

![An event with an end date beyond December 8th will be shown on the page.](https://imgur.elightup.com/4UqOrgp.png)

For some basic event details, I’ll create some custom fields. The start date and the end date as well as will be used for that filter. And in this case, each event will be a post of a custom post type.

Here's what we'll use:

* [Meta Box plugin](https://wordpress.org/plugins/meta-box/): to have a framework to create a custom post type and custom fields for the events. You can install it directly from [wordpress.org](https://wordpress.org/plugins/meta-box/);
* [MB Custom Post Type](https://metabox.io/plugins/custom-post-type/): to create a custom post type for the events;
* [MB Builder](https://metabox.io/plugins/meta-box-builder/): to have a UI on the backend to create the custom fields visually;

And, I use **Bricks** to build the page.

Now, let’s start!

## 1. Creating a new post type

Go to **Meta Box** > **Post Types** to create a new post type for the events.

![Create a new post type for the events.](https://imgur.elightup.com/nHqoJie.png)

After publishing, you’ll see a new menu. It’s your post type.

![A new menu in the dashboard](https://imgur.elightup.com/vfenqqI.png)

## 2. Creating custom fields

Each event may have some subsidiary information. Then, we should use custom fields to store them. I have some typical ones for this practice.

![Some typical custom fields to store event information](https://imgur.elightup.com/G8UYFj2.png)

Two of them, the start date and end date should be must-have items since they will be used for the filter.

Now, go to **Meta Box** > **Custom Fields** to create them.

![Go to Meta Box > Custom Fields to create fields](https://imgur.elightup.com/zLE9E3q.png)

Choose the **Date Picker** field type for the start and end date of the event.

![Choose the Date Picker field type for the start and end date of the event.](https://imgur.elightup.com/3tphzzX.png)

To display the date on the management dashboard for easy comparison with the results, turn on the button like in the image below. This setting is available only when enabling the [MB Admin Columns](https://metabox.io/plugins/mb-admin-columns/) extension. This extension is just optional, so I did not mention it at the beginning.

![Turn on the button to show the date on the management dashboard](https://imgur.elightup.com/F1vb6Th.png)

After creating all the needed fields, go to the **Settings** tab > choose **Location** as **Post type** > select **Event** to apply these fields to this post type.

![Set the location to apply these fields to the Event post type](https://imgur.elightup.com/95m0aQd.png)

Now, in the post editor, you will see the created custom fields.

![The created custom fields in the post editor](https://imgur.elightup.com/G8UYFj2.png)

Just input data into them.

Here are some posts that I created for example:

![Some posts that I created for example](https://imgur.elightup.com/g0cAvCN.png)

The start date and the end date are shown as admin columns. You may want to see these ones once again in the end to easily compare with the ones displayed on the page.

## 3. Displaying all events on the page

Now, edit a page with **Bricks**.

First, select a **Section** element.

![Select a Section element.](https://imgur.elightup.com/Jxjindh.png)

Next, add a **Heading** element, and name the title.

![Add a Heading element, and name the title](https://imgur.elightup.com/Fmxu74e.png)

In the **Container** element inside the section, select the **Div** element to contain the event’s information.

![Select the Div element to contain the event’s information.](https://imgur.elightup.com/ClxOPom.png)

Then, to get all posts in the **Event** post type, enable the **Use query loop** button. In the **Query** section, choose the **Type** as **Posts**. And, choose the post type you want to get data from in the Post type section.

![Set condition to get all posts in the Event post type](https://imgur.elightup.com/HGsTxC0.png)

Now, let’s add some elements to get detailed information of the events.

For the image of the event, choose the **Image** element. Since these images are the featured image of the post, click the **Select dynamic data** icon and choose the **Featured Image** option.

![Get the image of the event](https://imgur.elightup.com/i6yet3E.png)

As you can see, the image is displayed in the preview.

![The image is displayed in the preview](https://imgur.elightup.com/YlooJgw.png)

Next, add the **Post Title** element for the event title.

![Add the Post Title element for the event title](https://imgur.elightup.com/ULYQoiu.png)

Now, I want to display the start date, end date, and location along with icons, so choose the **Icon Box** element instead of normal text.

![Choose Icon Box element to display the start date, end date and location along with icons](https://imgur.elightup.com/gyULXuW.png)

You can style, and choose any icon as you want.

![You can style and choose the icon as you want.](https://imgur.elightup.com/NdQkqBu.png)

As this information is saved in custom fields created with Meta Box, we’ll use the **Select dynamic data**, and then choose the corresponding fields.

![Use the Select dynamic data, and then choose the corresponding fields](https://imgur.elightup.com/AfIA8NF.png)

As a result, you’ll see a date from the **Start Date** field displayed immediately.

![A date from the Start Date field displayed immediately](https://imgur.elightup.com/4vsG5r5.png)

Do the same with the end date and location. Just duplicate the **Icon Box** element for saving time, then change the corresponding information.

We’ve just finished getting all the posts in the event post type. Note that I specifically mentioned "all the posts".

![All the posts in the event post type display](https://imgur.elightup.com/9DKkkwv.png)

To style this section, choose each element and change its settings.

Look at this picture, you can see all the events shown on the frontend with styling.

![All the events shown on the frontend with styling](https://imgur.elightup.com/KufWzNx.png)

To display only the upcoming events, we need a custom query to filter those posts. Let’s move to the next step.

## 4. Quering to show the upcoming events

It’s great when Bricks supports creating any custom query on the screen. So in the page editor with Bricks, go back to the **Query** section of the div, look for the **Meta Query** section, and add a meta query.

![In the Query section of the div, look for the Meta Query section, and add a meta query.](https://imgur.elightup.com/c3nc2HU.png)

We should compare the end date with the current date. If the events have the end date after the current date, they could be displayed. Let’s set the condition like this:

![Set condition to display the upcoming event](https://imgur.elightup.com/JXmSMWZ.png)

**In there**:

* In the **Meta key** box, enter the ID of the field named **End Date**.
* In the **Meta Value** box, add the current date with the `{current_date:Y-m-d}` format.
* In the **Compare** box, choose the **Greater than or equal** option to get the events that have the end date after the current date.

That’s all for the condition!

On the frontend, just events have the end date after the current day, which I marked at the beginning could be displayed.

![Just events have the end date after the current day](https://imgur.elightup.com/cHLKvtj.png)

Should you need to display posts with additional [specific criteria](https://docs.metabox.io/tutorials/show-posts-with-specific-criteria-bricks/), you can refer to it. Hope it can be helpful to you!

# Showing upcoming events - Meta Box + Elementor

import LiteYouTubeEmbed from 'react-lite-youtube-embed';
import 'react-lite-youtube-embed/dist/LiteYouTubeEmbed.css';

**Showing upcoming events** provides a clear view of upcoming deadlines and important dates, allowing you to manage tasks and priorities effectively. Today, we’re going to do it by combining **Meta Box** and **Elementor**.

These are the upcoming events I want to display in this practice.

![The upcoming events section](https://imgur.elightup.com/5utS48h.png)

## Video version

<LiteYouTubeEmbed id='Xga9xDaFCZk'/>

## Preparation

Specifically, just **events with the end date after the current day could be displayed**. Day by day, if it passes the end date of any event, those events will disappear from the page. And, it’s all automatic.

For example, assume that today is November 15th.

![Assume that today is November 15th.](https://imgur.elightup.com/X6NTxDR.png)

We will filter and display events that are either ongoing or scheduled for the future. This means that an event with an end date beyond November 15th will be shown on the page.

![An event with an end date beyond November 15th will be shown on the page.](https://imgur.elightup.com/bpoARON.png)

For some typical information about the event, I’ll create some custom fields. The start date and the end date as well as will be used for that filter. And in this case, each event will be a post of a custom post type.

These are some tools we use for this practice:

* [The Meta Box plugin](https://wordpress.org/plugins/meta-box/): to have a framework to create a custom post type and custom fields for the events. You can install it directly from [wordpress.org](https://wordpress.org/plugins/meta-box/).
* [MB Custom Post Type](https://metabox.io/plugins/custom-post-type/): to create a custom post type for the events;
* [MB Builder](https://metabox.io/plugins/meta-box-builder/): to have a UI on the backend to create the custom field visually;
* [MB Elementor Integration](https://metabox.io/plugins/mb-elementor-integrator/): to help Elementor elements get the dynamic data from custom fields created with Meta Box.
* **Elementor** to build the page, obviously. I also use **Elementor Pro**, which Meta Box already has the integration with to display the information from custom fields.

## 1. Creating a new post type

Go to **Meta Box** > **Post Types** to create a new post type for the events.

![Create a new post type for the events.](https://imgur.elightup.com/dtSH6At.png)

## 2. Creating custom fields

Each event may have some subsidiary information. Then, we should use custom fields to store them. I have some typical ones for this practice.

![Some typical custom fields to store event information](https://imgur.elightup.com/6XgSeKy.png)

Two of them, the start date and end date should be must-have items since they will be used for the filter.

Now, go to **Meta Box** > **Custom Fields** to create them.

![Go to Meta Box > Custom Fields to create fields](https://imgur.elightup.com/Na25XOY.png)

Choose the **Date Picker** field type for the start and end date of the event.

![Choose the Date Picker field type for the start and end date of the event.](https://imgur.elightup.com/s1dP0SB.png)

To show the date on the management dashboard and then you can easily compare it with the result, turn on the button like in the image below. This setting is available only when enabling the [MB Admin Columns](https://metabox.io/plugins/mb-admin-columns/) extension. This extension is just optional, so I did not mention it at the beginning.

![Turn on the button to show the date on the management dashboard](https://imgur.elightup.com/NEwQuwz.png)

After creating all the needed fields, go to the **Settings** tab > choose **Location** as **Post type** > select **Event** to apply these fields to this post type.

![Set the location to apply these fields to the Event post type](https://imgur.elightup.com/q7r6Svj.png)

Now, in the post editor, you will see the created custom fields.

![The created custom fields in the post editor](https://imgur.elightup.com/6XgSeKy.png)

Just input data into them.

Here are some posts that I created for example:

![Some posts that I created for example](https://imgur.elightup.com/IYTVn8a.png)

The start date and the end date are shown as admin columns. You may want to see these ones once again in the end to easily compare with the ones displayed on the page.

## 3. Creating a template for displaying each event

With **Elementor**, we should create a template to stipulate how information about each event should be displayed.

![Create a template to stipulate how information about each event should be displayed.](https://imgur.elightup.com/6LWQjOn.png)

Because there are multiple events, and we will use this template to display them all on the page, we should set the template as the **Loop Item** type.

![Set the template as the Loop Item type](https://imgur.elightup.com/23rpUYO.png)

Remember to set the preview for the template.

![Set the preview for the template](https://imgur.elightup.com/6mu5qSd.png)

This is the display of an event that I’m going to have for this practice.

![The display of an event](https://imgur.elightup.com/mXKEHEW.png)

Let’s add some elements to have it.

For the image of the event, add the **Featured Image** element.

![For the image of the event, add the Featured Image element.](https://imgur.elightup.com/C5KTB6E.png)

Then, add the **Post Title** element for the event title.

![Add the Post Title element for the event title.](https://imgur.elightup.com/DwGdVQa.png)

Next, I want to display the start date and end date along with icons, so choose the **Icon List** element instead of normal text. Since this information is saved in custom fields created with Meta Box, we’ll use the **Dynamic Tags** for each item. Find the **Meta Box Field** in the **Post** section, and then choose the corresponding fields from the dropdown list.

![Choose the Icon List element for the date, use Dynamic Tags for each item and find the Meta Box Field in the Post section](https://imgur.elightup.com/6Q9IWoI.png)

![Choose the corresponding fields from the dropdown list.](https://imgur.elightup.com/jtP2iBG.png)

Now, you’ll see a date from the **Start Date** field displayed immediately.

![A date from the Start Date field displays immediately](https://imgur.elightup.com/x7H3jhW.png)

You also can change the icon for the start date if you want.

Do the same to display the end date.

![Use Dynamic Tags to get the information of the End Date field](https://imgur.elightup.com/CdSTtHI.png)

For the location, I’ll add another **Icon List** element, actually you can use the created icon list for the dates, I just create a new one for separation. Also, use the **Dynamic Tags** to connect this element with the field.

![Get the location information](https://imgur.elightup.com/4pqdOf9.png)

We’ve just finished getting all of the information for the event. Let’s move to the next step.

## 4. Showing the events on the page

Let’s edit any page you want to show the upcoming events.

First, add a section on the homepage for it.

![Add a section on the homepage for the upcoming events](https://imgur.elightup.com/H5b6TMv.png)

Next, add a **Heading** element for the section’s title as usual and style it as you want..

![Add a Heading element for the section’s title](https://imgur.elightup.com/ExGPQHA.png)

To get all the posts, add the **Loop Grid** element. In the **Layout** section of this element settings, choose the created template (the template in the type of **Loop Item** we created). Then, some blog posts will be displayed.

![To get all the posts, add the Loop Grid element and choose the created template in the Layout section](https://imgur.elightup.com/e5Z4Unq.png)

To replace them with the events, go to the **Query** section, and change the **Source** to the **Event** post type. Then, all of the posts in that post type will display.

![In the Query section, and change the Source to the Event post type.](https://imgur.elightup.com/YjZafCG.png)

Note that I specifically mentioned "all the posts". However, we just want to display the upcoming events, so we need a custom query to filter those posts.

Elementor does not support creating any custom query on this screen. We should add code to the theme’s file for the query.

## 5. Creating a custom query

Go to the **Theme Functions** file, add these lines of code.

```css
/* Filer Upcoming Event */
add_action('elementor/query/filter_events', function($query) {
    $current_datetime = current_datetime()->format('Y-m-d');
    $query->set('post_type', ['event']);
    $meta_query [] = [
        ‘Relations’ => ‘OR’
        [
            'key' => 'start_date',
            'value' => date($current_datetime),
            'compare' => '>=',
        ],
       [
            'key' => 'end_date',
            'value' => date($current_datetime),
            'compare' => '>=',
    ];
    $query->set('meta_query', $meta_query);
});
```
![Add code to the theme’s file](https://imgur.elightup.com/Xvk7MfP.png)

For your information, this syntax is provided officially by Elementor. So, just use it with no waver.

Let’s go through it in more detail:

* `add_action('elementor/query/filter_events', function($query) {`: This hook is to create a query with the ID - `filter_events` to execute the functions below.

* `$current_datetime = current_datetime()->format('Y-m-d');`: This code helps to get the current time based on the time zone the website has been set.

 * `$query->set('post_type', ['event']);`: This is to query the post in the **Event** post type.

* The events as well as the posts that meet at least one of the two conditions below will be obtained and displayed.

![The events as well as the posts that meet at least one of the two conditions will be obtained and displayed.](https://imgur.elightup.com/yWSKBhb.png)

**In there**:

These lines below are to compare the start date with the current date. It means that all the upcoming events will be displayed.

```css
'key' => 'start_date',
'value' => date($current_datetime),
'compare' => '>=',
```
If there is any event that doesn't meet the first condition, but it’s happening with the end date is after the current date. Then, the second one helps to display those events.

```css
'key' => 'end_date',
'value' => date($current_datetime),
'compare' => '>=',
```
* `$query->set('meta_query', $meta_query);`: This is to set the query from the `$meta_query` variable.

That’s done for the custom query.

Remember to copy the query ID - `filter_events`.

Then, go back to the page editor with Elementor and input the created Query ID to the box.

![Input the created Query ID to the box](https://imgur.elightup.com/7cWxYiY.png)

But before doing that, keep track of the posts carefully. Because once you insert the ID of the custom query, the list of displayed posts will change.

![Once you insert the ID of the custom query, the list of displayed posts will change.](https://imgur.elightup.com/E6qdlxk.gif)

The changing images are the most clearly showing which posts have been updated.

This is how the upcoming events section displays on the page.

![The upcoming events section before styling](https://imgur.elightup.com/4c1FMU3.png)

We should style it a bit for a better look.

## 6. Styling the section

Go back to the created template as a loop item for each event. Just customize each element's settings to have a better look for the event information.

![Customize each element's settings of the loop item](https://imgur.elightup.com/GQLK7dF.png)

As well as, in the page editor, do so with the settings of the **Loop Grid** element.

![Customize the element’s settings in the page editor and  the Loop Grid element](https://imgur.elightup.com/uQI7efX.png)

Now, all of the upcoming events are displayed as we want.

![The upcoming events are displayed as we want.](https://imgur.elightup.com/5utS48h.png)

We've covered all the steps to display **the upcoming events** using **Meta Box** and **Elementor**. If you use other page builders, you can follow our channel to see them later.

In case you want to show posts with other specific conditions, you can refer to [this tut](https://docs.metabox.io/tutorials/show-posts-specific-criteria-with-elementor/). Hope it can be helpful to you!

# Showing upcoming events - using MB Views

import LiteYouTubeEmbed from 'react-lite-youtube-embed';
import 'react-lite-youtube-embed/dist/LiteYouTubeEmbed.css';

Today, we're delving into a practical application of the **MB Views** extension from Meta Box on how to **show upcoming events**. It helps to highlight important dates and deadlines, making it easier for everyone to stay informed and participate.

Just events with the end date after the current day could be displayed. When each day passes, events that have ended will automatically disappear from the page.

![The upcoming events section is created by MB Views.](https://imgur.elightup.com/xSyaxCt.png)

## Video version

<LiteYouTubeEmbed id='s755CePEo8M'/>

## Preparation

Assume that today is January 10th.

![Assume that today isJanuary 10th.](https://imgur.elightup.com/GfpVAme.png)

We will filter and display the events that are either happening now or scheduled for the future. This signifies that an event with an end date beyond January 10th will be shown on the page.

![An event with an end date beyond January 10th will be shown on the page.](https://imgur.elightup.com/TCg2vTG.png)

In this case, each event will be a post of a custom post type. To store some typical information about the events, including dates, I’ll create some custom fields. The start date and the end date will be used for that filter.

Before going ahead, let’s prepare some necessary tools for this practice.

* [The Meta Box plugin](https://wordpress.org/plugins/meta-box/): to have a framework to create a custom post type, custom fields, and a template for displaying the upcoming events;
* [MB Custom Post Type](https://metabox.io/plugins/custom-post-type/): to create a custom post type for the events;
* [MB Views](https://metabox.io/plugins/mb-views/): to create a template to display the upcoming events;
* [MB Builder](https://metabox.io/plugins/meta-box-builder/): to have a UI on the backend to create the custom fields visually.

And now, let’s start!

## 1. Creating a new post type

Go to **Meta Box** > **Post Types** to create a new post type for the events.

![Create a new post type for the events.](https://imgur.elightup.com/yyfMGTt.png)

## 2. Creating custom fields

Each event might include additional details. Then, we should use custom fields to store them; just create them as you go. These are some typical ones for this practice.

![Some typical custom fields to store event information](https://imgur.elightup.com/wqkeGqN.png)

Two of them, the start date and end date, are essential since they will be used for the filter.

Now, go to **Meta Box** > **Custom Fields** and create them.

![Go to Meta Box > Custom Fields to create fields.](https://imgur.elightup.com/Bl8iZWM.png)

I’ll choose the **Date Picker** field type for both the start and end date of the event.

![Choose the Date Picker field type for the start and end date of the event.](https://imgur.elightup.com/YBxf59P.png)

To show the date on the management dashboard for easy comparison with results, we should enable the field’s setting below. This feature is only visible when enabling the [MB Admin Columns](https://metabox.io/plugins/mb-admin-columns/) extension. While optional, it's a handy feature to have.

![Turn on the button to show the date on the management dashboard.](https://imgur.elightup.com/P0k6zHg.png)

After creating all the fields, go to the **Settings** tab. Choose **Location** as **Post type**, and select **Event** to apply these fields to this post type.

![Set the location to apply these fields to the Event post type.](https://imgur.elightup.com/GUYQ8N3.png)

Then, in the post editor, you will see the created custom fields.

![The created custom fields in the post editor.](https://imgur.elightup.com/wqkeGqN.png)

Simply input data into them.

Here are some posts that I made, for example.

![Some posts that I created for example.](https://imgur.elightup.com/p2lQEeM.png)

The start date and the end date are shown as admin columns as well. You may want to see these ones once again in the end to easily compare them with the ones displayed on the page.

## 3. Creating a template to display all events on the page

In this step, I just want to show all the posts. It means all the events. For filtering the upcoming events, I’ll set a condition later.

Head over to **Meta Box** > **Views** to create a new template for the upcoming events section.

![Go to Meta Box > Views to create a new template for the upcoming events section.](https://imgur.elightup.com/gv0qKuC.png)

With **MB Views**, you can insert fields into the template by clicking the **Insert Fields** button, and choose any fields on the right sidebar to get data from them.

![Insert fields into the template by clicking the Insert Fields button > choose any fields on the right sidebar to get data from them.](https://imgur.elightup.com/hzqoHdE.png)

Or, you can also add some lines of code to the **Template** tab, like this:

![Add some lines of code to the Template tab.](https://imgur.elightup.com/H59IscS.png)

```css
{% set args = { post_type: 'event', posts_per_page: -1 } %}
{% set posts = mb.get_posts( args ) %}
{% for post in posts %}
{% endfor %}
```
**In there**:

```css
{% set args = { post_type: 'event', posts_per_page: -1 } %}
```

This line is to declare that we’ll get posts from the post type that has the `event` slug. And, `-1` helps to get all posts in that post type. You can change it to get the expected number of posts.

```css
{% set posts = mb.get_posts( args ) %}
```

We use the `mb.get_posts` function to get the posts.

As we have various posts, use a loop to display all of them.

```css
{% for post in posts %}
{% endfor %}
```

For displaying the event's information, just use the button, as I said before. And then, insert some fields into the mentioned loop.

First, for the image of the event, choose the **Post thumbnail** field. You can choose a suitable image size to display.

![For the image of the event, choose the Post thumbnail field.](https://imgur.elightup.com/XQaxxEn.png)

Next, choose **Post title** to display the title of the event.

![Choose Post title to display the title of the event.](https://imgur.elightup.com/6rMbokY.png)

Now, I want to show the start date, end date, and location, which are saved in the custom fields created with Meta Box. Find them in the list, then insert the fields as usual.

![Look for the Event Information field group.](https://imgur.elightup.com/AlOa5Jz.png)

**Meta Box** also provides some options to set the output of the date. So, just set the one that fits your needs.

![Meta Box also provides some options to set the output of the date.](https://imgur.elightup.com/jlFr28H.png)

Do the same to display the end date and location.

![Display the end date and location.s](https://imgur.elightup.com/HbeqDs6.png)

That’s all the information I want to show for the events.

I just keep the settings of the template’s type as **Shortcode** to display this template anywhere easier.

![Keep the settings of the template’s type as shortcode to display this template anywhere easier.](https://imgur.elightup.com/dVBIP7S.png)

Notice that you should copy the generated shortcode to use it later.

![Copy this generated code to use it later.](https://imgur.elightup.com/ZjLJxND.png)

Now, go to any place where you want to display the upcoming events, add the **Shortcode** block.

![Add the Shortcode block.](https://imgur.elightup.com/JK2whdN.png)

Following this, insert the created shortcode into the box.

![Paste the created shortcode in the box.](https://imgur.elightup.com/Q3fWTyz.png)

So, we’ve just finished getting all the posts of the **Event** post type. Again, I just specifically mentioned "all the posts".

![Display all the posts of the event post type.](https://imgur.elightup.com/uLctyxt.png)

If you want to style the section, go back to the template and add some codes.

![If you want to style the section, back to the template, add some codes.](https://imgur.elightup.com/fyKD6f7.png)

```css
<link rel="stylesheet" href="https://cdnjs.cloudflare.com/ajax/libs/font-awesome/5.15.4/css/all.min.css" />
```

This is to call the Awesome font library in order to add icons for the start date, end date, and location.

You should also add some **div** tags and classes to style easily.

![Add some div tags and classes to style easily.](https://imgur.elightup.com/r2sO8B3.png)

Afterward, go to the **CSS** tab and add some codes. All of these codes are available on our [GitHub](https://github.com/wpmetabox/tutorials/tree/tutorials/show-upcoming-event) channel, so you can refer to it for more details.

![Go to the CSS tab and add some codes](https://imgur.elightup.com/CydufwK.png)

Go to the frontend, the new look has been done.

![The new look has been done.](https://imgur.elightup.com/WwNf3Yk.png)

To display only the upcoming events, we need to add a condition to filter those posts. So, let’s move on to the next step.

## 4. Adding condition to show only the upcoming events

Go back to the template, add the specific line of code to **compare the end date with the current date**. If the events have the end date after the current date, they could be displayed. So, add the following line of code inside the loop::

```css
{% if post.end_date  >=  mb.date('Y-m-d') %}
```

![Add the specific line of code to compare the end date with the current date.](https://imgur.elightup.com/f6ivqLl.png)

**In there**:

* `post.end_date`: to get the value of the **End Date** field;
* `mb.date('Y-m-d')`: to get the value of the current date with its format;
* `>=`: this operation is to get the events that have the end date after the current date.

On the frontend, you can see the upcoming events clearly. Just events have the end date after the current day, January 10, which I marked at the beginning could be displayed.

![You can see the upcoming events clearly on the frontend.](https://imgur.elightup.com/xSyaxCt.png)

To learn how to [display posts based on specific criteria](https://docs.metabox.io/tutorials/show-posts-specific-criteria-oxygen/), check out our comprehensive guide. I hope you find it helpful!

# Showing upcoming events - Meta Box + Oxygen

import LiteYouTubeEmbed from 'react-lite-youtube-embed';
import 'react-lite-youtube-embed/dist/LiteYouTubeEmbed.css';

**Showing upcoming events** highlights important dates and deadlines, making it easier for everyone to join. Let's use **Meta Box** and **Oxygen** to make it happen!

We'll **only display events that have an end date after the current date**. Day by day, if it passes the end date of any event, those events will automatically disappear from the page.

![The upcoming events section](https://imgur.elightup.com/2qGRKvt.png)

## Video version

<LiteYouTubeEmbed id='0355b__TU9o'/>

## Preparation

Assume that today is December 12th.

![Assume that today is December 12th.](https://imgur.elightup.com/WjuSHun.png)

We will filter and display the events that are either ongoing or scheduled for the future. This means that an event with an end date beyond December 12th will be shown on the page.

![An event with an end date beyond December 12th will be shown on the page.](https://imgur.elightup.com/A7aiHaS.png)

In this case, each event will be a post of a custom post type. And, I’ll create some custom fields to store some typical information about the event including the dates. The start date and the end date, as well, will be used for that filter.

Before moving forward, let’s check which tools are necessary for this practice.

* **Oxygen**: to build the page;
* [Meta Box plugin](https://wordpress.org/plugins/meta-box/): to have a framework to create a custom post type and custom fields for the events;
* [MB Custom Post Type](https://metabox.io/plugins/custom-post-type/): to create a custom post type for the events;
* [MB Builder](https://metabox.io/plugins/meta-box-builder/): to have a UI on the backend to create the custom fields visually.

## 1. Creating a new post type

Go to **Meta Box** > **Post Types** to create a new post type for the events.

![Create a new post type for the events.](https://imgur.elightup.com/OwLdcXb.png)

## 2. Creating custom fields

Each event may have some extra information. As mentioned, we’ll use custom fields to store them, so just create them as you go. These are some typical ones for this practice.

![Some typical custom fields to store event information](https://imgur.elightup.com/L4VkKYI.png)

Two of them are the start date and end date. They should be must-have items since they will be used for the filter.

Now, go to **Meta Box** > **Custom Fields** and create them.

![Go to Meta Box > Custom Fields to create fields](https://imgur.elightup.com/Mj5vipt.png)

I’ll opt for the **Date Picker** field type for the start and end date of the event.

![Choose the Date Picker field type for the start and end date of the event.](https://imgur.elightup.com/PfprHUs.png)

Keep in mind that the field setting below is visible when enabling the **MB Admin Columns** extension. Just turn it on to show the date on the management dashboard, and then you can easily compare it with the result. It is optional, so I did not mention it before.

![Turn on the button to show the date on the management dashboard](https://imgur.elightup.com/R7bFwXo.png)

Once you’ve created all the needed fields, go to the **Settings** tab > choose **Location** as **Post type**, and select **Event** to apply these fields to this post type.

![Set the location to apply these fields to the Event post type](https://imgur.elightup.com/0uma3XH.png)

Now, in the post editor, you will see the custom fields.

![The created custom fields in the post editor](https://imgur.elightup.com/L4VkKYI.png)

Simply input data into them.

These are some posts that I created for reference.

![Some posts that I created for example](https://imgur.elightup.com/E36Ou5g.png)

The start date and the end date are shown as admin columns as well. You may want to see these ones once again in the end to easily compare them with the ones displayed on the page.

## 3. Displaying all events on the page

It’s time to showcase the event information on the page. Remember, we're just displaying "all the events”. For filtering, we’ll do it separately in the next step.

Now, edit any page with **Oxygen**.

First, select a **Section** component to contain all of the event's details.

![Select a Section component to contain all of the event's details](https://imgur.elightup.com/XFck560.png)

Next, add a **Heading** component for the title of the upcoming events section.

![Add a Heading component for the title of the upcoming events section](https://imgur.elightup.com/u0X0Ydc.png)

To get all the posts of the **Event** post type, select a **Repeater** component. Then, go to the **Query** section to choose the source of data.

![Choose a Repeater component to get all the posts of the Event post type](https://imgur.elightup.com/6J06dQX.png)

Normally, to get the posts, you can choose the default or custom type. As I only select a certain number of posts to be displayed based on the condition, I choose the query in the advanced type.

![Choose the query in the advanced type.](https://imgur.elightup.com/AKBhqjp.png)

We’ll add some query parameters, as follows:

![Add some query parameters to get all the posts](https://imgur.elightup.com/JdS50r8.png)

* The `post_type` parameter is to specify that we'll only get posts from the **Event** post type. Remember to enter the ID of the post type you want to get data in the **data** box.
* The `post_per_page` parameter is to limit the number of posts displayed in the section. You can set the number of posts you want. For my expectation, I just enter the default number as `-1` to display all the posts in that post type.

After applying, there are some boxes equivalent to the number of posts.

![Some boxes equivalent to the number of posts](https://imgur.elightup.com/R5R9YVe.png)

Let’s display information about each event. We’ll add some components to the available **Div** of the **Repeater** component.

![Add some components to the available Div of the Repeater component.](https://imgur.elightup.com/x9sGo30.png)

To display the event’s image, select the **Image** component, then connect it to the featured image of the post. After that, images are displayed immediately.

![Display the event’s image](https://imgur.elightup.com/NbjMnkH.gif)

For the event title, add the **Text** component. Link this component to the post's title by clicking the text, and choose **Insert data**.

![For the event title, add the Text component.](https://imgur.elightup.com/YVRdc8M.png)

Then, choose the **Title** option in the **Post** section.

![Choose the Title option in the Post section](https://imgur.elightup.com/rVD604C.png)

So, you can view the event's title.

![The event's title displays.](https://imgur.elightup.com/9xnSaOy.png)

I want to display the start date, end date, and location in the same style along with icons. I’ll begin with the start date first. Add a new **Div** component to cover the start date information with its icon. Next, select the **Icon** component for the icon.

![Add a new Div component to cover the start date information with its icon and select the Icon component for the icon](https://imgur.elightup.com/yjY4XS5.png)

Following that, choose **Text** to get the start date. As this information is saved in a custom field created with Meta Box, click the **Insert data** button > choose **Meta Box Field** > select the corresponding field. As a result, you’ll see a date from the **Start Date** field displayed.

![Get the start date information.](https://imgur.elightup.com/N4ii6li.gif)

Do the same with the end date and location. Just duplicate the **Div** component to save time, then change the corresponding information.

![Duplicate the Div component](https://imgur.elightup.com/ZCQSDlq.png)

We’ve just finished getting all the posts in the event post type along with their short information.

![All the posts in the event post type along with their short information.](https://imgur.elightup.com/W6pOc72.png)

Note that again, I specifically mentioned "all the posts".

You can beautify this section as you want by changing the settings of each component. After making some adjustments, my events display with styling on the frontend like this.

![All events display with styling on the frontend](https://imgur.elightup.com/p9ydux0.png)

Now, move on to an important step to display only the upcoming events using a custom query to filter those posts.

## 4. Quering to show only the upcoming events

It’s great when Oxygen supports creating custom queries. So, in the page editor with Oxygen, go back to the **Query** section of the **Repeater** component and edit the query once again.

![Go back to the Query section of the Repeater and edit the query once again.](https://imgur.elightup.com/hTbKPYU.png)

We should compare the end date with the current date. If the events have the end date after the current date, they could be displayed. So, add other parameters to execute.

![Add other parameters to only show the upcoming events.](https://imgur.elightup.com/ISd8tu2.png)

* The `meta_key` parameter: to get the value of the **End Date** field, so enter its ID in the data box.
* The `meta_value` parameter: to get the current date's value. Pay attention that Oxygen allows the use of PHP function to return values, so choose the option with the same name.

![PHP function to return values](https://imgur.elightup.com/pOr1nJ3.png)

Then, fill in the function name as "date" and fill in its format. In this case, enter the default current date.

![Fill in the function name as "date", and fill in its format.](https://imgur.elightup.com/MI1KBVA.png)

* The `meta_compare` parameter: to compare the end date to the current date. Use the `>=` operation to get the events that have the end date after the current date.

After applying, you can see the change in the preview section.

![The change in the preview section](https://imgur.elightup.com/SUjPN7E.gif)

It’s clear that some events have disappeared immediately. It means that only the upcoming events are displayed.

Check the frontend to double-check.

![The upcoming events section](https://imgur.elightup.com/2qGRKvt.png)

Just events have the end date after the current day, which I marked at the beginning could be displayed.

For displaying posts with [specific criteria](https://docs.metabox.io/tutorials/show-posts-specific-criteria-oxygen/), you can refer to our guide. I hope you find it helpful!

# Storing cloneable fields in multiple rows in the database

import LiteYouTubeEmbed from 'react-lite-youtube-embed';
import 'react-lite-youtube-embed/dist/LiteYouTubeEmbed.css';

Normally, the data saved in a custom field is stored in one row only in the database, even when it is a cloneable/repeater field. To convert its data to store in multiple rows, let’s follow this tutorial.

## Video version

<LiteYouTubeEmbed id='1aL_-T7UCtI'/>

## Preparation

Here is the mindset behind this practice:

1. For the **new data**: We’ll use [the "Clone as multiple" feature](https://metabox.io/introducing-clone-as-multiple-feature/) of Meta Box that allows you to store cloneable values in multiple rows in the database. Just turn it on in the field’s settings.
2. For the **existing data** that is not stored in multiple rows: We’ll add some code to the theme’s file to convert data to multiple rows.

Assuming that I have had a custom post type for events.

![Assuming that I have had a custom post type for events](https://imgur.elightup.com/DTKrEWd.png)

And, I also have a field to input the start date. This field is cloneable, so I can add multiple dates to the field.

![A cloneable field to input multiple start dates](https://imgur.elightup.com/xyubfJj.gif)

You can see that the values are stored in the database as a string of data and in a row only on the table.

![The values are stored in the database as a string of data and in a row only on the table.](https://imgur.elightup.com/Vnnj2hj.png)

We will convert this string to an array with two elements and store them in two rows in the database, as shown below.

![We will convert this string to an array with two elements and store them in two rows in the database](https://imgur.elightup.com/39blOUK.png)

Before we go, you should:

* Back-up your database before running the code following this tutorial.
* If you have a staging website or a copy of your website on your local host, test the code on that first.

## Setting the field to store in multiple rows

**Meta Box** provides an option to set the cloneable field to store values in multiple rows.

In the settings of the fields using the UI provided by the [MB Builder](https://docs.metabox.io/extensions/meta-box-builder/) extension, whenever you set the field as **Cloneable**, there will be an extra setting named ‘**Clone as multiple**’ right below the **Cloneable** option.

![The "Clone as multiple" feature of Meta Box allows storing cloneable values in multiple rows in the database](https://imgur.elightup.com/LjhoGyn.png)

Just turn it on.

In the case that you prefer to register the fields using code, add the `'clone_as_multiple' => true,` option to the code like this:

![Add the 'clone_as_multiple' => true, option to the code if you register the fields using code](https://imgur.elightup.com/GA0BEsr.png)

Then, all the data you input to the field after this action will be stored in multiple rows.

Let’s create a new post and add some data to the field to check that! Then, go back to check the database, the new data added to the field is stored in two different rows already. However, the data that I input before the change still is in one row.

![The new data added to the field is stored in two different rows already, but the old data is not.](https://imgur.elightup.com/Di7LgKX.png)

So, the new setting works well on all the new data, but doesn’t affect the old data.

Meanwhile, in the post editor, you will see the old data is displayed wrong and isn't separated into different rows anymore, it’ll be a string of text only.

![The old data is displayed wrong and isn't separated into different rows anymore](https://imgur.elightup.com/hikL8l2.png)

So now, we should convert the old data manually in the next step.

## Converting data to multiple rows

It should be recalled that we do this step only when you have existing data that is not stored in multiple rows. If you don’t have this kind of data, just enable the setting of the field, and then it’ll be done.

To convert the old data to be stored in multiple rows, we should use code.

Go to the theme folder, create a new `.php` file. Then, add these lines of code.

```css
<?php

function prefix_convert( $field_id ) {
     $query = new WP_Query( [
     'post_type' => 'event',
     'posts_per_page' => -1,
     ] );
     if ( ! $query->have_posts() ) {
        return;
     }
     while ( $query->have_posts() ) {
         $query->the_post();
         $values = rwmb_meta( $field_id );
         if ( ! is_array( $values ) || empty( $values ) ) {
            continue;
         }
         delete_post_meta( get_the_ID(), $field_id );
         foreach ( $values as $value ) {
            add_post_meta( get_the_ID(), $field_id, $value );
         }
     }
     wp_reset_postdata();
}

add_action( 'init', function() {
     if ( ! isset( $_GET['unique_key'] ) ) {
        return;
     }
     $field_id = 'start_date';
     prefix_convert( $field_id );
} );
?>
```

![Add code to the .php file to do converting](https://imgur.elightup.com/itOoG87.png)

Let’s go through it in detail!

```css
$query = new WP_Query( [
     'post_type' => 'event',
     'posts_per_page' => -1,
     ] );
```

This code is to query all the events in the custom post type with the `event` slug.

```css
if ( ! $query->have_posts() ) {
        return;
}
```

This is to check if there is no post for the event. If not, do not execute the action below, since that no post means no existing data in the field.

```css
while ( $query->have_posts() ) {
```

This is to know that if there is any existing post, the following lines will get the value of the field.

```css
 $query->the_post();
 $values = rwmb_meta( $field_id );
```
Next, here is used to check if the values are in an array or not.

```css
if ( ! is_array( $values ) || empty( $values ) ) {
    continue;
}
```

If yes, it will run following actions.

```css
delete_post_meta( get_the_ID(), $field_id );
foreach ( $values as $value ) {
            add_post_meta( get_the_ID(), $field_id, $value );
 ```

**In there**:

* `delete_post_meta( get_the_ID(), $field_id );`: to remove the custom field from the database.
* `foreach ( $values as $value ) {`: is a loop to list each value one by one.
* `add_post_meta( get_the_ID(), $field_id, $value );`: to insert new single rows into the meta table. The data added to the table will have the meta key as the field ID (`$field_id`) , and the meta value (`$value`) as a single value that is saved in the field.

The last one is to set a secret key (unique_key) in the URL. You can set it on your own. This means that all the actions in this function run only when the secret key is run.

```css

if ( ! isset( $_GET['unique_key'] ) ) {
        return;
     }
```
All the code is updated on [GitHub](https://github.com/wpmetabox/tutorials/blob/tutorials/storing-cloneable-fields-in-multiple-rows-in-the-database/convert.php), so you can refer to it.

Now, move to the `functions.php` file, add the .php file that we’ve just created.

```css
include 'convert.php';
```

![Add the php file to the functions.php file](https://imgur.elightup.com/aNYcBpZ.png)

Currently, the data has not been converted yet since we haven’t run the secret key..

![The data has not been converted yet.](https://imgur.elightup.com/TtYLp3j.png)

So, you have to access the URL in this form: **domain.com/?unique_key**. This action helps to run the secret key, then the code in the .php file will run to convert the data.

Go back to the database once again to check if the data is converted or not. Now, you can see that the old data also is in two rows instead of one row as before.

![The old data also is in two rows instead of one row](https://imgur.elightup.com/3KeB3DT.png)

Everything has been done automatically.

Let’s check whether the data also displays in the right format or not in the post editor!

![The data also displays in the right format in the post editor](https://imgur.elightup.com/QXdTp2O.png)

They display in the right way already.

## Stopping conversion

When the data of the cloneable field is in multiple rows already, there is no need to run the converting action anymore. It should be run only once.

To avoid it running again, we should go back to the `functions.`php file, and remove the line as shown in the image below.

![To avoid it running again, remove this line in the functions.php file](https://imgur.elightup.com/iJWh9gk.png)

That’s all!

# Styling posts in different categories

import LiteYouTubeEmbed from 'react-lite-youtube-embed';
import 'react-lite-youtube-embed/dist/LiteYouTubeEmbed.css';

If you want posts in different categories to have different styles, just follow this tutorial. I will set the background color for the posts as the example in this practice. The posts in a category will have a blue background color, then posts in another category will have another background color.

This is an example of the posts’ background.

![Example of the posts' background](https://imgur.elightup.com/7TsL5Wb.png)

## Video version

<LiteYouTubeEmbed id='sV_ZW2y5CpY' />

## Preparation

To change the posts’ background color by categories, we need to create a custom field for the category to choose the background color, then use some code to display it on the frontend.

With this method, you can change other CSS attributes of whatever category you want, for example:

* Add a class to the body tag (via the body_class filter) to customize the CSS for the whole page more conveniently;
* Change post title color;
* Change the font size;
* Change the position or hide the sidebar.

This method has many other applications as well. The main idea here is to create settings for the category, then get/use these settings for the posts in that category.

:::warning

If you already have had many different layouts and want to choose one for a post, or category, you can use this method. However, you’ll need to create a class to identify the post/category using which layout.

:::

As I’ve mentioned, we need to create a custom field for the category to choose the background color. So we need to install and activate the [Meta Box](https://metabox.io/) and some of its extensions:

* [MB Builder](https://metabox.io/plugins/meta-box-builder/): to have UI in the backend creating custom fields.
* [MB Term Meta](https://metabox.io/plugins/mb-term-meta/): to add custom fields to taxonomy terms such as categories and tags.

## 1. Creating a custom field

We’ll create a field only for the background color. Go to **Meta Box > Custom Fields > Add New**.

![Create a custom field](https://imgur.elightup.com/tRptXL6.png)

I choose the **Color Picker** field for the Background Color to choose the color.

![Choose the Color Picker field for the background color](https://imgur.elightup.com/gk6FAJm.png)

Pay attention to the **ID** of the field since we will use it in the next step.

Next, move to the **Settings** tab and choose **Location** as **Taxonomy** and select **Category** to display the custom field on category. You’ll have this option only when you install the **MB Term Meta** extension already.

![Set Location for the created custom fields](https://imgur.elightup.com/4hf66vQ.png)

Then, go to **Posts > Categories** and select any category you want to edit. You’ll see the field there.

![Seclect the wanted category to edit](https://imgur.elightup.com/bCg14PX.png)

Just choose a color for the category.

## 2. Changing the background color for posts

Go to a post in the **Breakfast** category, its background color still is the white as default.

![The default color background](https://imgur.elightup.com/bFncjk8.png)

To change the background color of the post, add the following code to the `functions.php` file:

```php
function estar_output_frontend() {
	If ( ! is_single() ) {
		return;
	}
	$categories       = get_the_category();
	$background_color = get_term_meta( $categories[0]->term_id, 'background_color', true );
	if ( ! $background_color ) {
		return;
	}
	echo '<style>
		.single-post {
			background-color: ' . $background_color . ';
		}
	</style>';
}
add_action( 'wp_head', 'estar_output_frontend' );
```

![Insert the code](https://imgur.elightup.com/7glCfcO.png)

**Explanation**:

* *estar* is the theme that I am using. You can download this free theme [here](https://gretathemes.com/wordpress-themes/estar/);
* `If ( ! is_single() ) {}`: is to check that the user is in the singular post or not. If yes, do the following actions.
* `get_the_category ()`: To know which category the post is.
* `get_term_meta ($ categories [0] -> term_id, 'background_color', true)`: use `get_term_meta ()` to get the value of the custom field corresponding to the category returned by the get_the_category() function, with the ID of the custom field is `background_color` (we created it in step 1).
* ` wp_head`: This hook will print the above data into the head tag on the front end of your WordPress website.

Now, I will set a color in the **Background Color** field of the **Breakfast** category:

![Set color in the Background color field](https://imgur.elightup.com/pXdv8dr.png)

Then, go back to the post, you will see the background turns to another color:

![Background turns into other color](https://imgur.elightup.com/7TsL5Wb.png)

# Translating Meta Box custom field values for users and taxonomies with WPML

import LiteYouTubeEmbed from 'react-lite-youtube-embed';
import 'react-lite-youtube-embed/dist/LiteYouTubeEmbed.css';

Having a multilingual website for products, and services is more and more essential in the global economy. And, it’s undeniable that using a translation plugin is an optimal choice to build it.

One in the range of translation plugins, WPML seems like the most popular with a large number of users. You might know that it can help to [translate custom fields created with Meta Box](https://metabox.io/translate-custom-fields-with-wpml/) a long time ago. And now, the integration between the two plugins is more deep so you can also **translate the custom field values easily, especially custom fields for users and taxonomies**. We’ll delve into it in this blog. It is one of the applications of [Meta Box - WPML compatibility](https://docs.metabox.io/integration/meta-box-wpml-integration/).

For demonstration purposes, I’ll translate information about a post-author as you can see below:


![Example of translating custom field values for users](https://imgur.elightup.com/vbVl6LG.gif)


## Video version

<LiteYouTubeEmbed id='ng4ZYZs6cEw' />

## Preparation

Sometimes you want to store some extra information of users or taxonomies in custom fields created with Meta Box then we can use WPML to translate them. So, these are the tools we need in this practice:

- [Meta Box core plugin](https://wordpress.org/plugins/meta-box/): to have a framework to create the custom fields for the users and taxonomies. You can install it directly from [wordpress.org](https://wordpress.org/plugins/meta-box/);
- [MB Builder](https://metabox.io/plugins/meta-box-builder/): to have a UI in the backend to create the custom fields visually;
- [MB Term Meta](https://metabox.io/plugins/mb-term-meta/): to add custom fields to taxonomies;
- [MB User Meta](https://metabox.io/plugins/mb-user-meta/): to add custom fields to a user profile;
- [MB Custom Post Types and Custom Taxonomies](https://metabox.io/plugins/custom-post-type/): to create a custom post type and custom taxonomy in the case that you don’t use the default;
- **WPML Multilingual CMS** (means WPML core): to create and manage multilingual websites on the WordPress platform easily. It helps translate the basic content of your WordPress such as posts, pages, menus, and notifications;
- **WPML String Translation**: to translate text strings from your theme and plugins on your WordPress, as well as special content in posts, pages, taxonomies, and taglines.

Also, you may want to use other extensions to have the appropriate structure of the custom fields such as [MB Tabs](https://metabox.io/plugins/meta-box-tabs/), [MB Group](https://metabox.io/plugins/meta-box-group/), and [MB Conditional Logic](https://metabox.io/plugins/meta-box-conditional-logic/).

Let’s start now!

## 1. Setting up languages in WPML

Before translating any object with WPML, you need to set up the languages that you want to have on the site.

Go to **WPML** > **Languages** to both the default language and custom languages. Then, click on the **Add/Remove languages** button to add the custom languages for your site.

![Go to WPML > Languages then add the custom languages for your site](https://imgur.elightup.com/tfetQ39.png)

WPML supports 65 languages which is the most popular in the world. Just check the languages on the list that fit your needs. In this practice, I’ll translate into Italian and Russian for example.

![Choose languages on the list that fit your needs](https://imgur.elightup.com/HwigBdo.png)

Then, on the admin bar, there are the enabled languages for your site.

![On the admin bar, there are the enabled languages for your site.](https://imgur.elightup.com/iKZR5Qz.png)

Now, it’s time to move to the main parts of this tutorial.

## 2. Translating custom field values for users

I suppose that you already have some fields for users. You can follow other tutorials to know how to do it with [40+ field types](https://www.youtube.com/watch?v=WWeaM5vIAwM&t=130s) provided by Meta Box in detail. I just created some fields for illustration.

![Add some custom fields for users](https://imgur.elightup.com/G0bPVbM.png)

I also input data into custom fields for each user.

![The data is input into custom fields for each user](https://imgur.elightup.com/FUdvsuu.png)

Now, we’ll translate them in the languages which we chose before.

### 2.1. Translating custom user field values

As I mentioned before, besides the basic content, we’ll use the WPML String Translation plugin to translate content in user meta.

Go to **WPML** > **String Translation**. There will be a table that includes all the strings that come from the different themes and plugins on our site.

![Go to WPML, String Translation to translate content in user meta](https://imgur.elightup.com/LiXSto3.png)

However, the fields created with Meta Box are not in the table automatically, because they haven’t been recognized as strings. By default, WPML can translate only the basic fields of the user such as the name and description. To make the custom ones translatable, we need to **convert them to strings first, and then translate those strings**.

![The fields created with Meta Box are not in the table automatically](https://imgur.elightup.com/02mNgjS.png)

#### 2.1.1. Converting custom fields to strings

To do it, you should add the following code to the theme’s file:

```
add_filter( 'wpml_translatable_user_meta_fields', function( $fields ) {
    $fields[] = 'author_level';
    return $fields;
} );
```

![Add code to the theme’s file to convert custom fields to strings](https://imgur.elightup.com/93aHwOJ.png)

**Specifically**:

- `wpml_translatable_user_meta_fields`: is a hook to declare the custom fields for users. It’s provided by the WPML.
- `author_level`: is the ID of the field we want to convert to strings.

You can convert one by one field by adding separate filters. In my case, since I have two fields, the full code as below:

![Convert one by one field by adding separate filters.](https://imgur.elightup.com/ljOvUY8.png)

Another way, you also can list them all in a line, then assign the fields to an array with the code:

```
add_filter( 'wpml_translatable_user_meta_fields', function( $fields ) {
    $fields = array('author_level','author_job_description');
    return $fields;
} );
```

![Another way is listing field IDs in a line, then assign them to an array](https://imgur.elightup.com/Qim8Kgi.png)

After that, back to the **String Translation** screen in WPML.

Before searching for any field ID to check if it has been converted to a string or not, you should scroll down to the **More options** section. We’ll regularize the role of the users which we want to translate by checking.

![Regularize the role of the users which we want to translate by checking](https://imgur.elightup.com/OlP6mtg.png)

Now, the fields are in the table along with their value.

![The fields are in the String table along with their value](https://imgur.elightup.com/Ki4IURH.png)

It means that the WPML plugin has recognized them as strings already.

#### 2.1.2. Translating the values

Translating custom field values for users becomes a simpler task now. Click on the ‘**+**’ icon below the flag of the language you want to add a translated version for each value. Then, add the translation.

![Click on the ‘+’ icon to add a translated version for each value](https://imgur.elightup.com/5H8HE2B.gif)

Do it one by one for each value. And, it’s the same with the other fields.

![The fields after adding the translation](https://imgur.elightup.com/fDnItZg.png)

We have just added translation versions for the values of each field. They are now available in the backend, but not on the frontend. So, the website visitors still can not see them. We should take one more step for that.

### 2.2. Displaying translation versions of custom user field values on the frontend

#### 2.2.1. Getting and displaying the field values

First, we should display the field’s values as the same as when the website has only one language.

You can use any tools or plugins that support displaying content on the frontend. You can refer to [other tutorials](https://docs.metabox.io/tutorials/) to know how.

Since I have the MB Views plugin that is included in the Meta Box package, I’ll use it as a demonstration.

Go to **Meta Box** > **Views**, and create a new view.

![Go to Meta Box > Views, and create a new view for user meta translation](https://imgur.elightup.com/UQsPXJR.png)

Click on the **Insert Field** button, then choose the field from the dropdown list on the sidebar.

![Click on the Insert Field button to choose the field from the dropdown list on the sidebar](https://imgur.elightup.com/DCewXWb.png)

Since the fields are for users, you should look for them in the **User** tab. It includes the default fields, and custom fields as well.

![Since the fields are for users, you should look for them in the User tab.](https://imgur.elightup.com/wMOeFoi.png)

Just select the fields you want to get data as usual.

![Select the fields you want to get data as usual](https://imgur.elightup.com/vZVmcKN.gif)

Also, set the type, and location of the template, as any place on your website, or save it as a shortcode, then you can embed it in any place as well.

![Set the type, and location of the template](https://imgur.elightup.com/qHcZi0a.png)

On the frontend, the information saved in the fields is displayed already, but in the original values that correspond to the default language.

![The custom field values is displayed in the default language](https://imgur.elightup.com/KWDmWAx.png)

You should modify the created template a little bit to make this section more beautiful.

Back to the created view. Add some **`div`** tags, classes, and a heading as in the below image:

![Add some div tags, classes and modify the created template a little bit to make this section more beautiful.](https://imgur.elightup.com/FTNkZsY.png)

**In there**:

- `get_the_author_meta`: this function is to get the values of the specified fields.
- `author_level`, `author_job_description`: is the ID of the field we want to get the value.
- `author.ID`: is the ID of the author. It is used to specify the current post which we will get the custom field values from.

Also, add **CSS** to style the section.

![Add some CSS to style the section](https://imgur.elightup.com/FLxsjVm.png)

Back to the page, the section’s style is better.

![The new look of the user section](https://imgur.elightup.com/KhuXe6m.png)

In the normal case that you have only one language on your site, that’s done to display custom field values at this moment. However, your website is now having more than one language, so you should display all the translation versions of them. Then, when visitors see the page in another language, they also can see the matching language version of the field’s values.

Currently, there is nothing on the page to change the language to another one, so you can not see other translation versions, even when they are already existing.

#### 2.2.2. Adding the language switcher on the page

Go to **WPML** > **Languages** to regulate the location for the language switcher on this page. And, look for the **Menu Language Switcher** section to add a new one.

![In the Languages submenu in WPML, look for the Menu Language Switcher section to add a new language switcher](https://imgur.elightup.com/nYLZnjJ.png)

Choose a menu of your website that you want the switcher to be on.

![Choose a menu of your website that you want the switcher to be on](https://imgur.elightup.com/z7aqo89.png)

There are also some other settings for the switcher in the window as well. Just configure it as you want.

Back to the page, the switcher is available on the place you set already.

![The switcher is available on the frontend](https://imgur.elightup.com/35cYQ42.png)

And, when you change the language on the switcher, the content of the author section is also switched to exactly the translation version that you input in the previous step.

![The content of the author section is also switched to exactly the translation version then we change the language on the switcher.](https://imgur.elightup.com/vbVl6LG.gif)

### 2.3. Remark

**The switcher displays only the languages the post has the translation version**. Then, there is no way to display the translation of the field values in other languages that the post doesn’t have.

And, even when you do everything following the above instructions, only the users who you regulate in the **More options** section can display the translated information.

There will be no translation for custom field values of the users who are unchecked. The information is kept intact in the original language, although you turn the page to another language. So, make sure you check all the boxes of the user types you want to translate.

## 3. Translating custom field values for a taxonomy

Translating custom field values for taxonomies is quite easier than custom fields of users. I’ll do it with an example as Categories.

![Example of translating custom field values for taxonomies](https://imgur.elightup.com/4bSAI9k.gif)

I have had some basic custom fields for it. Also, input some data into them for some terms.

![The custom fields and their value as demonstration](https://imgur.elightup.com/iZKqbbE.png)

In the taxonomy admin page, there are three tabs, since I have three languages for the site. But, there haven’t been any translation versions for Italian and Russian yet.

![There haven’t been any translation versions for Italian and Russian yet](https://imgur.elightup.com/3y167X8.png)

To translate those values, first, we should make the post, taxonomy, and custom field to be translatable.

### 3.1. Setting up

Go to the **Settings** submenu in **WPML** to set the translation feature for the necessary objects.

![Go to the Settings submenu in WPML to set the translation feature for the necessary objects](https://imgur.elightup.com/cDNISPt.png)

Move to the **Custom Term Meta Translation** section to enable any term meta to be translatable, including the custom fields. Then, search for the field ID one by one, and choose the **Translate** option.

![Move to the Custom Term Meta Translation section to enable any term meta to be translatable](https://imgur.elightup.com/zBrVxtg.png)

Next, for the post, scroll down to the **Post Types Translation** section. It is selected to be translatable by default. But if your taxonomy is for any custom post type, just look for that post type and select the translation option.

![In Post Types Translation section, the posts are selected to be translatable by default](https://imgur.elightup.com/PdZh0Yb.png)

Lastly, go to the **Taxonomies Translation** section to turn on the translation feature for the taxonomy. It also lists all the taxonomies on the site, just choose the one having the custom fields you want to translate.

![Go to the Taxonomies Translation section to turn on the translation feature for the taxonomy](https://imgur.elightup.com/BrROGid.png)

That’s done for settings.

### 3.2. Translating the fields values

Move to the **Taxonomy Translation** submenu, then select the taxonomy from the drop-down list to translate it.

![Move to the Taxonomy Translation submenu, then select the taxonomy from the drop-down list to translate it](https://imgur.elightup.com/lkD3F6r.png)

WPML will list all the terms of that taxonomy on the screen, and also provide a column to add translation versions for each language. Click on the “**+**” button to add the translation.

![Click on the “+” button to add the translation](https://imgur.elightup.com/bpK4ynf.png)

There will be a **Term translation** pop-up. On the screen, not only the custom fields of the taxonomy display to translate, but also all the term information such as name, slug, and description are available. Just input translations for them one by one.

![The custom fields, name, slug, and description are available for adding translation](https://imgur.elightup.com/j75QI3G.png)

After that, in the taxonomy admin page, the number of translation versions is changed to other ones.

![The number of translation versions is updated](https://imgur.elightup.com/3mRdhSK.png)

When you click on each tab to see the translation versions, all the value input to the fields are turned to the corresponding language version automatically.

![All the value input to the fields are turned to the corresponding language version automatically.](https://imgur.elightup.com/S9Nzmx6.png)

### 3.3. Displaying term meta translations on the frontend

Similar to displaying the custom user meta, I’ll use MB Views to display category information on the frontend.

Go to **Meta Box** > **Views**, and create a new view to have a template to display the term meta.

![Go to Meta Box > Views, and create a new view for term meta translation](https://imgur.elightup.com/IfE6MOu.png)

Then, add some code to the **Template** tab along with some **`div`** tags, and classes.

```
{% set post_id = post.ID  %}
{% set category_detail = mb.get_the_category(post_id) %}
<h2>Categories</h2>
{% for category in category_detail %}
    <div class="mb-category">
        <div class="item">
            {% set meta_title = mb.get_term_meta( category.term_id, 'meta_title', true) %}
            {% set meta_description = mb.get_term_meta( category.term_id, 'meta_description', true) %}

            <div class="mb-taxonomy">{{ category.cat_name }} </div>
            <div class="meta_title"><b>Meta Title:</b> {{ meta_title }}</div>
            <div class="meta_description"><b>Meta Description:</b> {{ meta_description }} </div>
        </div>
    </div>
{% endfor %}
```

![Add some code to the Template tab along with some div tags, and classes](https://imgur.elightup.com/j6udYj6.png)

Also, you can add some **CSS** to style.

Next, go to a post, the Categories section is displayed with the original language.

![On the frontend, the Categories section is displayed with the original language](https://imgur.elightup.com/6K9PxJP.png)

Since we have added the language switcher on the menu, we can turn this page to another language. And, the translation version of the term meta is displayed as well.

![The translation version of the term meta is displayed when you change language via the switcher](https://imgur.elightup.com/4bSAI9k.gif)

### 3.4. Remark

There are two notices for translating custom field values for taxonomy which are quite the same as displaying the value of fields for users:

- We should add the language switcher somewhere on the page.
- The translation of the fields for taxonomy is also available on the page only when the post has the translation for that language.

That’s all.

You can take a look at our [detailed review of the top 4 plugins to translate your site](https://metabox.io/review-translation-plugin/) or [an in-depth comparison between the Polylang plugin vs. Multisite](https://metabox.io/polylang-vs-wordpress-multisite/) to have your own choice. For custom fields of other objects, you can look at the instructions from [our documentation](https://docs.metabox.io/integration/meta-box-wpml-integration/) for more details.